

As I slowly work through the projects for my upcoming book Go, Go, Go I’ve been trying to do as many things the same way as Tage Frid did. It has been an interesting experiment.
Most of Tage’s advice has been sound and reproducible. Once in a while a given technique may want to induce fits. Those are often the most interesting to experiment with — especially if it clashes with what I learned in my manual training days. When I learned how to dovetail as a student at NBSS I was taught how to cut them either ‘Pins First’ or ‘Tails First’ and often switch between them depending on the project at hand. For drawers or boxes its nice to gang sides together and cut them tails first to save some time. For one offs and odd angles pins first sometimes makes the most sense.
Tage was a proponent of ‘Pins First’ arguing that:
“The reason pins are made first is that it is easier to follow the tail saw line. If the tails were made first and the pins were scribed onto the end of the wood from the tail, the first saw cut on the end grain would destroy the pin line since end grain fibers become fuzzy so easily. And we all know how difficult it is to follow a line started on end grain. By making the pins first and scribing the tails to them, we can begin sawing on the face side of the wood and we have more strokes to try to saw to the line accurately.” — Tage Frid, Tage Frid Teaches Woodworking Vol. 1
With decades of experience cutting all manner of joints his logic can be hard to argue with. To transfer the pins to the tail board Tage would often just hold the piece in place with his hands and mark the tails with a scratch awl. No skew block plane trick here. If the board was warped he’d flatten it with 2 clamps and a block of wood.
You may feel like you need a steady hand or super human strength to keep the pin board exactly where you want it to scribe the pins onto the tail board, but there are ways help make this easier when you are getting started.
When teaching students how to transfer the pins to the tail board I was taught to put a clamp on the setup — holding the pin board to the tail board, allowing you to adjust it a bit under tension and free up your hands to move around as needed to do a good job scribing. The idea is reasonable but I’ve seen folks do all sorts of fiddling with a clamp to try and make this work, often with headache inducing dings and colorful curse words as a clamp falls over and mars a piece of wood or a pin board goes flying.
In cutting a lot of drawers and trays for a Tage Frid drawing table I figured I’d go for the full experience in cutting them all pins first and given the very thin stock used — 3/8″ thick 1-1/4″ wide strips mating to a 1″ wide front there was not a lot of bearing surface so I went to break out a clamp and after messing with it for a bit (and remembering why I prefer tails first) it hit me that I should try and be more production minded — there’s gotta be a less fiddly way of doing this as I have a lot of drawers to make. I was working at my Festool MFT/3 table and it hit me — if I side clamp a Bessey K-body to the edge of the bench the wide jaws of the clamp would do a great job overhanging a bit of the bench and if I moved the jaw up and down I had a nice consistent way of setting up my pin and tail board and apply a little pressure as I quickly and accurately scribe the pins to the tails as you can se here:
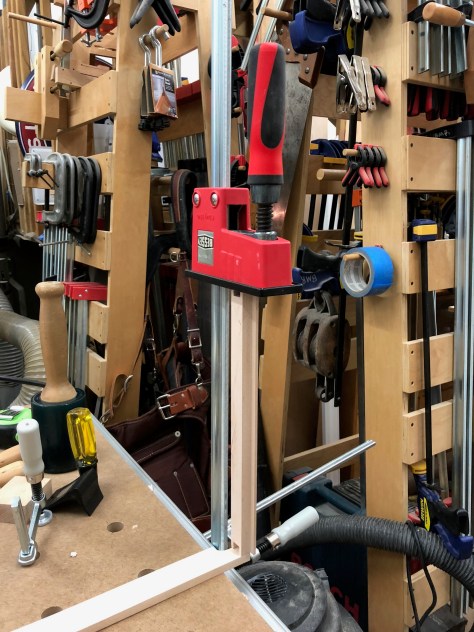
There’s no magic to what I show here, but a nice little setup that can be applied to any bench or work surface and save some time and frustration.
Take care,
-Bill
@TheRainford

Funny, I first read the title of this post as “Pins first, pal!” Thanks for sharing a great tip!