As I slowly work through the projects for my upcoming book Go, Go, Go I’ve been trying to do as many things the same way as Tage Frid did. It has been an interesting experiment.
Most of Tage’s advice has been sound and reproducible. Once in a while a given technique may want to induce fits. Those are often the most interesting to experiment with — especially if it clashes with what I learned in my manual training days. When I learned how to dovetail as a student at NBSS I was taught how to cut them either ‘Pins First’ or ‘Tails First’ and often switch between them depending on the project at hand. For drawers or boxes its nice to gang sides together and cut them tails first to save some time. For one offs and odd angles pins first sometimes makes the most sense.
Tage was a proponent of ‘Pins First’ arguing that:
“The reason pins are made first is that it is easier to follow the tail saw line. If the tails were made first and the pins were scribed onto the end of the wood from the tail, the first saw cut on the end grain would destroy the pin line since end grain fibers become fuzzy so easily. And we all know how difficult it is to follow a line started on end grain. By making the pins first and scribing the tails to them, we can begin sawing on the face side of the wood and we have more strokes to try to saw to the line accurately.” — Tage Frid, Tage Frid Teaches Woodworking Vol. 1
With decades of experience cutting all manner of joints his logic can be hard to argue with. To transfer the pins to the tail board Tage would often just hold the piece in place with his hands and mark the tails with a scratch awl. No skew block plane trick here. If the board was warped he’d flatten it with 2 clamps and a block of wood.
You may feel like you need a steady hand or super human strength to keep the pin board exactly where you want it to scribe the pins onto the tail board, but there are ways help make this easier when you are getting started.
When teaching students how to transfer the pins to the tail board I was taught to put a clamp on the setup — holding the pin board to the tail board, allowing you to adjust it a bit under tension and free up your hands to move around as needed to do a good job scribing. The idea is reasonable but I’ve seen folks do all sorts of fiddling with a clamp to try and make this work, often with headache inducing dings and colorful curse words as a clamp falls over and mars a piece of wood or a pin board goes flying.
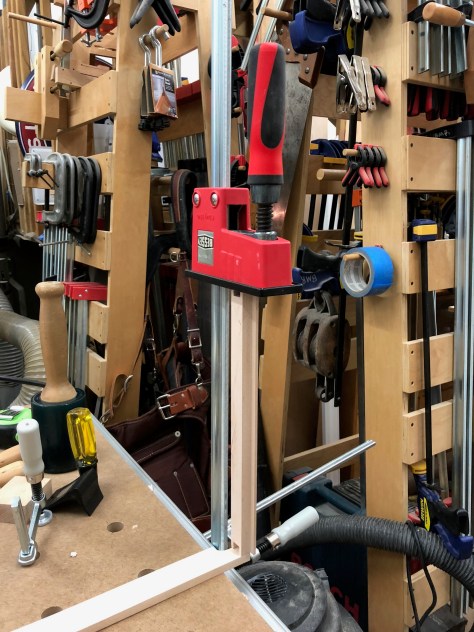
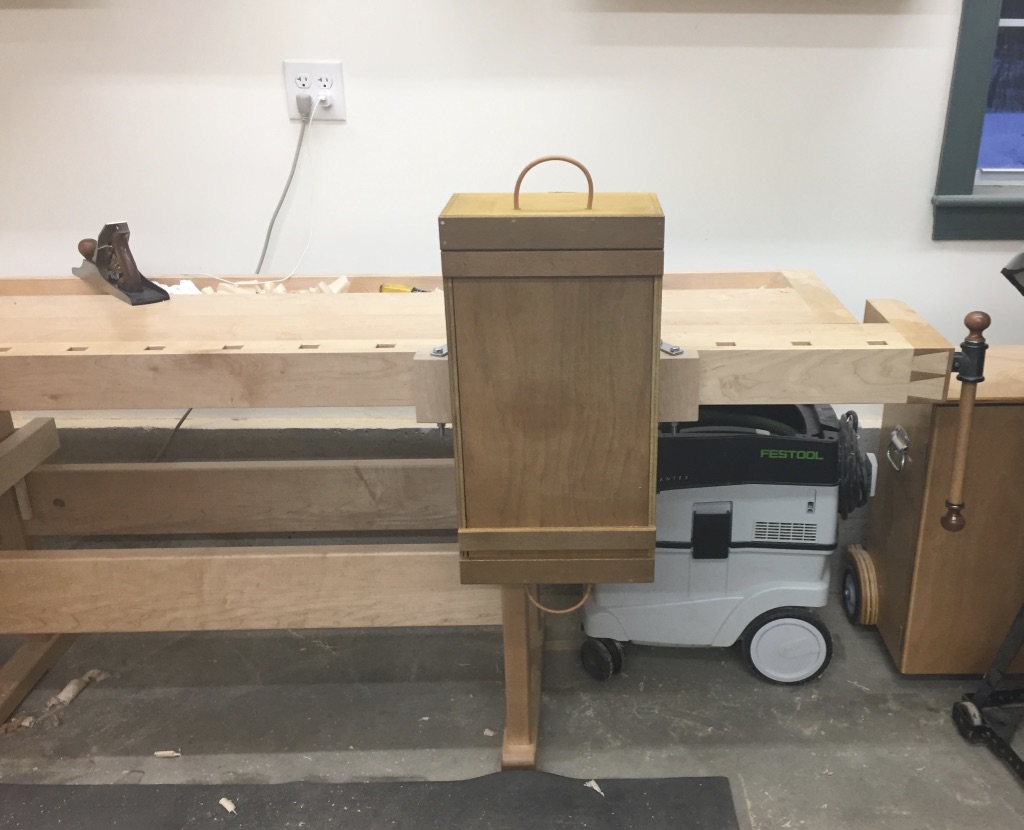
In cutting a lot of drawers and trays for a Tage Frid drawing table I figured I’d go for the full experience in cutting them all pins first and given the very thin stock used — 3/8″ thick 1-1/4″ wide strips mating to a 1″ wide front there was not a lot of bearing surface so I went to break out a clamp and after messing with it for a bit (and remembering why I prefer tails first) it hit me that I should try and be more production minded — there’s gotta be a less fiddly way of doing this as I have a lot of drawers to make. I was working at my Festool MFT/3 table and it hit me — if I side clamp a Bessey K-body to the edge of the bench the wide jaws of the clamp would do a great job overhanging a bit of the bench and if I moved the jaw up and down I had a nice consistent way of setting up my pin and tail board and apply a little pressure as I quickly and accurately scribe the pins to the tails as you can se here:
Pins First Pal for Transferring Pins to a Tail Board by clamping a K-body clamp to the side of your bench
There’s no magic to what I show here, but a nice little setup that can be applied to any bench or work surface and save some time and frustration.
Making Things Work: Tales From a Cabinetmaker’s Life by Nancy R. Hiller
The book had a great buzz from a lot of my woodworking friends and I bought it as soon as it came out, but with two toddlers and a crazy work schedule it took me a while to find time to read it.
The book was a quick read and provides an unvarnished view of what life is like for a full time cabinetmaker. The highs, the lows, and the brutal realities of making a living as a craftsmen in a world that seems bent on mechanization and disposable goods. Nancy’s stories are touching, personal and entertaining. I feel like I know her as a close friend when in reality I’ve only talked to her a few times online.
If you’ve spent time making money from your craft work, or even just day dreamed about it, it’s a solid dose of reality. The book provides some keen insights and reinforced some feelings I had as well when pricing work and trying to build a business. A living can be made, but it’s not easy and you can’t live on the good feelings you get by owning the process of making. It takes thick skin, determination, luck, business skills and many other traits Nancy has.
After reading Nancy’s book I felt compelled to share a story from my time as a student at NBSS learning some of the life lessons of being a craftsmen — I hope Nancy would approve.
The Old Corner Bookstore in Boston 2010. Just after it closed after a LONG time as the oldest bookstore in America. We were there when it was recently vacated. I think its a Chipotle now.
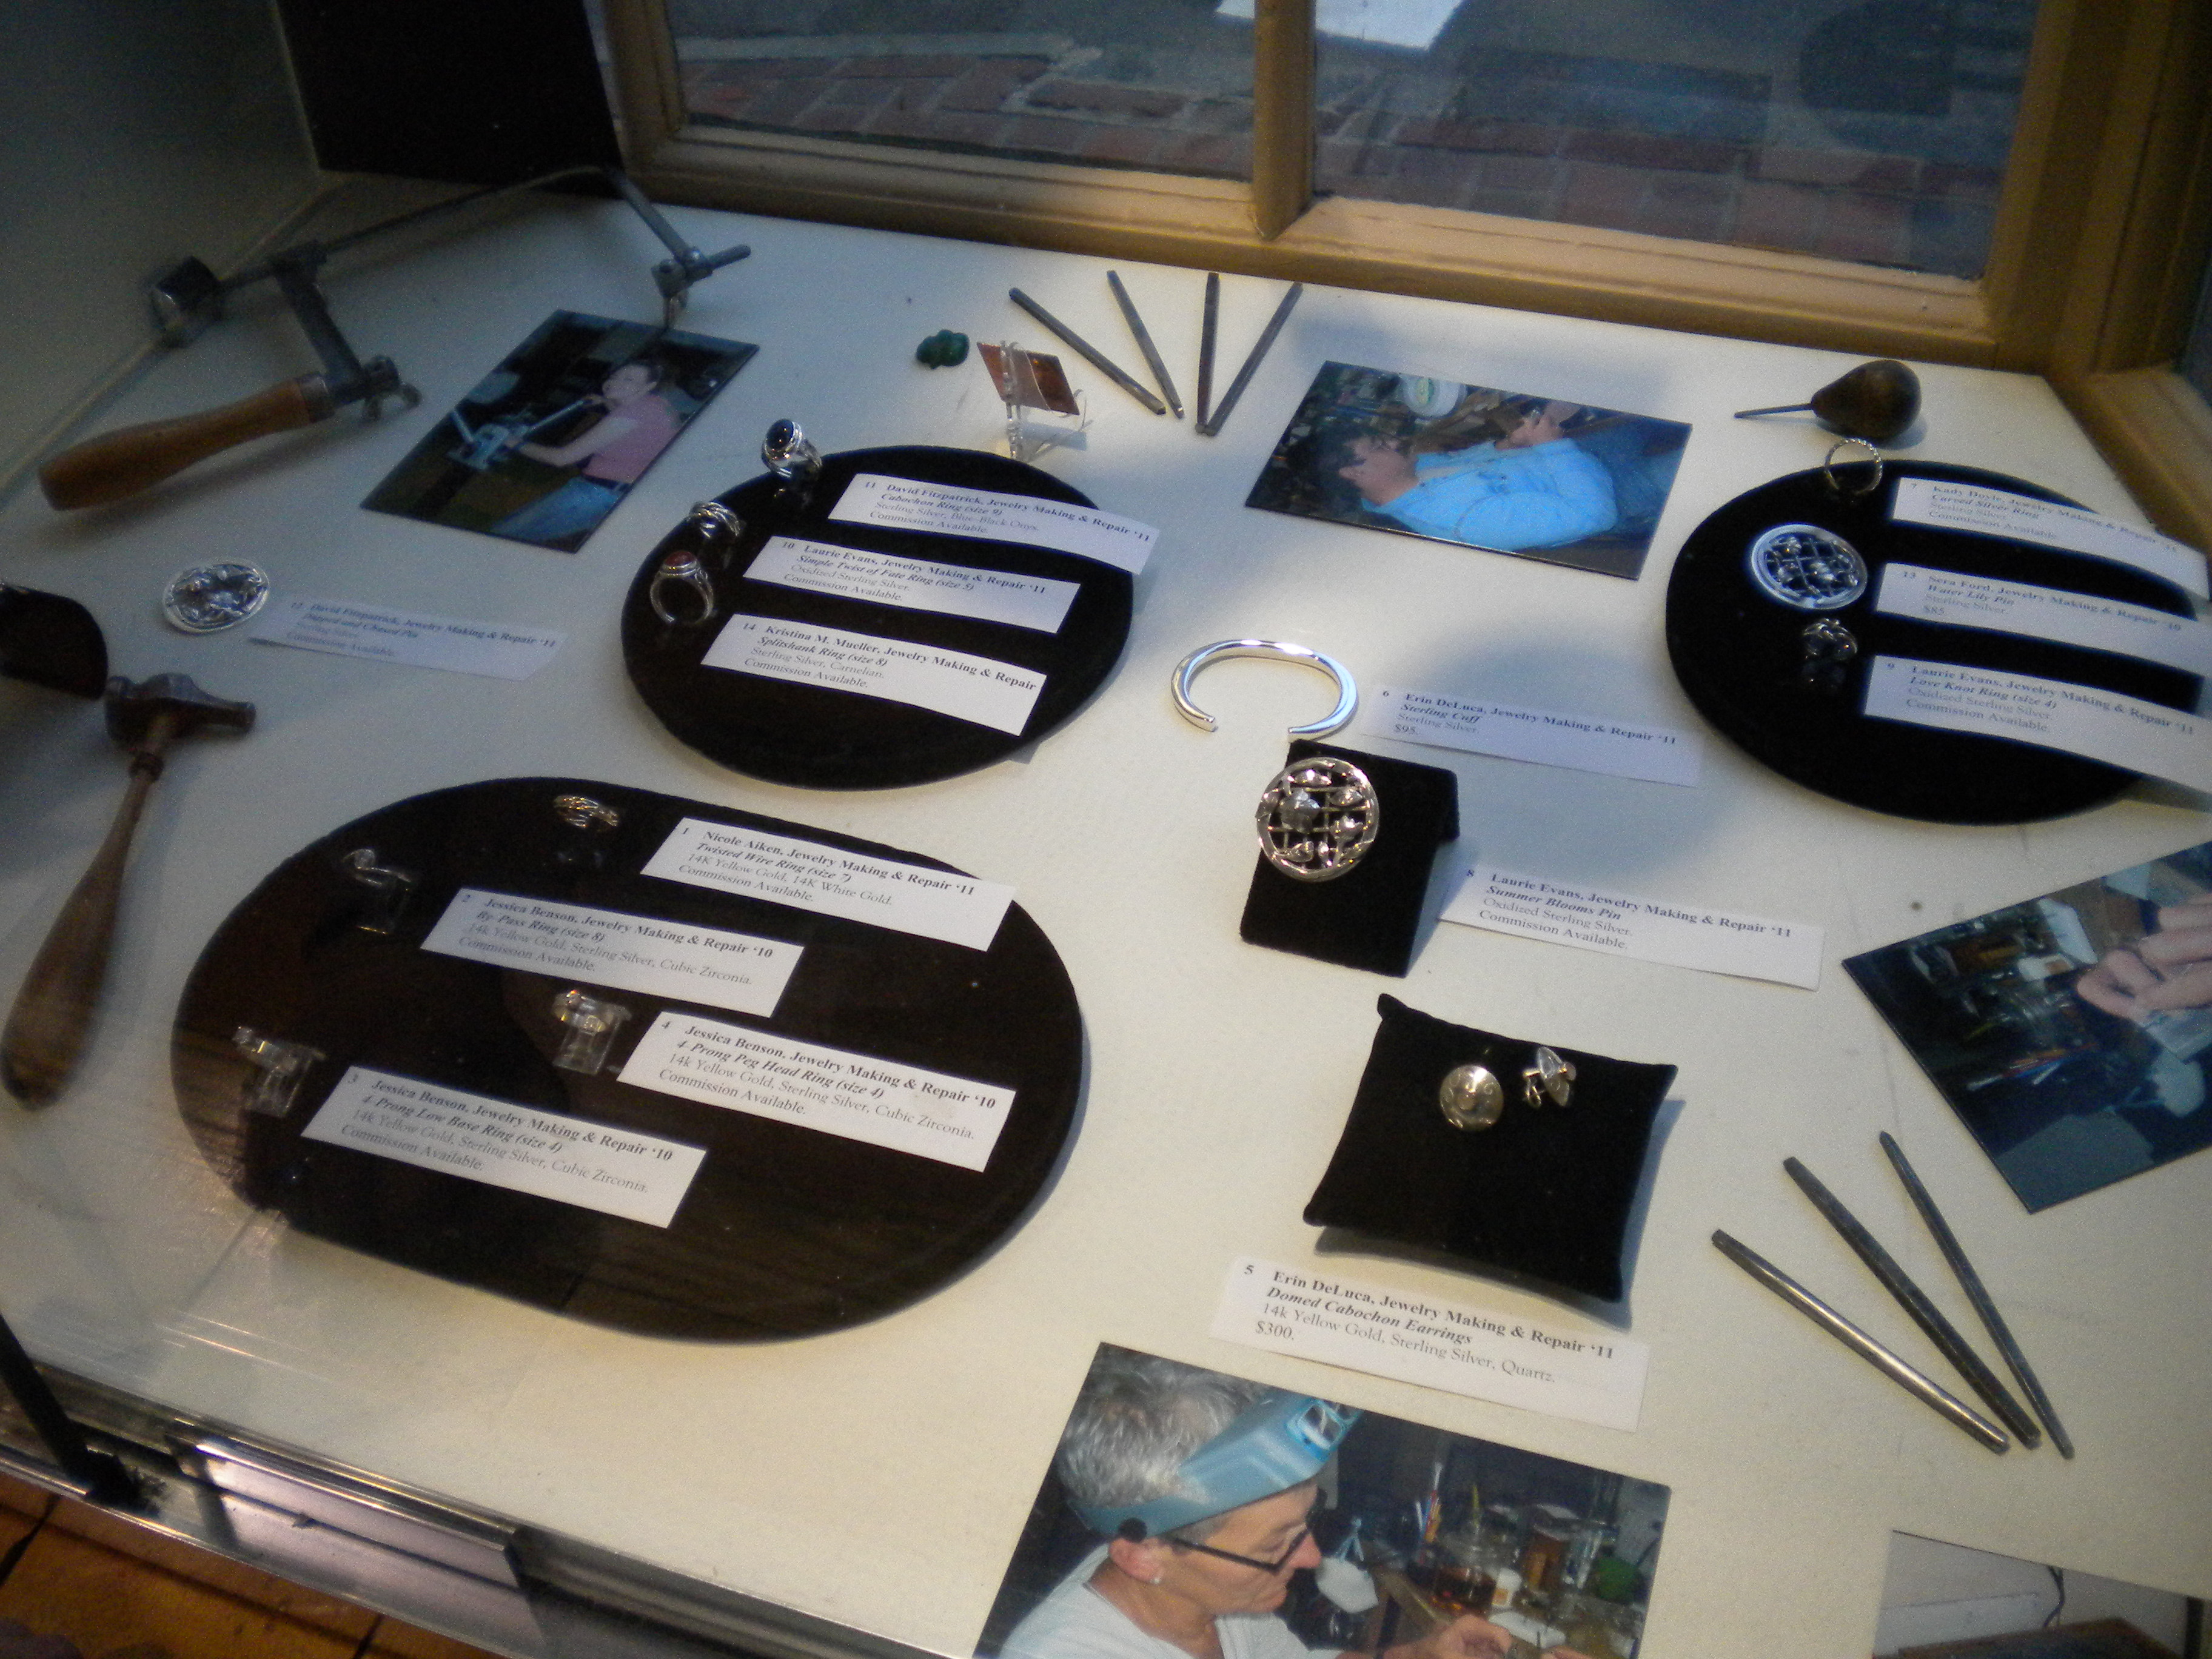
Back when I was a student at NBSS, they would have a student works exhibit at reasonably public location which culminated in an annual giving/alumni/supporter event where donors and art enthusiasts could middle with students, see some of their work and help support the craftsmen and craftswomen associated with the school. The works are usually on display for a couple of weeks and we all had to take turns watching over the displays during the hours it was open.
A younger Bill Rainford (back when I was a student at NBSS) proudly standing in front of my tool cabinet on display
It was a coordinated volunteer effort and neat to have work on public display in downtown Boston. The vast majority of the folks coming through the store would poke around, compliment the student work and ask a few questions here and there.
My hanging tool cabinet
Lots of folks expressed the common longing for hand made work, talked about family heirlooms and/or woodworking hobbies.
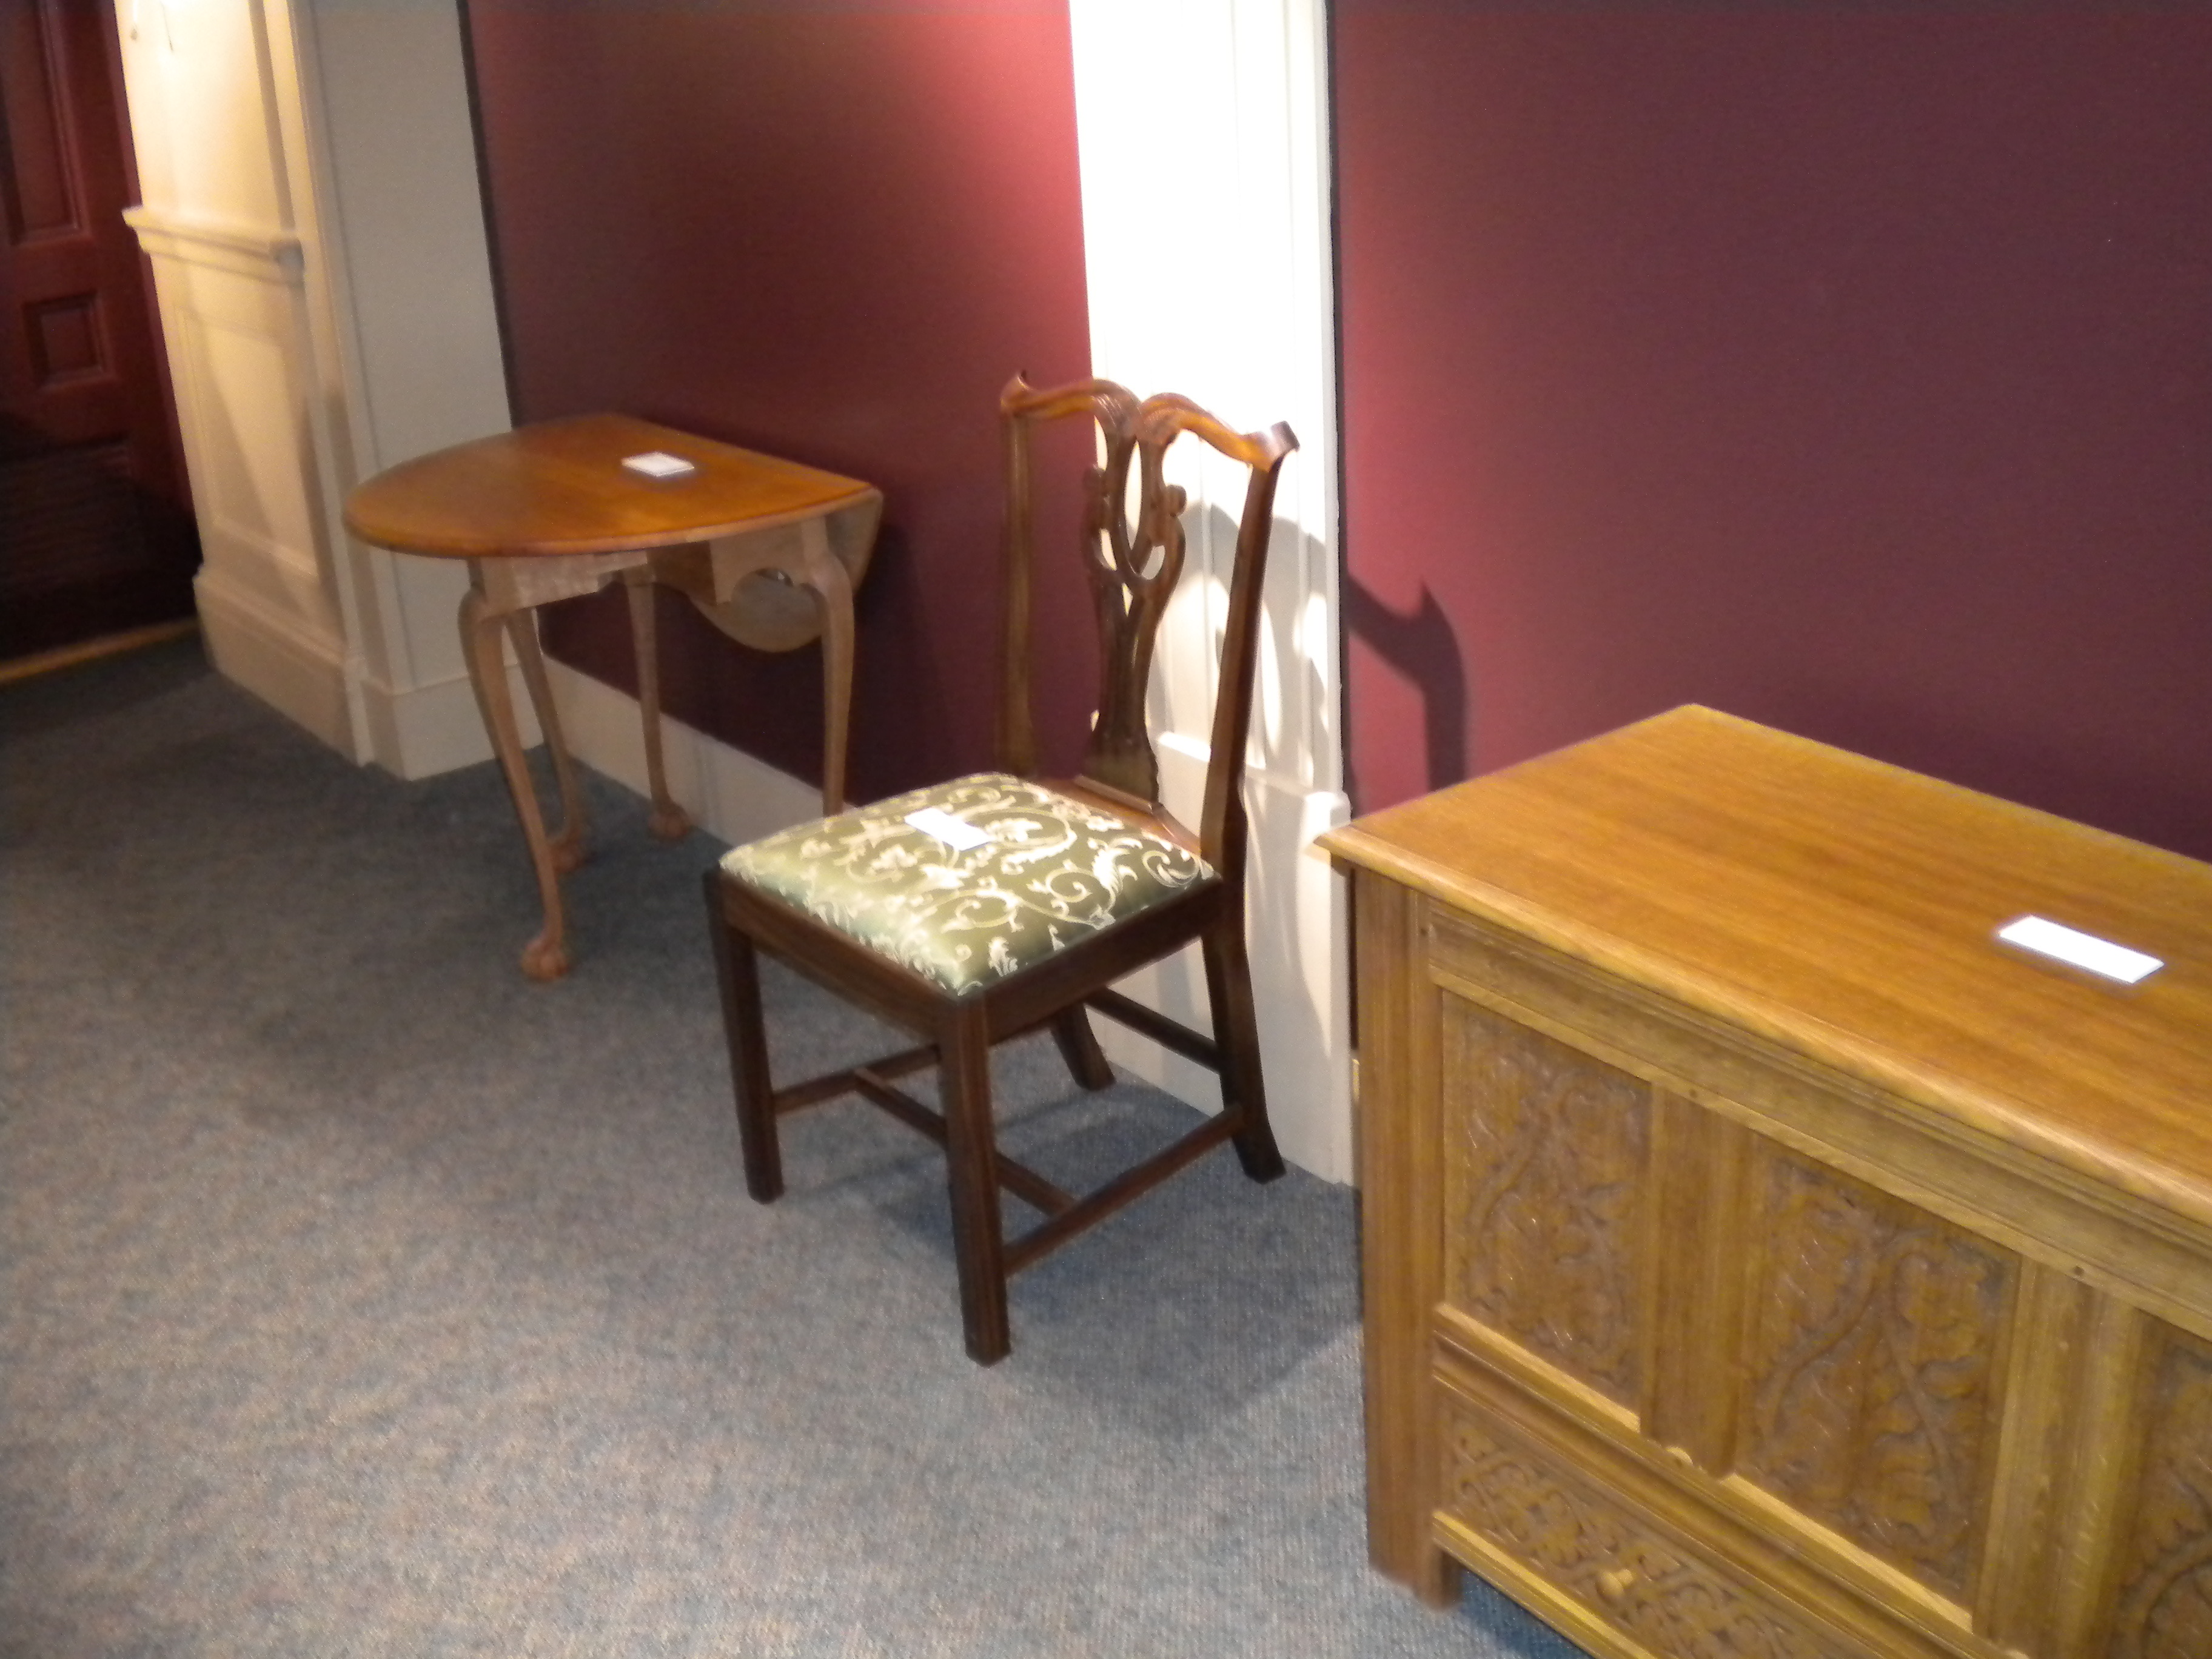
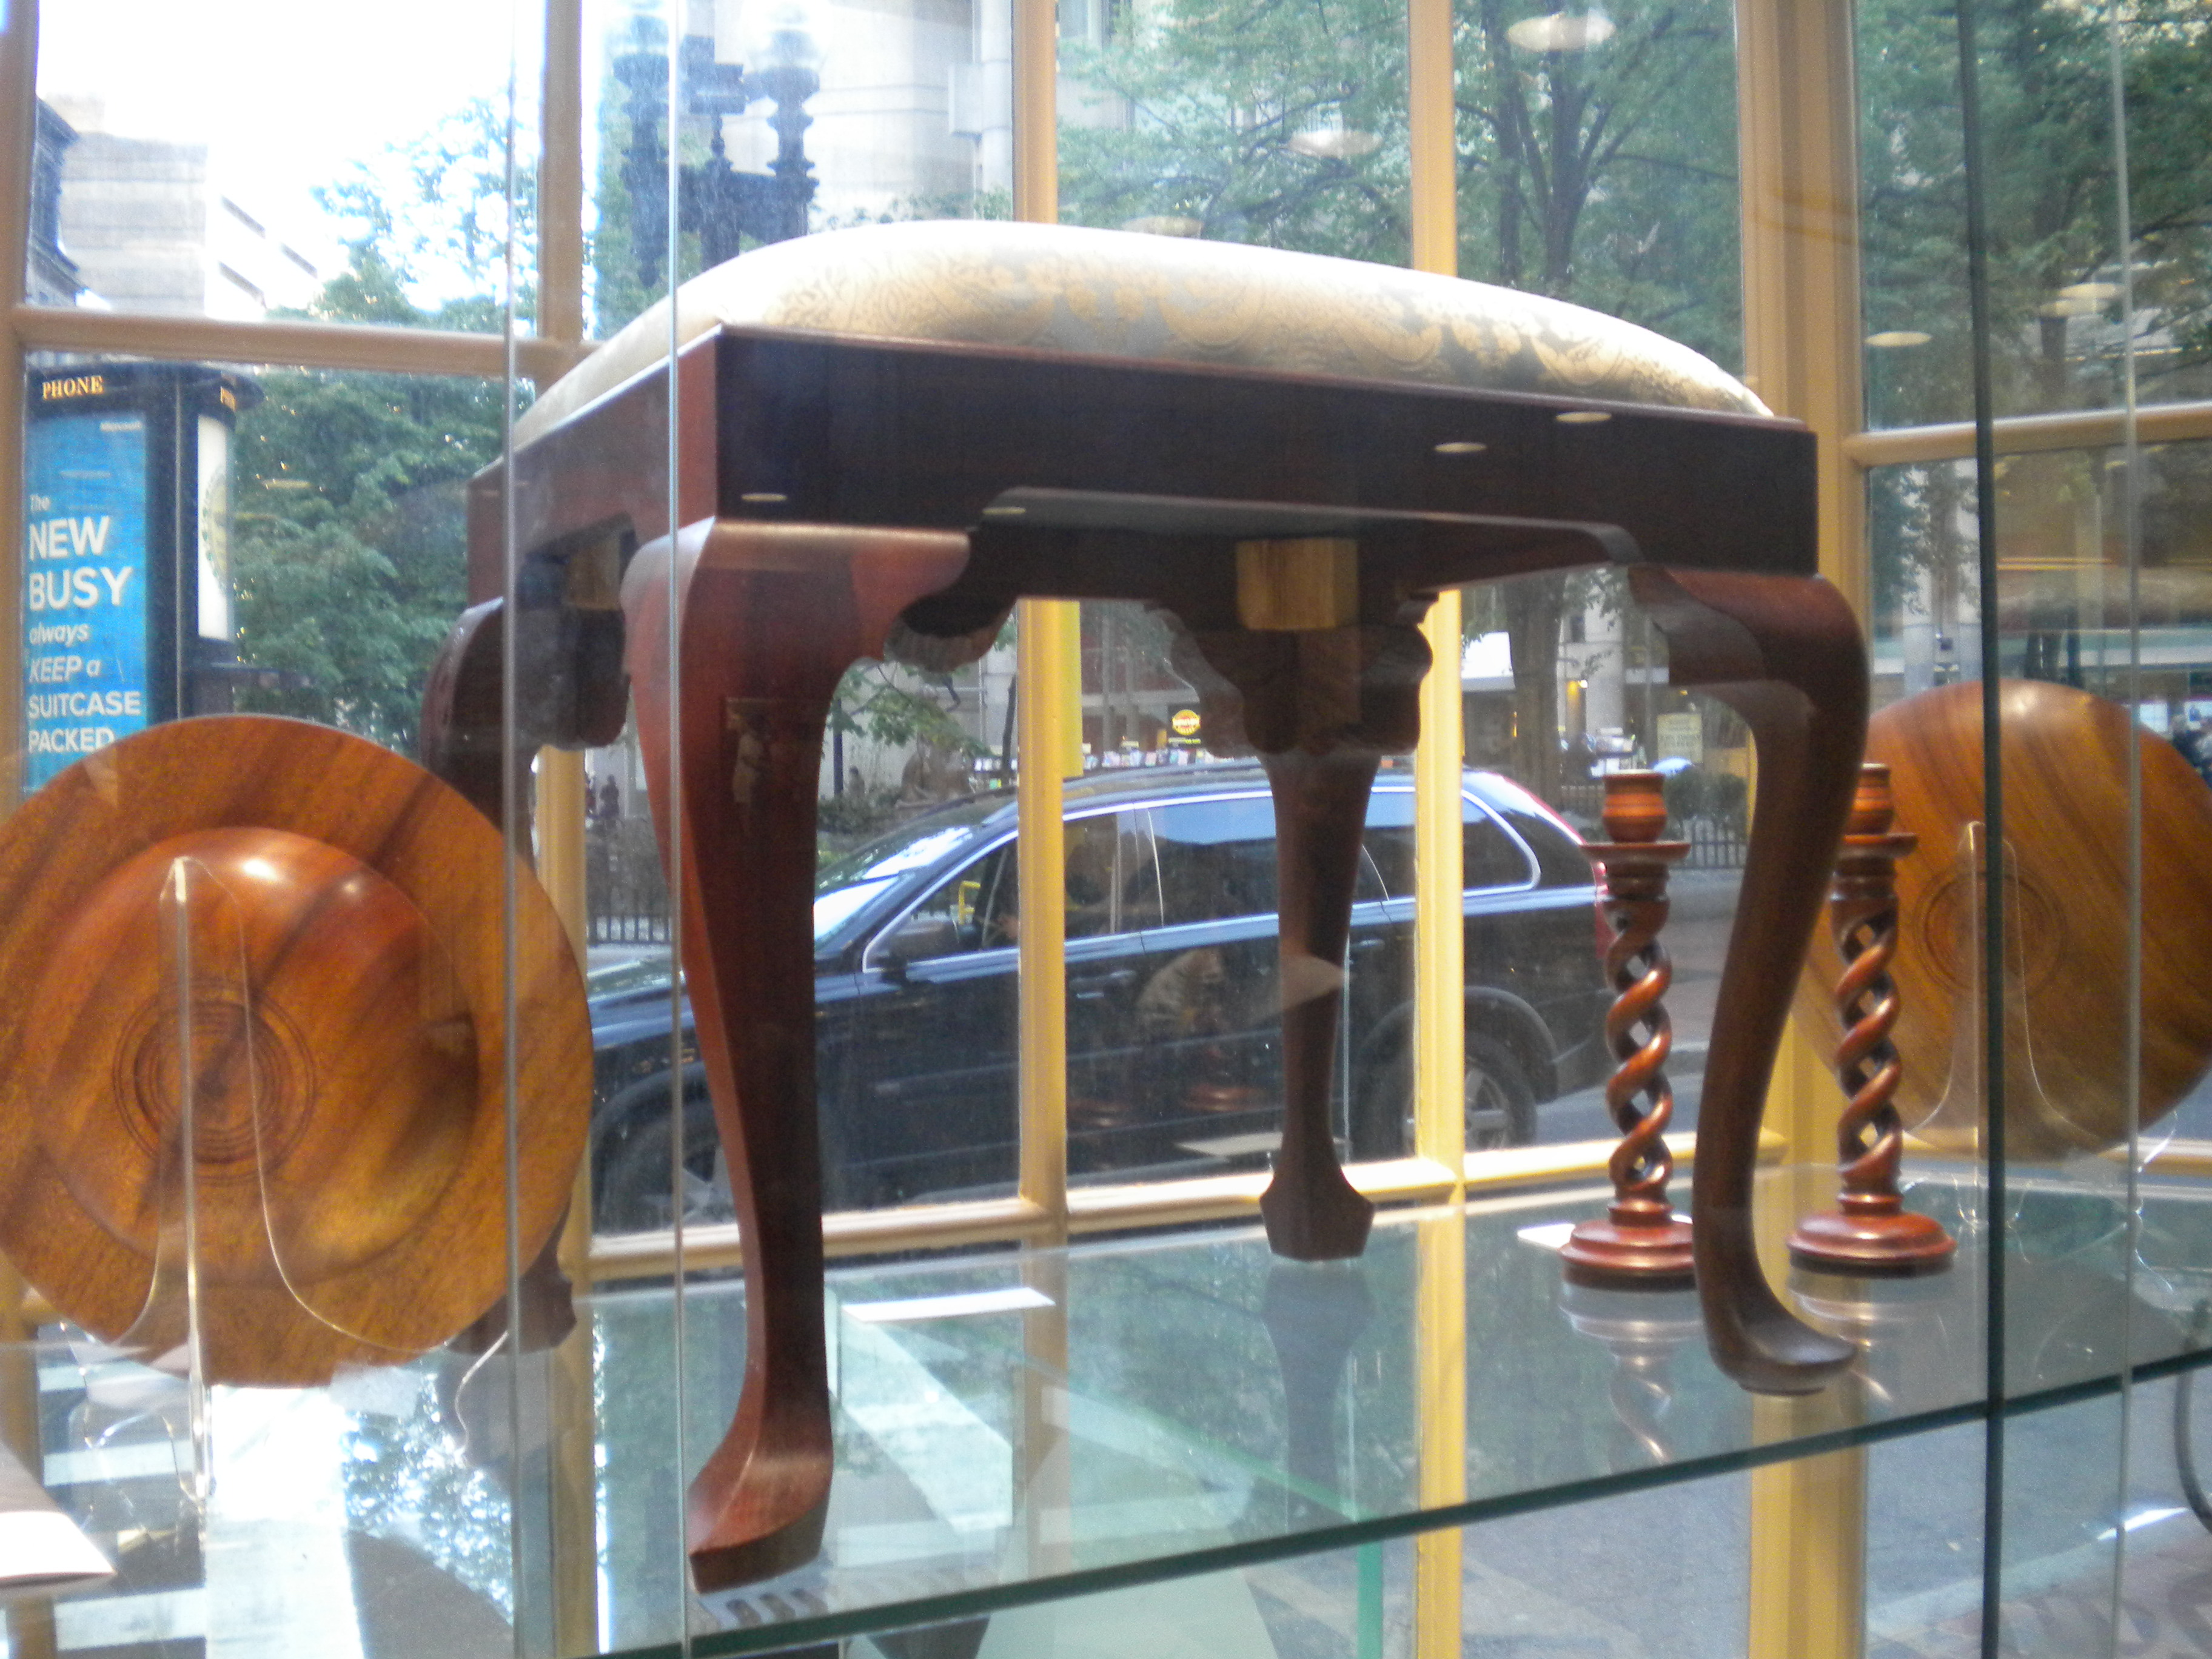
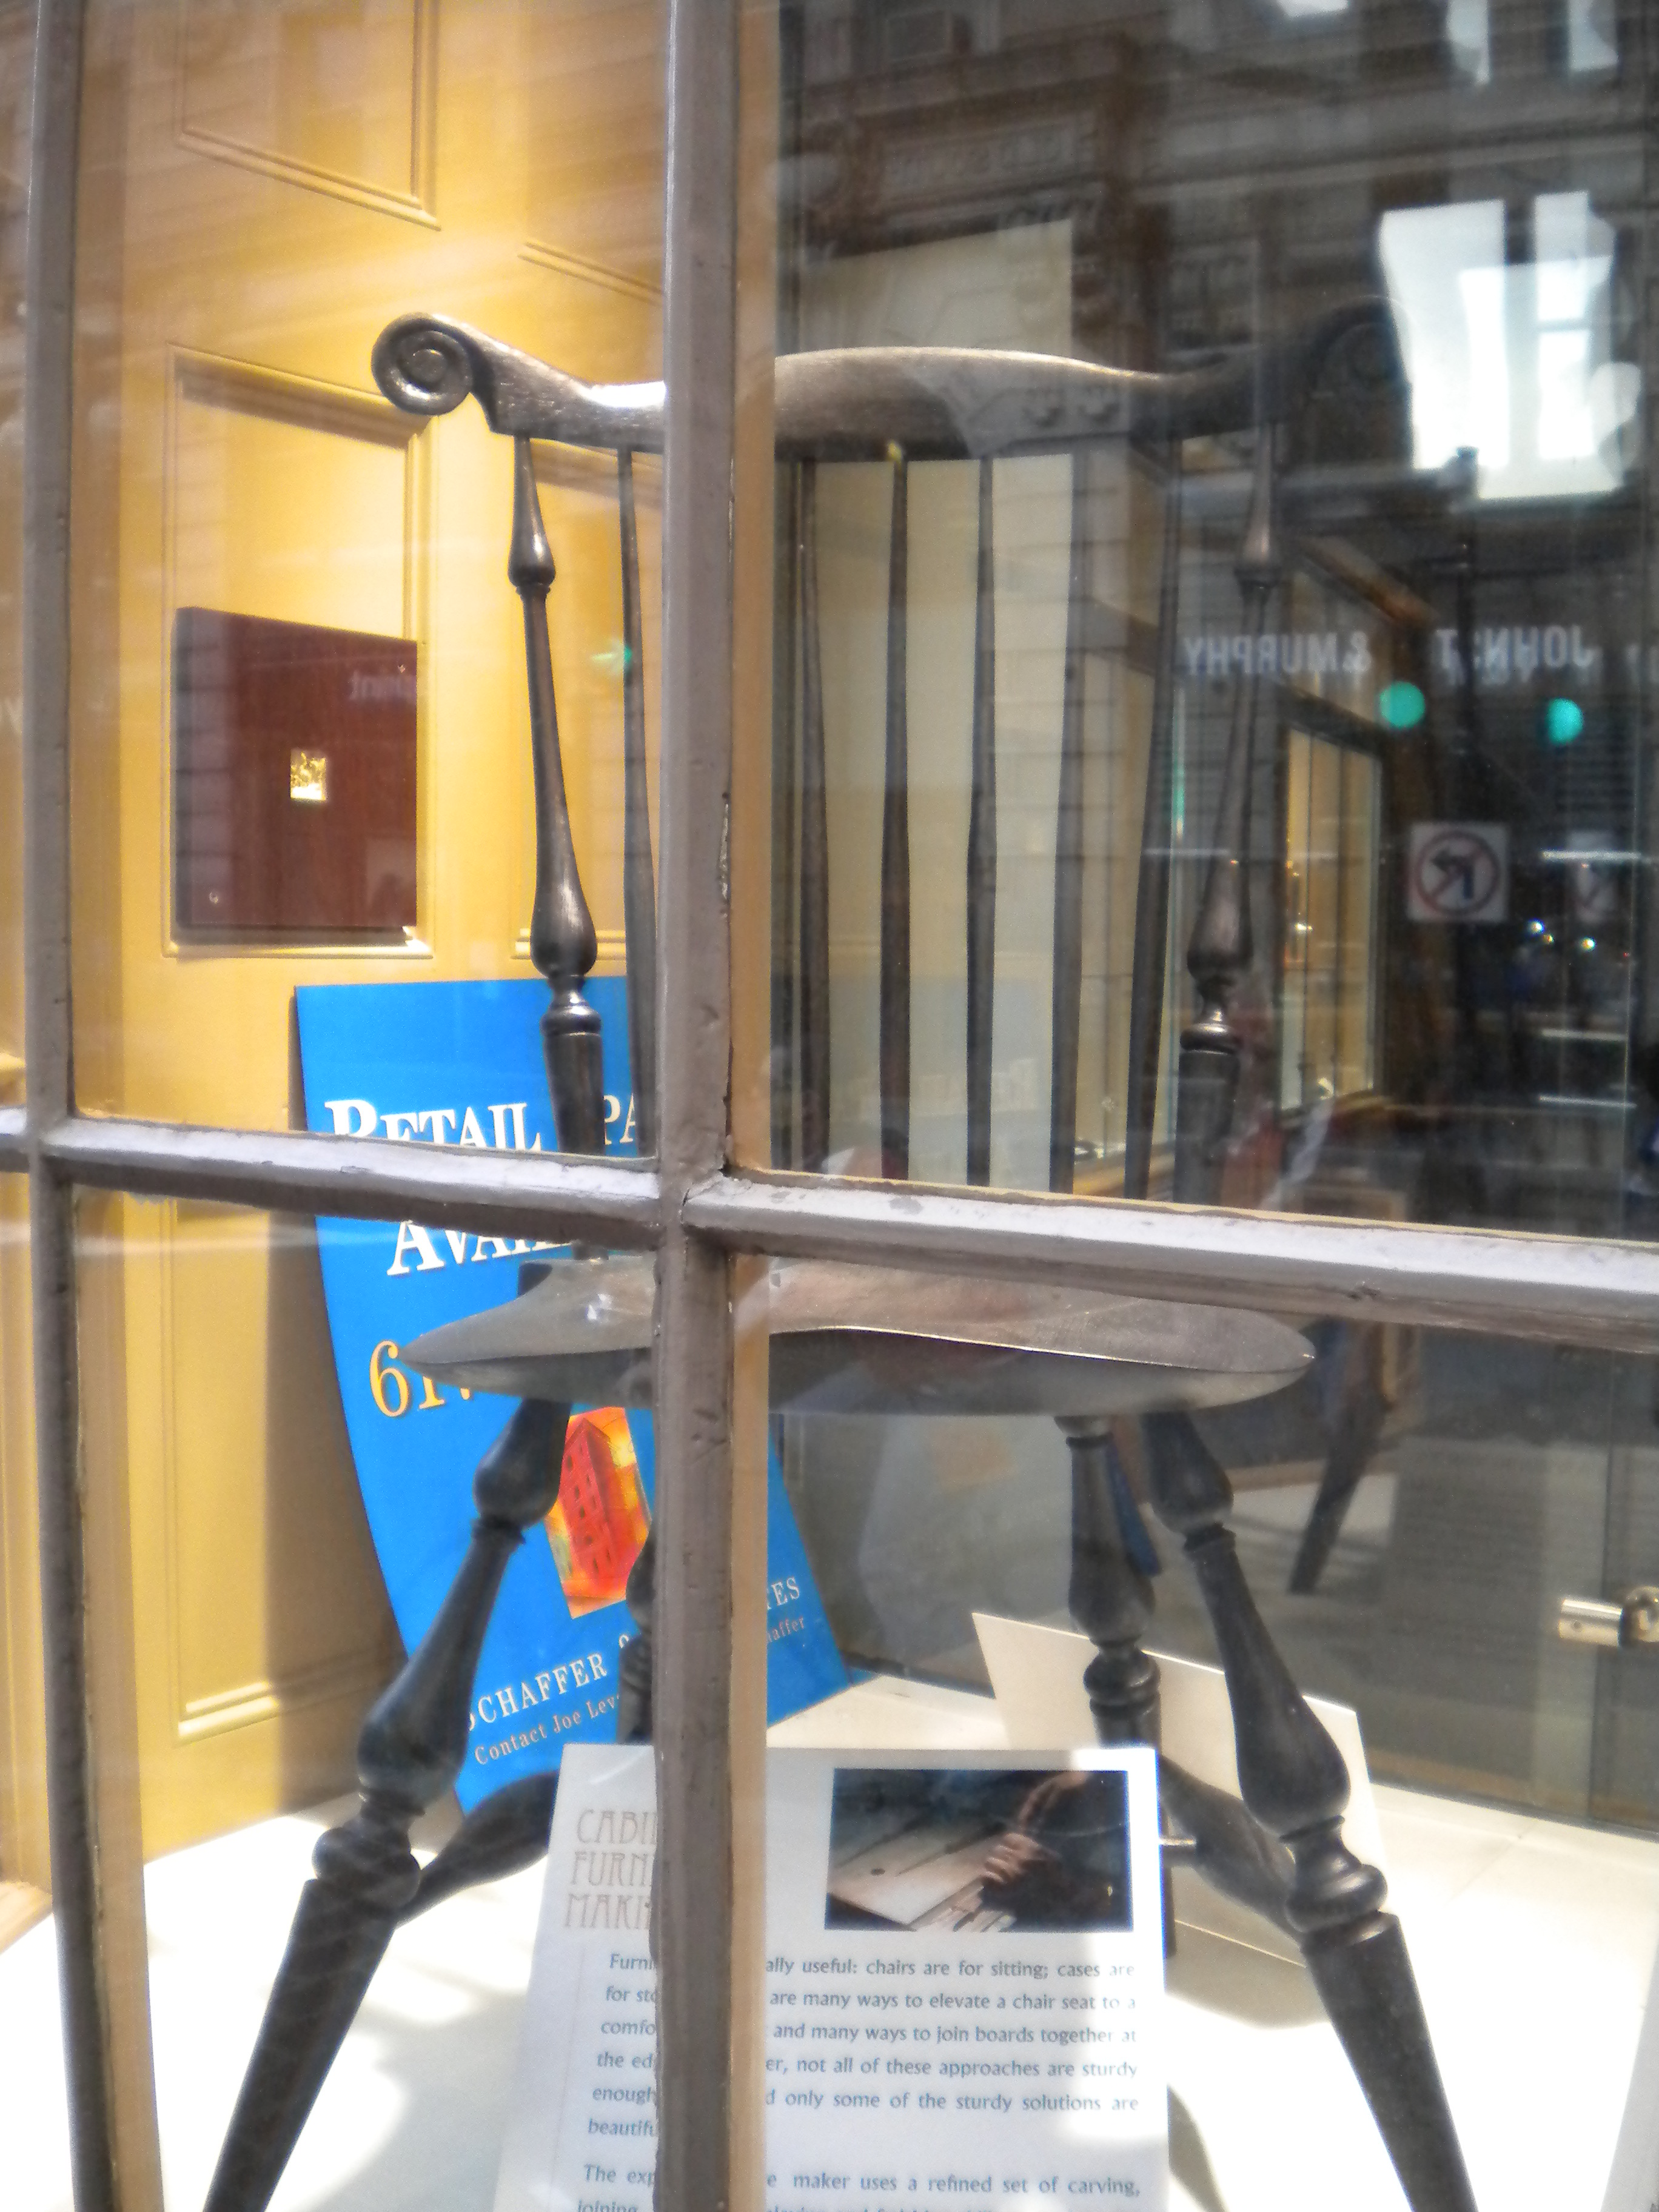
Tables, chairs and casework
There were a few outliers that passed through the store and left me with some memorable stories/interactions.
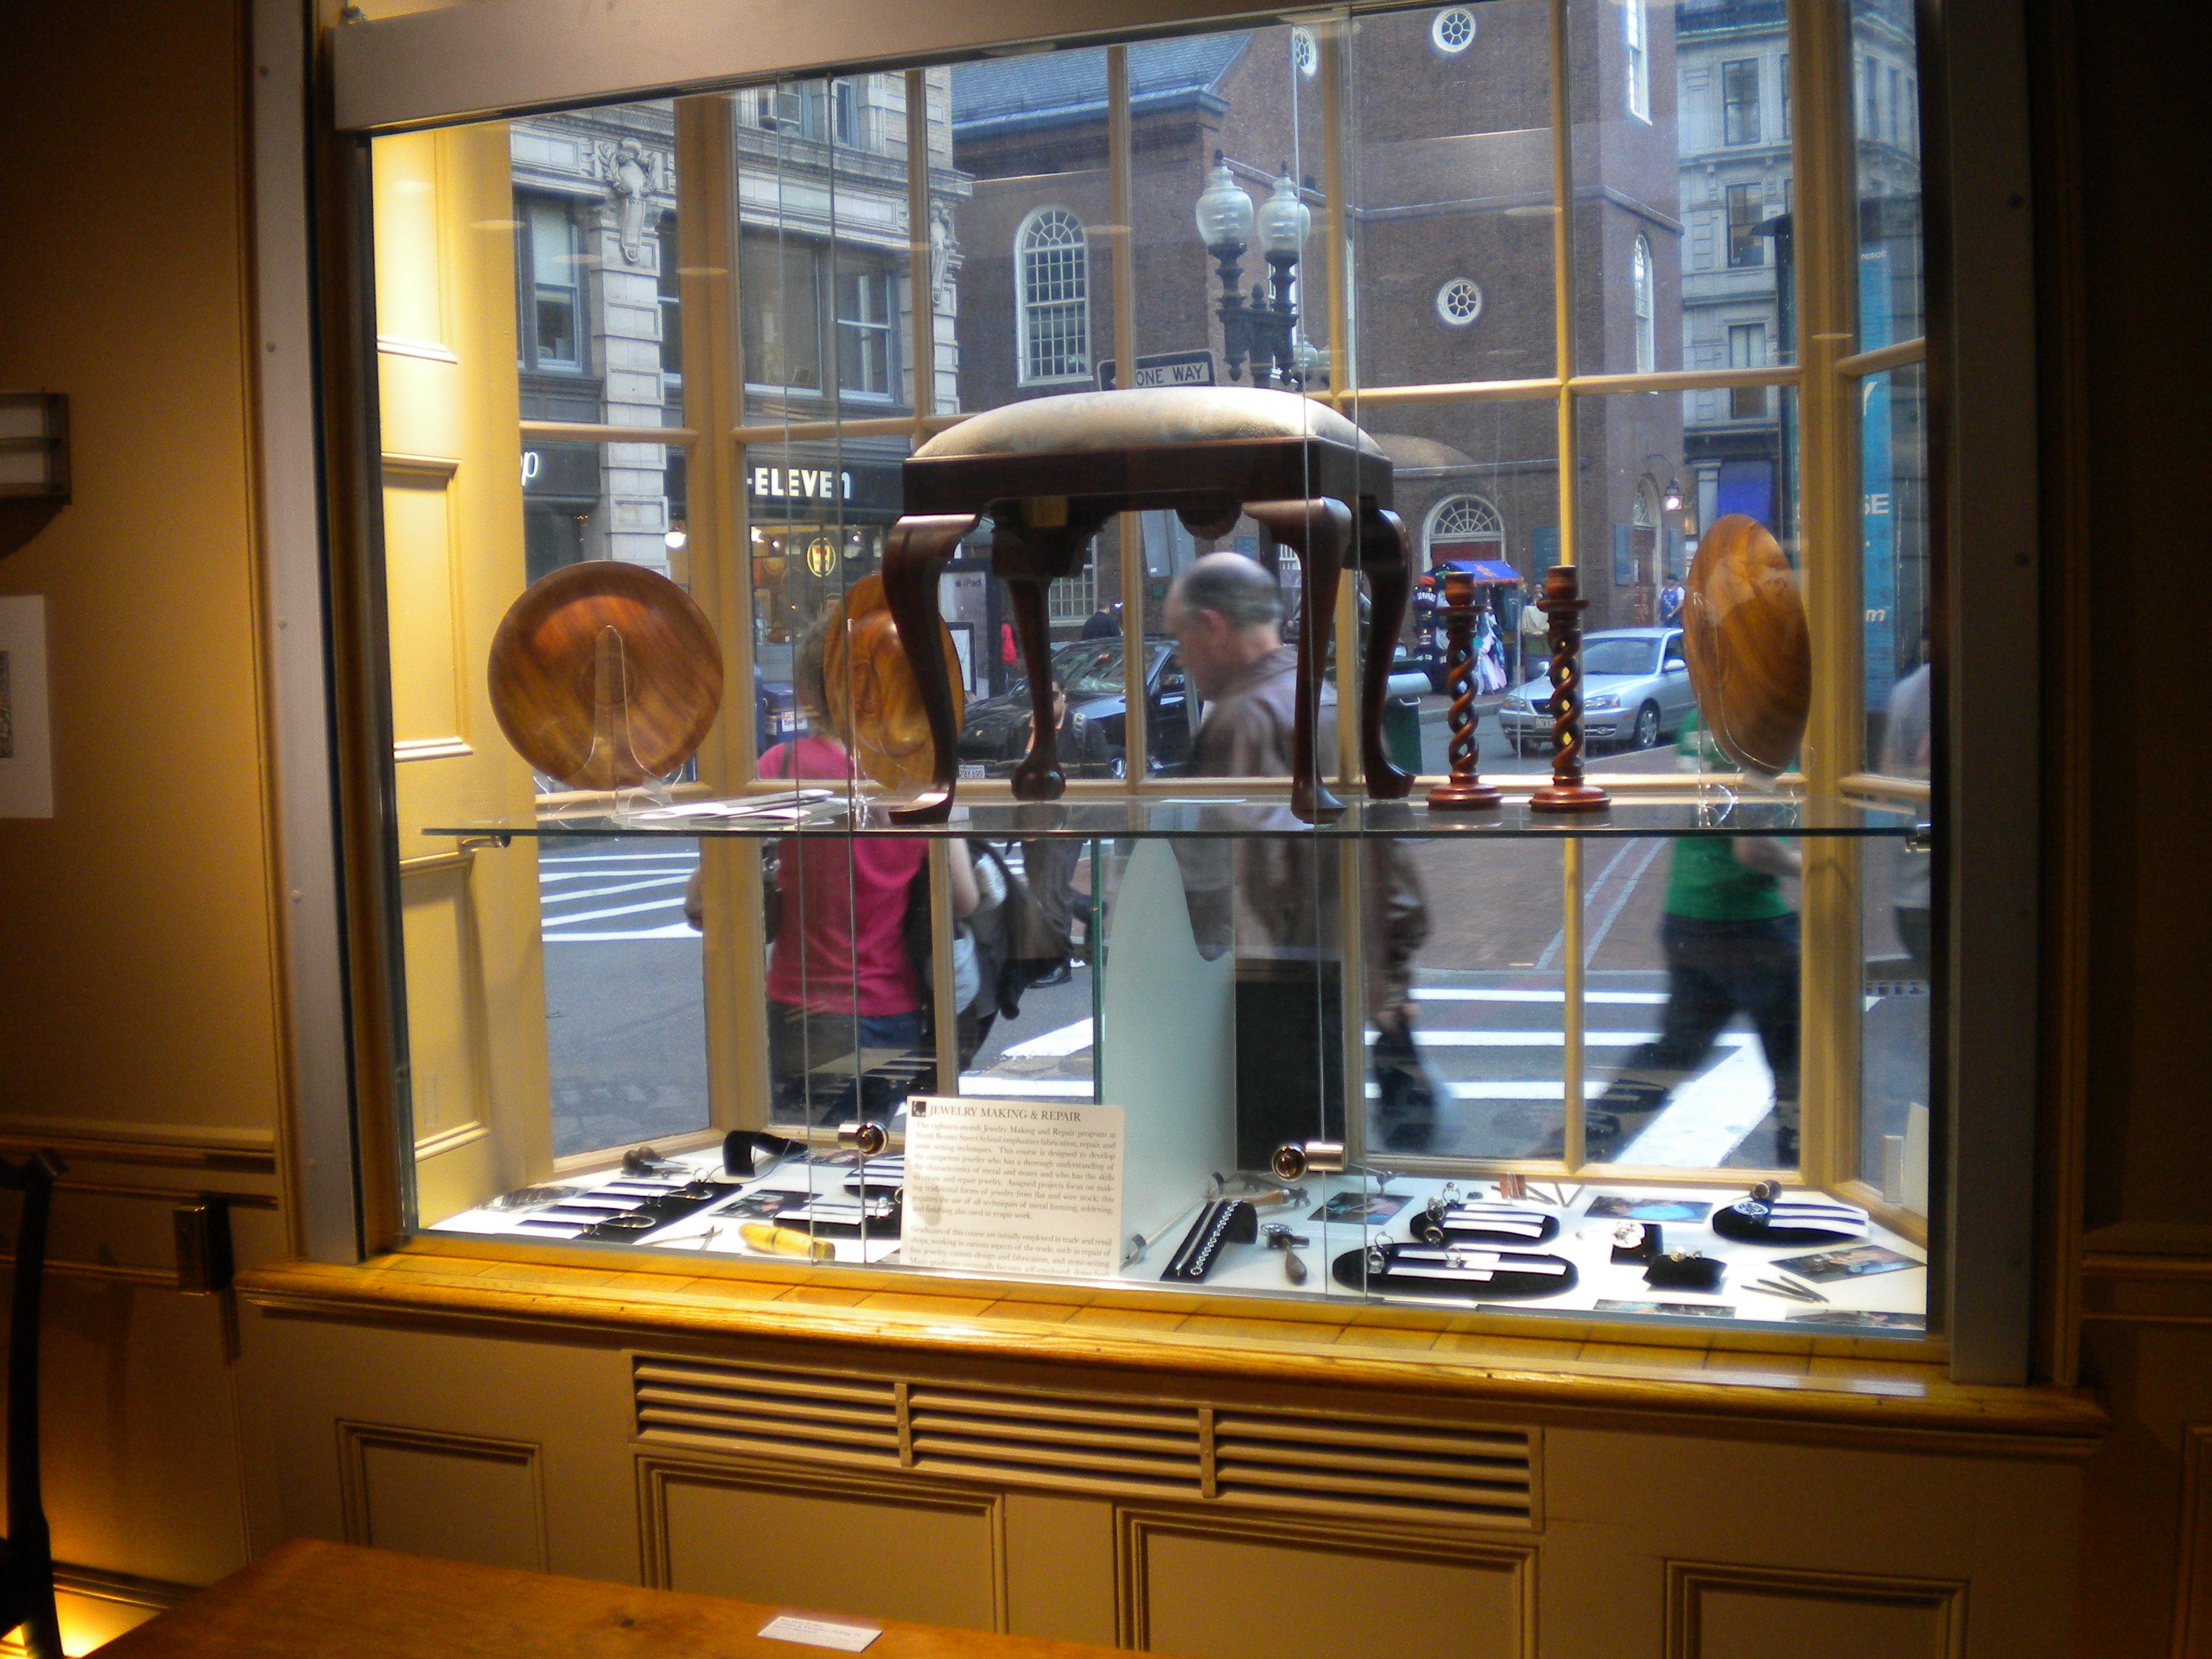
Footstool, turnings, locks, jewelry etc
On a busy Saturday afternoon an heavy set middle aged guy came through and was poking around making excessive huff and puff and snort sorts of noises. I knew from a distance he had an agenda.
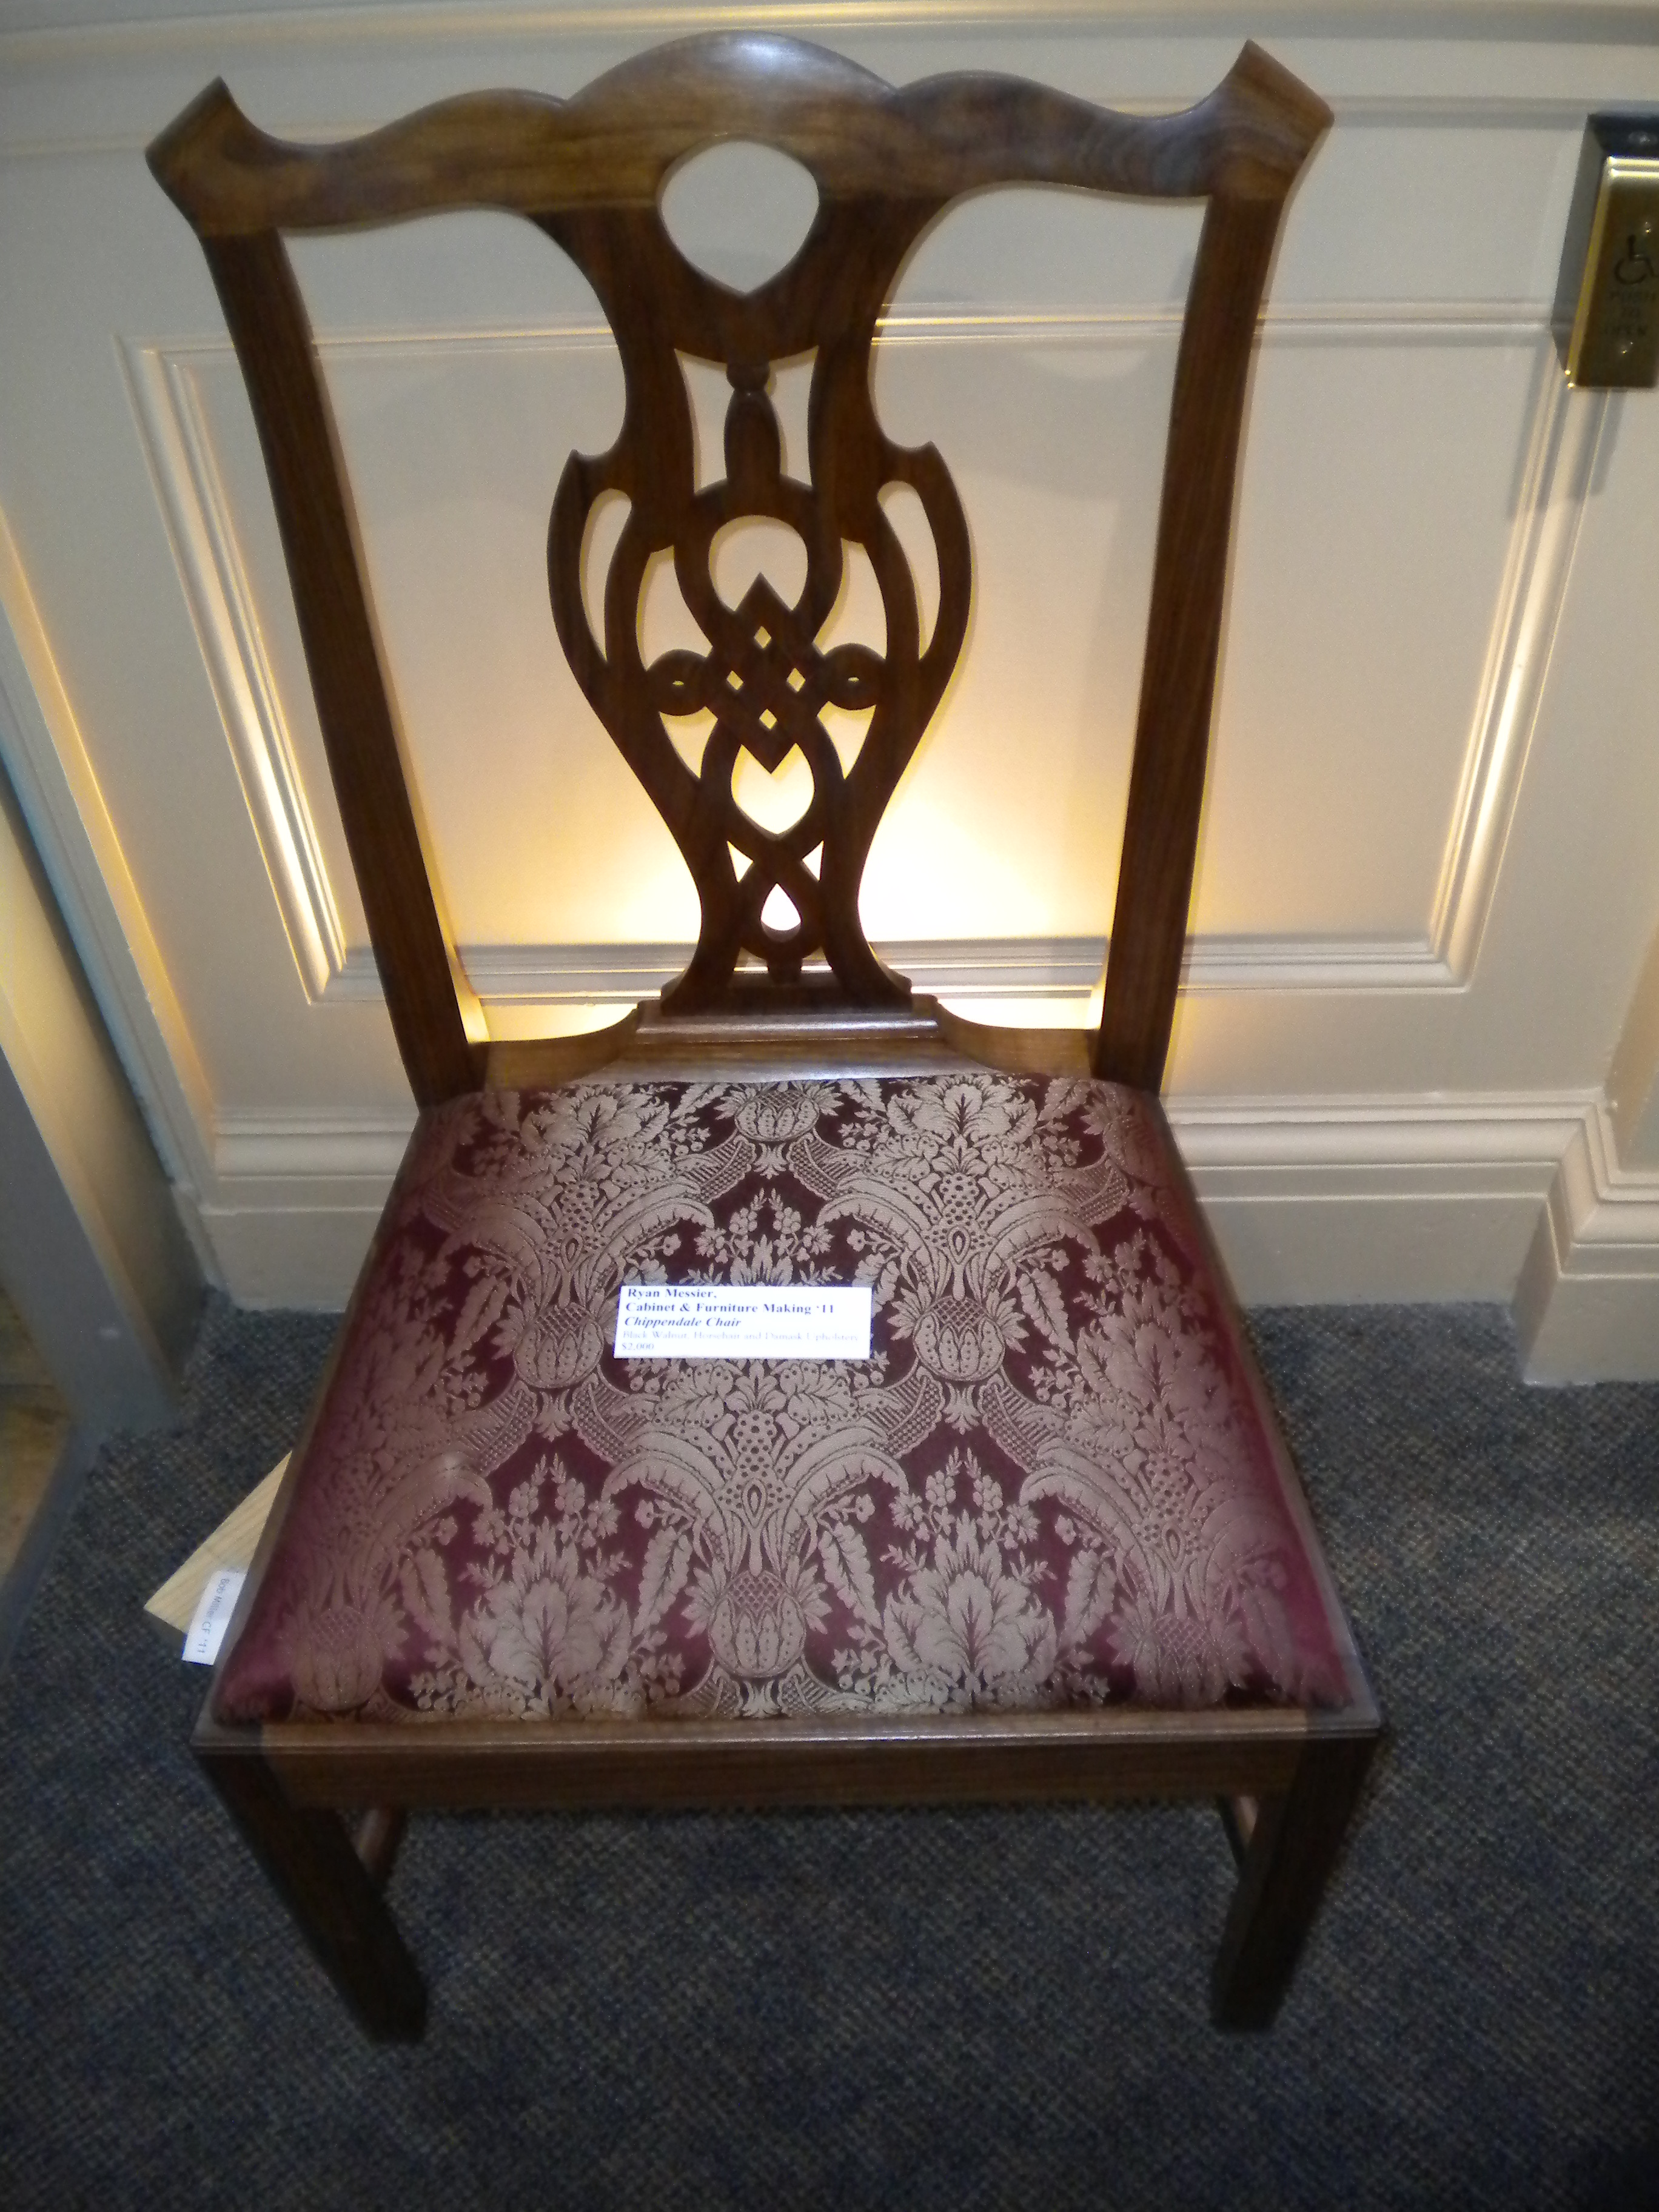
Dining Chair
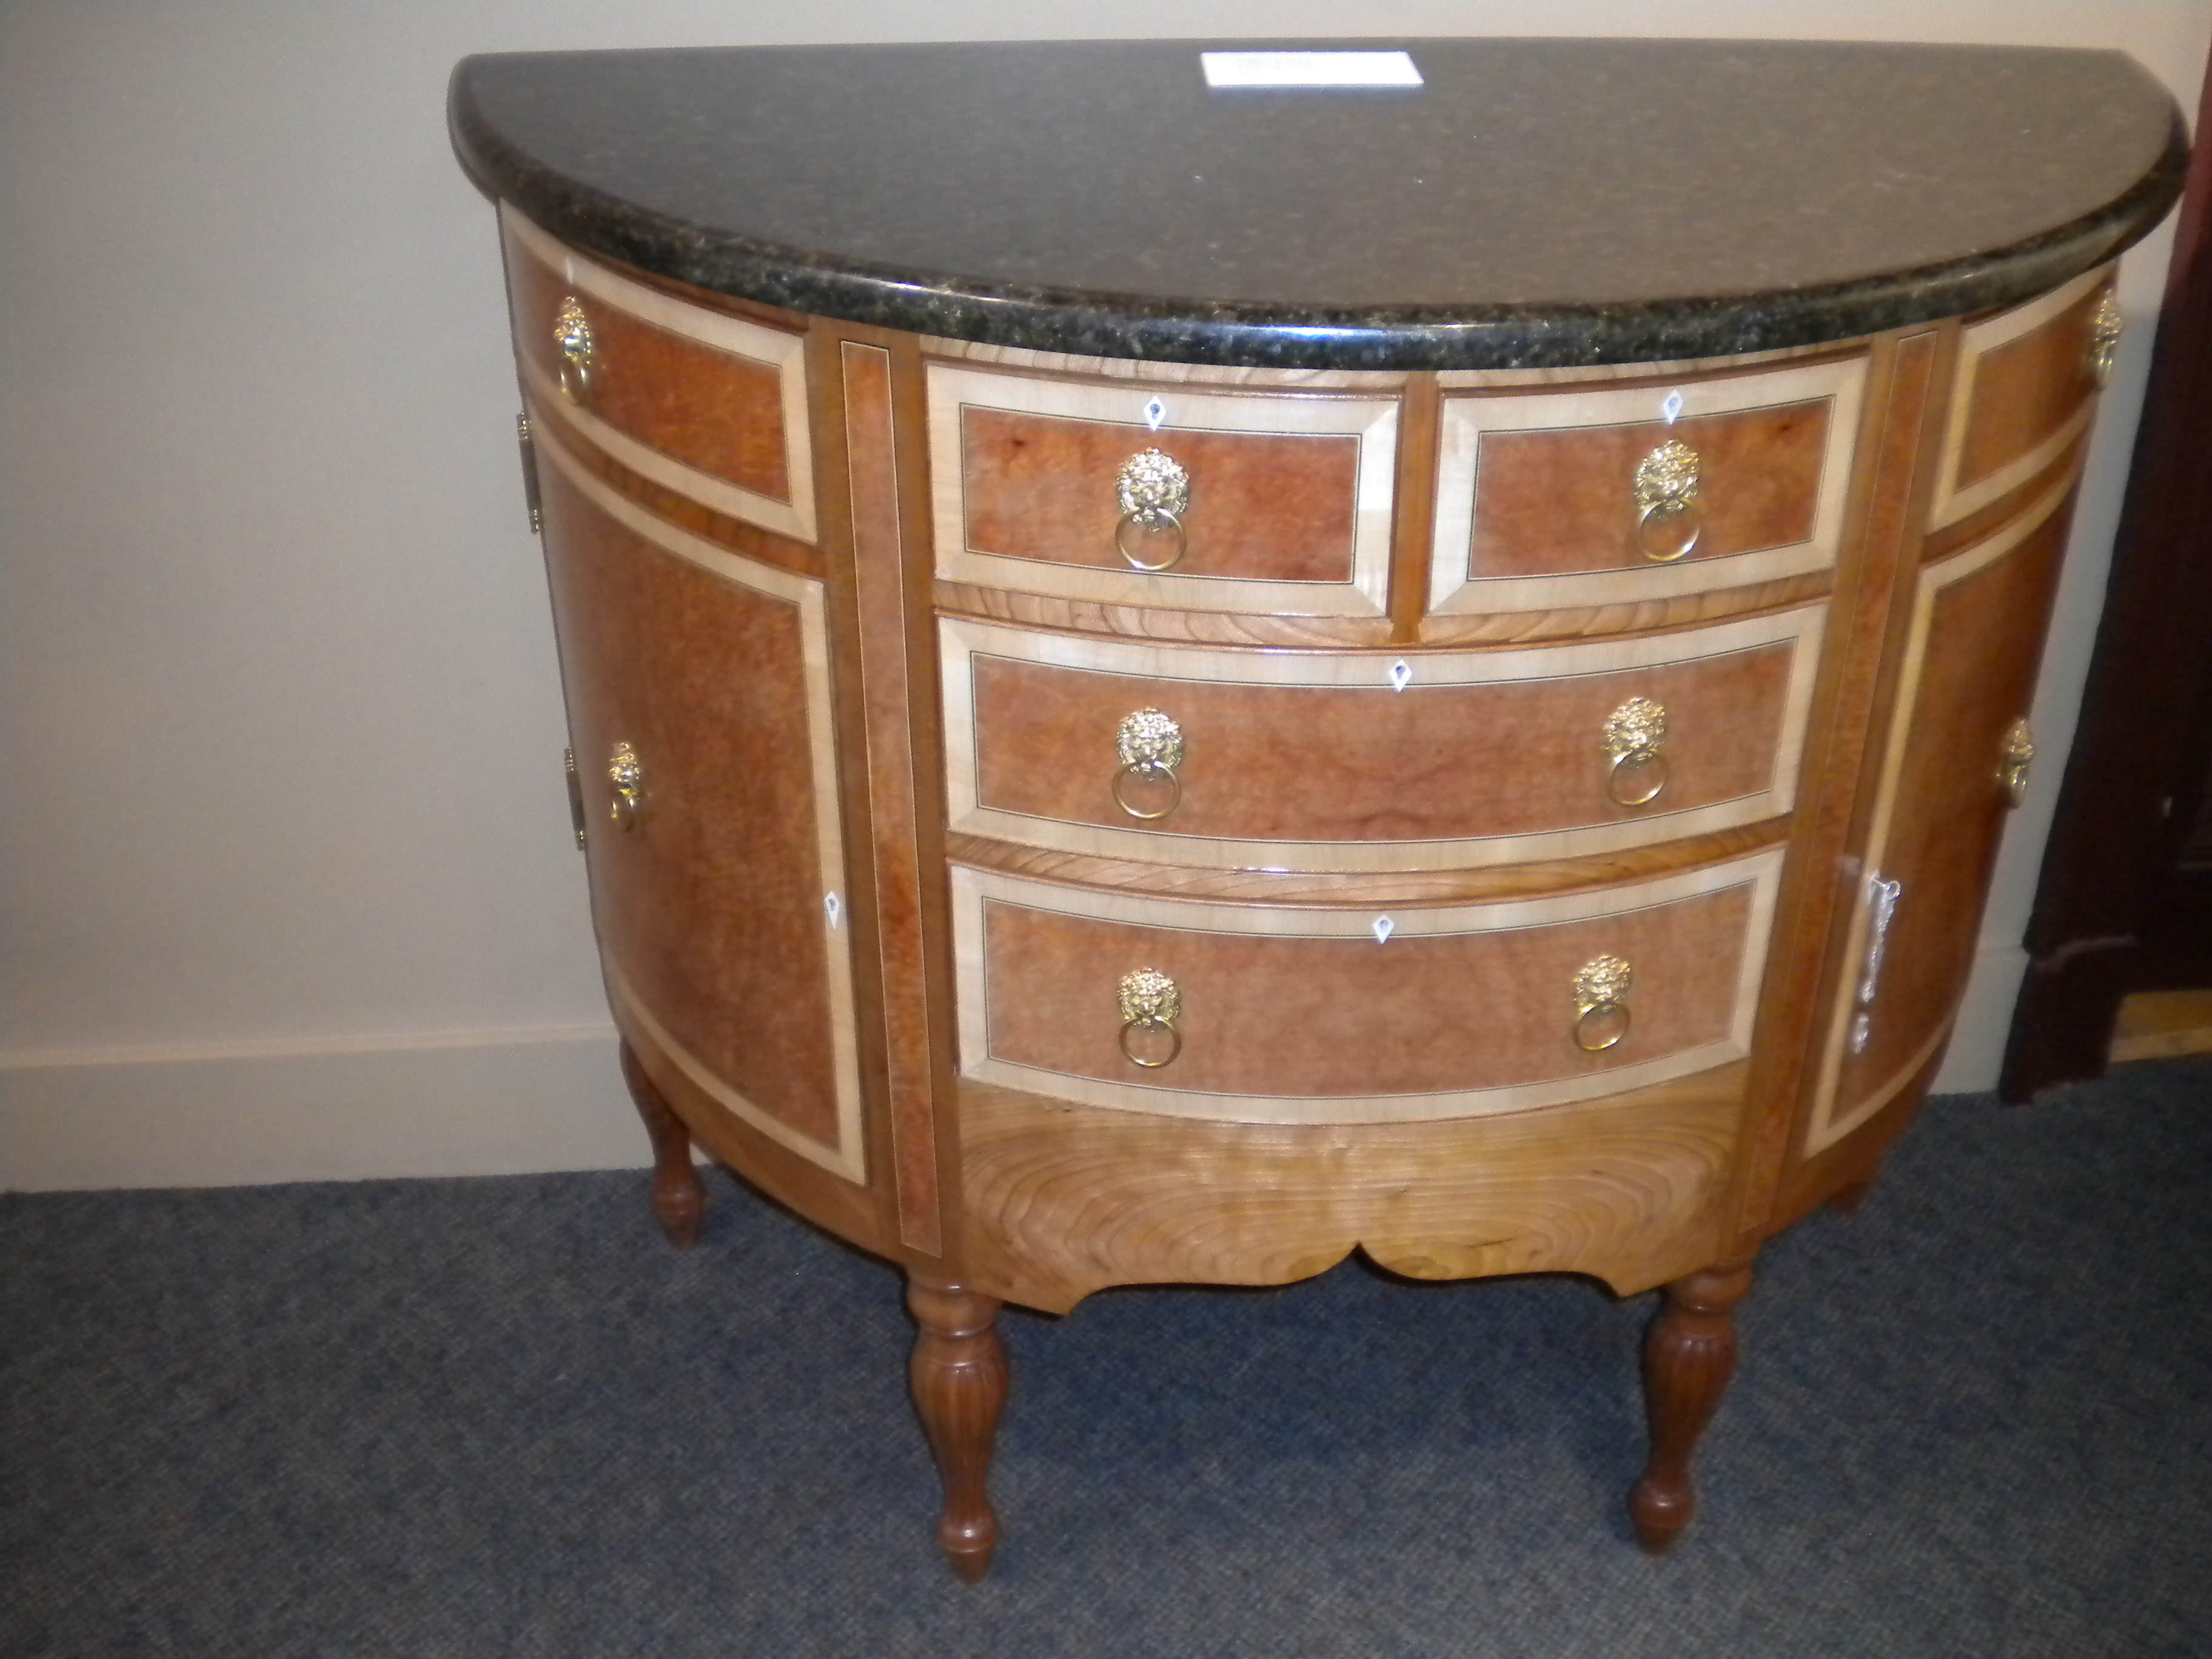
He poked around at the wares shown in the photos from this post. He motioned for me to come over as he paused in front of this exquisite demilune cabinet. The wood, stone and veneer work was excellent, the inside of the cambered doors have even more details that rewarded anyone who had the chance to see the interior.
Exquisite Demiline Cabinet
He asked me “How much is it?”
I went over to read the card as not all items on display were for sale or some were already sold, but in this case there was a price listed along with details about all the work, materials and finish that went into the piece. The student who made it spent well over 100 hours on this piece and for the effort and result the price was quite reasonable for what it was. (I don’t recall the exact price anymore but it was a few thousand dollars) I know if I were to contract someone doing this longer for a living it would cost twice as much.
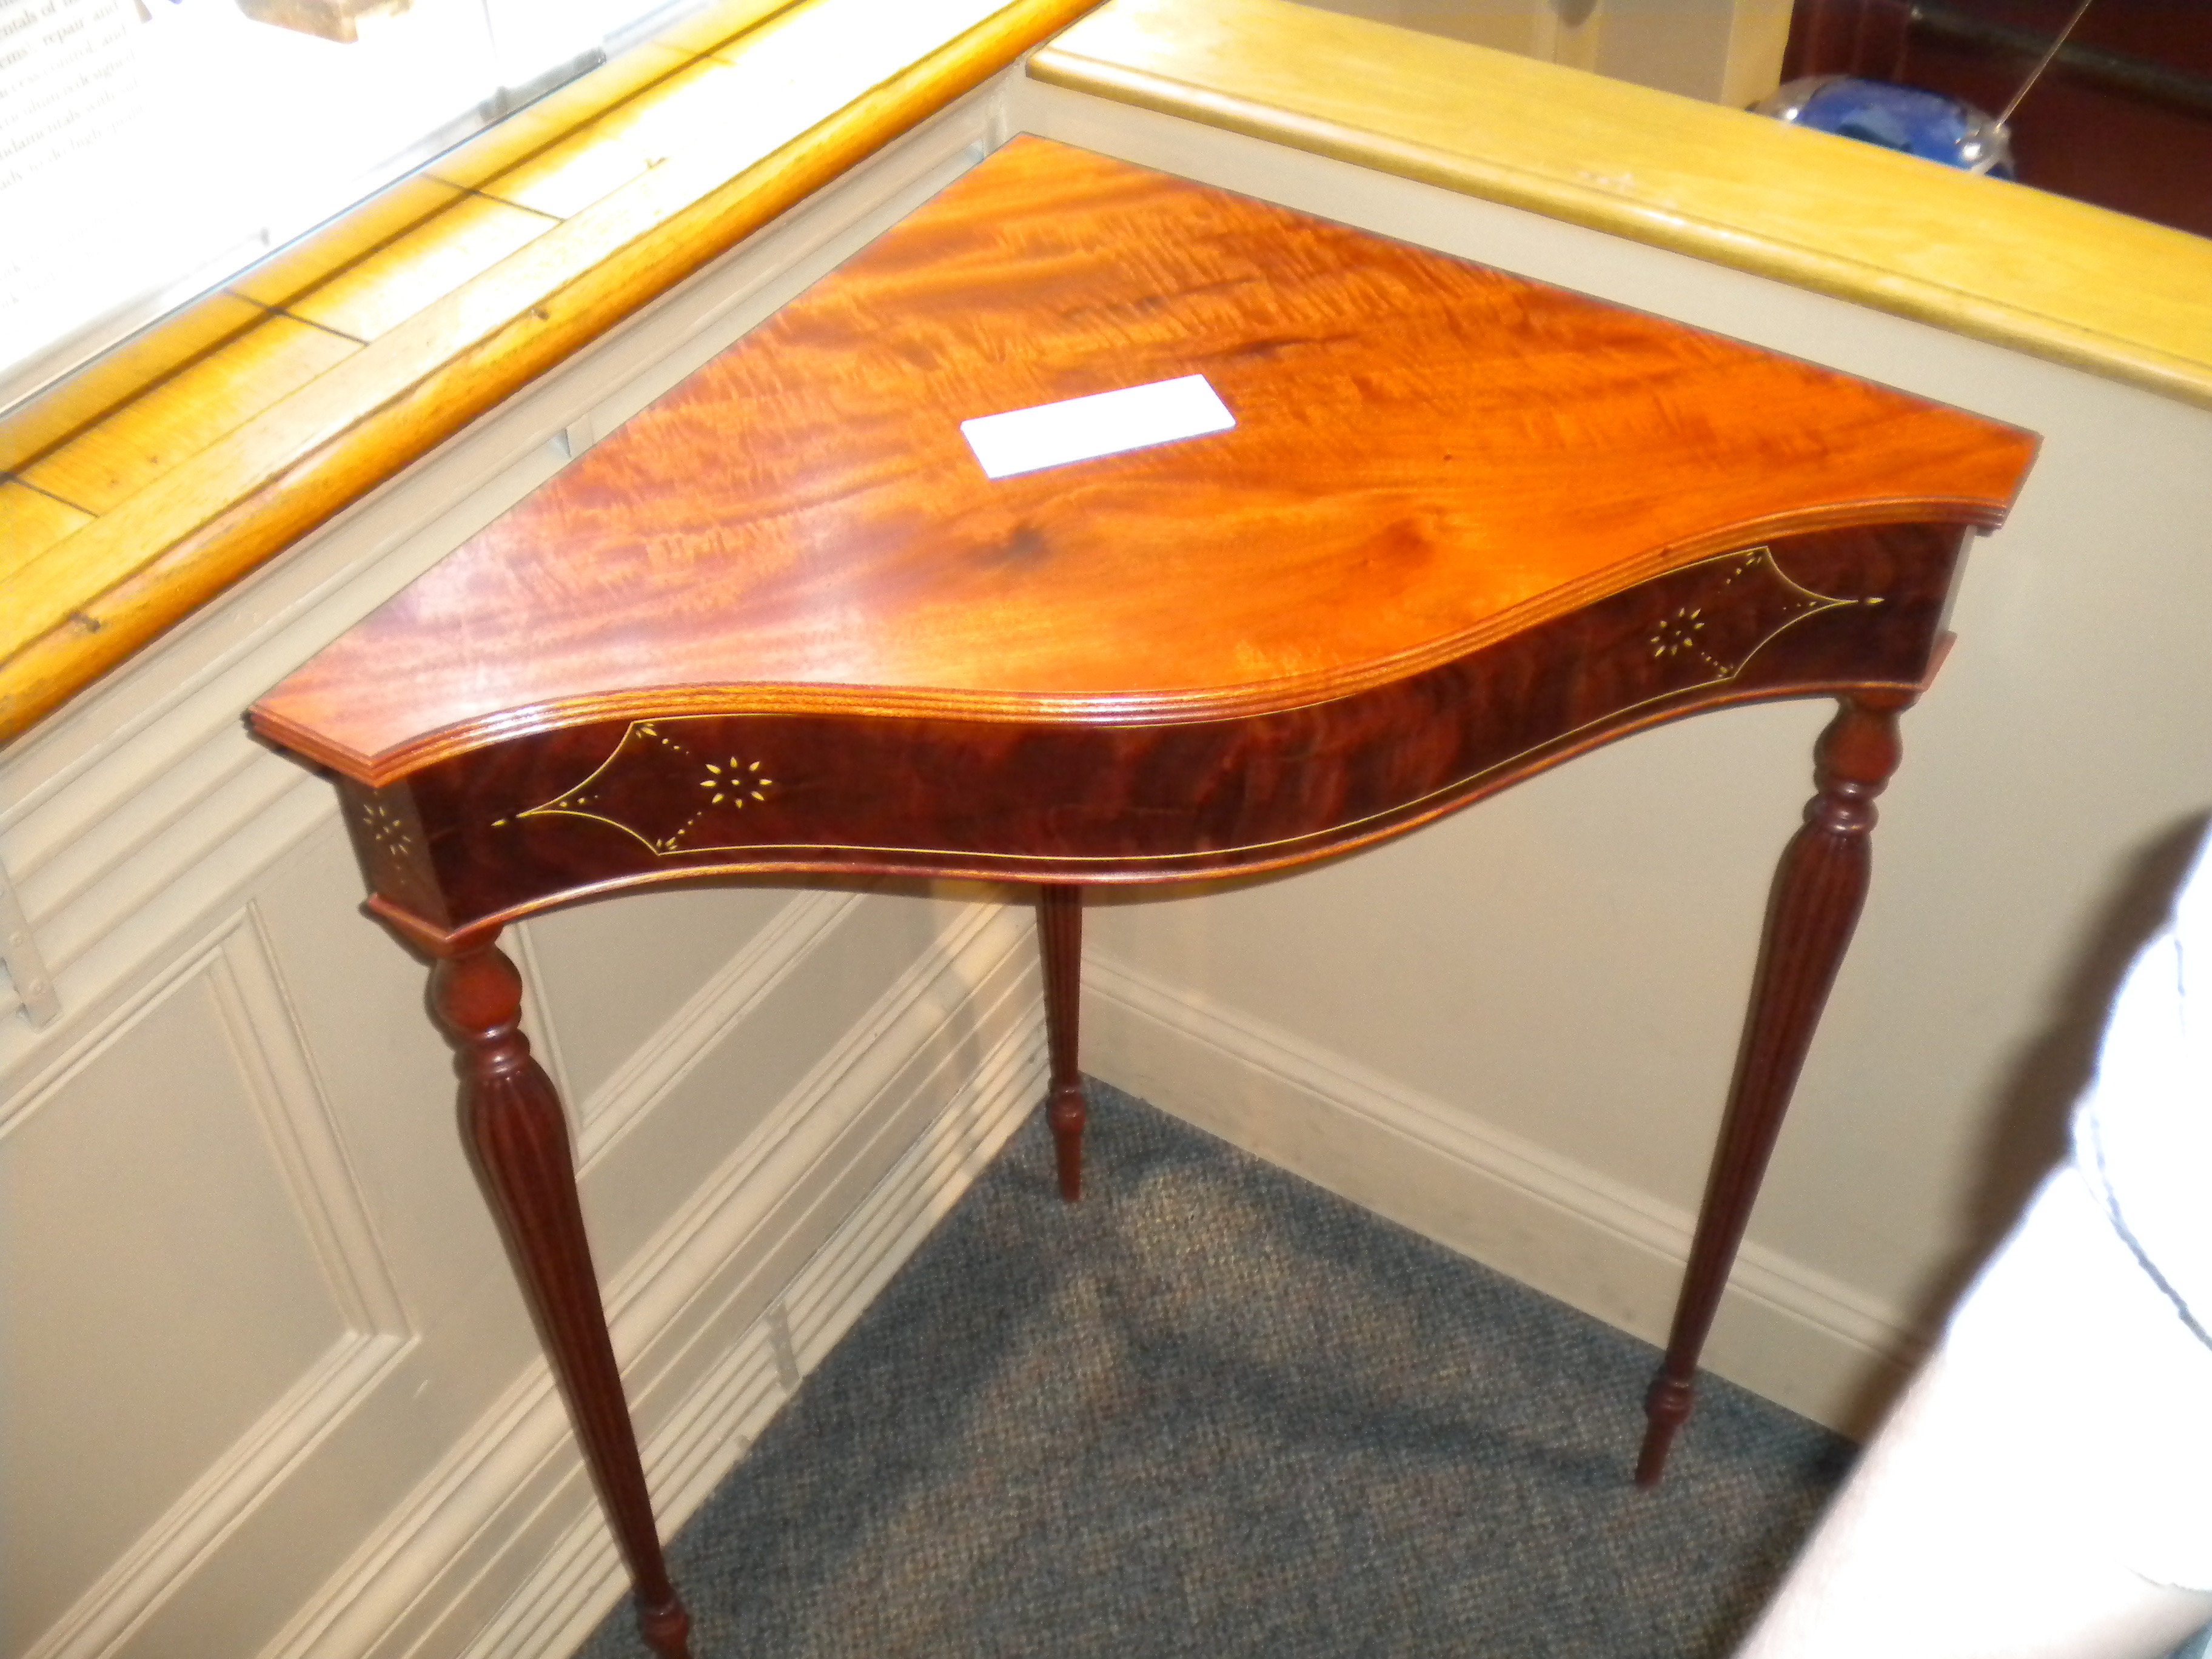
Corner table
I talked to this man about the hand work that went into it, what the school is doing to teach the next generation of craftsperson, the longevity and value of such a piece and how relative to the amount of work and skill that went into it, it’s priced quite fairly. I highlighted the intricate details and selection of wood and hand many hardware etc.
He wasn’t having any of it. He laughed and said “Why would anyone buy this when I could buy something at Ikea for under $500 to do the same thing?”
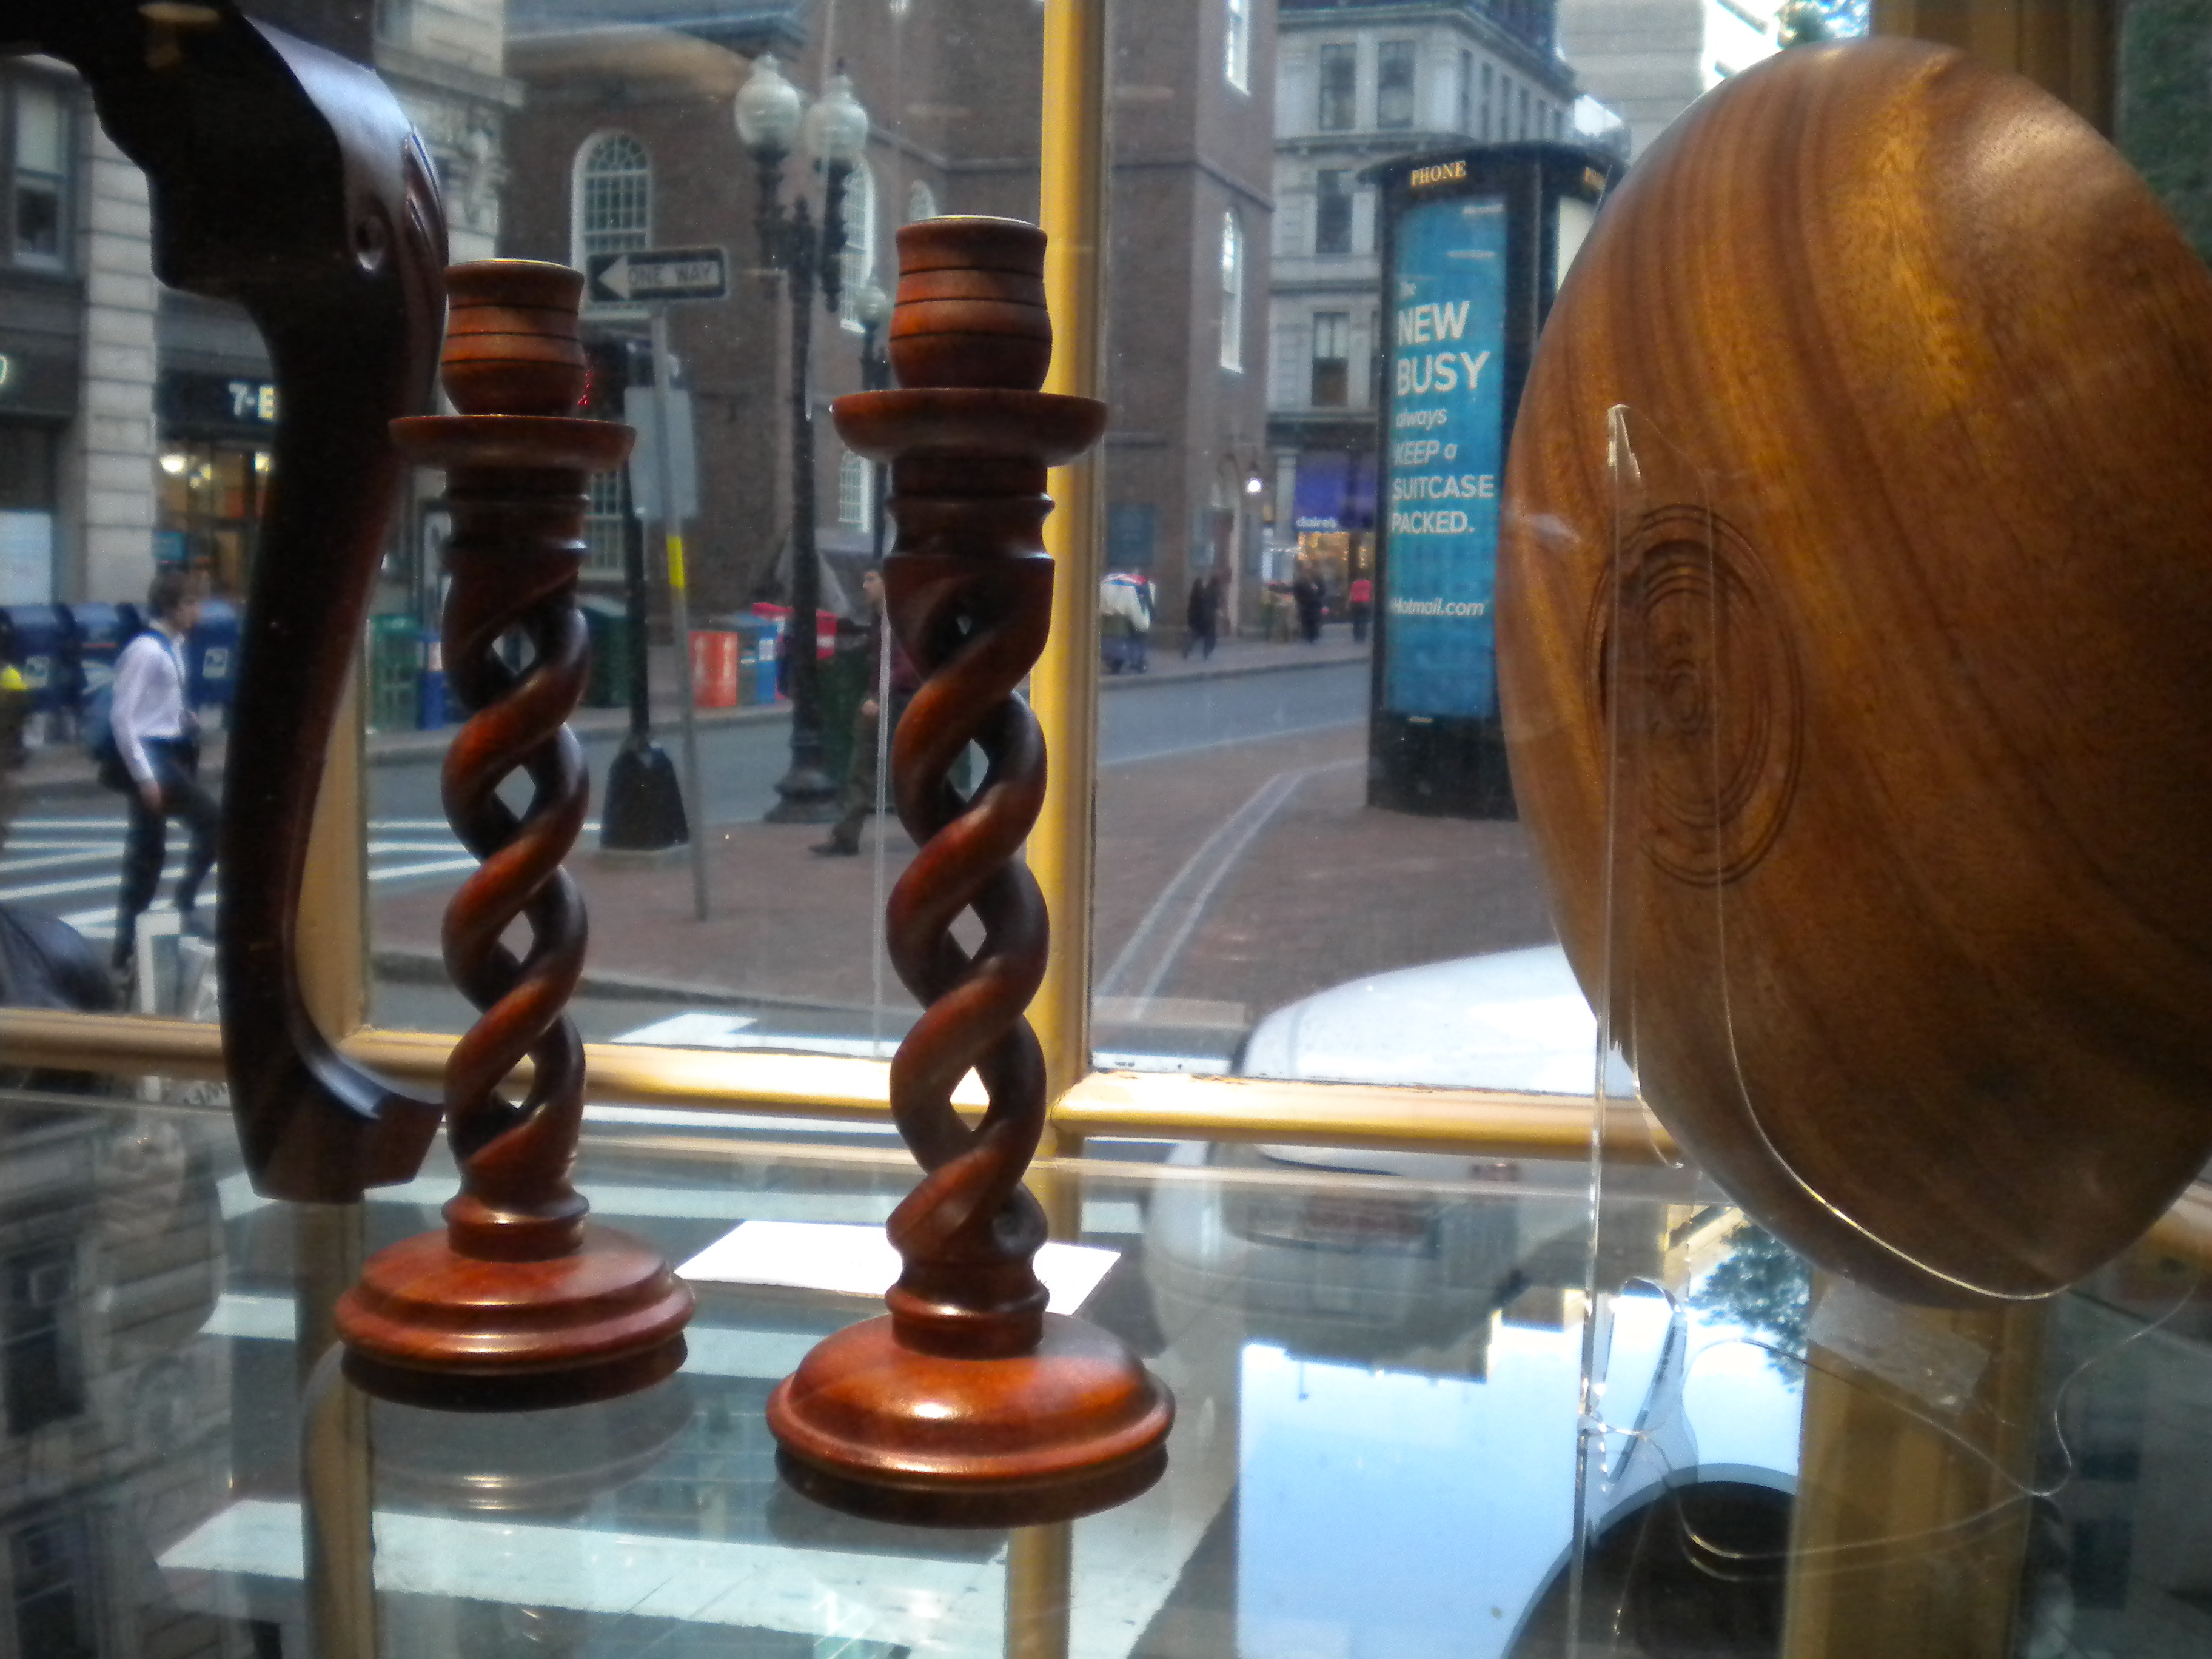
Barley Twist Candle Holders
It was clear this guy had nothing better to do than mess around in this fashion and I wasn’t going to let this joker bait me any further. I tactfully explained how this display was geared toward folks that love and value craft work and moved on to the next customer — thankfully someone with a smiling face who loved traditional hand work.
Jewelry
On a different evening of minding the display a gentleman in his late 30s came in to look around.
Footstool
He examined many pieces in close detail and seemed to appreciate the work that went into them. He was friendly enough and said he dabbled a bit in woodworking as a hobby and got to talking about the sorts of work I did at the time.
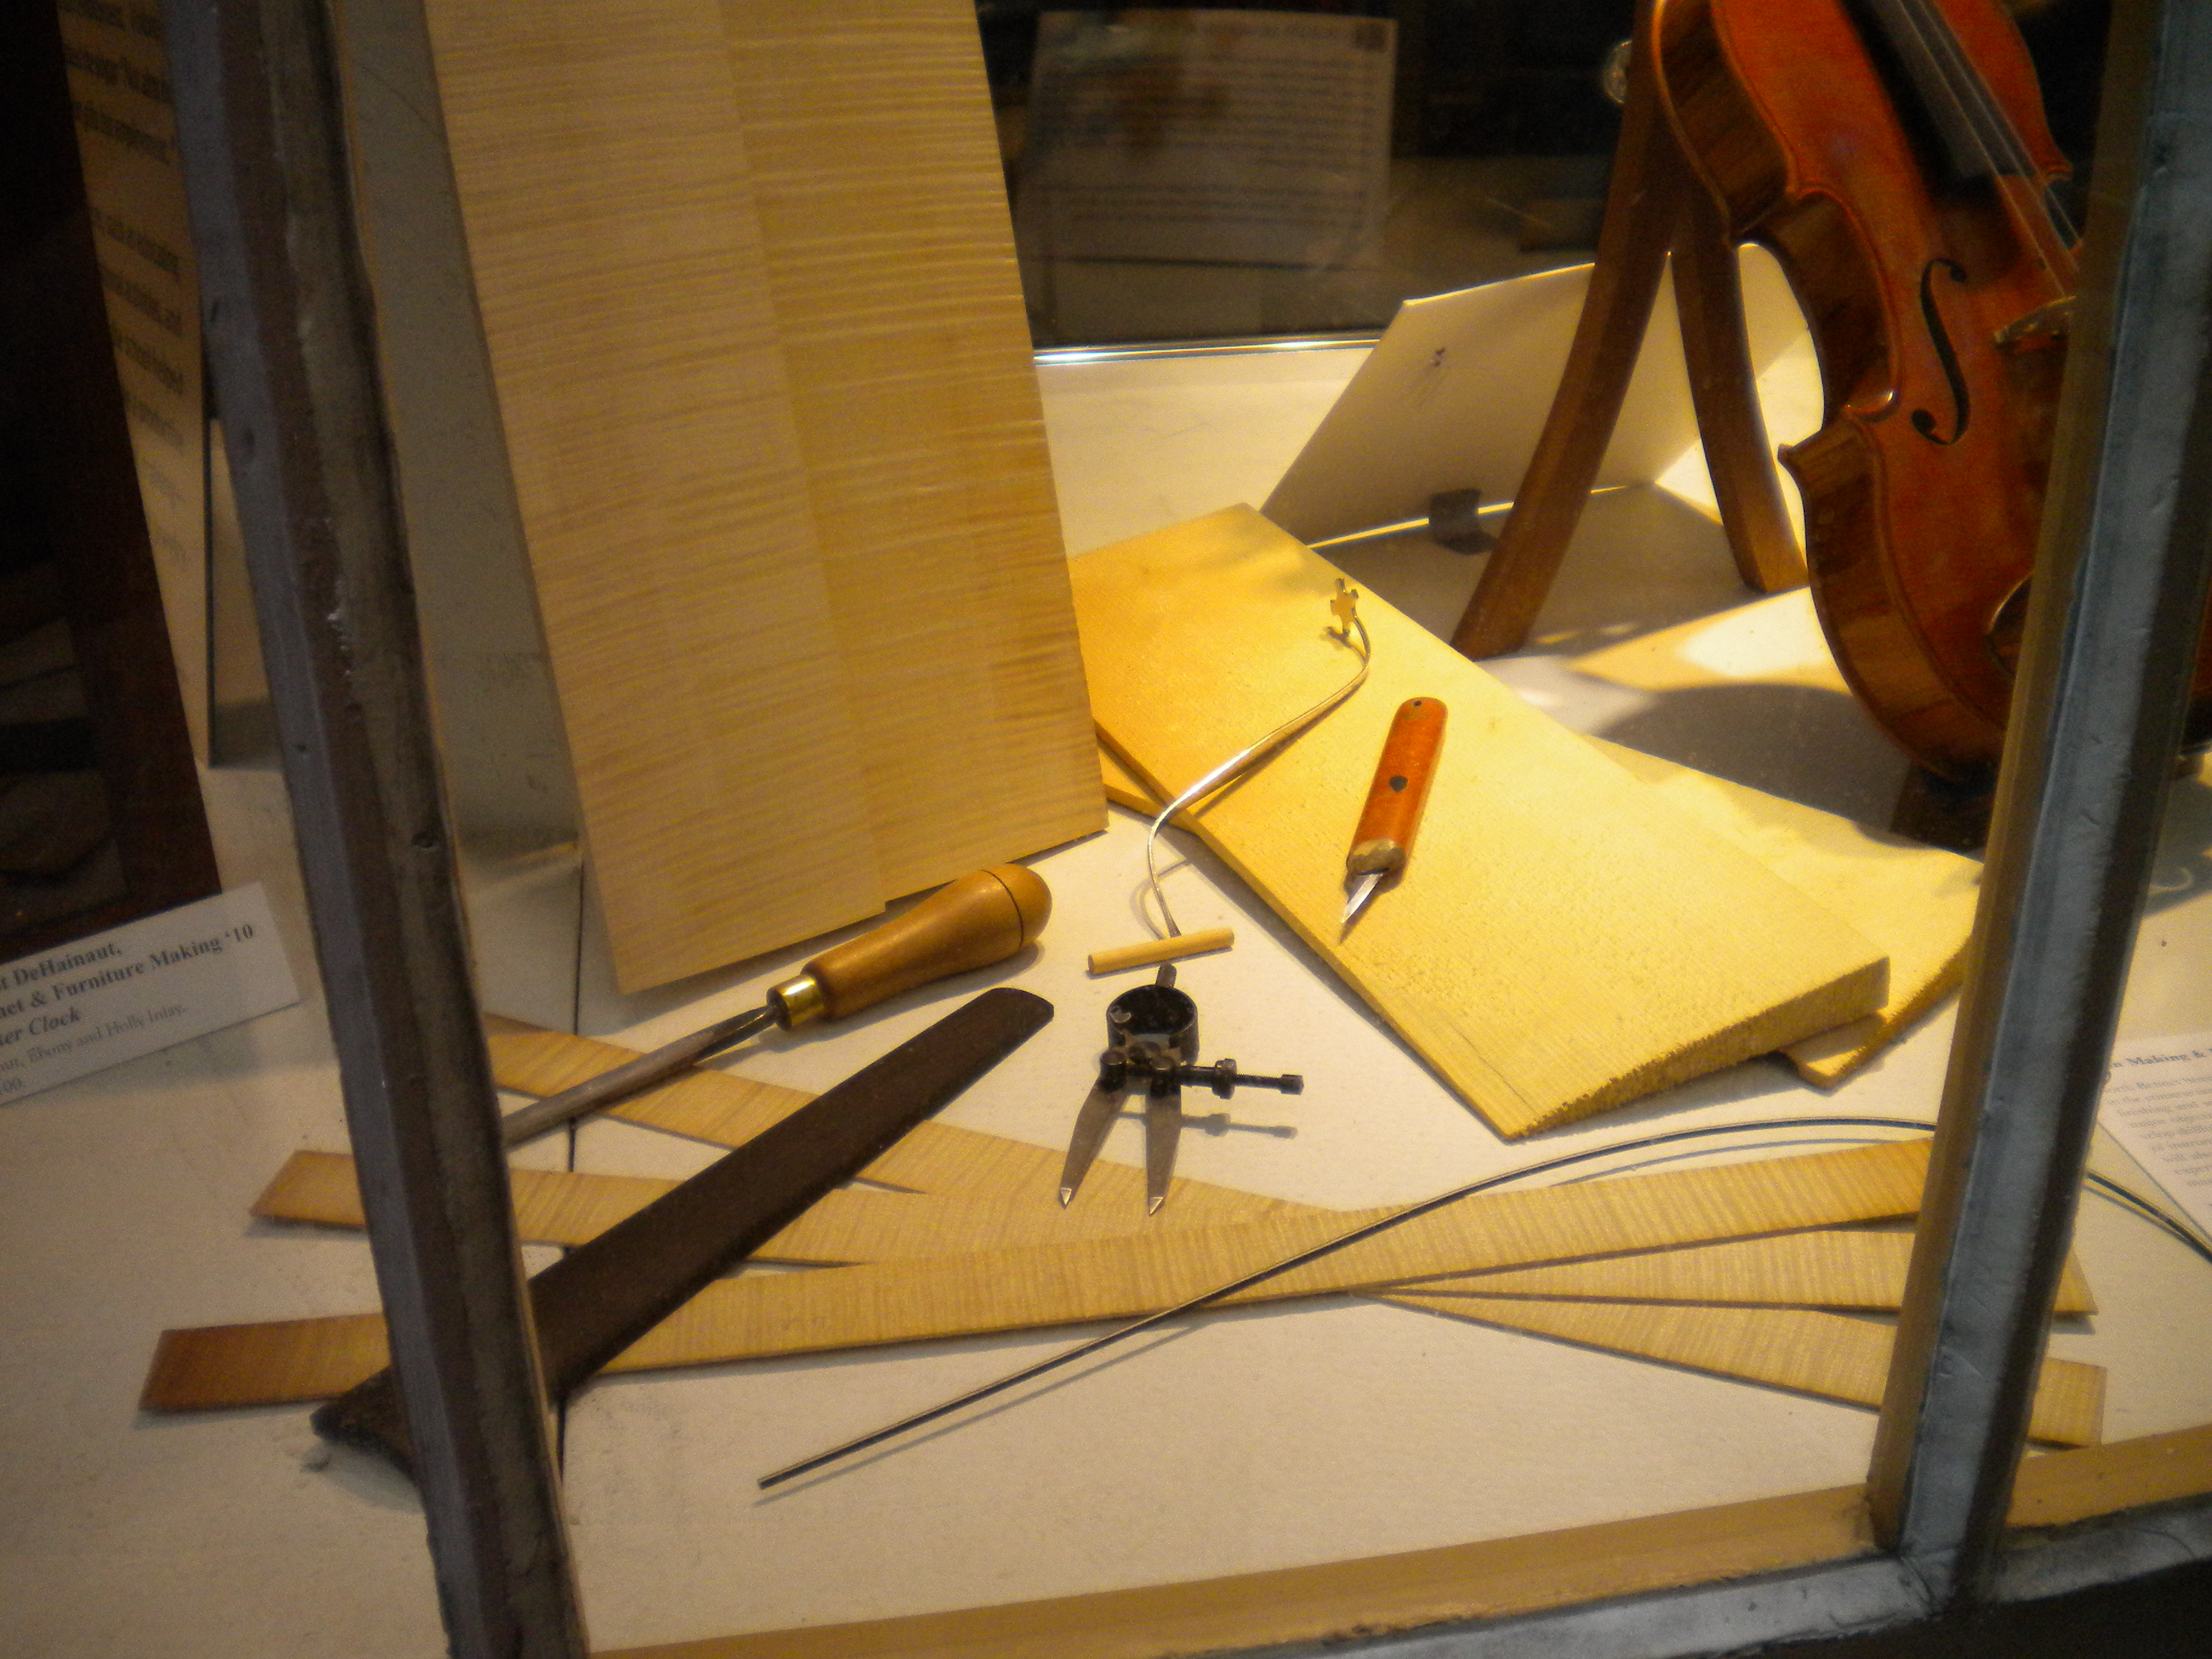
Tools of the woodworking trades
He said he was looking for a couple of solid bookcases. I explained how working with a cabinetmaker or joiner you could really tailor a piece to the style, taste and budget of the customer. He affirmed all the things we talked about with respect to hand work, materials etc. It was looking like this might result in a commissioned piece for me or one of my fellow students…
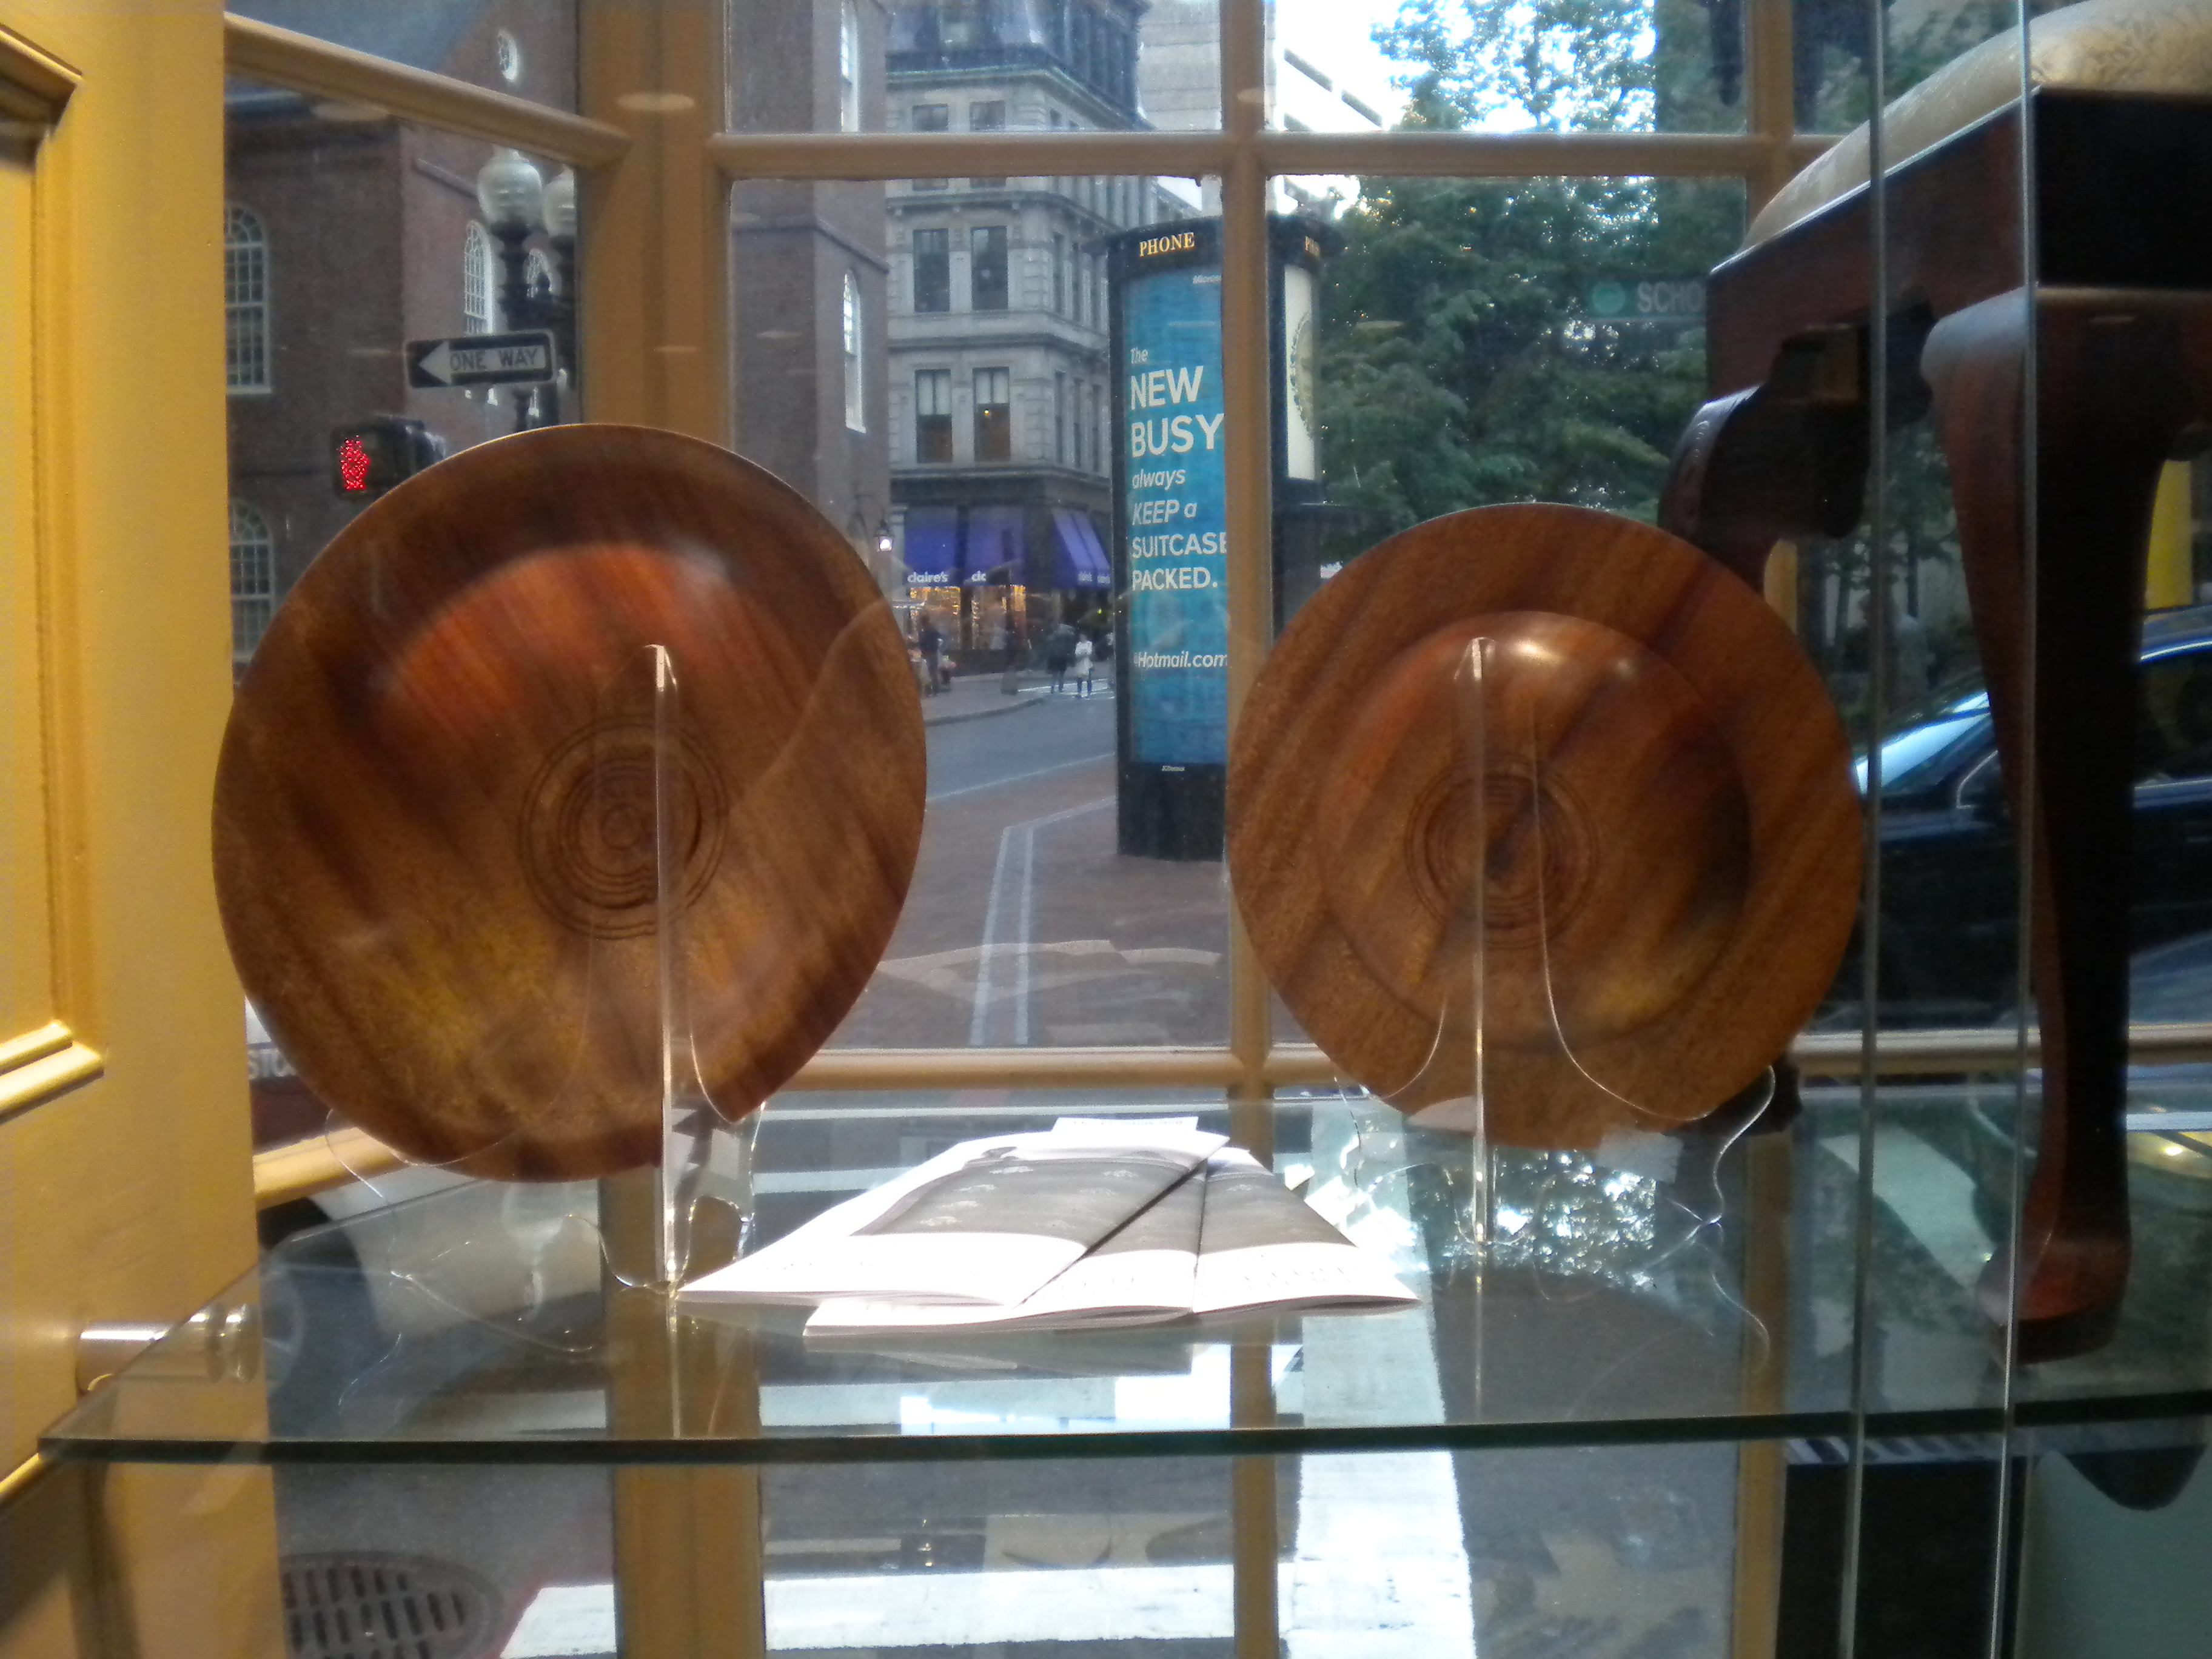
Turned Plates
Then with a straight face he said “If you can do it for cheaper than Ikea, then I’m happy to throw the work your way.” It took a moment to process that and stay composed.
Windsor Chair
I did my best to explain how the materials alone (and far superior to the pressboard of many Ikea pieces) would cost more than that, let alone the labor and finish work. It seemed odd to me at the time to meet someone who seemed to understand and admire quality yet assign so little monetary value to it.
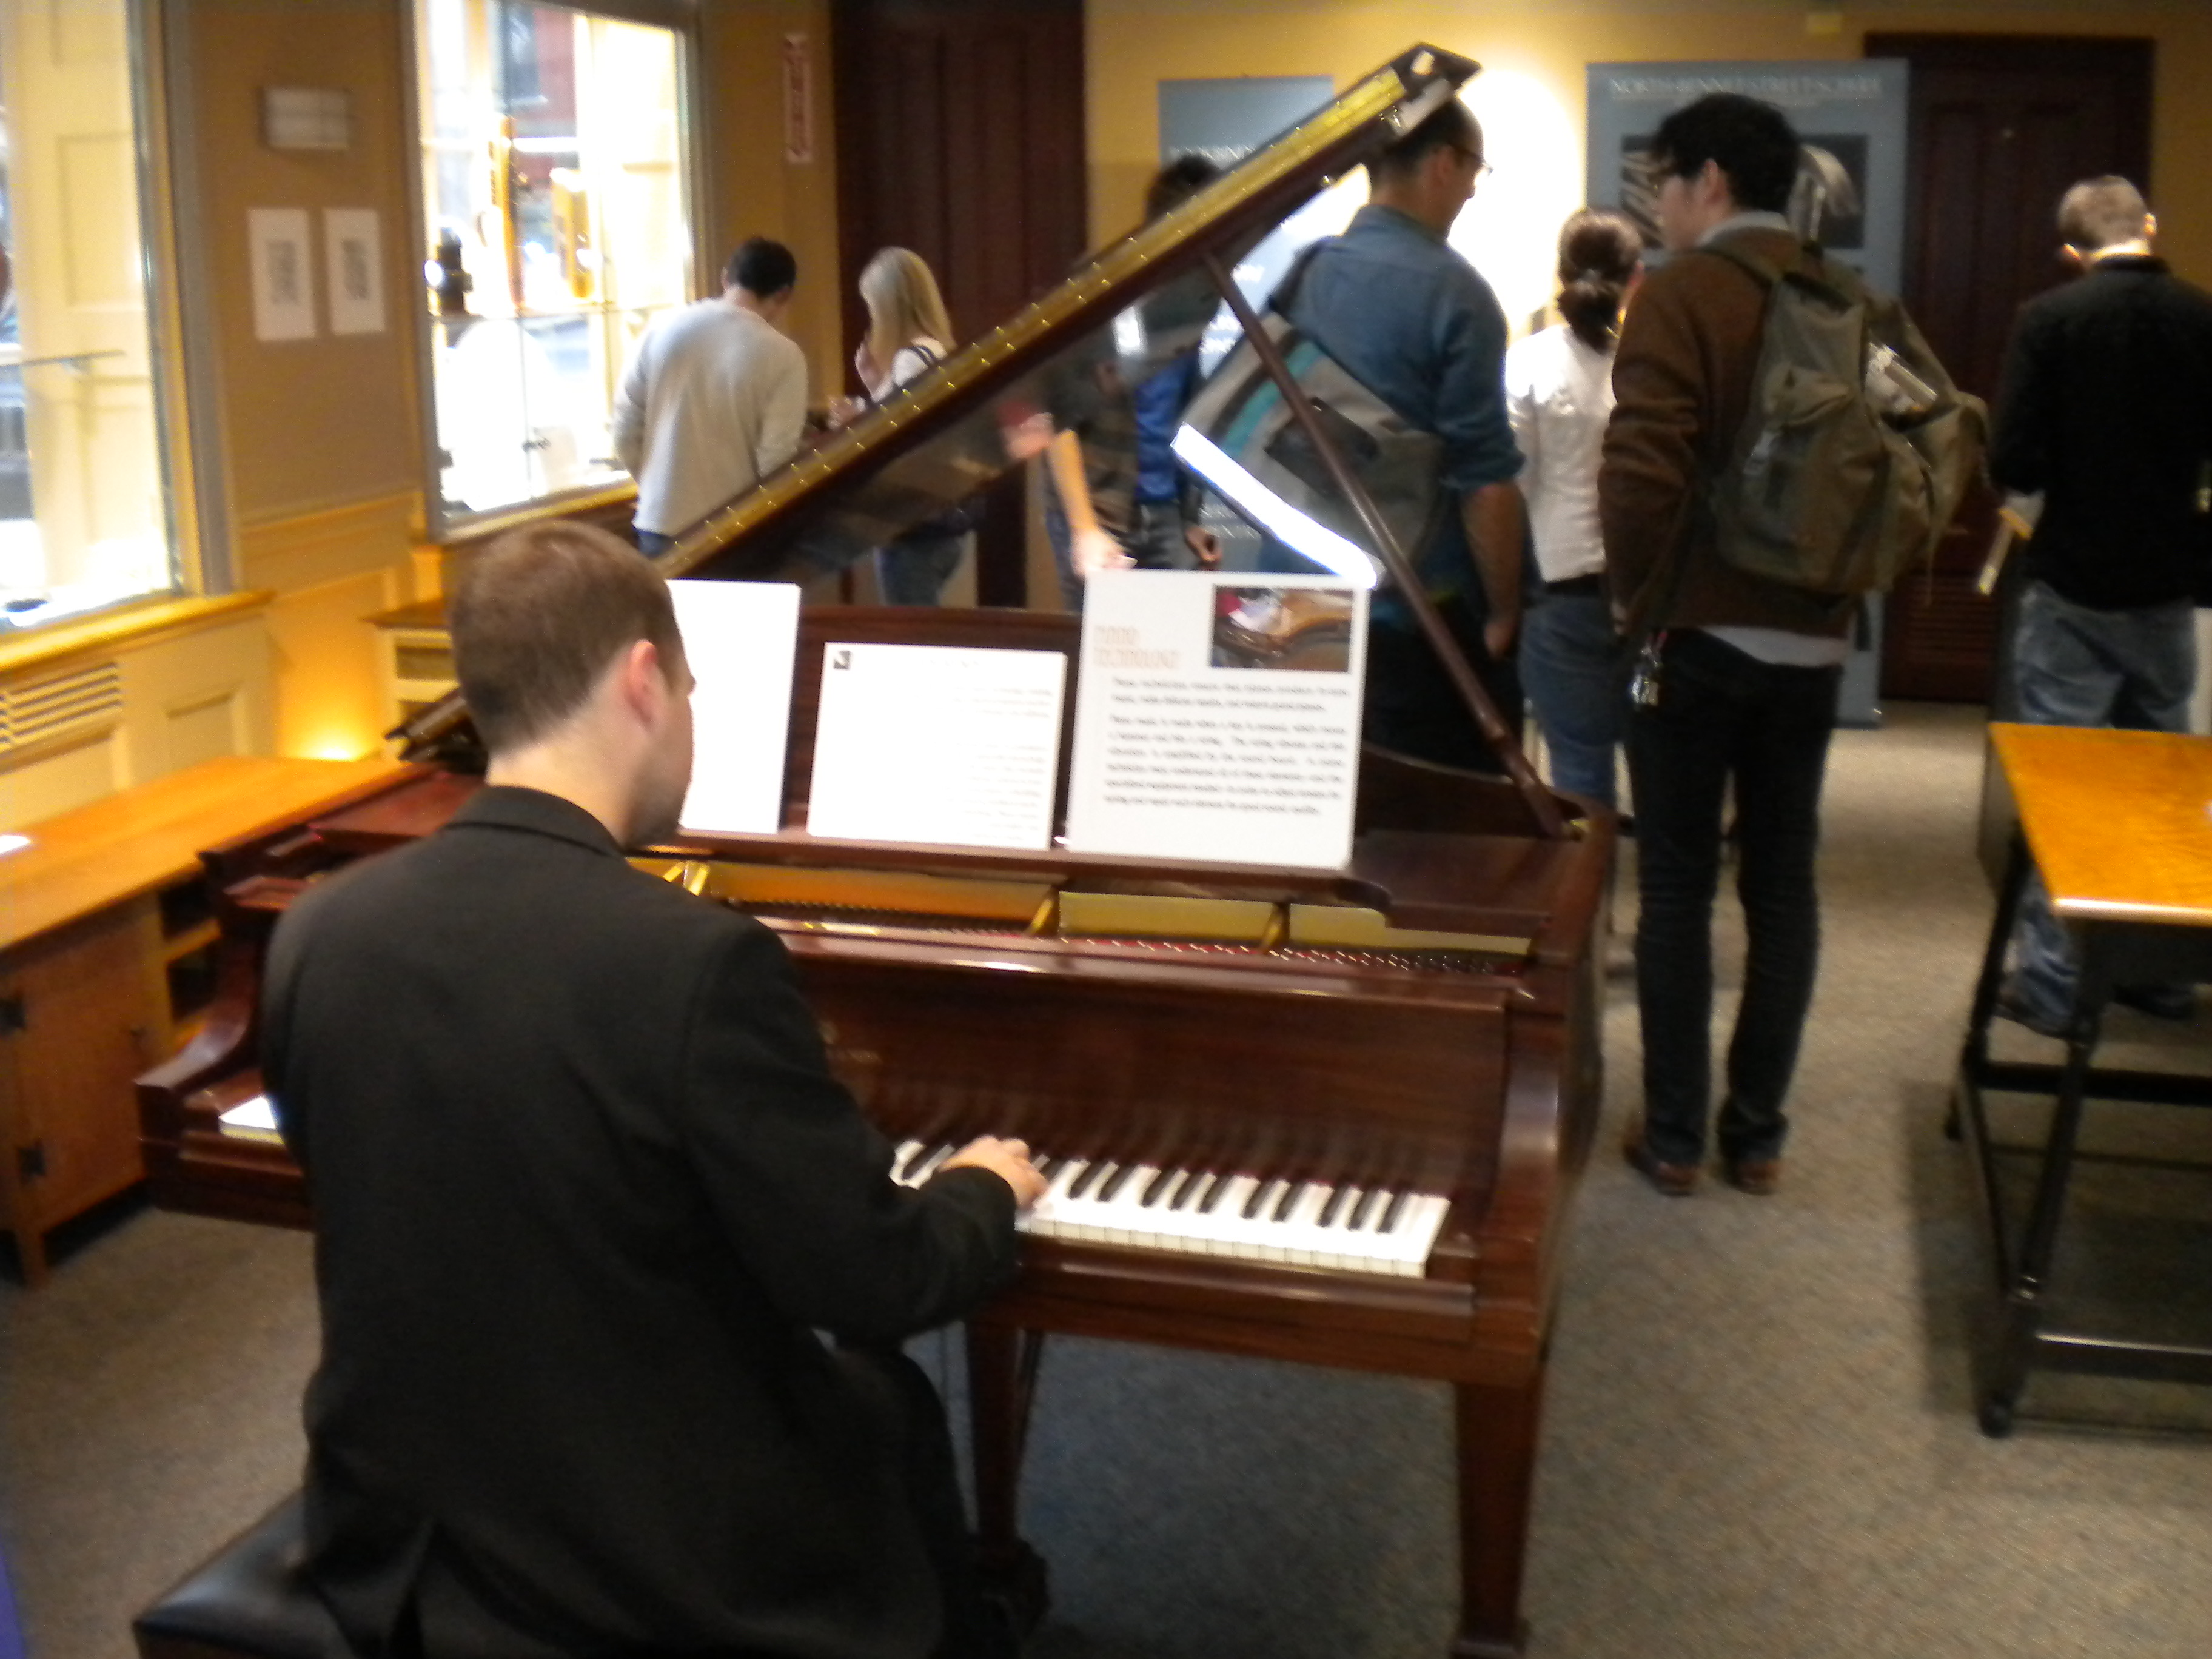
Have a seat, play a well tuned piano
Not all the memorable interactions at the display were negative either. One afternoon a young guy came in off the street, sat down at a beautifully restored piano and started to play it. Normally they had us politely asking folks not to touch or sit on the pieces but this guy walked in like he owned the place and was an exceptional pianist. I wondered if we were being pranked. The event coordinator from the school talked to him a bit, I didn’t get to hear the conversation but she let him stay and he played for an hour or two and the music helped draw even more folks into the storefront.
More works by NBSS students at the Old Corner Bookstore
What’s the moral of this story? (Or at least my unsolicited advice on similar topics that I felt compelled to share after reading Nancy’s book )
Publicity and exposure are certainly good things to have though I’ve found far more work via word of mouth than I have from any of these sorts of open gallery events. My mentors at the school often said the same thing. There are good people out there who appreciate and are willing to pay for craft work but you have to know how to find them and network with them. The gallery experience allowed me to apply some of what I learned in high school working in retail to deal with the public and applied many of the lessons from my instructors at the school . “Trust your gut” If you get a bad read from someone trying to solicit work from you, its perfectly acceptable to pass on them as well. I know thats hard to do when there are bills to pay and mouths to feed. When you find a great patron or customer ask if they have friends or family who might be interested in similar work.
People skills also help. A little time spent educating the consumer on what hand work really is, the process, the textures, the output, etc all can help as well.
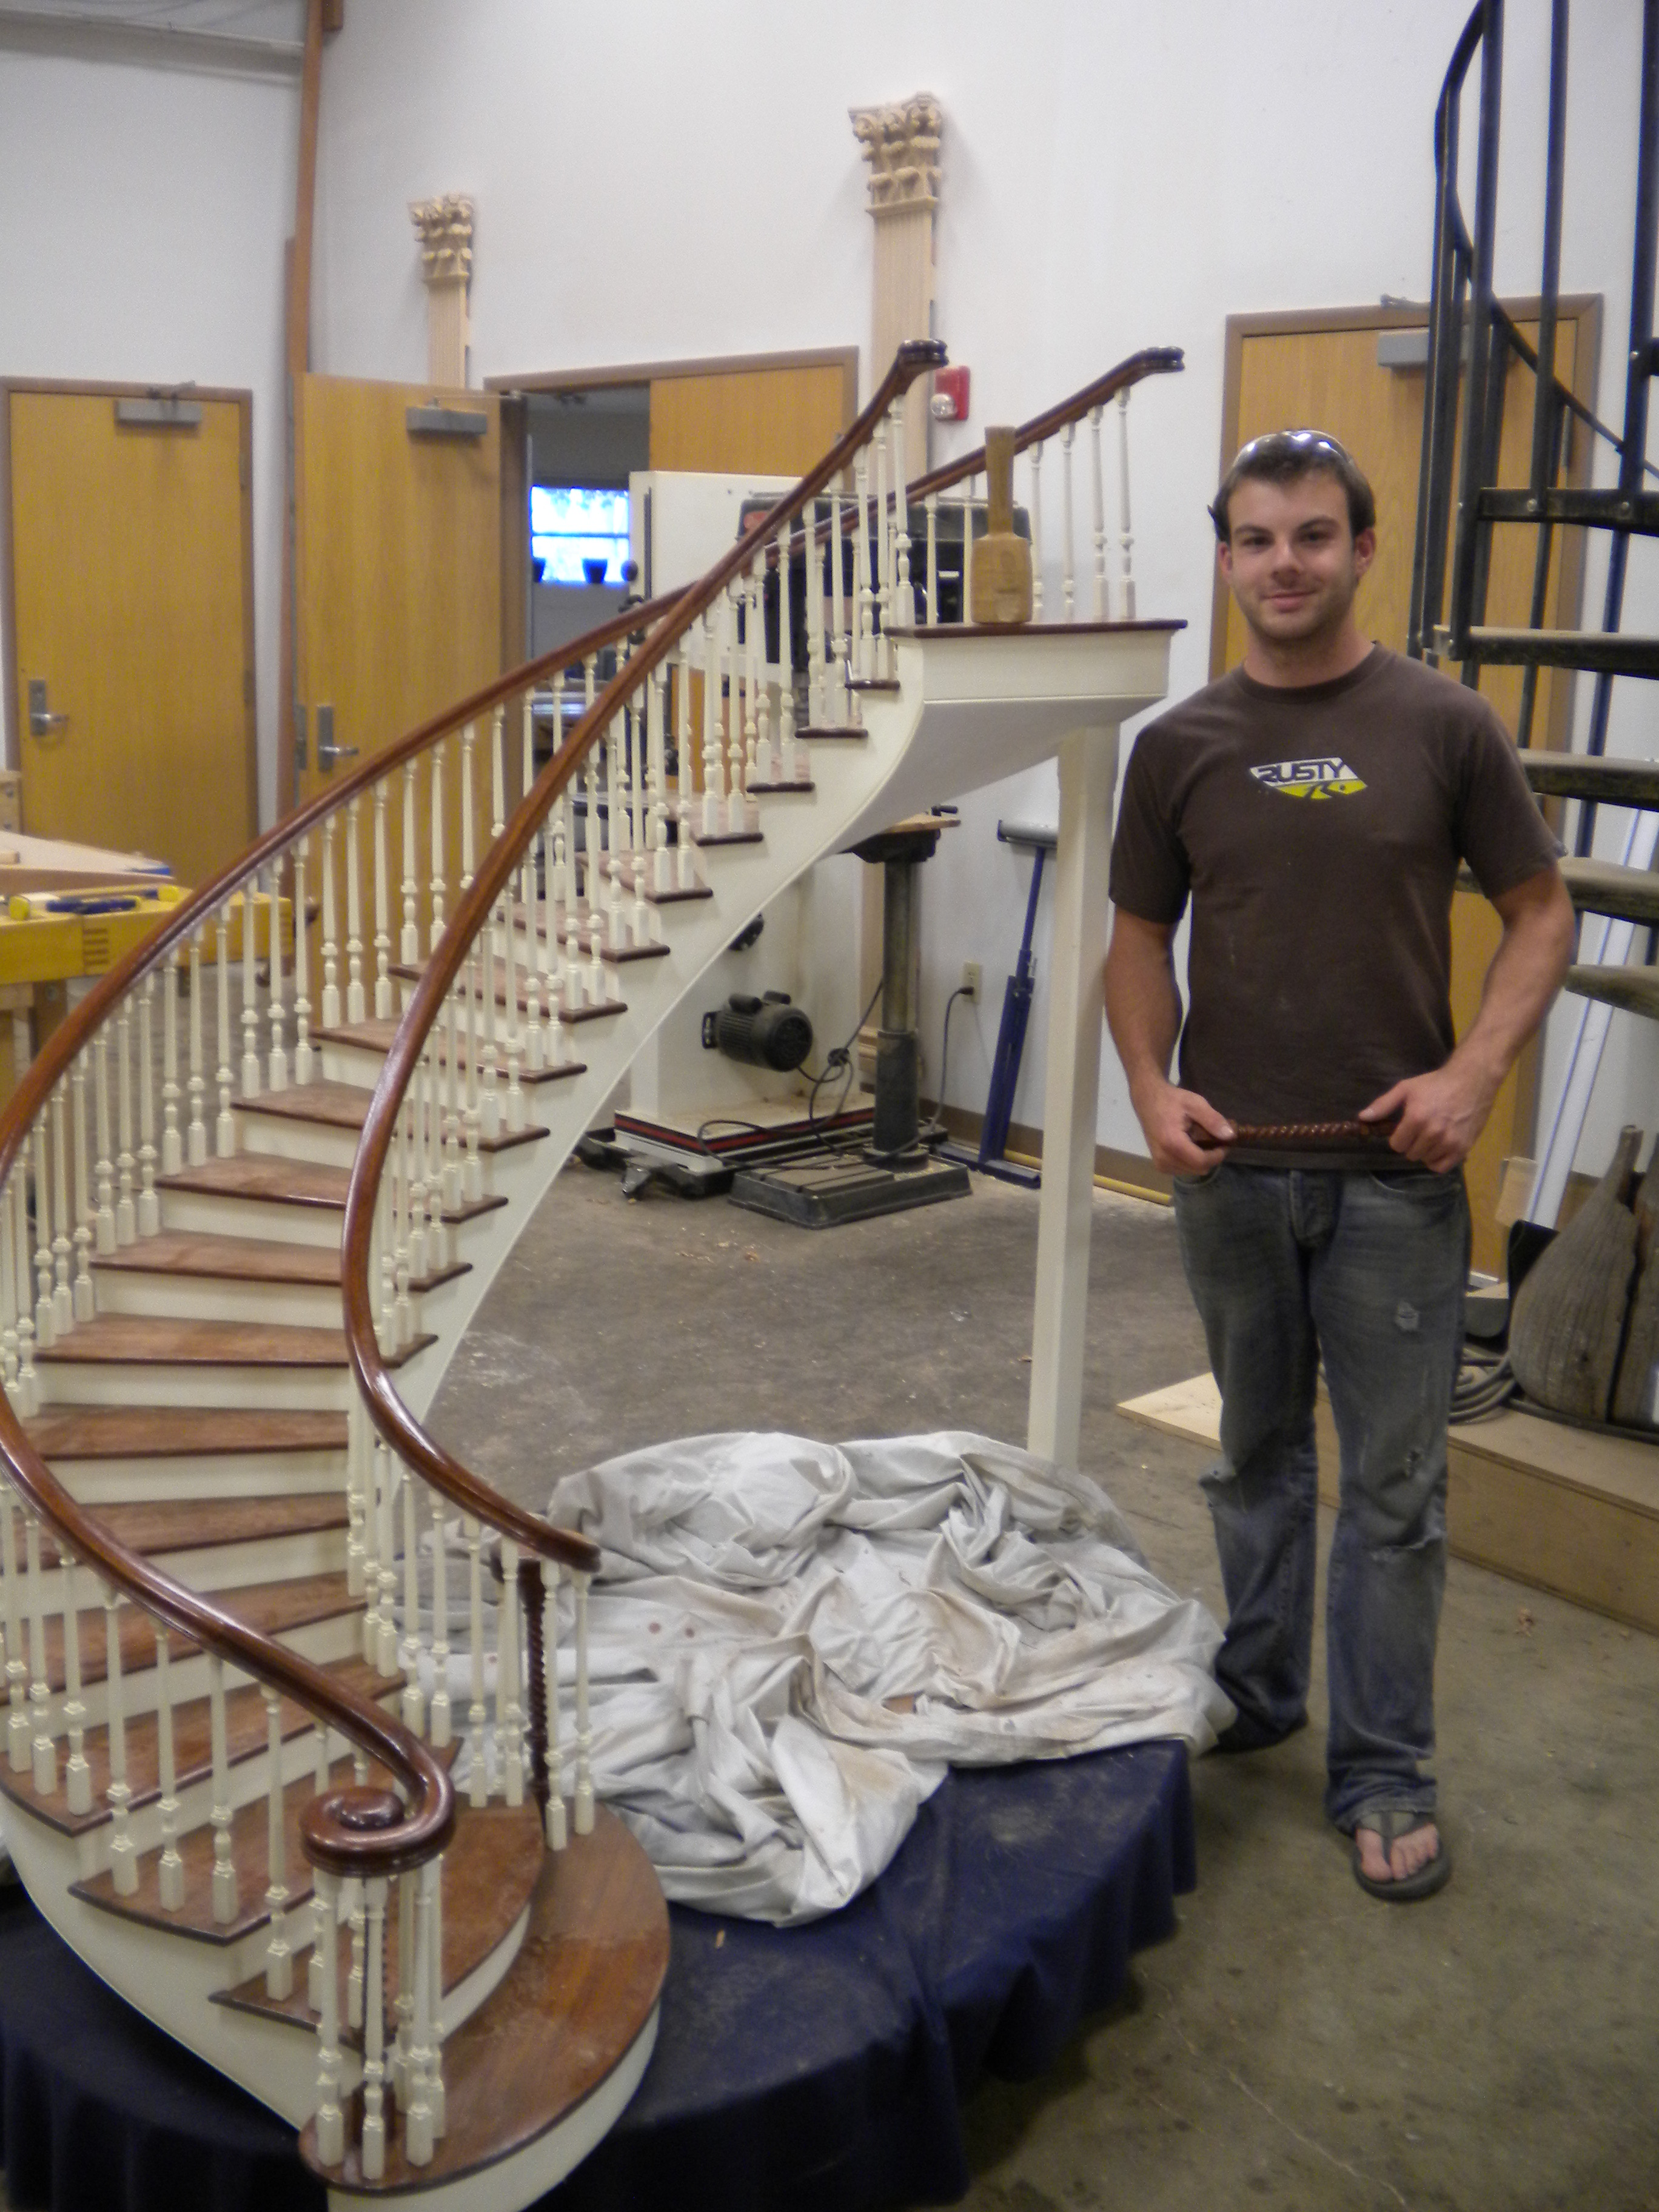
Brad with his curved staircase model that was part of the student works exhibit
The other hard lesson I can recall from this sort of experience is with how much information you put into a bid. Not related to a gallery event, more from people cold calling/emailing me via the website, I had a few experiences where I went into too much detail itemizing costs, materials, construction details etc (I think I felt like I had to justify it to myself back then) to have them take it to someone else and be undercut — and frankly as someone doing this as an avocation I was not charging as much as I should have and after taxes would have been losing money on the deal.
CYA — Cover Your Ass — make sure any contract templates you use cover you for things like change orders, what you are delivering, payment terms and all that sort of fun business oriented stuff. NBSS overs a very good course on starting and running a small business which covers a lot of that in detail and if it doesn’t sell out I think folks outside of the school can pay for a slot.
Yesterday evening in the weekly Popular Woodworking ‘Week in Review’ email summary I saw a nice post by Bob Flexner — Contributing Editor to Popular Woodworking and well known Finishing Expert — sharing his thoughts on Danish Workbenches.
Bob Flexner’s ETA brand Danish workbench
You can read Bob’s post here. Bob shares his thoughts on this form of bench along with some interesting anecdotes on his time in Denmark and importing some ETA benches.
Bob also had a couple questions/comments that I wanted to reply as they are good topics of discussion:
“The first was the top surface. Bill uses two 12¼-inch wide “slabs.” He suggests using three boards instead of two if you can’t find these widths. My workbench is made with slightly less than 1-inch wide boards laminated to form the wide surface. Wider boards could warp over time with humidity changes and water spills. The laminated narrower boards seem to me a better idea.” == Bob Flexner
The slab portion of my bench-top is only 12-3/4″ wide and was composed from two ~7″ wide 8/4 boards that were hand selected. I chose pieces with nice tight and even growth rings oriented to be reasonably stable — trying to get as much quarter sawn grain as I could from those pieces. The wood also sat in my reasonably climate controlled shop for a few years before I got around to building this bench. In the 3 years or so I’ve been working on this bench I haven’t had to re-flatten it at all so far.
When building the bench I gave serious consideration to deviating from Frid’s design and building the top from narrower laminated strips. Given the stock on hand I didn’t think I was buying myself much as it would have been a lot of ripping and jointing and gluing to get a very similar grain profile to what I had. If I didn’t have the quality of wood I had on hand, or if the bench top were thicker, say 4″ thick instead of 1-3/4″ or 1-7/8″, I definitely would have laminated up strips as Bob suggests.
“One more thought. Once or twice in forty years the mortise-and-tenon joints at the top and bottom of the legs have worked loose and the workbench became lose front-to-back. To tighten them I removed the bench top, which just sits on the frame, and drove the wedges that tighten the joints a little deeper. So I don’t understand Bill’s rationale for gluing the wedges in place.”
When gluing the wedged mortise and tenons in place I was following Frid’s advice directly from his books. I believe he used PVA glue, but chose to use hot hide glue so I could have a longer open time and potentially repair it if need be in the future.
One of Tage Frid’s Original Workbenches that pre-dates his famous articles and books.
Notable differences compared to the workbench in his book include hand cut dovetails on the tail vise, a much thinner skirt board and dog-hole strip, wooden screw in the shoulder vise with much larger wooden jaw, a little less refinement in terms of details on the vise jaws and undercarriage. Nonetheless this bench seems to have over a half century of use to its credit and the legs were still solid and the vises moved surprisingly well. It gives some interesting insights into how even Tage Frid’s interpretation of this sort of workbench changed over the years.
I hope to have and use my workbench for many more years to come and I’m sure it will acquire some more scars over the years that become part of its history.
Take care,
-Bill
@TheRainford
P.S. You can check out some other posts related to the Tage Frid inspired workbench along with a simple Deadman, Side-clamps and other similar workbenches out in the wild here.
I haven’t seen a lot of left-handed, or ‘sinister‘ workbenches out in the wild. I suspect most are from the mid 20th century or later with the assumption that earlier southpaws were likely forced to work right-handed much as a lot of the left-handed folks in my family were forced to learn to write with their right hands in school. If my woodworking research friends have actual information to the contrary I am interested to learn more about left-handed woodworkers. Given that in earlier times craftsmen usually made their own benches it seems logical left handed benches would be easy enough to make unless the social stigma and/or dominance of right handed tools outweighed the convenience.
3/4 view of left handed Tage Frid workbench by Paul Van Pernis
My friend Paul Van Pernis, former president of the Early American Industries Association (EAIA) , recently reached out to me and shared that he built a pair of left-handed workbenches based off of Tage Frid’s original plans — one for himself and one for his youngest son.
Paul Van Pernis at the EAIA Annual Meeting 2015 holding my first son Bradley 🙂
Paul did an great job building his bench and it sounds like it has served him we’ll for 20+ years. It was great to see all the finger joints and other details much as what Frid had in his book and FWW article. The bench-top and vises look like they have all held up great.
Detail view of the shoulder vise
Paul’s original note about his workbench, how he acquired the materials and built them was too good not to share: (Shared with his permission):
The bench is still my primary bench. I use it all the time. Unfortunately I don’t have any pictures of my son and I together at the bench. It’s not like my wife to take a lot of pictures of me or my kids down in my basement workshop. The wood was milled at a local mill just 25 miles south of us in Mellen, Wisconsin called North Country Lumber. I knew the owner of the mill and his brother. I took care of their families when I was still practicing family medicine. I told the owner Bob Stilen that I was interested in building the benches and asked him if he could provide me with some 8/4 clear hard maple select or better. He was surprised that I knew a little about trees, sawmills, and furniture grade wood, but said he could get the wood. He called me about a month later and we agreed to meet at the saw mill the next Saturday when I wasn’t on call. The mill was closed, but both Bob and his brother were there when I got to the mill. After a cup of coffee and a lot of bad jokes and stories from a couple of real northern Wisconsin characters (think the movie, Grumpy Old Men) I got a private tour of the mill and the drying kilns. Then he showed me the wood he had selected for me. It was a gorgeous pile of absolutely clear northern Wisconsin hard maple all cut to 8/4 thickness, kiln dried and planed on two sides. The boards were all 8 feet long or better and many of them were 12 inches wide. It was drop dead gorgeous wood! I was thrilled and had a smile from ear to ear. I asked how much I owed them for the wood and both of them said to me, “Take it it’s yours. You’ve taken such good care of our families and especially our mom (she was elderly and one of my residents in the local nursing home), this is our gift to you.”
It was a wonderful gift and very typical of the good people who work hard and live well in the woods of northern Wisconsin. Bob Stilen started the saw mill on his own and had grown it into a significant business that employed about 80 people and was supplying hardwood to several furniture manufacturers throughout the U.S. They practiced great forest management (select cutting only) and gave good jobs and good salaries to their employees. Both Bob and his brother have passed away, but the sawmill is still in business. A lot of the teenagers in Mellen get their first summer job piling lumber and stickering it came off the saw.
I brought the wood home and have great memories of the time my youngest son and I had making those benches. My youngest son is now a Prebyterian minister in Howard Lake, Minnesota and still likes working with his hands. He and his wife are the ones I built the bed frame for that you saw in the picture I sent. My other memory of building those two work benches was that I burned out the ¾ horse motor on my old 1978 Sears table saw trying to rip that 8/4 hard maple. I replaced it with a 3 horse Baldor electric motor and switched from 110 to 220 and after that I had no problems. I retired that table saw about 18 months ago (it went to the son of a friend a local farmer from whom we buy 1/3 of a pig each fall) and invested in a Sawstop table saw which I really love.
My guess is that we built those workbenches in about 1990 or 1991, so they’re at least 26 years old. As benches do, they’ve acquired a few scratches, gouges, and dings, but they are both still doing well. After working with the benches there are really not any significant things I’d change about them. So, that’s the story.
Warm Regards,
Paul
Here are a few more photos of the bench from Paul:
Detail view of the shoulder vise
Left-handed Tage Frid workbench by Paul Van Pernis (Alternate view)
Detail view of the tail vise
Left-handed original plans Tage Frid workbench by Paul Van Pernis
Shoulder vise close up
Left-handed Tage Frid workbench by Paul Van Pernis
3/4 view of workbench
If you built your own Tage Frid inspired bench, either from Frid’s book and/or article or my recent revisit in the February 2017 issue of Popular Woodworking, I’d love to hear your story as well.
P.S. Check out Paul’s excellent series of blog posts on various planes from the Stanley Model shop over on the EAIA blog here.
P.P.S. I’m the webmaster for the EAIA website as well so if anyone has a relevant story they’d like to share with the EAIA, please feel free to contact me.
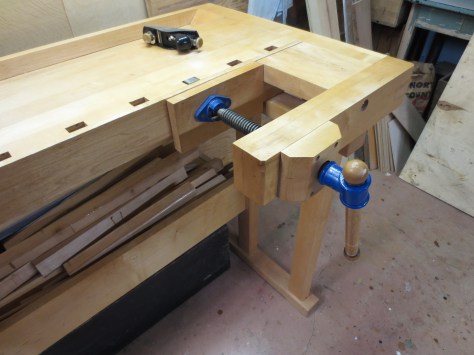
Workbench side clamps are not something I think anyone would generally use on a daily basis, but when the job calls for the sort of clamping they provide, they do a great job. I think one of the reasons they were not used often is the time it takes to affix them to the workbench — usually requires the use of nuts and wrenches.
How can I improve the likelihood I will use my new side clamps?
The 3/8″ 5 star knobs I ordered from Rockler for my side clamps arrived yesterday and I gave them a shot.
Side clamps with 5 star knobs
On the left you can see both knobs on the same side of the clamping block and on the right you can see one knob on the top and one knob on the bottom. Either configuration works well. With a 5 star knob you can easily loosen both knobs and remove one knob to move the block around.
The verdict?
The above tweak is not an earth shattering change but it does remove the need for a wrench and make it a little more likely I’ll break out the side clamps with the need comes up.
Take care,
-Bill
@TheRainford
P.S. If you’d like to read up on how to build your own pair of side clamps you can read my earlier post on that topic here.
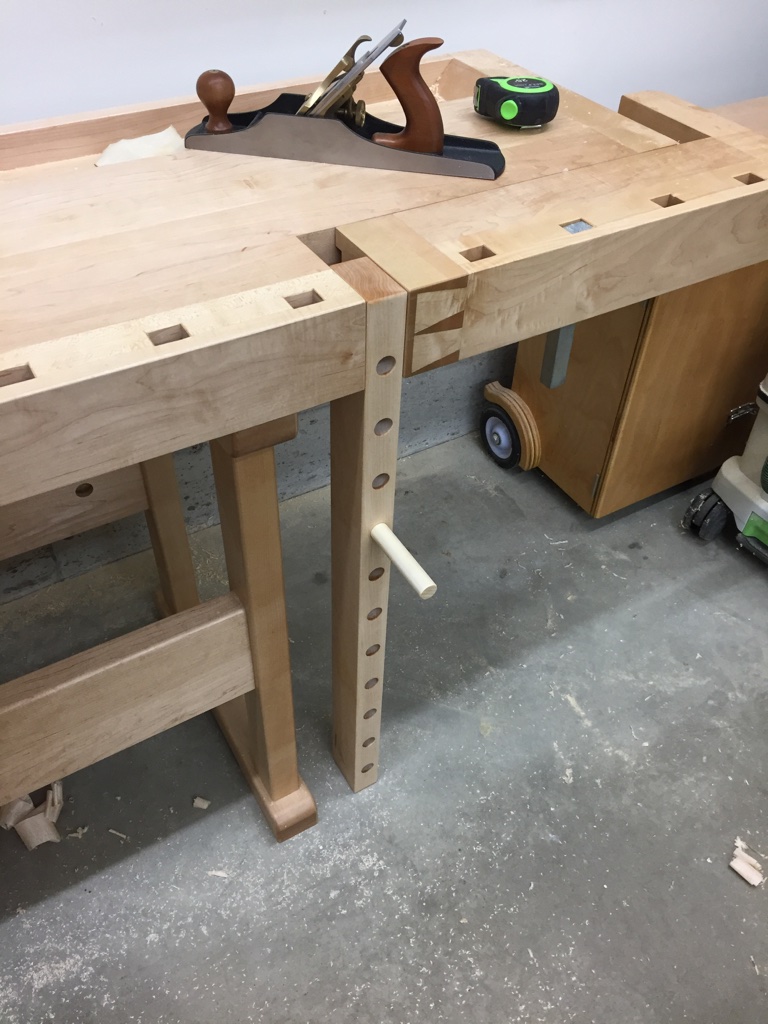
In building my workbench I also built a simple traditional deadman to help support long boards at the bench.
Workbench Deadman
This simple to build workbench accessory is as a great addition to any bench with a tail vise.
Bill demonstrating the use of his deadman
If you’d like to learn more about this bench and how to build one for yourself, please check out my blog post on this topic over on the Popular Woodworking site here.
Have you used your side clamps lately? Wait, what are side clamps?
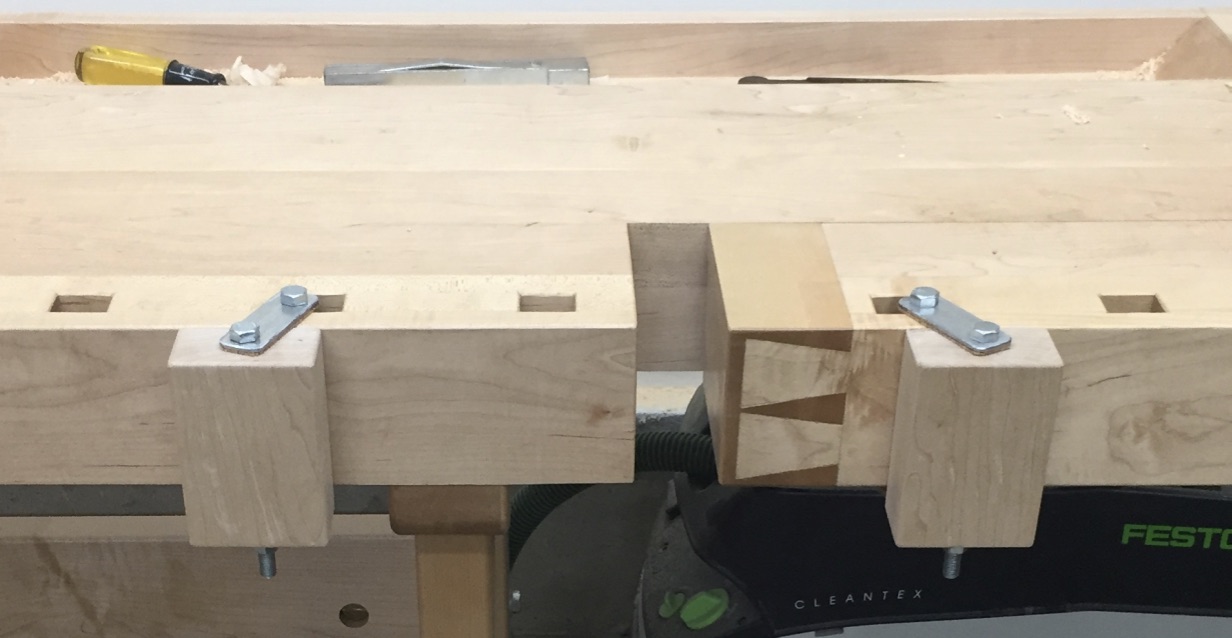
Close up of the side clamps
Side clamps are a pair of adjustable wooden blocks that mount on the outside of a traditional continental workbench with one block mounted to the tail vise and one mounted to the fixed portion of the bench top. In this experiment the blocks are mounted to the bench via 3/8″ diameter, 6″ long threaded bolts and some shop made metal plates.
Background:
When building my Tage Frid inspired Scandinavian workbench I spent a lot of time looking at examples of Frid’s benches — some early extant examples in person, his Fine Woodworking article on his bench (FWW Issue #4, October 1975), the chapter in Tage Frid Teaches Woodworking Volume 3 and various online searches.
In the FWW issue #4 diagrams and text there was a very brief mention of a set of ‘side clamps’. I couldn’t find any photos of these clamps online and they didn’t seem to make it into the book version of the bench. I was curious if they were cut to save space or if in fact they didn’t turn out to be useful.
I decided to build my own version of these clamps based on that lone diagram and experiment with them.
Building a pair of side clamps:
Using some scrap hard maple left over from the workbench I made two 1.75″ thick, 3″ wide and 4.5″ long blocks. I planed them and rounded over the edges with a 1/8″ radius router bit.
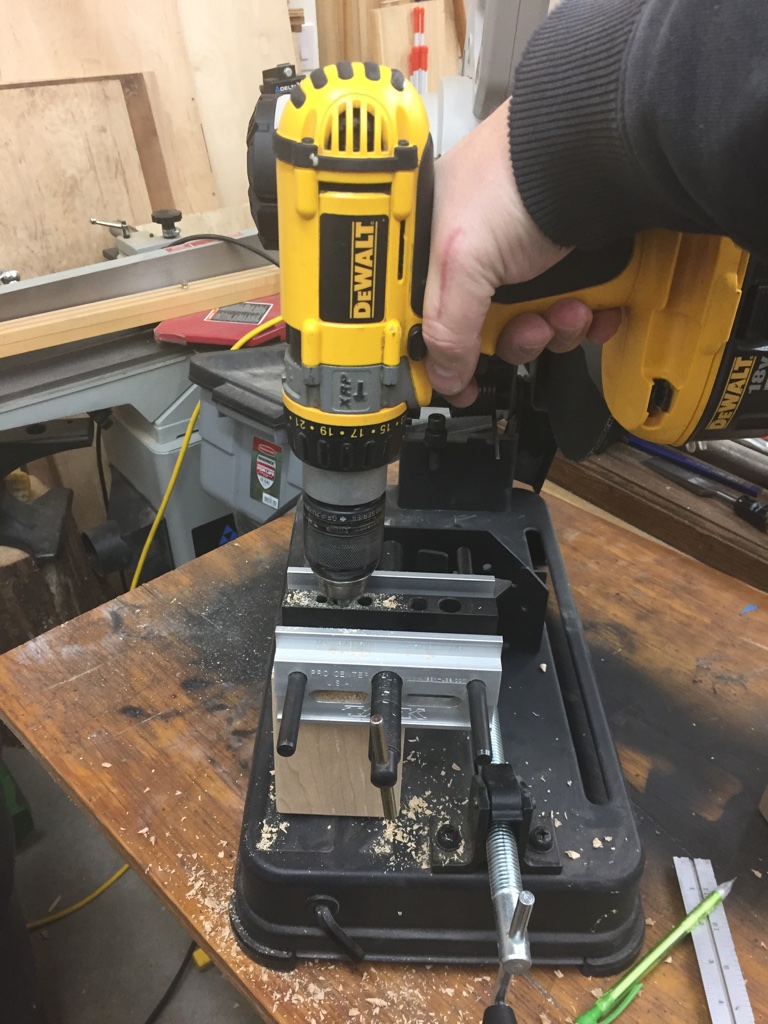
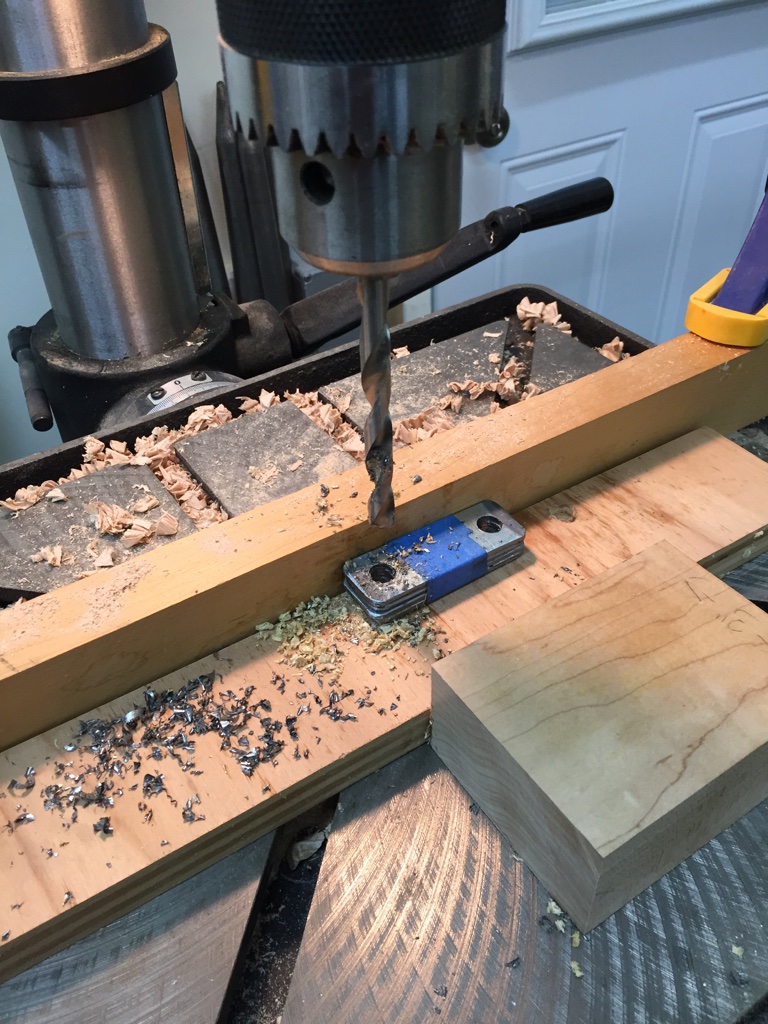
Use a self centering doweling jig to start the 3/8″ holes
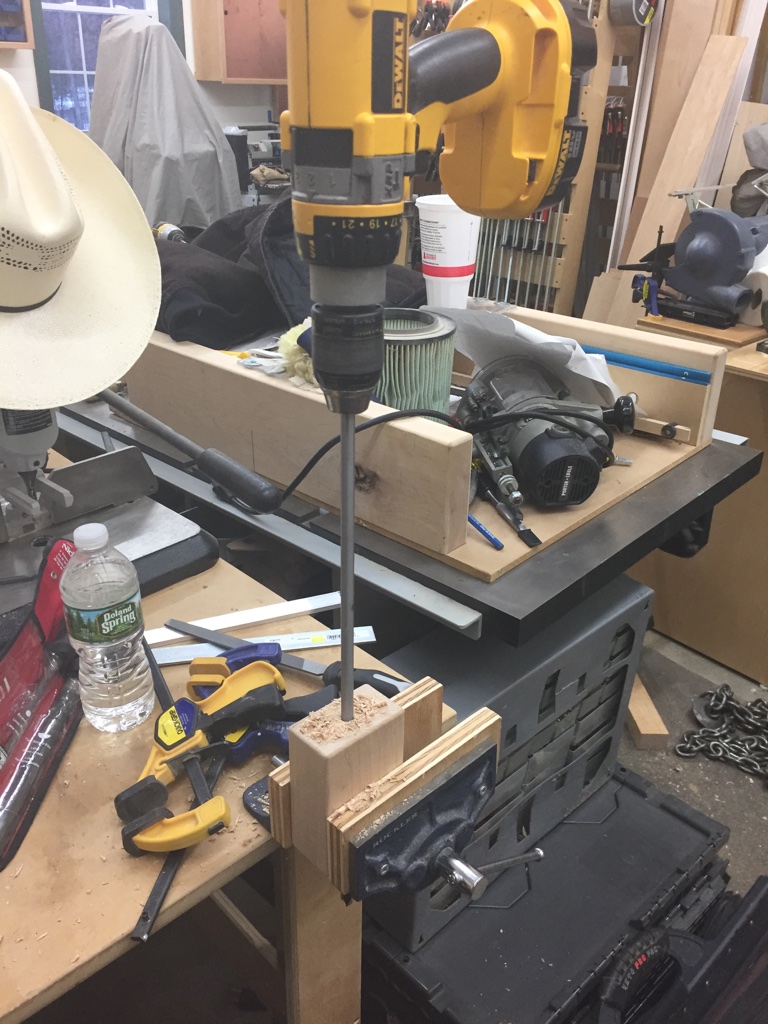
Next up was drilling a 3/8″ diameter hole through the center of the block, the long way. I started off the drilling by using a self-centering doweling jig (see photo above), and went as far as the bit would let me drill into the block. Then using that first hole as a guide I used a longer electrician’s style 3/8″ drill bit to drill the rest of they way through the block. (see photo below)
Use a long electrician’s style 3/8″ drill bit to finish the centered hole.
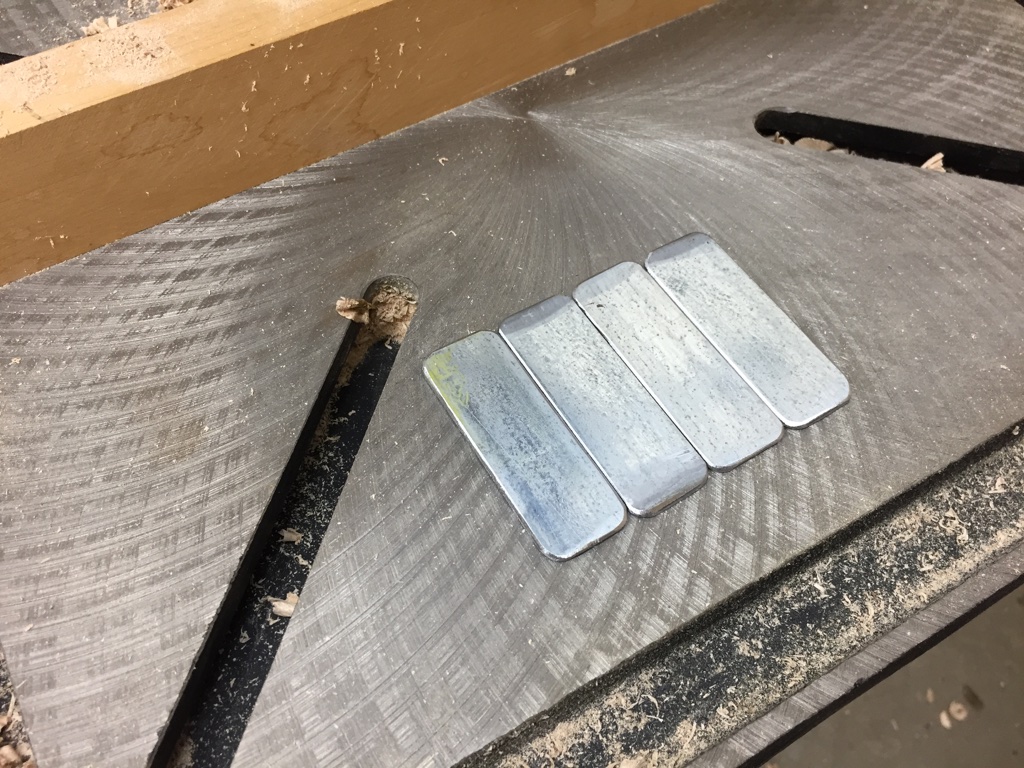
With the woodworking complete, it was time do to some metal working to make a series of small plates that are used to affix the clamp blocks to the dog holes in the bench by way of the 3/8″ bolts. I bought some 1/8″ thick x 1″ wide zinc’ed steel bar at my local hardware store and cut them to 2-7/8″ long. (Note this is 1/2″ shorter than what Frid called for as I as felt 3-3/8″ would have too much slop/space. I also could not find 1/4″ thick bar stock, but think 1/8″ thick is still plenty strong for anything I plan to do with these clamps. Make sure to leave at least 1/4″ of metal on all side around the holes). I cut the pieces to length using an abrasive cut off chop saw, but a hack saw could also get the job done.
Zinc’ed steel bar, cut to size, corners ground round and edge burs removed
I took the metal blanks over to the slow speed grinder and rounded over the corners and chamfered the edges a bit to remove any burs.
Drilling all four blanks at once.
Next up I stacked/ganged up all 4 pieces and drilled 3/8″ diameter holes at the drill press. The pieces were held together with some strong tape and held in place against my makeshift fence via the scrap block in the foreground of the above picture. Make sure to use some cutting oil and make sure you don’t overheat the metal nor your drill bit. Also use some scrap underneath the blanks to protect your drill press table.
Using a file to clean up and remaining burs and fine tune the work you did on the grinder
With the holes drilled out I took the metal blanks over to a vise wherein I made sure the bolts fit through the holes, cleaning things up with a rat-tail (round) file. I then used a flat mill file to clean up any roughness on the outside edges left from the work at the grinder.
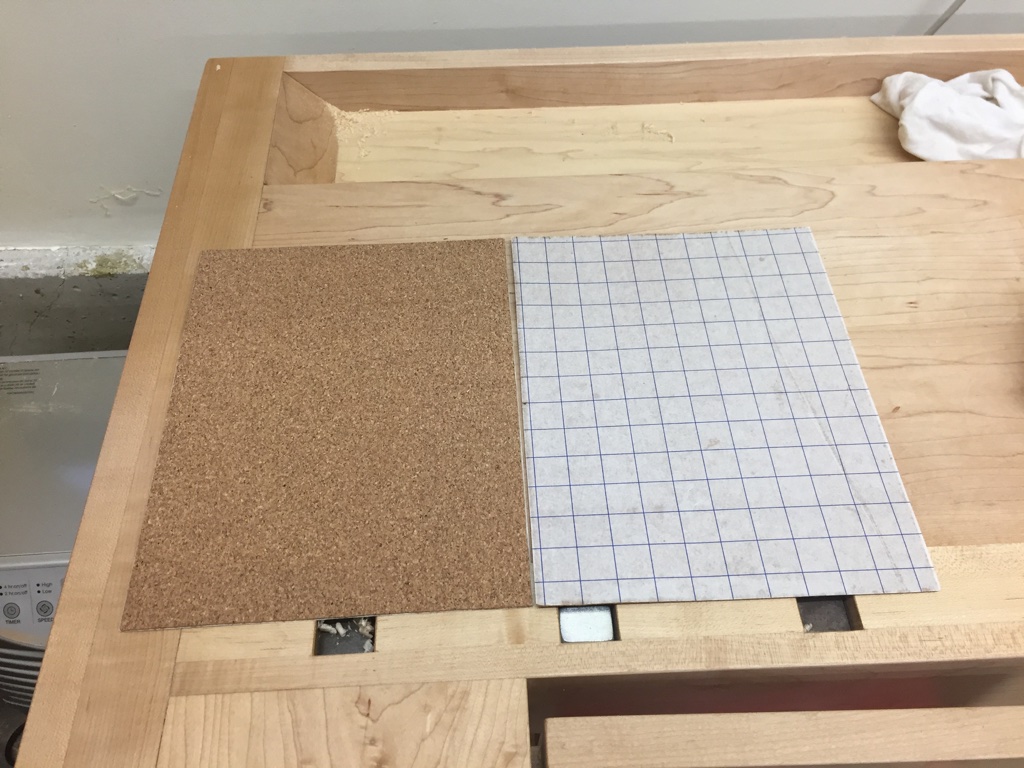
Given my background as an engineer, and touch of OCD I decided to add some self adhesive cork to the sides of these metal plates that might come in contact with my bench top
Self-adhesive cork sheets
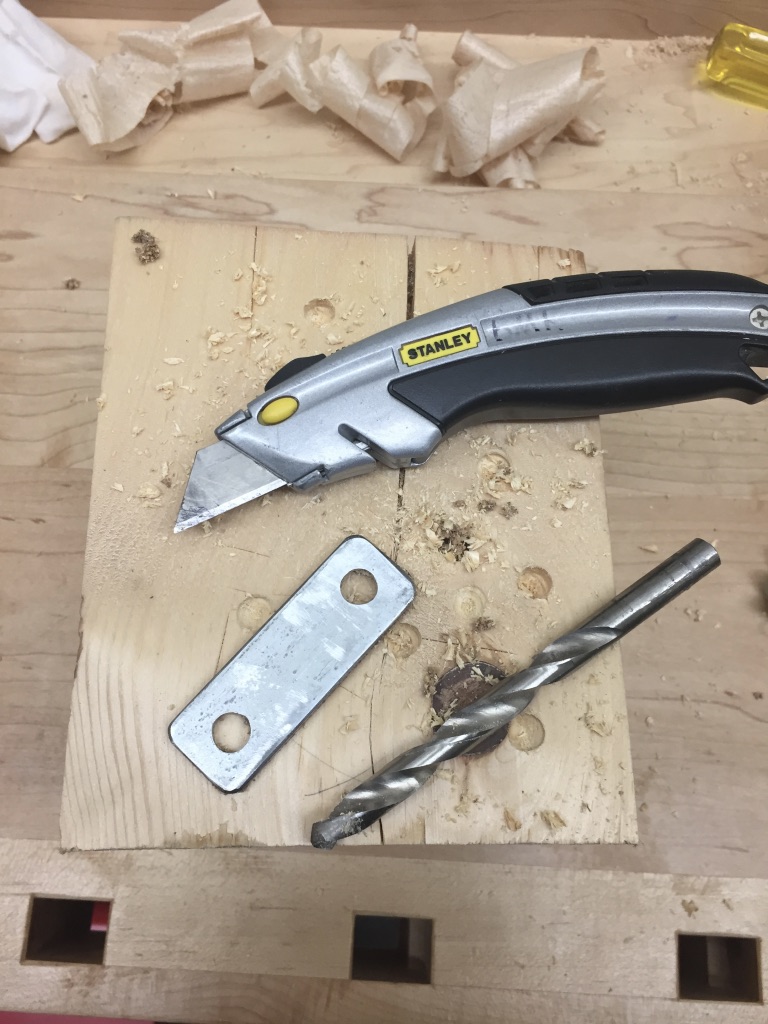
I cut the cork to rough size, affixed it to the plate and used a utility knife to cut off any excess around the edge and a 3/8″ drill bit to remove any waste inside the drilled out holes.
Use a utility knife to clean up the cork around the edges of the plate and the 3/8′ drill bit to clean up and cork in the holes
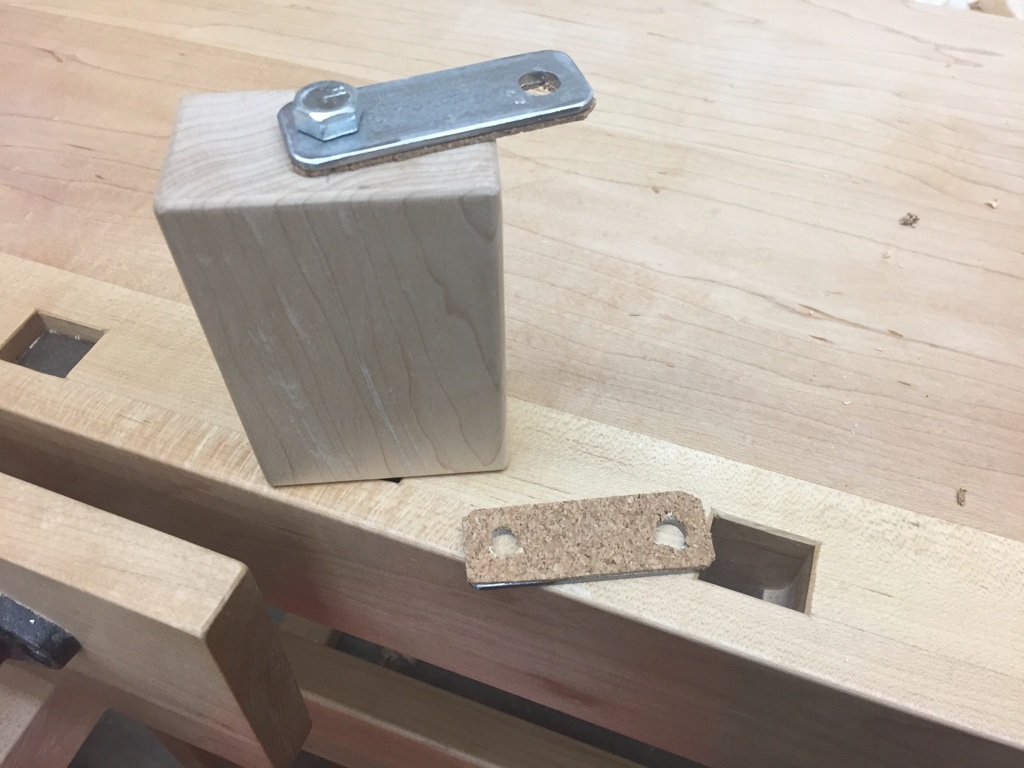
With the metalworking completed, it was time to install the nuts and bolts and try out the clamping blocks. One bolt goes through the top plate, the wood block, the bottom plate and is secured with a nut or five star knob. (I ordered some knobs from Rockler but at the time of this writing they’d didn’t arrive yet, once they come I’ll add some post script to show the clamps with easier to use knobs in place.) The other bolt goes through the top plate, the dog hole, the bottom plate and is secured with another nut.
Assembling a side clamp
Given the use of square dog holes on this bench, and the fact that that blocks are 1/2″ longer than the bench is thick, this allows the side clamps to pivot a few degrees in either direction. This gives you the ability to securely clamp some tapered or irregularly shaped pieces.
The blocks can be moved to different dog holes as needed or removed from the bench altogether. In testing these clamps on a few different items and shapes I found the blocks were surprisingly easy to use and held oversized items with ease.
Large objects are easily held between these side clamps
The Verdict: (So far…)
It was a fun project to build and experiment with. These clamps are useful for specialized clamping needs, such as large items, re-working the edges of a drawer box, planing dovetails flush, and similar operations.
Do I think they will get used every day? No. Do I think they can do a few jobs that would be tougher to do on the bench-top secured via bench dog, hold fast, face or shoulder vise? Yes.
For the small amount of wood, metal and time it took to make these side clamps I think they were a nice addition to my workbench.
If you build some side clamps for your workbench, please share what you thought of them in the comments below.
Take care,
-Bill Rainford
@TheRainford
P.S. If you’d liked to learn about the workbench featured in this post, please check out my related article in the February 2017 issue of Popular Woodworking Magazine which can be found here.
I have some big news to share with everyone today, I’m proud to say that I am the process of writing a book for the Lost Art Press tentatively titled “Go, Go, Go: The Life, Influence and Woodworking of Tage Frid”
You can read more about my background and the premise of the book in this post I made on the Lost Art Press Blog here. It’s an exciting opportunity and look forward to sharing my passion for Frid’s work and Danish Modern furniture design.
Related to the above book I’ve also written an article for Popular Woodworking Magazine on my Tage Frid inspired workbench which will be the cover story for the February 2017 issue which is coming out later this month. Once it is published I’ll be sure to share more related links and details.
UPDATE: The February 2017 issue of Popular Woodworking is now out and you can read more about it or purchase it here on PopularWoodworking.com
–Bill Rainford
@TheRainford
P.S. A big thank you to Doug Levy for allowing me to share two of the excellent photos he took for the upcoming article. You can check out Doug’s photography work here. He also has a great series on New England Craftsmen here.
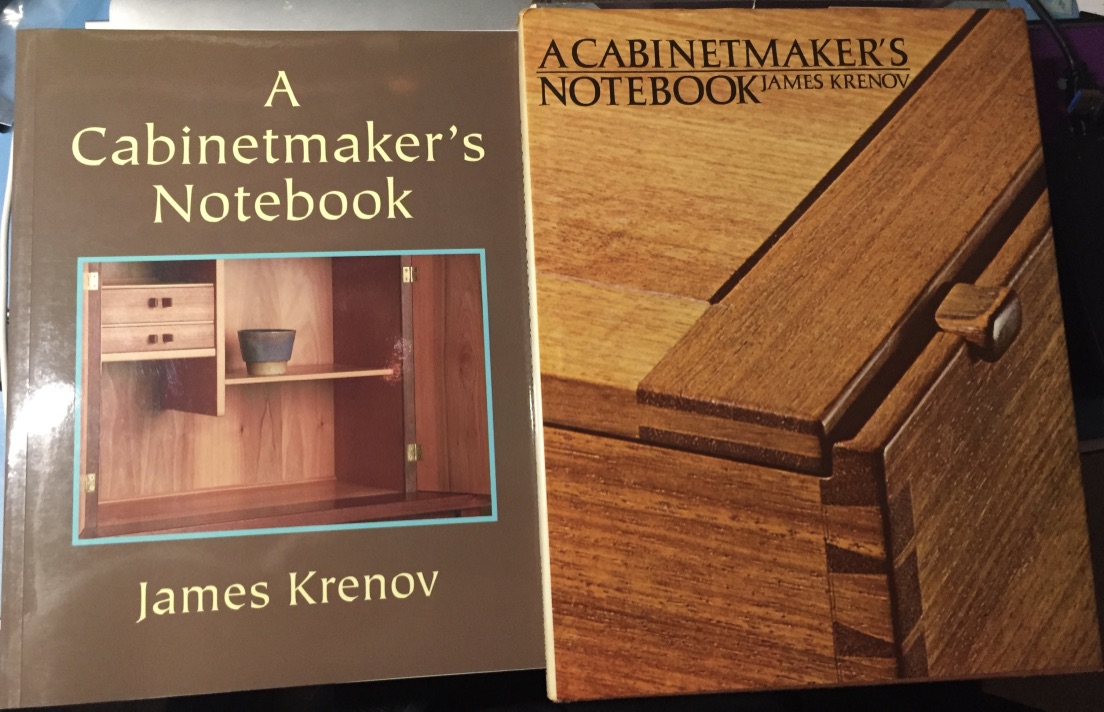
Reading A Cabinetmaker’s Notebook by James Krenov is often considered to be a woodworking rite of passage. And with any worthwhile ritual you don’t want to rush into it.
The Cabinetmaker’s Notebook by James Krenov
If you are just starting out in woodworking you’ll want to start with some solid introductory books (Tage Frid Teaches Woodworking, Made by Hand by Tom Fidgen, The Woodworker: The Charles H. Hayward Years, Understanding Wood by Bruce Hoadley etc. ), get your feet wet, mess up some pieces, experiment with hand and power tools.
Some of your projects will be triumphs, some of them will be failures and all of them will teach you some valuable lessons. After some time behind the bench you’ll more than likely hit a crisis of faith at some point. Are you bored with woodworking? Are you looking for a new design style? How do you rectify using power and hand tools or are you looking to be a hand tool purist? How well do you know the wood you are using? Does your work have any deeper meaning? How do I make a living at this? Will my work survive?
Everyone will have some questions along those lines at some point during their woodworking journey. That’s when it’s time to reach for A Cabinetmaker’s Notebook. This classic book from 1976 will not directly teach you woodworking skills like joinery or finishing techniques, but will provide you with some insights and inspiration that will often stay with you long after you read this book.
For folks that have read this blog for a while you’ve seen me go on about a desire to create items that last, getting away from our disposable culture and finding meaning in our work. Krenov was contemplating the same things back in the 1970s well before I was born, but the way he addresses it is often intoxicating and seeps into your subconscious.
“What I would like to do before it is too late is to get this [message] across to a few craftsmen-to-be who will work after me, and also to a public which will be there to receive them, because we are living in a time when, I believe, this is important, not only aesthetically, as oddities or rarities, but because …. much of our life is spent buying and discarding and buying again, things that are not good. Some of us long to have at least something, somewhere which will give us harmony and a sense of durability — I won’t say permanence, but durability — things that, through the years, become more and more beautiful, things we can leave to our children” — James Krenov, The Cabinetmaker’s Notebook, 1976
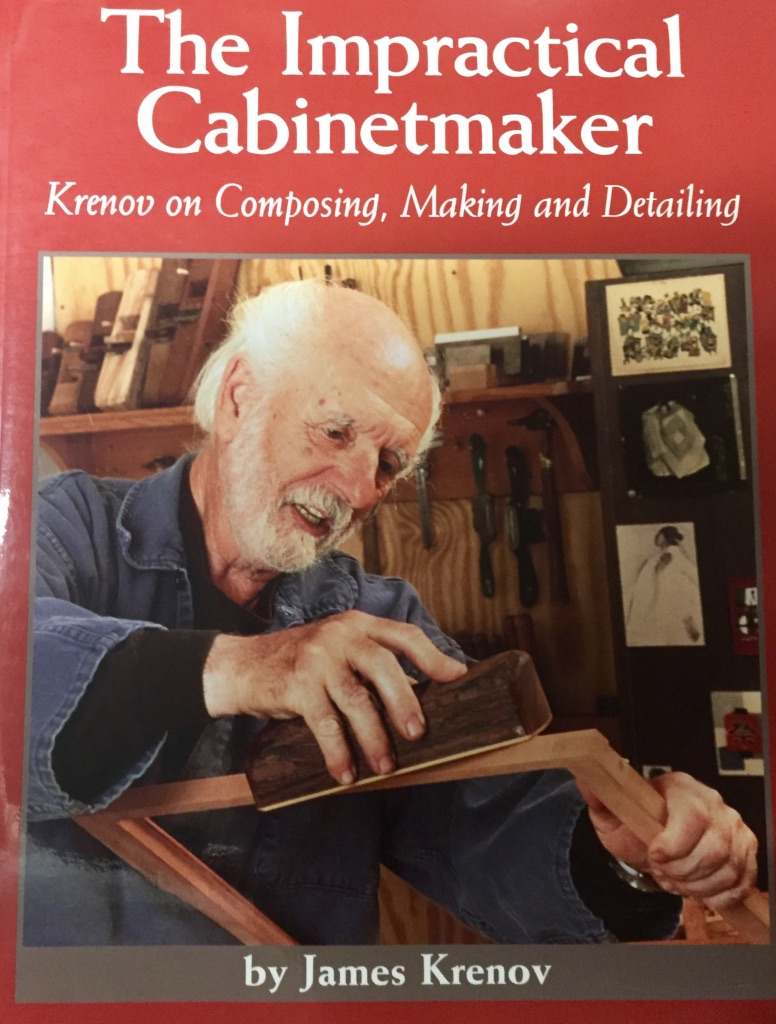
I first read the book about 10 years ago when I bought several of Krenovs books as softcover prints based on feedback from some other woodworkers. (With woodworking as my avocation I figured his book The Impractical Cabinetmaker would be right up my alley, but that is a post for another day).
The Impractical Cabinetmaker by James Krenov
At the time I first read them I wasn’t in the right frame of mind to fully appreciate it. Some insights on detailing and rewarding the curious stayed with me but I wasn’t a full cult member yet.
Back in September I picked up two early hardcover prints of Krenov books at the Nashua Tool show and decided to read this copy of A Cabinetmaker’s Notebook as I was doing some research on folks who taught at the School for American Craftsmen (SAC) and studying Danish and Scandinavian Designs. Over the past decade I also learned more about Krenov’s career, time at SAC, BU (heard funny but less than flattering stories about his time there at my Alma Mater), his time in Sweden, College of the Redwoods etc.
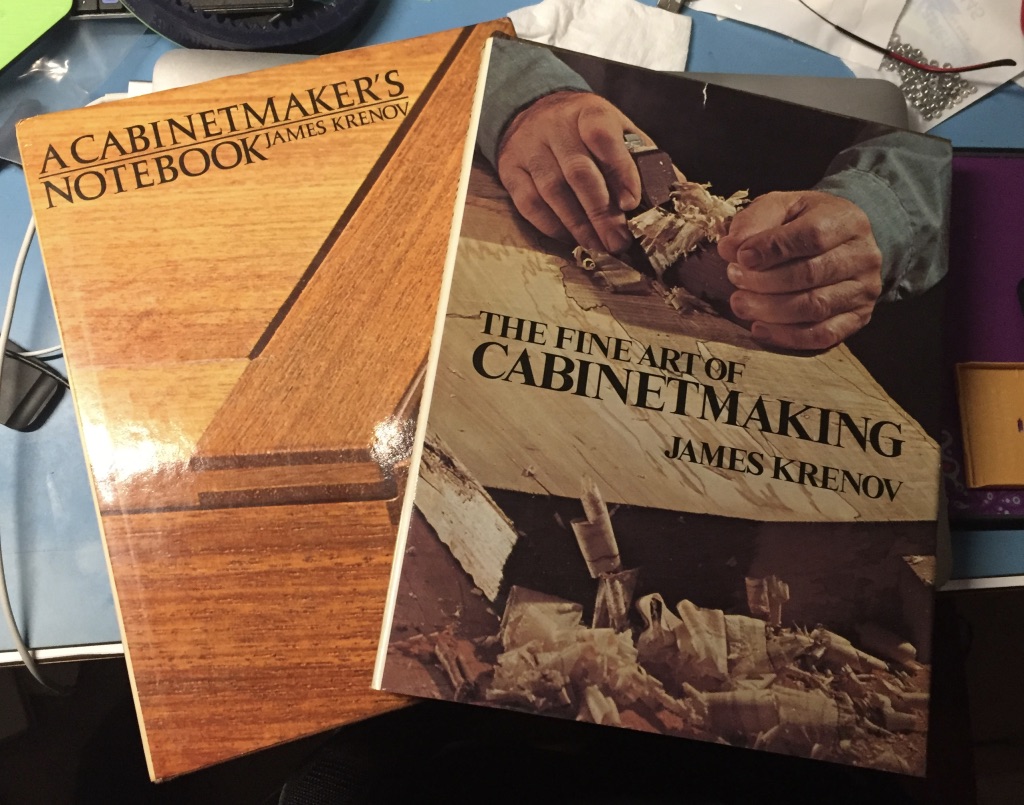
The Cabinetmaker’s Notebook and The Fine Art of Cabinetmaking by James Krenov
This time out the book really hit home for me. Krenov talks about what drives him as a craftsman and how he often agonizes over the best use of the wood. He’ll take some usage requirements from customers on commissioned work, but wants the freedom to let the wood talk to him and let the design flow. He works in little details to try and create pieces that are visually and tactilely interesting. By dabbling with asymmetry, curves, light/shadow, grain orientation and minimal finishes he’s able to produce interesting pieces that elicit emotions from the viewer. This process results in pieces that only get better with age and use.
The anecdotes in the book also add to the warmth — finding work early on, cats in the shop, revisiting your wood pile for inspiration, using the natural properties of wood and grain to help find the best use for that specific piece of wood to create something long lasting that will make yourself and anyone living with the piece happy.
So if you are in need of an inspirational recharge I recommend reading or re-reading A Cabinetmaker’s Notebook.
-Bill
P.S. I always say that woodworking is often the art of hiding your mistakes. (Sometimes by accentuating the defect with a bead or constructing things in such a way we try and cover up less desirable grain with other forms of joinery etc.) With all the time Krenov talked about fine details, it was interesting to me that the case piece on the cover of the original version of the book had an interesting minor mistake front and center for those who knew to look for it. If you look closely at the image below you’ll see he made 2 passes with a marking gauge at a slightly different setting. I know it is something I’ve done in the past.
Original cover from The Cabinetmaker’s Notebook
That may be why they changed the cover in later reprints, but much like a hidden or asymmetric pull or hidden cubby in a cabinet I think it was an interesting find and also shows that we are all human and even with a minor imperfection here and there we can still produce satisfying results.
Here’s a recap of Saturday and Sunday (days 2 &3) of Woodworking in America 2016. Saturday was a fun day of workshops and lectures. I watched a great talk by Caleb James on Danish Modern furniture. Chris Schwarz had a talk about Chairmanning and a talk about his Roman Workbenches. Roy Underhill demonstrated how to make a classic coffin. Mary May demonstrated how to carve volutes, C-Scrolls and other similarly projects. I also had some fun guarding Chris’ low Roman workbench as I helped Roy get it out to his van.
I got to see some more old friends, meet some new ones and meet several friends I knew from being online, but not in person. I got to meet Mike Flaim and had a brief interview with Dyami Plotke of MWA.
In the evening we had an event where we went Rhinegeist Brewery for some very good beer and BBQ followed by a tour of some of the massive underground brewing and beer storage tunnels that are under much of Cincinnati.
Click on any of the images below to click through the images as a slideshow. (if you are viewing this post in an email browser, please click on the post title above to view the post on the website itself)
Another great view of the Cincinnati waterfront.
Caleb James’ excellent presentation on Danish Modern furniture.
Caleb’s traveling tool chest with a large collection of the planes he’s made.
Great Hans Wegner quote
Caleb James
Nicely proportioned stool
A table from Caleb’s presentation we all hope to see in an article at some point.
George Walker
George Walker’s talk on Designing With Curves
George Walker with his string 2.0
George Walker demonstrating some great, and traditional ways of working with curves
Mary May’s class on carving volutes, C-scrolls and similar things
Sample of a violin scroll
Carving a volute
Mary May Carving a C-Scroll
Mike Siemsens’s Anarchist Tool Chest
Zach Dillinger with his very nice reproduction ottoman.
Zach Dillinger taking questions as the end of one of his workshops.
Quick selfie with my hero, Roy Underhill. It’s always great to see him and he’s very nice to all of us fans.
You know Roy Underhill’s presentation killed — there were a LOT of coffins all over the room.
Chris Schwarz’ talk on Roman Workbenches
Chris demonstrating how versatile the low bench is for preparing stock.
Taller Roman Workbench with Chris hand rasped nuts.
Chris Schwarz’ talk on making a straightforward chair (showing how you don’t need to invest in a lot of fancy chairmanning tools to make a comfortable and nice looking chair)
Chris cutting wedges for his chair leg tenons.
Vampire vise made by my friend Peter Ross for Chris Schwarz’ tall Roman workbench
Double wedged tenons in the Roman Workbenches to close up any gaps.
The nicest bus stop bench in Covington, KY. Guarding Chris’ low Roman workbench as Roy went to get his van.
Selfie while laying on a Roman bench in the middle of a city sidewalk.
Couldn’t help but think of the beginning of the Woodwright’s Shop as Roy walked to the parking garage that looks almost a bit like the streets of Durham, NC 😉
Rhinegeist Brewery in Cincinnati
Enjoying my time at Rhinegeist Brewery with Zach, Jake and others. They even had a beer called ‘Steve’
It was OctoberFest weekend in Cincinnati — the largest outside of Germany. Made my German ancestors happy to try all the brews and see all the folks in Lederhosen and Dirndls.
Folks jousting American Gladiator style in full on lederhosen.
One of our tour guides of the many underground brewery buildings in Cincinnati
Cincinnati Connector Street Cars
Great old sign dating back to the first days of electric in the city (At least according to our guide who was quite a character)
Pig sticker fence. I also really like how the guy restoring this row house painted the CDX on the door to look like a door and even layered it on the windows and painted them to look a bit like sash. Nice touch.
About to enter a spooky underground brewing cave that has even been in some recent movies.
Gives and idea of how big some of these brewers were back in the day, under a large hill in the city.
There might even be a ghost in this photo….
Inside of the hotel lobby. A very big open space
Testing out my new Timbuk2 camera backpack. Worked out great on this trip
A paddlewheel sightseeing boat out on the river.
If you’d like to see my photo recap of the first day of WIA 2016, please check out this earlier post here.
I had a great time at the event and hope to see many of you there next year.
Take care,
-Bill
@TheRainford
A Joiner's Guide To Traditional Woodworking and Preservation