

Have you used your side clamps lately? Wait, what are side clamps?
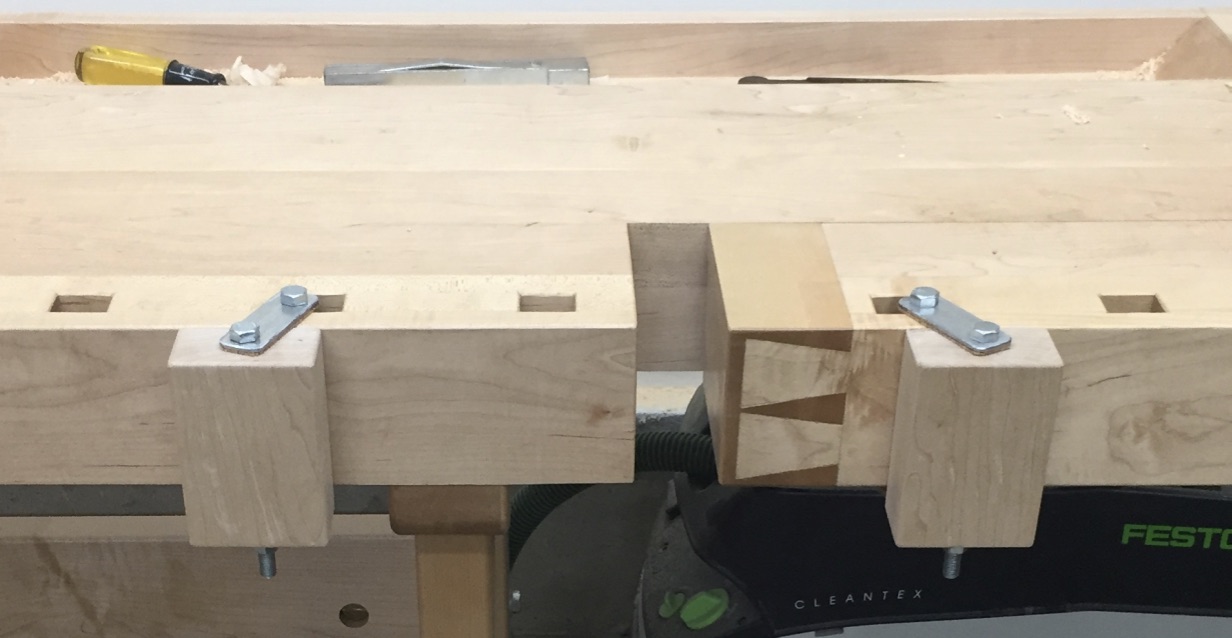
Side clamps are a pair of adjustable wooden blocks that mount on the outside of a traditional continental workbench with one block mounted to the tail vise and one mounted to the fixed portion of the bench top. In this experiment the blocks are mounted to the bench via 3/8″ diameter, 6″ long threaded bolts and some shop made metal plates.
Background:
When building my Tage Frid inspired Scandinavian workbench I spent a lot of time looking at examples of Frid’s benches — some early extant examples in person, his Fine Woodworking article on his bench (FWW Issue #4, October 1975), the chapter in Tage Frid Teaches Woodworking Volume 3 and various online searches.
In the FWW issue #4 diagrams and text there was a very brief mention of a set of ‘side clamps’. I couldn’t find any photos of these clamps online and they didn’t seem to make it into the book version of the bench. I was curious if they were cut to save space or if in fact they didn’t turn out to be useful.
I decided to build my own version of these clamps based on that lone diagram and experiment with them.
Building a pair of side clamps:
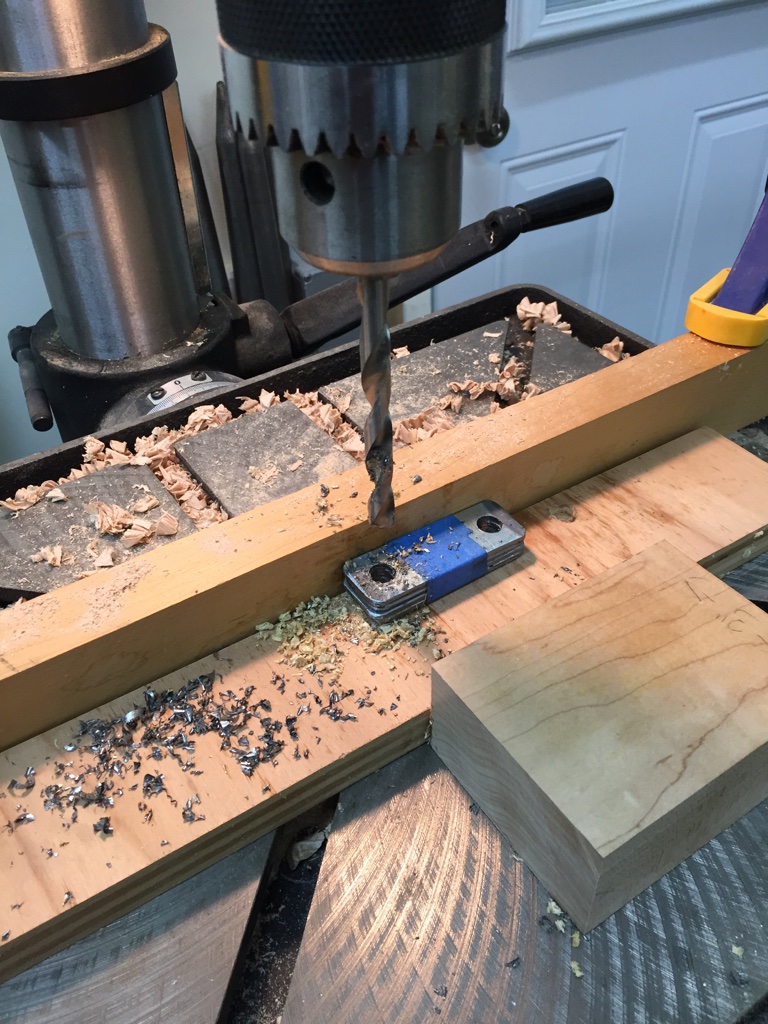
Using some scrap hard maple left over from the workbench I made two 1.75″ thick, 3″ wide and 4.5″ long blocks. I planed them and rounded over the edges with a 1/8″ radius router bit.
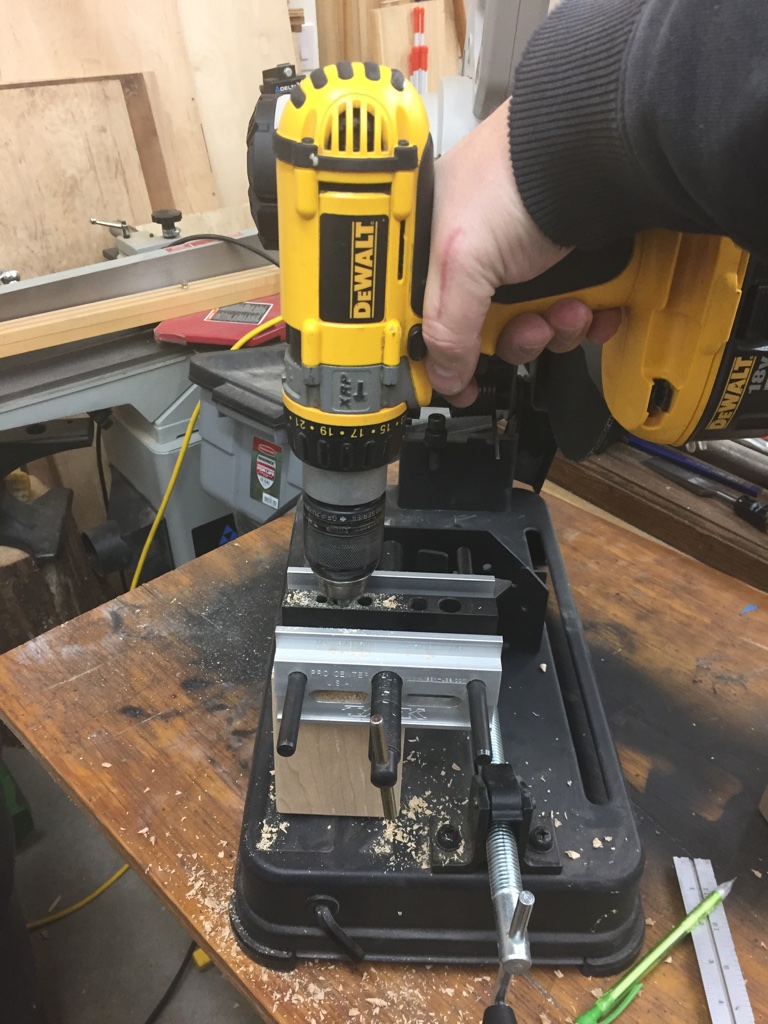
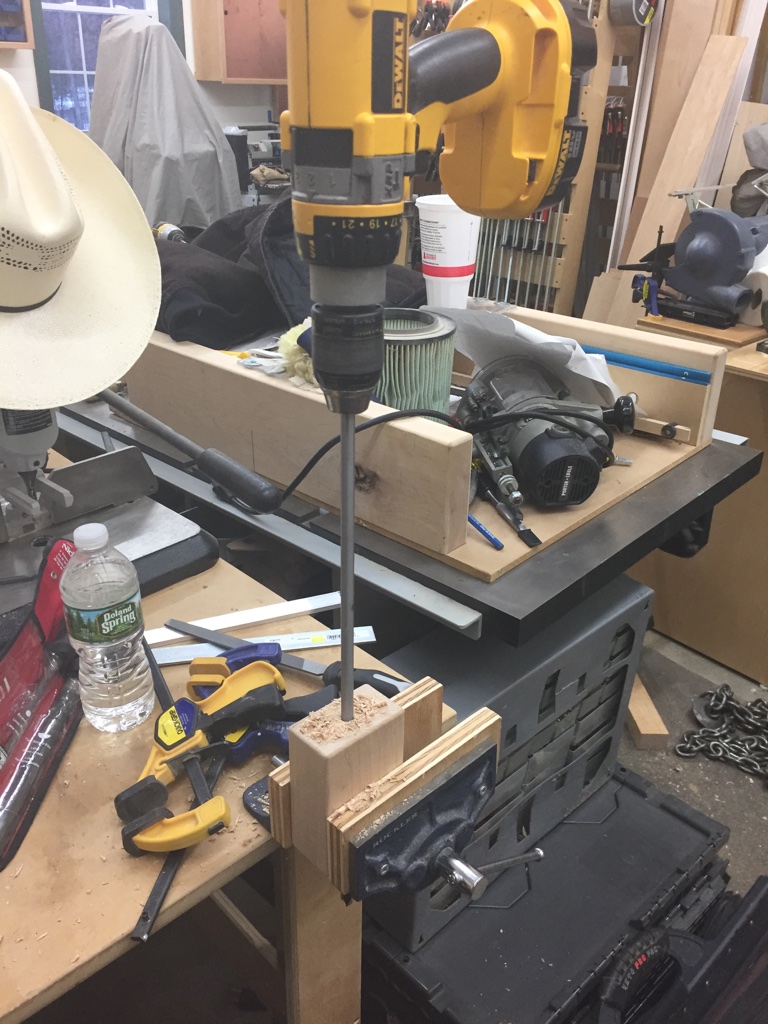
Next up was drilling a 3/8″ diameter hole through the center of the block, the long way. I started off the drilling by using a self-centering doweling jig (see photo above), and went as far as the bit would let me drill into the block. Then using that first hole as a guide I used a longer electrician’s style 3/8″ drill bit to drill the rest of they way through the block. (see photo below)
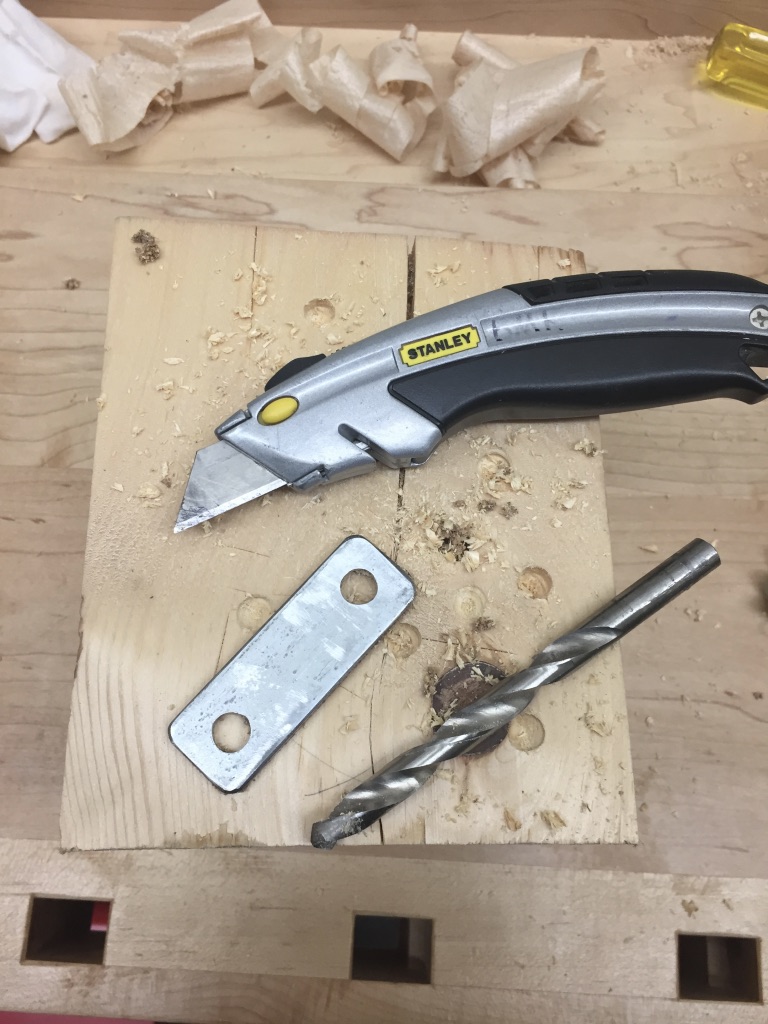
With the woodworking complete, it was time do to some metal working to make a series of small plates that are used to affix the clamp blocks to the dog holes in the bench by way of the 3/8″ bolts. I bought some 1/8″ thick x 1″ wide zinc’ed steel bar at my local hardware store and cut them to 2-7/8″ long. (Note this is 1/2″ shorter than what Frid called for as I as felt 3-3/8″ would have too much slop/space. I also could not find 1/4″ thick bar stock, but think 1/8″ thick is still plenty strong for anything I plan to do with these clamps. Make sure to leave at least 1/4″ of metal on all side around the holes). I cut the pieces to length using an abrasive cut off chop saw, but a hack saw could also get the job done.
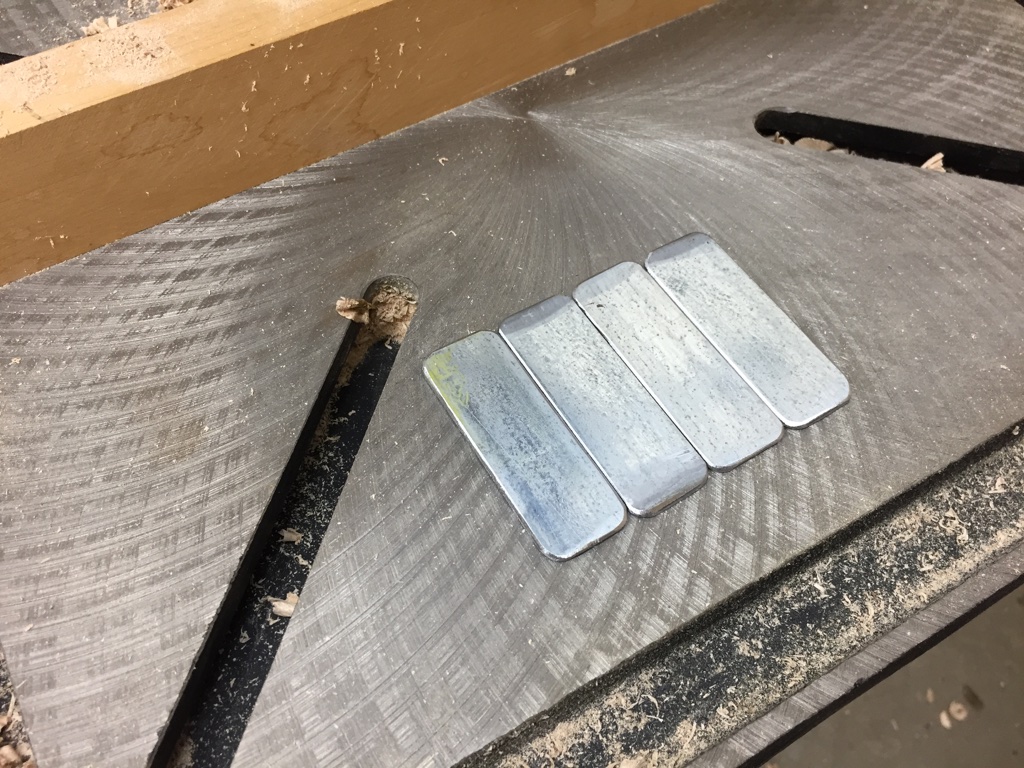
I took the metal blanks over to the slow speed grinder and rounded over the corners and chamfered the edges a bit to remove any burs.
Next up I stacked/ganged up all 4 pieces and drilled 3/8″ diameter holes at the drill press. The pieces were held together with some strong tape and held in place against my makeshift fence via the scrap block in the foreground of the above picture. Make sure to use some cutting oil and make sure you don’t overheat the metal nor your drill bit. Also use some scrap underneath the blanks to protect your drill press table.

With the holes drilled out I took the metal blanks over to a vise wherein I made sure the bolts fit through the holes, cleaning things up with a rat-tail (round) file. I then used a flat mill file to clean up any roughness on the outside edges left from the work at the grinder.
Given my background as an engineer, and touch of OCD I decided to add some self adhesive cork to the sides of these metal plates that might come in contact with my bench top
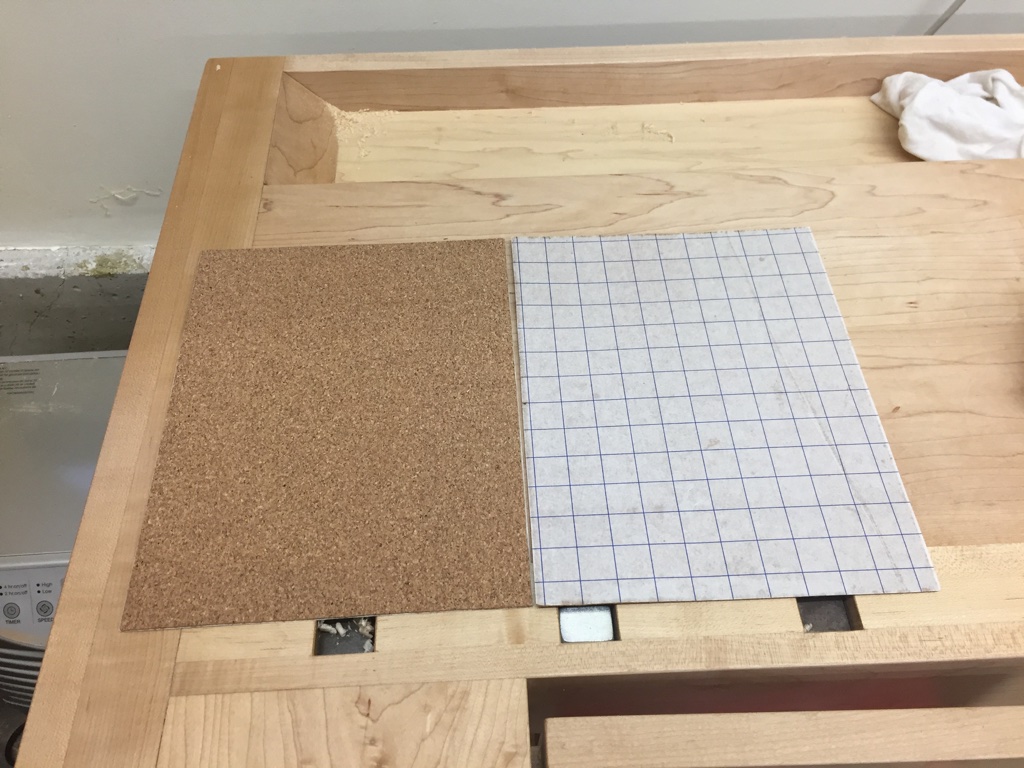
I cut the cork to rough size, affixed it to the plate and used a utility knife to cut off any excess around the edge and a 3/8″ drill bit to remove any waste inside the drilled out holes.
With the metalworking completed, it was time to install the nuts and bolts and try out the clamping blocks. One bolt goes through the top plate, the wood block, the bottom plate and is secured with a nut or five star knob. (I ordered some knobs from Rockler but at the time of this writing they’d didn’t arrive yet, once they come I’ll add some post script to show the clamps with easier to use knobs in place.) The other bolt goes through the top plate, the dog hole, the bottom plate and is secured with another nut.
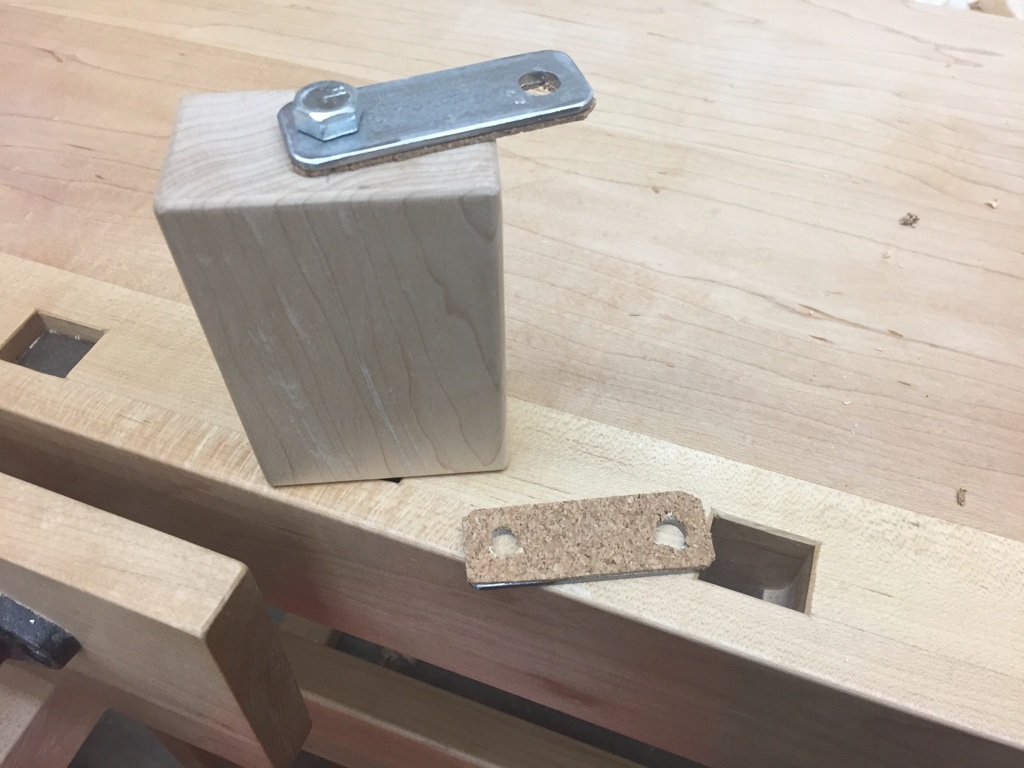
Given the use of square dog holes on this bench, and the fact that that blocks are 1/2″ longer than the bench is thick, this allows the side clamps to pivot a few degrees in either direction. This gives you the ability to securely clamp some tapered or irregularly shaped pieces.
The blocks can be moved to different dog holes as needed or removed from the bench altogether. In testing these clamps on a few different items and shapes I found the blocks were surprisingly easy to use and held oversized items with ease.
The Verdict: (So far…)
It was a fun project to build and experiment with. These clamps are useful for specialized clamping needs, such as large items, re-working the edges of a drawer box, planing dovetails flush, and similar operations.
Do I think they will get used every day? No. Do I think they can do a few jobs that would be tougher to do on the bench-top secured via bench dog, hold fast, face or shoulder vise? Yes.
For the small amount of wood, metal and time it took to make these side clamps I think they were a nice addition to my workbench.
If you build some side clamps for your workbench, please share what you thought of them in the comments below.
Take care,
-Bill Rainford
@TheRainford
P.S. If you’d liked to learn about the workbench featured in this post, please check out my related article in the February 2017 issue of Popular Woodworking Magazine which can be found here.


Your side clamps ensure parallel jaws (except may be the dog holes ‘ slant but it can be compensated if necessary or not desirable).
I have once seen a workbench picture with lateral dog holes as in the drawing you can see here:
https://www.fine-tools.com/veritasvise.html about the Veritas Quick-Release Sliding Tail Vice.
Veritas text: “Workpieces can be clamped between the jaw and the apron; however, it is more common to clamp workpieces between bench dogs, either on the top of the workbench or along the front of the bench, if appropriate dog holes have been drilled in the jaw/apron.”
Sylvain
Oops,
I didn’t catch “This gives you the ability to securely clamp some tapered or irregularly shaped pieces.”
Sylavin
Here pictures:
http://en.ramia.cz/pro-series
Sylvain
Hi Sylvain,
Thank you for the comments and link. Yes, that is interesting to see a set of dog holes in the apron, especially in a modern/commercial bench. I’ve only seen maybe 2 or 3 period work benches with dog holes in the skirt, usually Germanic style benches, the most memorable of which was at Old Salem in NC. Roy Underhill visited the bench as well and can be seen this video, about 20 minutes in:
http://www.pbs.org/woodwrightsshop/watch-on-line/watch-season-episodes/2007-2008-episodes/
Take care,
-Bill
Very nice link. I note that in Old Salem they say they didn’t use this feature (lateral dogs) very often.
Sylvain
Yep, I don’t think I’ll use them too much either but for the occasional time they are needed they are real nice to have handy 🙂 we’ll see how much or little use they get as I work my way through writing the book I’m going to try and use the bench and accessories as I figure Frid did . I met with Tage’s son Peter today and didn’t recall them around his fathers shop so I suspect they never got much use or at least didn’t have set on his home bench, but it has been a fun experiment