Workbench side clamps are not something I think anyone would generally use on a daily basis, but when the job calls for the sort of clamping they provide, they do a great job. I think one of the reasons they were not used often is the time it takes to affix them to the workbench — usually requires the use of nuts and wrenches.
How can I improve the likelihood I will use my new side clamps?
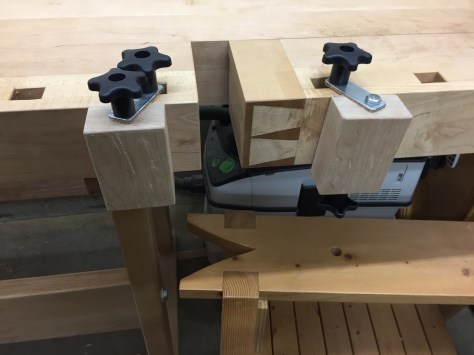
The 3/8″ 5 star knobs I ordered from Rockler for my side clamps arrived yesterday and I gave them a shot.
Side clamps with 5 star knobs
On the left you can see both knobs on the same side of the clamping block and on the right you can see one knob on the top and one knob on the bottom. Either configuration works well. With a 5 star knob you can easily loosen both knobs and remove one knob to move the block around.
The verdict?
The above tweak is not an earth shattering change but it does remove the need for a wrench and make it a little more likely I’ll break out the side clamps with the need comes up.
Take care,
-Bill
@TheRainford
P.S. If you’d like to read up on how to build your own pair of side clamps you can read my earlier post on that topic here.
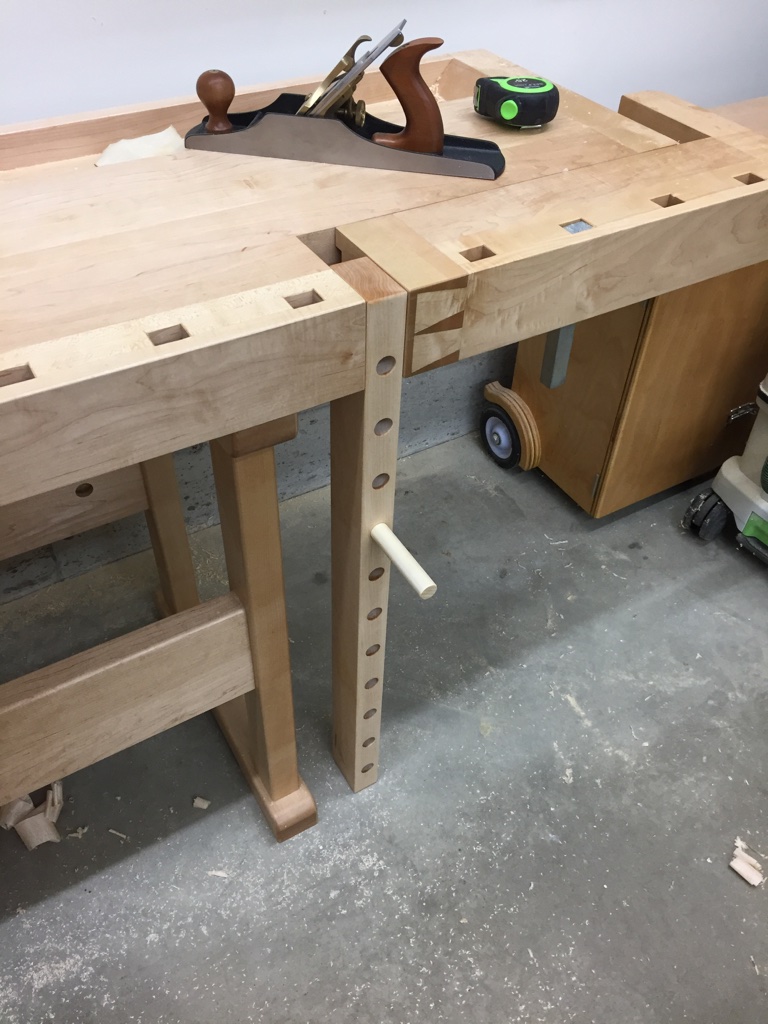
In building my workbench I also built a simple traditional deadman to help support long boards at the bench.
Workbench Deadman
This simple to build workbench accessory is as a great addition to any bench with a tail vise.
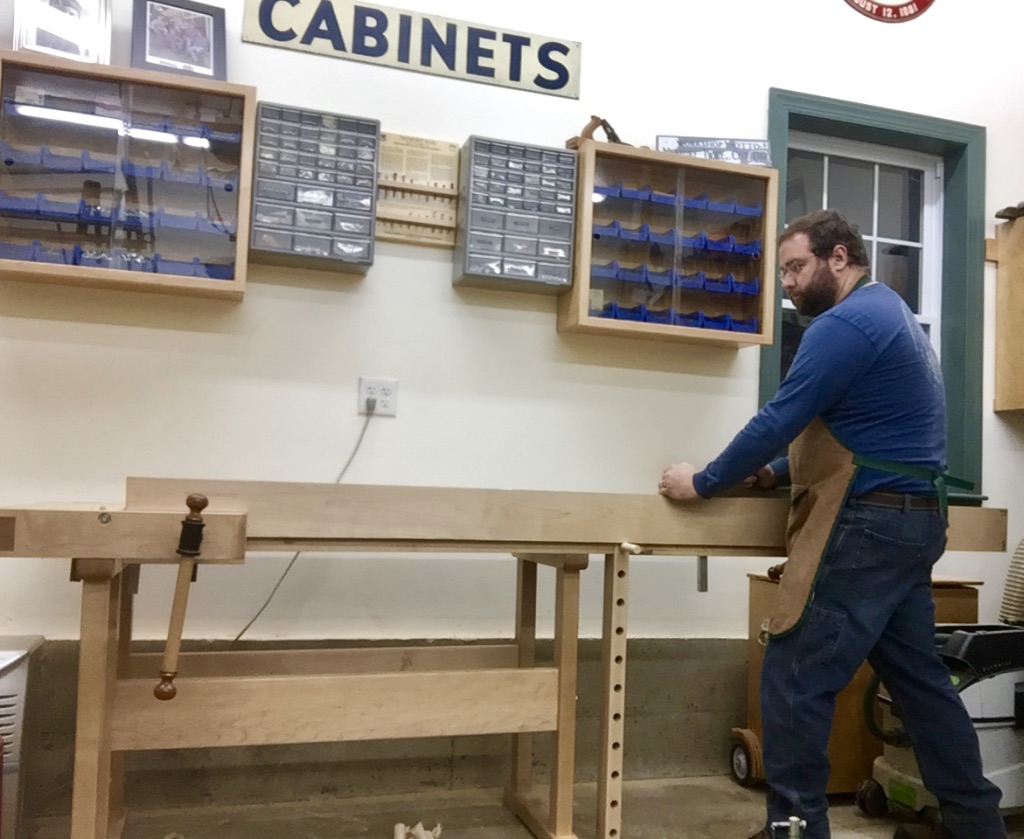
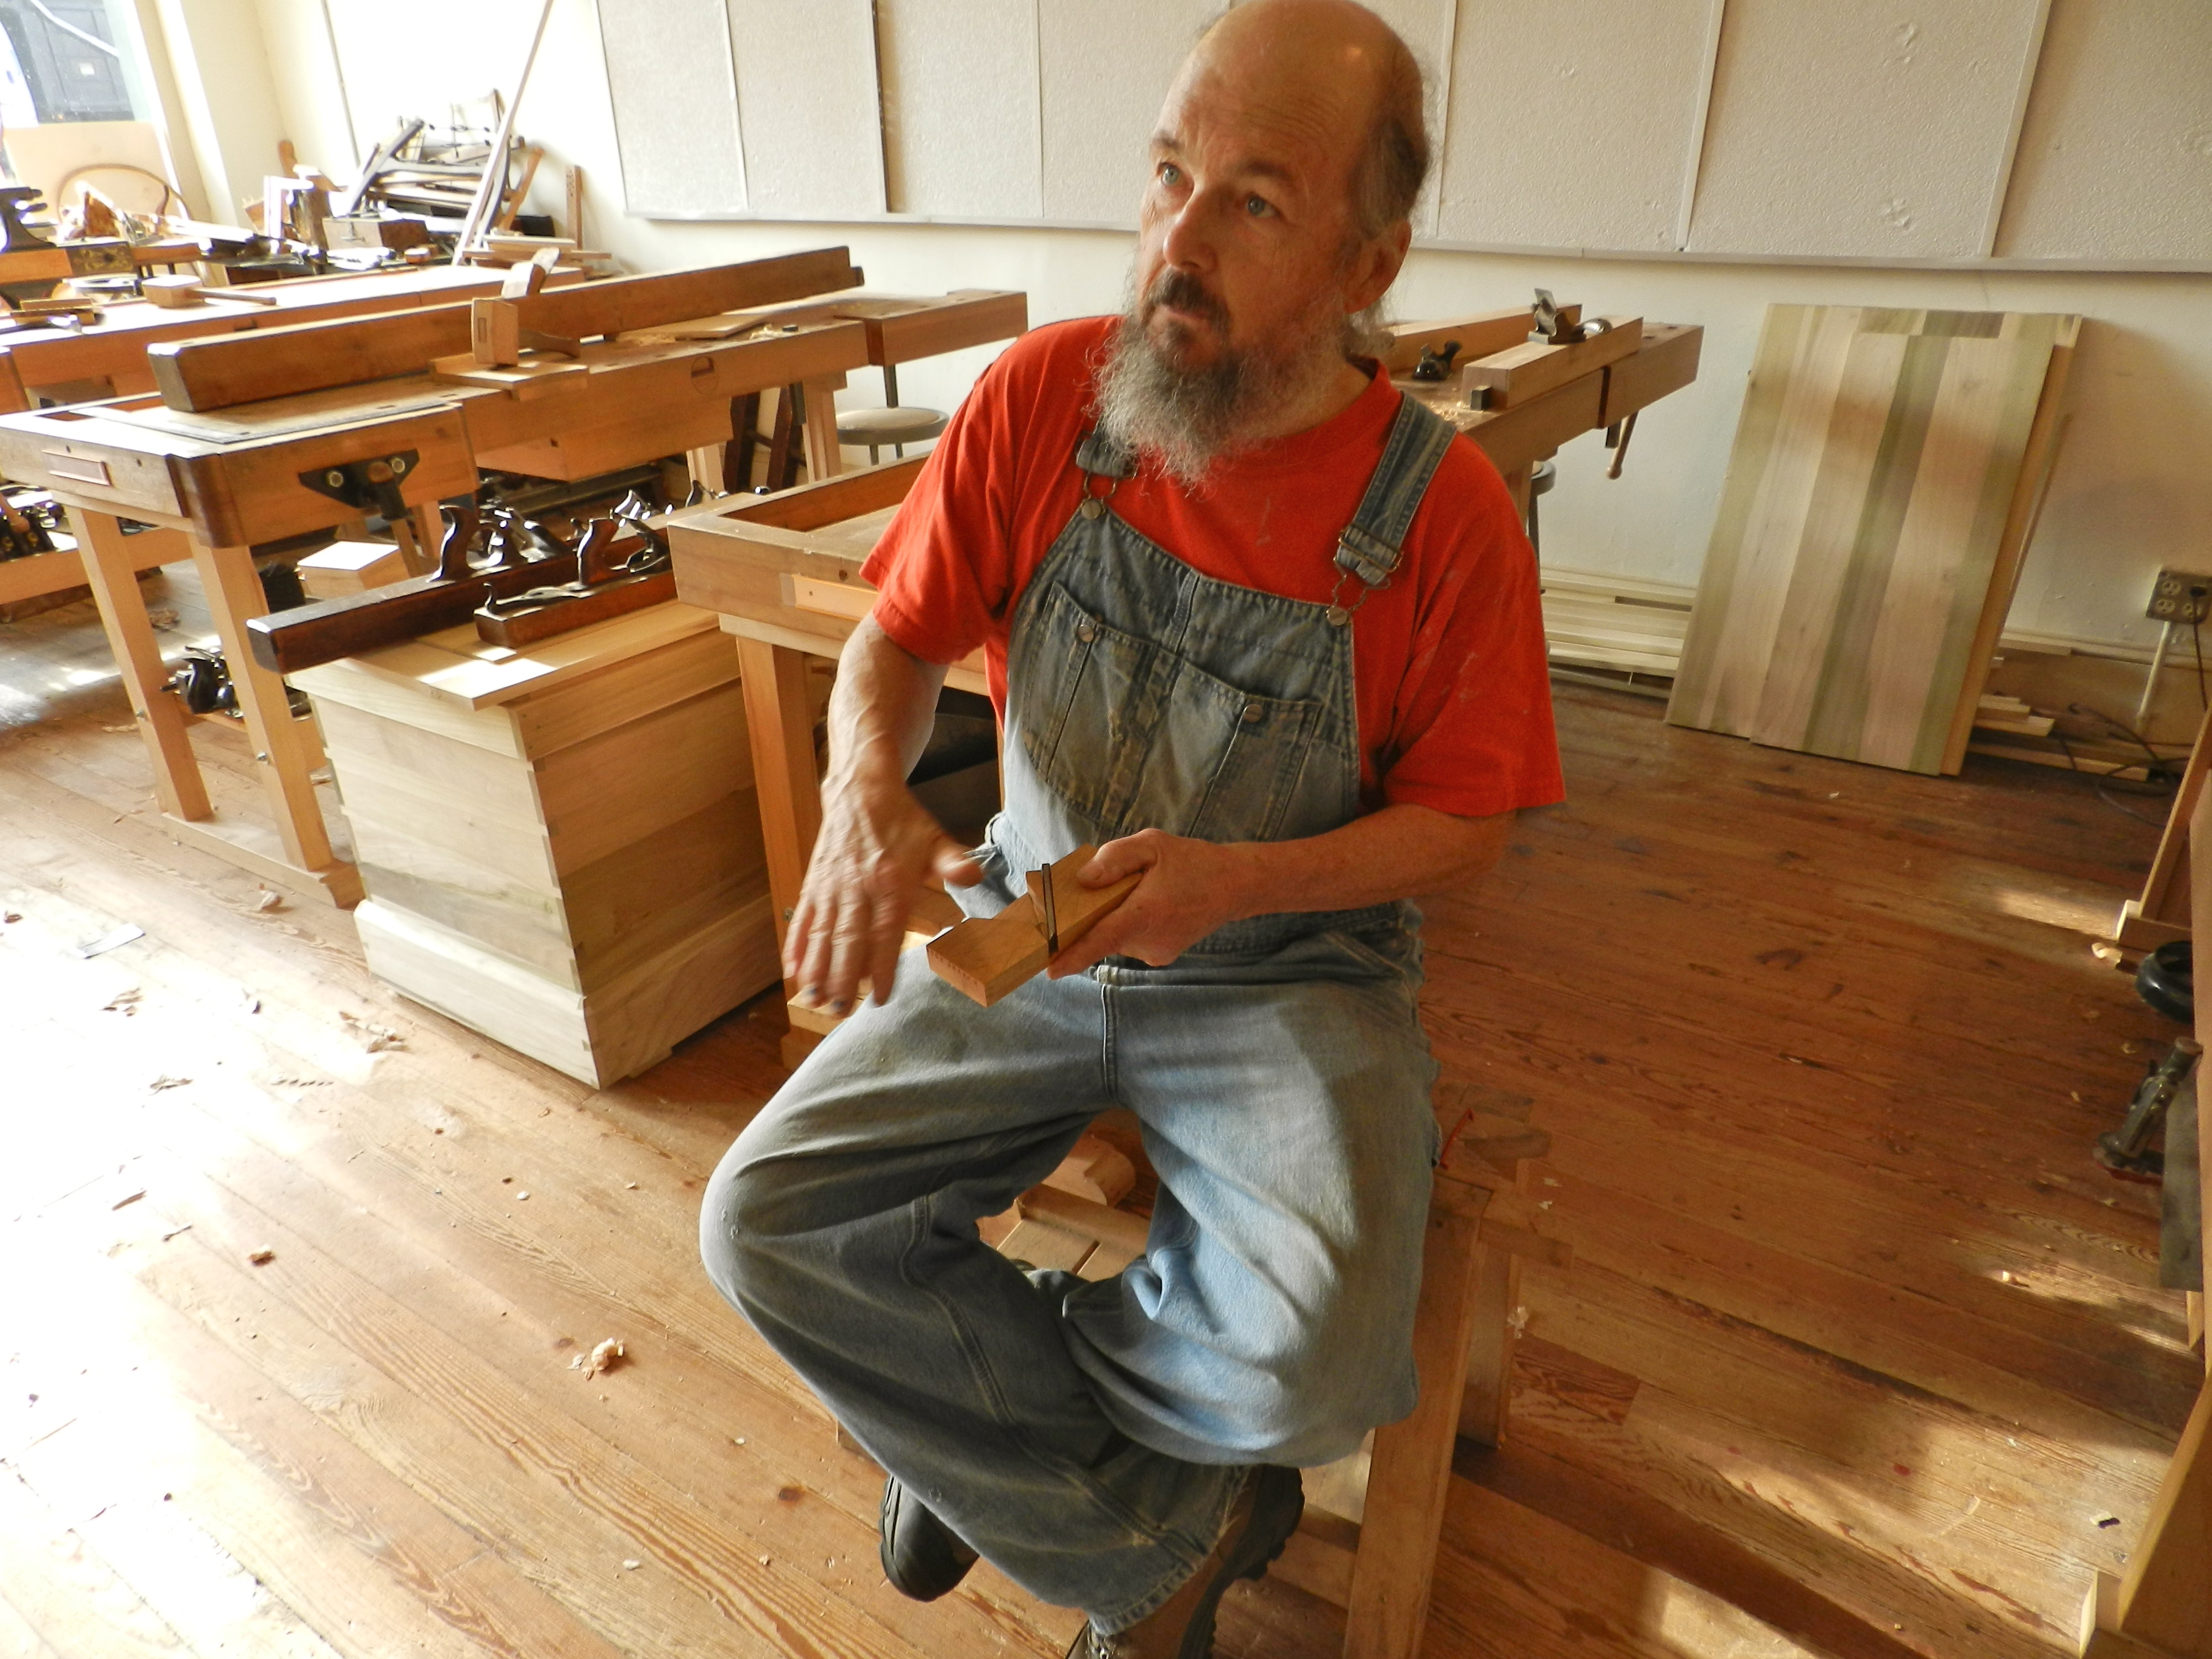
Bill demonstrating the use of his deadman
If you’d like to learn more about this bench and how to build one for yourself, please check out my blog post on this topic over on the Popular Woodworking site here.
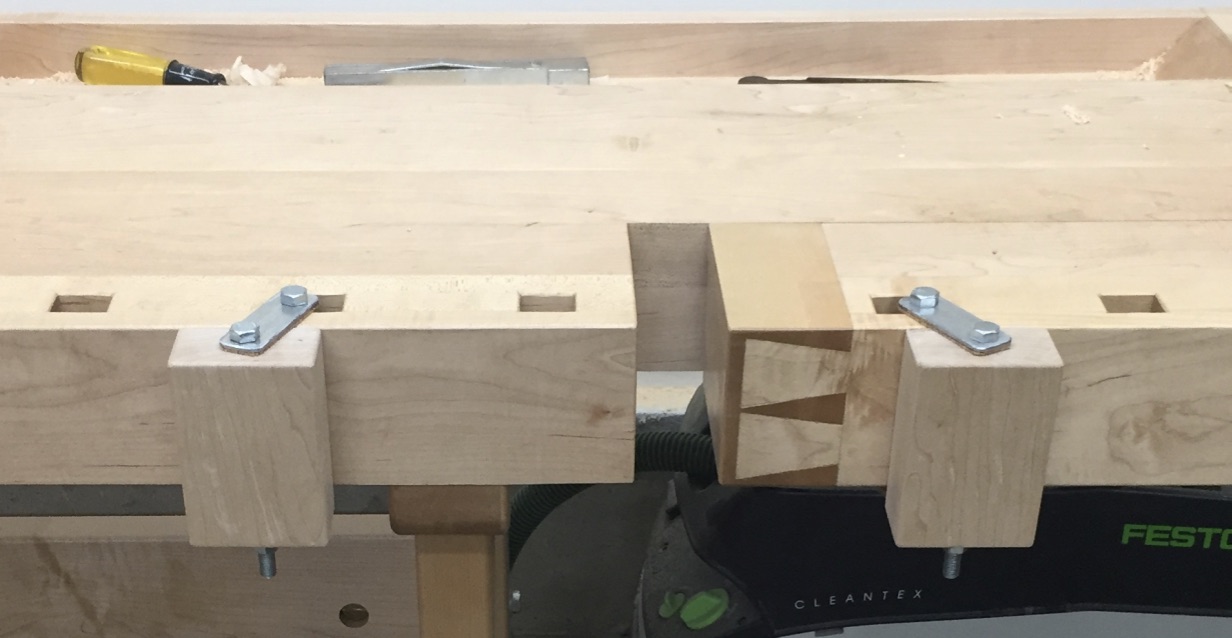
Have you used your side clamps lately? Wait, what are side clamps?
Close up of the side clamps
Side clamps are a pair of adjustable wooden blocks that mount on the outside of a traditional continental workbench with one block mounted to the tail vise and one mounted to the fixed portion of the bench top. In this experiment the blocks are mounted to the bench via 3/8″ diameter, 6″ long threaded bolts and some shop made metal plates.
Background:
When building my Tage Frid inspired Scandinavian workbench I spent a lot of time looking at examples of Frid’s benches — some early extant examples in person, his Fine Woodworking article on his bench (FWW Issue #4, October 1975), the chapter in Tage Frid Teaches Woodworking Volume 3 and various online searches.
In the FWW issue #4 diagrams and text there was a very brief mention of a set of ‘side clamps’. I couldn’t find any photos of these clamps online and they didn’t seem to make it into the book version of the bench. I was curious if they were cut to save space or if in fact they didn’t turn out to be useful.
I decided to build my own version of these clamps based on that lone diagram and experiment with them.
Building a pair of side clamps:
Using some scrap hard maple left over from the workbench I made two 1.75″ thick, 3″ wide and 4.5″ long blocks. I planed them and rounded over the edges with a 1/8″ radius router bit.
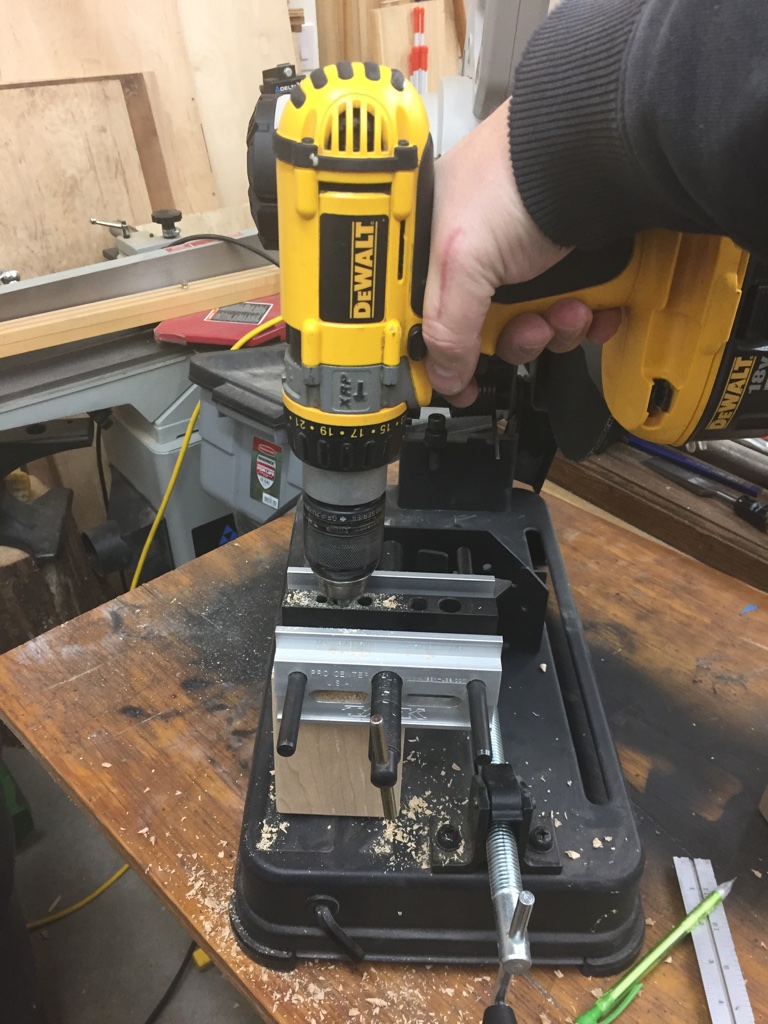
Use a self centering doweling jig to start the 3/8″ holes
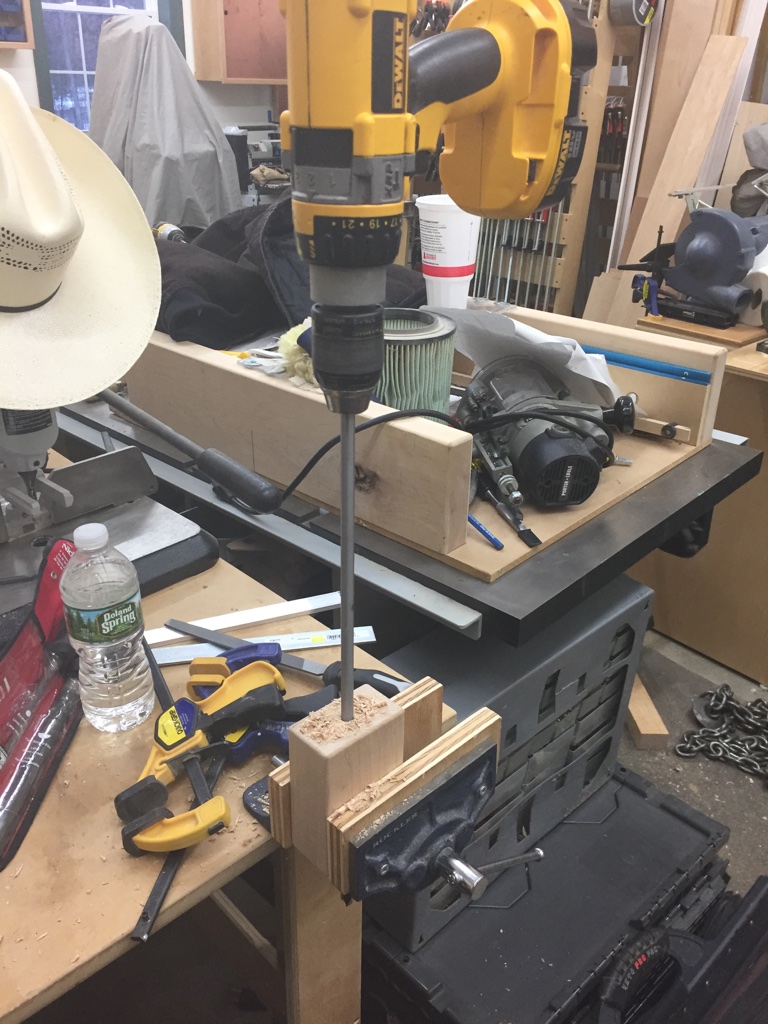
Next up was drilling a 3/8″ diameter hole through the center of the block, the long way. I started off the drilling by using a self-centering doweling jig (see photo above), and went as far as the bit would let me drill into the block. Then using that first hole as a guide I used a longer electrician’s style 3/8″ drill bit to drill the rest of they way through the block. (see photo below)
Use a long electrician’s style 3/8″ drill bit to finish the centered hole.
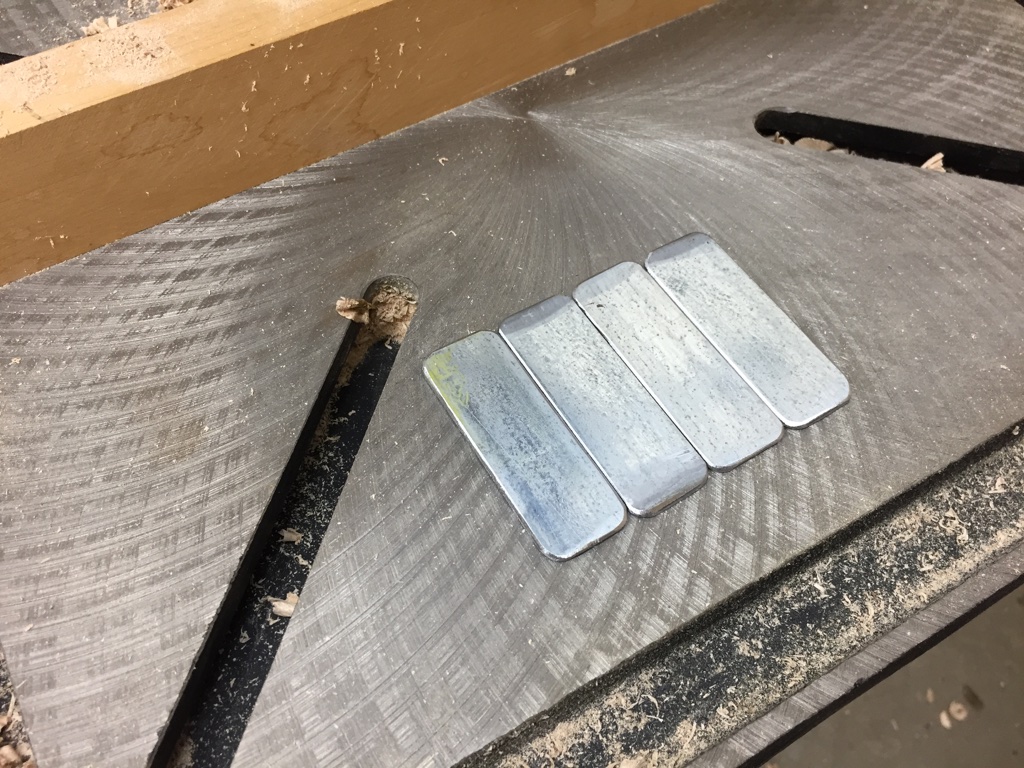
With the woodworking complete, it was time do to some metal working to make a series of small plates that are used to affix the clamp blocks to the dog holes in the bench by way of the 3/8″ bolts. I bought some 1/8″ thick x 1″ wide zinc’ed steel bar at my local hardware store and cut them to 2-7/8″ long. (Note this is 1/2″ shorter than what Frid called for as I as felt 3-3/8″ would have too much slop/space. I also could not find 1/4″ thick bar stock, but think 1/8″ thick is still plenty strong for anything I plan to do with these clamps. Make sure to leave at least 1/4″ of metal on all side around the holes). I cut the pieces to length using an abrasive cut off chop saw, but a hack saw could also get the job done.
Zinc’ed steel bar, cut to size, corners ground round and edge burs removed
I took the metal blanks over to the slow speed grinder and rounded over the corners and chamfered the edges a bit to remove any burs.
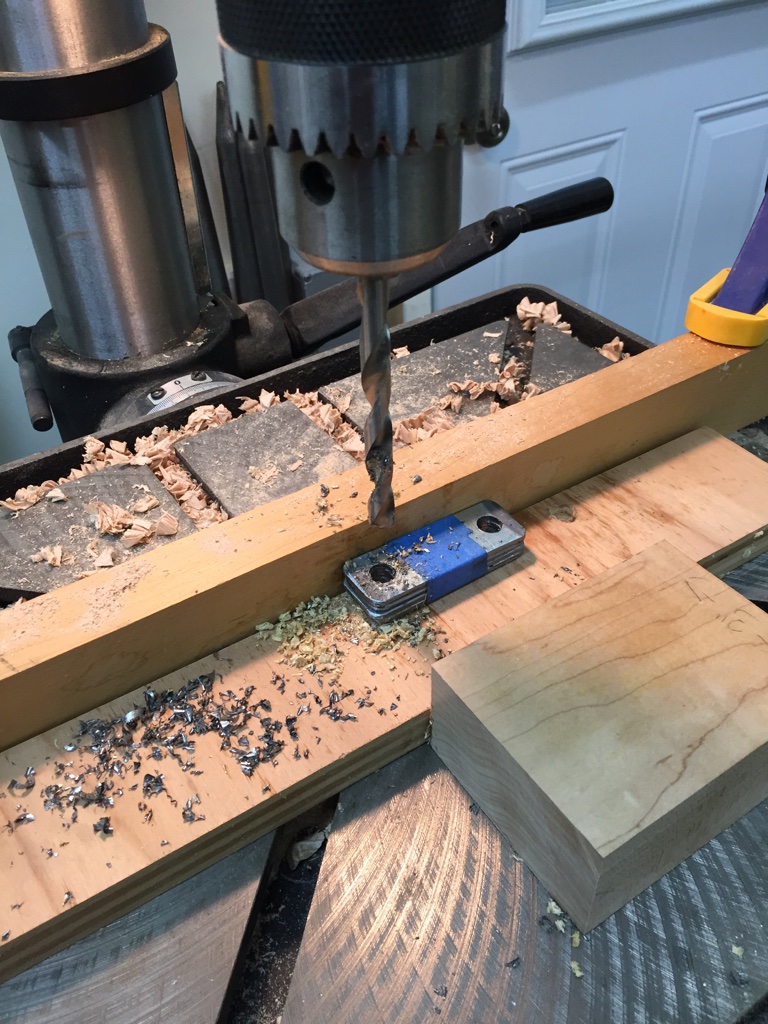
Drilling all four blanks at once.
Next up I stacked/ganged up all 4 pieces and drilled 3/8″ diameter holes at the drill press. The pieces were held together with some strong tape and held in place against my makeshift fence via the scrap block in the foreground of the above picture. Make sure to use some cutting oil and make sure you don’t overheat the metal nor your drill bit. Also use some scrap underneath the blanks to protect your drill press table.
Using a file to clean up and remaining burs and fine tune the work you did on the grinder
With the holes drilled out I took the metal blanks over to a vise wherein I made sure the bolts fit through the holes, cleaning things up with a rat-tail (round) file. I then used a flat mill file to clean up any roughness on the outside edges left from the work at the grinder.
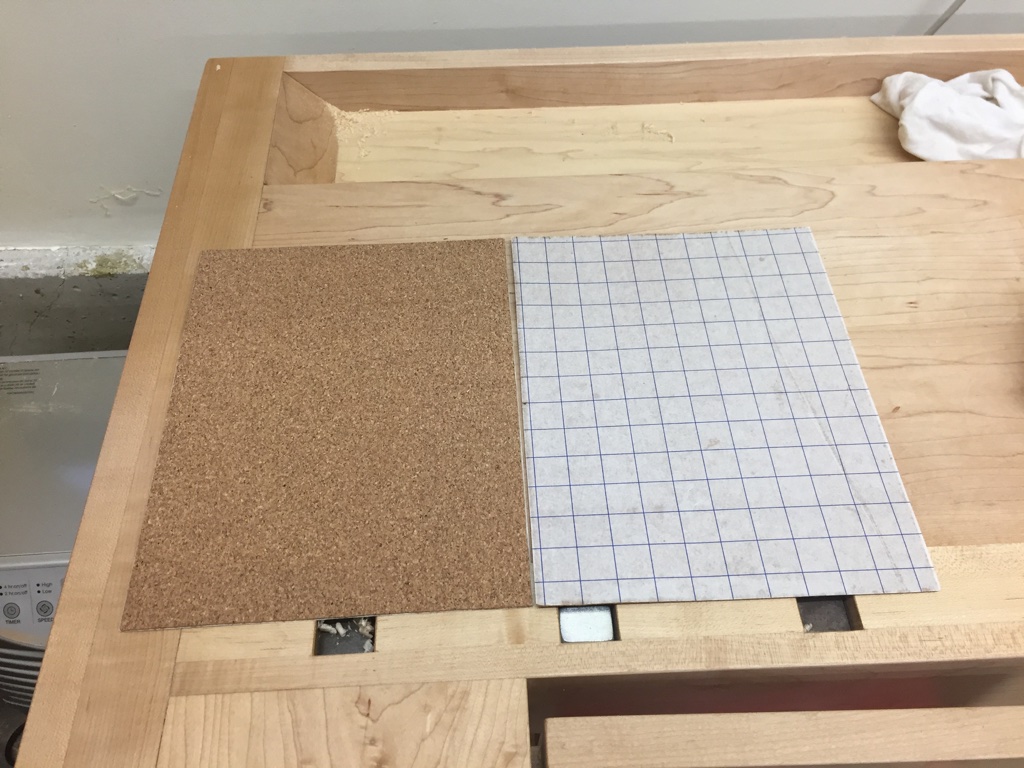
Given my background as an engineer, and touch of OCD I decided to add some self adhesive cork to the sides of these metal plates that might come in contact with my bench top
Self-adhesive cork sheets
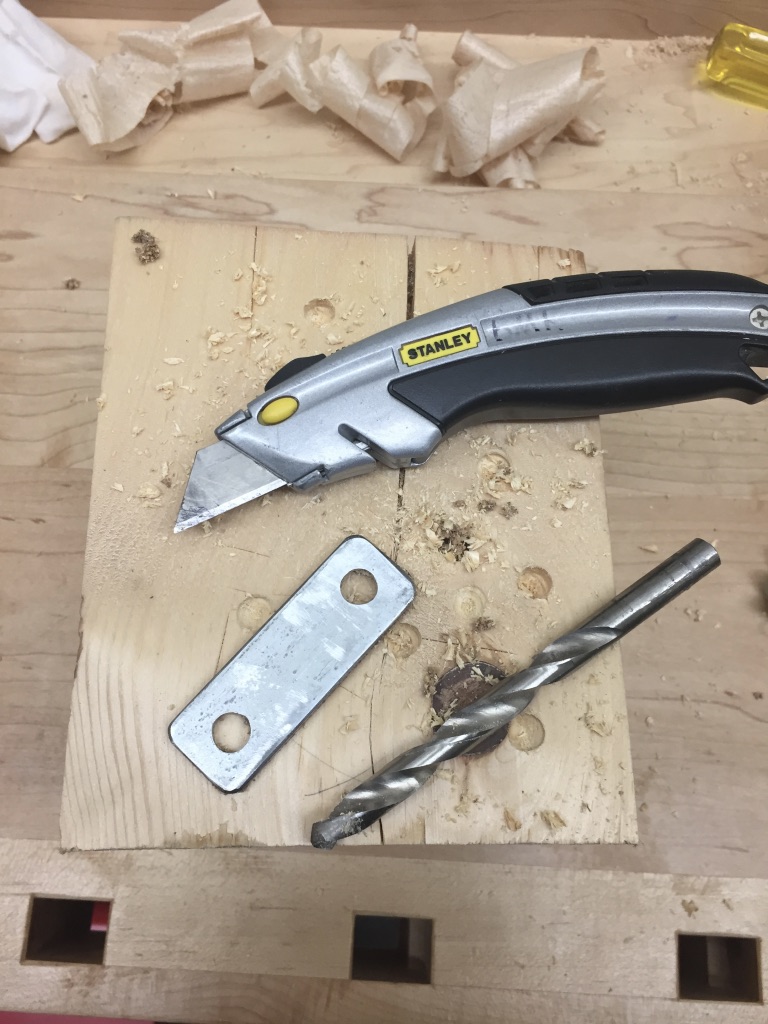
I cut the cork to rough size, affixed it to the plate and used a utility knife to cut off any excess around the edge and a 3/8″ drill bit to remove any waste inside the drilled out holes.
Use a utility knife to clean up the cork around the edges of the plate and the 3/8′ drill bit to clean up and cork in the holes
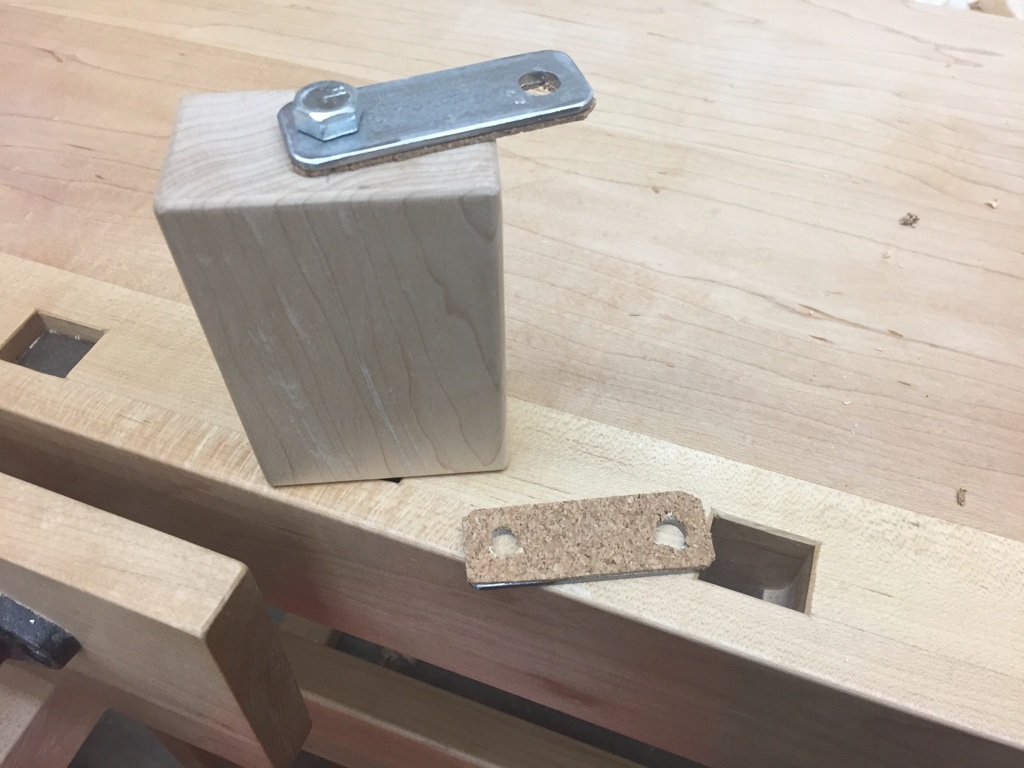
With the metalworking completed, it was time to install the nuts and bolts and try out the clamping blocks. One bolt goes through the top plate, the wood block, the bottom plate and is secured with a nut or five star knob. (I ordered some knobs from Rockler but at the time of this writing they’d didn’t arrive yet, once they come I’ll add some post script to show the clamps with easier to use knobs in place.) The other bolt goes through the top plate, the dog hole, the bottom plate and is secured with another nut.
Assembling a side clamp
Given the use of square dog holes on this bench, and the fact that that blocks are 1/2″ longer than the bench is thick, this allows the side clamps to pivot a few degrees in either direction. This gives you the ability to securely clamp some tapered or irregularly shaped pieces.
The blocks can be moved to different dog holes as needed or removed from the bench altogether. In testing these clamps on a few different items and shapes I found the blocks were surprisingly easy to use and held oversized items with ease.
Large objects are easily held between these side clamps
The Verdict: (So far…)
It was a fun project to build and experiment with. These clamps are useful for specialized clamping needs, such as large items, re-working the edges of a drawer box, planing dovetails flush, and similar operations.
Do I think they will get used every day? No. Do I think they can do a few jobs that would be tougher to do on the bench-top secured via bench dog, hold fast, face or shoulder vise? Yes.
For the small amount of wood, metal and time it took to make these side clamps I think they were a nice addition to my workbench.
If you build some side clamps for your workbench, please share what you thought of them in the comments below.
Take care,
-Bill Rainford
@TheRainford
P.S. If you’d liked to learn about the workbench featured in this post, please check out my related article in the February 2017 issue of Popular Woodworking Magazine which can be found here.
The best saw horses cannot be bought in a store, you have to build them. I’ve seen plastic saw horses bend and buckle under < 200 pounds of load. I’ve seen 2×4 saw horses with sheet metal couplers deform and crush.
When I was a student at NBSS one of the first projects we completed was building a pair of solid wood saw horses that could meet the heavy demands of a preservation carpenter. The school would load them up with more material than I ever thought a simple horse could hold. I was so impressed with how well they turned out I built 10 more while I was there and they have served me well over the years.
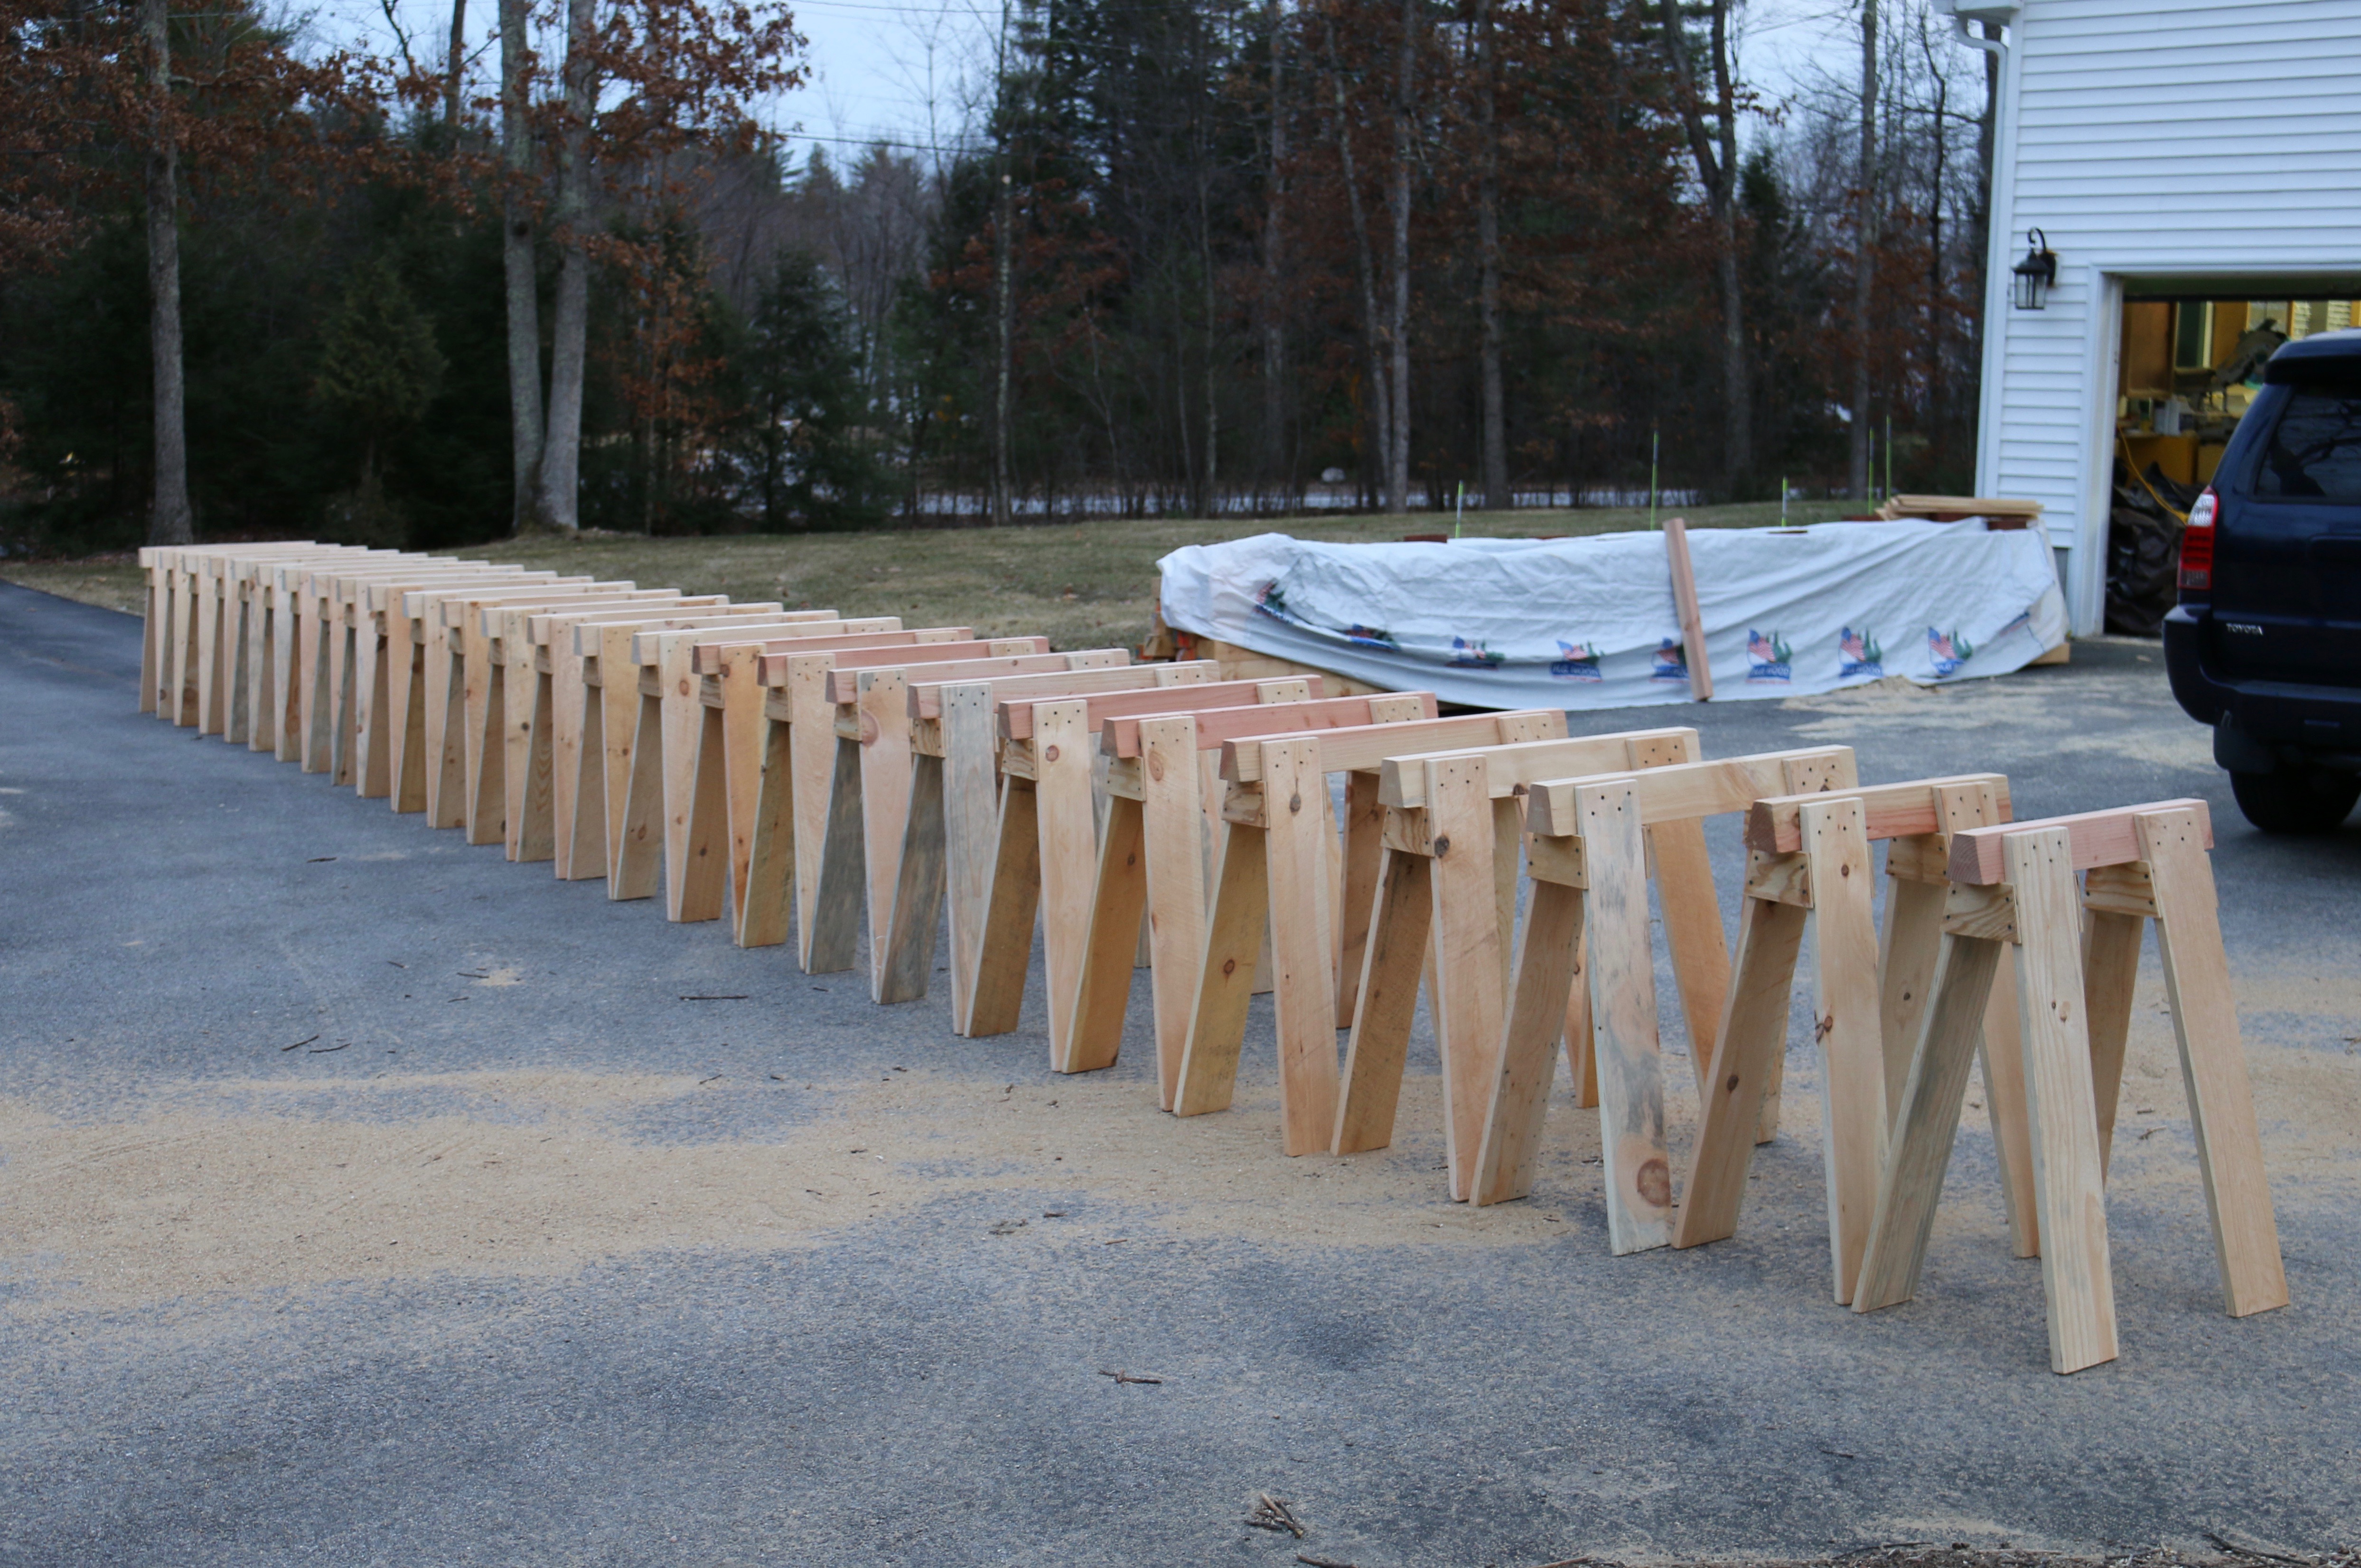
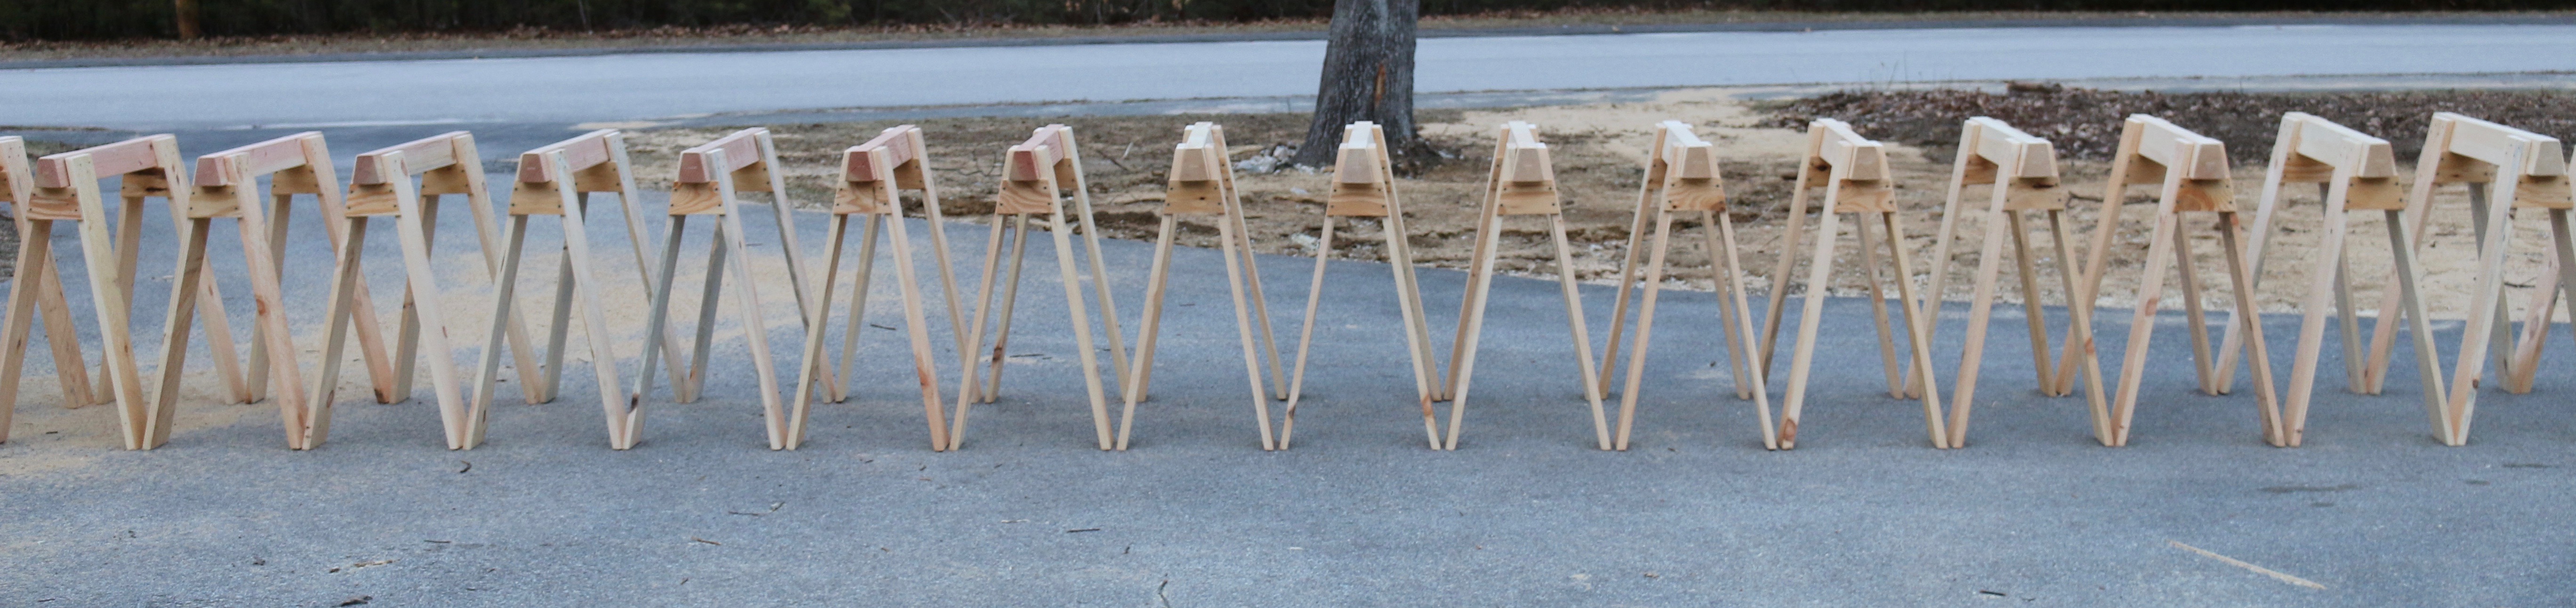
28 horses out on parade
Right now as I build a 24’x30′ timber framed barn out in the yard I built another 28 horses to hold all the timber off the ground for sorting and working through the piles. The post below covers how I built these heavy duty horses.
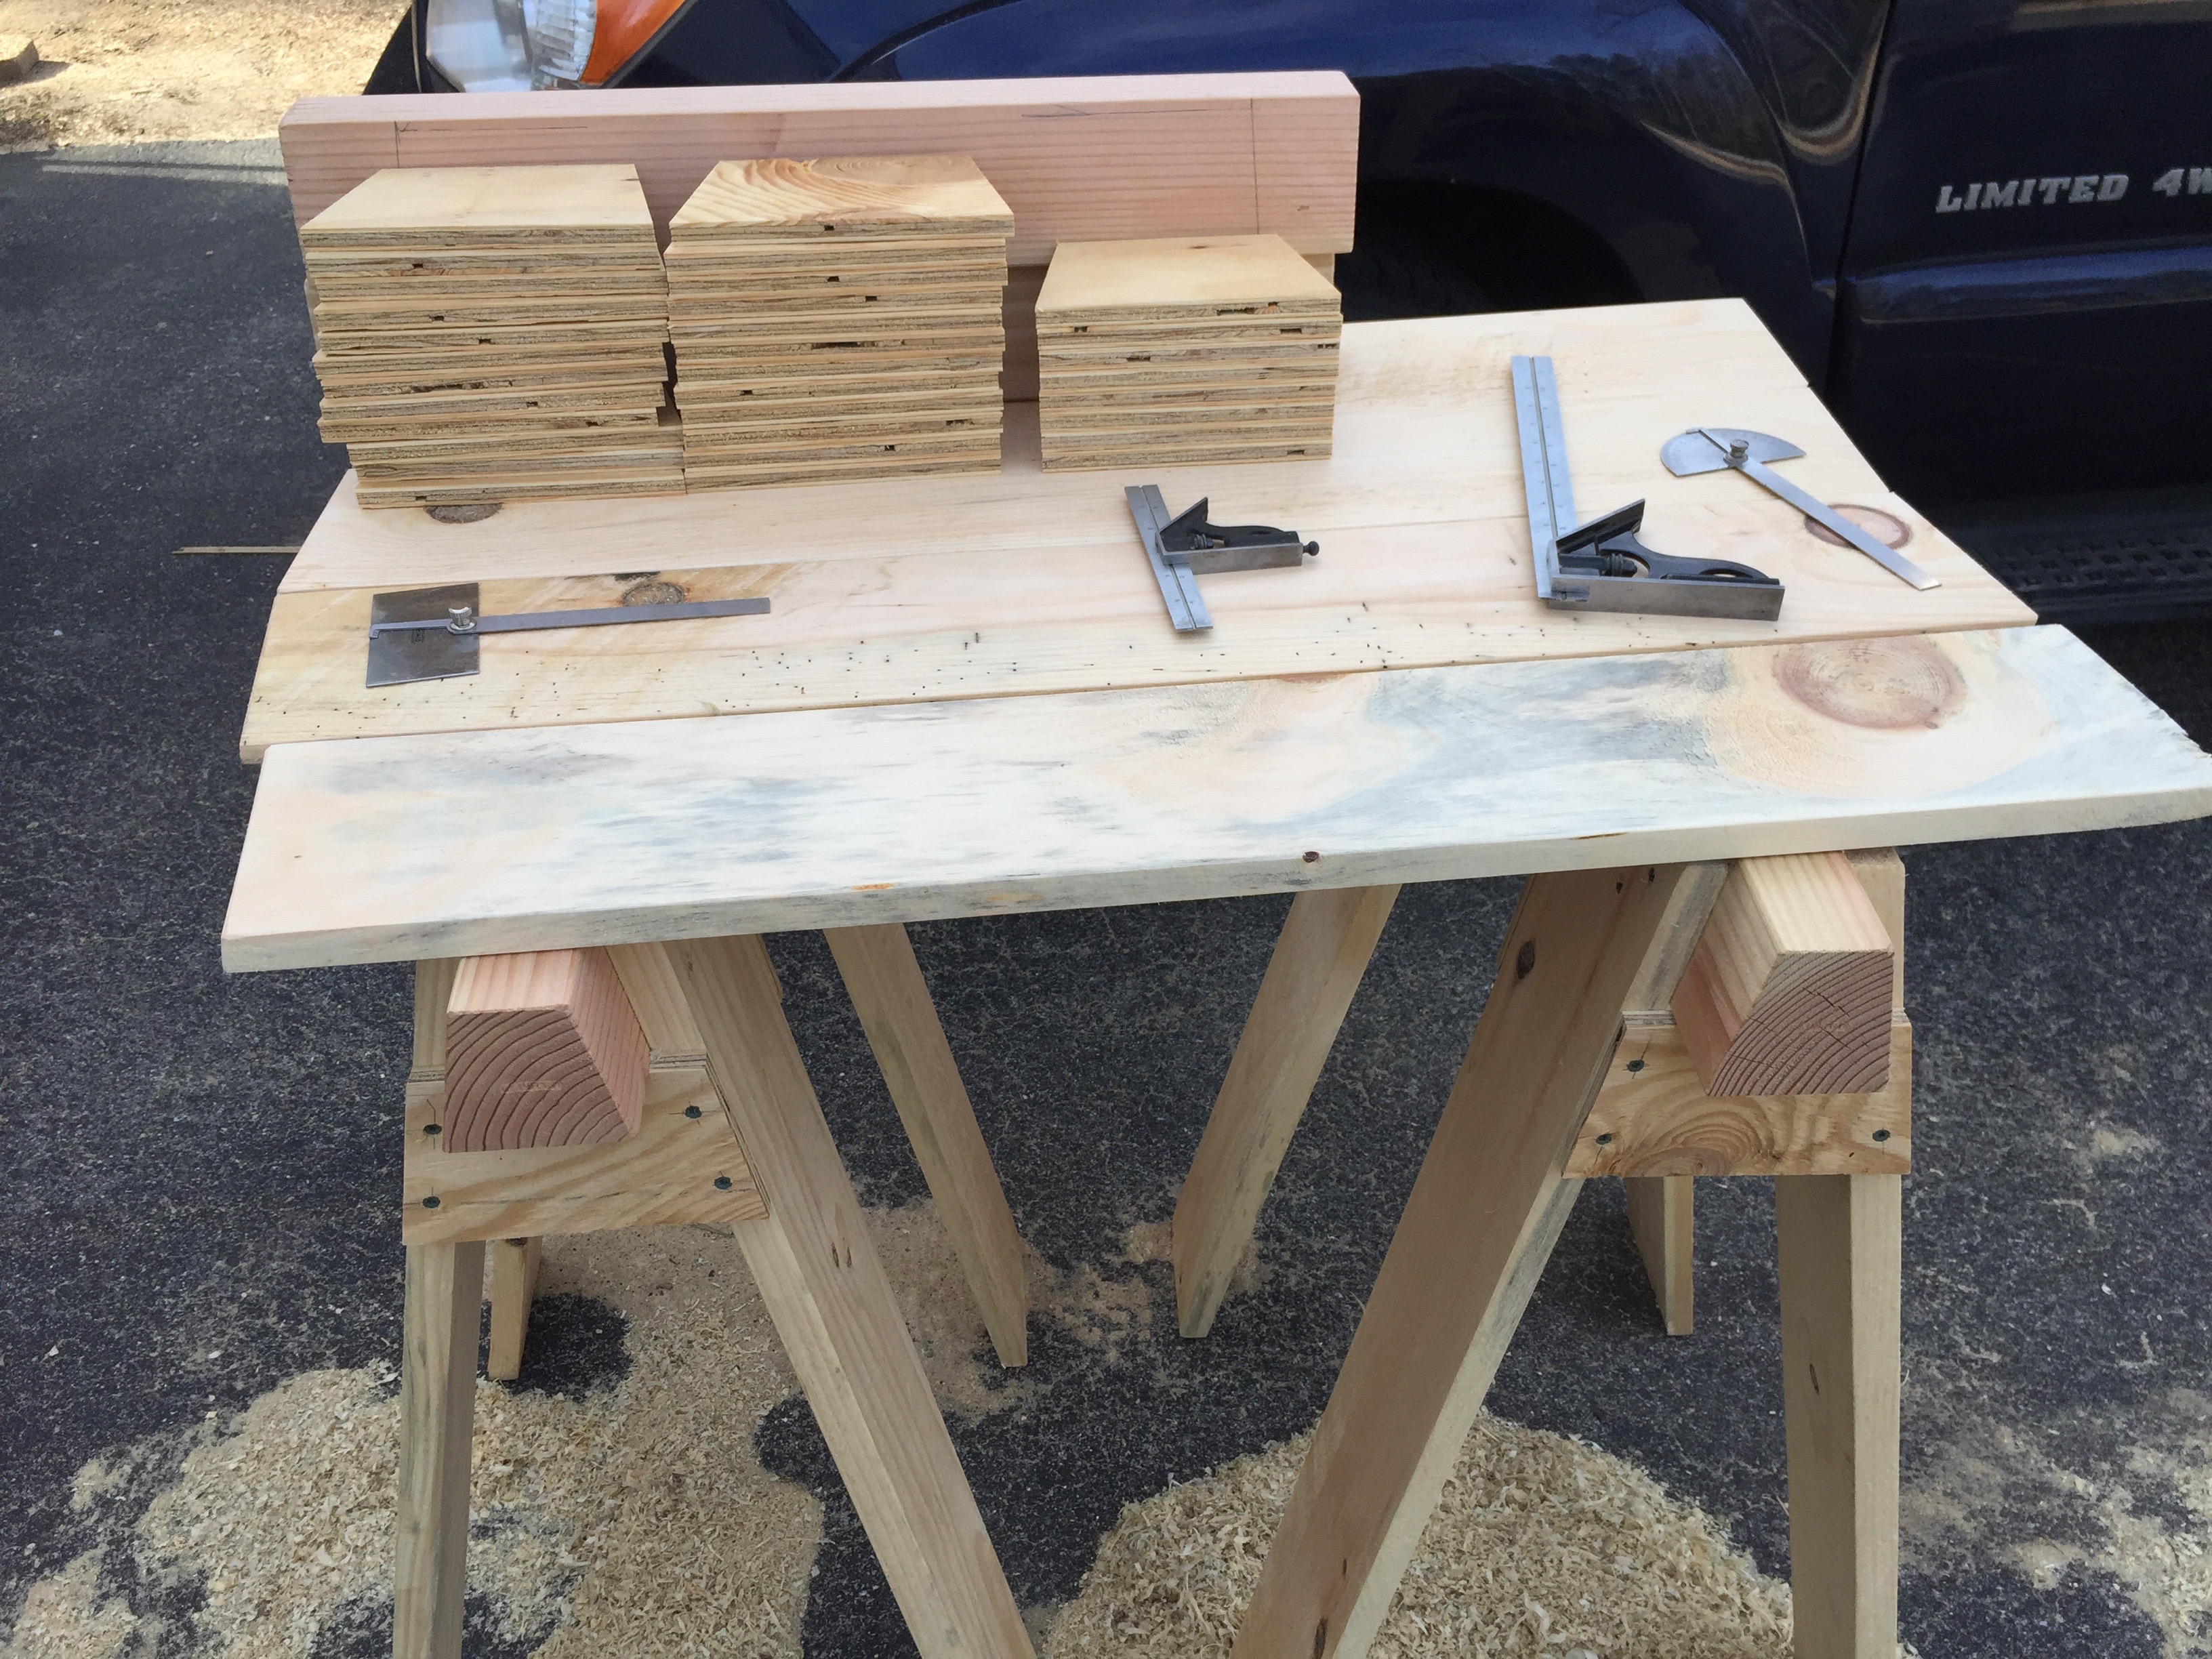
For a large run of horses like this it is important to run through each operation like a small assembly line, though at times it can feel like a slog — after cutting 112 legs you become a master at optimizing all of your operations.
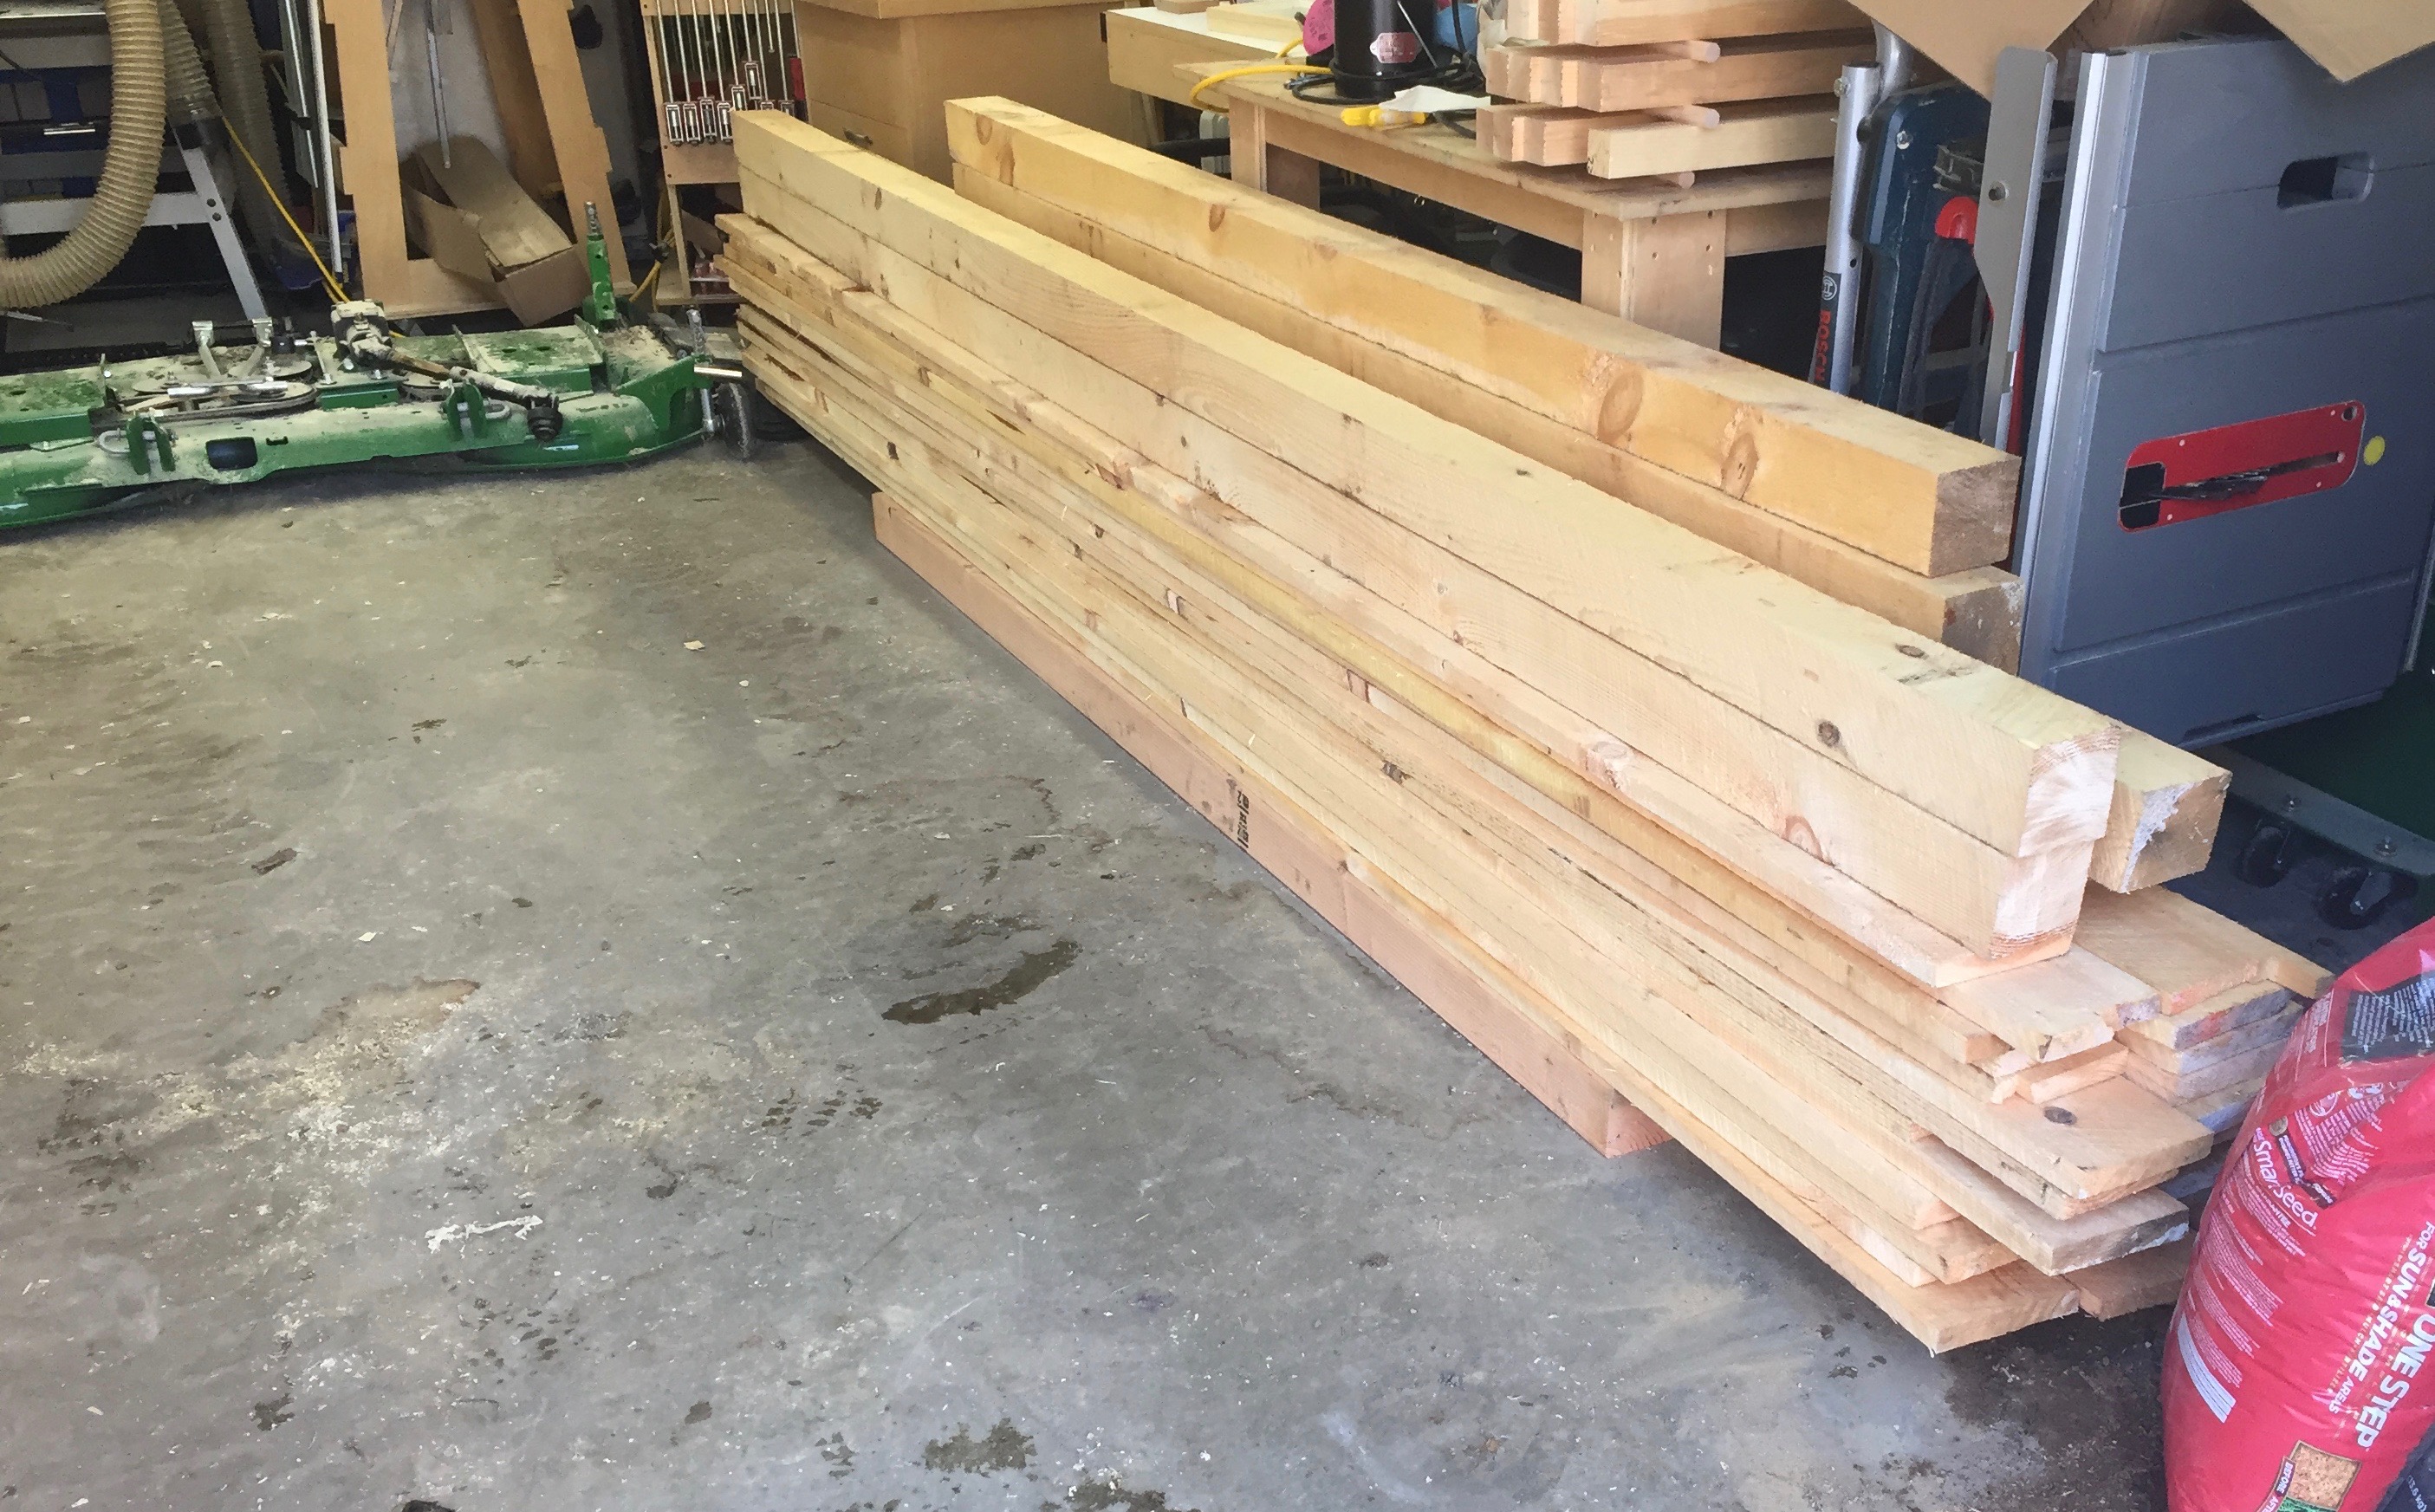
Large pile of green eastern white pine ready to go.
The wood of choice is green eastern white pine we buy from a local sawyer/lumber company. (Copeland And Sons Lumber). The beams (the work surface of a horse) is cut from a 4x4x12′, the legs are made from 1x6x12′ boards and the gussets are made from 1/2″ CDX plywood. Buying rough green stock like this from a sawyer helps keep the price per horse reasonable and the wood is full size, not nominal, so my 4×4 is 4″x4″ when I get it. I estimate that they cost me < $10 each in terms of materials.
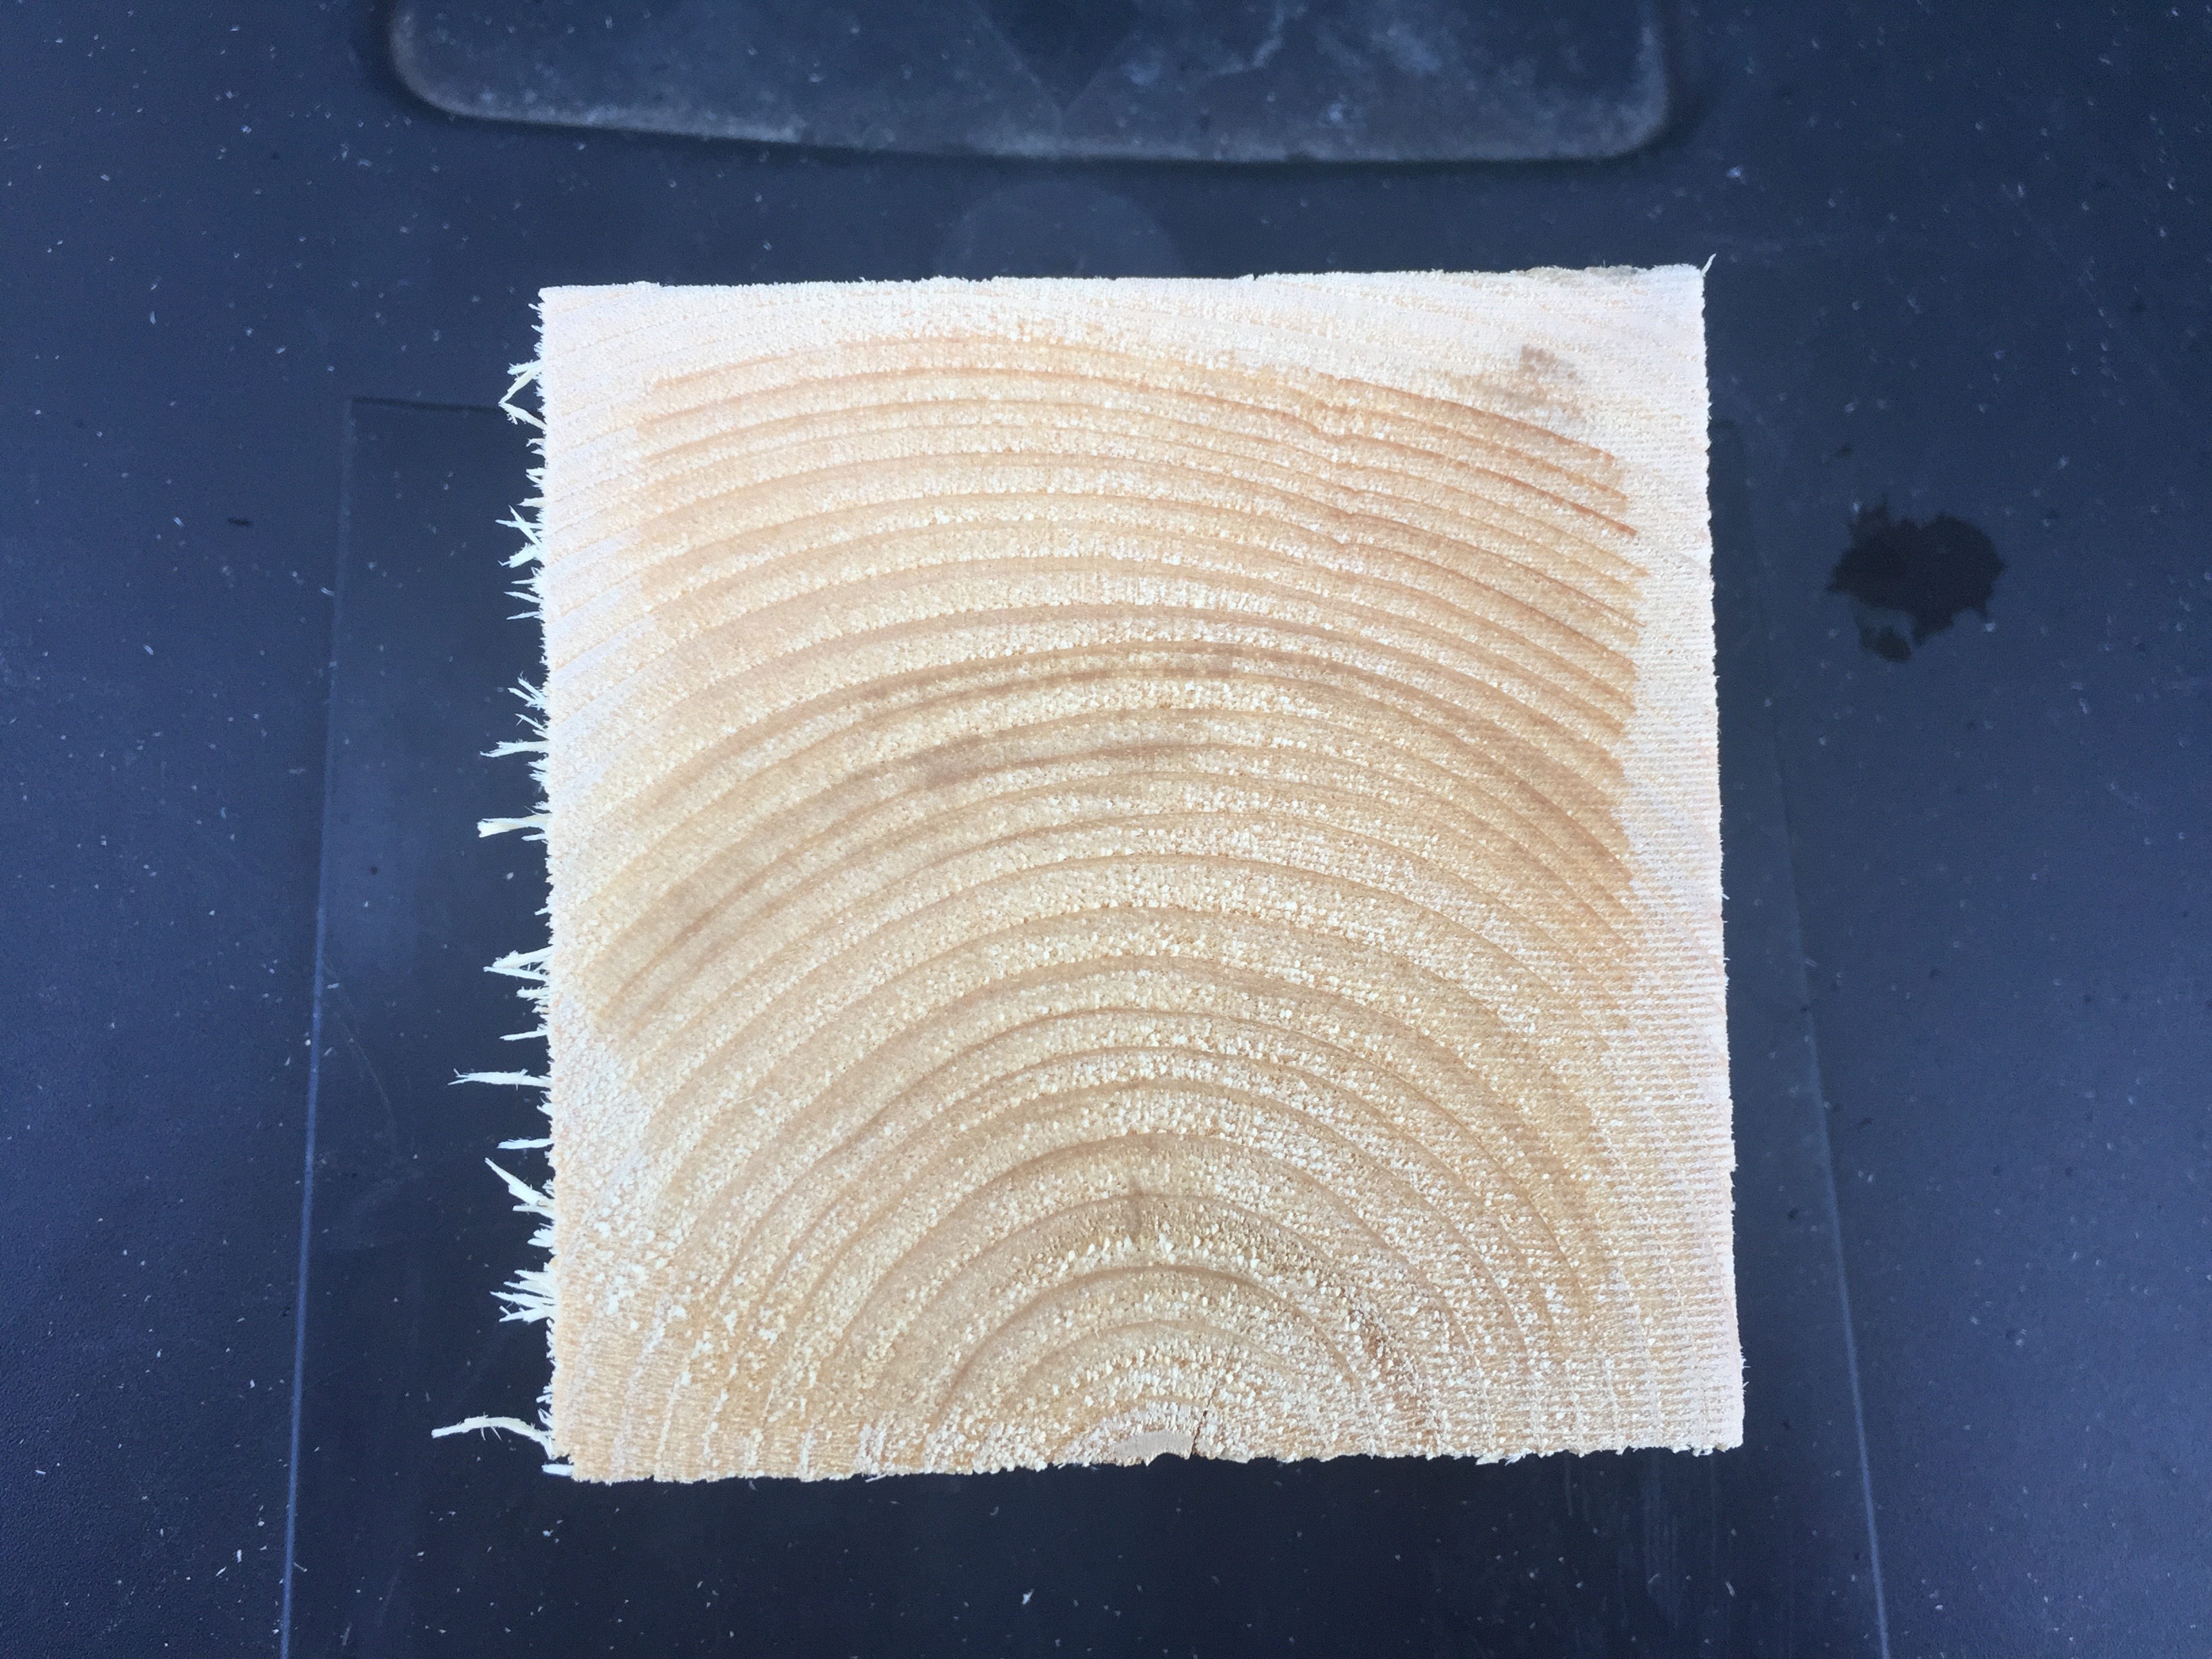
You can see how much moisture is still in the 4x4s
A note on working with green lumber, for horses or timber frames or similar projects — this wood was a tree possibly only a day or two before I get it, so if you use a power tool you may get some water spray on you. Be warned. Also make sure you wipe down and oil your tools appropriately so they do not rust. In the photo above you can see the outer 1/4″ or so that has dried a bit vs the wet center on this fresh cut off piece.
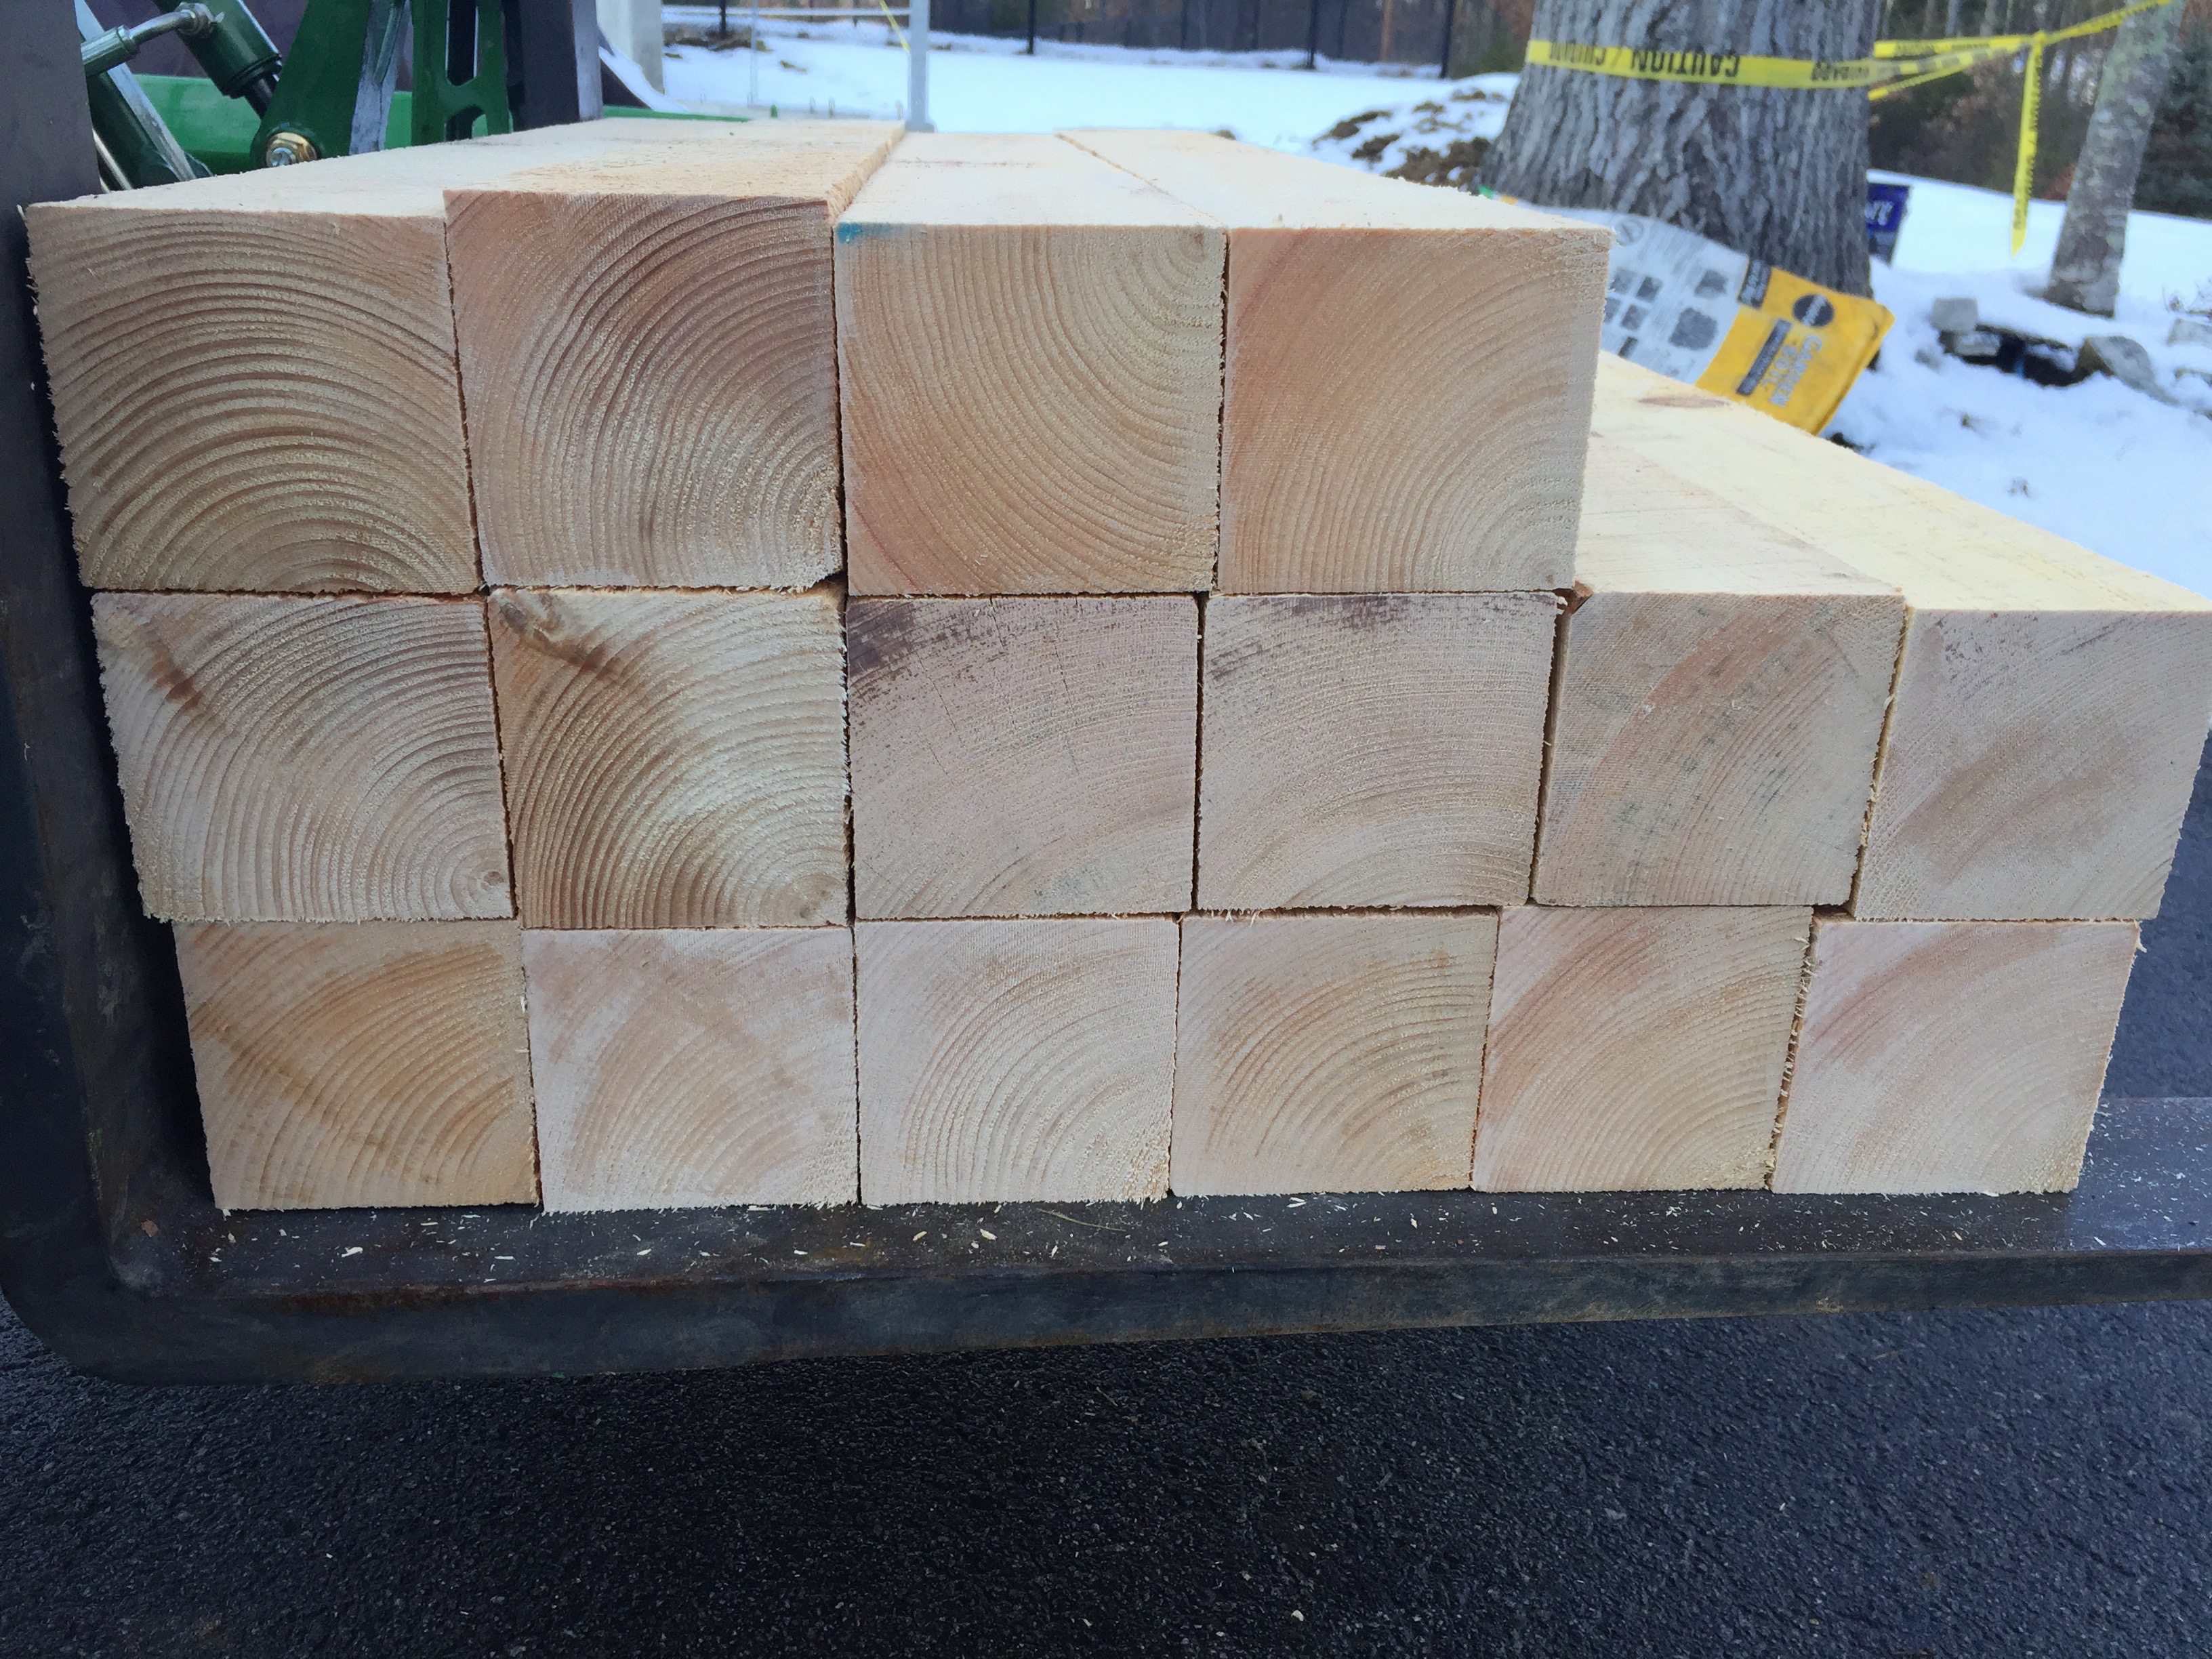
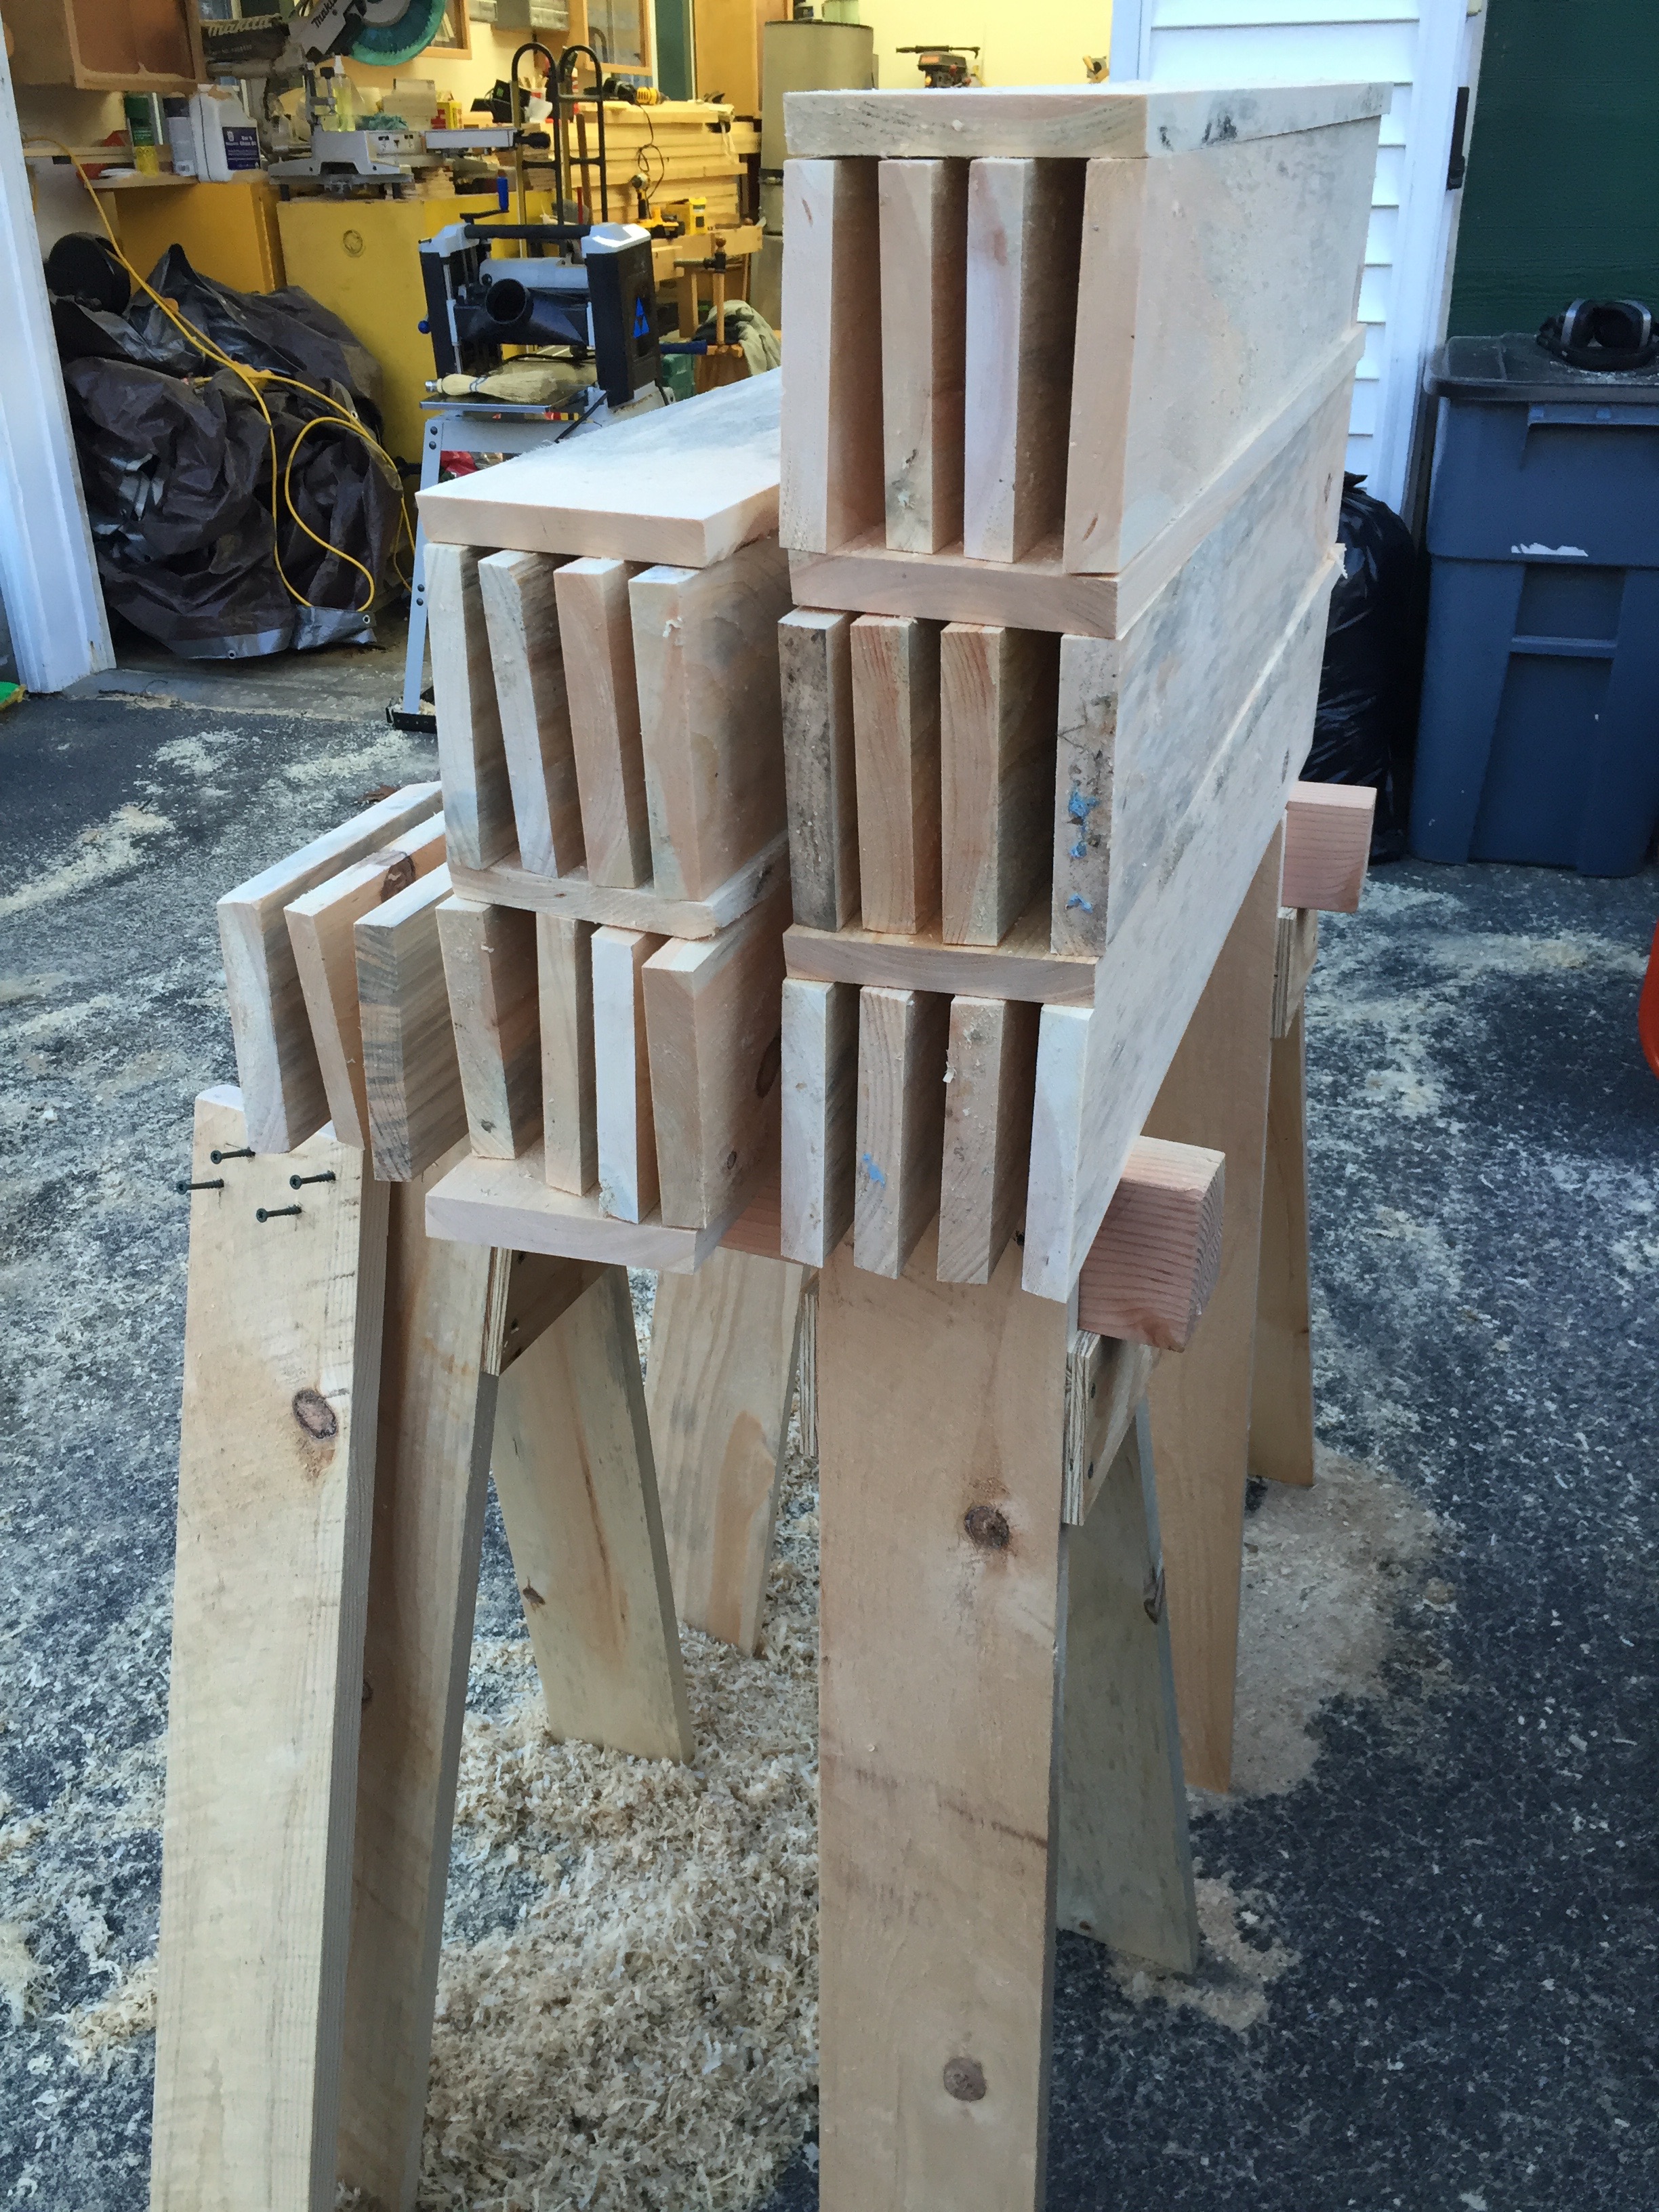
Stack of cut beams
I start by cutting the beams to 36″ long. I then cut a 12 degree bevel on two sides. If your table saw cannot cut a full 4″ on an angle you can cut as much as you can, snap off most of the waste and then use a jointer or portable power planer (like 3-1/4″ Makita Door planer) to even out the side.
I also stamped my name into the end grain of each beam with my name stamp. It makes it easy to tell my horses apart from say another friend from the school.
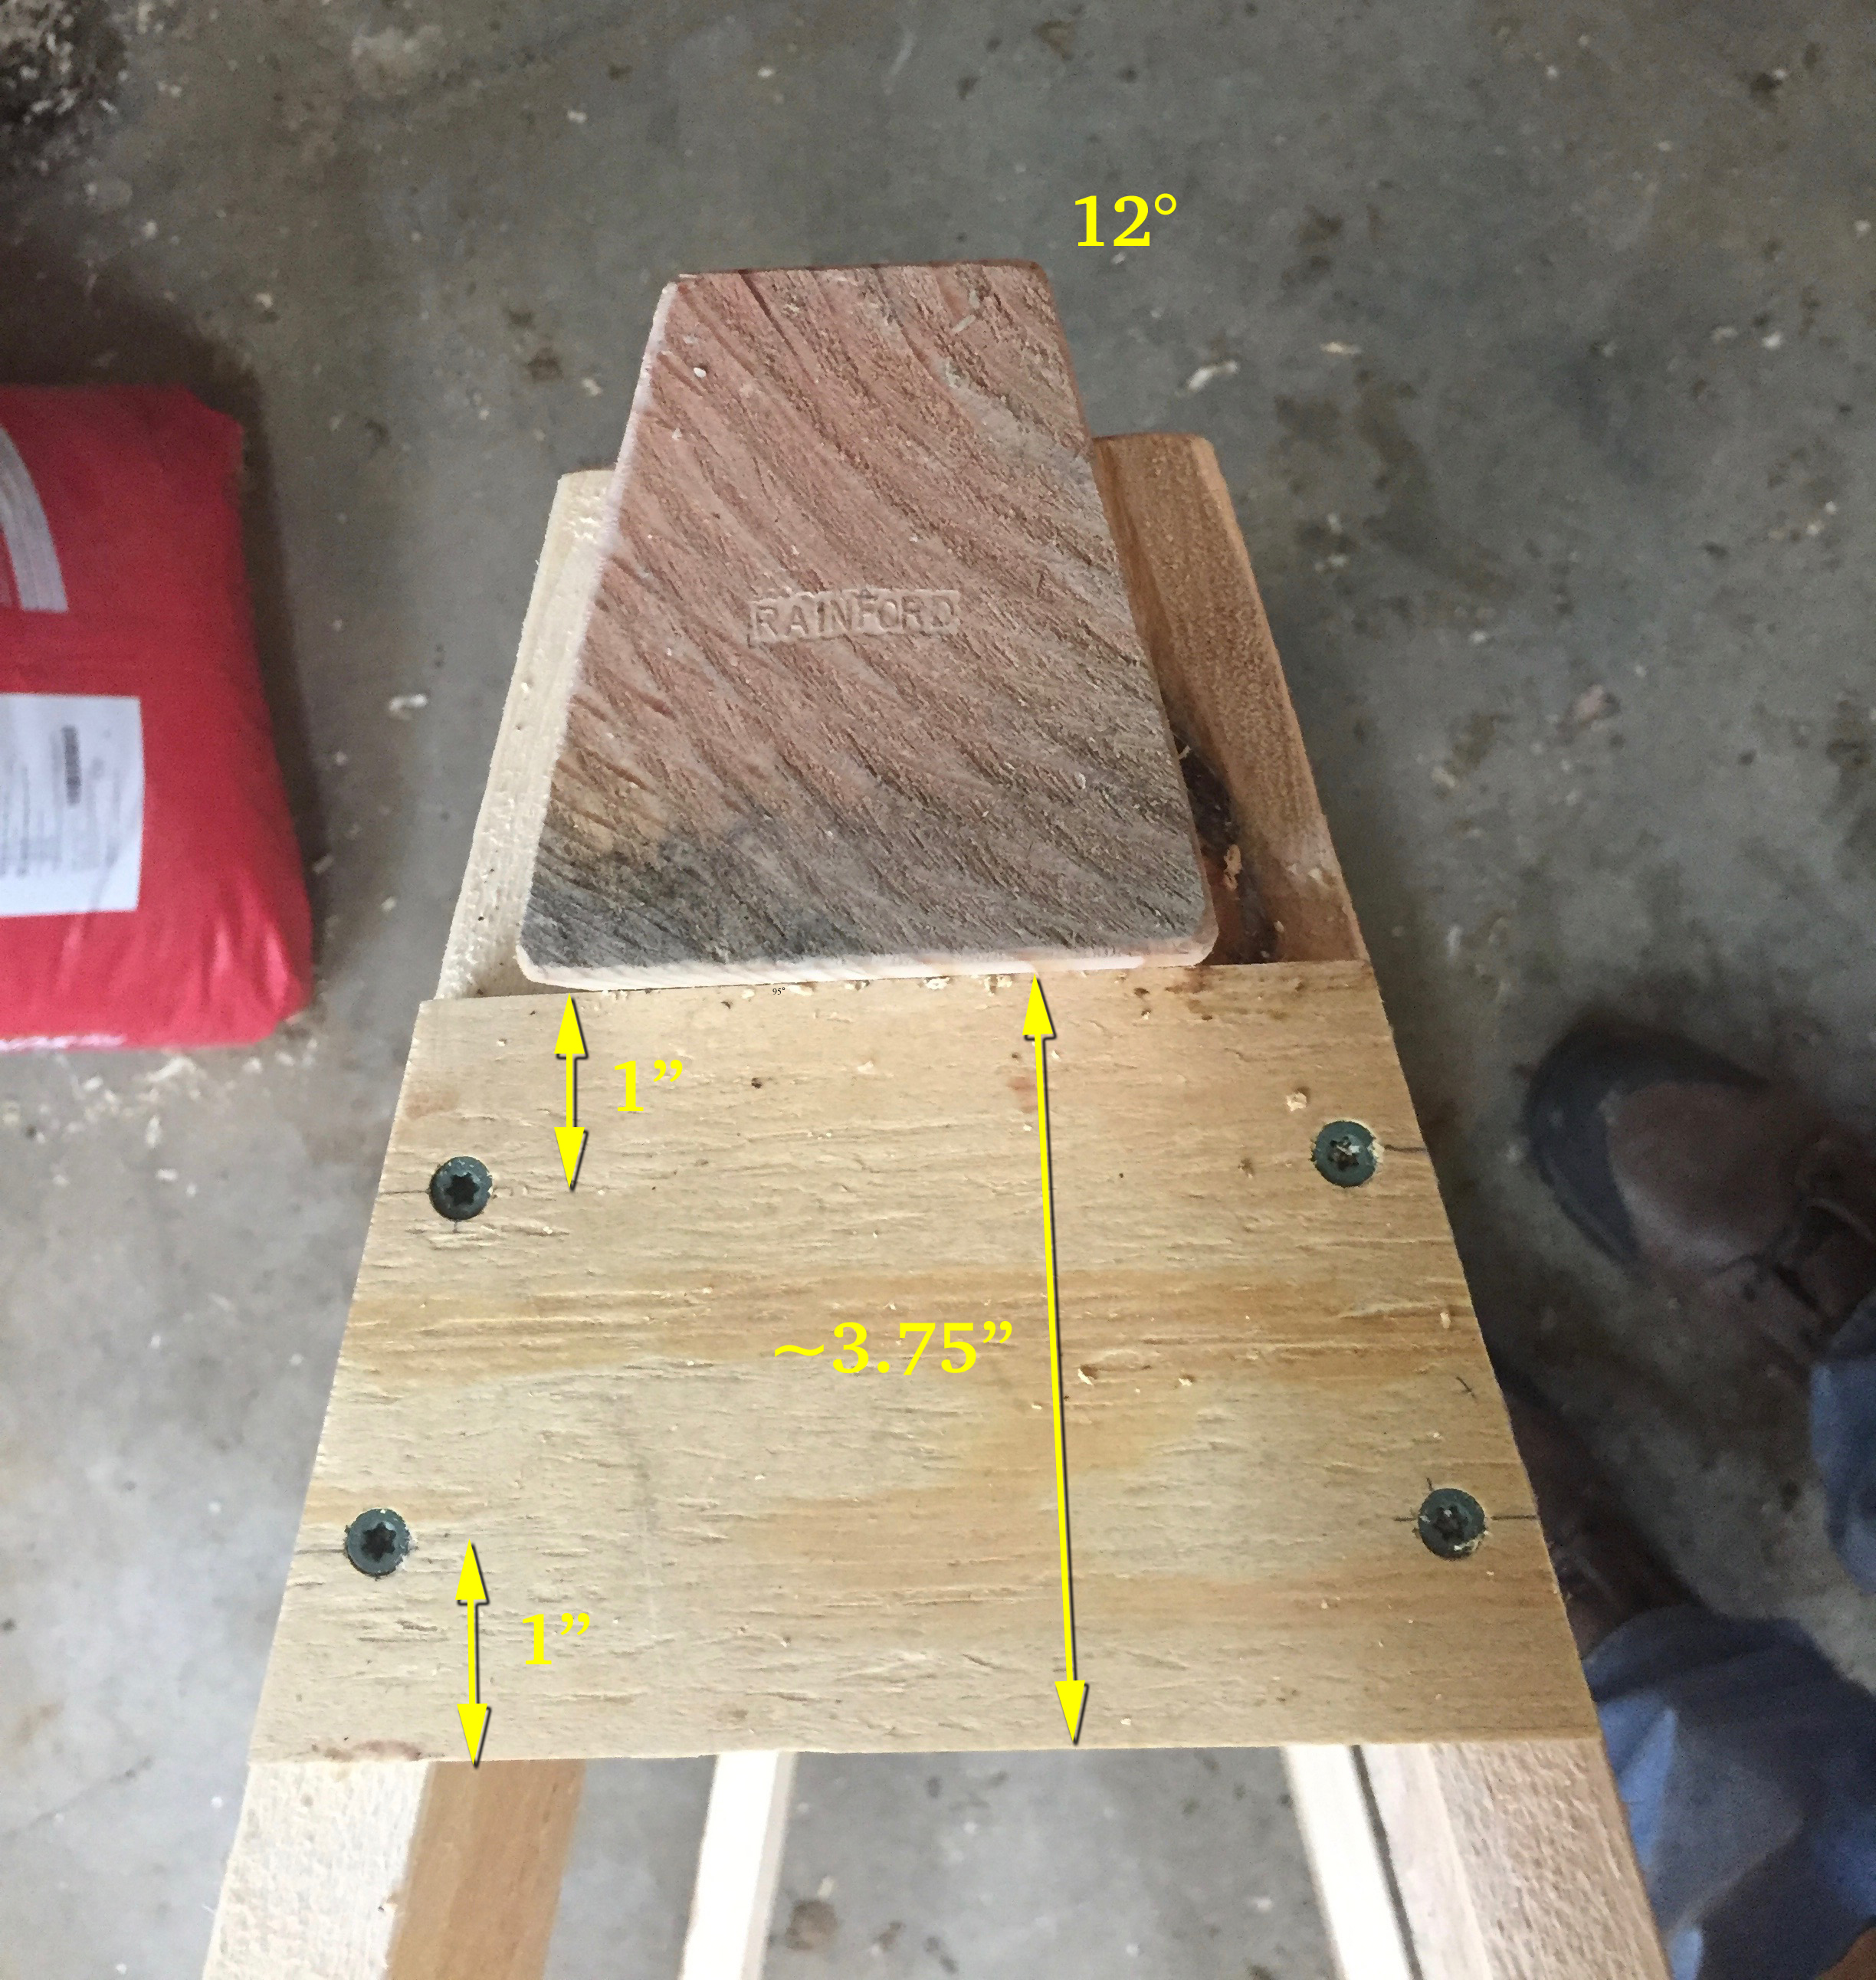
Beam and gusset with dimensions. I also used my namespace on the beam end grain.
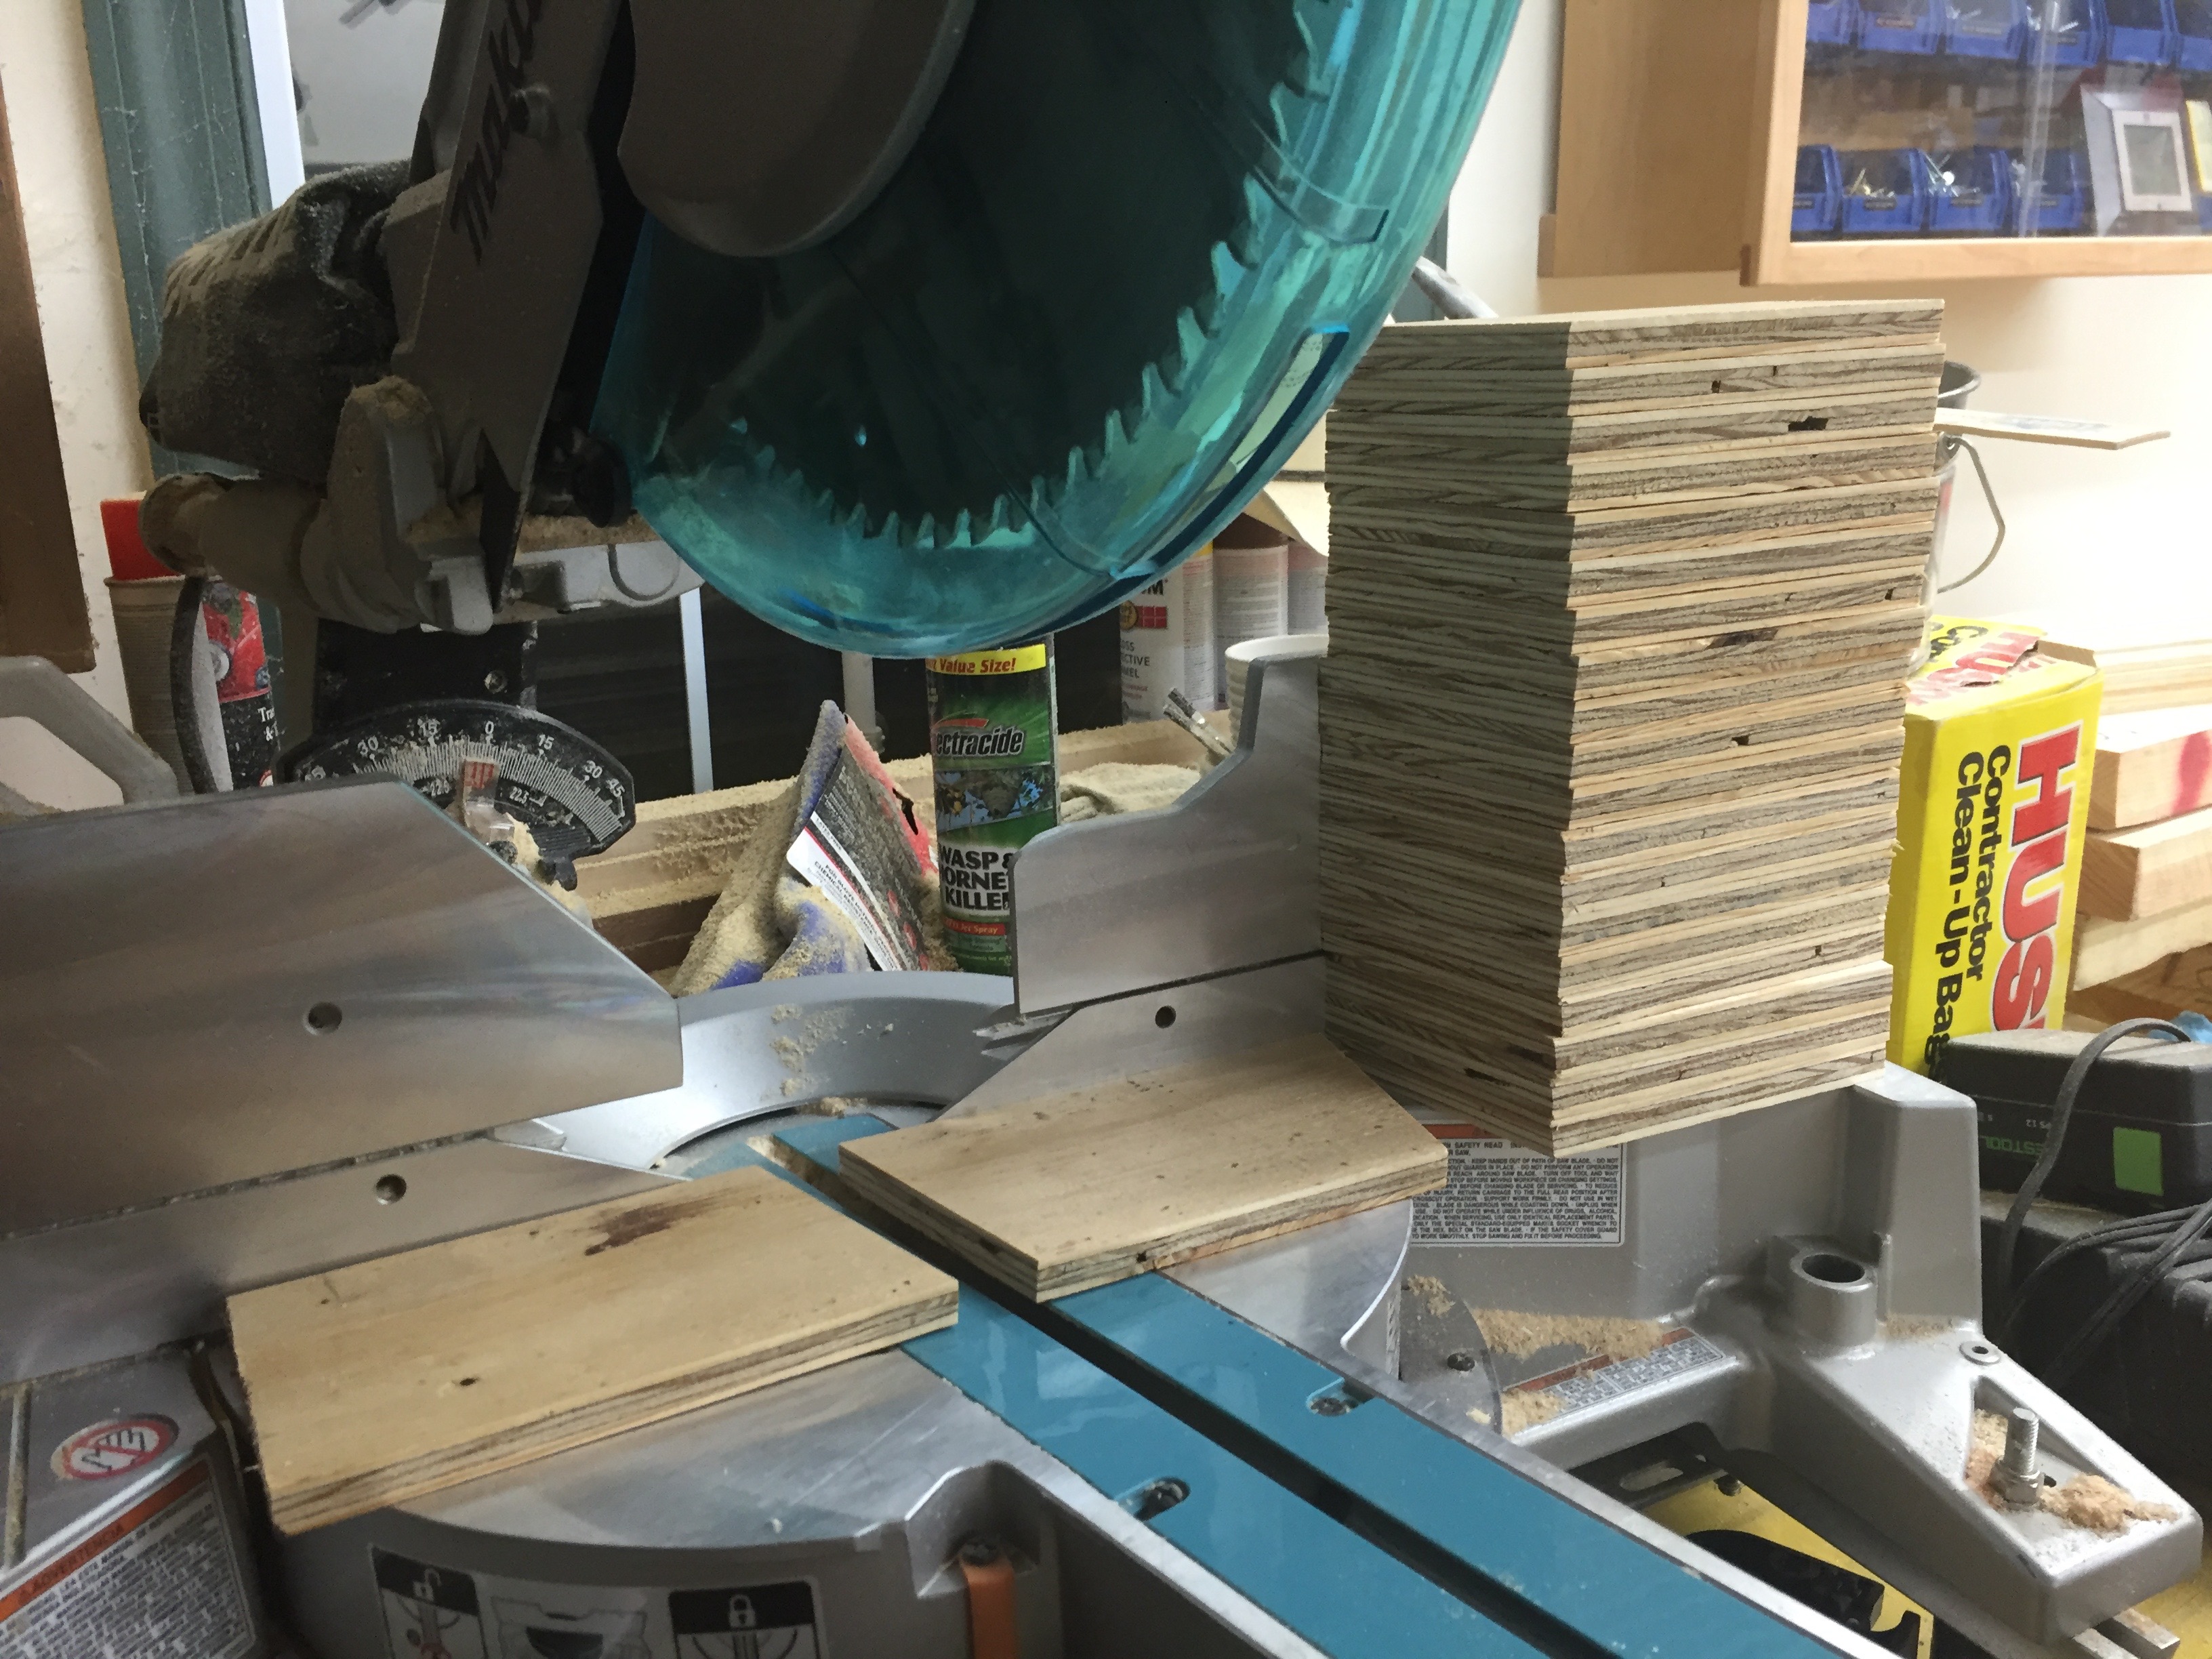
Next up I ripped my 4×8 sheet of 1/2″ CDX plywood into ~4″ wide strips. I then took a second pass on each strip with the blade set to a 5 degree angle. This allows the gussets to nestle up tightly against the beam during final assembly.
Cutting compound angles for the legs. 5 degrees and 12 degrees.
Next up I cut all the legs. I set the compound miter saw to cut at a left tilt of 5 degrees and a right rotation of 12 degrees. (See image above). The long side of each leg was cut to be 34.75″ long.
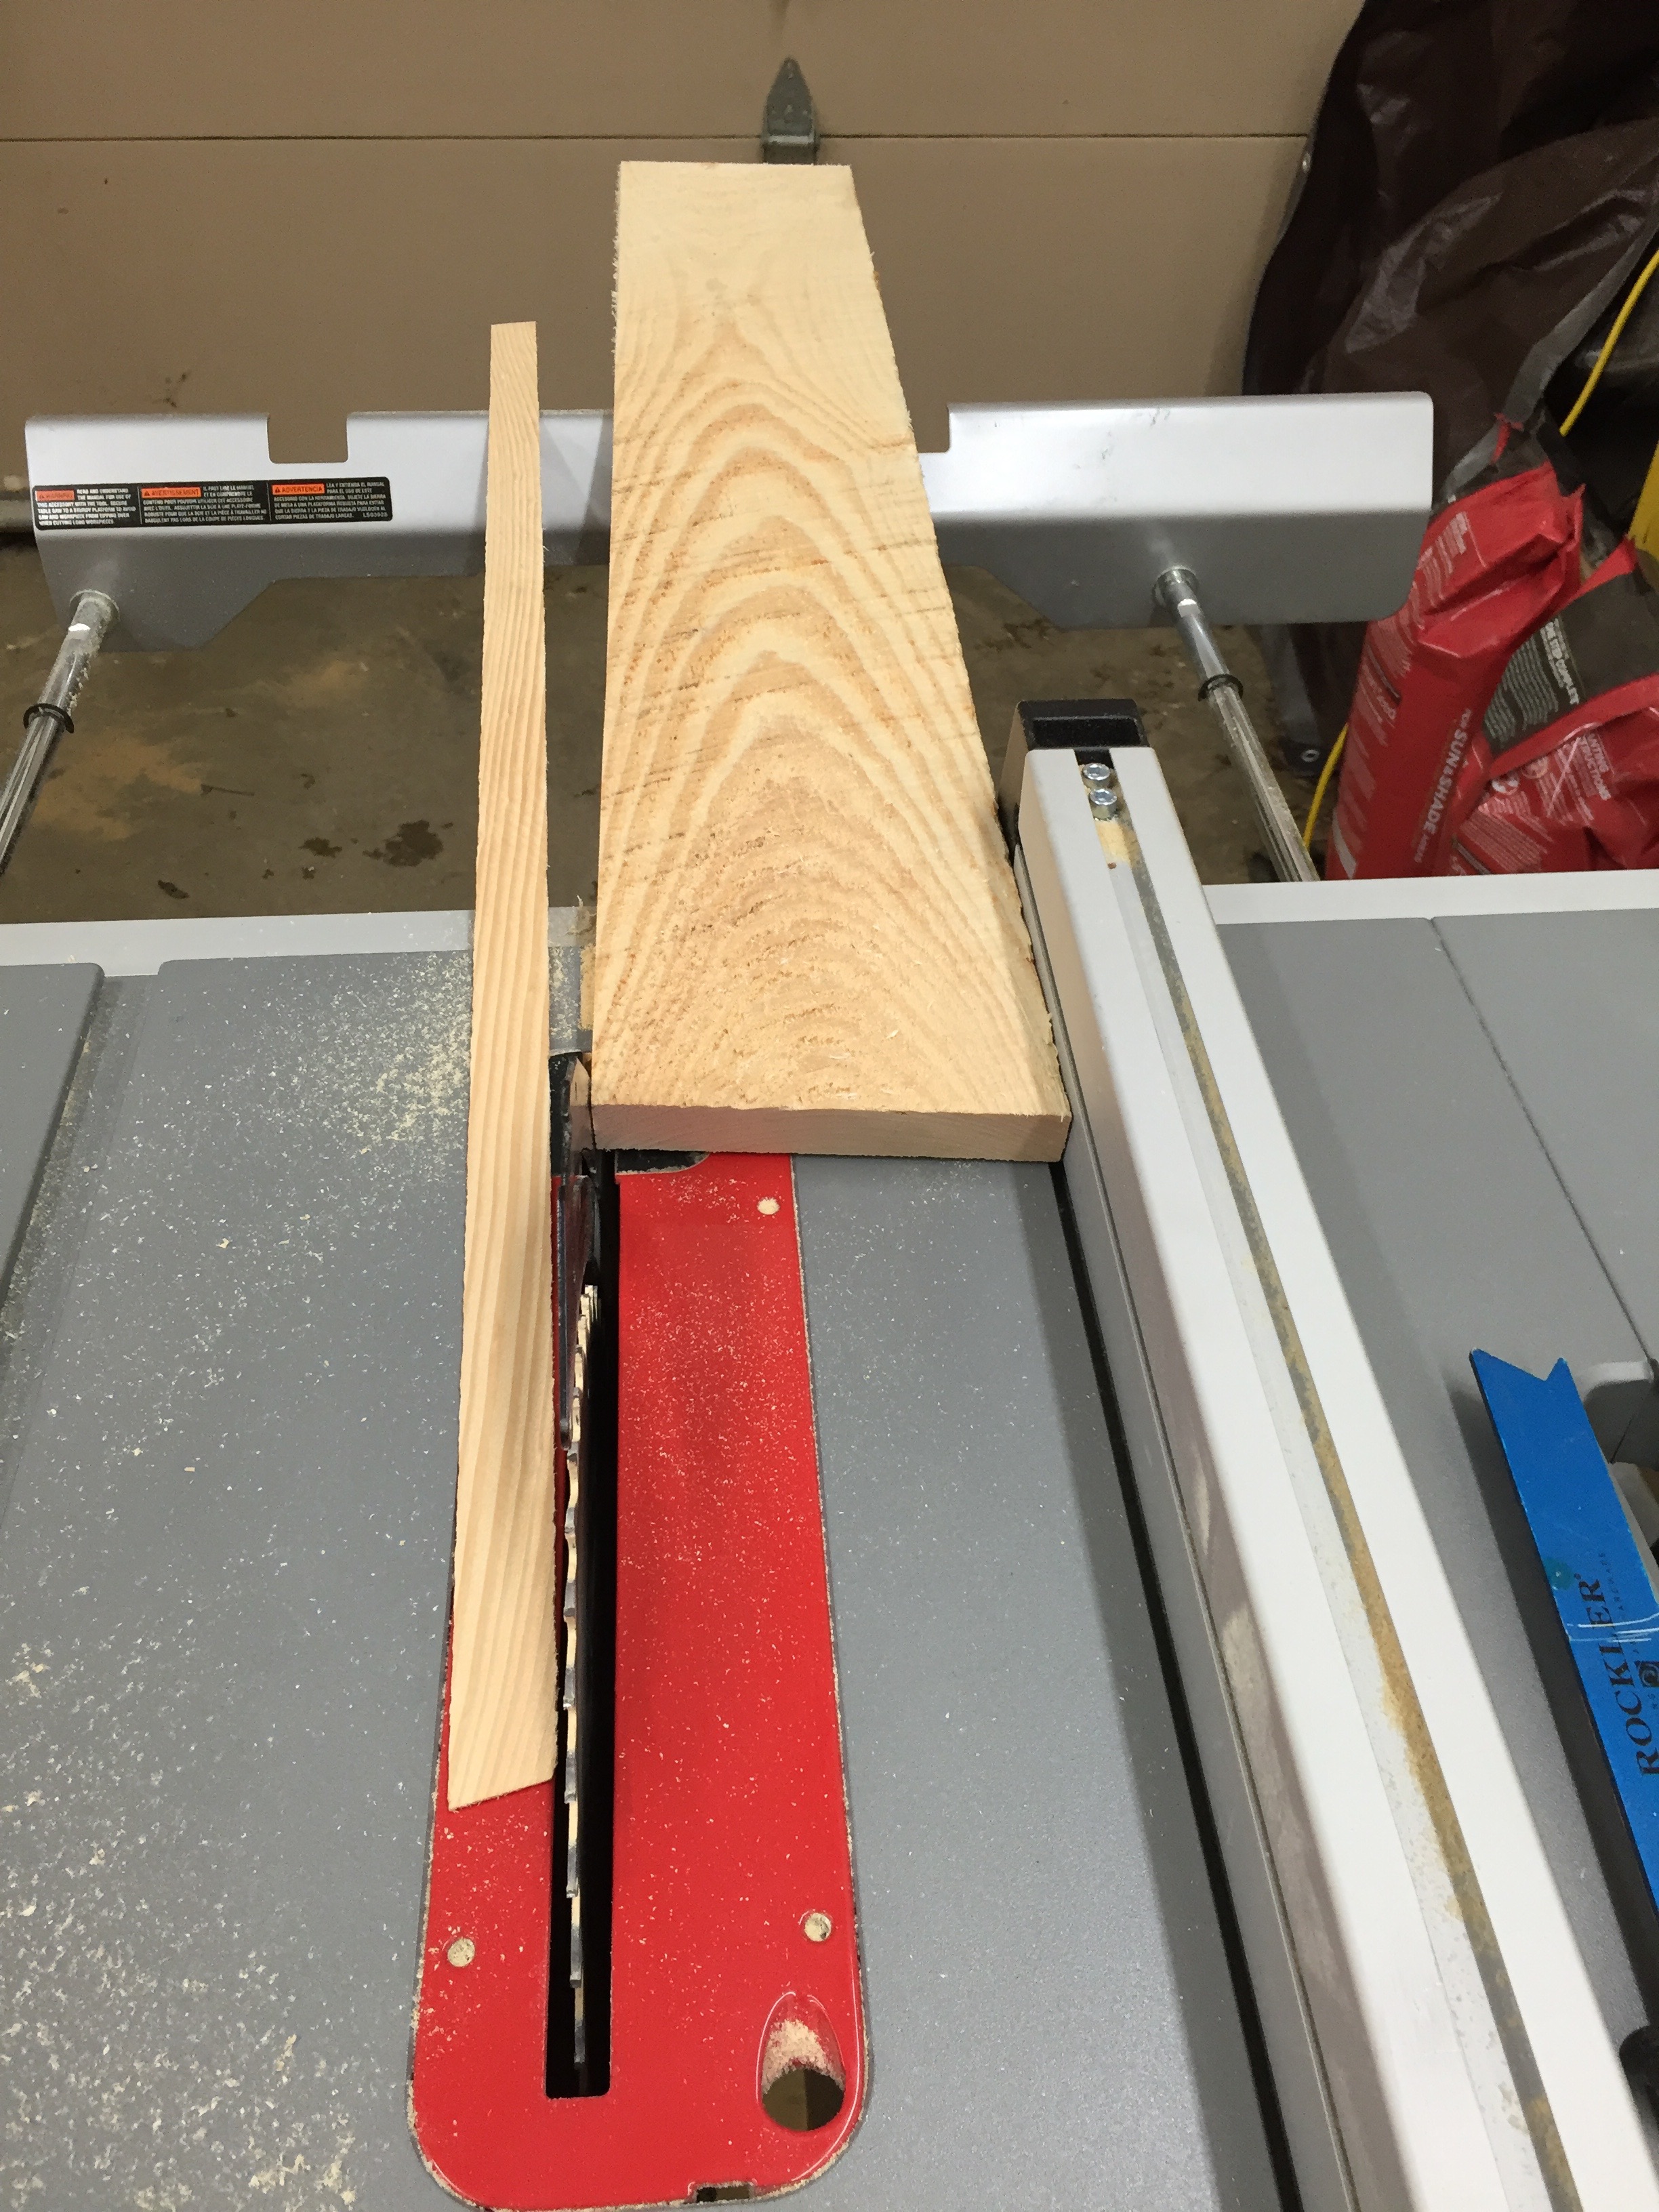
Ripping the legs to a consistent width
With all the legs cut I ripped the rough edge off of each board, then ripped the other side so all the boards landed at a consistent 5.5″ width.
Stacks of cut legs
You don’t have to plane the boards to thickness if you don’t want to. Leaving them as thick as possible added to the strength and I am not thrilled about passing green wood though my cast iron tools and into my dust collection system. My site chop saw and portable table saw both have aluminum tops which deal better with the wet wood.
112 legs ready to go
All the legs are the same, though above I stacked them to make sure I had a correct number for all the horses I planned to build. I also used a low angle block plane to break all the edges on the boards since they will be handled many times over the years and you don’t want any splinters.
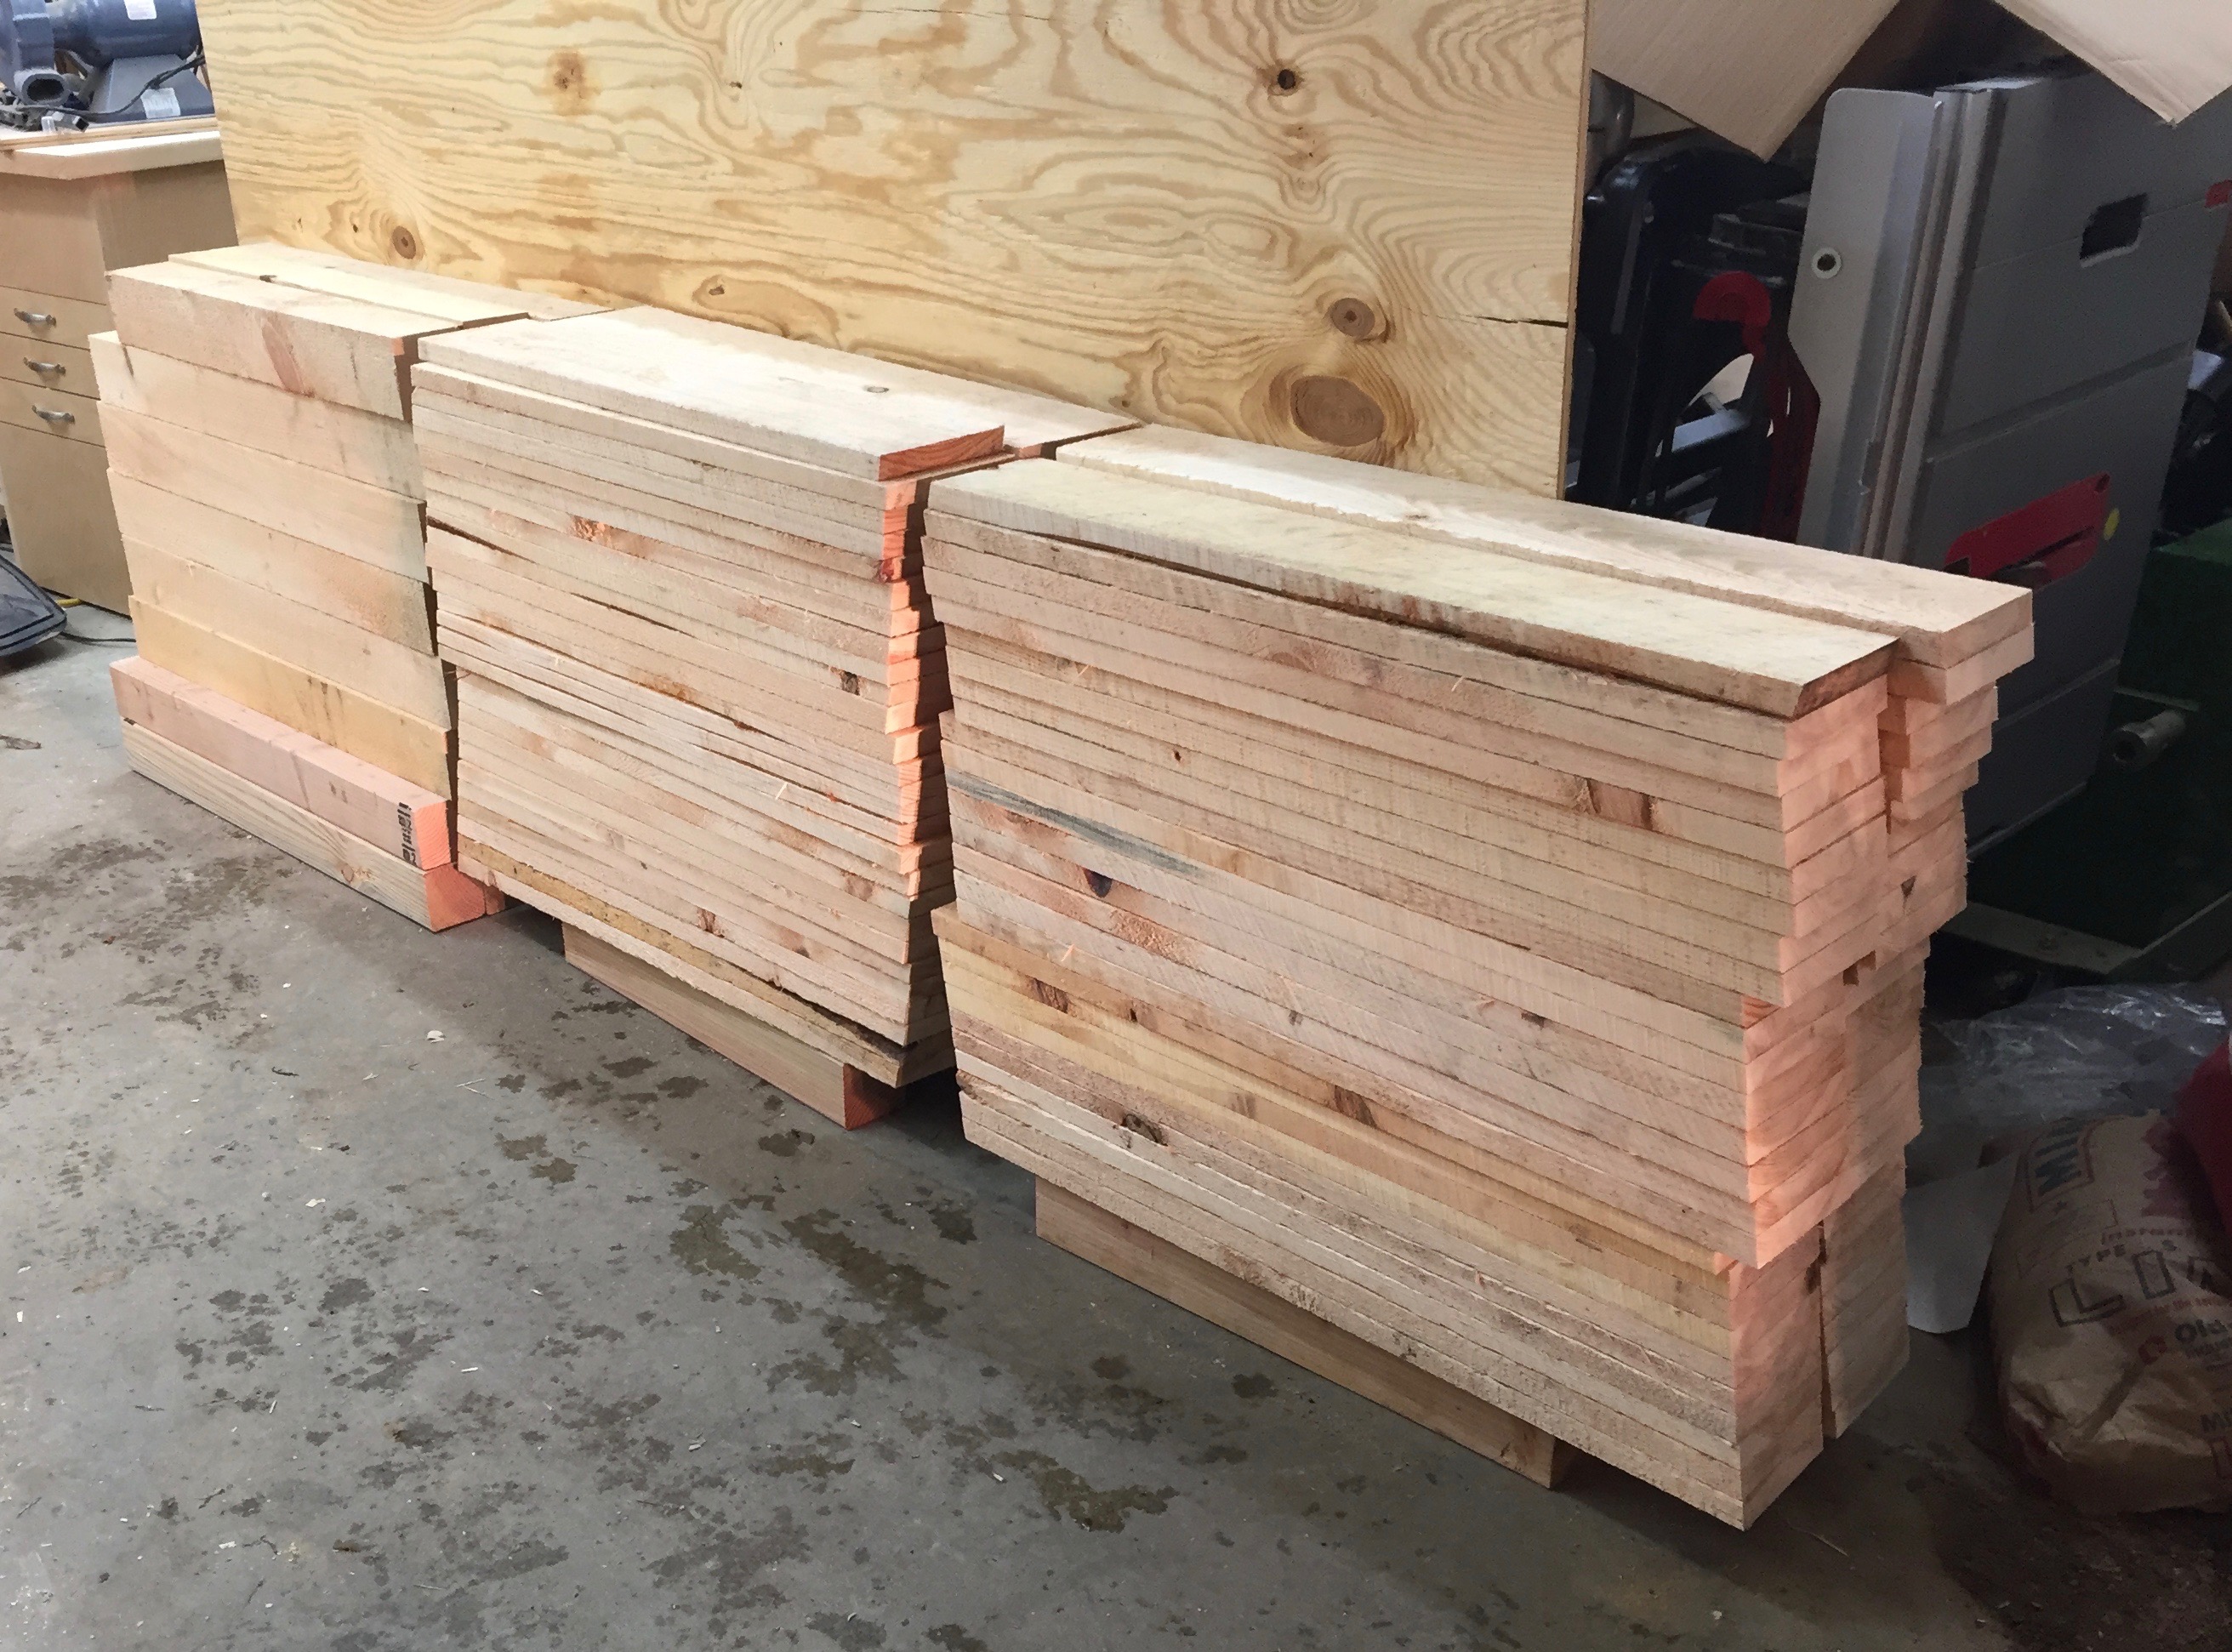
Stacks of cut legs and beams back in the shop
I then brought my wood into the heated shop as we were getting some snow and stacked them as you see above. This was a big mistake as I’ll describe later. I planned to be out there the next day but with snow and a baby in the house they sat out there for a week. If you bring sopping wet/green wood into a heated shop, make sure you sticker them so air can flow around all the edges and the wood can dry evenly.
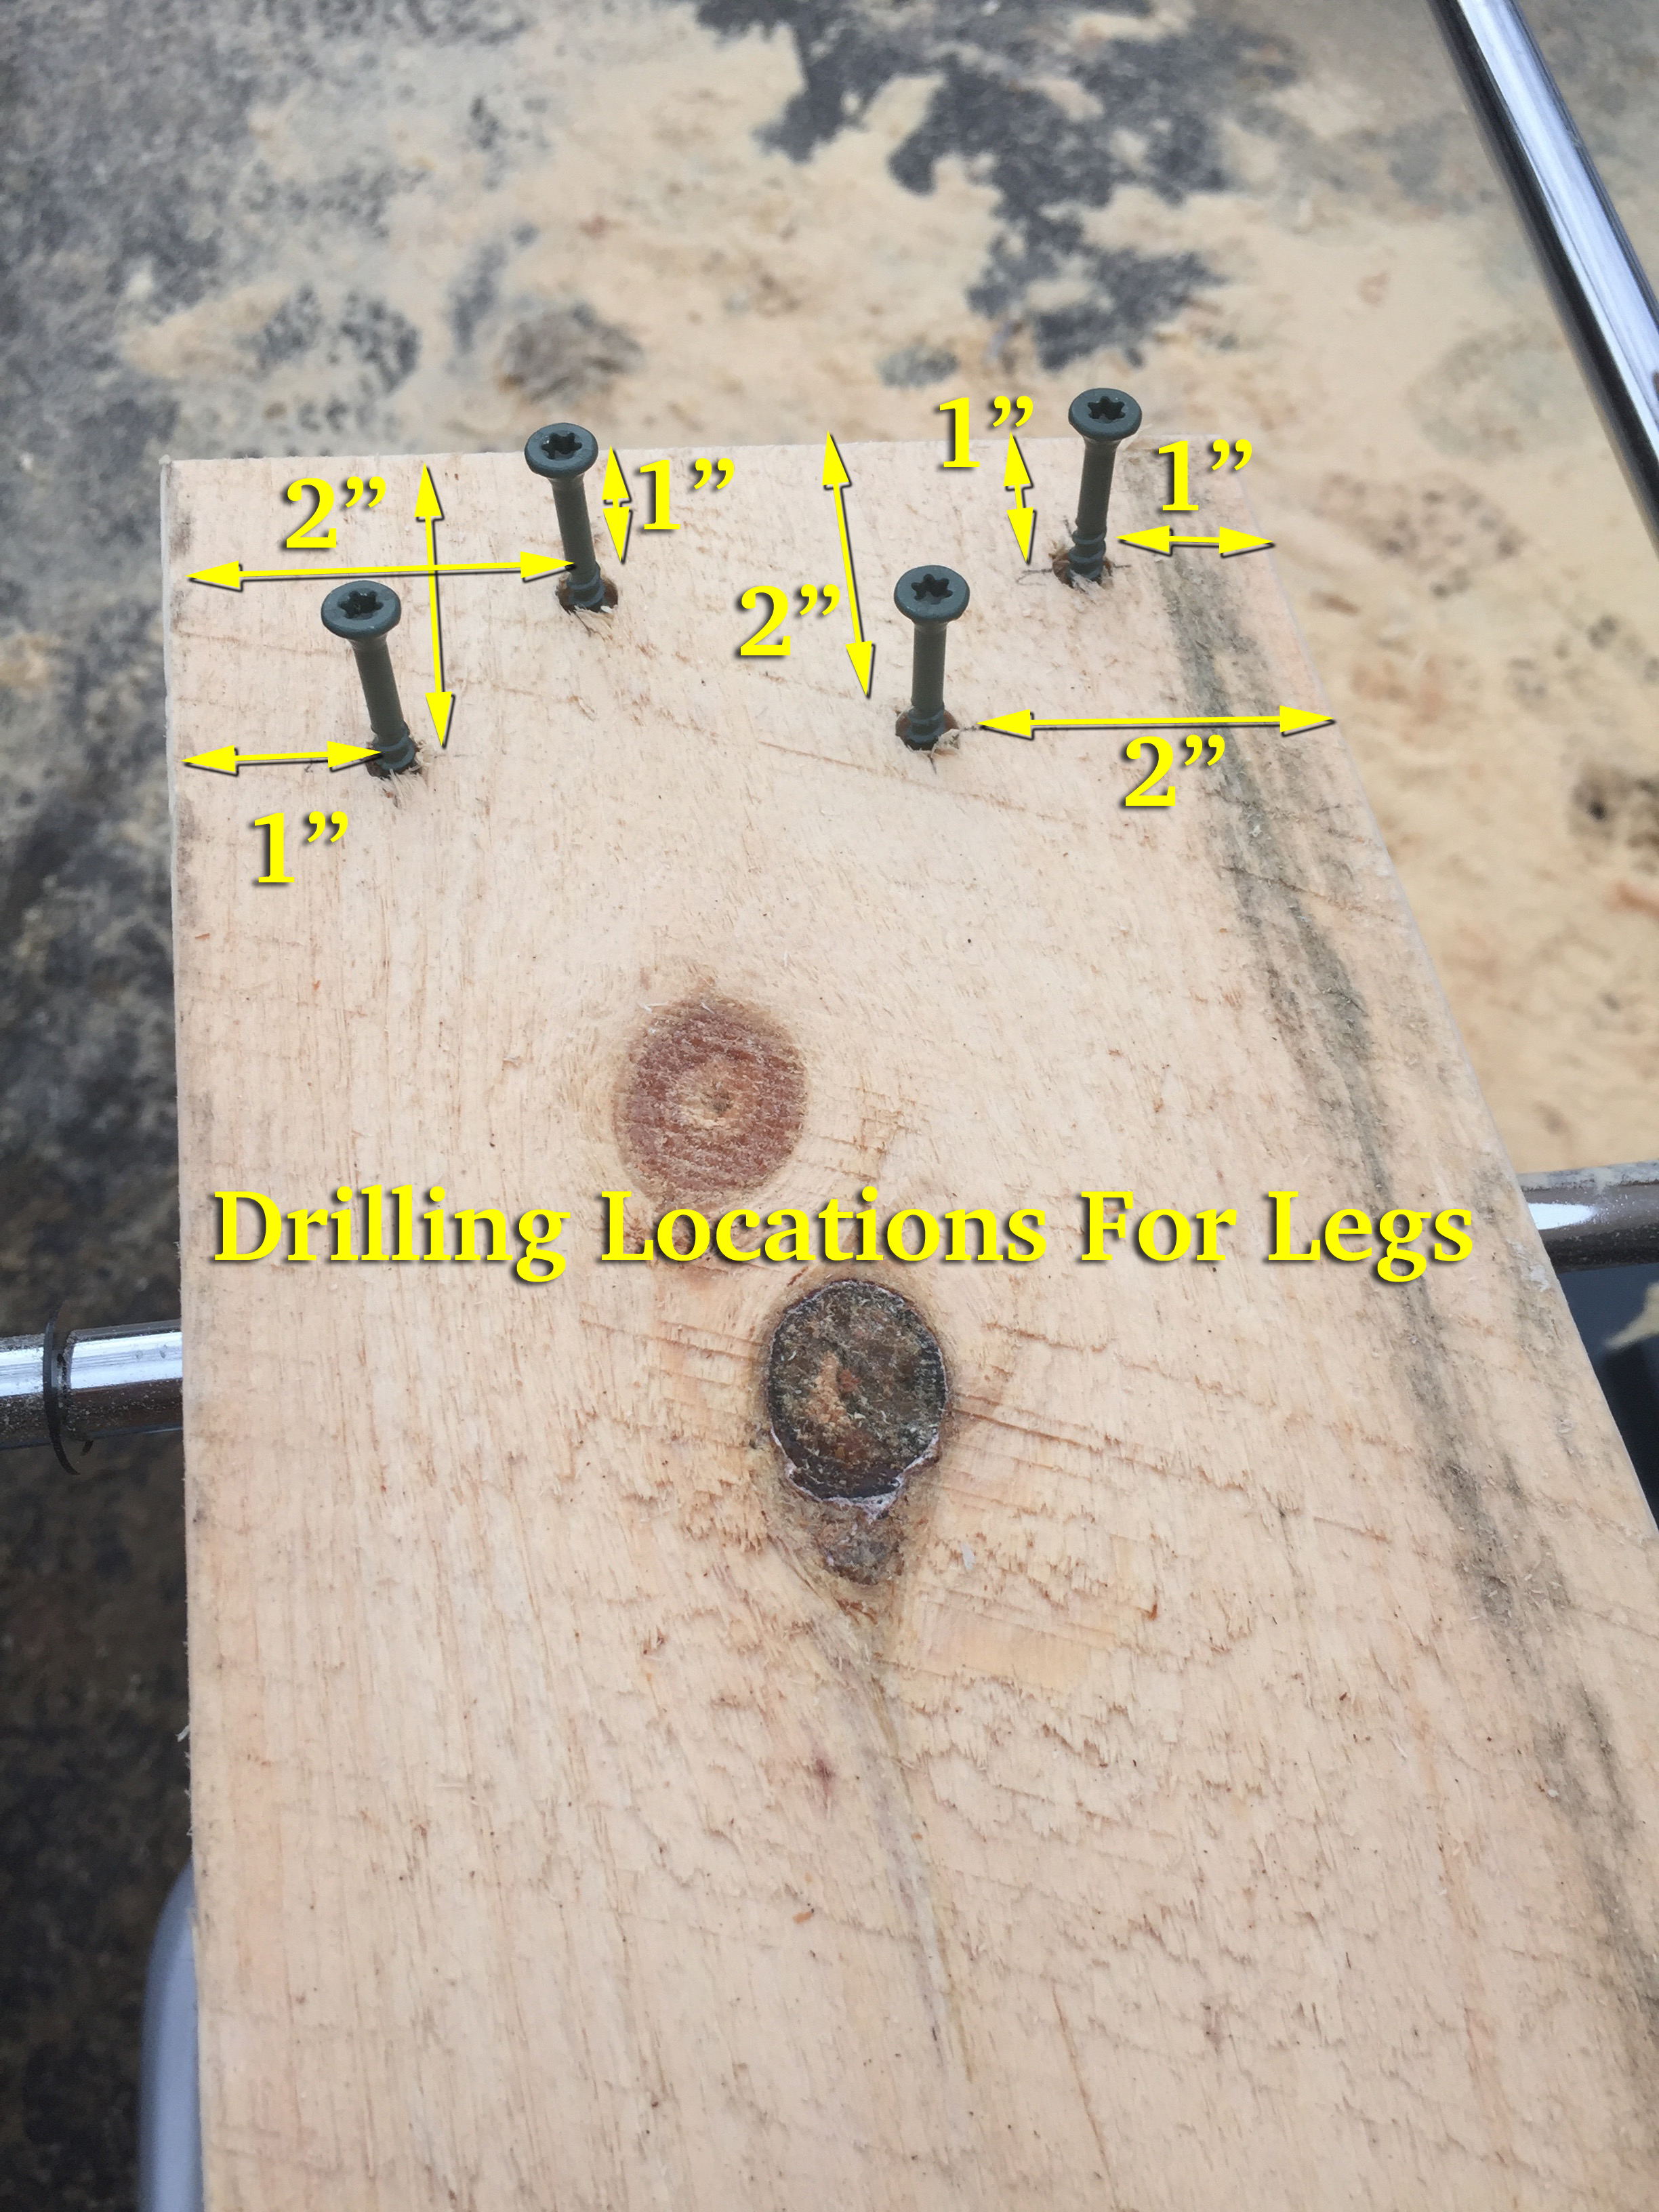
Layout for the 2″ ceramic star drive deck screws.
With all the legs cut I started to layout for the screws. I grab two combination squares and set one to be 1″ and set the other to 2″. This allows for fast/efficient layout. (see above image). Each of the screws is either 1″ or 2″ from the edge or top of the board. The screws are staggered to help avoid splitting the wood. I used DeckMate 2″ ceramic coated deck screws that have a nice thick shaft and are rated for outdoor structural use and do not rust. Do NOT use drywall screws on this sort of project, they are far too weak and not meant for the outdoors. One 5lb box of #8 2″ screws was enough to attach all the legs. After layout I pre-drill each of the holes and start the screws into the boards — this makes it a lot easier to assemble the horse later on.
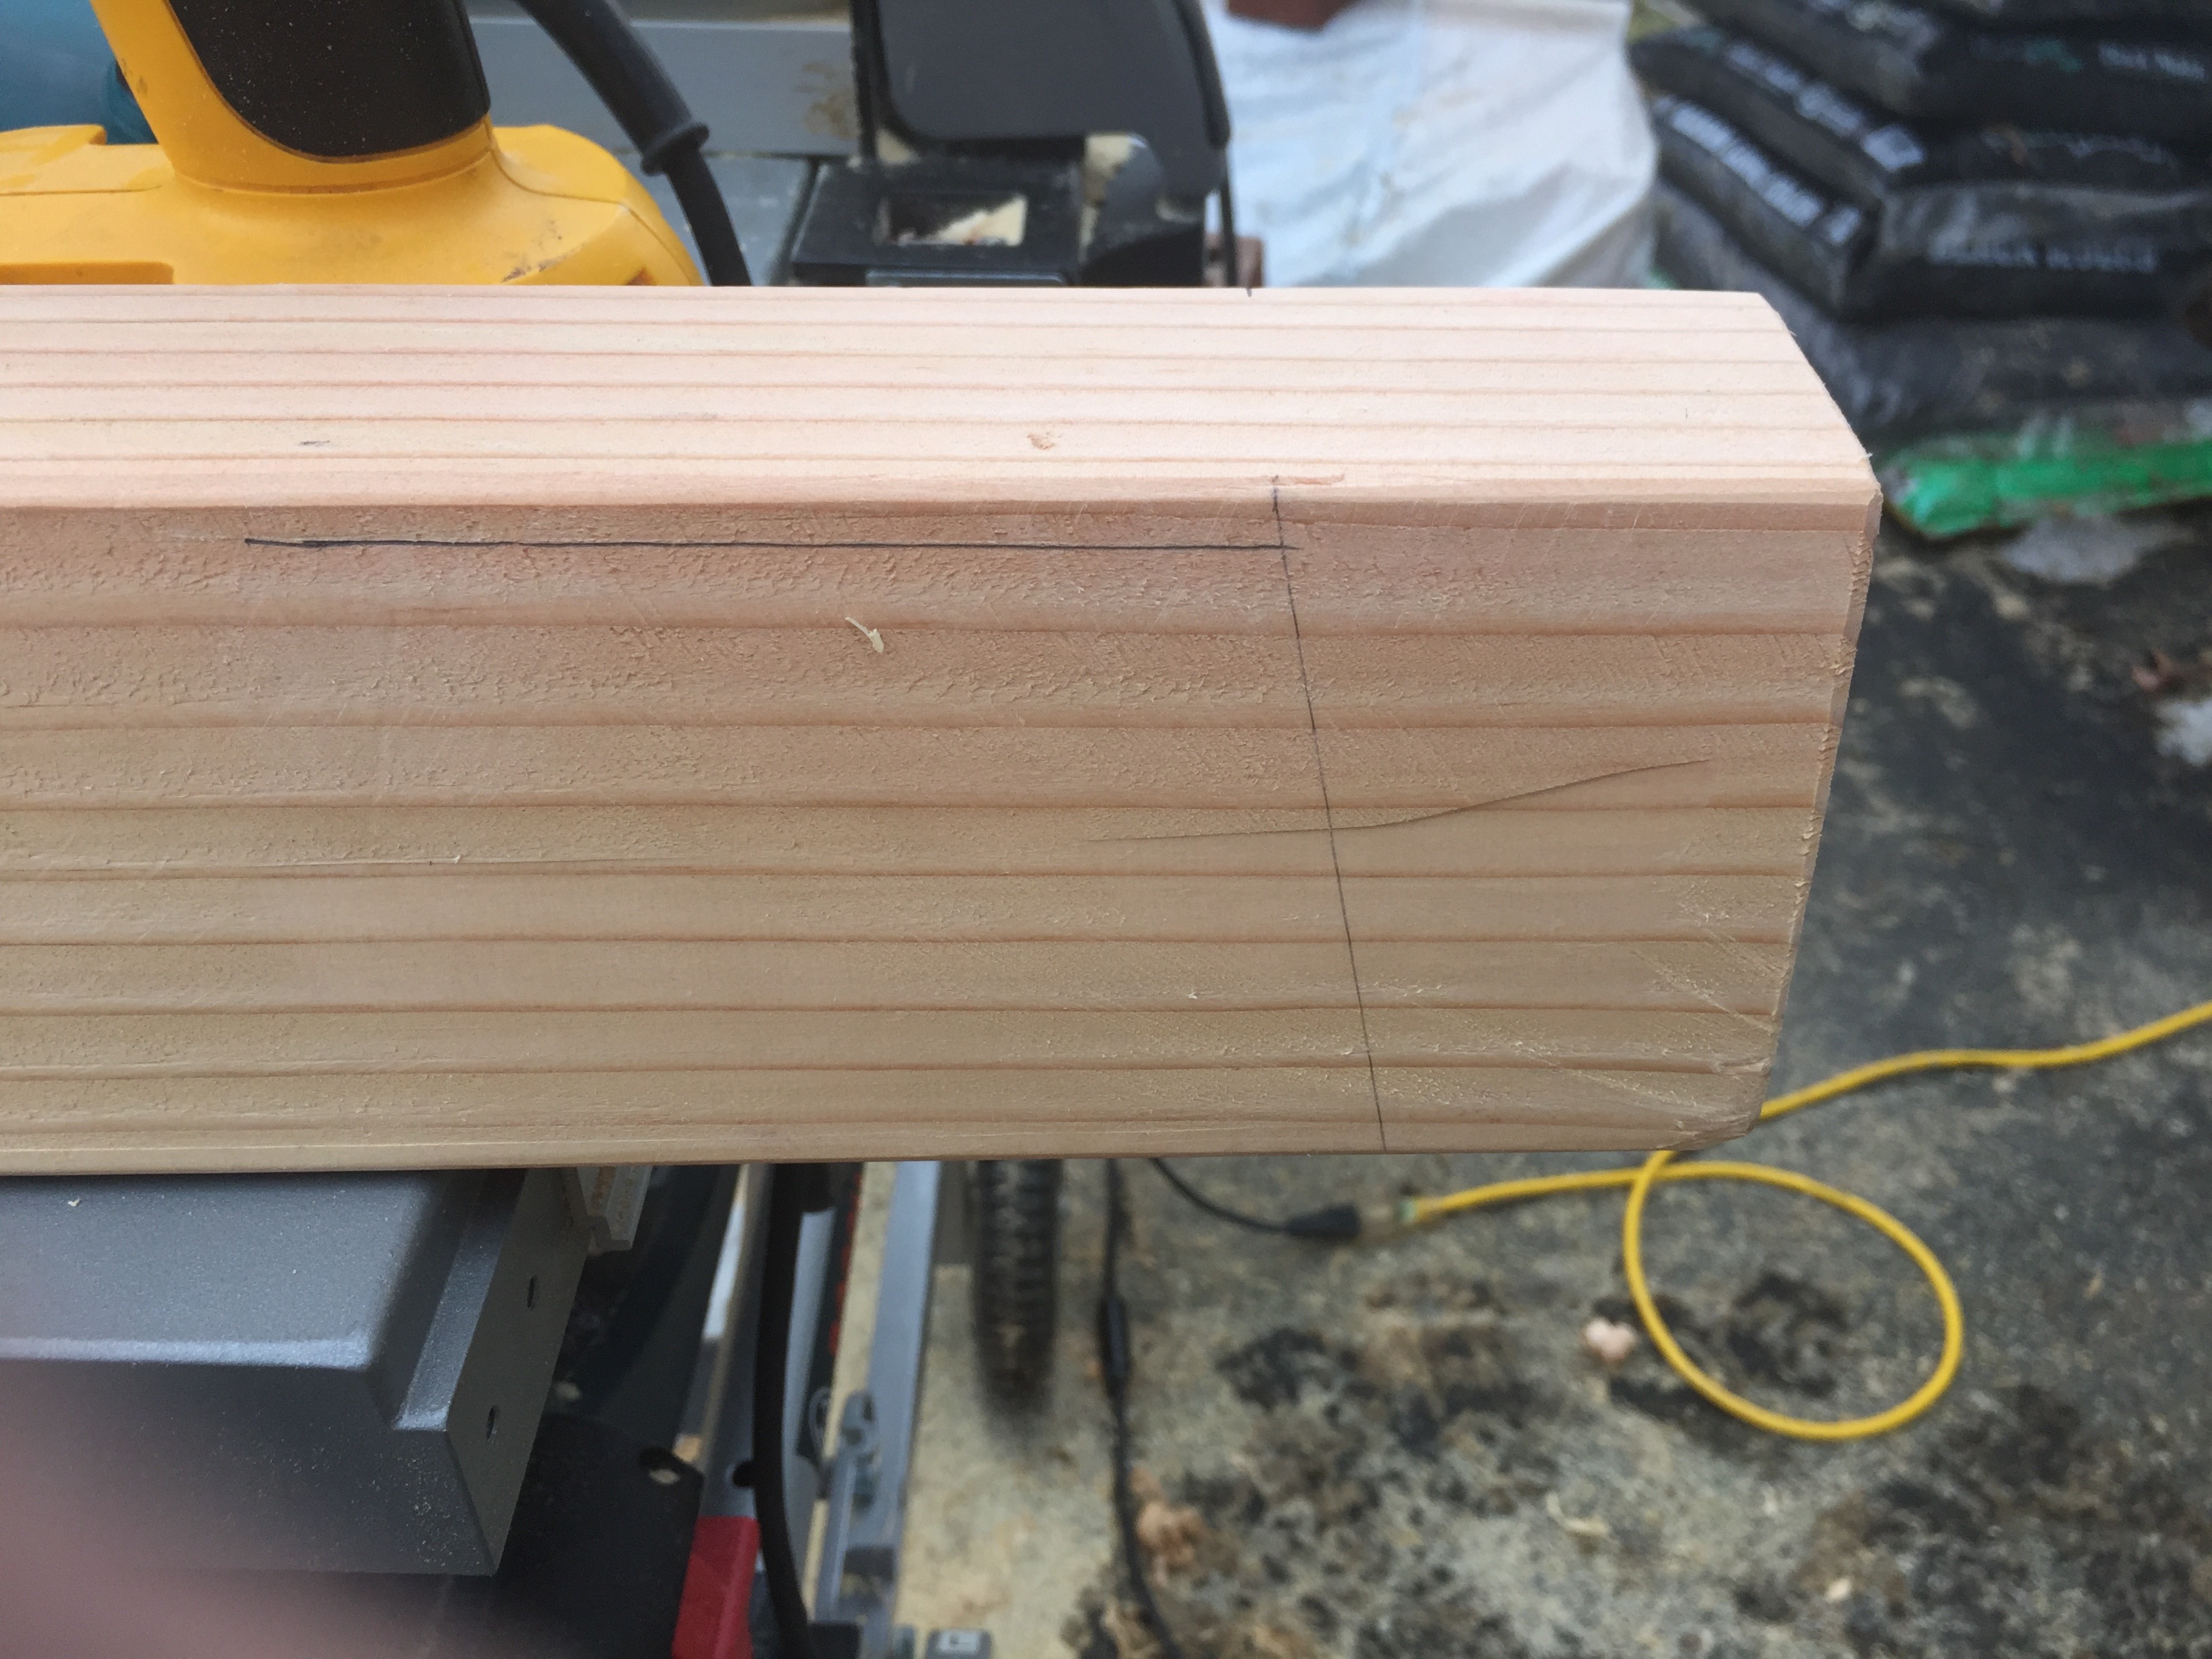
Laying out the beam. 5 degree angle is set in 2.5″ from the end. The top of the legs should be 1/4″ below the top of the beam.
For the beams I make a tick mark 2.5″ in from each end on the top edge of the beam. Using a protractor I make a 5 degree line down the side of the beam — this splays the legs and gives use nice stable horse. Having two protractors on hand is nice as I have one set for the right and one set for the left. I then set a combination square to 1/4″ and make a line along the top edge of the beam — this allows me to line up the legs during assembly. I also broke all the edges with a block plane.
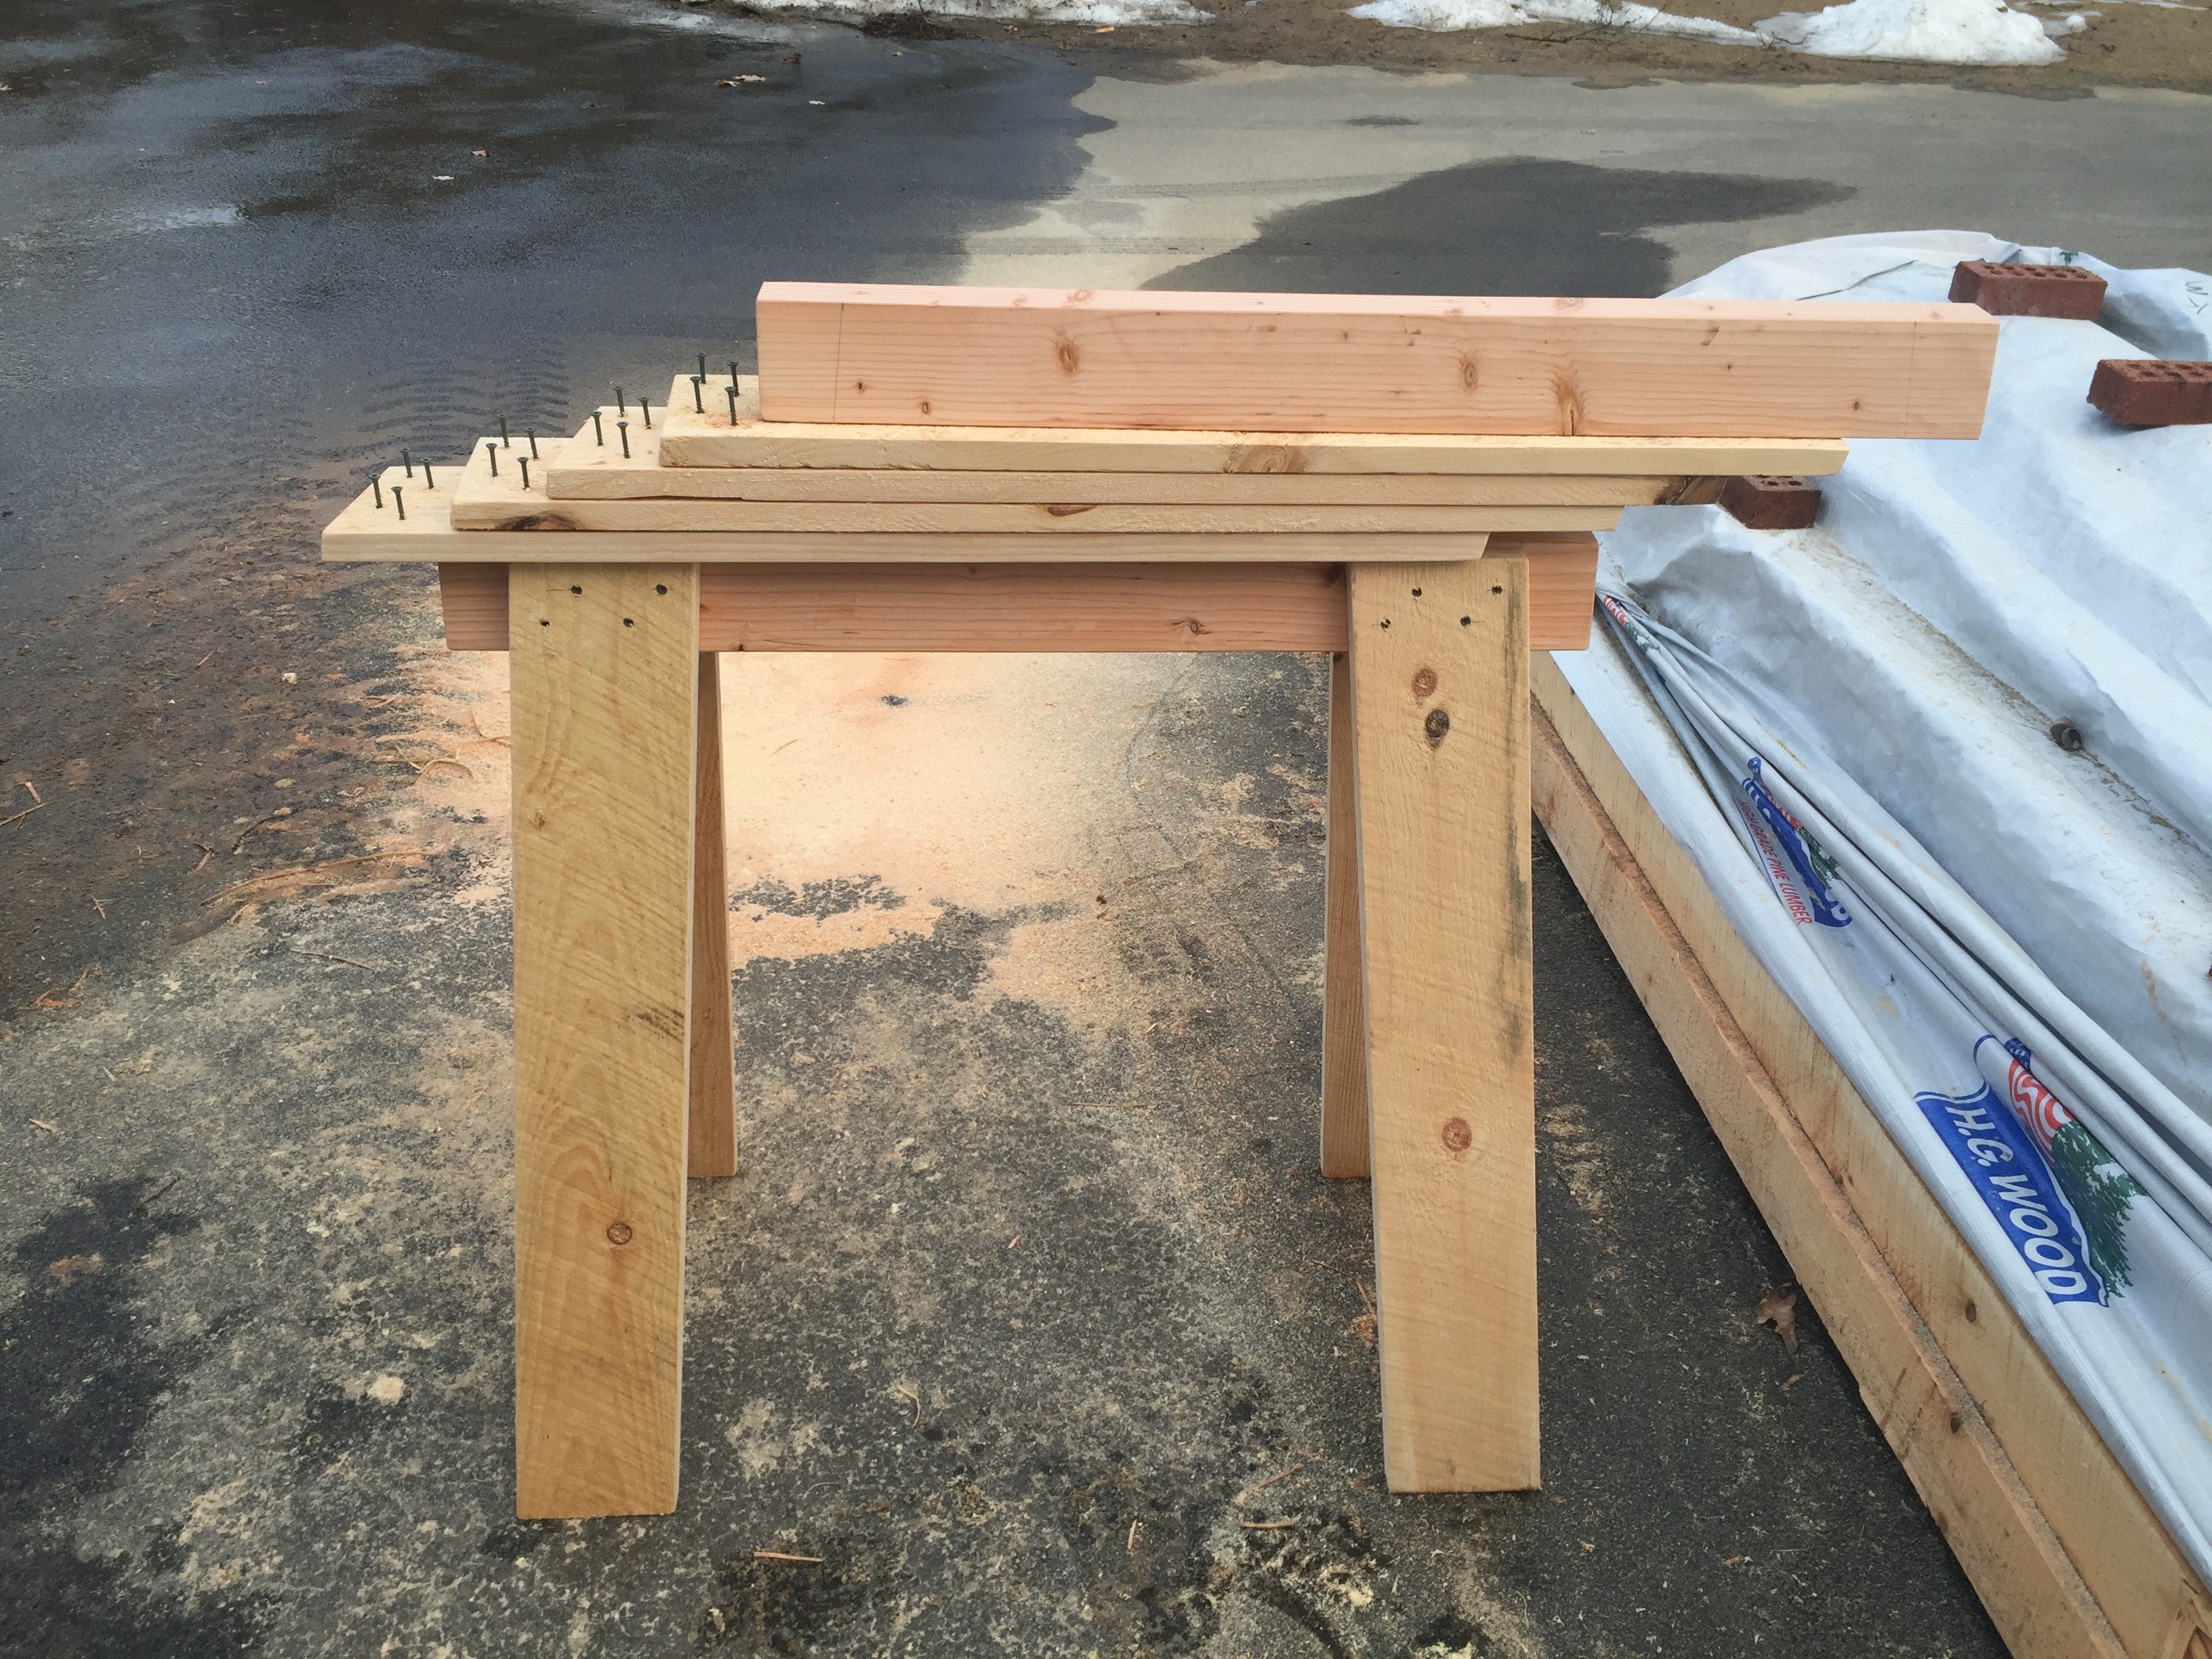
Another horse ready to be assembled
Early on I made a few pairs of saw horses to work from and did the majority of the horses as a large run.
Attaching the legs — I added one leg at a time, usually only sinking 2 or 3 of the pre-started screws into the beam. I add one leg, then add the second leg on the same side of the beam. This makes it easier to stand the horse on those two legs and add the third leg. When adding the 4th leg you’ll want to make sure all 4 legs are properly resting on the ground. If your horse wobbles this is your chance to adjust the legs. When the horse is standing the way you want you can sink the rest of the screws on the legs. When using an impact gun you don’t want to sink the screws any further into the wood than you absolutely have to. Ideally the screw heads should come to rest in the same plane as the surface of the wood, but green pine can be a bit soft so some of them may go deeper before they have enough grip to pull the leg tight to the beam.
Mass producing gusset plates.
With a beam and set of legs ready to go and standing nicely you can take a plywood gusset blank, bring it over to the partially assembled horse and trace where it meets the legs. Ideally the gussets should not stick out farther than the legs, otherwise they might catch on things. Making them say 1/32″ inside of the surface of the legs is what I shoot for. Using that traced piece I cut it and label it as a the template and use that for laying out each of the subsequent gussets
Important Notes About Gussets:
1.) When cutting the gusset the beveled end is always ‘up’ on the installed gusset — it mates nicely to the underside of the beam.
2.) When installing a gusset make sure the 5 degree bevel is facing the correct way so that it rest tightly up against the beam.
Impromptu work table
With a few horses pressed into early service I was able to make a makeshift table that allowed me to layout/mark all the of the gussets. Each one is secured with 4 screws. I made a mark for each screw to be 1″ down from the top or the bottom of the gusset and centered on the thickness of the leg, so for most that would be ~3/8″ in from the mitered edge. I turn a horse on its side and place the marked gusset where it is going to go. I then pre-drill the gusset in place and drive the screws. I used #8 1-5/8″ Deckmate Ceramic Star-drive screws and again a 5lb box was enough for this project.
Each horse required 16 2″ screws and 16 1-5/8″ screws.
Saw horse with dimensions.
And now we have a completed horse! The image above has some more dimensional information for quick reference.
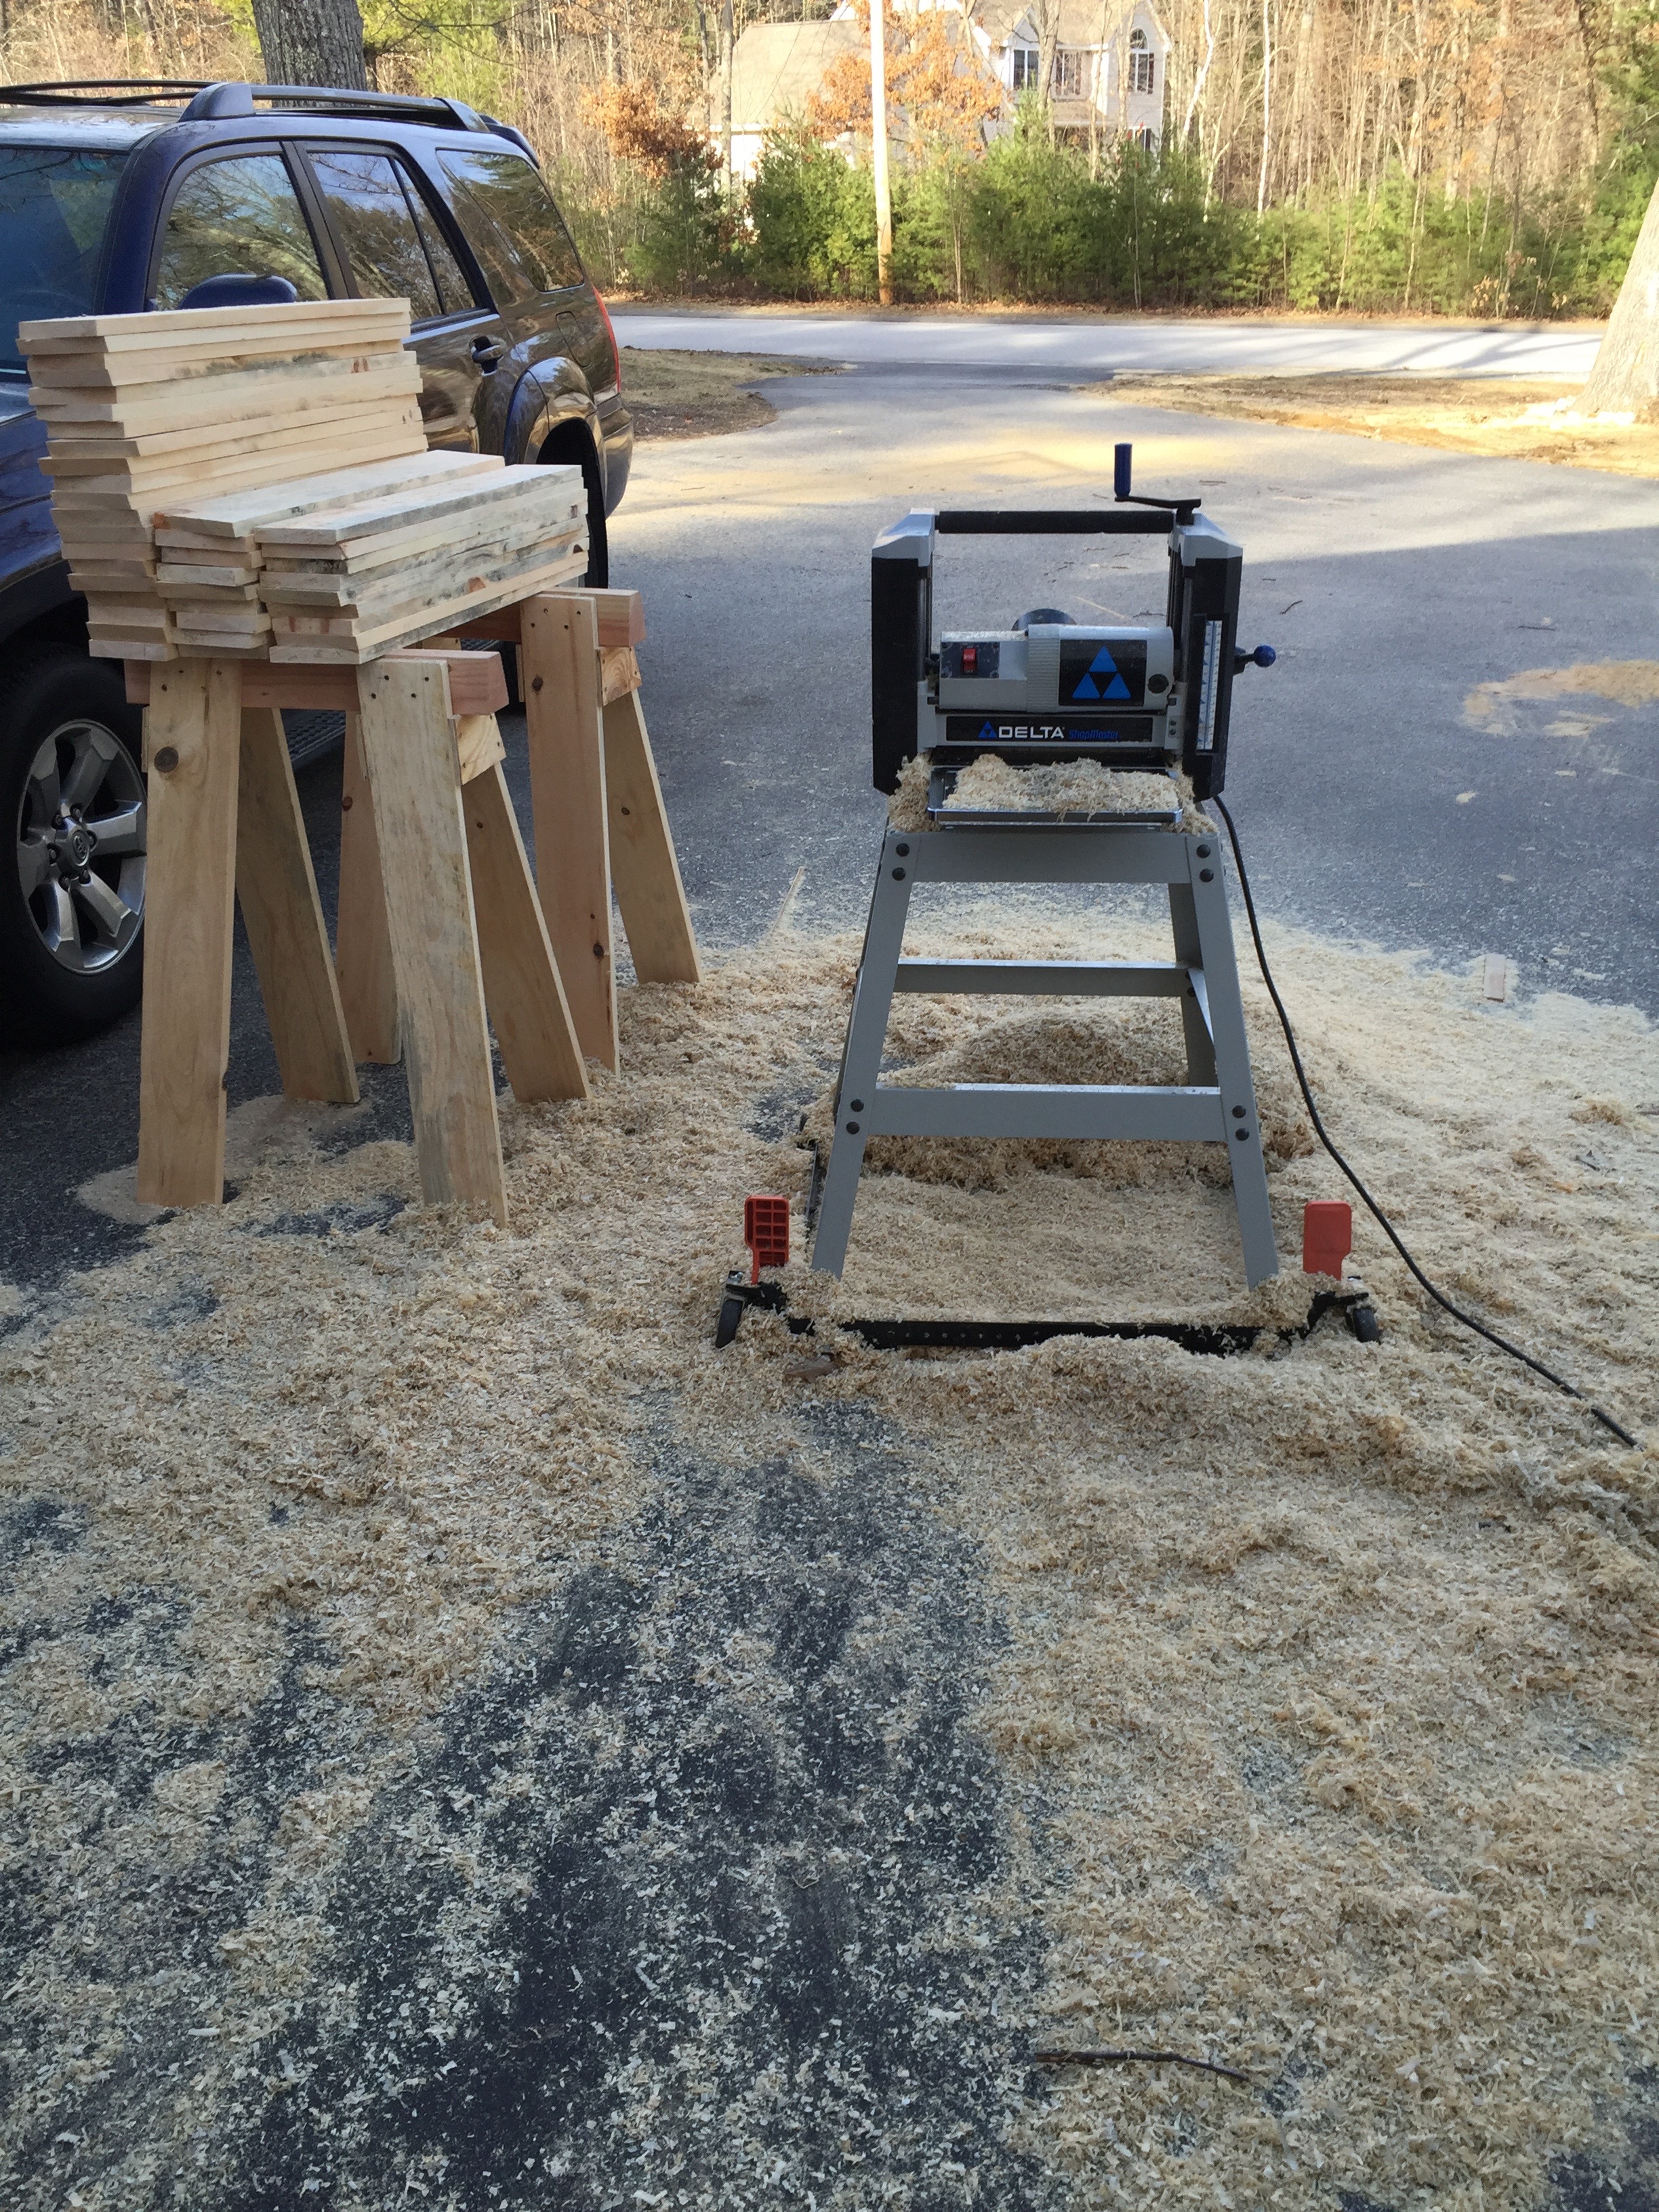
Lunchbox planer getting a workout
Now back to that mistake I mentioned earlier. By leaving the cut wet boards tightly stacked a mold/fungus quickly bloomed on half of the boards. I have a lot of allergies so I didn’t want to handle those boards any more than I’d have to, and it was unsightly, so I suited up and with my dust mask and fed them through my lunchbox planer. I also didn’t use my dust collector as I don’t want that wet fungus living in my filter. I planed the rough boards smooth and stickered them up to dry in the sun as I worked on other horses.
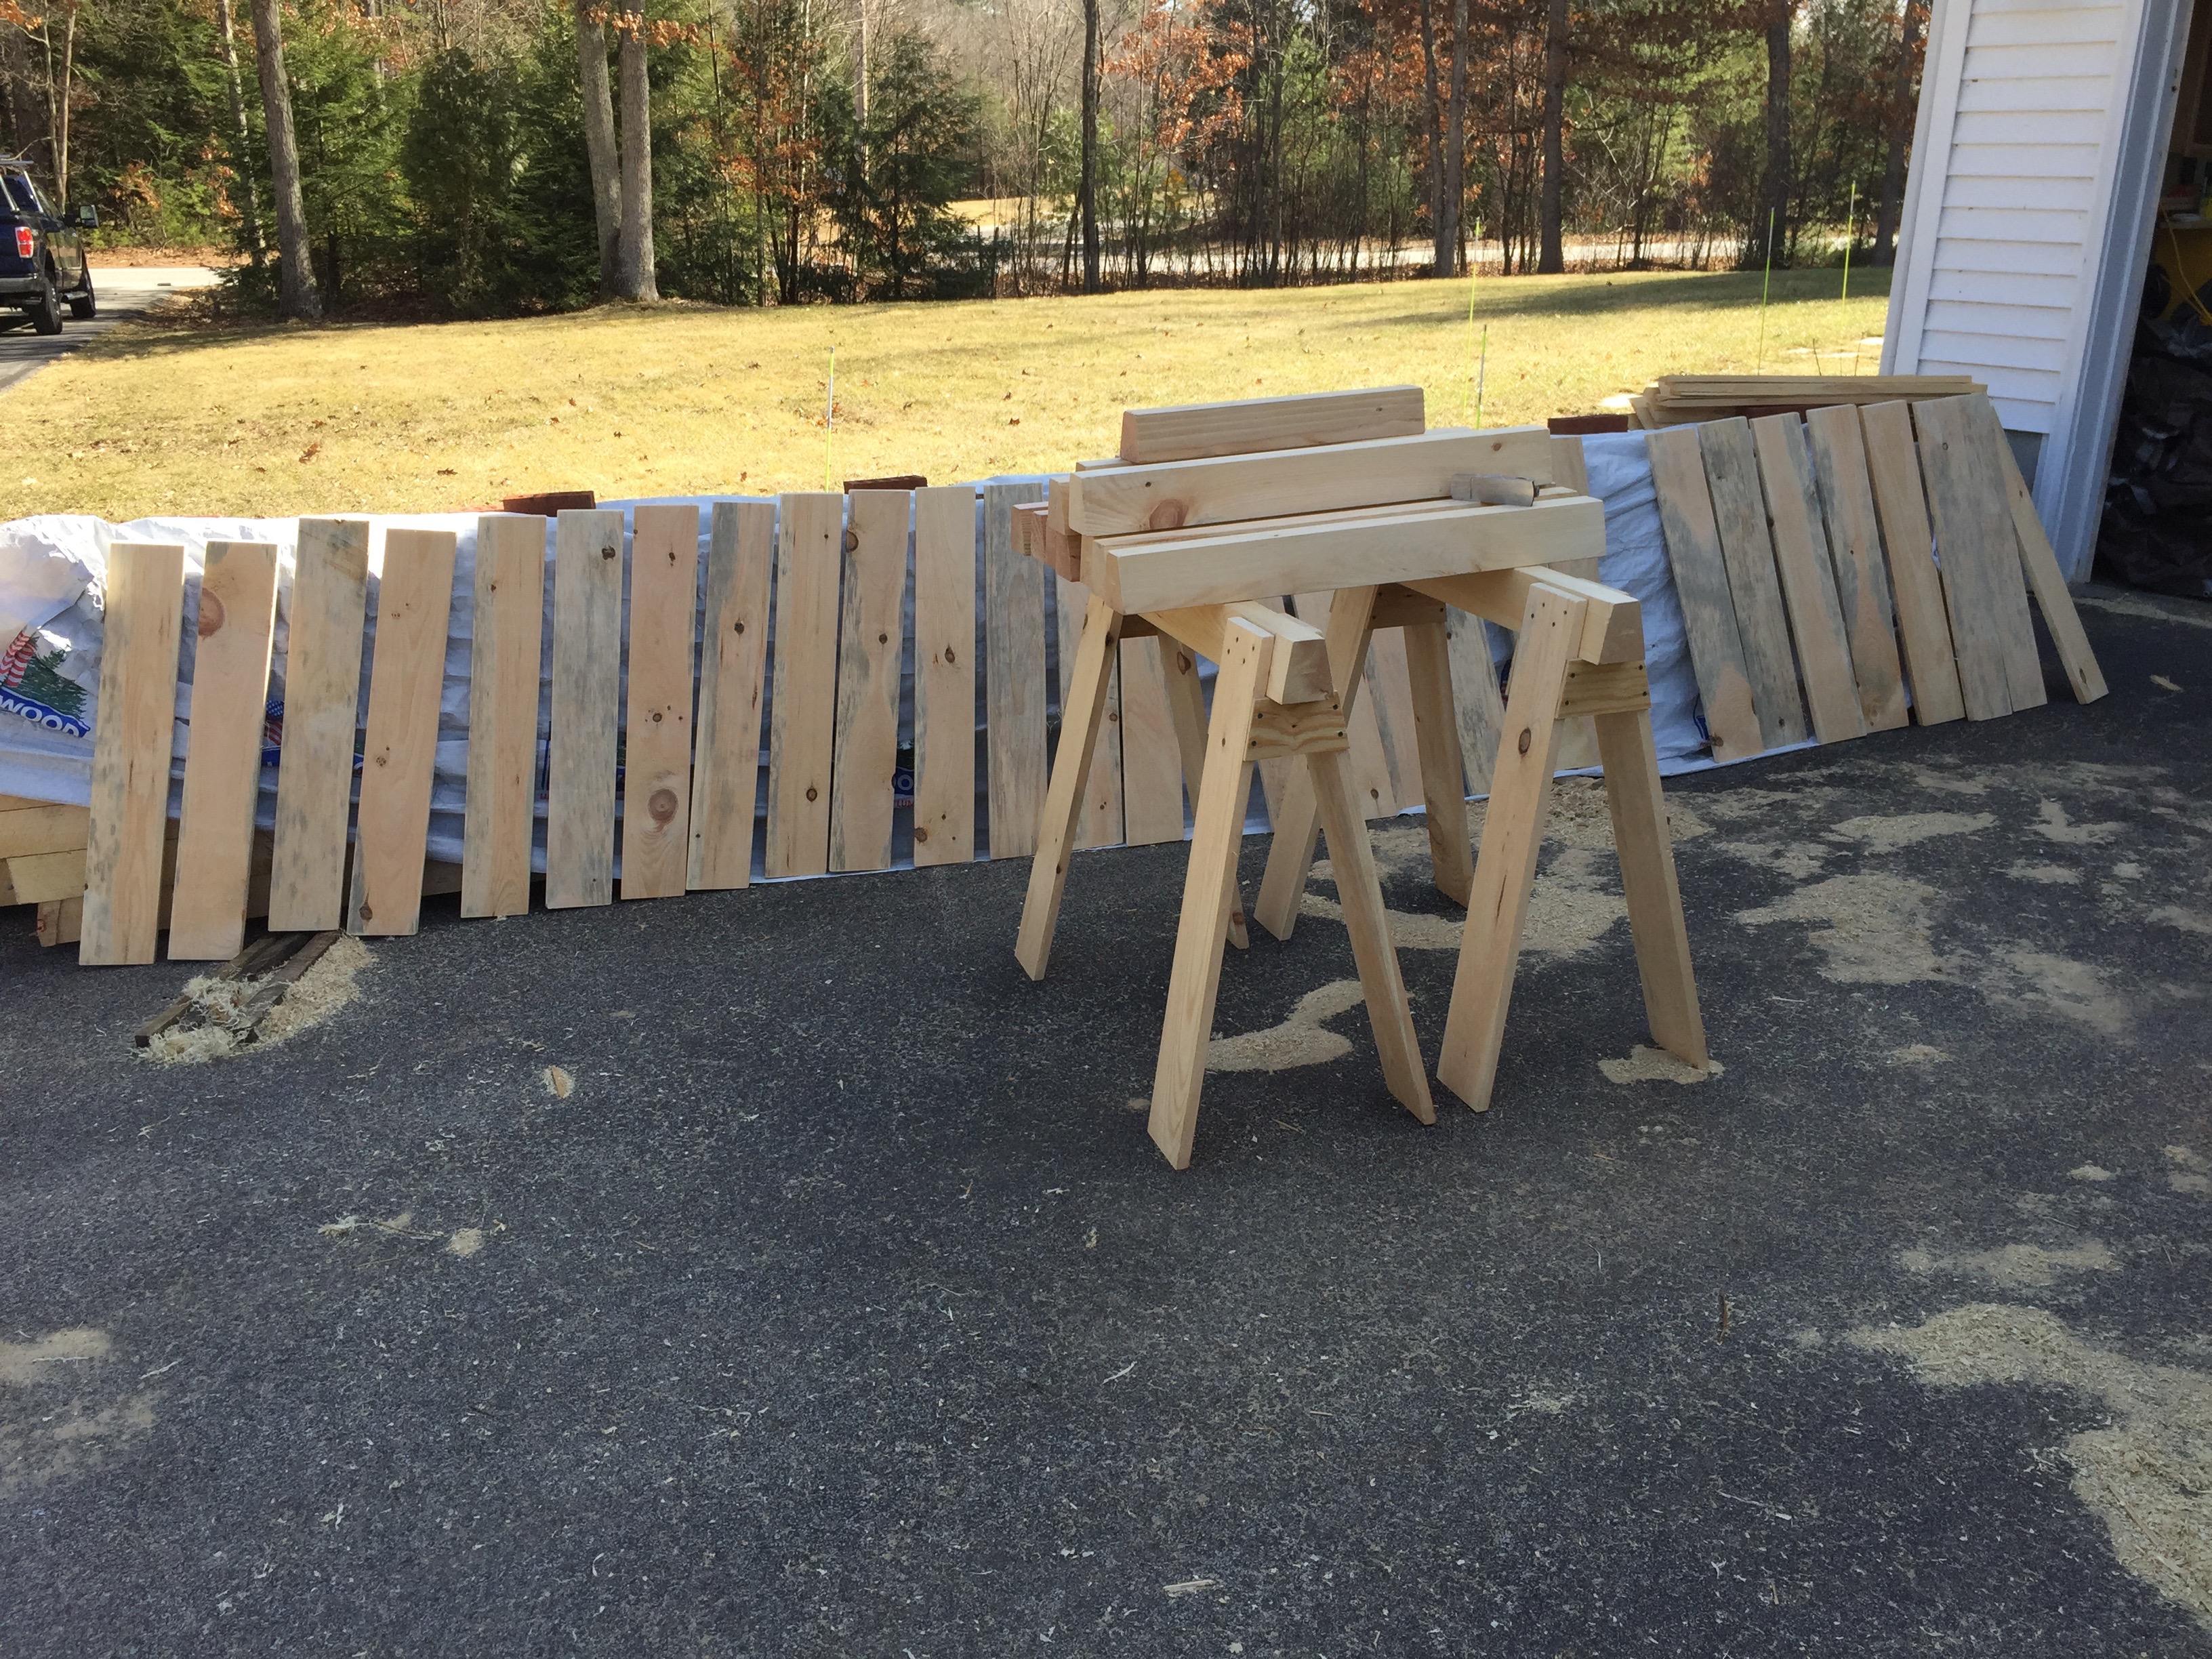
Letting the legs air dry a bit
That little mistake accidentally created ‘Denim Pine’ — pine boards with a blue tint that results from that fungus blooming and is desirable to some folks, presumably non-workers that like the look of it. (See above and below). With the mold/spores/fungus/grossness removed and stickered the legs will dry and be fine to use. As I completed each horse it will live out side where it can dry at a steady rate until the barn gets finished.
Some ‘Denim Pine’ Legs
How do you store all of these horses?
Stacked horses.
The horses stack nicely and even when stacked all the wood can dry nicely.
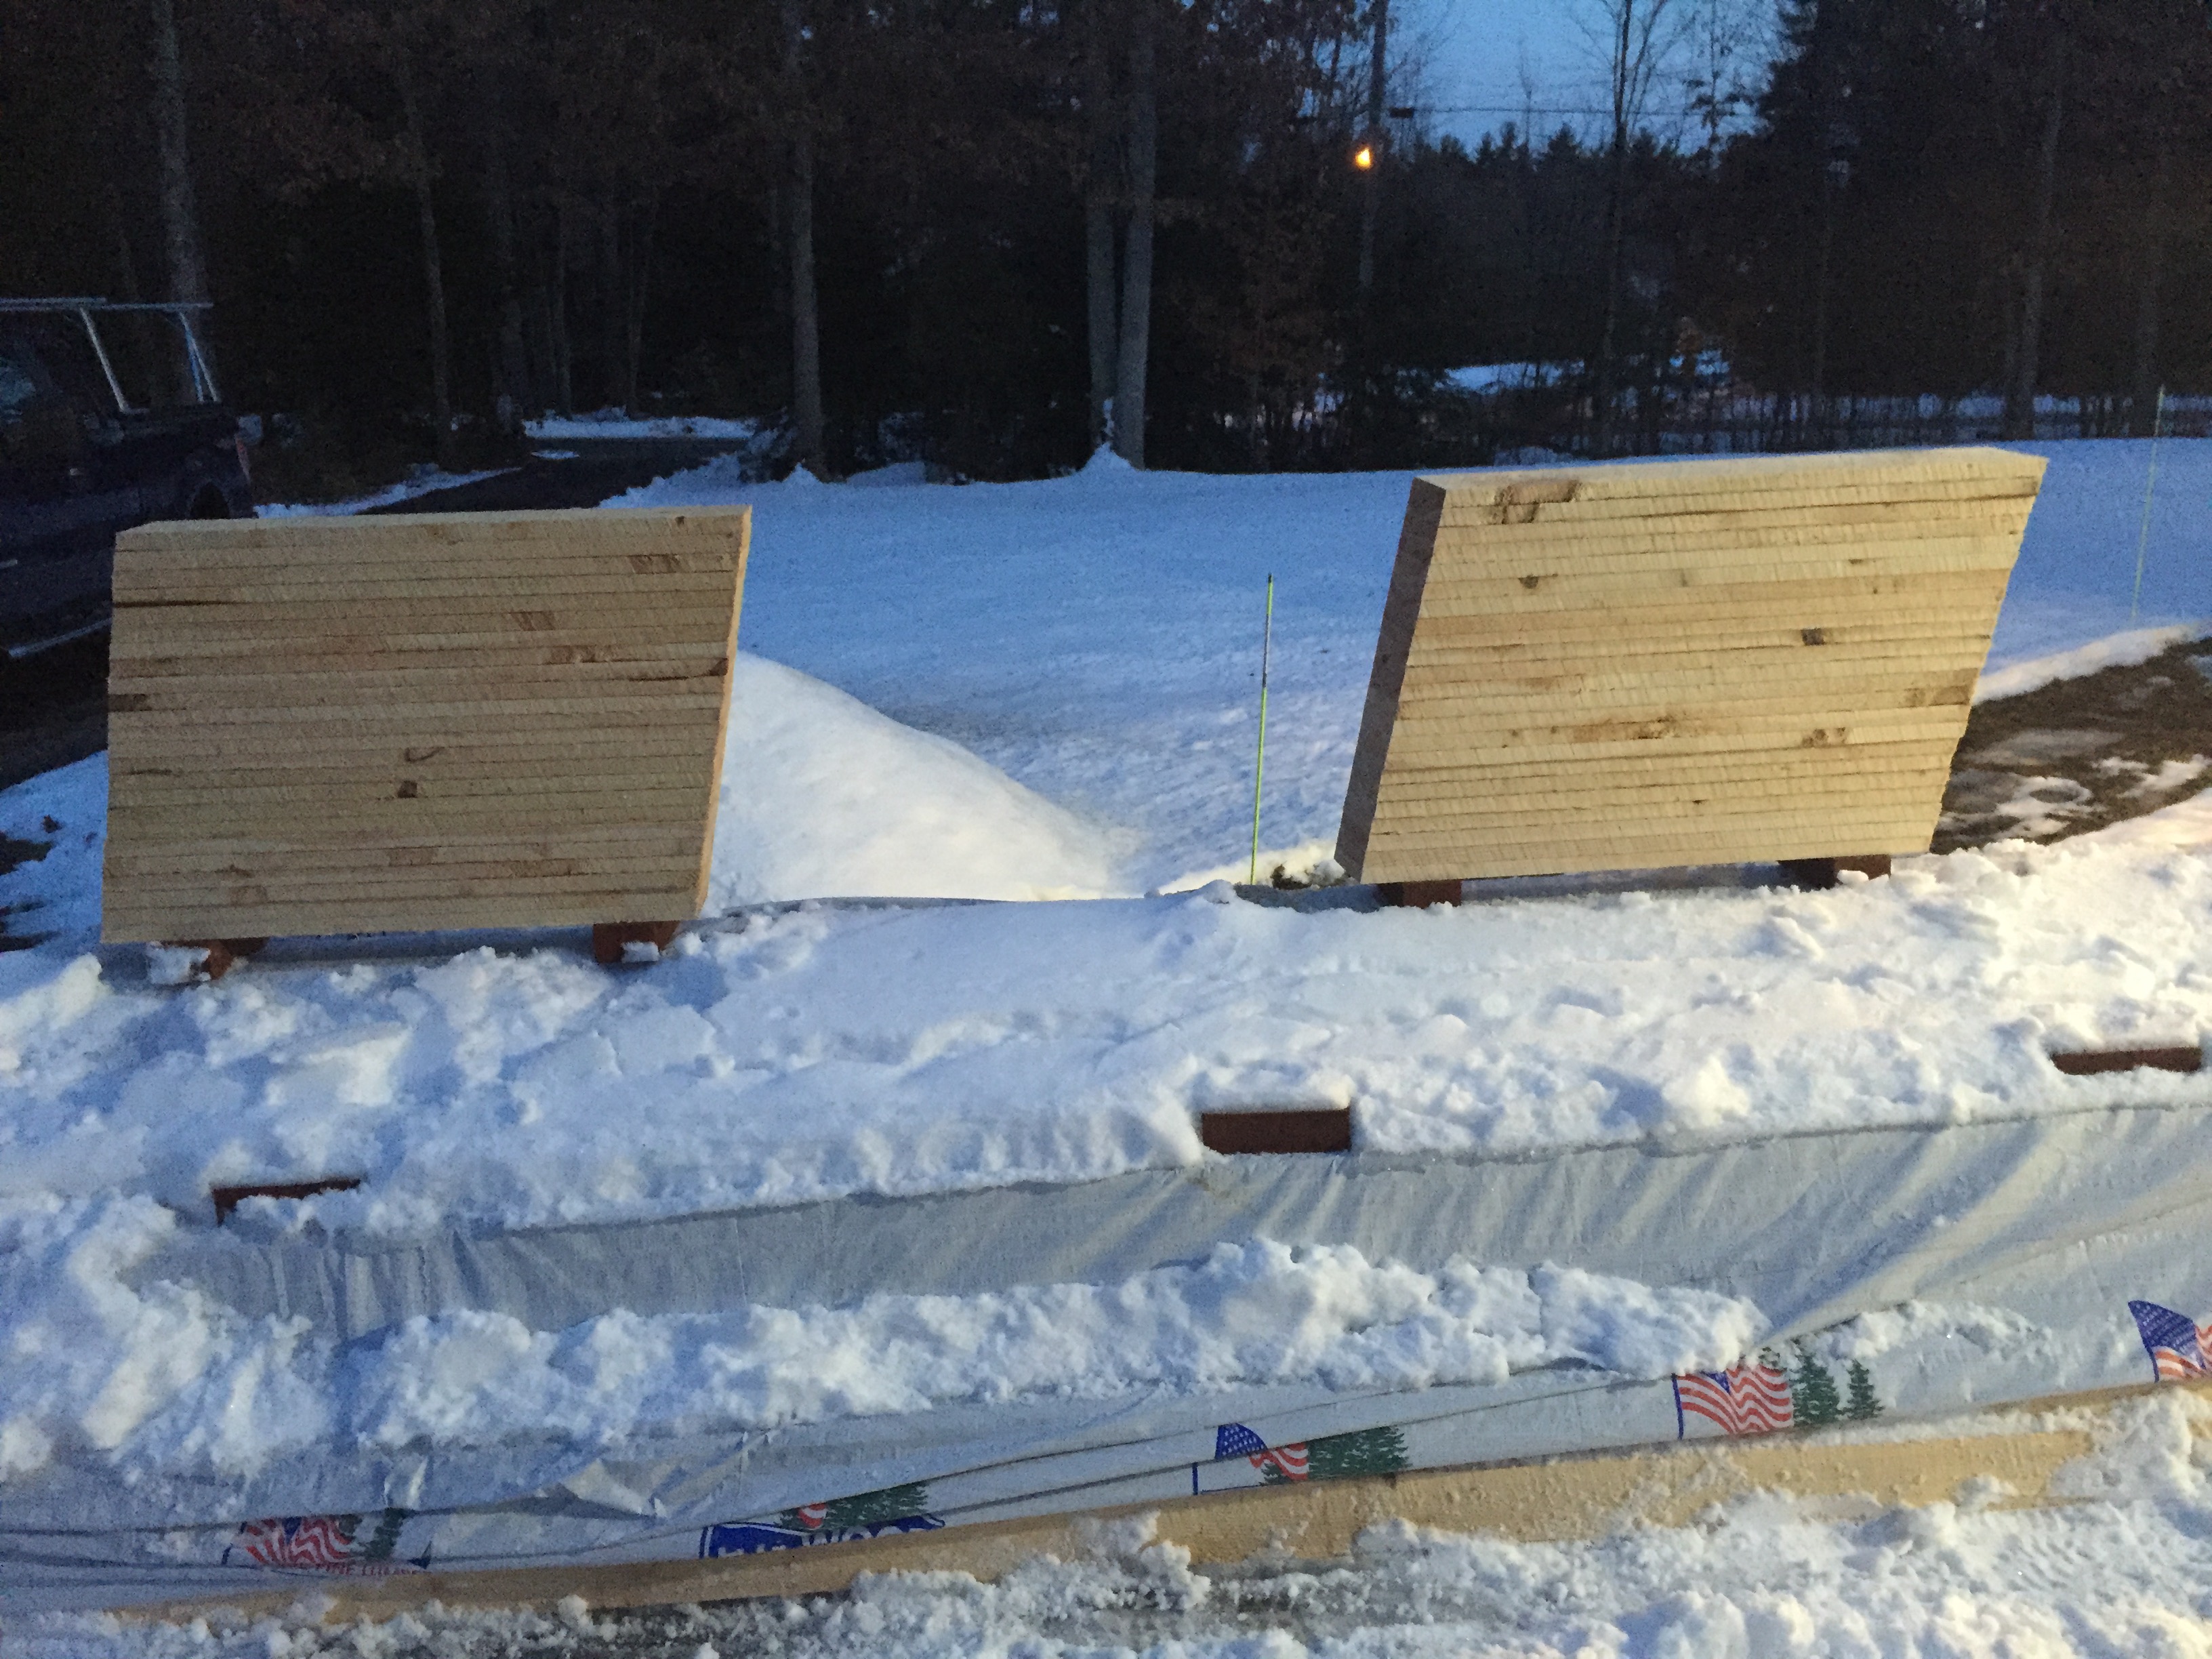
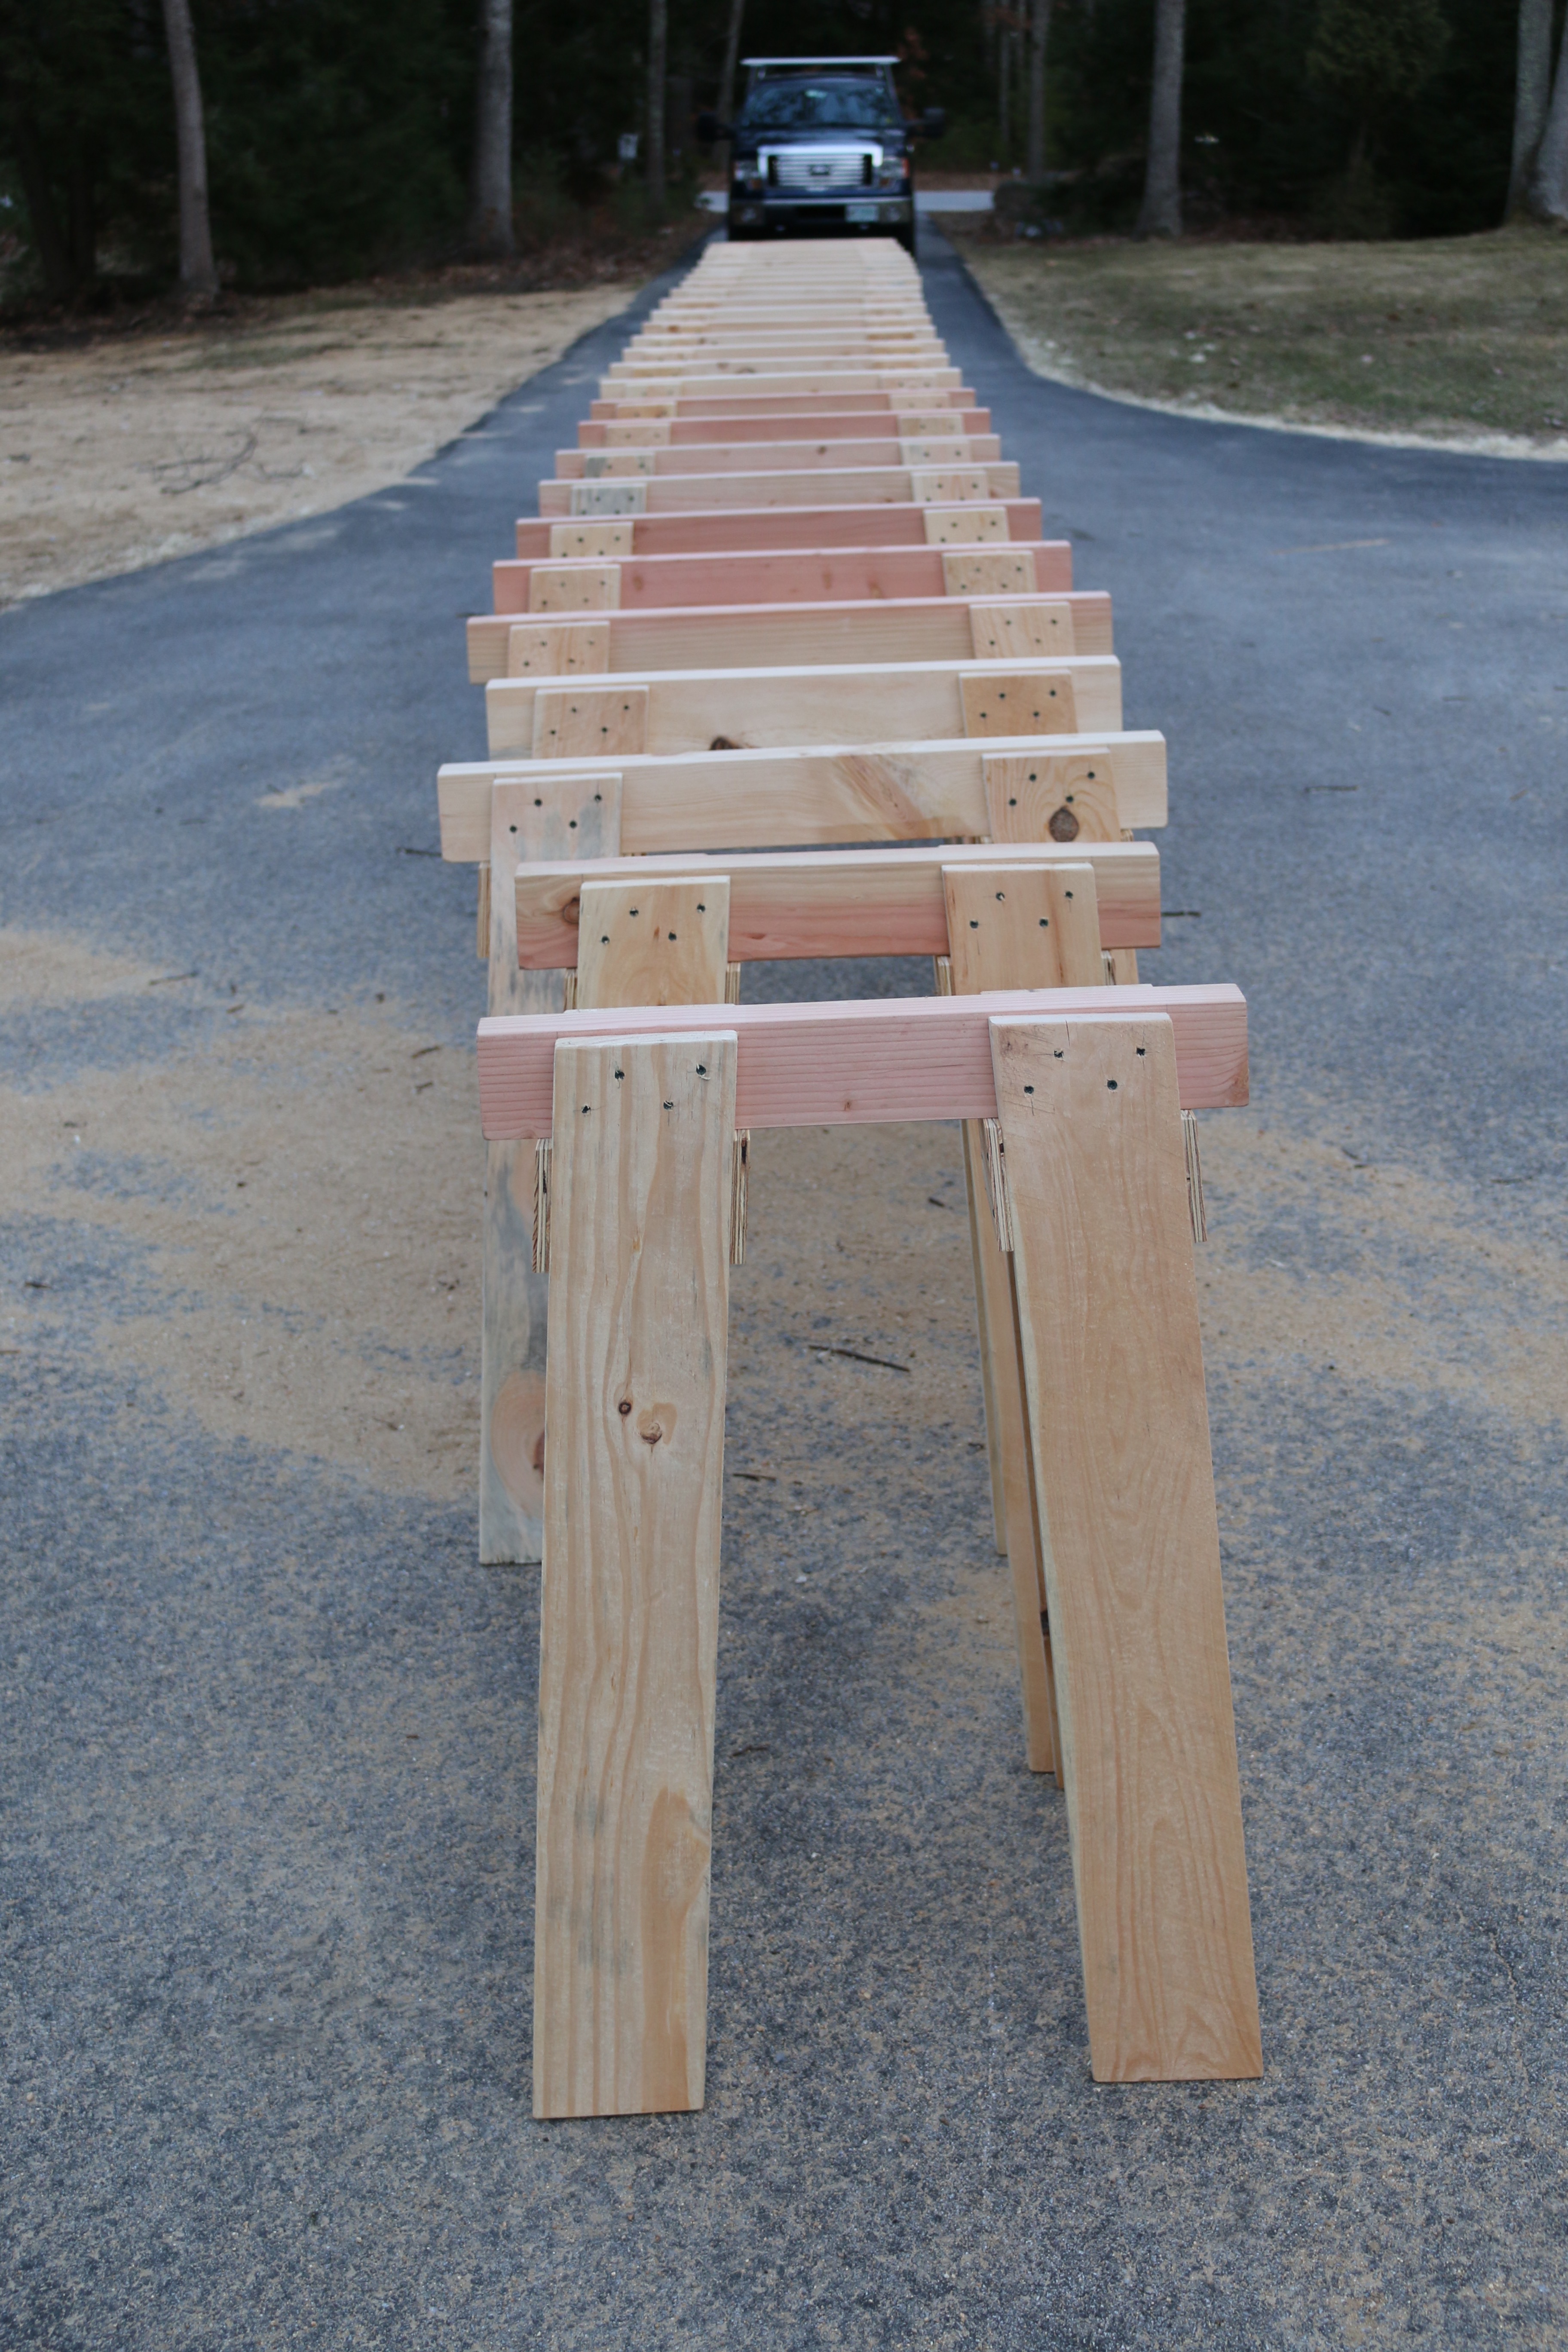
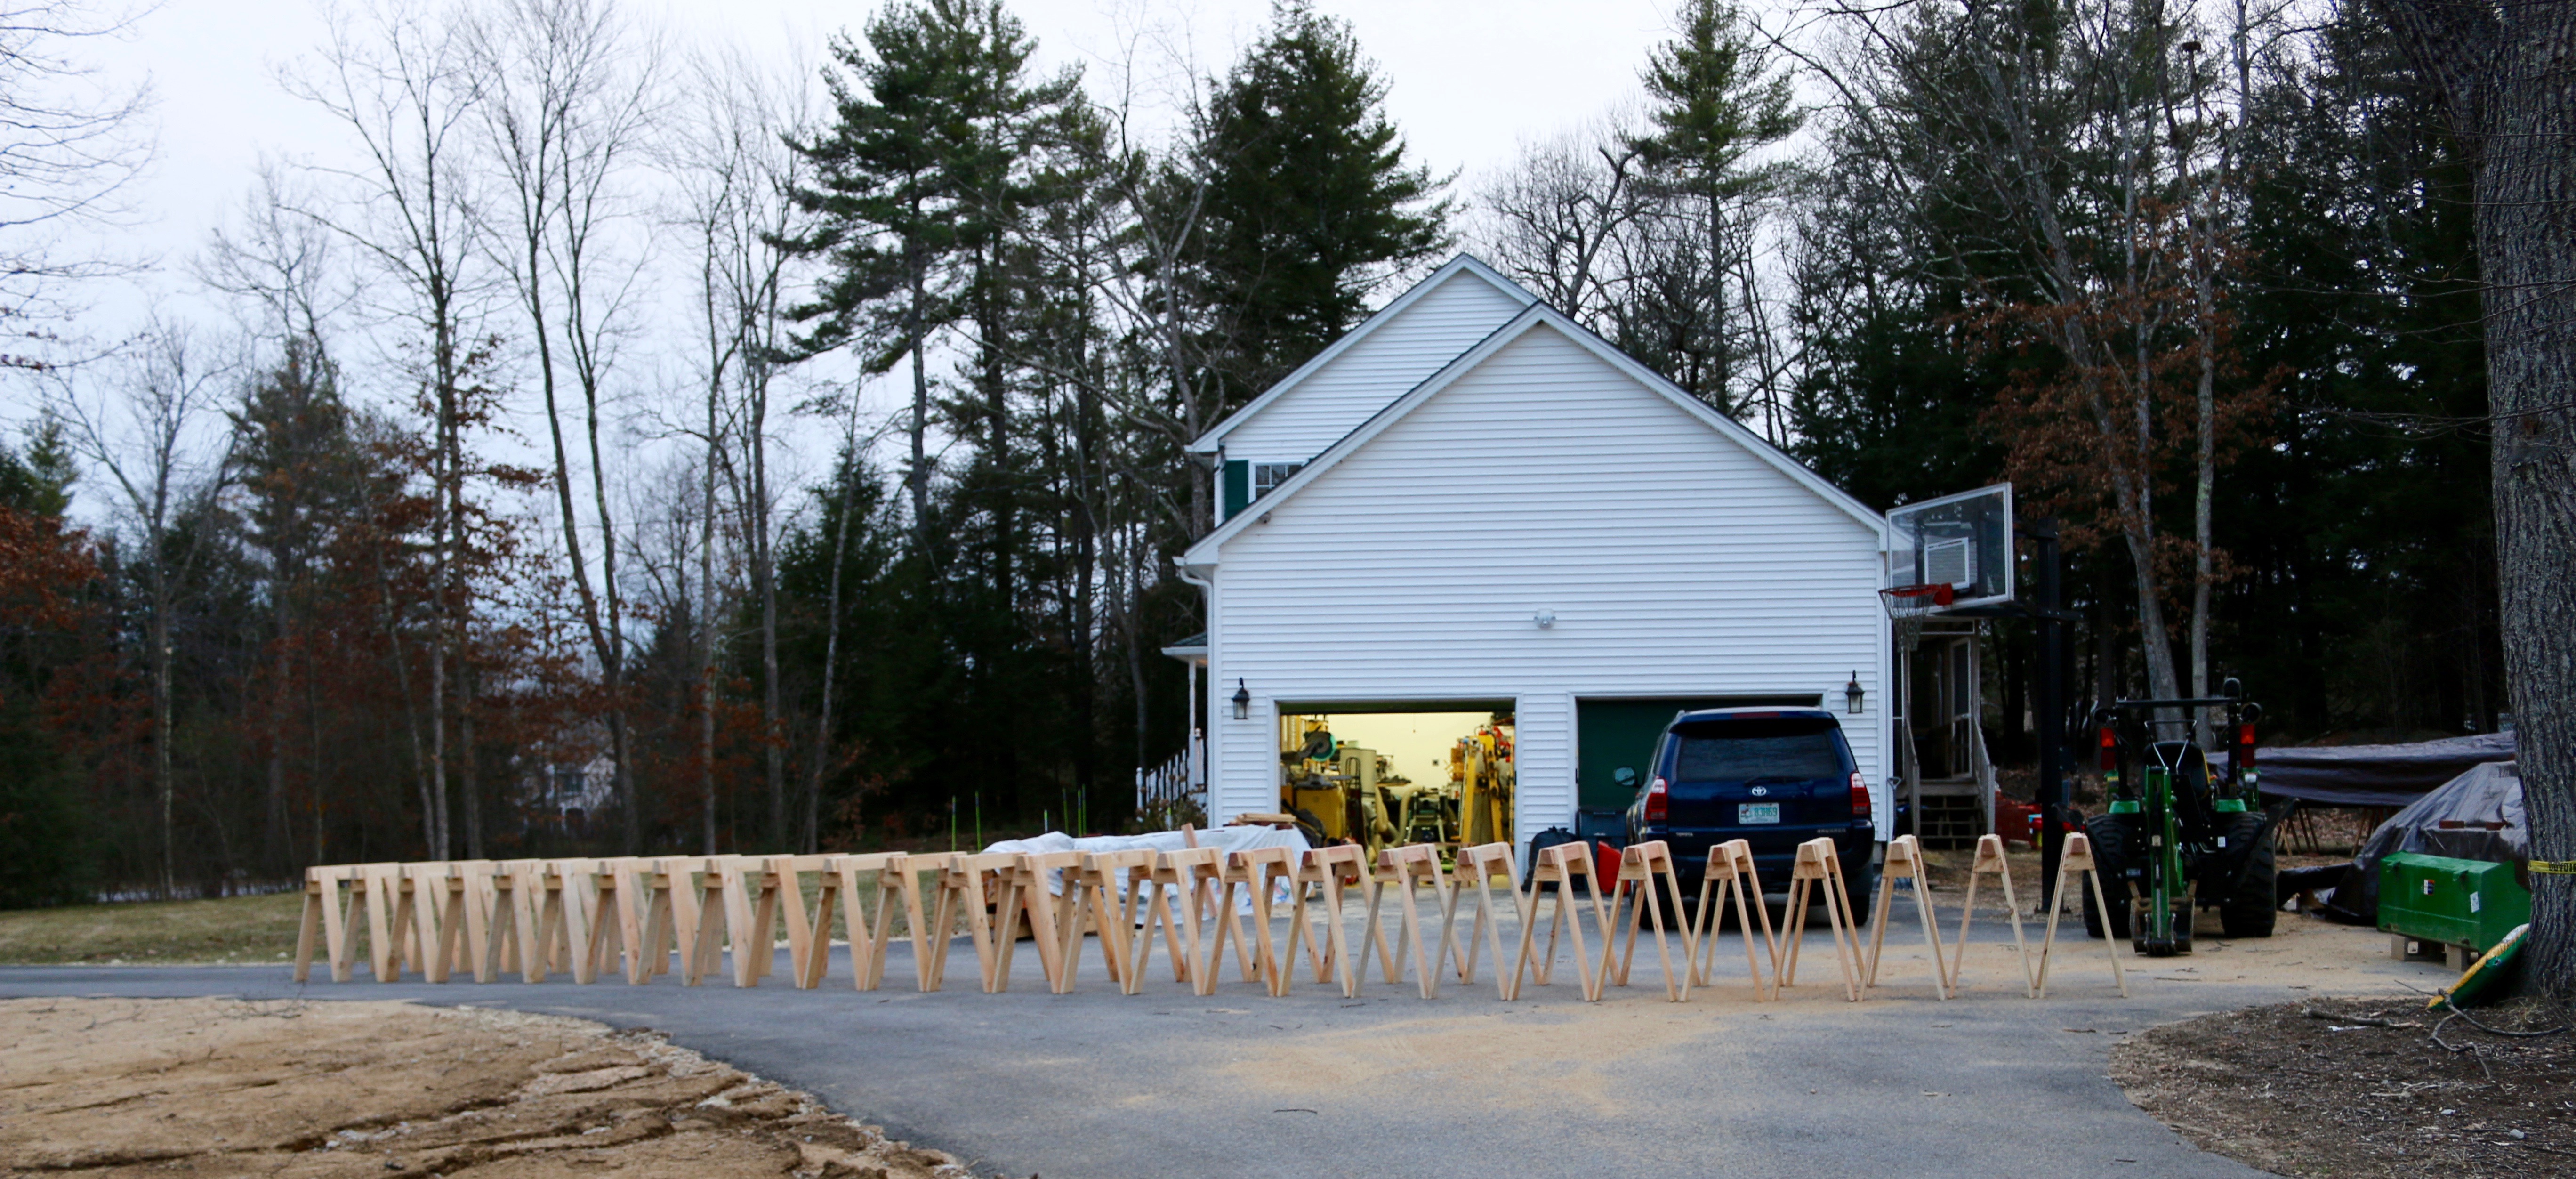
Wide angle view of the horses
This was the largest run of horses I’ve made to date so I set them all up out in the driveway just to see them all in one place.
2 ponies in the foreground 26 horses in the background
Two of the horses, my ponies, had a 24″ beam as two of the 4x4s were a little short and I thought it would be nice to have a set that can fit into a tight place.
It looks like a TON of horses, but these 12, plus the 12 I already had will just barely be enough for the barn build.
What do you plan to do with all these horses?
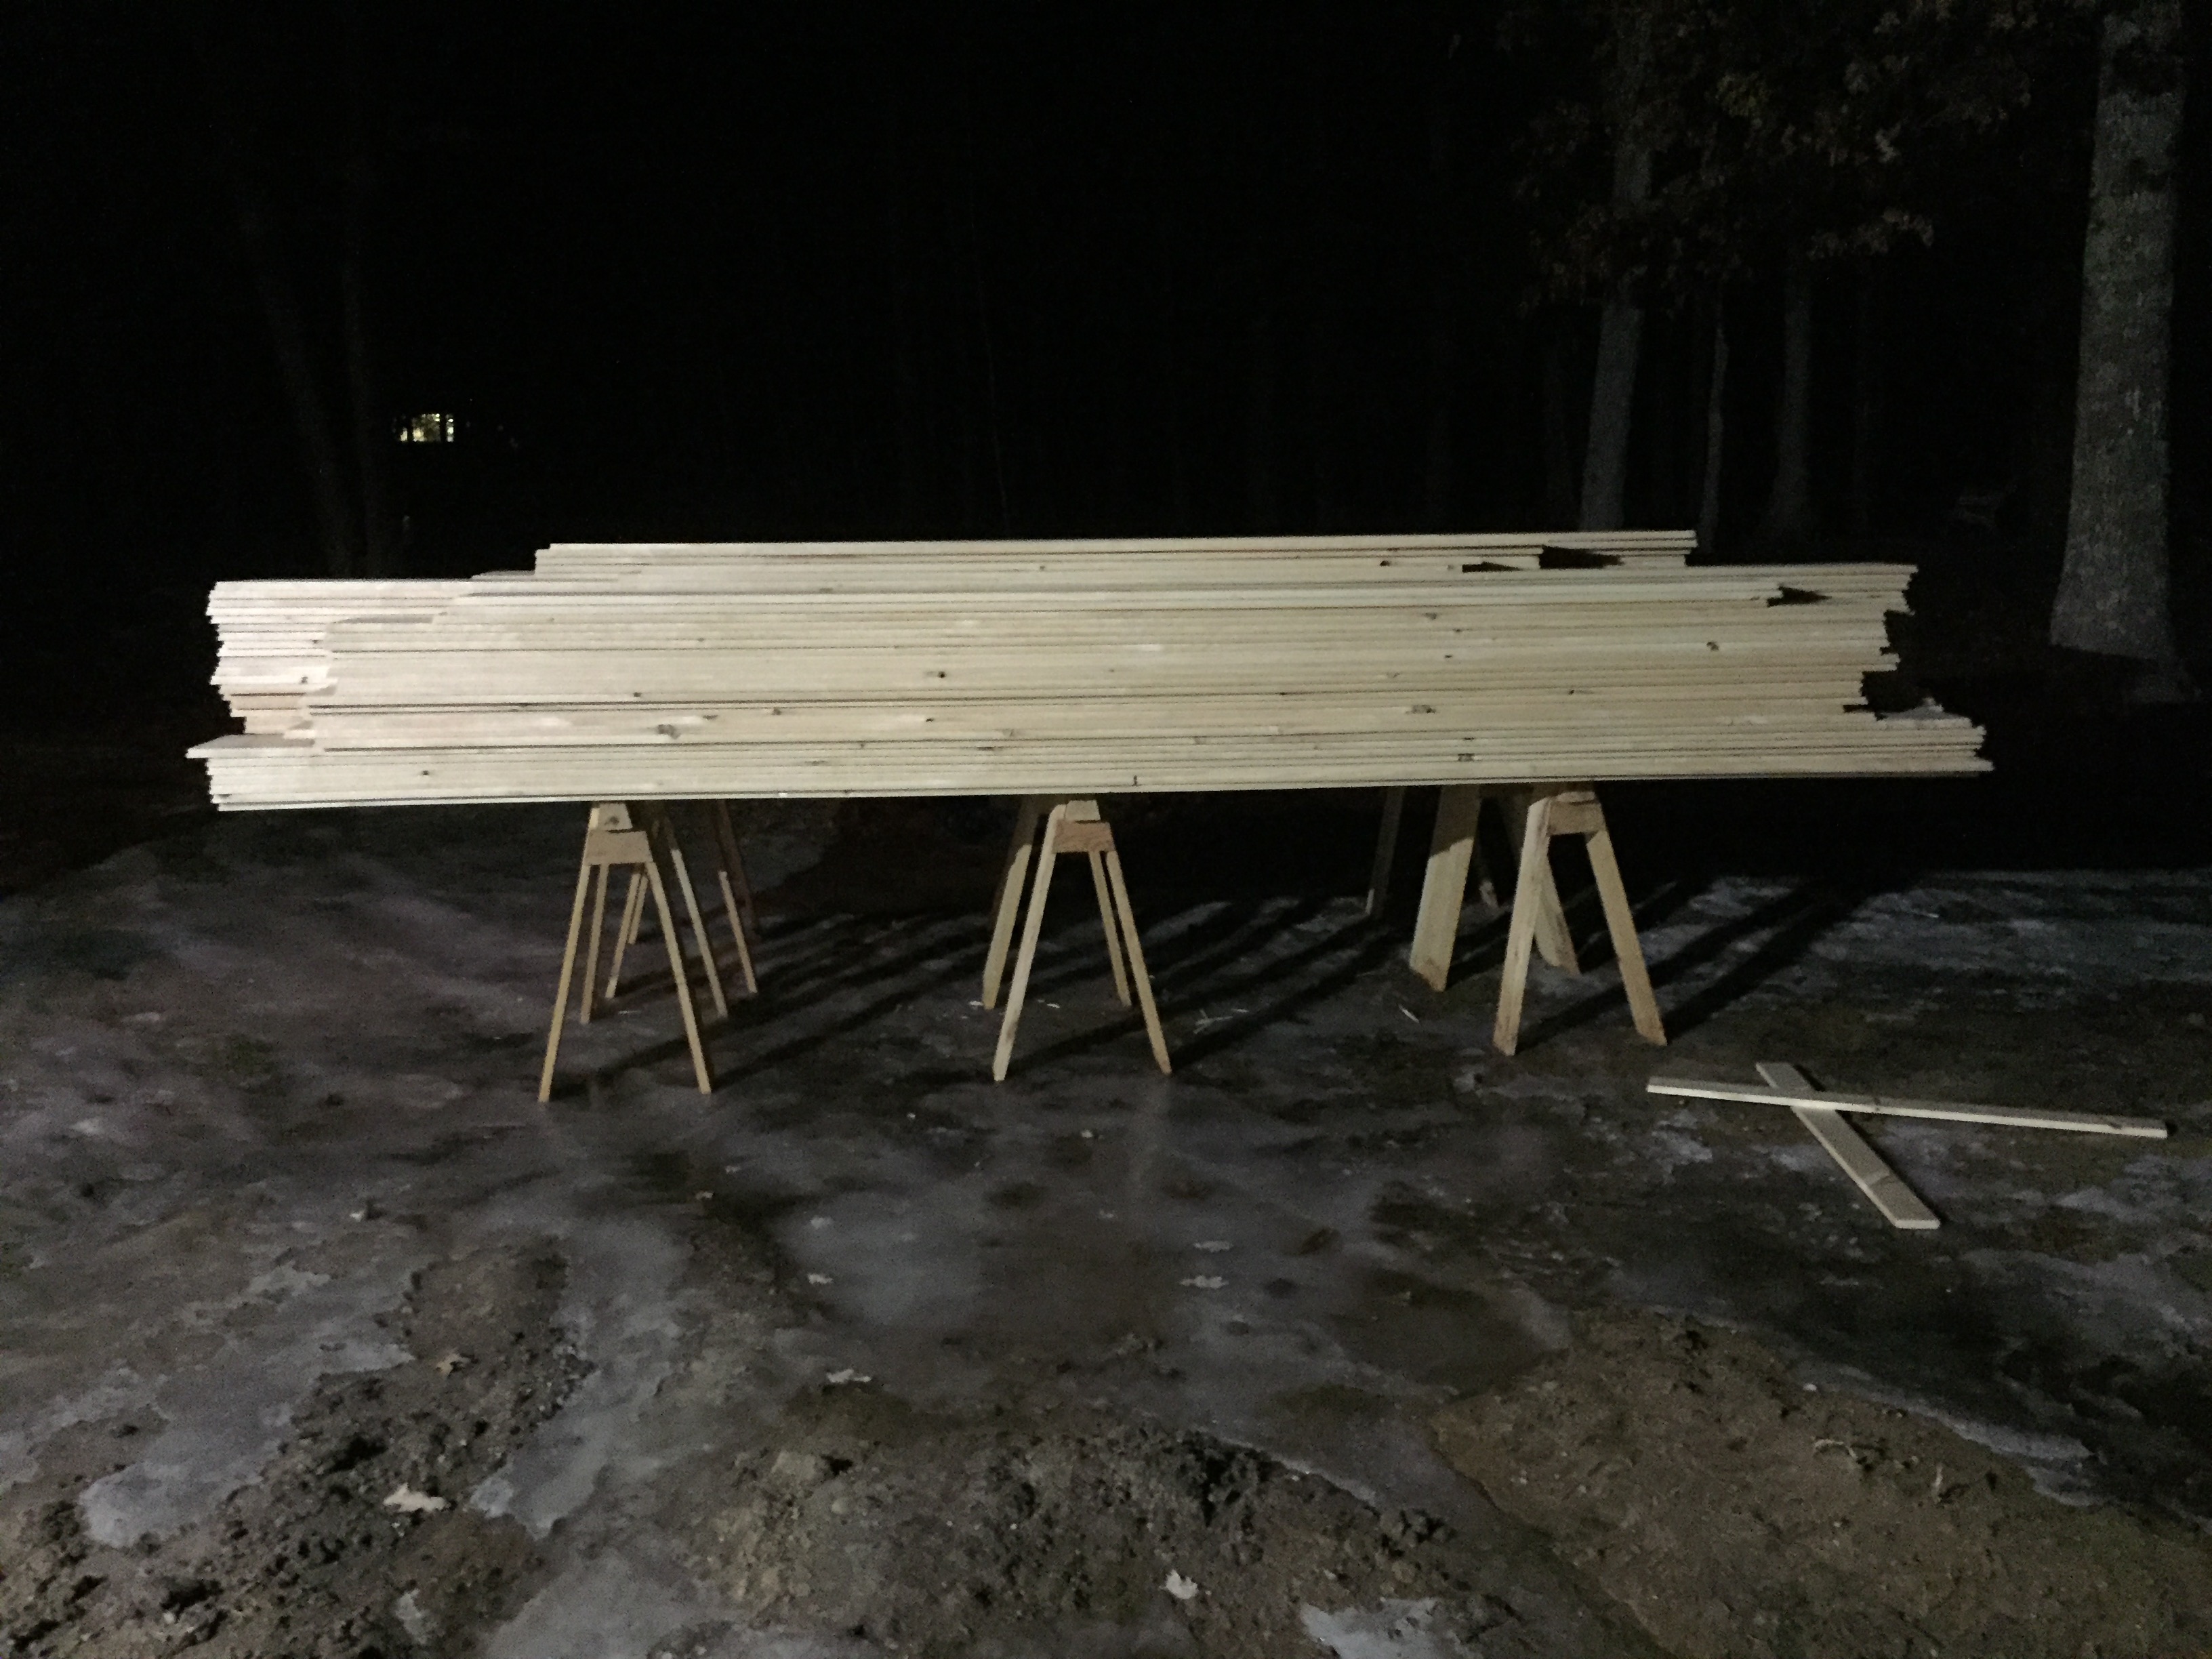
A LOT of shiplap siding on horses. 10-12″ wide 16′ long pieces
Above and below you can see a couple thousand linear feet of 16′ shiplapped pine sheathing held with ease by these horses.
A LOT of shiplap siding on horses
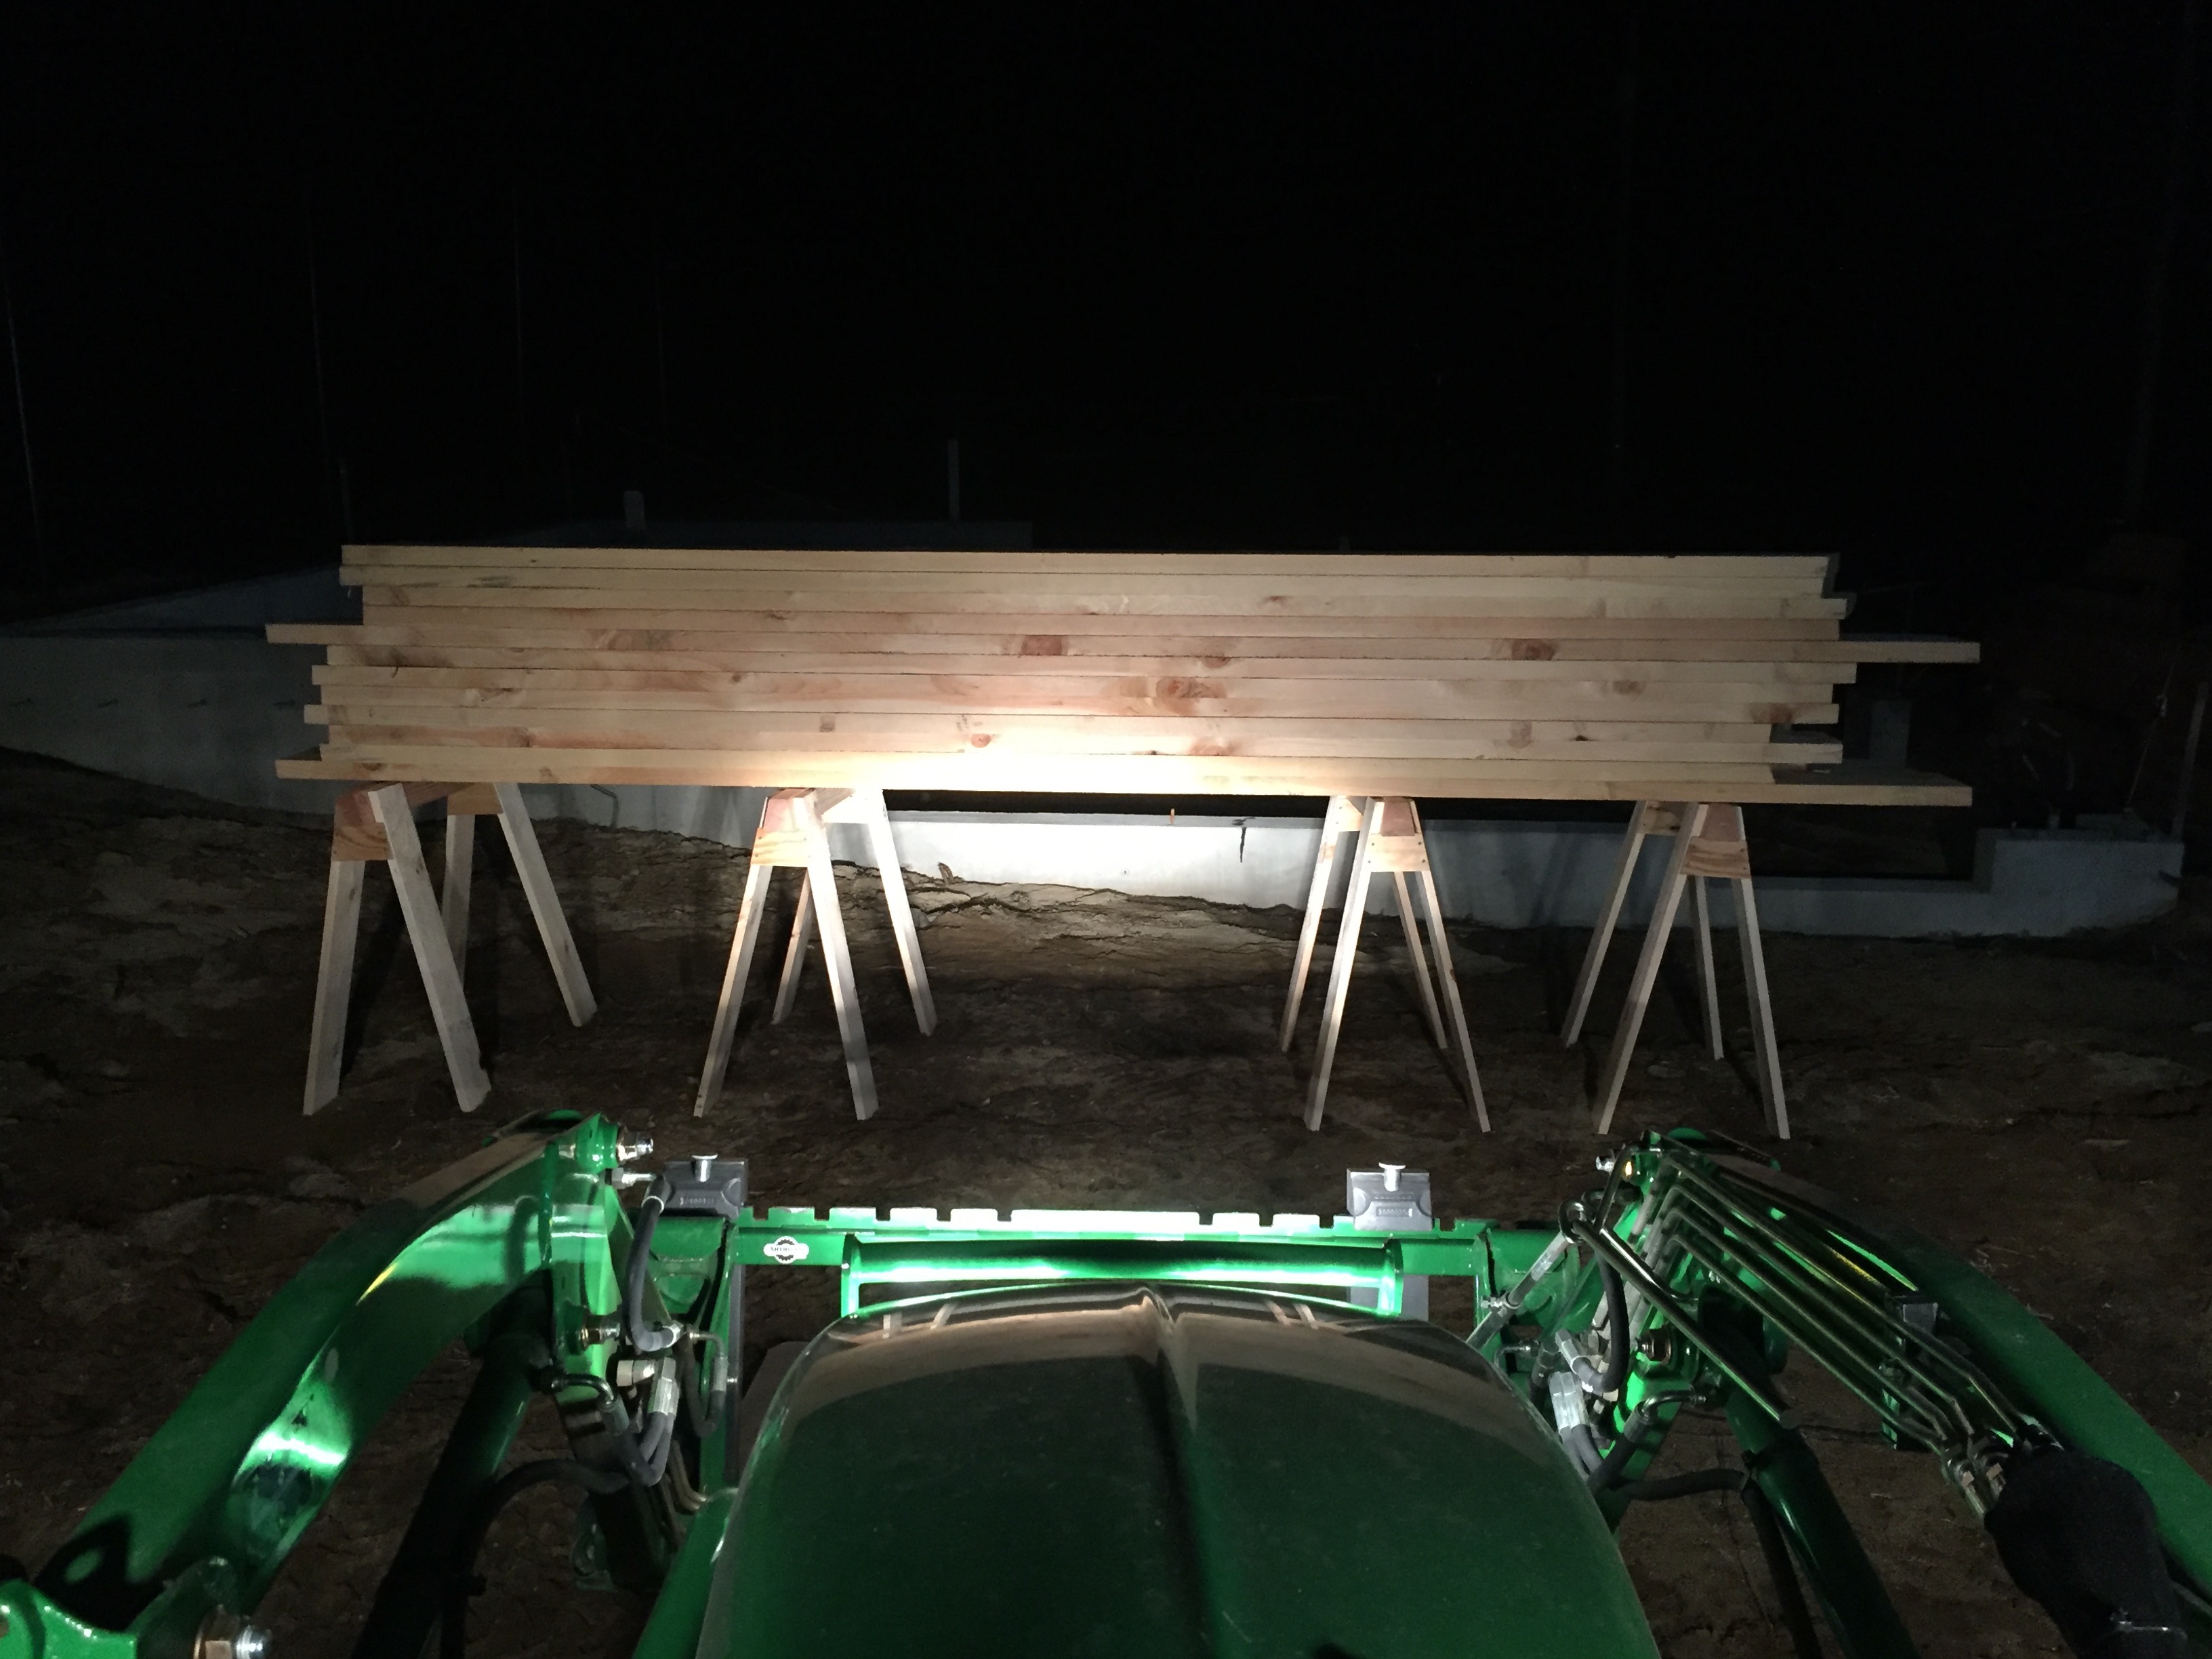
In the photo below are 24 2″ thick 12″ wide green pine planks that will be used in the barn loft. I estimated this wood to weigh 1800lbs and the 4 horses below seem to hold it with ease.
4 horses holding over 1850+lbs of green pine planking
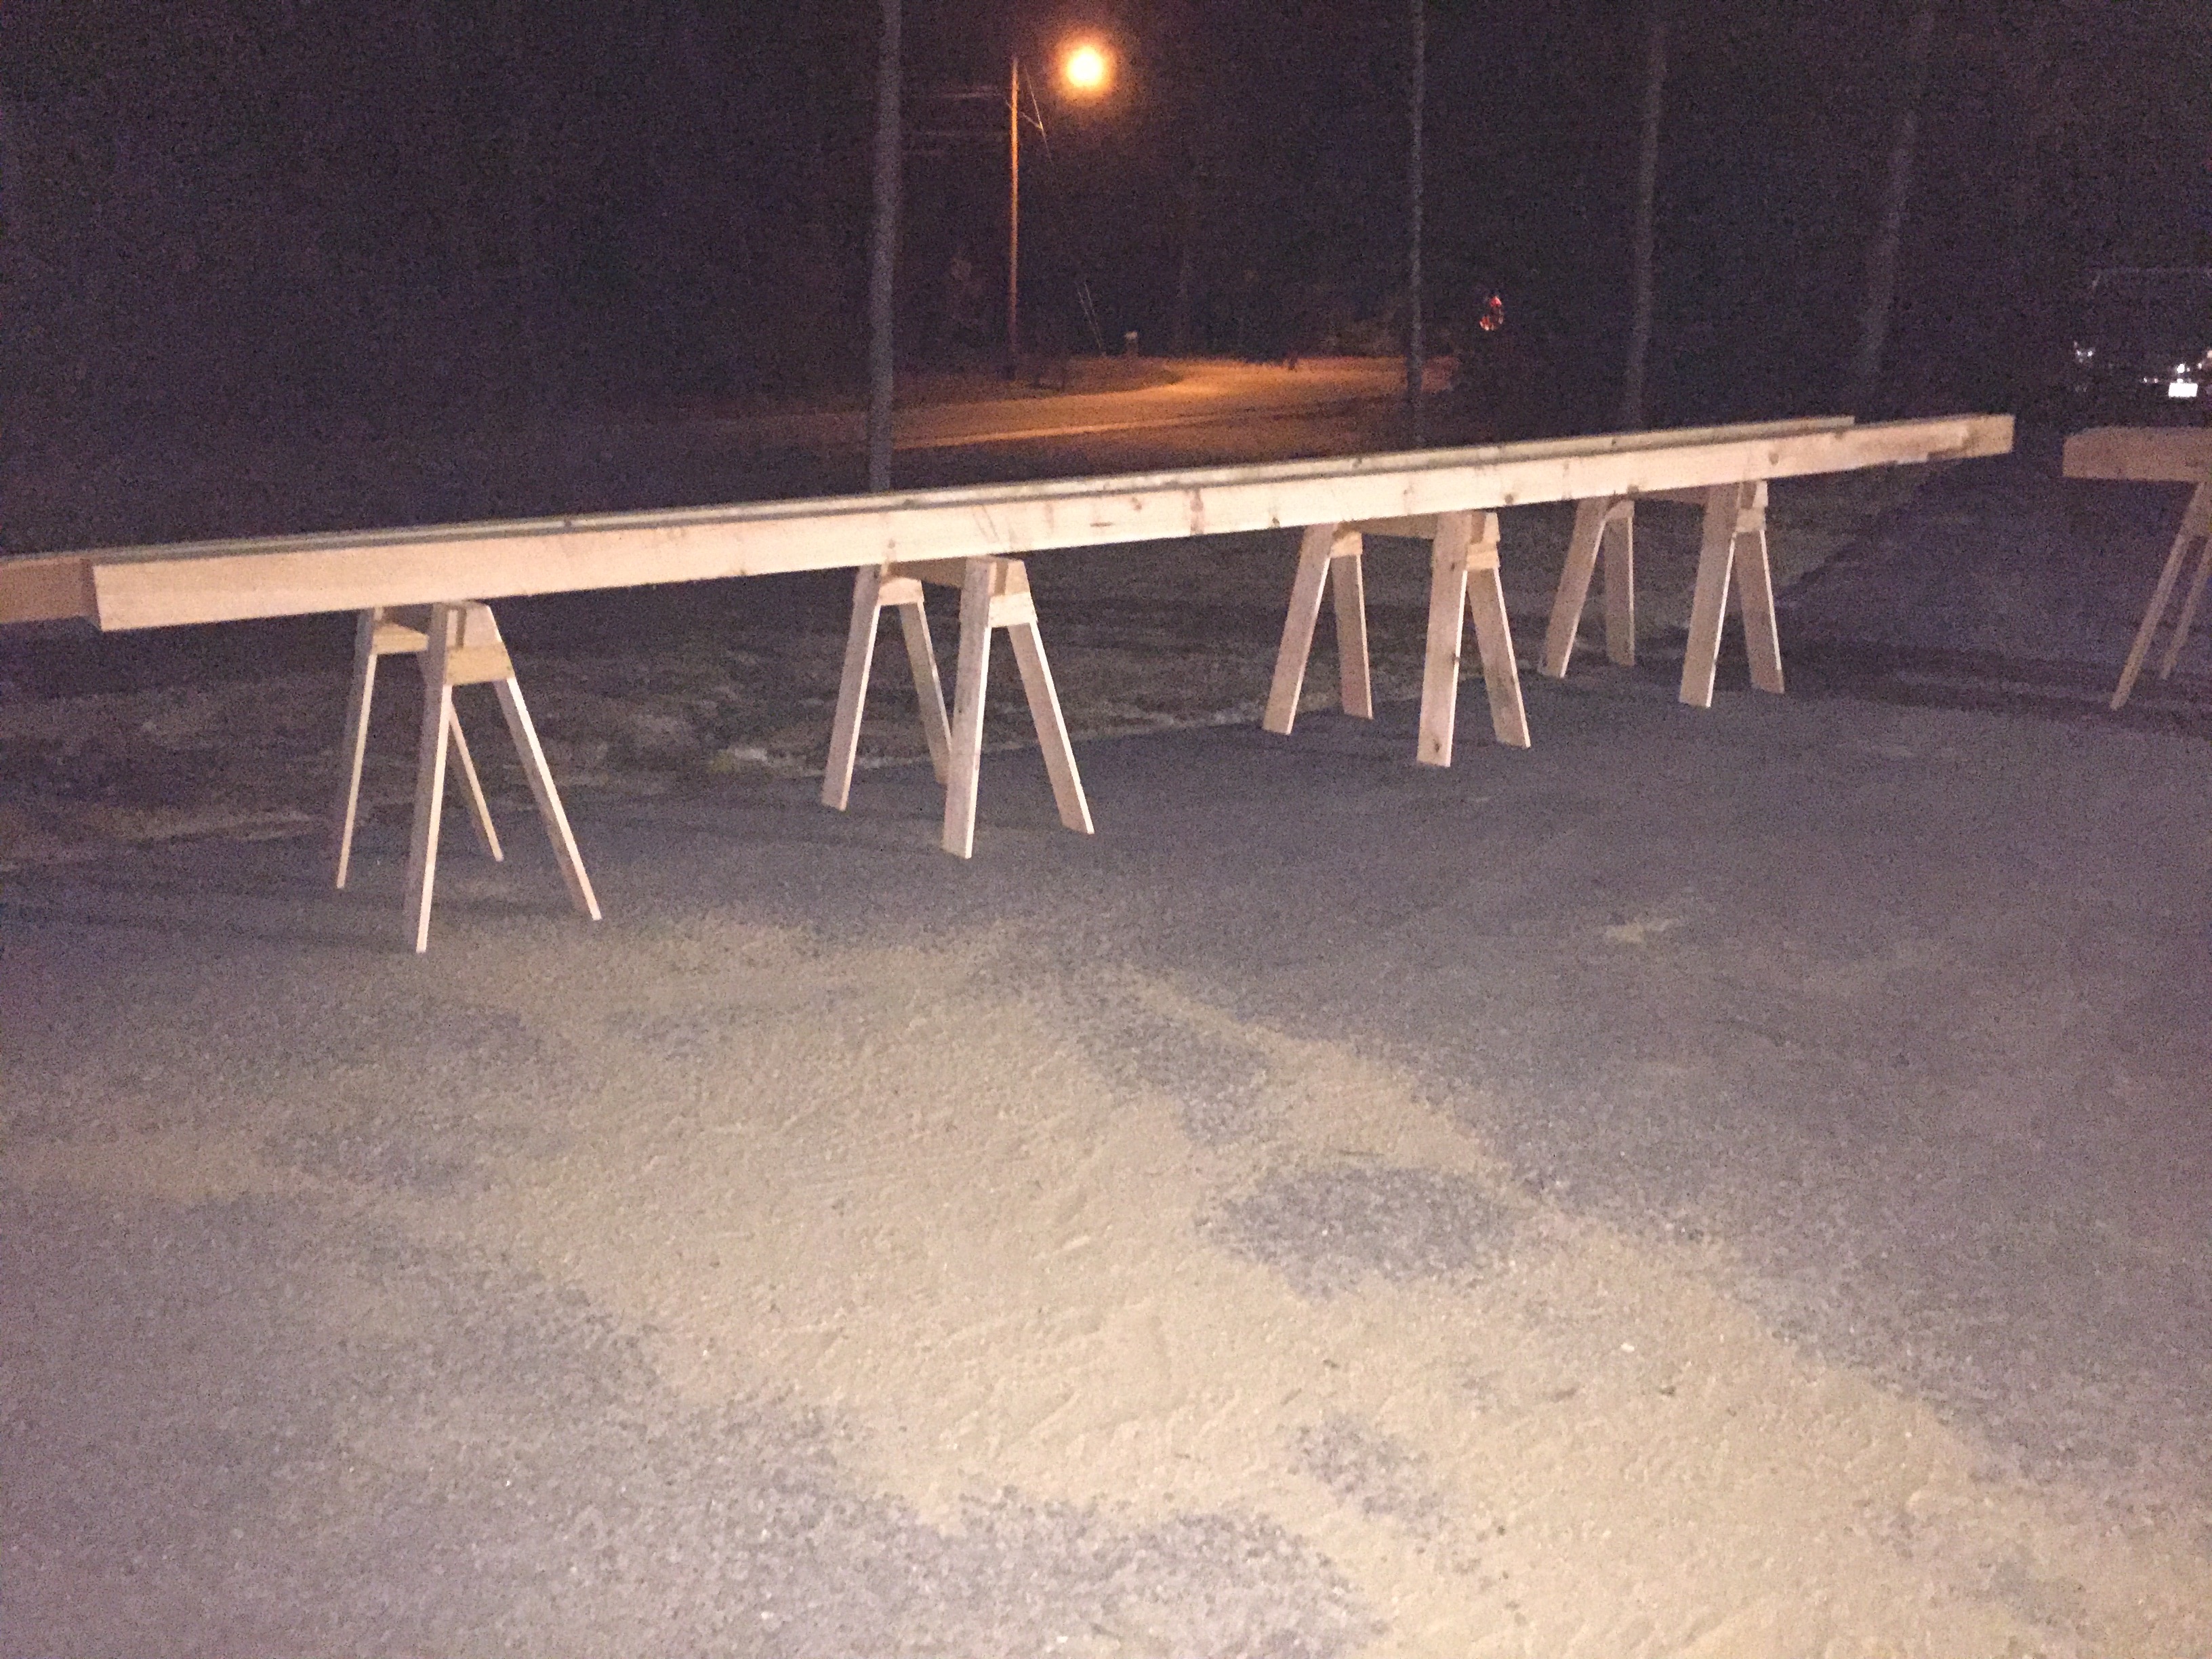
And below are some 6×9 25′ long timbers.
Horses holding 6″x9″x25′ timbers
As you can see these versatile horses are at home in the shop or out on a worksite and I hope that you’ll build a few pairs for yourself. If you do, please let me know in the comments.
Some woodworking projects are for fun, some are skill builders, some are to keep the lights on and some are for necessity. As they say “necessity is the mother of invention.” When taking a woodworking workshop at the North Bennet Street School one of the challenges is often lugging all your tools to class. The school is set in the North End of Boston and most folks take public transportation to get to the school as parking in that area is expensive and in short supply. I’ve seen folks use bags, backpacks, plastic toolboxes, 5 gallon buckets, rolling carts, suitcases, you name it. I can still remember lugging big toolboxes on the subway when I was student.
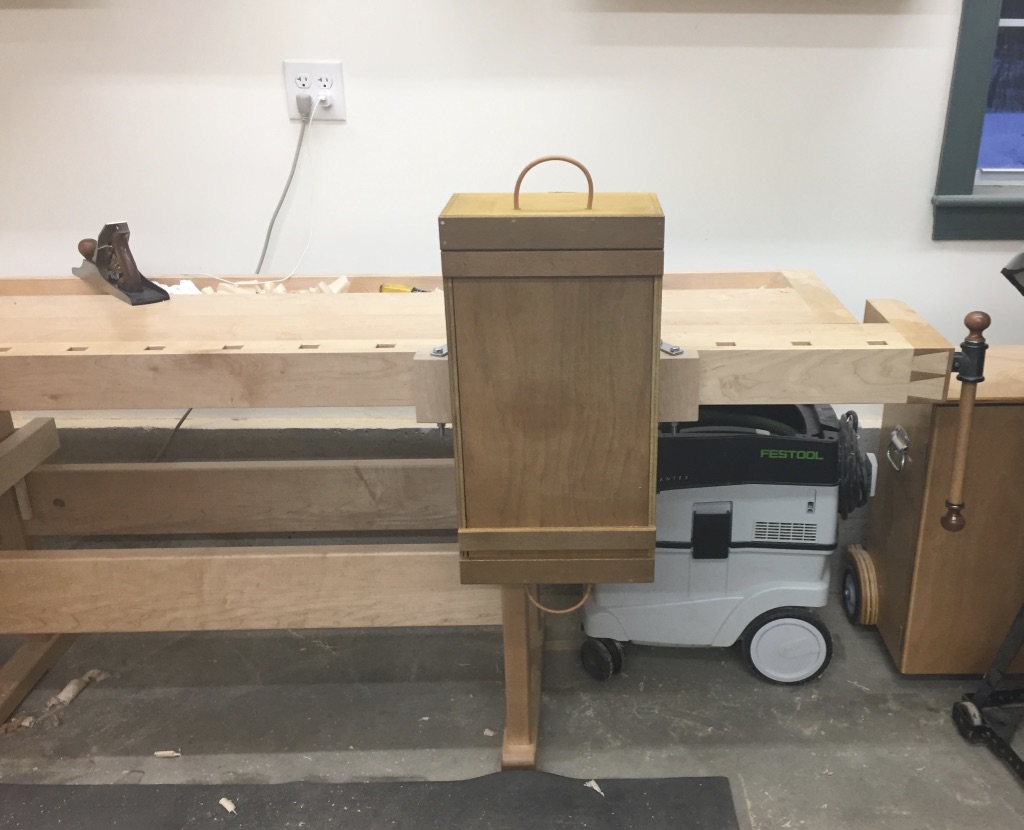
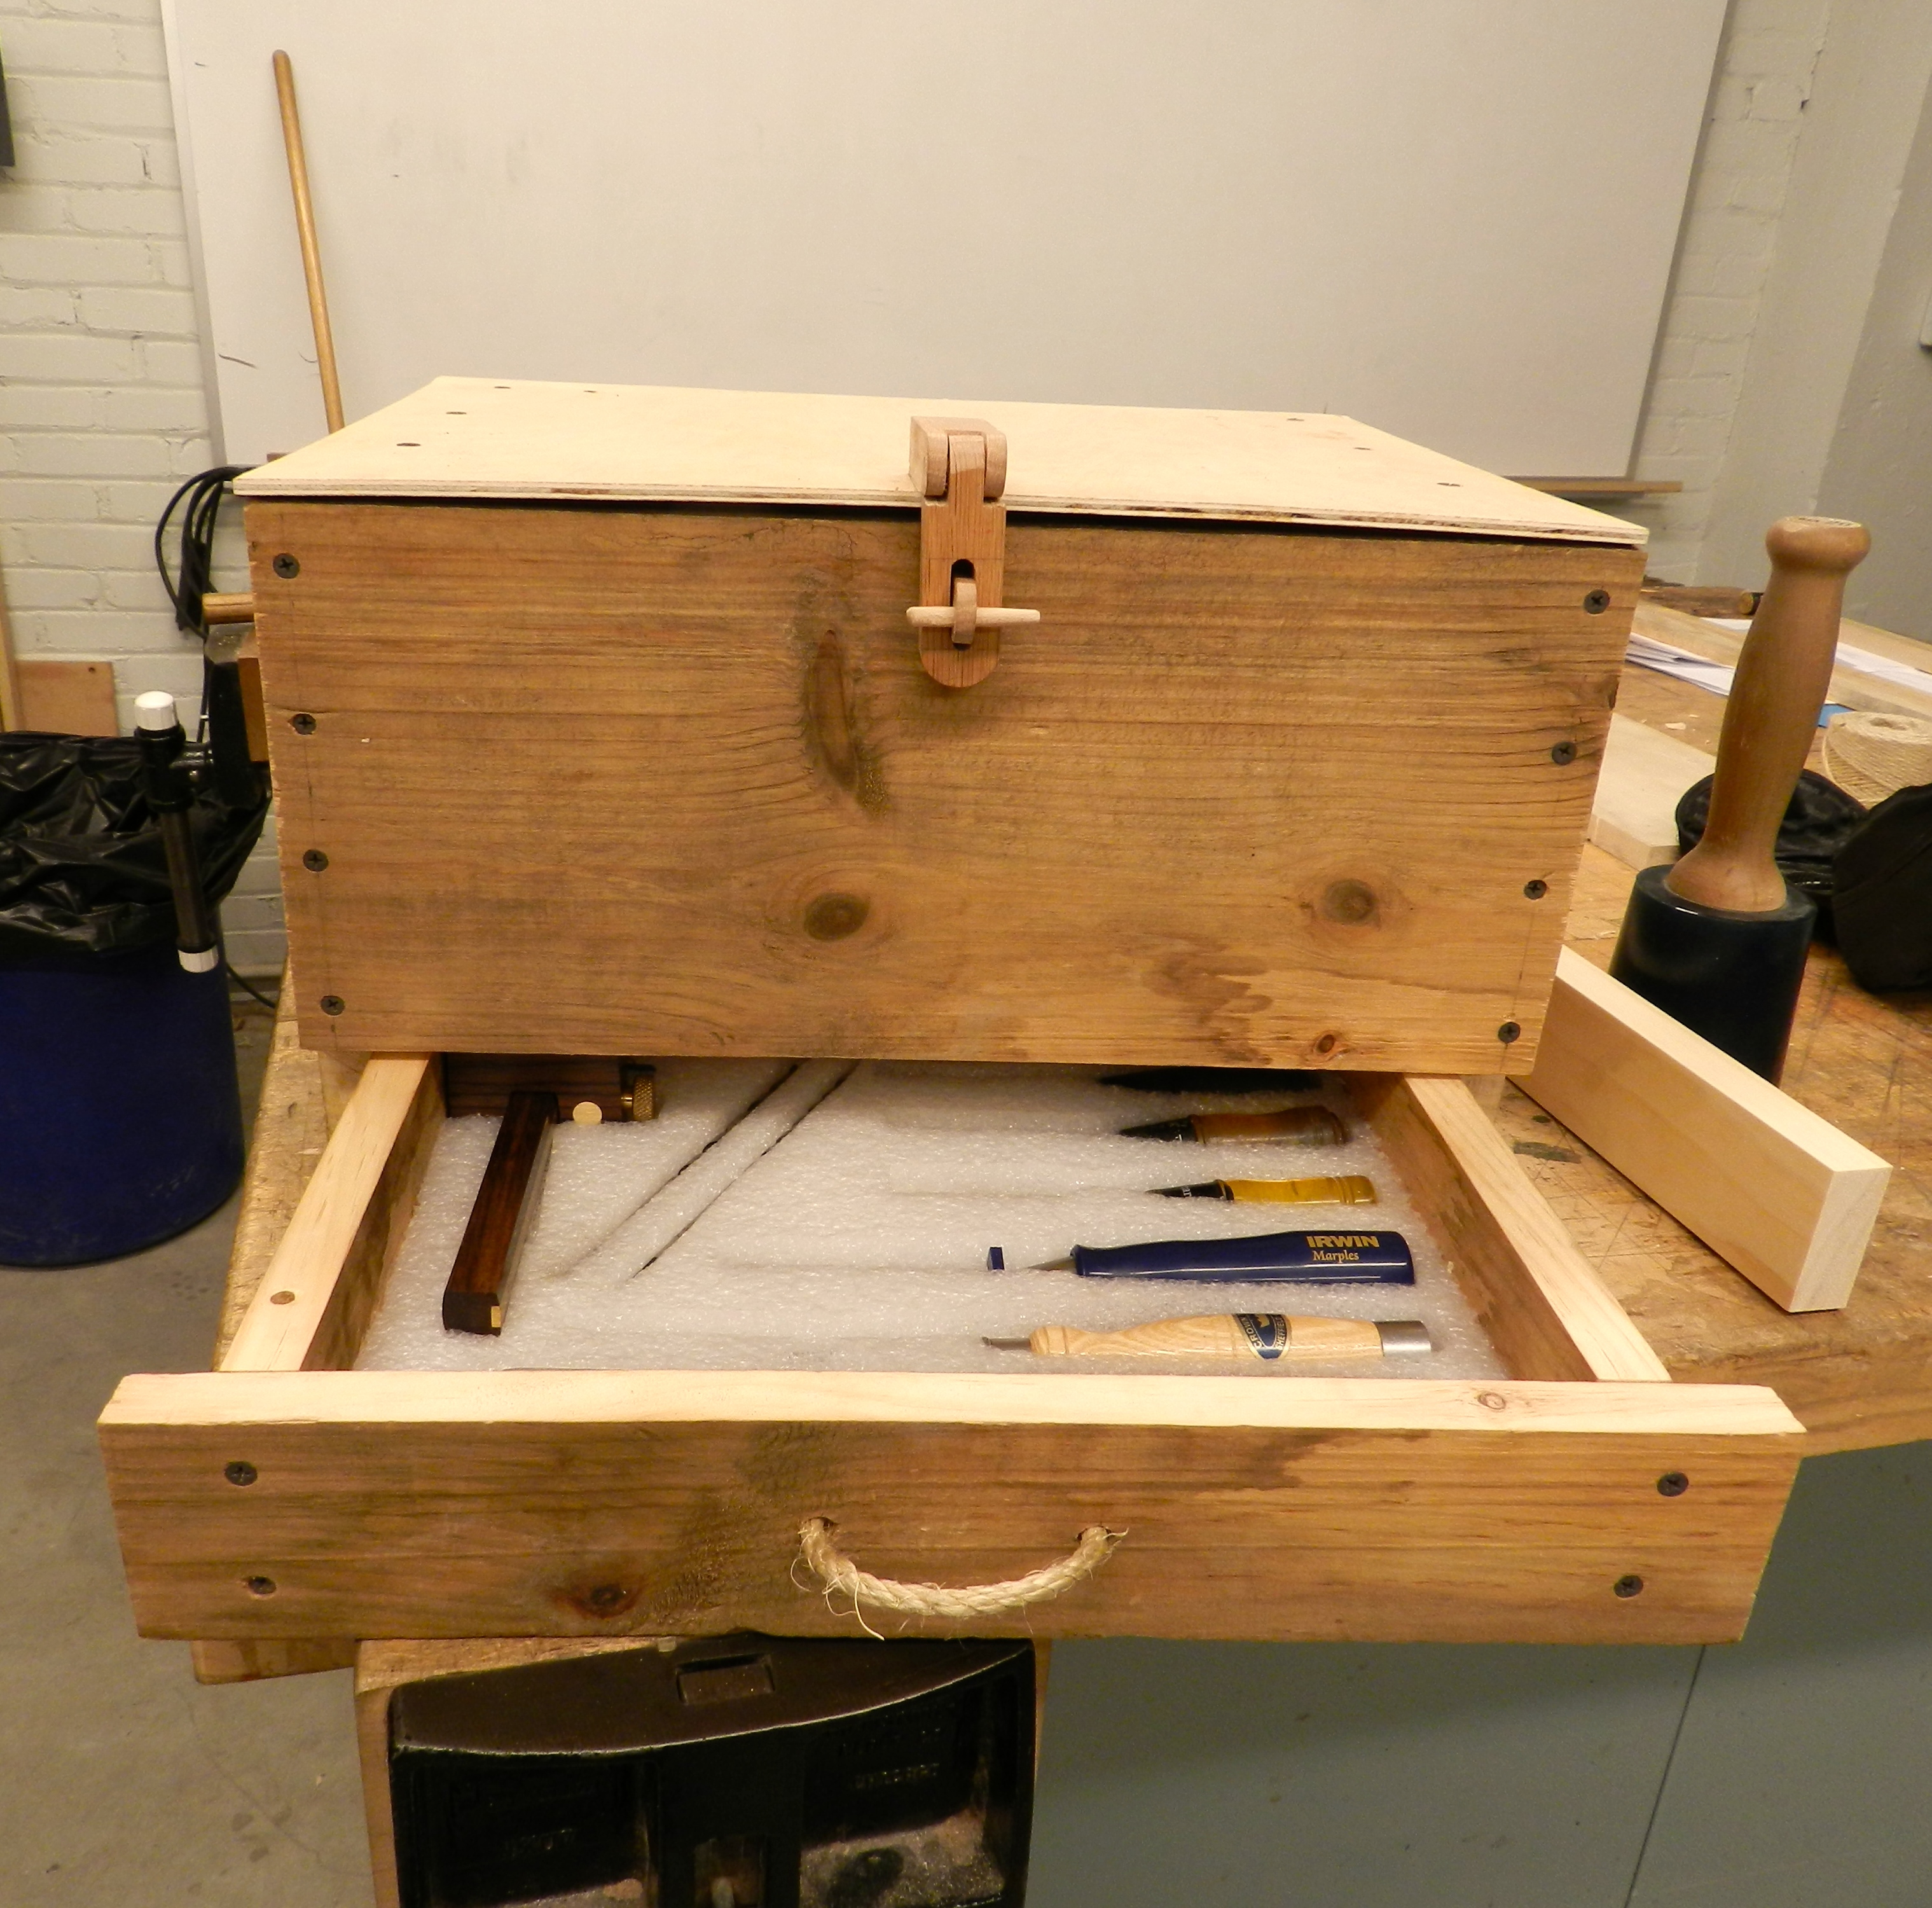
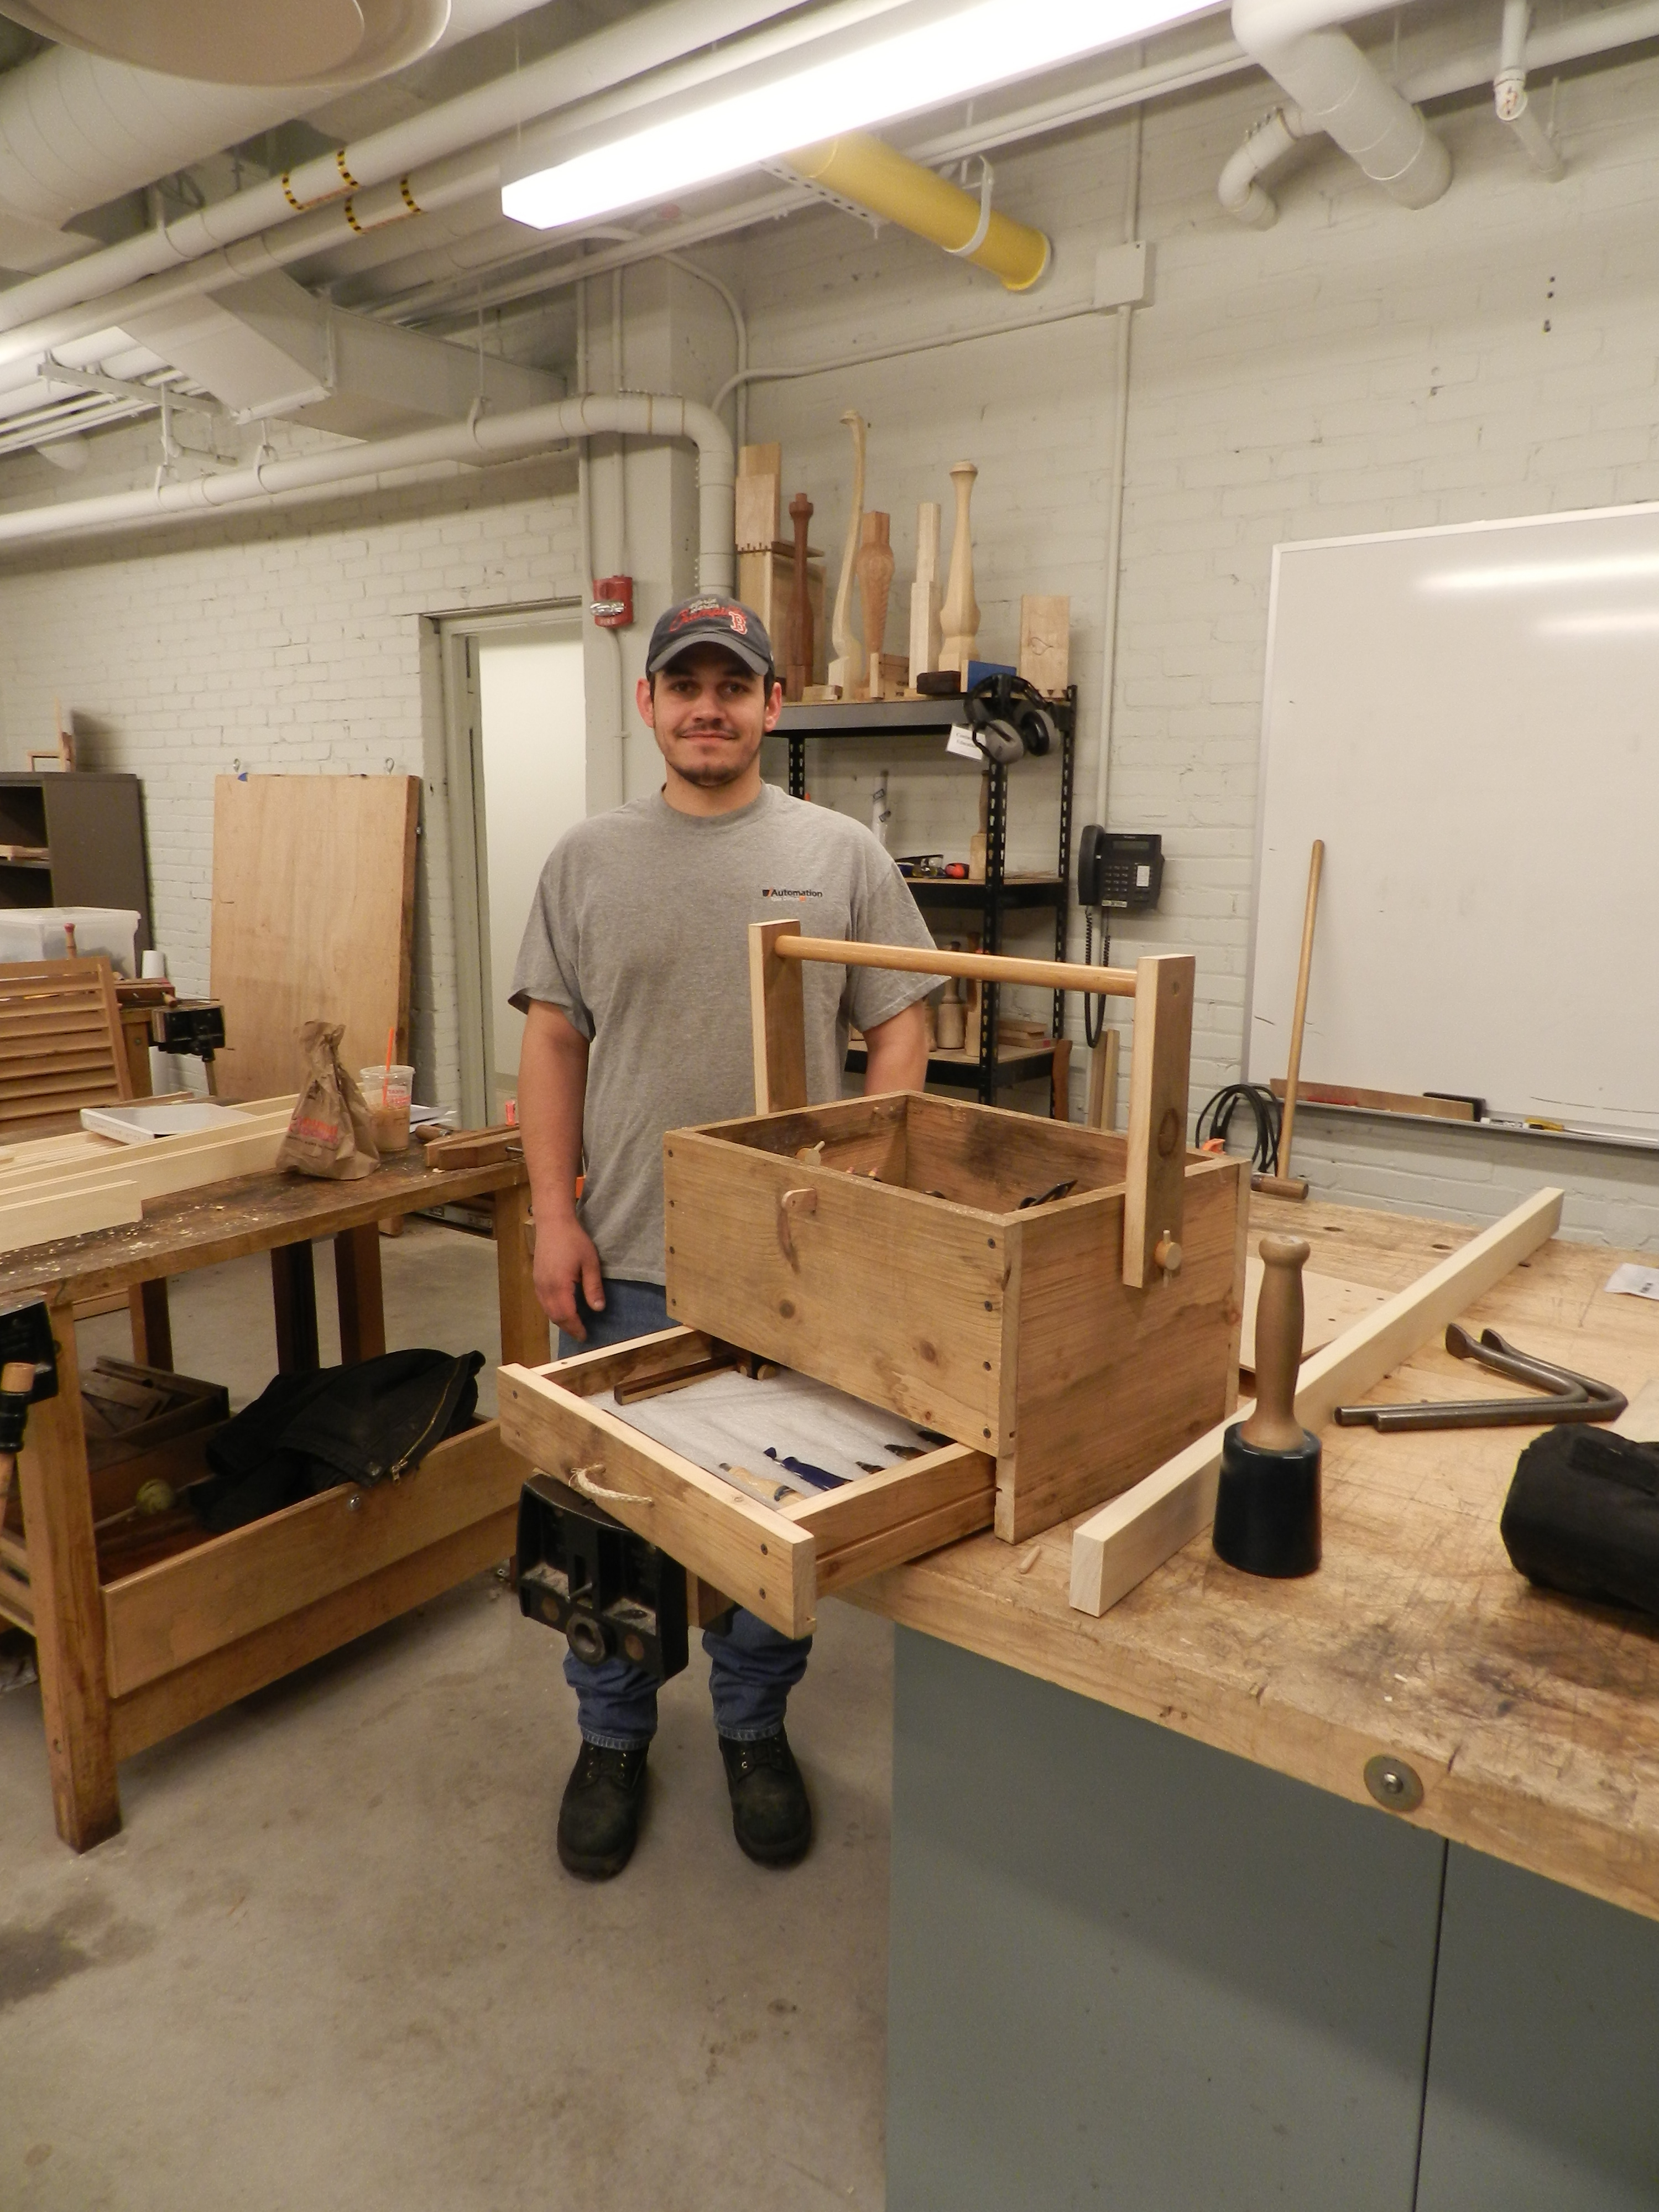
This past weekend one of my students, Jordan Ruiz, showed up to my Introduction To Shutters Workshop with the toolbox you see below:
Closed toolbox with oak hasp
He designed it off the top of his head and made it mostly from a single pine board.
Open drawer
What I like about his utilitarian design is how he translated a lot of the traditional hardware needs into wooden or other natural equivalents. Note the oak hasp which is articulated and secured with wooden pins. A hemp rope drawer pull. Dowels to secure the moving wooden tote handle, sliding top secured by a captured dowel etc.
French fitted packing foam to keep the tools in place
I also like how Jordan used some packing foam to ‘French Fit’ all of the tools into his toolbox.
Jordan Ruiz with his toolbox
If he’s willing to do all that work to prepare for a workshop I can only imagine the dedication and creativity he’ll have at the job site. I think Jordan has a bright future ahead of him in the woodworking field. (He also made a very nice shutter as seen in the previous post)
Building customized storage solutions is one of the joys of being a woodworker. I never seem to have enough storage at home or in the shop. On days when I don’t have a lot of time in the shop, when I have some nice scraps I want to use or when I want a quick warm-up, I often find myself making boxes and other storage solutions for items I want to take care of. Below are three posts I recently made for Popular Woodworking on their ‘Woodworking Daily’ blog to explore some of my thoughts on this topic. I hope that they will inspire you to get out into the shop and make something today.
Aging 100 Years in a Day
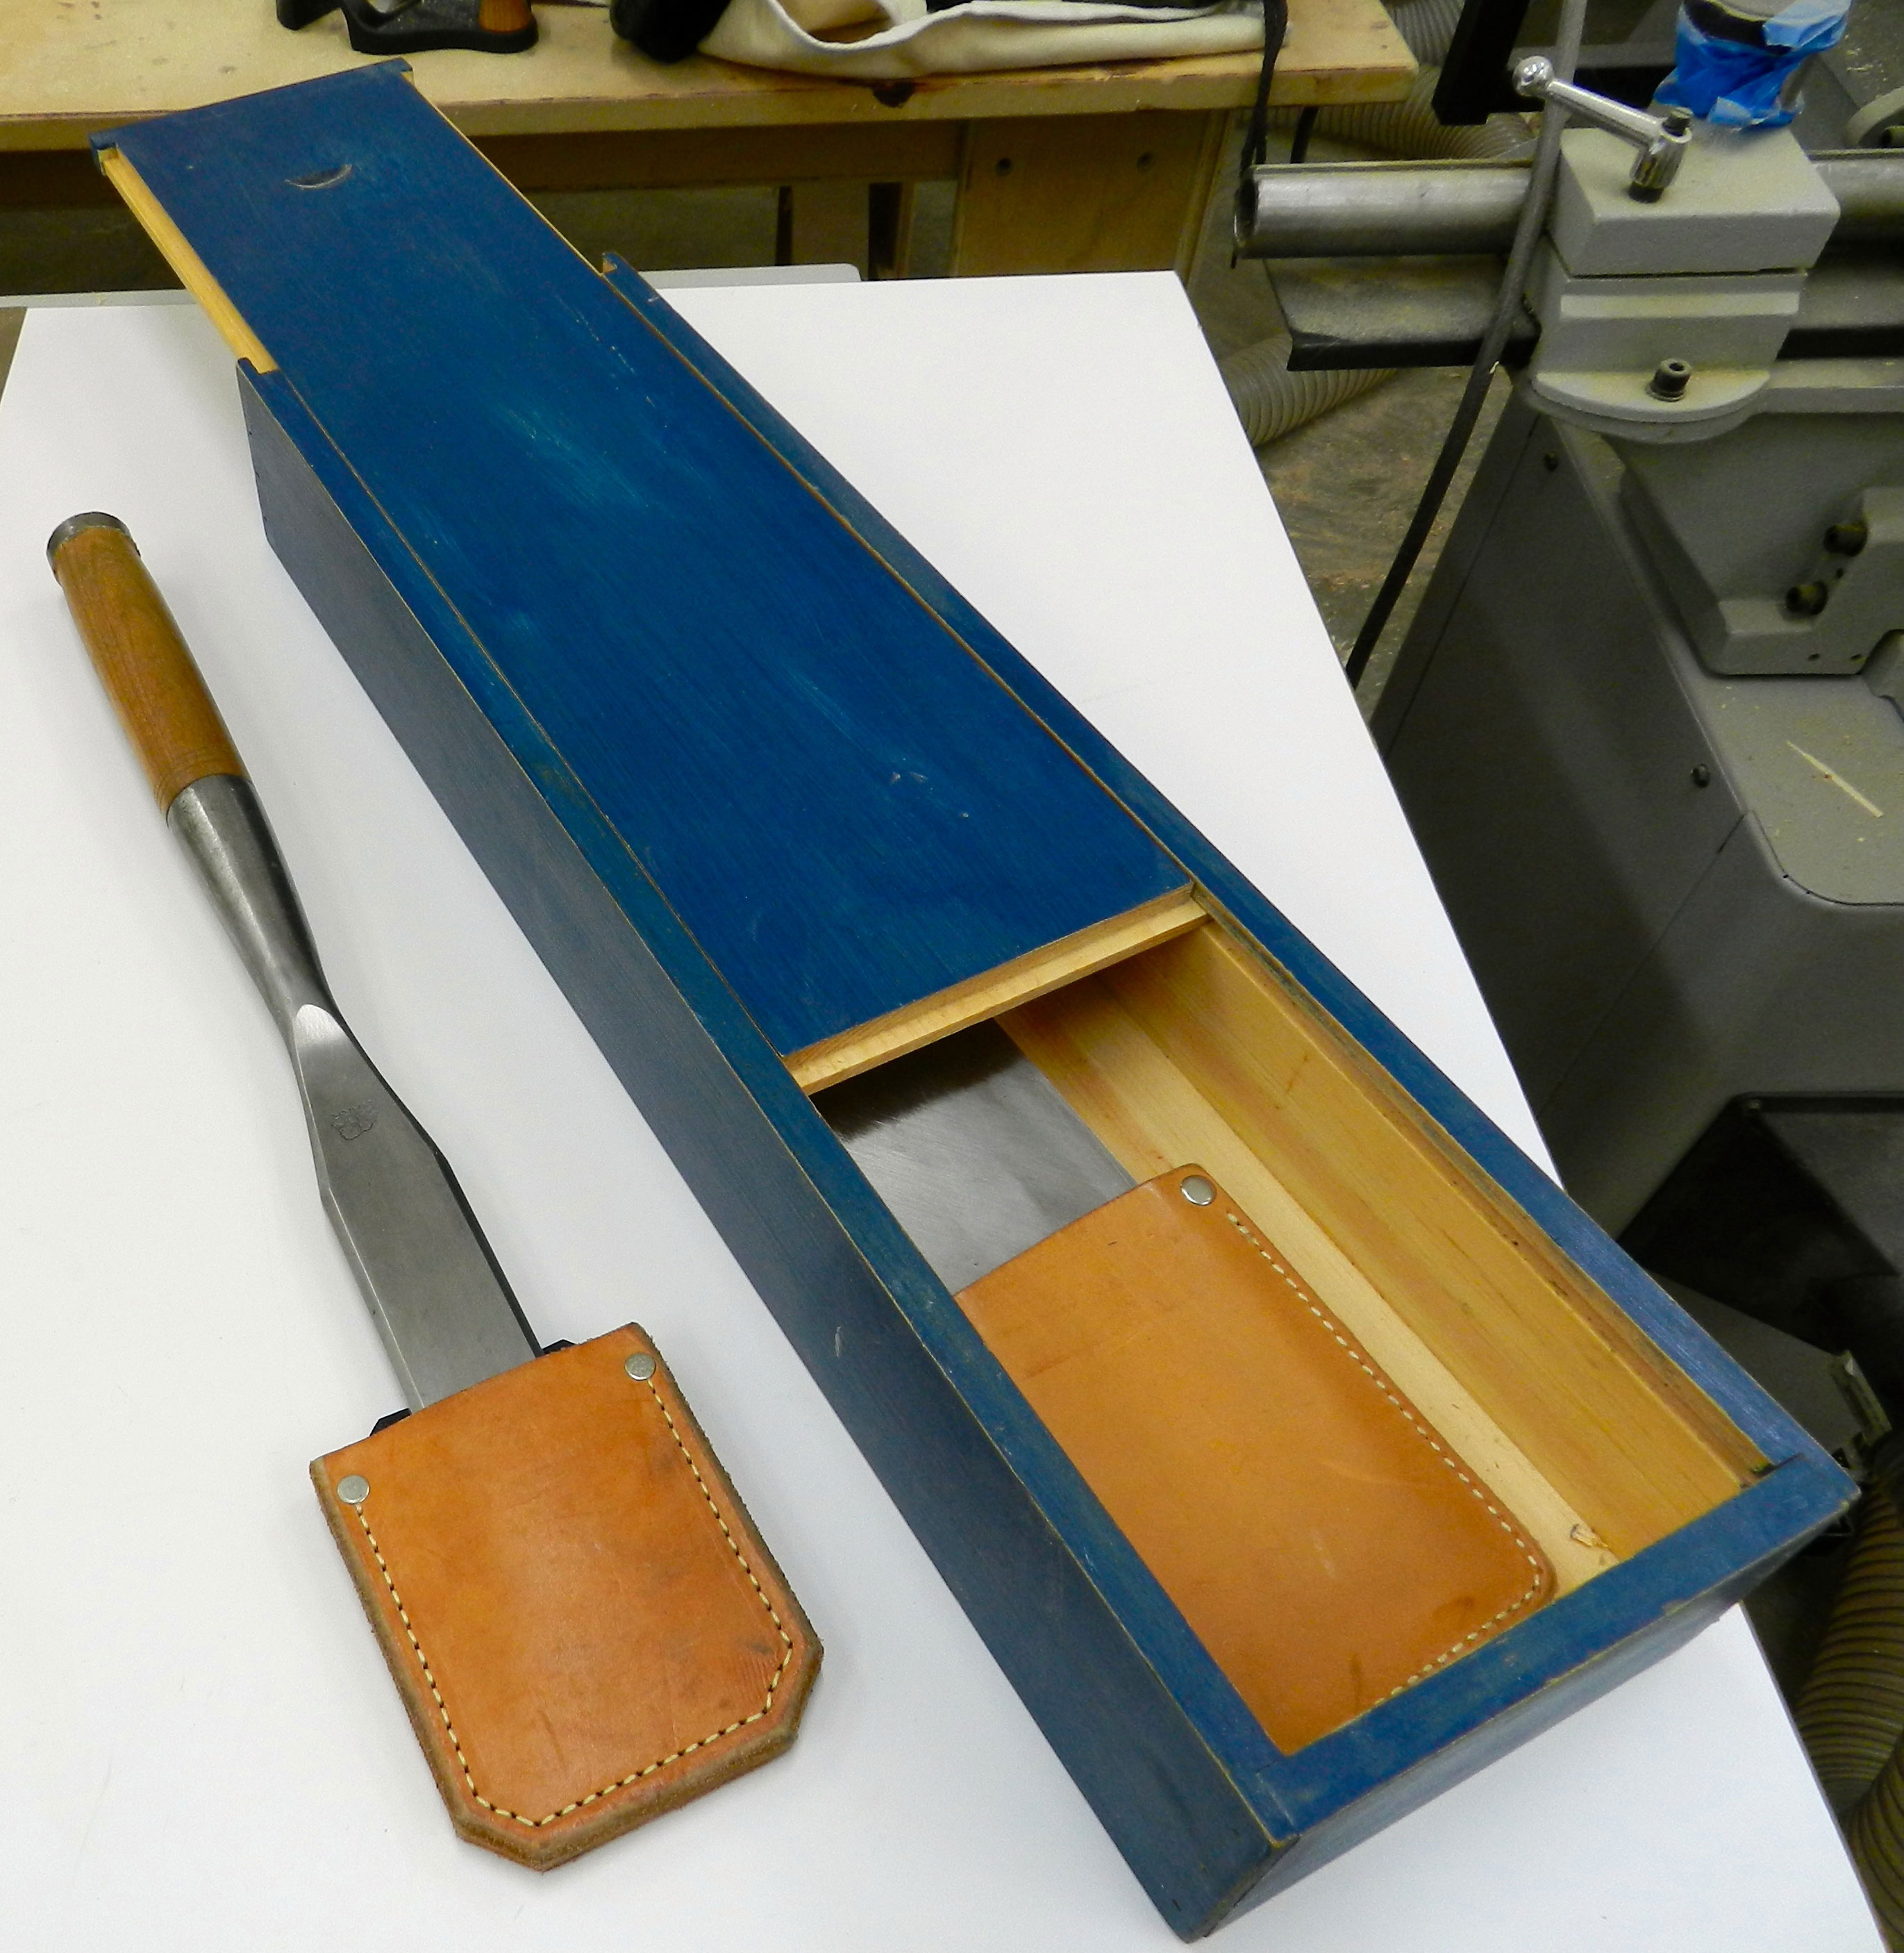
Sliding top timber framing chisel box
You can check out this post on making a sliding top timber framing chisel box from eastern white pine, simple rabbet joints and cut nails. It features a weathered finish made from milk paint and wax that will only look better with age and use. You can read the post here.
Working in the Round
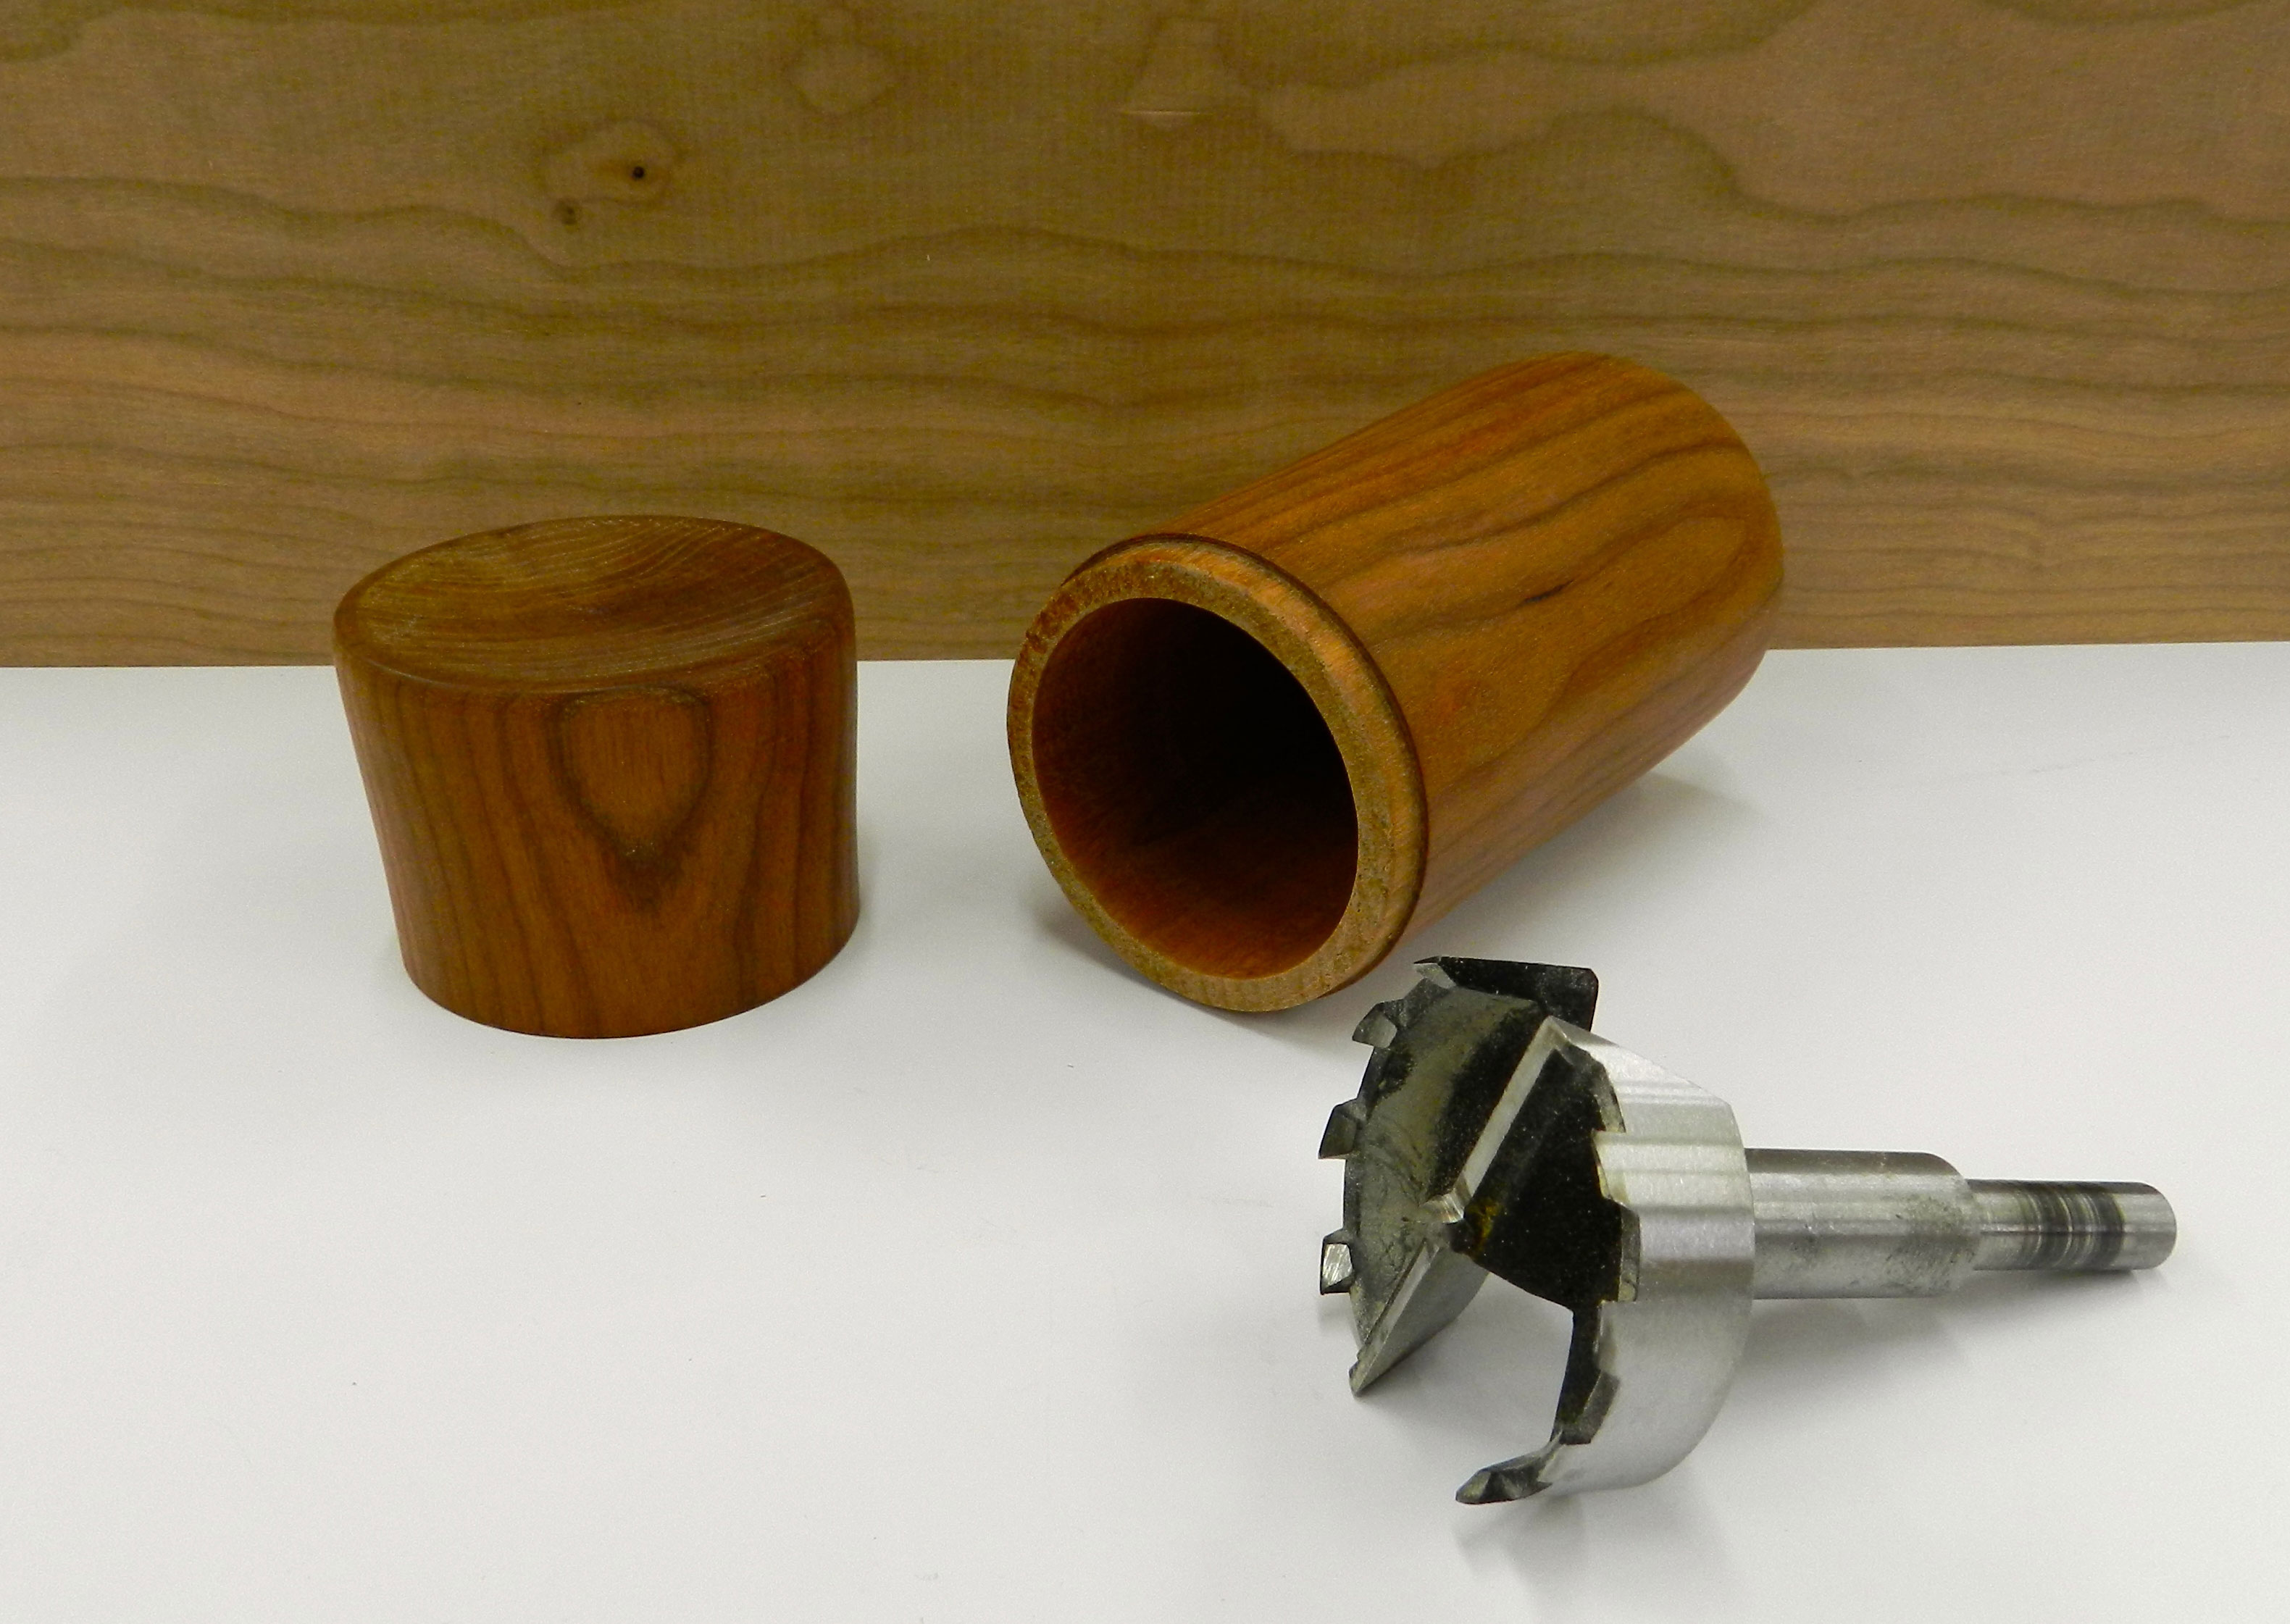
Turned Box
This turned cherry box is a great way to start turning round boxes. The hollowing is done via a large Forstner bit. You can learn more about how to do this here.
A Great Box to Have Dinner With
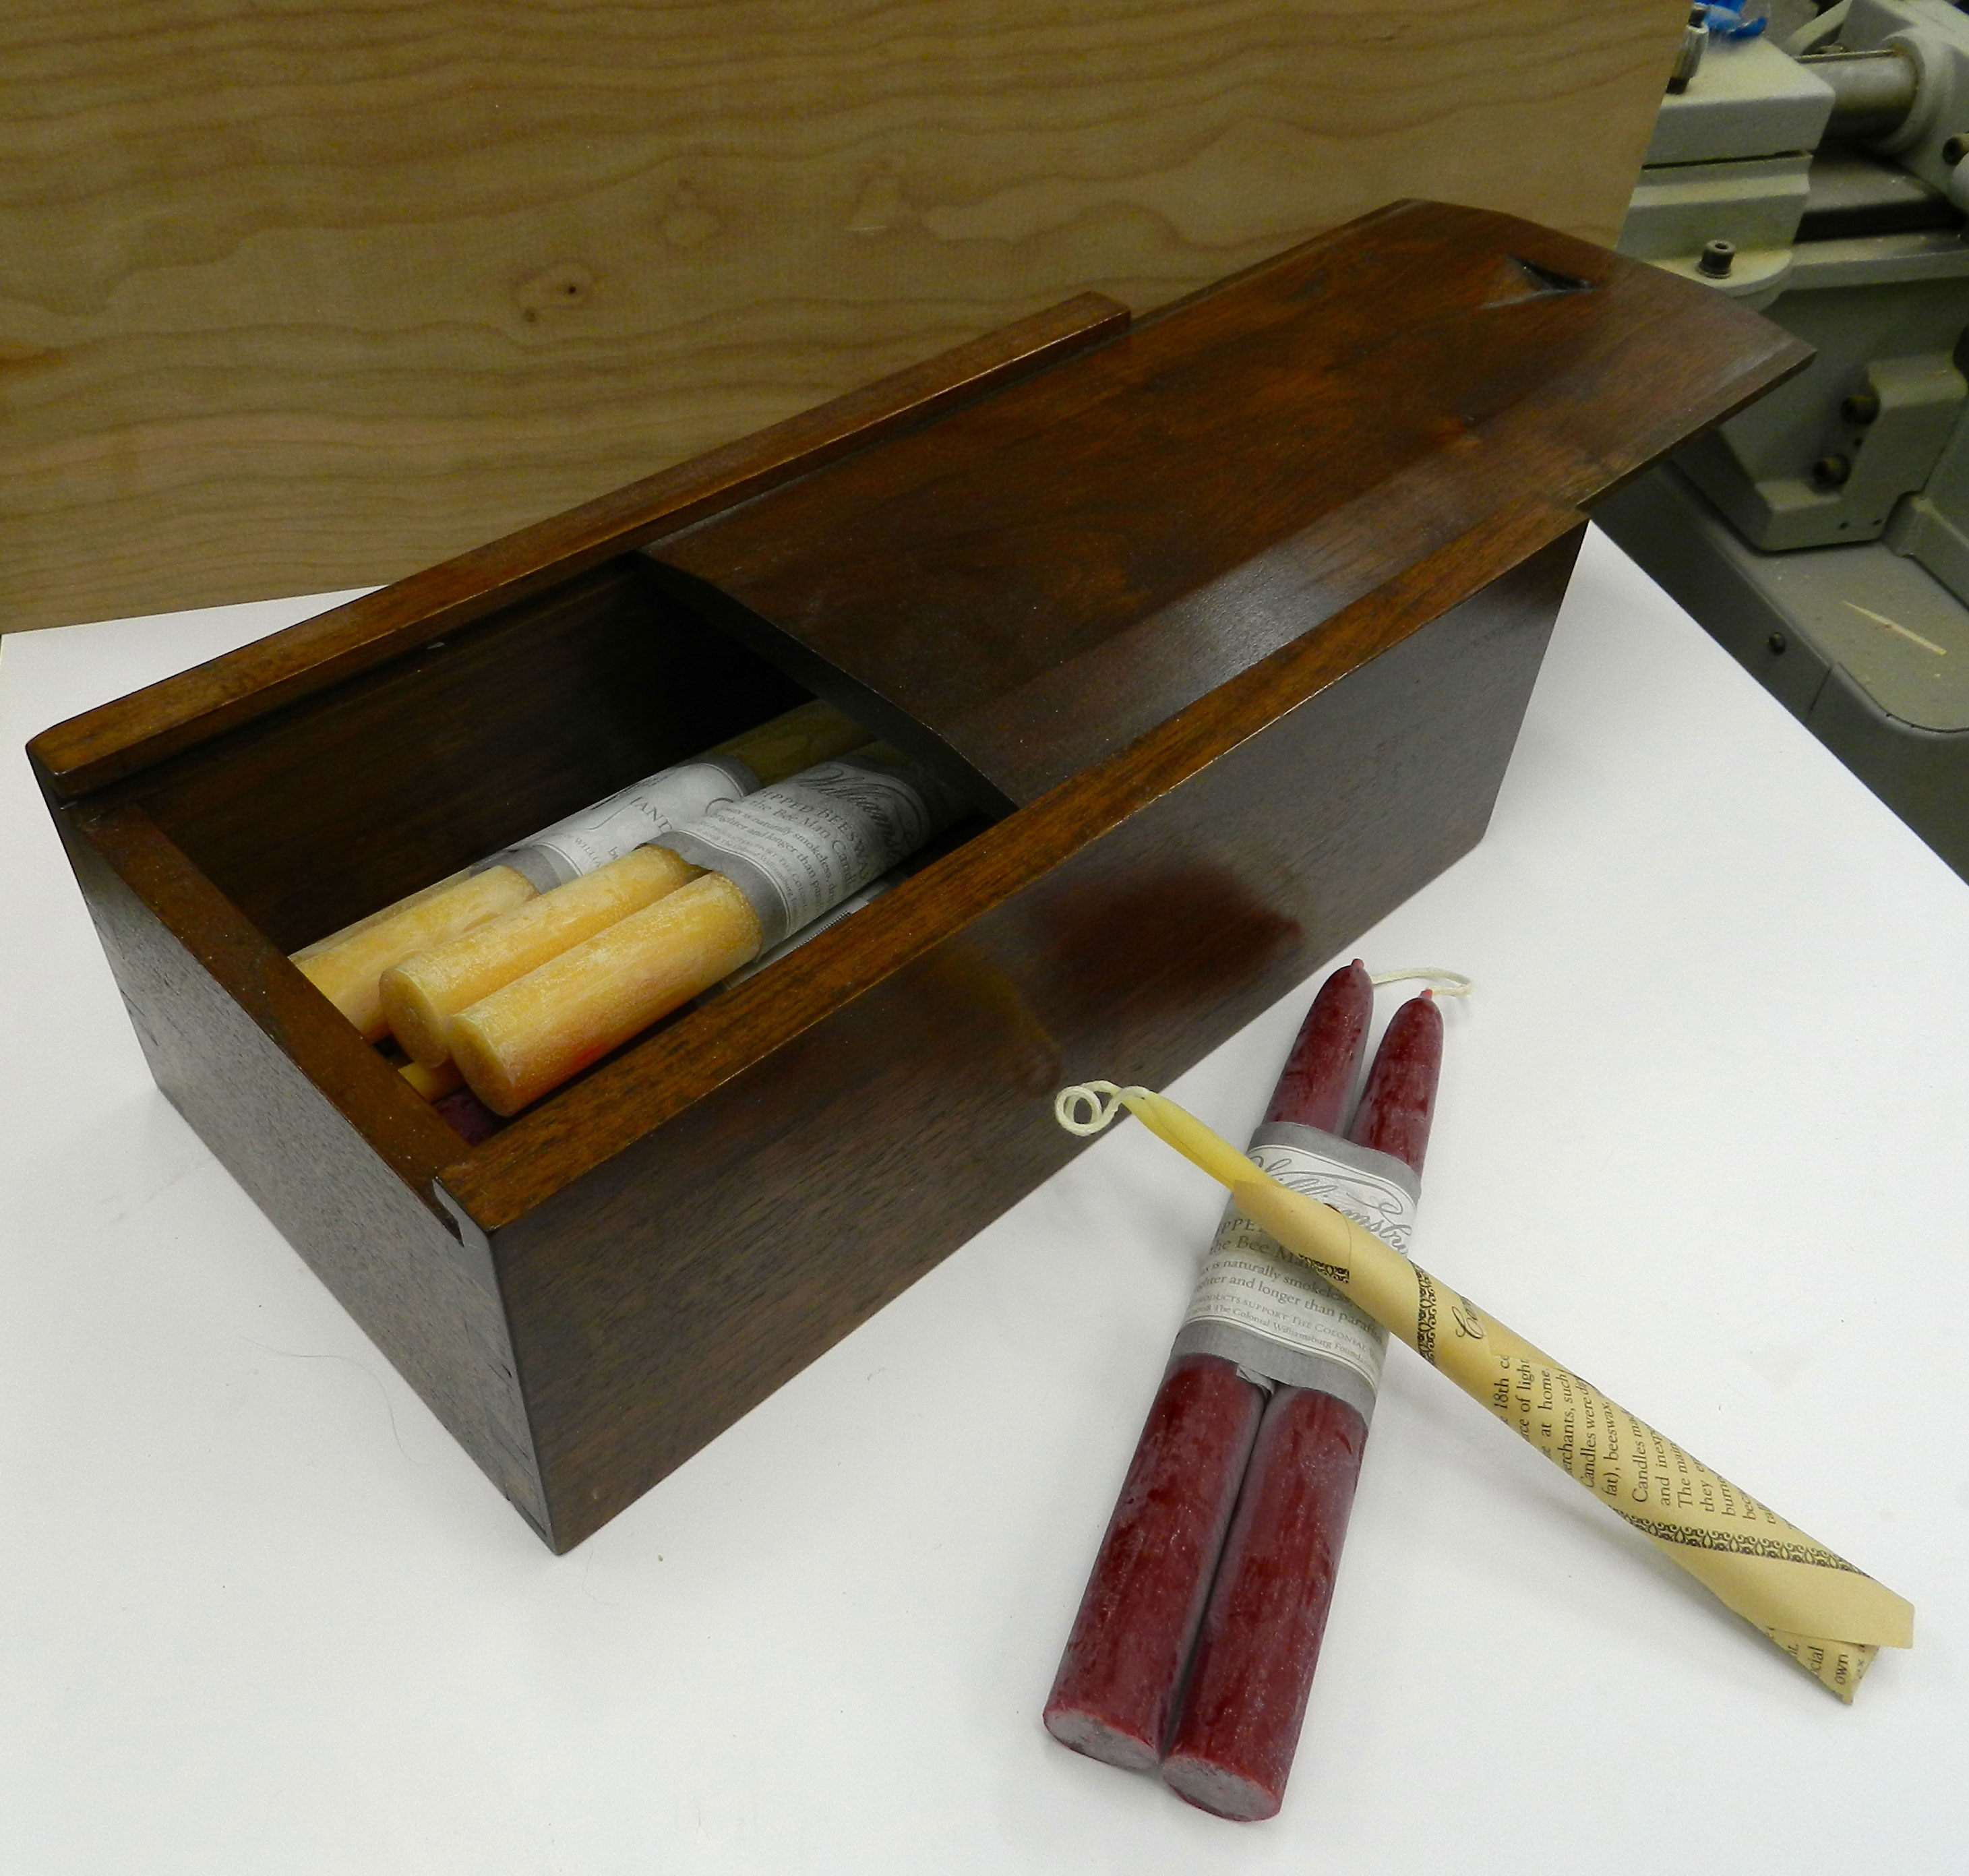
Dovetailed Candle Box
This walnut candle box was one of the first projects I built as a student at NBSS and we still use it today. I’ve seen similar boxes for sale at Colonial Williamsburg (Prentis Store) and various Shaker Villages, so even in our modern times there is apparently still some demand for candle boxes. Learn about some of the details you can apply to your own shop built version. You can read more about it here.
What do you do when you need a very long bolt? Most hardware stores only stock bolts up to about 10″ or 12″ in the sizes most woodworkers use — 1/4″, 5/16″, 3/8″ and 1/2″ diameter.
Time to break out the bolt stretcher?
Assuming you don’t have such a mythical machine you can make your own longer bolts.
Start with some threaded rod and appropriately sized nuts…
Filing off the rough machined edge
File off any paint and machine/mill marks from the end of the threaded rod.
TIP:Place a nut a 1/2 in or so down onto the threaded rod before filing. Once you finish your filing you can remove the nut, and in the process will clean out the top threads which may have been deformed by the filing. Use should also use this technique when cutting threaded rod or bolts.
Why do I need such a long bolt?
In this case, I am building a workbench with a shoulder vise — this bolt helps make sure the massive vise screw does not blow out the wood joinery.
From Tage Frid Teaches Woodworking Volume 3 he suggest brazing a nut onto the end of a threaded rod, so I figured I’d give that a shot…
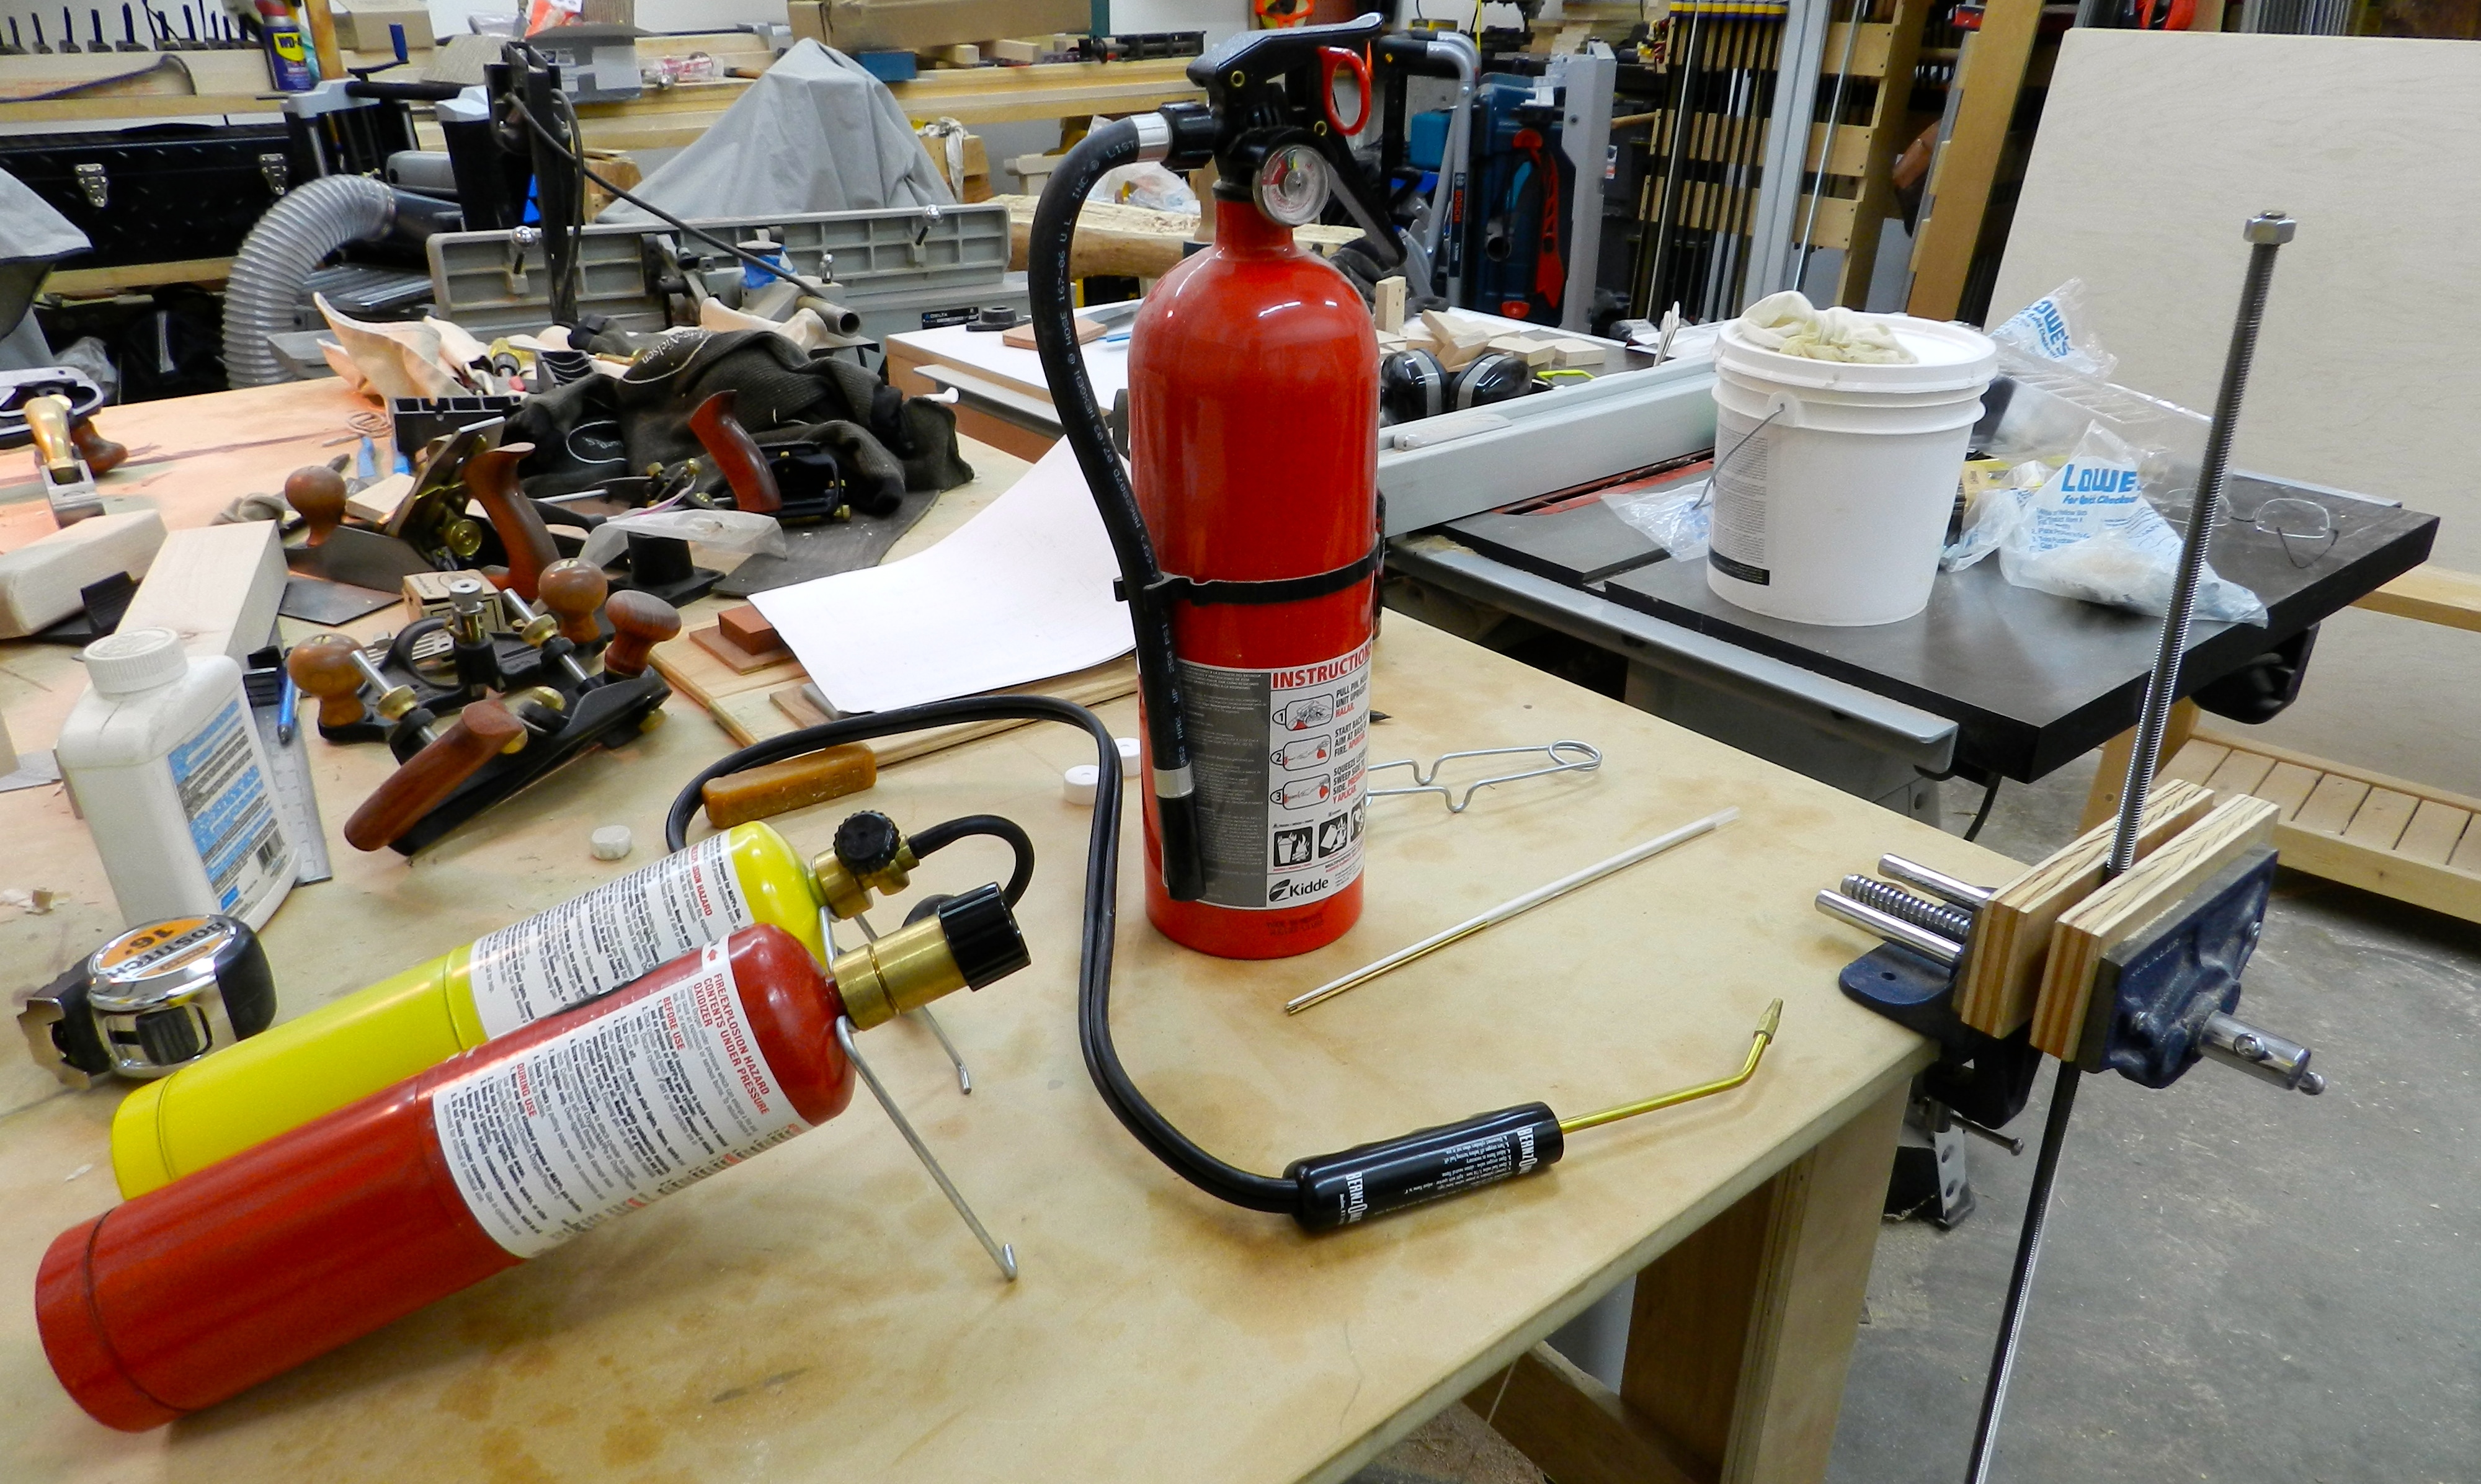
Mapp + Oxygen cutting and welding torch used for brazing
Time to break out the Mapp + Oxygen cutting/welding/brazing torch and some brazing rod which works much like solder. (Make sure you work in a well ventilated space and take all necessary safety precautions). Clean the mating surfaces and apply flux, then braze the nut to the threaded rod.
Brazed nut
Once it cools down you can file off any excess and use this newly made bolt. I’m no expert on welding, but the amount of hardware, time, and cleanup seemed excessive. Even with some filing, wire brush work and then some polishing I was not happy with the result — this end of the bolt would be visible in the finished bench. The coloring was off and now the nut looked a little off.
Is there another way?
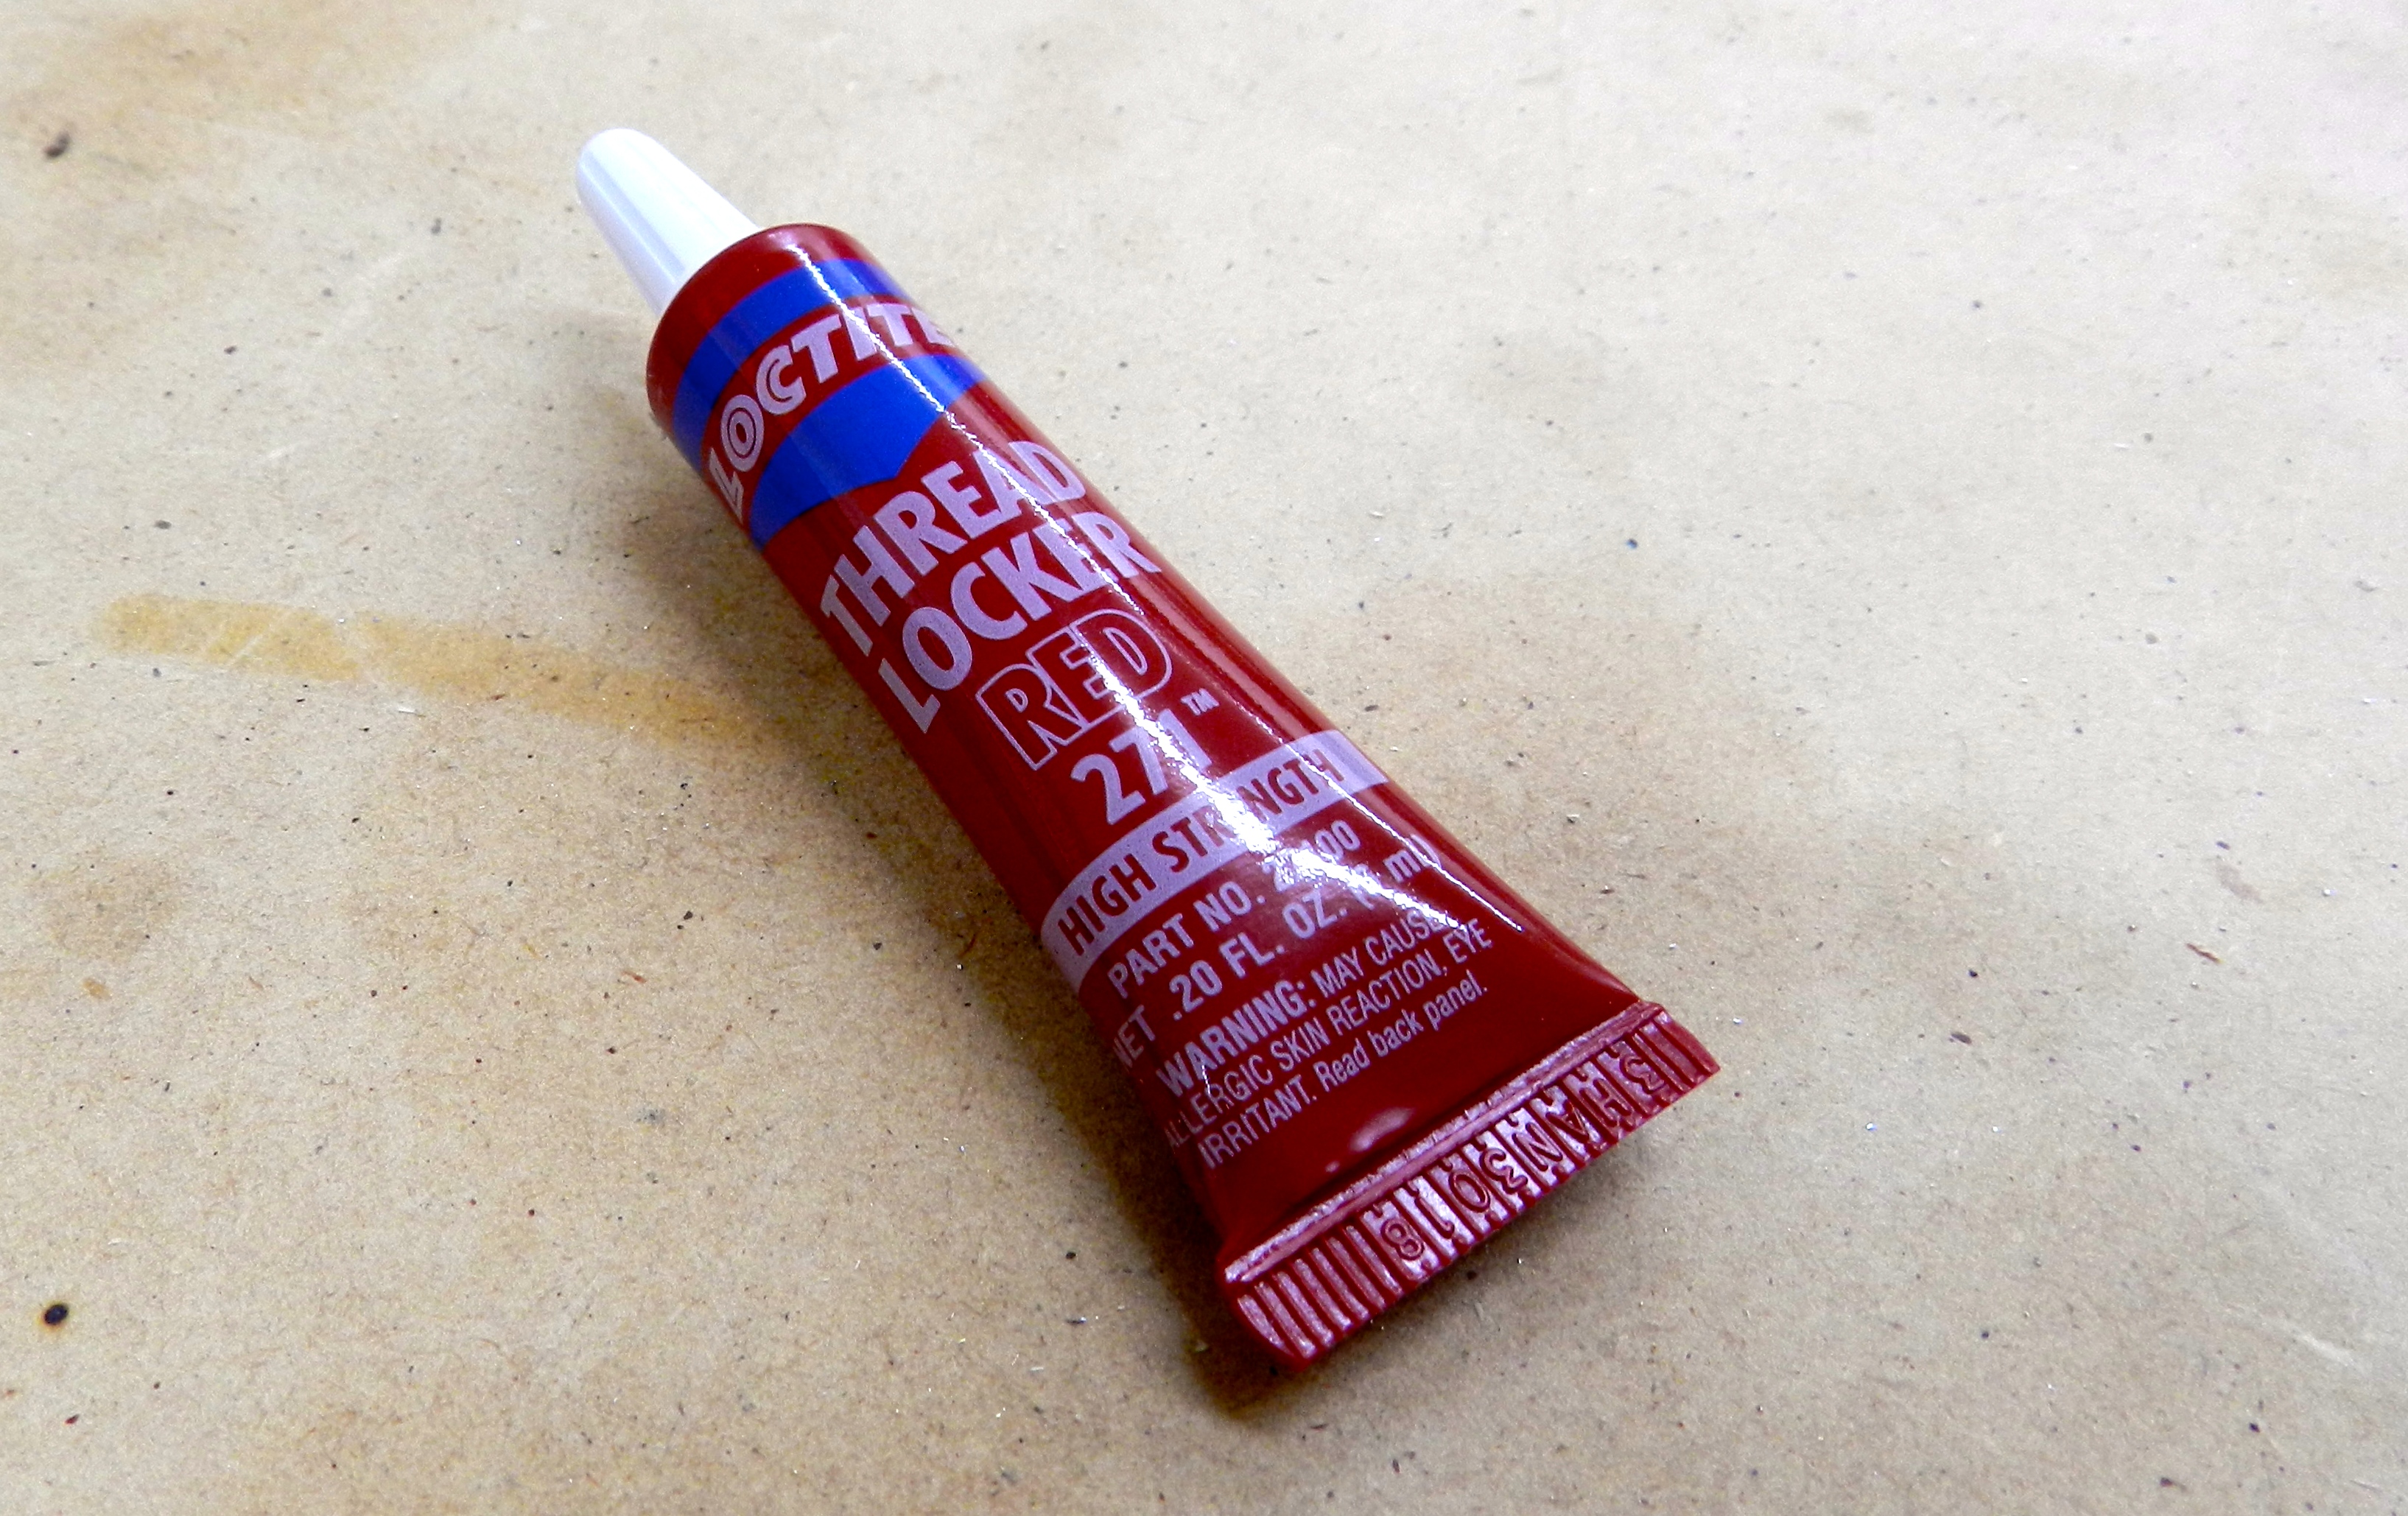
I thought back to my days working on my Mustang and old F-150 and a remembered good old Locktite Red Threadlocker 271.
Locktite 271 Red Threadlocker
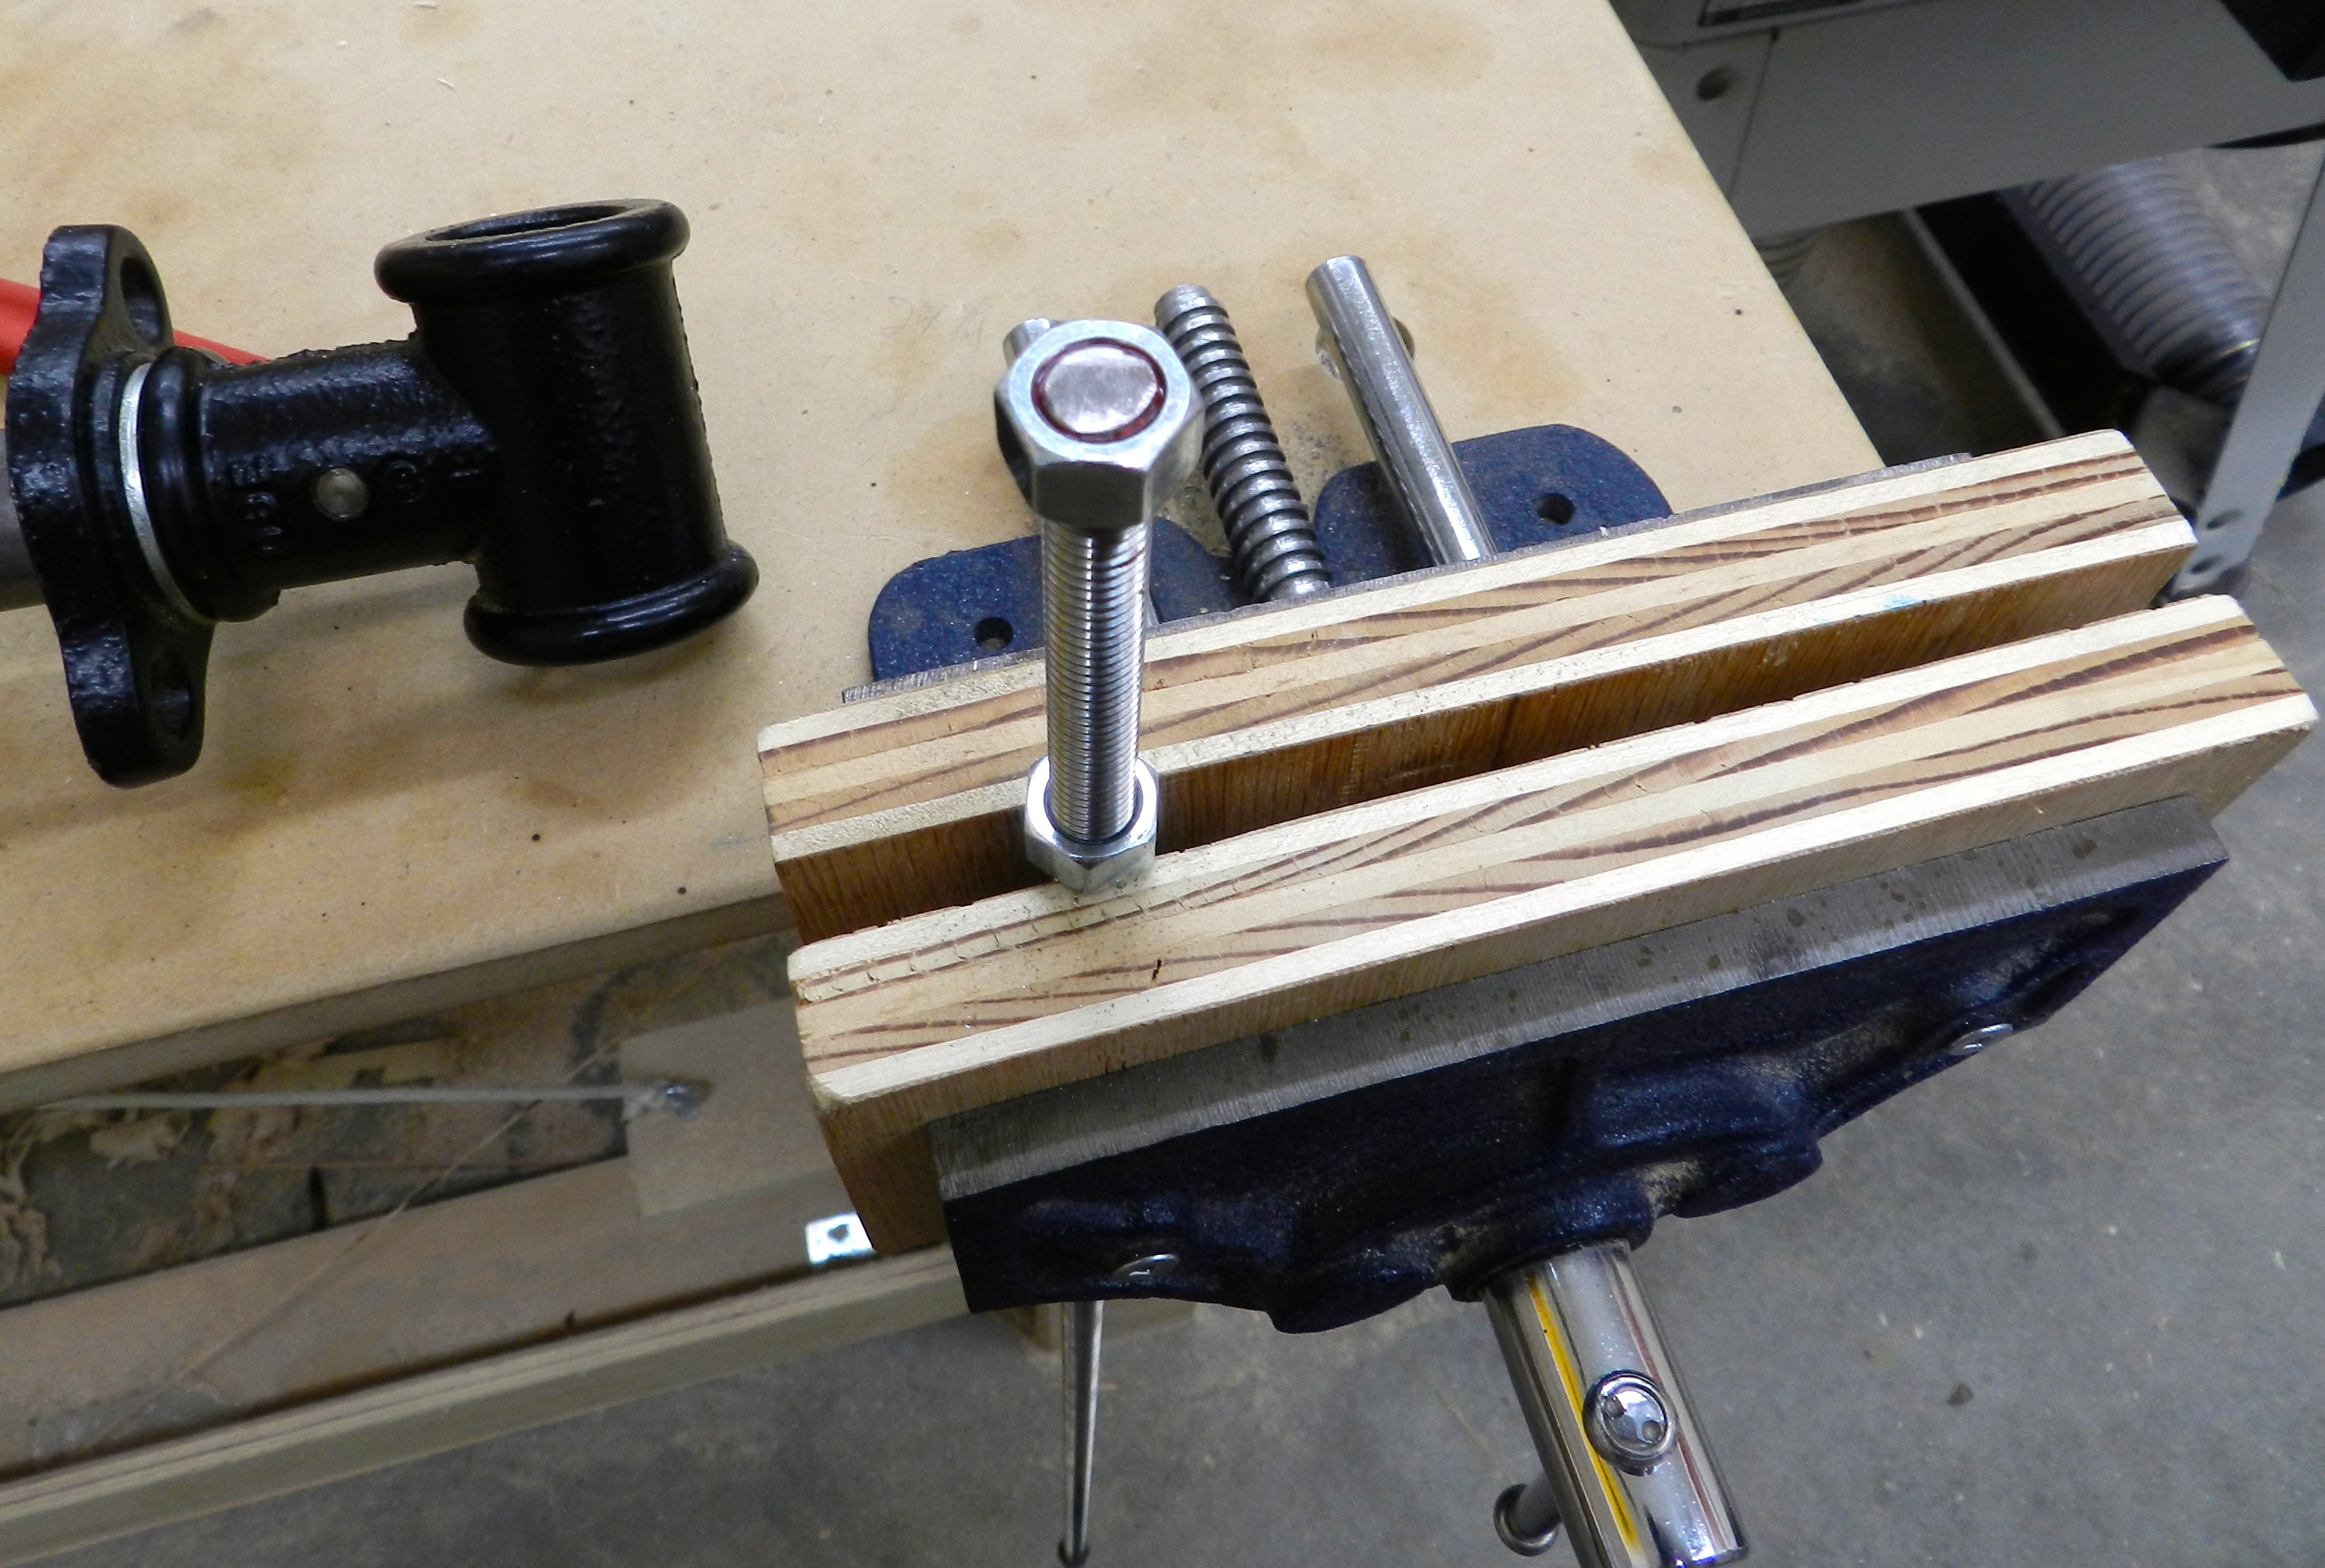
This little tube packs a heck of a grip. You apply some threadlocker on the threads and inside of the nut, put them together and let it cure for 24 hours. You would need to exceed 500 degrees F and 245 ft/lbs of torque in order to break the bond — so in other words, plenty of strength for my use.
Threadlocker curing
Once cured I cut the bolt to length, filed off the hacksaw marks and cleaned up the leading threads using the tip above.
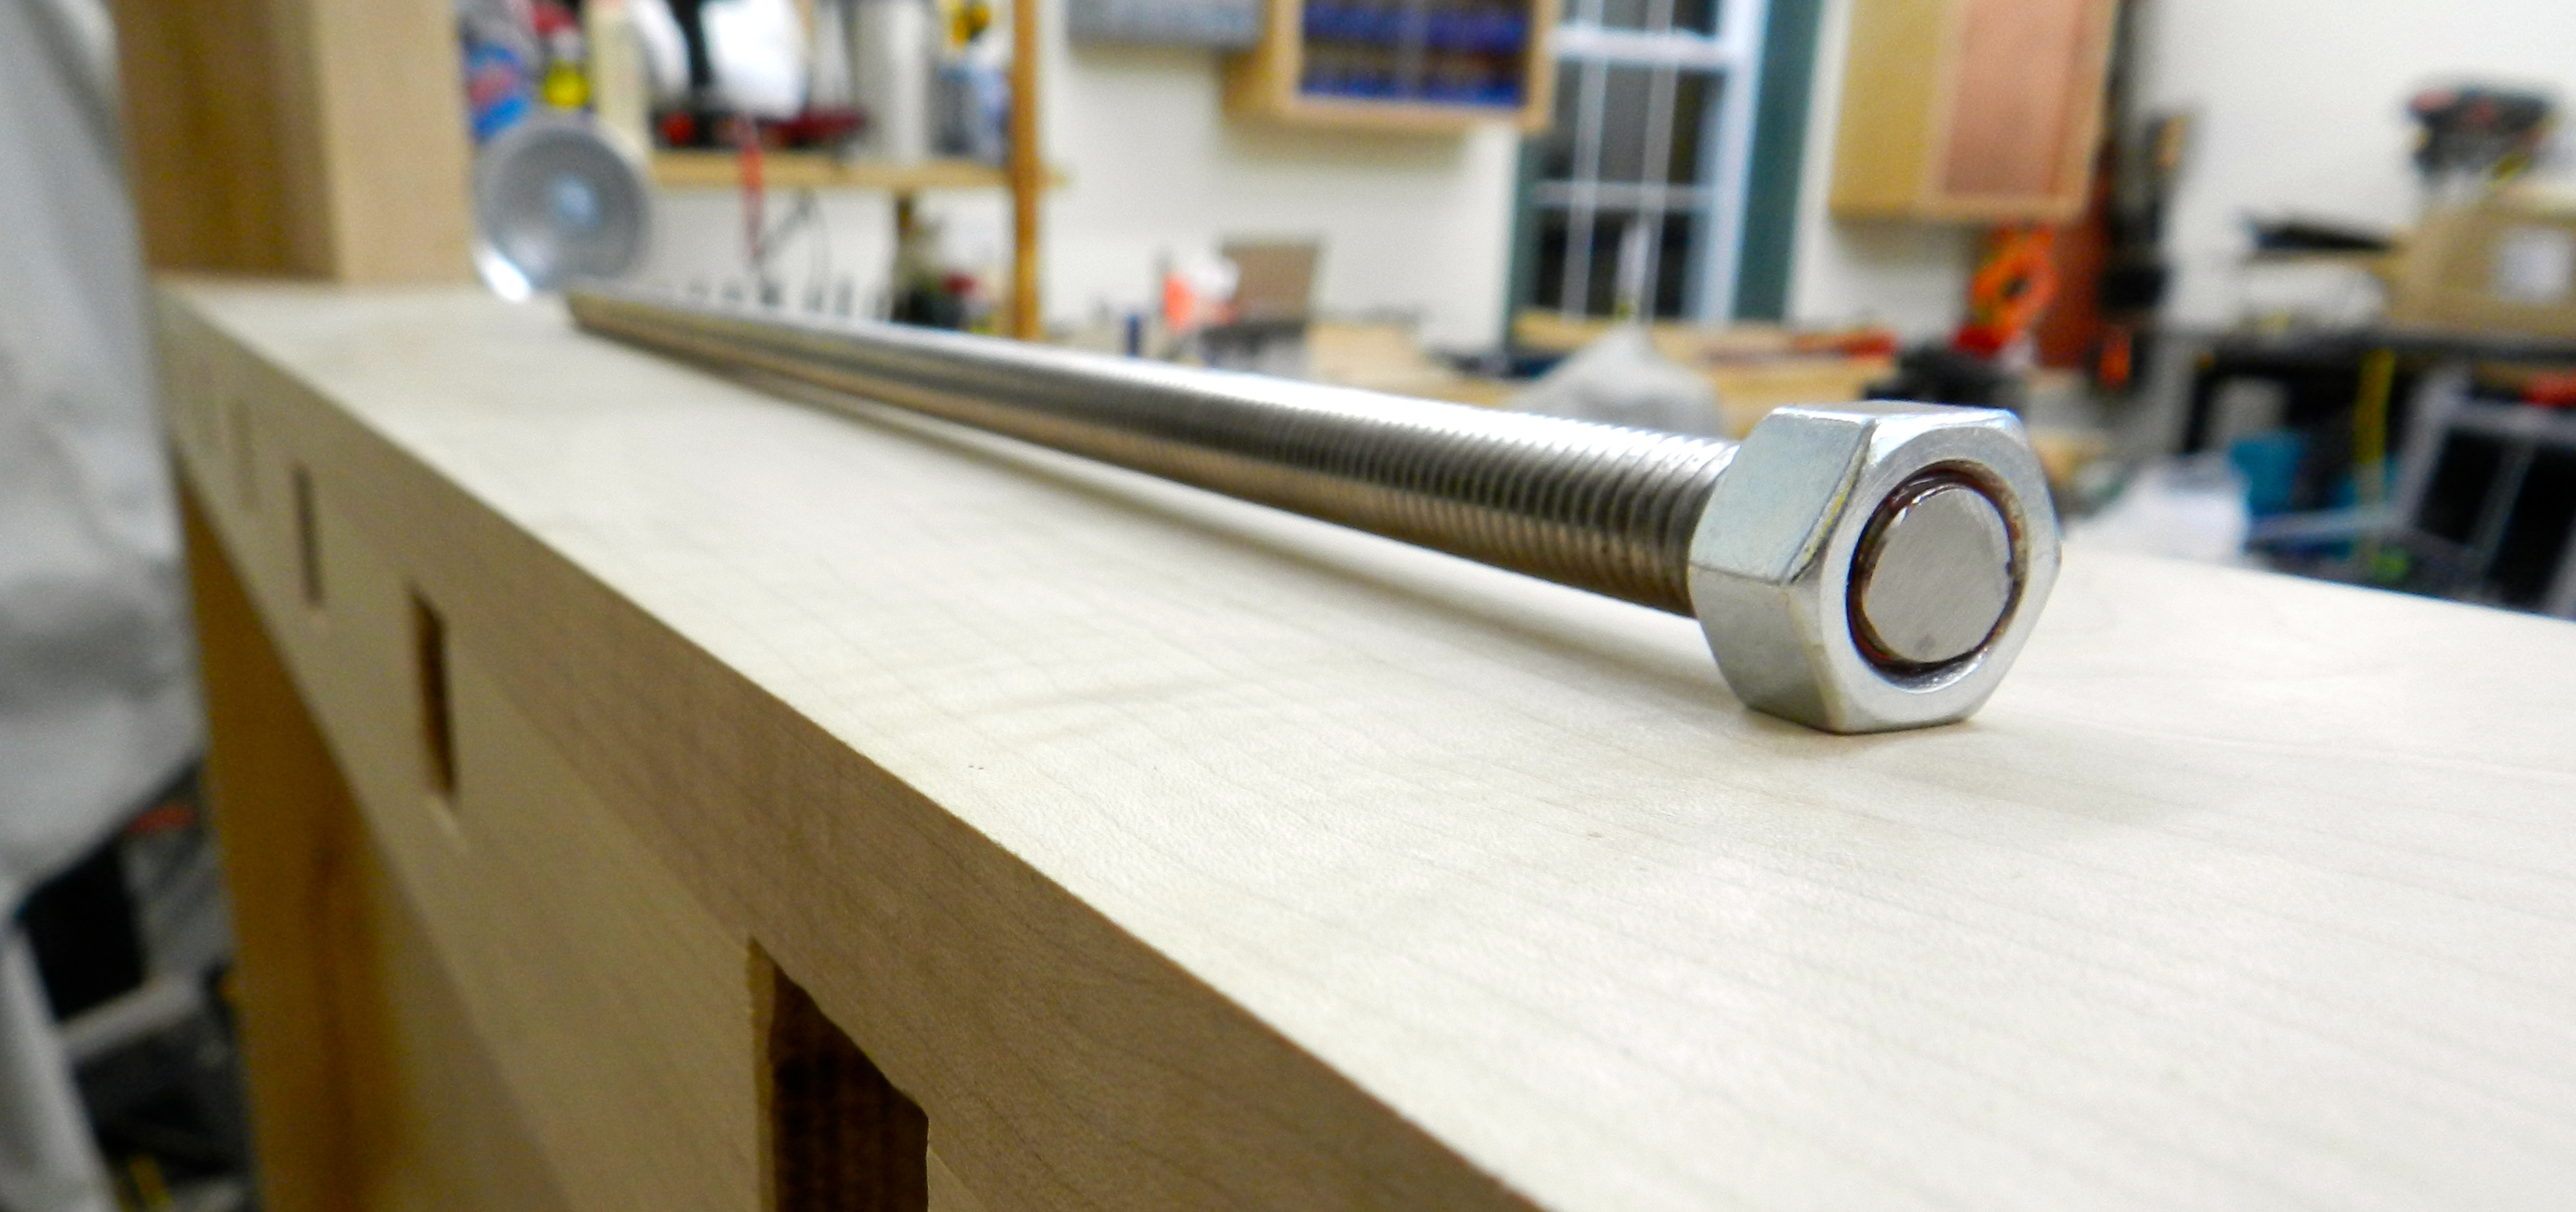
15″ Long Bolt
Now I have a nice custom sized bolt ready to go. If the need arises I hope you’ll give these techniques a try. If you do, let me know in the comments.
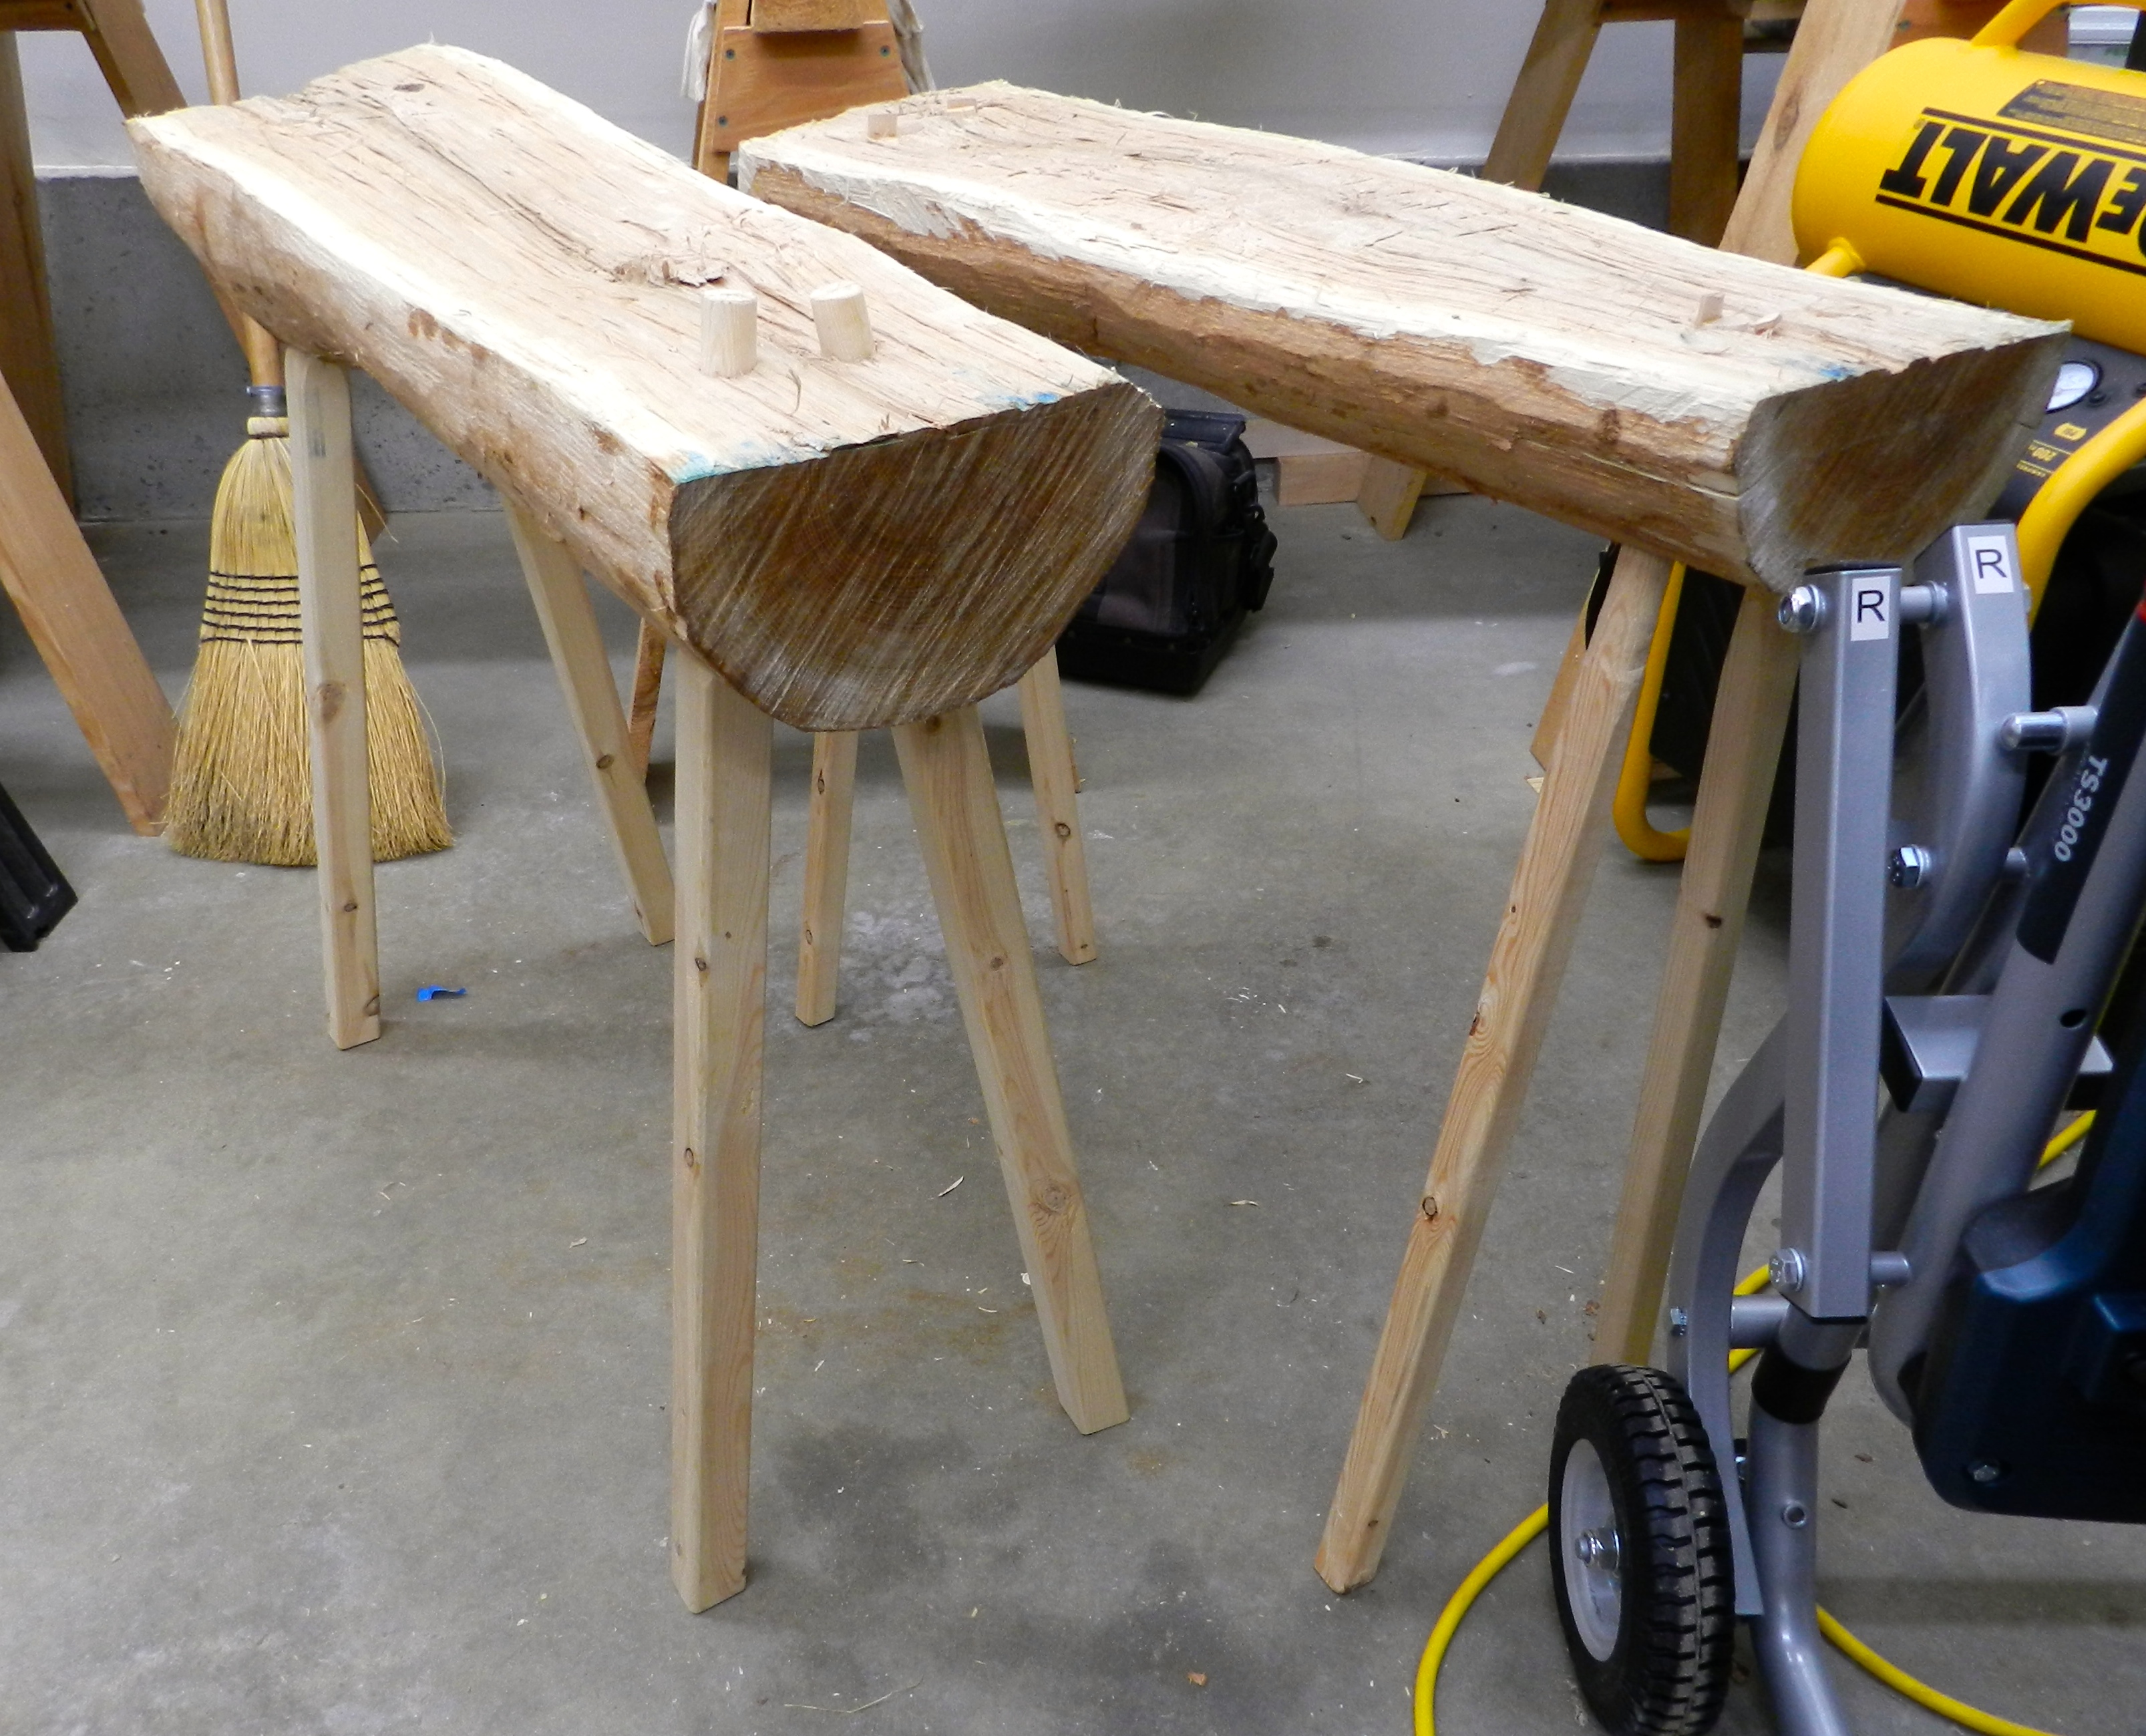
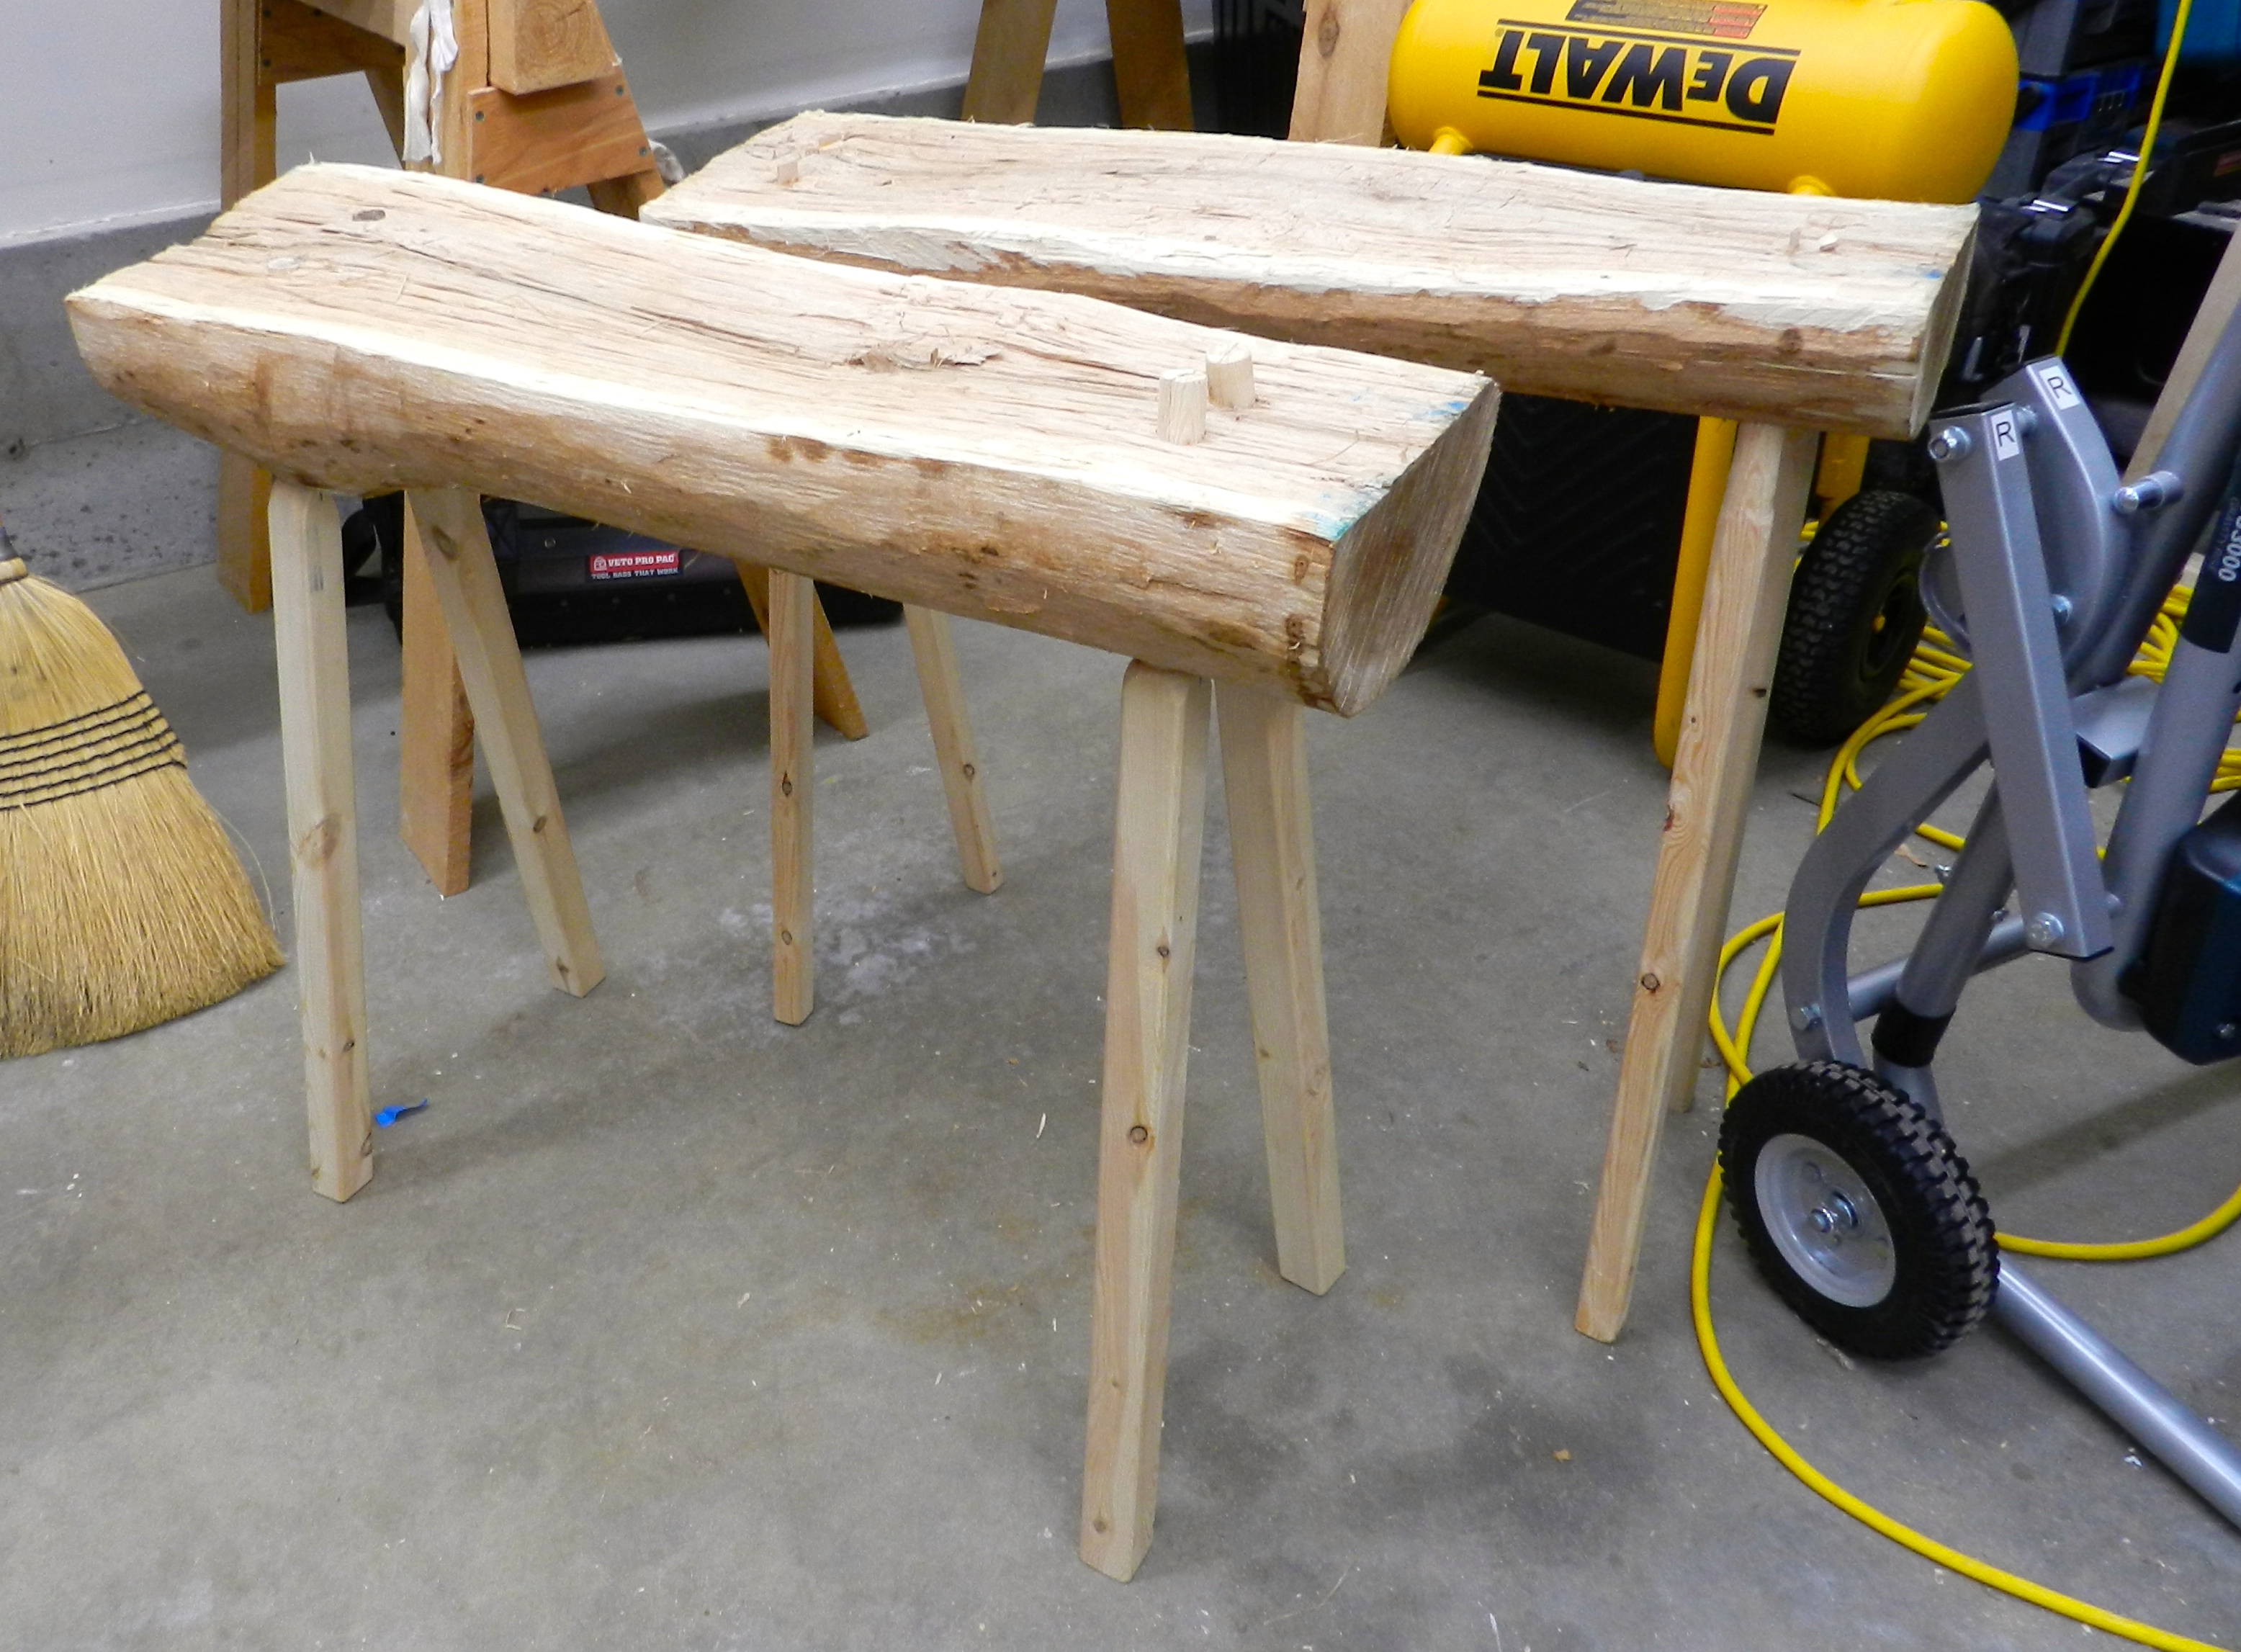
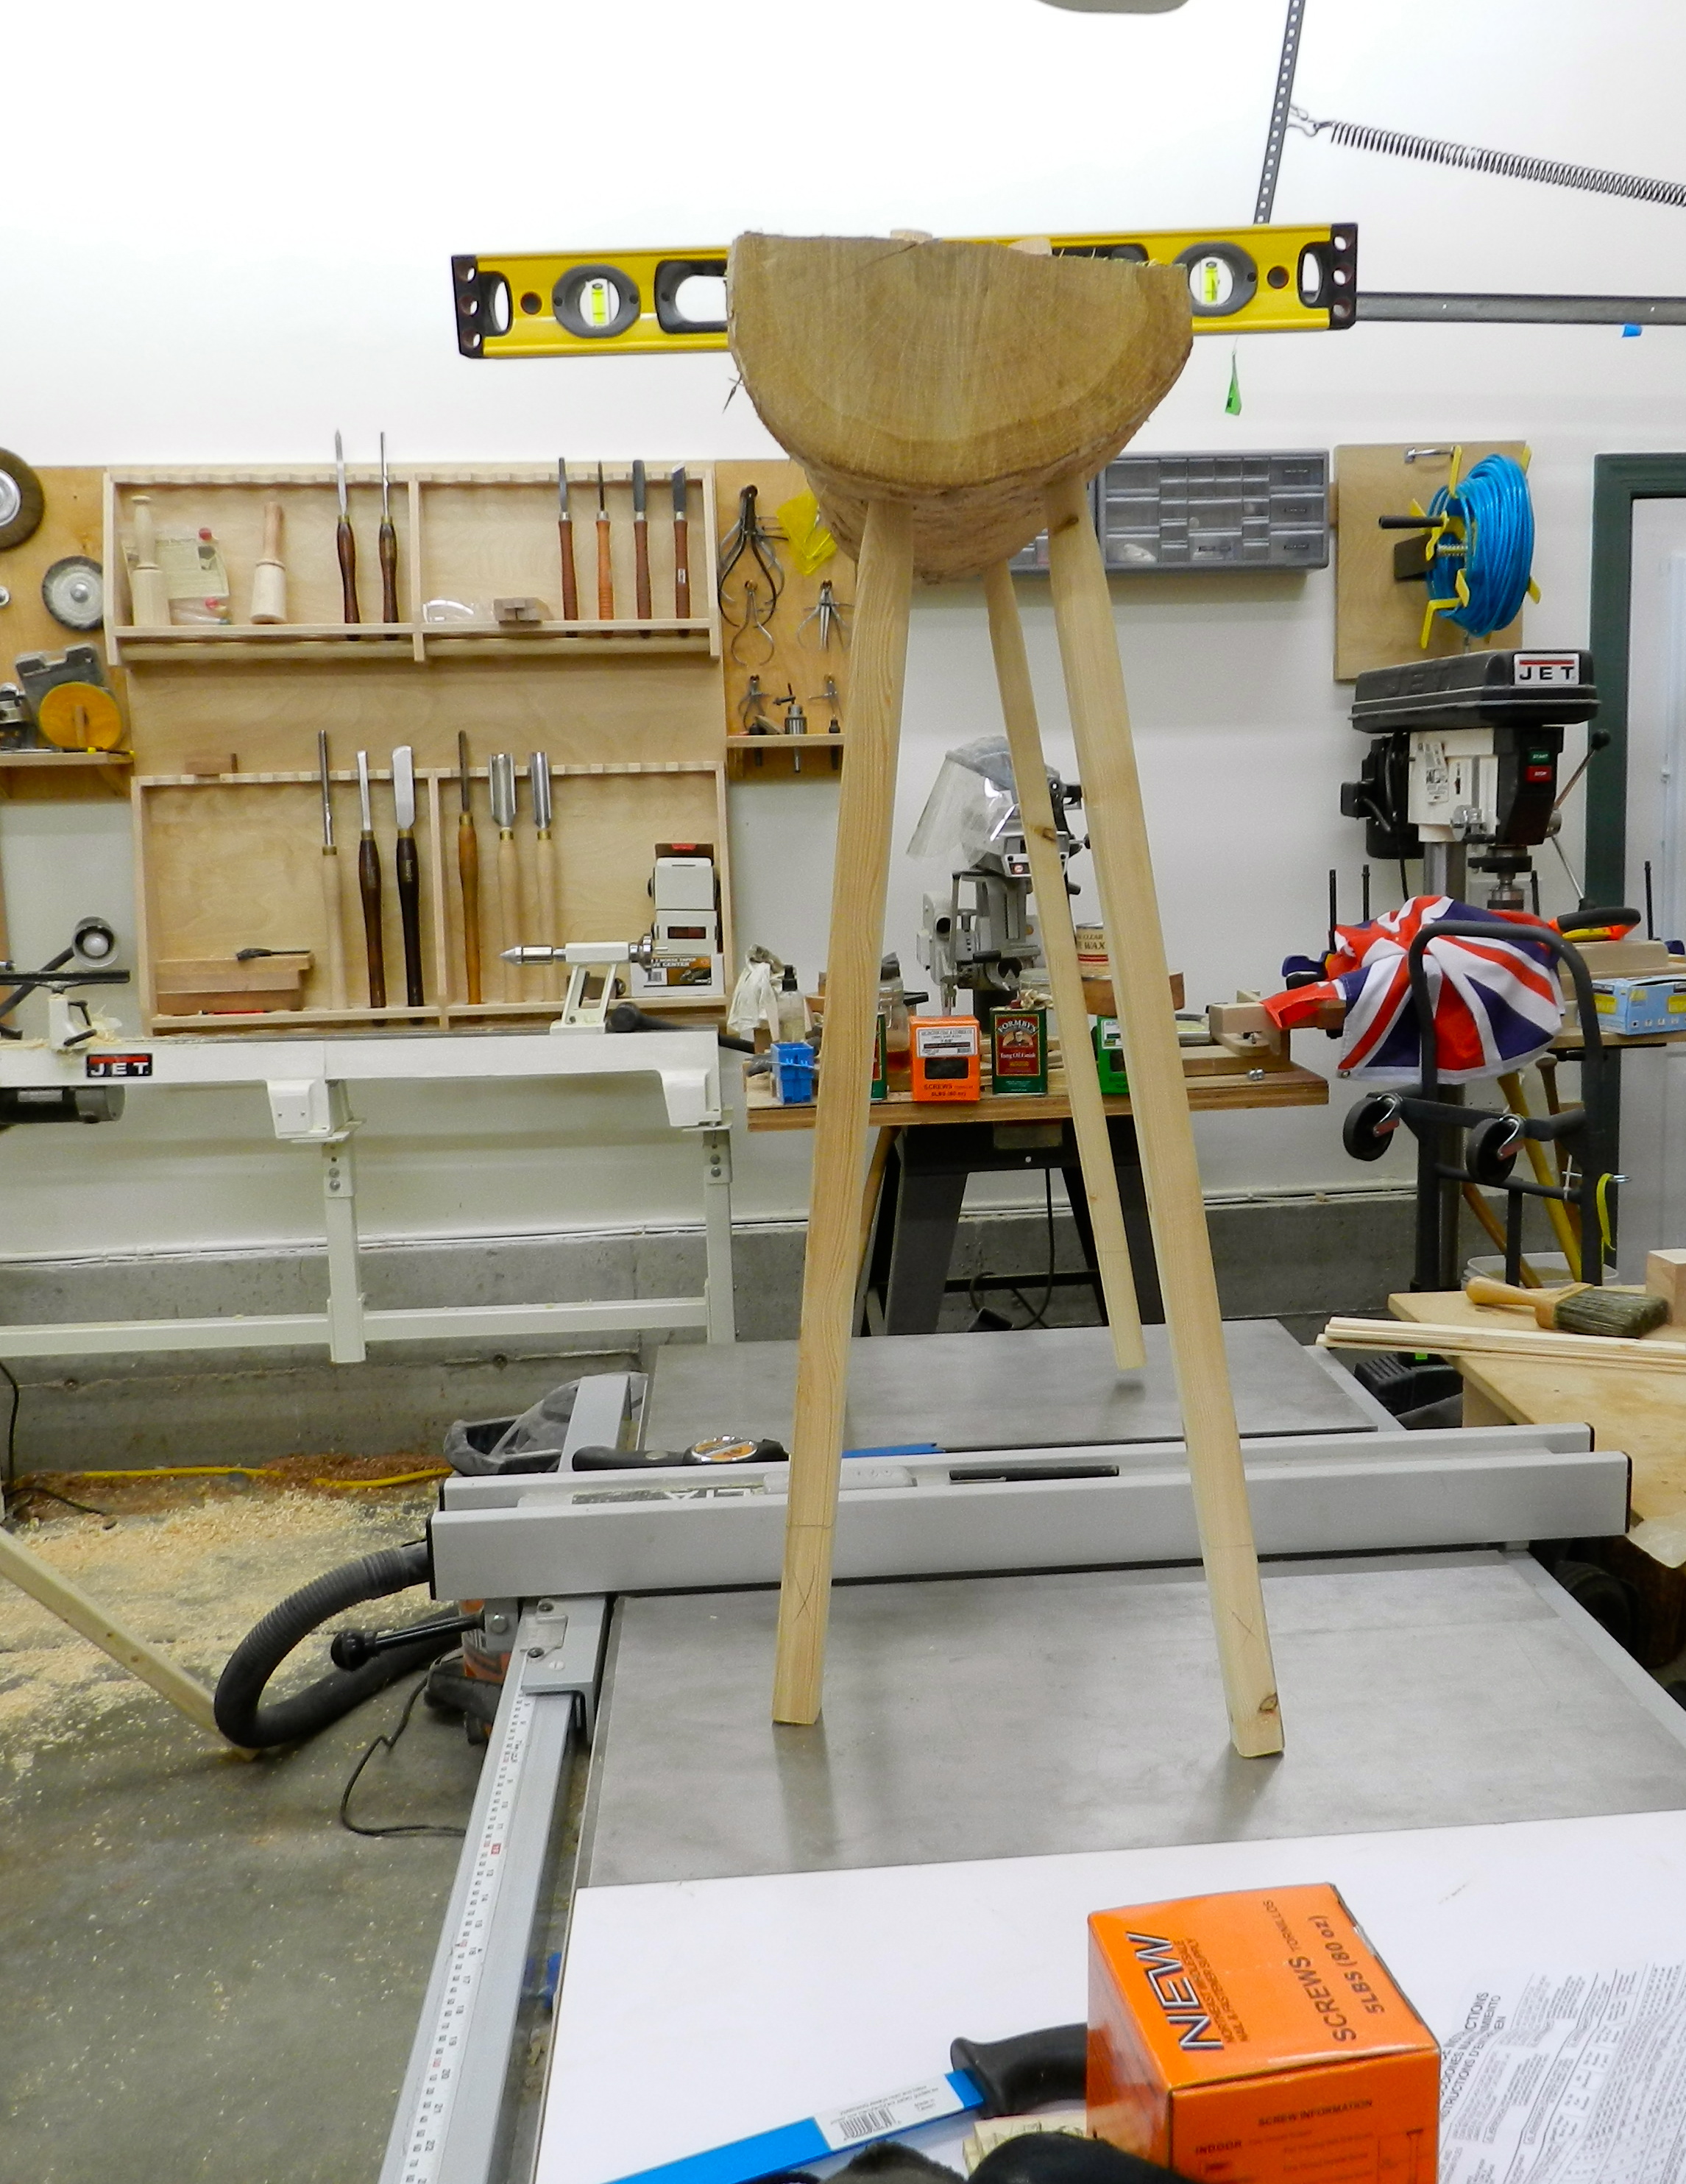
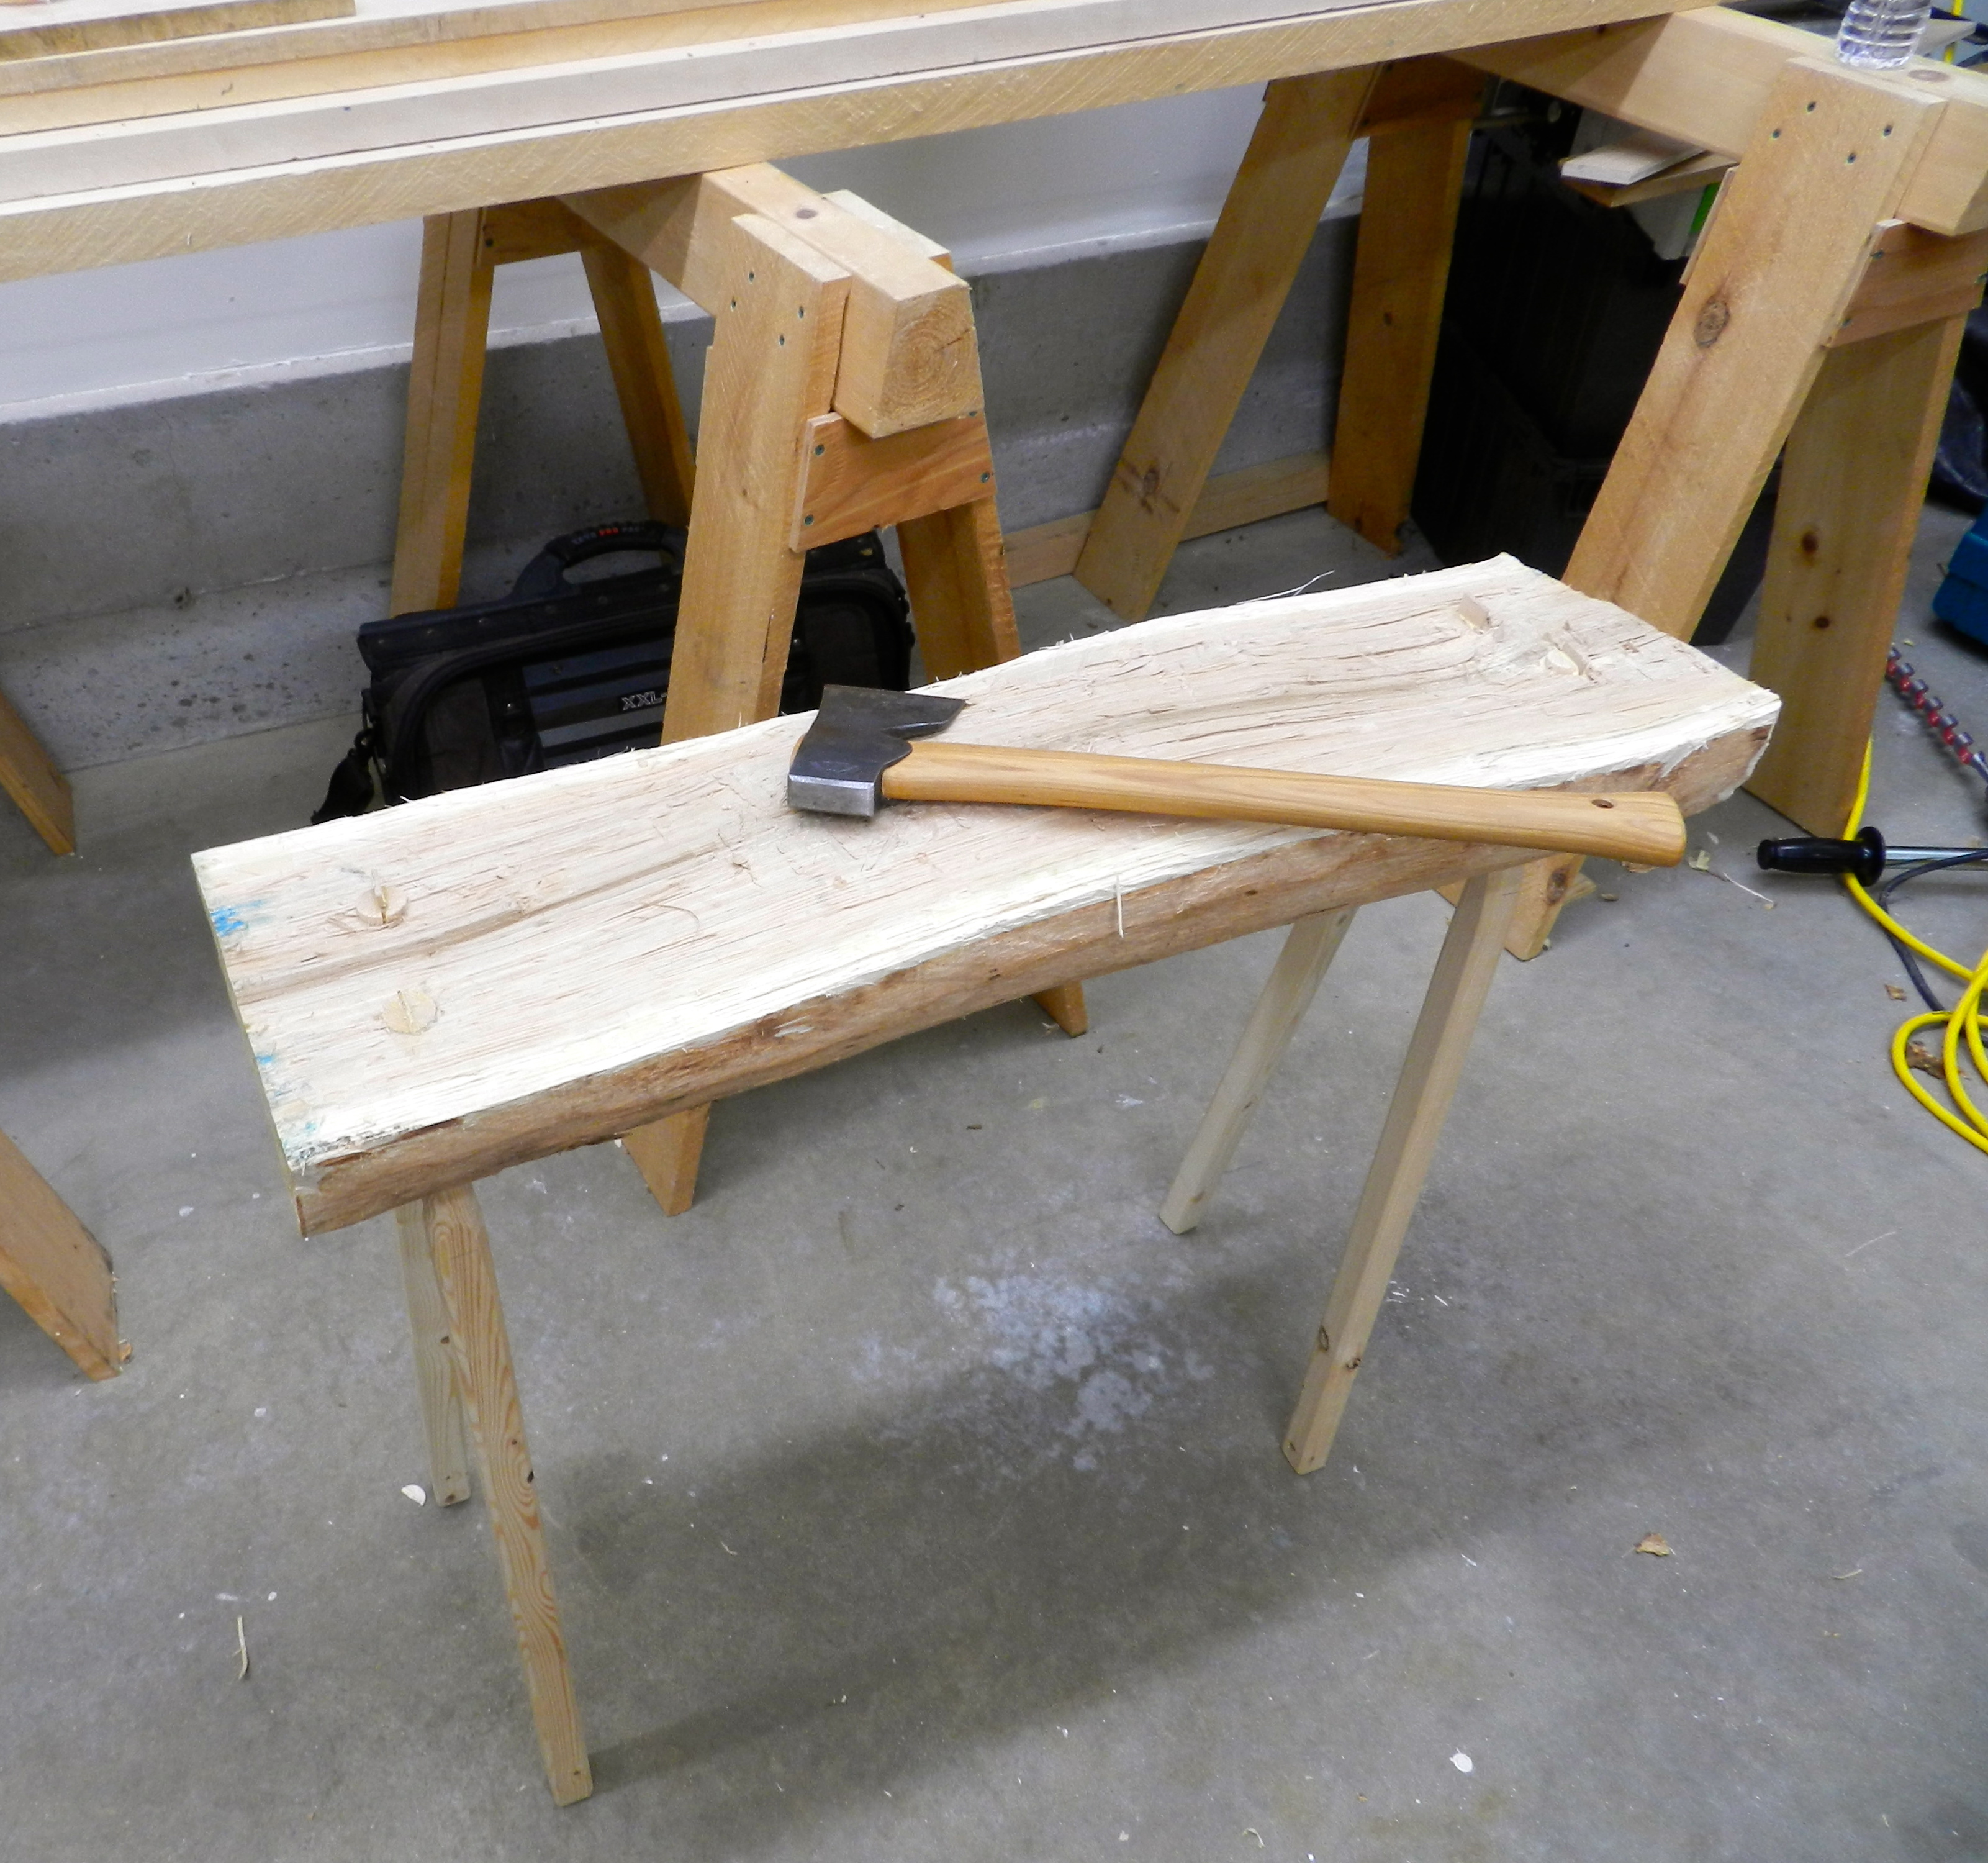
After living with my new hewing bench for a few weeks I finally got around to using the other half of the log. I’m glad things worked out this way as I made some modest improvements based on our time together.
Original bench on the right, revised model on the left
The original bench was fairly solid — it could hold me standing on it and didn’t bounce around when I would strike it in a downward motion — but when I’d do something heavy and lateral I could feel what felt like a tiny bit of flex in the the legs.
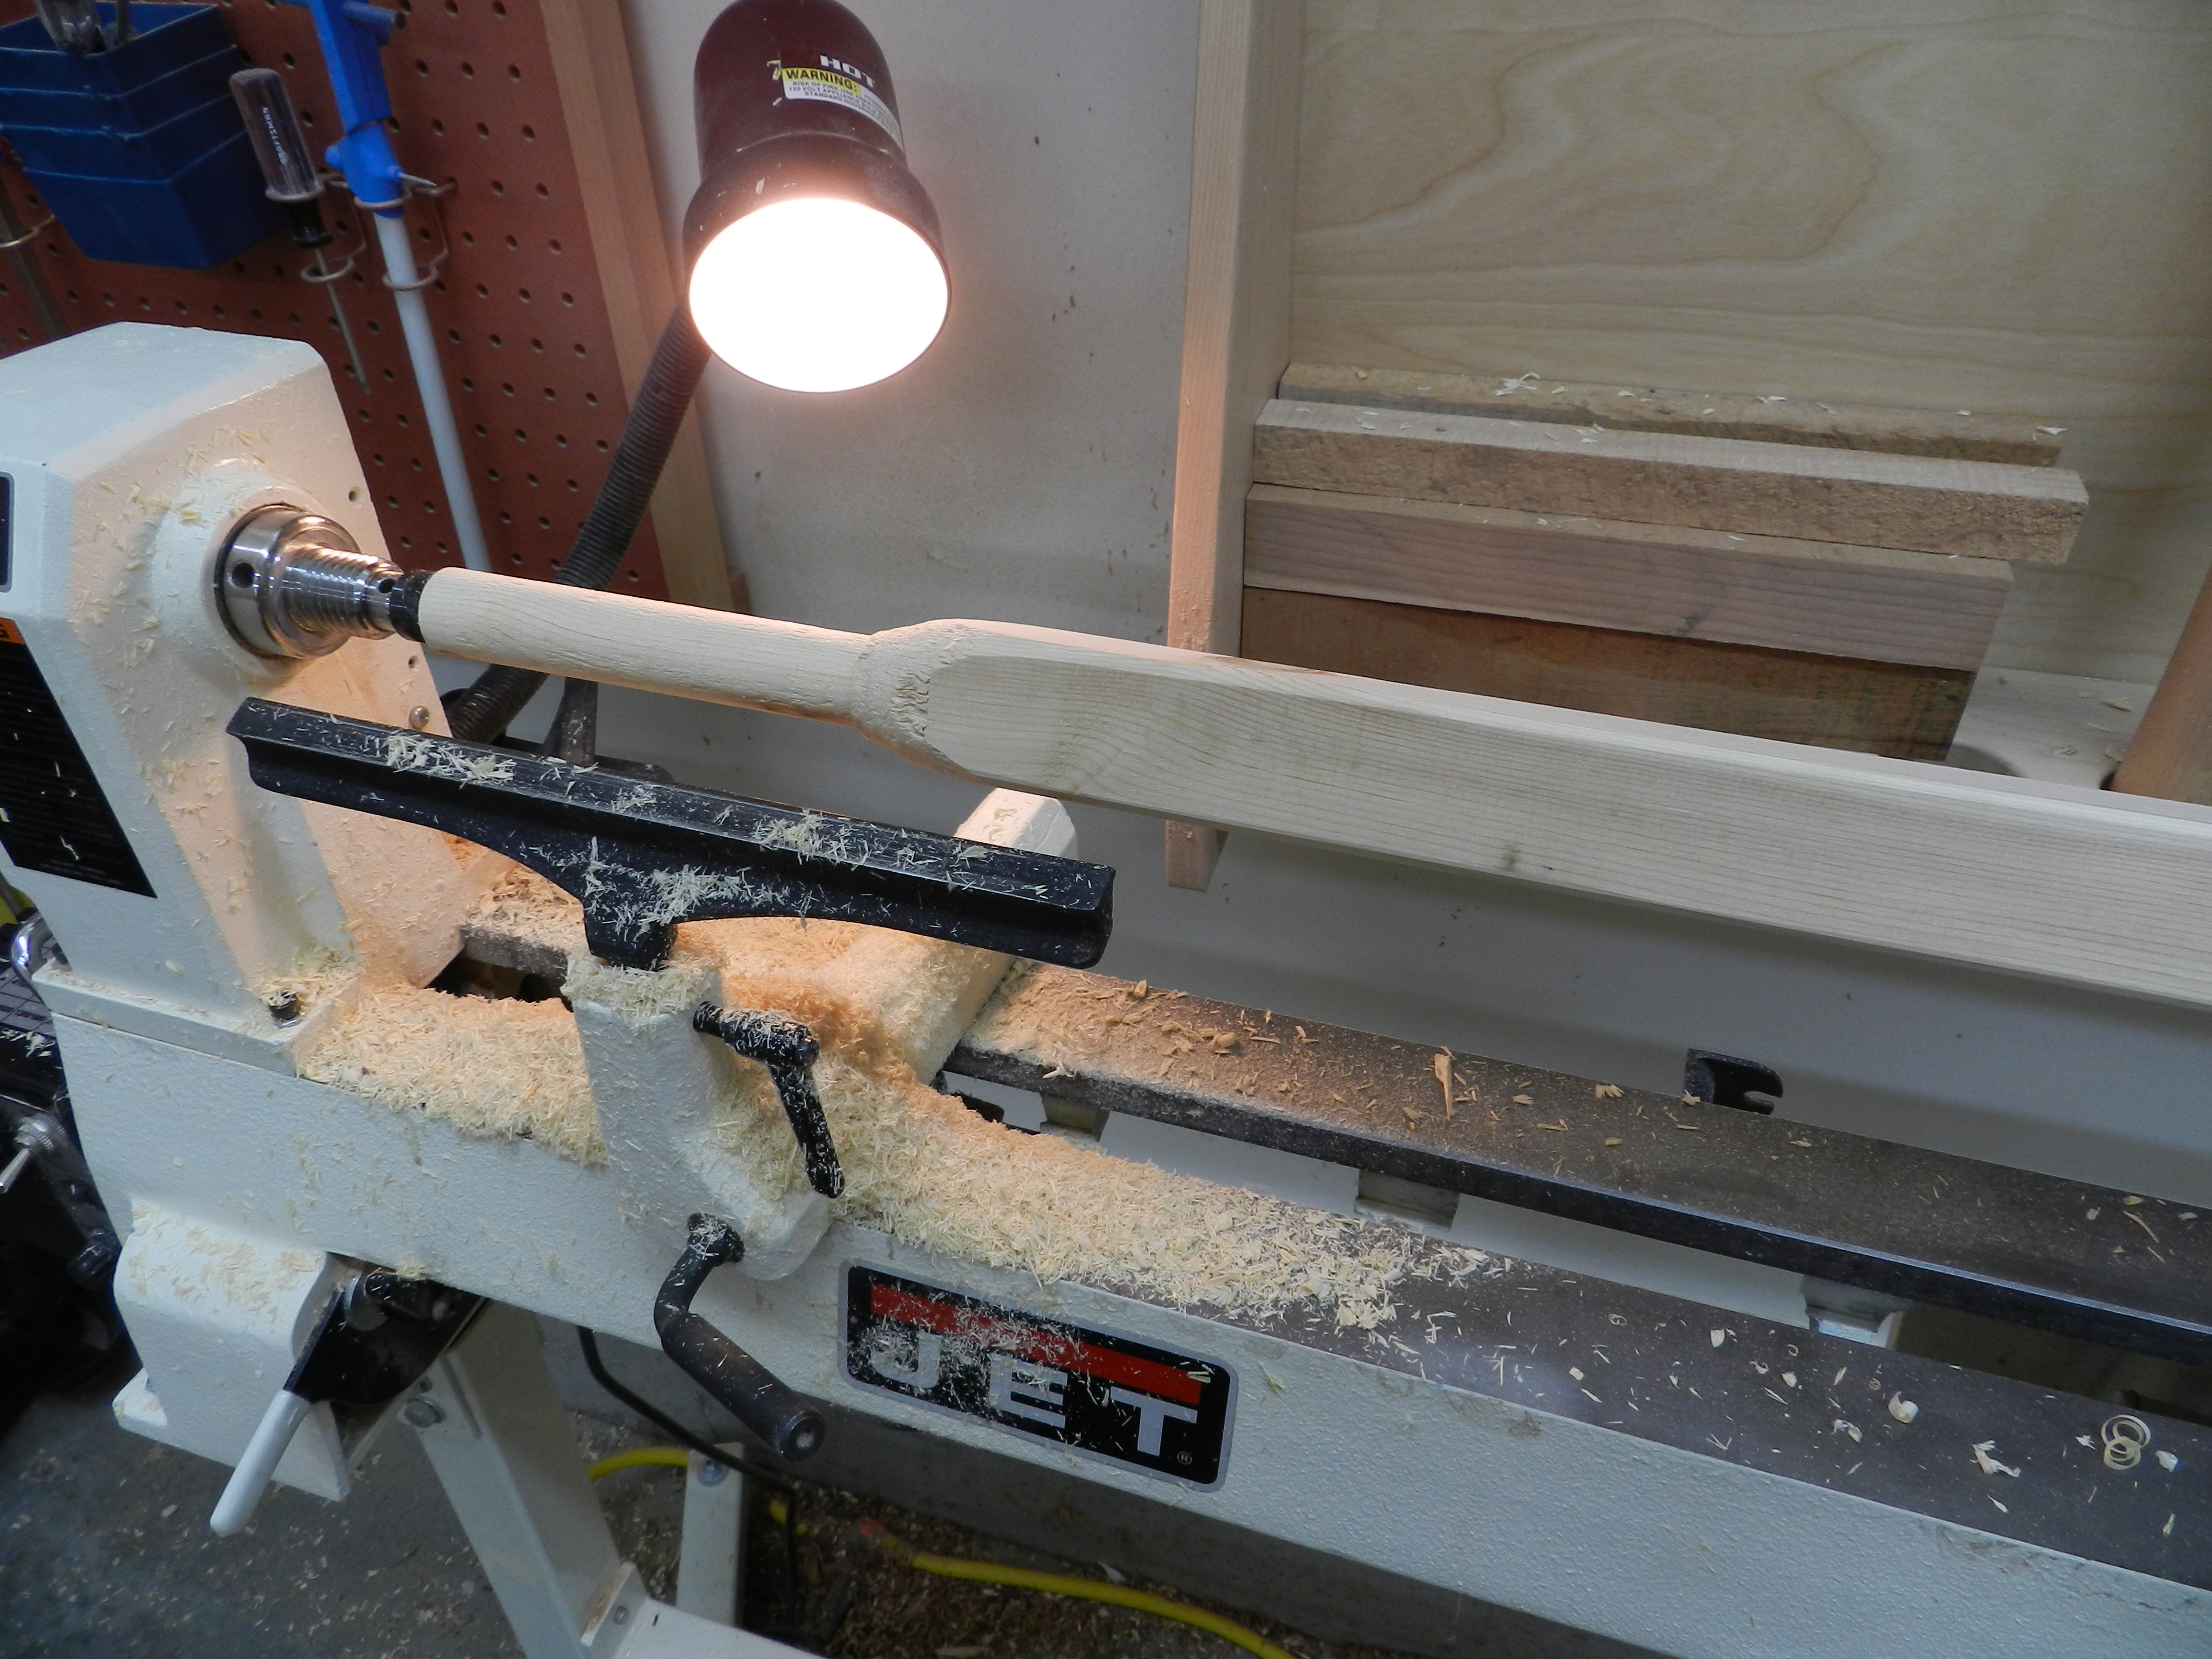
Turning thicker legs
At the time I ripped down a 2×3 to make the legs roughly sized to the 1″ ship auger bit which was the largest I had on hand, but I worried about the 1-1/8″ legs being too spindly. The mental image of the legs being too spindly haunted me, so for this second time out I decided to rectify that issue.
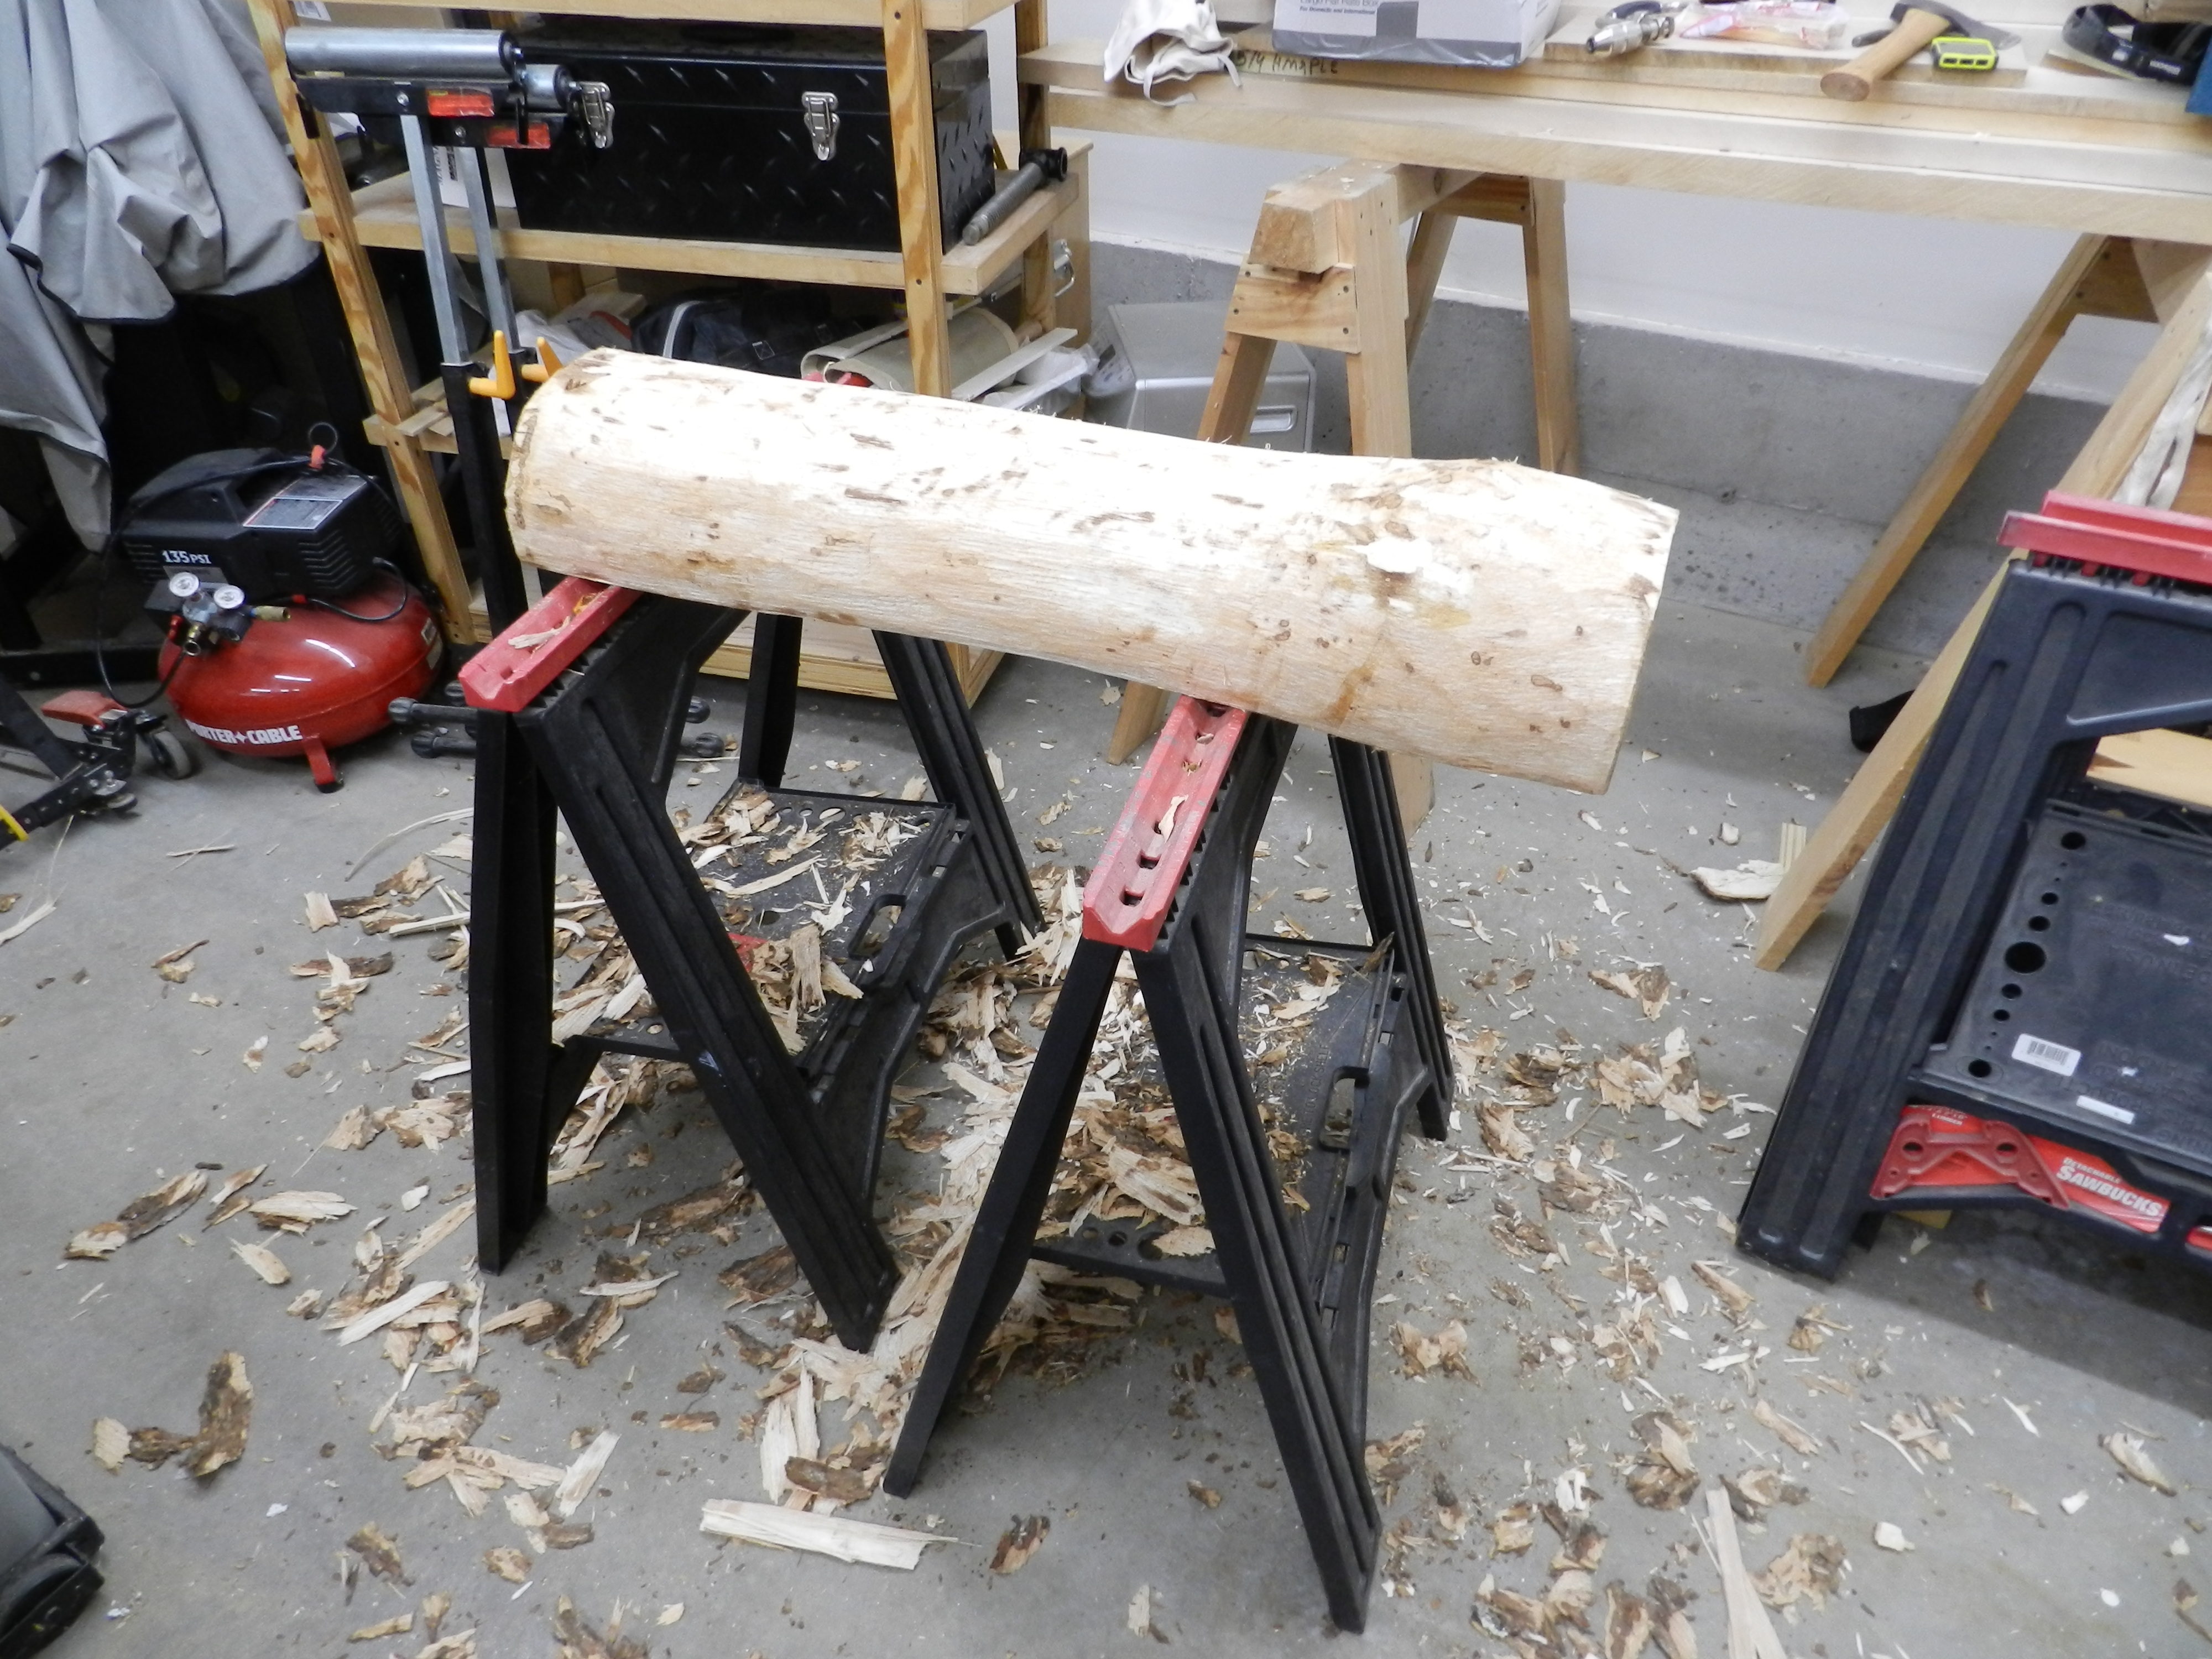
Removing the bark from the half log
Improvements:
Thicker legs (1-1/2″ square) with a more pronounced shoulders (this way the legs don’t add to any unnecessary wedging/splitting pressure and no matter how much hammering takes place on top of the bench the legs are maxed out in how deep they will go into the top of the bench)
Legs splayed in both directions to be that much more stable
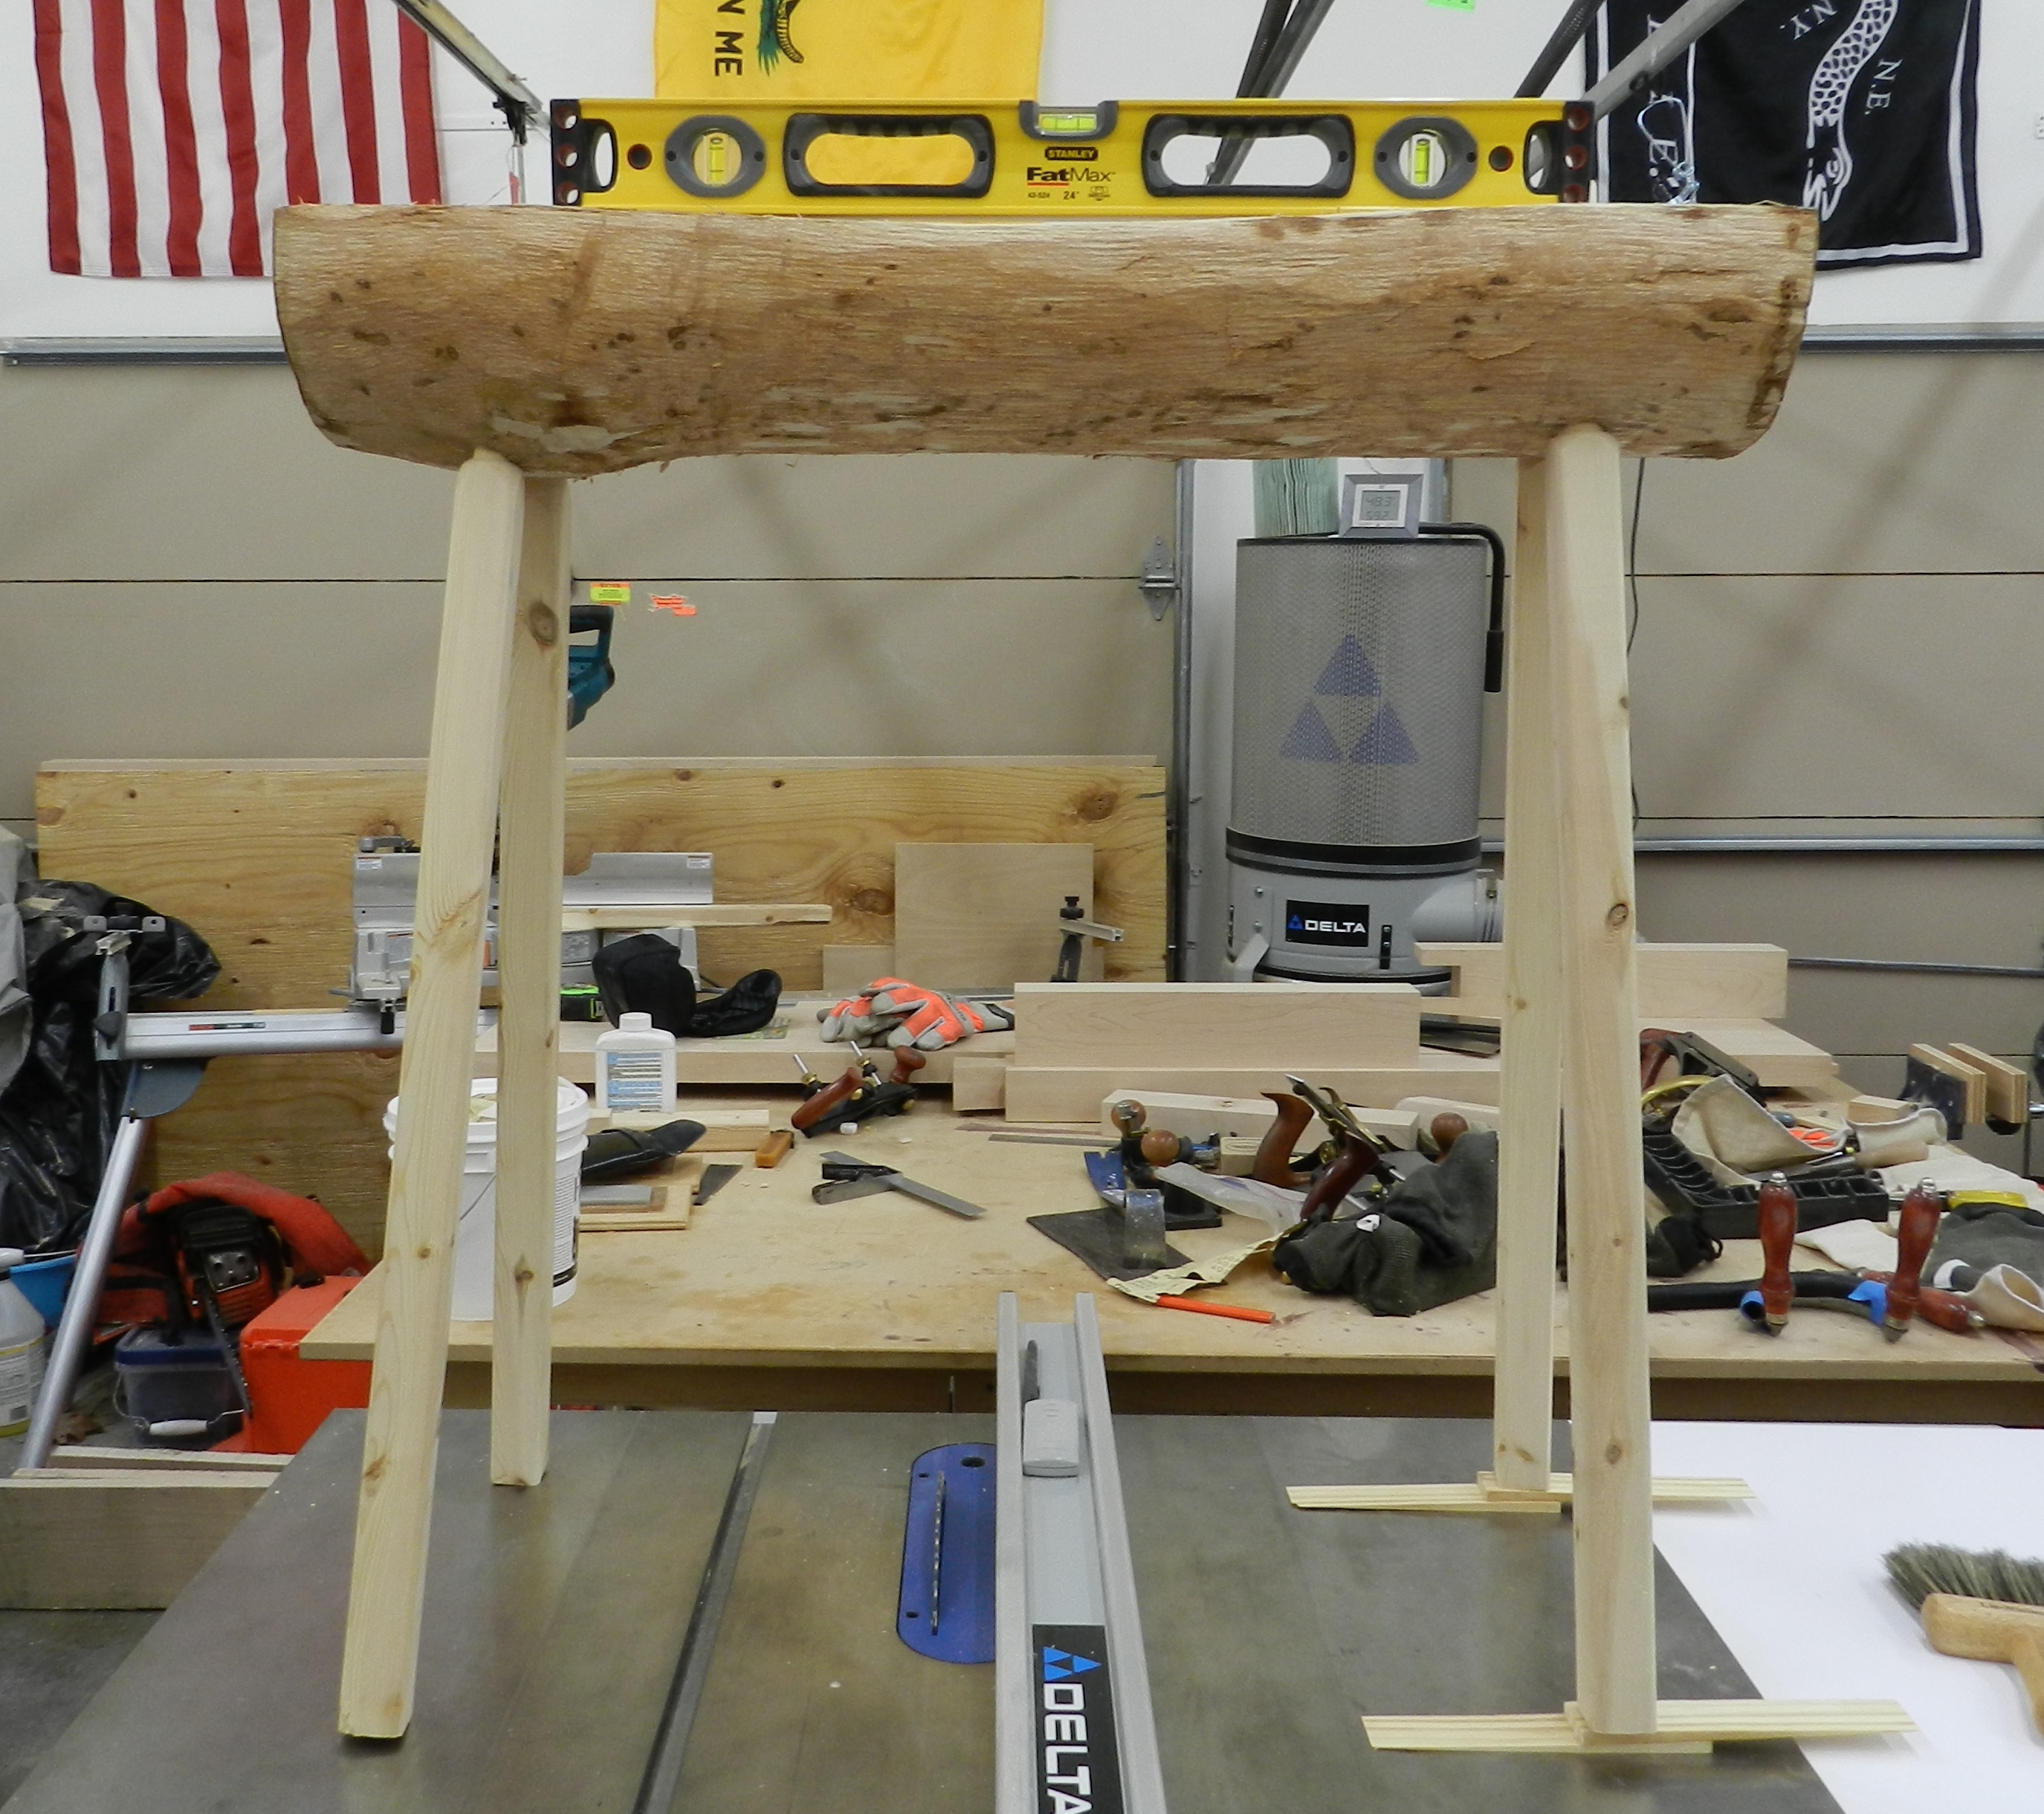
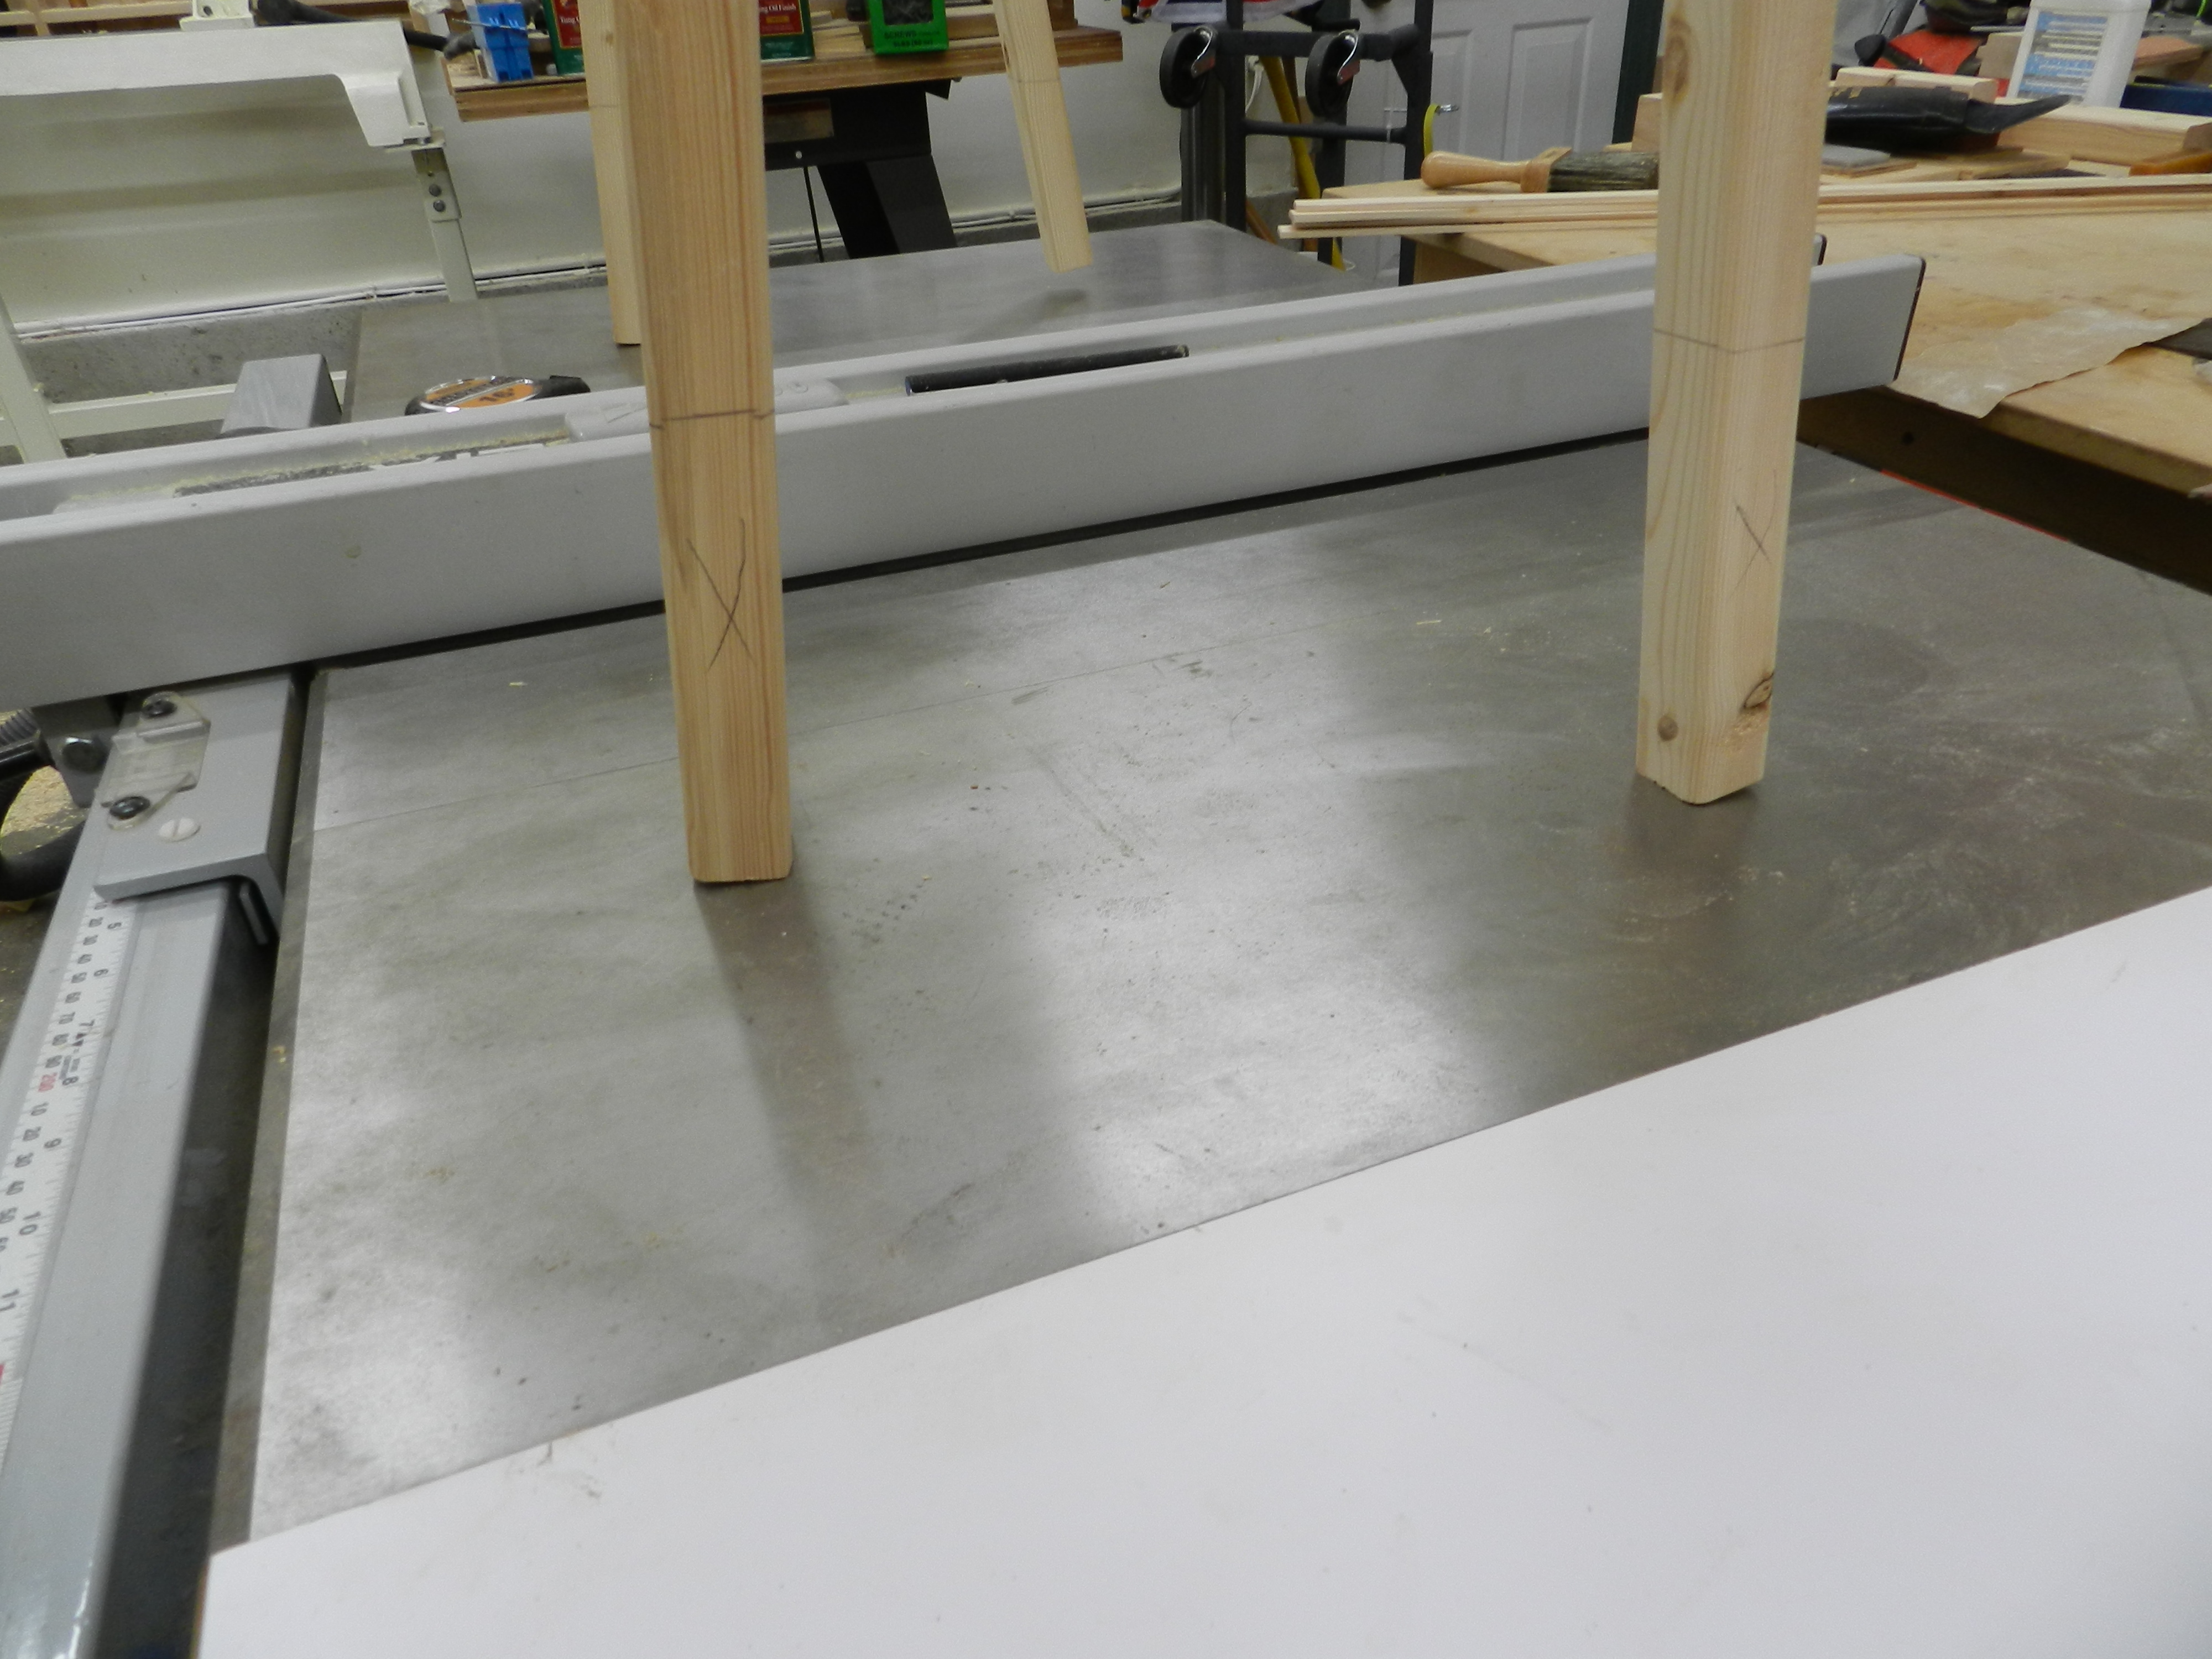
Leveling the legs
Beyond the modest improvements called out above, I otherwise built it the same way as the first hewing bench. (Wedged tenons, wax sealed end grain, leveled legs etc)
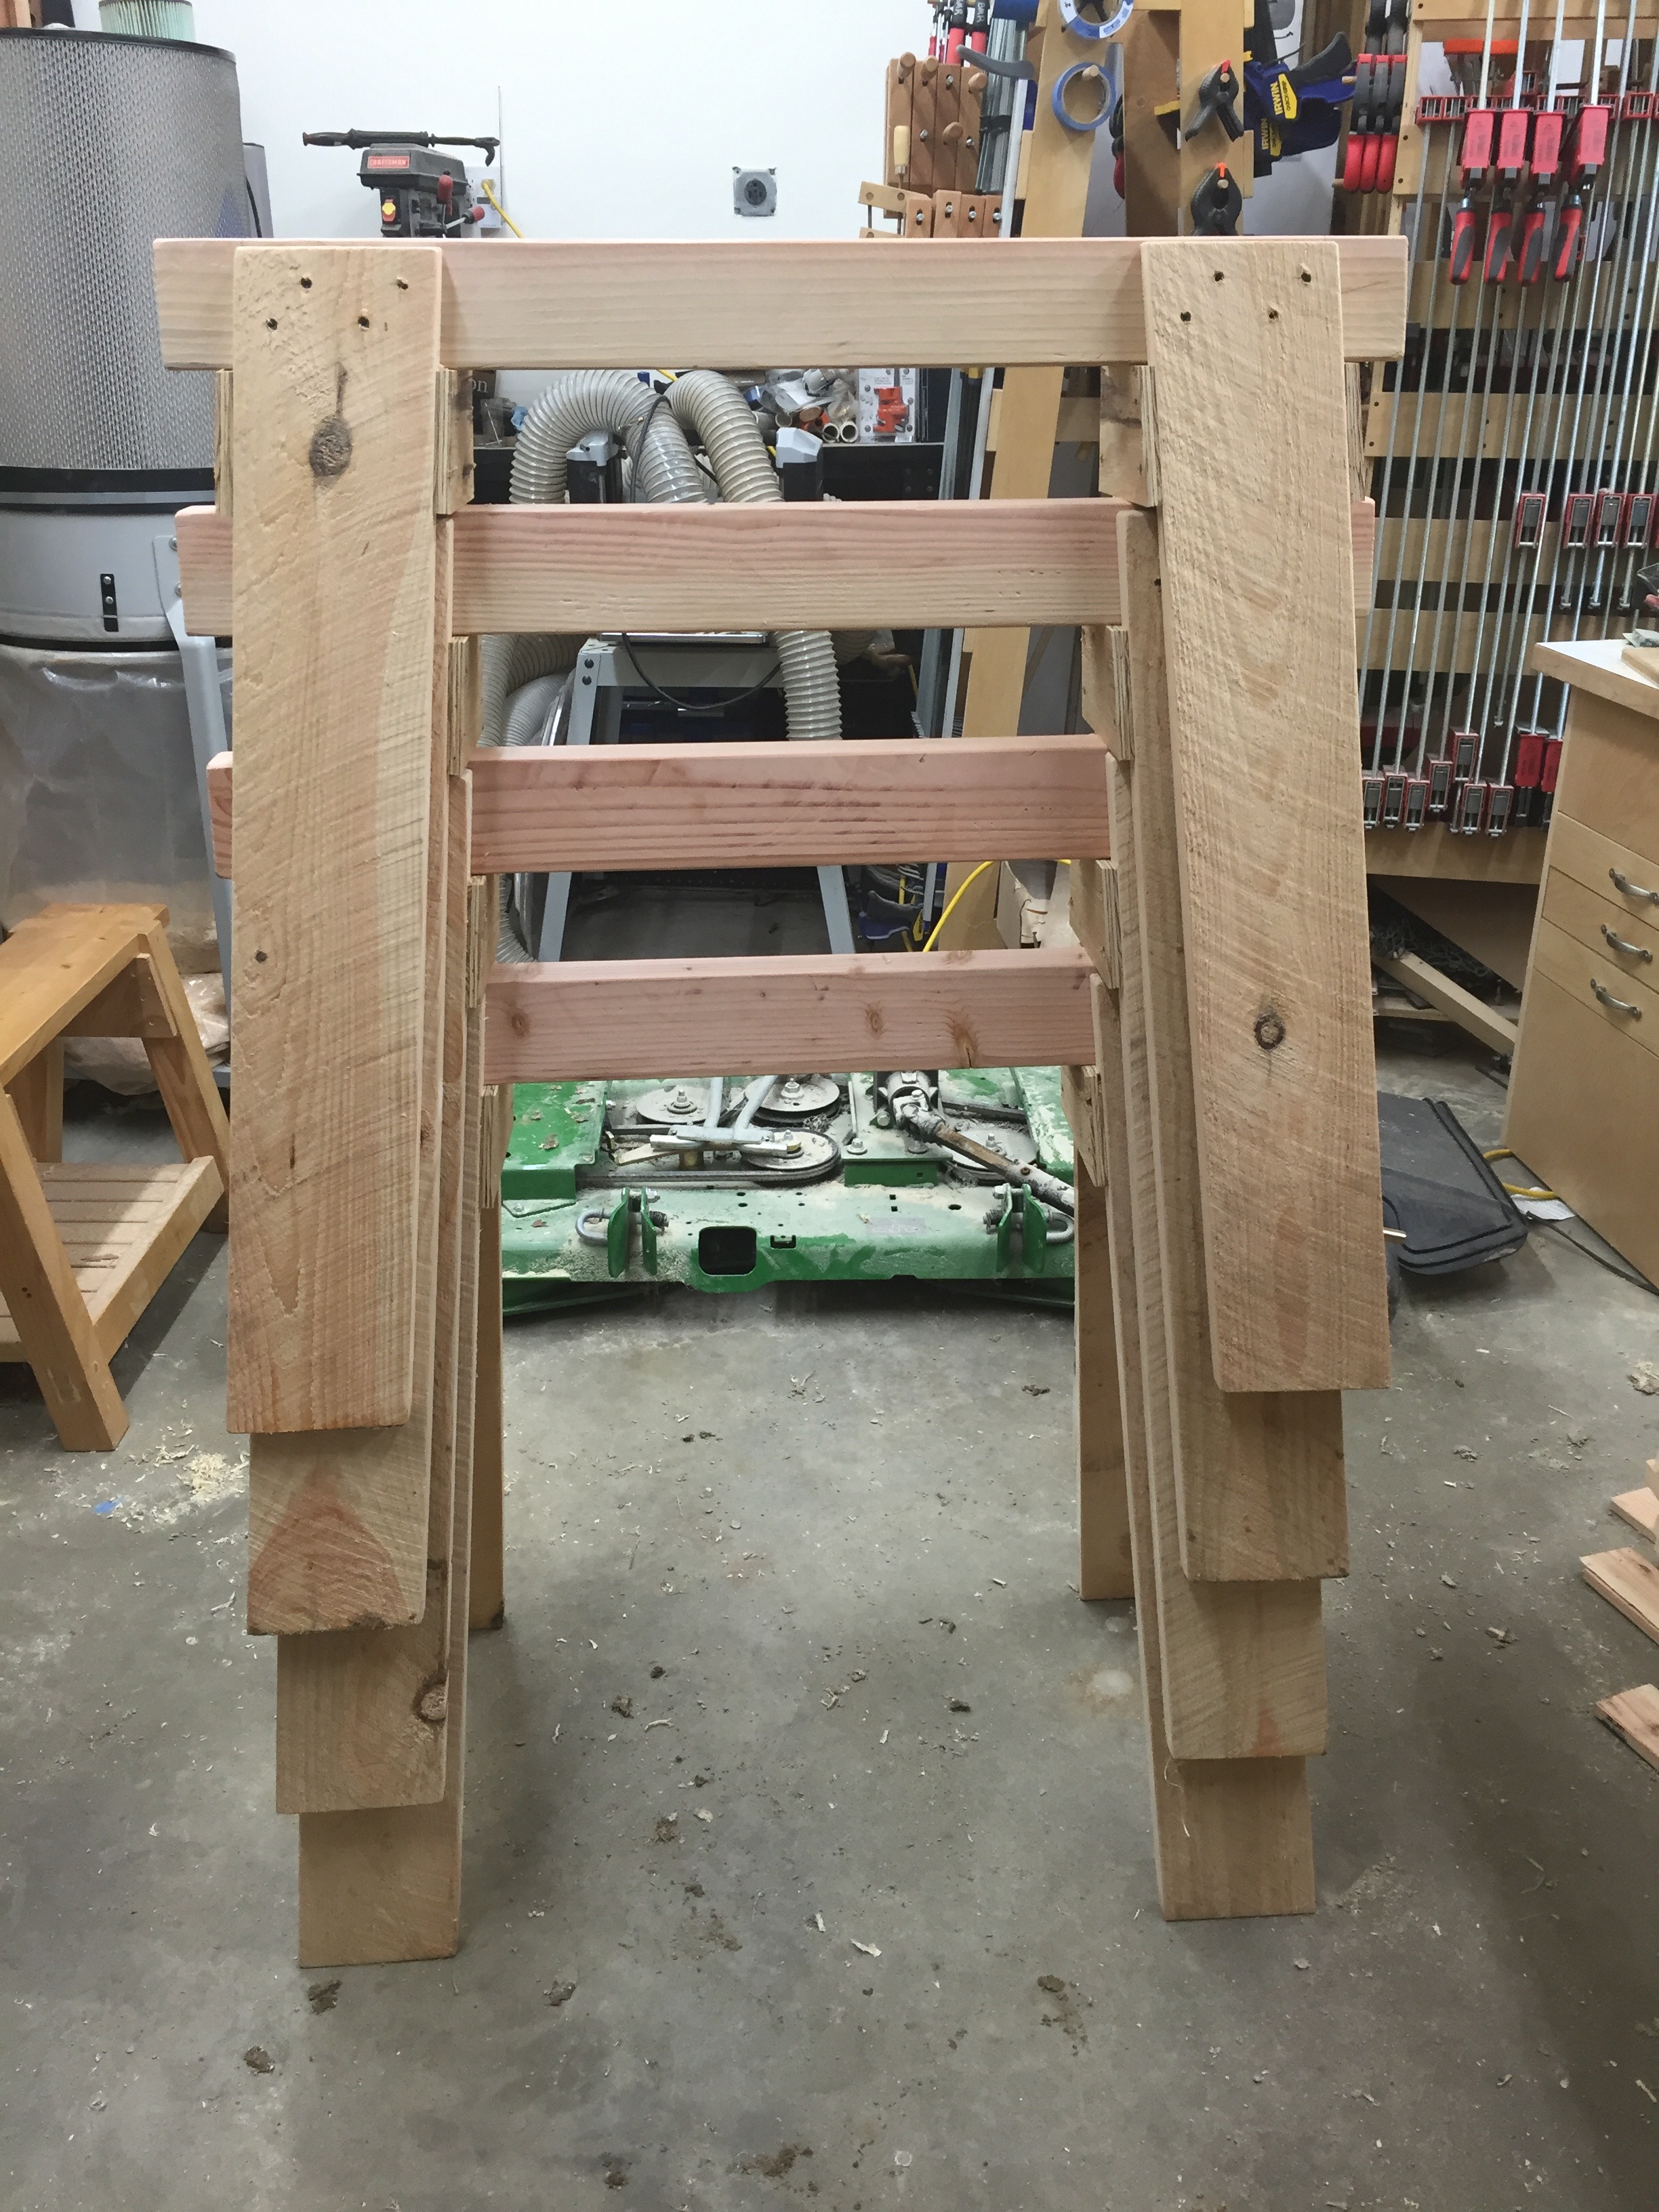
Completed benches. They can also work well as a pair of saw horses.
The Verdict:
The new bench is rock solid and will be a workhorse in the shop. The new legs are nice and stiff. Having a pair of these benches in the shop has already come in handy as you’ll see in the next post.
If you’ve watched Roy Underhill on the Woodwright’s Shop with any regularity then no doubt you’ve seen him using a hewing bench. It’s a great little bench made from half a log on 4 modest legs. Roy’s used it for hewing, trimming, holding, sitting and many other common shop uses. It’s a project you can complete in an afternoon and will serve you well for many years in the shop.
Why would anyone really want this rough little bench?
If you do any sort of green woodworking it’s nice to have a place you can quickly hew a blank in the shop with a hatchet or similar small ax. When the ax hits the long grain of the bench it will not dig in the way it would if you were using the end grain of a stump or similar log section. (It also protects the reference surfaces of your real workbench) For tapering the end of treenails, splitting wood or roughing a green turning blank it has been a priceless addition to the workshop. It also makes a nice place to sit when people visit the shop. 😉
How do I make one of these benches?
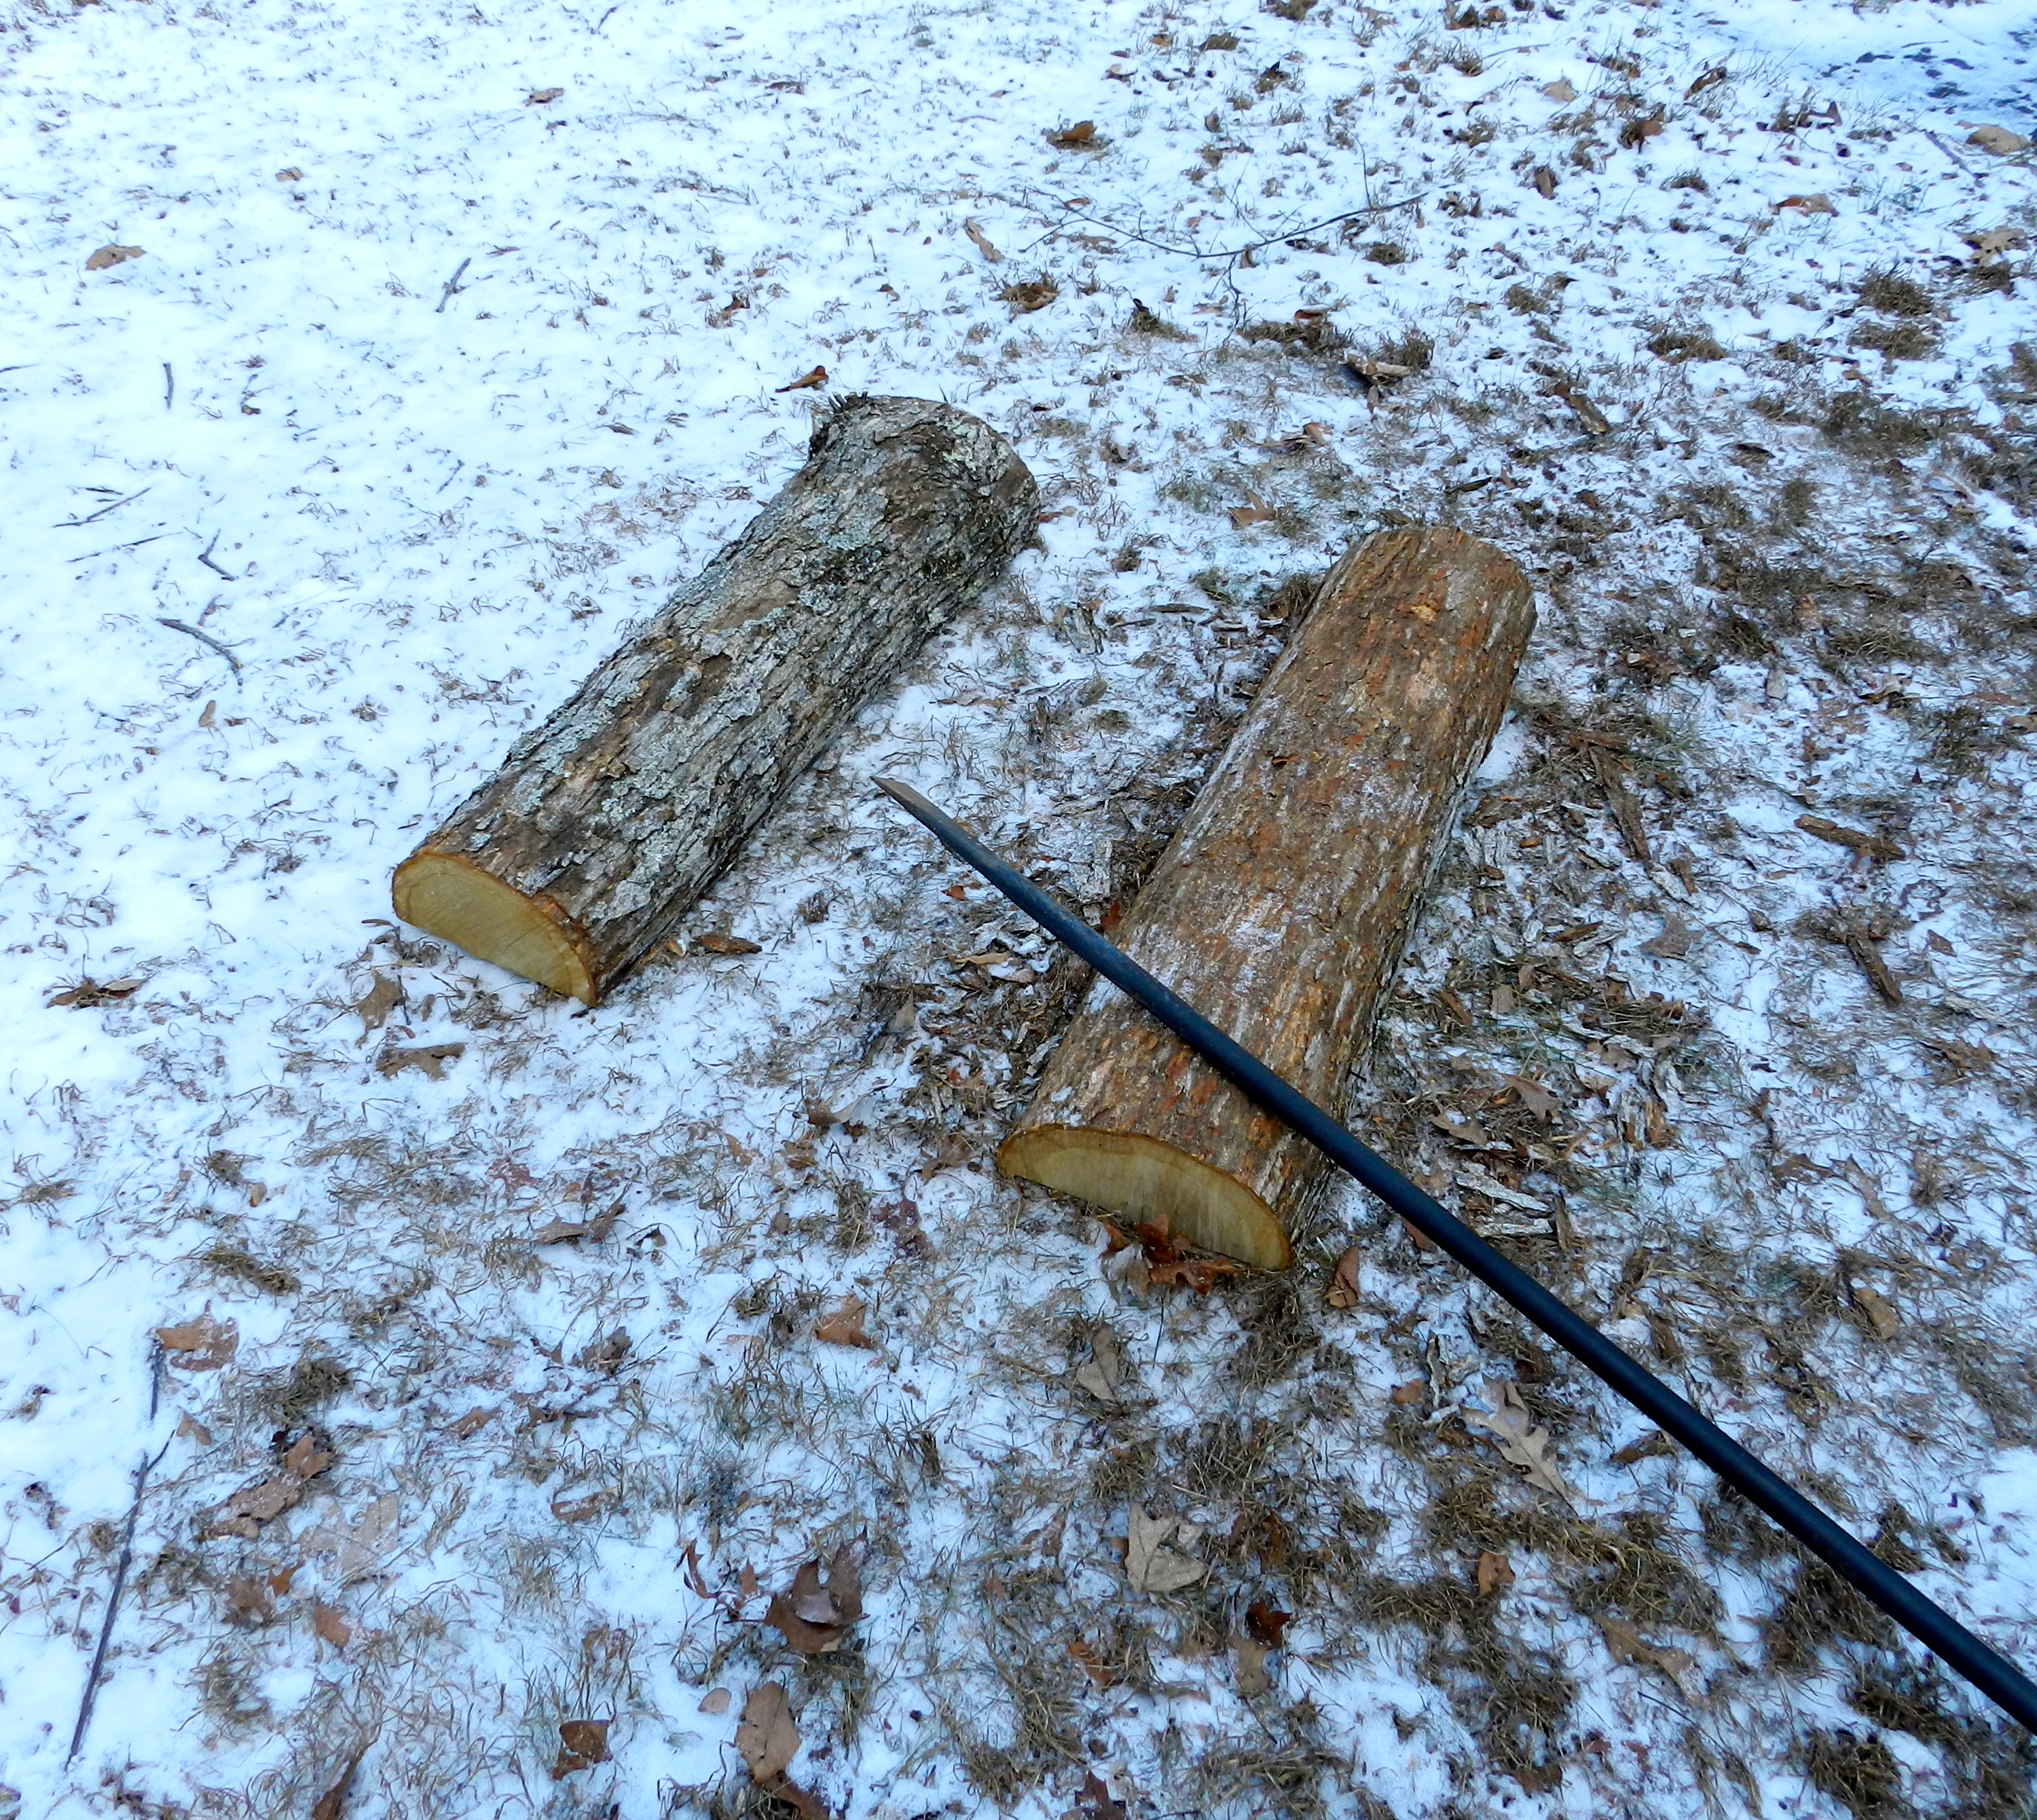
Like any good Roy anecdote it starts with “First you find a tree….”
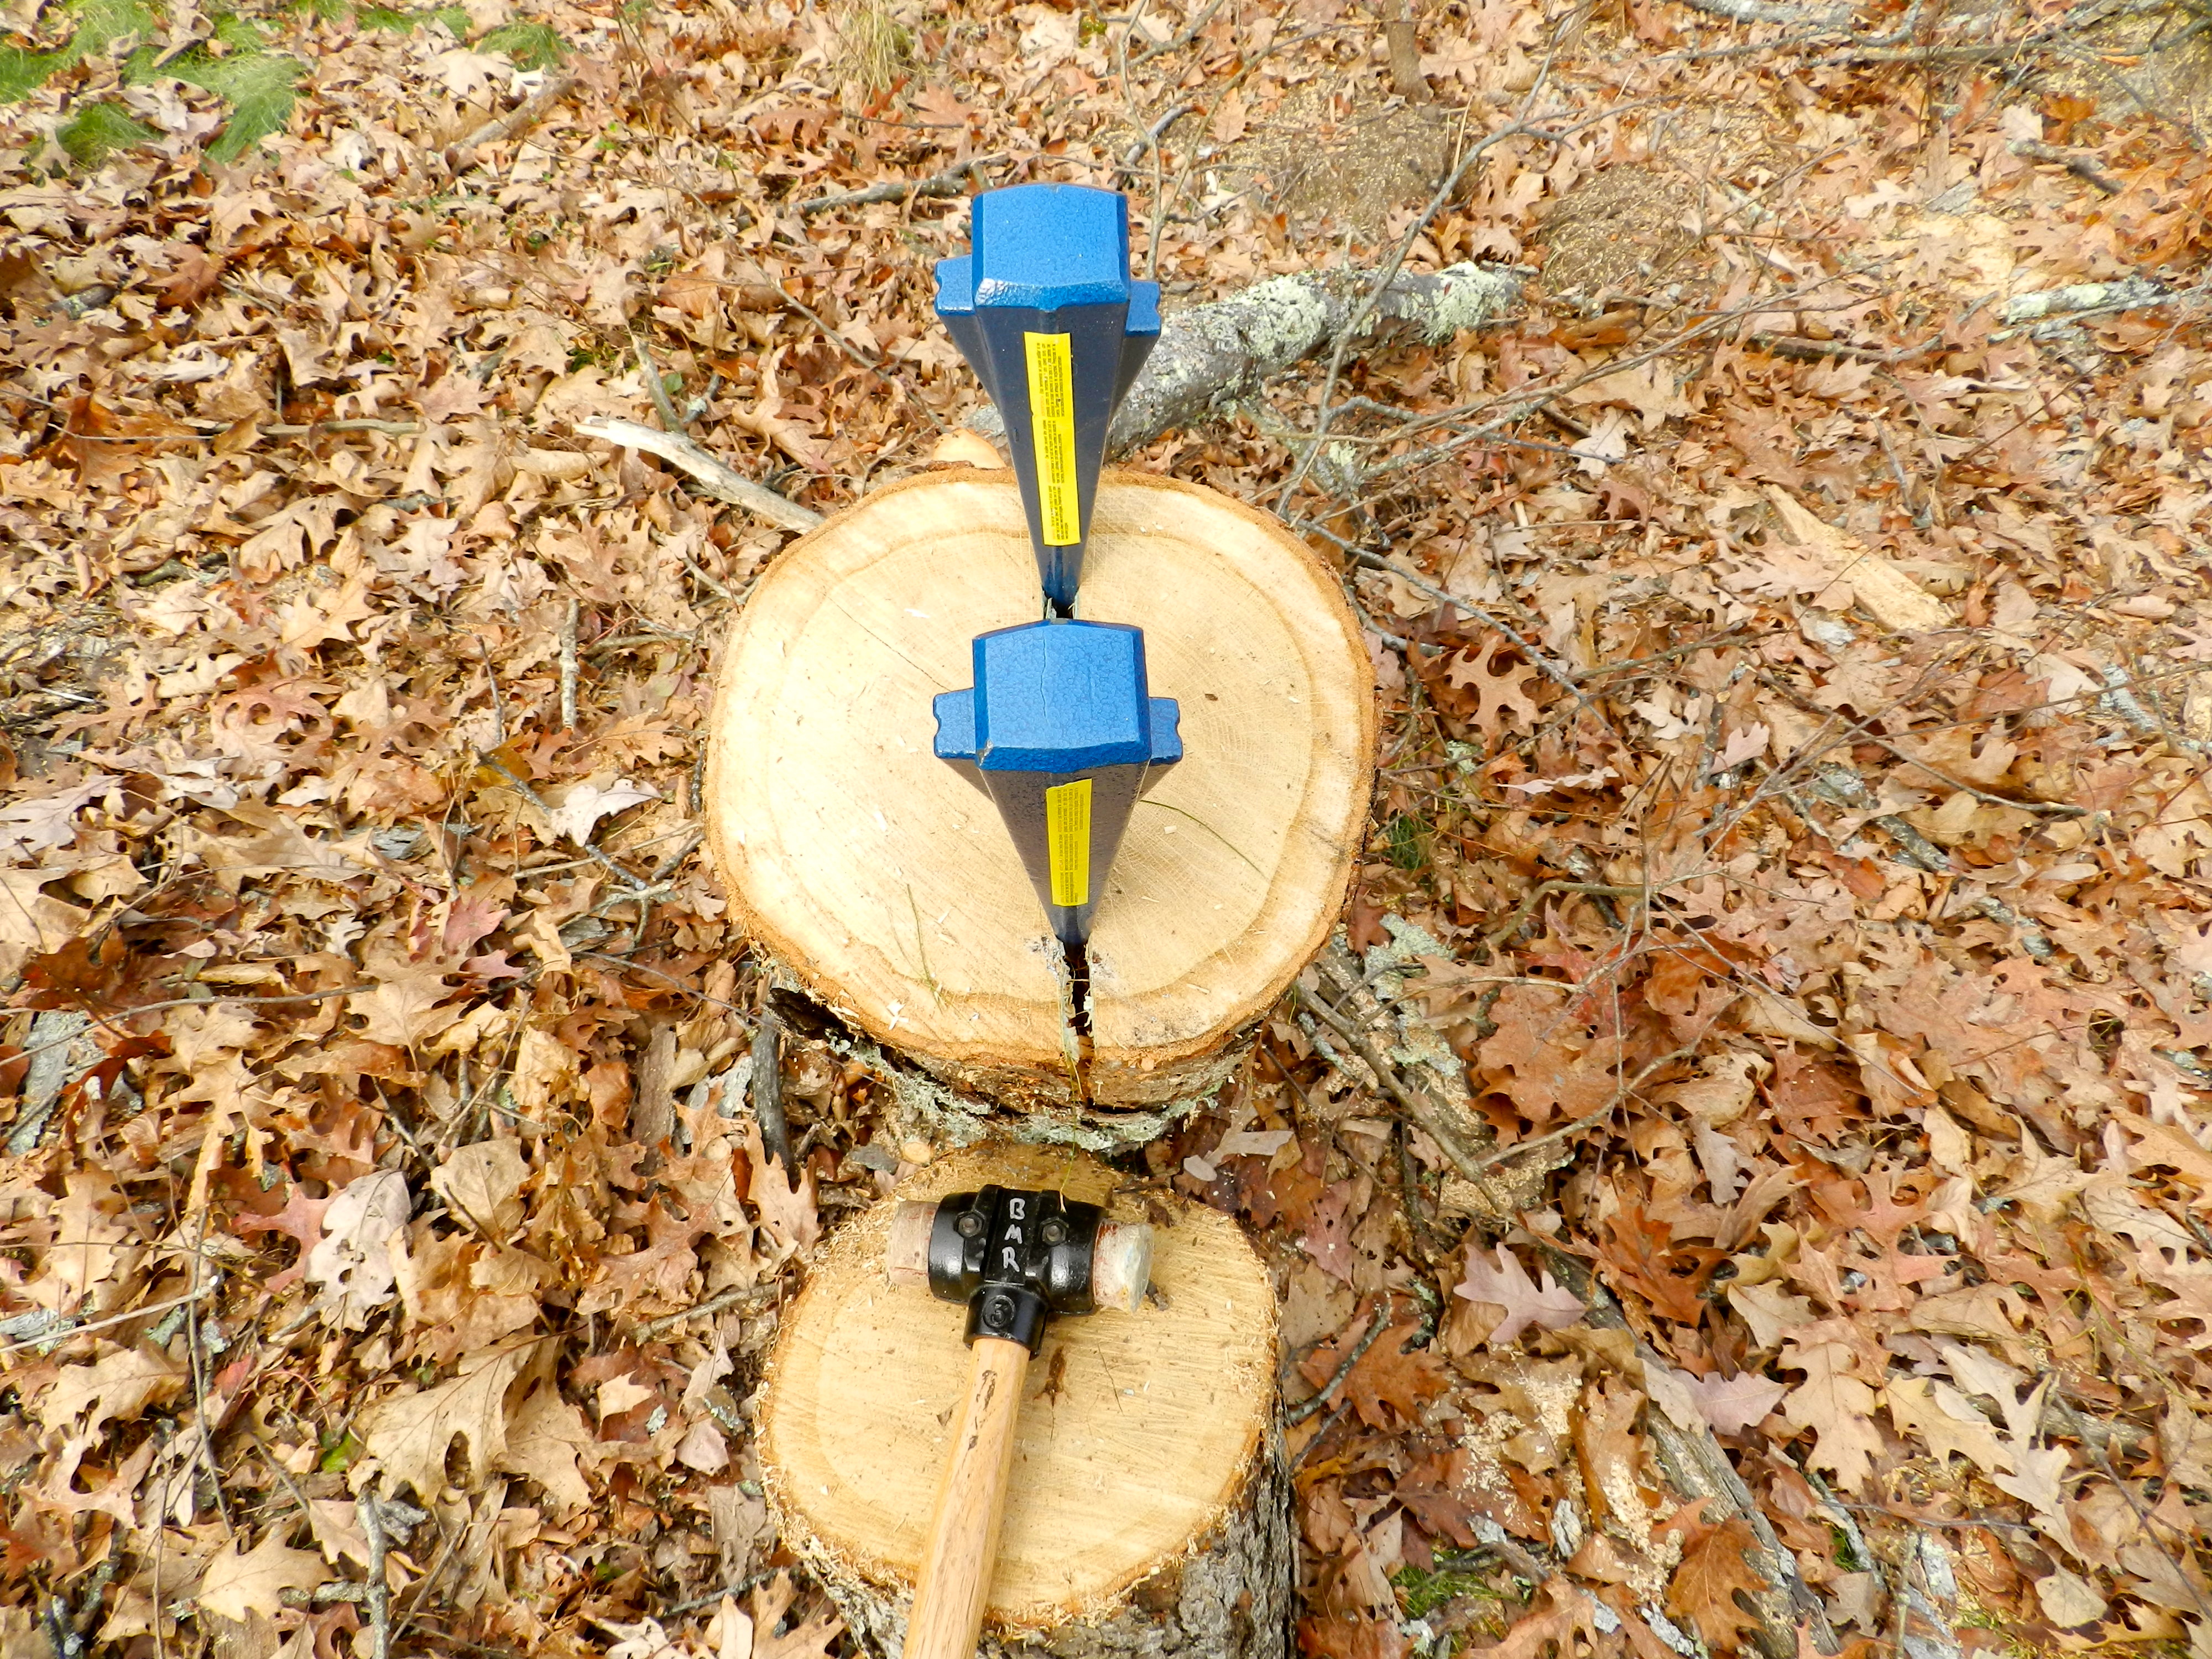
Splitting the oak log with metal wedges and a heavy leather faced mallet
In this case I took a 12-15″ wide and 30″ long section of white oak from a large tree I recently felled in my yard. This tree was over 130 years old so the growth rings are nice and tight. Using metal wedges and a large leather faced mallet I use for my timber framing I split the log in half.
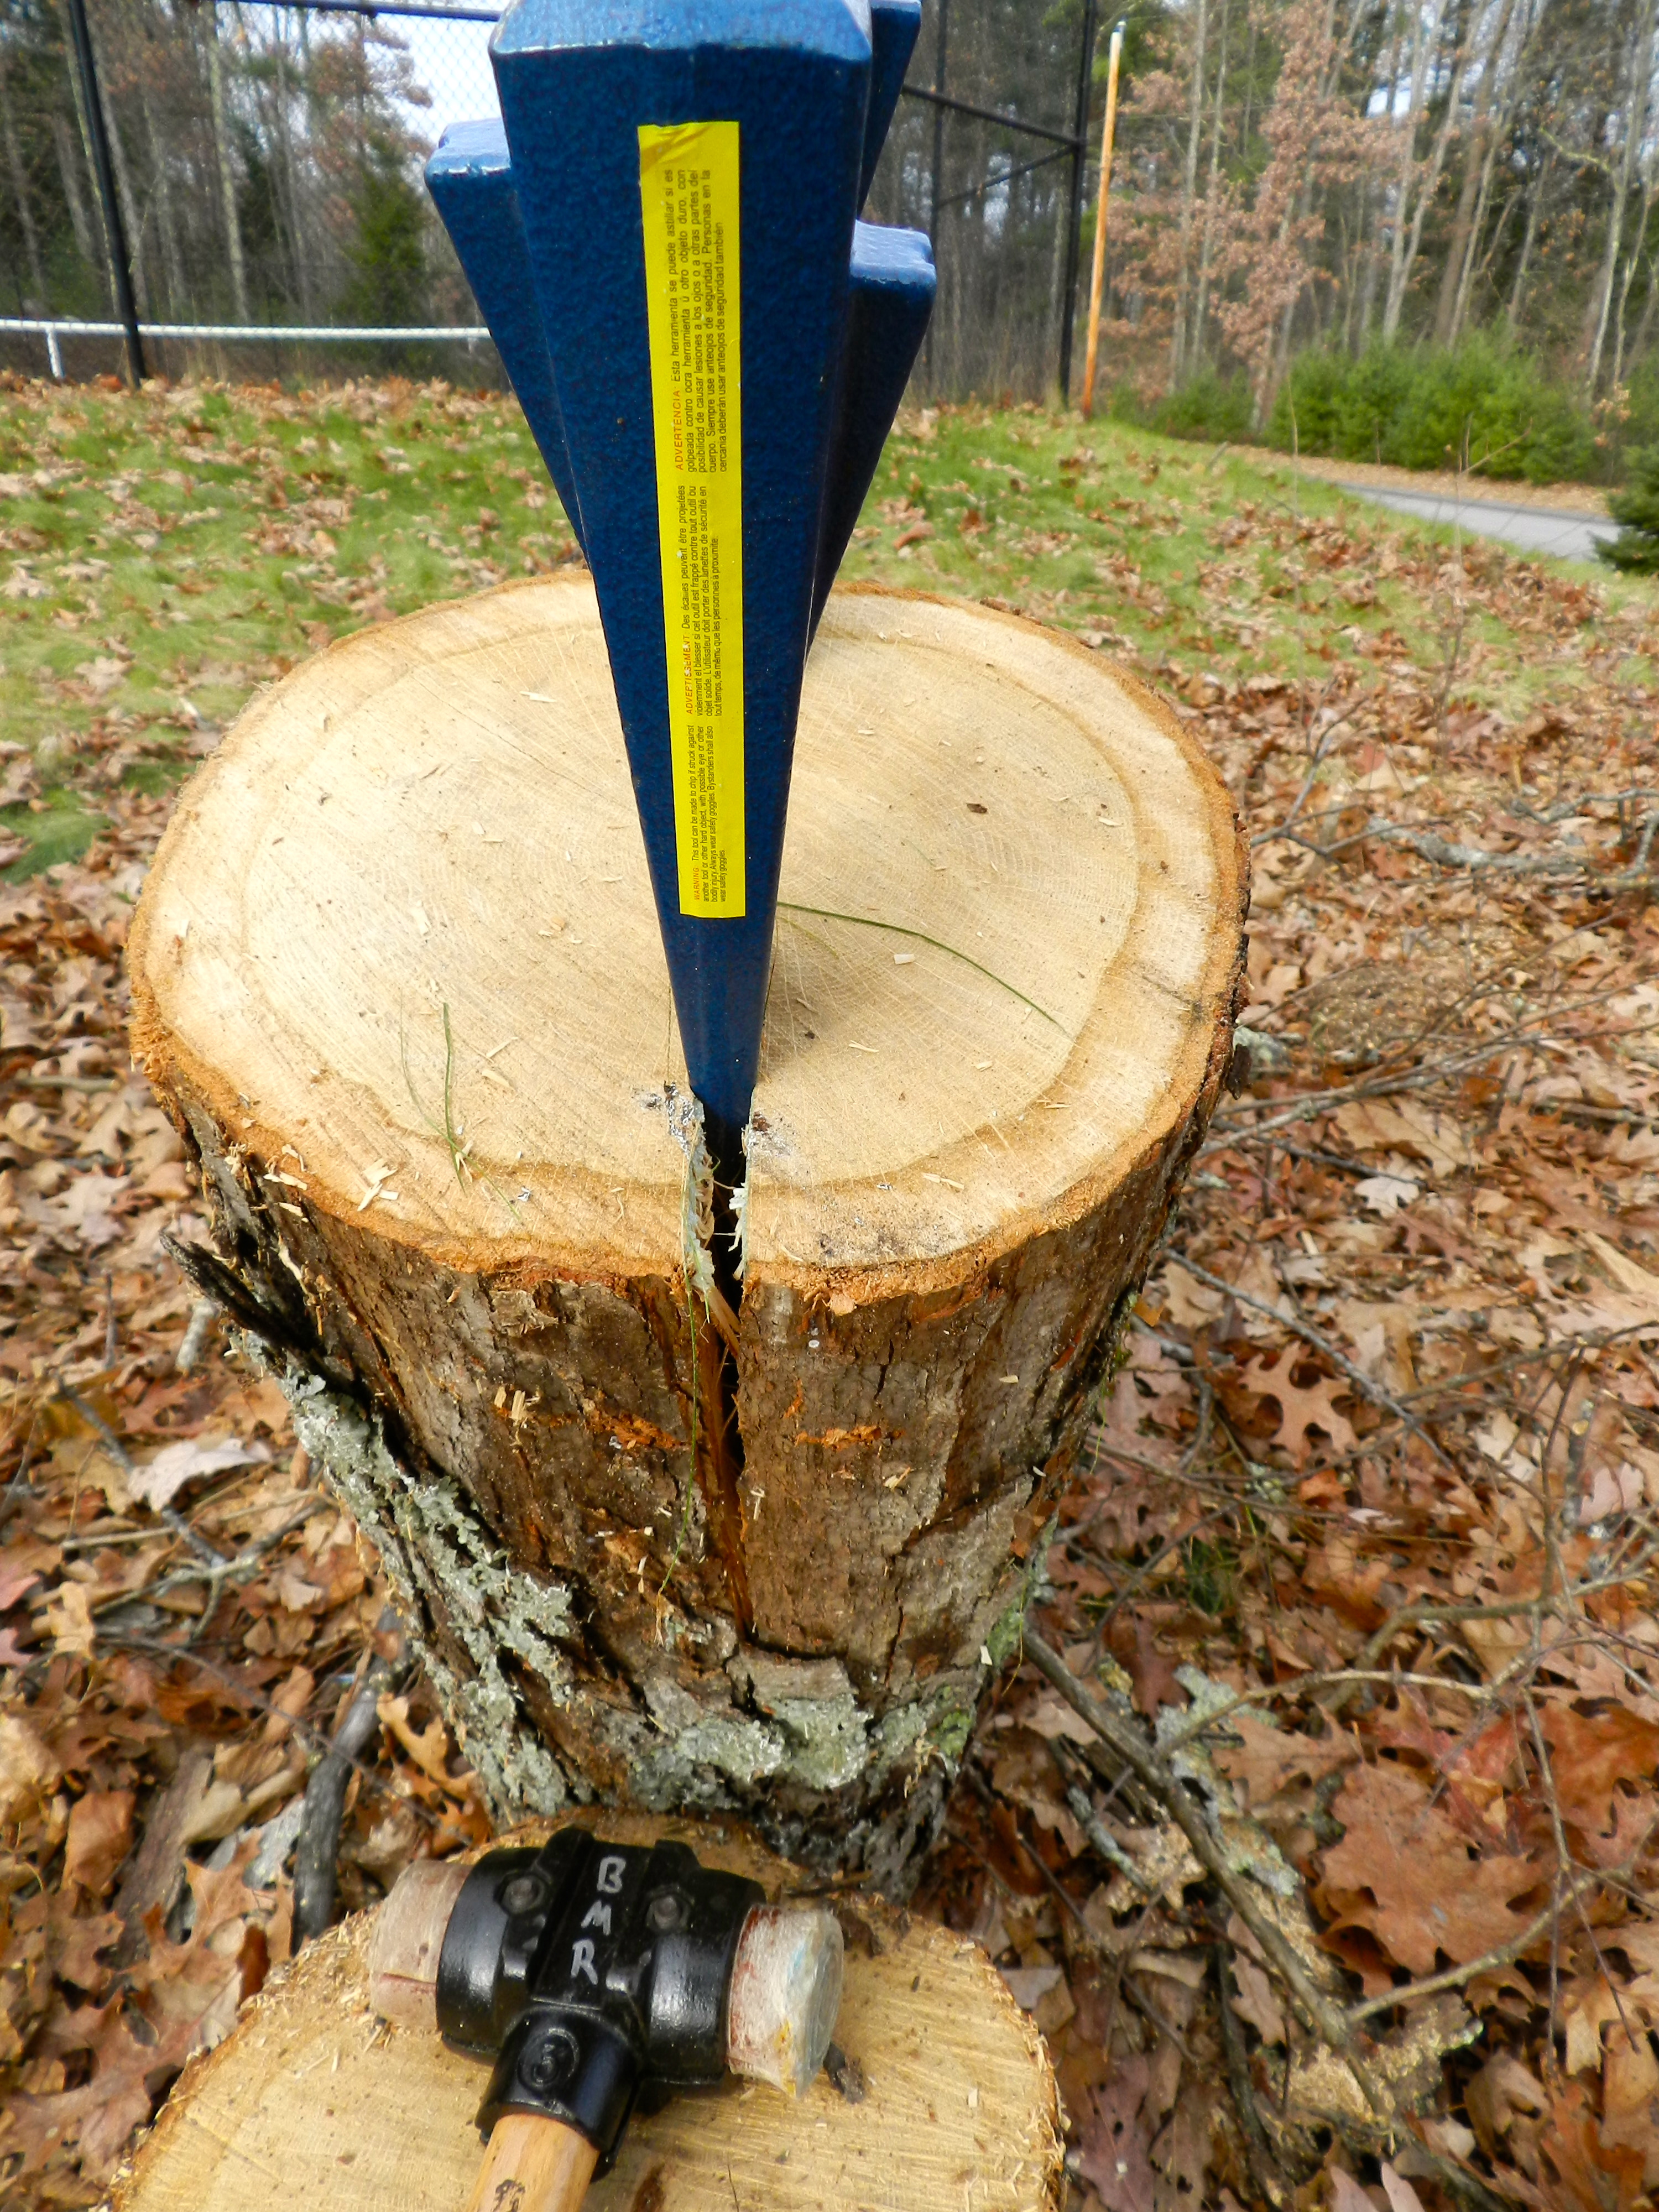
Watch to make sure the split runs the way you want down the log
If the wedges alone cannot do the whole job of splitting for you, a froe can help it along.
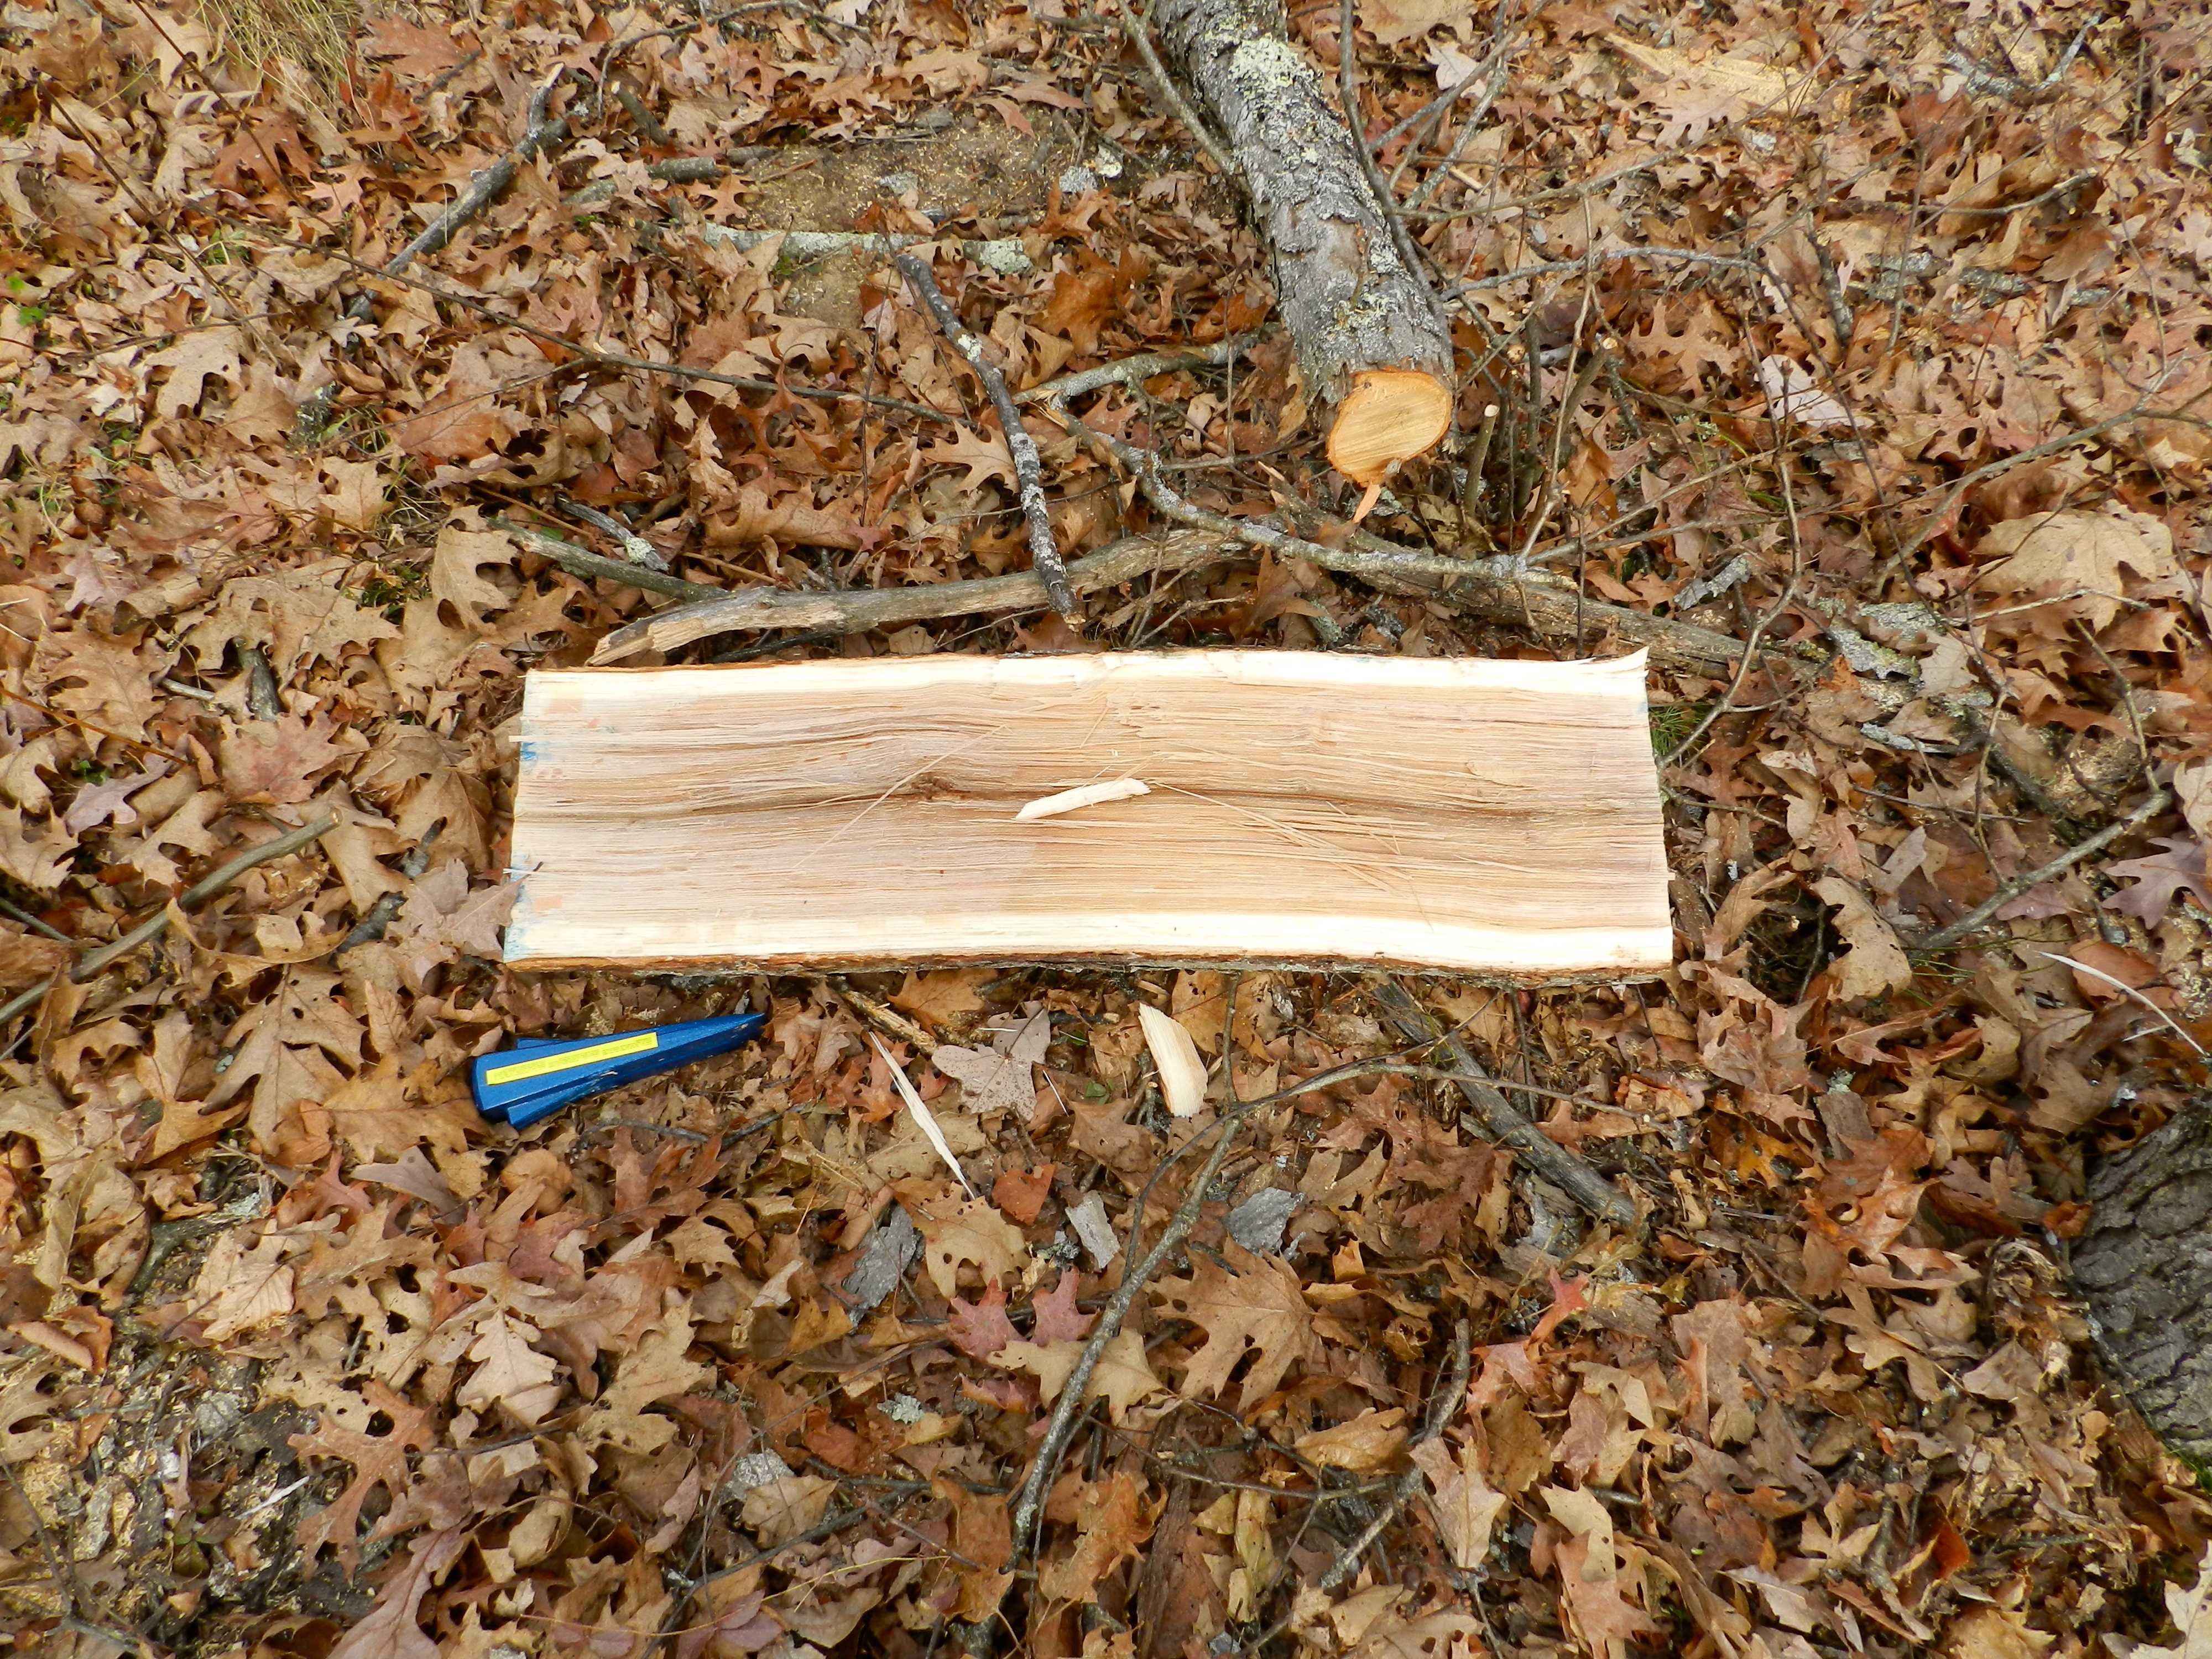
Log split in half. You can clearly see the heartwood and the sapwood
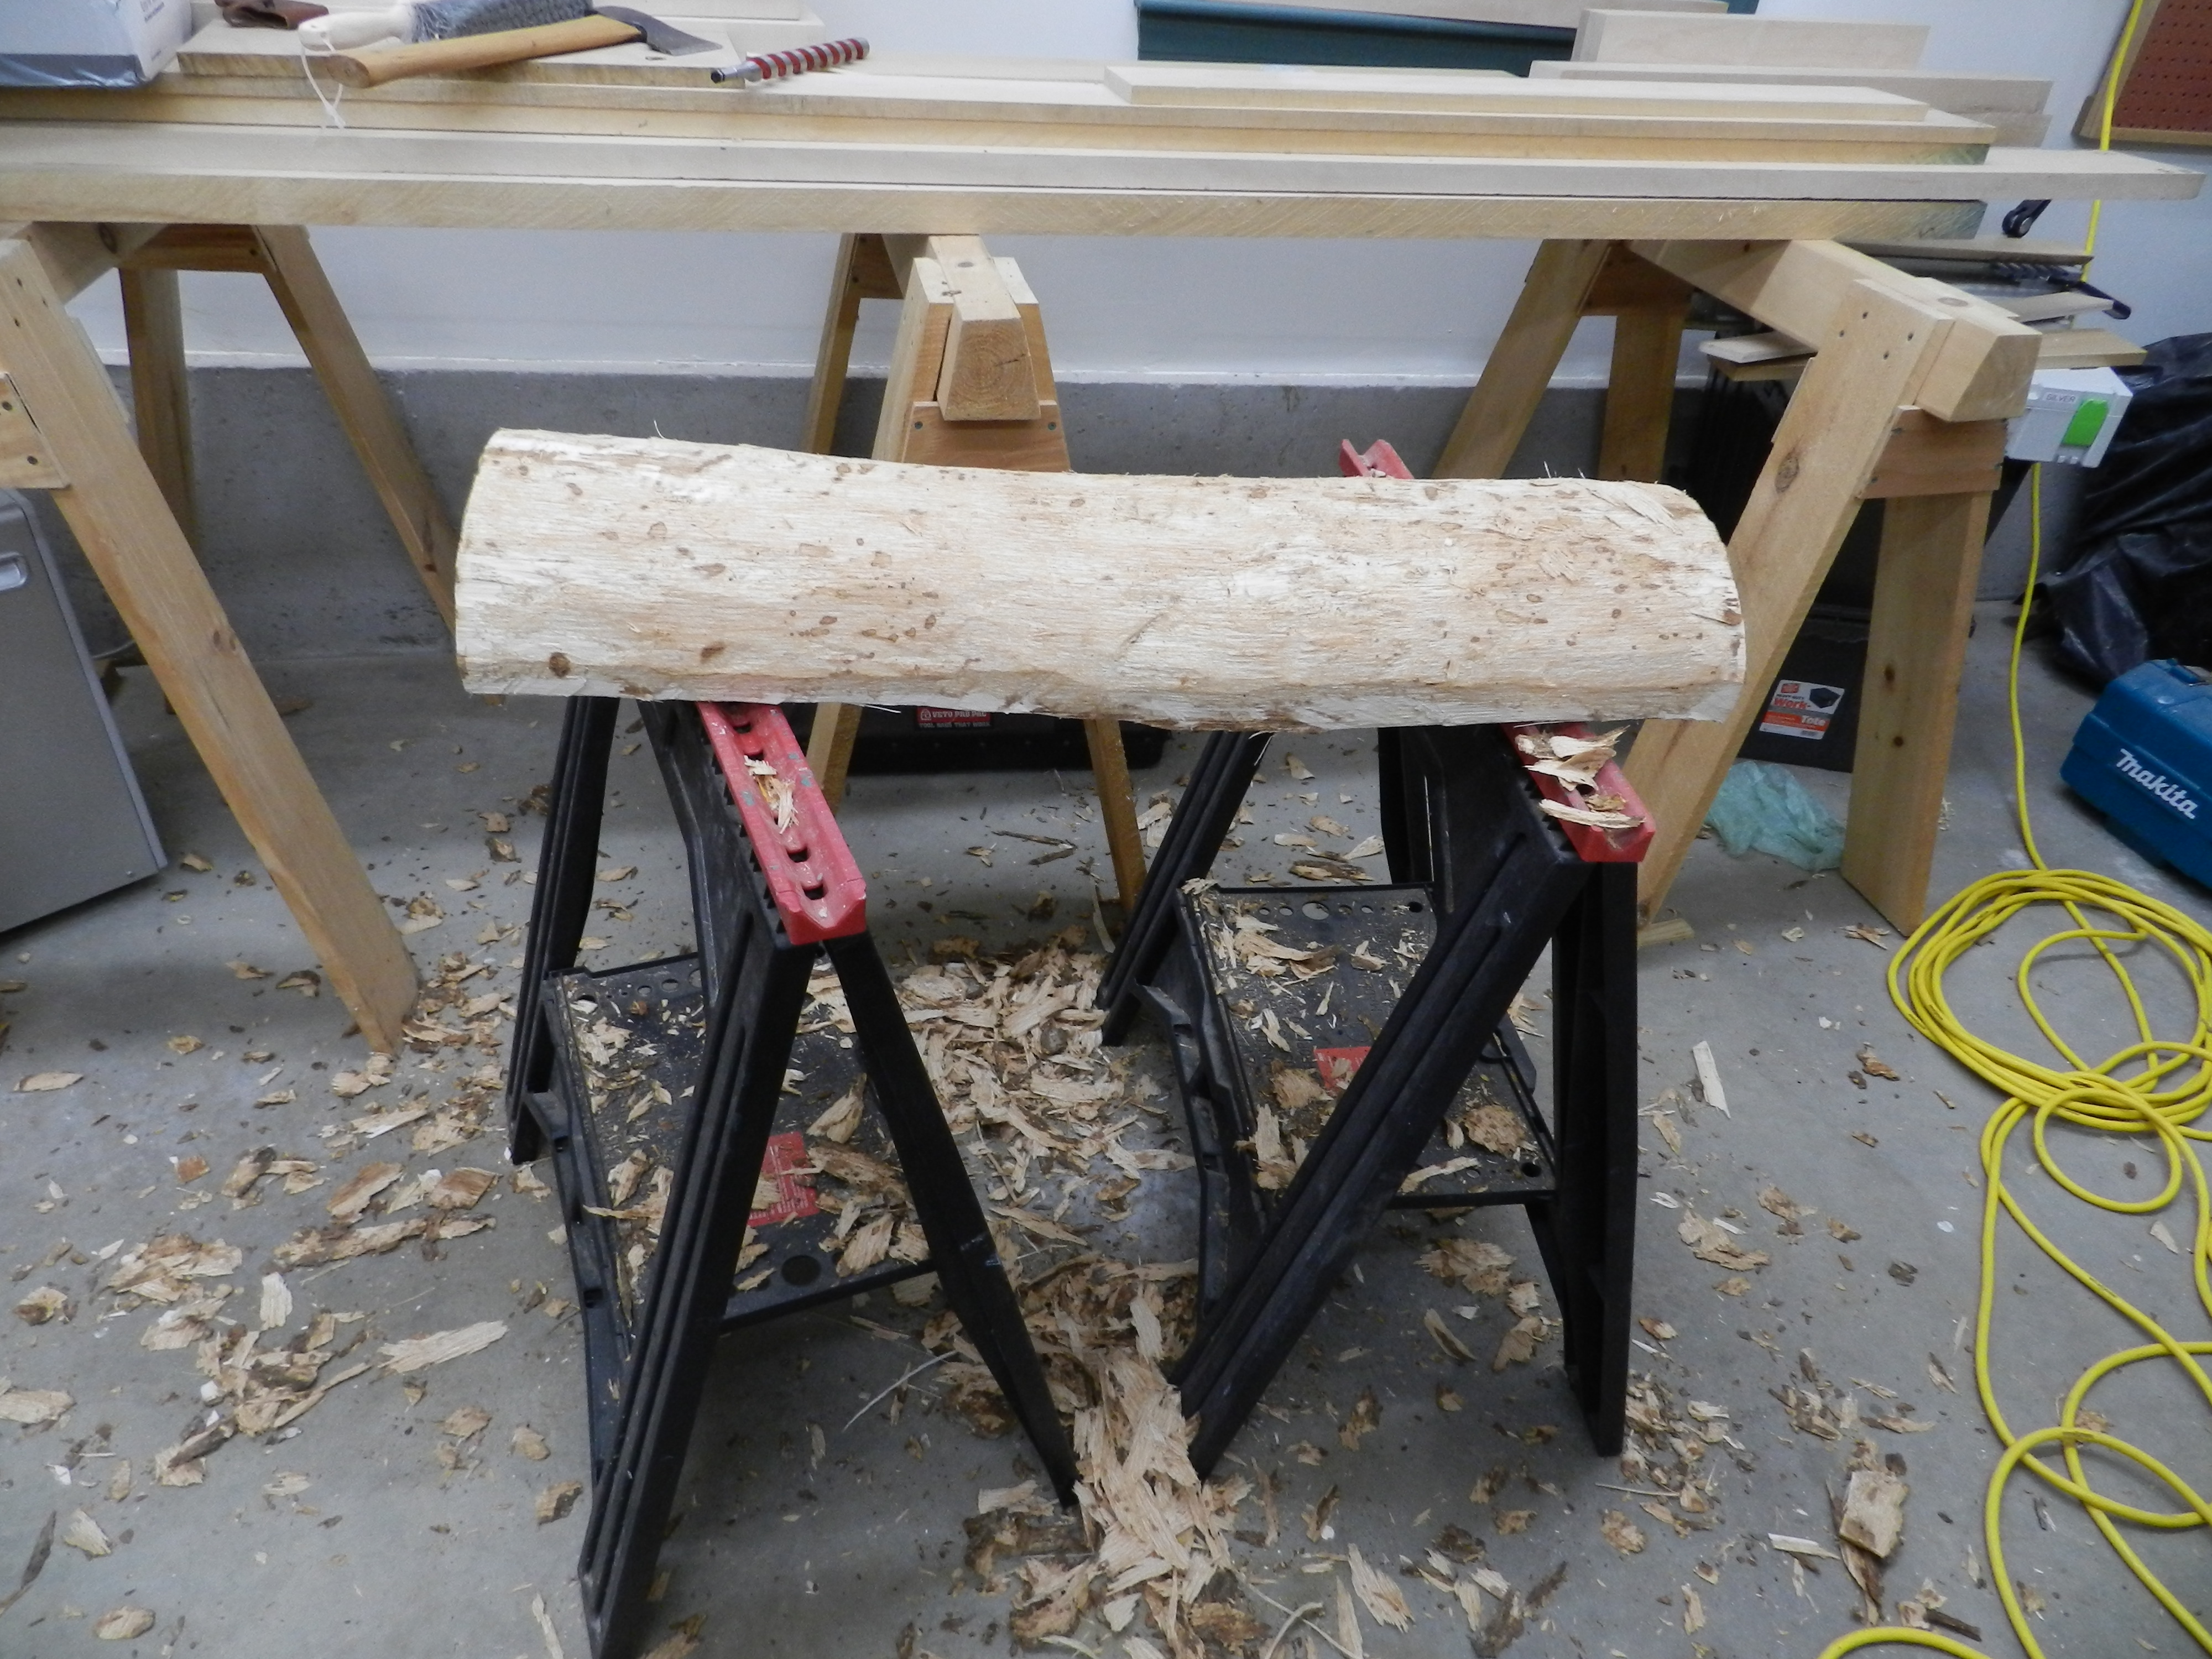
After letting the slabs sit for a few days, it was time to de-bark the logs. If you don’t have a dedicated de-barking spud you can use any tough metal roughly chisel shaped tool or ax. In this case I used a 16lb post hold digger as shown below.
De-barking the log on the right. A metal post hole digging bar makes a good impromptu barking spud.
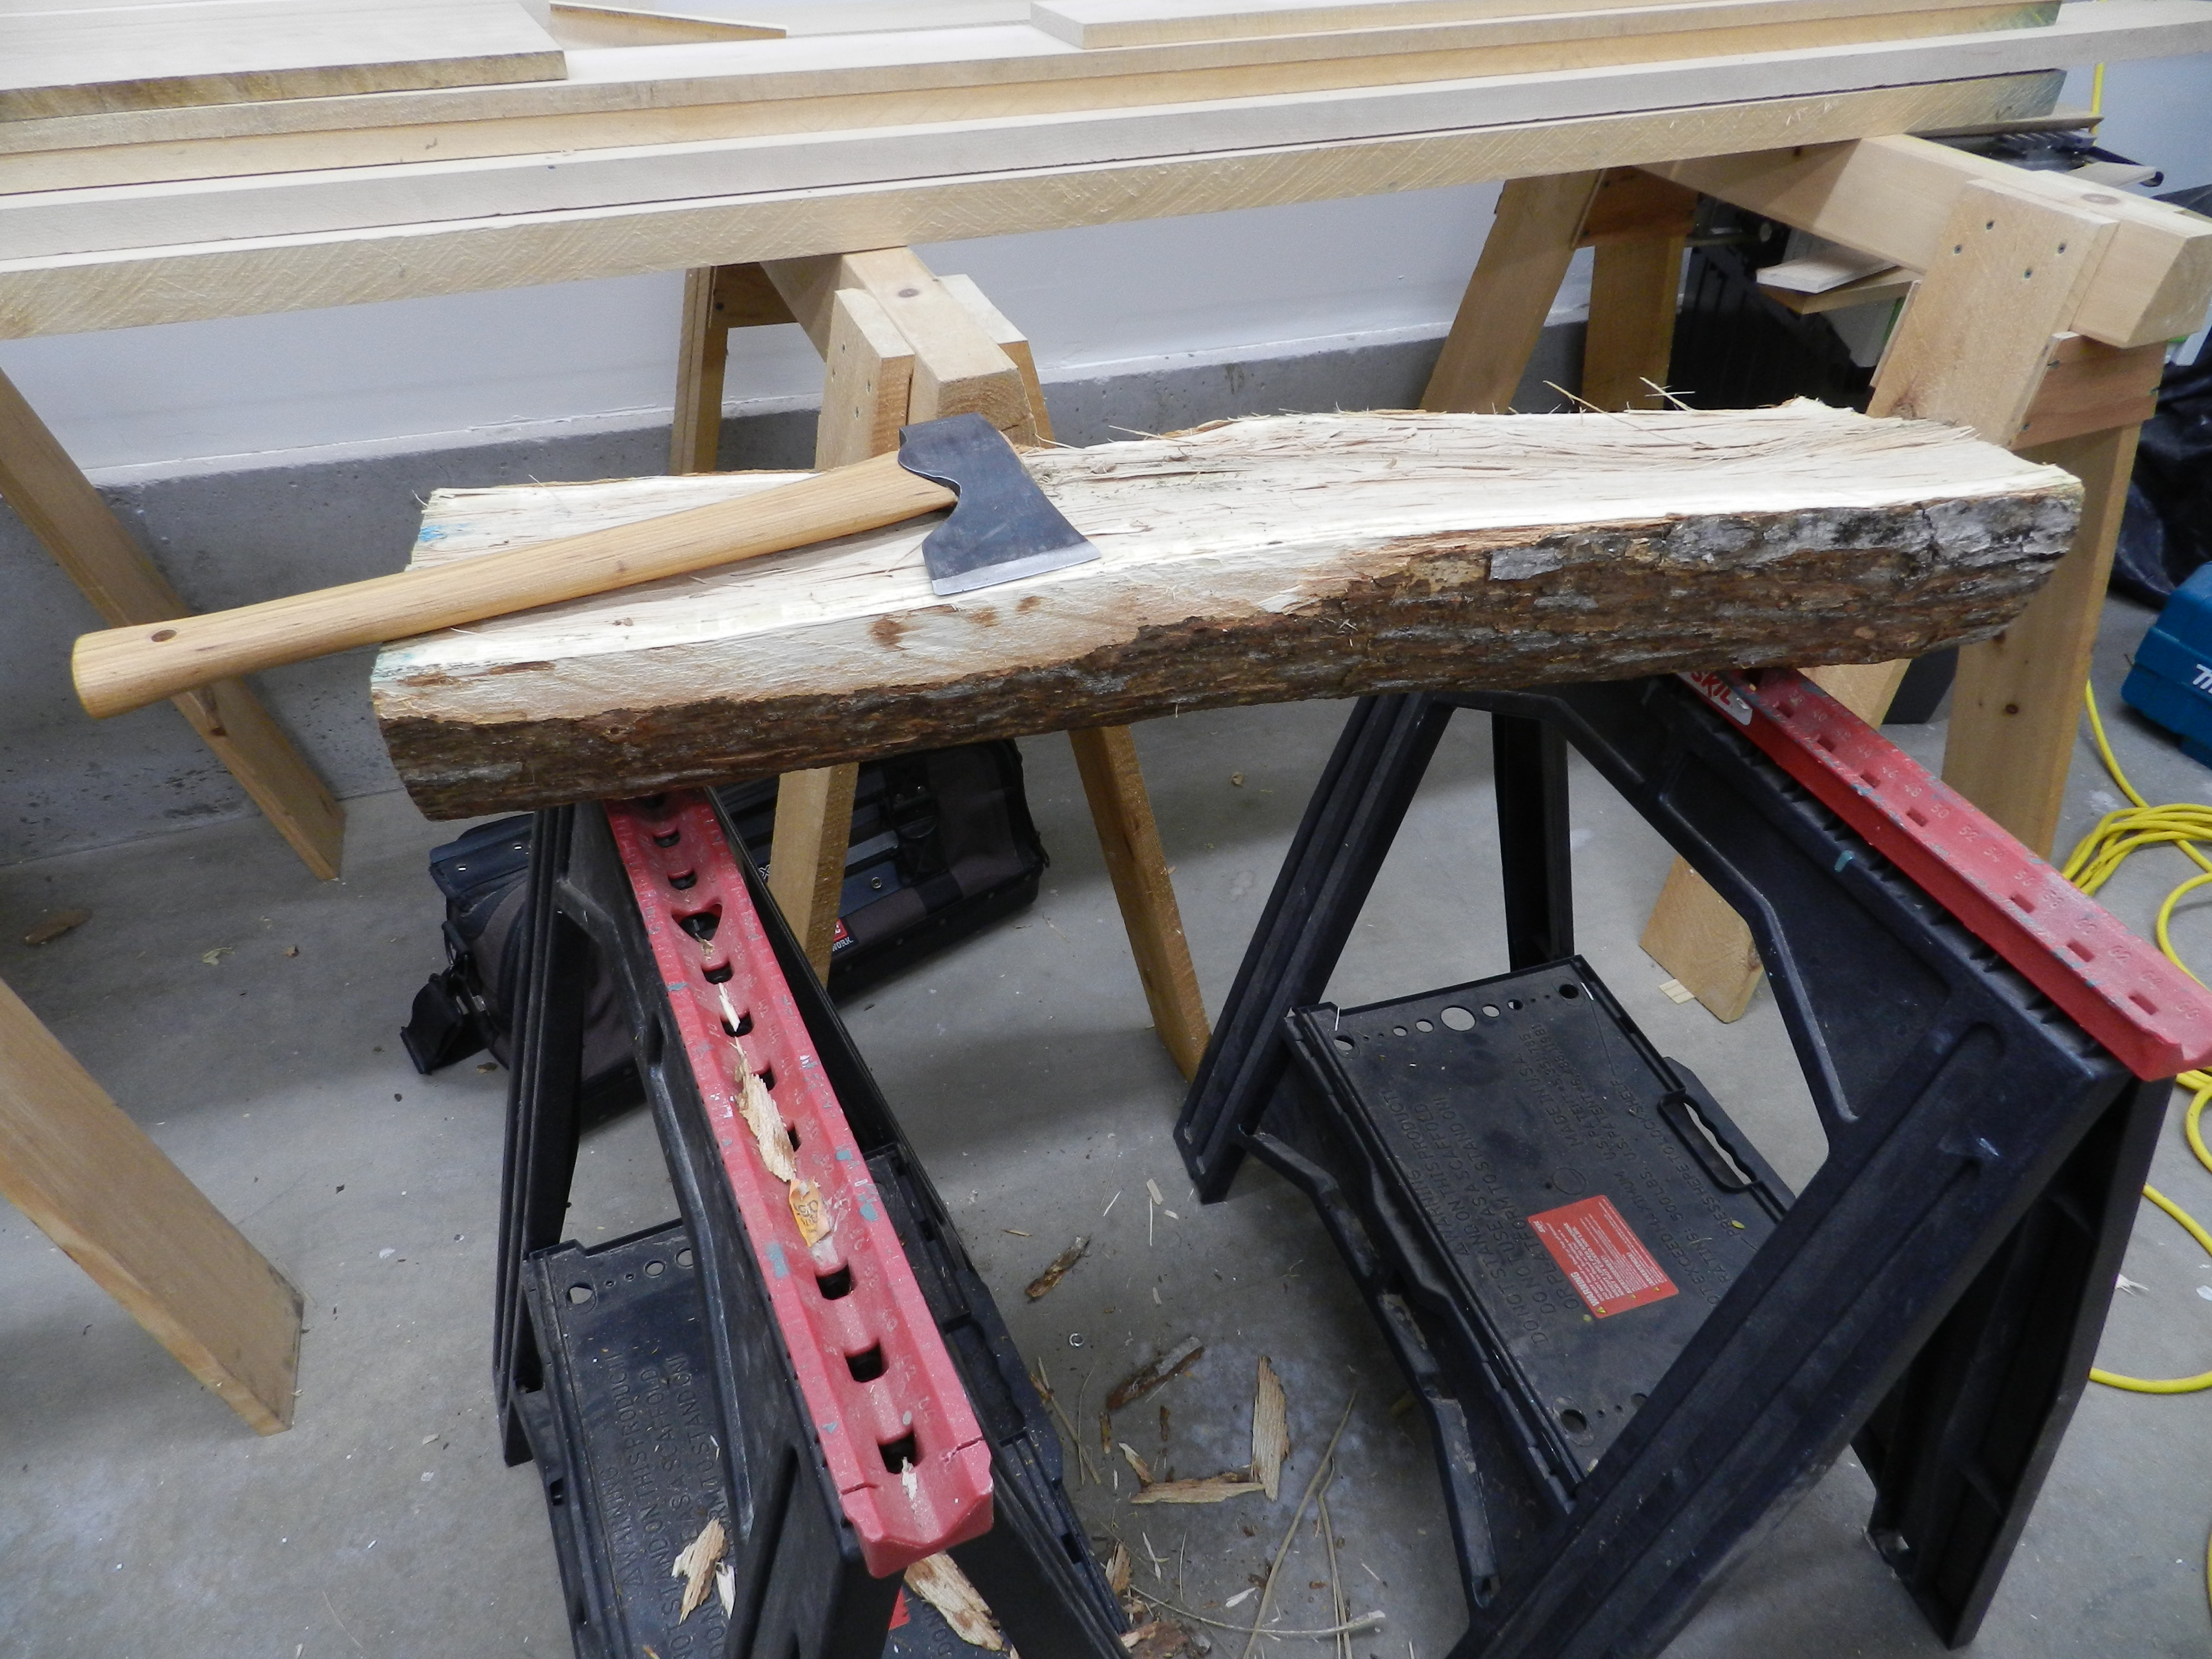
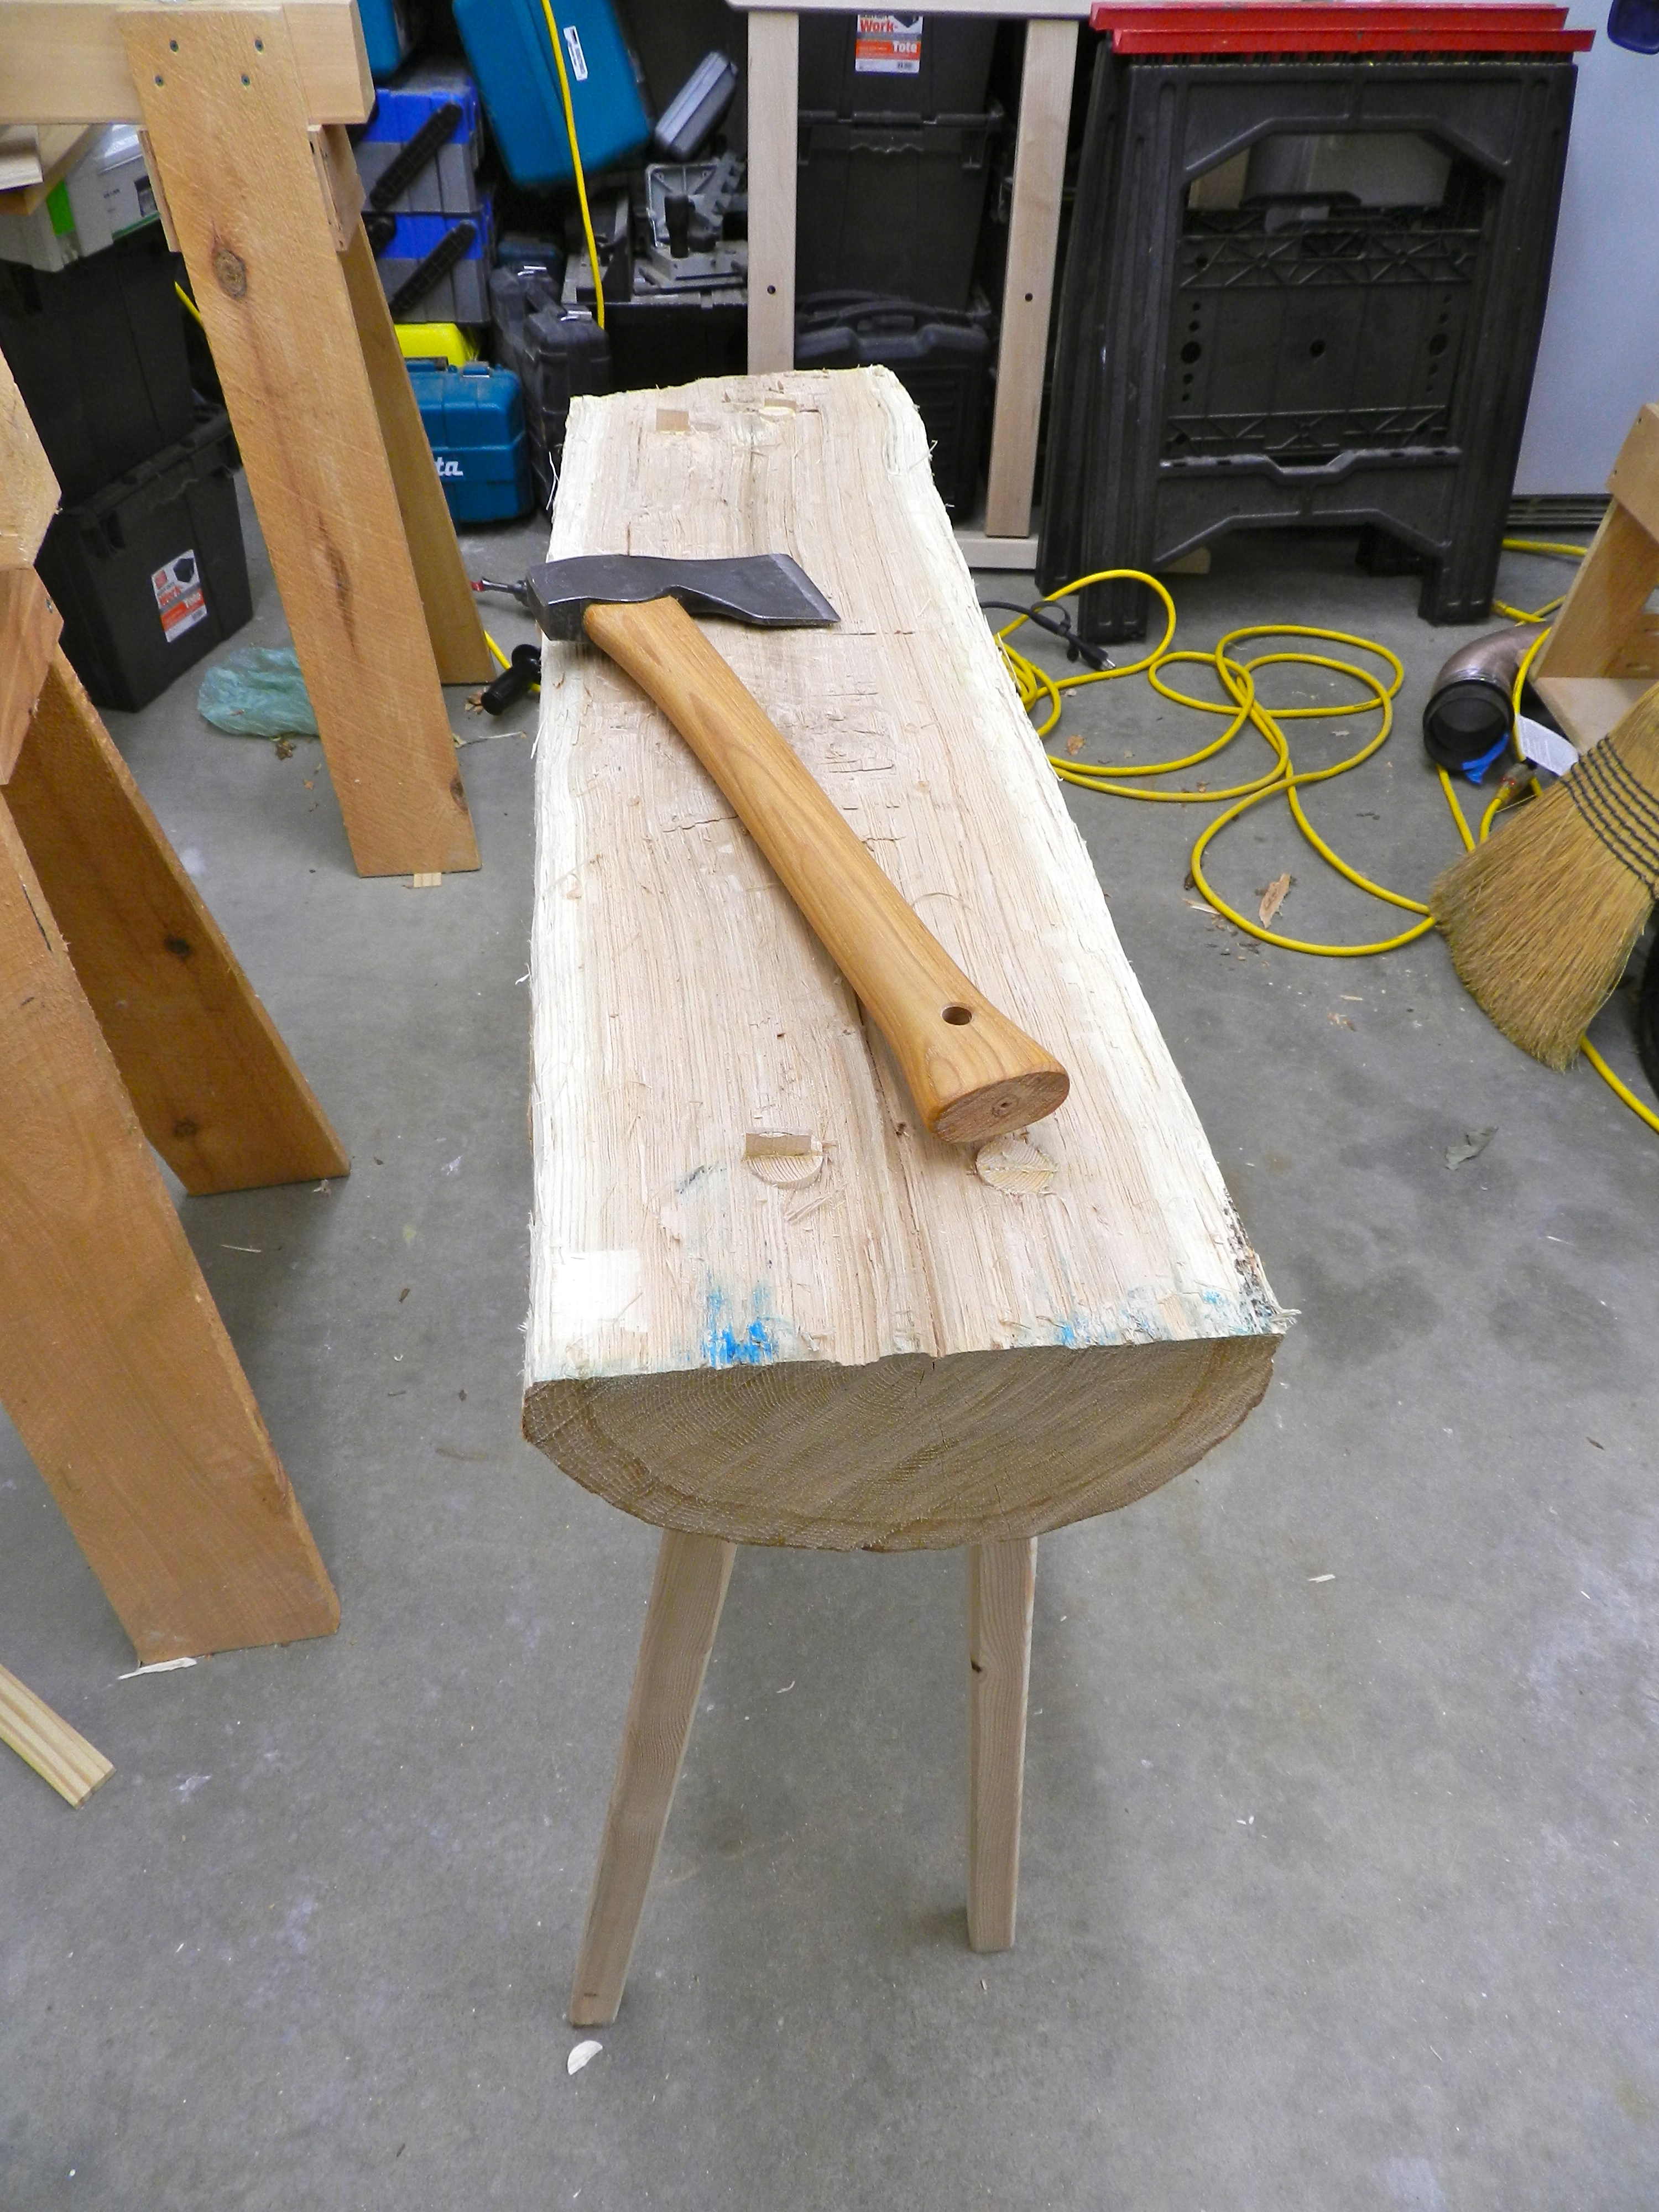
Back again in the shop I squared up the edges of the log with a hatchet. Being a green piece of wood this razor sharp ax made quick work of it.
Square up the edges with a hatchet
I flipped the log over and removed any remaining bark.
Remove any remaining bark with the hatchet
Now time for the legs…
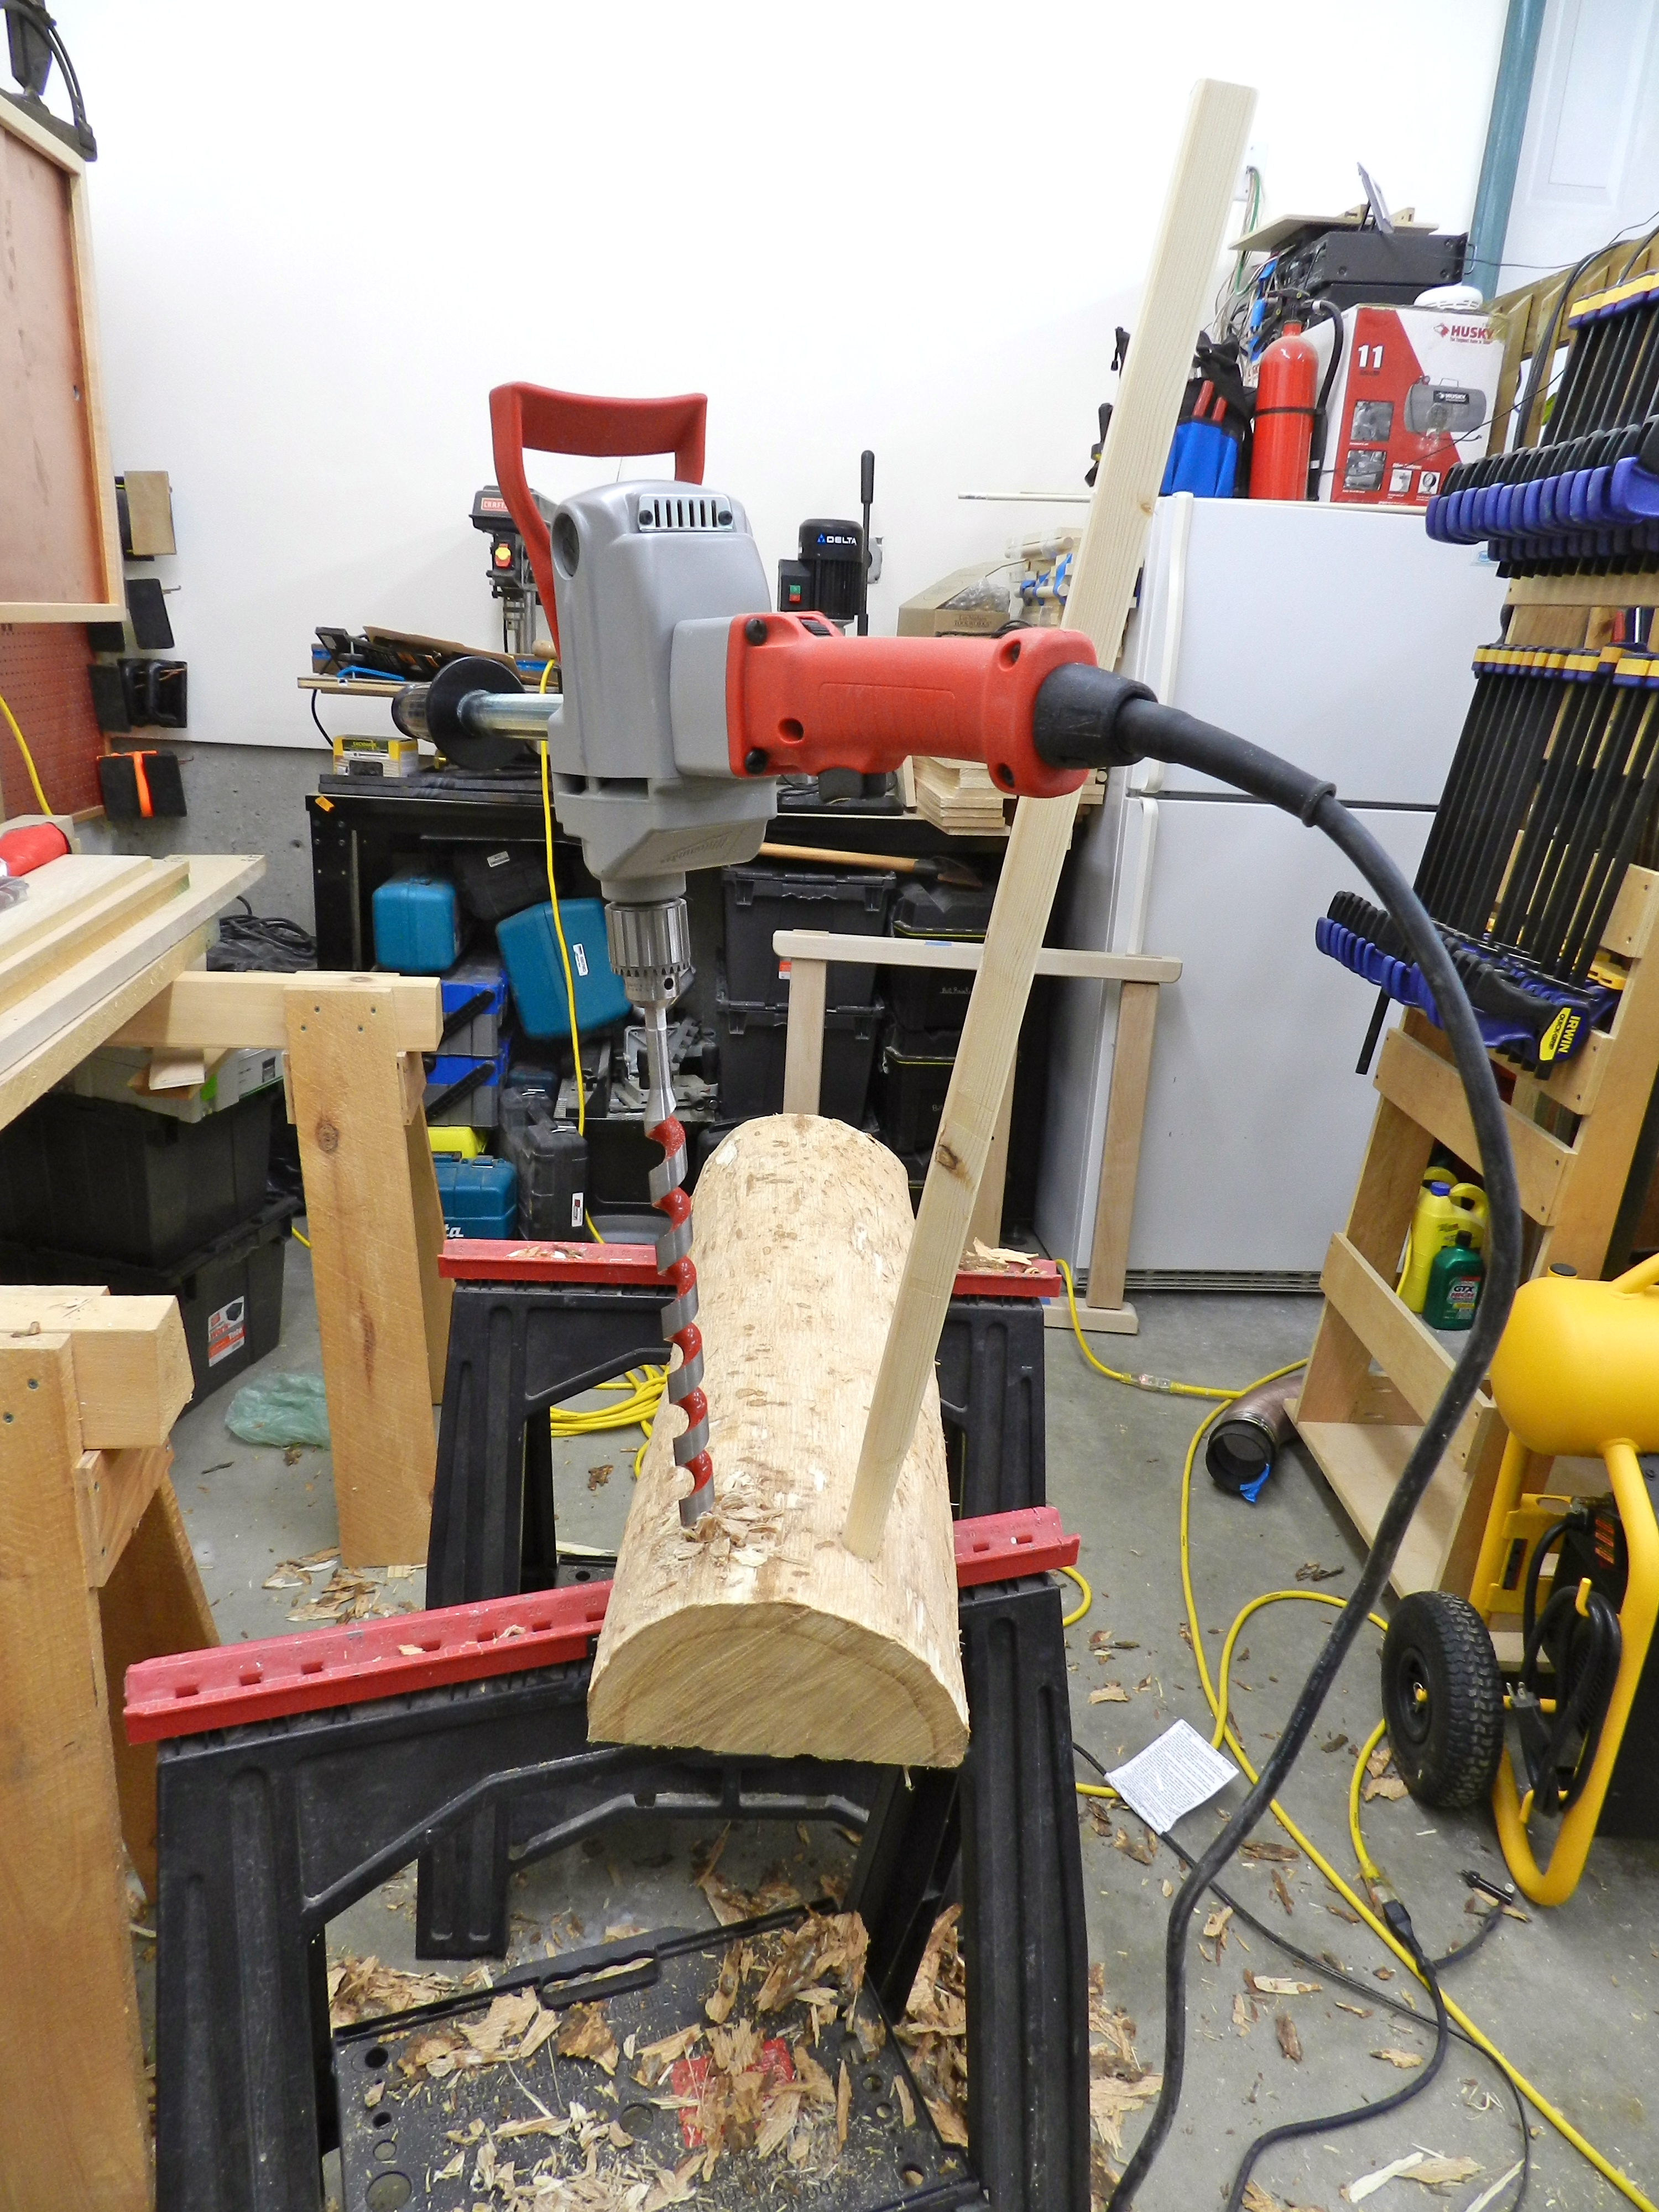
Ideally you want to split out some 1.5 inch diameter legs. In my case it was snowing and I didn’t have suitable wood on hand to do that, plus the largest ship auger bit I had on hand was 1″. I ripped down some nice straight grained 2x3s I had on hand to 1 1/4″ by 30″ long. I put them on the lathe and turned down the top 6″ to 1″ diameter. I then used a block plane to chamfer the edges.
Split or rip some leg stock. Drill holes with an auger and set your legs
Using a ship auger bit I bored a through hole into the log to allow the legs to splay a bit in both directions. After you set the first leg you’ll want to visually reference that first leg when drilling the next leg. Repeat this process for all 4 legs. After test fitting you’ll want to cut a kerf in the end of each tenon and re-install the legs. Make sure those kerfs are perpendicular to the grain of the log so you don’t split it with the wedges. Then glue and wedge the tenons. If you have ever built a windsor chair, this is a cruder version of the same process you’d use to fit the legs and level the feet.
Test fit on a level surface like a table saw
With the legs installed I put the bench on a known level surface, in this case my table saw. Using a compass or similar tool mark higher up on the legs and cut them where you marked them. Then chamfer the ends of the feet and you’re almost done.
Mark what you want to remove to reduce the height and level the feet
Next I applied some end grain sealer (from Land Ark/Heritage Finishes) to reduce the likelihood of splitting in my heated shop. I also trimmed off the wedges and tenons.
Seal the end grain to reduce checking
Now the bench is read for use in the shop. This bench, with it’s delicate looking legs, can hold me standing on it, so it should have no problem handling my in shop hewing needs.
Trim the leg stumps and the wedges
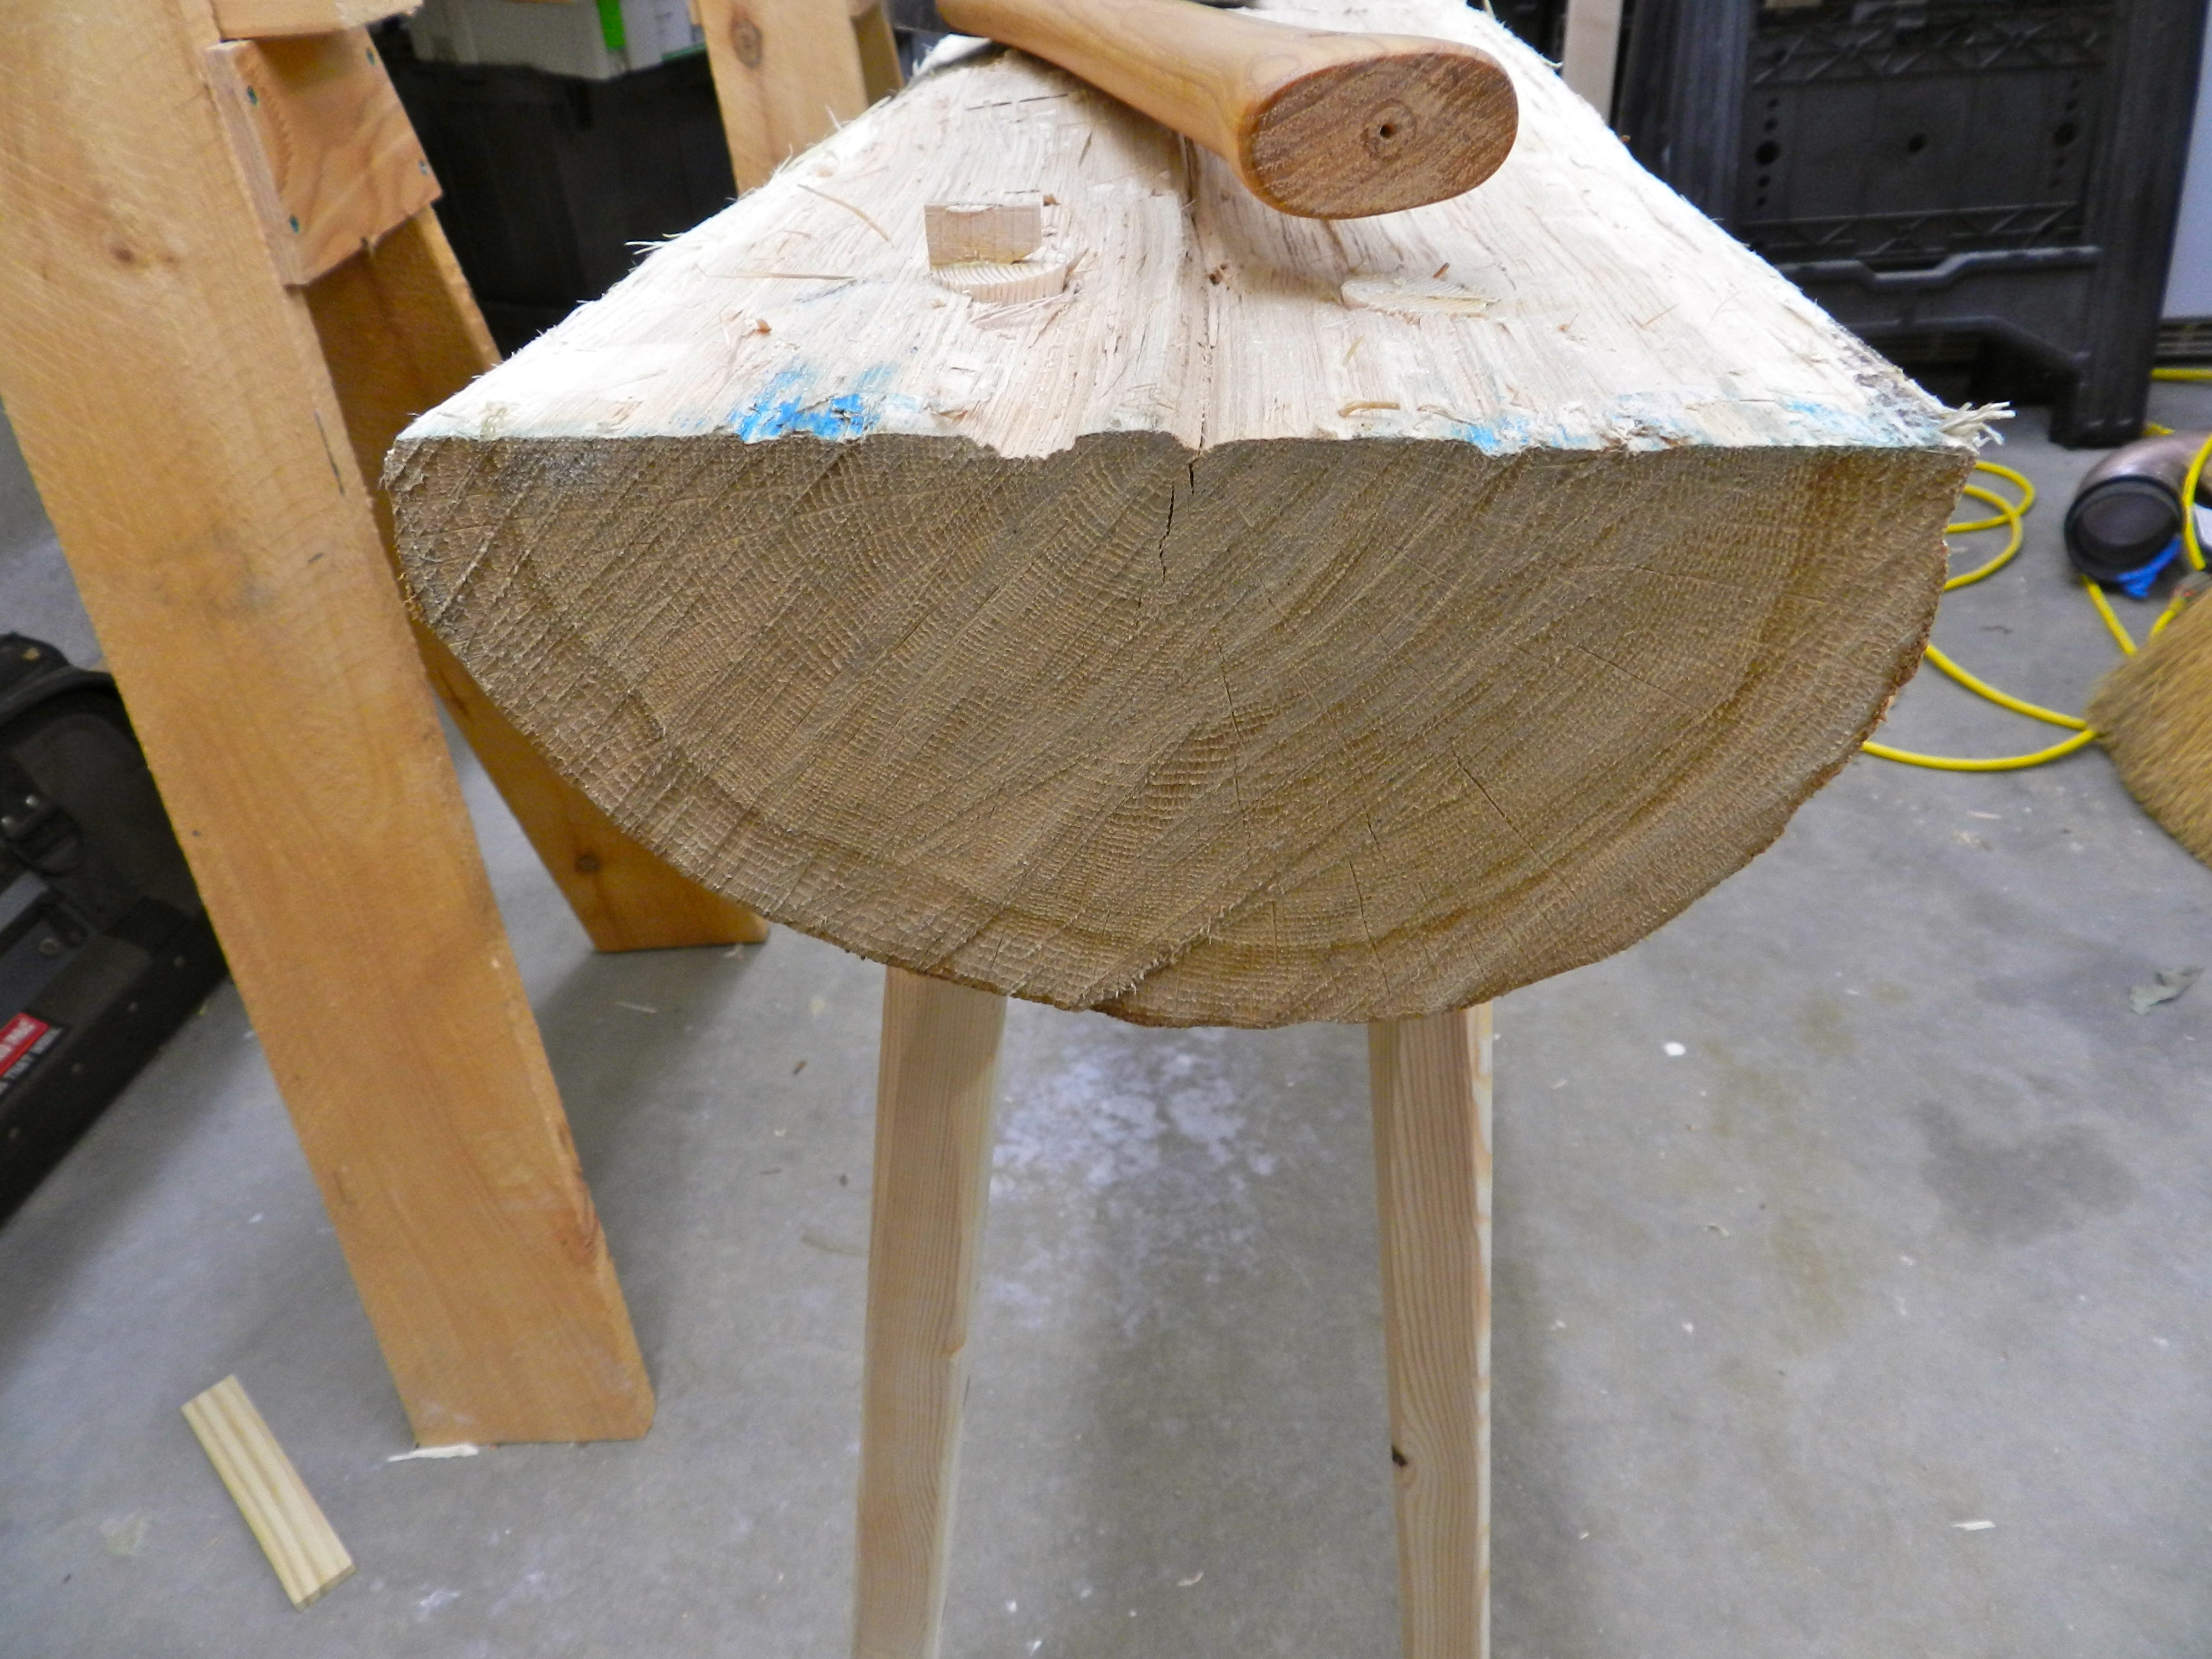
Shown here is a Gransfors Bruks hand made Swedish ax. This carpenter’s hatchet is my goto ax for small trimming work and is sharpened to the point of being able to shave with it. The poll (the other business end) of this ax is hardened and can be used like a hammer. The handle is carefully tapered to fit in the hand and without looking you know when your hand is at the end of the handle. The notch under the bit allows you to use this ax much like a large chisel or plane and can yield impressive results. I used this to quickly level bits of the bench surface.
Enjoy your new hewing bench
For short cash, a few tools and an afternoon in the shop this project is well worth the effort.
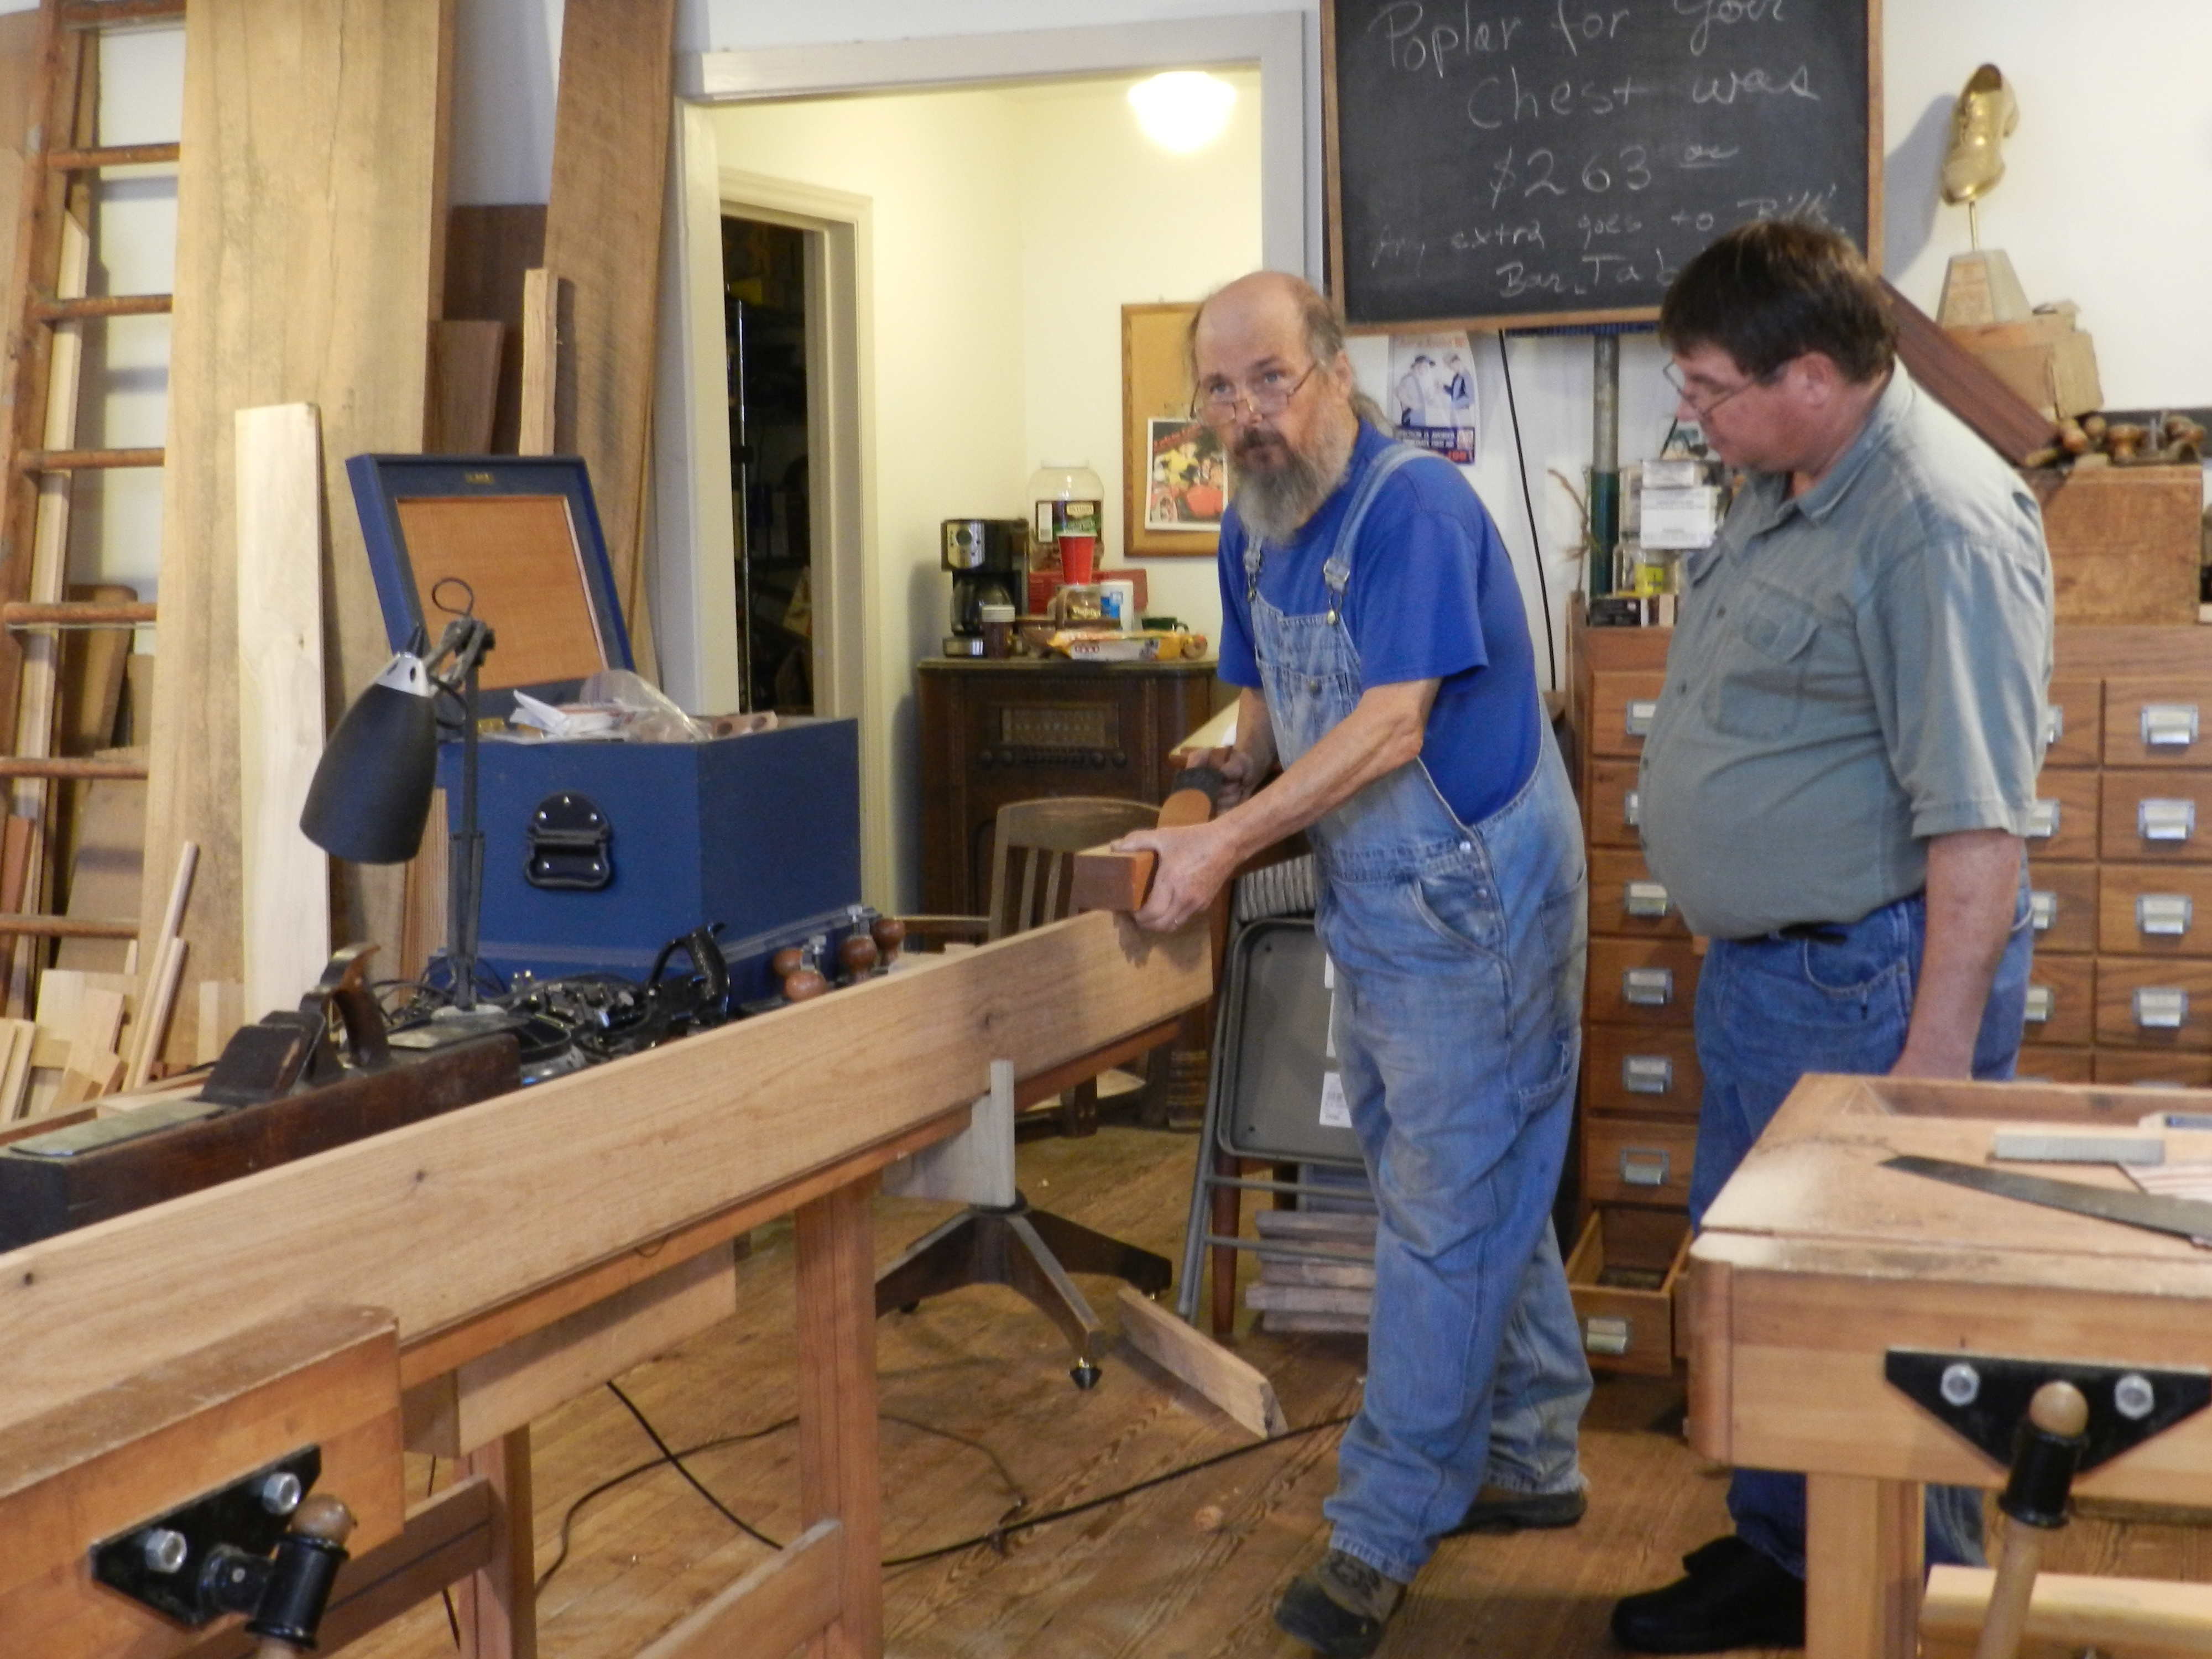
When last we left our plane-making heroes they were in the process of making a traditional single iron jointer plane with my friend Bill Anderson at the Woodwright’s School.
Bill demonstrating with a great bench plane cross section model
Bill had a great cross section model of how this sort of bench plane works — made by one of his students. With the body of the plane taking shape, next up was tuning the mouth opening and the abutments. If the mouth is too wide or too large the plane may not cut cleanly so you need to carefully fit the iron to the opening. If the abutment is not carefully placed when you re-flatten the sole of the plane you’d also be opening the mouth more. You also need to take care flatten the face of the bed that supports the iron — if there are high points the iron can pivot on those and make it tough to use the plane. One of the many testing/fitting gauges Bill had was a ‘bed testing gauge’ which looks and works much like a pair of ‘pants’ we use in timber framing to test out the thickness of a tenon, except in this case you are using it to check the thickness of the cheeks and how close your bedline is getting to the line scribed on the side the plane body.
Planing the wedge
With the mouth and throat all set, next up was making the wedge to hold the iron in place. The wedge needs to be carefully planed to fit the abutments inside of your plane and tightly hold the iron in place. Again here you are using an abutment gauge (wooden wedge of a known profile in degrees) to test your work as you go. With all the gauges and specialized tools you can quickly see why plane-making was its own dedicated craft specialty.
Shaped and fitted wedge
The wedge is further relieved so that the shavings can clearly escape the plane body.
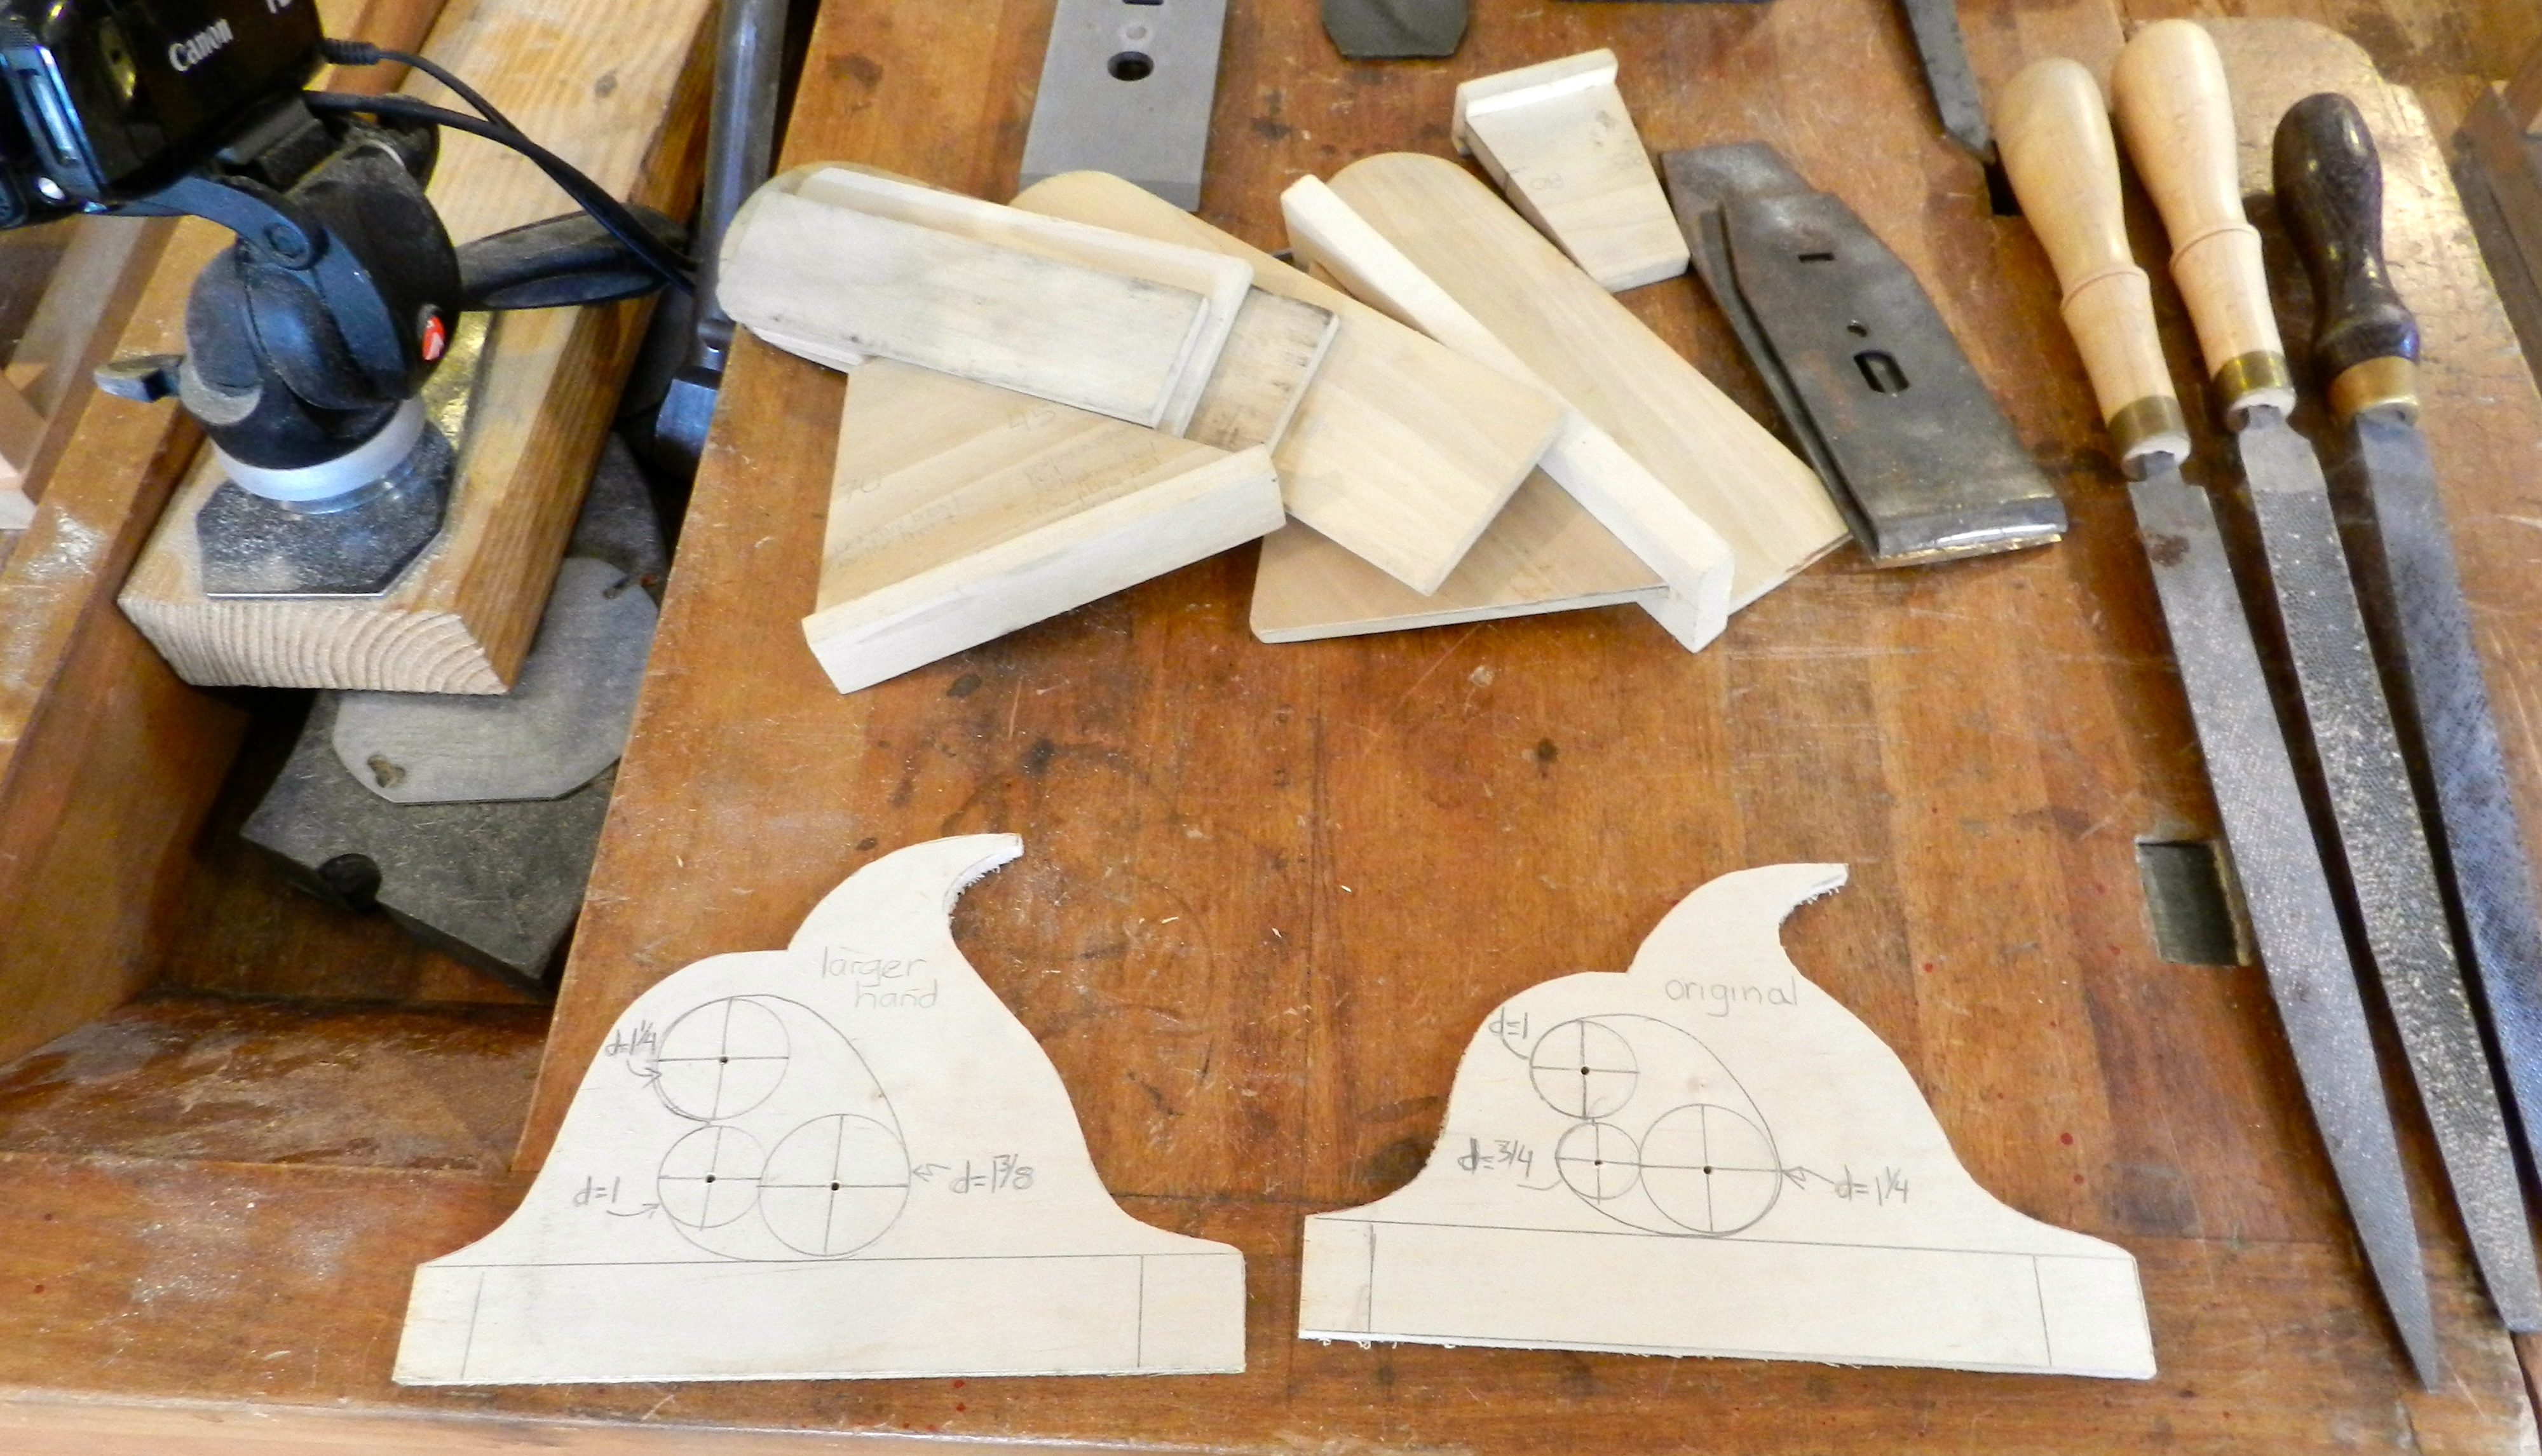
Templates, bed gauges blocks and pants
Above you can see some of the many gauges used in laying out and testing parts of your plane, along with templates for the handles.
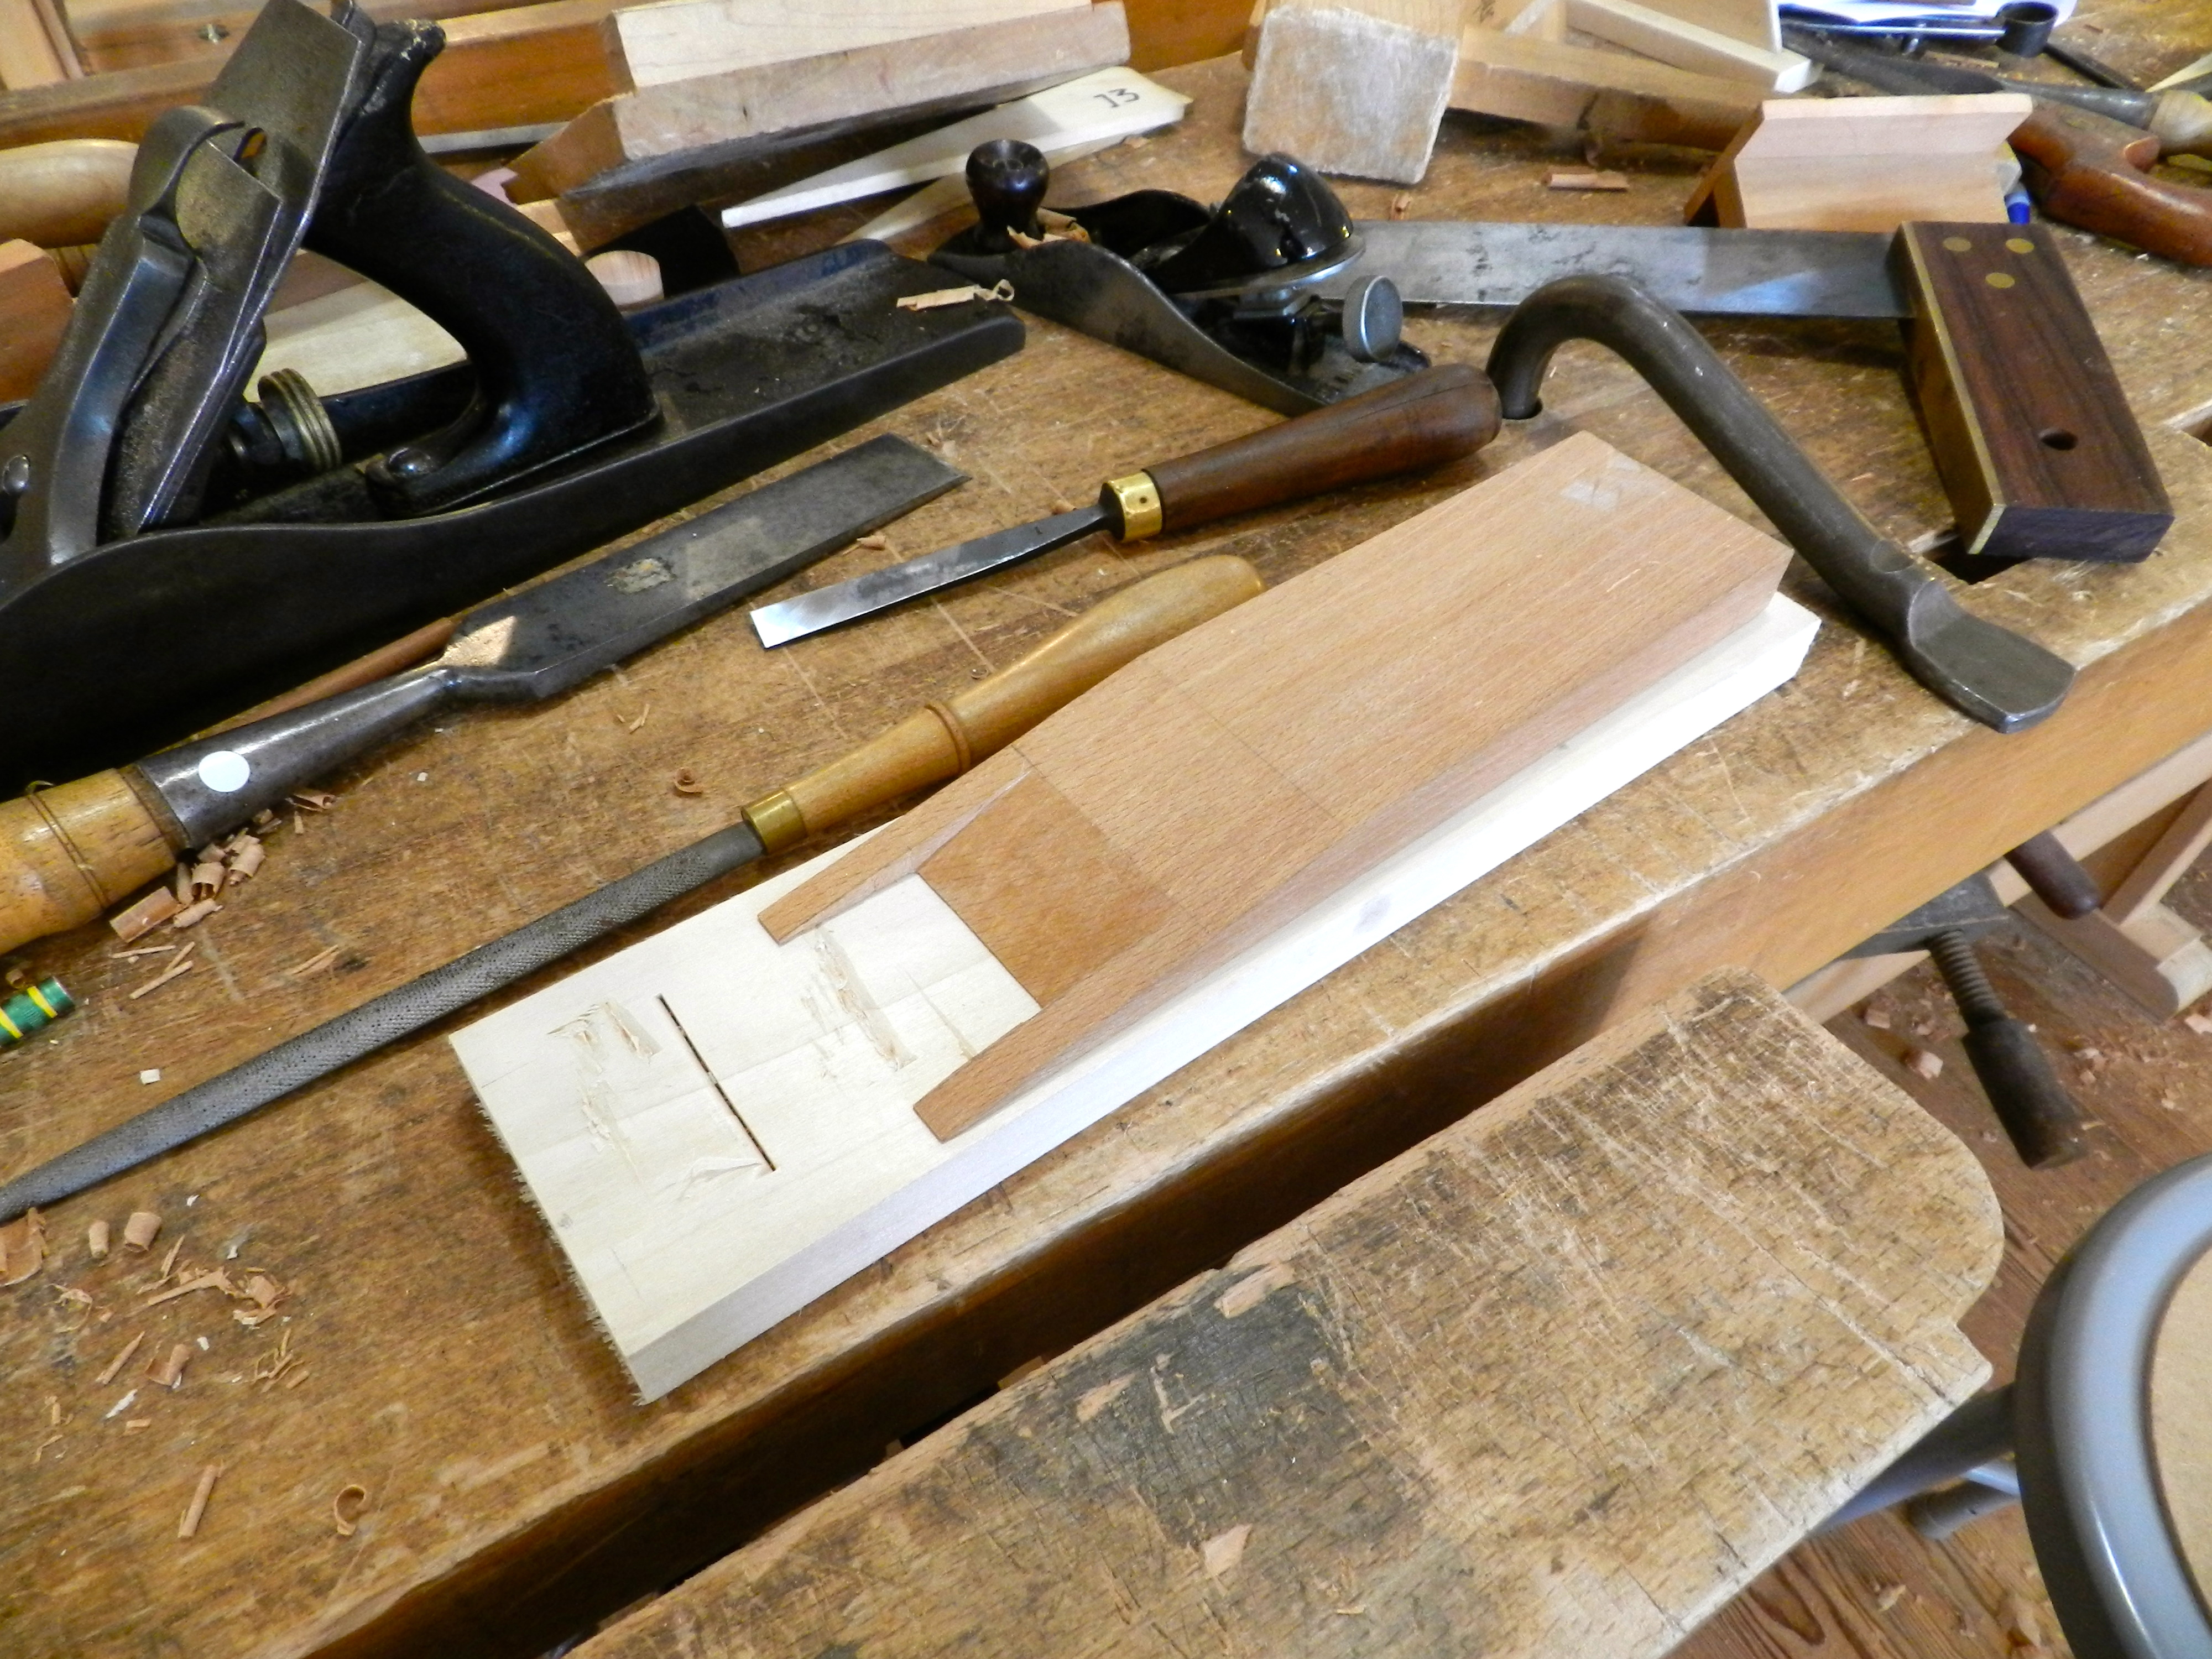
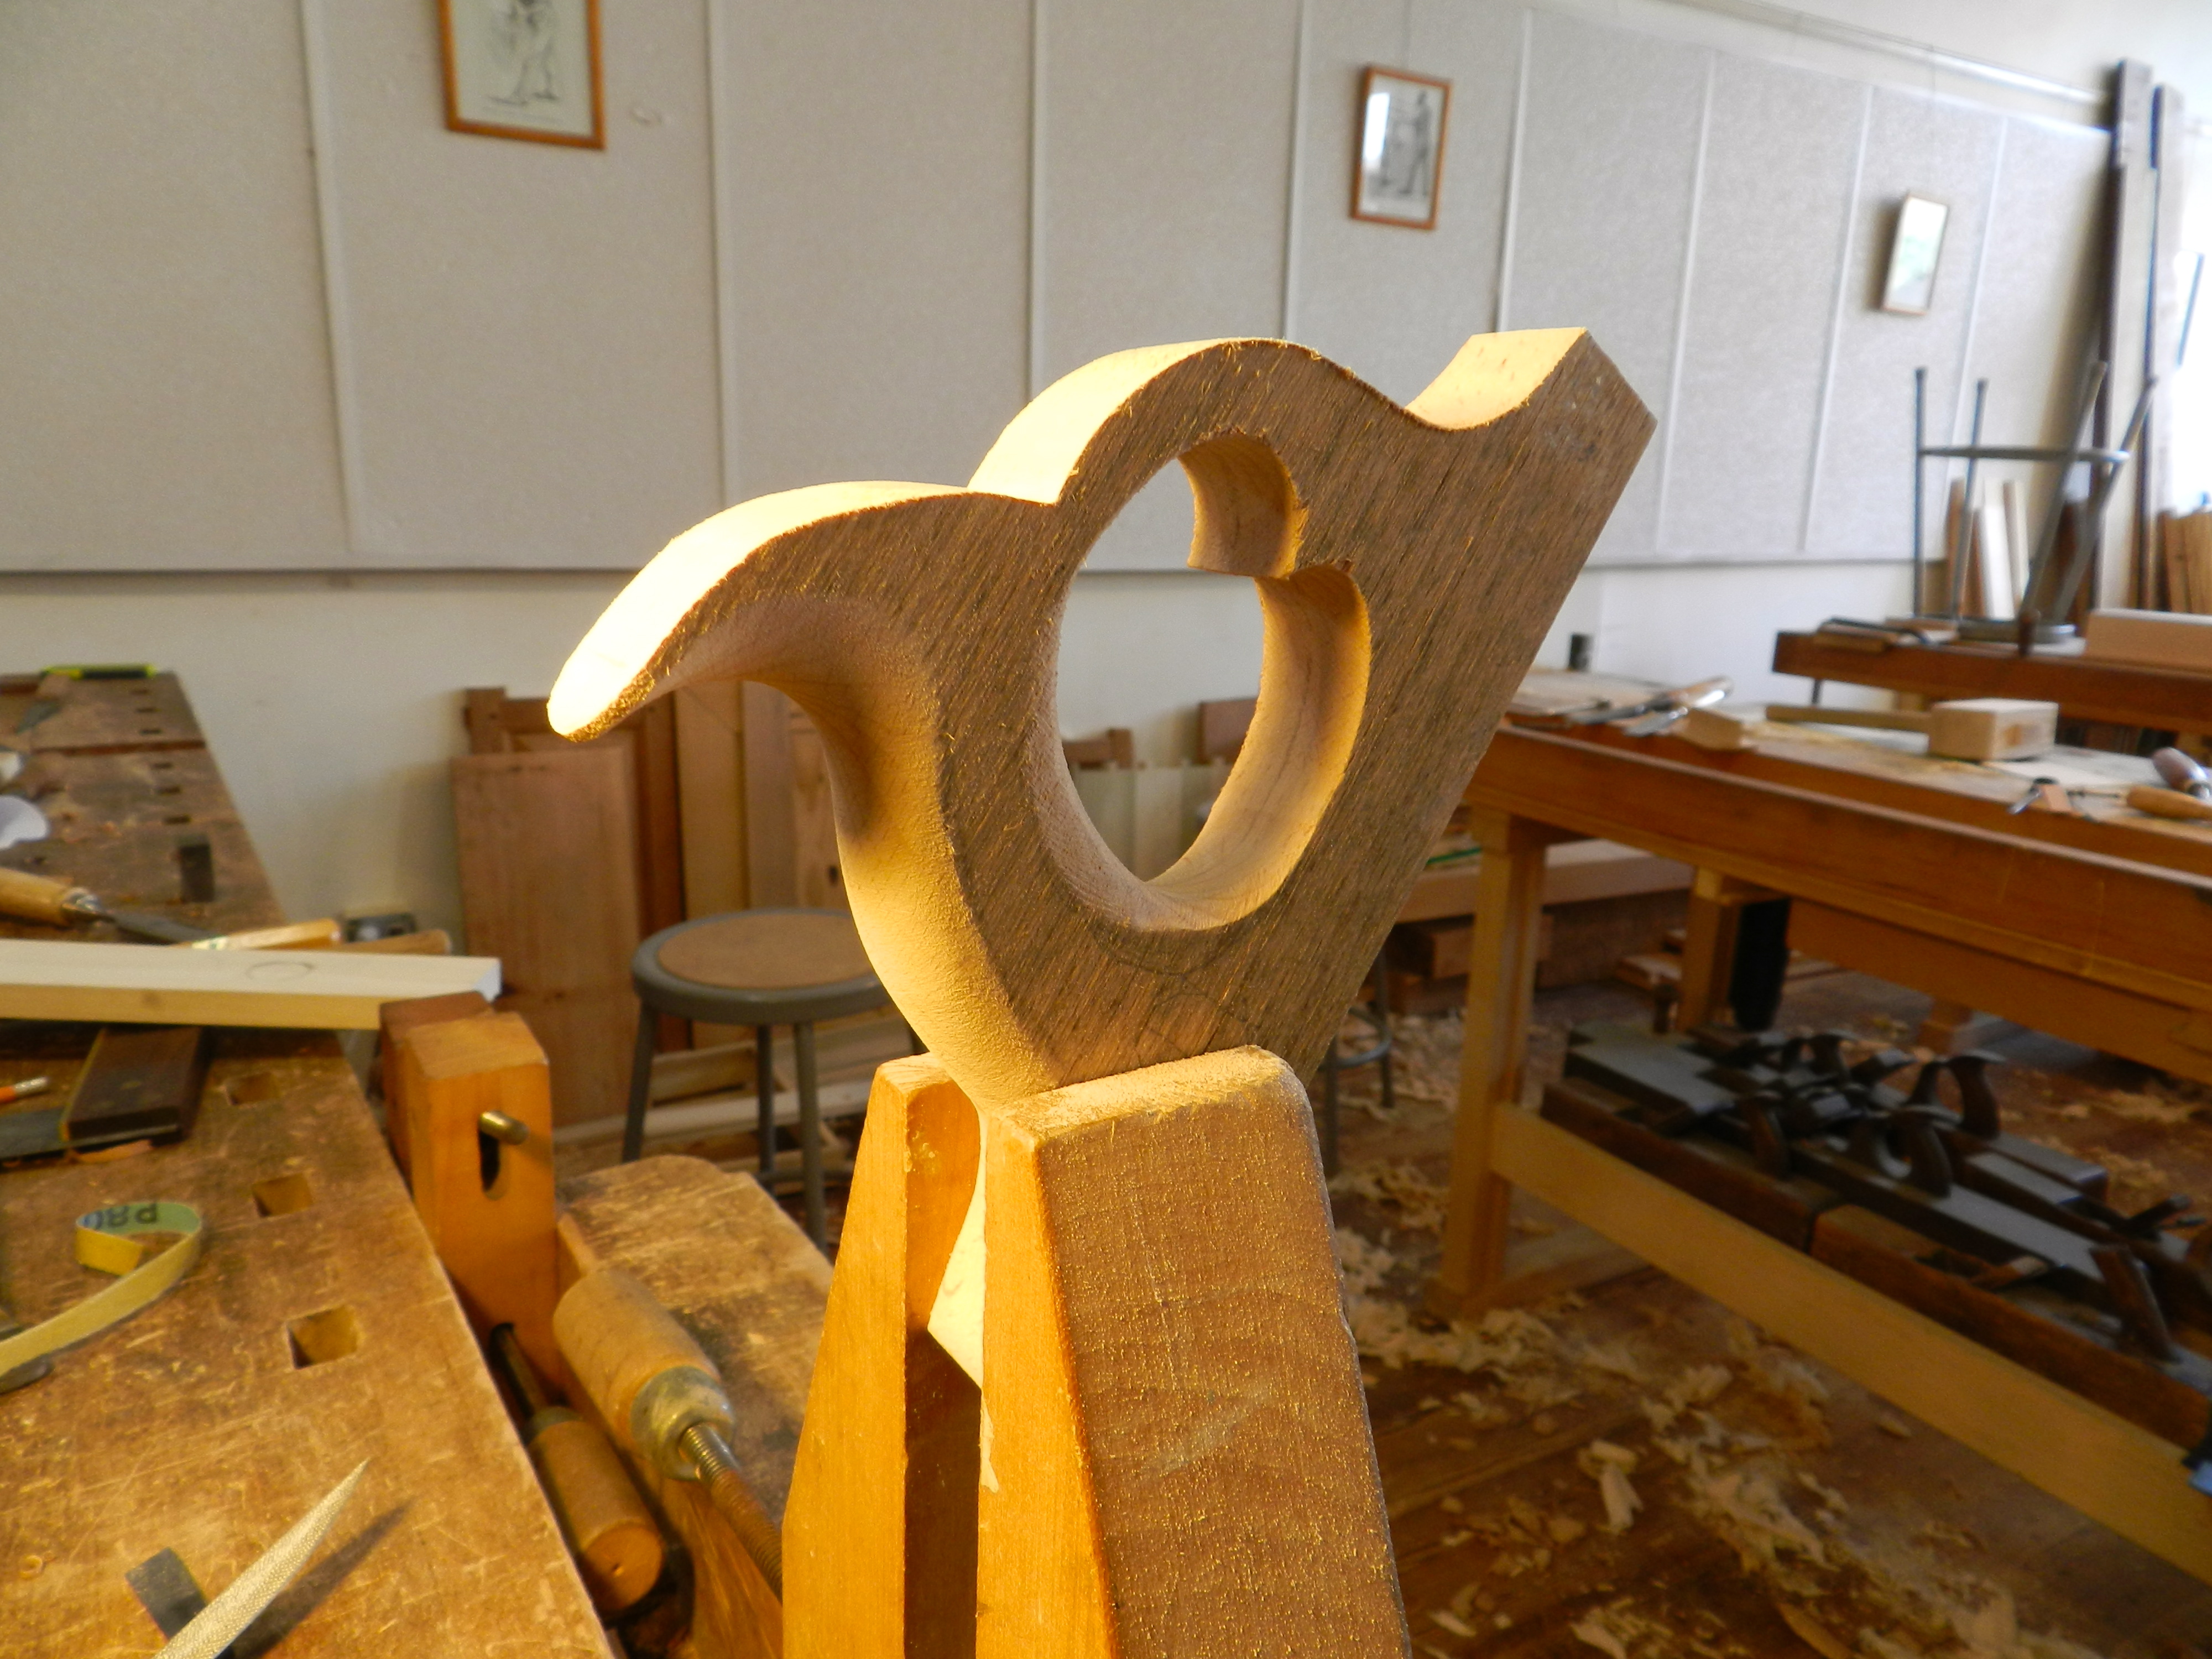
Starting to shape the handle
The handle is first cut out from a rough blank and then carefully shaped by hand to have flowing, graceful lines similar to that of a quality hand saw. The result is a handle that fits the hand so well it, the whole plane feels like an extension of your body.
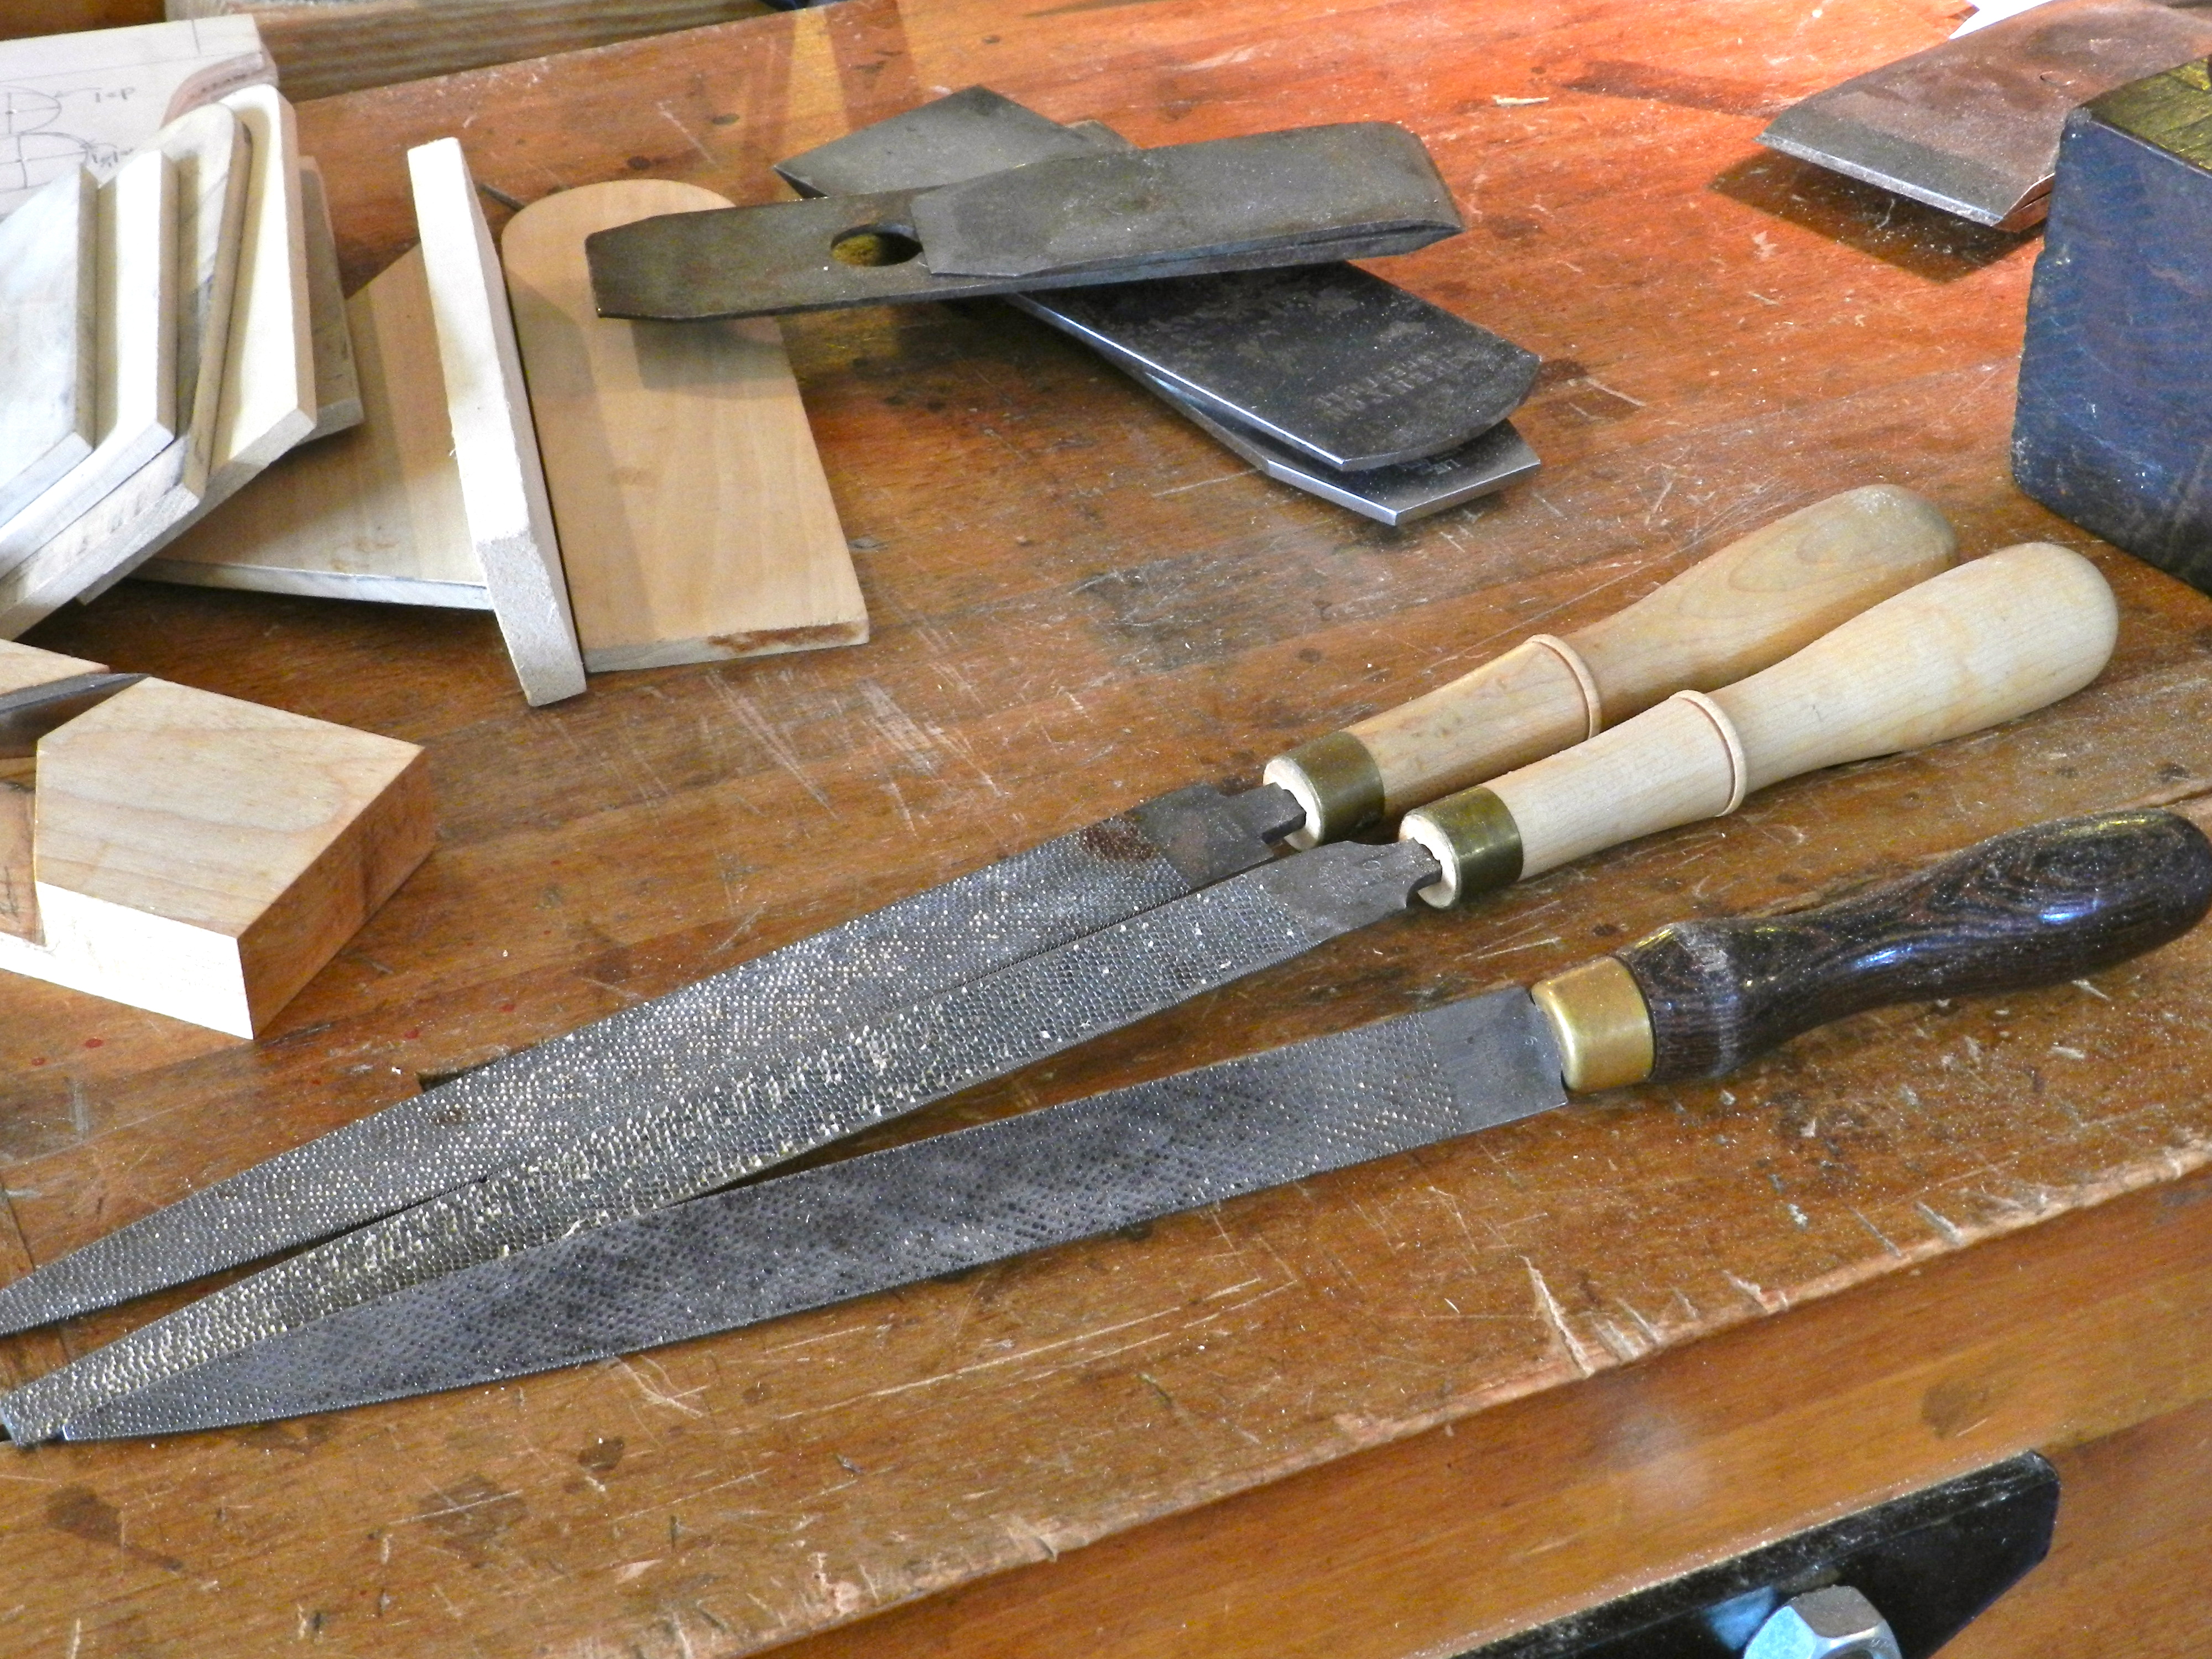
Auriou rasps used to shape the handle — they were a pleasure to use
Various rasps, files and sandpaper are used to shape the handle. Using crisp hand stitched Auriou rasps made quick work of shaping the handles.
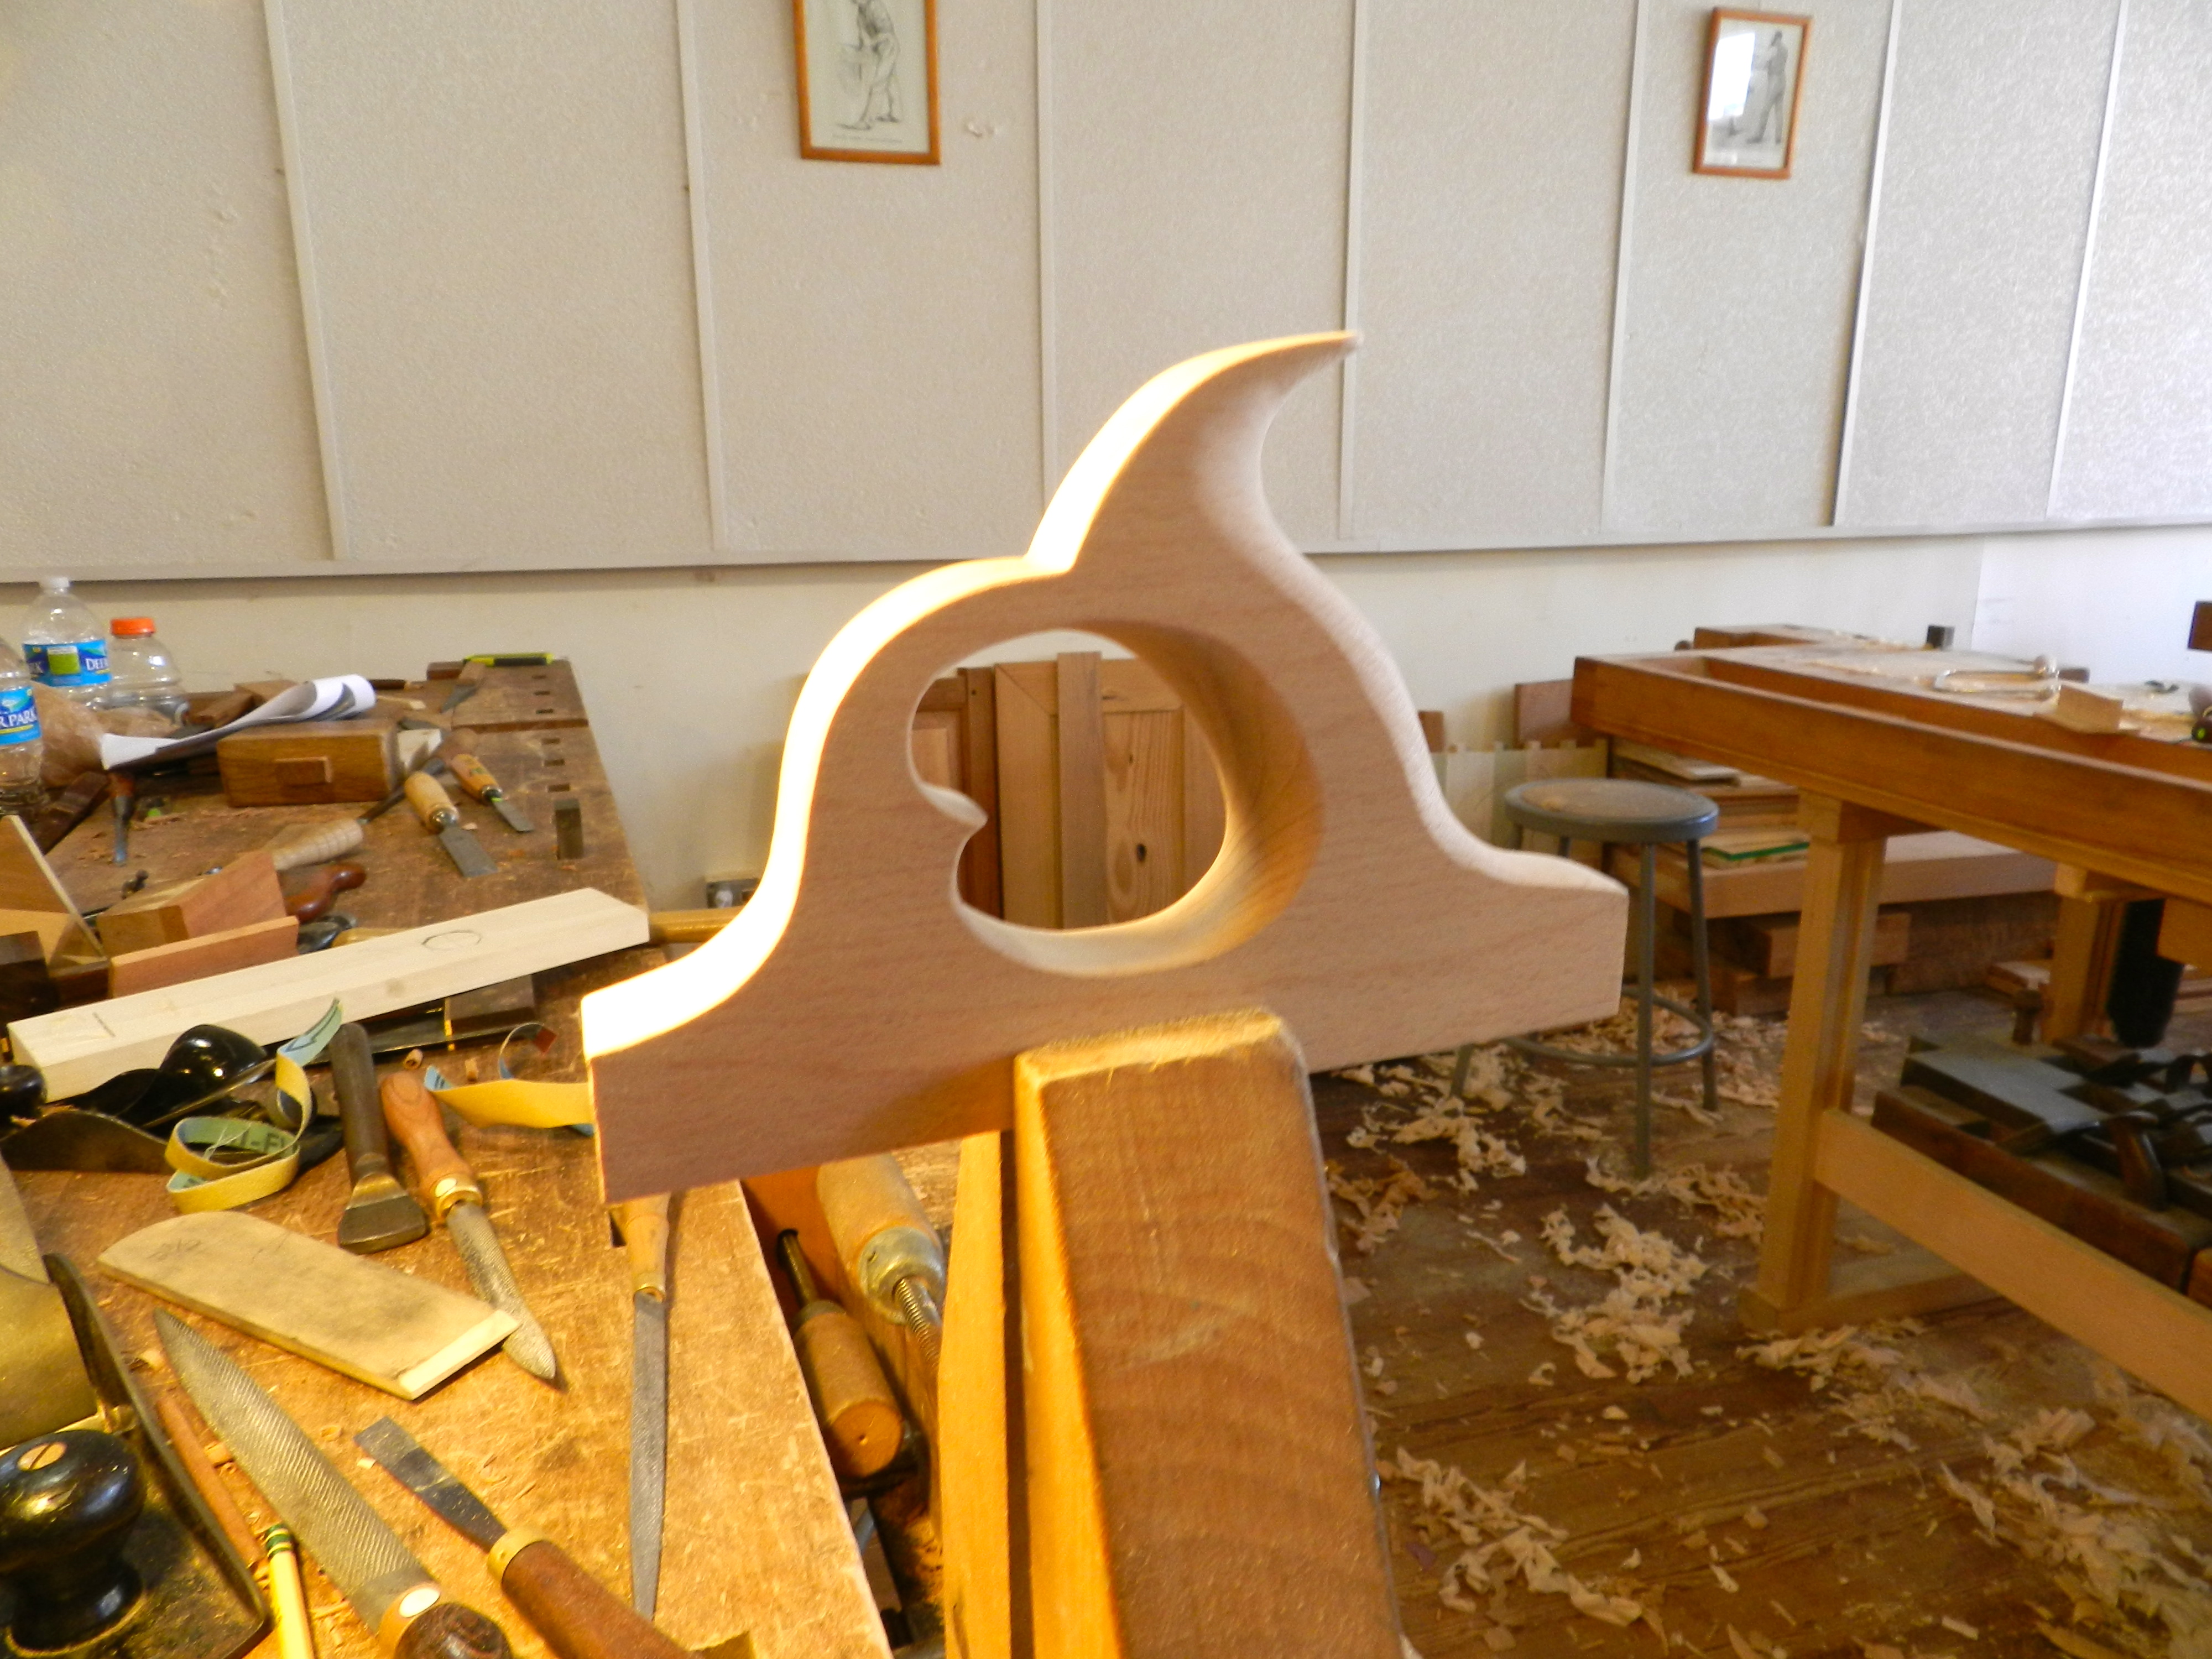
Finished handle
Above is the handle after a bit of light sanding.
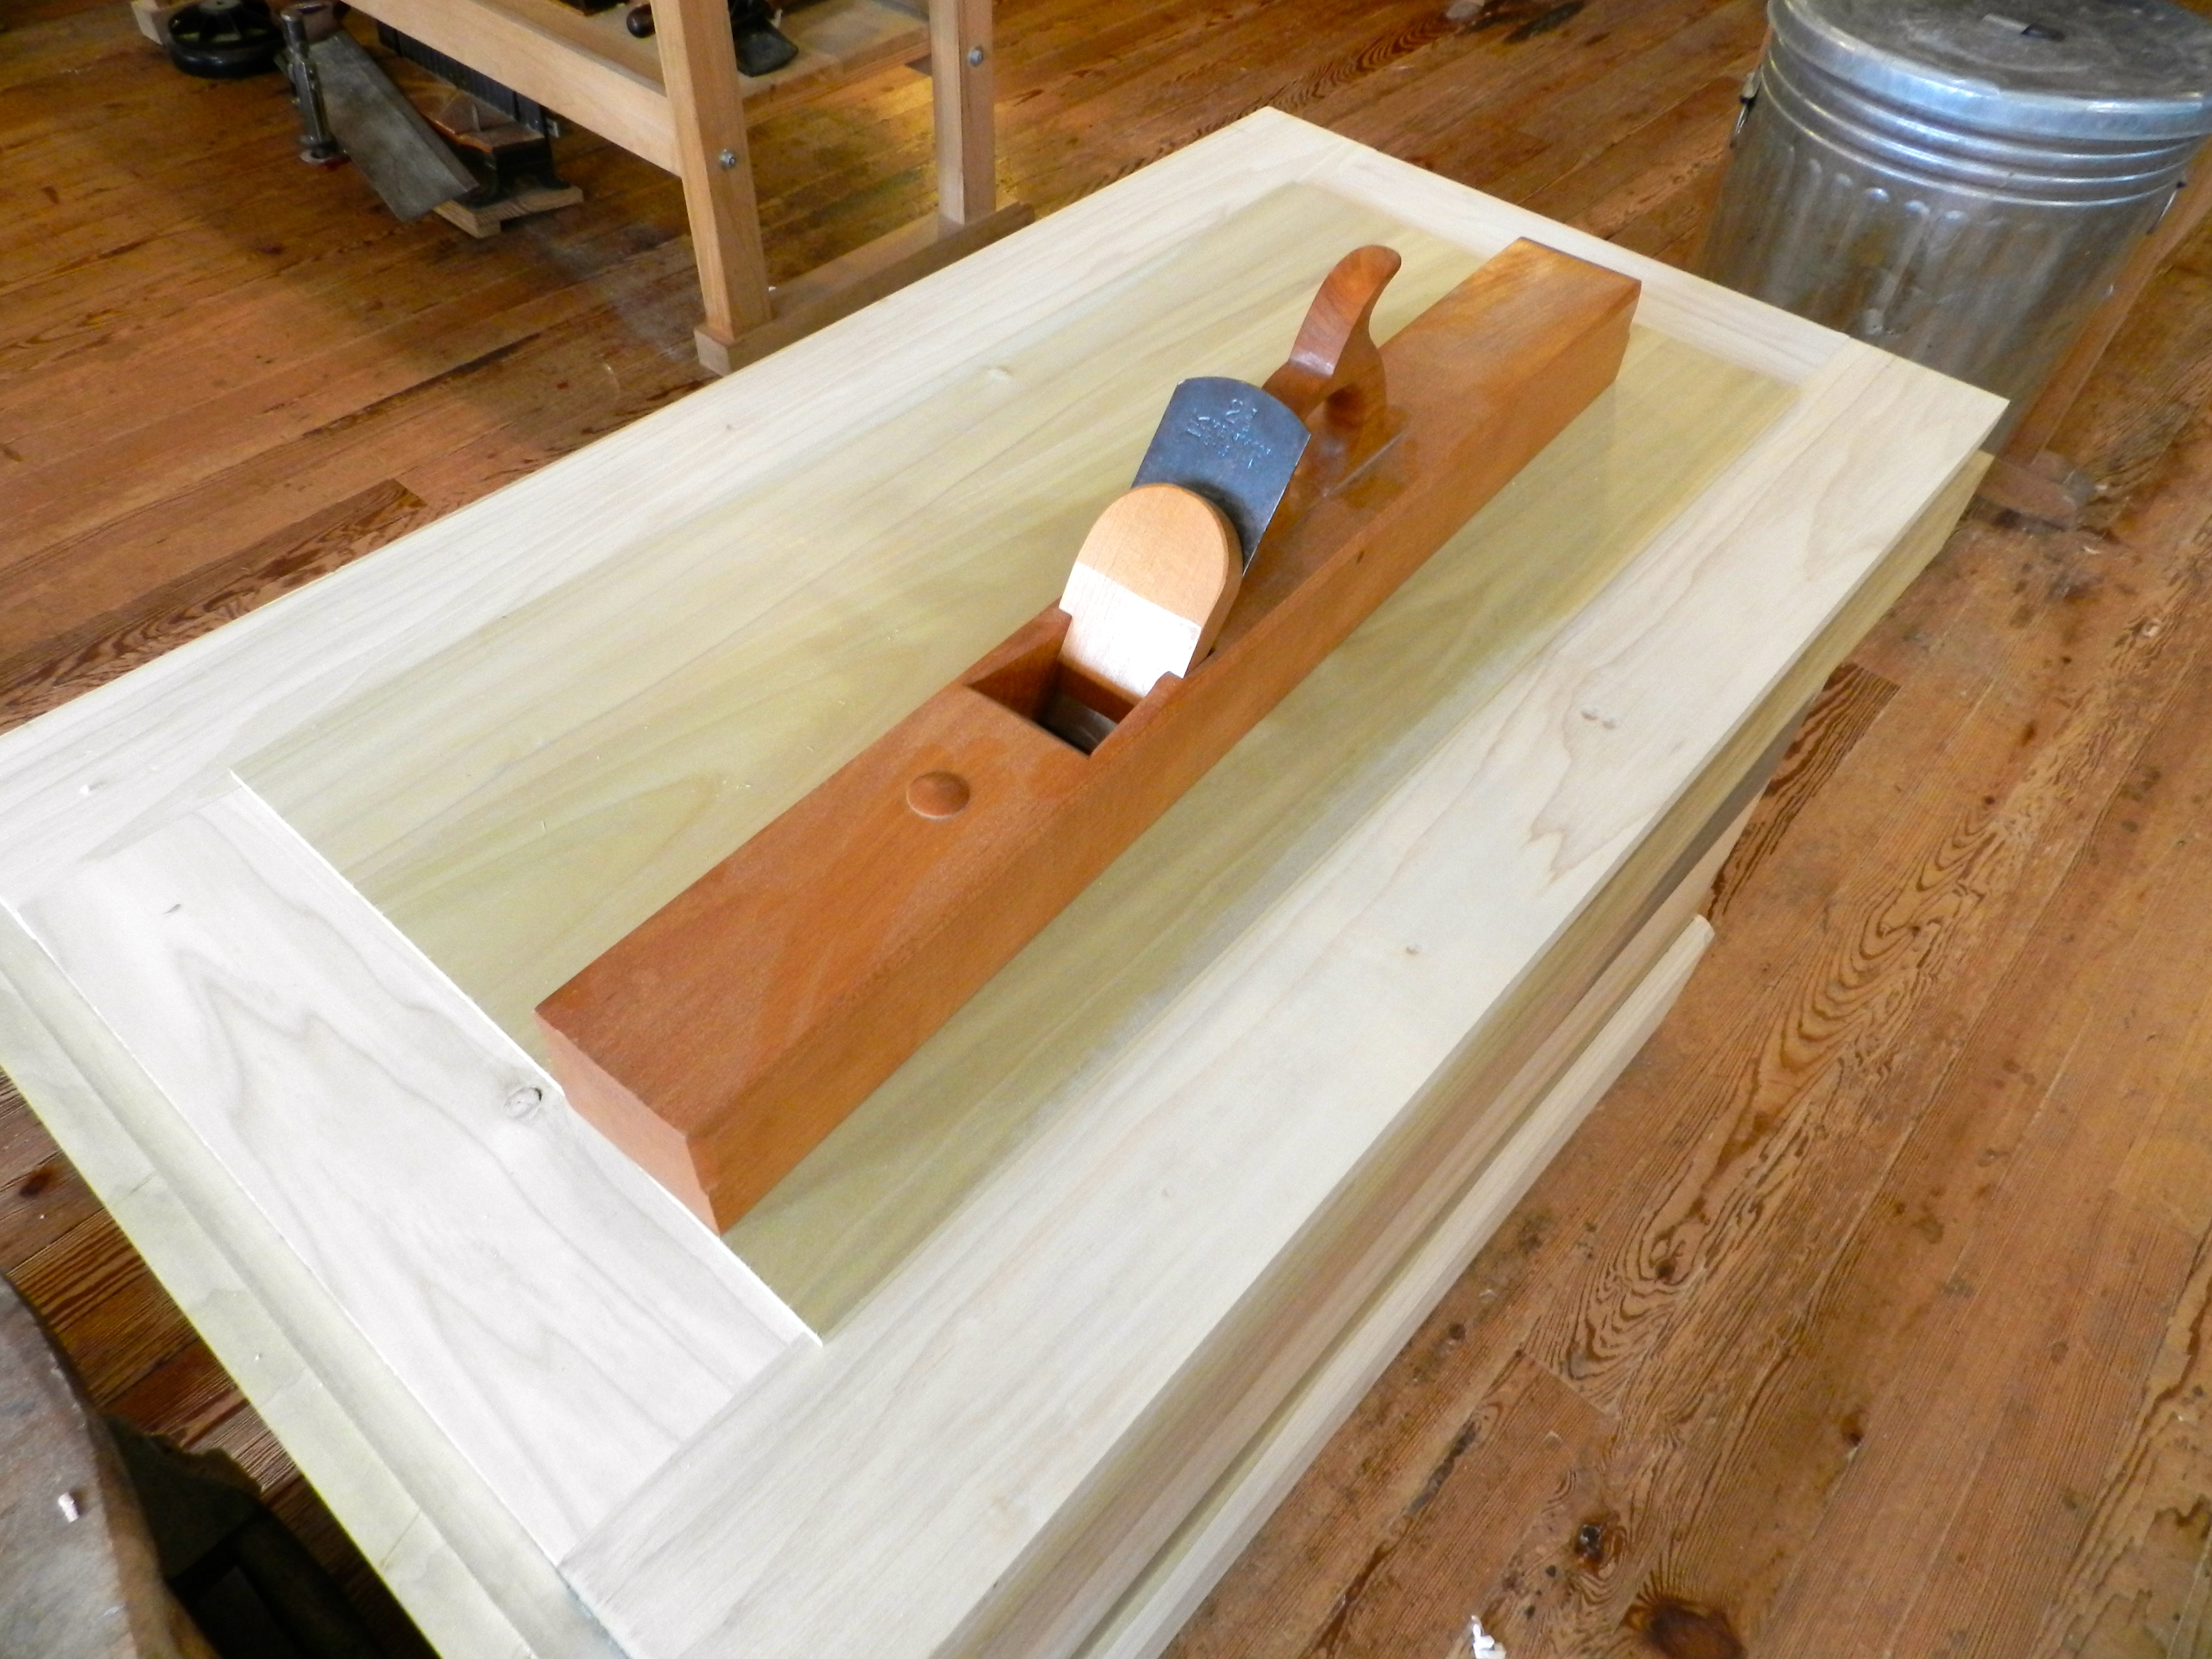
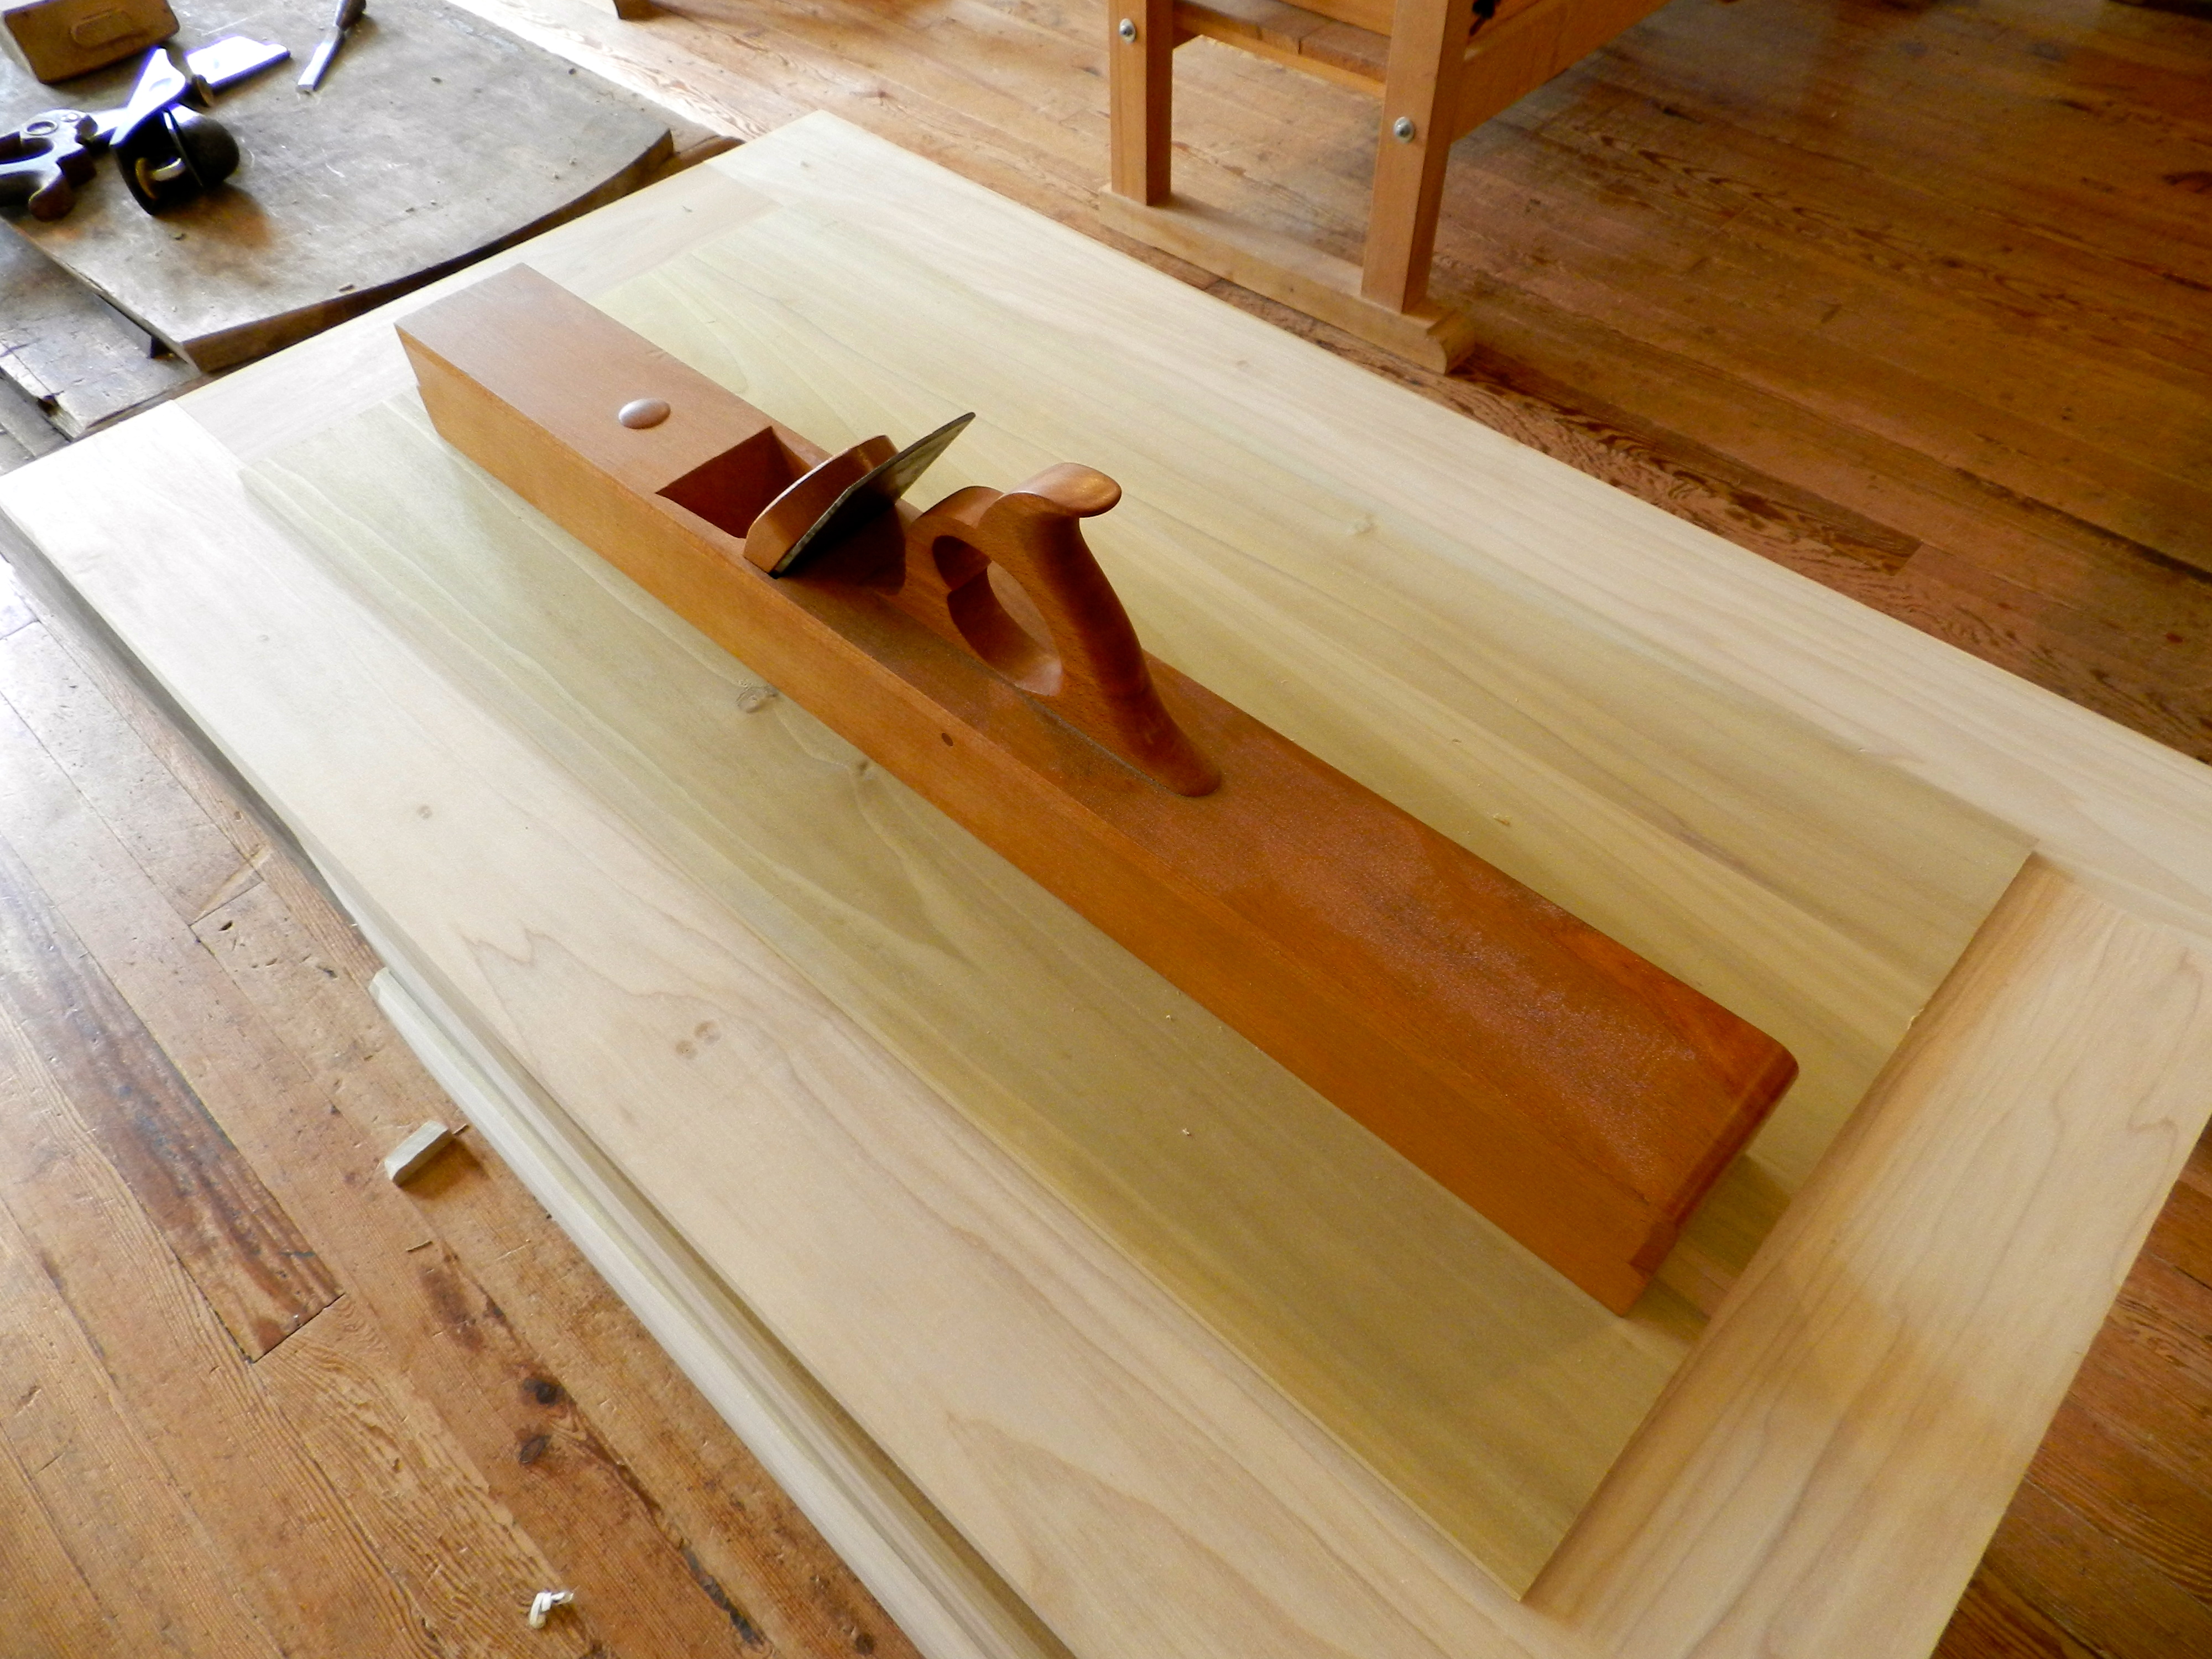
A finished Jointer Plane
Shown here you can see Bill’s finished/sample plane which is based on an historical example. I’ll post the final shots of my own plane when I finish it soon in my shop.
Rear 3/4 view of the completed sample plane
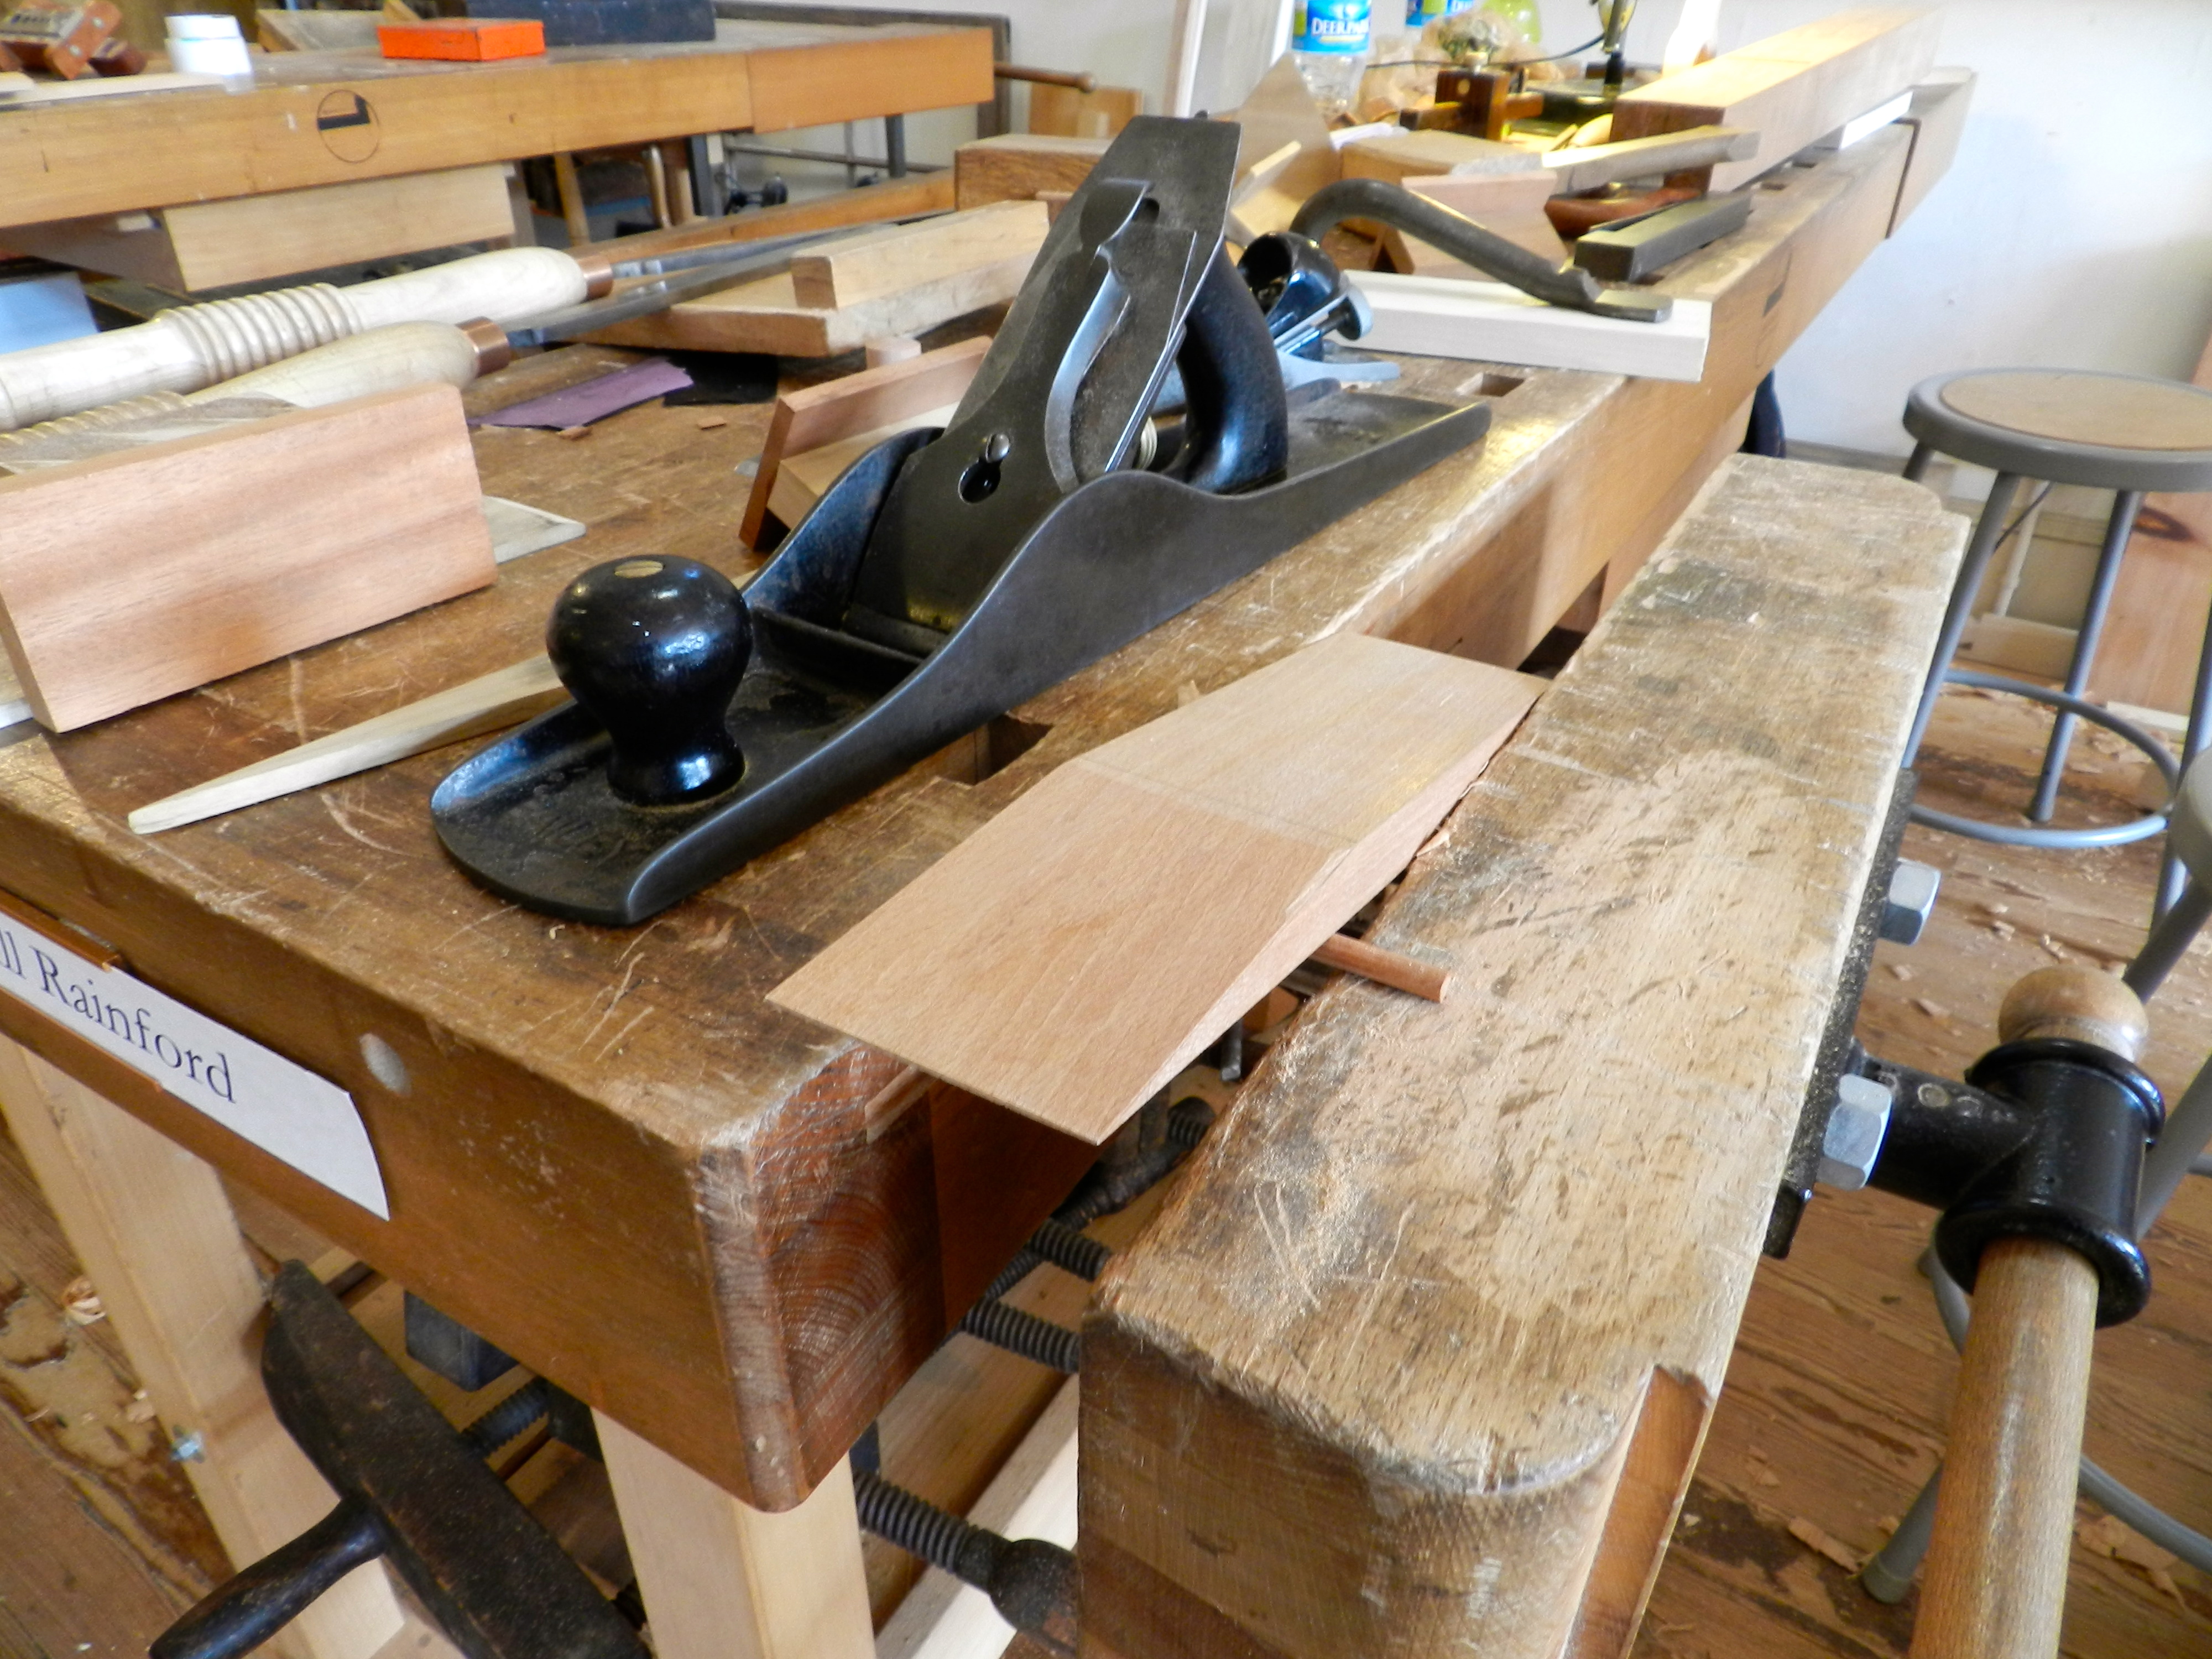
At the end of the workshop one of the most important tasks was to make sure you plane can take a nice shaving. I’m happy to report that I was able to get a nice full width shaving with my mostly completed plane. (I need to finish setting the handle, trim the edges, apply some finish and use my maker’s name stamp and it will be ready for regular use in the shop).
Making the first shaving with a new plane…
In an upcoming post I will complete this series with how I finished off the plane. Stay tuned…
In the meantime, if you’d like to learn more about Bill Anderson or take a class with him, and I highly encourage you to do so, please check out his website here.
-Bill
P.S. You can see the first post on making this jointer plane here.
A Joiner's Guide To Traditional Woodworking and Preservation