After living with my new hewing bench for a few weeks I finally got around to using the other half of the log. I’m glad things worked out this way as I made some modest improvements based on our time together.
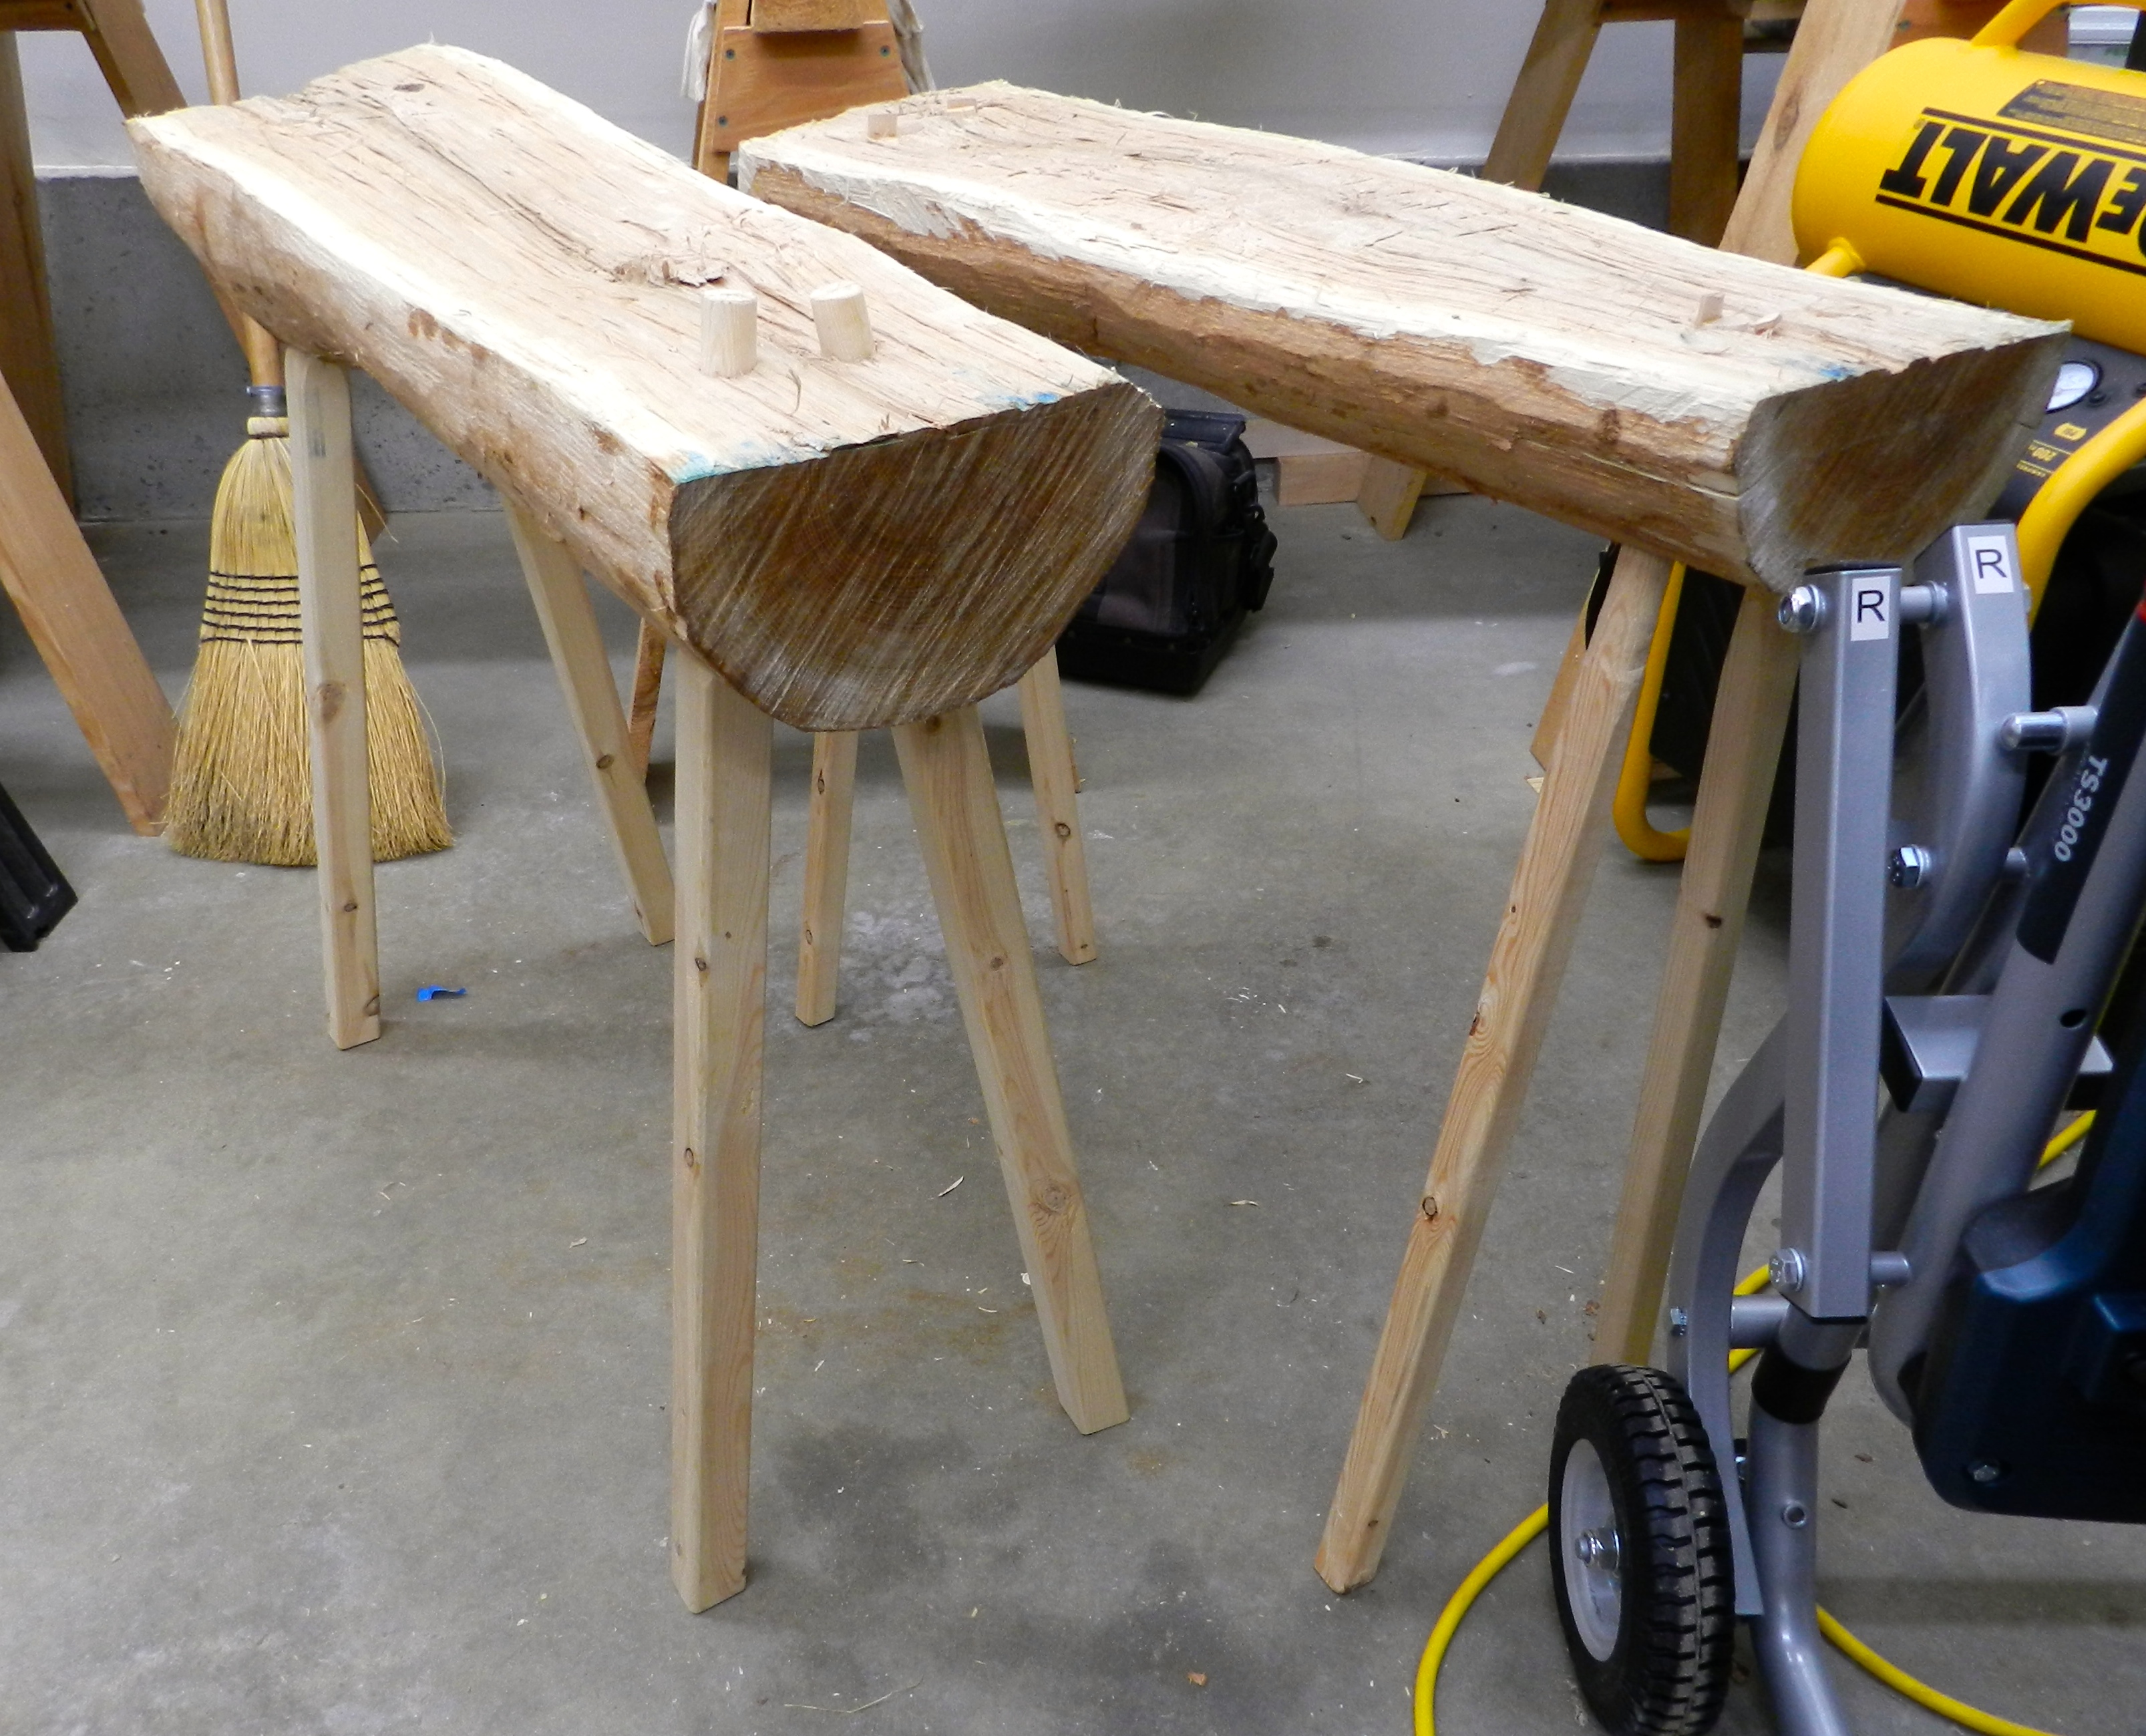
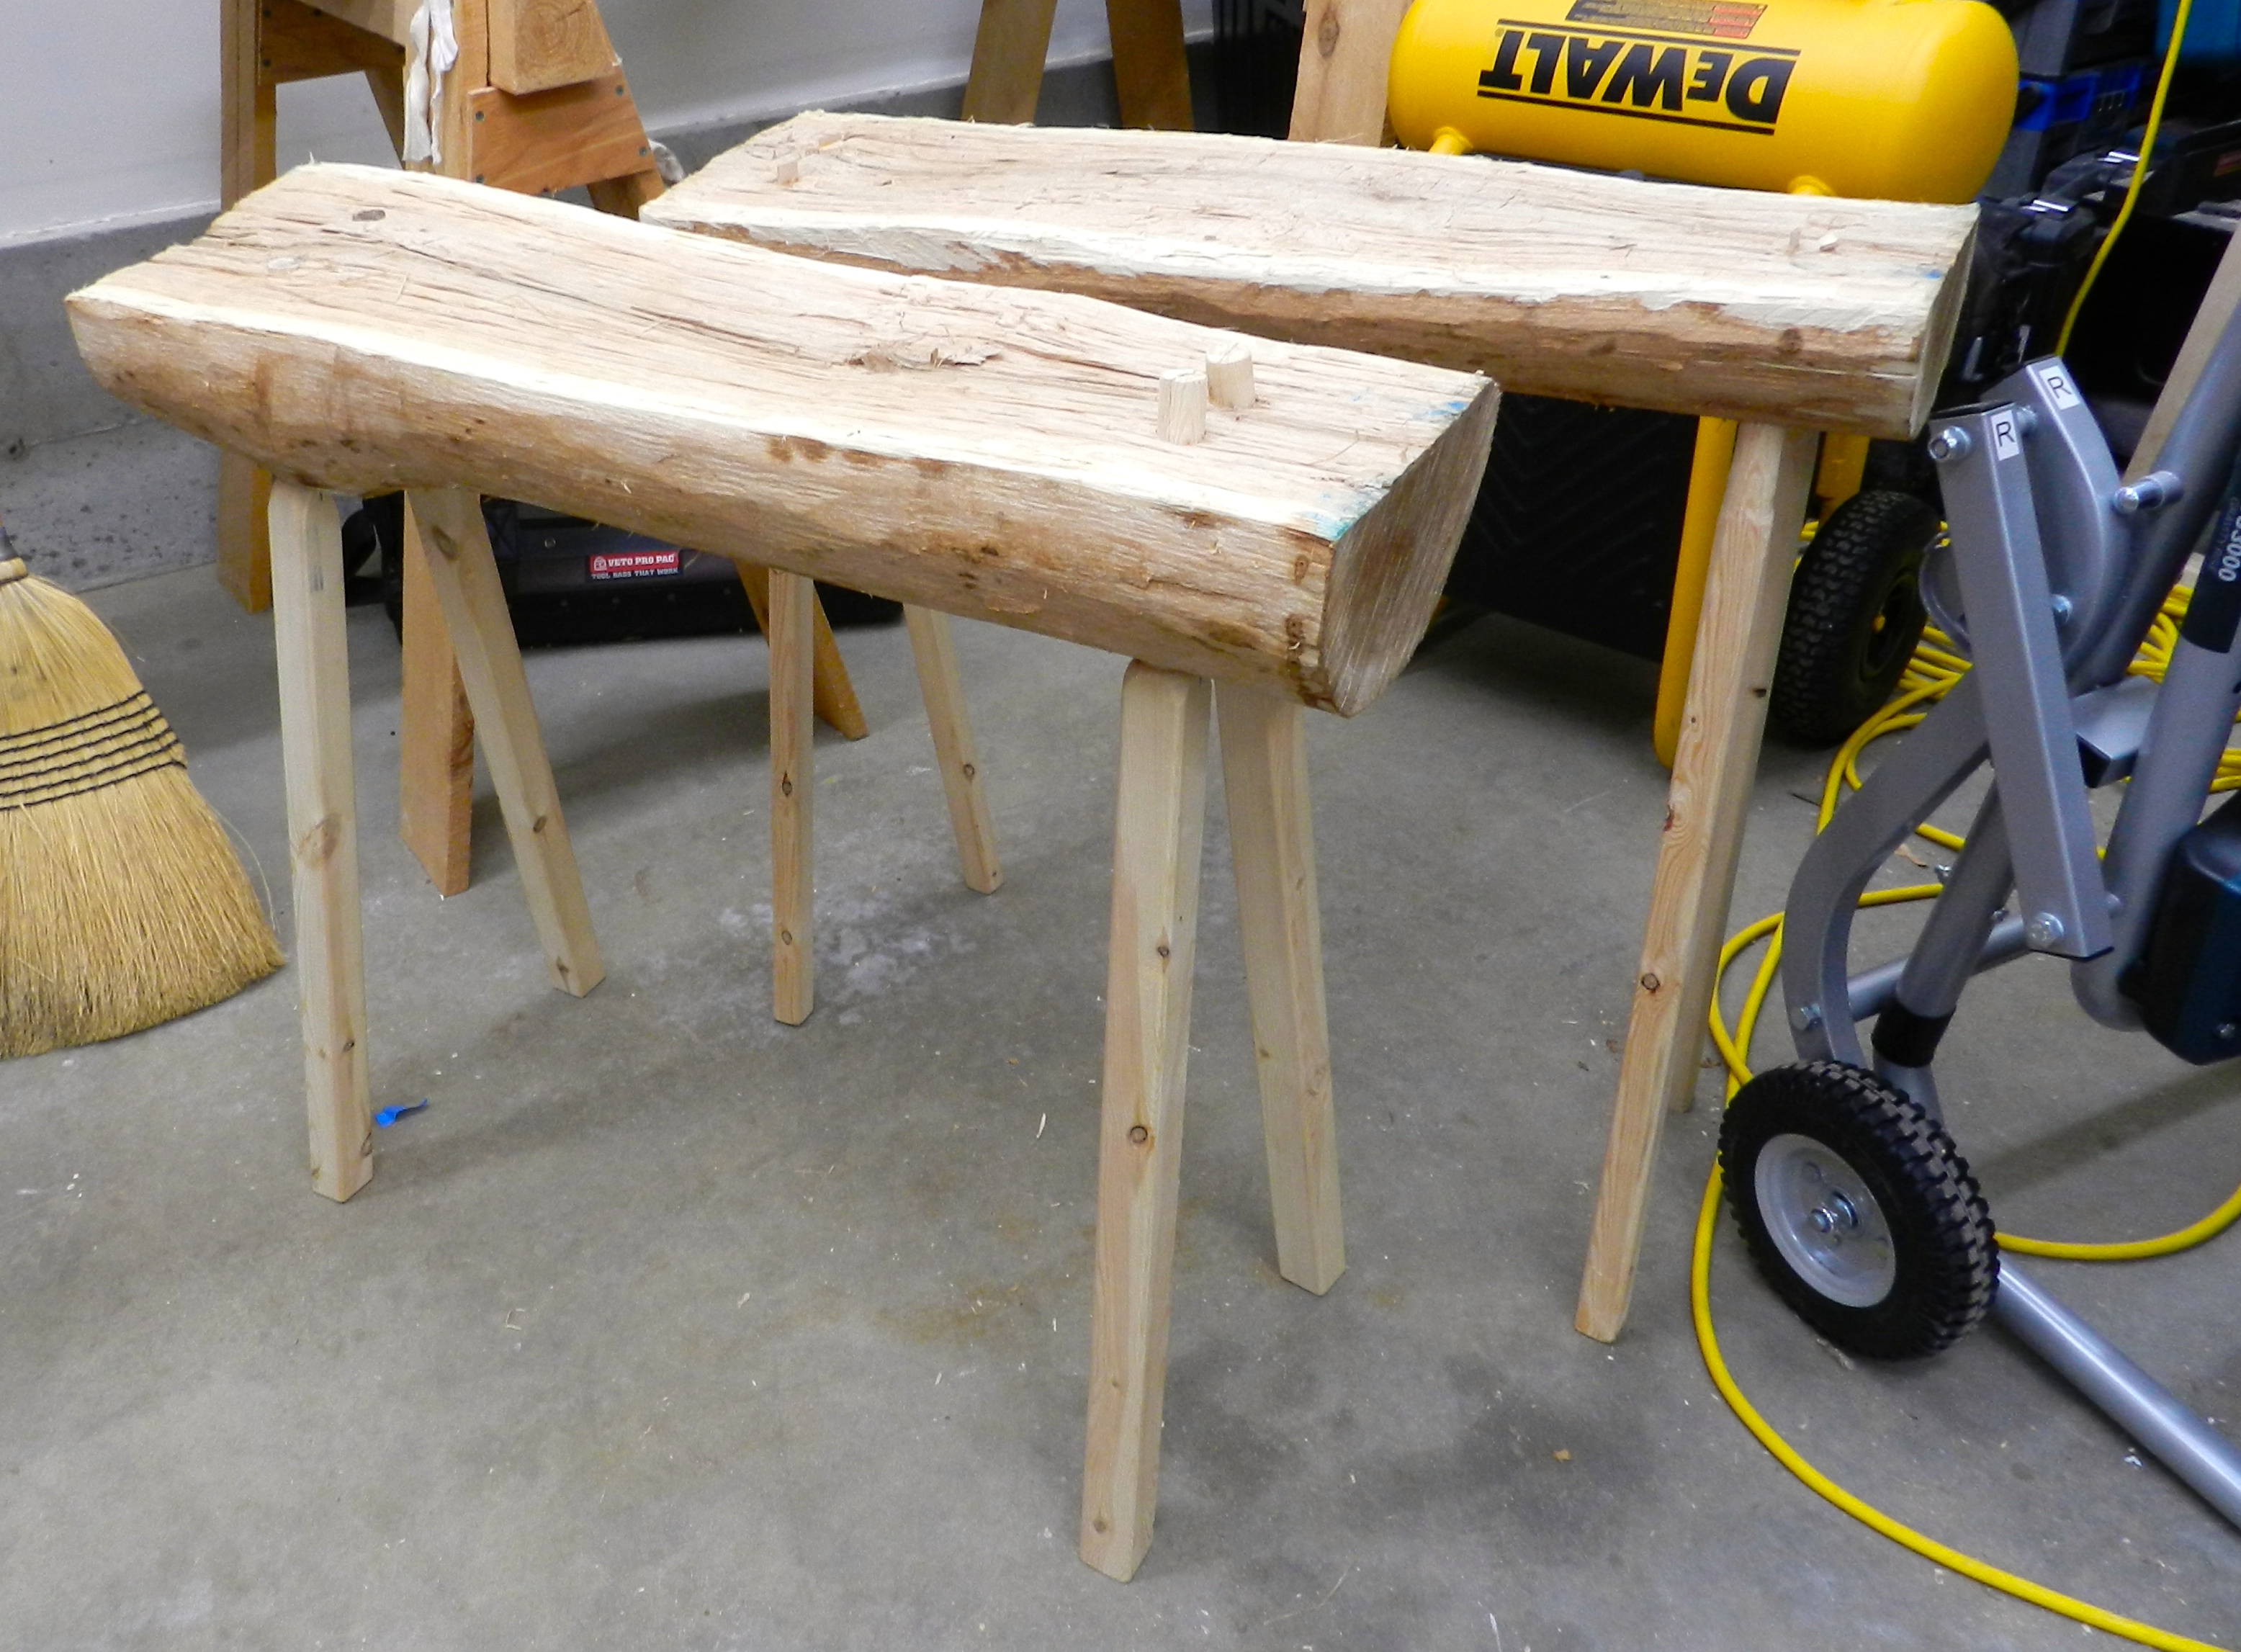
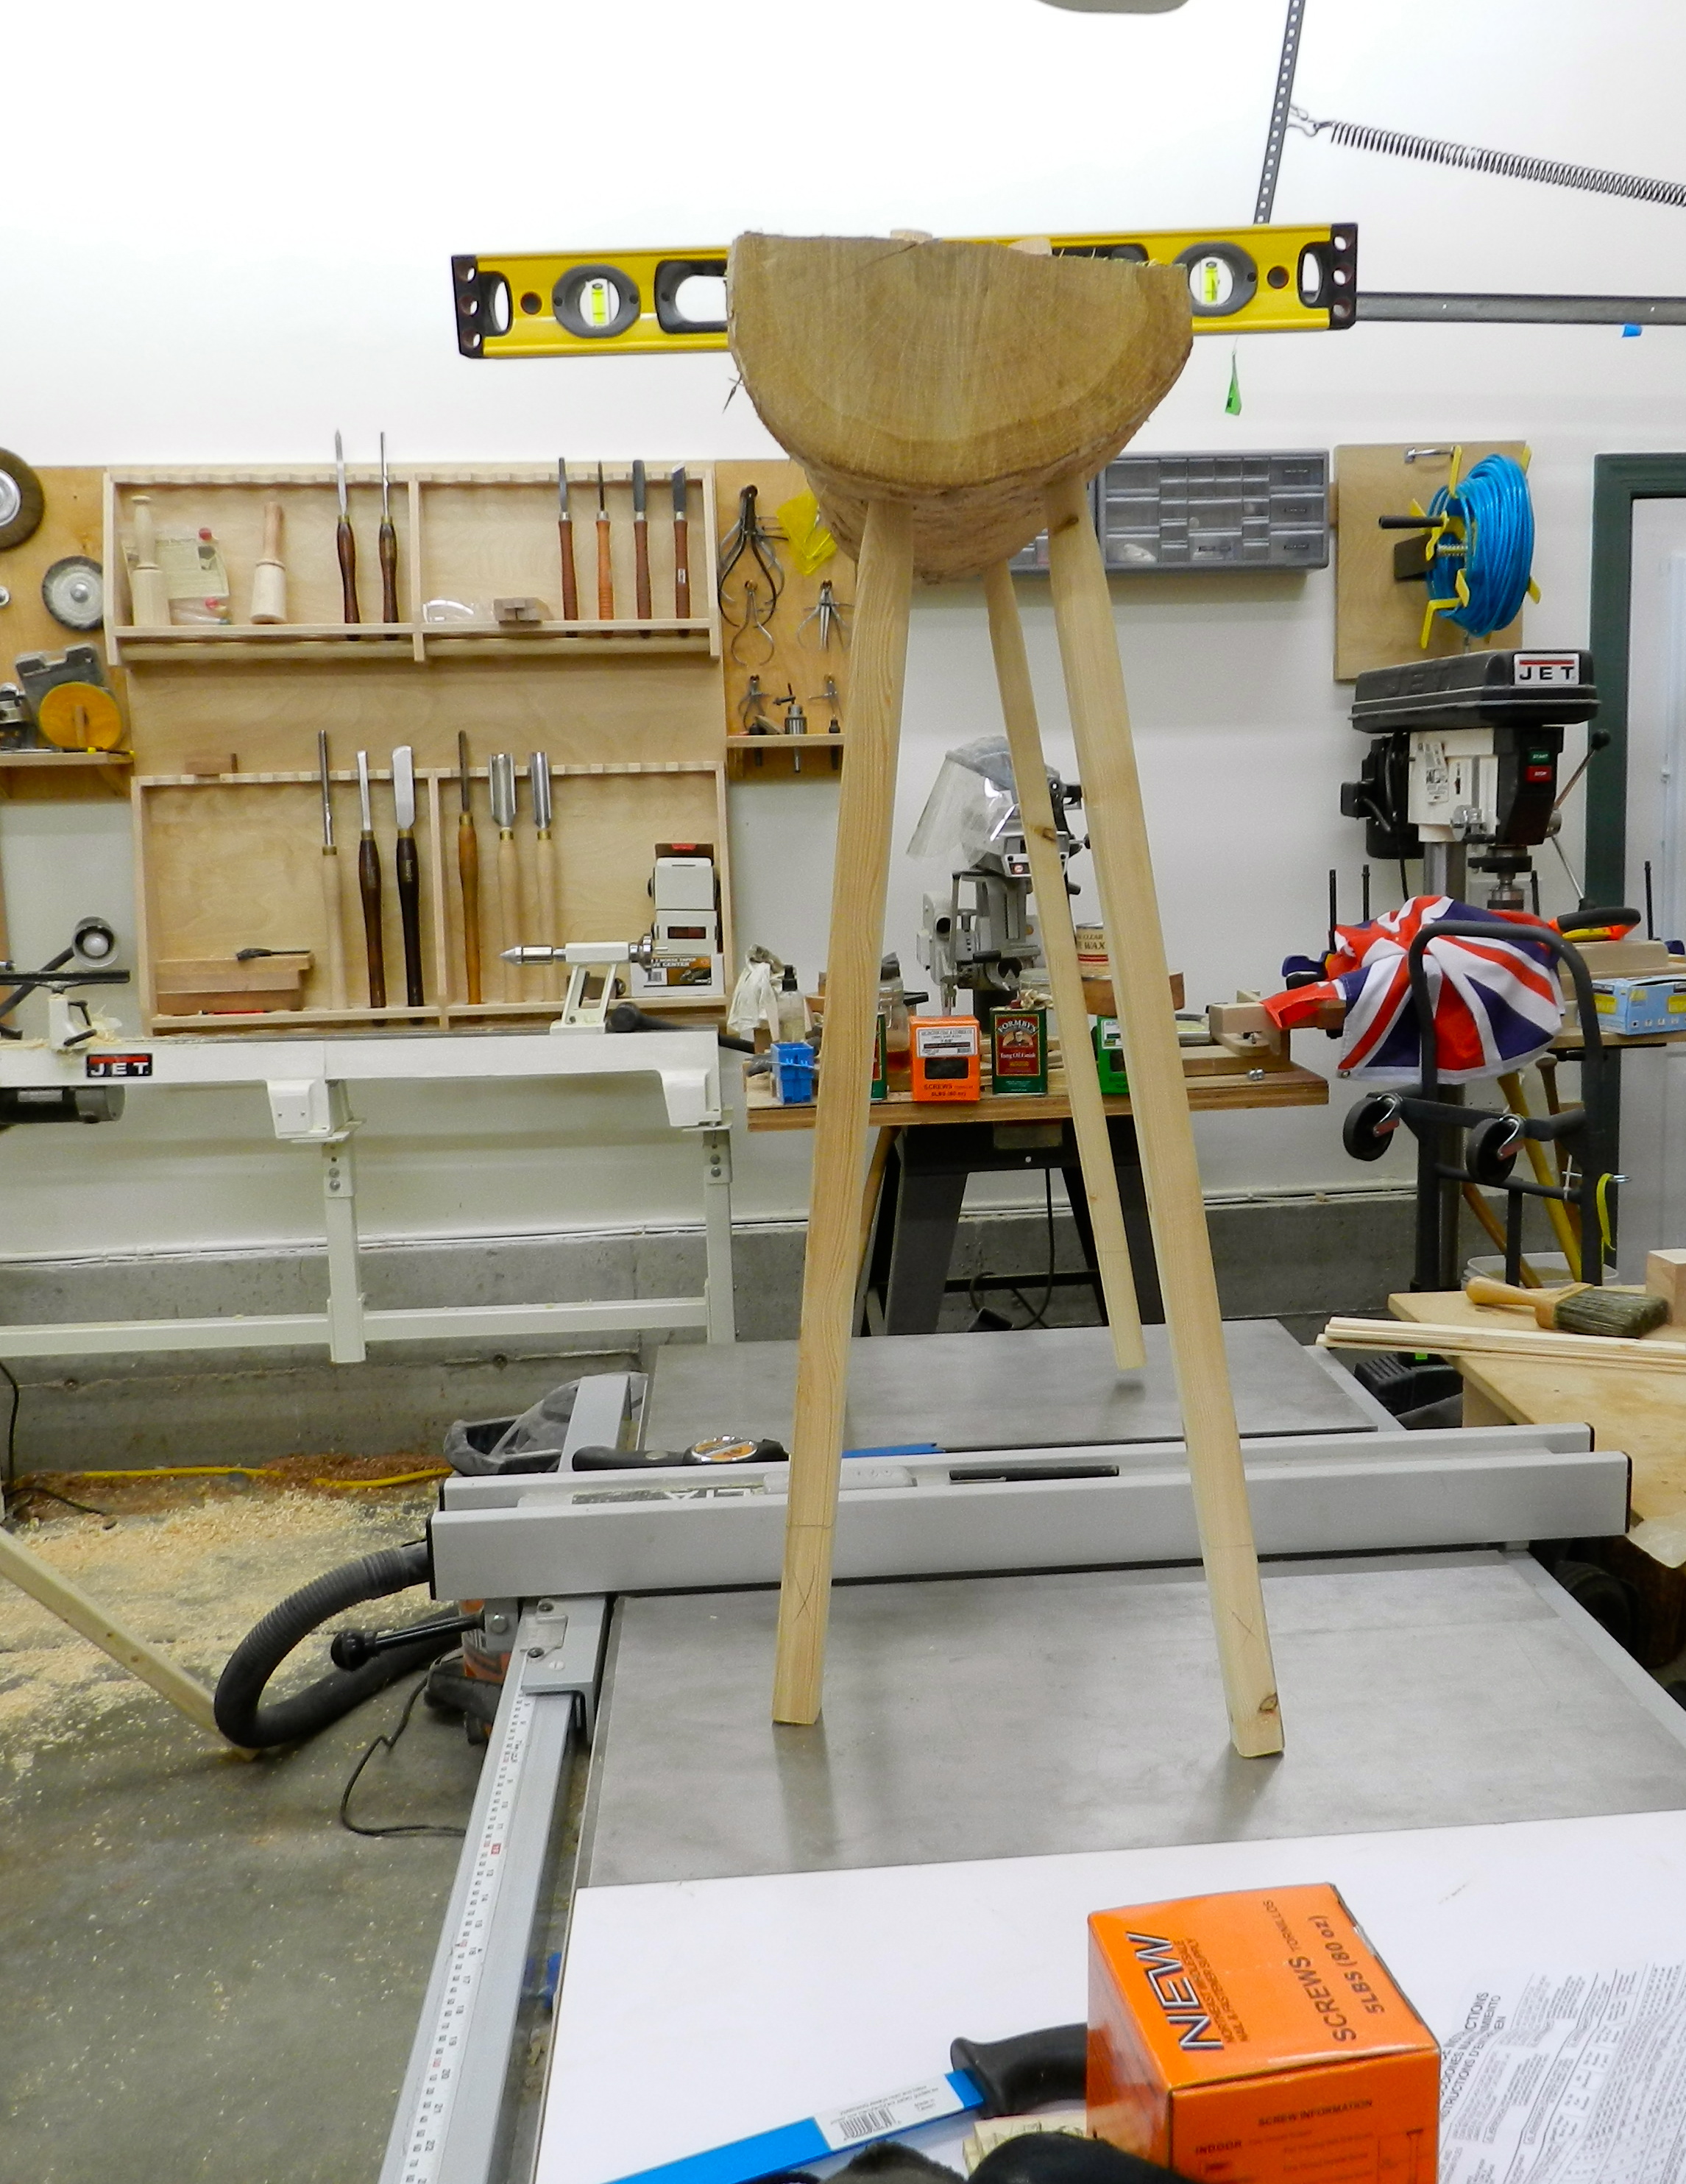
Original bench on the right, revised model on the left
The original bench was fairly solid — it could hold me standing on it and didn’t bounce around when I would strike it in a downward motion — but when I’d do something heavy and lateral I could feel what felt like a tiny bit of flex in the the legs.
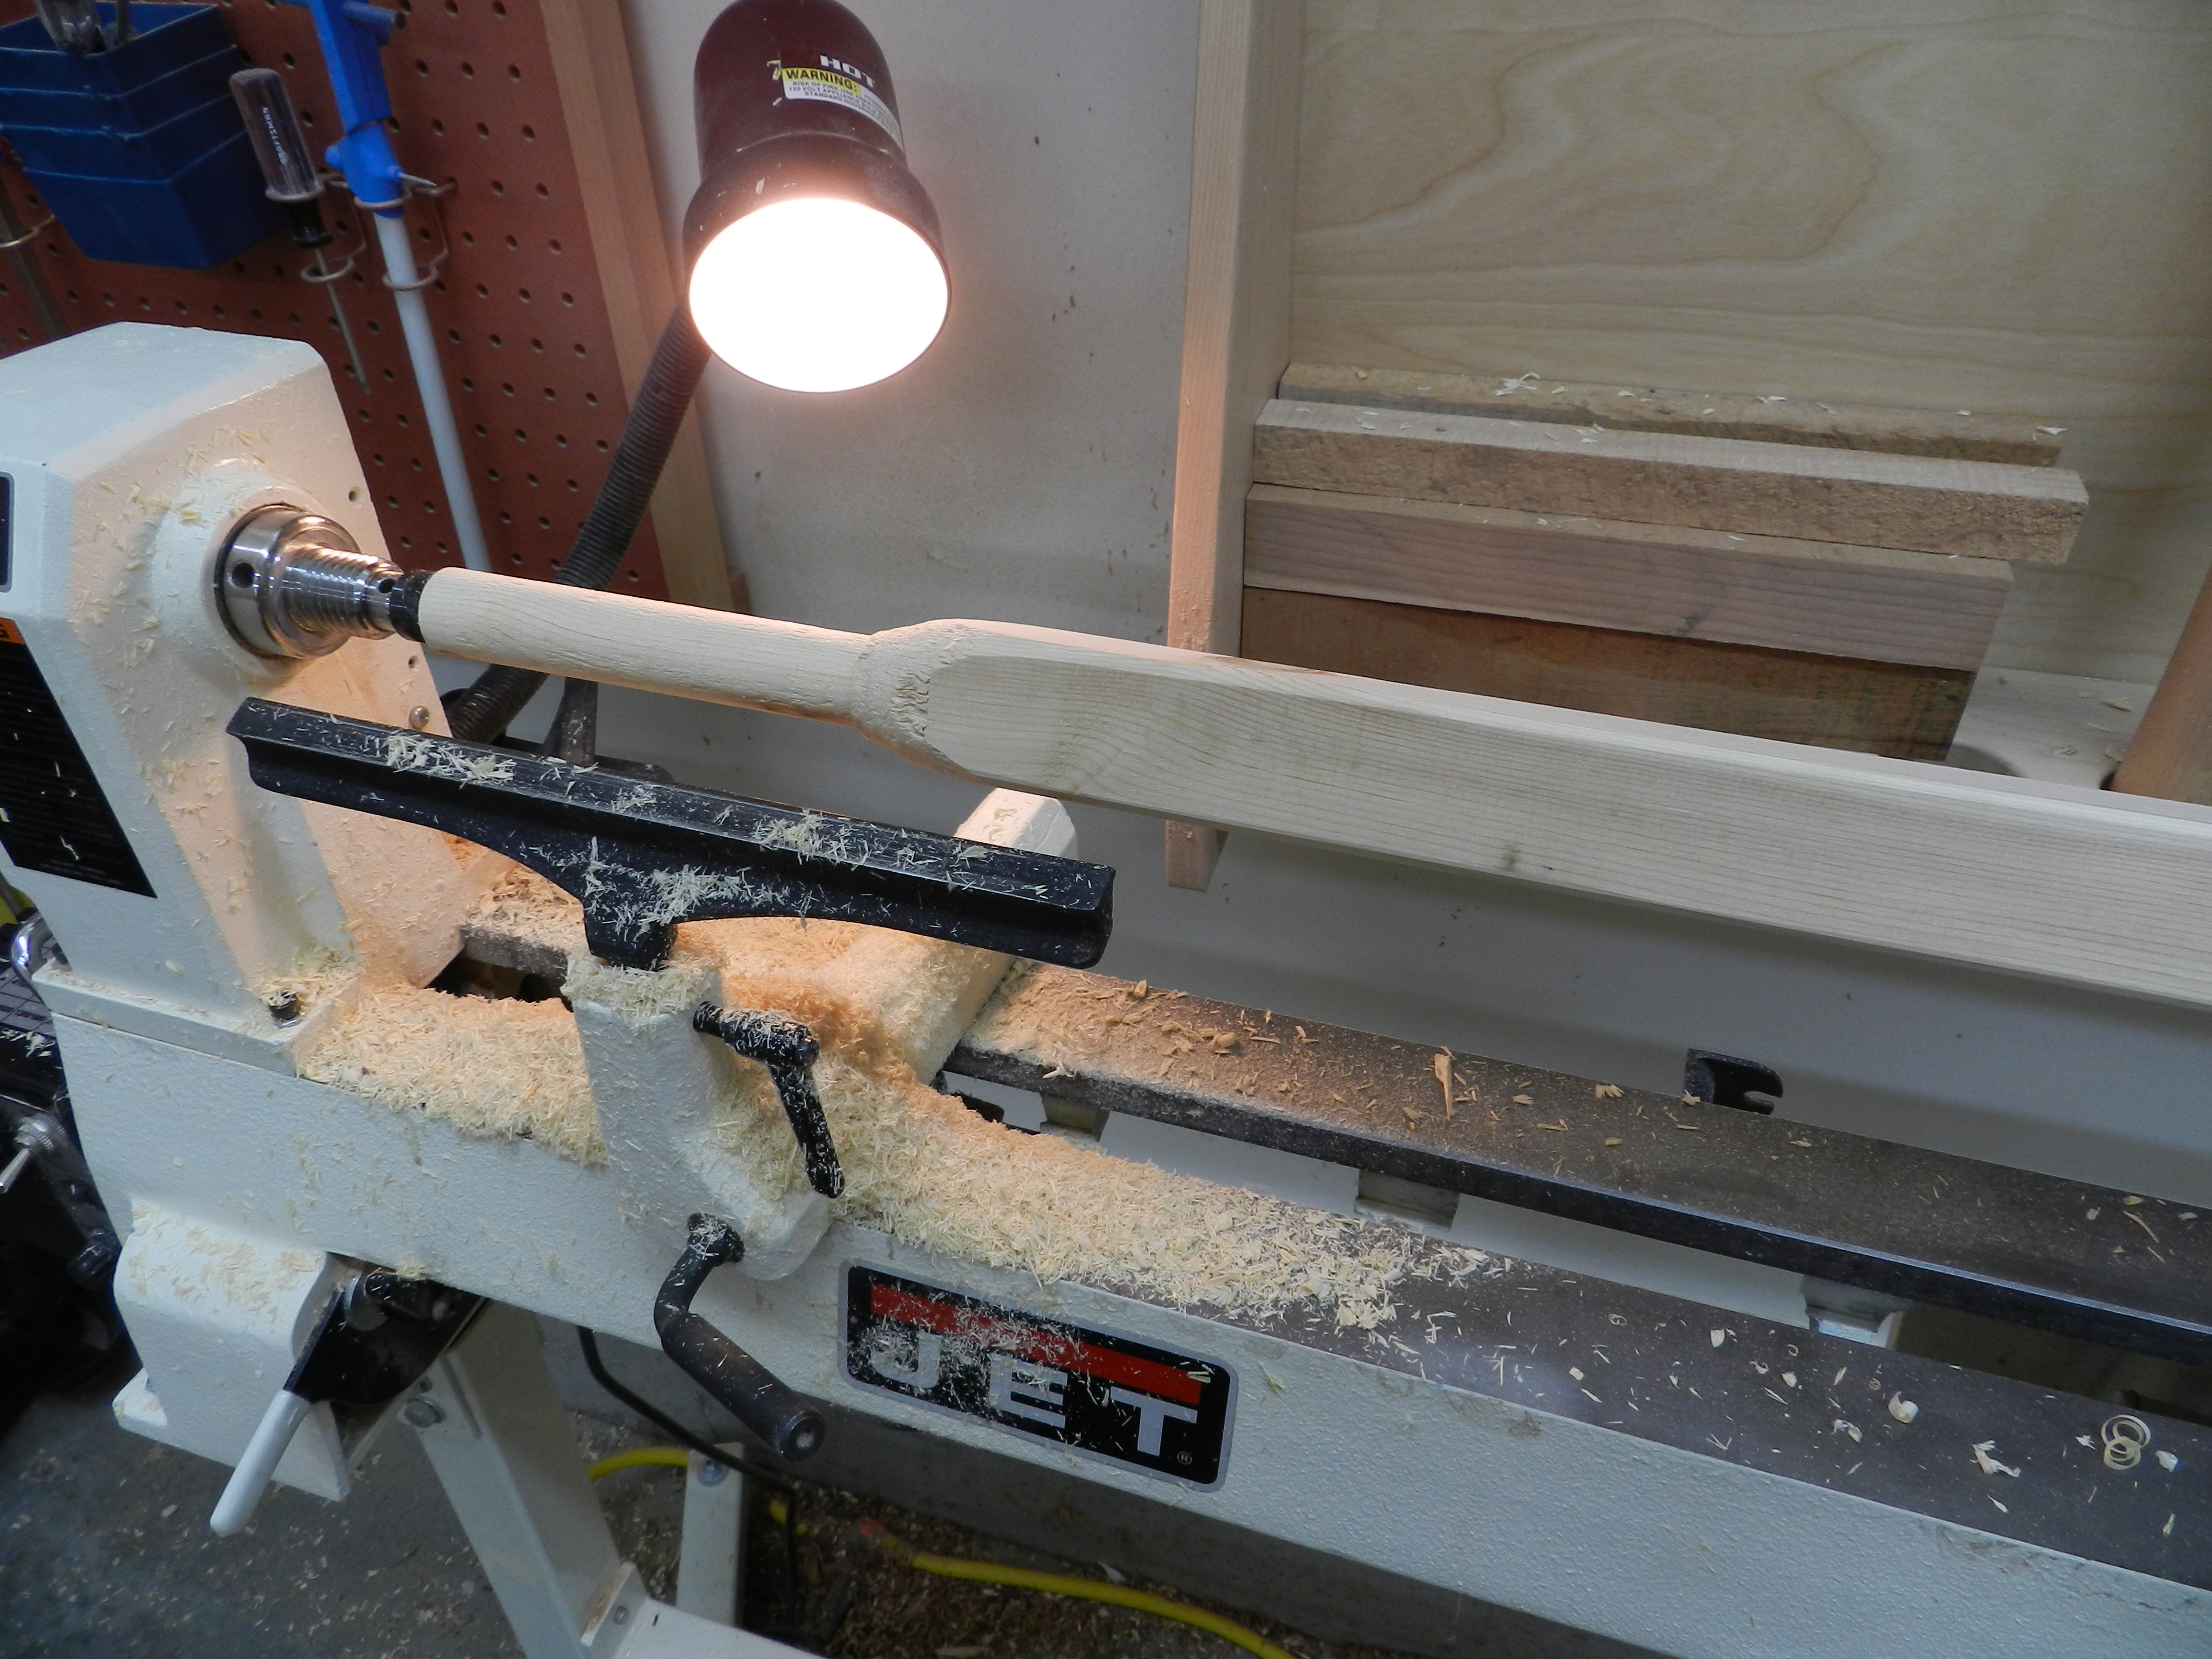
Turning thicker legs
At the time I ripped down a 2×3 to make the legs roughly sized to the 1″ ship auger bit which was the largest I had on hand, but I worried about the 1-1/8″ legs being too spindly. The mental image of the legs being too spindly haunted me, so for this second time out I decided to rectify that issue.
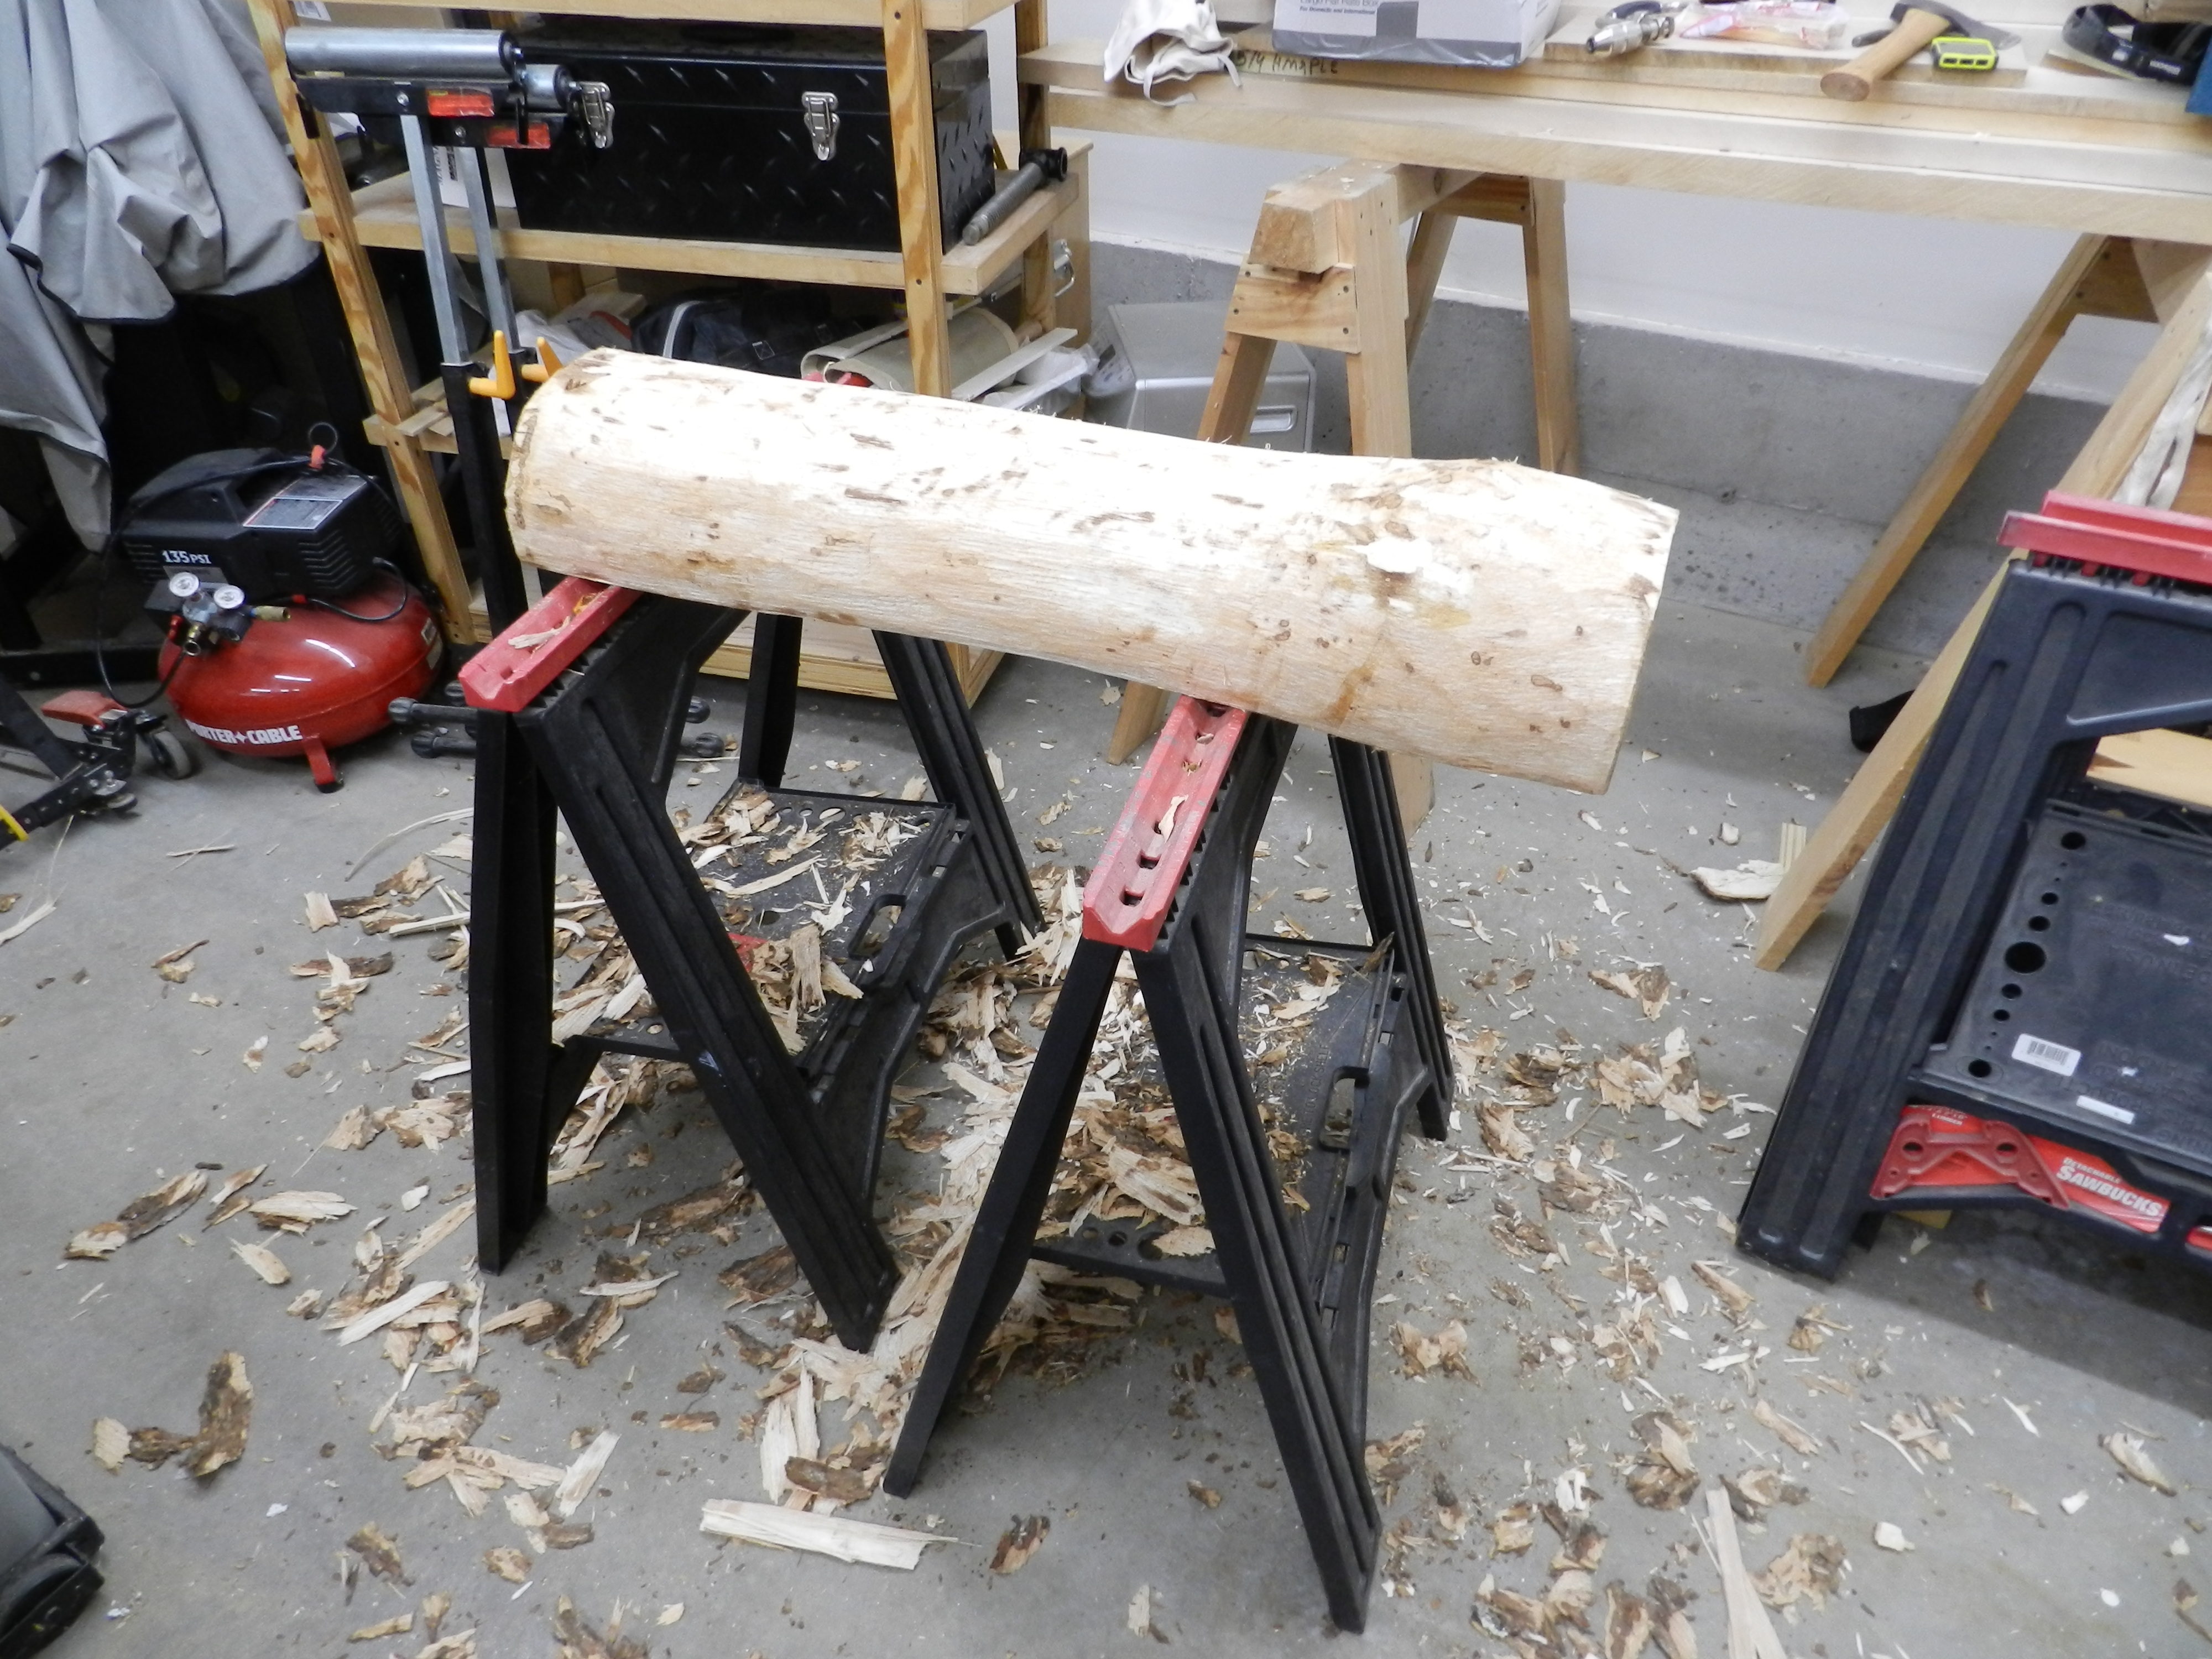
Removing the bark from the half log
Improvements:
Thicker legs (1-1/2″ square) with a more pronounced shoulders (this way the legs don’t add to any unnecessary wedging/splitting pressure and no matter how much hammering takes place on top of the bench the legs are maxed out in how deep they will go into the top of the bench)
Legs splayed in both directions to be that much more stable
Leveling the legs
Beyond the modest improvements called out above, I otherwise built it the same way as the first hewing bench. (Wedged tenons, wax sealed end grain, leveled legs etc)
Completed benches. They can also work well as a pair of saw horses.
The Verdict:
The new bench is rock solid and will be a workhorse in the shop. The new legs are nice and stiff. Having a pair of these benches in the shop has already come in handy as you’ll see in the next post.
If you’ve watched Roy Underhill on the Woodwright’s Shop with any regularity then no doubt you’ve seen him using a hewing bench. It’s a great little bench made from half a log on 4 modest legs. Roy’s used it for hewing, trimming, holding, sitting and many other common shop uses. It’s a project you can complete in an afternoon and will serve you well for many years in the shop.
Why would anyone really want this rough little bench?
If you do any sort of green woodworking it’s nice to have a place you can quickly hew a blank in the shop with a hatchet or similar small ax. When the ax hits the long grain of the bench it will not dig in the way it would if you were using the end grain of a stump or similar log section. (It also protects the reference surfaces of your real workbench) For tapering the end of treenails, splitting wood or roughing a green turning blank it has been a priceless addition to the workshop. It also makes a nice place to sit when people visit the shop. 😉
How do I make one of these benches?
Like any good Roy anecdote it starts with “First you find a tree….”
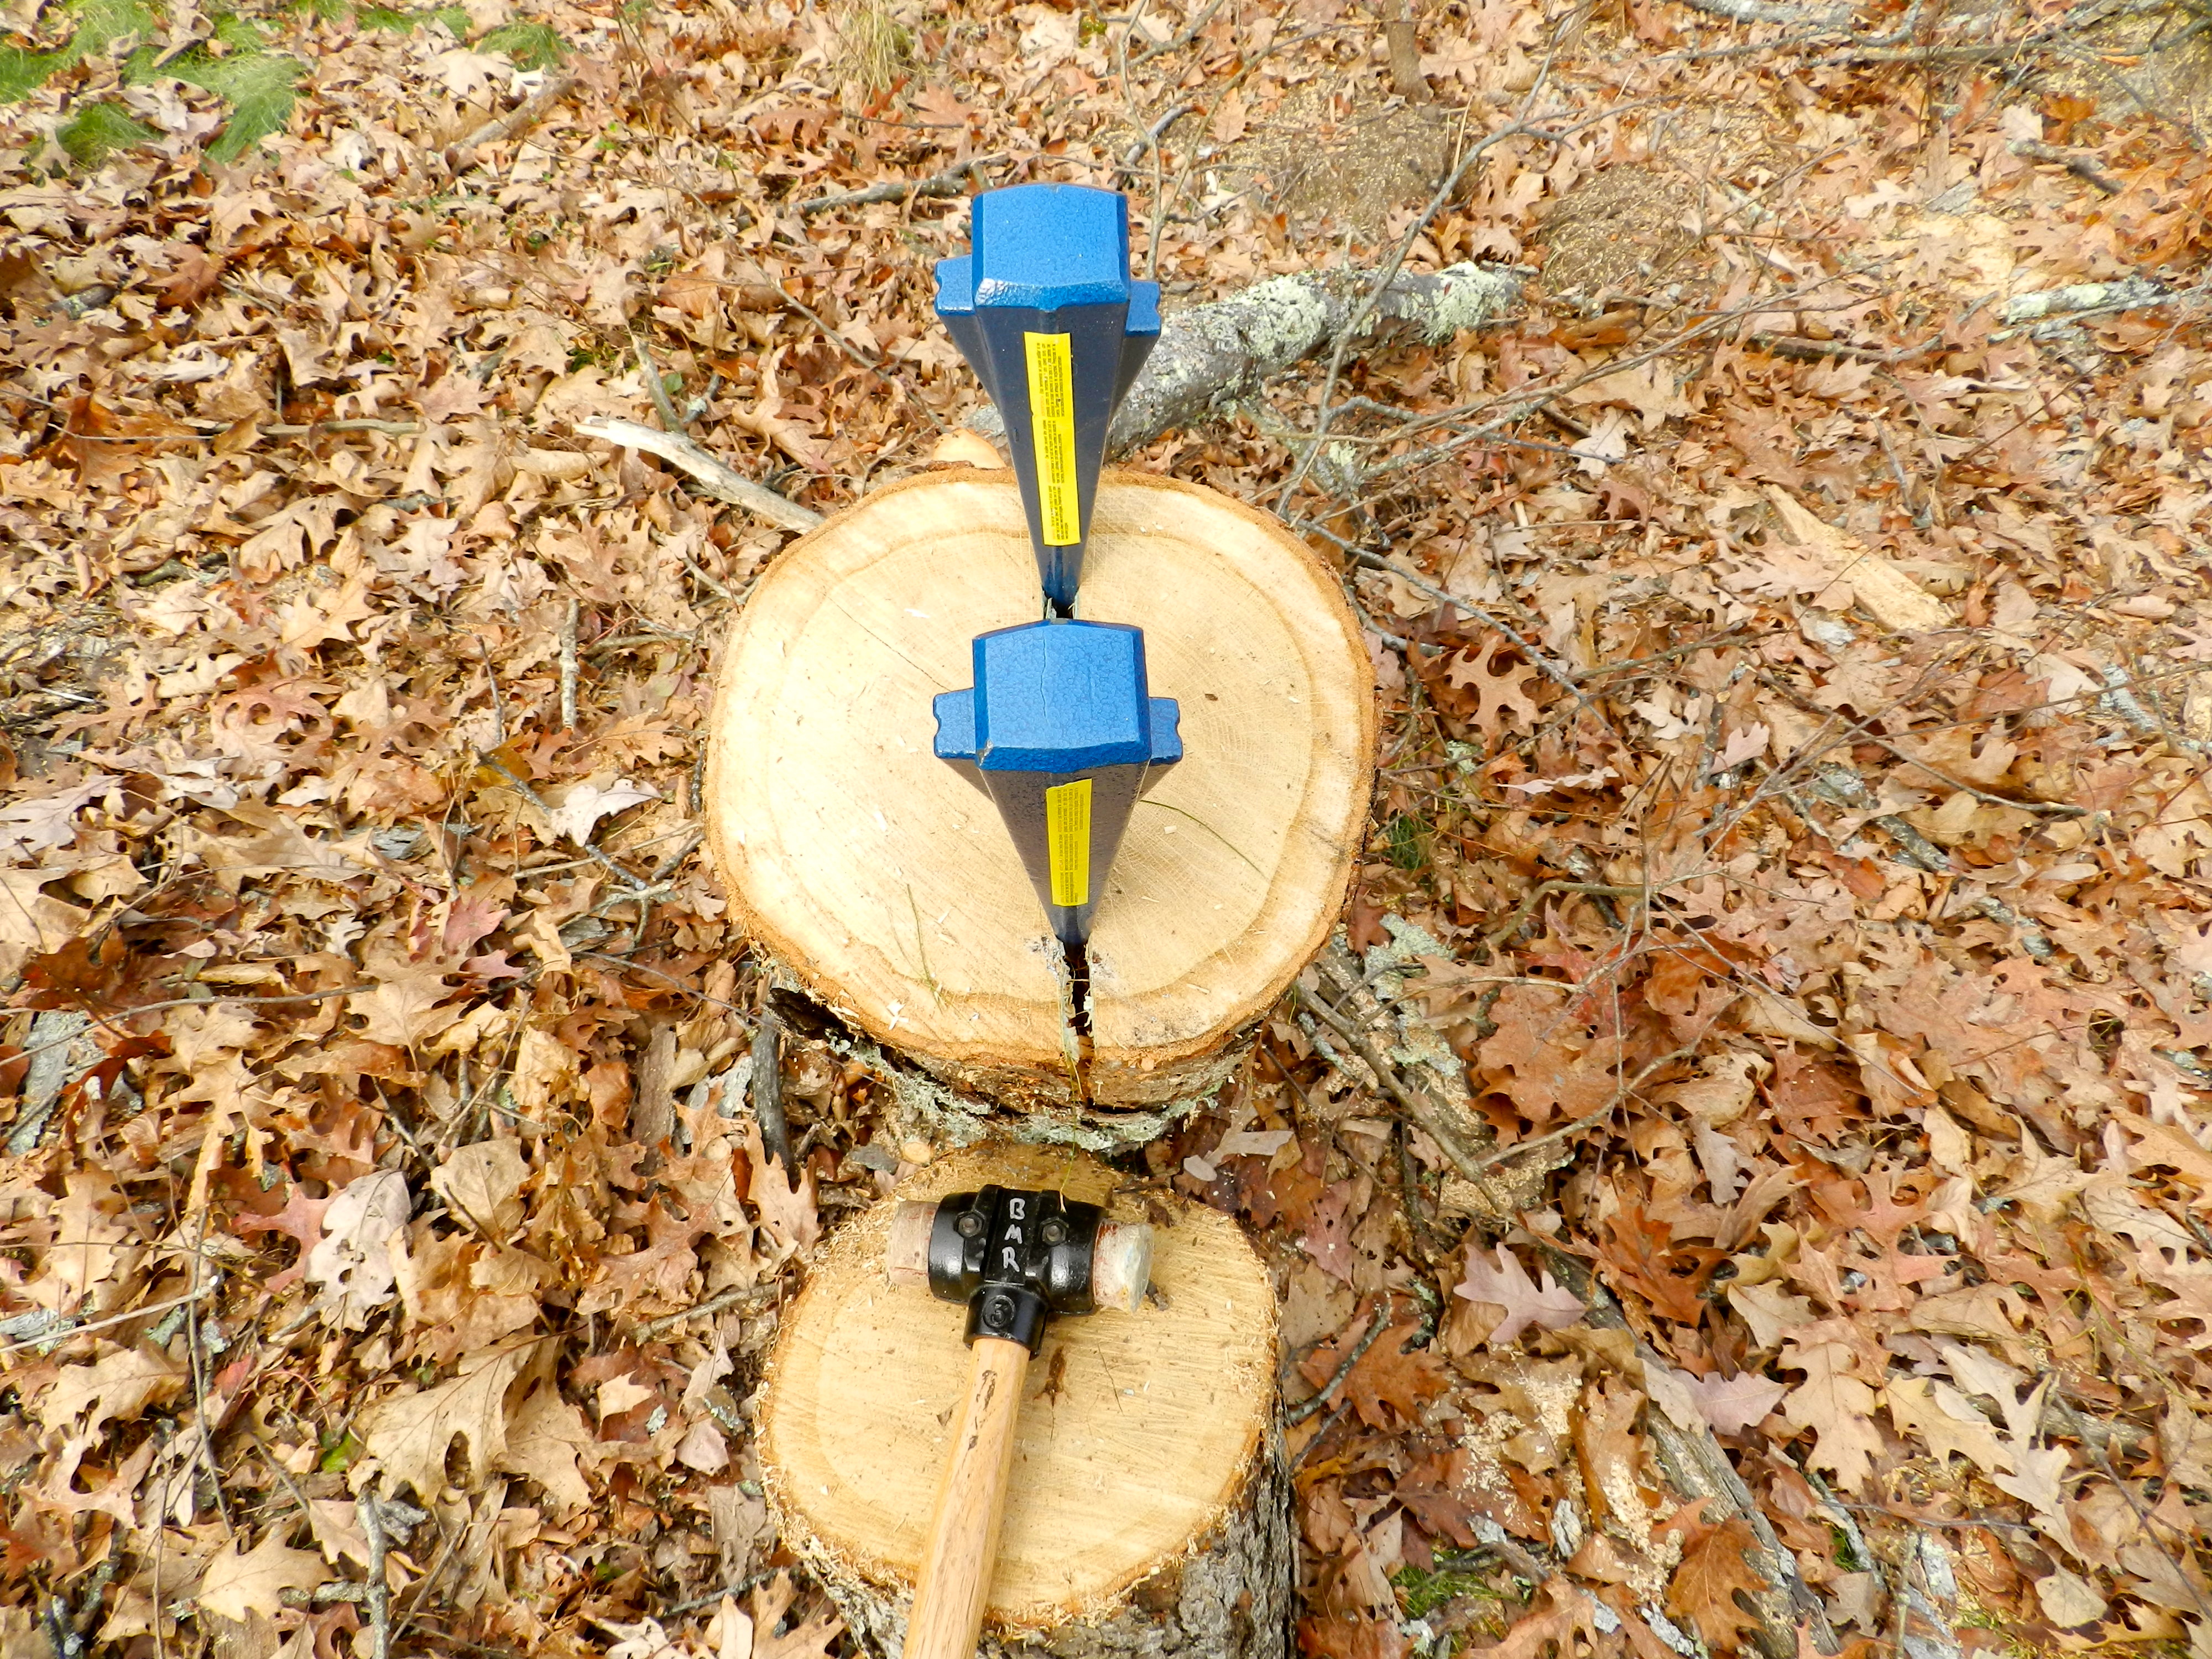
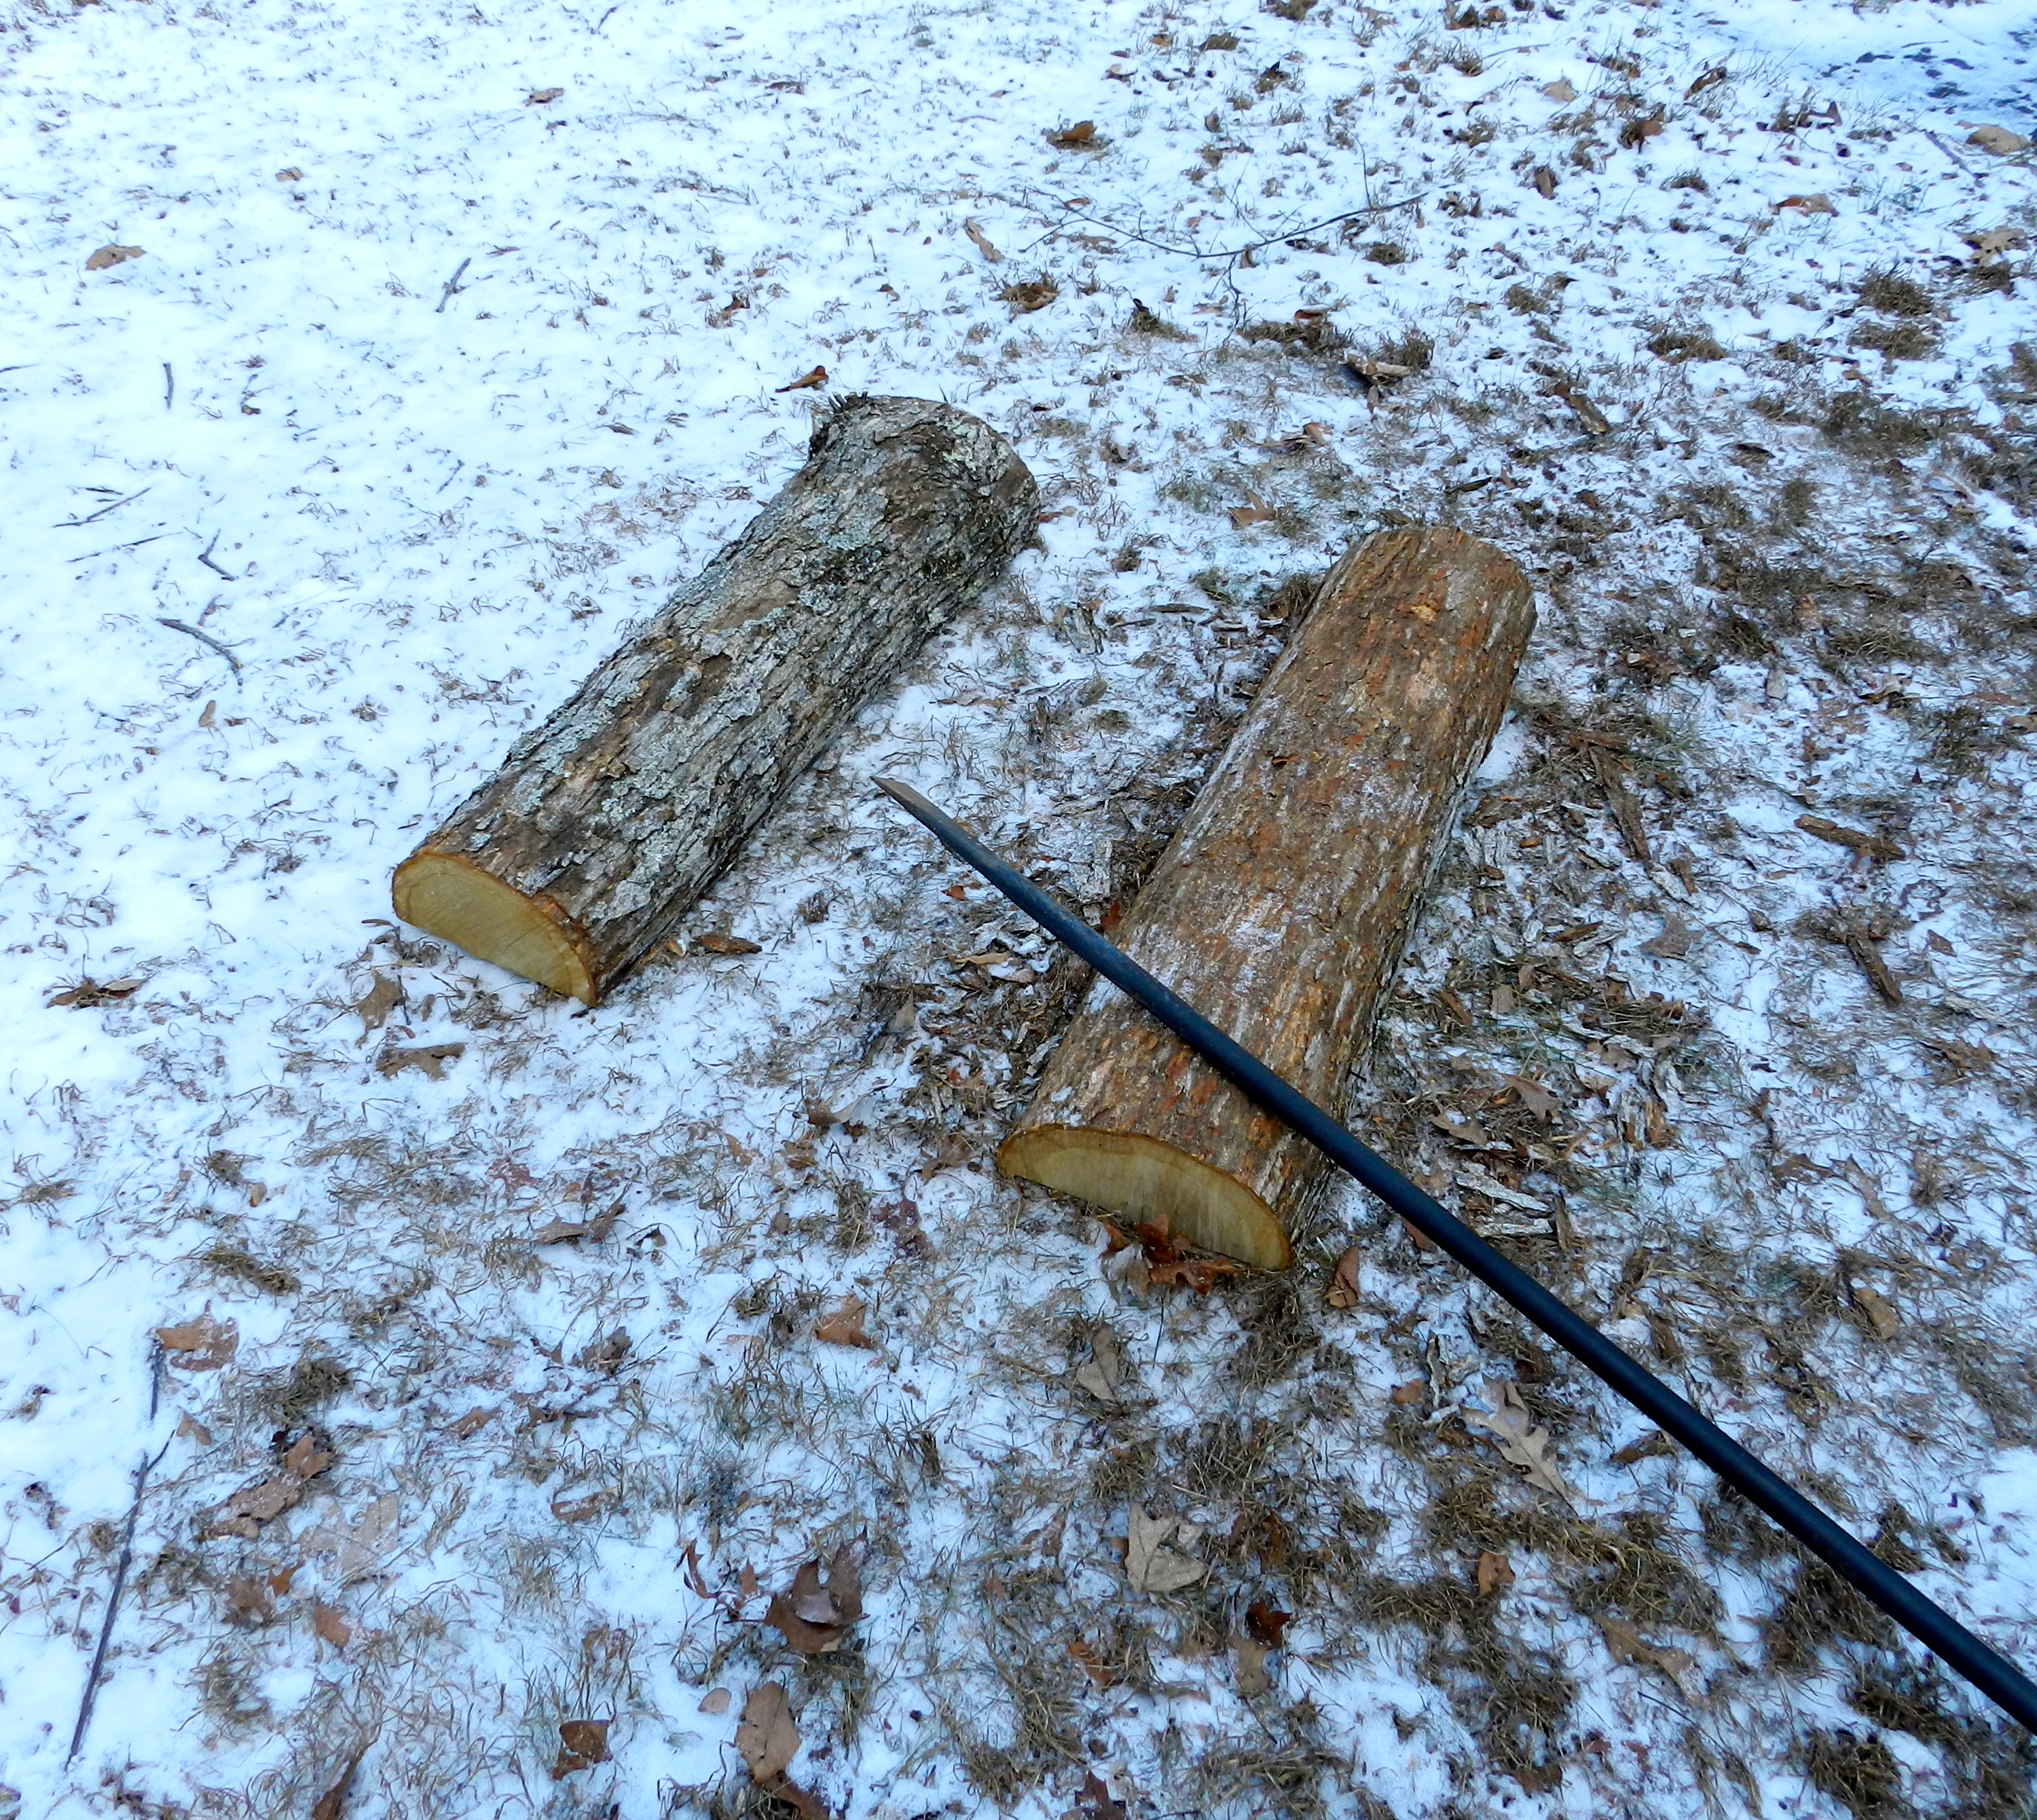
Splitting the oak log with metal wedges and a heavy leather faced mallet
In this case I took a 12-15″ wide and 30″ long section of white oak from a large tree I recently felled in my yard. This tree was over 130 years old so the growth rings are nice and tight. Using metal wedges and a large leather faced mallet I use for my timber framing I split the log in half.
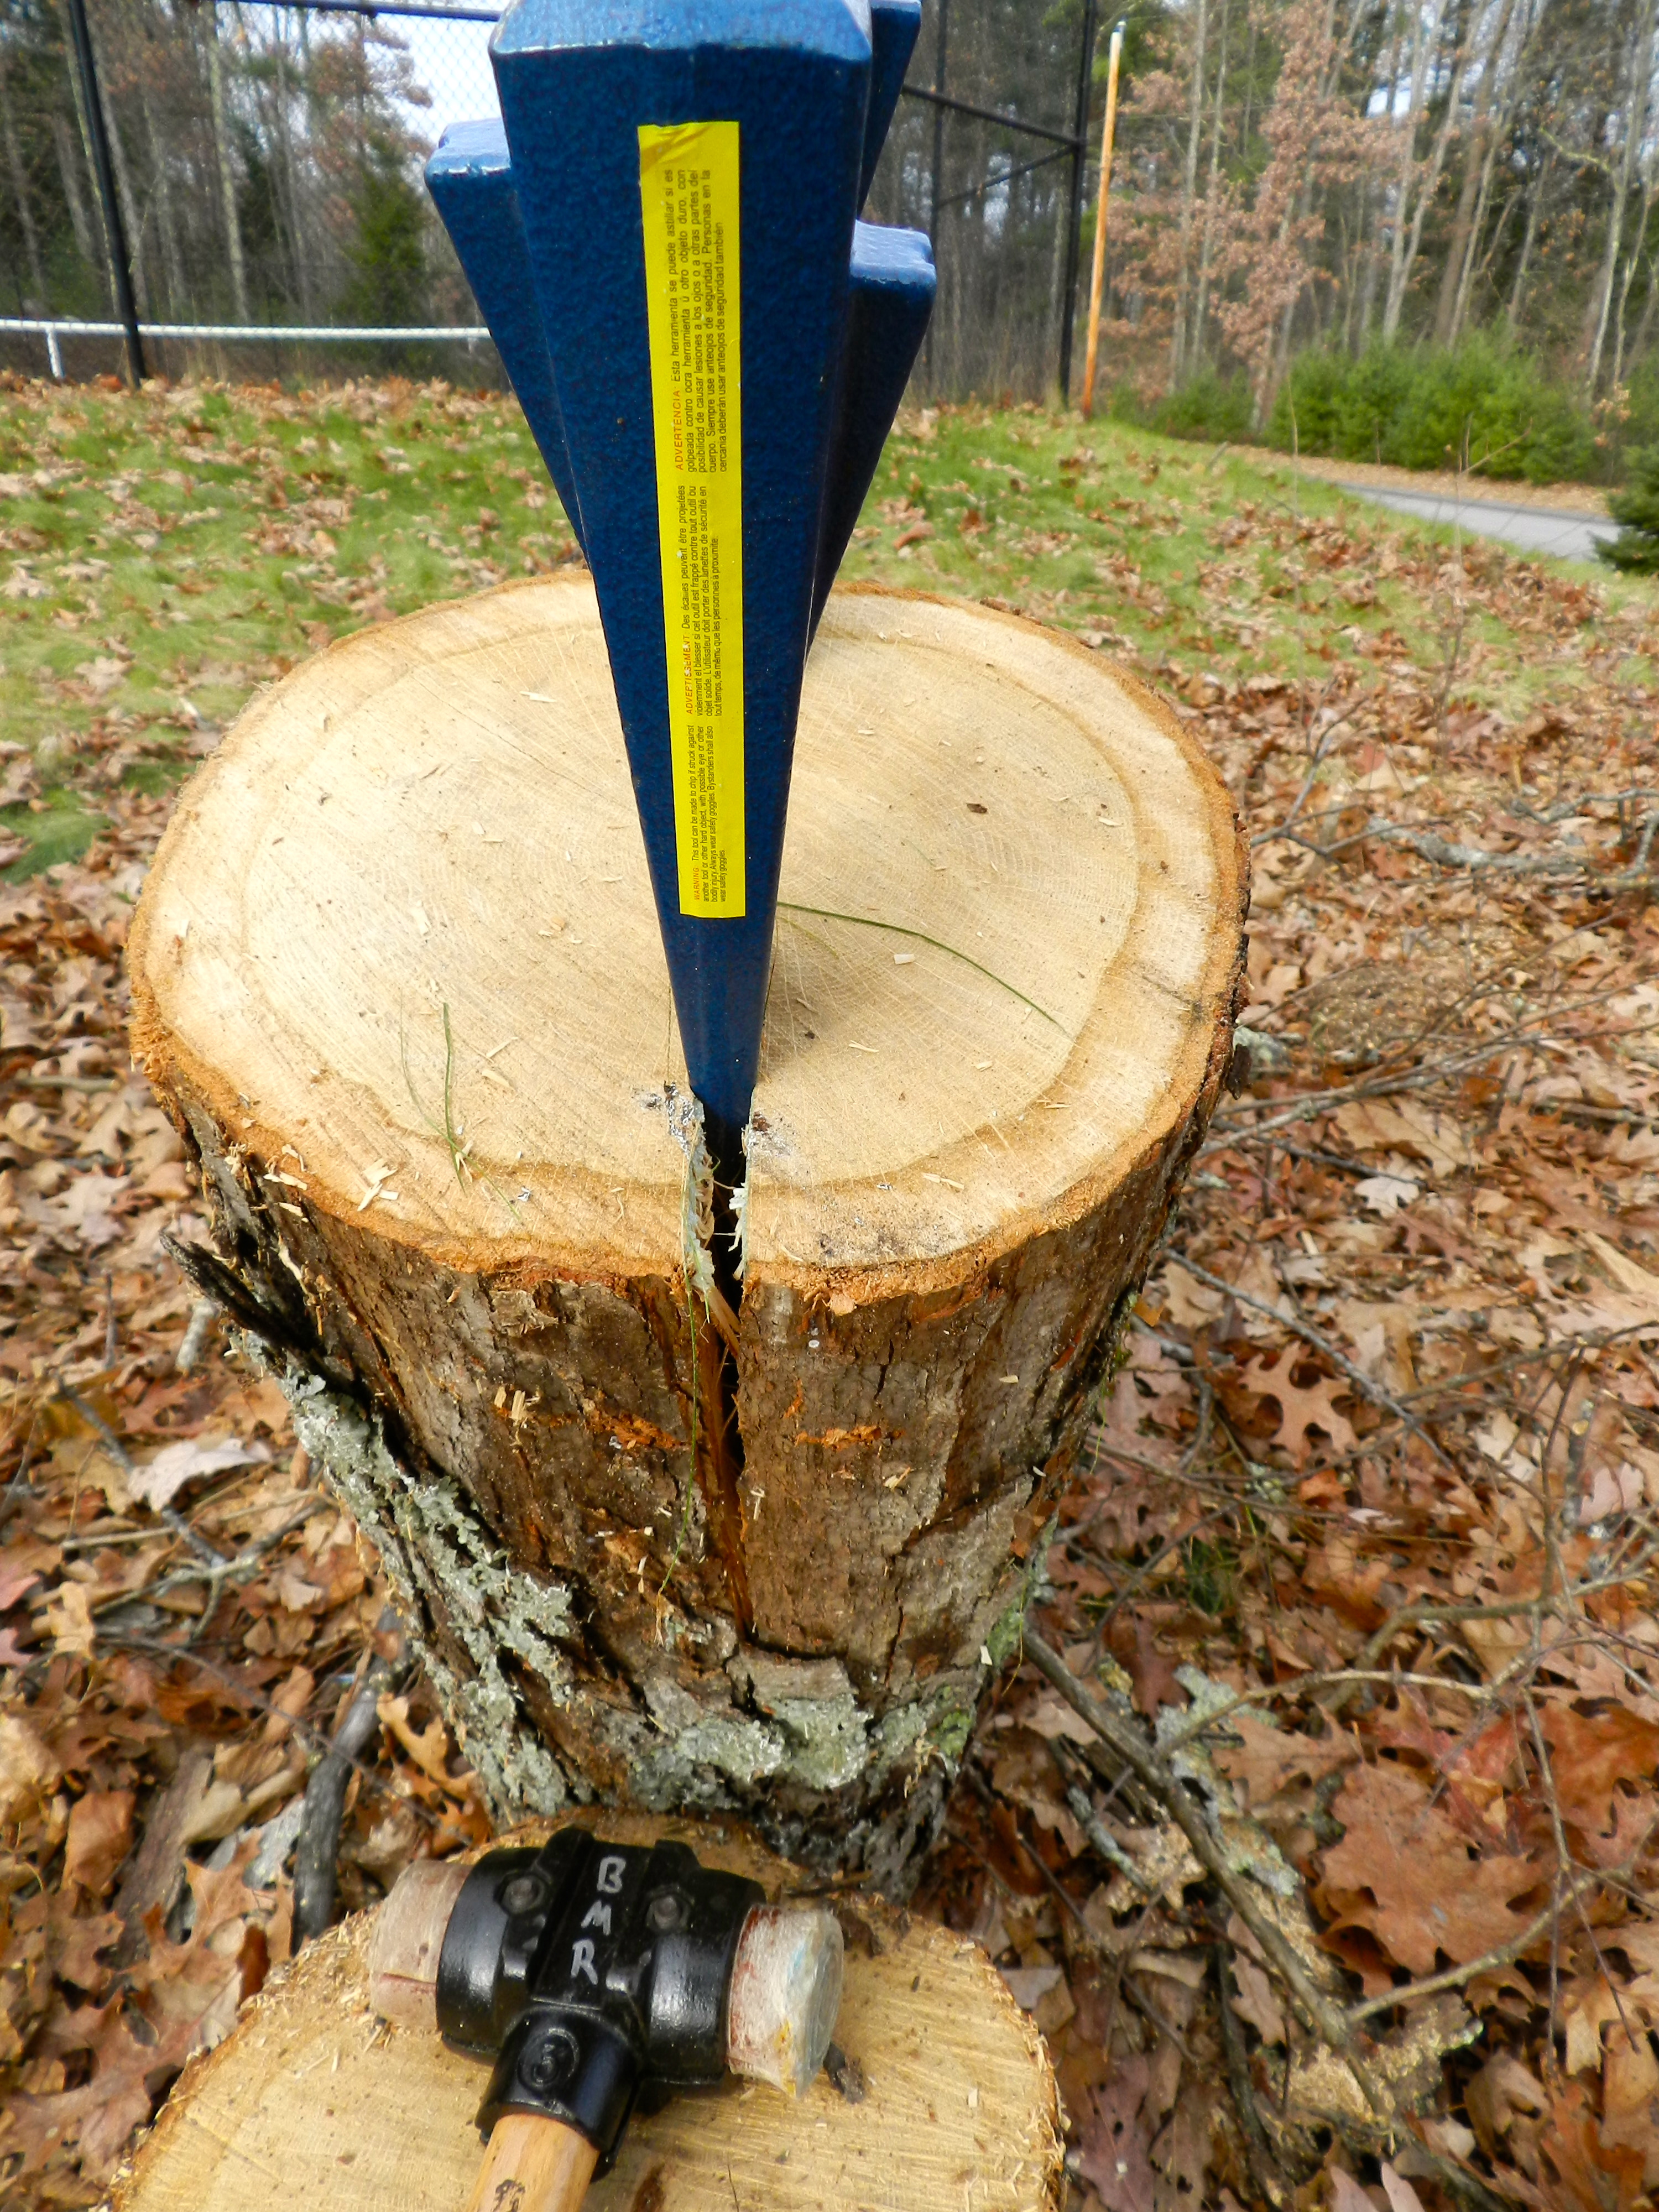
Watch to make sure the split runs the way you want down the log
If the wedges alone cannot do the whole job of splitting for you, a froe can help it along.
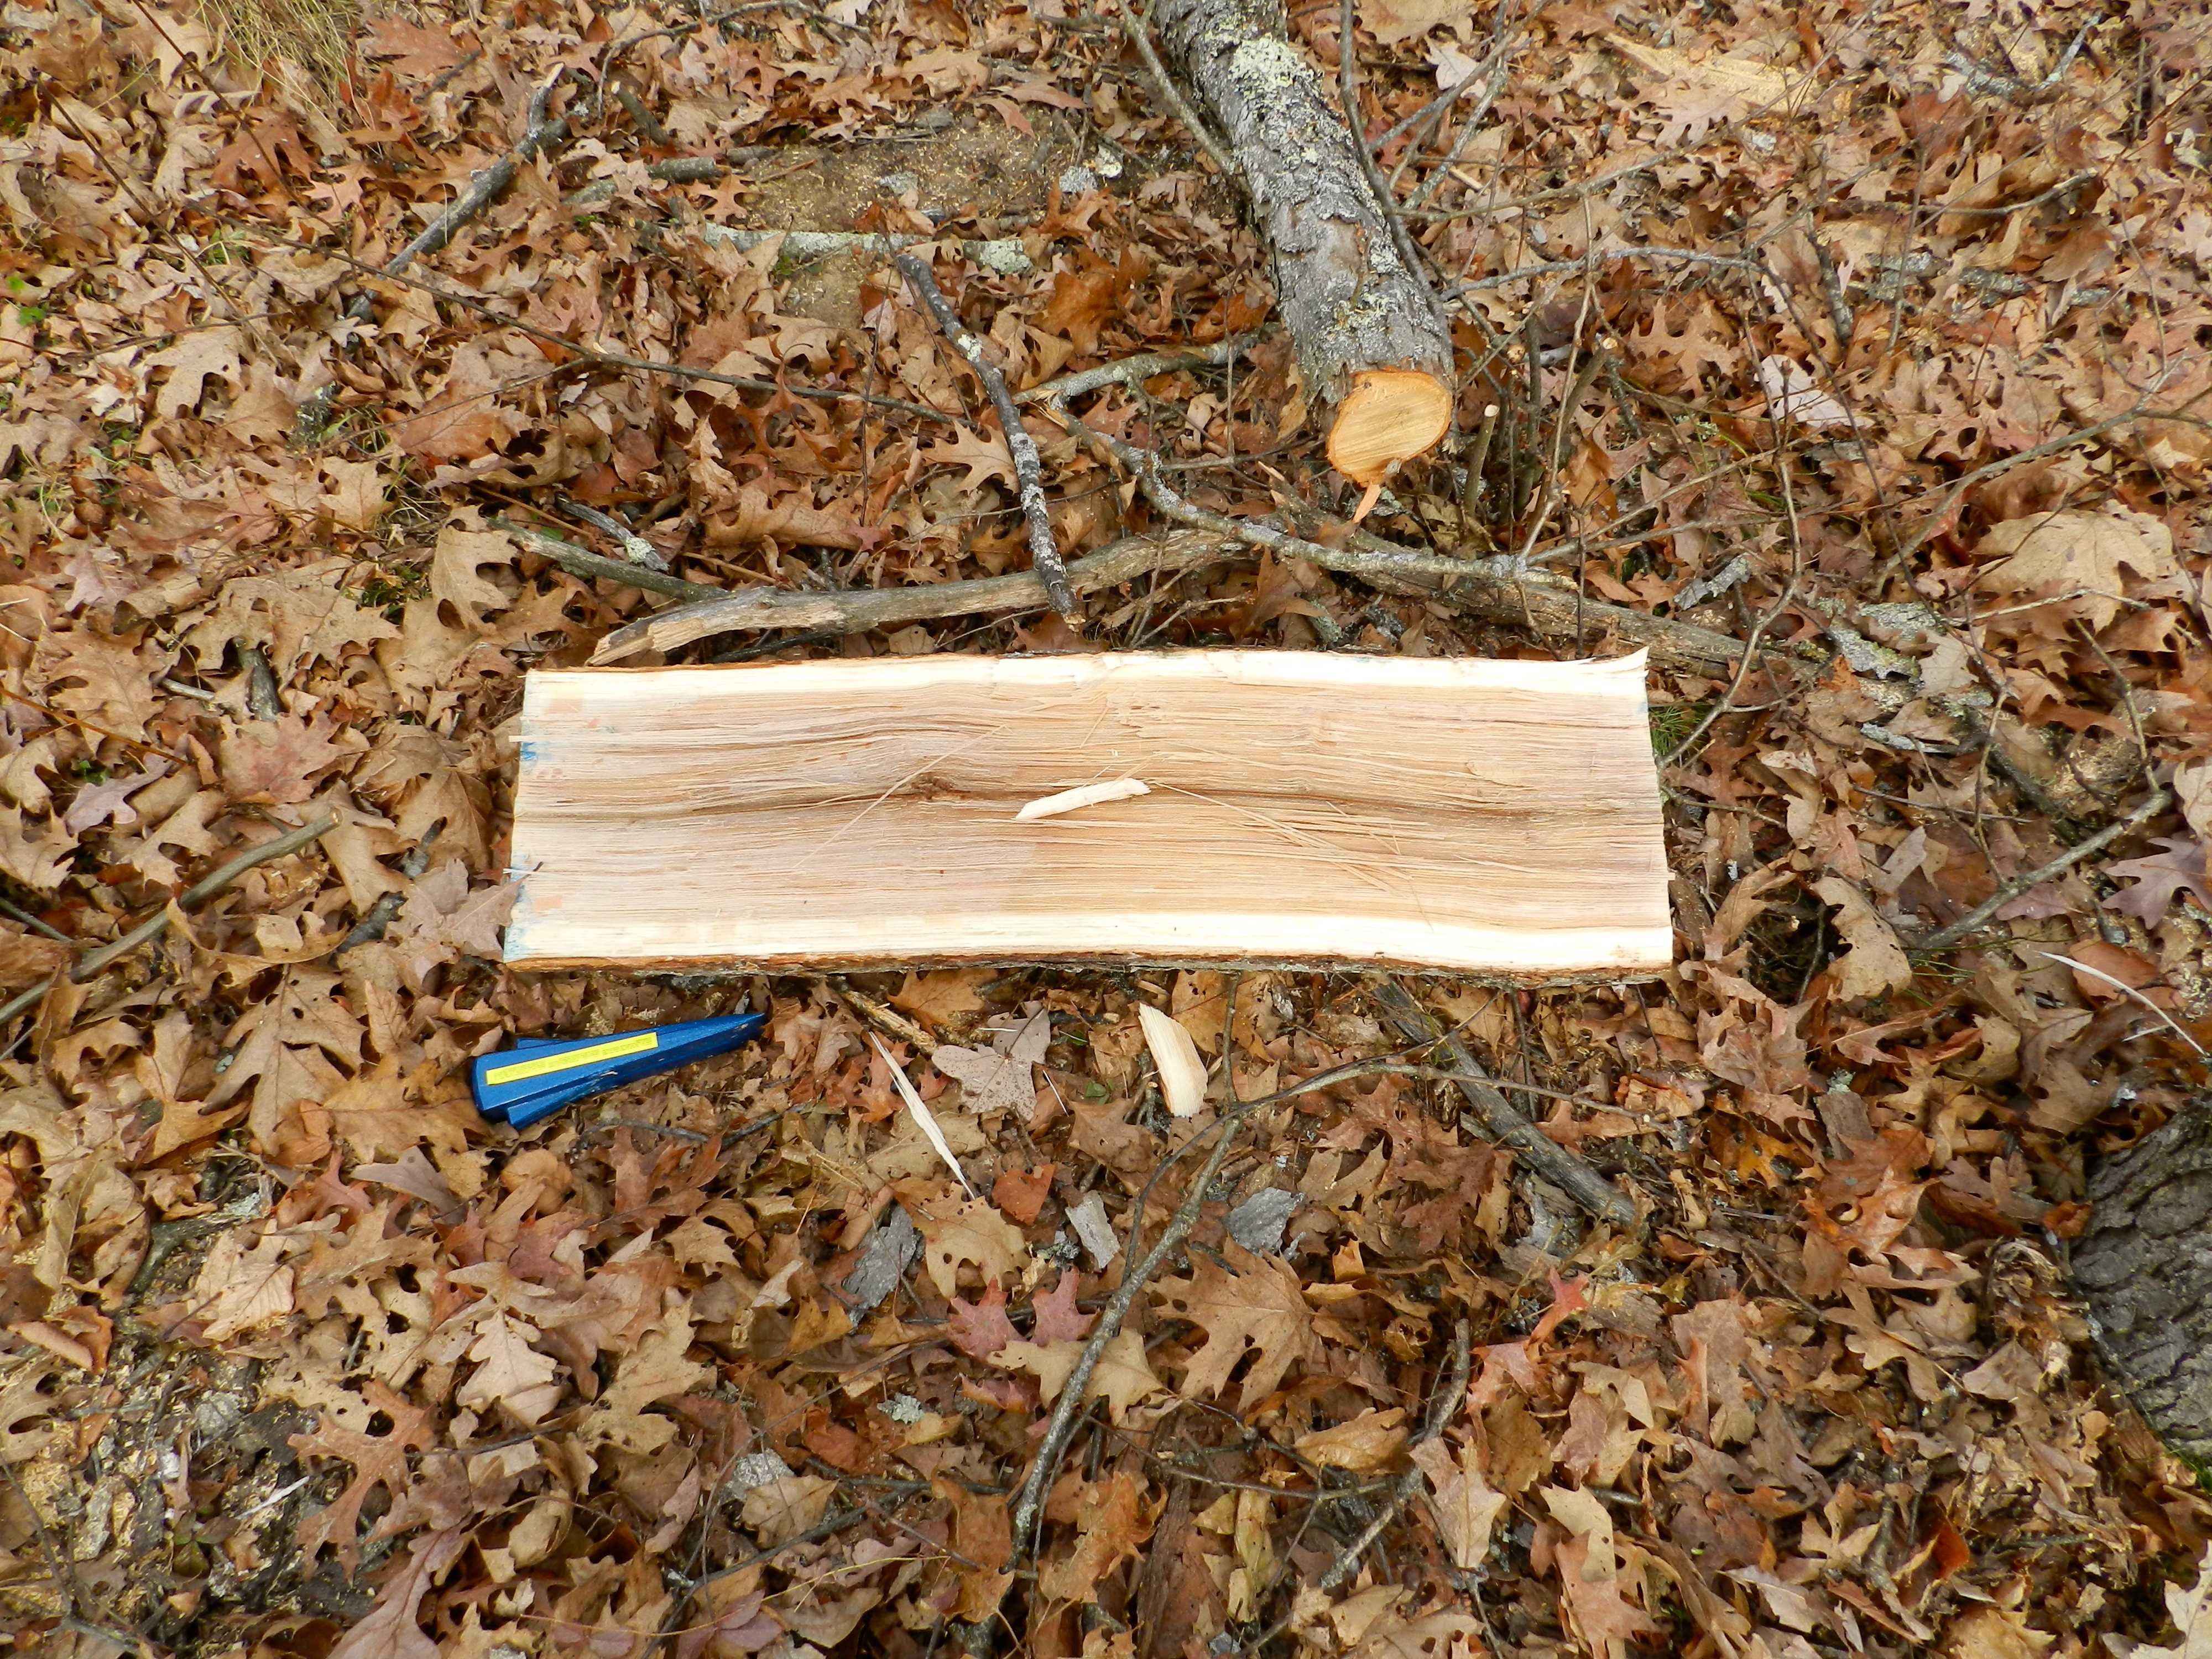
Log split in half. You can clearly see the heartwood and the sapwood
After letting the slabs sit for a few days, it was time to de-bark the logs. If you don’t have a dedicated de-barking spud you can use any tough metal roughly chisel shaped tool or ax. In this case I used a 16lb post hold digger as shown below.
De-barking the log on the right. A metal post hole digging bar makes a good impromptu barking spud.
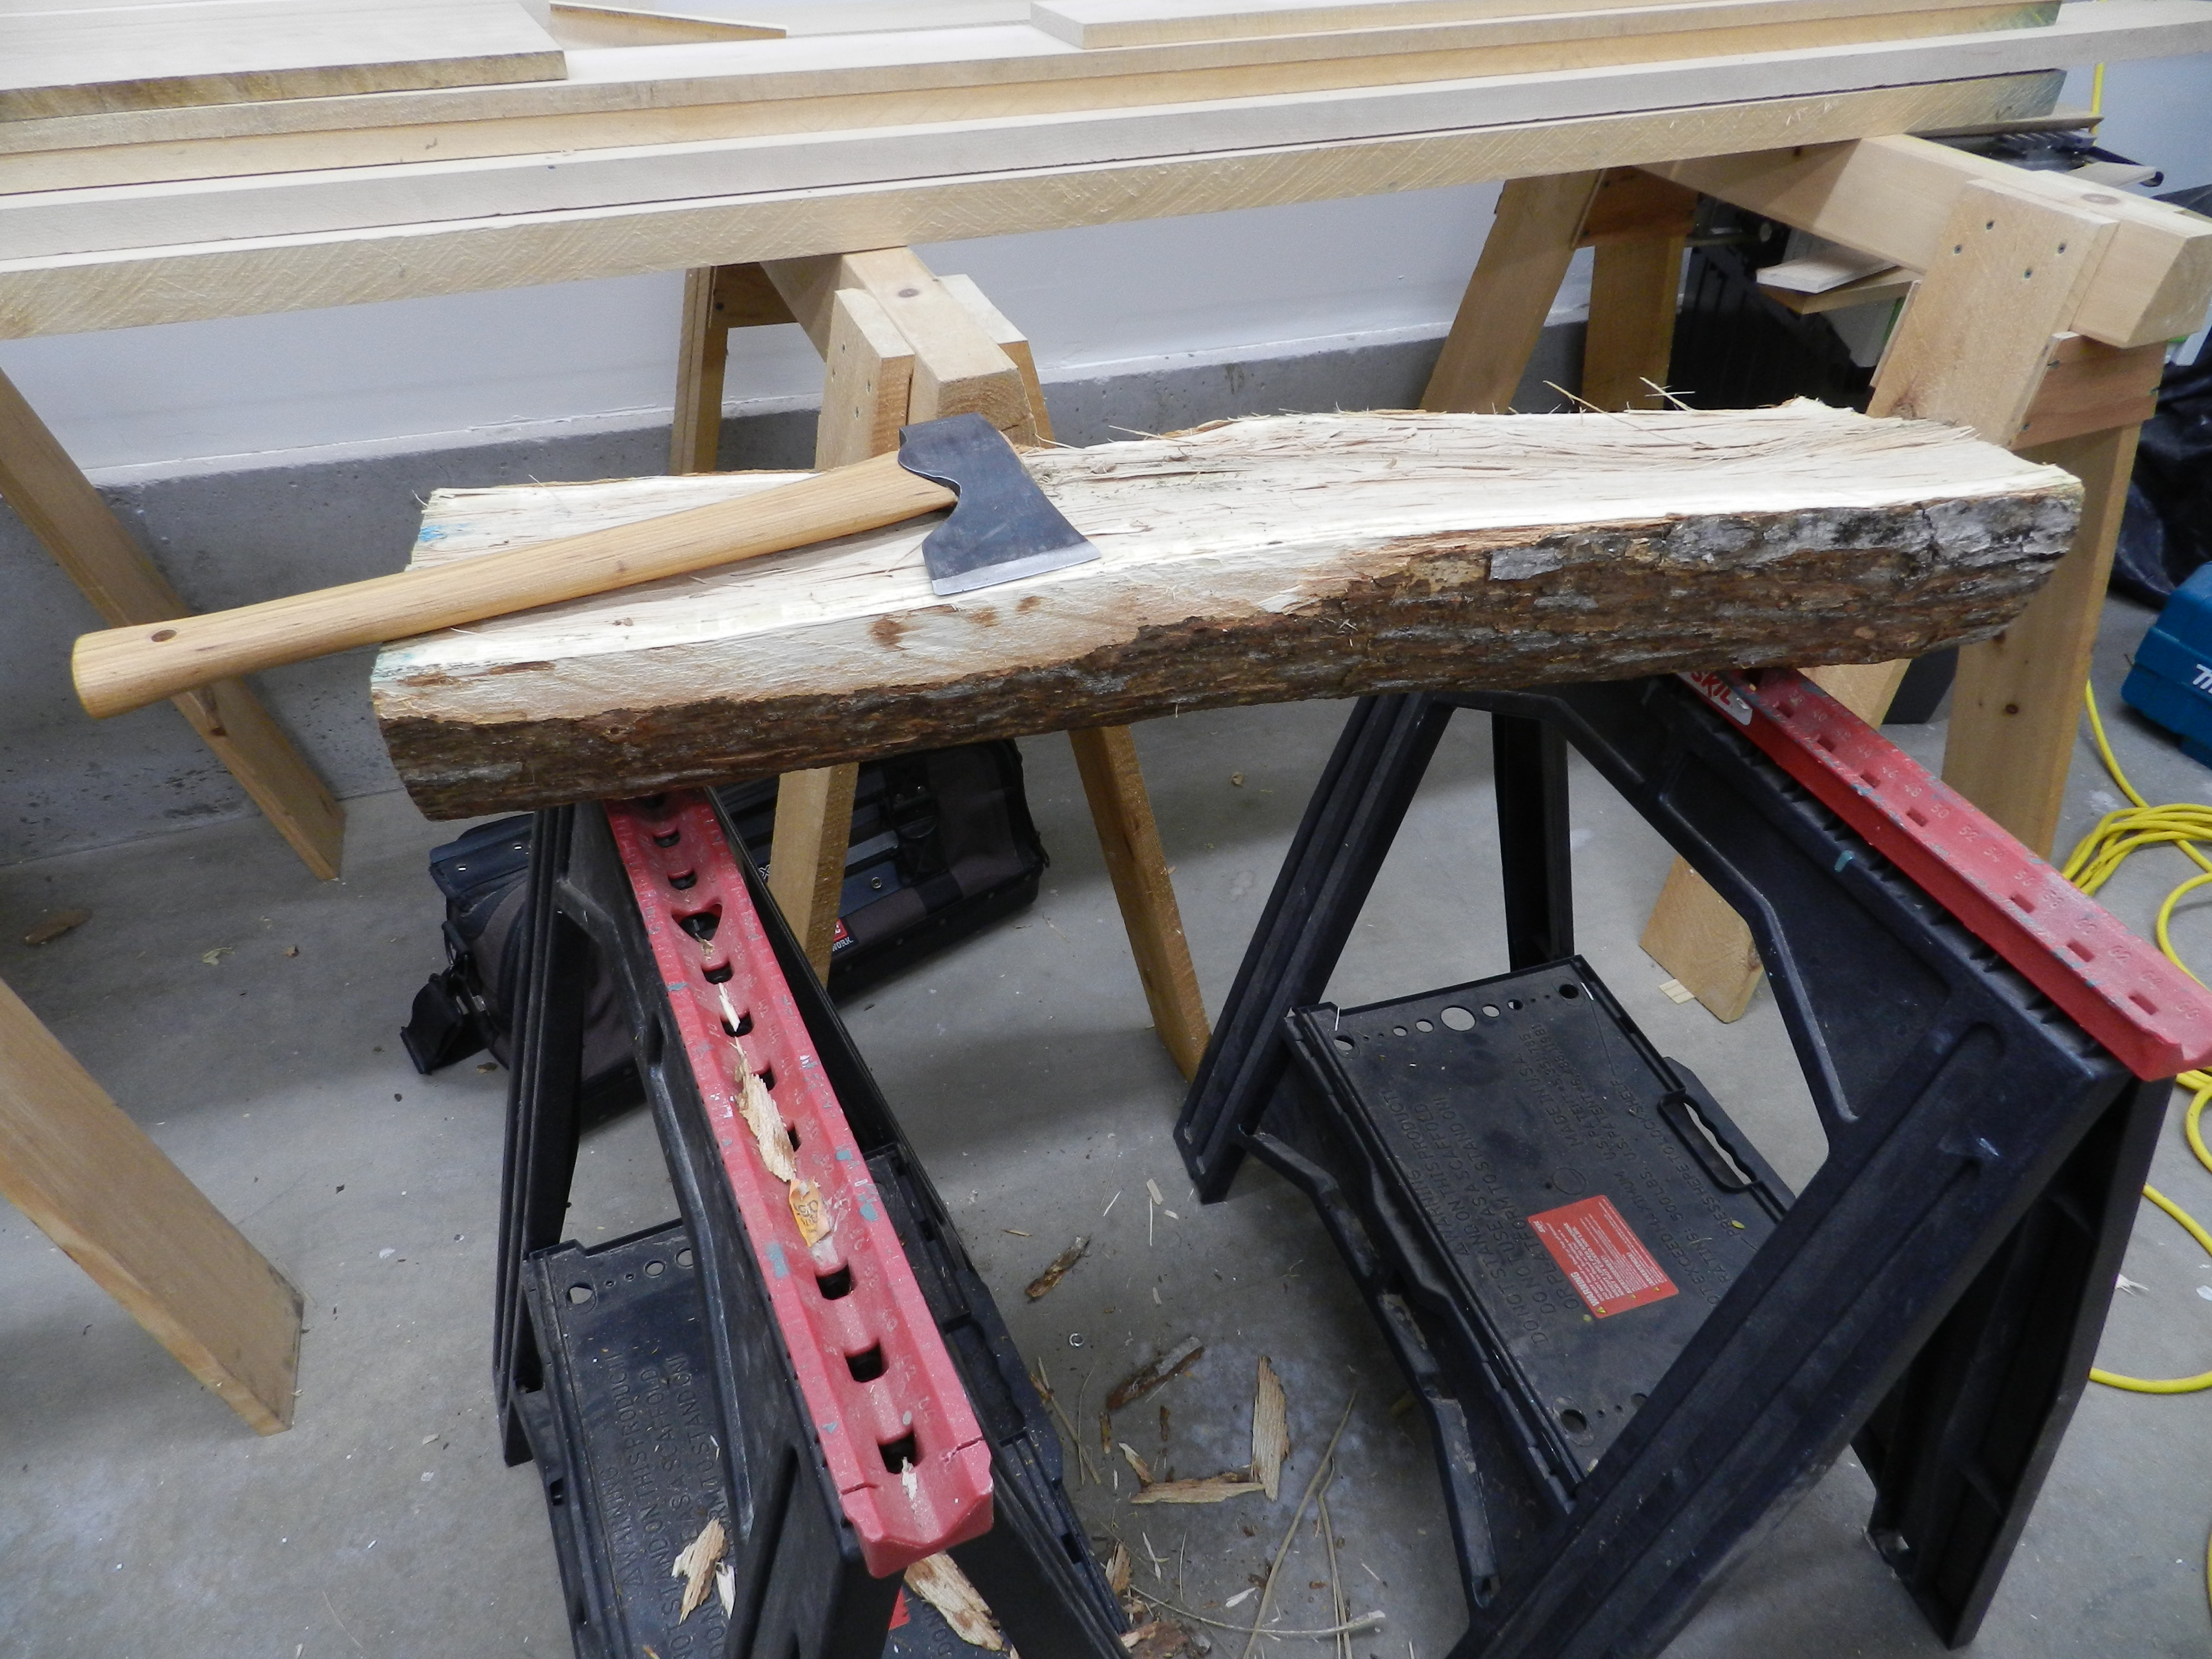
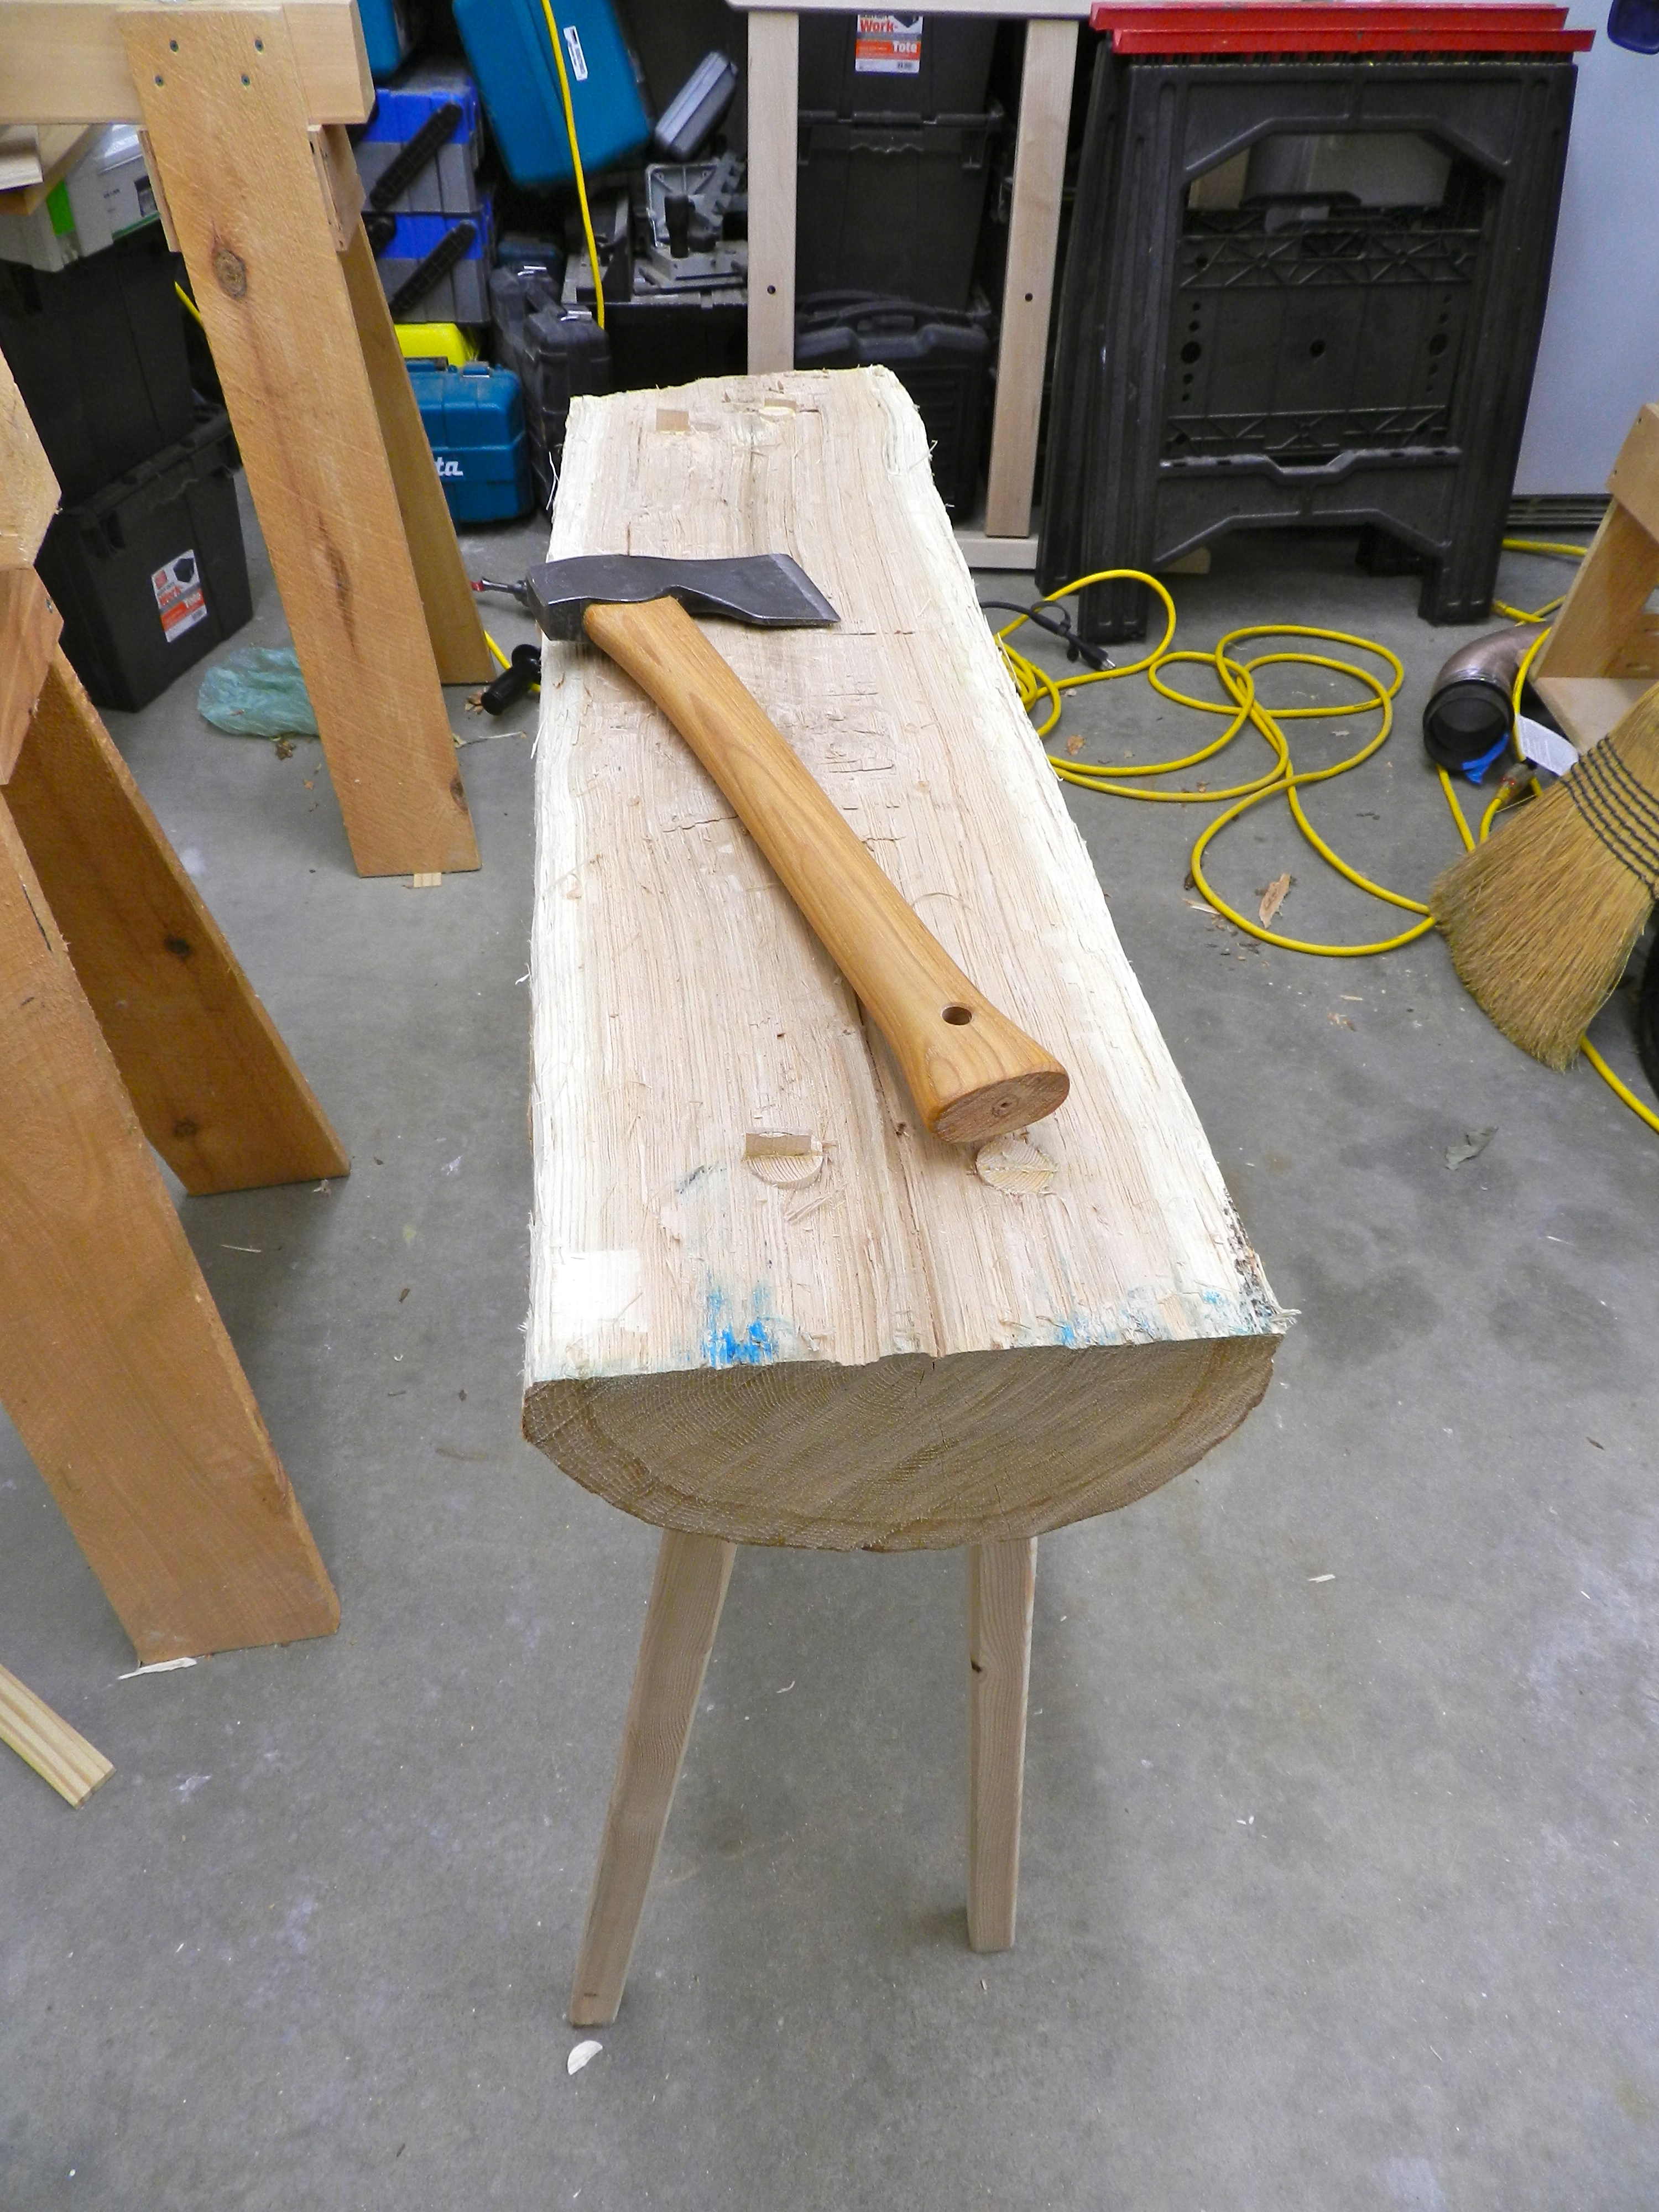
Back again in the shop I squared up the edges of the log with a hatchet. Being a green piece of wood this razor sharp ax made quick work of it.
Square up the edges with a hatchet
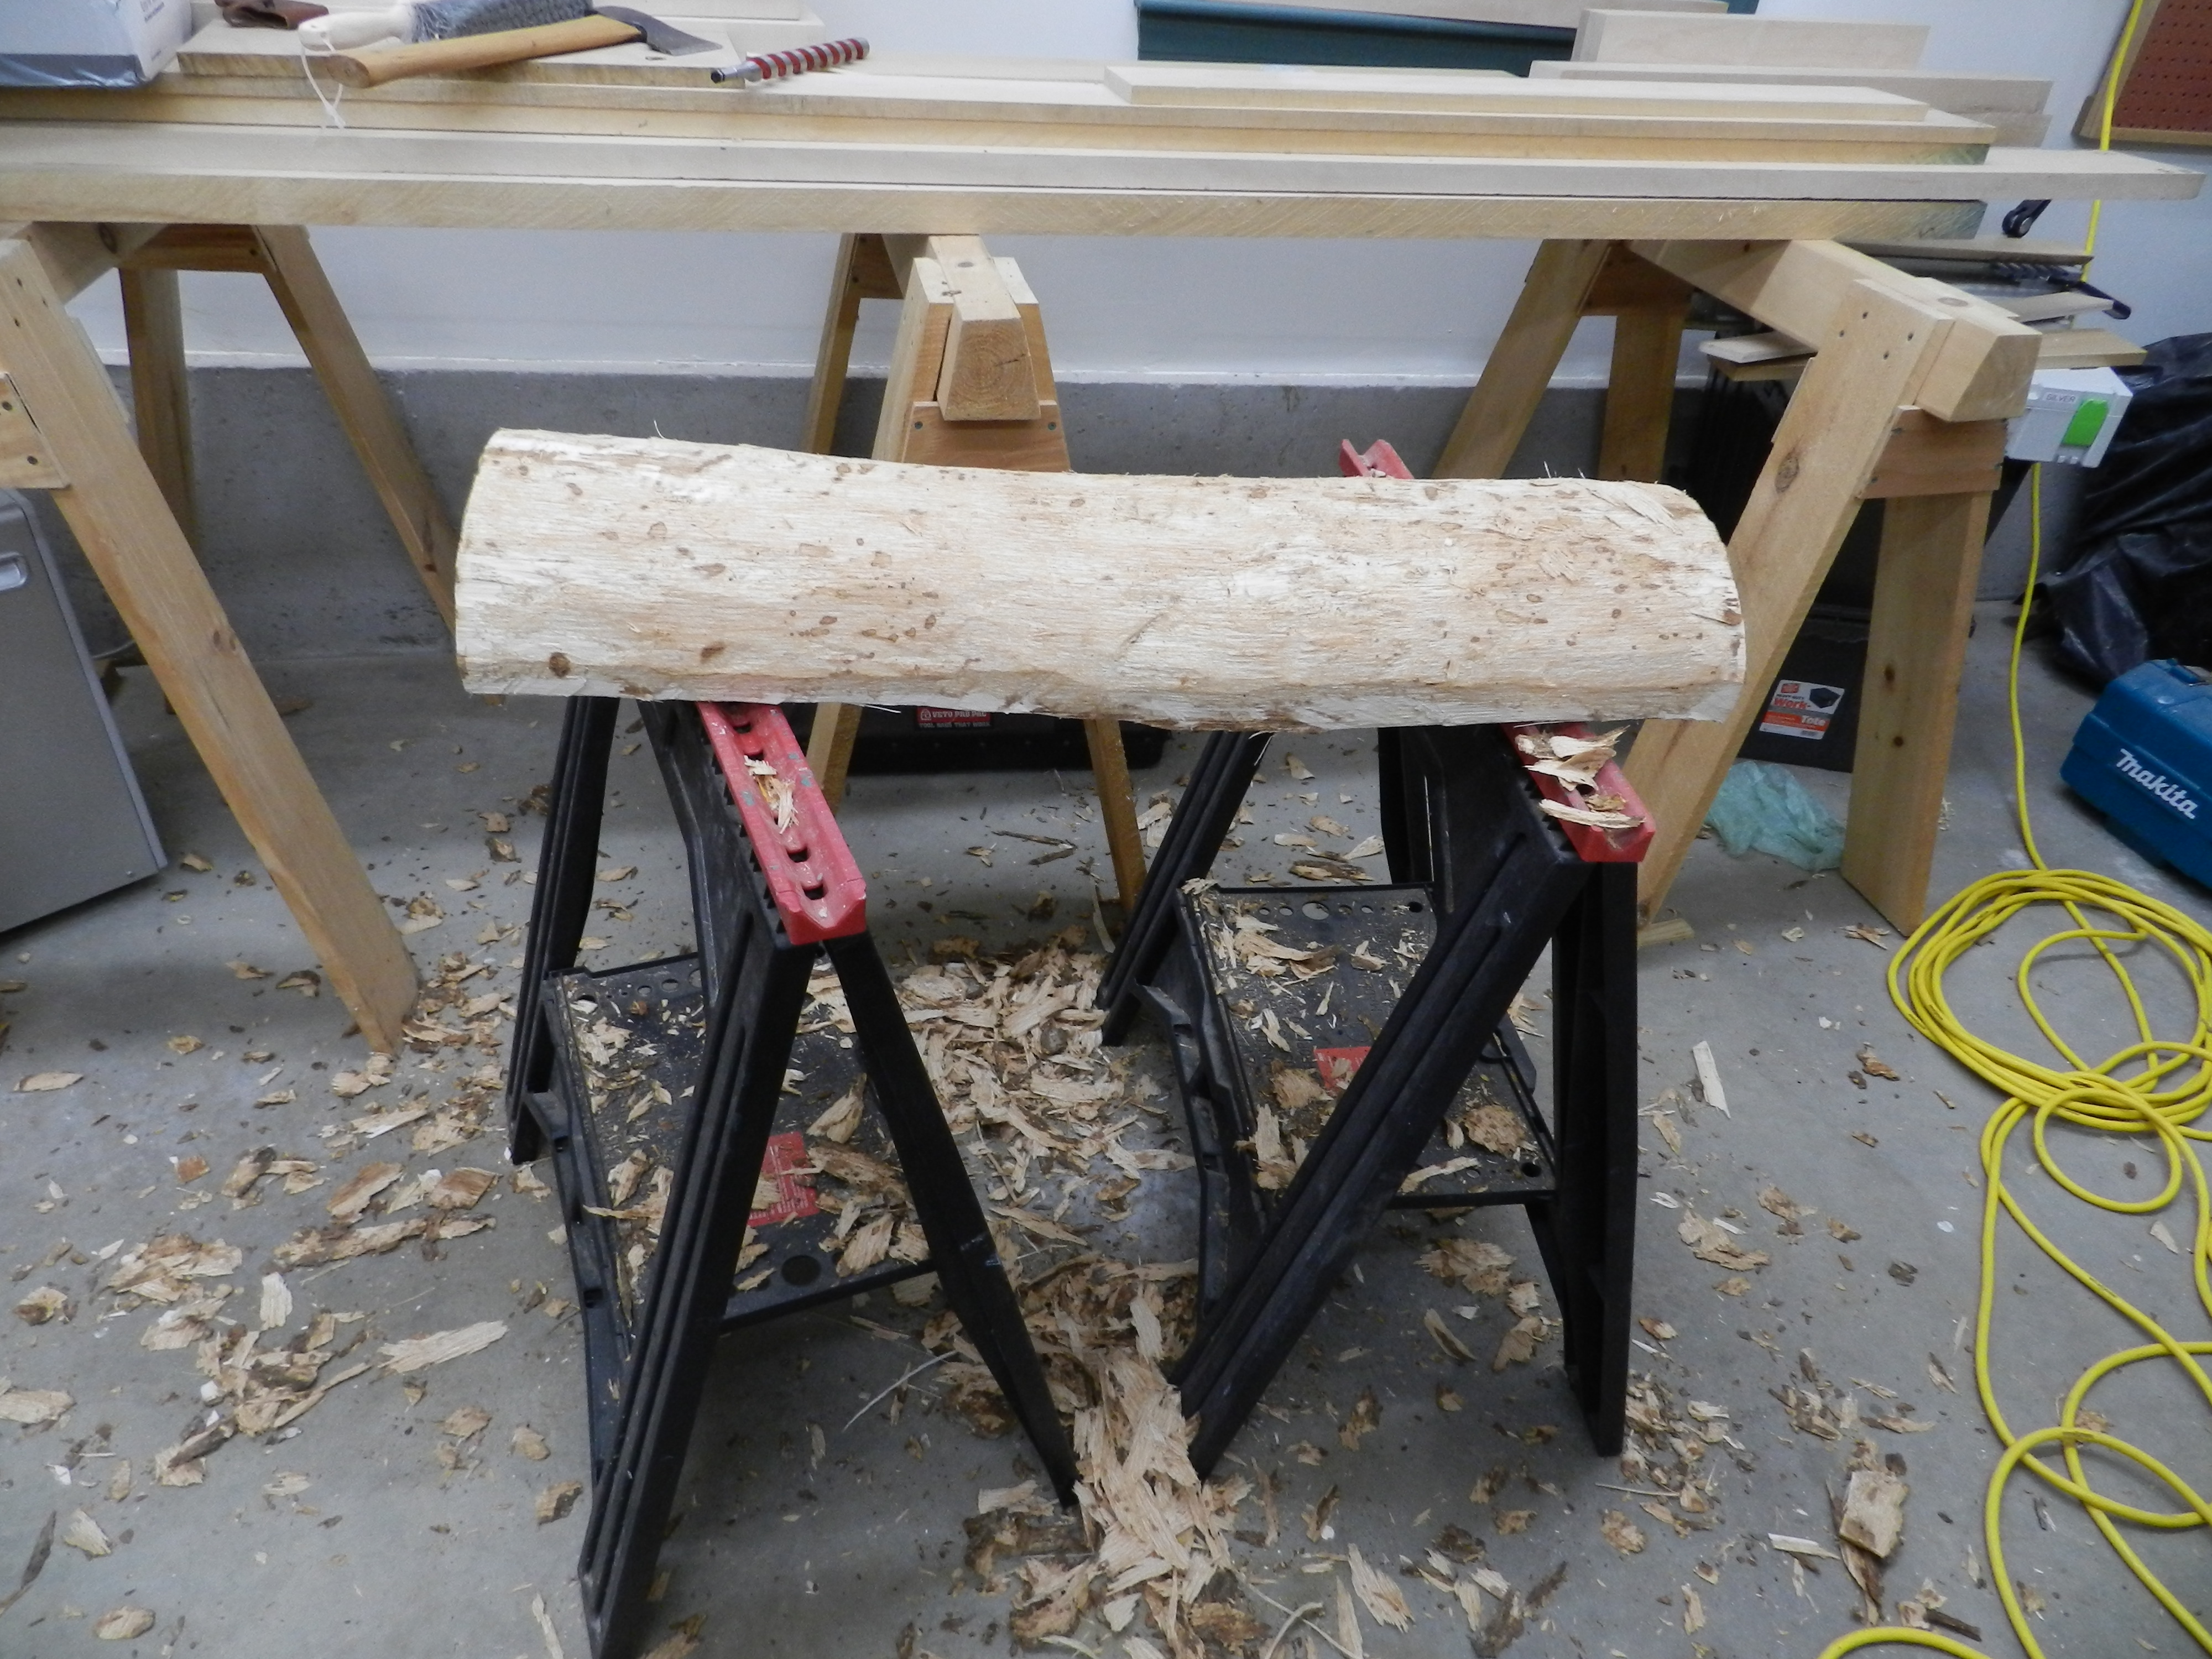
I flipped the log over and removed any remaining bark.
Remove any remaining bark with the hatchet
Now time for the legs…
Ideally you want to split out some 1.5 inch diameter legs. In my case it was snowing and I didn’t have suitable wood on hand to do that, plus the largest ship auger bit I had on hand was 1″. I ripped down some nice straight grained 2x3s I had on hand to 1 1/4″ by 30″ long. I put them on the lathe and turned down the top 6″ to 1″ diameter. I then used a block plane to chamfer the edges.
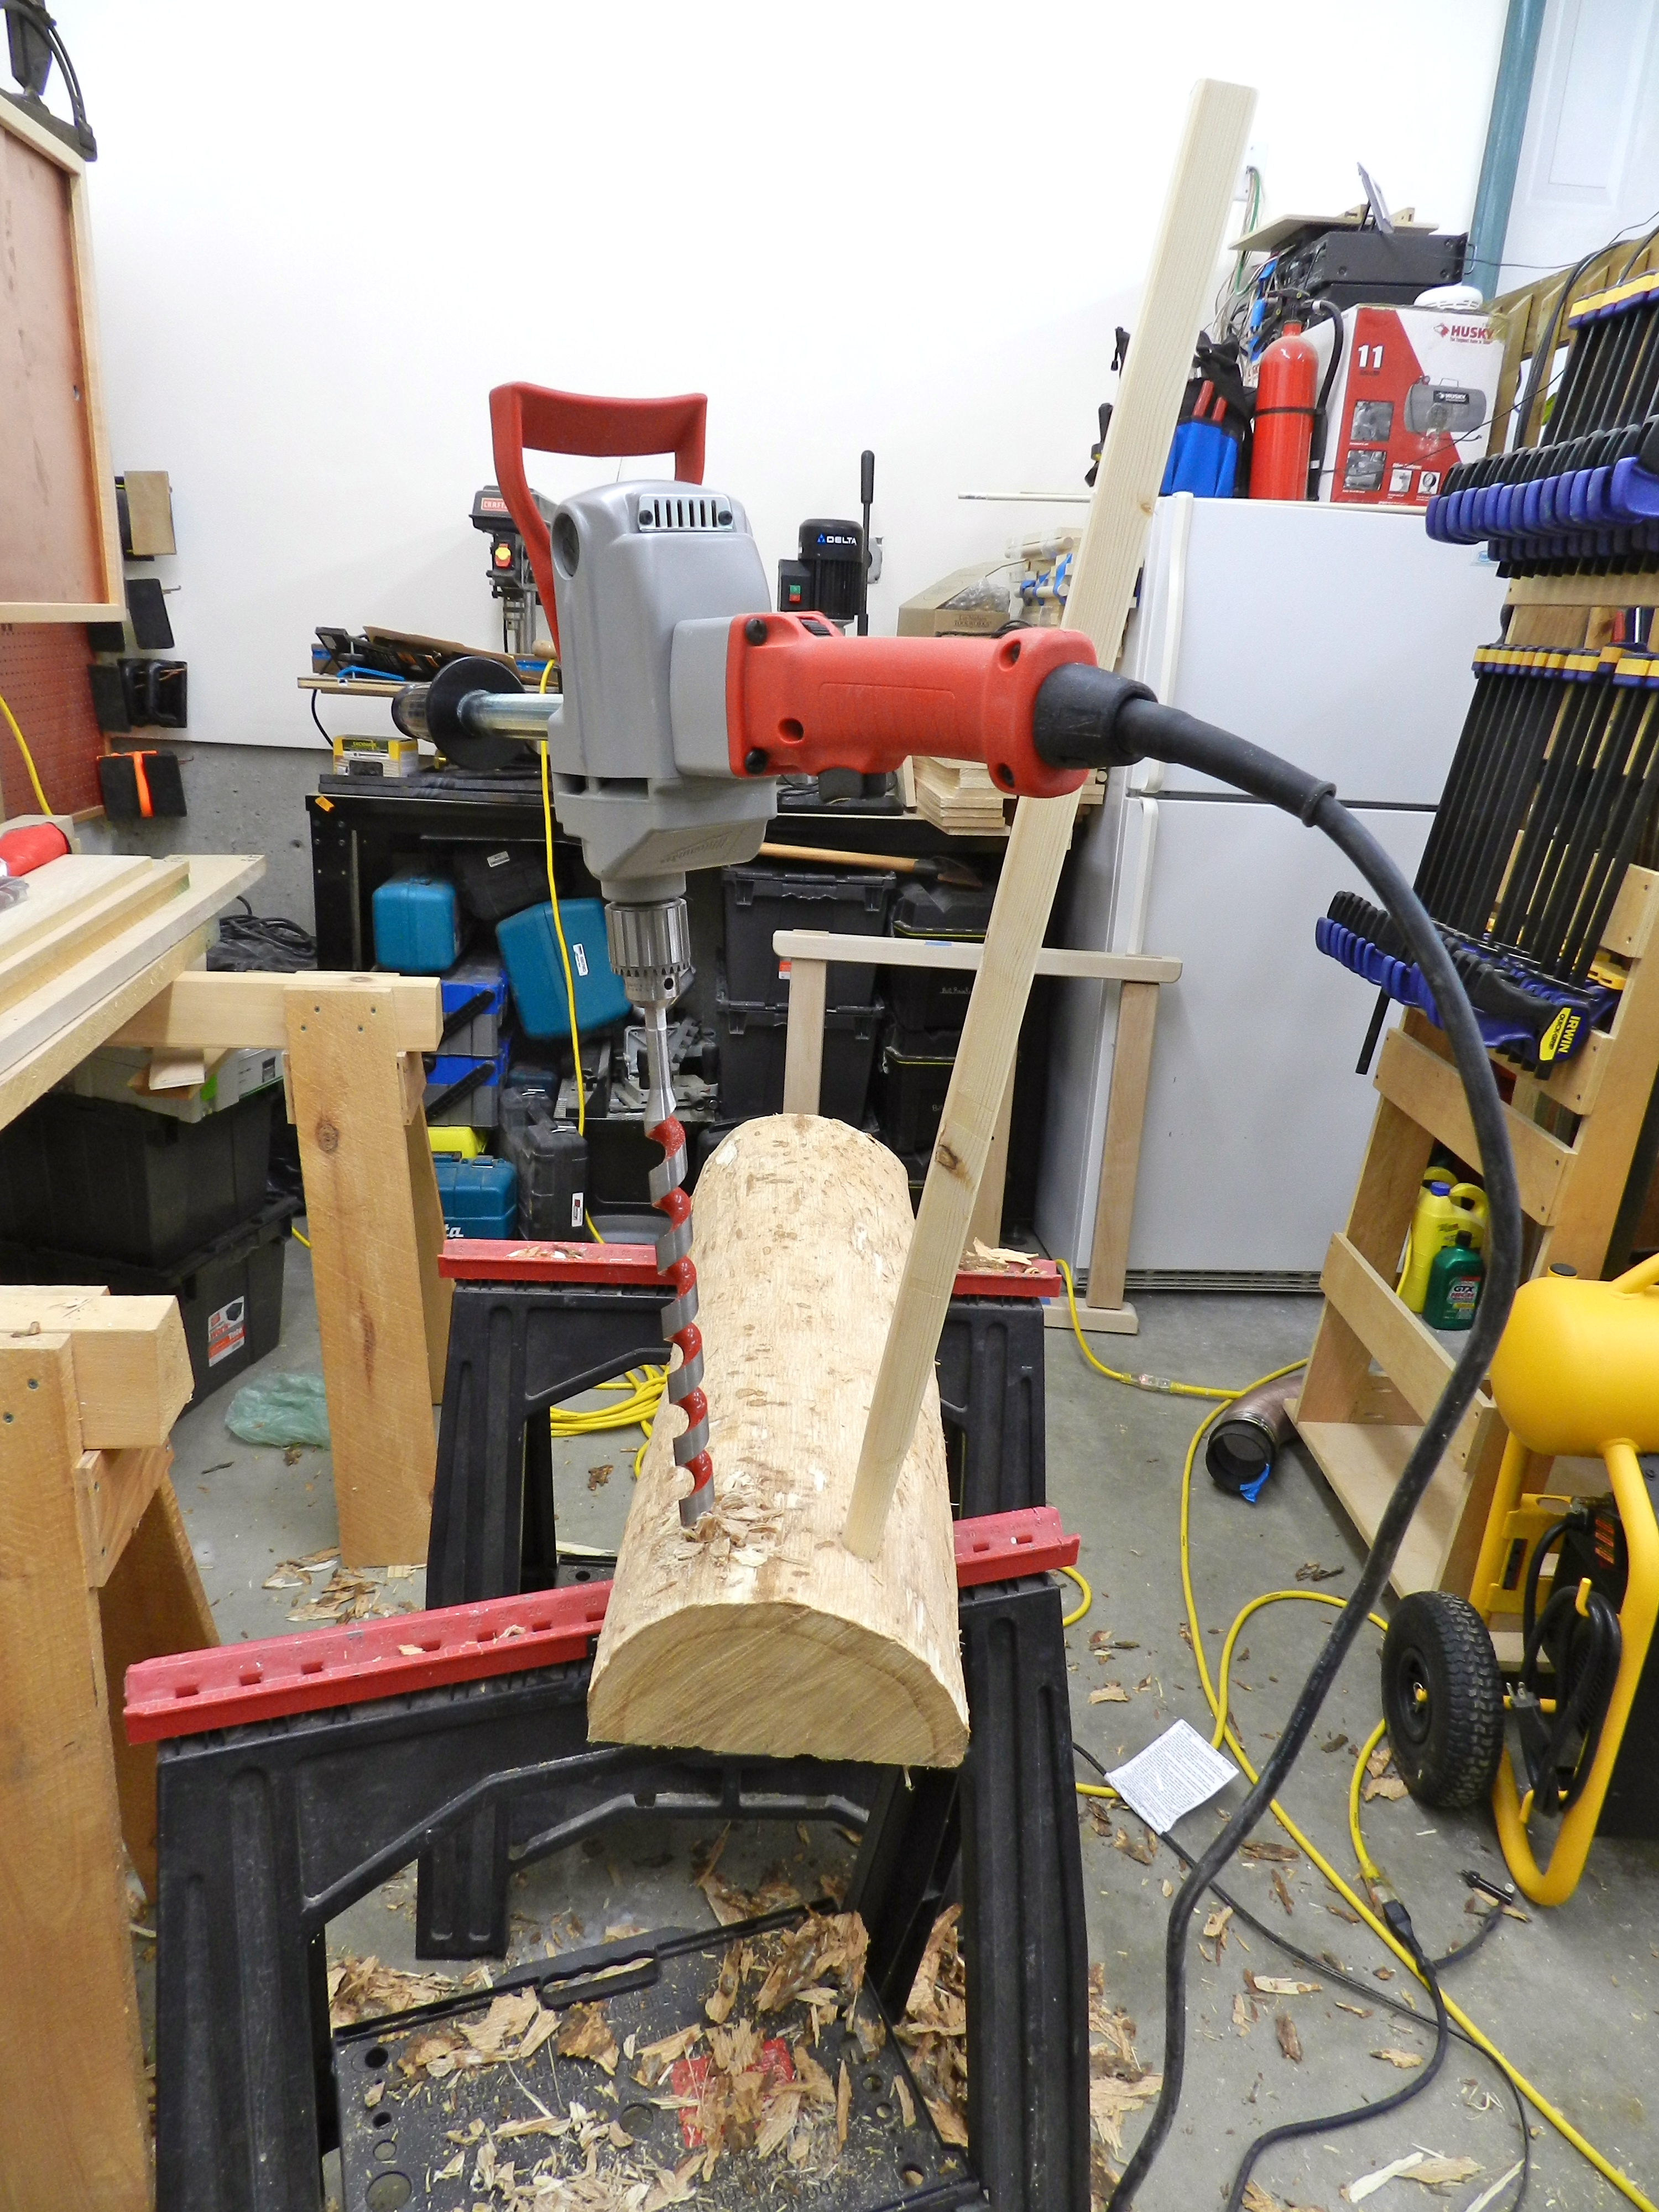
Split or rip some leg stock. Drill holes with an auger and set your legs
Using a ship auger bit I bored a through hole into the log to allow the legs to splay a bit in both directions. After you set the first leg you’ll want to visually reference that first leg when drilling the next leg. Repeat this process for all 4 legs. After test fitting you’ll want to cut a kerf in the end of each tenon and re-install the legs. Make sure those kerfs are perpendicular to the grain of the log so you don’t split it with the wedges. Then glue and wedge the tenons. If you have ever built a windsor chair, this is a cruder version of the same process you’d use to fit the legs and level the feet.
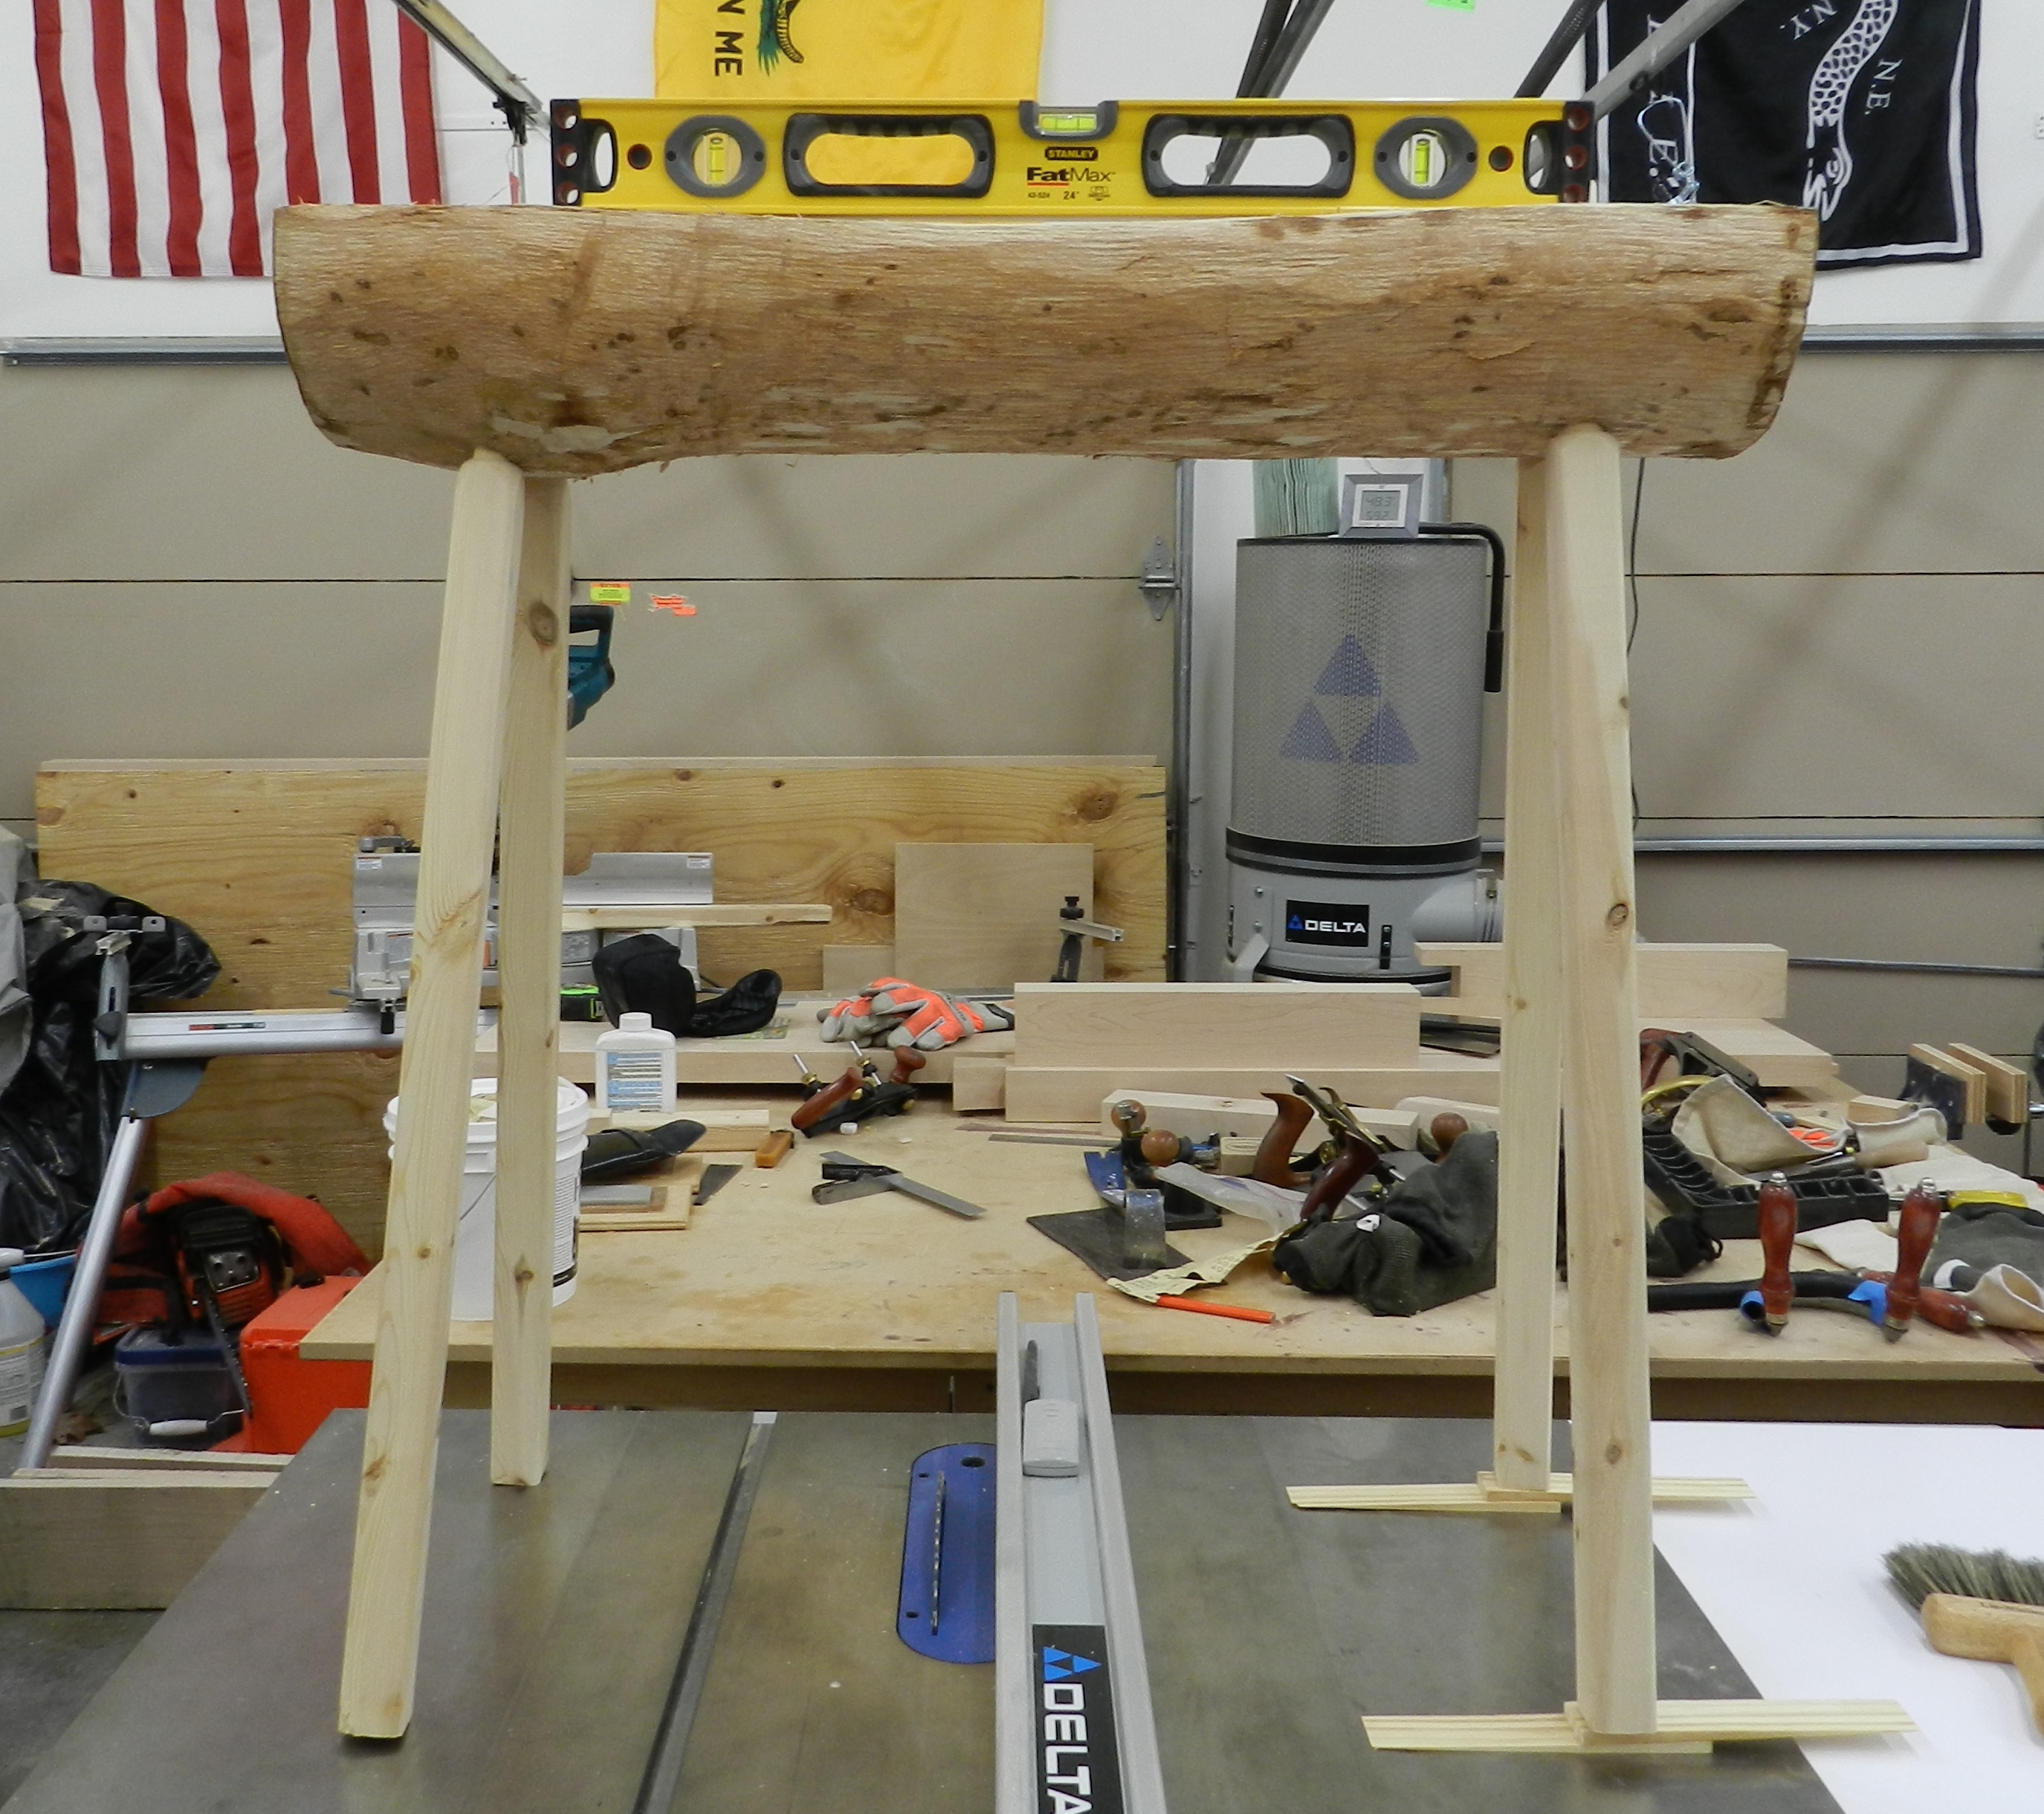
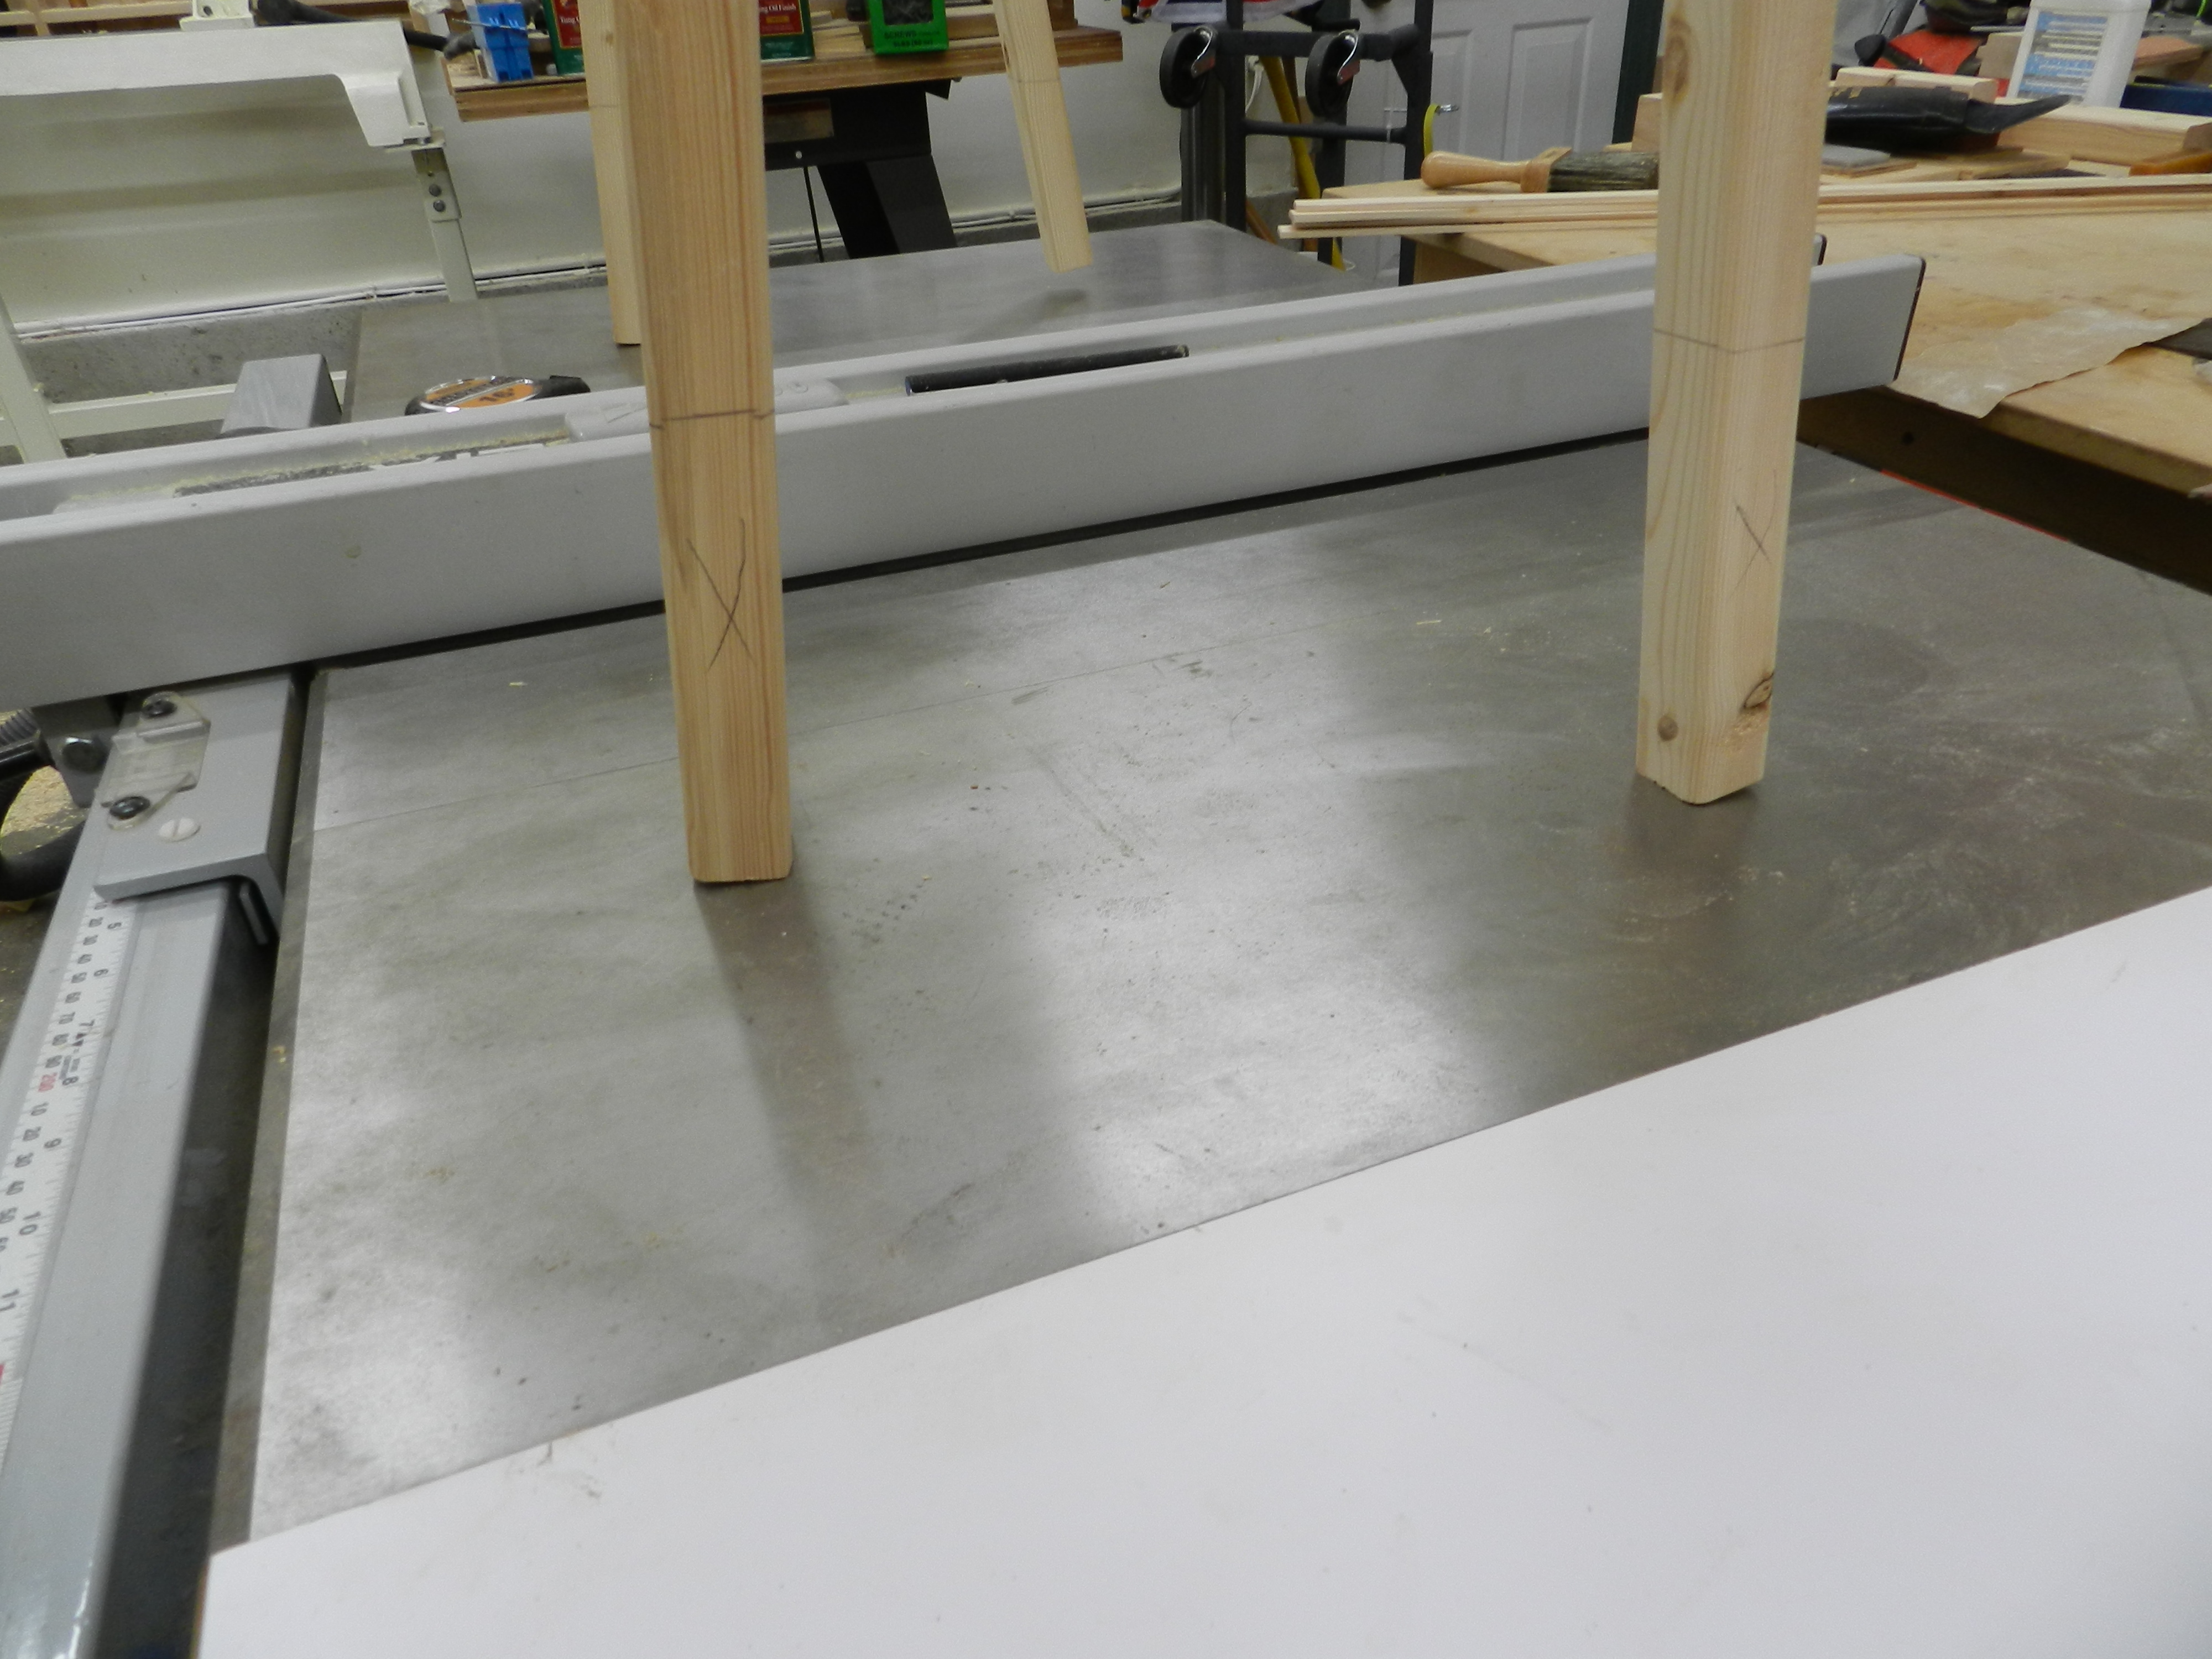
Test fit on a level surface like a table saw
With the legs installed I put the bench on a known level surface, in this case my table saw. Using a compass or similar tool mark higher up on the legs and cut them where you marked them. Then chamfer the ends of the feet and you’re almost done.
Mark what you want to remove to reduce the height and level the feet
Next I applied some end grain sealer (from Land Ark/Heritage Finishes) to reduce the likelihood of splitting in my heated shop. I also trimmed off the wedges and tenons.
Seal the end grain to reduce checking
Now the bench is read for use in the shop. This bench, with it’s delicate looking legs, can hold me standing on it, so it should have no problem handling my in shop hewing needs.
Trim the leg stumps and the wedges
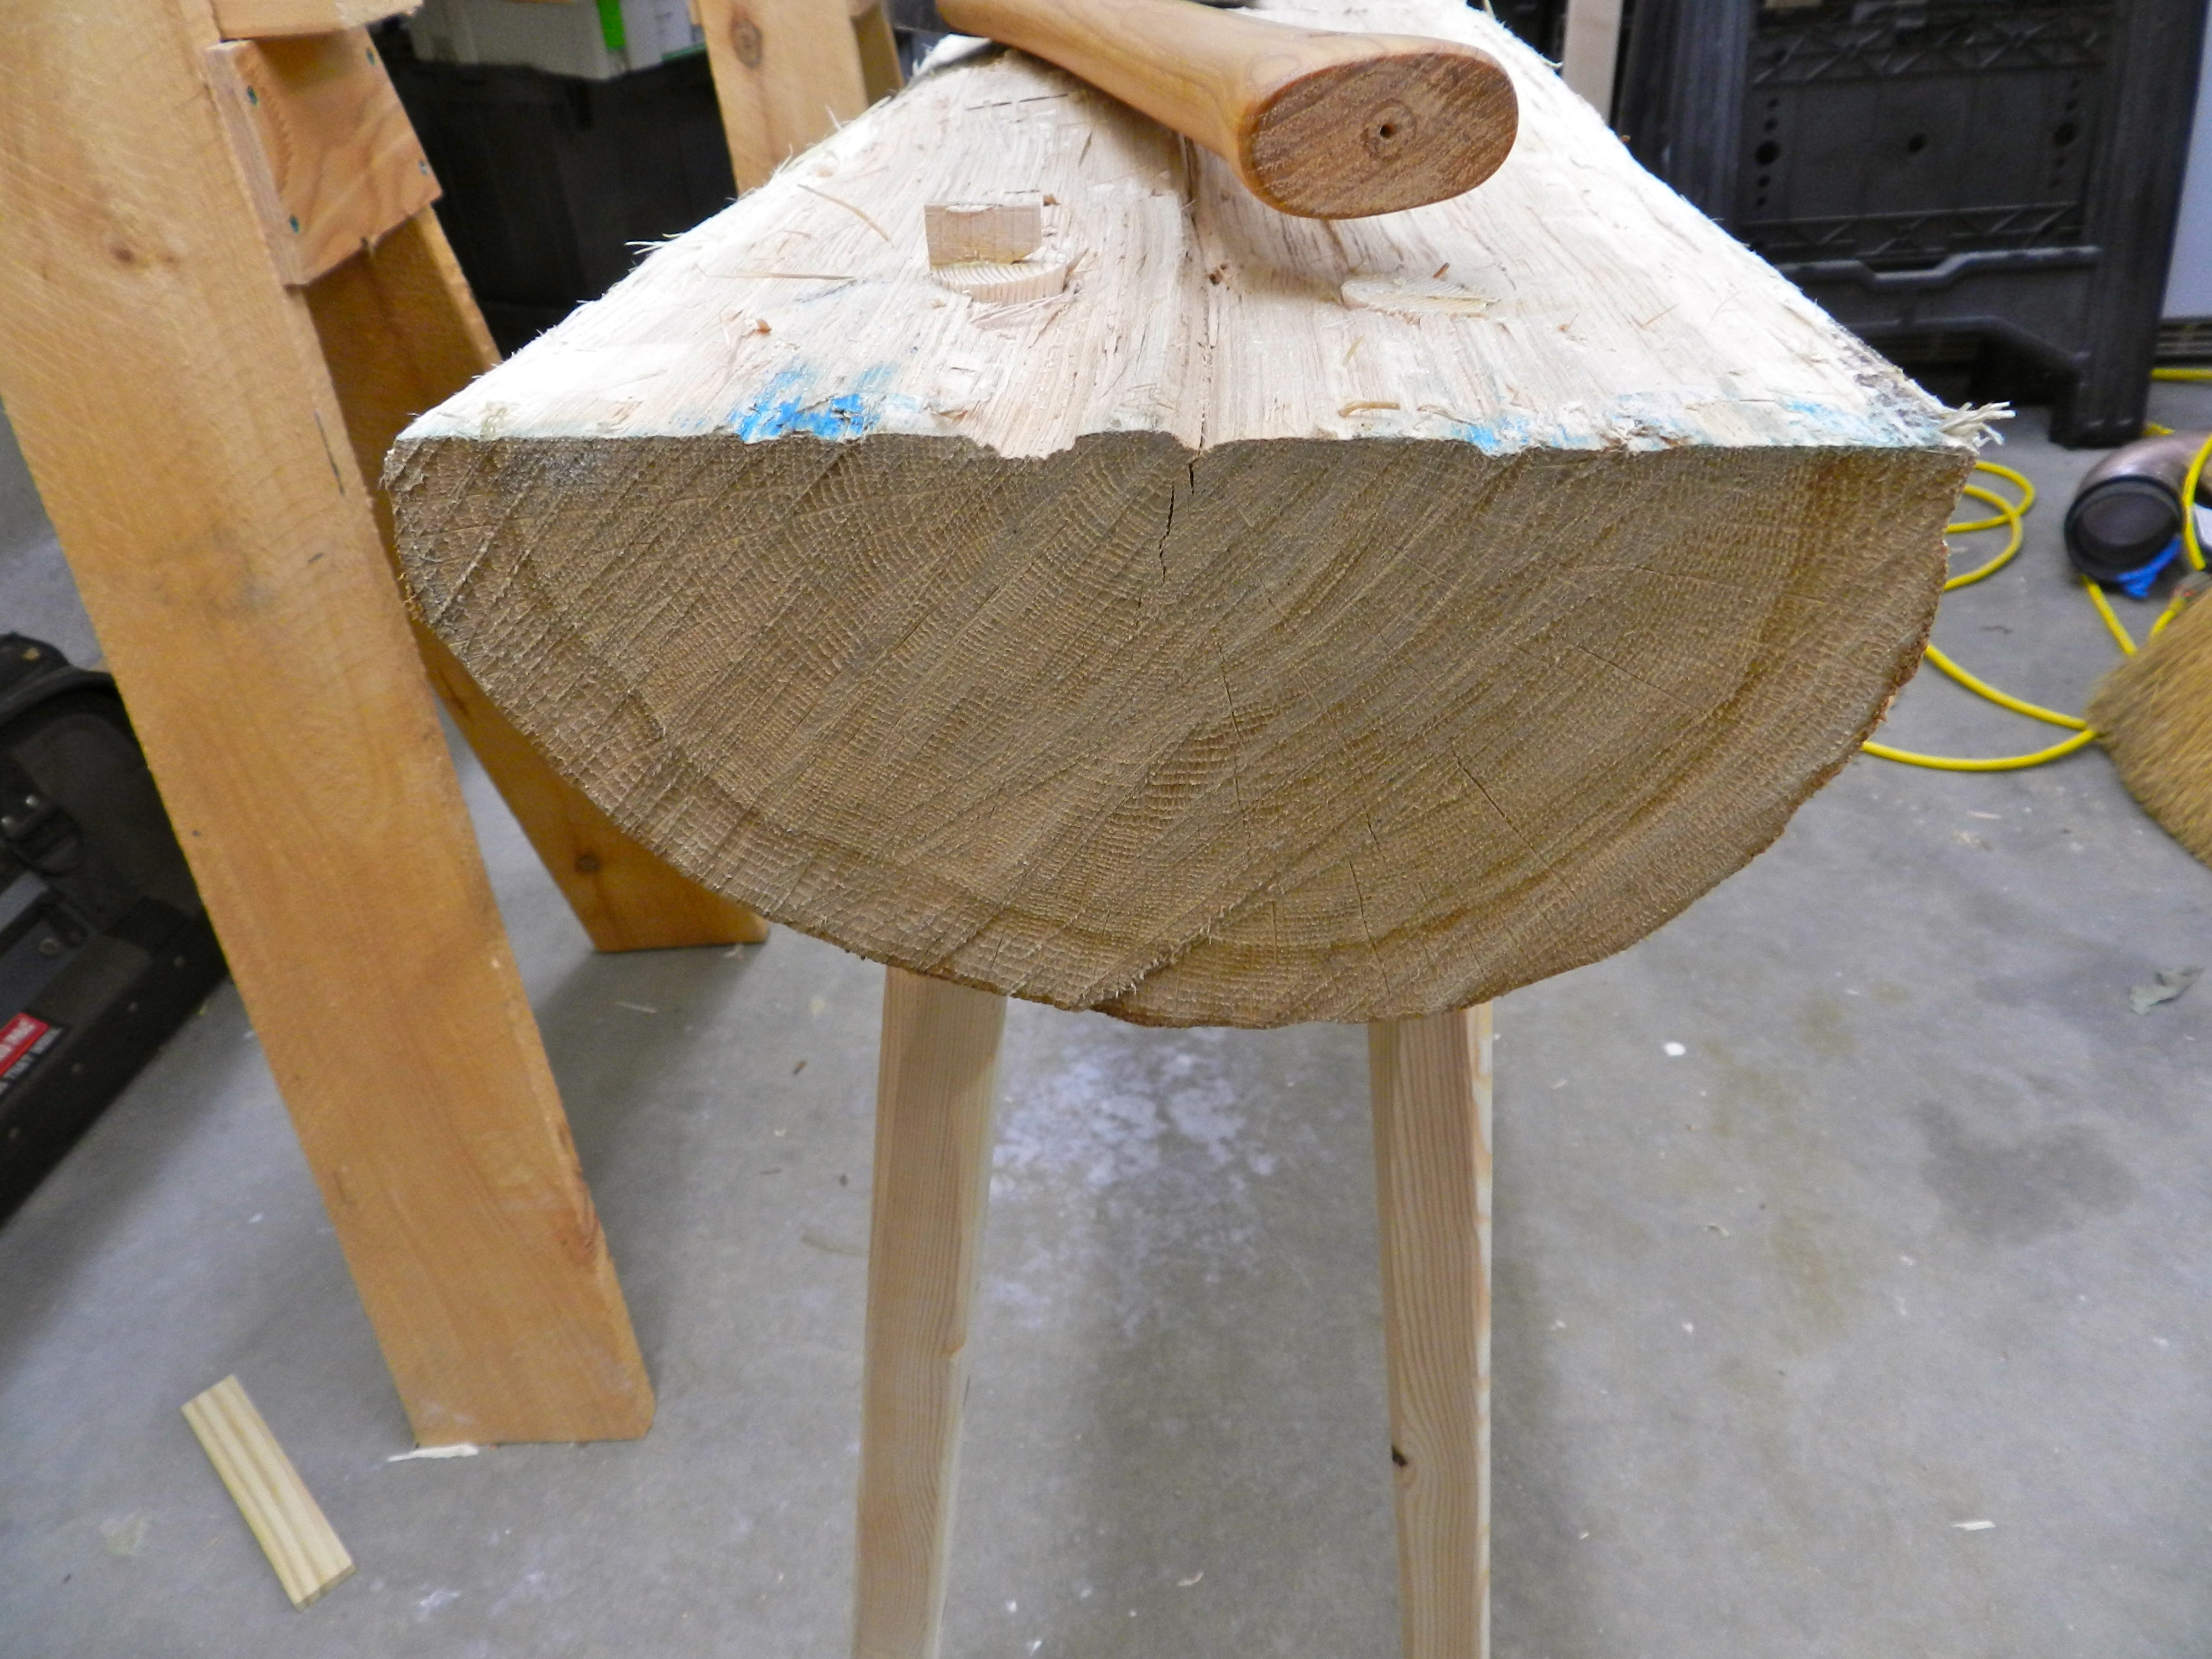
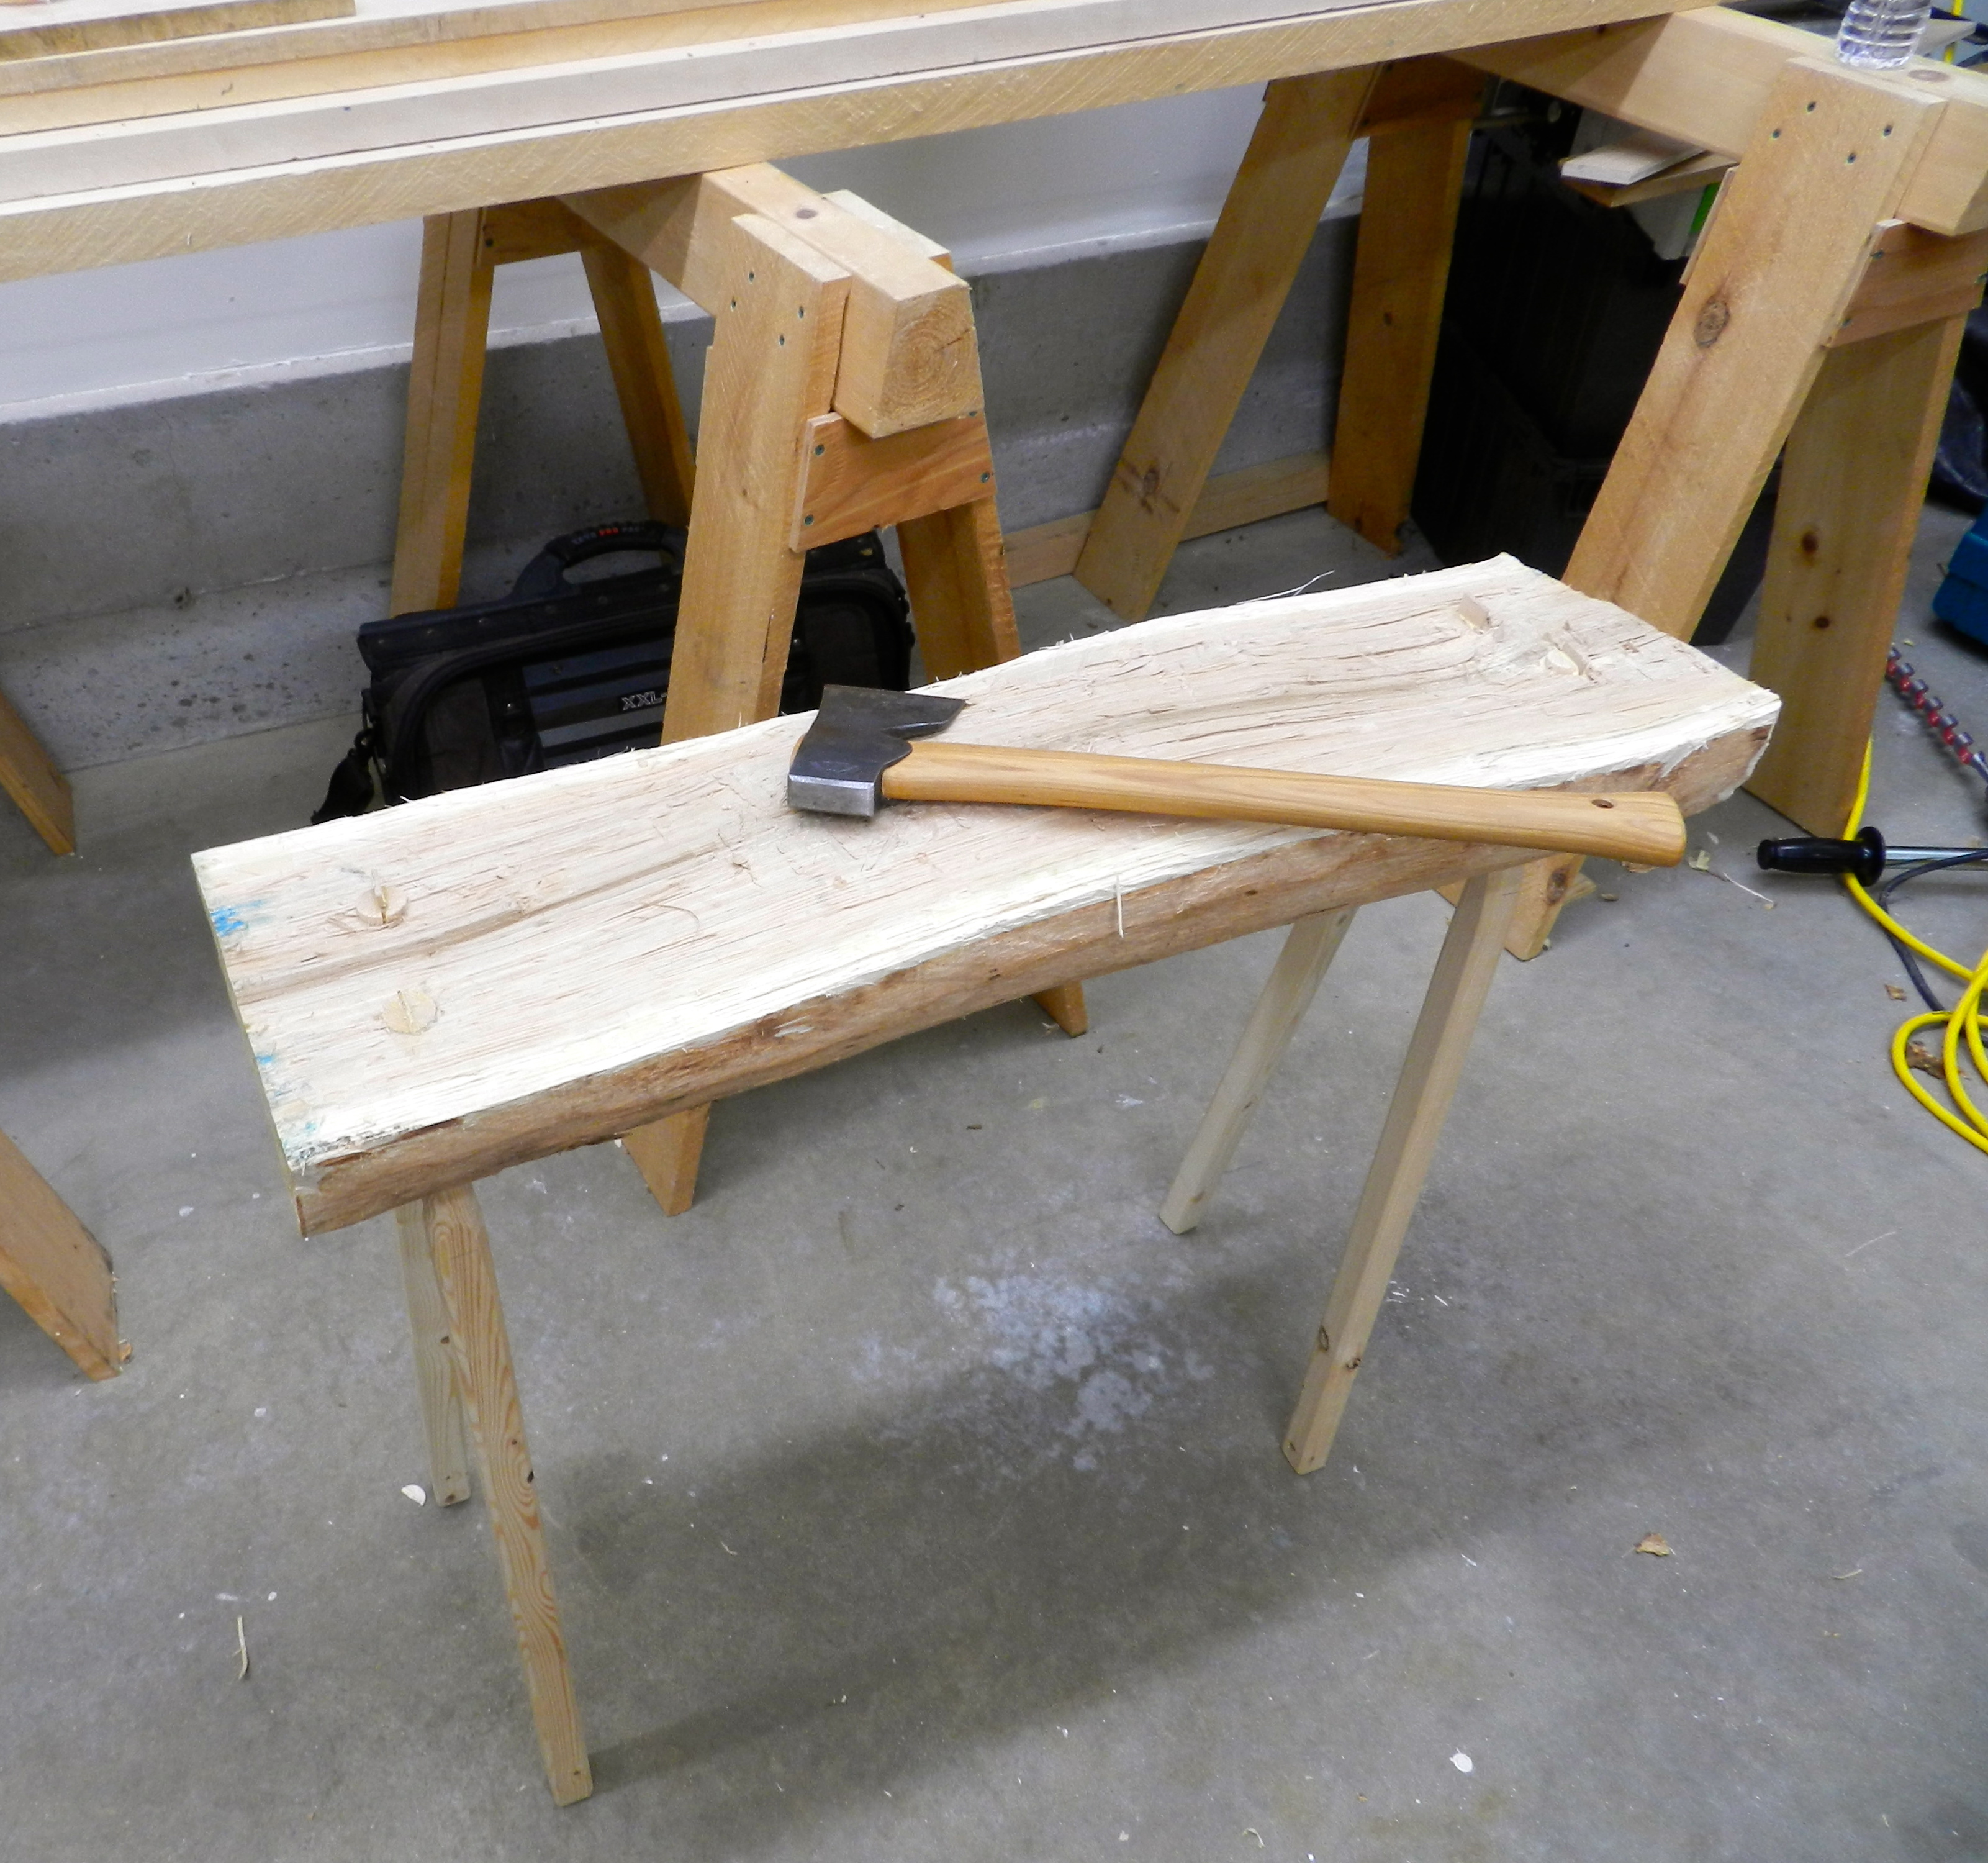
Shown here is a Gransfors Bruks hand made Swedish ax. This carpenter’s hatchet is my goto ax for small trimming work and is sharpened to the point of being able to shave with it. The poll (the other business end) of this ax is hardened and can be used like a hammer. The handle is carefully tapered to fit in the hand and without looking you know when your hand is at the end of the handle. The notch under the bit allows you to use this ax much like a large chisel or plane and can yield impressive results. I used this to quickly level bits of the bench surface.
Enjoy your new hewing bench
For short cash, a few tools and an afternoon in the shop this project is well worth the effort.
We recently posted on some square rule Timber Framing work. As a contrast, today we’ll take a look at an earlier form of timber framing known as ‘Scribe Rule’. In contrast to ‘Square Rule’ timber framing with interchangeable parts, pieces of a scribe rule timber frame are each scribed to one another — so each piece can only be used in a single location.
NBSS Sign in front of reconstructed floor system
Back in 2009 as part of a North Bennet Street School Project at Brookwood Farm we worked on restoring the timber frame for a 2 bay English Style barn that was thought to be the oldest such barn in New England. Against the odds, the dendrochronology results were inconclusive which was disappointing, but based on what we can tell from what was left of the barn, even if it’s not the oldest it was/is still a notable barn both for some of the old world design and techniques used in its original construction.
The barn was found when a parks employee ran into the side of this barn (which was attached via ells to several other barns at Brookwood farm) with a tractor and uncovered posts that looked hand hewn. From there the school was eventually called in, and after careful evaluation and research by Steve O’Shaughnessy, Rich Friberg and others that this barn was indeed a rare bird and worth preserving. The class of 2009 and 2010 carefully dismantled the barn, cataloged the pieces and loaded it into a tractor trailer that now resides at the school (at the time of this writing). In or around May 2012 the restored/repaired frame should be raised again — I hope to post more on that if I am present for the barn raising.
The sills and floor structure of the barn were severely rotted, missing or replaced by the time we got to the barn, so in order to repair the barn we needed to start at the bottom and work our way up. This started with hand hewing new sills from oak.
Bill notching in on the side of a timber.
After juggling off the sides with the felling ax, we moved on to the hewing axe, the use of which could best be described as halfway between an ax and a chisel. It also makes for a great workout routine — but remember to let the ax head do the work — trying to swing as hard as you can reduces your accuracy and just wears you out faster — believe me the oak knows how tough it is.
Bill hewing the log into a square timber
After doing a lot of square rule work with timbers from a saw mill, we all had new appreciation for how much work went into many of our historical structures in terms of manual labor. Once we had the sills ready to go the next step was to join them together using scribe rule techniques. Scribing is an intricate process which will get you handy with your plumb bob, level and scribes real fast. You’ll also learn the term ‘bump and die’ meaning if you bump into my carefully placed timber as I am trying to scribe it, I will kill you. 🙂 Death threats aside it can be a very interesting and rewarding process. This technique is especially well suited for folks working with hand hewn timbers which can often be warped, bowed, tapering, etc. and one can see how it worked well during the times when hand hewn timber was the only option available.
Completed floor system
Once the flooring system was complete the next step was repairing/replacing the large oak gun-stock posts.
Lee working on hewing a gunstock post from oak
With our work done, the next year’s class took over and continue to work on the various pieces of this barn back in the trailer at the school.
Below is a slide show outlining in more detail the process:
This slideshow requires JavaScript.
A Joiner's Guide To Traditional Woodworking and Preservation