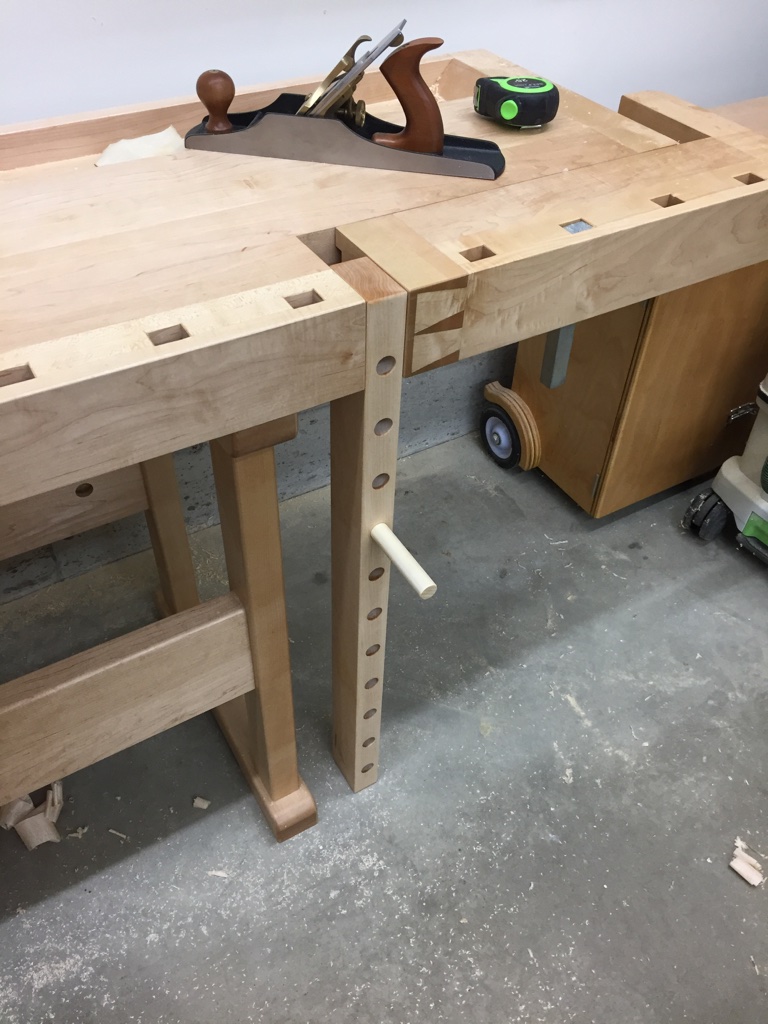
In building my workbench I also built a simple traditional deadman to help support long boards at the bench.
Workbench Deadman
This simple to build workbench accessory is as a great addition to any bench with a tail vise.
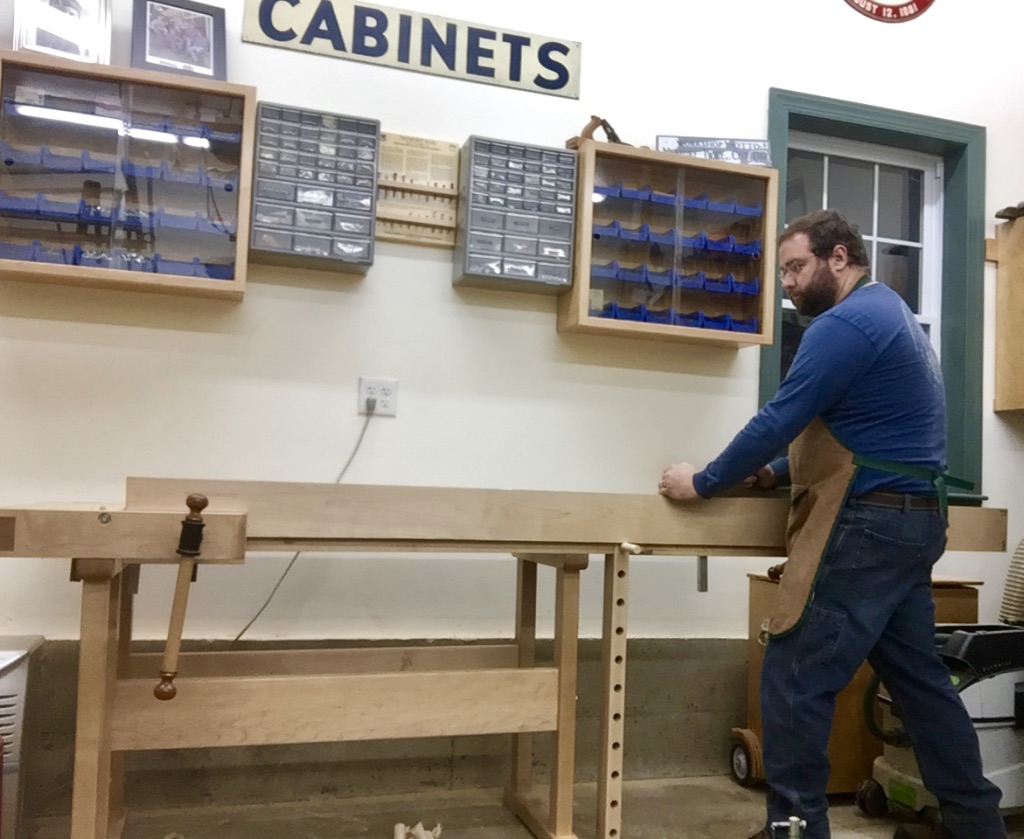
Bill demonstrating the use of his deadman
If you’d like to learn more about this bench and how to build one for yourself, please check out my blog post on this topic over on the Popular Woodworking site here.
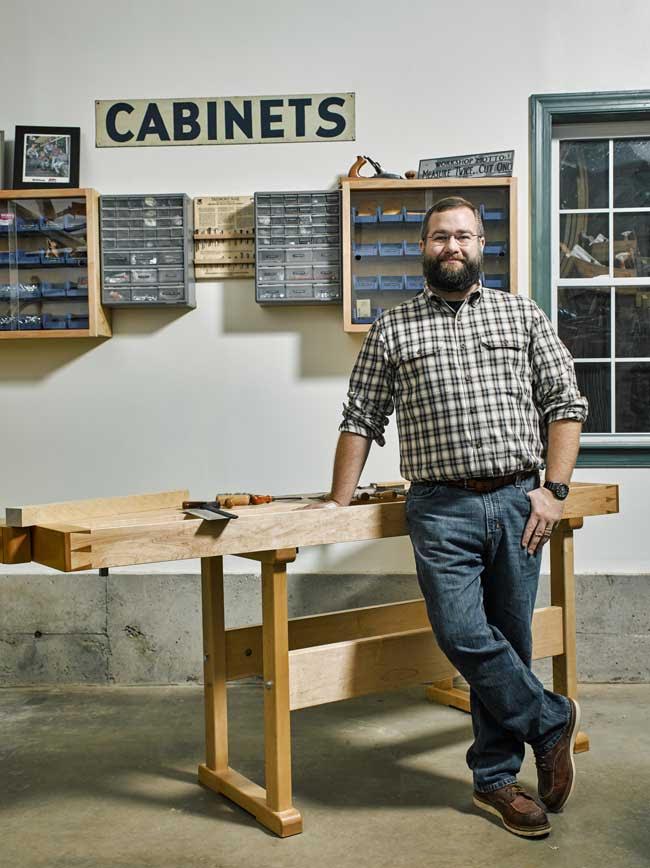
I have some big news to share with everyone today, I’m proud to say that I am the process of writing a book for the Lost Art Press tentatively titled “Go, Go, Go: The Life, Influence and Woodworking of Tage Frid”
You can read more about my background and the premise of the book in this post I made on the Lost Art Press Blog here. It’s an exciting opportunity and look forward to sharing my passion for Frid’s work and Danish Modern furniture design.
Related to the above book I’ve also written an article for Popular Woodworking Magazine on my Tage Frid inspired workbench which will be the cover story for the February 2017 issue which is coming out later this month. Once it is published I’ll be sure to share more related links and details.
UPDATE: The February 2017 issue of Popular Woodworking is now out and you can read more about it or purchase it here on PopularWoodworking.com
–Bill Rainford
@TheRainford
P.S. A big thank you to Doug Levy for allowing me to share two of the excellent photos he took for the upcoming article. You can check out Doug’s photography work here. He also has a great series on New England Craftsmen here.
“Pay no attention to that man behind the curtain.” — Wizard of Oz
Back in May I spent a couple of days in Cincinnati Ohio on my way down to Harrodsburg Kentucky for the EAIA Annual Meeting and a quick stop in Covington Kentucky on my way home to visit with some of my woodworking friends in the area.
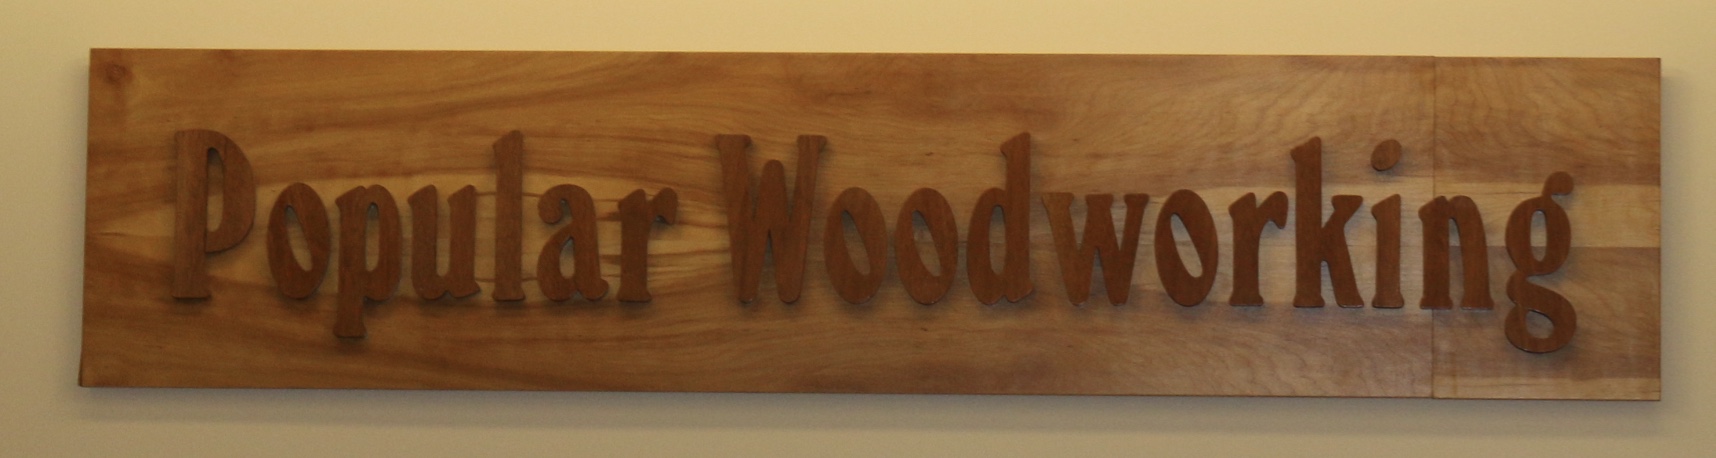
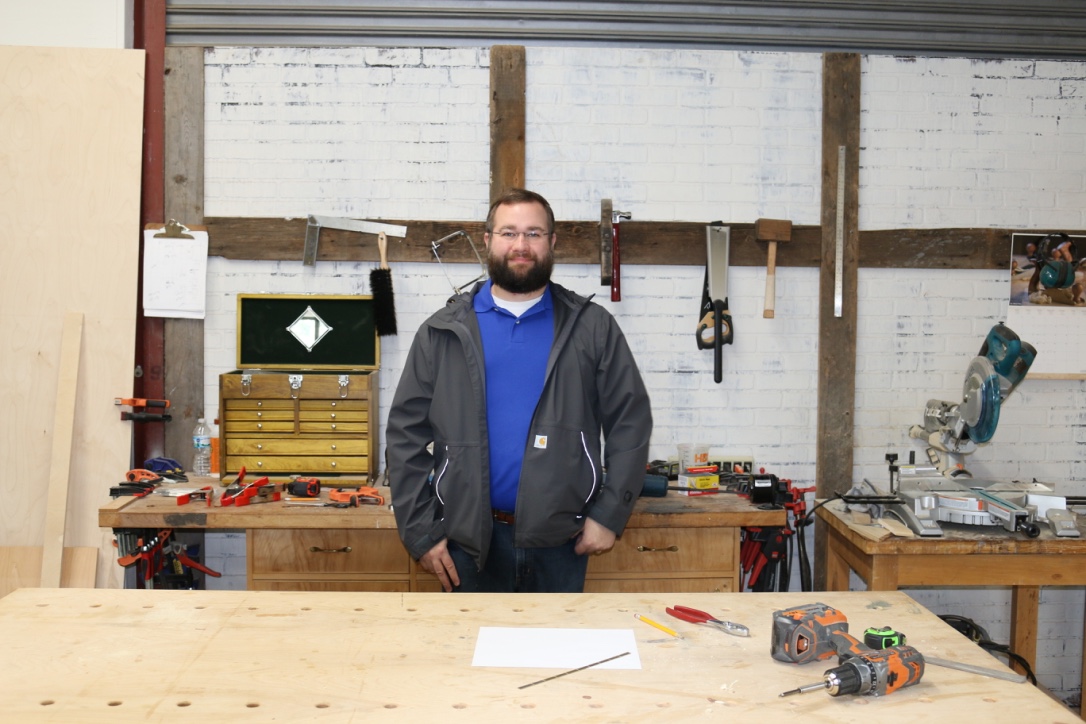
My first stop was at the Popular Woodworking offices and studio to see Megan Fitzpatrick and David Thiel who graciously showed me around.
Popular Woodworking Sign
The office building while nondescript from the outside contained an interesting space on the inside. A mixture of office space, editing bays, studio/soundstage and a woodworking shop.
Me in one of the locations you’ve seen in Popular Woodworking videos
I visited the shop area with backdrop you may recognize from several woodworking videos. The timber framer in me wants to push up that simulated plate and add some braces. 🙂
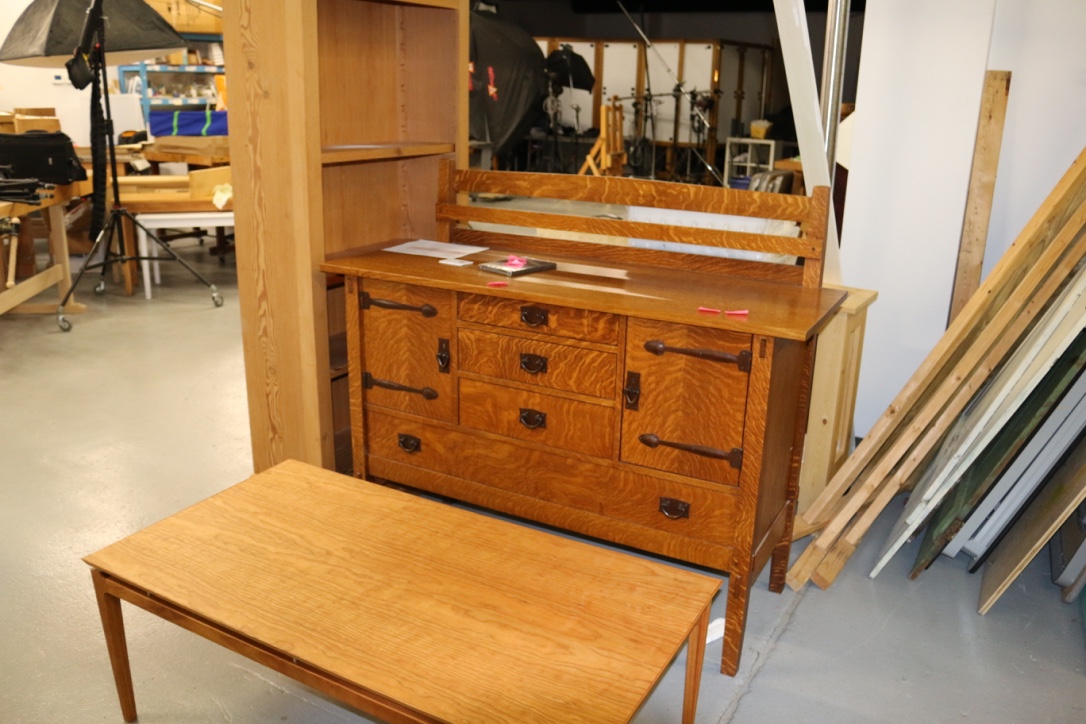
Furniture from earlier magazine projects
In the warehouse space you could see several projects from Popular Woodworking and American Woodworker magazine. If only we had room in the car to buy one and bring it home.
A live shoot & recording session in the studio
In the studio area I was able to see another F+W project video being recorded.
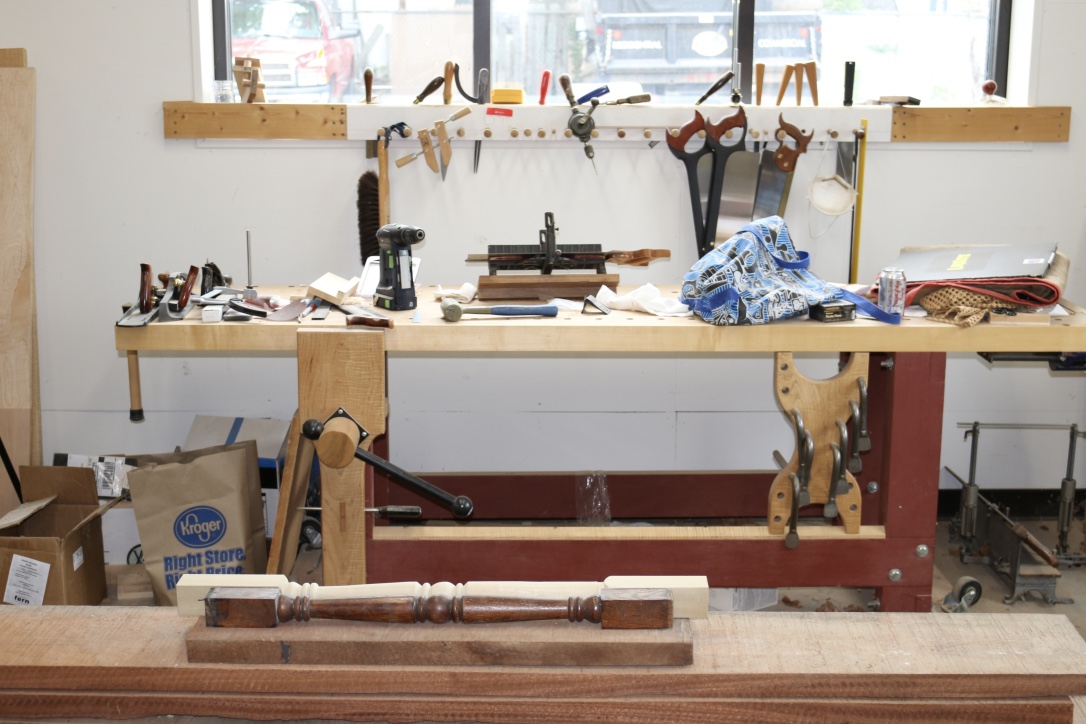
Megan’s workbench in the corner of the workshop
Out in the woodworking shop I felt right at home. There was a large machine and bench room. In the corner I could see Megan’s workbench and the windows you may recognize from many an article and post from Popular Woodworking over the years.
I was too busy talking David’s ear off and didn’t take a picture of him to include in the post, but I’ll make sure to take one next time I am in town.
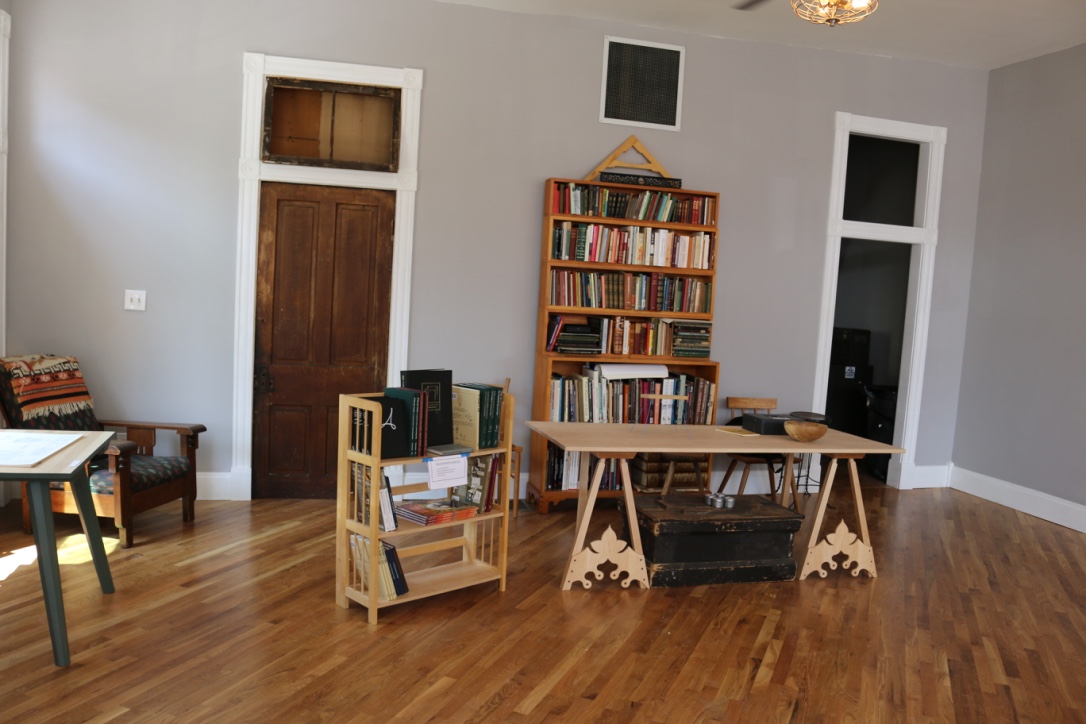
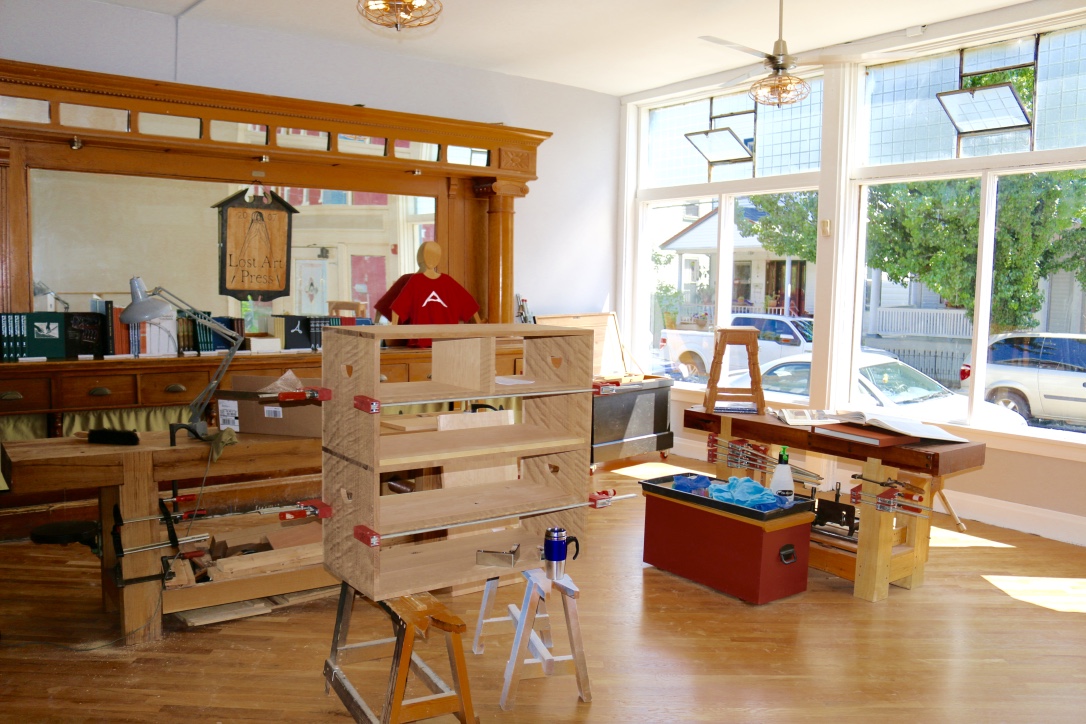
On the way home from our trip I also stopped in Covington KY (right across the Ohio river from Cincinnati OH) to visit Chris Schwarz at the Lost Art Press storefront. The storefront is a nice historic building that used to be a saloon in a part of Covington that reminds me a bit of Brooklyn — lots of history, artists, hipsters, good restaurants etc.
Inside of the Lost Art Press Storefront
After watching the build out via many of Chris’ blog posts it was neat to see it in person and to see several of Chris’ recent pieces in person.
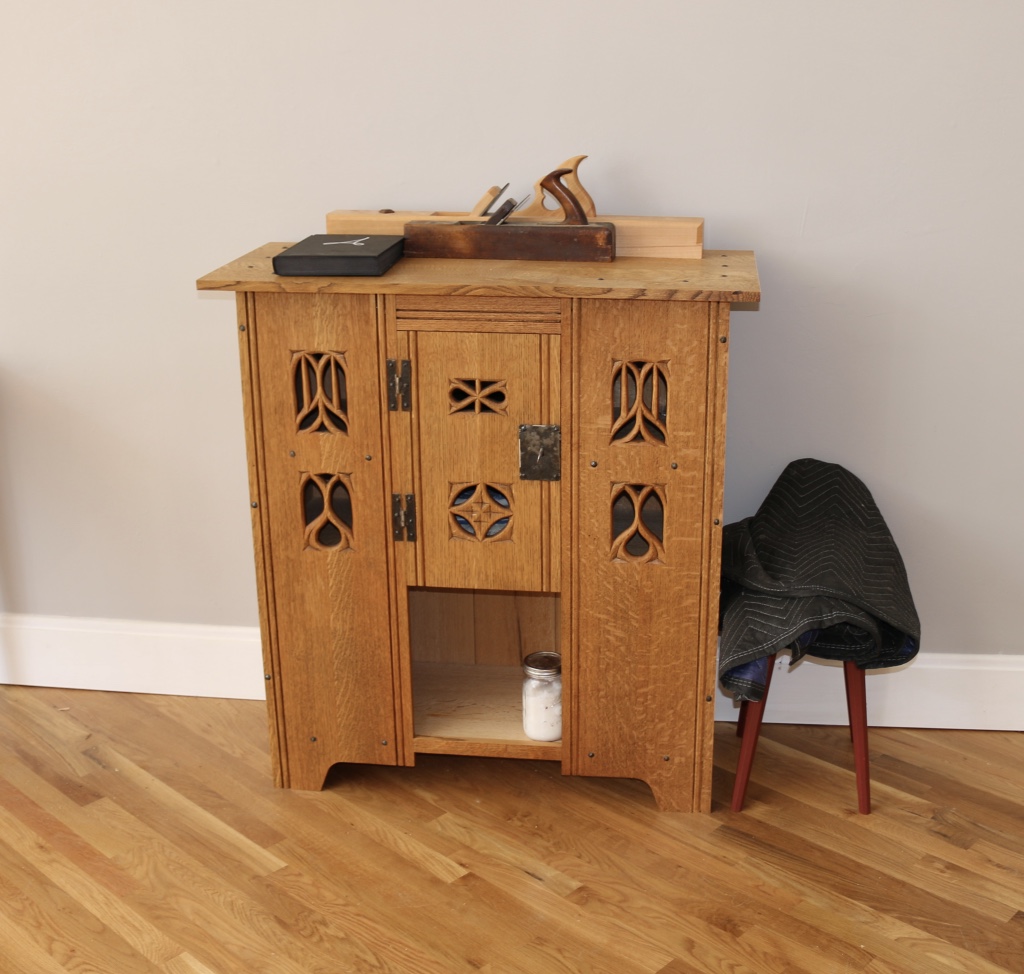
Aumbry from the Anarchist’s Design Book
You may recall the Aumbry above from the cover of a Popular Woodworking issue earlier this year and from the Anarchist’s Design Book.
I had fun talking shop with Chris and Megan and checking out some of the recent bits of hardware he picked up.
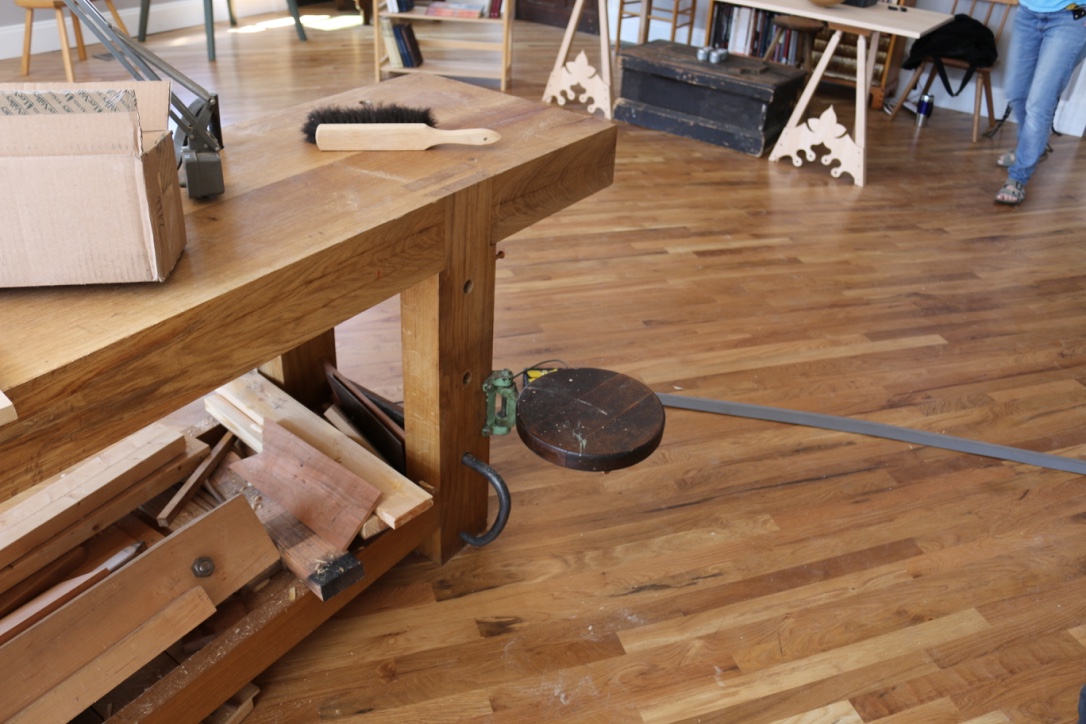
Nice swing out adjustable seat attached to the workbench leg
The adjustable swing out seat he added to his bench was a nice addition I’d love to have on my own bench someday for carving and other detail and design work on the bench.
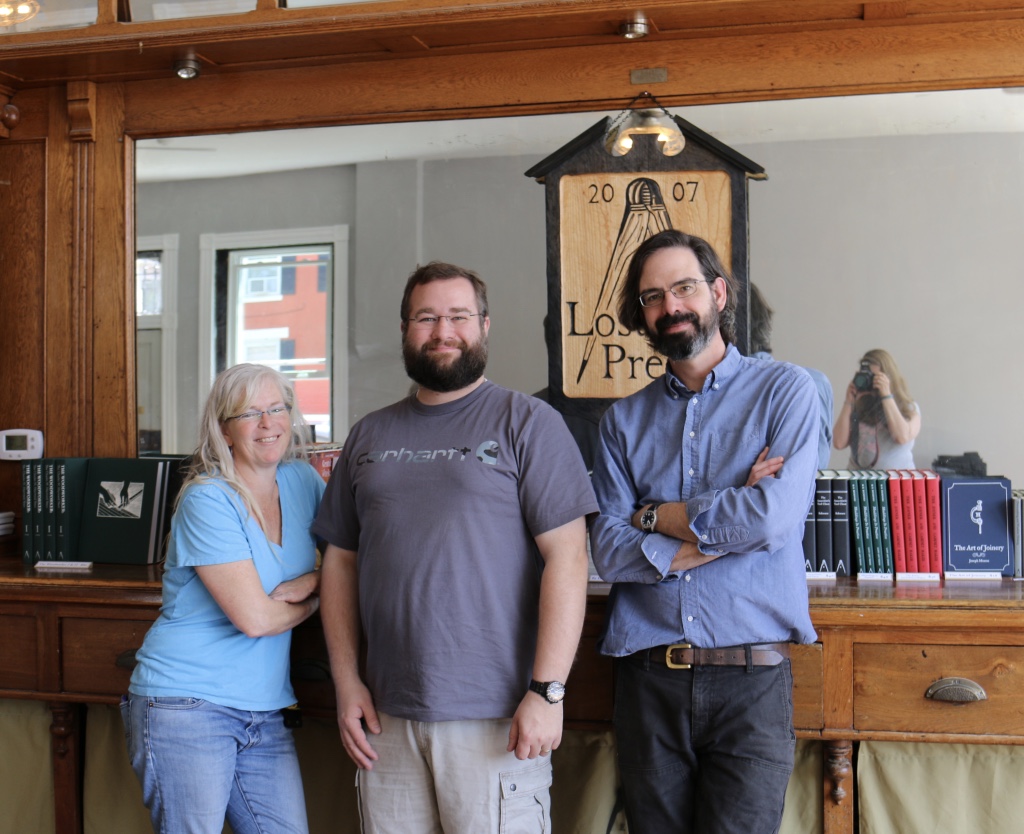
Megan Fitzpatrick, Bill Rainford and Chris Schwarz
This was my first trip to Cincinnati and I had a great time exploring the city. In fact I’ll be in the area again in September for Popular Woodworking in America.
A big thank you to Chris, Megan and David for showing me around and a big thank you to my wife Alyssa for wrangling the babies while I geeked out with fellow woodworkers.
Take care,
-Bill
For more information on the Lost Art Press you can check out their website here.
For more information on Popular Woodworking you can check out the magazine’s website here.
For information on Popular Woodworking in American 2016 you can check out their site here.
The weather is finally starting to warm up and it’s time from some summer workshops at The North Bennet Street School and Historic Eastfield Village.
As always you can find my teaching schedule on the ‘Instruction‘ page at the top of this blog.
First up is the ever popular ‘Drywall for Beginners‘ course at NBSS. There are a couple of seats left and registration closes soon, so if you are interested, please sign up ASAP. In past offerings of this course I posted about it here and here if you’d like to see what it looks like. It’s an excellent opportunity to learn how to hang drywall, tape, mud and texture it.
Saturday-Sunday, June 25-26 (2 Sessions)
8:30am-4:30pm
Instructor: Bill Rainford
Students learn how to hang drywall, tape seams, work with mud, sanding (wet and dry), and how to work with corners. Additional topics covered include light framing overview, repairing holes, working around outlet boxes and fixtures, repairing damage, finishing the surface, painting tips and, if time allows, the basics of texturing. Students assemble and work from full-size model wall sections which include an inside and outside corner and opportunity to work with stud bays. This class is intended for homeowners, DIY enthusiasts and carpenters/contractors. Basic carpentry or handy skills are a plus.
Students are responsible for supplying their own tools. A tool list will be sent at least 2 weeks prior to class start.
Next up is a new ‘Introduction to Sharpening‘ at NBSS. This workshop is a great opportunity for students to learn how to tune up their basic tools — bench planes, chisels, marking knives, cutting gauges, block planes and specialty planes. The genesis of this course was the realization that some students coming to weekend workshops at the school only had some, and possibly none of their tools properly sharpened and ready to go. (For other workshops I’d rather see students focused on the course at hand and not trying to hastily tune a chisel or iron rather than paying attention to a new course lessons) If you don’t have the time to commit two weeks to the Fundamentals of Fine Woodworking, or even if you completed that course and need more time and practice at sharpening, need access to a proper grinder or you have a new more complex iron or chisel that needs sharpening this is a great class to get your tool kit tuned up. The course is a mixture of demonstration and hands on time with with an instructor.
Saturday-Sunday, July 23-24
8:30am-4:30pm
Instructor: Bill Rainford
Having sharp, well-tuned tools is perhaps the most important aspect of woodworking; they are requisite for good work. Learn the basics of sharpening a core set of tools used in many woodworking applications. We cover tuning up and sharpening a bench chisel, smoothing plane, and cutting gauge. Additional topics covered include hollow grinding, honing, making a stone holder and tuning up your stones. Additional tools covered as time allows.
Students are responsible for supplying their own tools. A tool list will be sent at least 2 weeks prior to class start.
And last, but certainly not least is an upcoming workshop at Eastfield Village as part of the Early American Industries Association (EAIA) Historic Trades Sampler. The course I will be teaching will be building a domed top box. This will give each students hands on exercises in working wood, assembling a small box, setting butt hinges and an optional lock, and working with cut nails. Once students complete their box we’ll work with Bill McMillen to do grain painting on the box as well. Details below including info on other courses being offered as part of this event:
Eastfield Historic TradesSampler Early American Industries Association
Join Us July 28-31,2016!
The Early American Industries Association Eastfield Historic TradesSampler, will be held on Thursday, July 28th through Sunday, July 31st, 2016, at Historic Eastfield Village, East Nassau, New York. The program this year will include:
The name name Eastfield Historic TradesSampler reflects what we actually offer-a sampler of various trades with an opportunity to learn about them while completing a small project related to the craft.
There are two different workshops each day from which to choose. The classes start at 9 a.m. and there is a lunch provided in Eastfield’s historic tavern from noon until 1 p.m., at which time the afternoon session of the workshops resume. The workshops end around 5 p.m.
Accommodations in Eastfield’s taverns are available free of charge for those wishing to stay as guests in early 19th century surroundings. The only requirements is that each person supply their own bedding, plus 10 ten inch white candles.
Students are encouraged to stay here during the Historic TradesSampler. Meals may be cooked or served in the late 18th century kitchens. Accommodations are rope beds with straw and feather ticks. Facilities are located in period out houses. There are evening gatherings in the Briggs Tavern and lively conversations and games of dominoes by candlelight. This immersive experience offers an unforgettable opportunity to be with others-students and teachers-of similar interests, to gain appreciation for the work and daily life of early 19th century America.
Registration
The cost of registration for the workshop is $485.00.
To register, you can contact John Verrill by phone at (703) 967-9399 or email EAIA1933@verizon.net or via mail:
Early American Industries Association PO Box 524
Hebron, MD 21830
If you have any questions about these upcoming workshops, please send me a comment below or contact me directly via the contact form here.
The best saw horses cannot be bought in a store, you have to build them. I’ve seen plastic saw horses bend and buckle under < 200 pounds of load. I’ve seen 2×4 saw horses with sheet metal couplers deform and crush.
When I was a student at NBSS one of the first projects we completed was building a pair of solid wood saw horses that could meet the heavy demands of a preservation carpenter. The school would load them up with more material than I ever thought a simple horse could hold. I was so impressed with how well they turned out I built 10 more while I was there and they have served me well over the years.
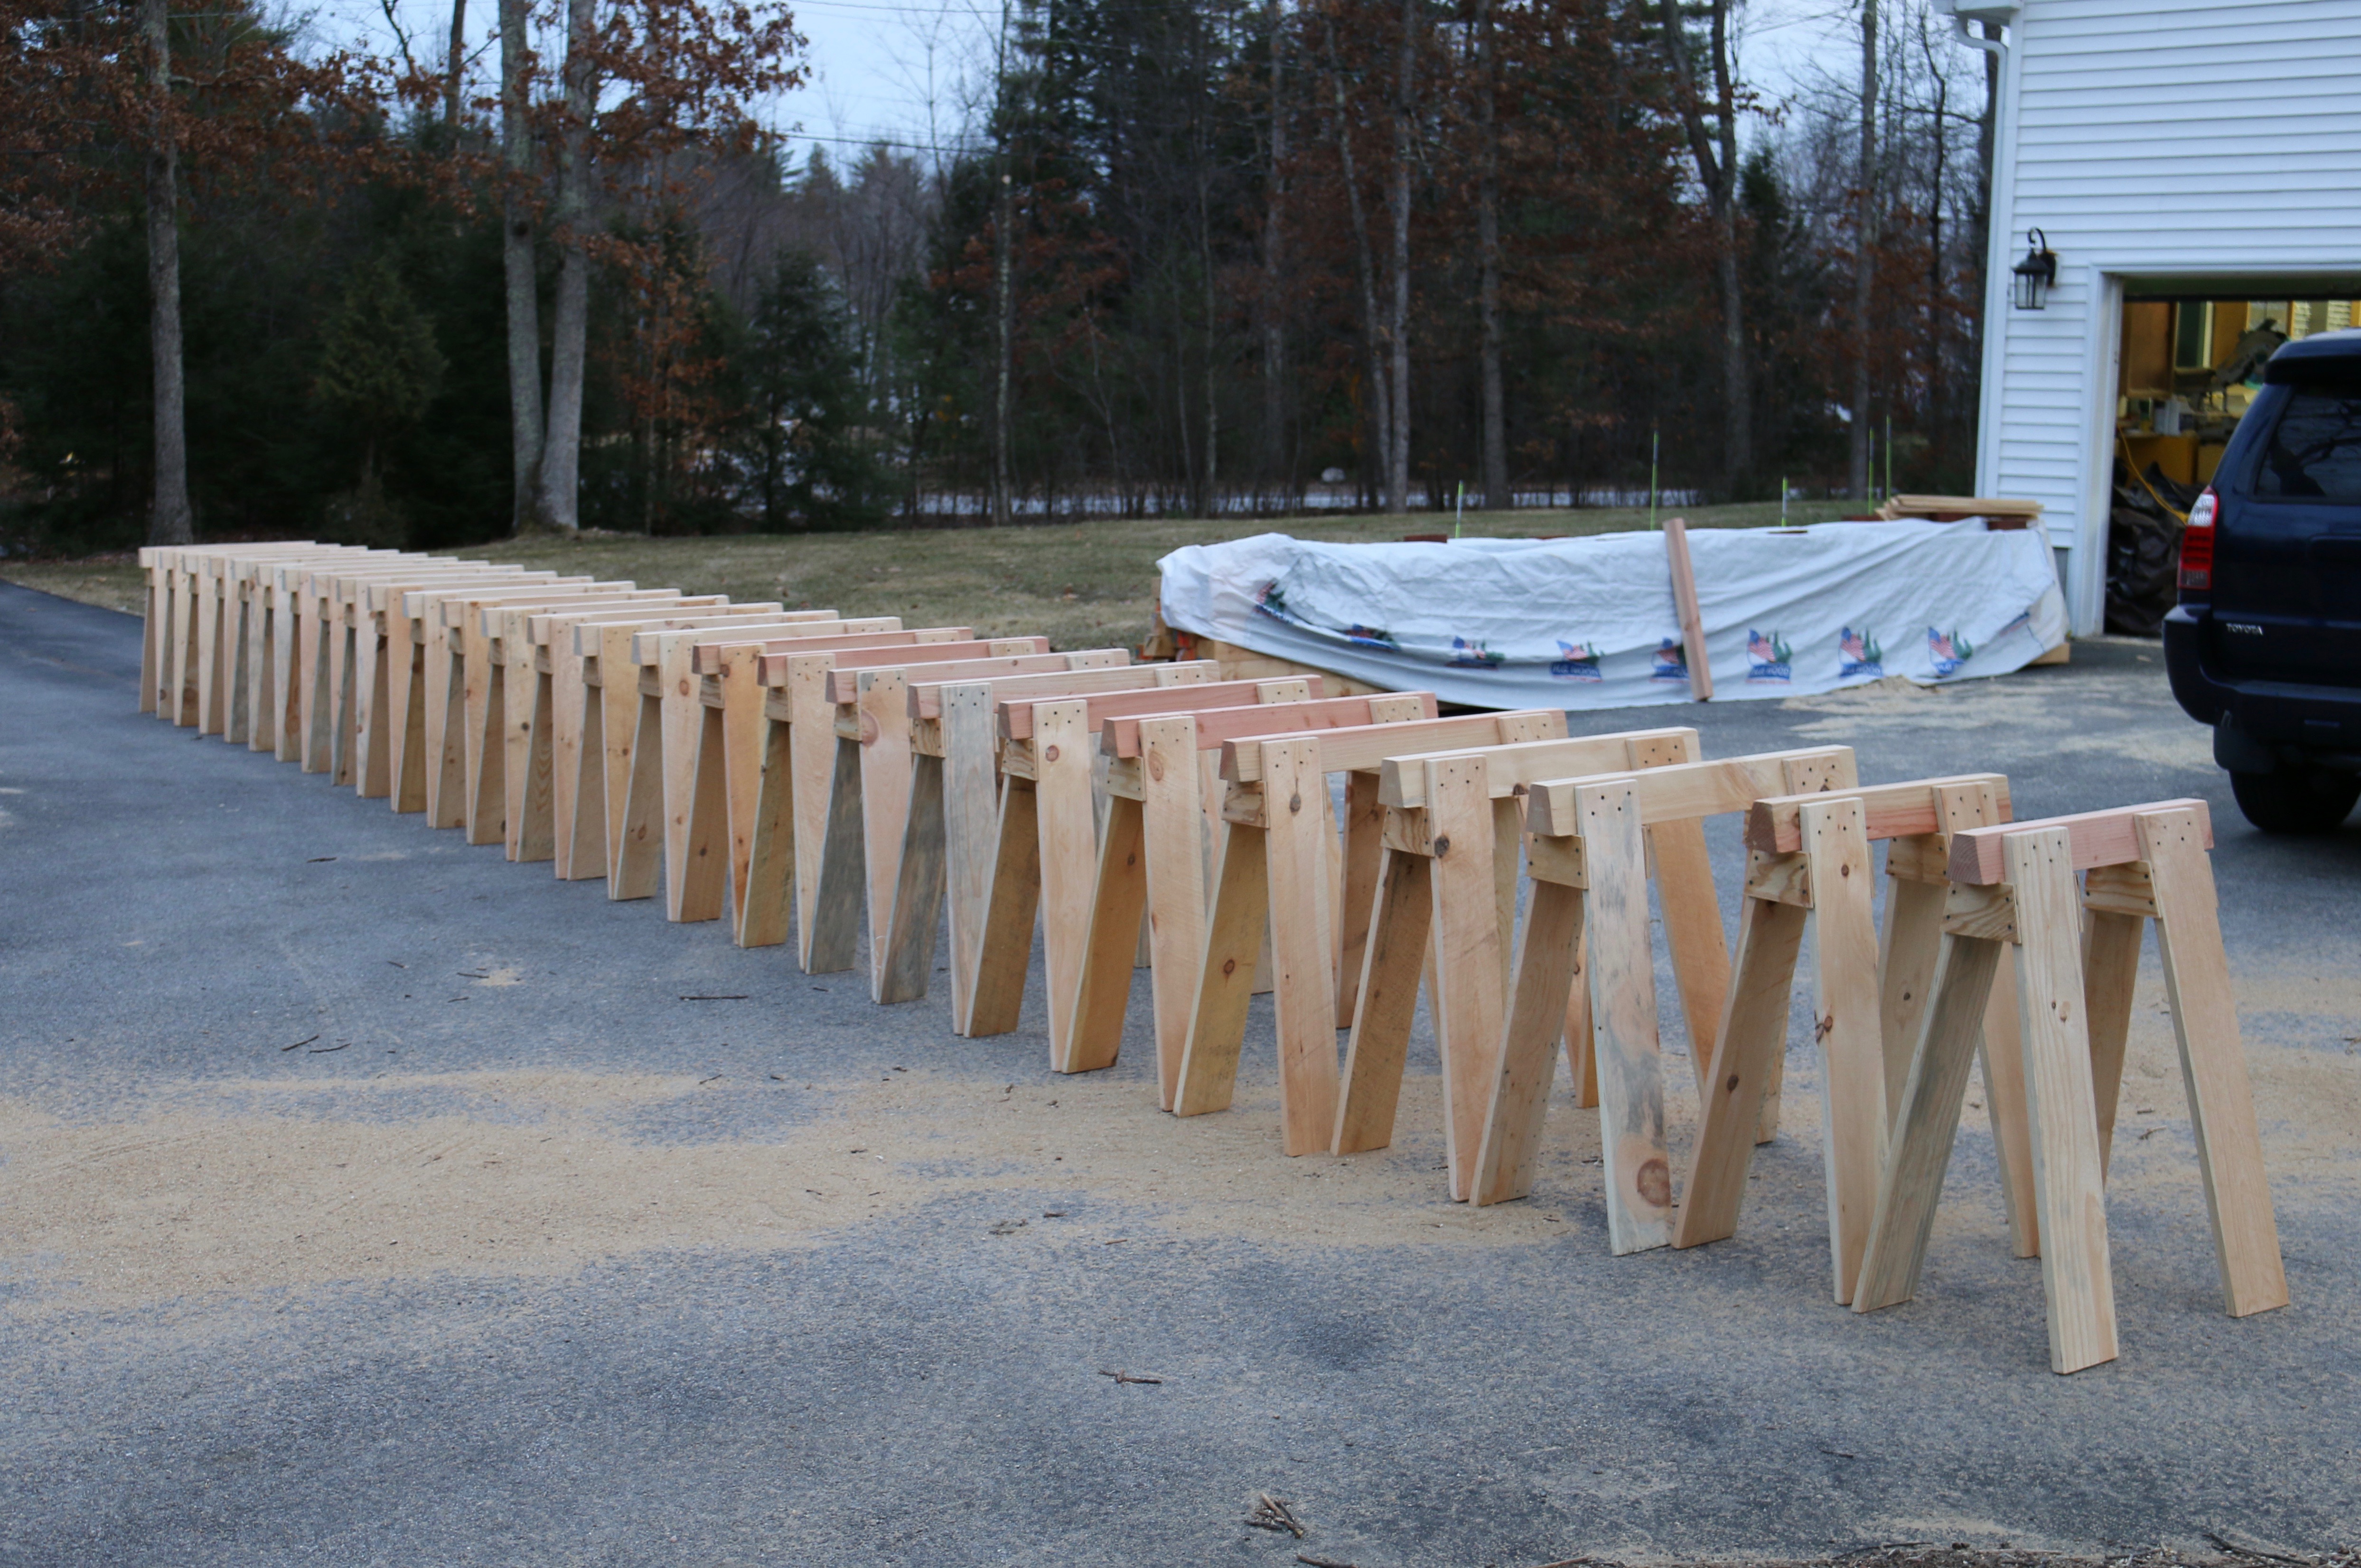
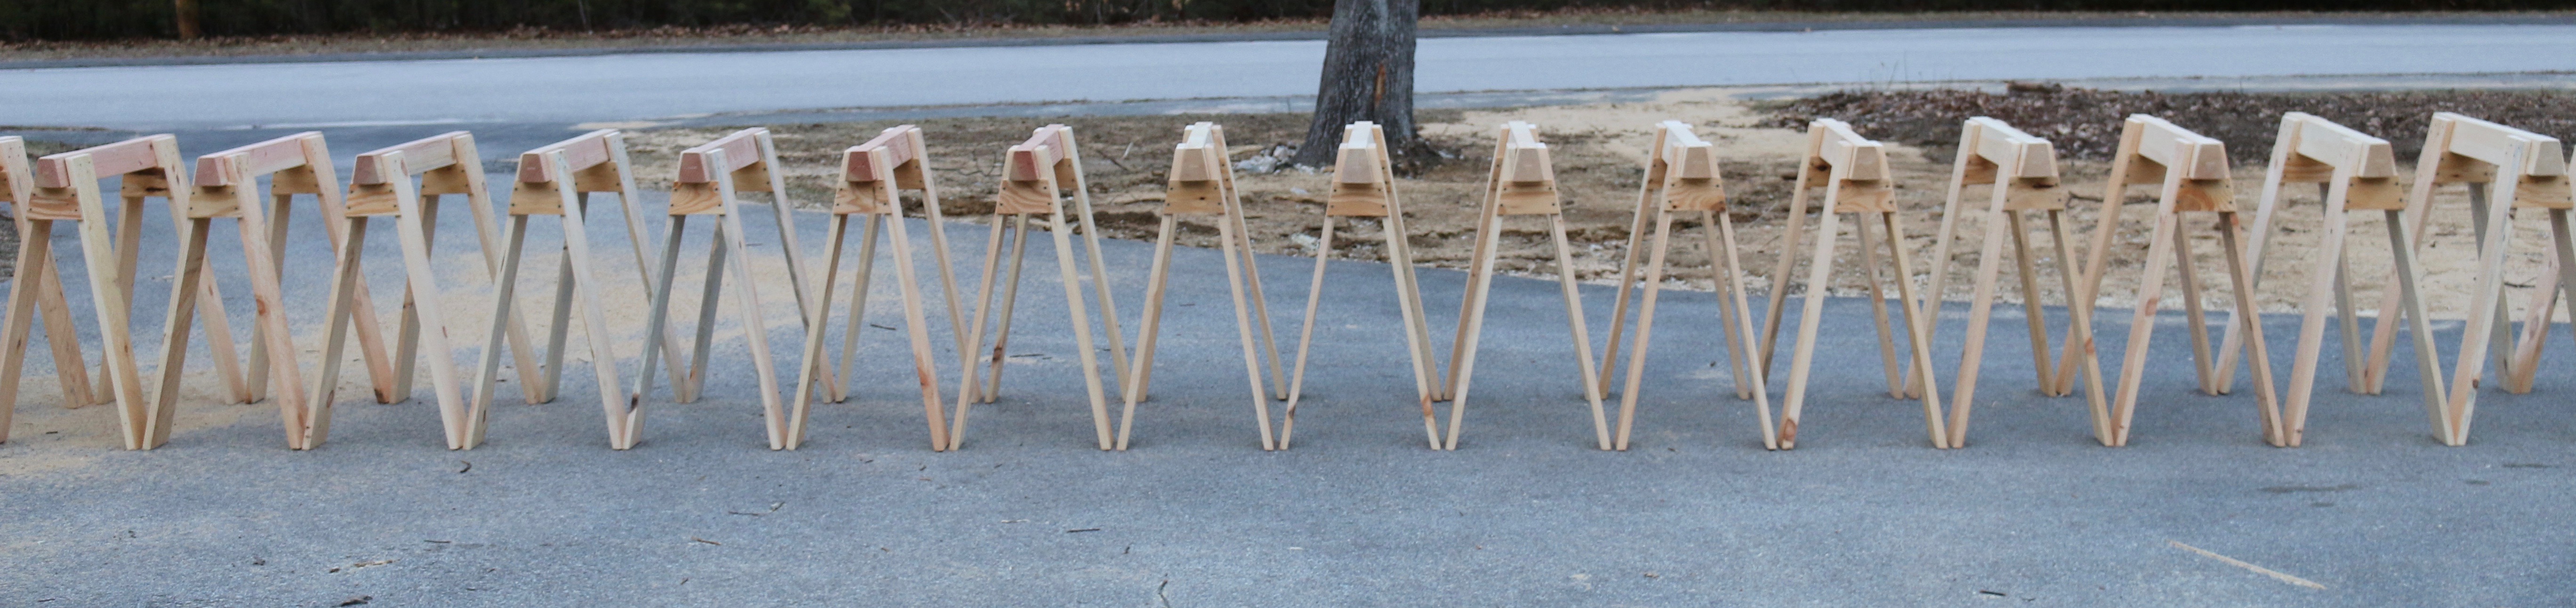
28 horses out on parade
Right now as I build a 24’x30′ timber framed barn out in the yard I built another 28 horses to hold all the timber off the ground for sorting and working through the piles. The post below covers how I built these heavy duty horses.
For a large run of horses like this it is important to run through each operation like a small assembly line, though at times it can feel like a slog — after cutting 112 legs you become a master at optimizing all of your operations.
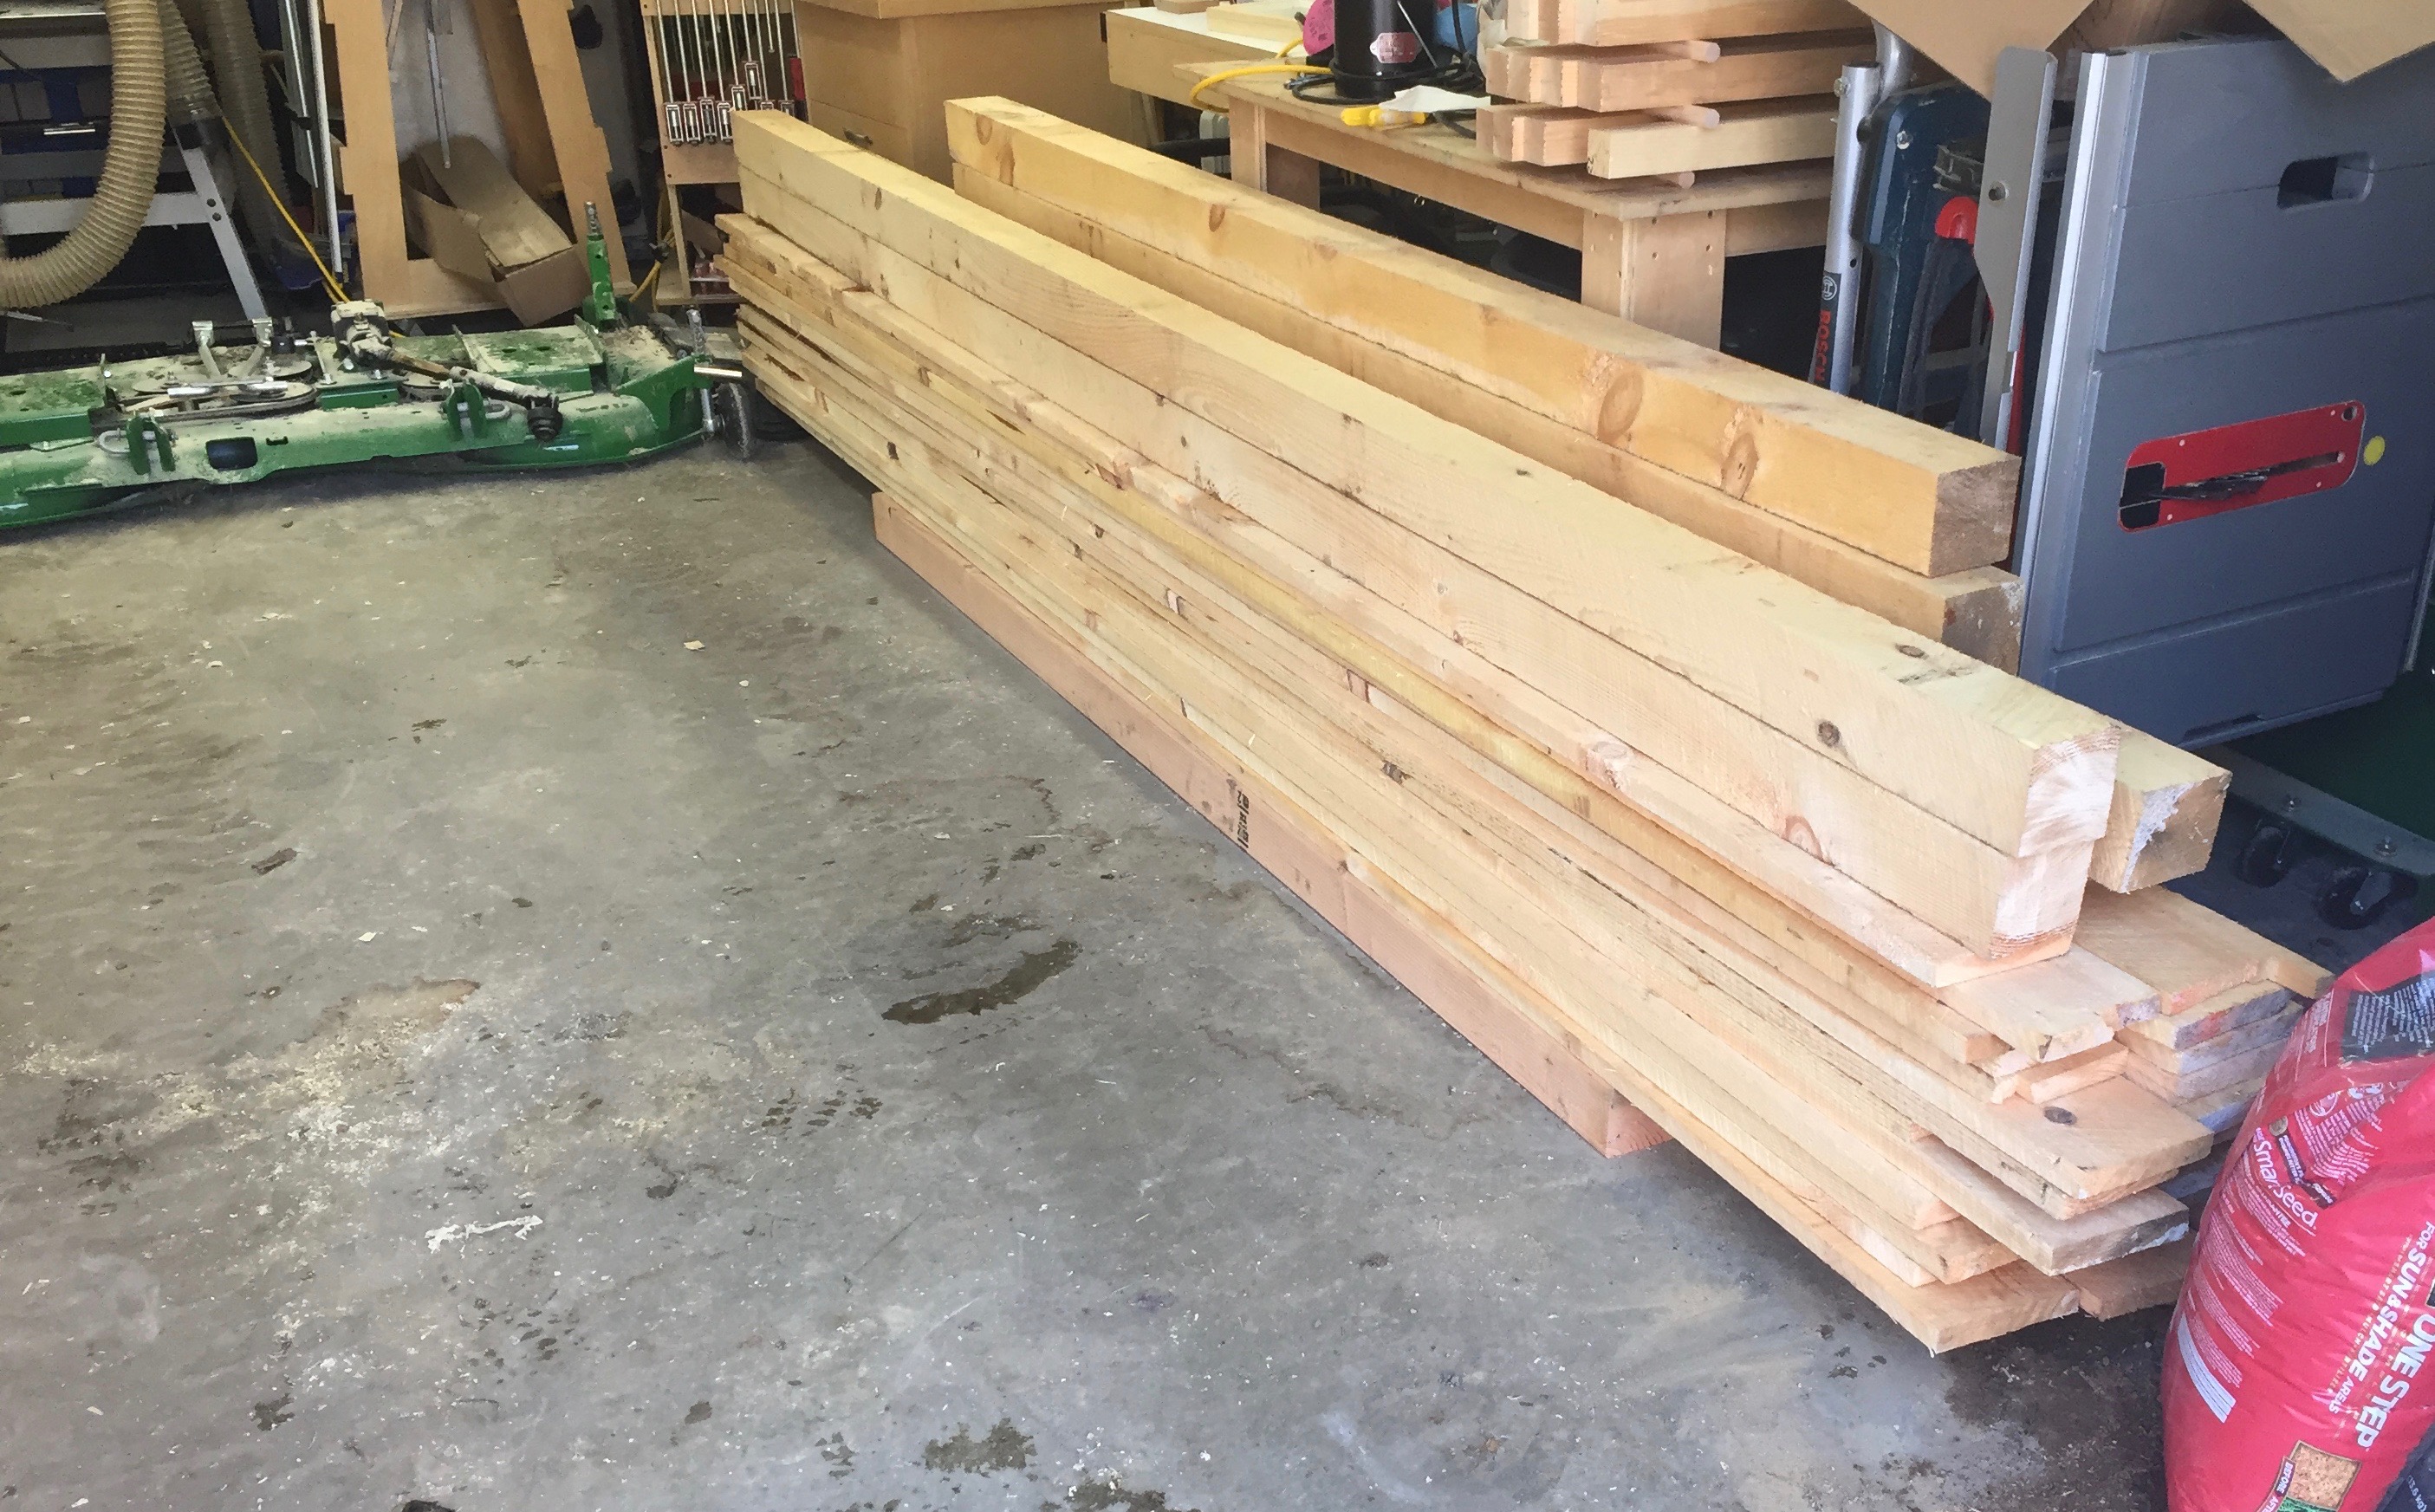
Large pile of green eastern white pine ready to go.
The wood of choice is green eastern white pine we buy from a local sawyer/lumber company. (Copeland And Sons Lumber). The beams (the work surface of a horse) is cut from a 4x4x12′, the legs are made from 1x6x12′ boards and the gussets are made from 1/2″ CDX plywood. Buying rough green stock like this from a sawyer helps keep the price per horse reasonable and the wood is full size, not nominal, so my 4×4 is 4″x4″ when I get it. I estimate that they cost me < $10 each in terms of materials.
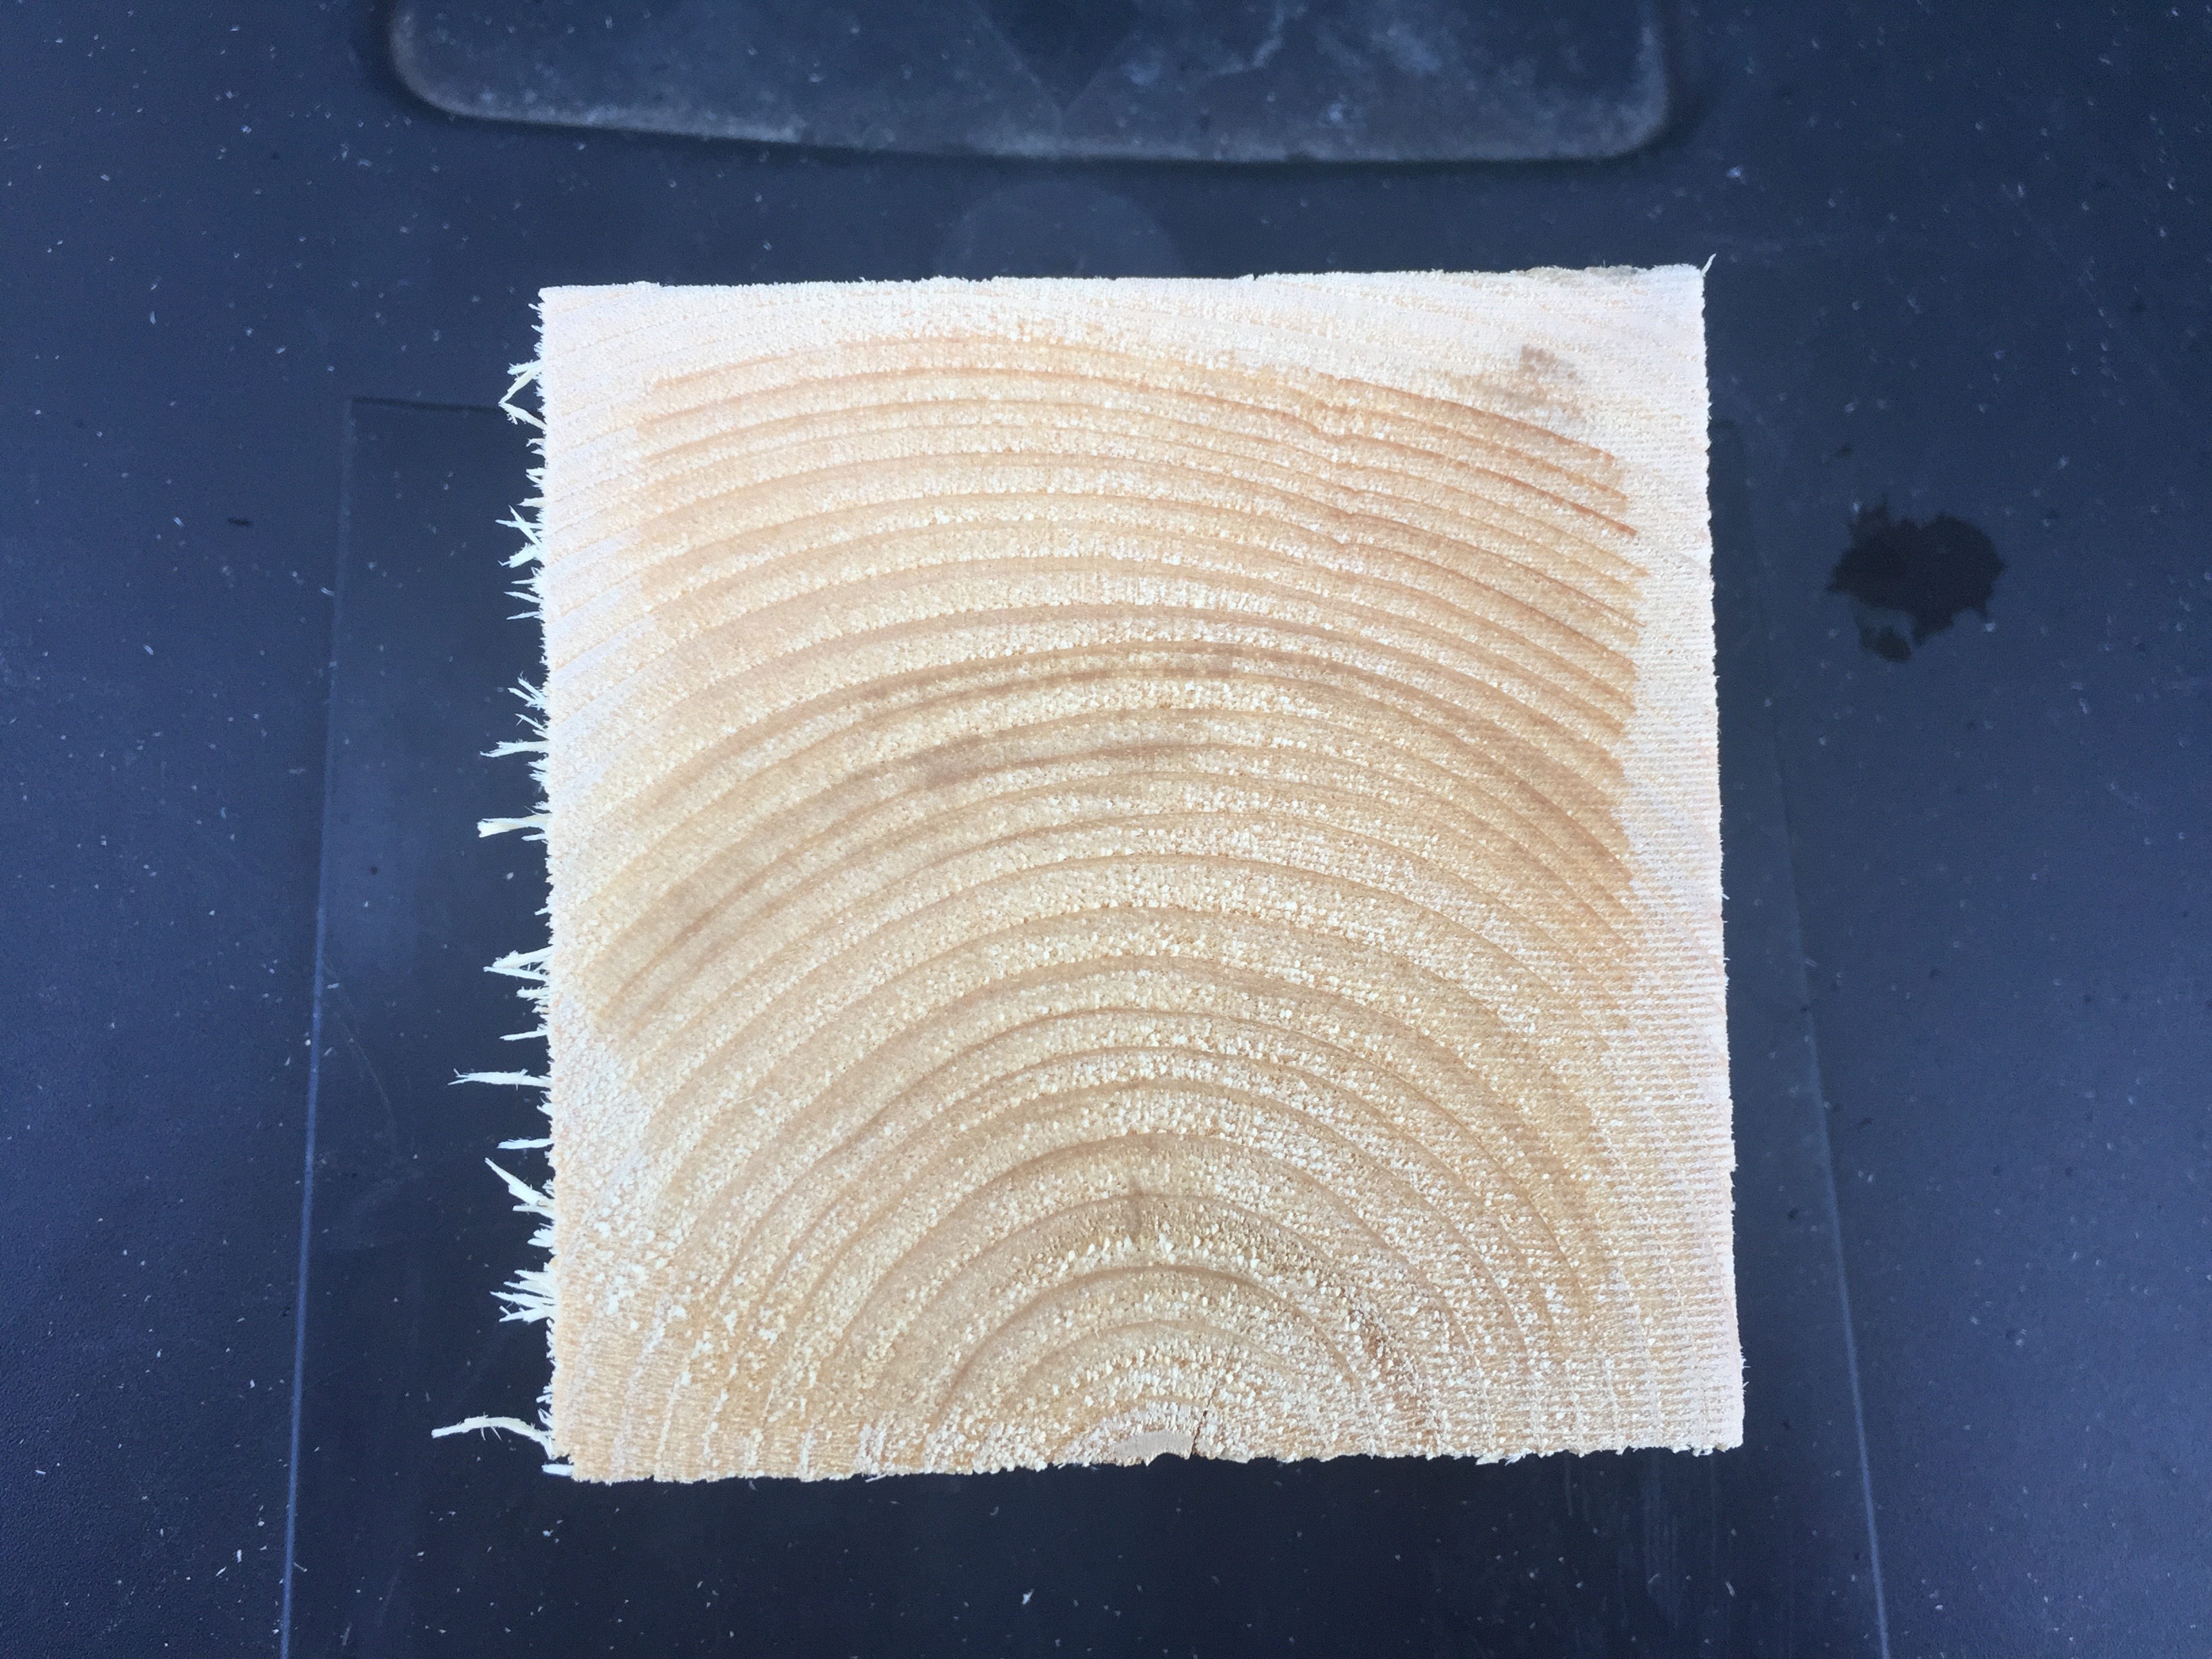
You can see how much moisture is still in the 4x4s
A note on working with green lumber, for horses or timber frames or similar projects — this wood was a tree possibly only a day or two before I get it, so if you use a power tool you may get some water spray on you. Be warned. Also make sure you wipe down and oil your tools appropriately so they do not rust. In the photo above you can see the outer 1/4″ or so that has dried a bit vs the wet center on this fresh cut off piece.
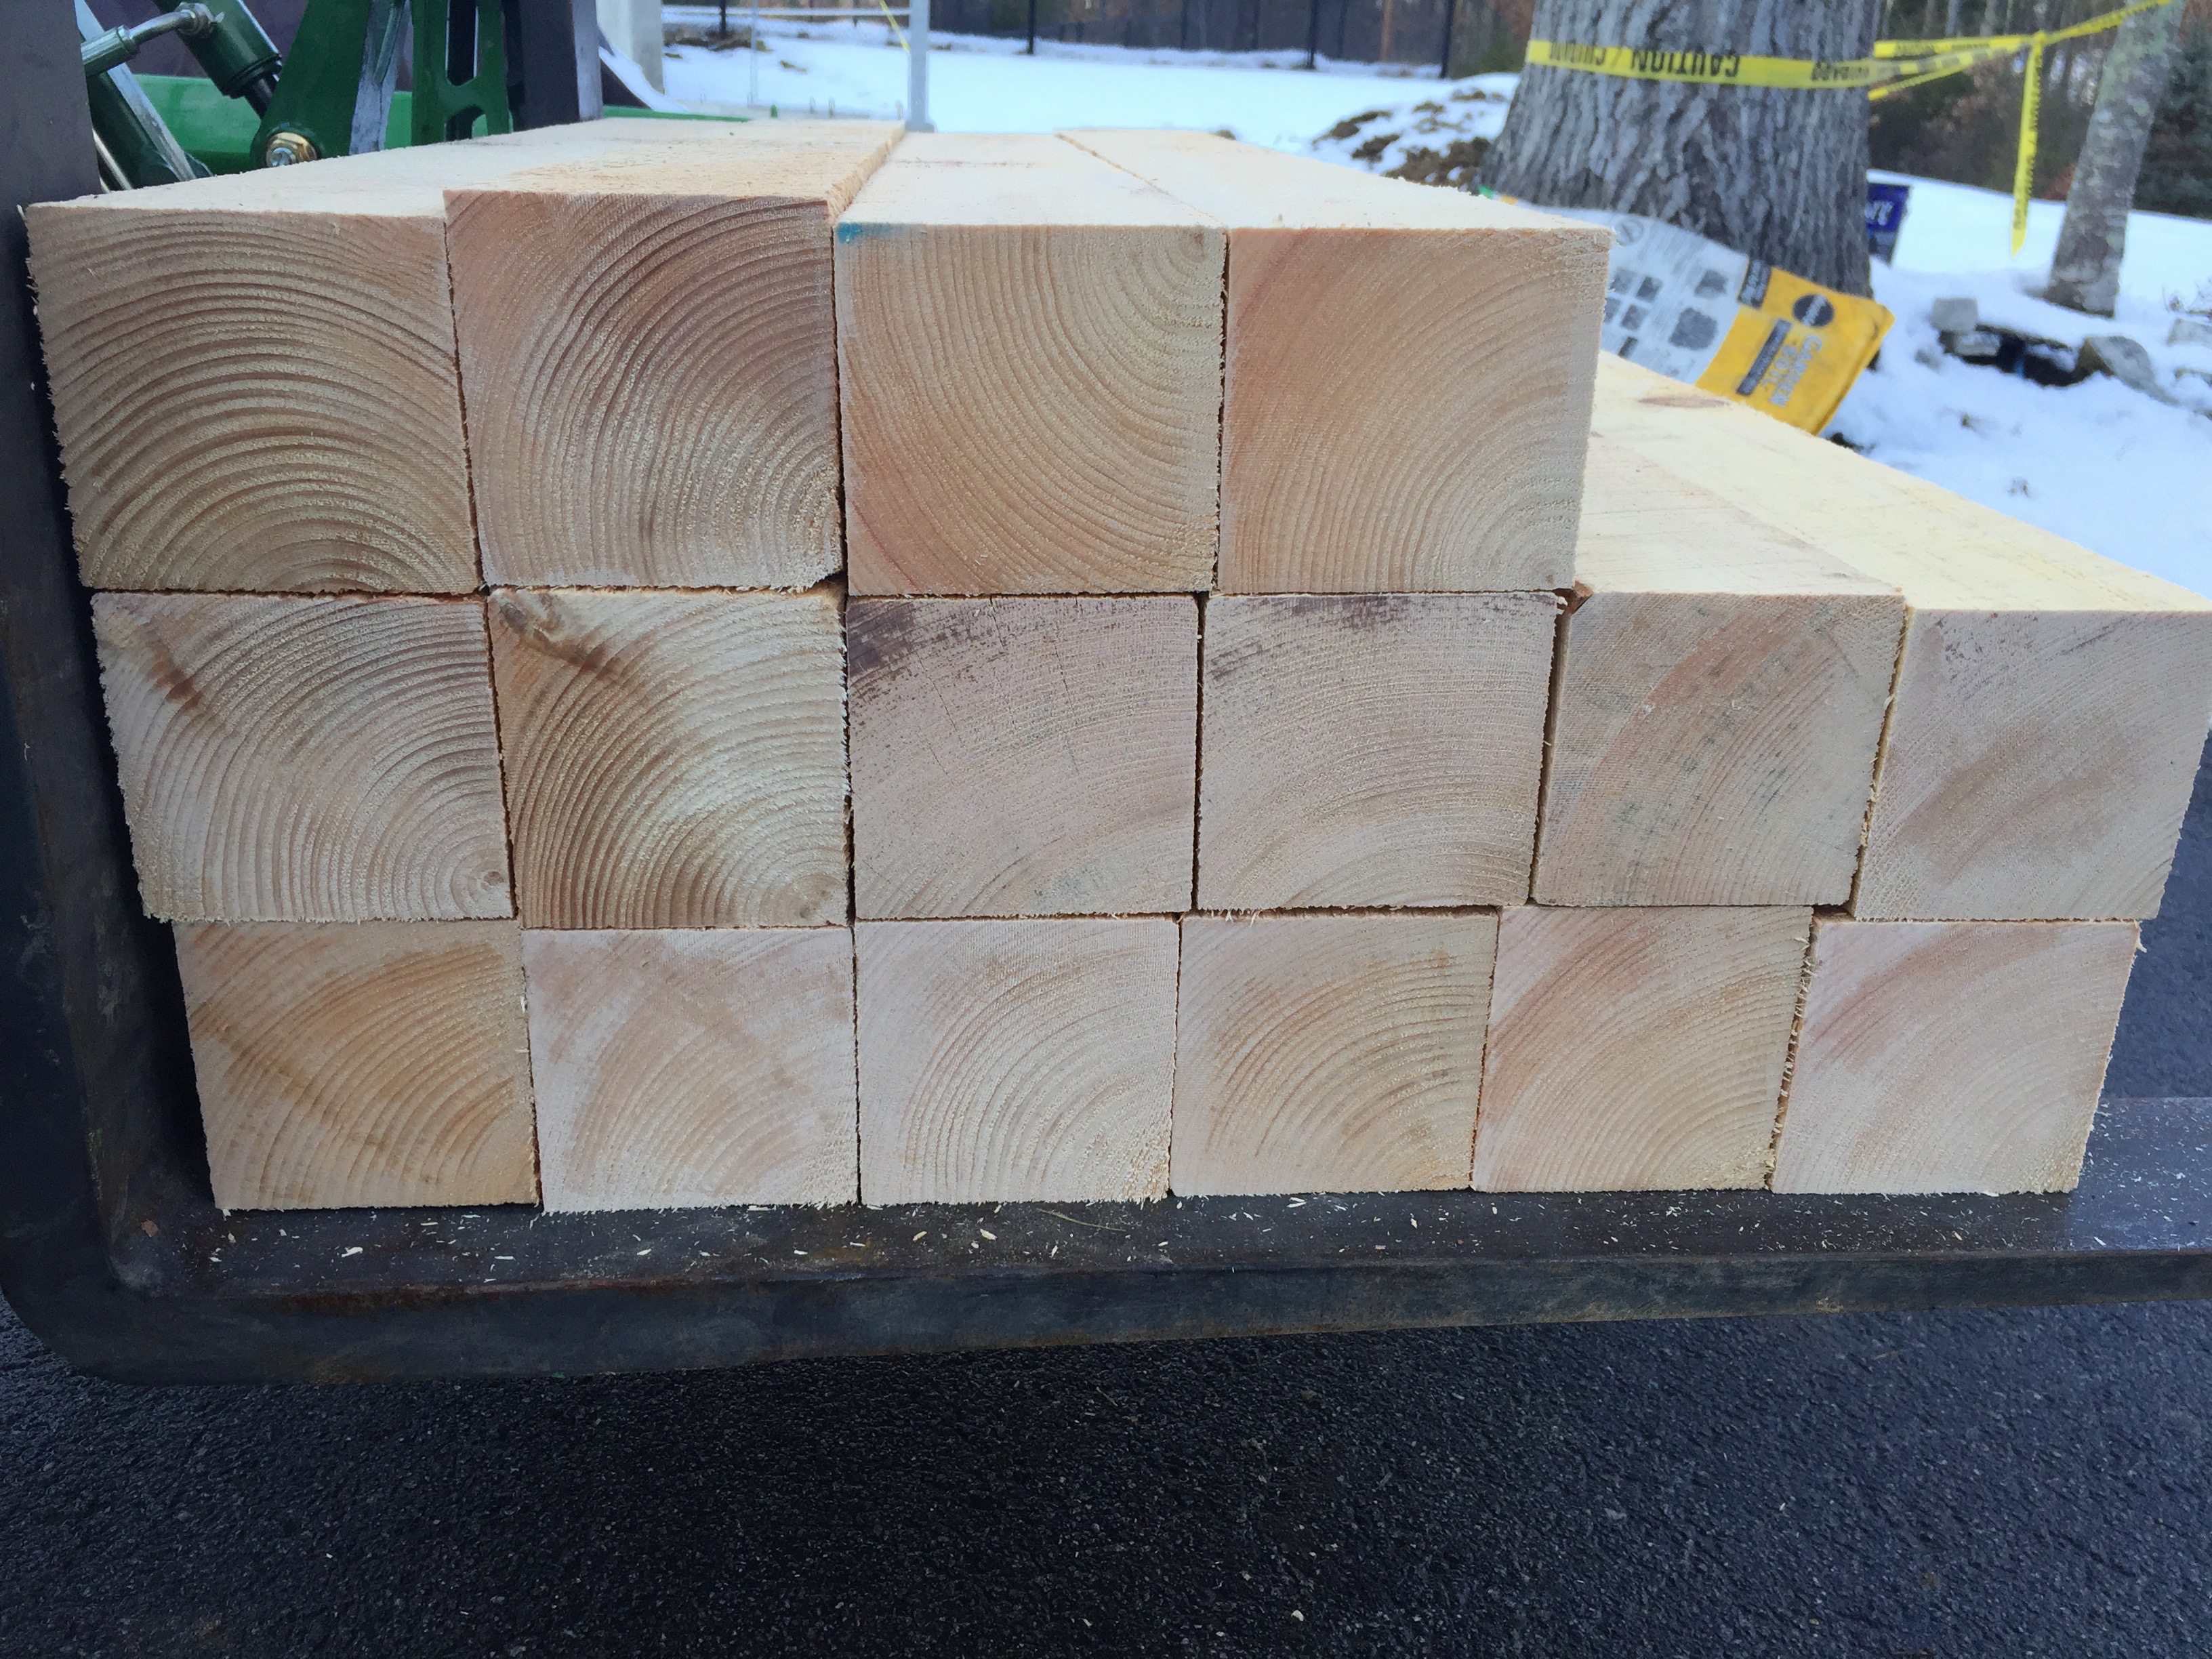
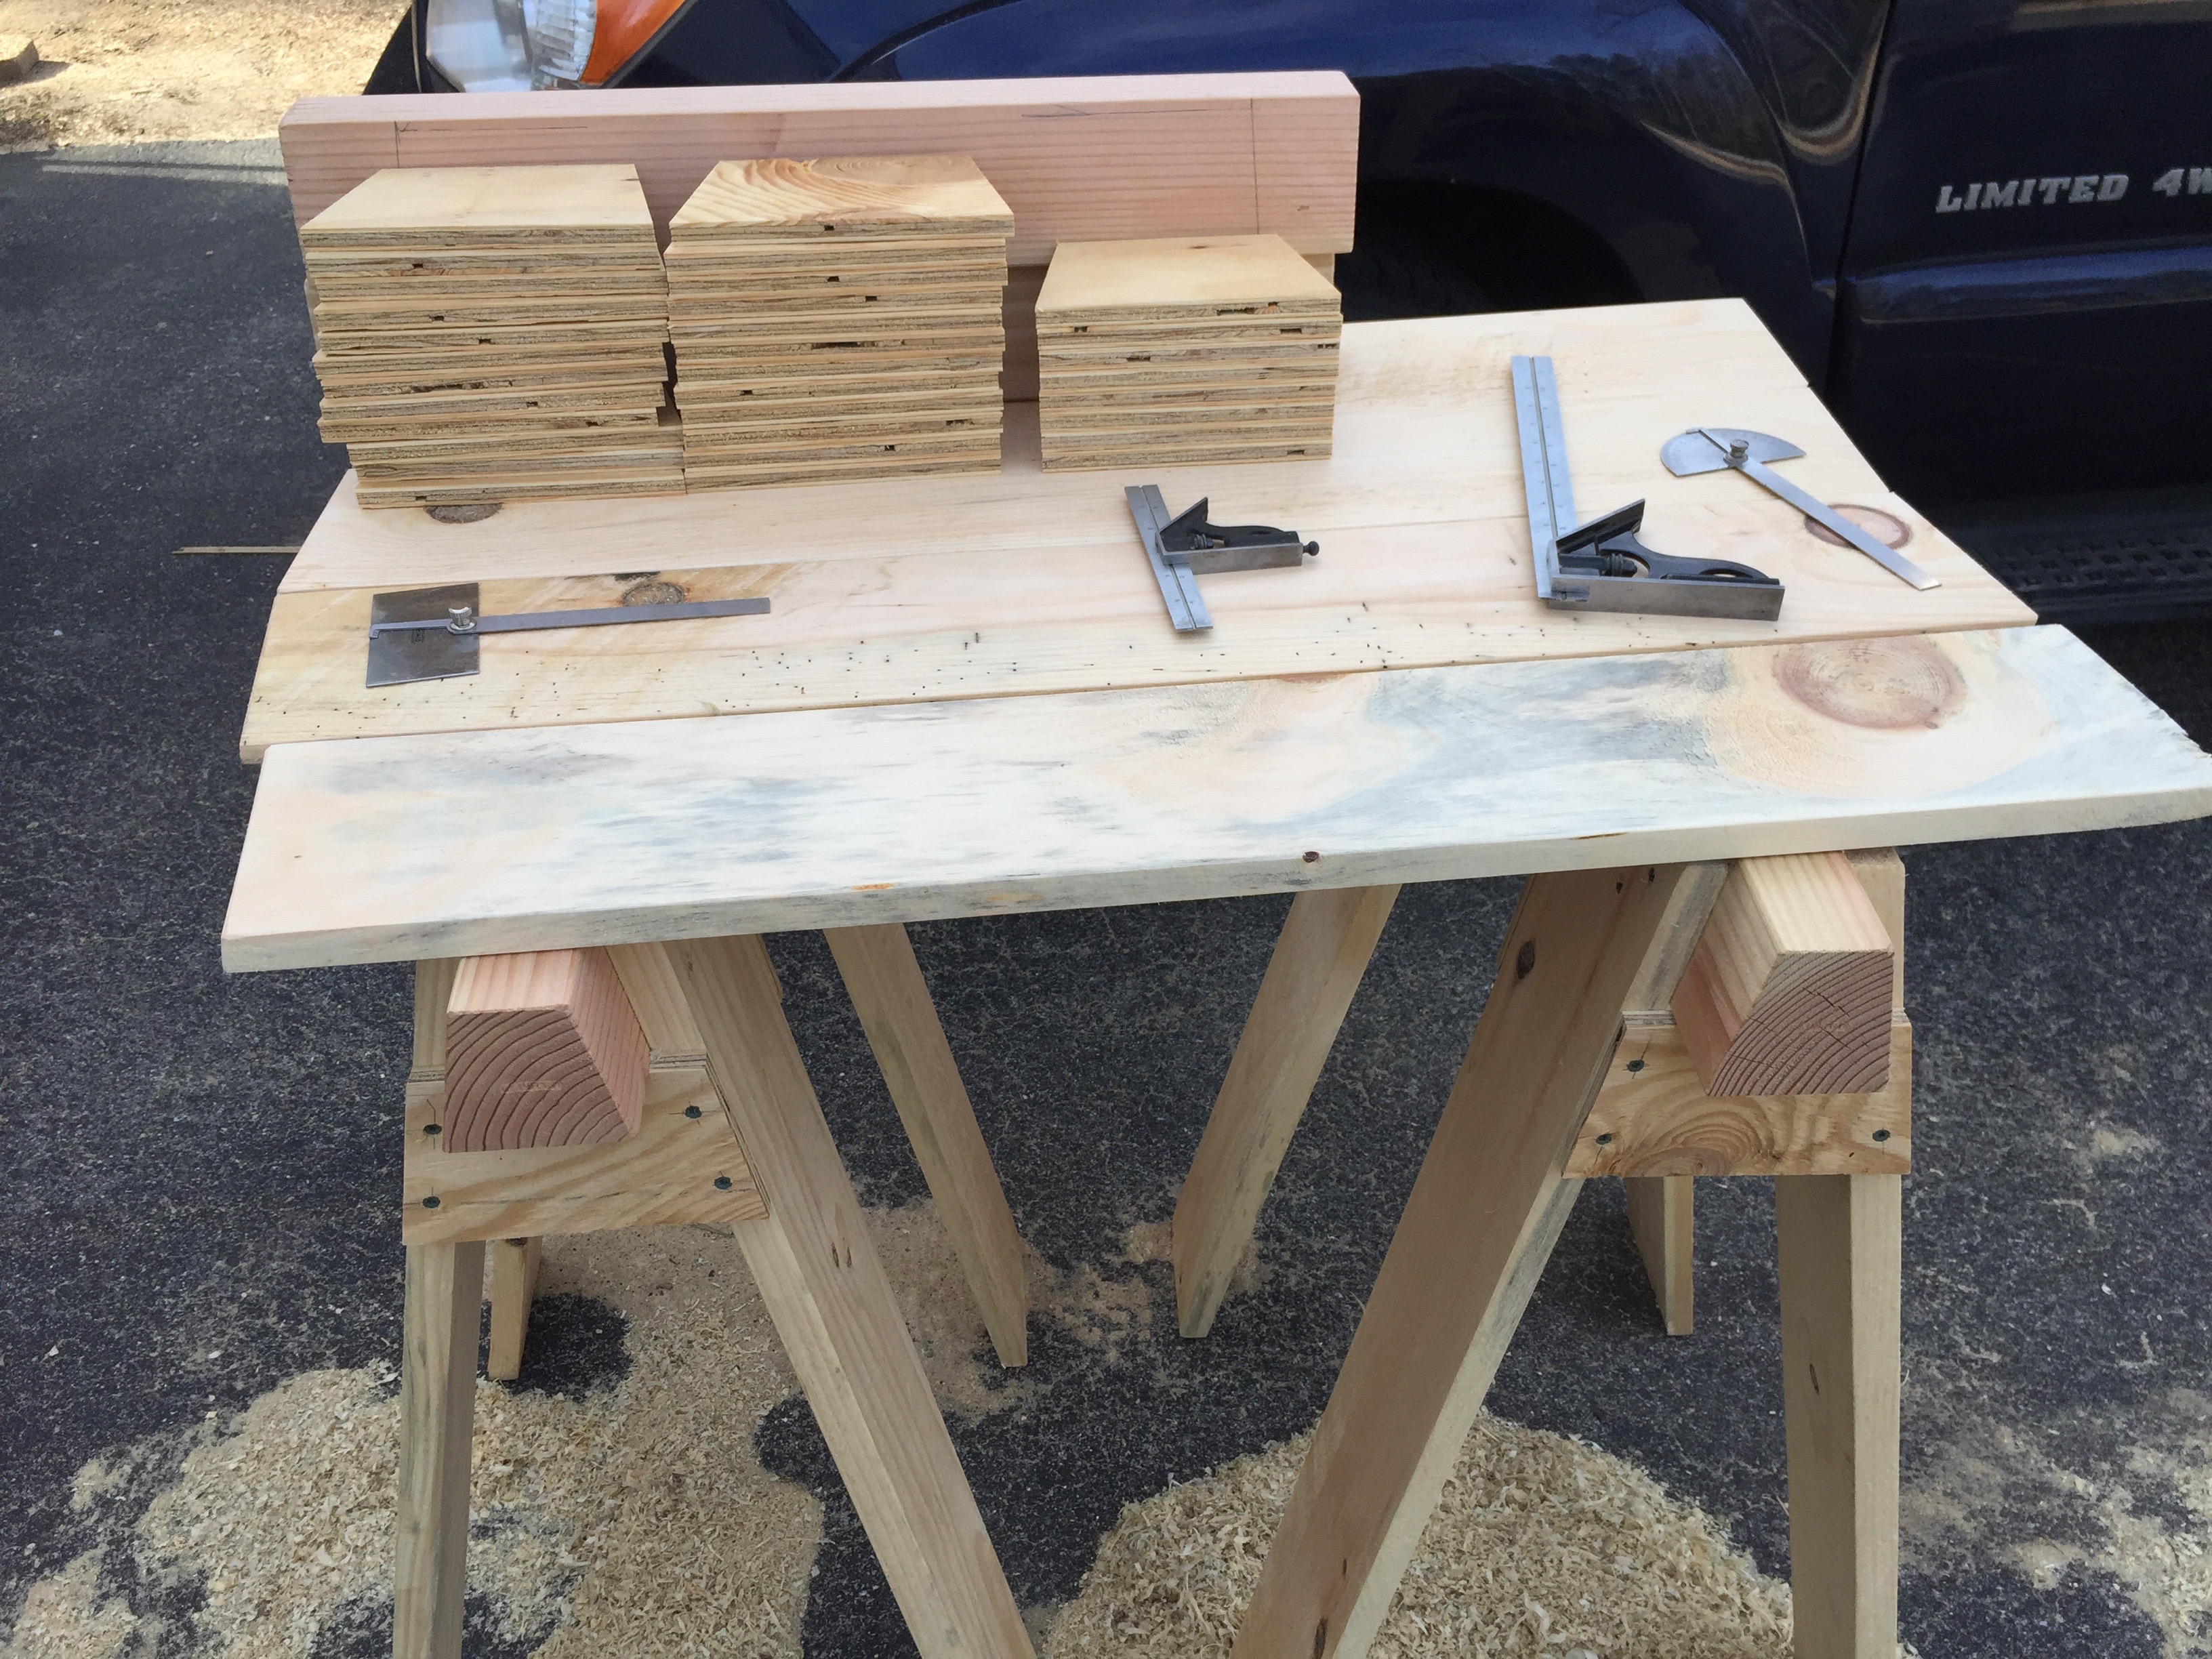
Stack of cut beams
I start by cutting the beams to 36″ long. I then cut a 12 degree bevel on two sides. If your table saw cannot cut a full 4″ on an angle you can cut as much as you can, snap off most of the waste and then use a jointer or portable power planer (like 3-1/4″ Makita Door planer) to even out the side.
I also stamped my name into the end grain of each beam with my name stamp. It makes it easy to tell my horses apart from say another friend from the school.
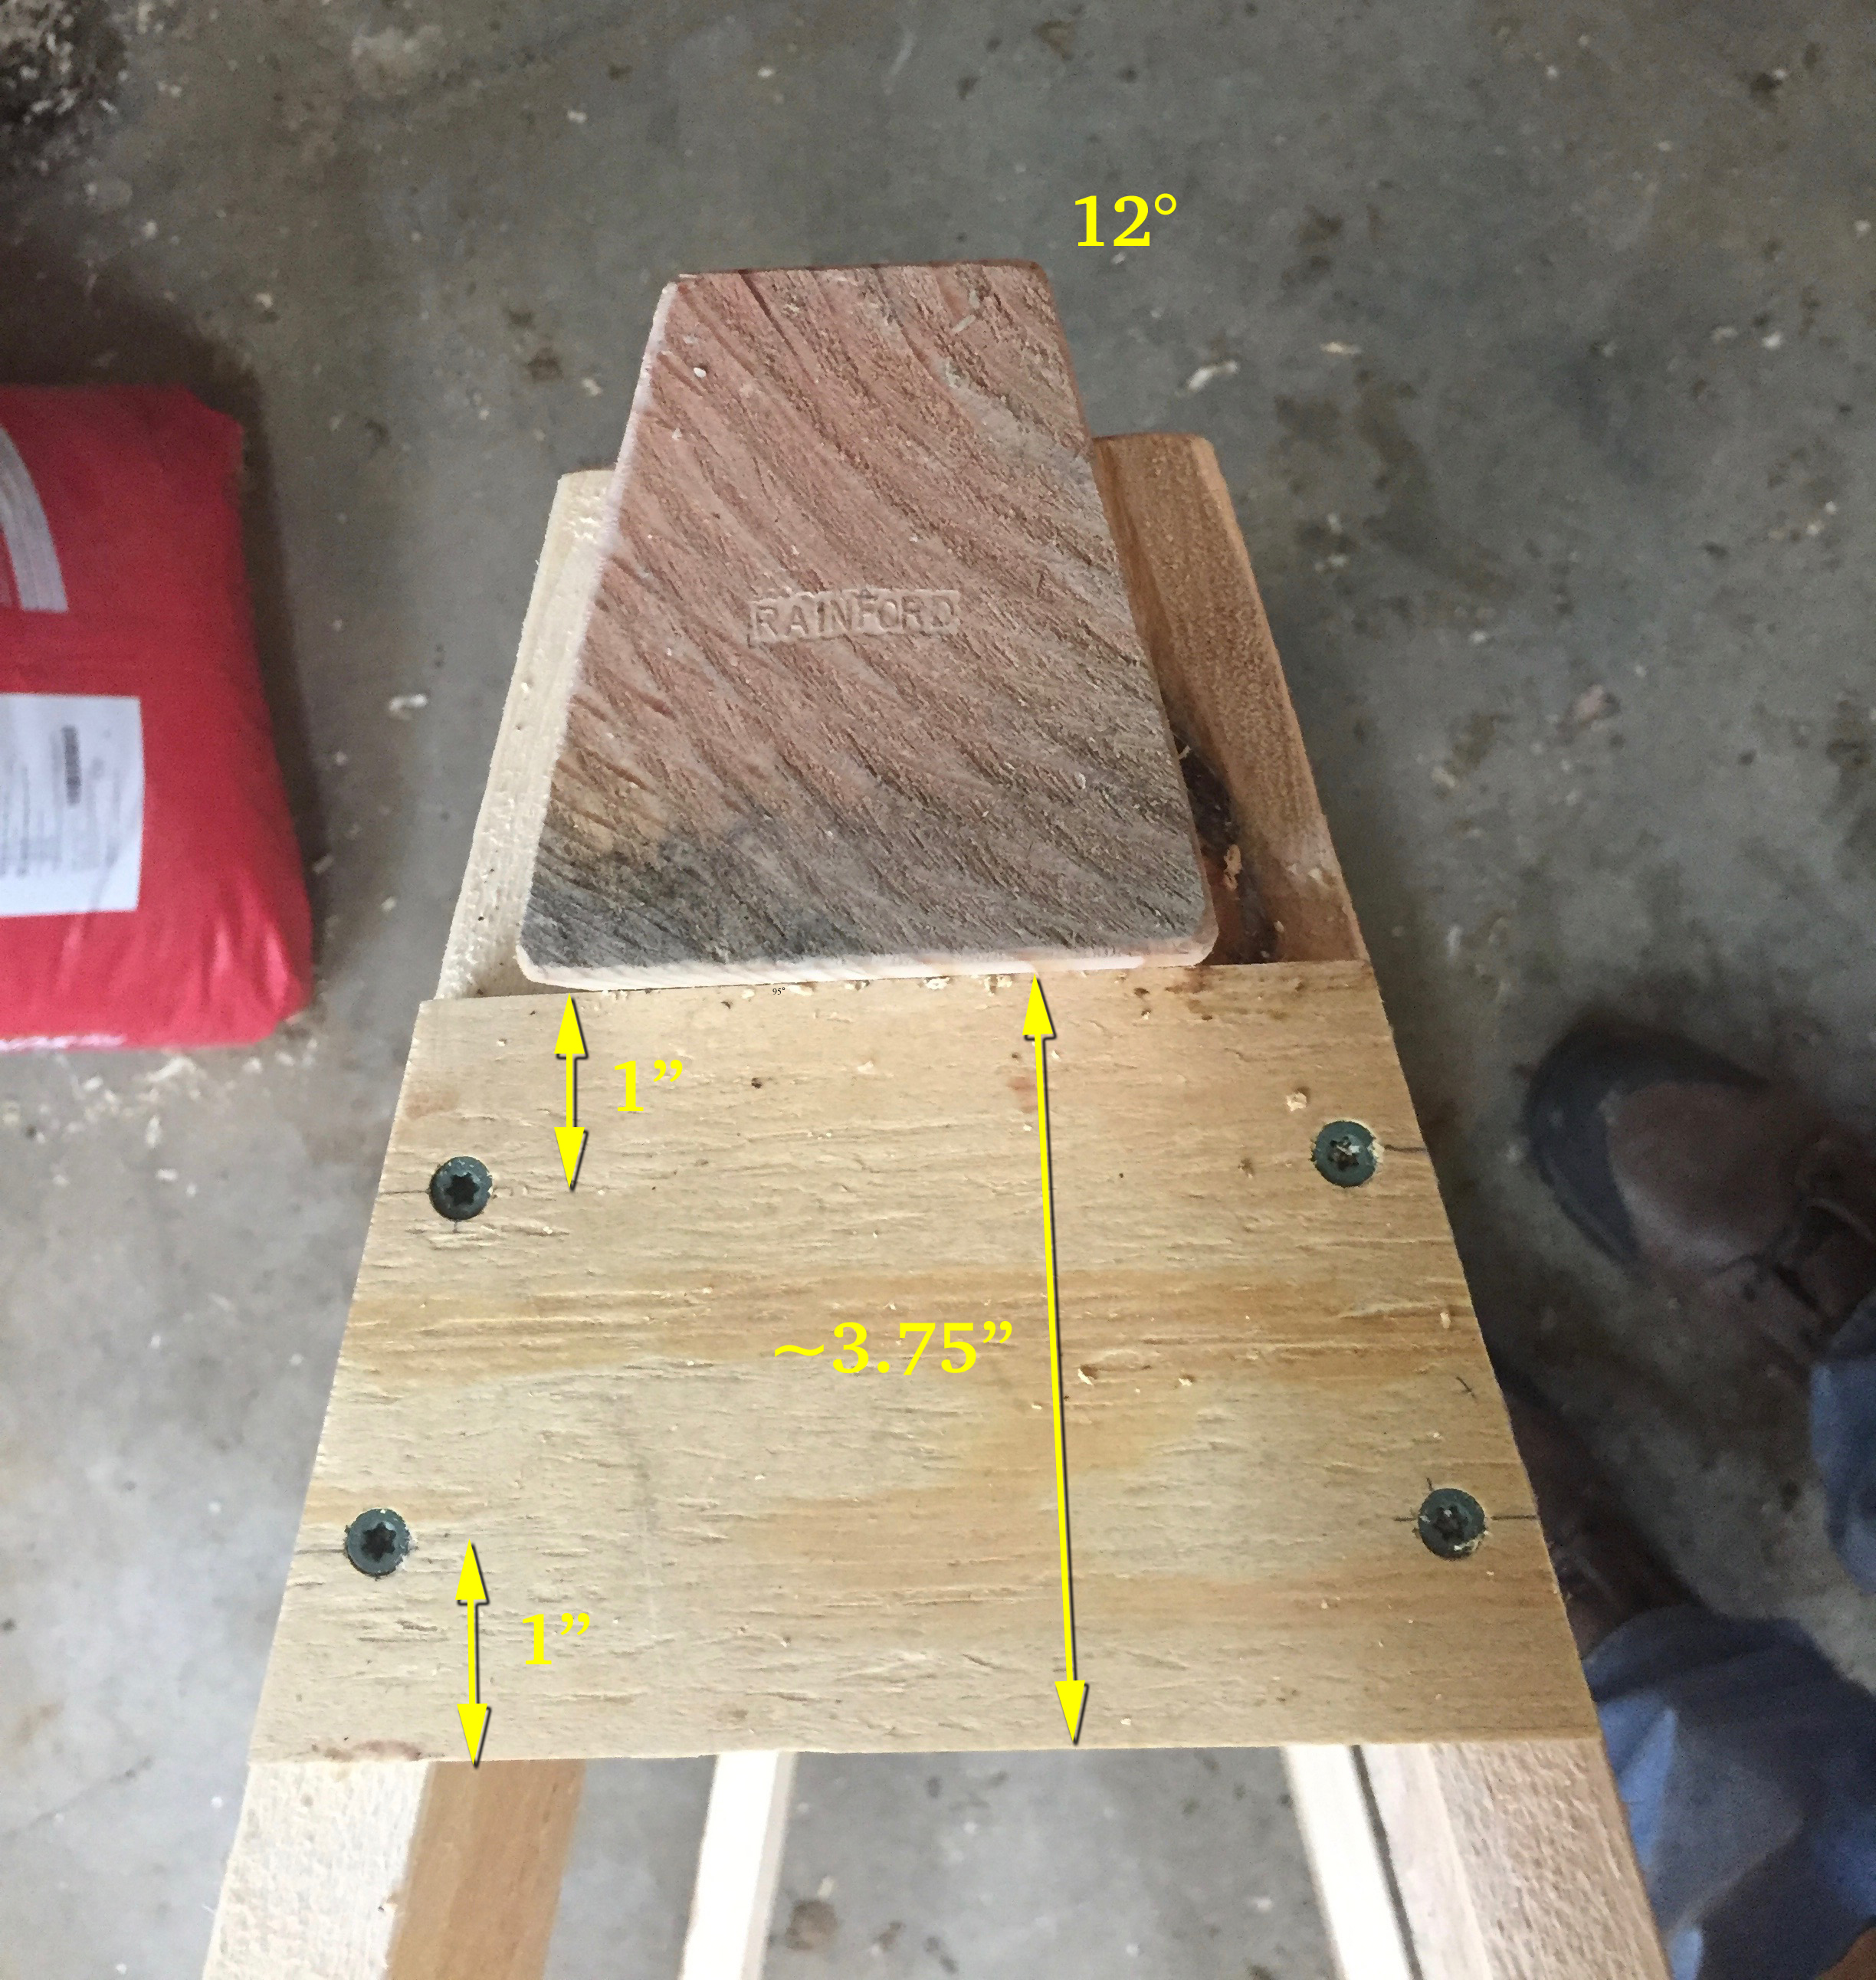
Beam and gusset with dimensions. I also used my namespace on the beam end grain.
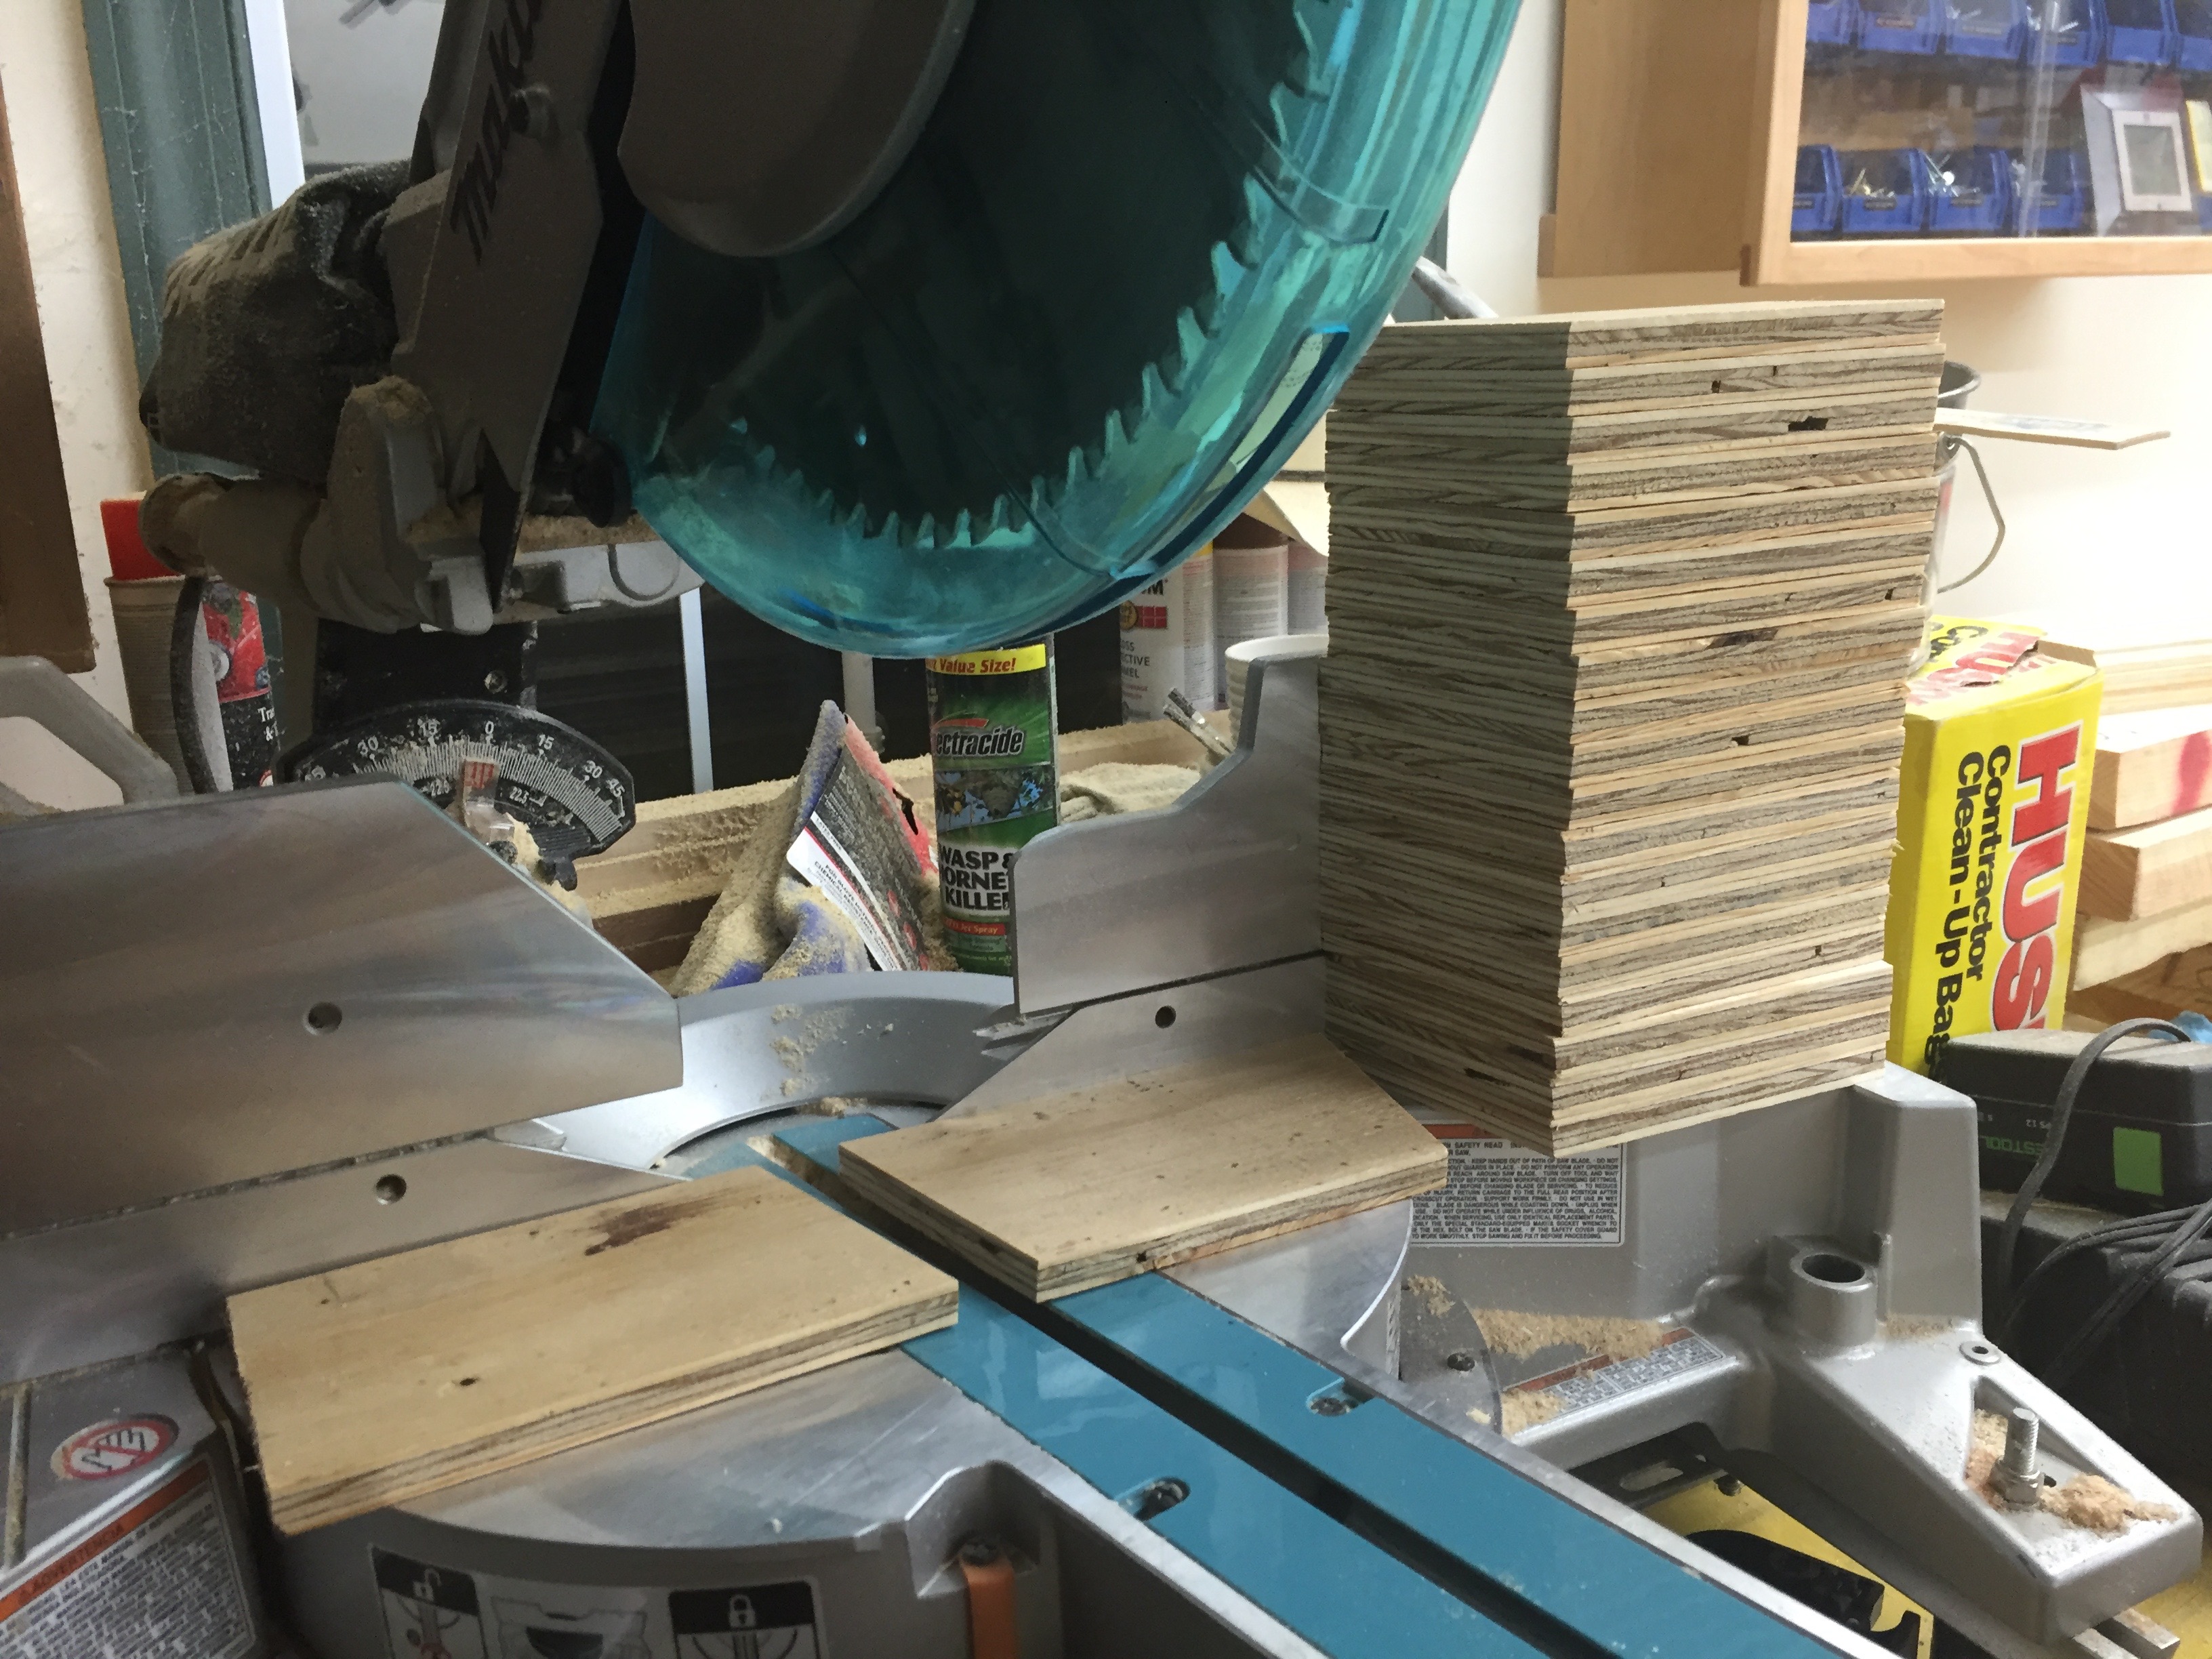
Next up I ripped my 4×8 sheet of 1/2″ CDX plywood into ~4″ wide strips. I then took a second pass on each strip with the blade set to a 5 degree angle. This allows the gussets to nestle up tightly against the beam during final assembly.
Cutting compound angles for the legs. 5 degrees and 12 degrees.
Next up I cut all the legs. I set the compound miter saw to cut at a left tilt of 5 degrees and a right rotation of 12 degrees. (See image above). The long side of each leg was cut to be 34.75″ long.
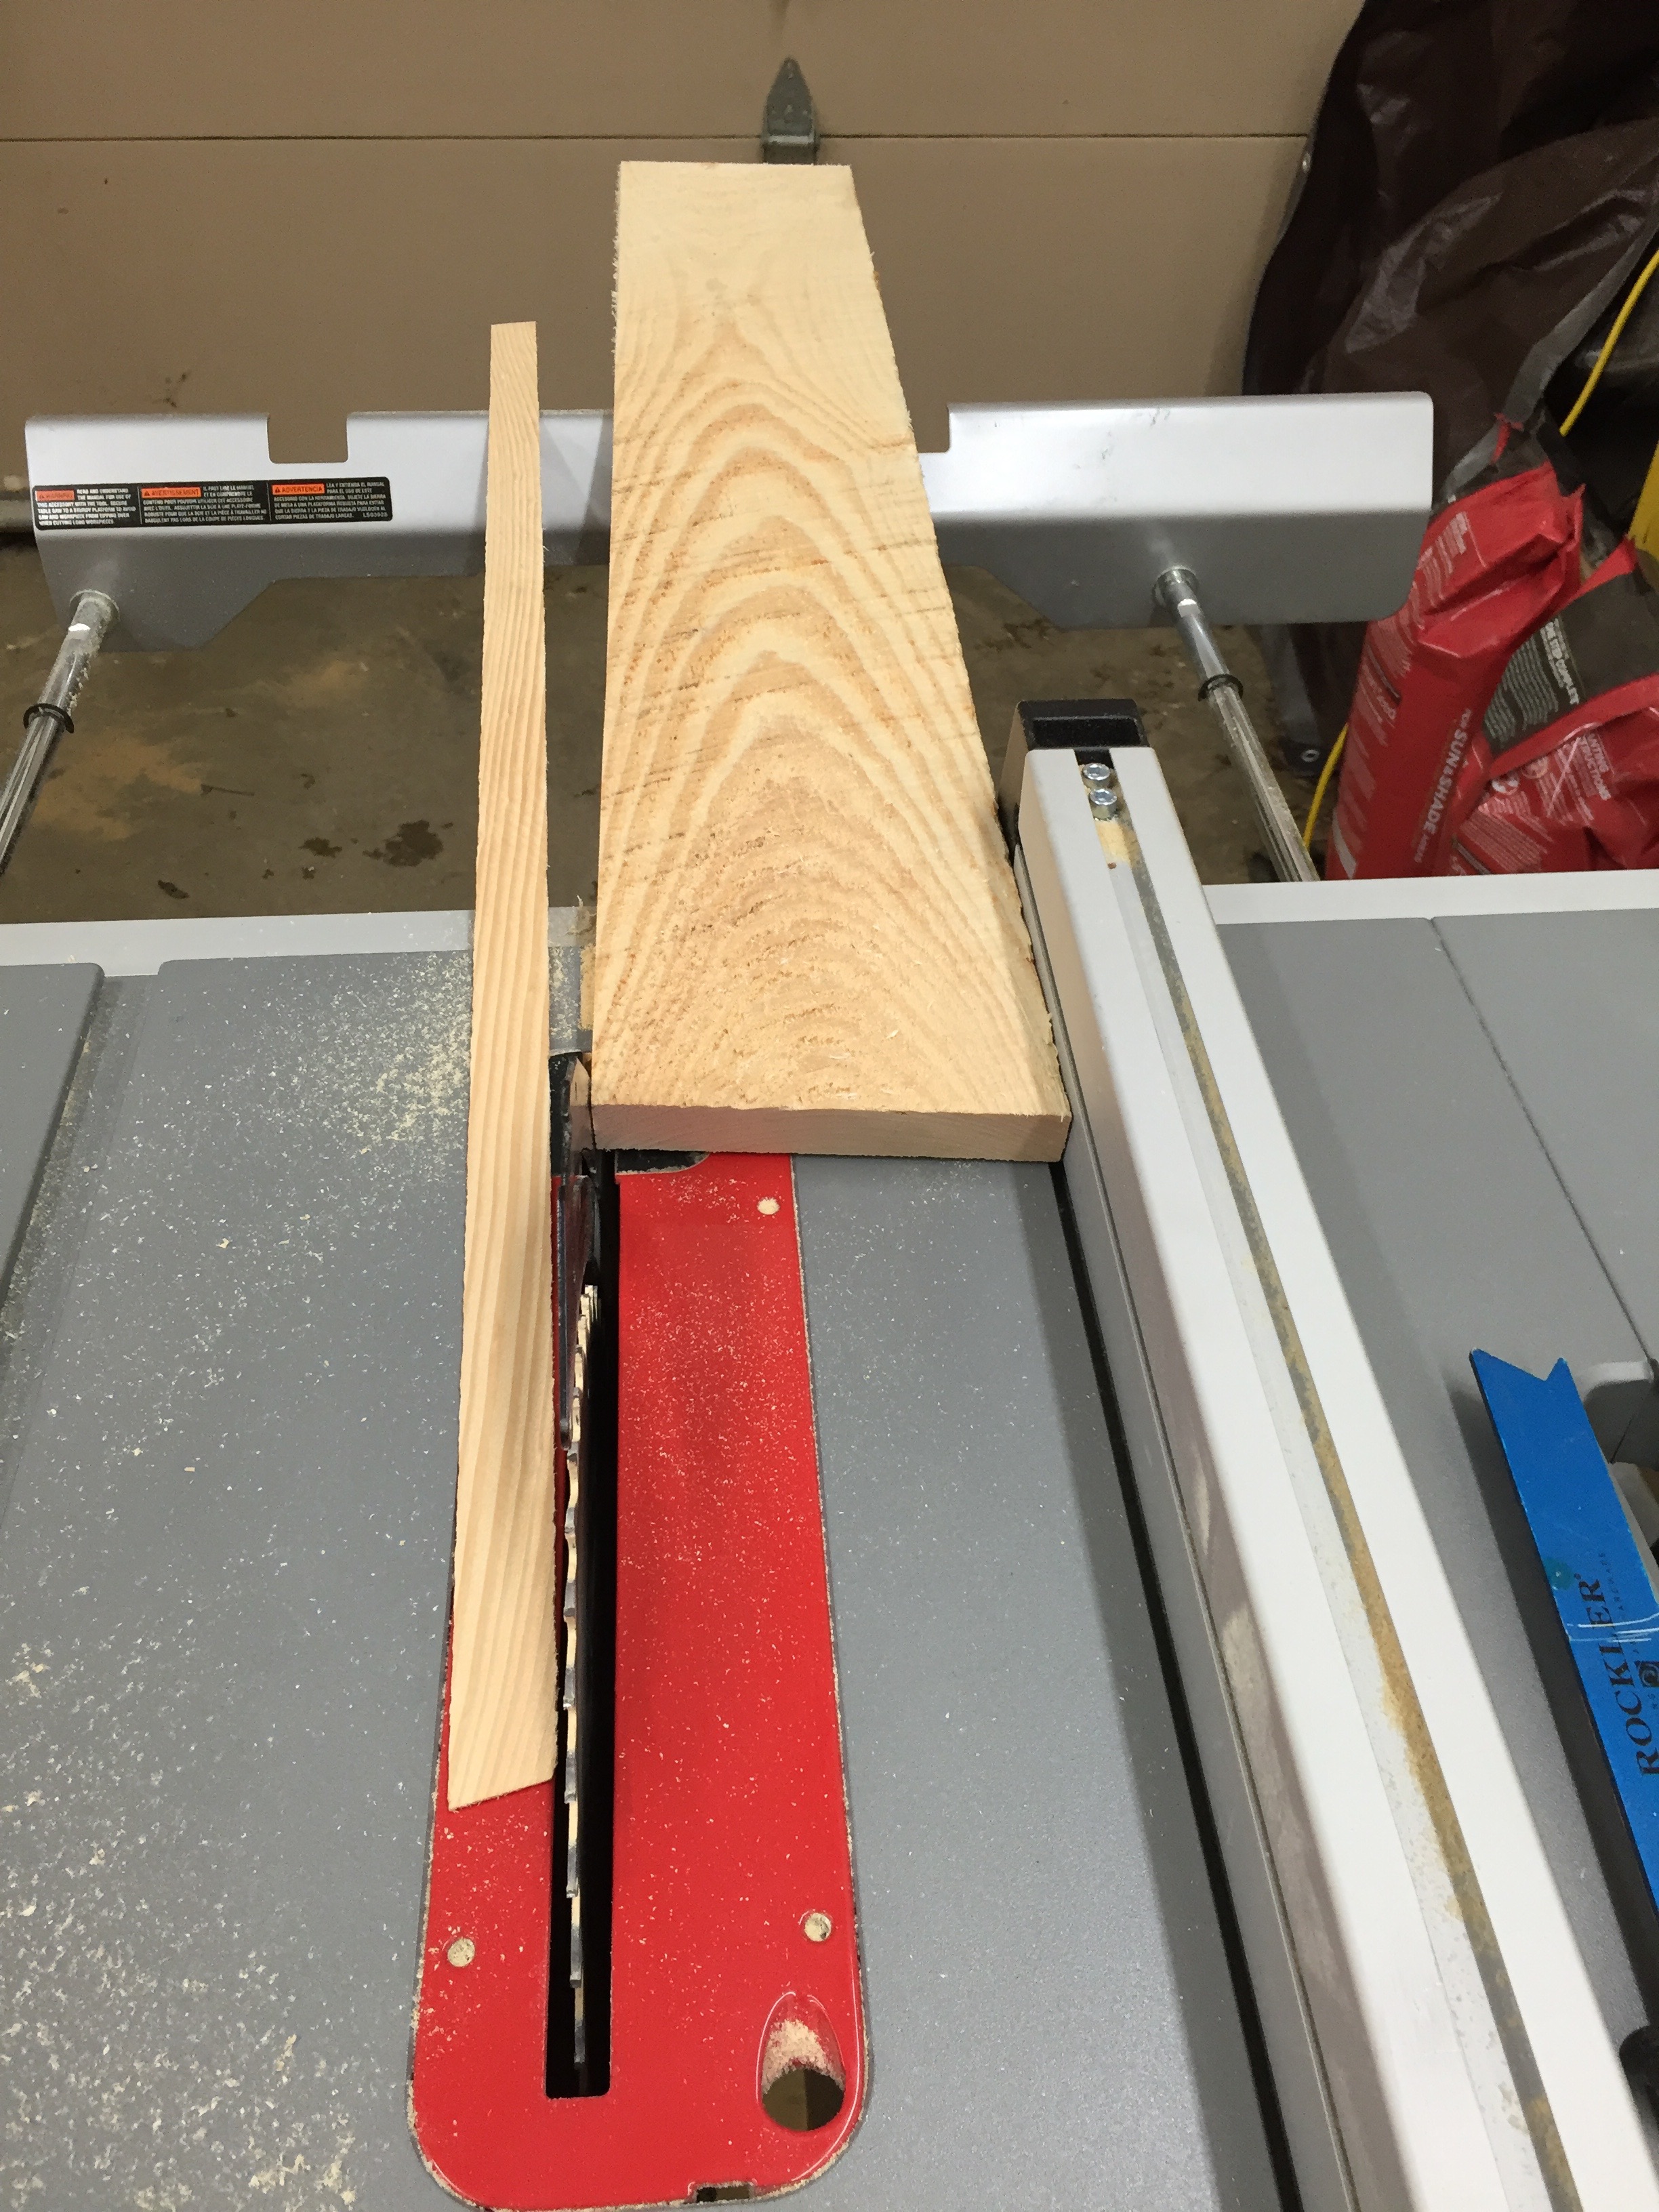
Ripping the legs to a consistent width
With all the legs cut I ripped the rough edge off of each board, then ripped the other side so all the boards landed at a consistent 5.5″ width.
Stacks of cut legs
You don’t have to plane the boards to thickness if you don’t want to. Leaving them as thick as possible added to the strength and I am not thrilled about passing green wood though my cast iron tools and into my dust collection system. My site chop saw and portable table saw both have aluminum tops which deal better with the wet wood.
112 legs ready to go
All the legs are the same, though above I stacked them to make sure I had a correct number for all the horses I planned to build. I also used a low angle block plane to break all the edges on the boards since they will be handled many times over the years and you don’t want any splinters.
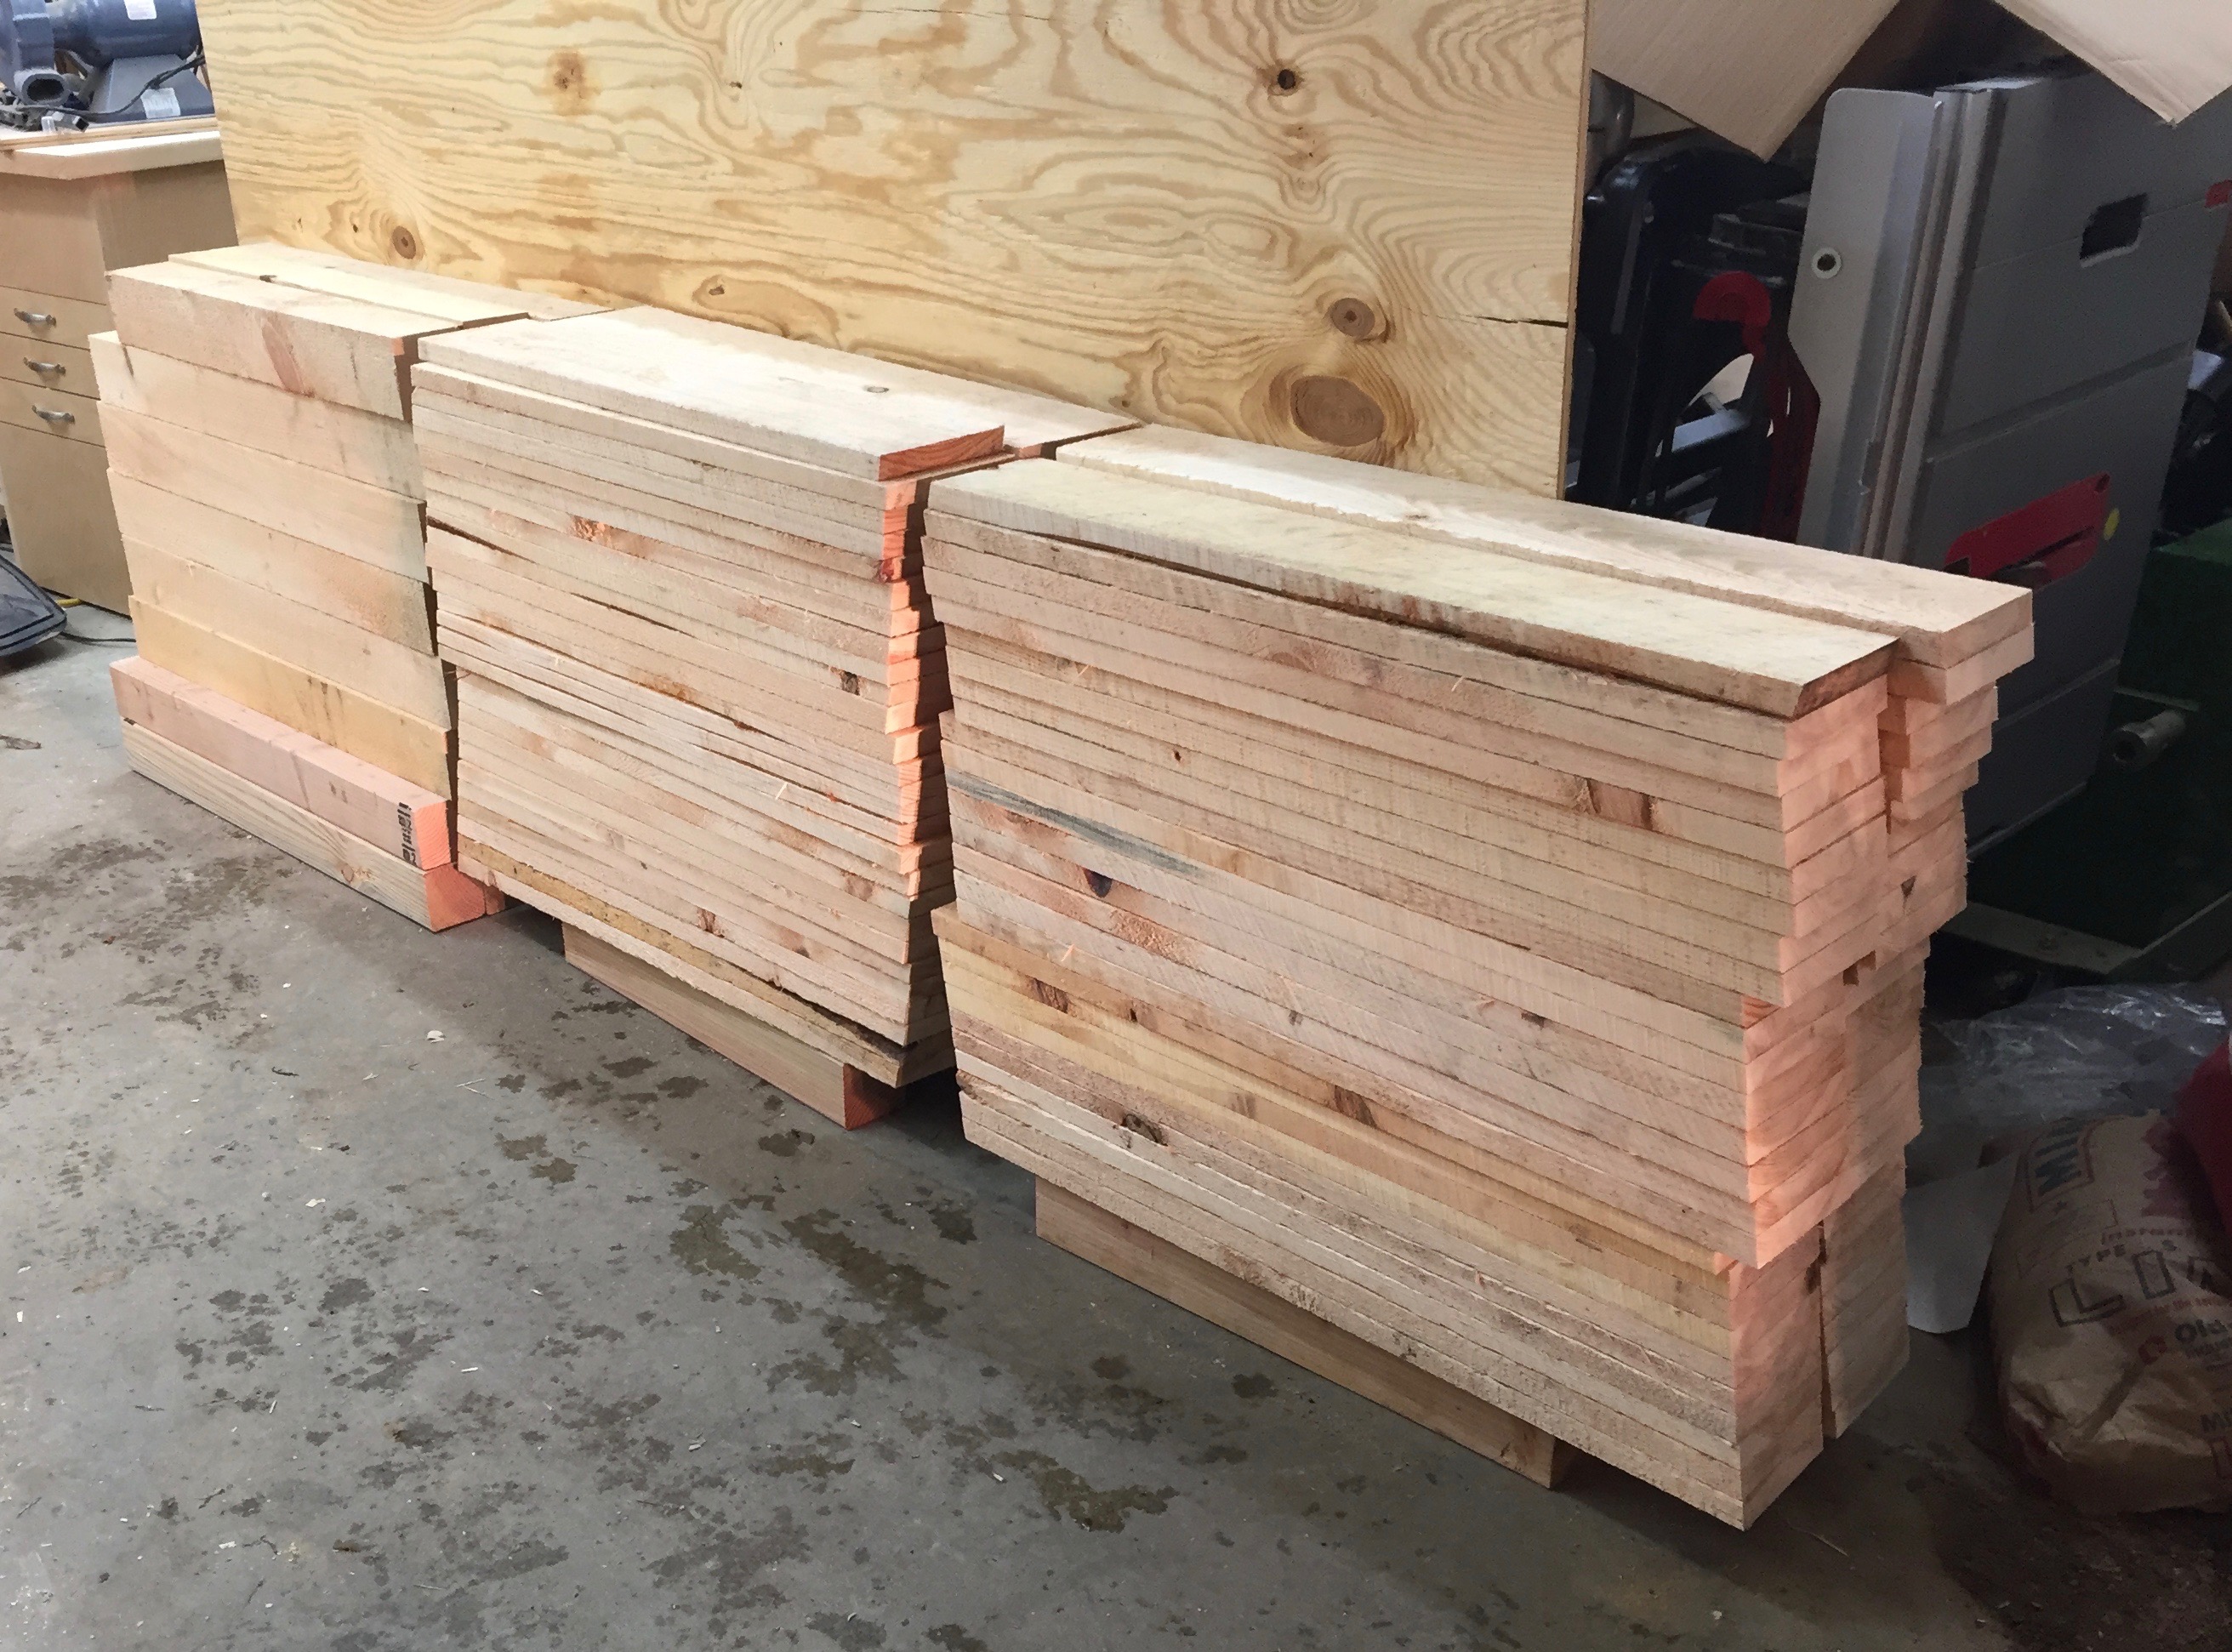
Stacks of cut legs and beams back in the shop
I then brought my wood into the heated shop as we were getting some snow and stacked them as you see above. This was a big mistake as I’ll describe later. I planned to be out there the next day but with snow and a baby in the house they sat out there for a week. If you bring sopping wet/green wood into a heated shop, make sure you sticker them so air can flow around all the edges and the wood can dry evenly.
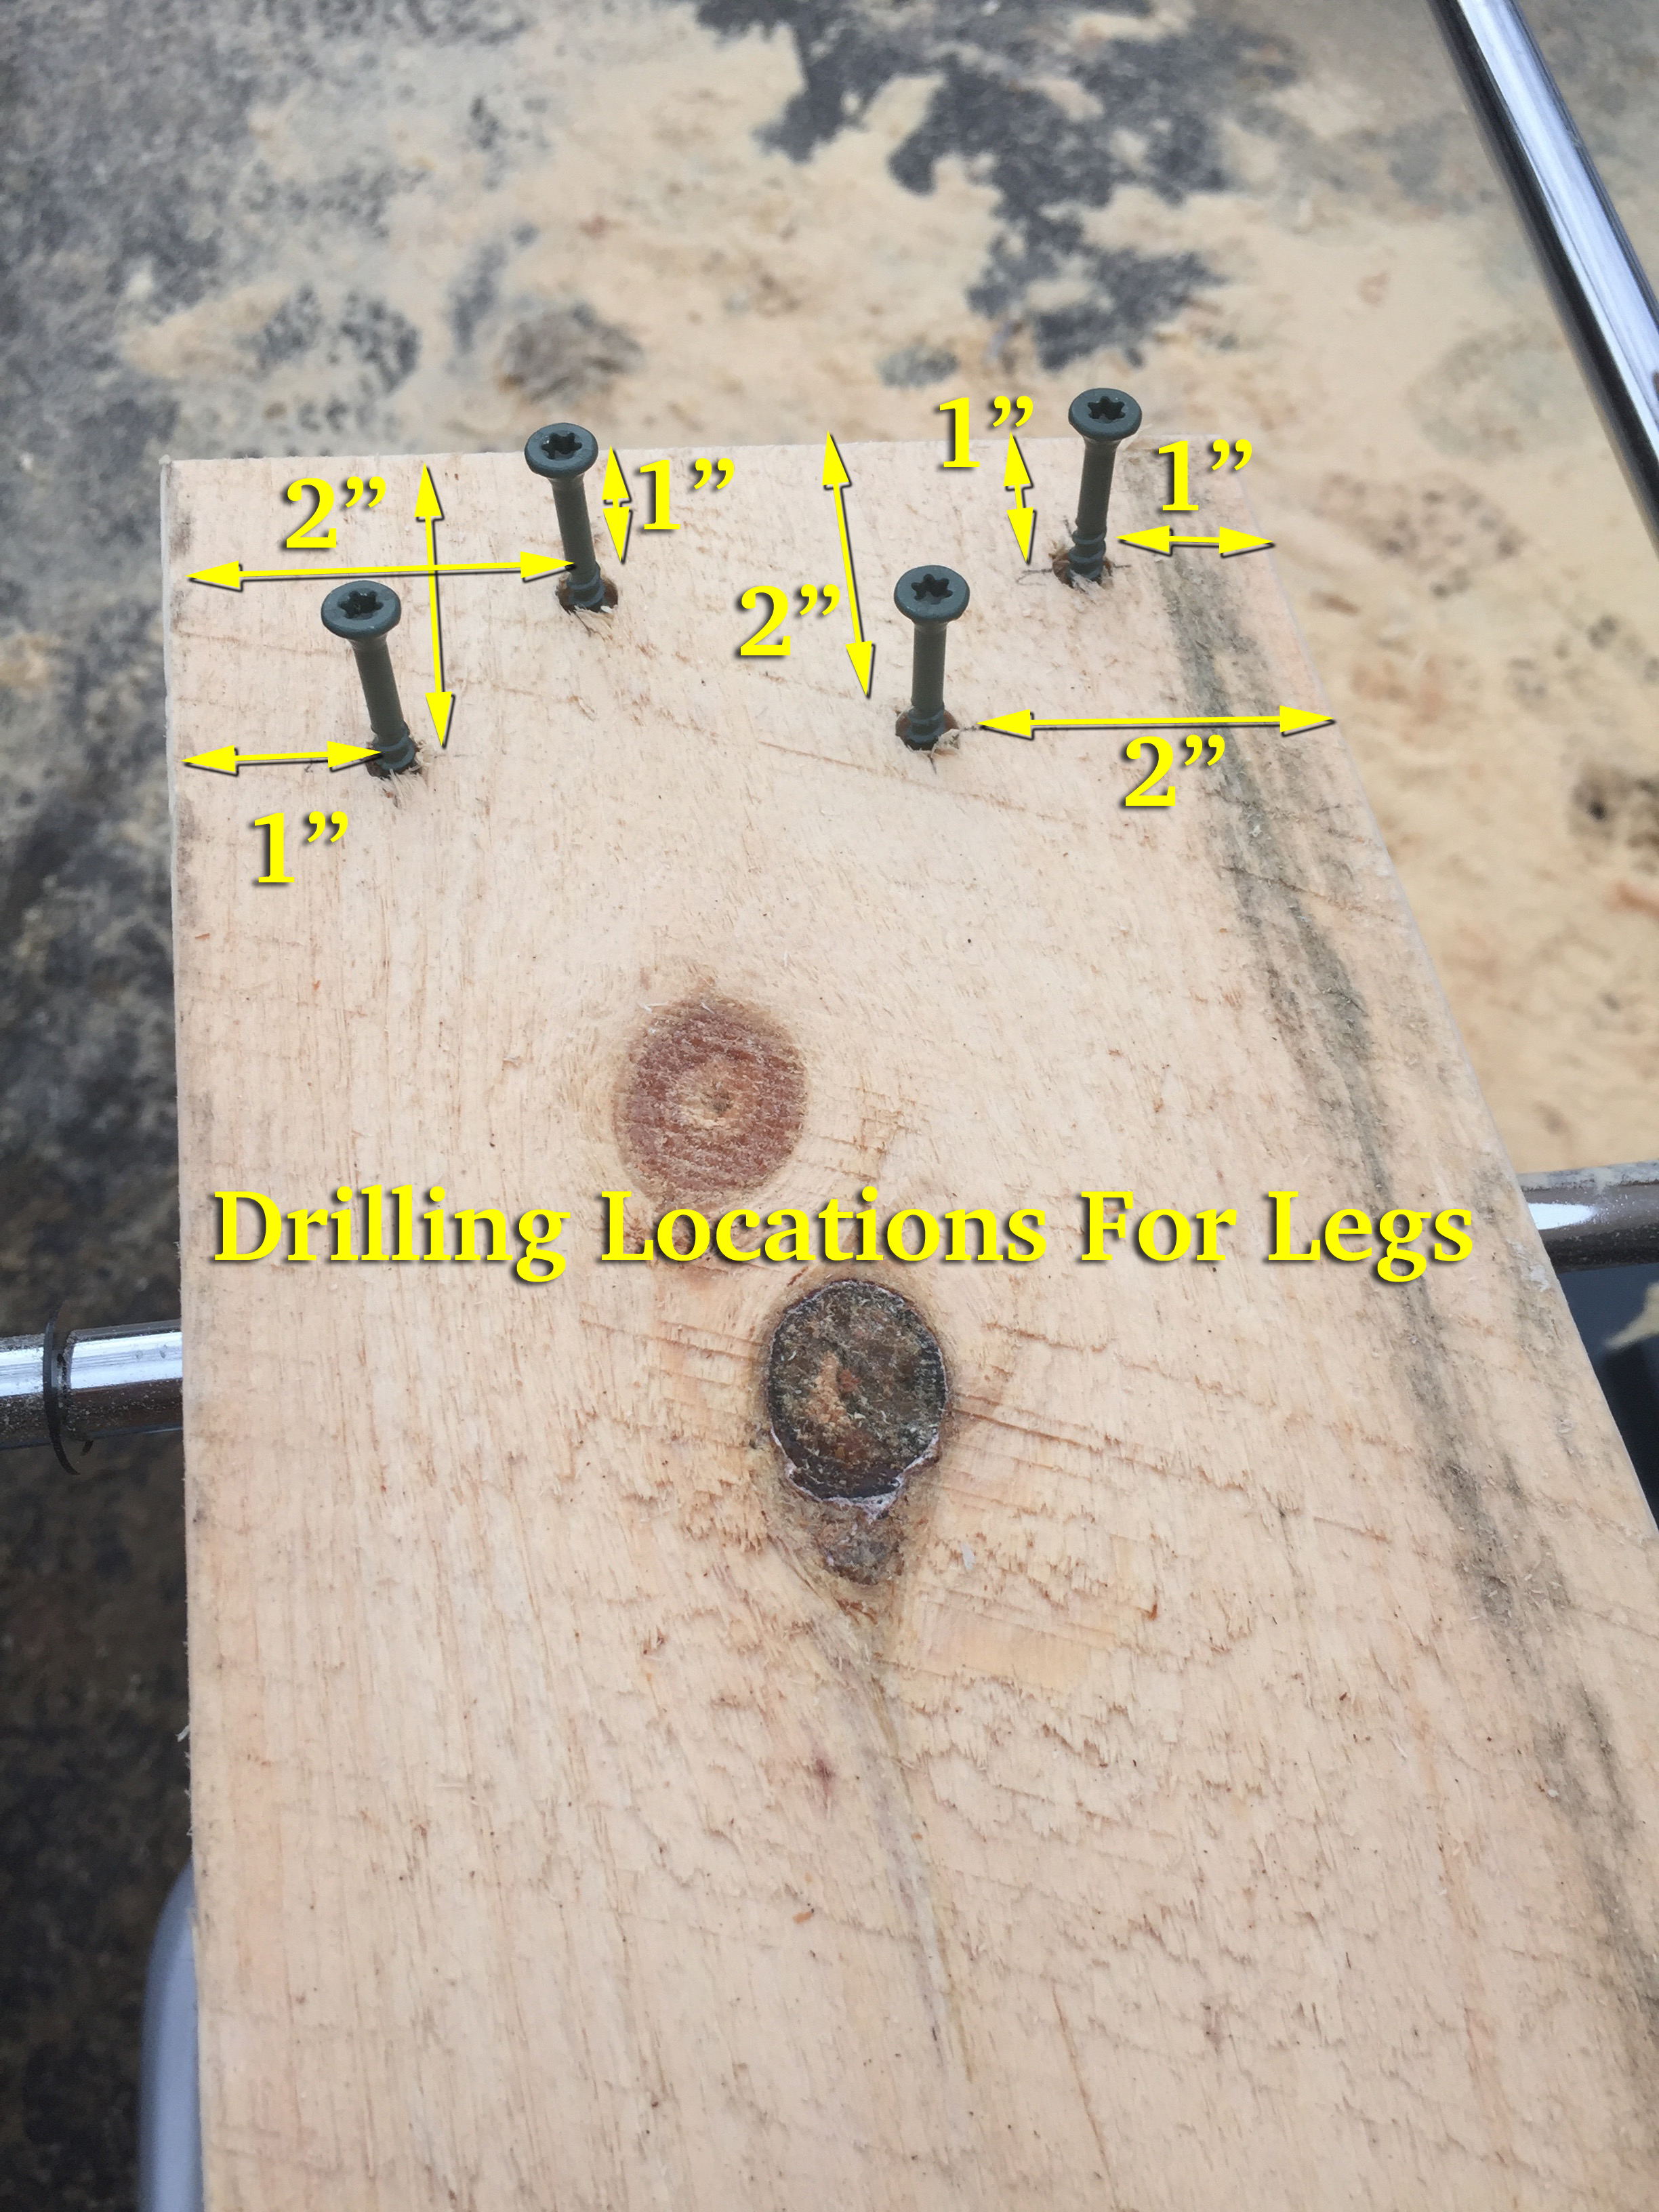
Layout for the 2″ ceramic star drive deck screws.
With all the legs cut I started to layout for the screws. I grab two combination squares and set one to be 1″ and set the other to 2″. This allows for fast/efficient layout. (see above image). Each of the screws is either 1″ or 2″ from the edge or top of the board. The screws are staggered to help avoid splitting the wood. I used DeckMate 2″ ceramic coated deck screws that have a nice thick shaft and are rated for outdoor structural use and do not rust. Do NOT use drywall screws on this sort of project, they are far too weak and not meant for the outdoors. One 5lb box of #8 2″ screws was enough to attach all the legs. After layout I pre-drill each of the holes and start the screws into the boards — this makes it a lot easier to assemble the horse later on.
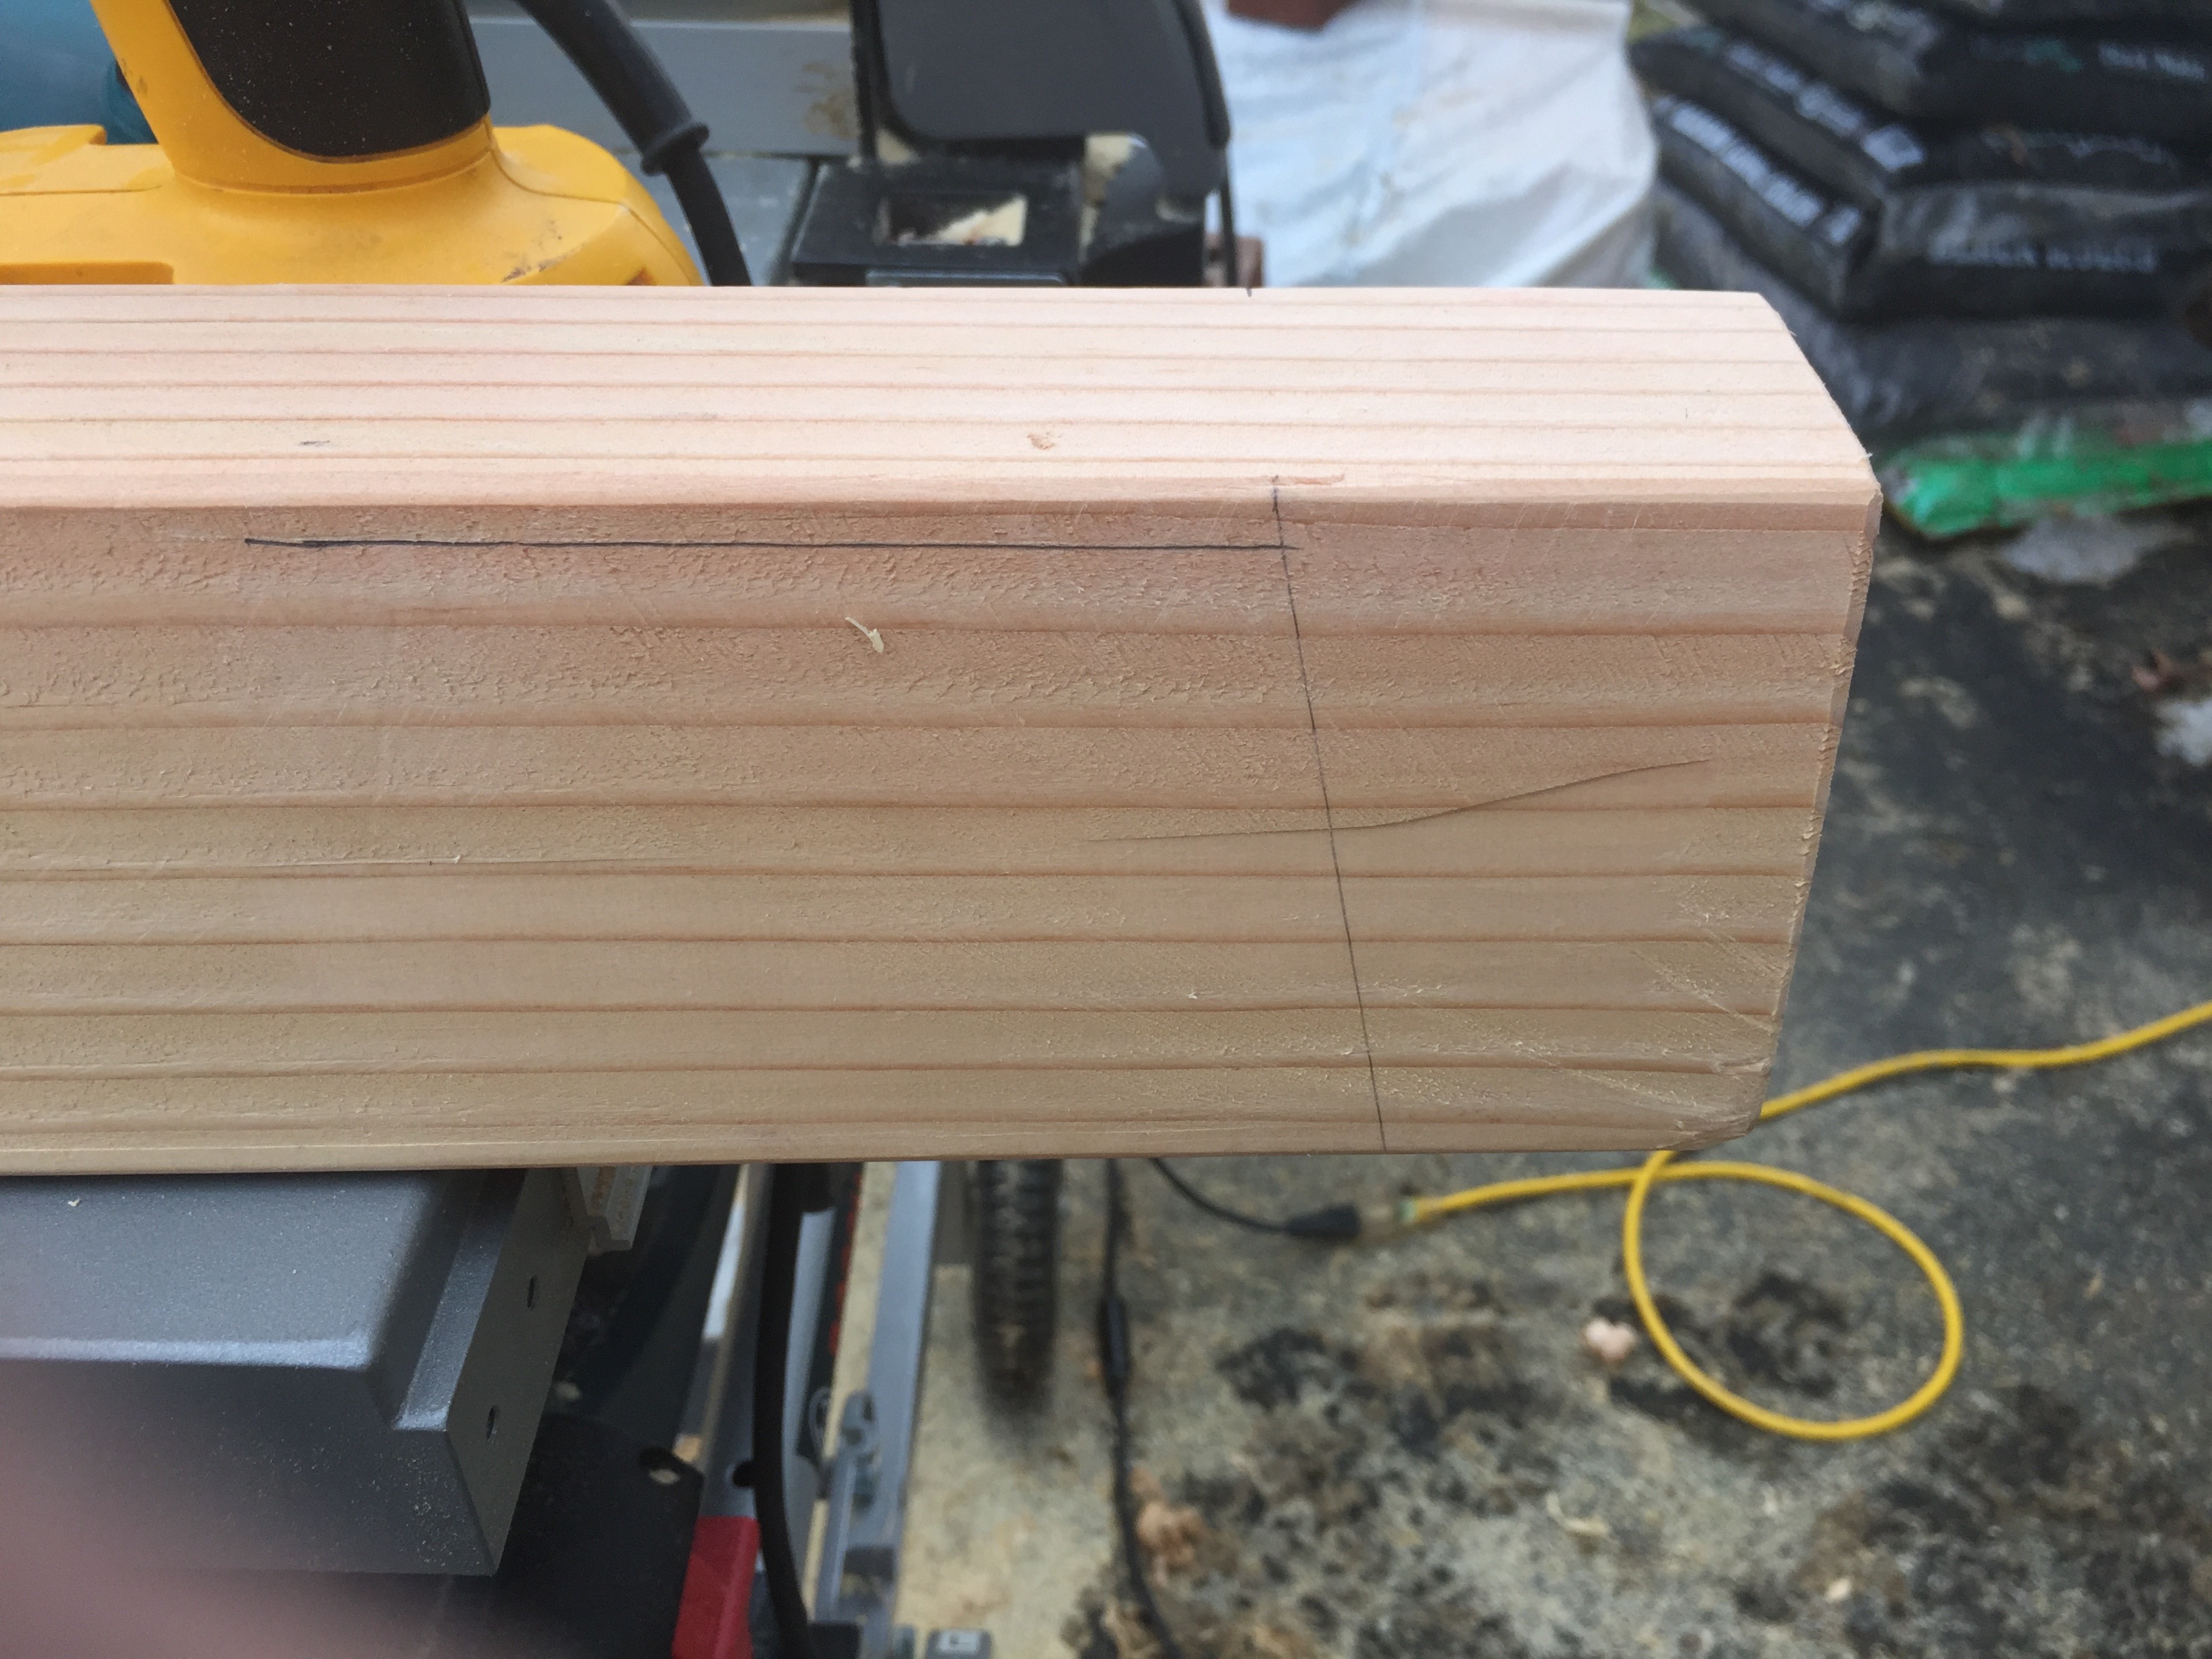
Laying out the beam. 5 degree angle is set in 2.5″ from the end. The top of the legs should be 1/4″ below the top of the beam.
For the beams I make a tick mark 2.5″ in from each end on the top edge of the beam. Using a protractor I make a 5 degree line down the side of the beam — this splays the legs and gives use nice stable horse. Having two protractors on hand is nice as I have one set for the right and one set for the left. I then set a combination square to 1/4″ and make a line along the top edge of the beam — this allows me to line up the legs during assembly. I also broke all the edges with a block plane.
Another horse ready to be assembled
Early on I made a few pairs of saw horses to work from and did the majority of the horses as a large run.
Attaching the legs — I added one leg at a time, usually only sinking 2 or 3 of the pre-started screws into the beam. I add one leg, then add the second leg on the same side of the beam. This makes it easier to stand the horse on those two legs and add the third leg. When adding the 4th leg you’ll want to make sure all 4 legs are properly resting on the ground. If your horse wobbles this is your chance to adjust the legs. When the horse is standing the way you want you can sink the rest of the screws on the legs. When using an impact gun you don’t want to sink the screws any further into the wood than you absolutely have to. Ideally the screw heads should come to rest in the same plane as the surface of the wood, but green pine can be a bit soft so some of them may go deeper before they have enough grip to pull the leg tight to the beam.
Mass producing gusset plates.
With a beam and set of legs ready to go and standing nicely you can take a plywood gusset blank, bring it over to the partially assembled horse and trace where it meets the legs. Ideally the gussets should not stick out farther than the legs, otherwise they might catch on things. Making them say 1/32″ inside of the surface of the legs is what I shoot for. Using that traced piece I cut it and label it as a the template and use that for laying out each of the subsequent gussets
Important Notes About Gussets:
1.) When cutting the gusset the beveled end is always ‘up’ on the installed gusset — it mates nicely to the underside of the beam.
2.) When installing a gusset make sure the 5 degree bevel is facing the correct way so that it rest tightly up against the beam.
Impromptu work table
With a few horses pressed into early service I was able to make a makeshift table that allowed me to layout/mark all the of the gussets. Each one is secured with 4 screws. I made a mark for each screw to be 1″ down from the top or the bottom of the gusset and centered on the thickness of the leg, so for most that would be ~3/8″ in from the mitered edge. I turn a horse on its side and place the marked gusset where it is going to go. I then pre-drill the gusset in place and drive the screws. I used #8 1-5/8″ Deckmate Ceramic Star-drive screws and again a 5lb box was enough for this project.
Each horse required 16 2″ screws and 16 1-5/8″ screws.
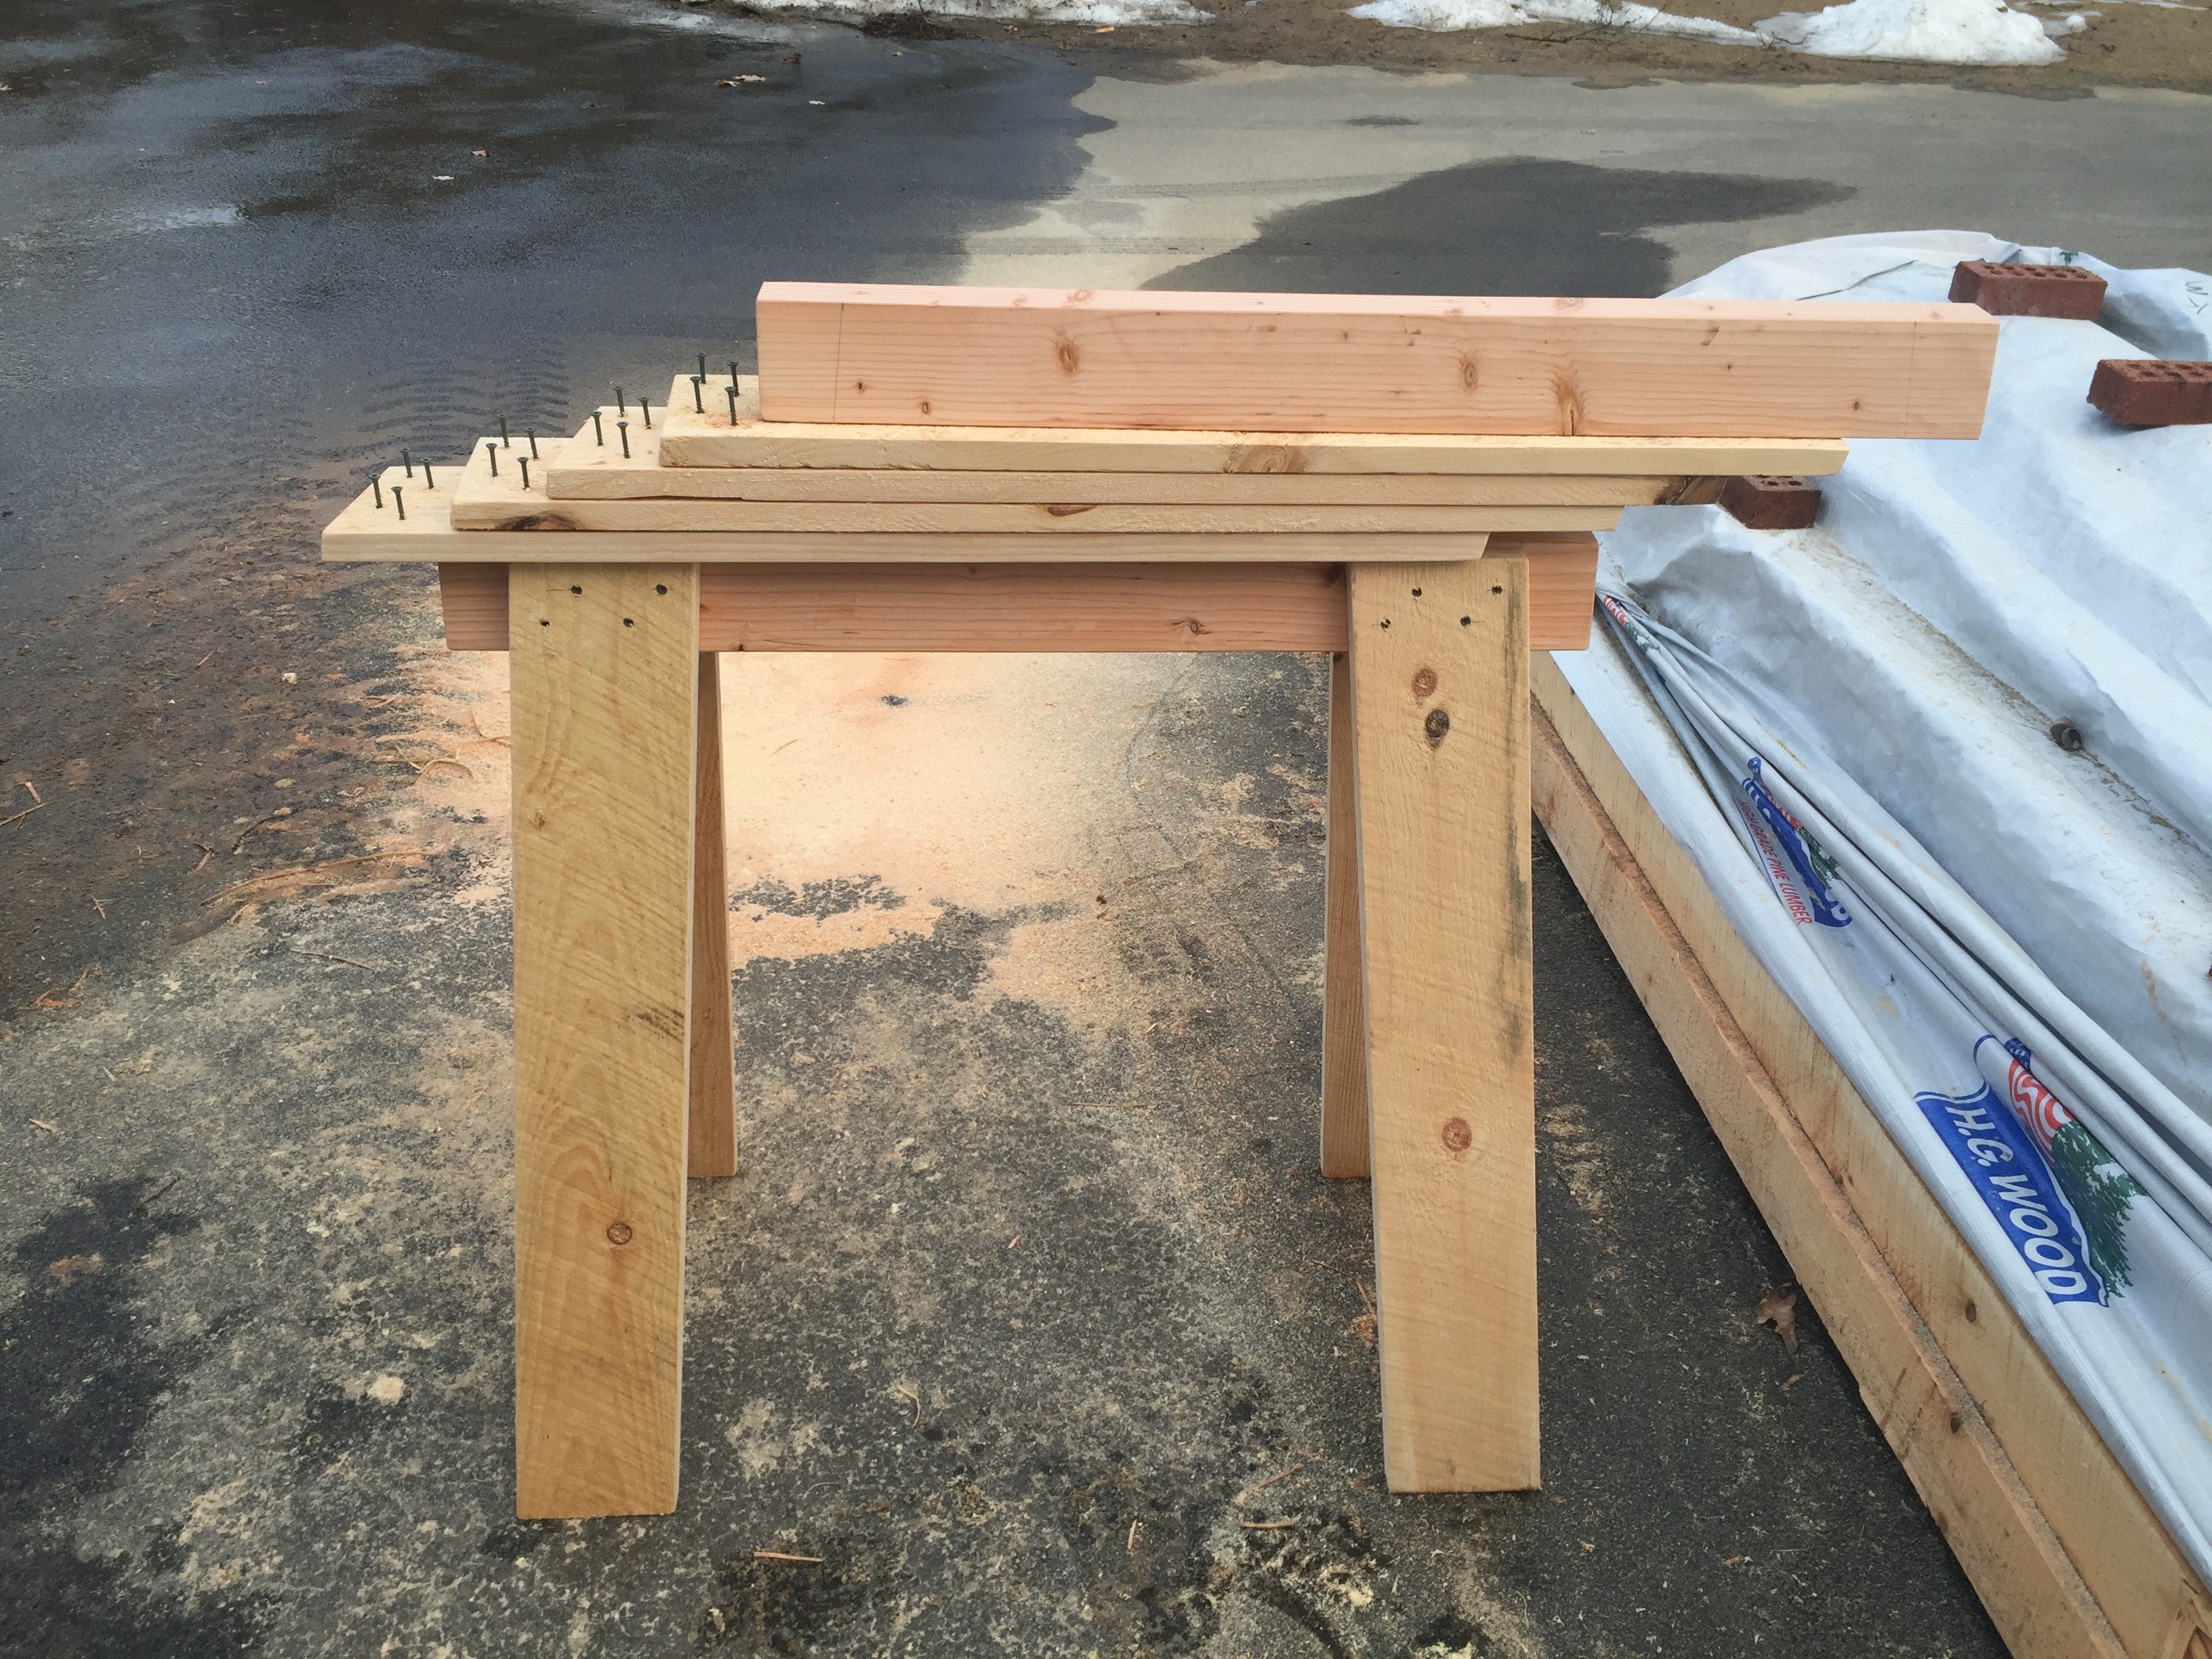
Saw horse with dimensions.
And now we have a completed horse! The image above has some more dimensional information for quick reference.
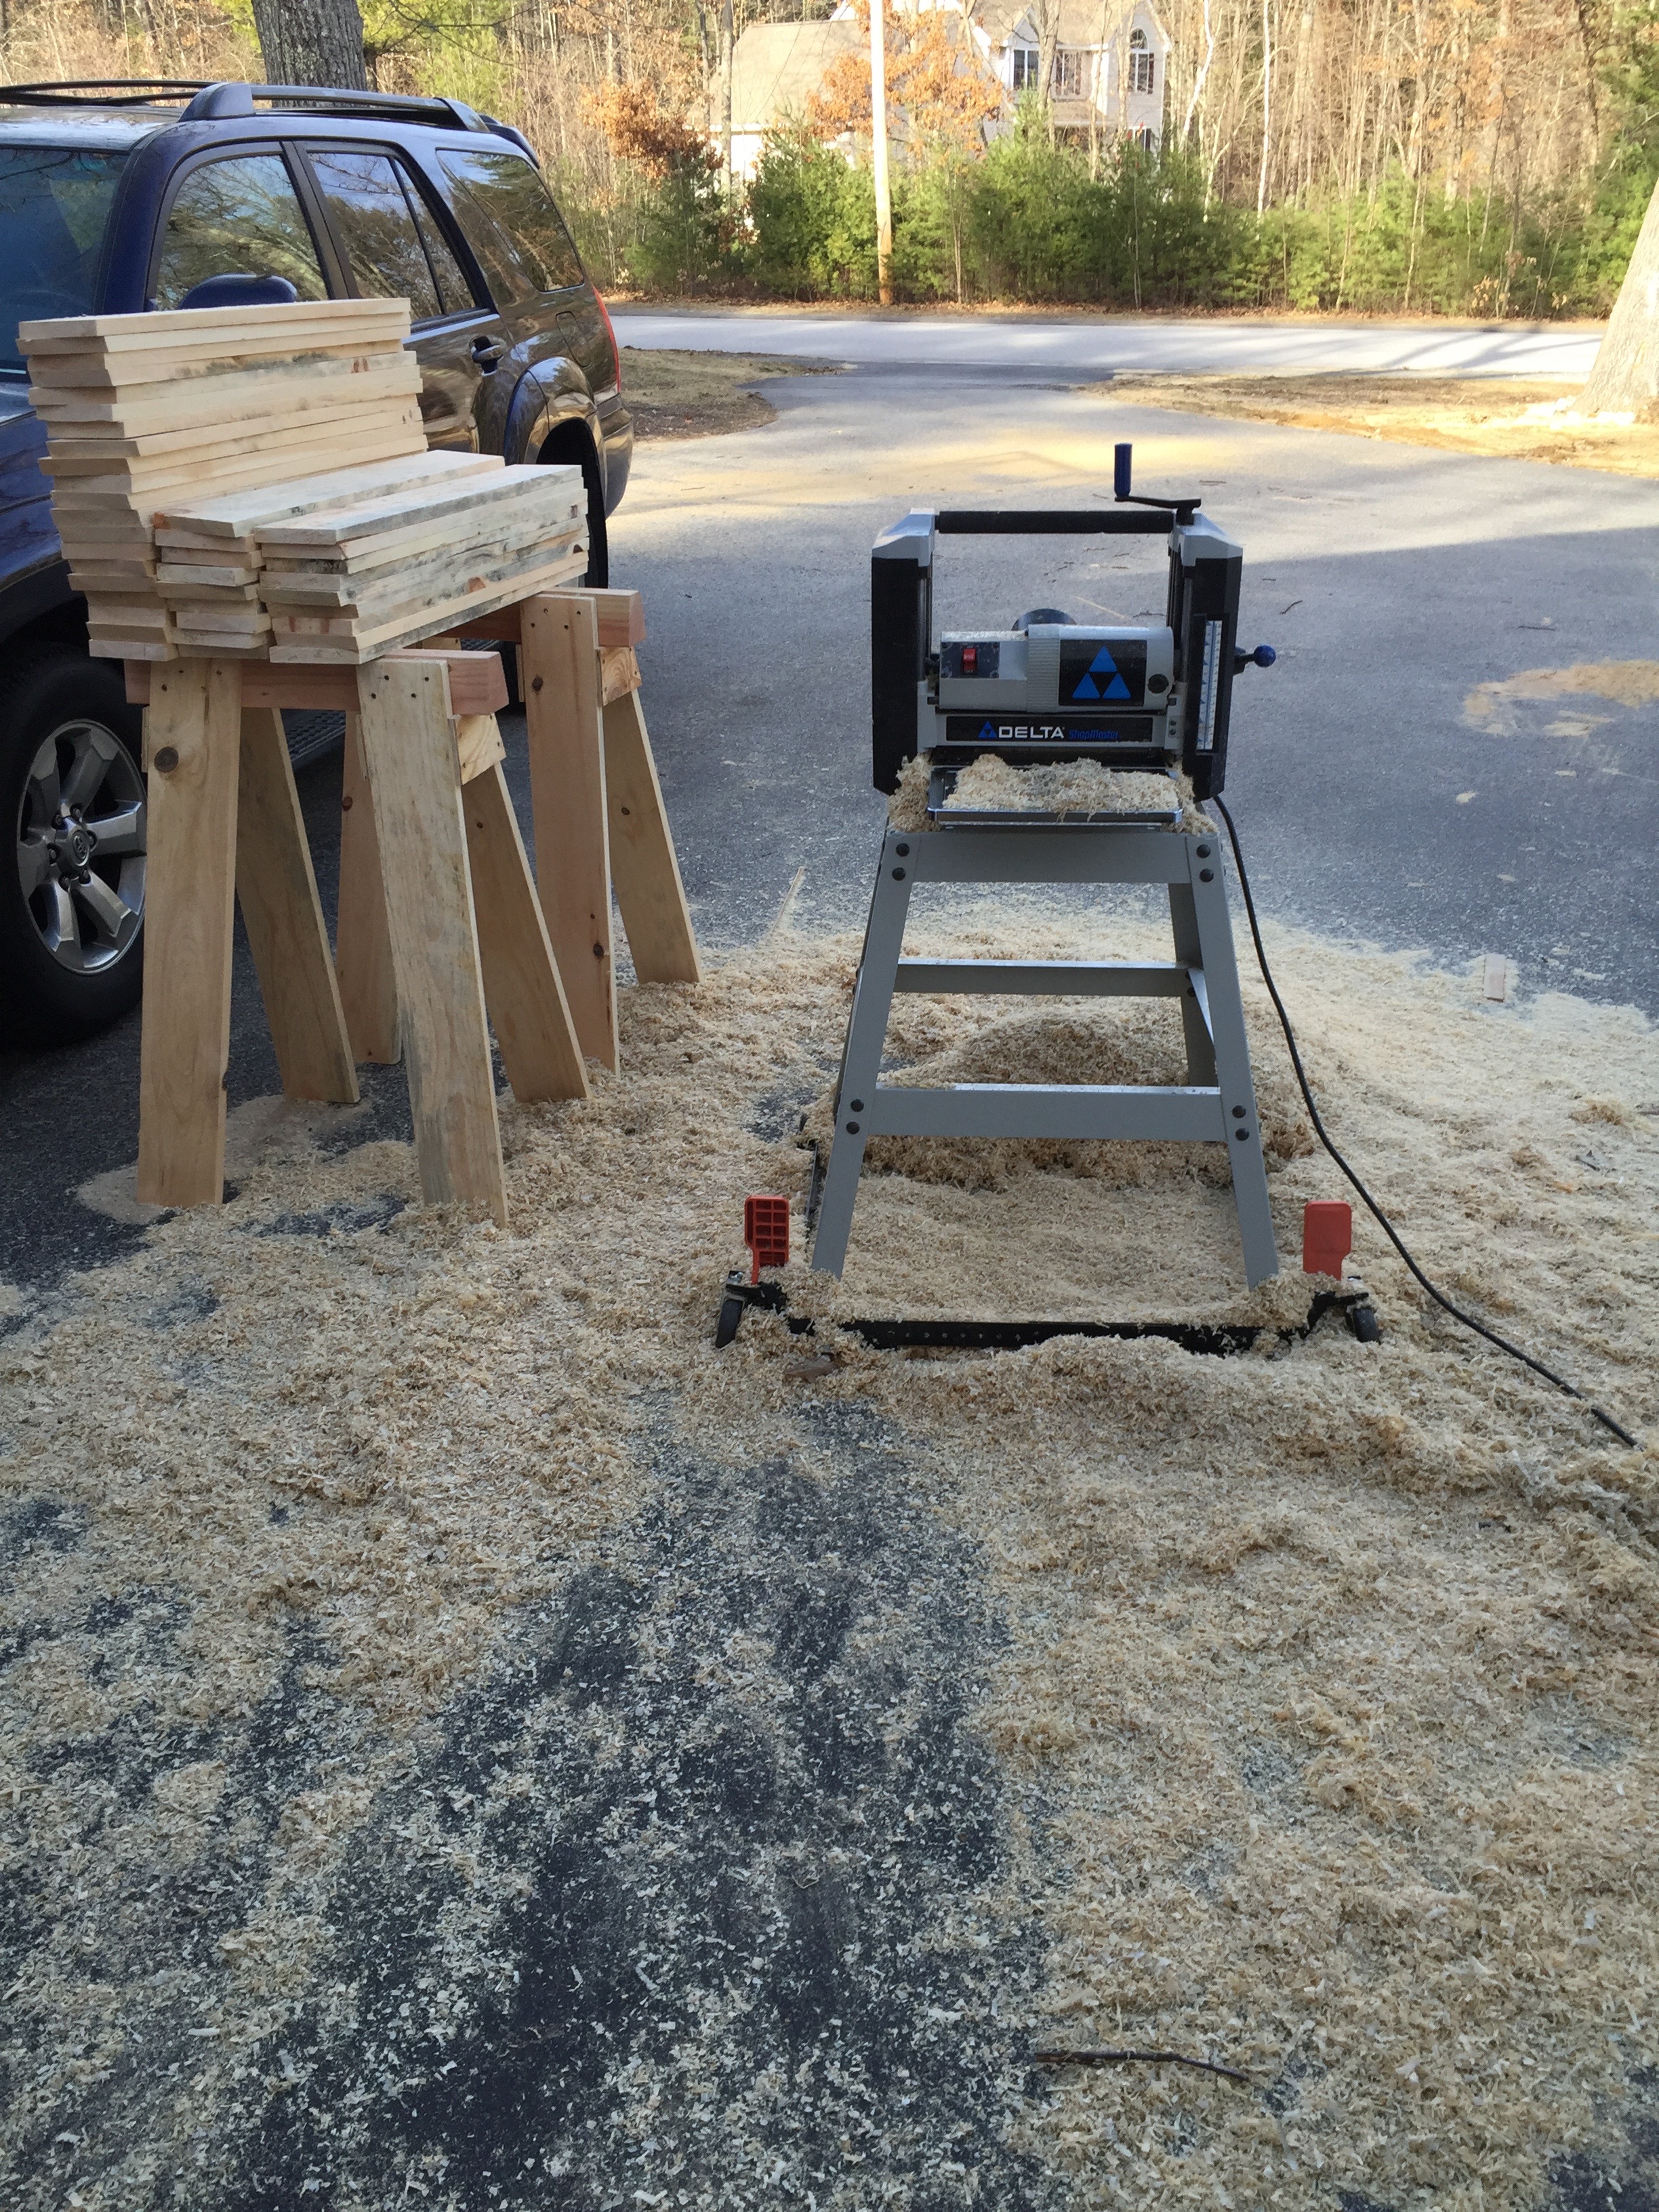
Lunchbox planer getting a workout
Now back to that mistake I mentioned earlier. By leaving the cut wet boards tightly stacked a mold/fungus quickly bloomed on half of the boards. I have a lot of allergies so I didn’t want to handle those boards any more than I’d have to, and it was unsightly, so I suited up and with my dust mask and fed them through my lunchbox planer. I also didn’t use my dust collector as I don’t want that wet fungus living in my filter. I planed the rough boards smooth and stickered them up to dry in the sun as I worked on other horses.
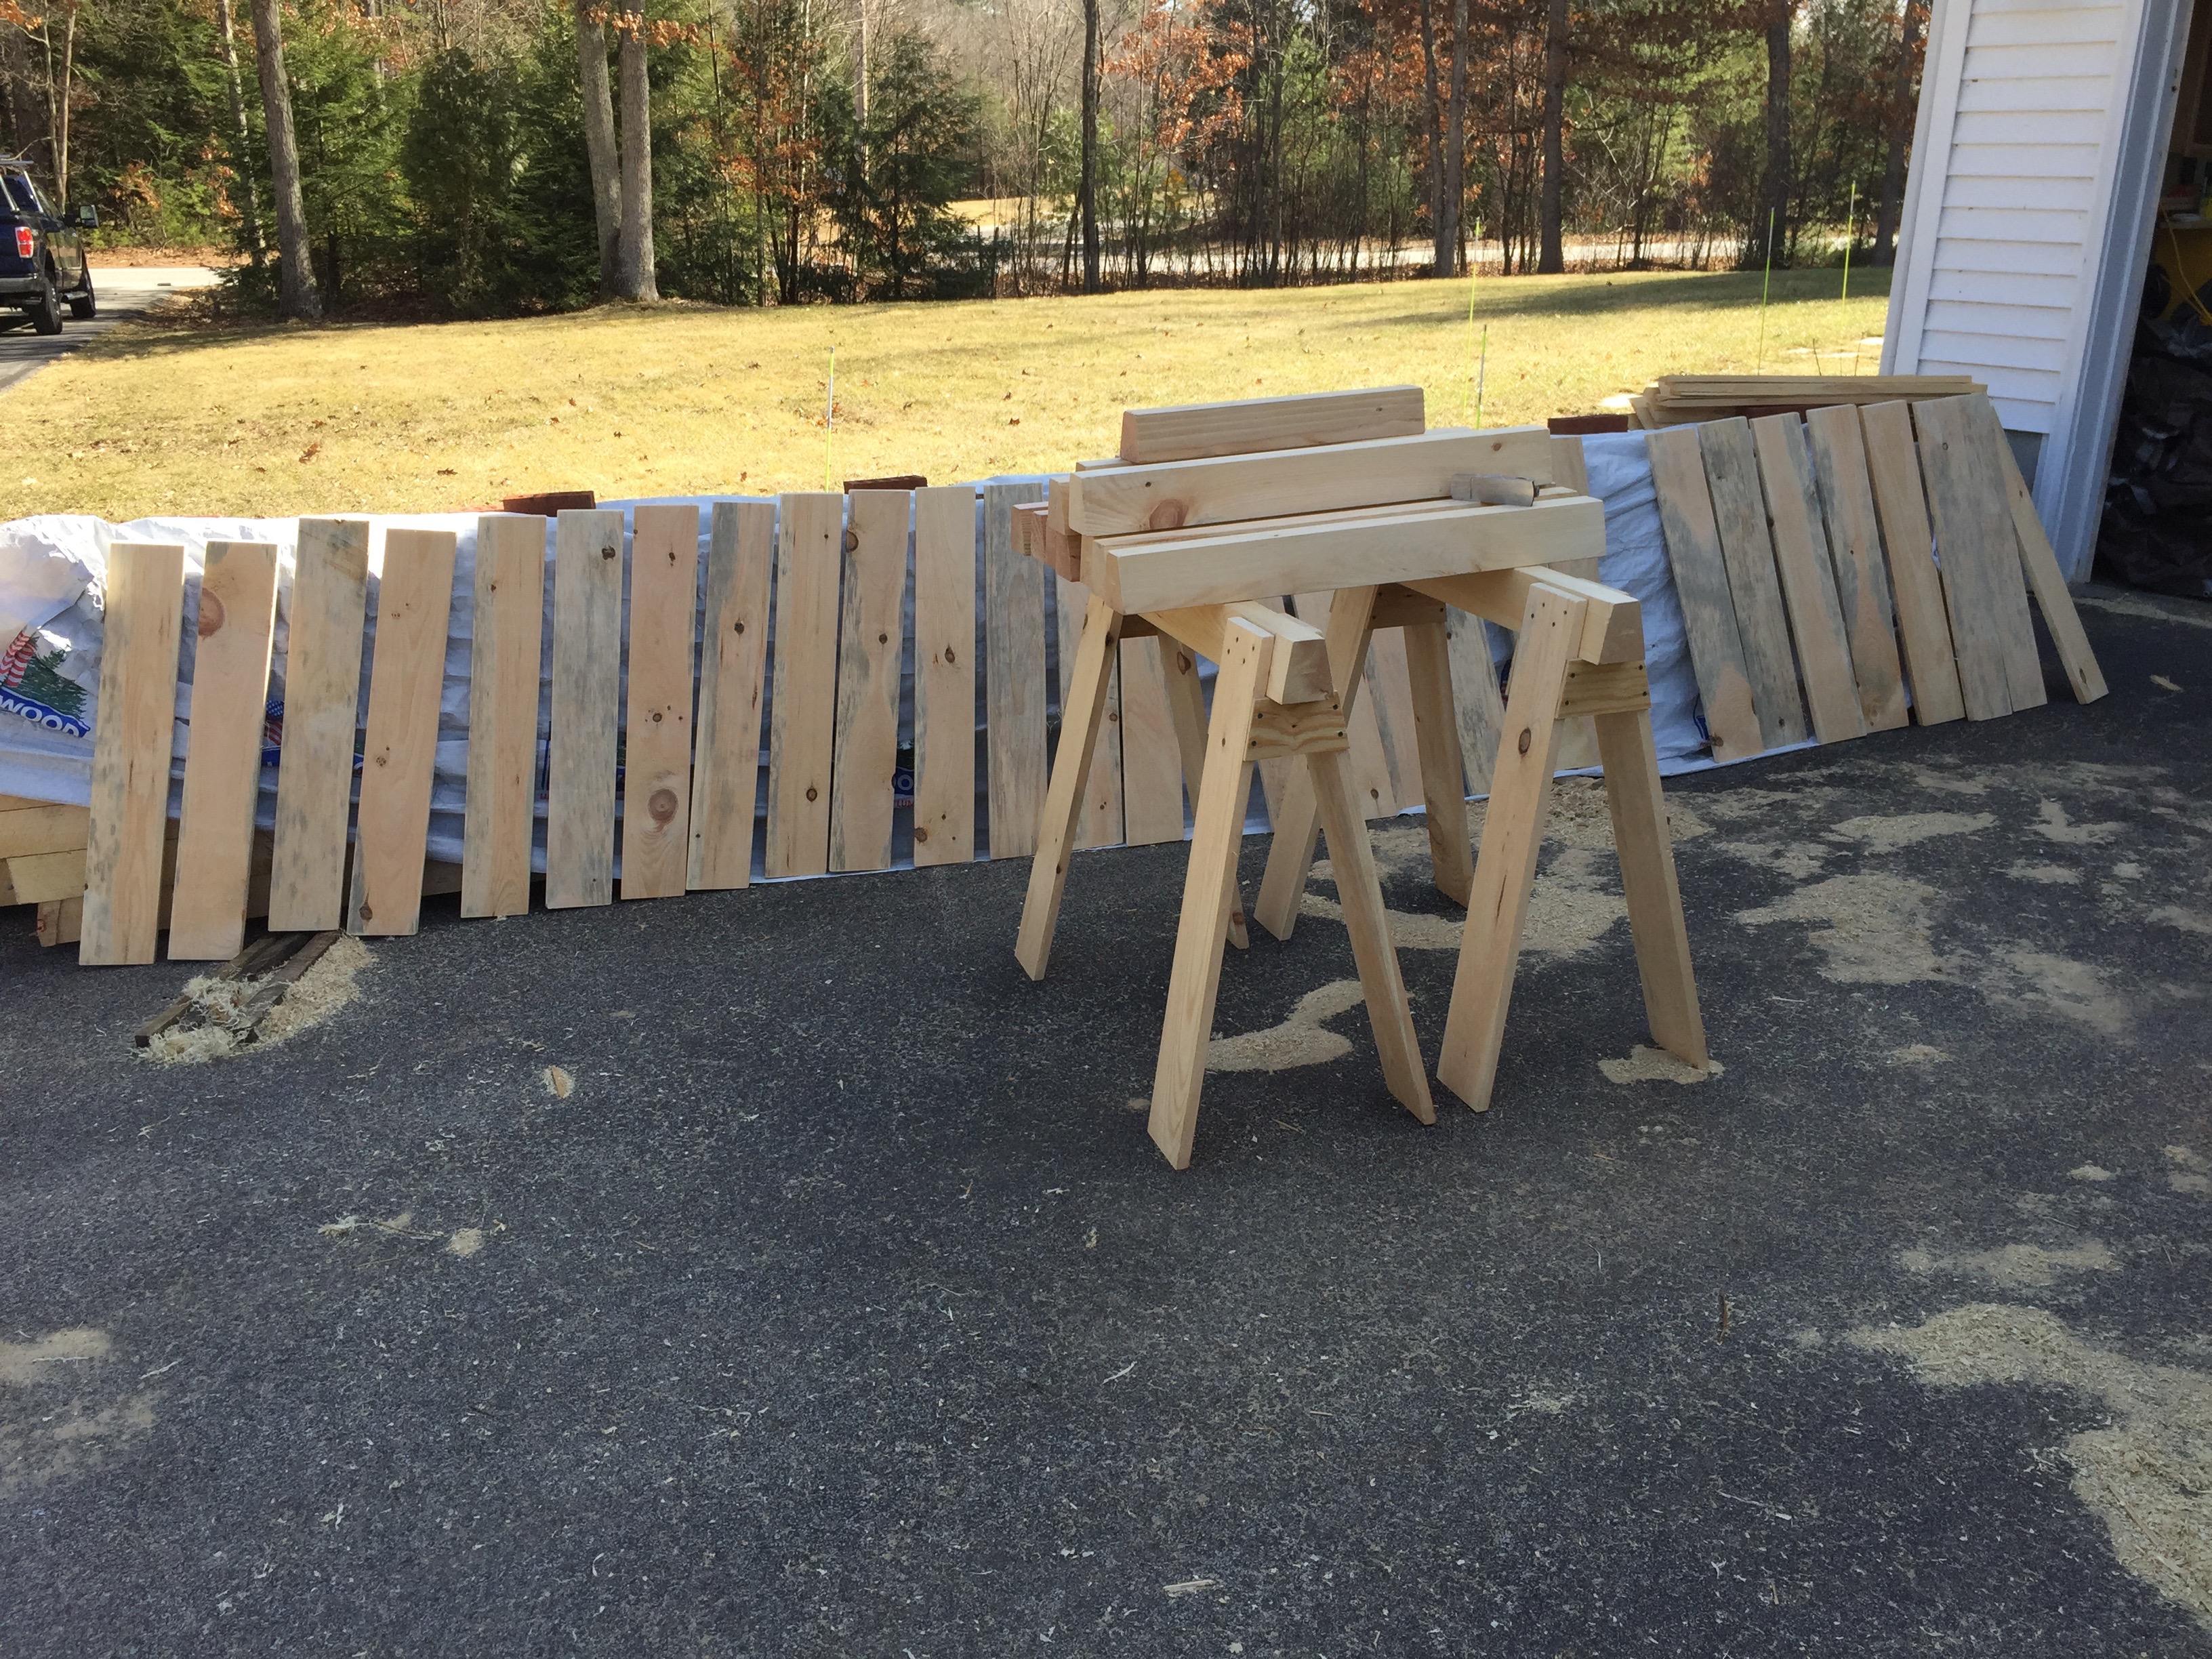
Letting the legs air dry a bit
That little mistake accidentally created ‘Denim Pine’ — pine boards with a blue tint that results from that fungus blooming and is desirable to some folks, presumably non-workers that like the look of it. (See above and below). With the mold/spores/fungus/grossness removed and stickered the legs will dry and be fine to use. As I completed each horse it will live out side where it can dry at a steady rate until the barn gets finished.
Some ‘Denim Pine’ Legs
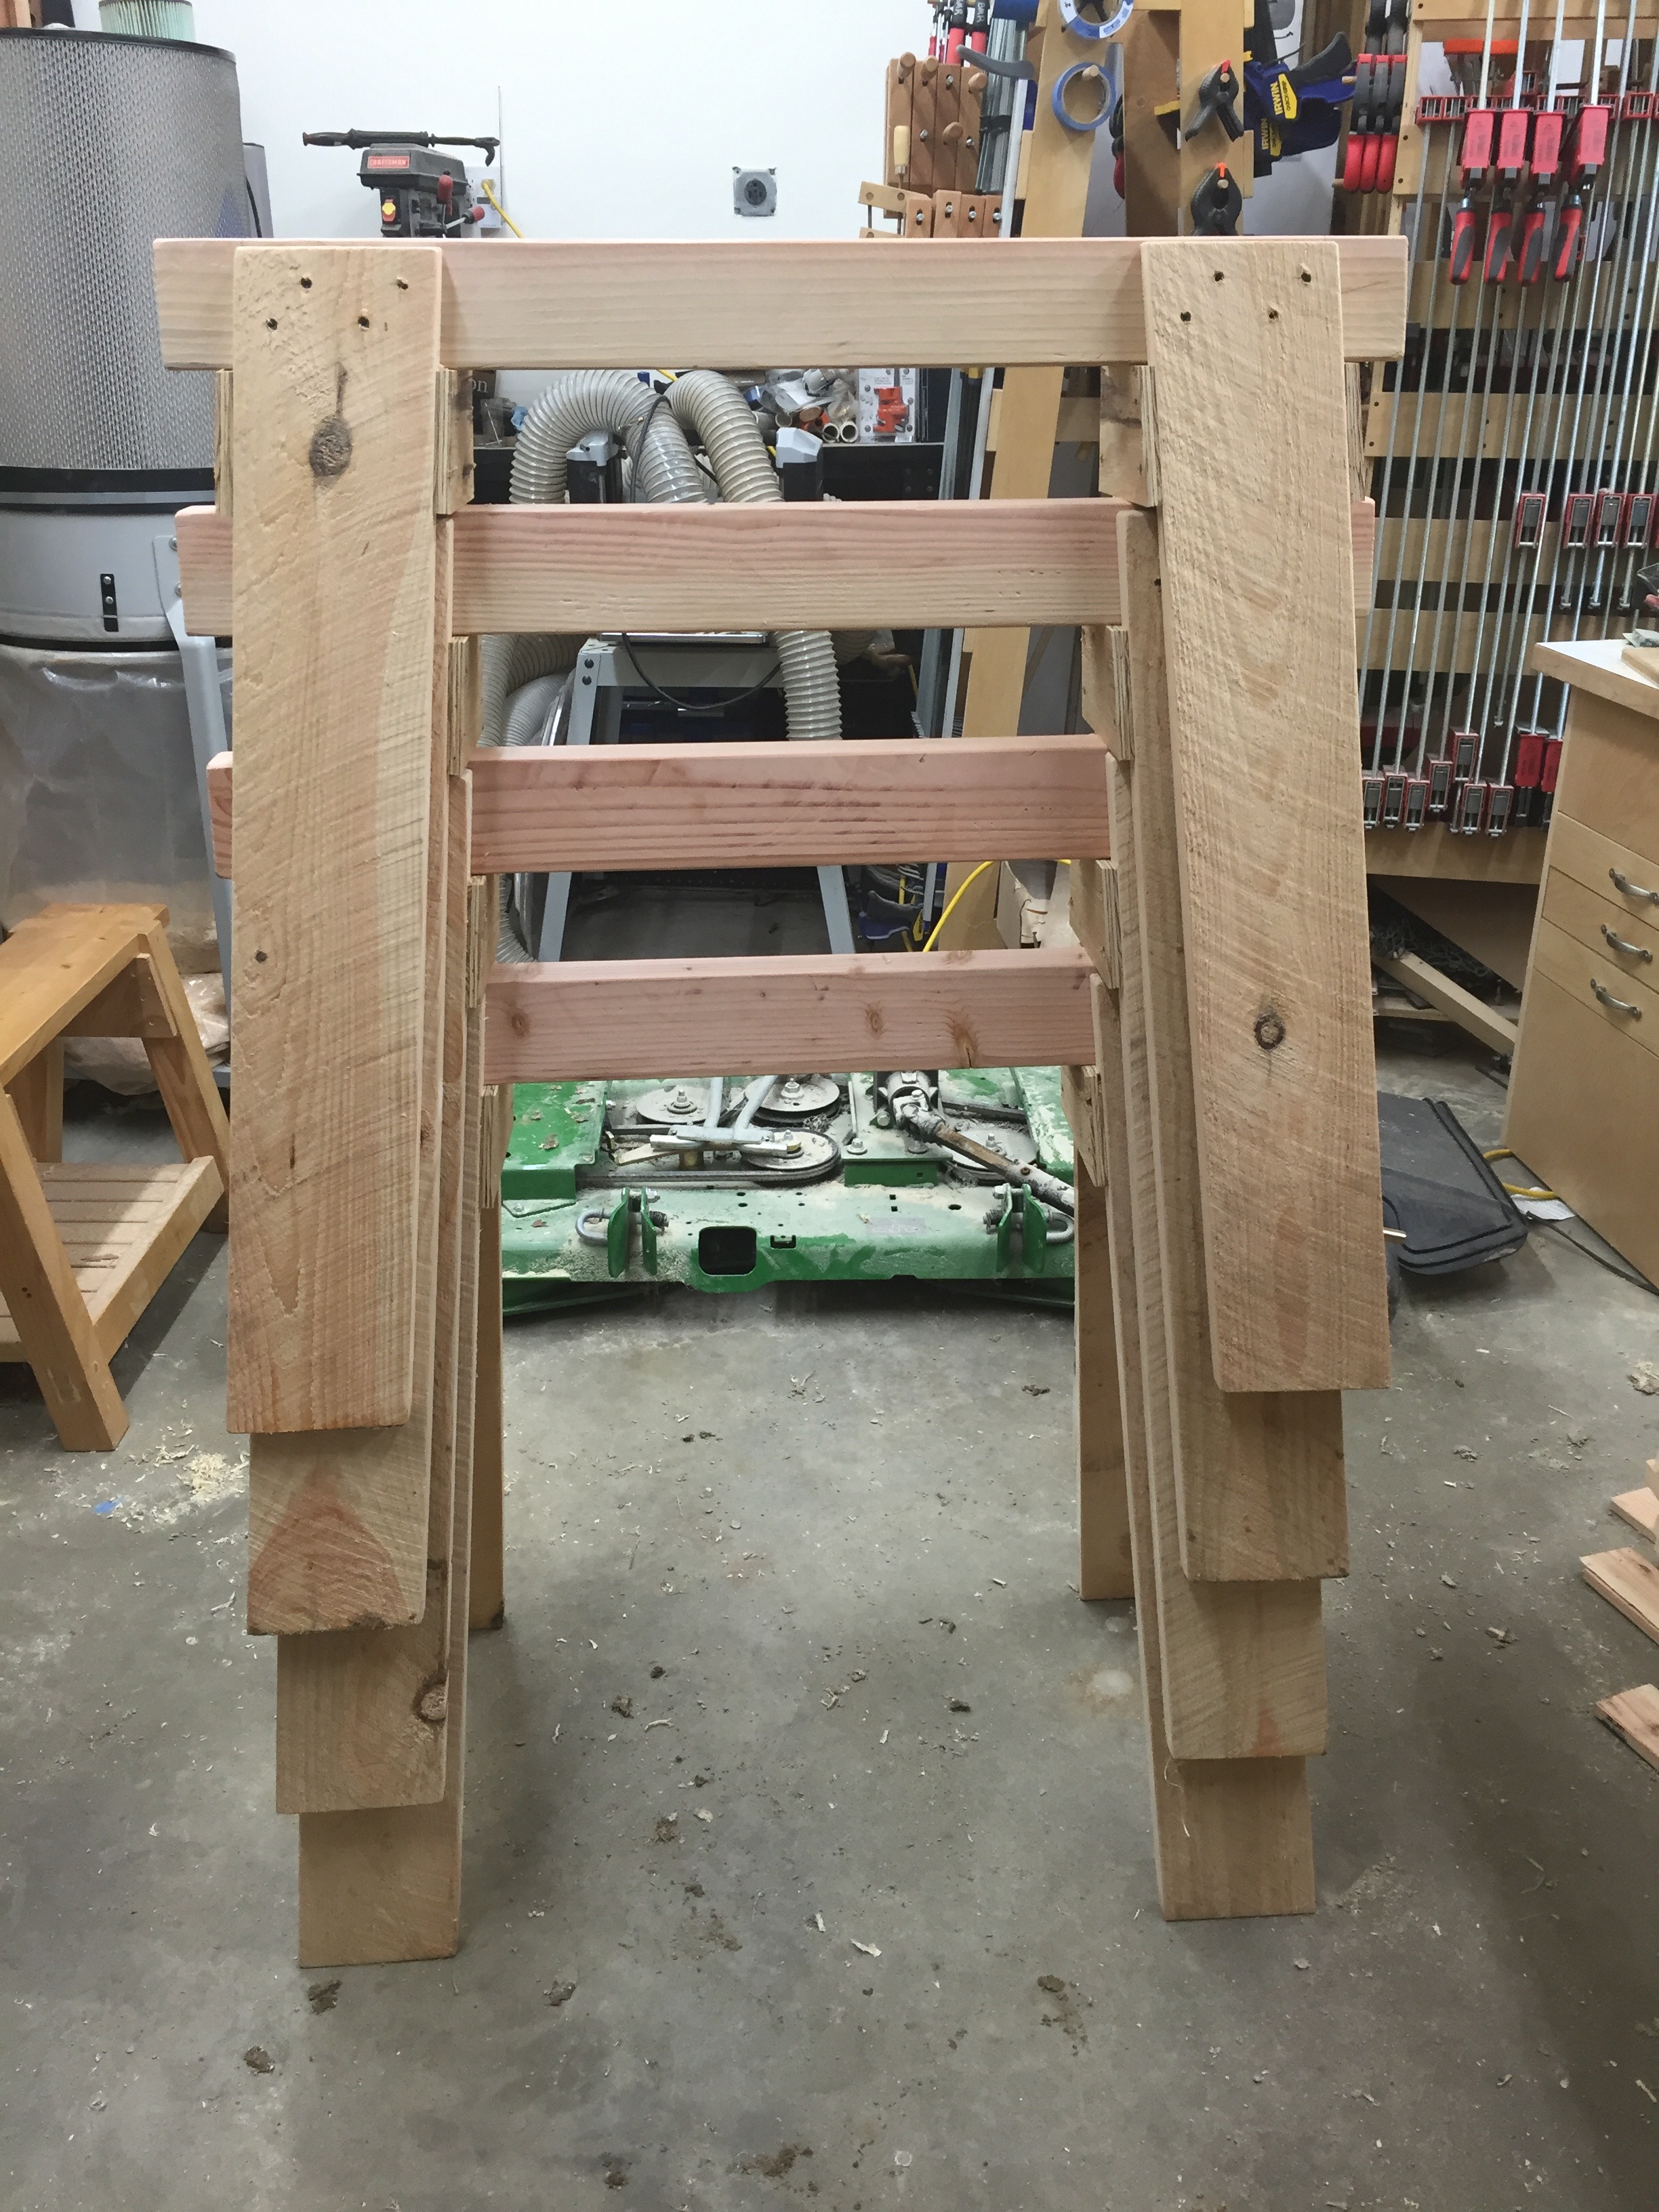
How do you store all of these horses?
Stacked horses.
The horses stack nicely and even when stacked all the wood can dry nicely.
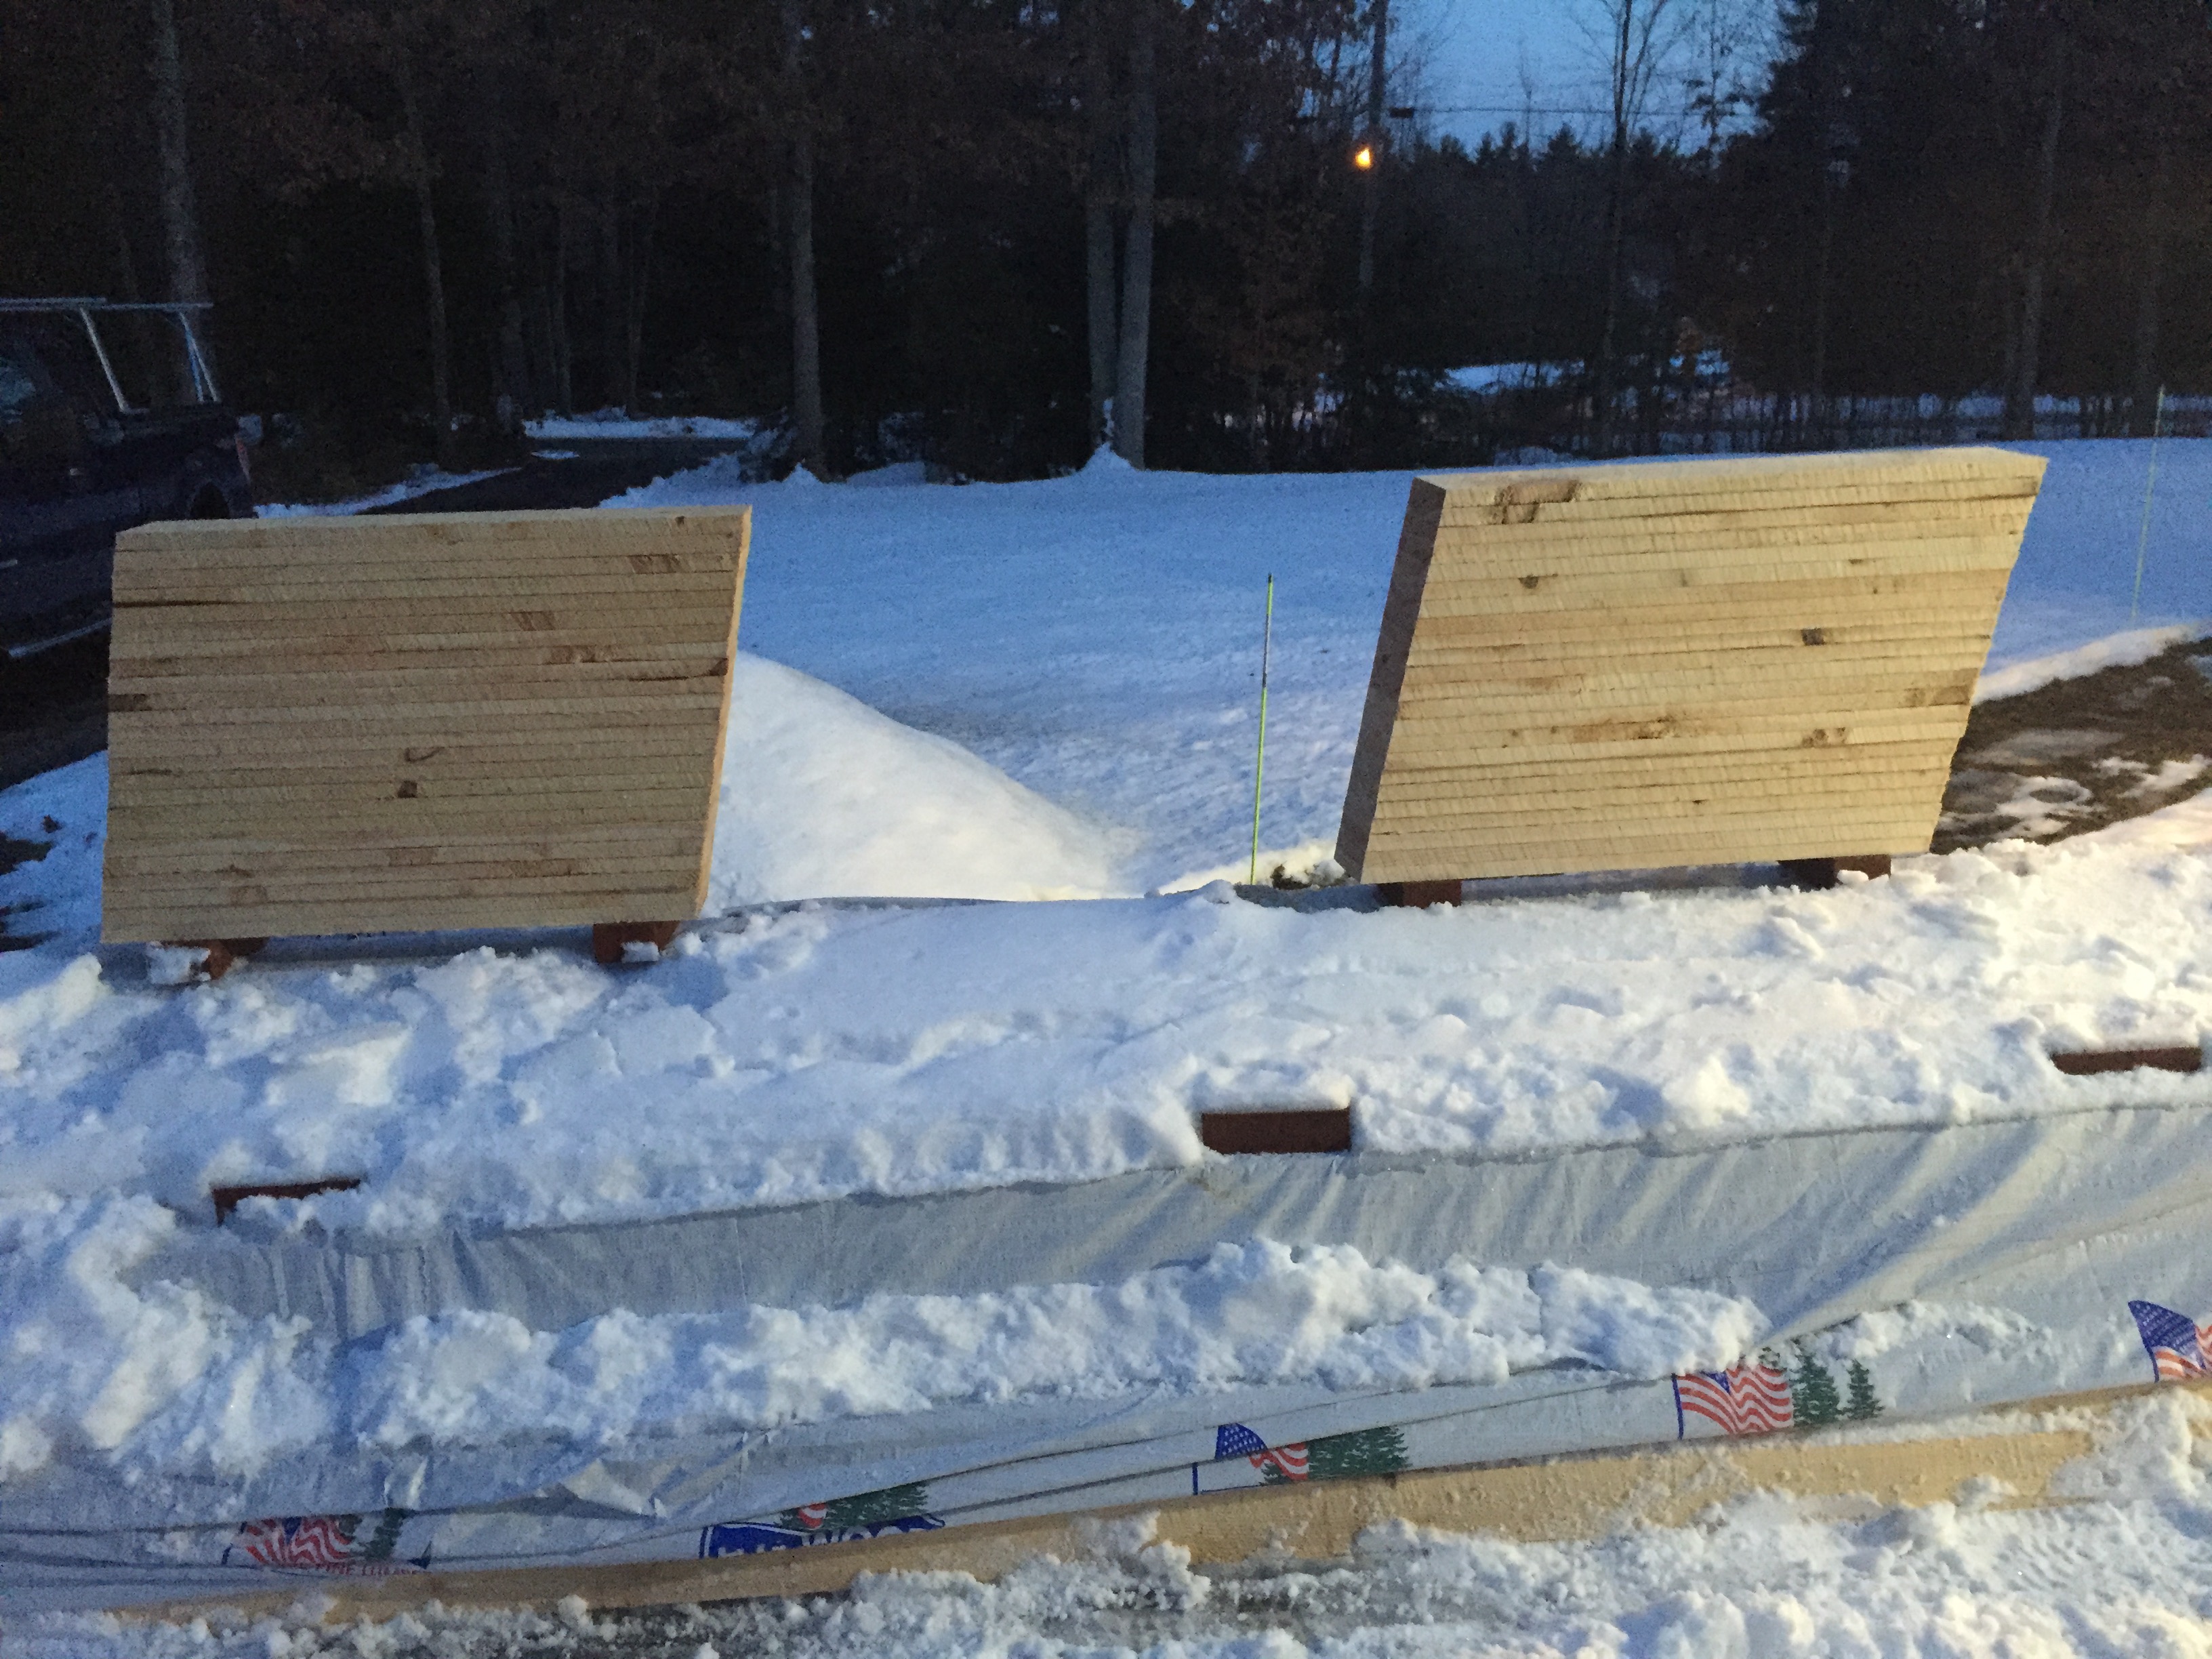
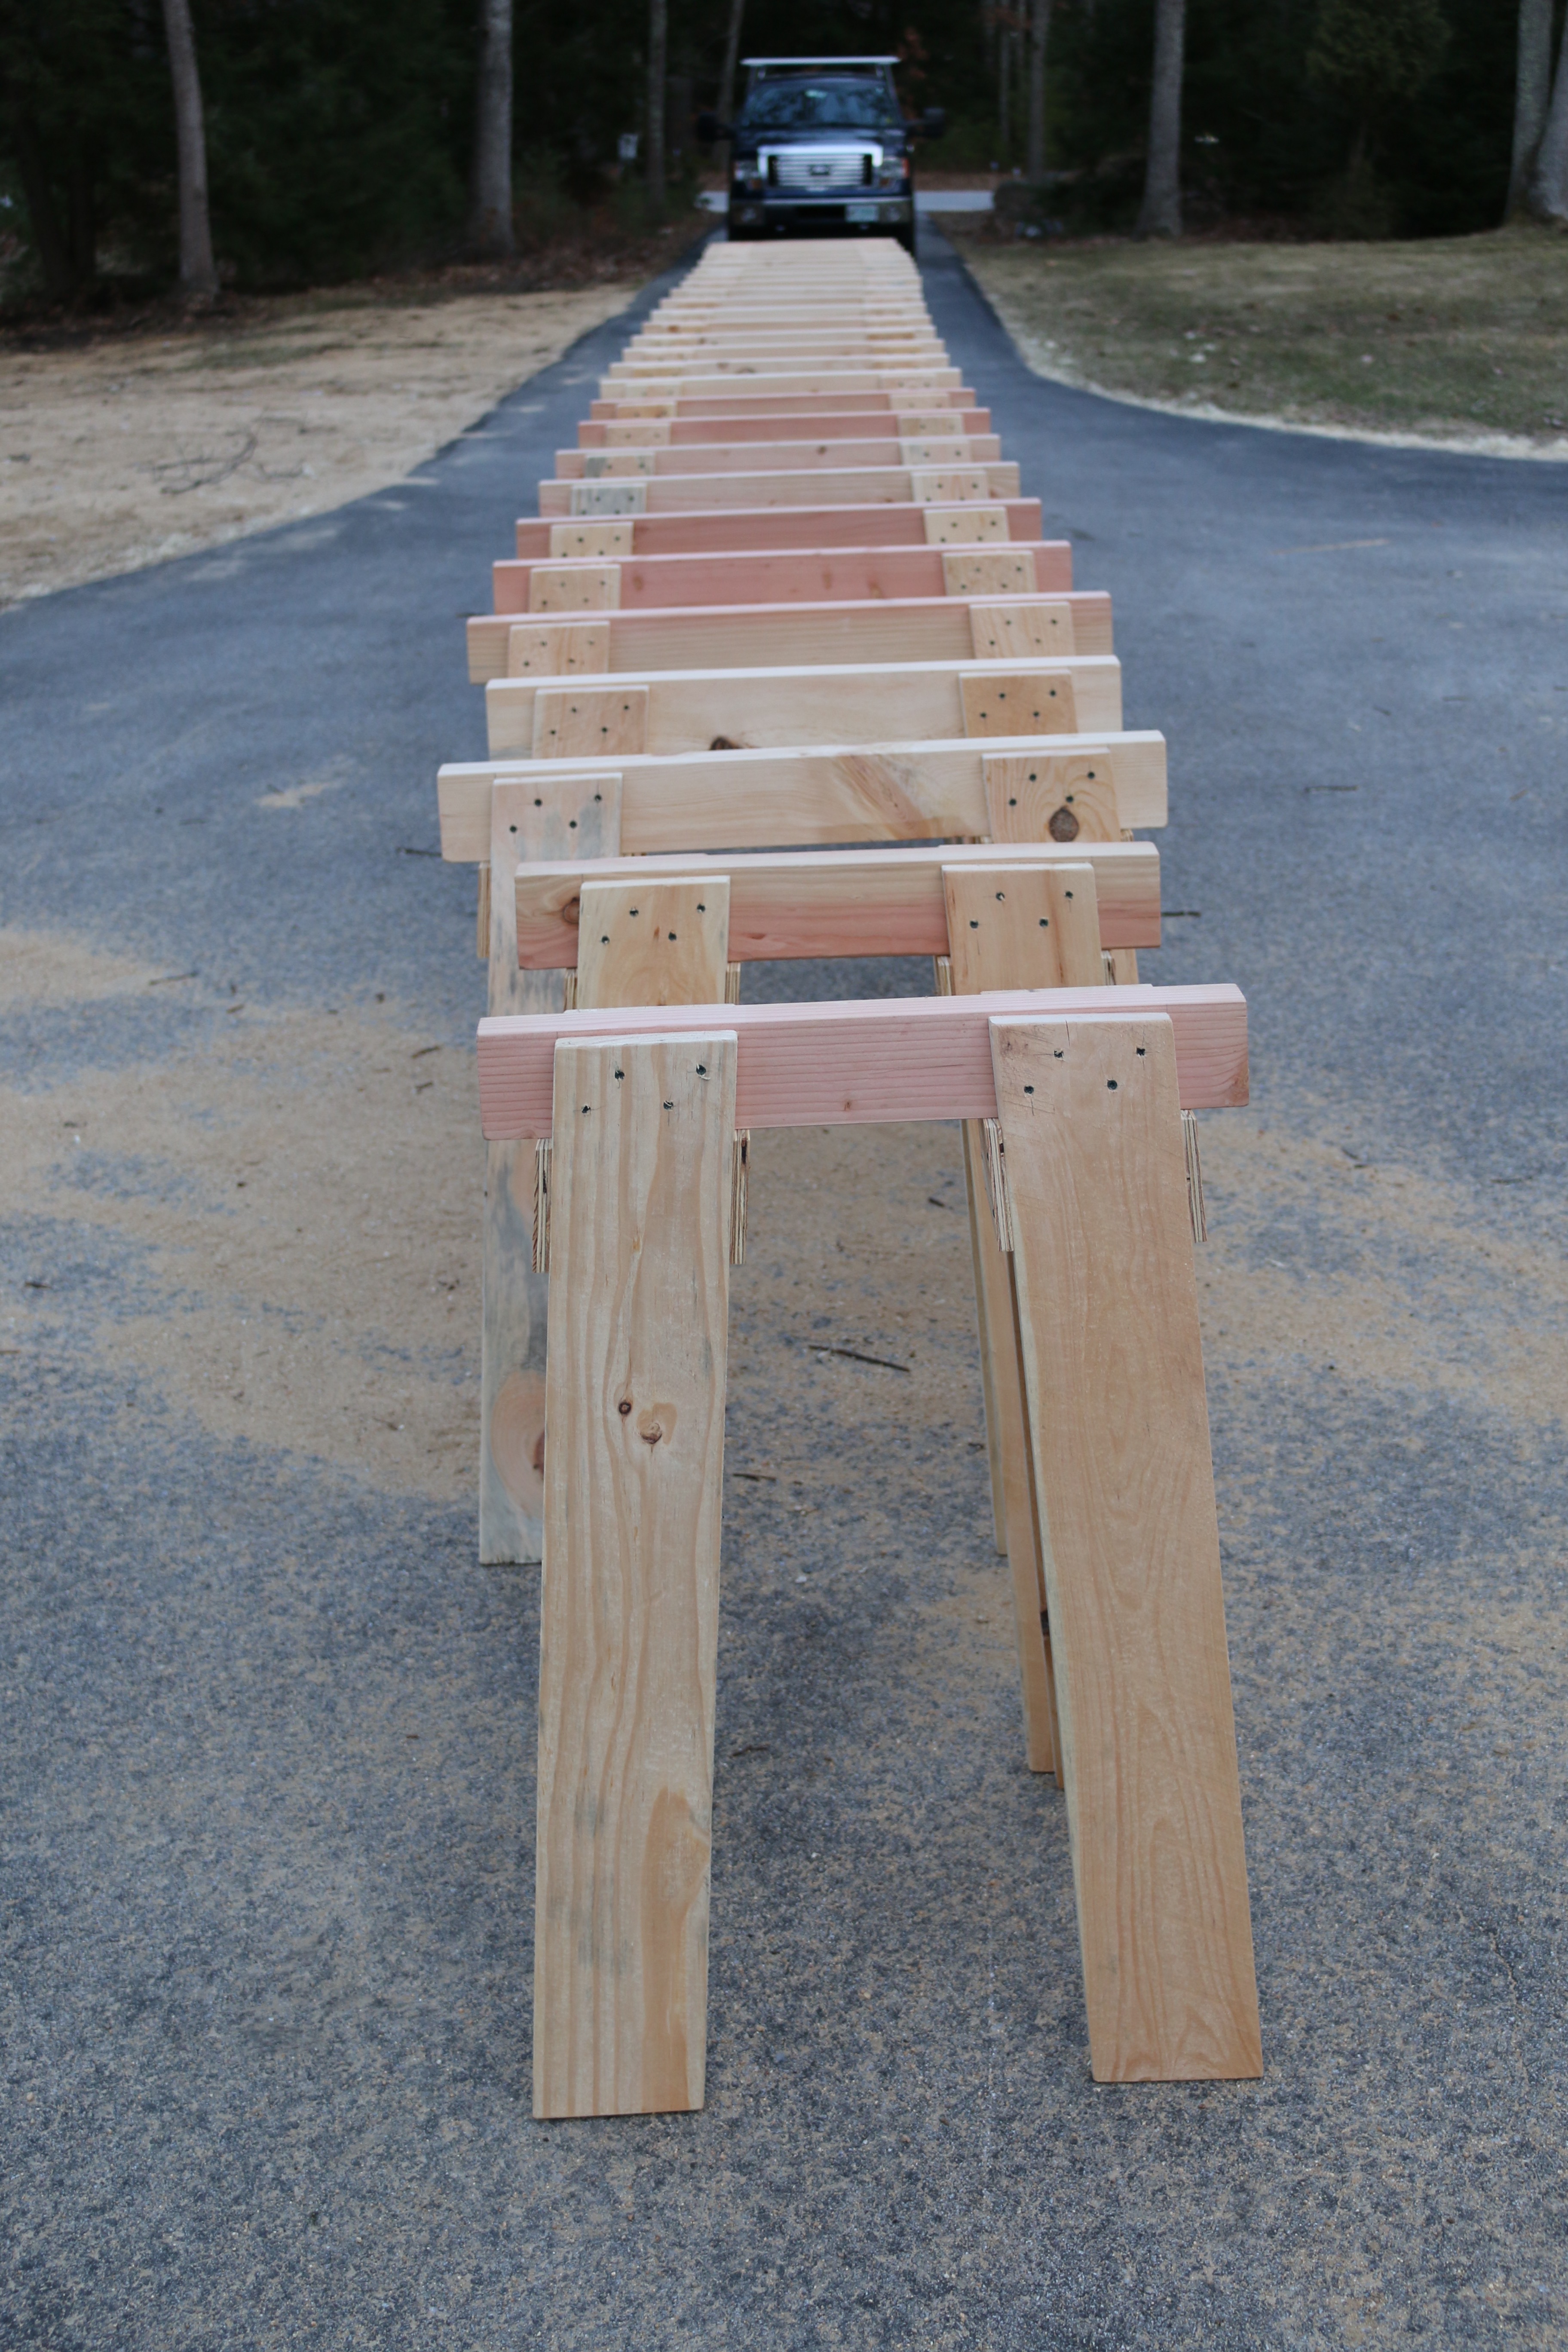
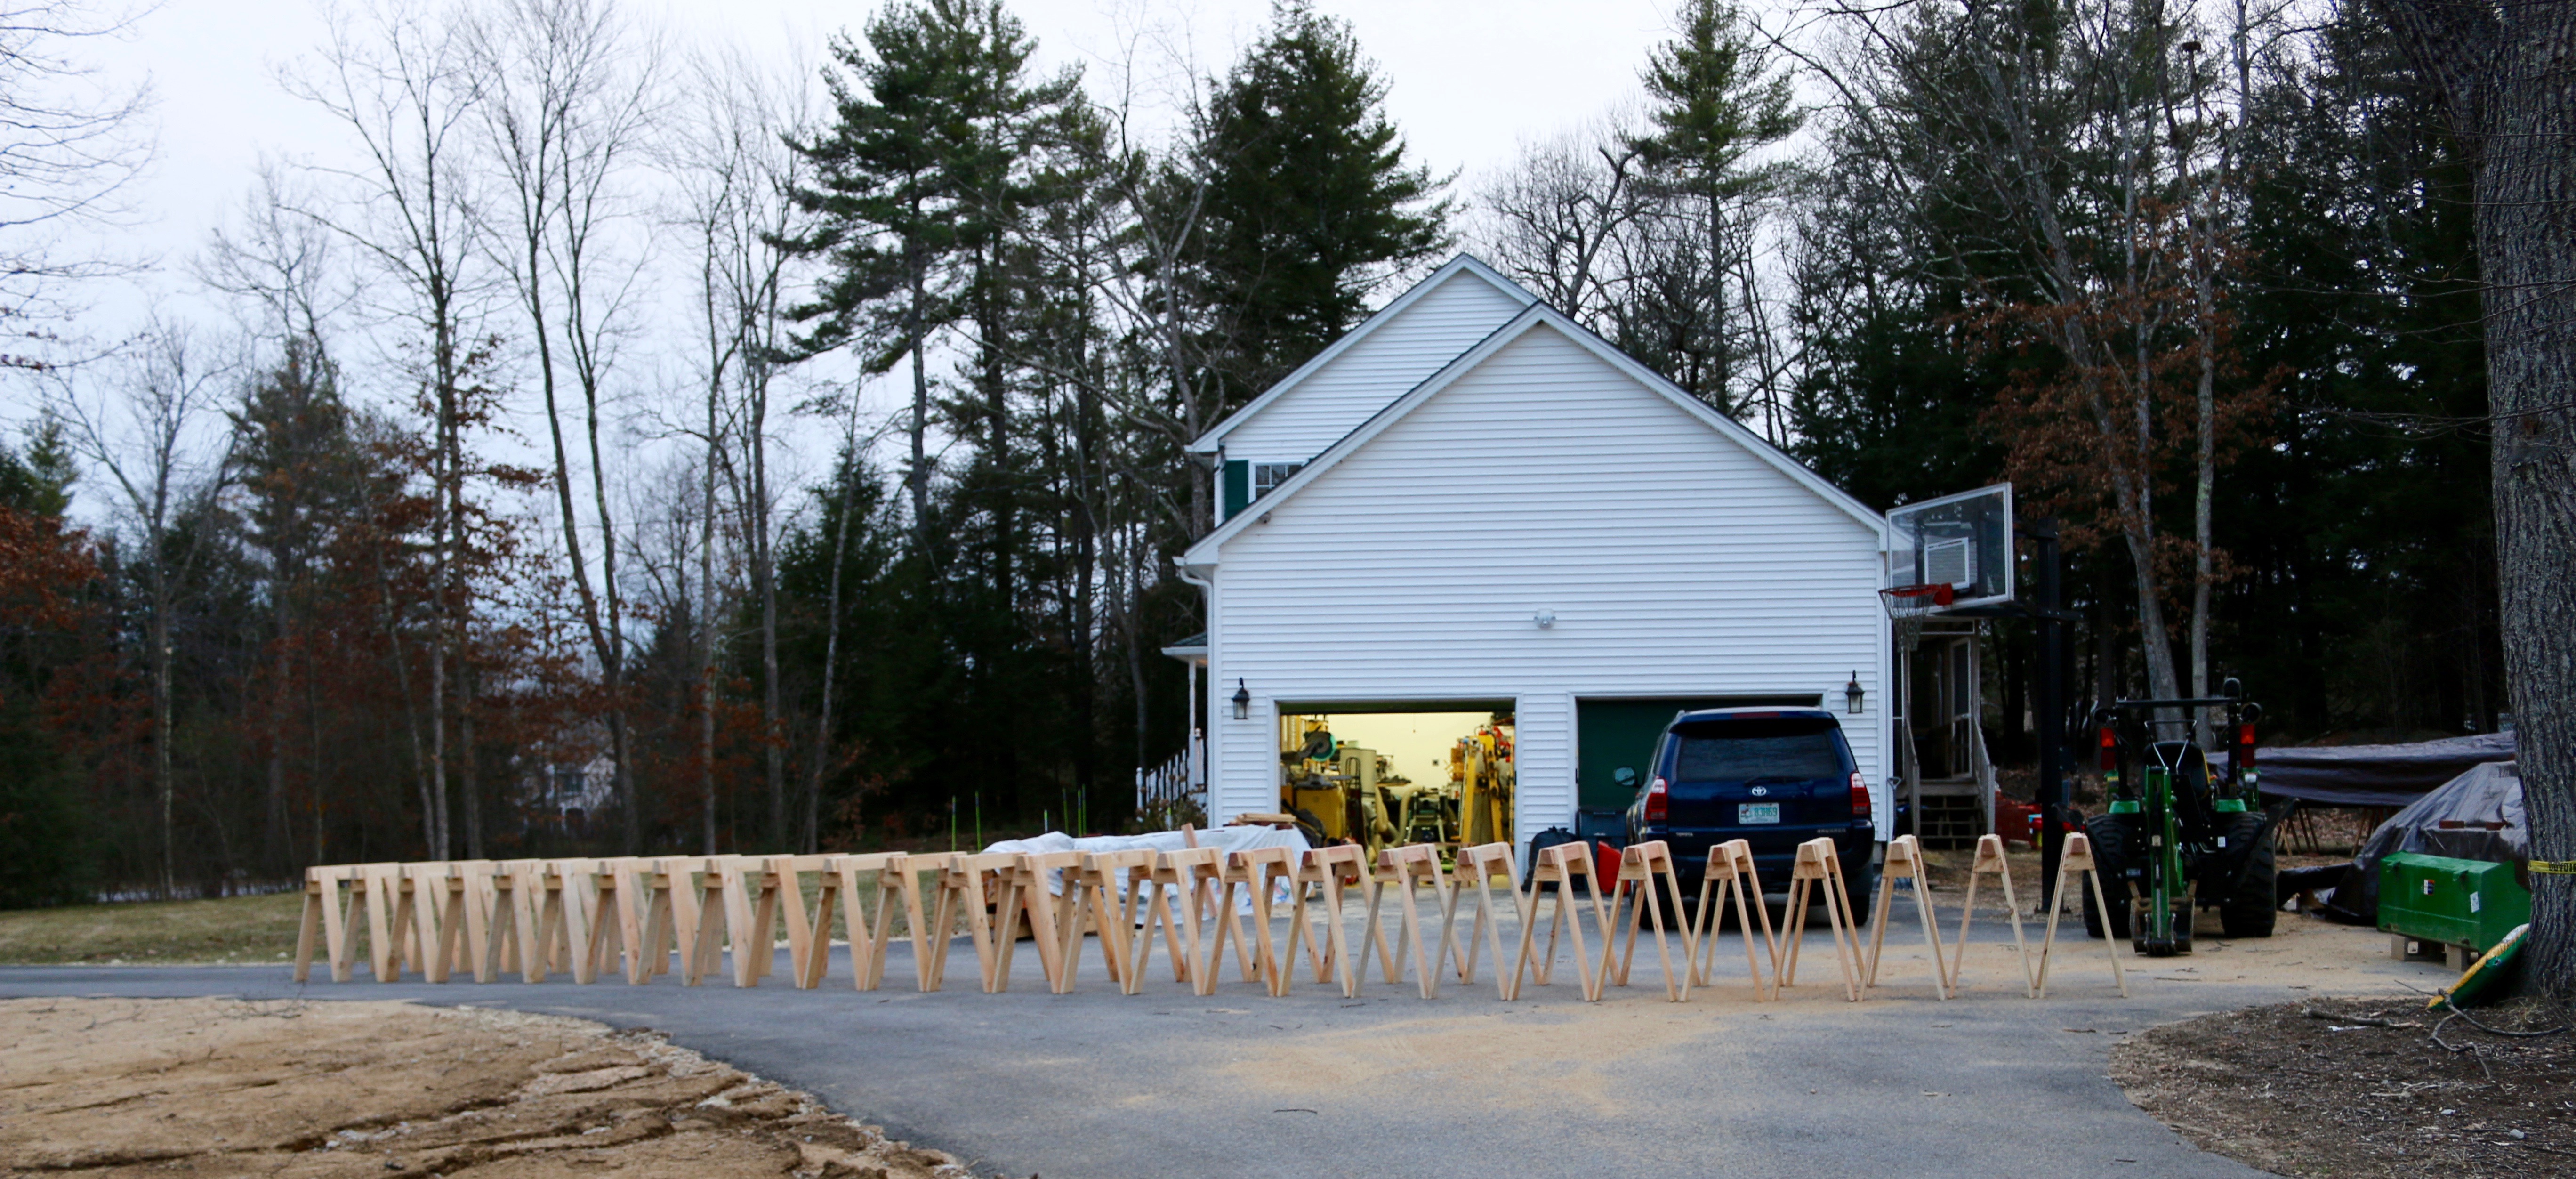
Wide angle view of the horses
This was the largest run of horses I’ve made to date so I set them all up out in the driveway just to see them all in one place.
2 ponies in the foreground 26 horses in the background
Two of the horses, my ponies, had a 24″ beam as two of the 4x4s were a little short and I thought it would be nice to have a set that can fit into a tight place.
It looks like a TON of horses, but these 12, plus the 12 I already had will just barely be enough for the barn build.
What do you plan to do with all these horses?
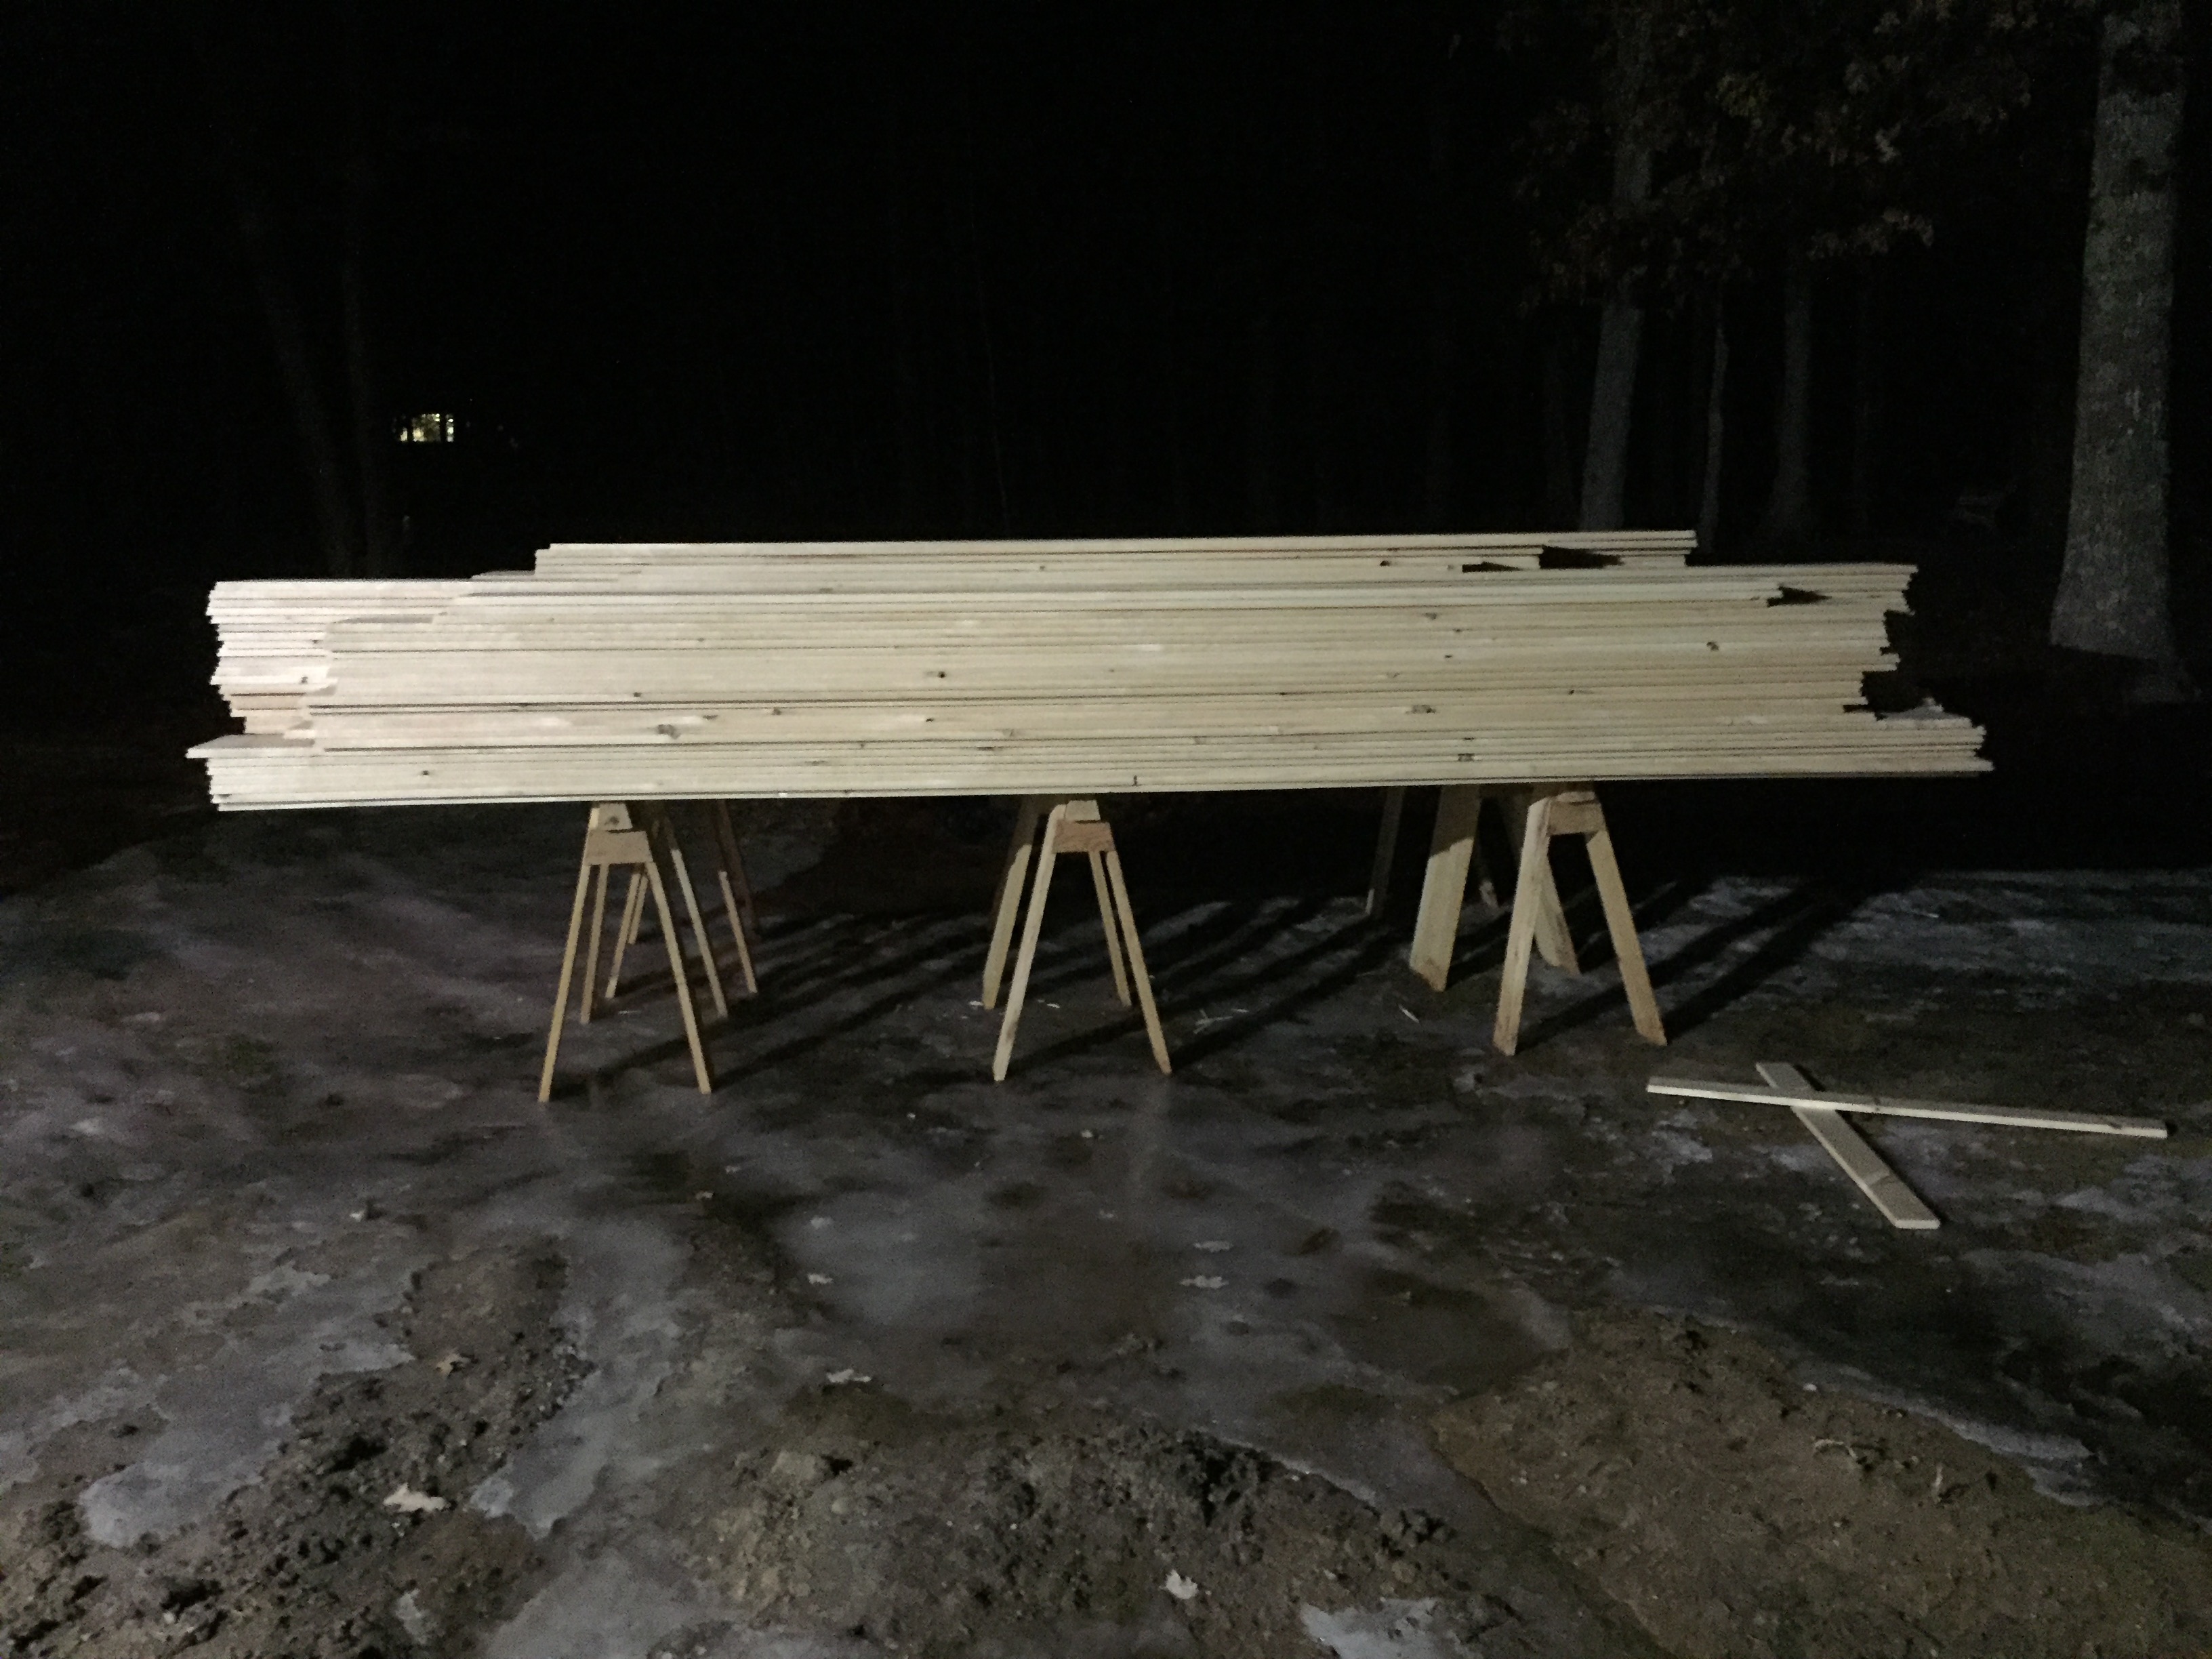
A LOT of shiplap siding on horses. 10-12″ wide 16′ long pieces
Above and below you can see a couple thousand linear feet of 16′ shiplapped pine sheathing held with ease by these horses.
A LOT of shiplap siding on horses
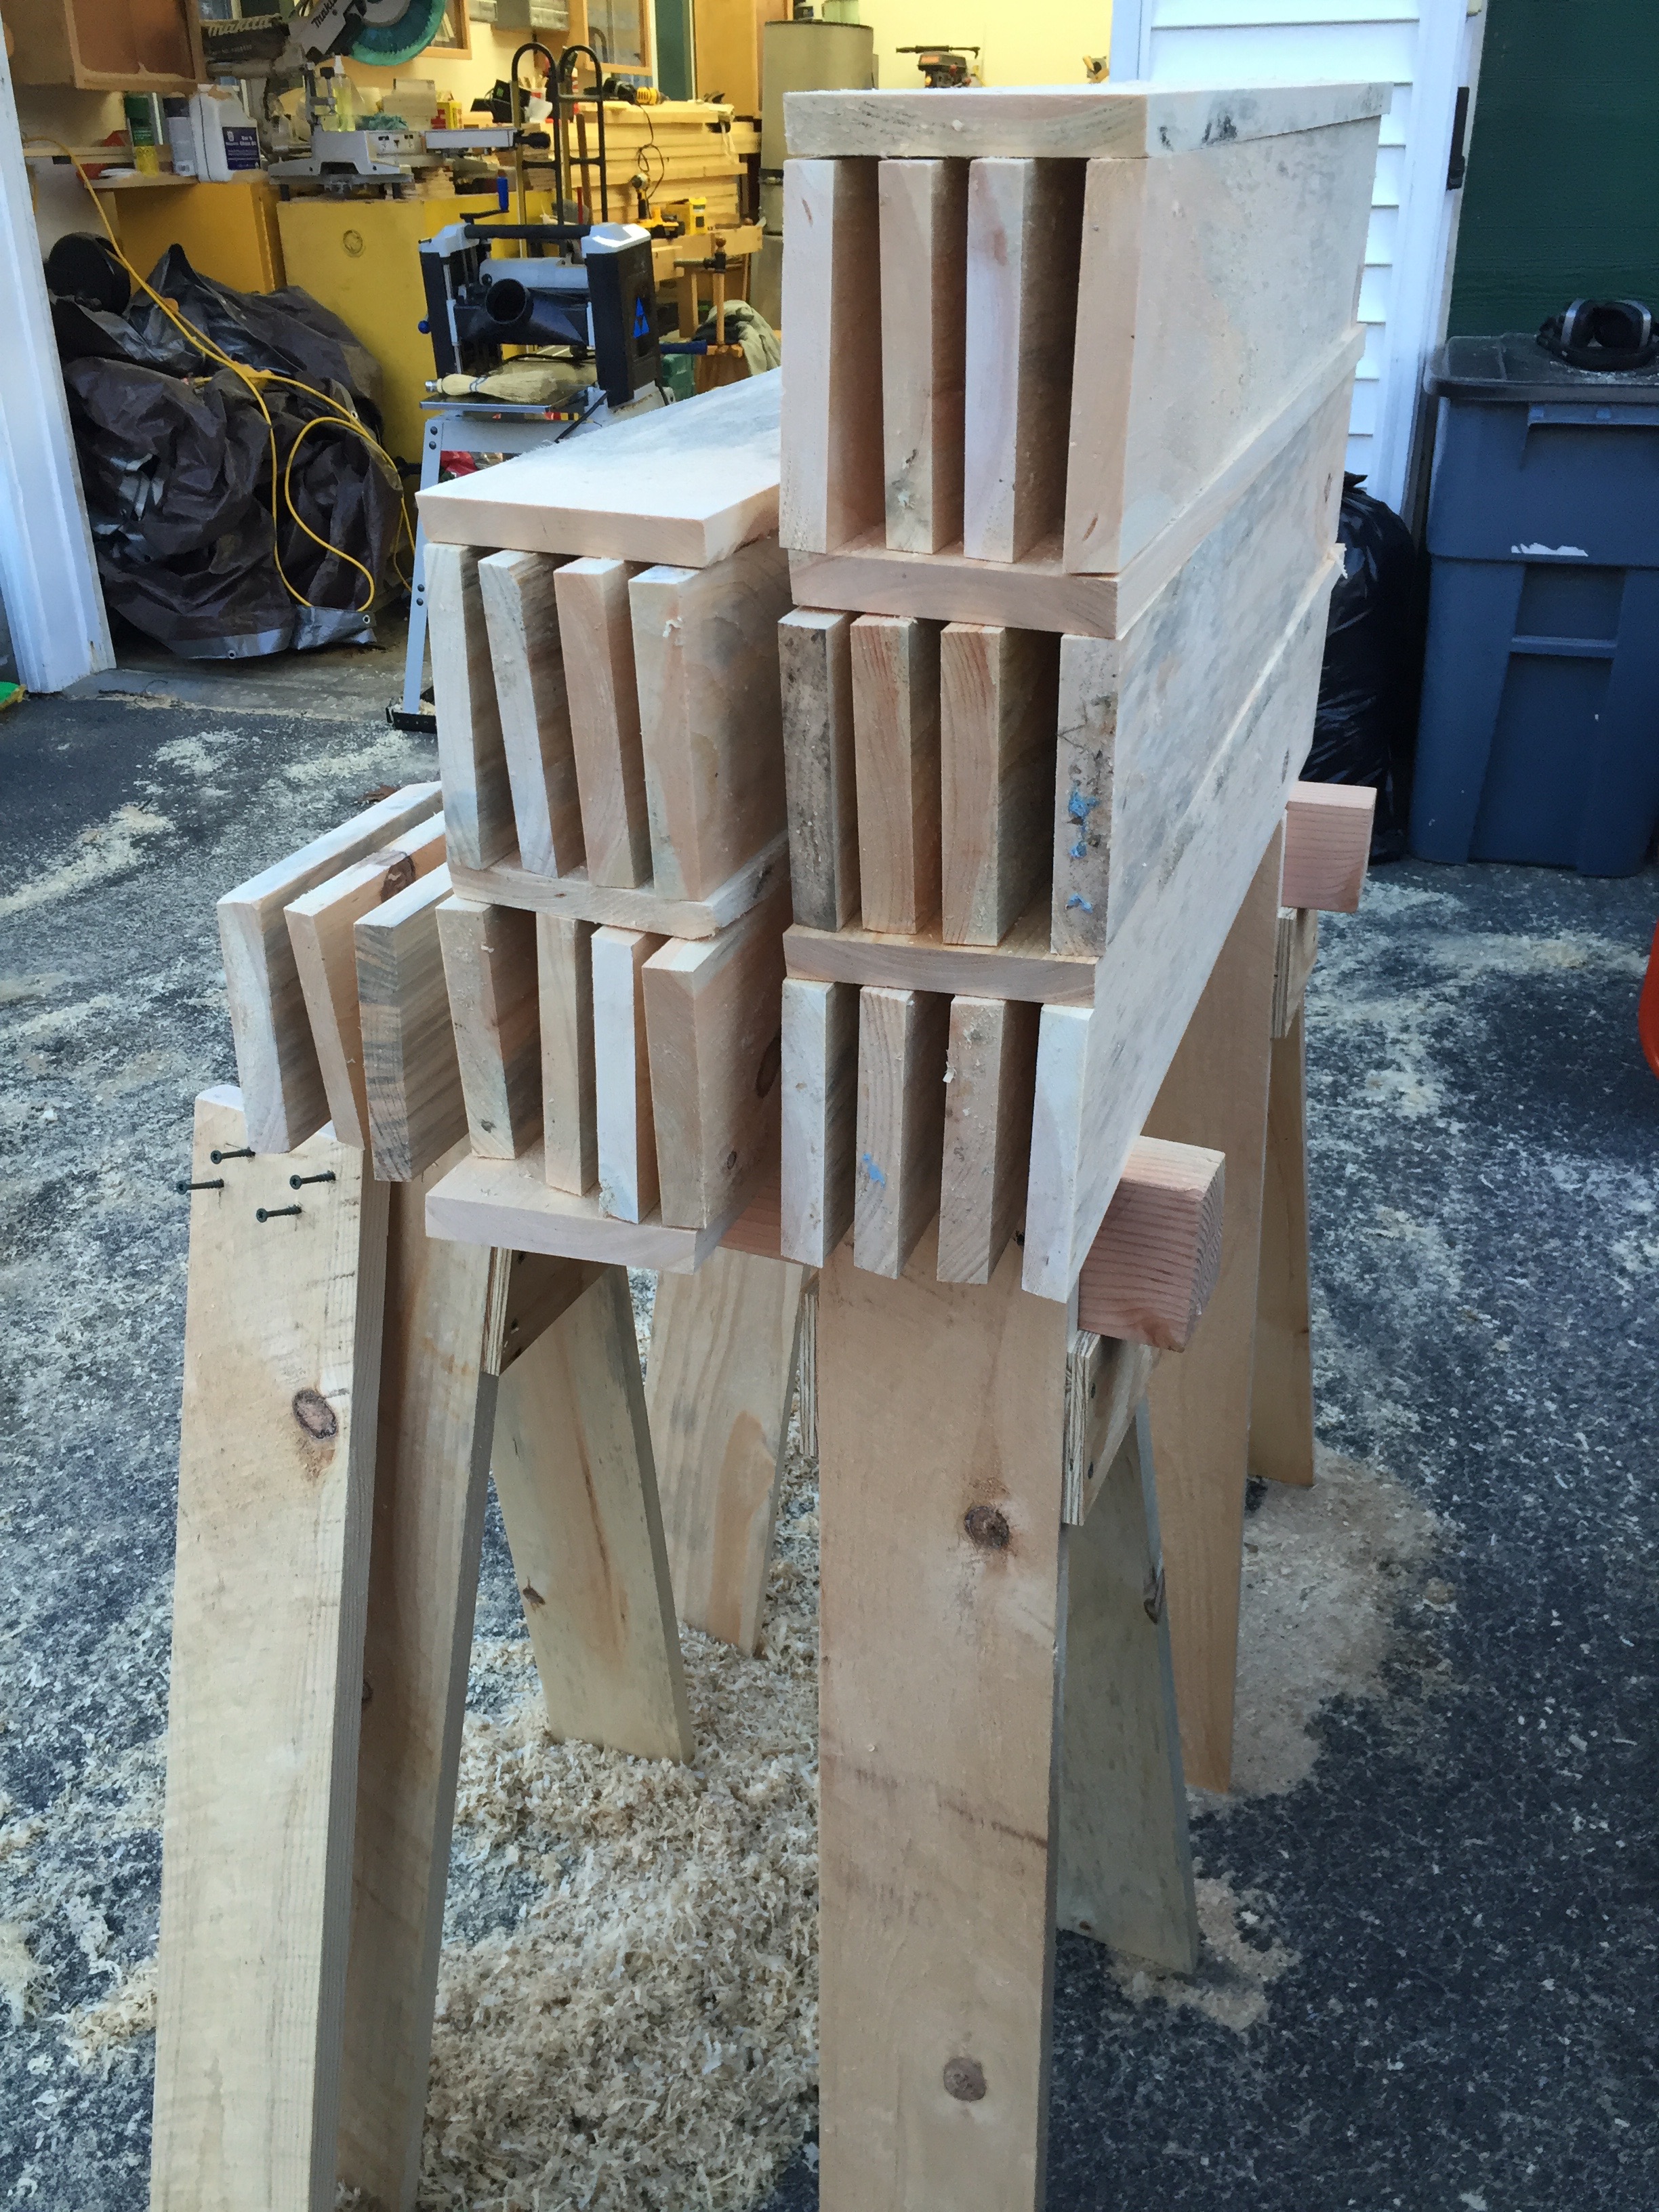
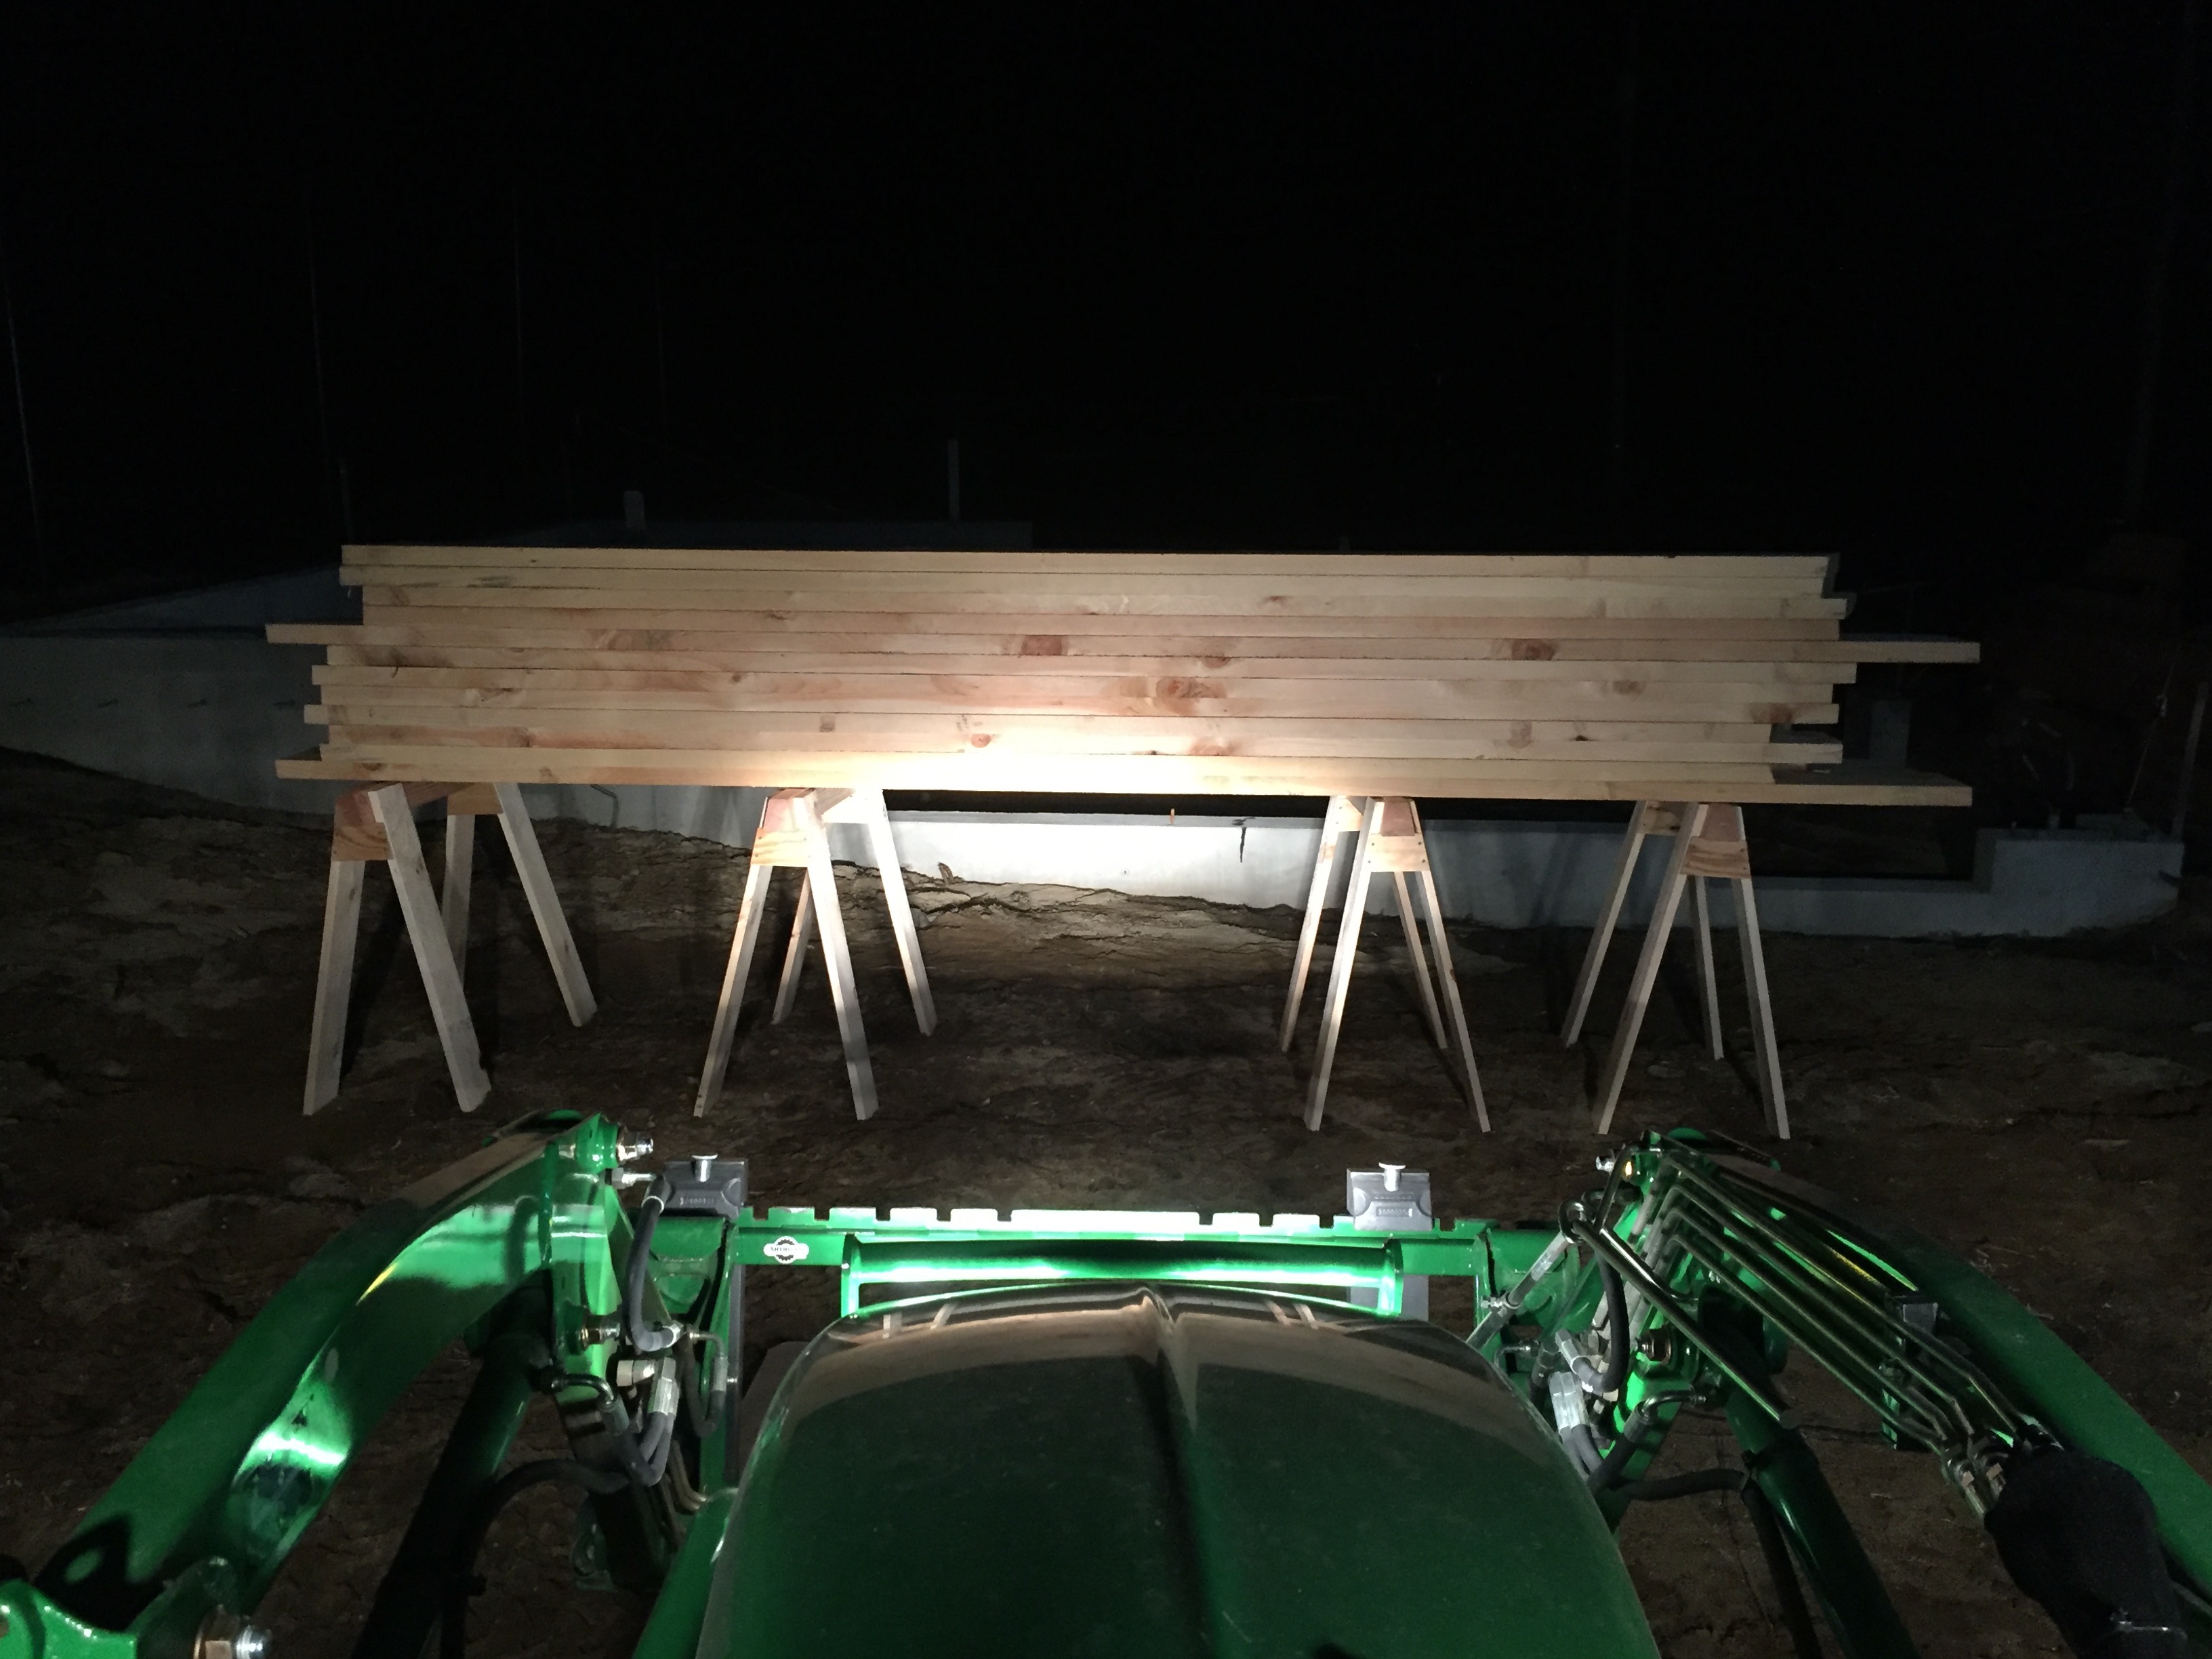
In the photo below are 24 2″ thick 12″ wide green pine planks that will be used in the barn loft. I estimated this wood to weigh 1800lbs and the 4 horses below seem to hold it with ease.
4 horses holding over 1850+lbs of green pine planking
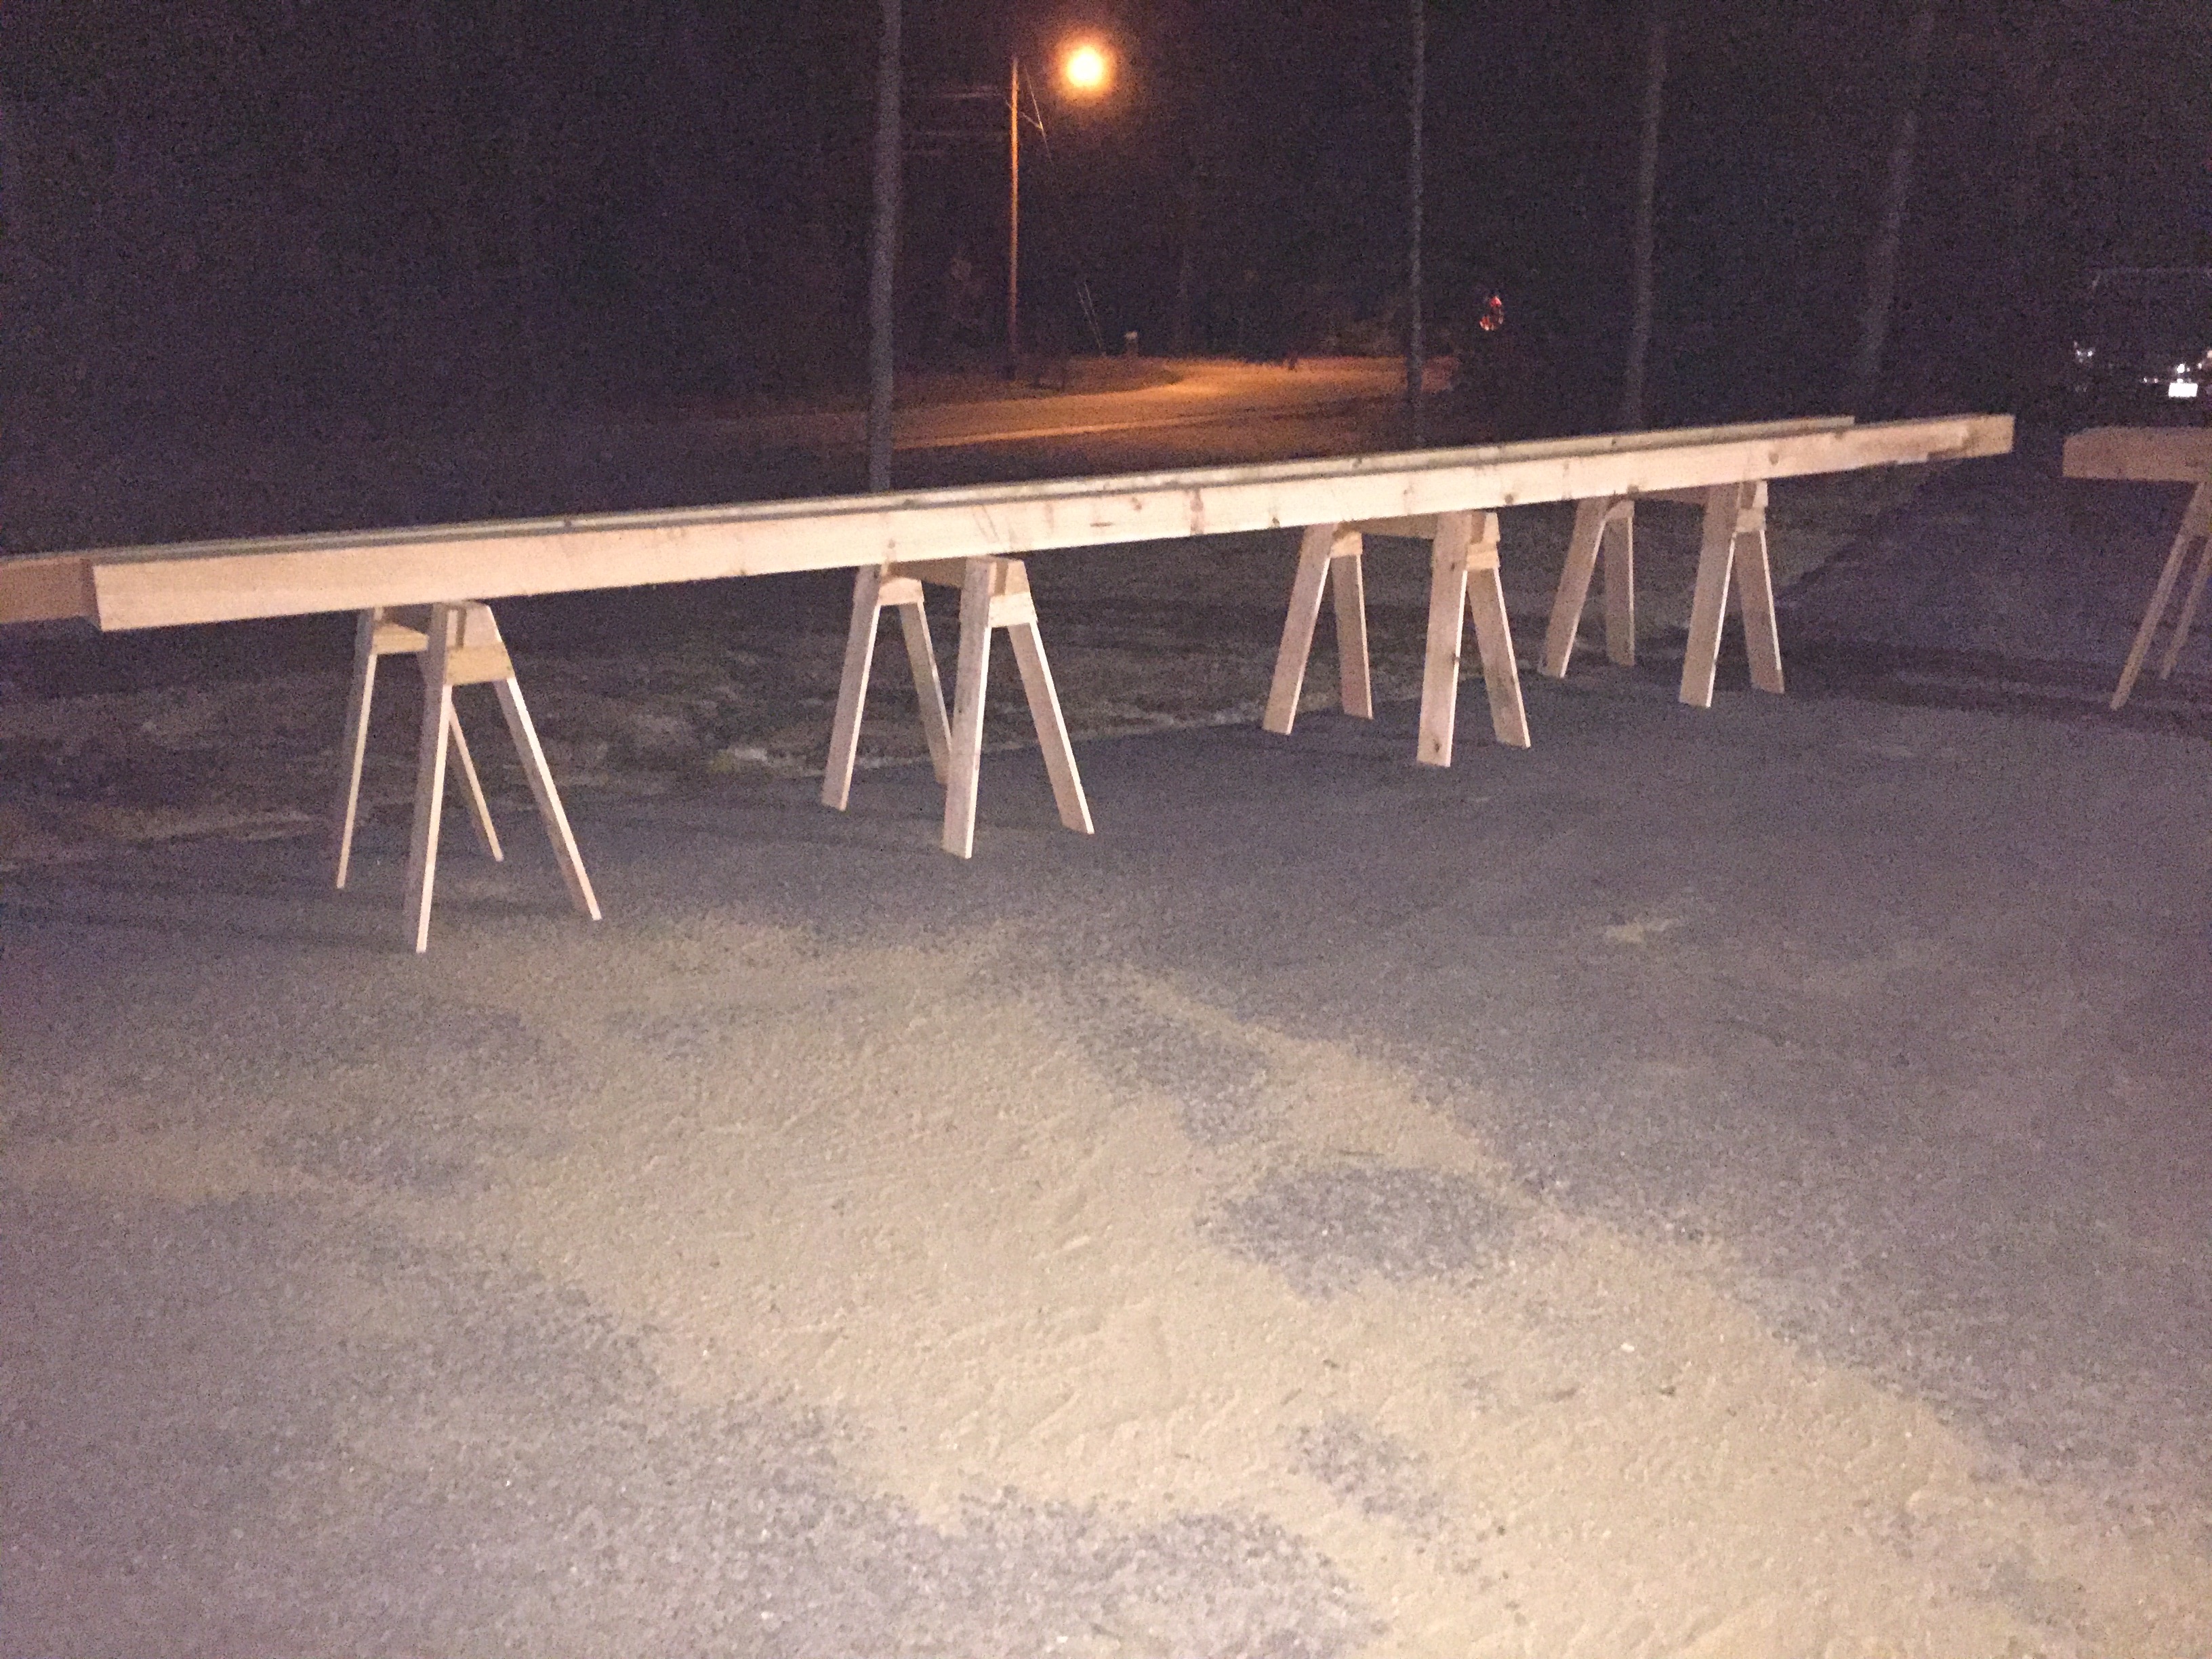
And below are some 6×9 25′ long timbers.
Horses holding 6″x9″x25′ timbers
As you can see these versatile horses are at home in the shop or out on a worksite and I hope that you’ll build a few pairs for yourself. If you do, please let me know in the comments.
Building a window sash by hand can sound intimidating, but with some practice it can be an enjoyable experience. Early window sash were built by hand designed to be maintainable — if a component broke or rotted out it could be replaced — something that is not possible with most aluminum and vinyl windows you see on the market today.
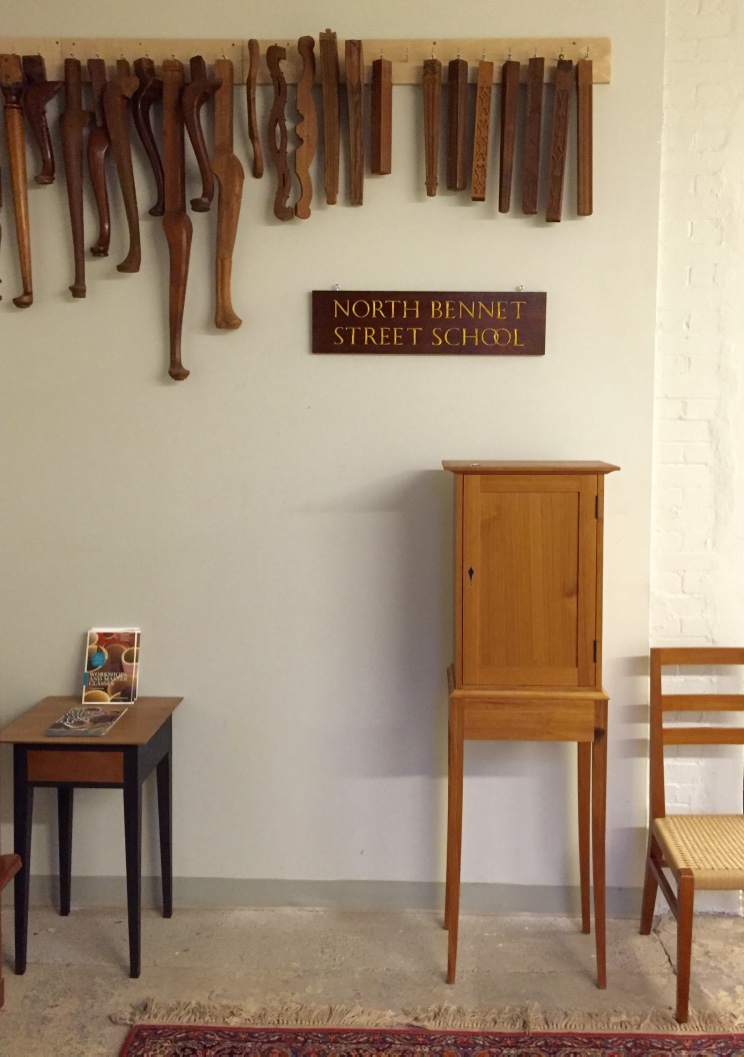
Continuing Education Department at the North Bennet Street School, Boston, MA
A few weekends ago I taught a two day workshop I developed on building a window sash at the North Bennet Street School. This post and the next are a high level recap of the course with some photos from building the prototype in my workshop and what we did in the classroom
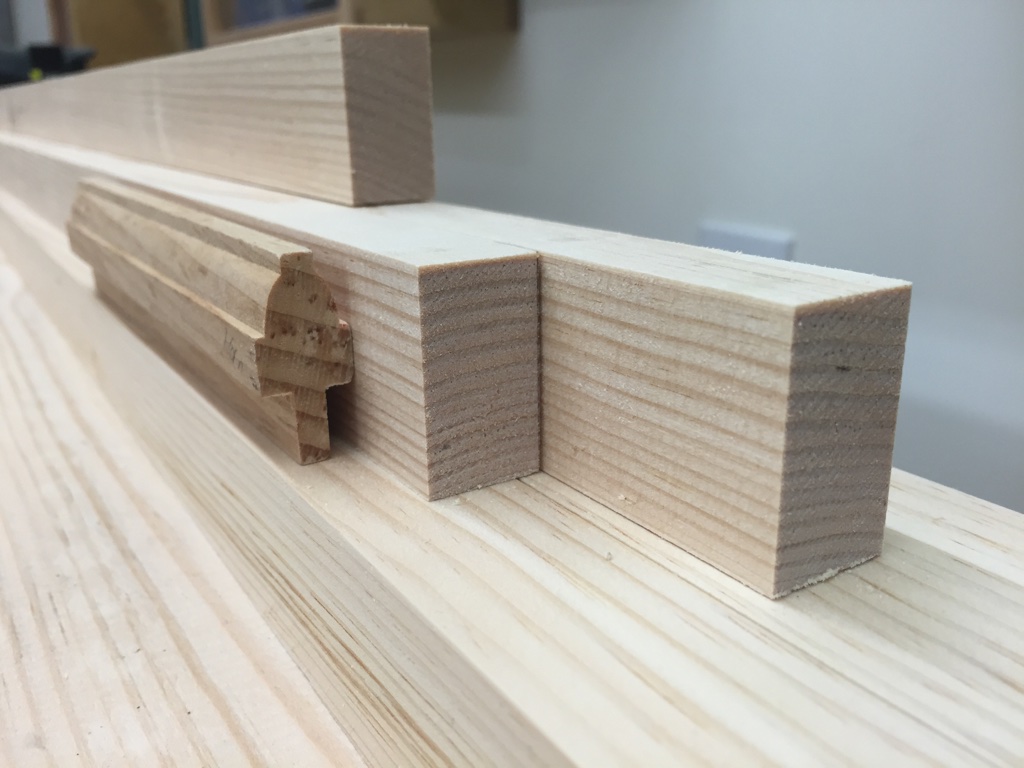
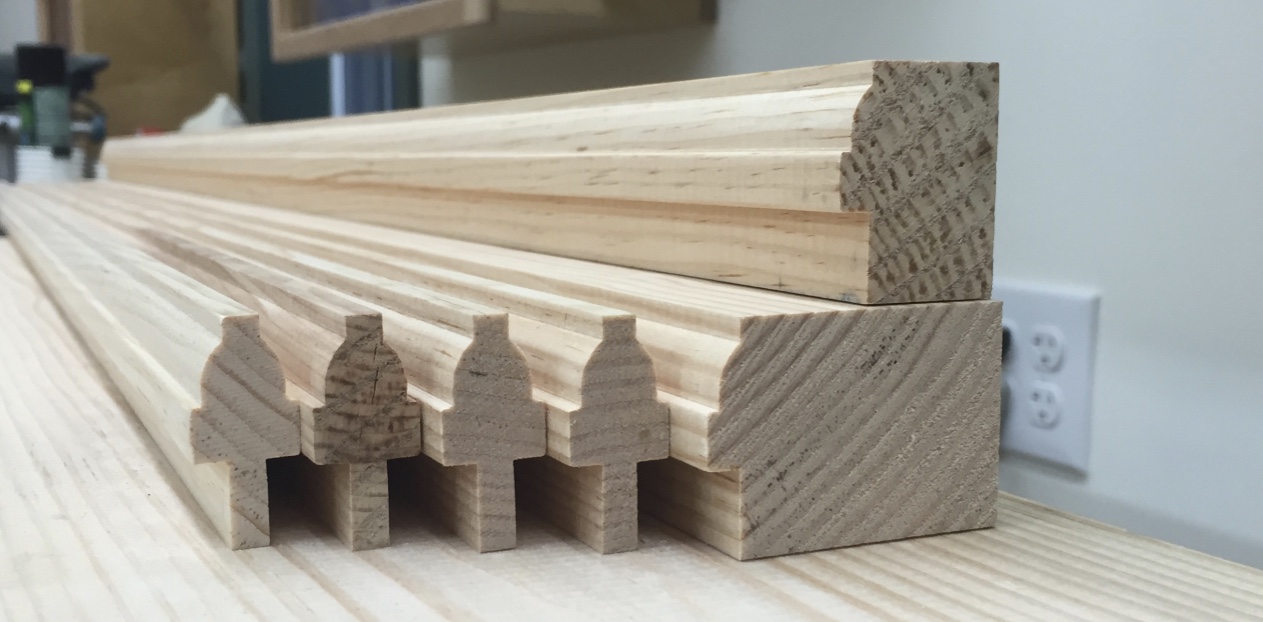
Nice quarter-sawn stock for muntins.
Stock selection is important. My wood of choice is Eastern White Pine, preferably quarter-sawn heart pine which is easy to work, weathers well and historically appropriate in my area — the greater Boston area.
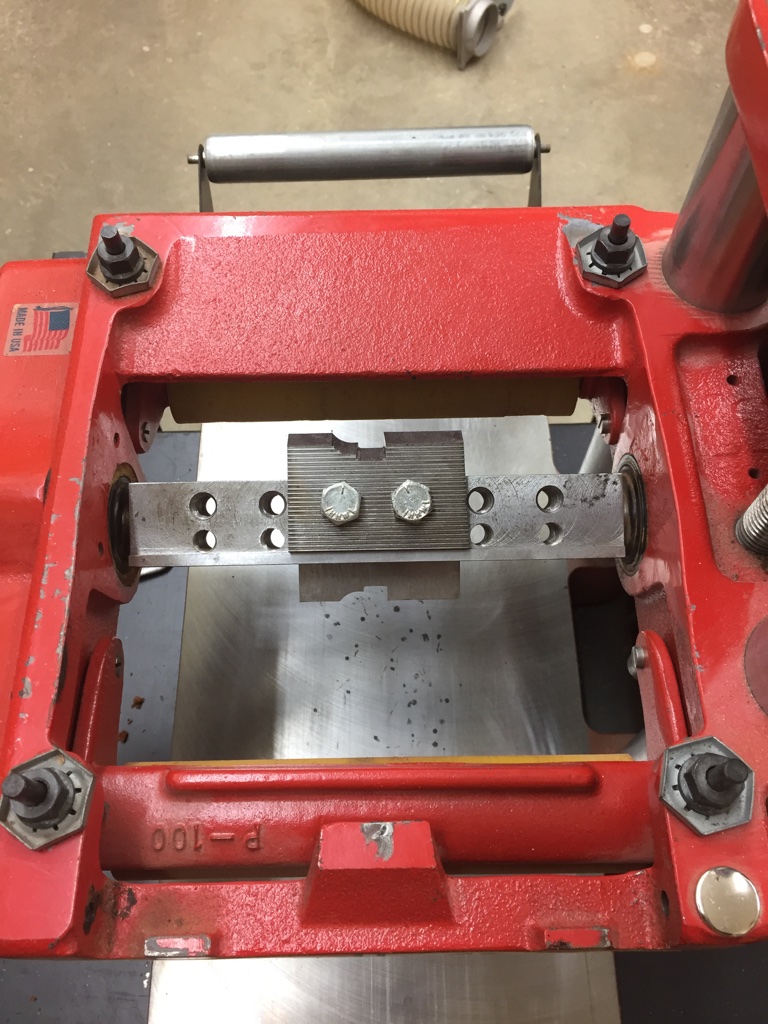
Sticking Knife Profile in the Williams and Hussey
A profile can be run by hand using sash planes or using a router table. For larger runs a custom molding knife can make fast work of this often tedious task using a machine like the ‘Williams and Hussey’ molder. (Shown above and below)
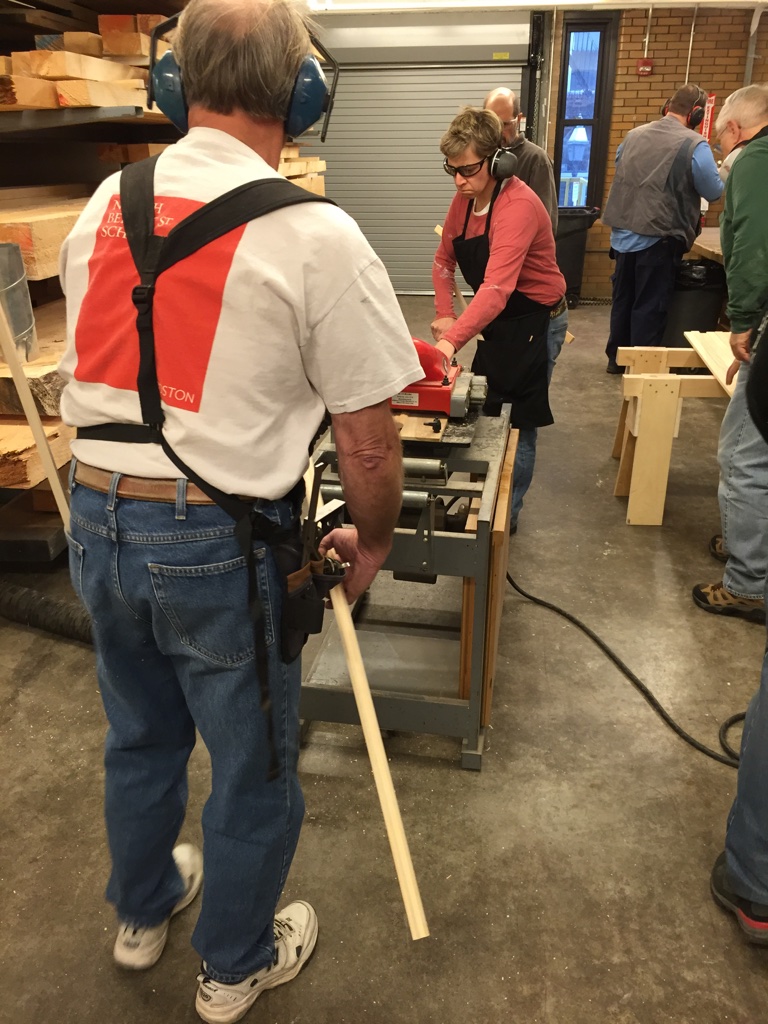
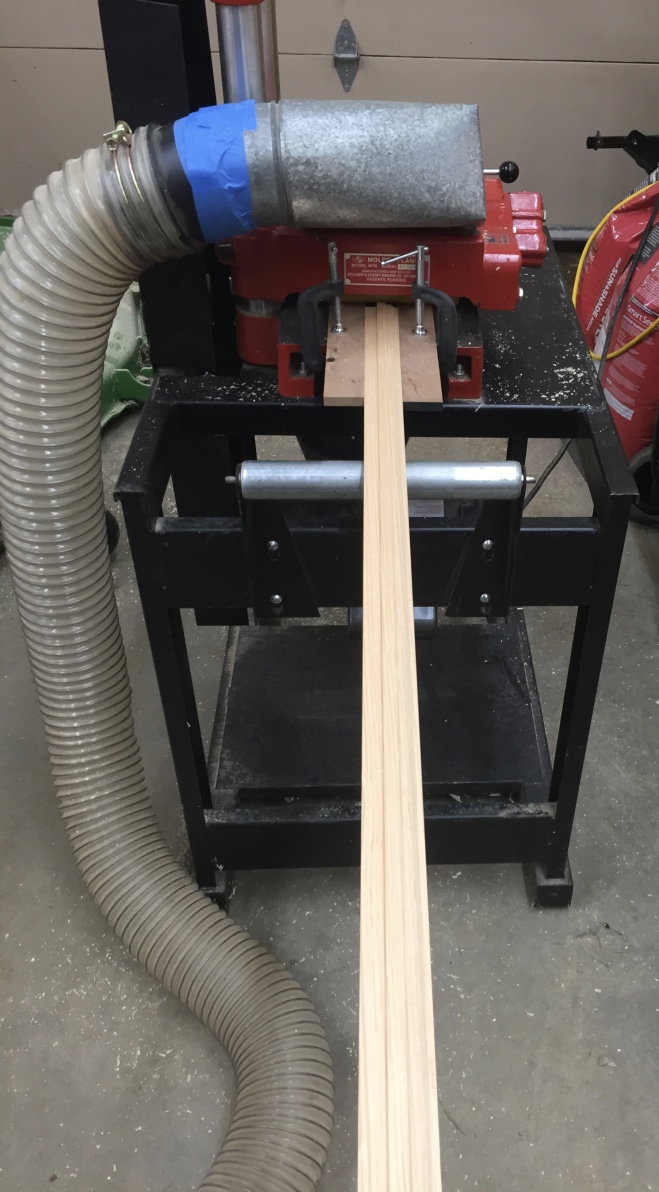
Profiling the stock
We make a few passes to get near the finished size wanted and then a final cleanup pass at the end to leave the piece with a nice finish.
Profiled stock coming out of the molding machine
Rails, stiles and muntin stock are run using the same setup on the machine — this way all the profiles are consistent.
Rails, stiles and muntin stock profiled.
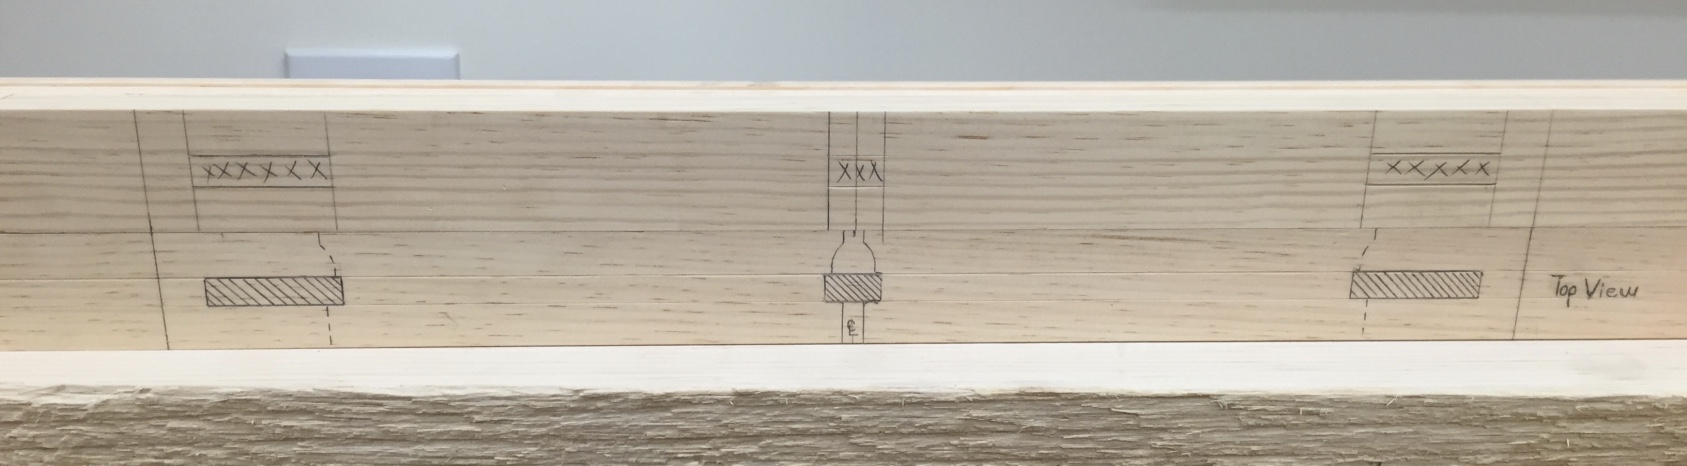
Next up is the use of a story stick — this traditional device is effectively a set of plans laid out on a piece of stock that matches the rest of your milled stock. Key locations like mortises are transferred to the work piece by using a marking knife and a combination square. The knife allows for accurate and consistent transfer of measurements to the work-piece.
Using the story stick to transfer measurements to the work piece
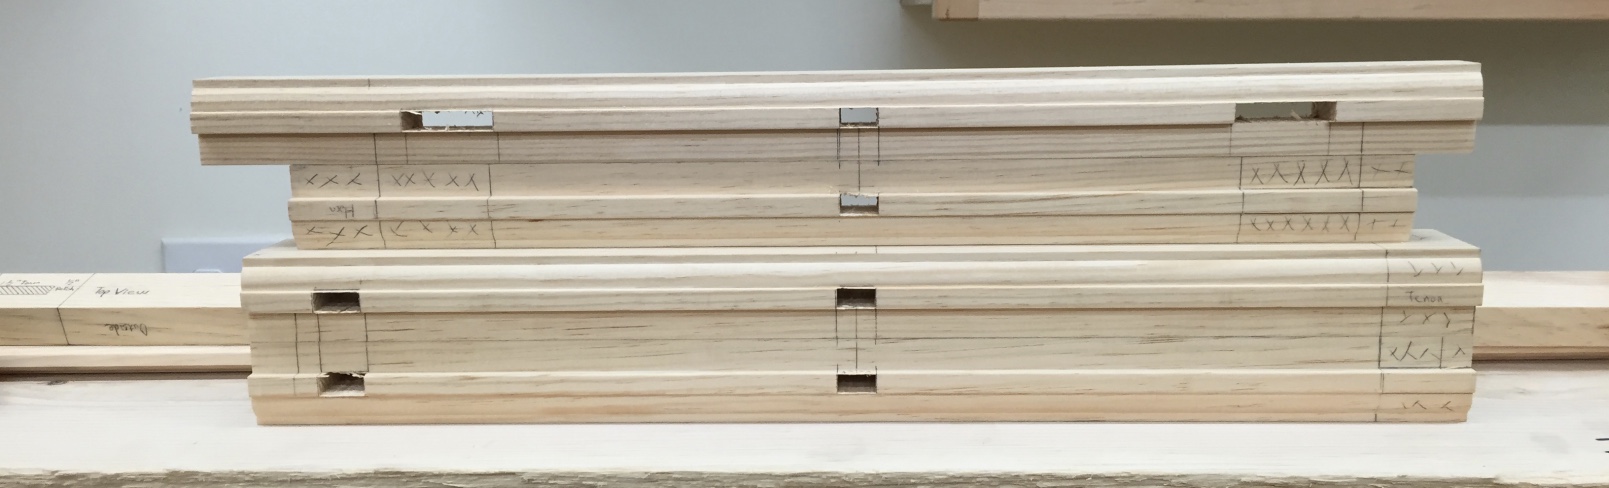
Shown below are mortises cut either with a hollow chisel mortiser or by hand with a mortising chisel. Also note that the work pieces are deliberately left long. These ‘horns’ allow for more relish to support mortise walls from blowing out and also allow the sash to sit in the shop and not ding or damage the piece as it is worked on and eventually glazed.
Mortises cut
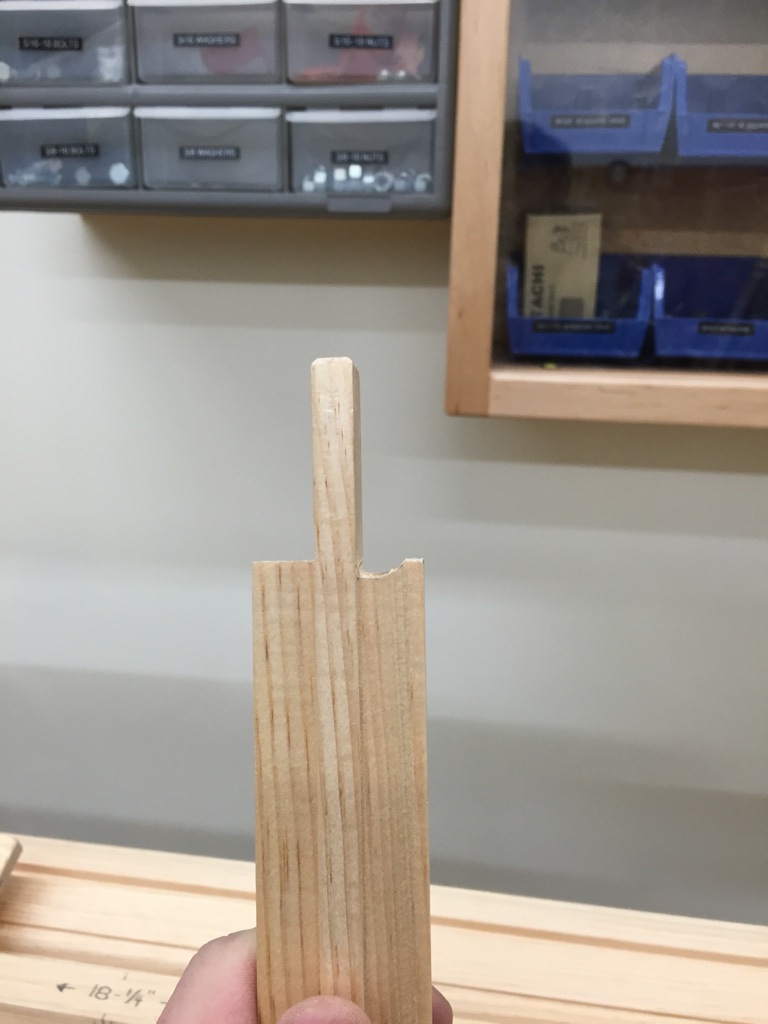
Once the mortises are cleaned up its on to cutting the tenons. Once the piece is laid out I start by cross-cutting the shoulders. (See below). I then use a chisel to pop off the waste or for larger tenons will make a second saw cut (This time ripping down to the shoulder cut) and clean it up with a chisel.
Cutting in to reveal the tenon
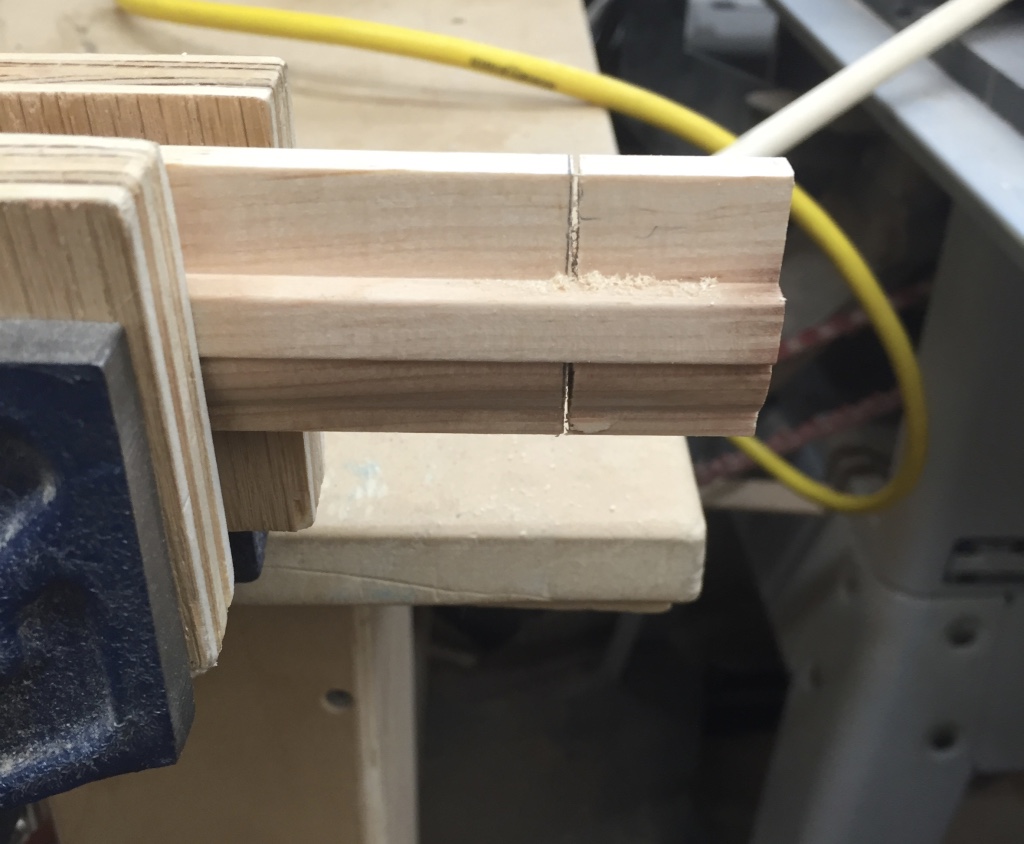
With the shoulders in place I can dry fit them (using the square shoulders that are on the exterior side of the sash) to make sure I have a tight fit as seen below. Note that I am not fitting the tenon yet, just the shoulder to start.
Test fit the central muntin
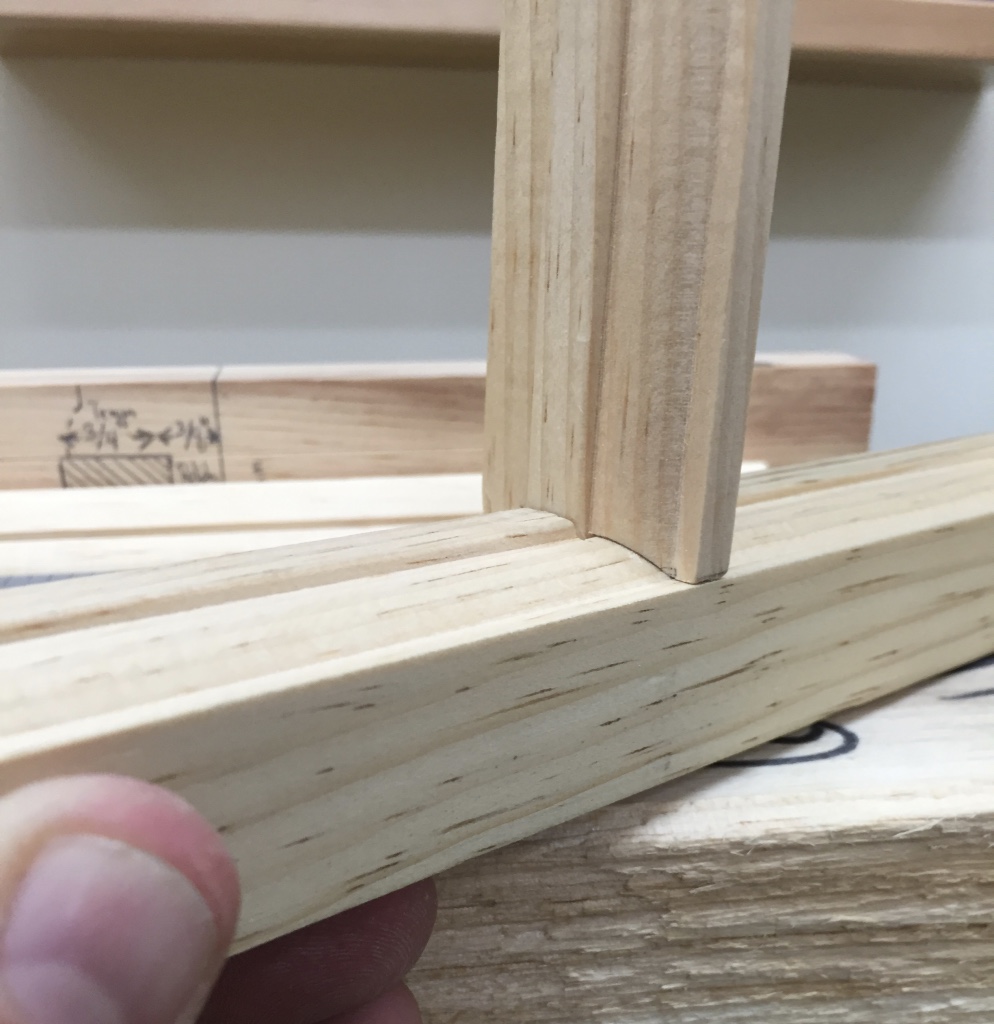
Next up was the coping. I make use of a saddle block with a 45 degree ramp and some in-cannel chisels to cope the muntin stock as shown below. With the cope in place I can now test the fit of each of the tenons into its mortise.
Tenon complete and profile coped
This creates a nice tight joint that allows the pieces to mate together in a pleasing manner that allows to profile to make that 90 degree transition from the horizontal to the vertical.
A nicely coped joint
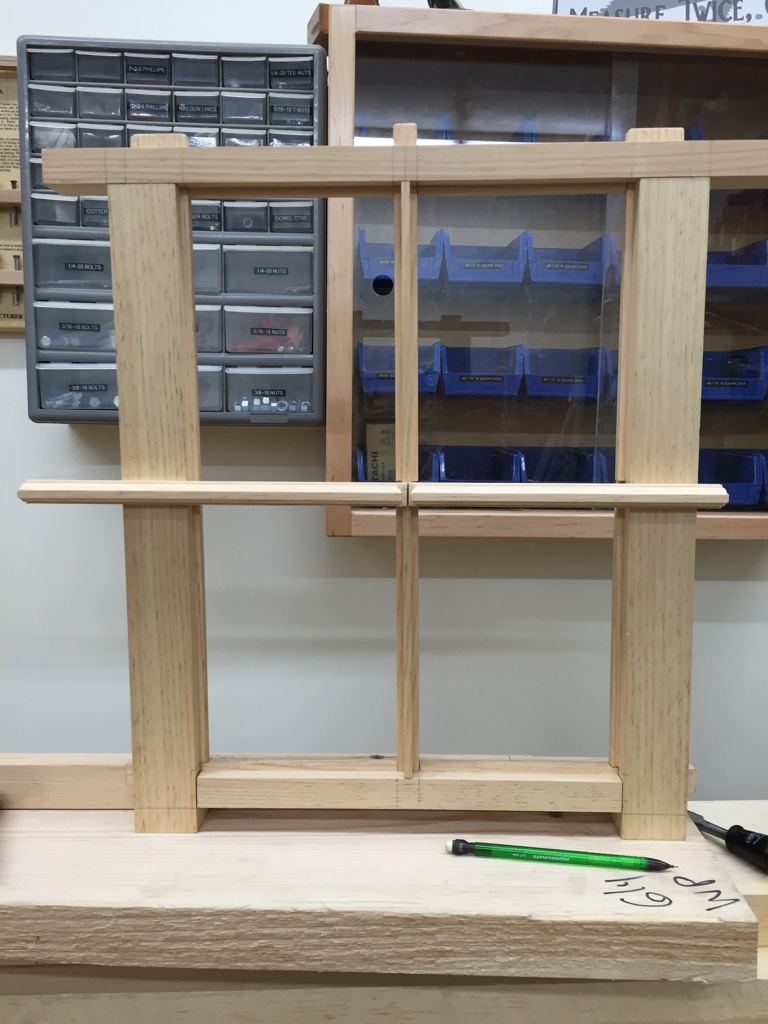
I use a similar process for fitting the horizontal muntins — starting first with the center joint as this can be fussy at times. I want each horizontal muntin to meet cleanly in the center and have both tenons fill as much of the mortise as possible. I leave the stock long so if something goes wrong with the joint I can cut off that inch or so and try again without wasting a whole piece of stock. With the center joint in place I’ll cut the other shoulder and fit it as we did with the vertical muntin and then cope the joint and test those tenons.
Test fitting the shoulders for the horizontal muntins
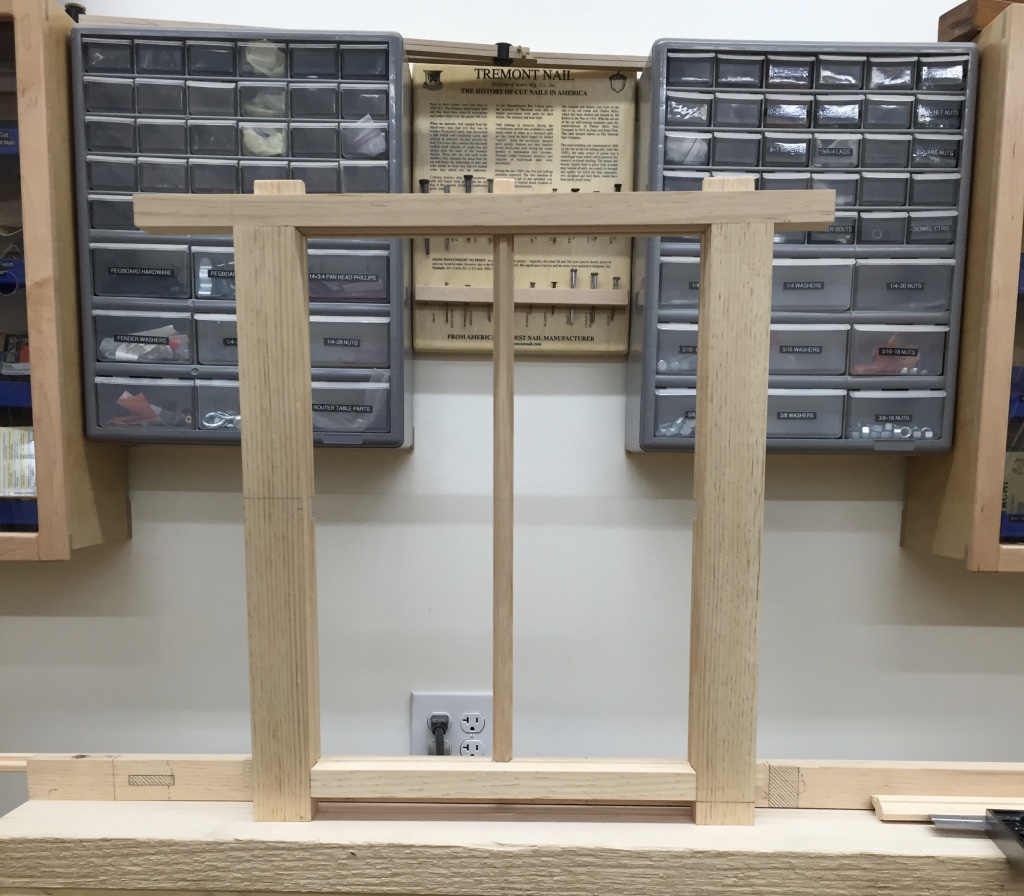
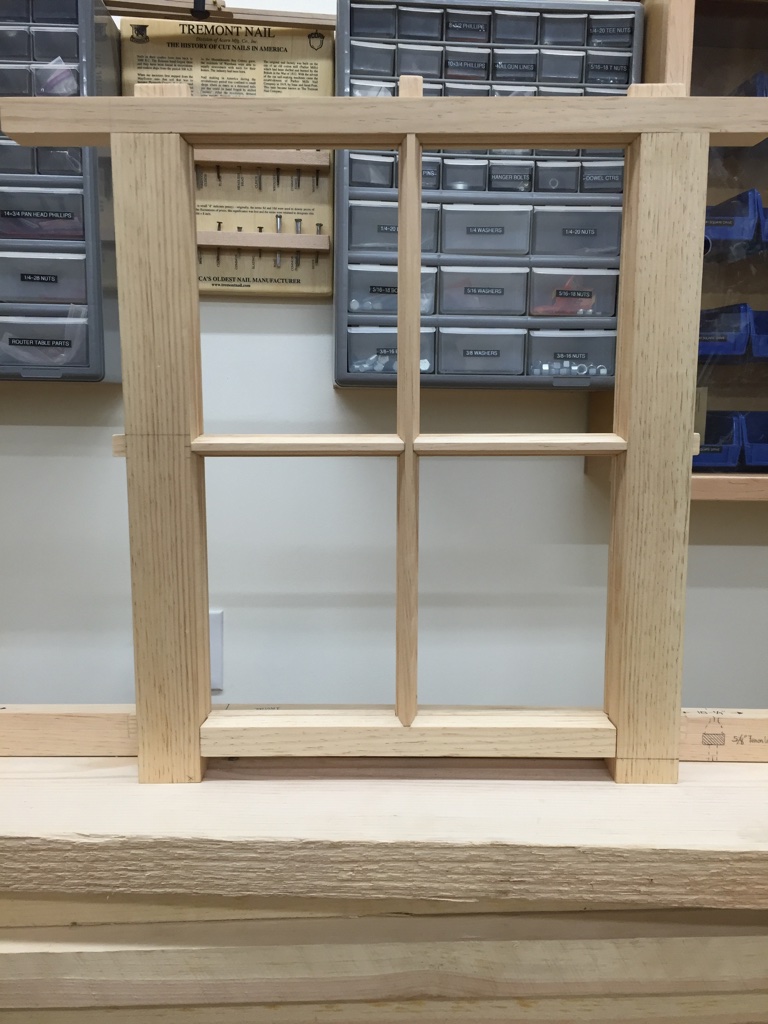
With all the primary joinery completed its time to dry fit it all together and check for square. All the joints should fit together well and the shoulders and copes should be nice and tight.
Test fitting the primary joinery. Note the horns will remain until we paint the sash.
If your joints close up with some mild pressure don’t worry too much as the draw bored pins will help pull the joints together and keep them closed. With each stage in this process the sash becomes more and more rigid.
In the next post we’ll talk about making pins, draw-boring, cutting glass and glazing.
Things have been busy at home and in the shop. I’m in the process of building a 24’x30′ timber framed garage/barn. Lots of good content coming from that build, and I promise a lot of it will *eventually* make it to the blog, but the pressure is on to get as much of it up and built before baby #2 arrives at the end of March and our lives change even more at home. We have a 17 month old son that keeps us very busy as it is. On my Facebook page I often post some more real time photos of what I’ve been up to.
Last weekend I taught a workshop at the North Bennet Street School on building a Window Sash that sold out and was a lot of fun. (Recap of that class to follow in the next post)
I believe there are still a couple of spots open in my up coming 1 day workshop on February 27th at the North Bennet Street School in Boston on making traditional molding by hand and making a picture frame from that molding. If you are interested, please make sure you sign up soon.
This course will be very similar to a course I taught out at Eastfield Village for the EAIA’s Historic Trades Sampler. You can see a recap of that course and some of the frames students built here.
For a full list of upcoming courses I am teaching, please check out the ‘Instruction’ page at the the menu bar for the blog or you can directly access it here.
Here is a quick recap of the next few workshops that are scheduled:
This workshop will focus on creating moldings using traditional hand planes. Each student will have the opportunity to setup and use some hollows and rounds, beading planes, rabbet planes and molders on a sticking board to make a short run of molding that will be mitered to form a small picture frame. Cutting/fitting glass will also be covered.
Beginners are welcome.
If you’d like to learn more about this workshop from a prior running, please check out this post. If you’d like to learn a bit more about this sort of work please check out this earlier post as well as this one.
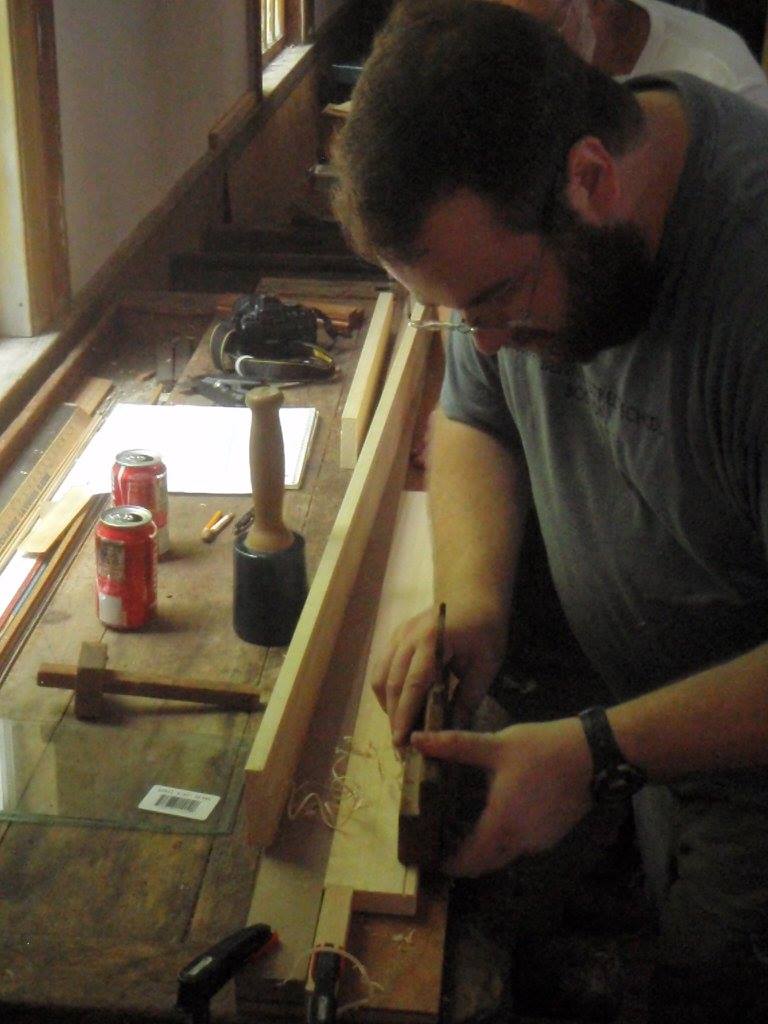
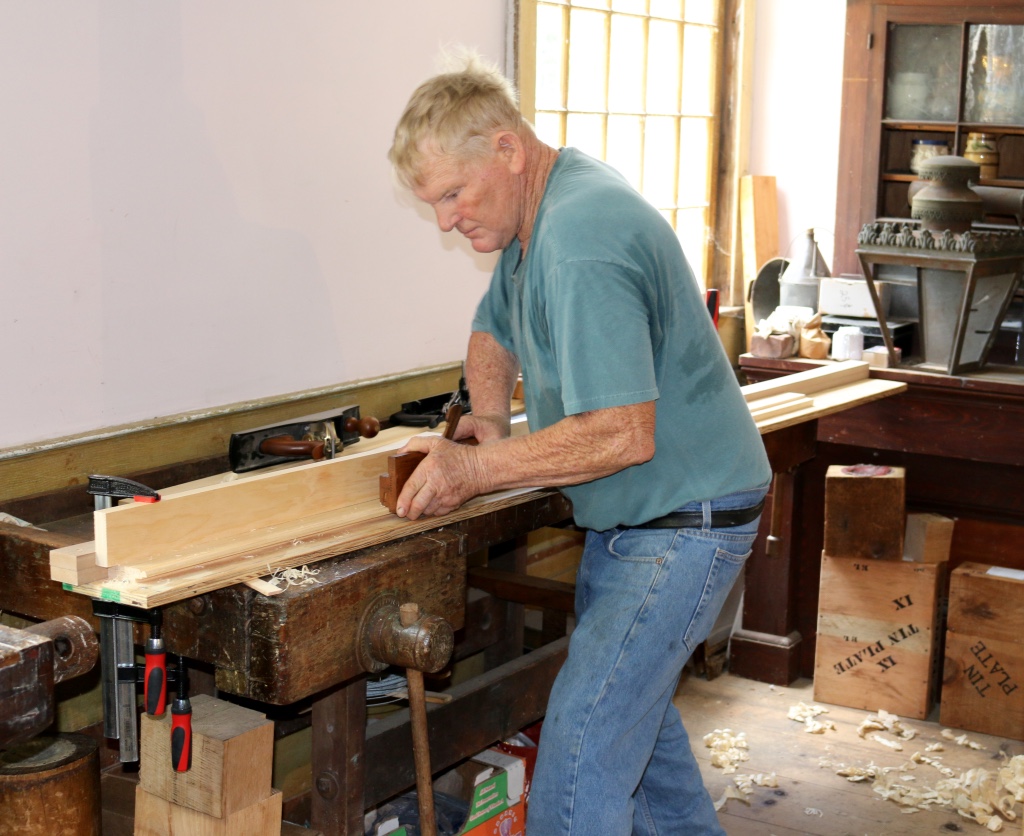
On Saturday I taught a workshop on the use of traditional molding planes to make a picture frame. In this post I’ll cover some of the highlights of the course and share some details for folks who might want to give it a try at home.
Demonstrating the use of a molding plane on a sticking board. (Photo by Carol Coutinho)
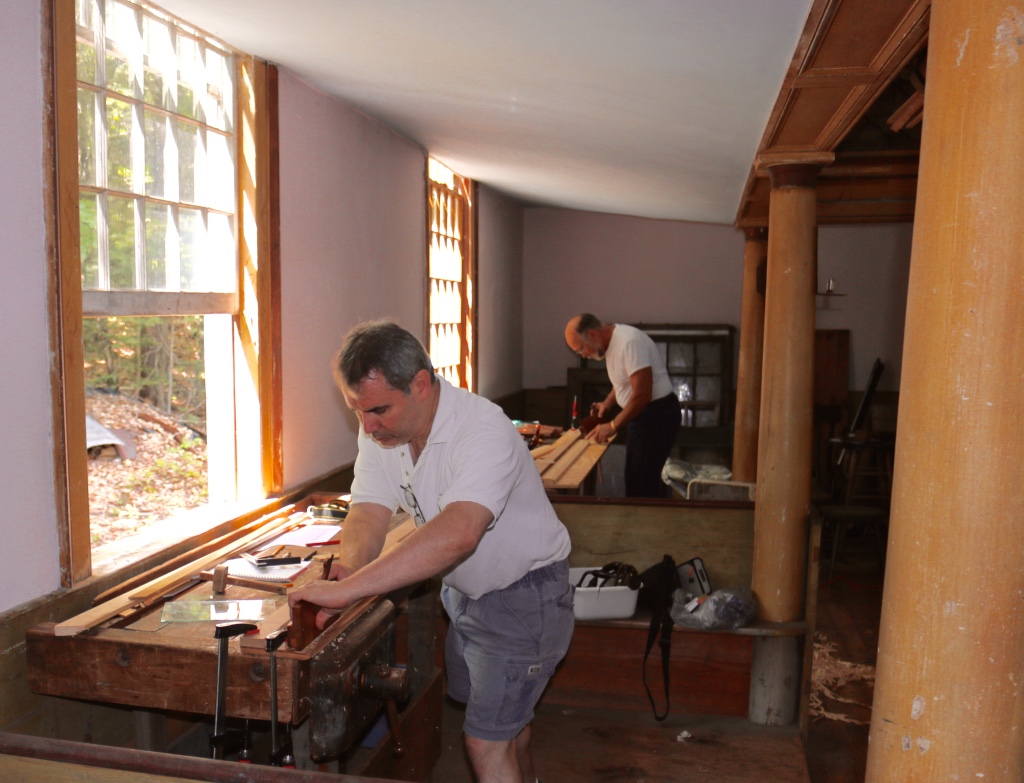
One of the joys of an event at Eastfield Village is to work by natural light in a beautiful and immersive setting — in this case Don Carpentier’s village of carefully moved and restored historic buildings — taverns, trade shops, homes and outbuildings.
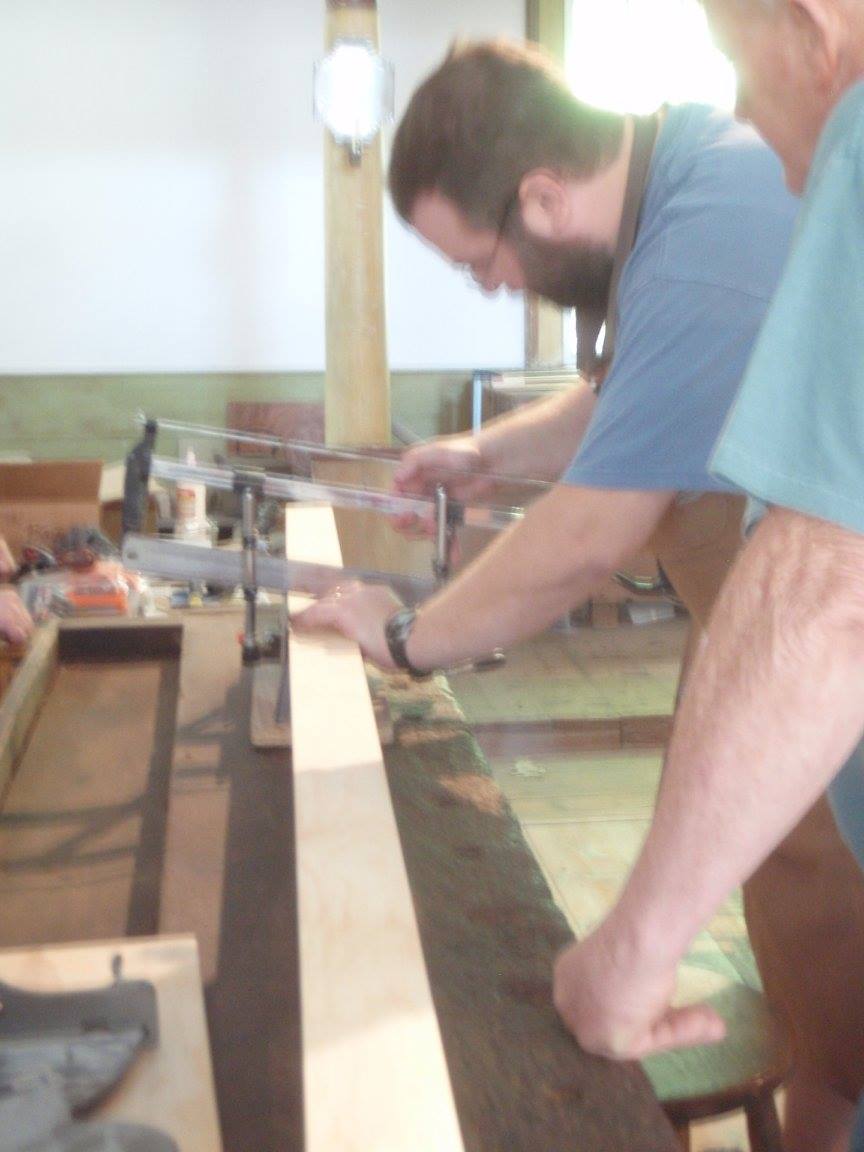
Brian and Tom working with the molding planes.
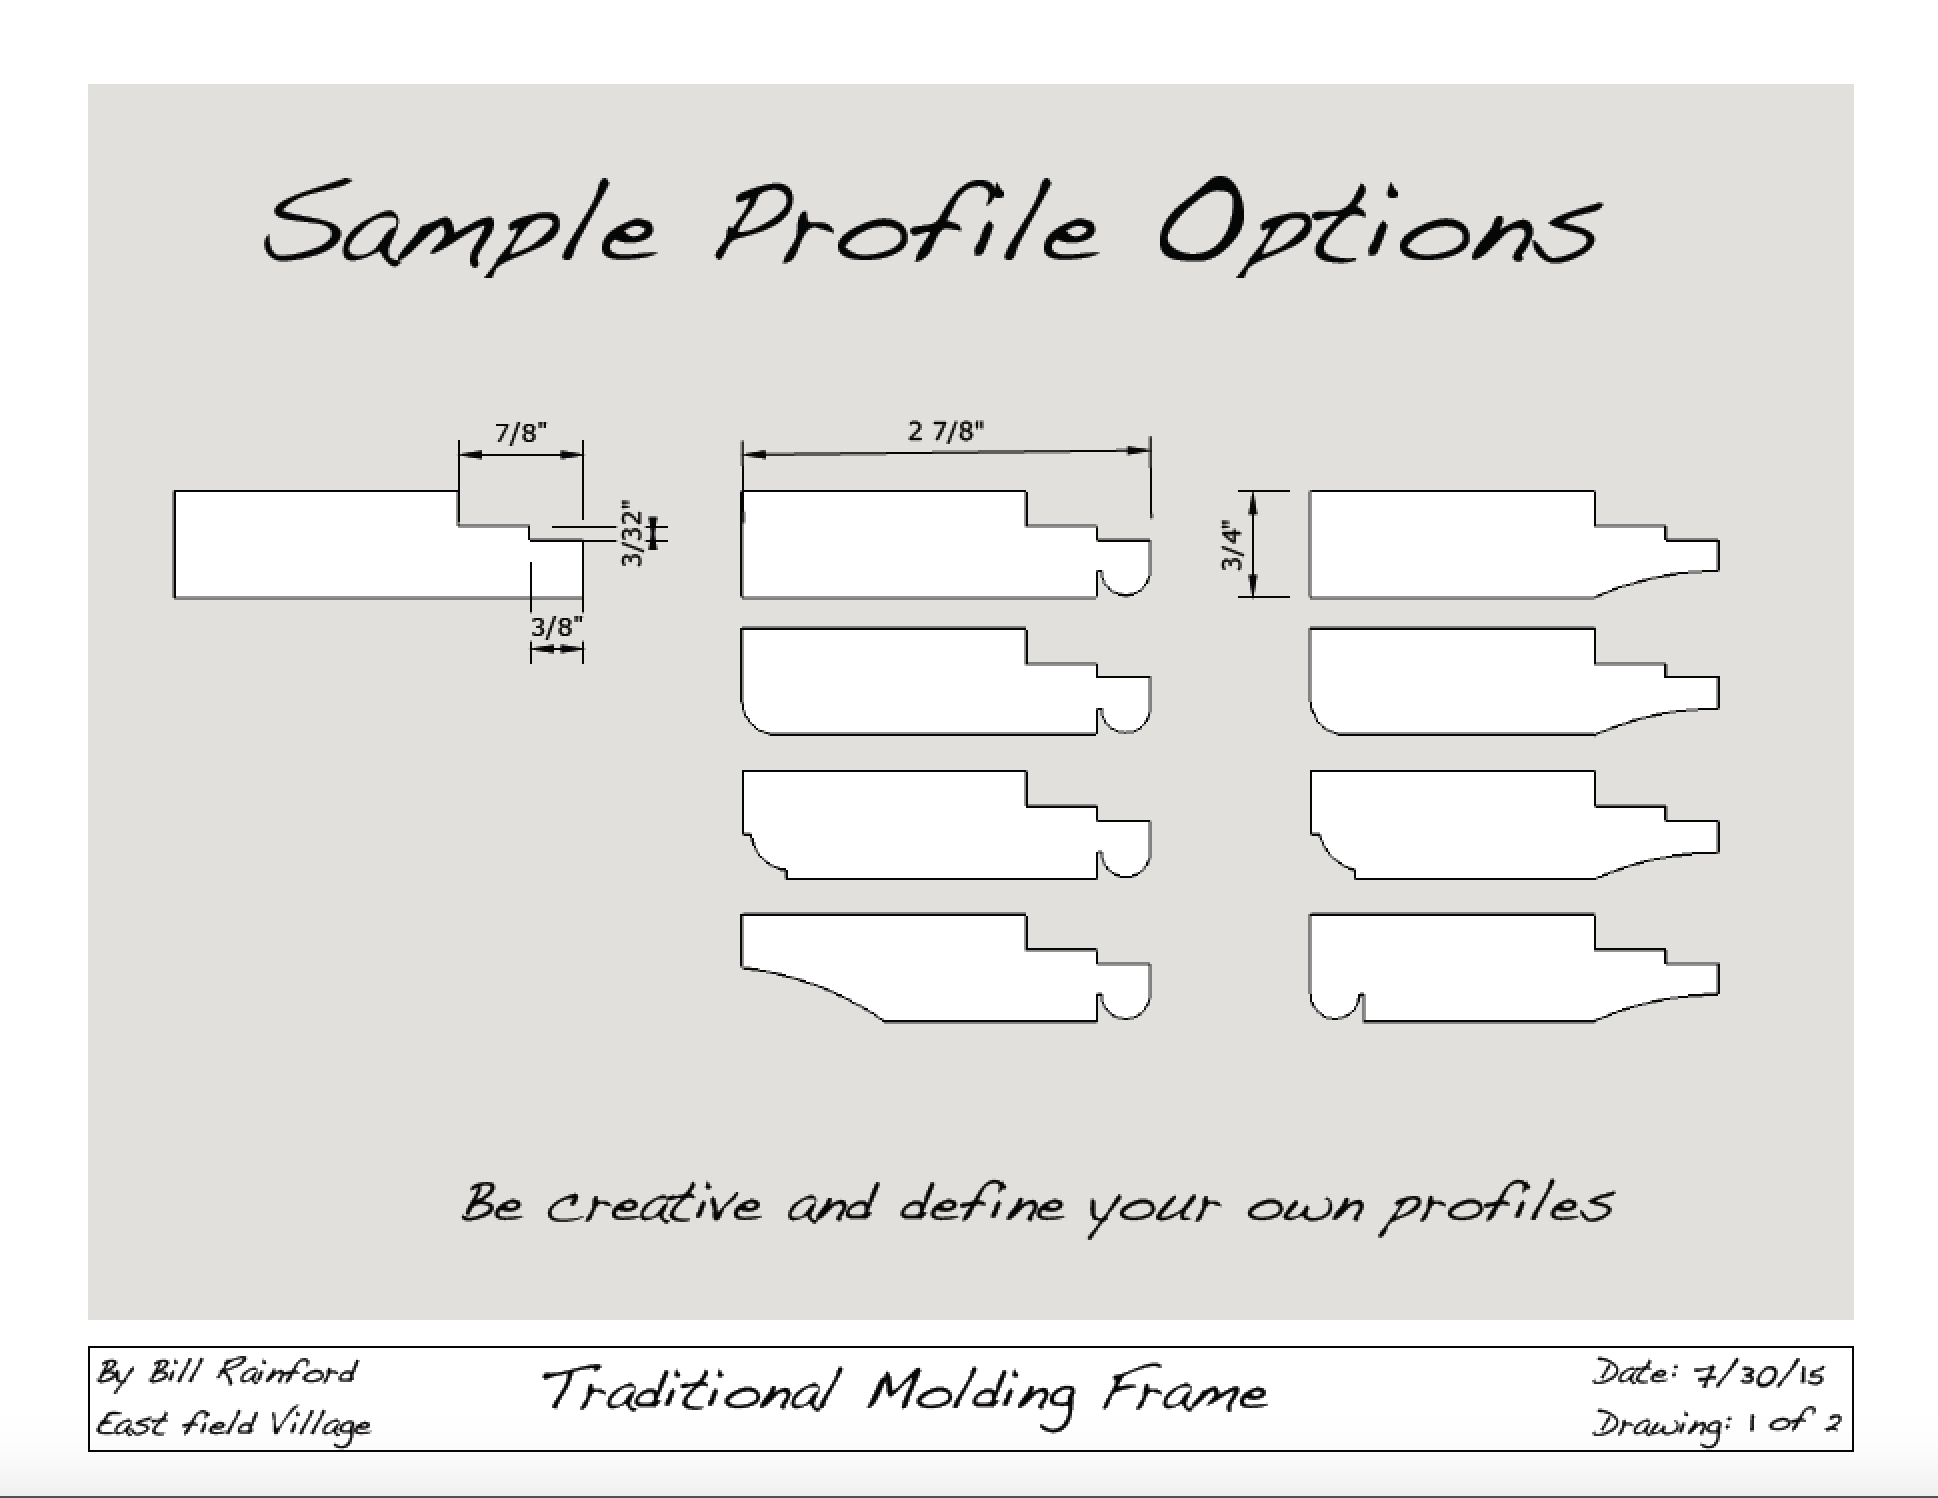
After an orientation to the tools and classroom setup I demonstrated how to evaluate a molding plane and how to tune up an iron. We also talked about the wide variety of profiles that can be created from even a very modest set of molding planes. The profiles below can be created using a beading plane, a pair of hollows and rounds (say #8) and a rabbet plane.
A sampling of how a few simple profiles can generate a large variety of frames.
And with hollows and rounds the profiles are only limited by your imagination.
Students tuned up their planes, squared up their stock, and tested their plane setup on some scrap and set about making the stepped rabbet needed to hold the glass in place and the plywood back. The plywood back is carefully screwed in place and helps created a very solid/rigid frame compared to the floating backs held in by stamped metal retainers we see on many modern store bought frames. The long piece of plywood with an MDF fence and screws at the end to secure the stock is called a ‘sticking board’ and can be as long or as short as your project stock requires.
Don making a profile on the edge of his frame stock.
Next up students started molding their chosen profile(s). We talked about how to work backwards withe the molding planes building on the work of an earlier swipe, how to adjust irons as needed and how to get a nice finish on the profile.
Making the miters with a miter box. (Photo by Carol Coutinho)
With a fully molded piece of stock now it was time to layout your cuts and cut the miters. In this case students left the line knowing that we could creep up on it by using my Lion Mitre-Master (large metal frame-makers guillotine) or a shooting board with 45 degree insert to clean up the corners and ensure we have a nice tight miter at each corner.
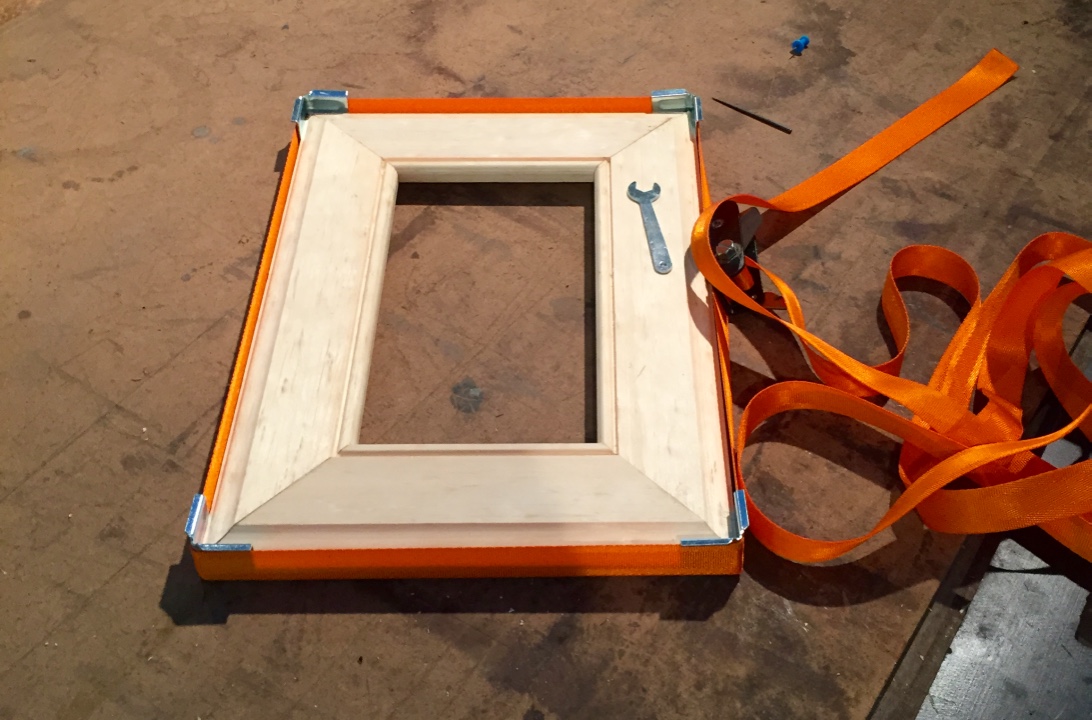
Frame baking in the band clamps
With the woodworking complete, next up was a test fit in the band clamps and then final gluing of the frame. While the frames baked in the clamps it was time to cut the glass to size and test fit it. We did this with a self-oiling glass cutter and a layout I made on the bench. Once the glass was fit it was time to layout and countersink the plywood back which was made if 1/4″ thick Baltic birch plywood and secured with #6 1/2″ waxed screws. We used bit braces and egg-beater drills to make quick work of this step.
Hanging hardware came in the form of a self leveling hanger (Think saw-tooth that hangs on single nail) which is affixed with two tiny brads. An appropriate finish would be stain and shellac or a nice bright milk-paint.
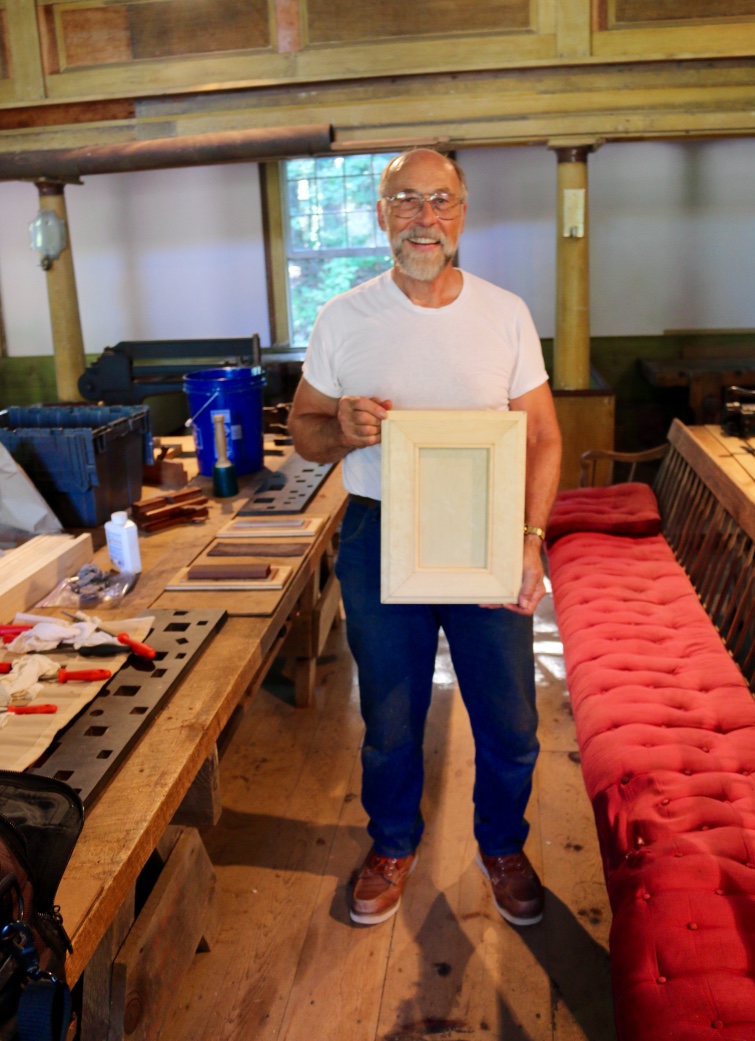
Tom with his finished picture frame.
I’m happy to report that everyone in the class was able to complete their frame, and I had a great time working with Tom, Don, Carol and Brian. (Carol I’m sorry that I didn’t have any photos of you working to add to this post, but I did make use of some of those photos of me you share with me — thanks again) .
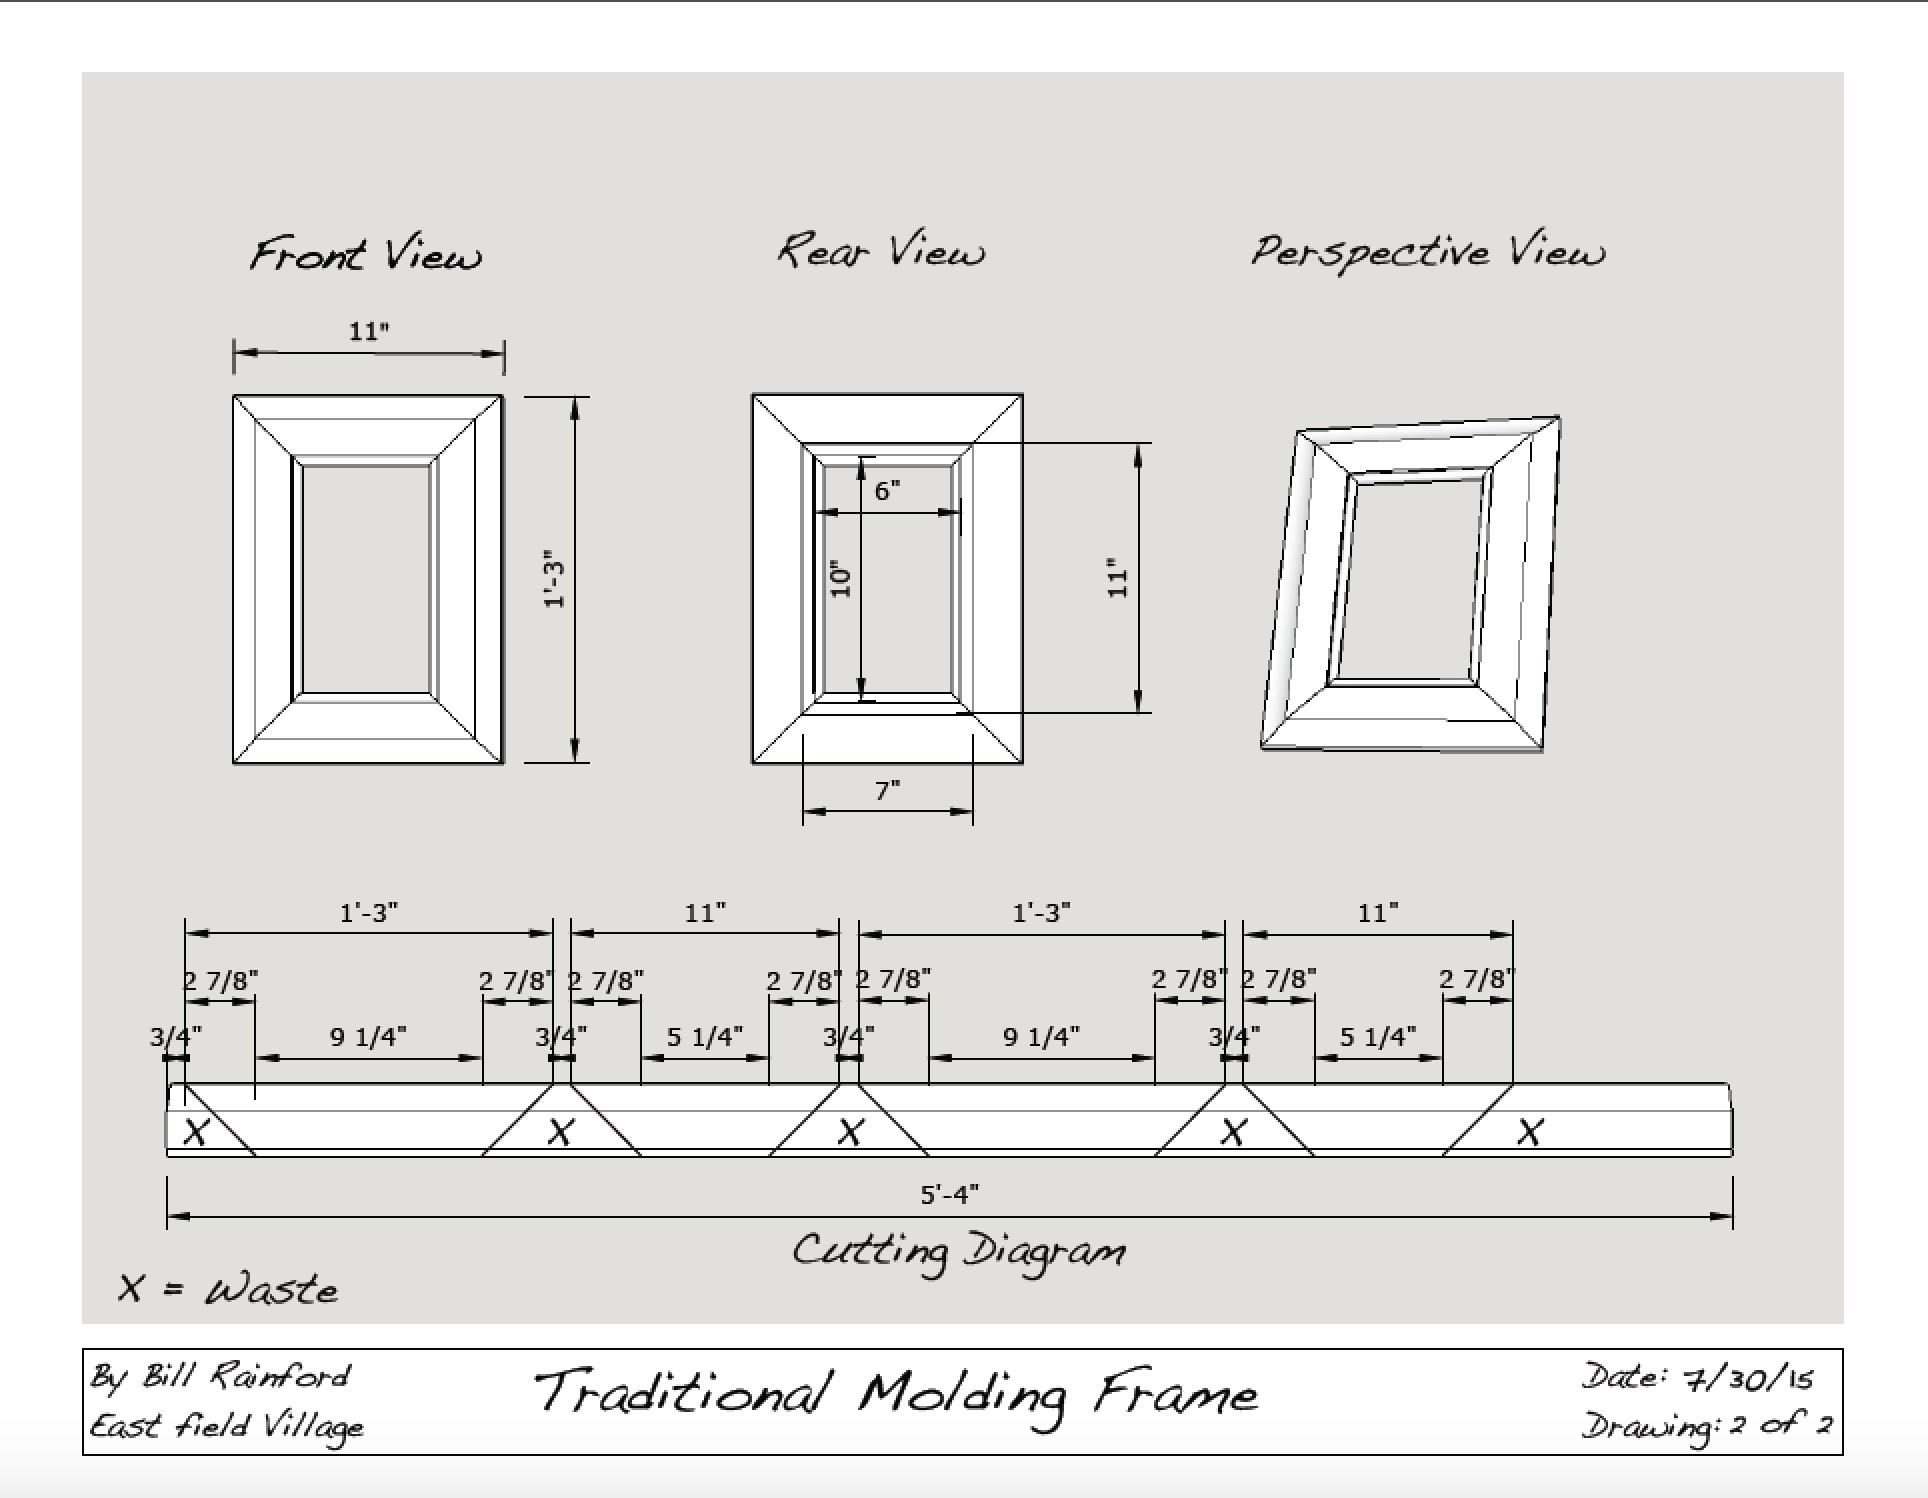
If you’d like to make a frame of your own the plans I put together for this workshop can be seen and downloaded from the link below. The seemingly odd size of this frame was dictated by two factors — the smallest size glass I can get at my local home center is 10×12″ so if you cut it in half you wind up with two 6×10″ pieces which allows each student to have a spare in case their glass cutting didn’t go well and they need a spare or they find time to make a second frame. The size is also dictated by the sticking board and stock. I wanted something that would fit on the 8′ sticking boards I had and allow some extra space in layout and for cutting and to have a bit for testing/trial. The plans below could be scaled up or down to fit whatever size frame you desire.
If you make a frame of your own and take some photos of it, please share it in the comments below. It’s a great project that can add some unique personality to your pictures and add valuable skills to your woodworking repertoire.
The ax is a noble tool. One of, if not the earliest tools used by man it has been by our side since time immemorial. Different cultures mythologize different axes as part of their cultural heritage, from prehistoric cave drawings, to vikings to Native Americans to western pioneers but at their core the ax and its purpose is the same. All of these cultures had similar needs– to provide food, shelter, and protection for its citizens.
Over time this commonality seemed to fade away, relegated to a cob-webbed corner of the barn or missing from the home altogether as many people live in a world where providing for food, shelter, protection etc is derived from modern trade and conveniences. For those that remember their father or grandfather using an ax and want to re-capture that piece of their heritage, even finding a decent ax in a modern store will often only turn up cheap caricatures of what an ax used to be.
Rather than lament this loss I fell down the hand-tool rabbet hole many years ago and I have no intention of returning to ignorant life I led when I thought power tools and jigs were the best way forward. Sure I still have plenty of power tools for some mundane tasks like thicknessing wood in volume, but more often than not I reach for a hand tool — to enjoy the relative quiet (always good as their is a baby in the house), the energy efficiency (I can stand to lose more weight so burning calories is better than burning kilowatts), the speed, the accuracy and connection to the past.
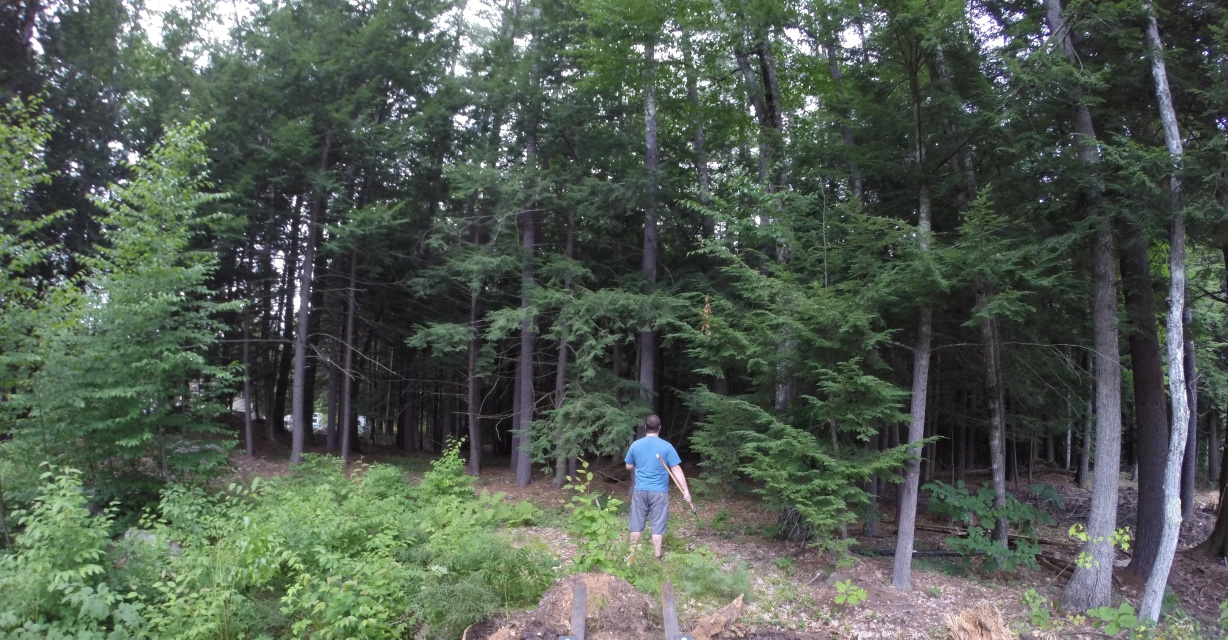
Wandering out into the woods with an ax….
Nothing I wax on about in this post is new or novel in the woodworking community, but it strikes a nerve for me that can at times be hard to articulate. A quote from early in Roy’s first book aptly summarizes a core bit of his philosophy that is near and dear to my own heart:
“I teach traditional hand-tool woodworking — how to start with a tree and an axe and make one thing after another until you have a house and everything in it. The satisfactions of this work are immediate and personal. You find the tree, fell it, shape the wood, and join it together. The mistakes and successes, the accidents and discoveries are between you and the tree.” — Roy Underhill ‘The Woodwright’s Shop: A Practical Guide to Traditional Woodcraft’
I owe a big debt of gratitude to Roy Underhill for helping me get in touch with my inner Carpenter/Joyner via his show, his books and in person classes. At NBSS I got real familiar with a felling ax and a hewing ax for hewing timbers, but I never took down a tree by hand using an ax. Even though I had the axes on hand I always used my trusty chainsaw. On a recent weekend of clearing trees in the yard I decided to get an item off my bucket list, grab my trusty Gransfors Bruks felling ax (sharpened/maintained so that I could shave with it if need be), and fell a tree by hand.
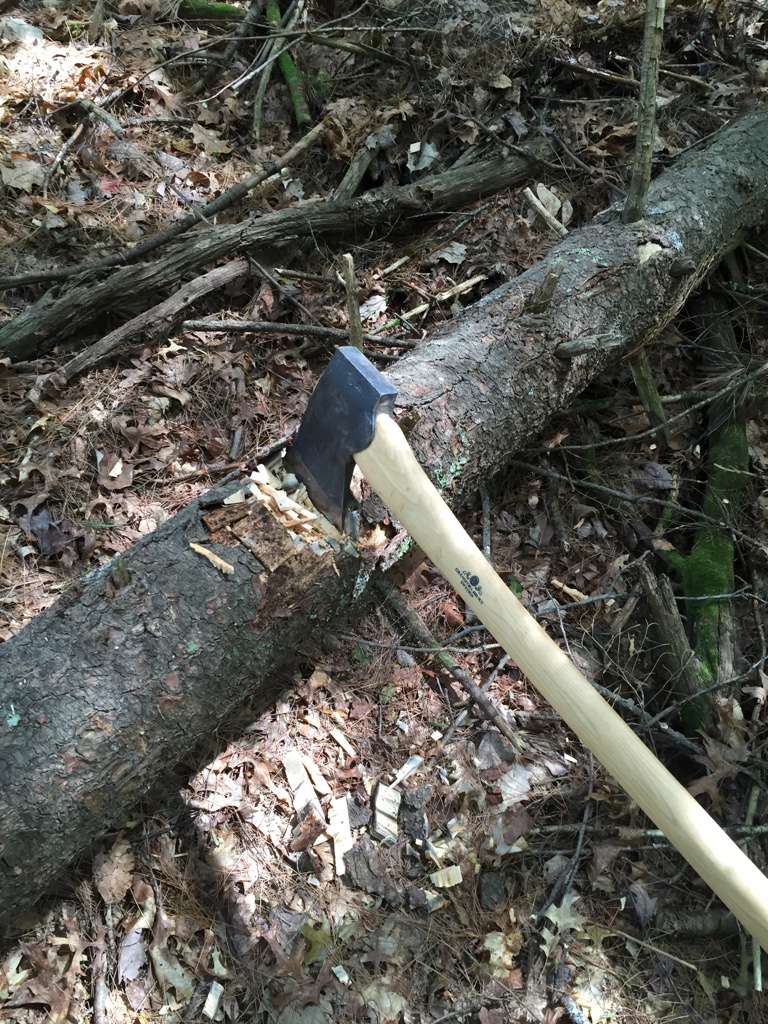
Bucking a tree into a log
I wandered out in the woods and trimmed some dead branches to clear a bit of a path. Whack — nice clean cut and a lot less work compared to my tree saw on a pole. Let’s go bigger. I took down a small pine tree about 8′ tall. In a few minutes the tree was down. Still too easy. Let’s go bigger. A standing dead remnant of a tree. Now the blood is flowing and adrenaline is kicking in, but apparently there was no fear of death by crushing. Let’s go for something bigger still. I found a medium sized (~40′ tall) eastern white pine that was between me and where I wanted to dump some stumps in the back acreage. I notched in where I wanted the tree to fall. Each strike with the ax severed fibers or popped out chunks as I worked my way into the tree. I then notched in from the opposite side, though higher, so the tree would hinge over where I wanted. Timber! Down it went. Time to de-limb it and buck it into a movable log size. Bucking the tree into logs was a similar process of working through the tree as I did when felling it, though this time I was going completely through rather than creating notches to pivot on. Once I got the logs down to about 8′ sections I was able to drag them out of the way, put them up on some rocks to keep them off the ground and make use of this newly created path. The logs will start to season over the dry winter and we’ll see if they become firewood or maybe some other use around the house or yard.
It was a great workout and came with a sense of accomplishment that stayed with me along with the realization that there are some muscles in my back and shoulders that clearly are not getting enough use. 😉 I felt more a part of a continuum dating back to those earlier generations who started at the tree and made all the items they needed to survive and eventually thrive. It also gave me a new appreciation for the amount of human energy invested in a lot of those earlier buildings.
If you have the opportunity to take down a tree by hand, I encourage you to learn how to do it safely and then give it a try and make something from some of that wood once it is seasoned. It’s good for the mind, the body and the environment.
If you’d like to learn more about the proper use of the ax or see the more eloquent and entertaining philosophizing of Roy Underhill you may want to check out some of these videos:
Great Video Clip of Roy Underhill in Philosopher Mode talking about historic Axes. (I agree with Chris that Roy should have decimated that podium here.)
Roy’s Ted talk — ‘Have Broad Ax, Will Travel’ here.
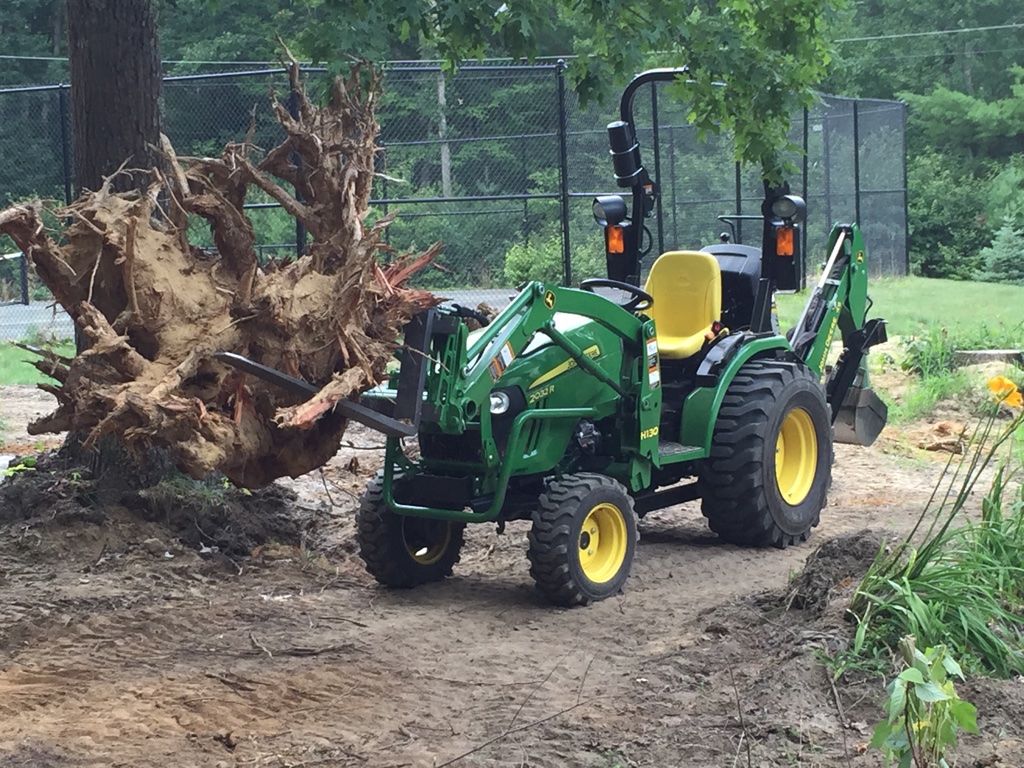
Moving ever larger stumps
What have I been up to when I haven’t been swinging an ax?
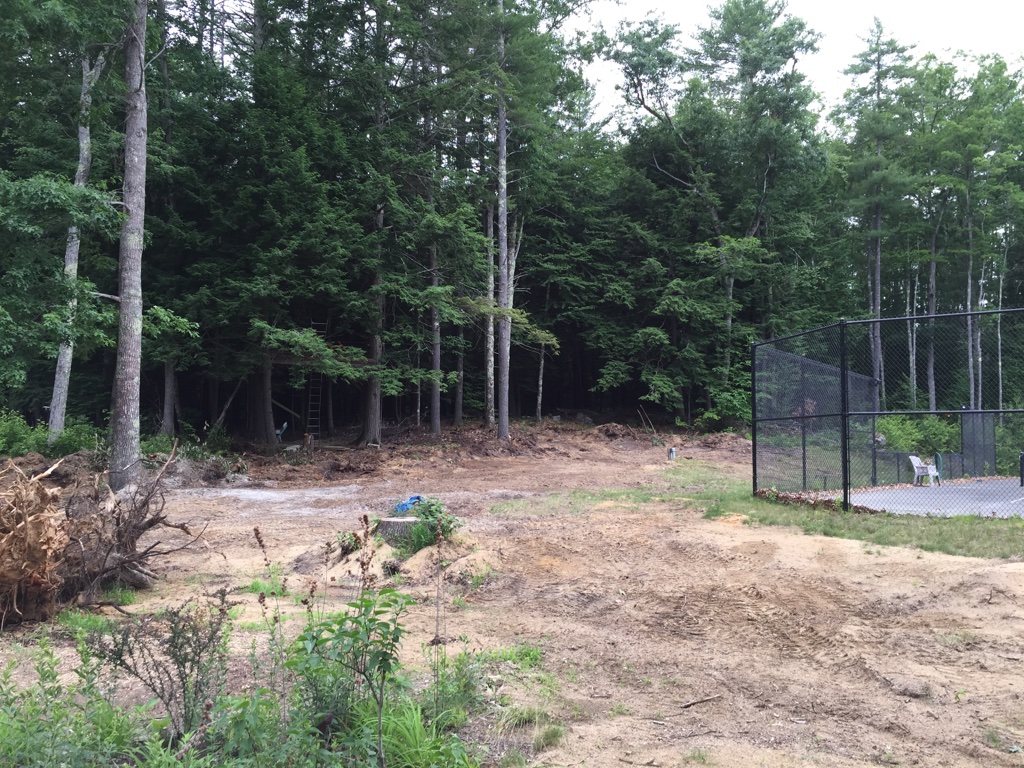
I apologize that I have not been blogging as much this summer as I have in the past, but with work, teaching, a < 1 year old baby and a big project in the works I’ve been spread thin. My free time has been spent on a different sort of project — one that will have been worth the wait. Since April I’ve been spending most of my free time, nights and weekends clearing land out in the back yard to make room for a timber framed shed/barn and I am finally in the home stretch. I’ve removed about 50 stumps, some of them as heavy as the tractor I used to dig them out with and I have cleared about a quarter of an acre of dense woods. It was a LOT more work than I thought, but similar to tree felling experience has been good exercise and a personal accomplishment I am proud of. A little more grading/leveling and blending the transition from yard to woods and I’ll be ready to break ground on a barn/outbuilding.
Finally some clear land…
I’ll be documenting the process from beginning to end in video, in photos on the blog and with some content partners so I hope you will stay tuned for that along with the regular stream of blog posts.
This summer I’ll be teaching a workshop as part of the Early American Industries Association (EAIA) ‘Historic Trades Sampler’ at Eastfield Village.
Hands on learning at Eastfield Village
The events run from Thursday, July 30 through Sunday, August 2, 2015, at Historic Eastfield Village, East Nassau, New York. The program this year includes:
The name ‘Eastfield Historic Trades Sampler’ reflects what is being offered –a sampler of various trades- with an opportunity to learn about them while completing a small project related to the craft.
Students exploring the village details
There are two different workshops each day from which to choose. The classes start at 9 a.m. and there is a lunch provided in Eastfield‘s historic tavern from noon until 1 p.m., at which time the afternoon session of the workshops resume. The workshops end around 5 p.m.
I’ll be teaching a lesson on running traditional moldings using traditional hand planes. Each student will have the opportunity to setup and use some hollows and rounds, beading planes, rabbet planes and molders on a sticking board to make a short run of molding that will be mitered to form a small picture frame.
If you’d like to learn a bit more about this sort of work please check out this earlier post as well as this one.
The General Store at Eastfield Village
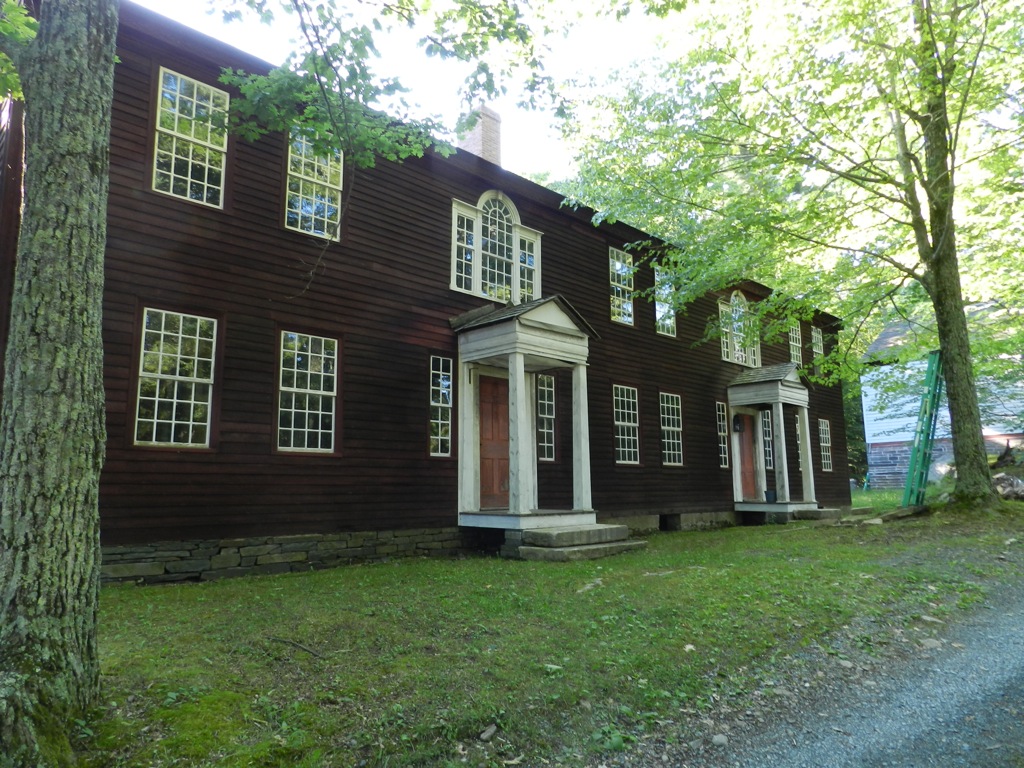
About Eastfield Village:
Eastfield is a village of historic buildings that Don Carpentier brought to the eastfield of his farm in East Nassau, New York, over a period of forty years. The village is used as a hands on preservation lab and students can explore the village, handle period objects and learn a lot in a short period of time.
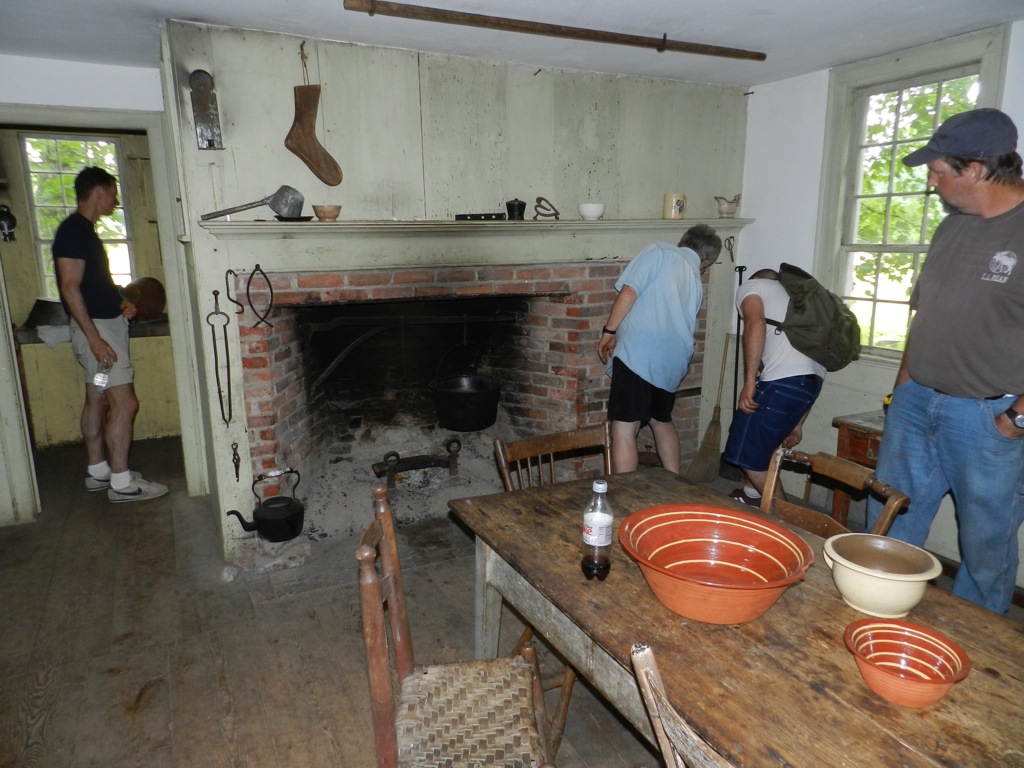
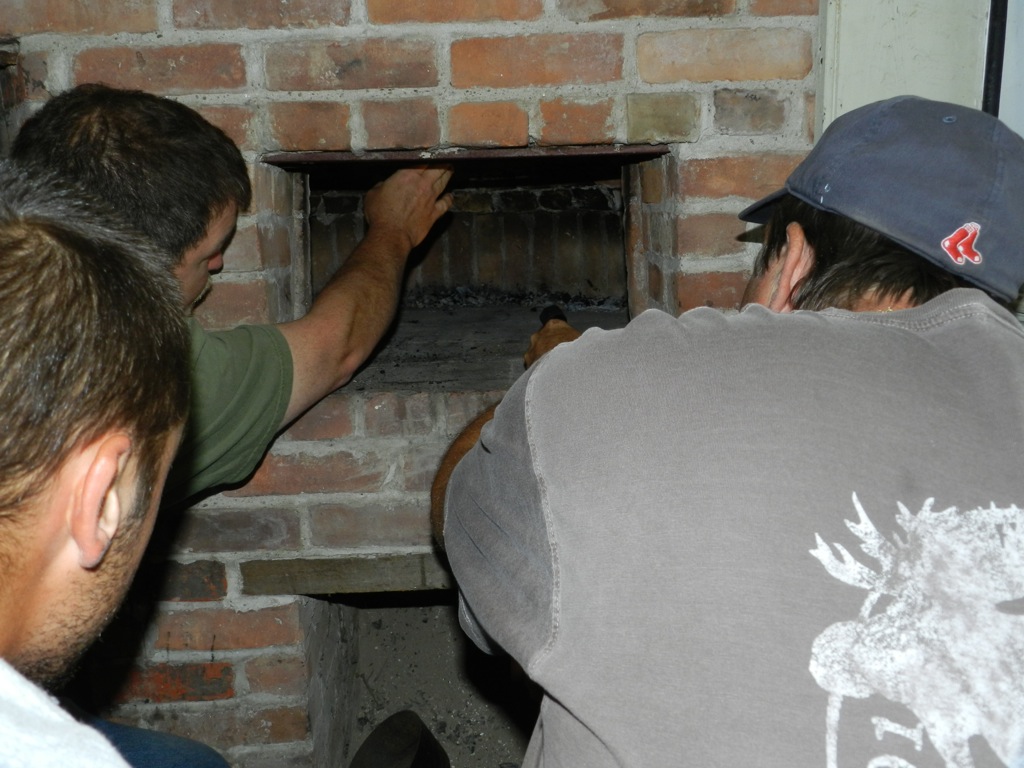
Examining a period oven
Students are welcome to stay in several of these buildings which have been restored to their 18th and 19th century appearance; however there are hotels and other accommodations nearby. Learn more about Eastfield Village here.
The Tavern at Eastfield Village
Accommodations at the Village:
Accommodations in Eastfield‘s taverns are available free of charge for those wishing to stay as guests in early 19th century accommodations. The only requirement is that each person supply their own bedding, plus 10 ten-inch white candles.
Students who take classes at the Village are encouraged to stay here during the Historic Trades Sampler. Meals may be cooked or served in the late 18th century kitchens. Accommodations are rope beds with straw and feather ticks. Facilities are located in period out houses (and there is a modern porta-john, and a running hose should you need those slightly more modern comforts ). There are evening gatherings in the Briggs Tavern and lively conversations and games of dominoes by candlelight. This immersive experience offers an unforgettable opportunity to be with others – students and teachers – of similar interests, to gain an appreciation for the work and daily life of early 19th century America.
Don’t forget to Register Today!
This is an great opportunity to learn and practice historics trade using traditional tools!
Dates: Thursday July 30-Sunday August 2, 2015
Location: Historic Eastfield Village, East Naussau, NY 12062 (Directions)
Cost: $485 for this 4 day event
I hope to see some of you at Eastfield this year. You can register for the event on the EAIA website here. If you have questions, feel free to ask me in the comments or via the contact page for my blog.
Take care,
-Bill
A Joiner's Guide To Traditional Woodworking and Preservation