

What do you do when you need to tie into a non-stock molding? Or a very short run of custom or carved molding?
You make it yourself of course!
Making a short run of custom molding is often faster, and definitely cheaper than having a custom knife or bit fabricated. The next time you need a short run of molding I highly encourage giving this a try.
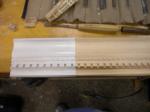
Below are some photos walking through the process of creating a short run of custom molding. This piece is an interesting bit of crown molding with a carved rope pattern and dentils. I think the ‘carved’ rope on the original was pressed in by machine, which is why I like my hand carved section even more than the original.
The process I followed:
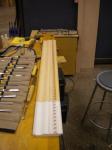
- Draw your profile on both ends of the piece
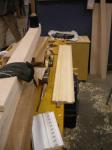
- Rough in as much as you can via machine — like the table saw to save yourself time and effort
- Use hollows and rounds (wooden molding planes) to get the curves
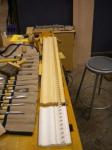
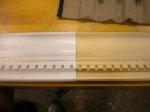
- Square up your rabbet for the dentil
- Cut the dental on the table saw, align it where you want and affix it to the piece
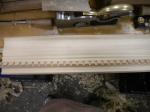
- Walk off your carved pattern using dividers and pencils
- Carve out your rope pattern
- Enjoy your finished work 🙂


2 thoughts on “Running custom molding by hand”