Tag Archives: molding

Building Bradley’s Crib Part 4 – Final Assembly

Molding plays with light and shadow, it blends transitions and it can be pleasing to touch. I’m glad molding has so many positive features as I had to make a LOT of it to finish off this project. Below is a quick walk through of what it took to complete the woodworking on this project.

Making Molding:

Sampling of the MANY moldings

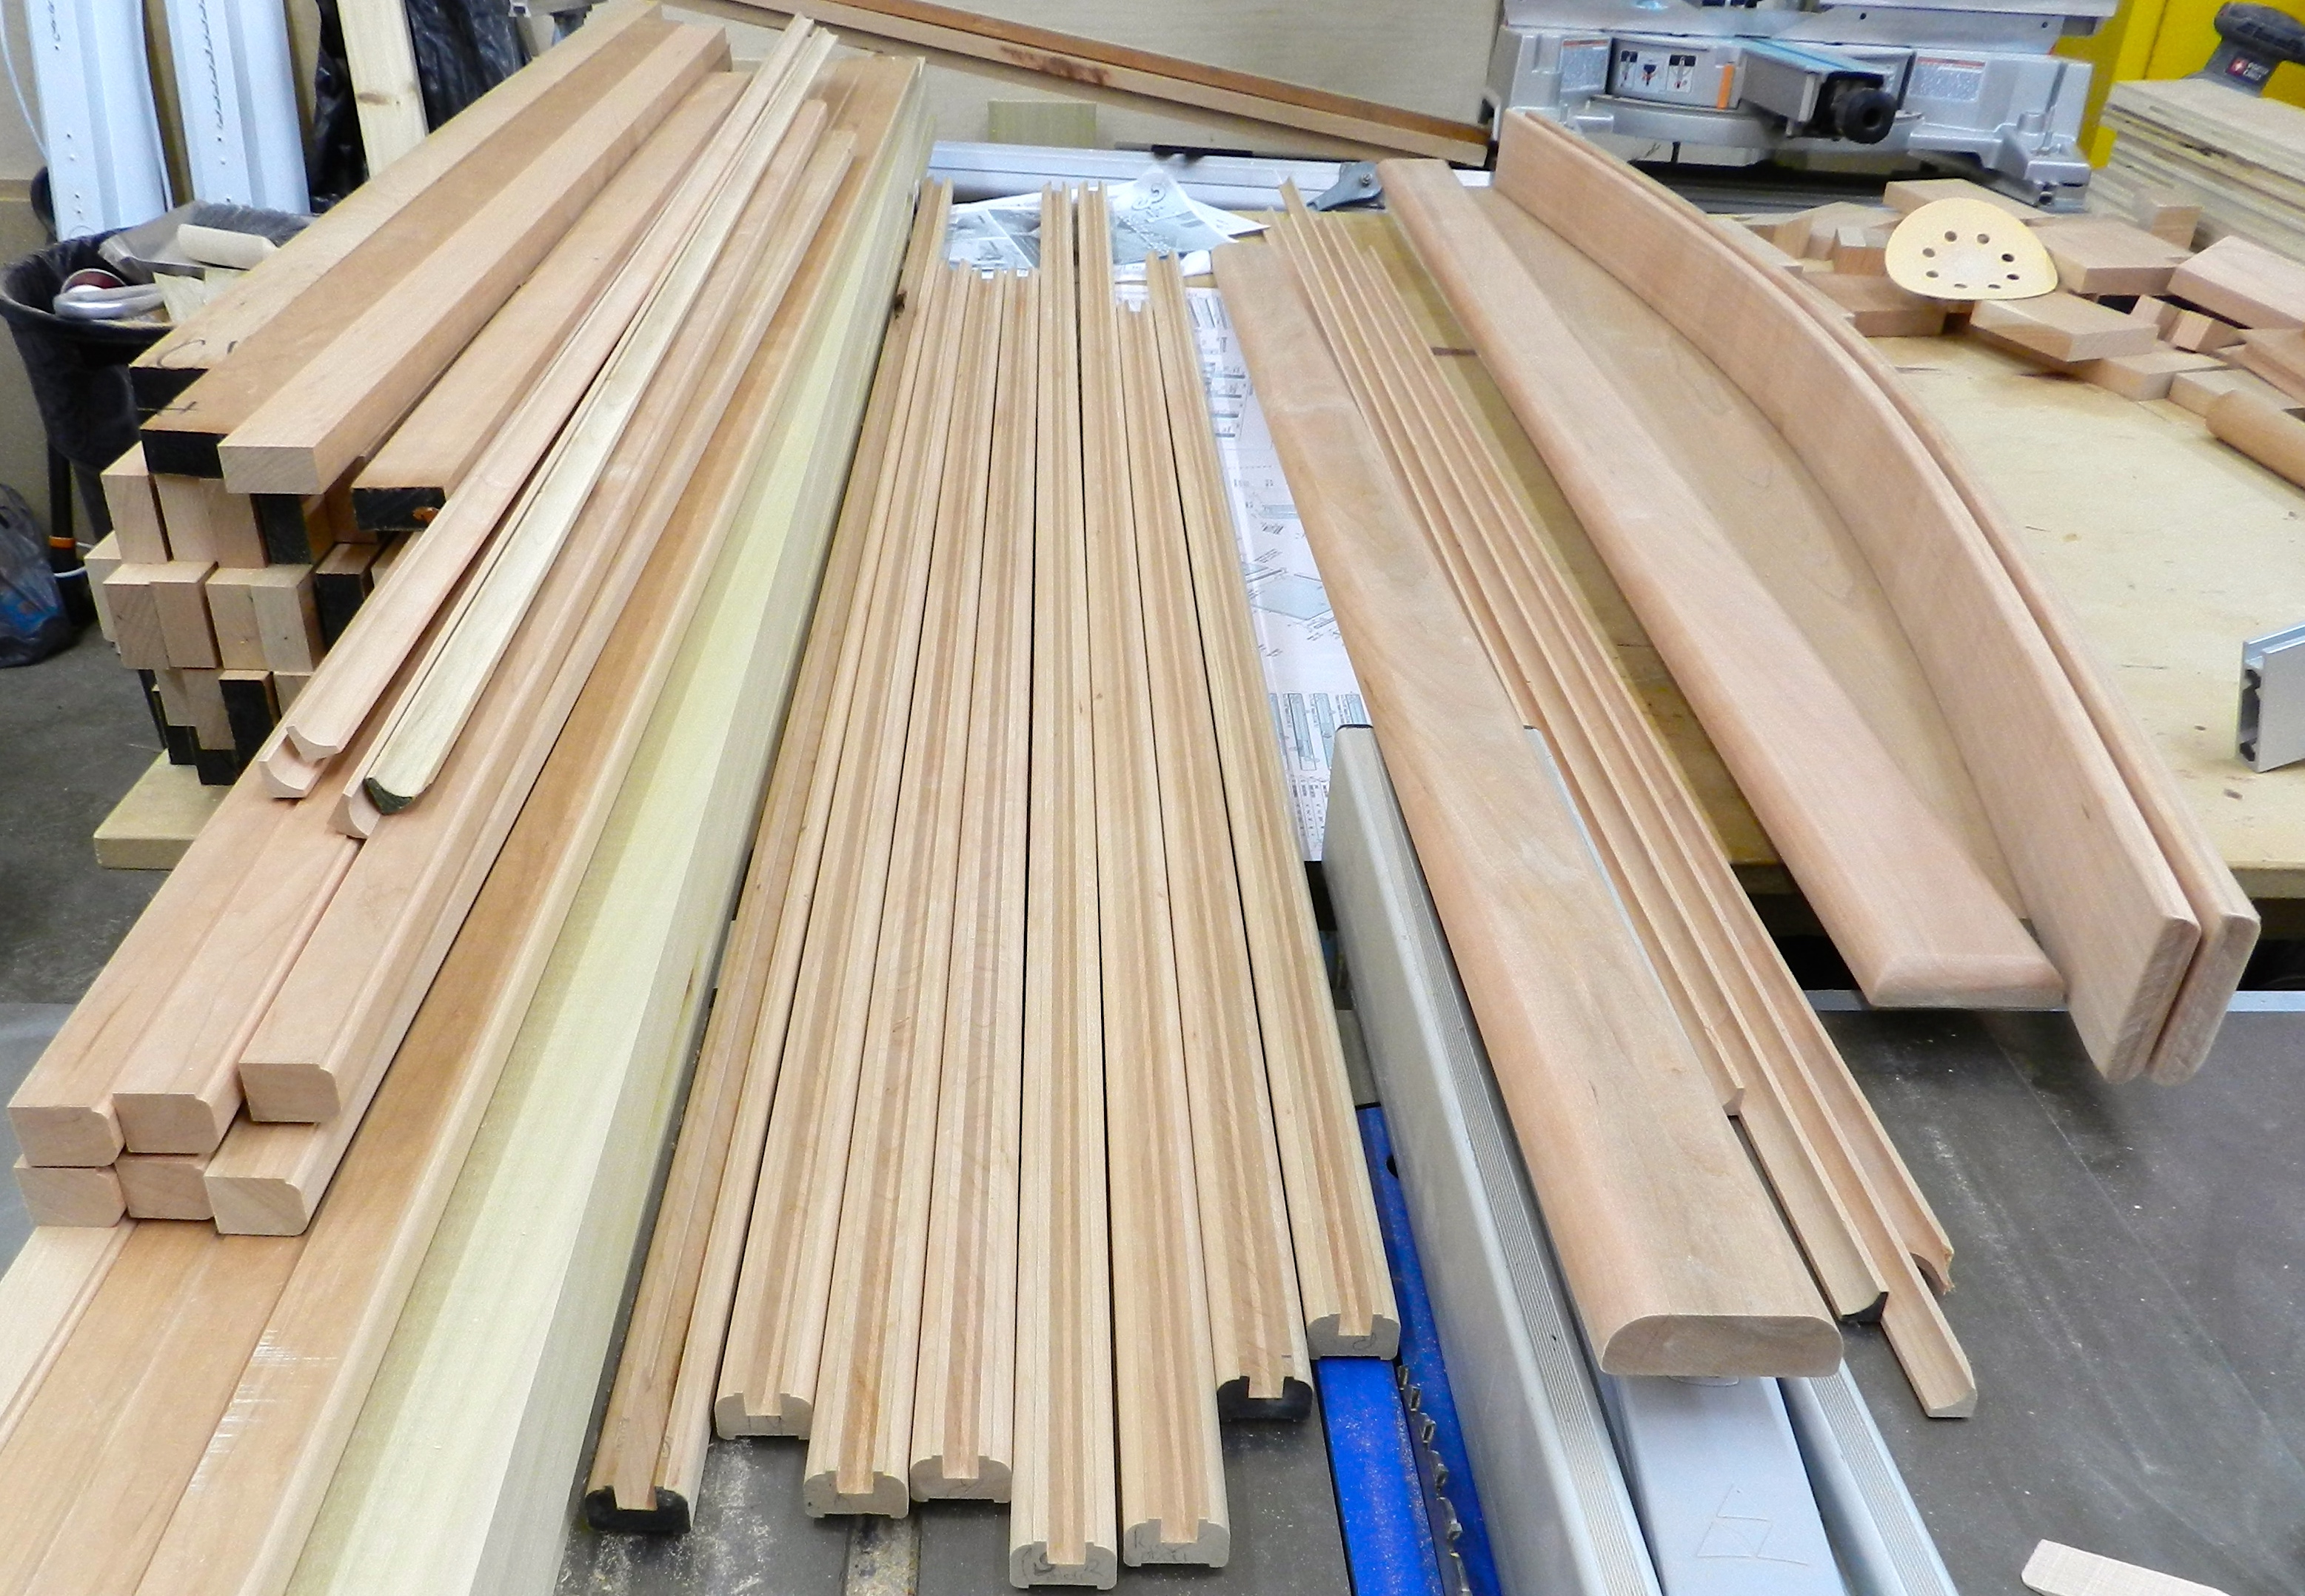
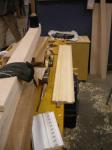
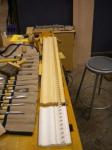
As you can see from the photo above a had to mill a lot of stock and produce a lot of profiles to produce all the moldings necessary for this project. I won’t go into the minutia of each profile, or how to create molding using a handheld or table mounted router as that has been covered to death elsewhere. I will talk about a few of the things I do to help get consistent results when using a router.

1.) Make sure your router bits are clean and sharp. Make sure to use a bit cleaner to remove any pitch left on the bits. A diamond card or file can also be used to tune up a bit that is not cutting as well as it used to.

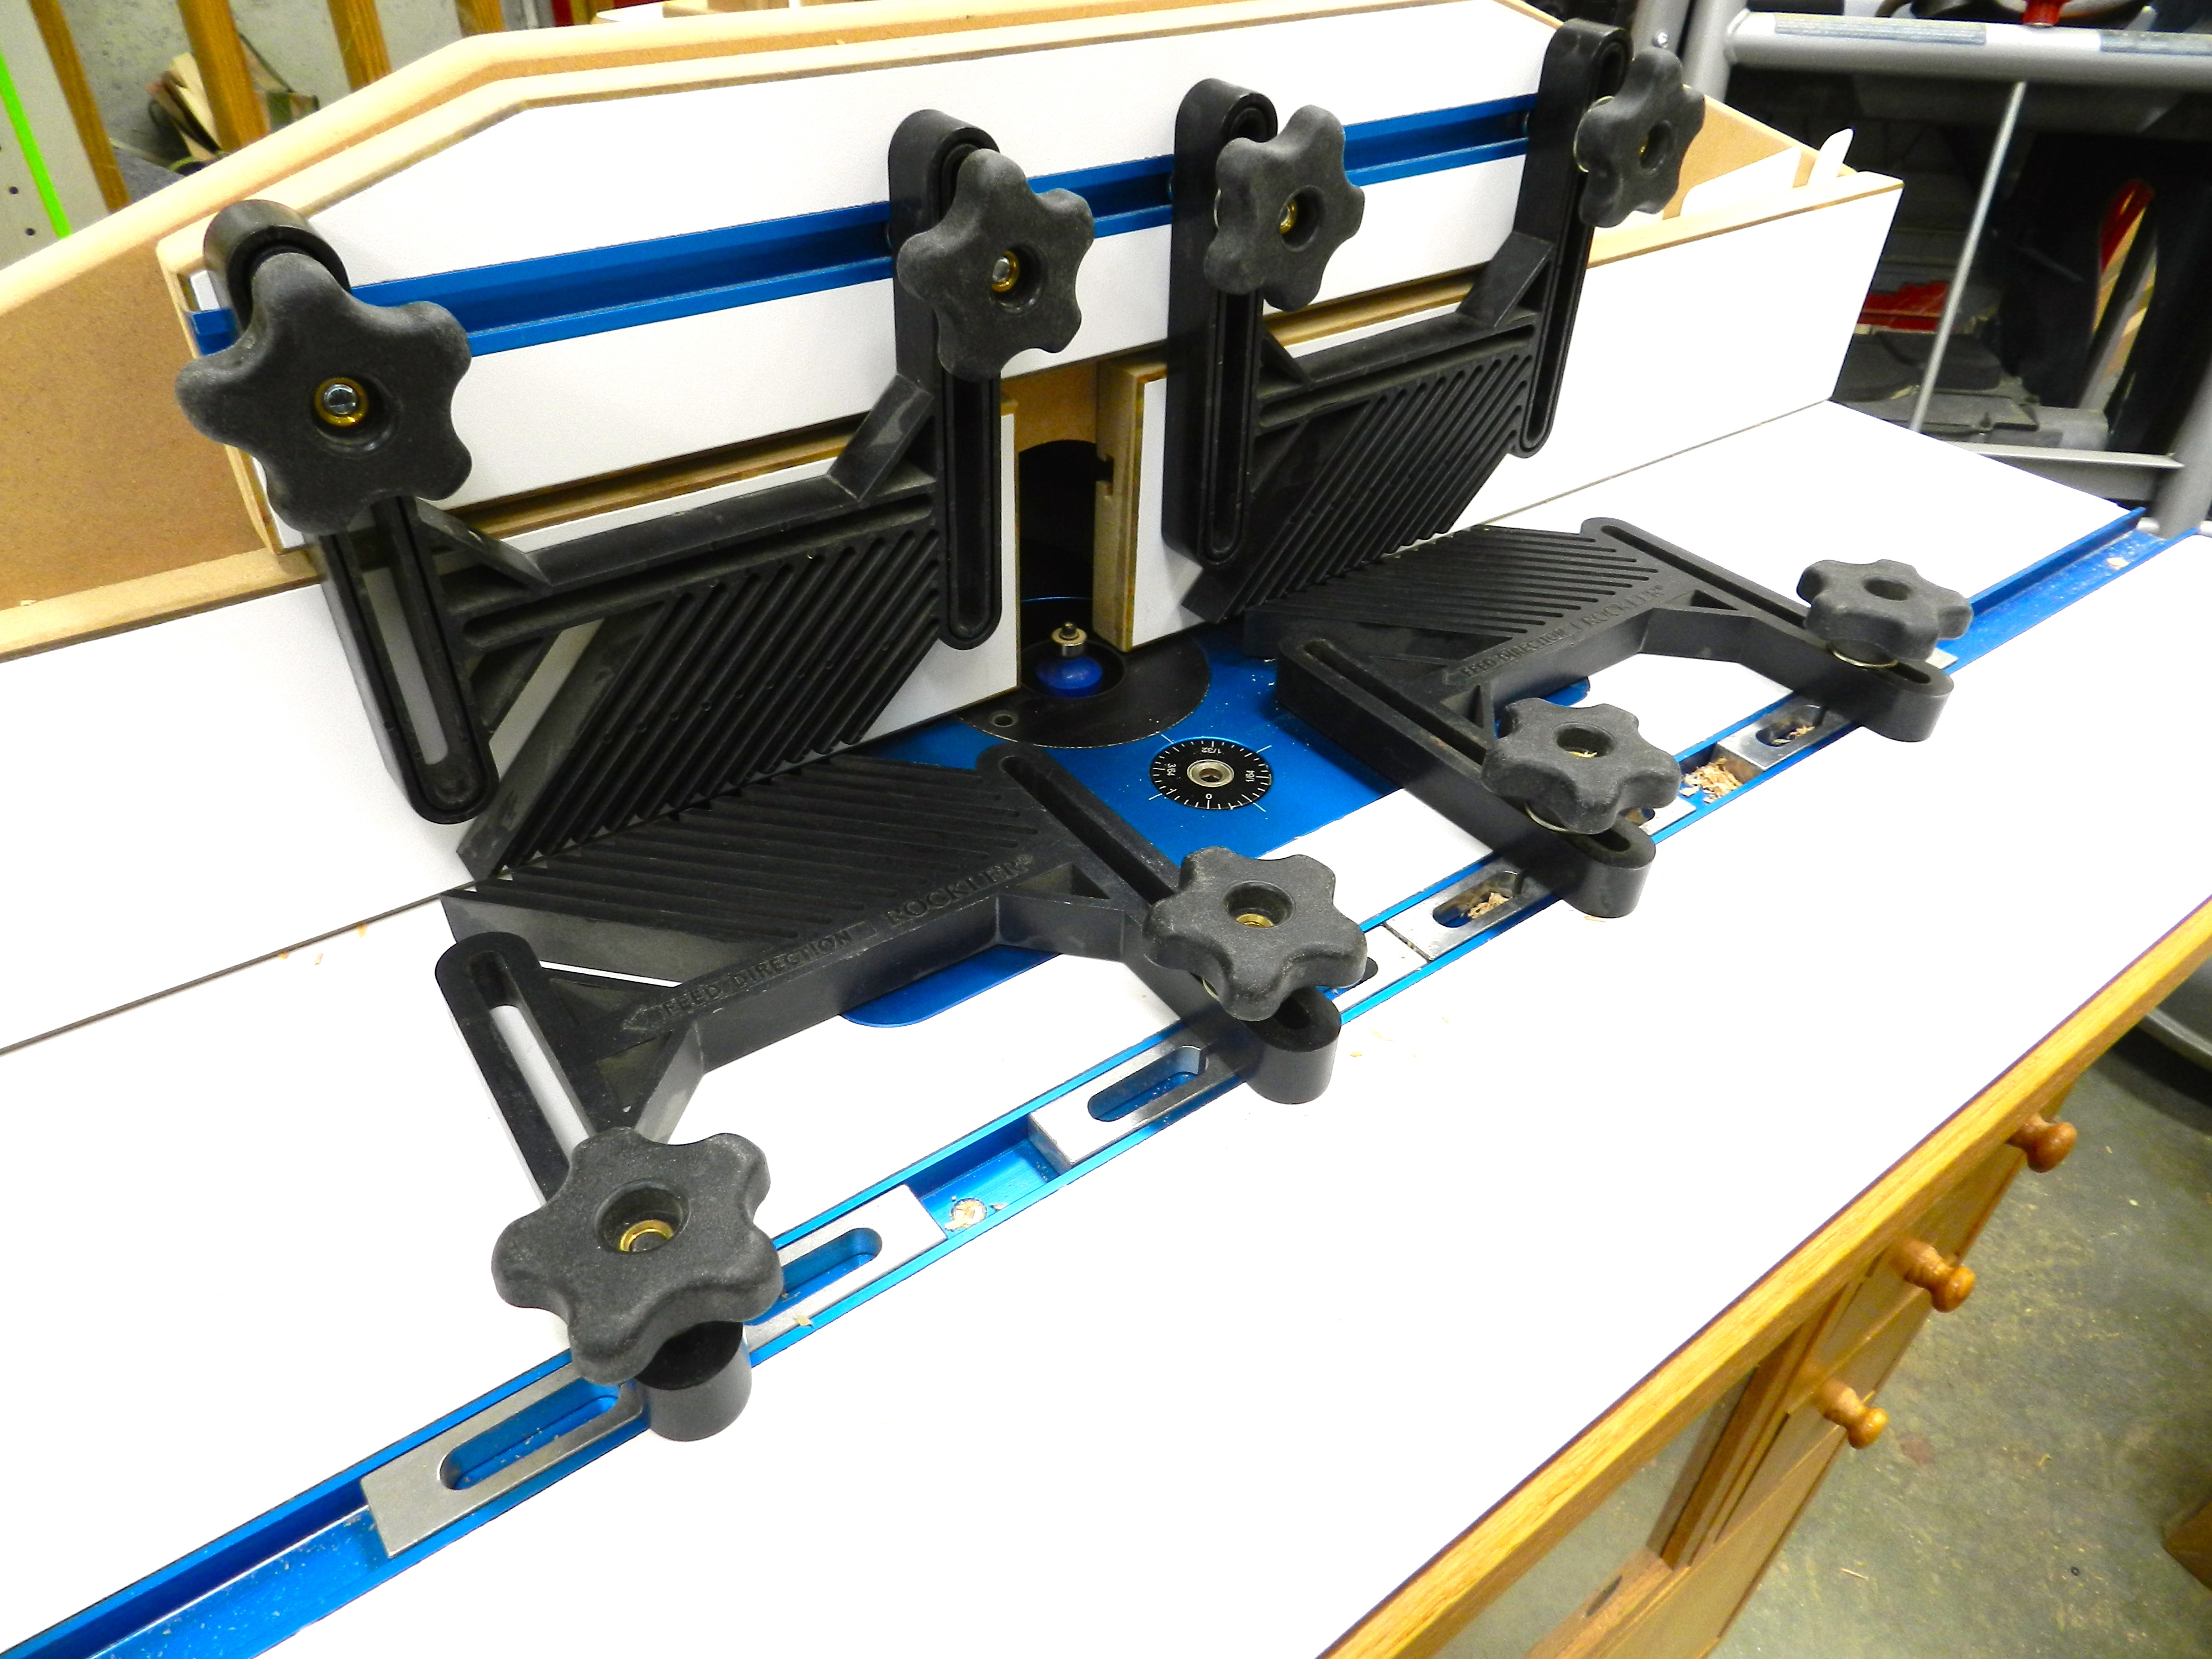
2.) Feather-boards. Whether they are store bought or shop made a feather-board is a great way to help keep stock where you want it. This project required many thin moldings with several different profiles on the same piece of stock. To ensure that the stock stayed exactly where I wanted it I used feather-boards to keep the stock pressed firmly against the table top and against the fence, both before and after the cutter. Without this seemingly heavy handed setup the stock could flex and you’d have to run it a few times. A push stick is also nice to have nearby. For this project the blanks were 2 to 6′ long so I was able to safely move the stock through the cutter with my hands kept at a safe distance from the cutter by virtue of the feather boards.

Extensive use of feather-boards on the router station

3.) When possible, try to be aware of the grain orientation when passing it through the bit to minimize tear-out

Profiled sanding blocks

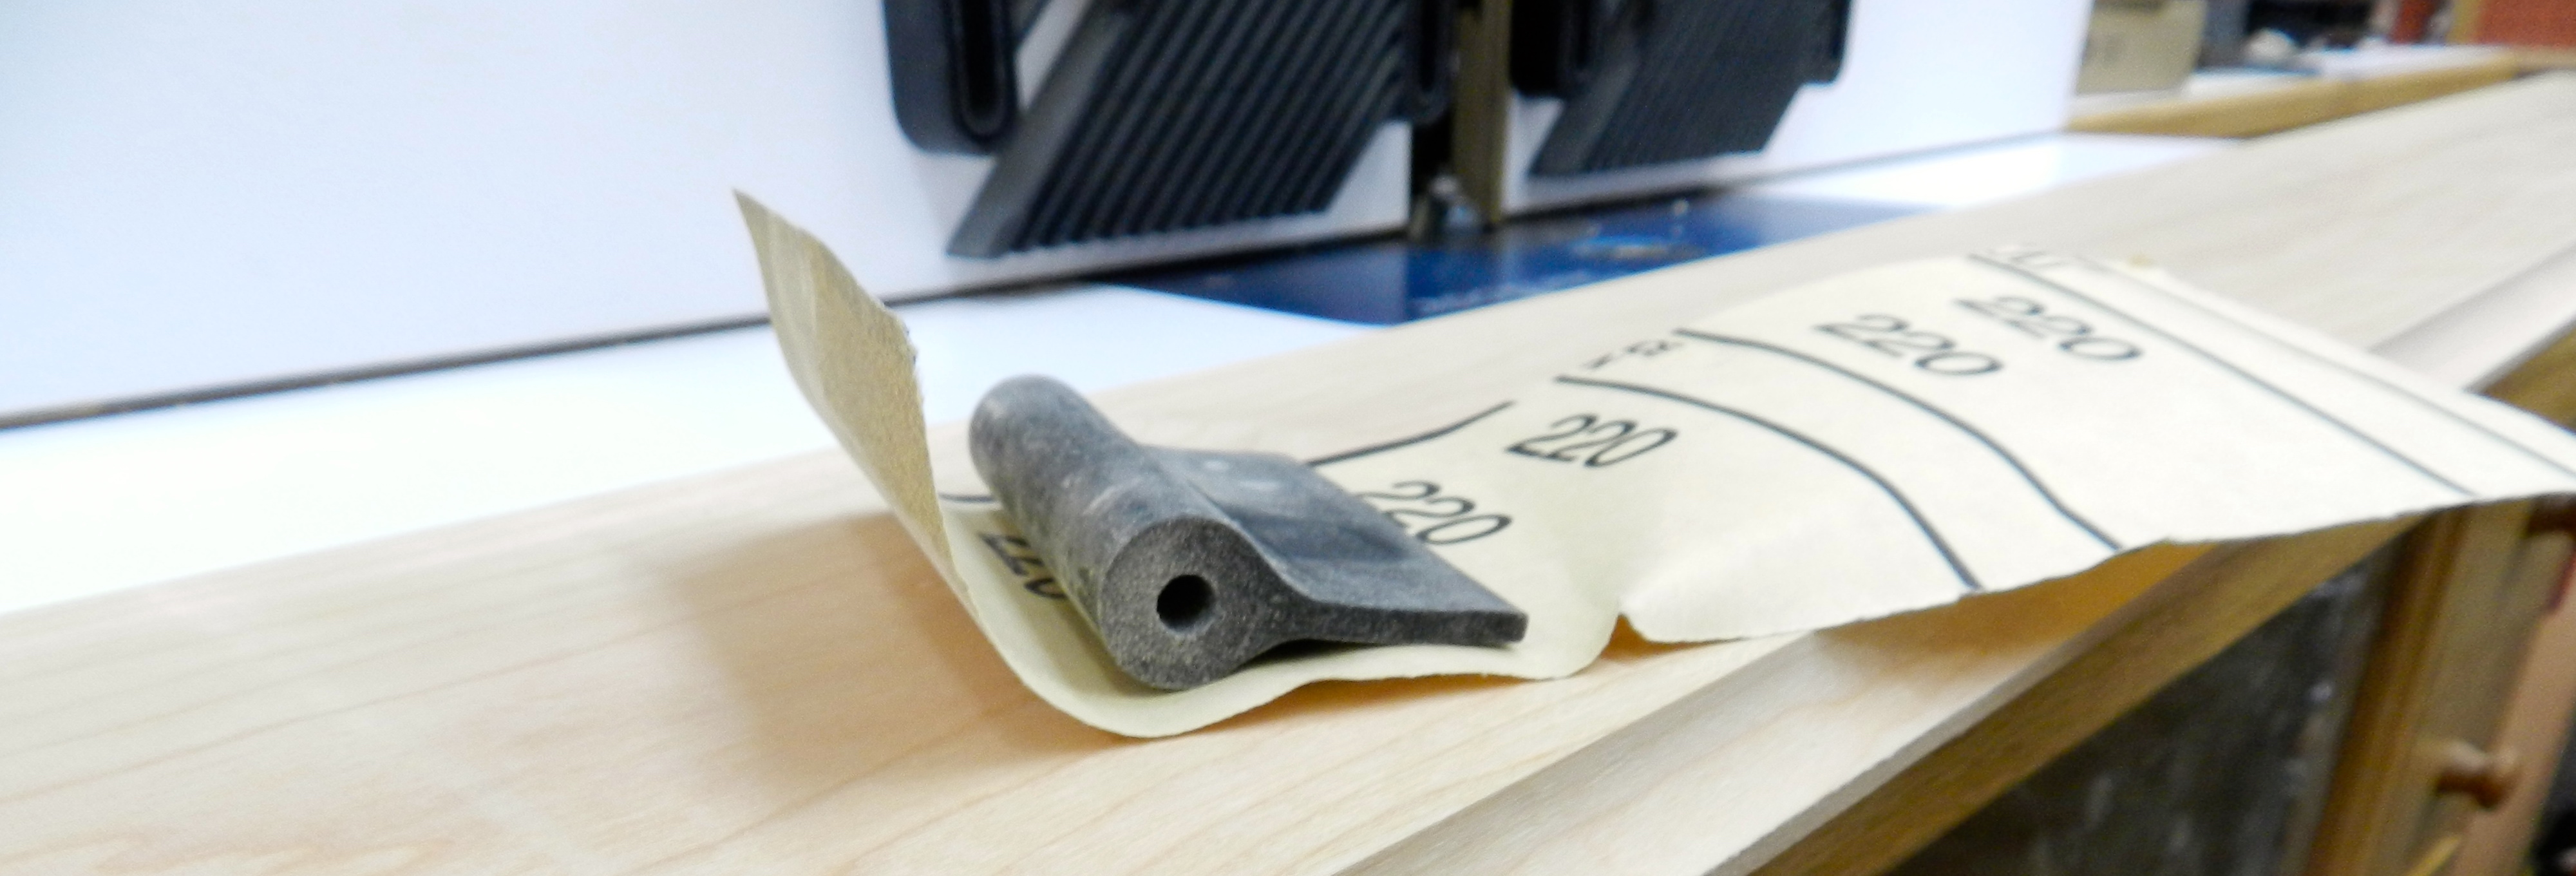
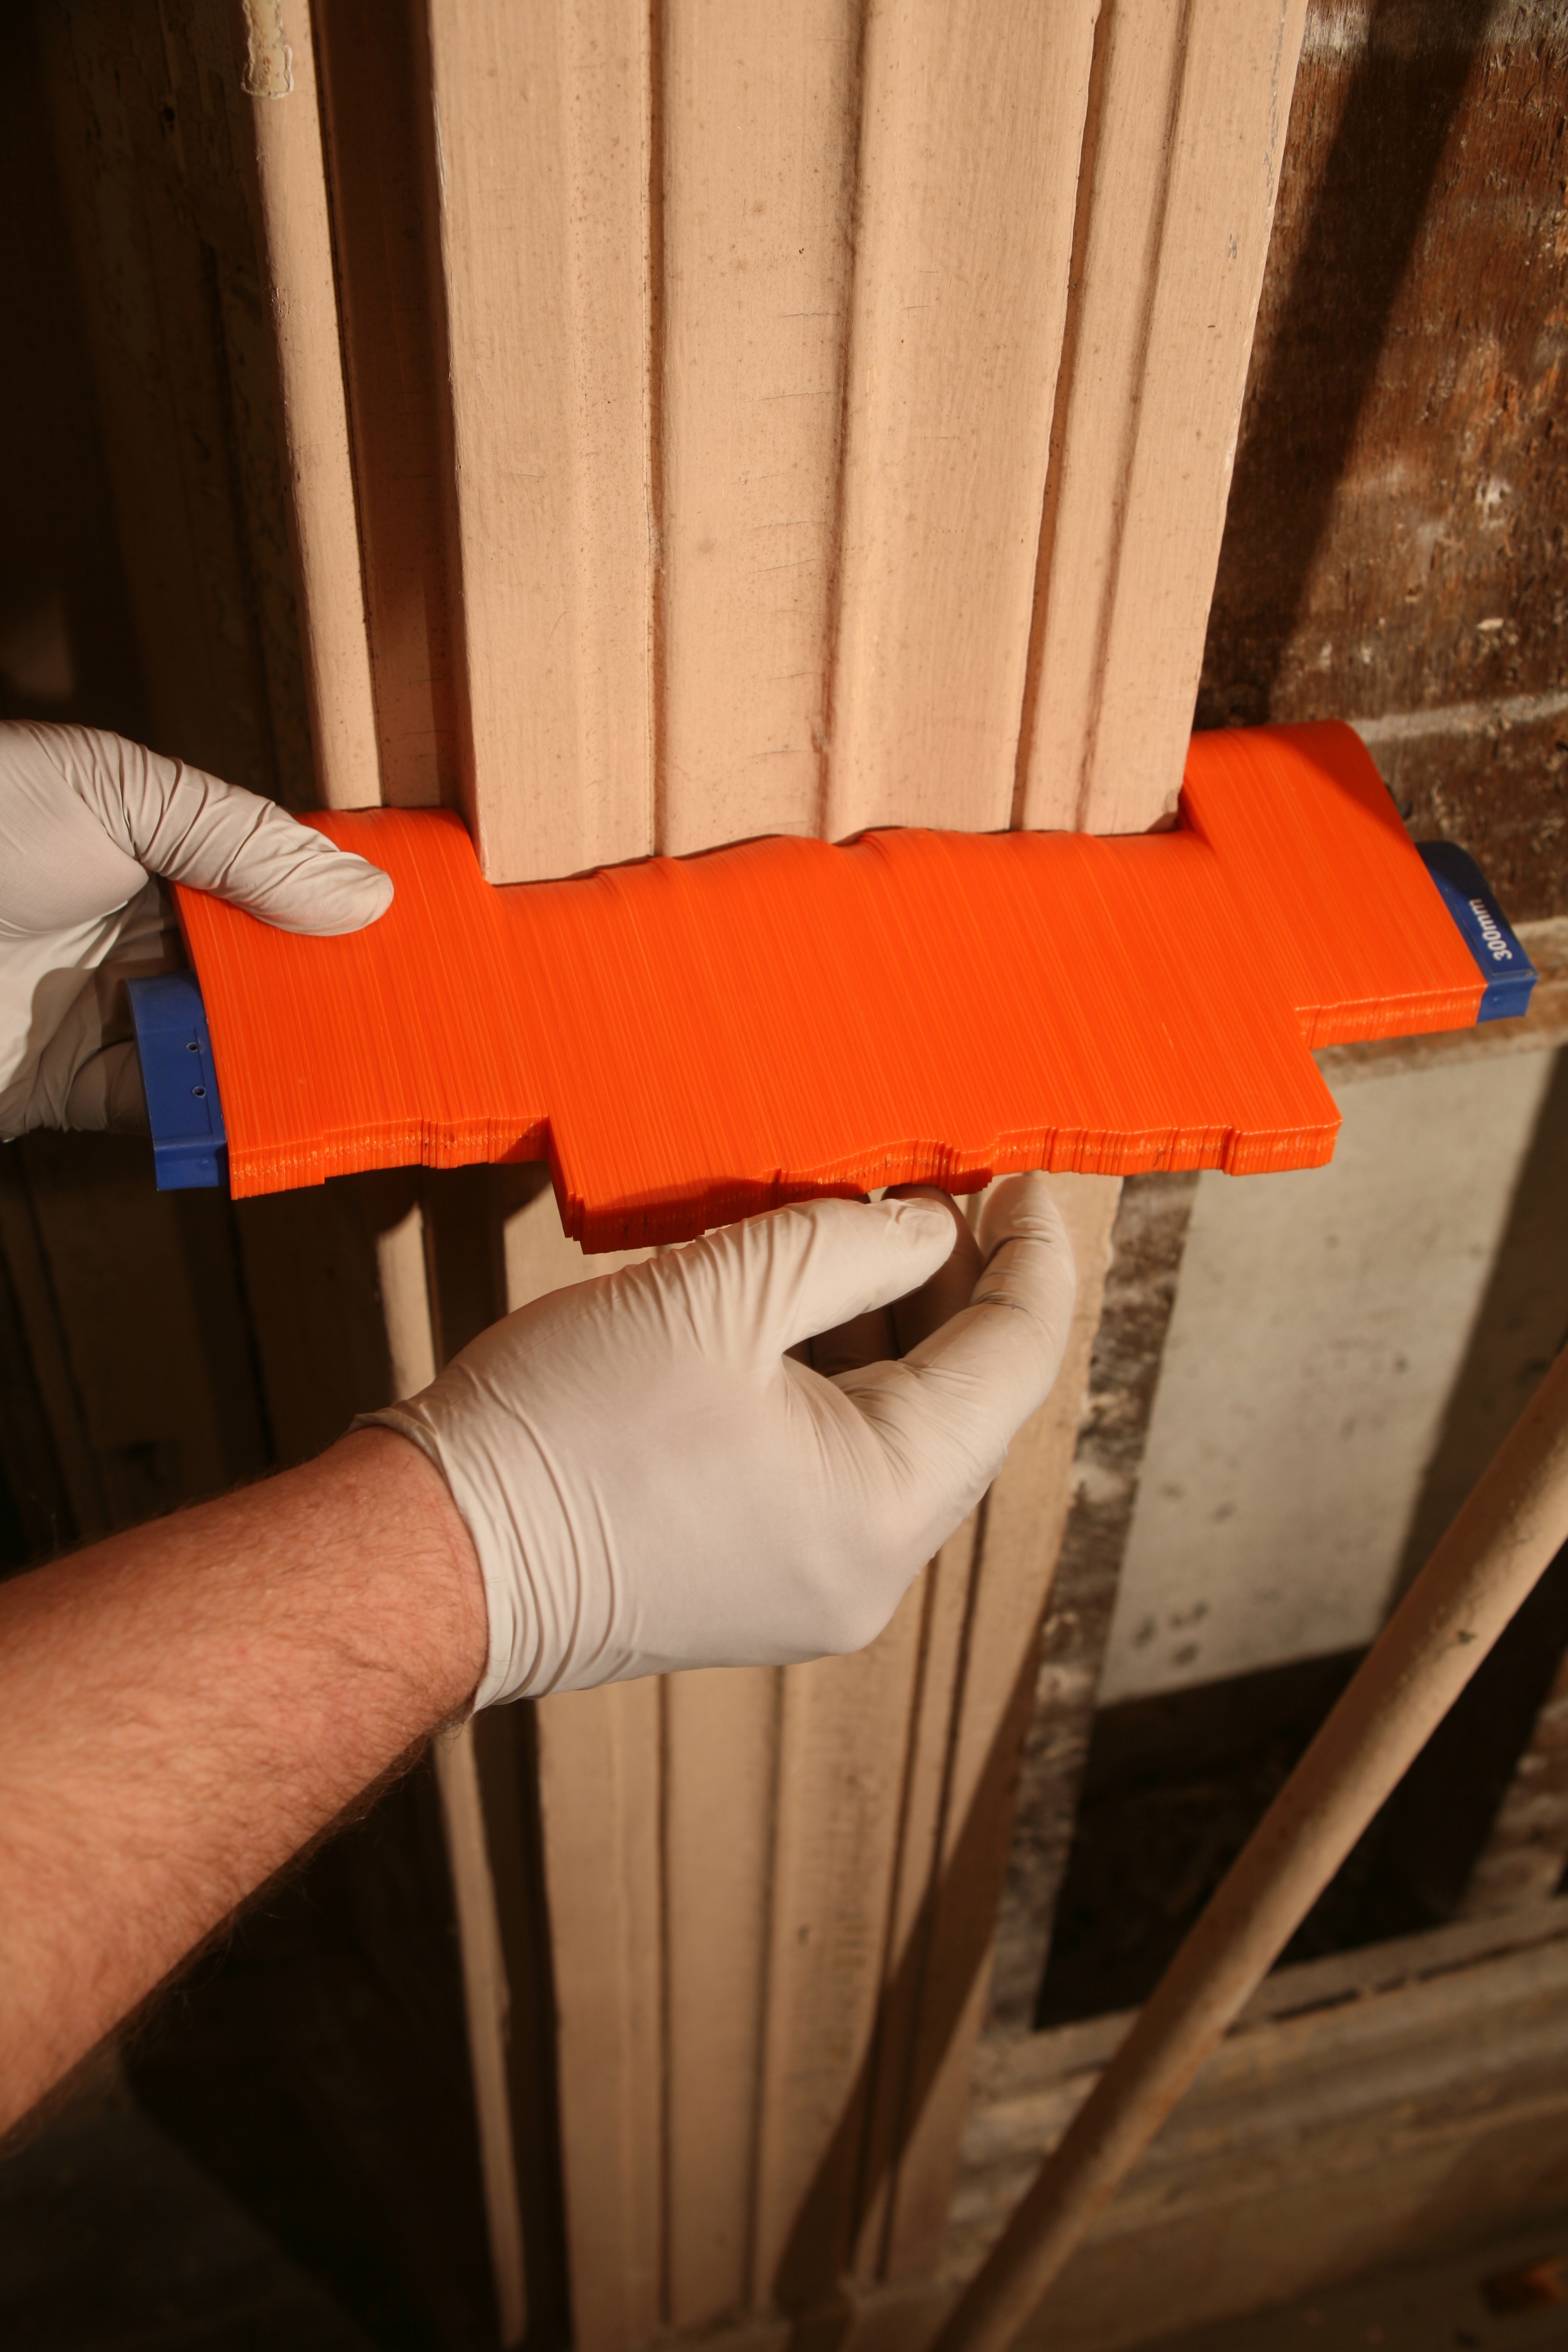
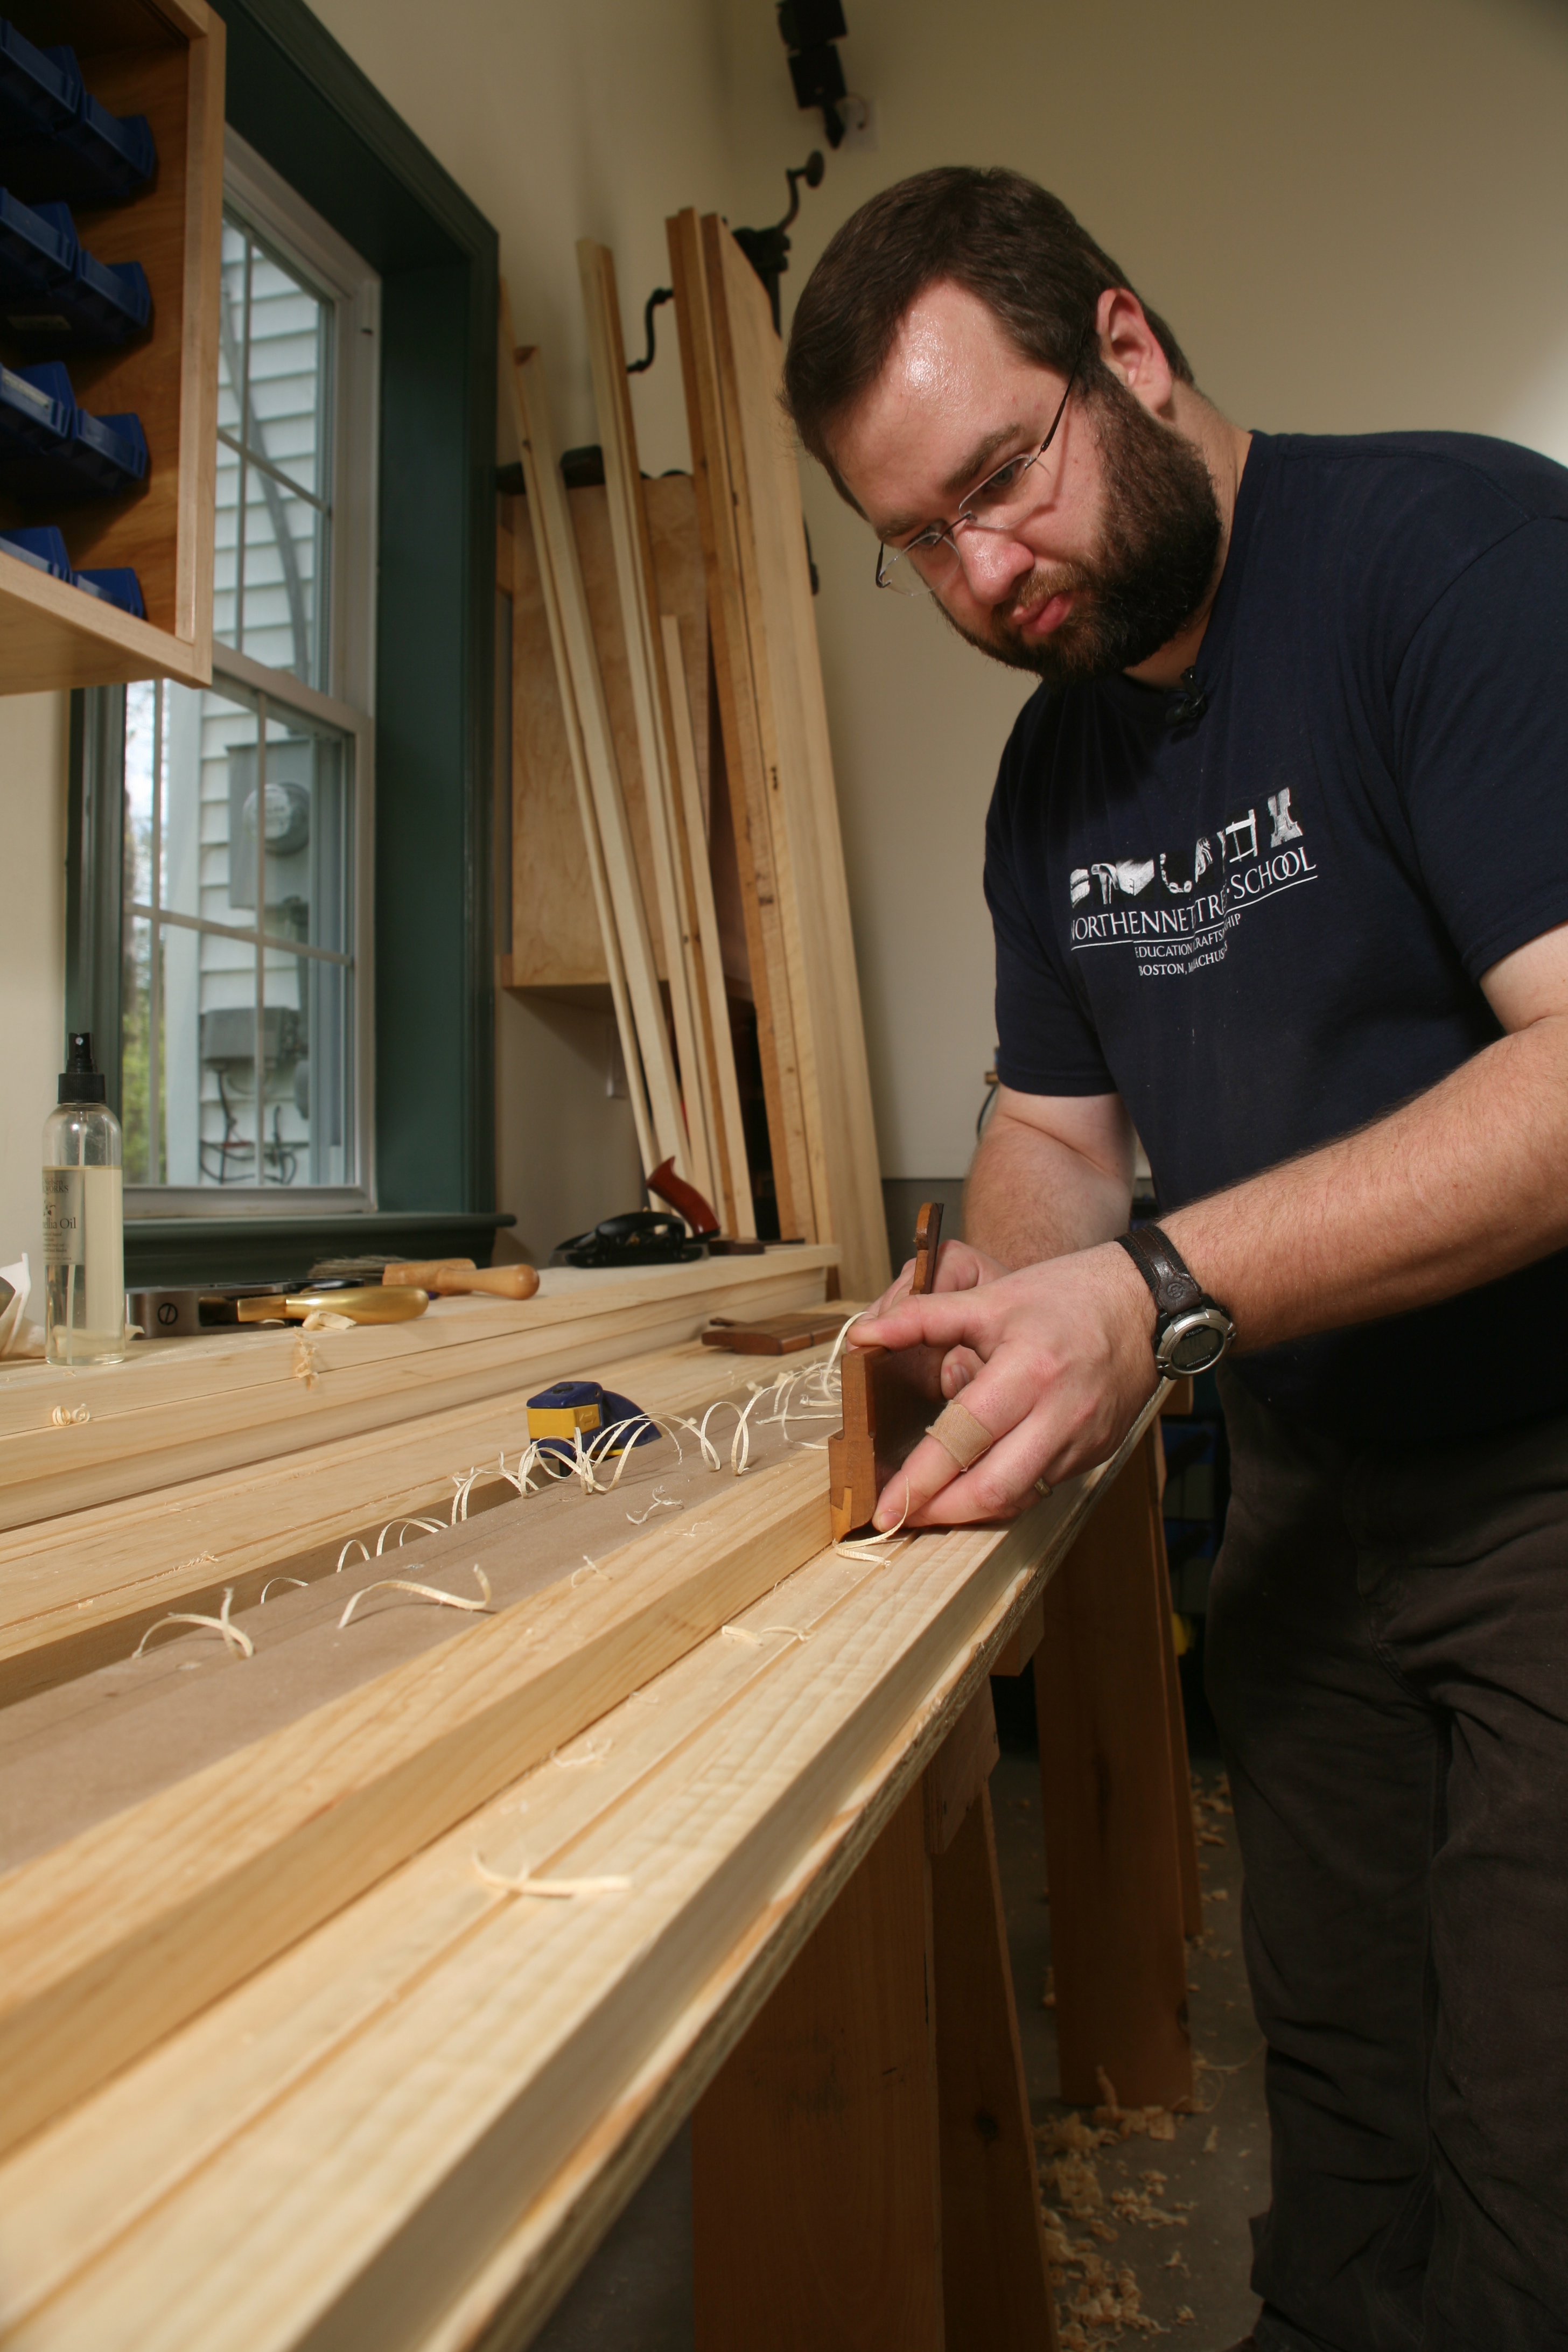
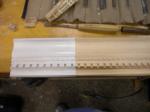
4.) After coming out of the router I hand sand the profiles to remove any scallops left by the bit. For tight or very complex profiles I will also use a profiled sander (a bit of formed rubber (shown above), piece of dowel or block of wood) that will help me get the sandpaper into the portion(s) of the profile I want to sand.

Molding profile details

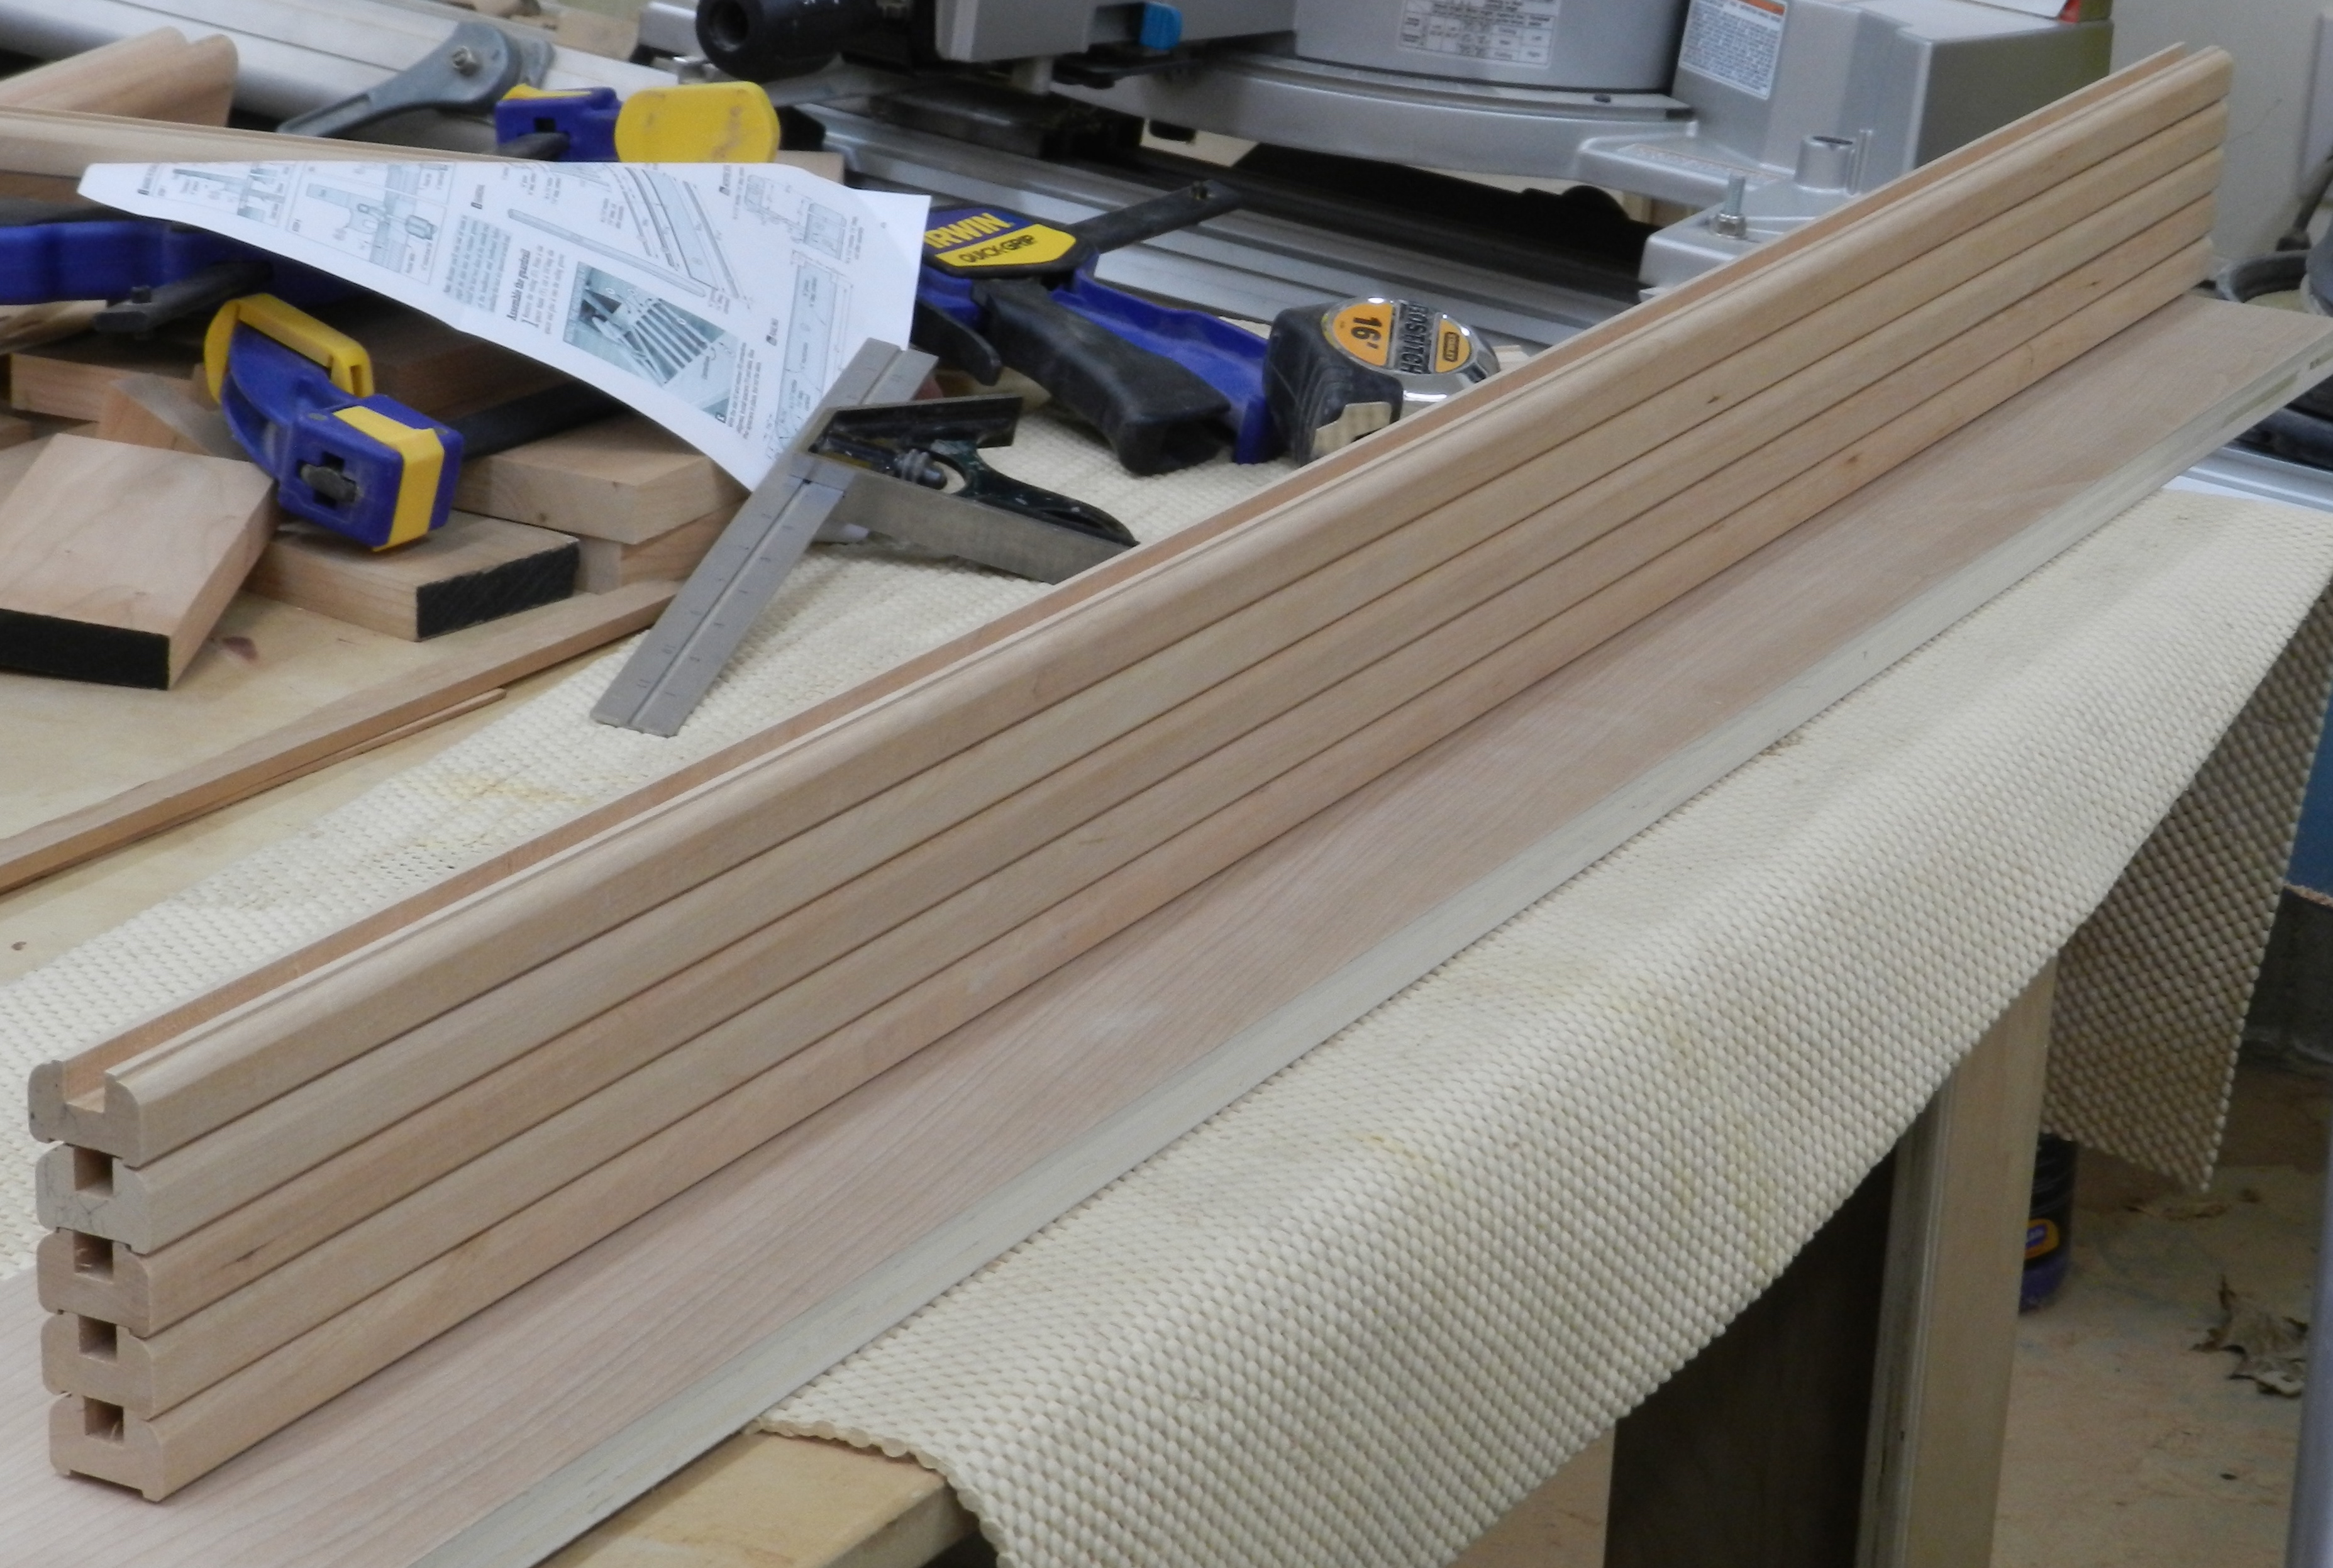
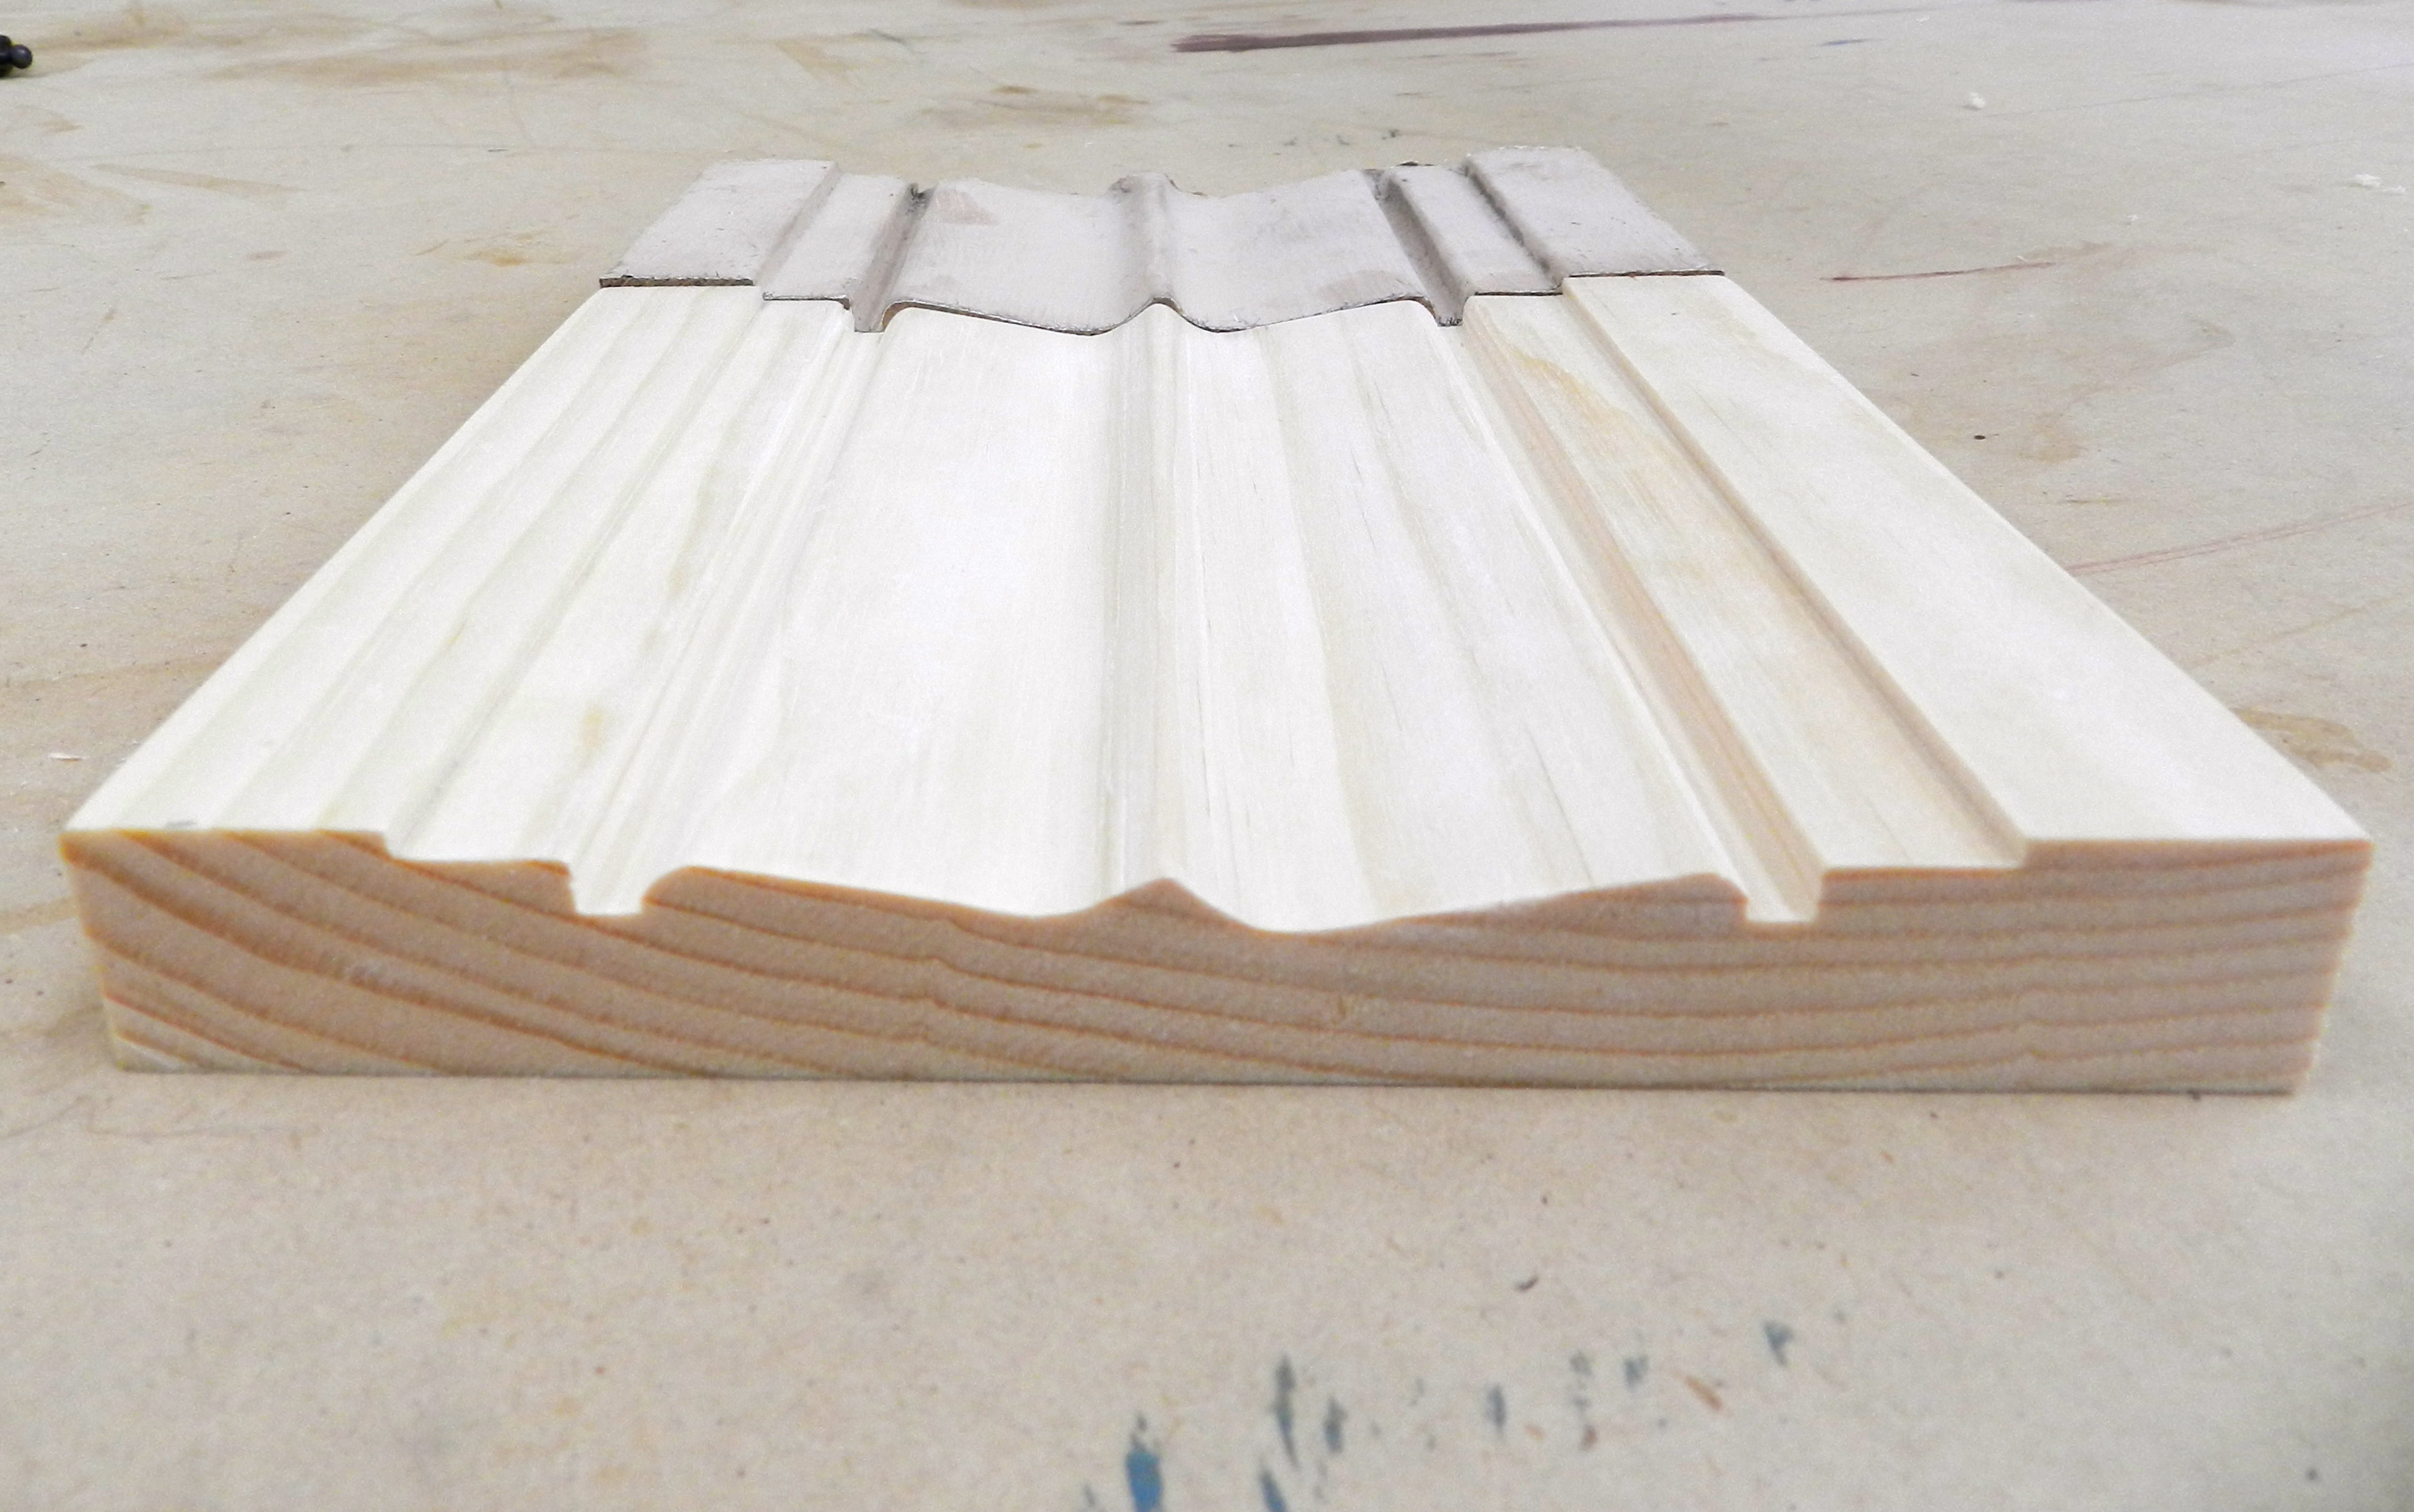
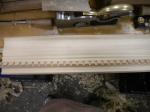
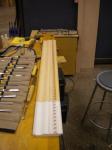
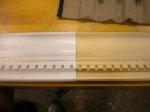
5.) Use the right tool for the job. For the cap moldings above I used a dado set on the table saw (with feather-boards there as well) to create the dadoes, and round-over bits in the router table for the round-overs. (You certainly could use a straight bit to cut the dadoes on the router table, but it would involve taking a few passes which takes more time and could introduce error).

Assembly:

Gluing up the bed rails

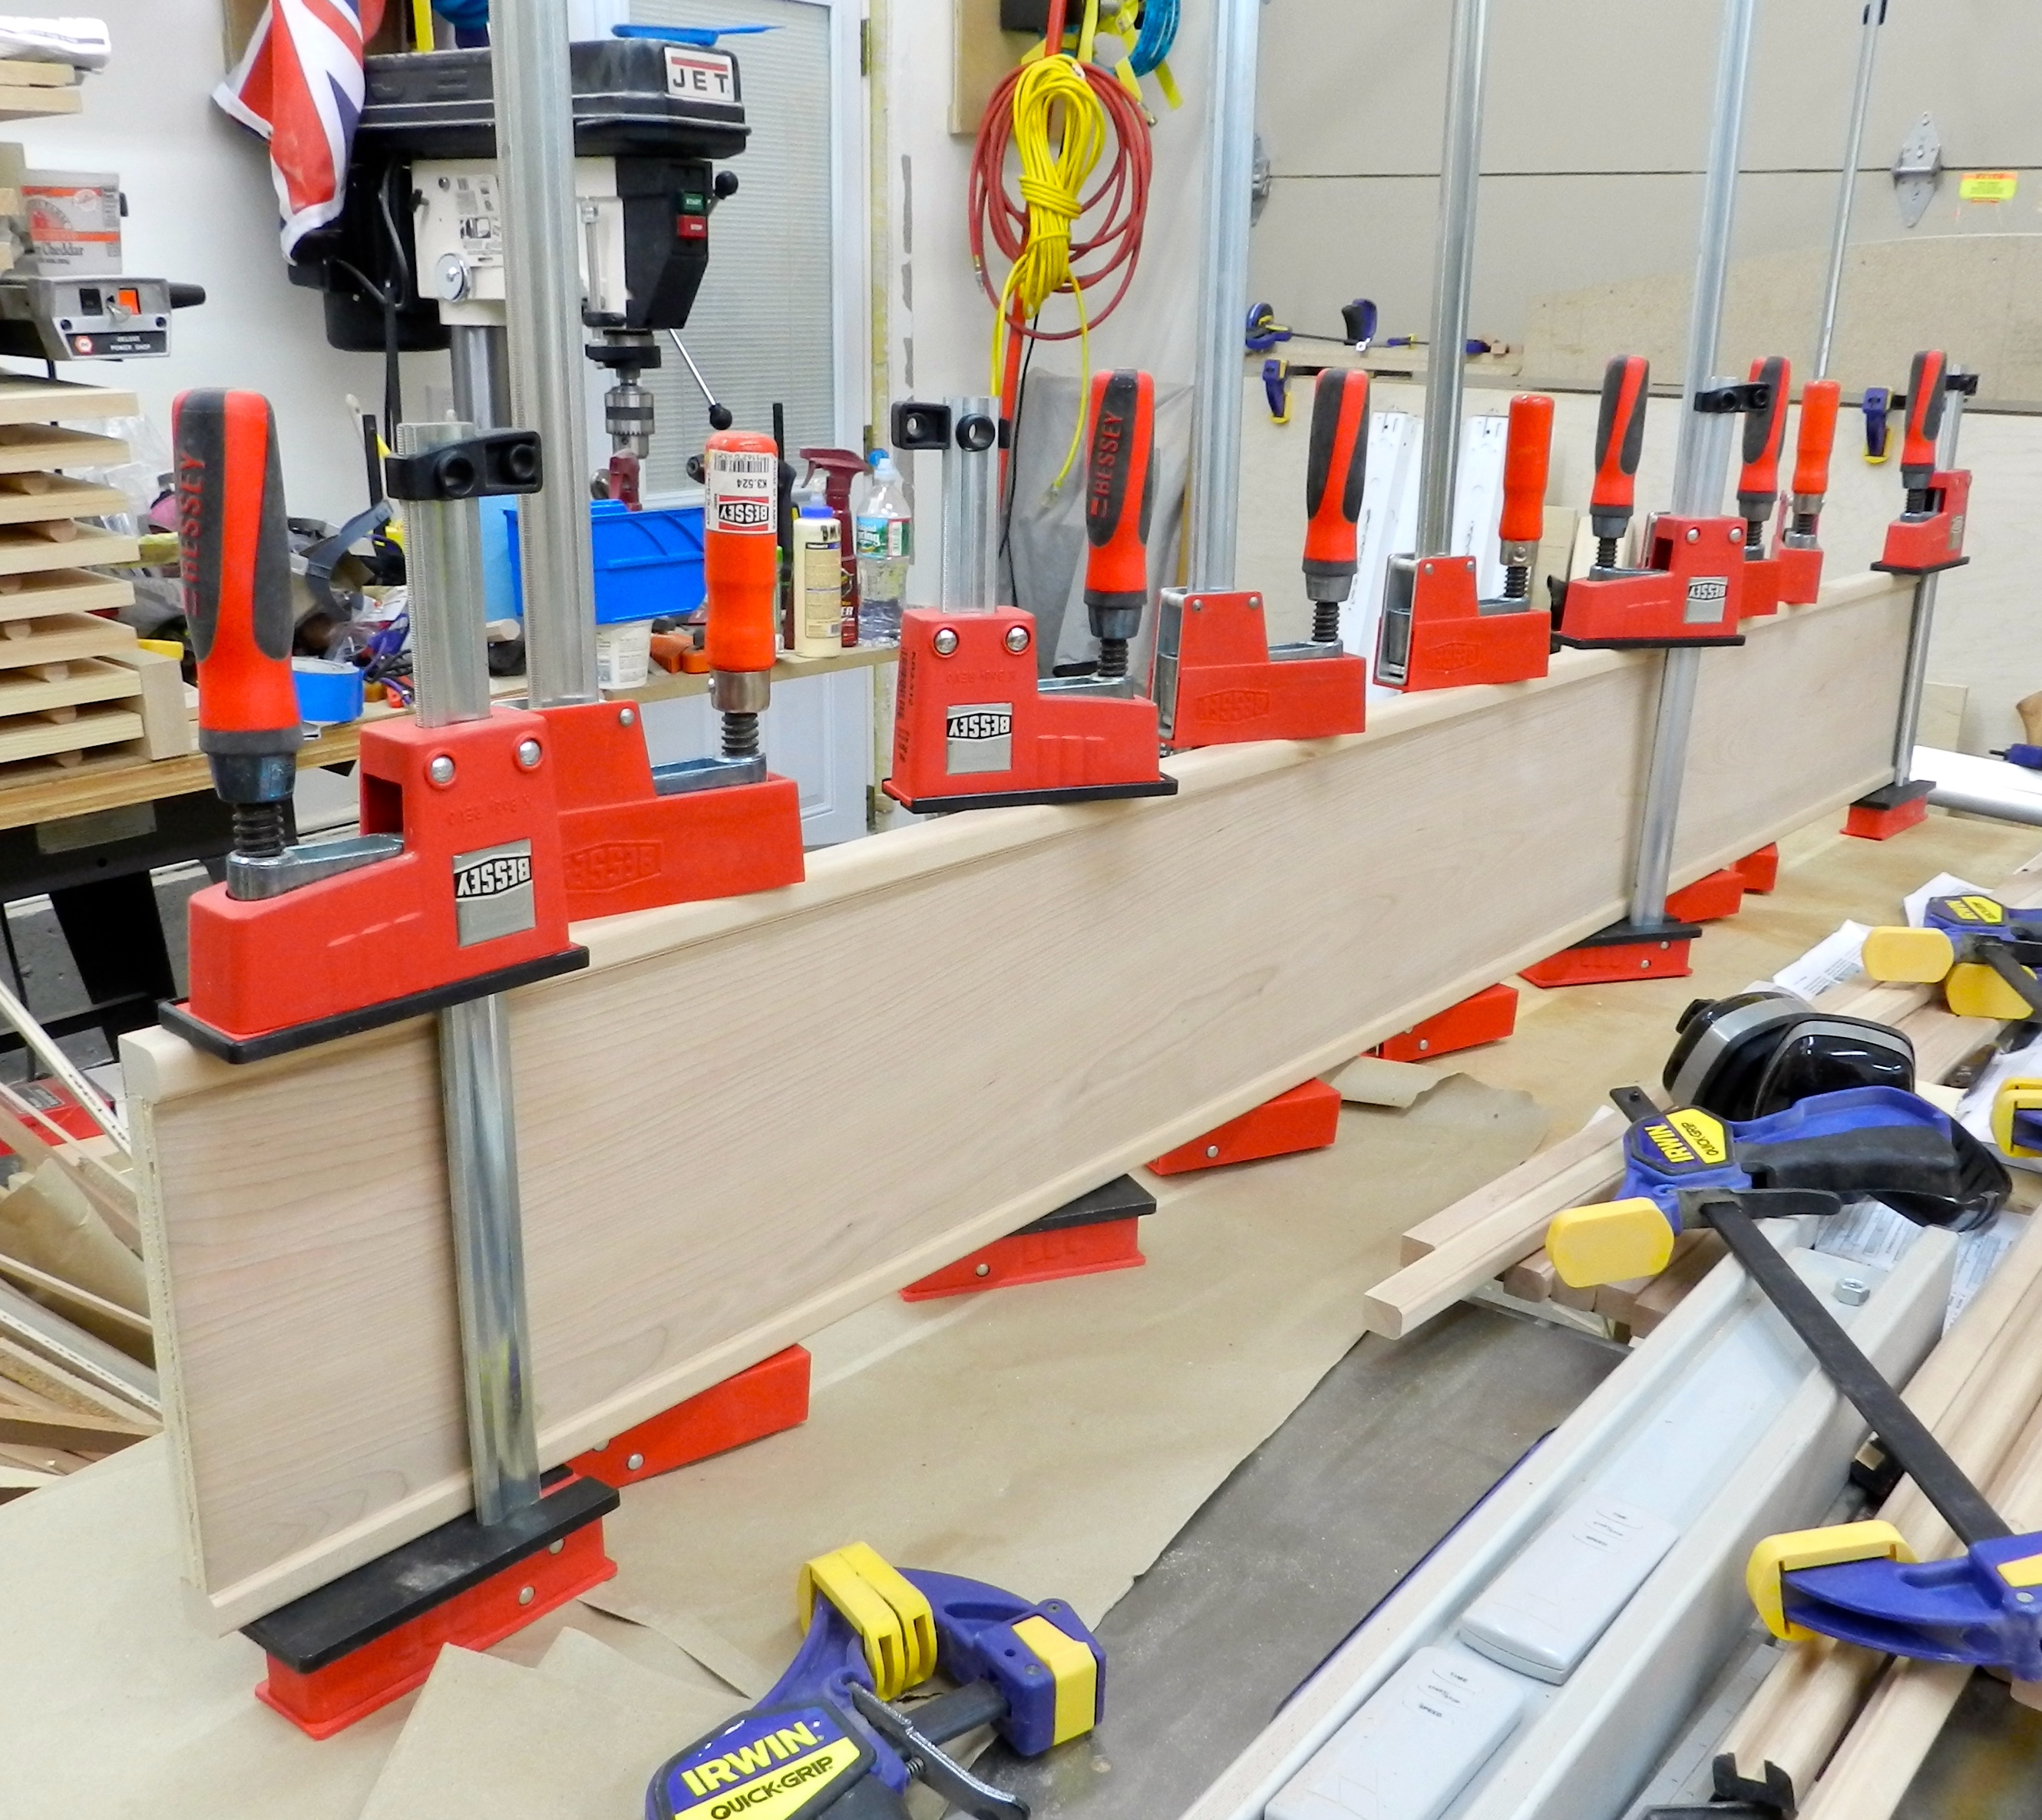
With the moldings all milled, sanded and cut to size it was time to glue up the various assemblies. Shown above I am gluing up the top and bottom molding onto the adult bed rails.

Shop made jig for drilling centered holes

After the glue dried overnight on the rails it was time to drill holes for the through bolts using a shop made jig constructed out of plywood. This made it very easy to line up and drill consistently centered holes on the ends of the rails. I also made use of some of the stopped drilling techniques outlined here.

Clamping each section using extended bar clamps

Next up was gluing up all of the large sections of the bed — head-board, foot-boards, side panels etc. Given the width of this project I had to break out the Bessey K-Body rail extenders which allow me to bolt two K-Body clamps together to effectively make an even longer clamp. The connector section also works as an extra set of feet to keep the clamps level. I used hot hide glue again for its long open time and compatibility with finishes. Once in the clamps I checked everything for square, adjusted as needed and let the section dry overnight.

Attaching the cap.
Attaching the cap.

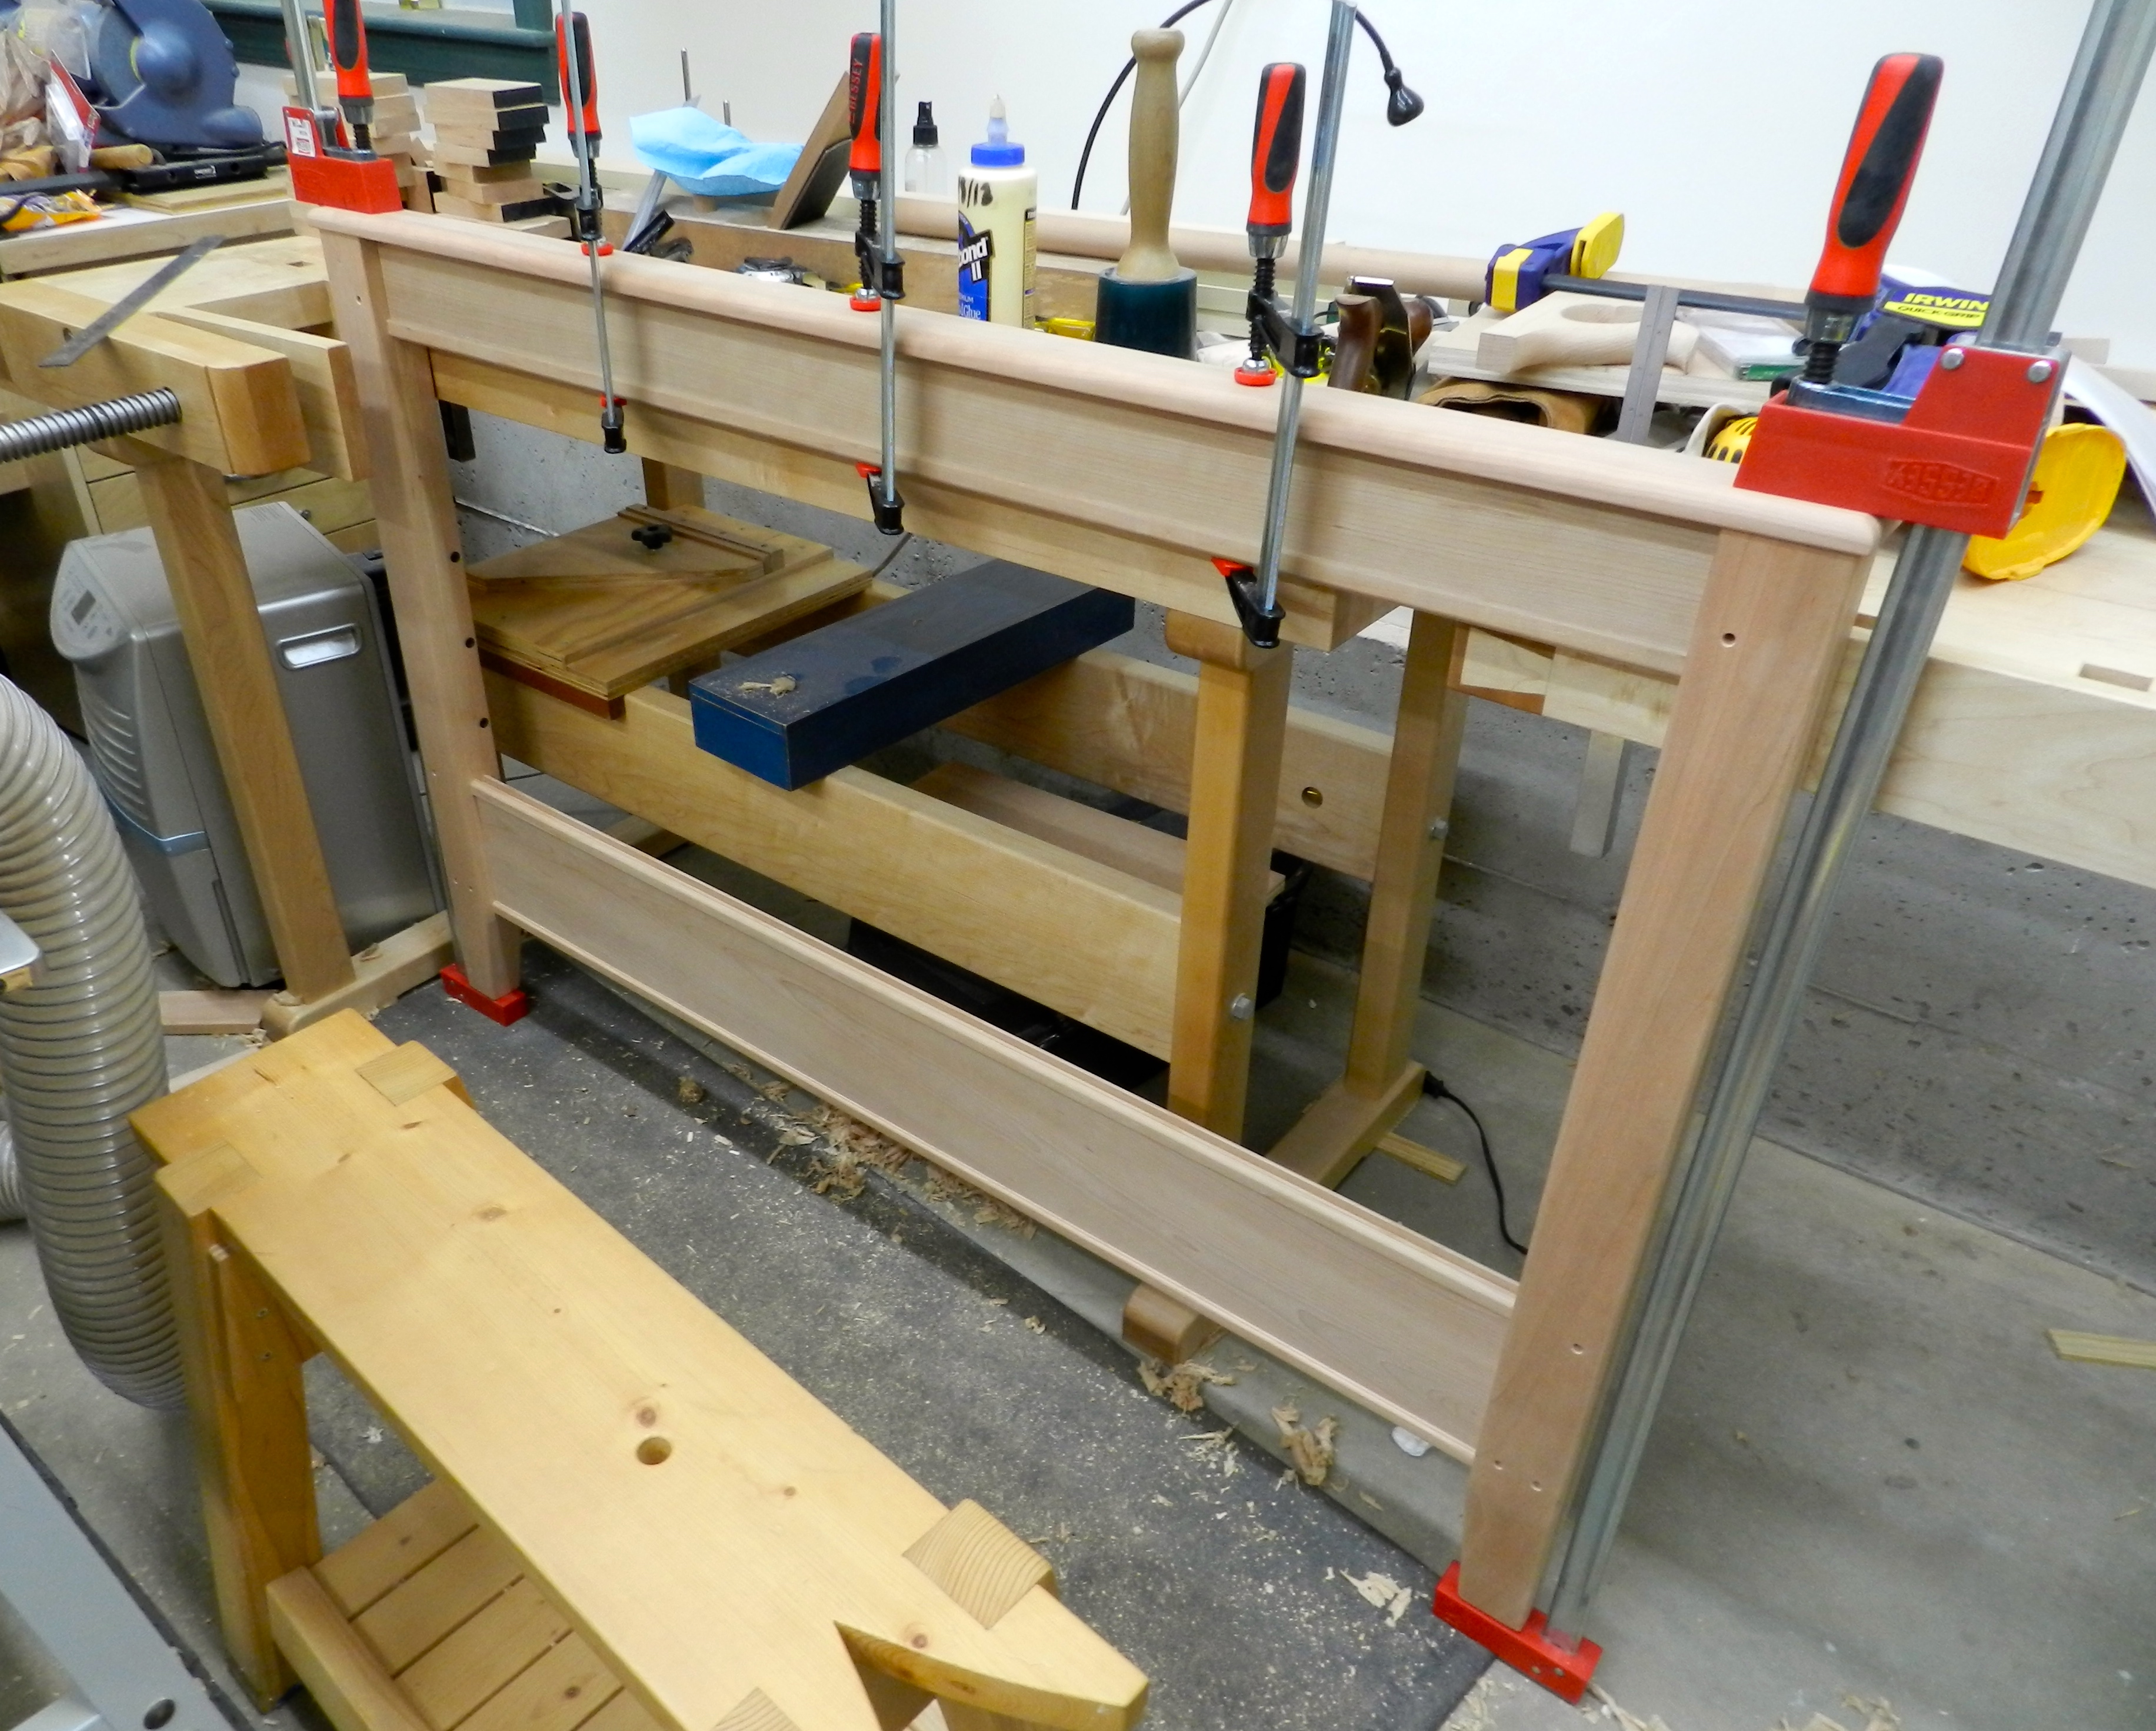
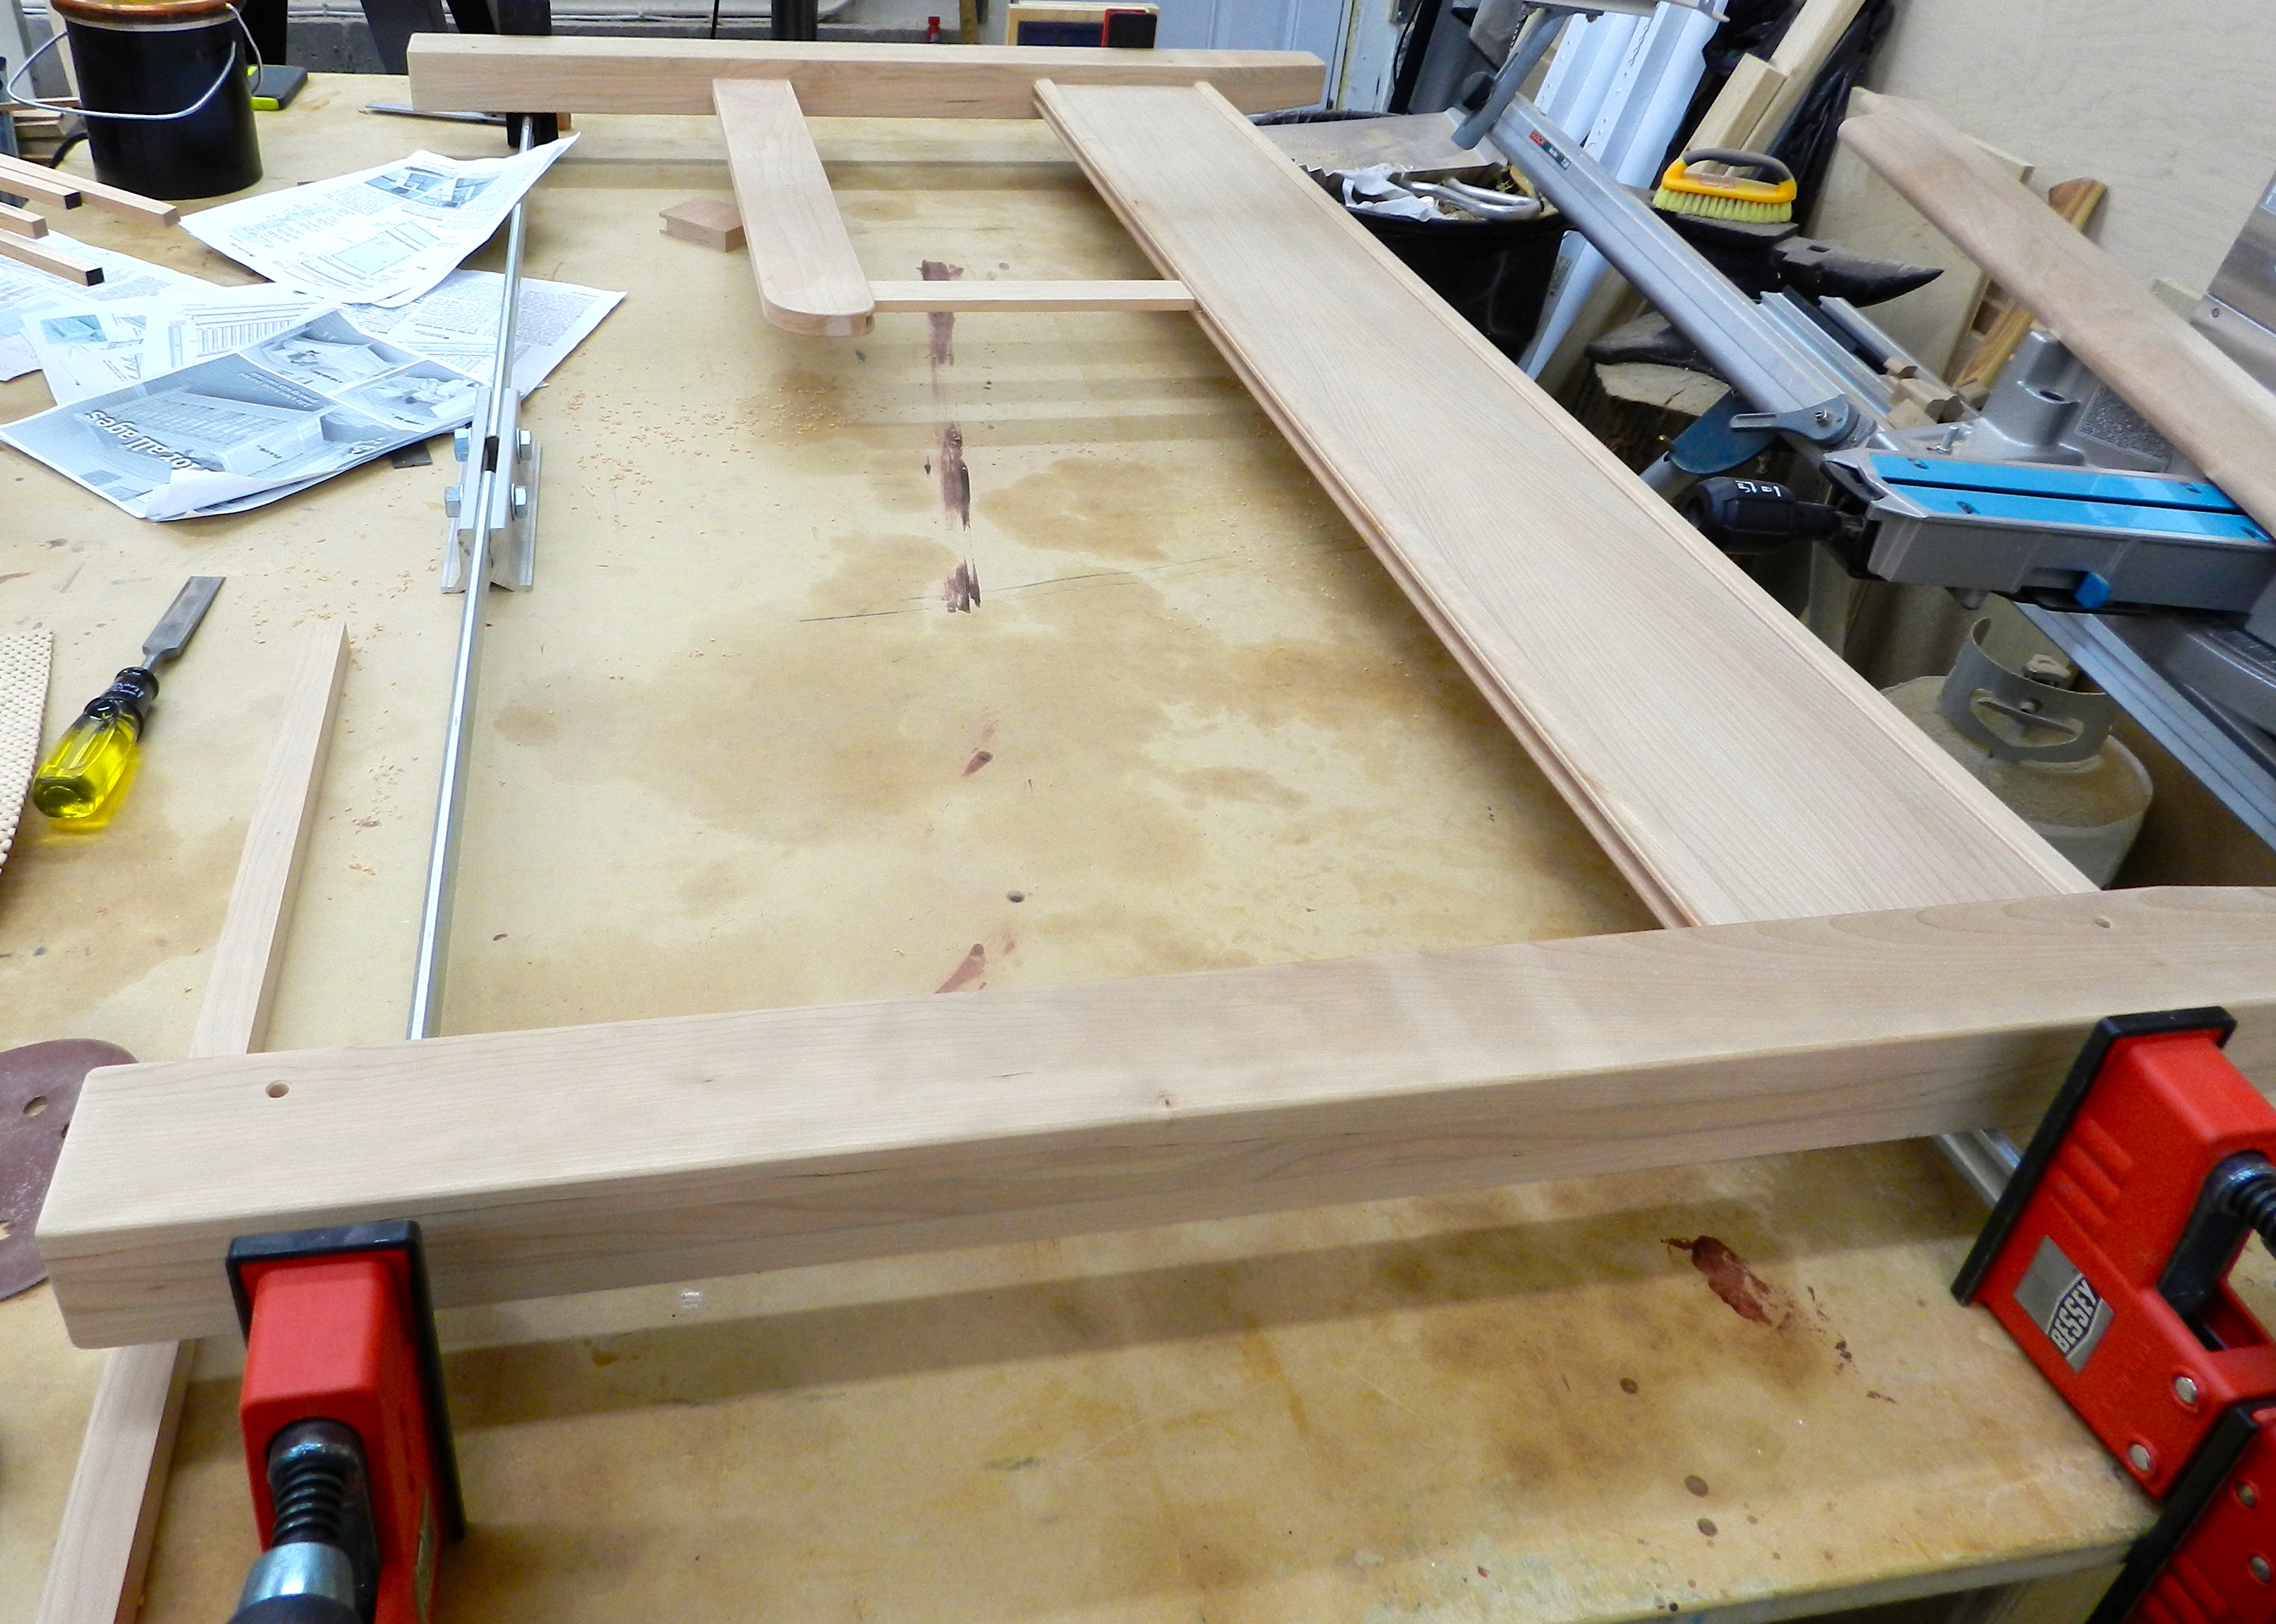
Once the panel was dry it was time to glue on the top cap/hand rail. Next I cut the cove molding to size and glued it in place with the help of some dowel cut-offs.

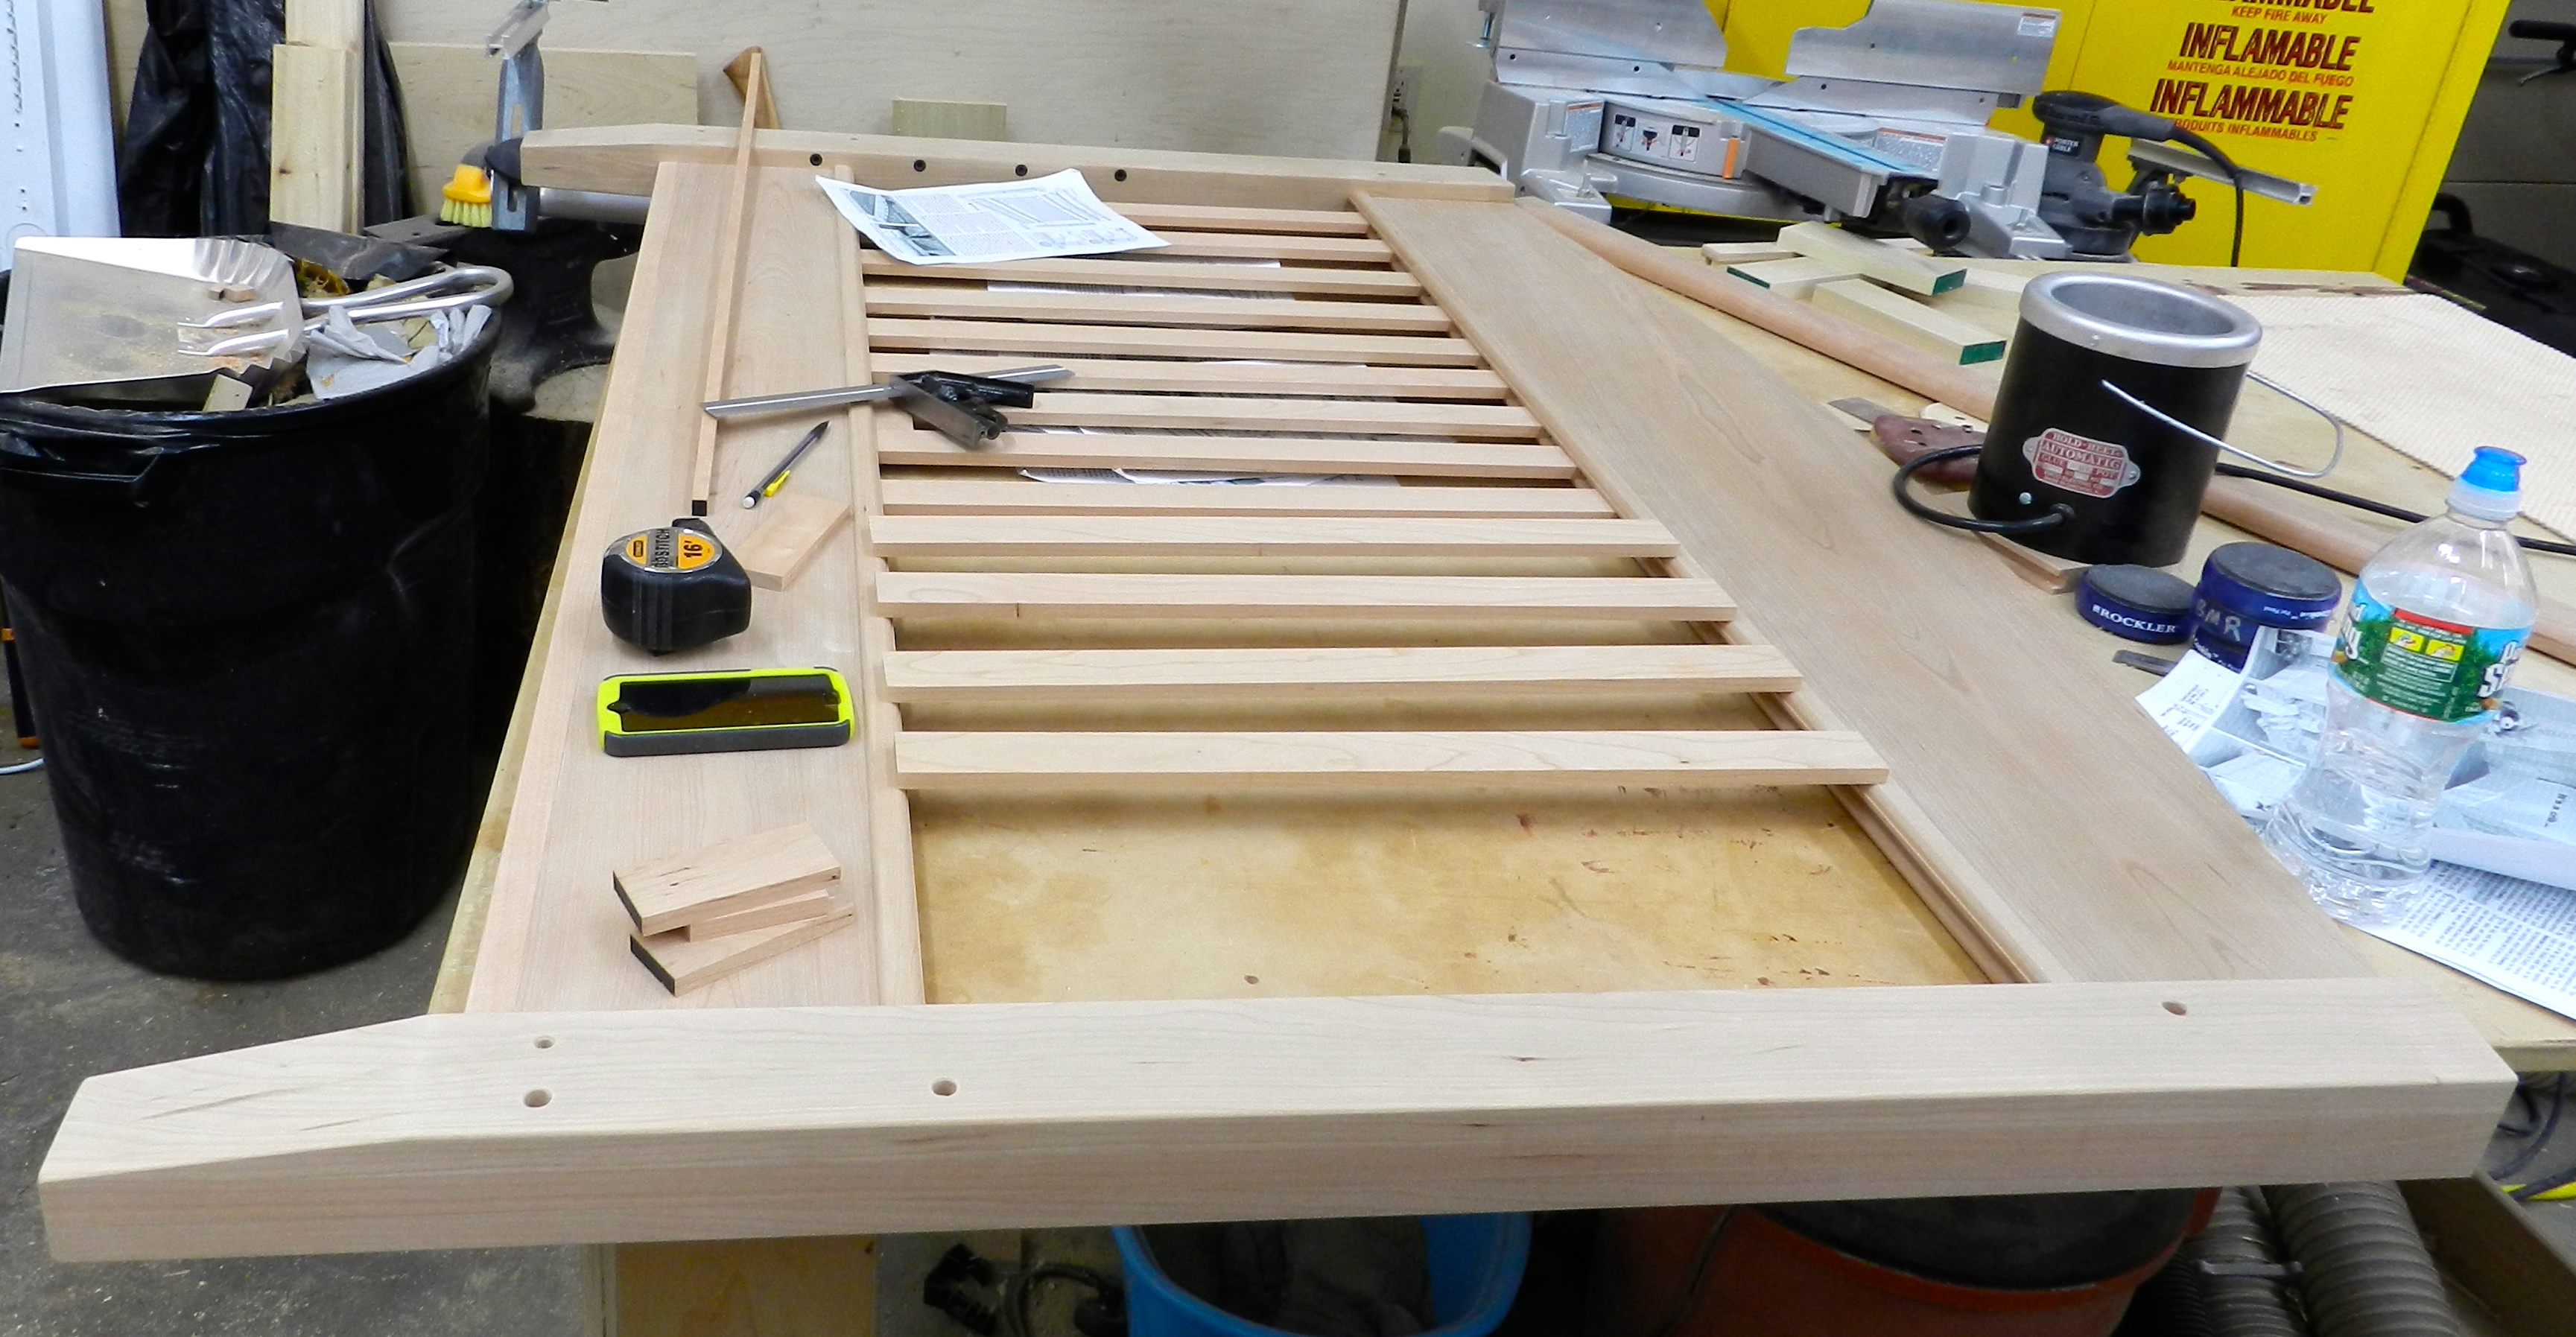
 Installing the slats:

Cutting spacers on the cross-cut sled

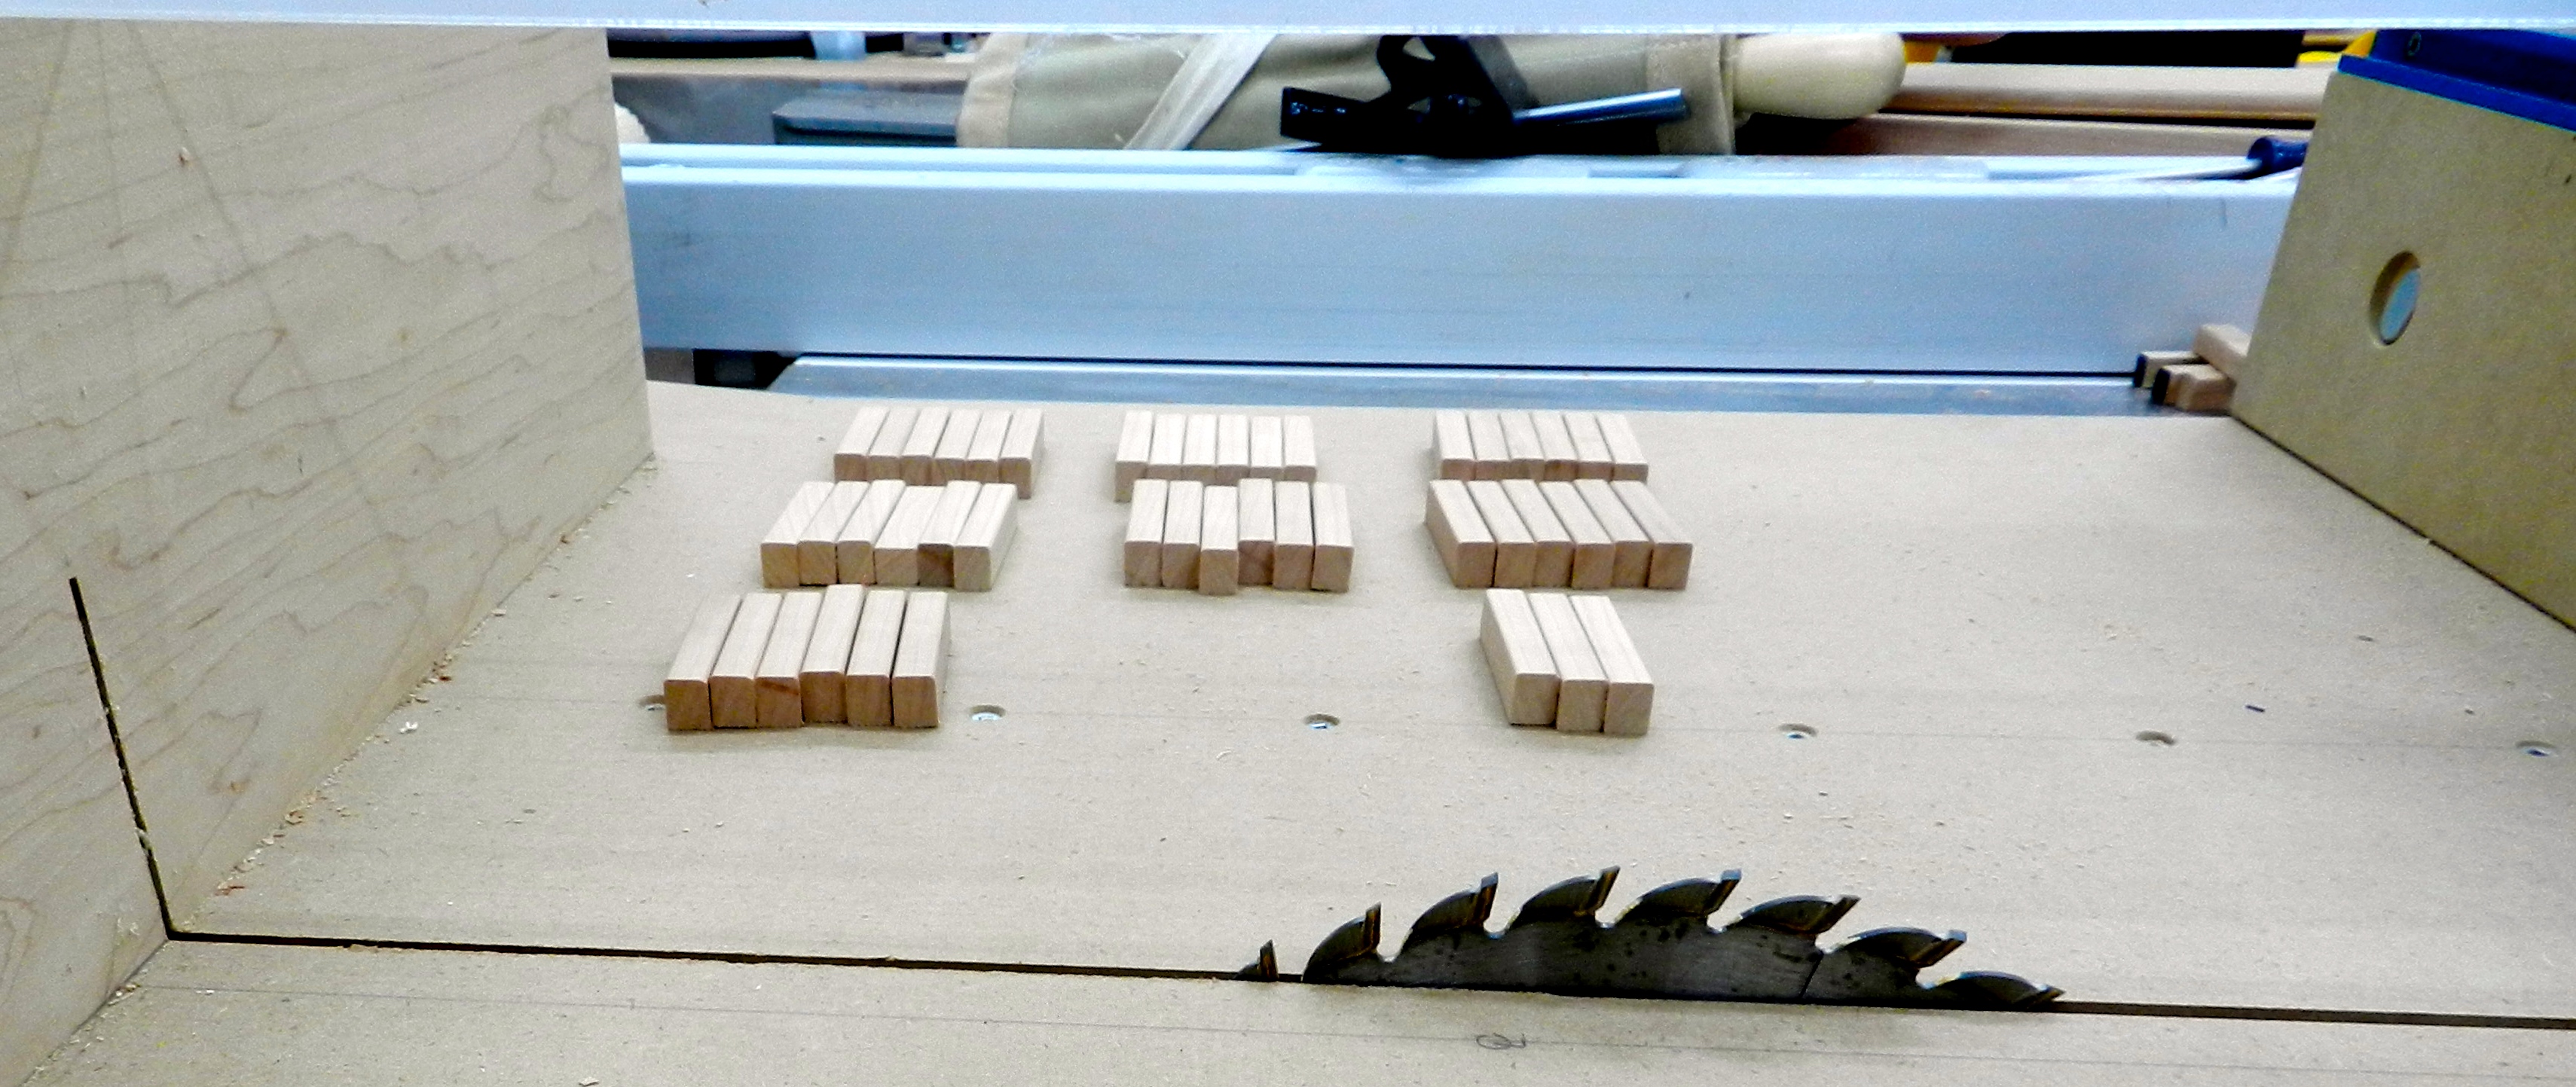
I milled and test fit the slat spacers when I produced the molding above. I gently eased the corners with some sandpaper and cut them to length using my crosscut sled on the table saw and a stop block that was clamped in place against the rear fence of the sled. My OCD side also kept them in order so the grain matched across each panel.

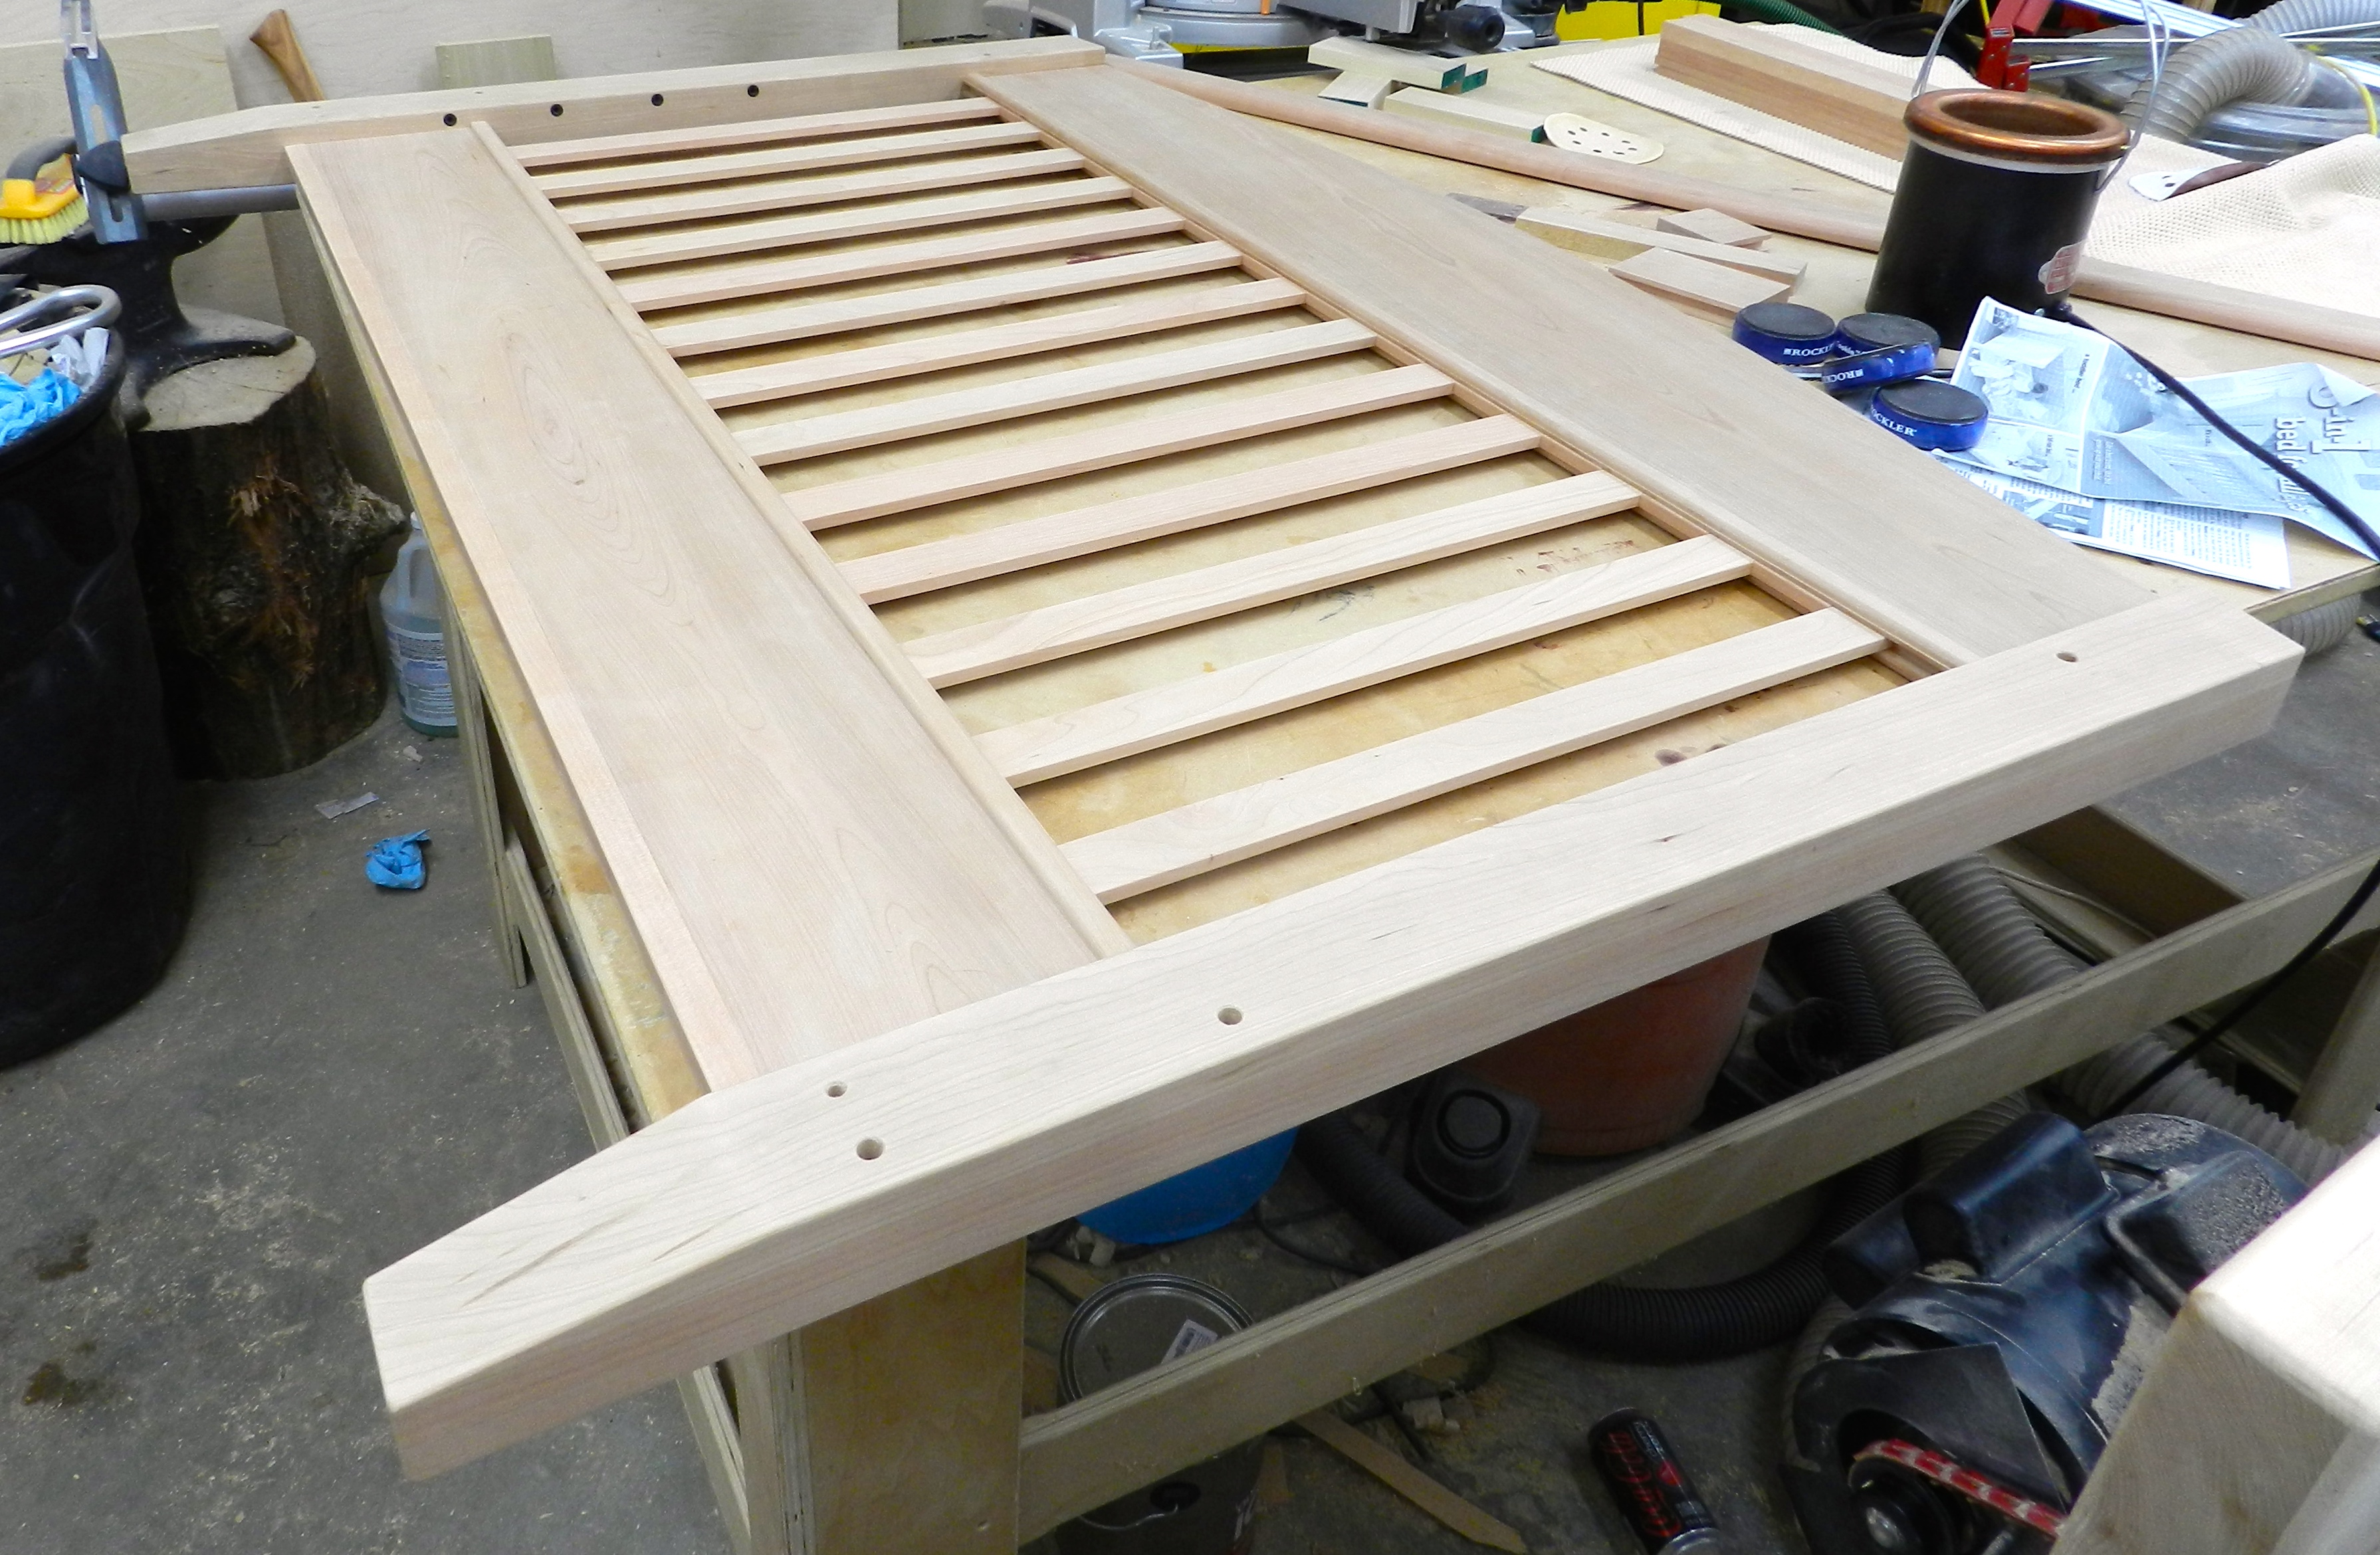
Installing the slats is a bit of challenge so I did a full dry fit/test run before doing it for real with glue. You start from the center slat which you mark with center lines on blue tape (that way you can remove the lines easily as they are only on the tape) on the slat and the panel and install at an angle to insert the slat and then straighten out when it is firmly in the top and bottom slot. I then install spacers to the left and right of the slat and repeat the process. When I get near the end of the assembly I install the last 3 slats at once (otherwise there would not enough room to angle them into place), move them to where they need to be and finish gluing in the spacer blocks.

Installing the slats

When laying out the slats in the dry run I also examined the individual pieces and laid them out so that the completed piece had even grain patterns and tones. I also made a few extra slats so I could swap in grain I liked etc. Some of those extra pieces were recycled into a baby blanket display rod here.

Slats installed
Slats installed

Once I completed all the assemblies, I test fit the bed in all three configurations. (You can see several photos of that process over on my public Facebook page here.)

Test fit
Test fit

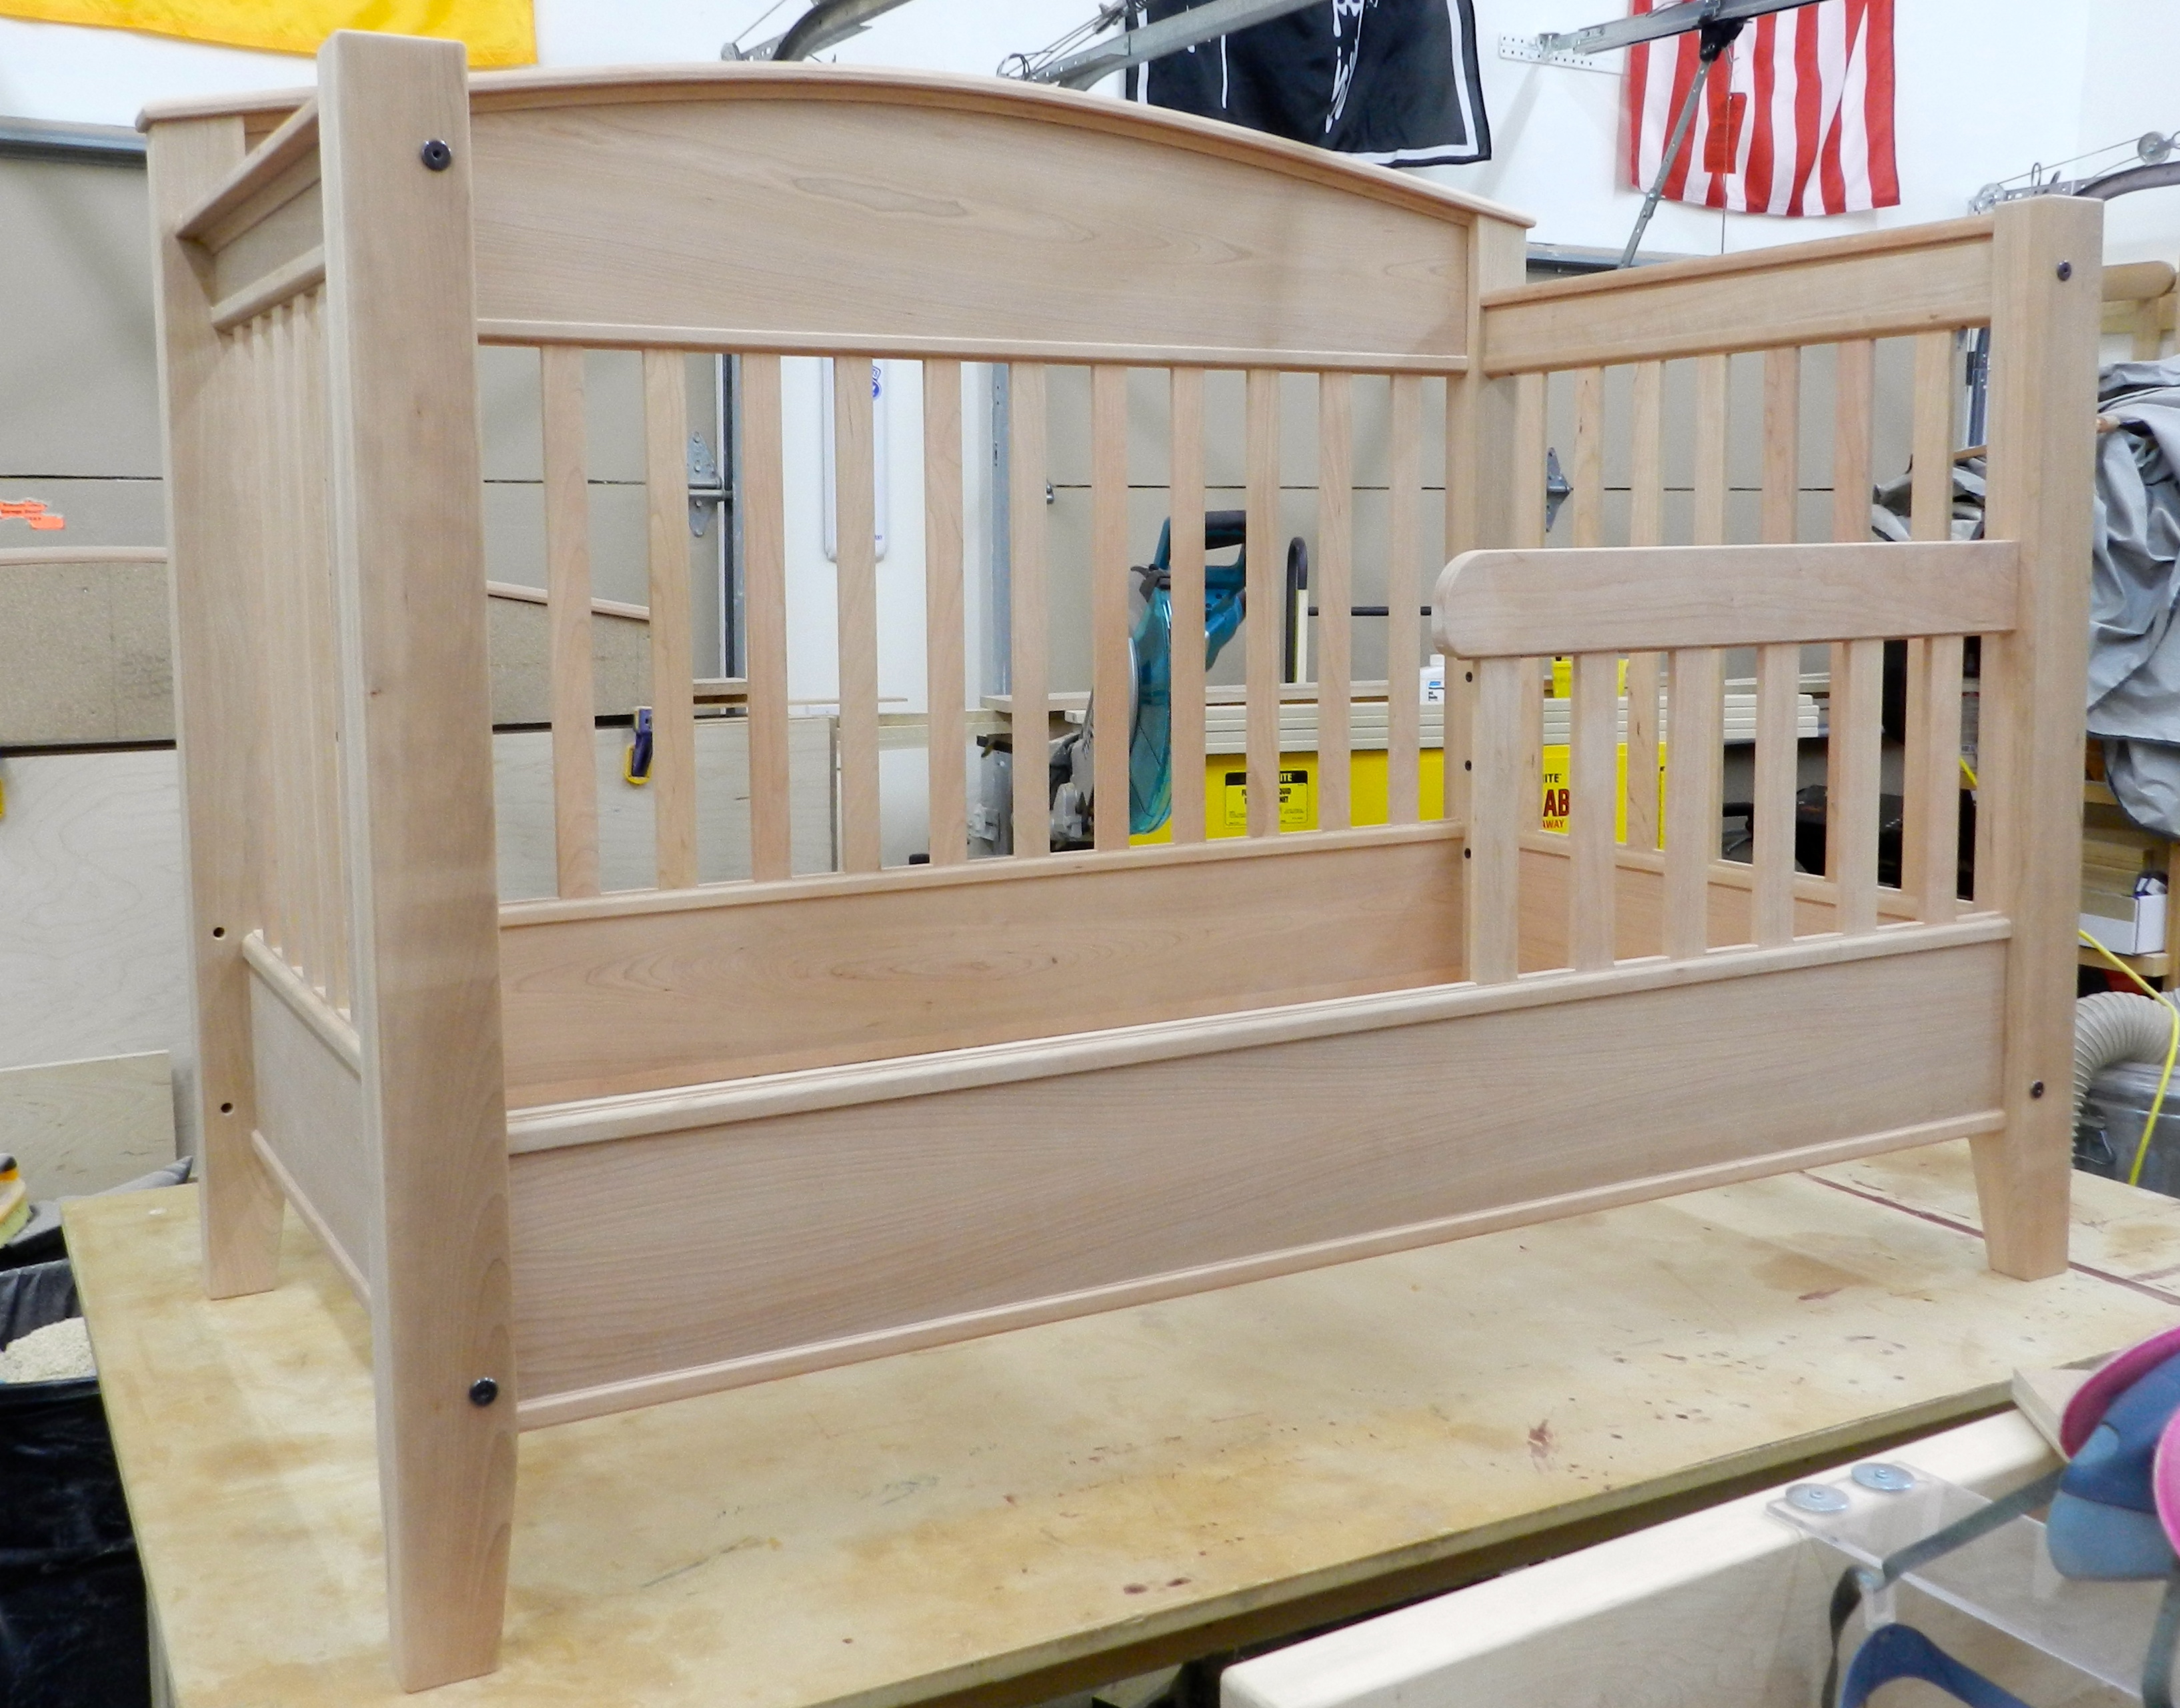
Now it was time to pick a finish and head out to the finishing booth. To cap off this series, I’ll be talking about choosing and using a finish.

If you’d like to read some other posts related to this project as they get posted please check out this link here.

Take care,
-Bill

A Few Good Carpenters

A good carpenter can be hard to find. Many of us like to think that in earlier times there were was an abundance of exceptional carpenters, but this sort of lament is not a new phenomenon. Check out the interesting except below from the 1850s:

“The Author’s Experience.

These facts and reflections have been impressing themselves upon the mind of the Author of this work for twenty years past, while he has been serving the Public as a practical carpenter. During much of this time it has been his fortune to have large jobs on hand, employing many journeymen mechanics, who claimed to understand their trade, and demanded full wages. But it has been one of the most serious and oppressive of his cares, that these journeymen knew so little of their business.

Few Good Carpenters

They had, by habit, acquired the use of tools, and could perform a job of work after it had been laid out for them; but not more than one man in ten could himself lay out a frame readily and correctly.

Why Apprentices do not Learn

Now, it is not commonly because apprentices are unwilling to learn, or incapable of learning, that this is so, but it is because they have not the adequate instruction to enable them to become master-workmen.”

— William E. Bell ‘Carpentry Made Easy: The Science and Art of Framing’ (1858)

I think Bell’s comments ring as true today as they did when he wrote the above in 1858. I won’t focus on the lazy workmen uninterested in learning, but I will focus on those who want to keep learning new skills. As with many of life’s pursuits, you’ll get out of it what you put into it, and there is much to be learned if you know where to look.

Finding a good carpenter

Most of the best carpenters and woodworkers I know get the majority of their work via word of mouth and are booking months out at a time and  thus don’t have to invest much in marketing. If you’re looking to find one of the ‘few good carpenters’, ask around at a local woodworking school, shop, guild, club or friends and family for referrals and interview your next carpenter.

Learning More

One of the best ways to learn a woodworking skill is to take a class or workshop.

I have a few upcoming workshops this spring at the North Bennet Street School (details below) and there are some seats available if you are interested in joining me.

Molding planes
Molding planes

Making Traditional Moldings Using Hand Planes @ The North Bennet Street School

Saturday, April 12 – Sunday April 13 2014

8:30 AM – 4:30 PM Register

Instructor: Bill Rainford
$365

Learn to use traditional molding and joinery planes to produce beautiful traditional molding profiles. Learn the basics of tuning and using these planes. Build a basic sticking board, used to hold the moldings you are making. Layout and execute historic profiles. We discuss the history of traditional moldings, examine planes/profiles students bring (optional) and, if there is time, an introduction to carved moldings.

Shutters Workshop
Shutters Workshop

Introduction To Shutters @ The North Bennet Street School

Saturday, March 15 – Sunday March 16, 2014

8:30 AM – 4:30 PM Register

Instructor: Bill Rainford
$365

Learn about traditional wooden shutters in this two-day workshop. Using traditional joinery, students build a sample shutter and learn the skills needed to layout and build shutters for custom projects. Discussion includes interior and exterior uses, fielded panels and louvered styles. Students should be able to plane and square up a board by hand and have some experience laying out and cutting traditional mortise-and-tenon joinery by hand. Some experience with tuned hand tools and power tools is required.

Traditional Shutters


If the above does not appeal to you, there are several schools around the country that teach solid woodworking and carpentry skills. I encourage your to explore classes at any of these schools: The North Bennet Street School in Boston, The College of the Redwoods in California, The Heartwood School, The Shelter Institute in Maine, Philadelphia Furniture Workshop, The Kelly Mehler School of Woodworking, Phil Lowe’s Furniture Institute of MassachusettsConnecticut Valley School of Woodworking, and Roy Underhill’s The Woodwright’s School

If you’re not able to make it to one of the above schools there are scores of books that can help you along your woodworking journey. I think every carpenter would benefit from reading all 4 volumes of Audel’s Carpenter’s Guide, Tage Frid Teaches Woodworking Vol 1-3, Bell’s Carpentry Made Easy: The Science and Art of Framing, and Get Your House Right.

Woodworking is a life long journey and I hope that you will continue pursuing new aspects of the craft.

Take care,
-Bill

Reproducing Traditional Molding for the Alvah Kittredge House

The Alvah Kittredge House in Roxbury Massachusetts is a great example of high style Greek Revival architecture in Boston and a tangible link to the city and the nation’s early history.

Alvah Kittredge House in the 1880s (Photo Courtesy of Historic Boston Inc)

The Greek Revival Style was most popular in the United States during the second quarter of the 19th century. (Approximately 1820-1850) During this time period the population and economy was also growing by leaps and bounds. The United States was still a young nation and many folks wanted to show off their new found affluence.  During this period of great optimism there was a strong belief in the American Democracy and many associated the ideals of the new nation with those of early Greek Democracy. Around this time, access to Greece and the designs of antiquity were also coming into the mainstream as influential citizens like Thomas Jefferson read books like ‘The Antiquities of Athens‘, Benjamin Latrobe and others built out Hellenistic monuments and public buildings in Washington D.C. and other large east coast cities, and builder’s guides like Asher Benjamin’s ‘The Practical House Carpenter’ proliferated the tool chests of local joiners and carpenters. Given this atmosphere many folks wanted to have their own building look like a Greek temple. For most of the ‘middling’ Americans, especially those in more rural and western locales the scale and details would be simplified down to keeping classical proportions and greatly simplifying details to meet their budgets — pilasters instead of columns, simplified moldings or even flat boards attempting to echo the pediment and other design elements of a Greek temple.

Looking up at the portico of the Alvah Kittredge House (Photo by Bill Rainford)

In places with money — like public buildings and mansions — the builders could afford to go big with design elements like a colonnaded portico and carved relief details in the pediment etc. The Alvah Kittredge house is a great example of a high style Greek revival home which reflected the wealth of its original owner, and of Boston and the US in general at that time.  Not only is the house unusual given how the city has grown up around this once grand country estate, but the scale of the front facade needs to be seen in person to be properly appreciated. The two story portico with its double hung windows and high ceilings required wide and detailed moldings in order to be the appropriate scale for such a magnificent home.

The original crisp detail of this hand run molding is obscured by the many layers of paint over the generations. (Photo courtesy of the Taunton Press)

This 8 inch wide molding was made by hand using traditional wooden molding planes likely on site and from eastern white pine. This is not the sort of thing you can buy at a local big box store, or millworks supply company. The best way to replicate this sort of casing is to make it from the same materials and in the same manner as the original joiner….

Using a molding comb to capture the profile. (Photo courtesy of the Taunton Press)

I started by capturing the molding profile via molding comb or profile gauge which aids in transferring the profile to the newly prepared stock.

Setting in the details with a Snipe's Bill plane. (Photo courtesy of the Taunton Press)
Setting in the details with a Snipe’s Bill plane. (Photo courtesy of the Taunton Press)

Next by using traditional wooden molding planes I carefully set in all the major transitions in the profile

Using traditional molding planes to replicate the profile. (Photo courtesy of the Taunton Press)

Many of these planes I use date back to the time period when the Kittredge house was actually built and yields results that simply cannot be duplicated by machine. The original handwork had variations and facets which catch the light differently when compared to stock that is milled by a machine.

Section of new molding alongside an original sample -- a nice match. (Photo by Bill Rainford)
Section of new molding alongside an original sample — a nice match. (Photo by Bill Rainford)

The end result is a near identical match that will help insure that future generations living in the Kittredge house will be able to enjoy it’s many details in much the same way as Alvah did when the house was first built.

If you’d like to learn more about how to make traditional moldings, please check out the related article ‘Master Carpenter Series:Traditional Molding’ I wrote for FineHomebuilding which can be found here  (There is also a related video series which you can find on www.finehomebuilding.com/extras for the Sept 2013 issue)

-Bill Rainford
Preservation Carpenter, Joiner, and Instructor
https://rainfordrestorations.wordpress.com

P.S. The above post was written for my friends at Historic Boston Inc here. You can learn more about Historic Boston and specifically about the Alvah Kittredge House here.

Don’t forget to pack your Molding Comb


As a preservation carpenter or cabinet maker a common task that comes up is replicating a molding you find out in the world. Unfortunately most historic sites, museums and stores will not let you pop off a piece of molding to directly trace its profile — no matter how politely you ask. That’s where the molding comb, a.k.a profile gauge, comes in handy. This seemingly simple tool works by pressing it up against the molding you want to capture, and pressing the little feelers against the pieces so they take on the shape of what it’s pressed against. This works much the same way as a common desktop toy from the 1980s with a ton of metal pins held in a grid that can capture whatever you press into it. Once you have the profile you can take the gauge and trace it onto paper thus transferring the profile.  This tool also works well for wood turners.

When it came time for me to try and find my own molding combs, I was surprised by how few are even on the market, let alone quality versions. As a kid I remember playing with some versions of this tool made from a series of metal pins, they were often very stiff to use and once a pin got bent, rusty or lost the tool usually became very hard to use. When looking for one of these tools you’ll want to seek out a model that has pins or blades that move smoothly but are kept under sufficient tension to retain the shape you are tracing. You also want to have the finest/thinnest blades you can find as the higher resolution will result in smoother curves. Some of the cheap import models yield results that look like an old 8-bit video game with jagged edges. 


The best ones I could find on the market today I bought from GarrettWade.com, and you will pay a premium to get a quality tool you may not use everyday, but I believe the much higher quality results are worth the extra expense in this case. Pictured above are all 3 sizes they offer, and coming from Europe they are in metric sizes roughly on the order of 6″, 12″ and 18″. What I like about them is the fairly fine granularity of the blades, the nice amount of tension on the blades which hold a profile well, and the way one side is triangular and one side is round making it easier to get into odd places. For exterior work the plastic surfaces will not rust which comes in handy when working out in the weather.

Running custom molding by hand

What do you do when you need to tie into a non-stock molding? Or a very short run of custom or carved molding?

You make it yourself of course!

Making a short run of custom molding is often faster, and definitely cheaper than having a custom knife  or bit fabricated. The next time you need a short run of molding I highly encourage giving this a try.

Below are some photos walking through the process of creating a short run of custom molding. This piece is an interesting bit of crown molding with a carved rope pattern and dentils. I think the ‘carved’ rope on the original was pressed in by machine, which is why I like my hand carved section even more than the original.

The process I followed:

  • Draw your profile on both ends of the piece
  • Rough in as much as you can via machine —  like the table saw to save yourself time and effort
  • Use hollows and rounds (wooden molding planes) to get the curves
  • Square up your rabbet for the dentil
  • Cut the dental on the table saw, align it where you want and affix it to the piece
  • Walk off your carved pattern using dividers and pencils
  • Carve out your rope pattern
  • Enjoy your finished work 🙂