Tag Archives: Shutters

The Shutters of Old Quebec

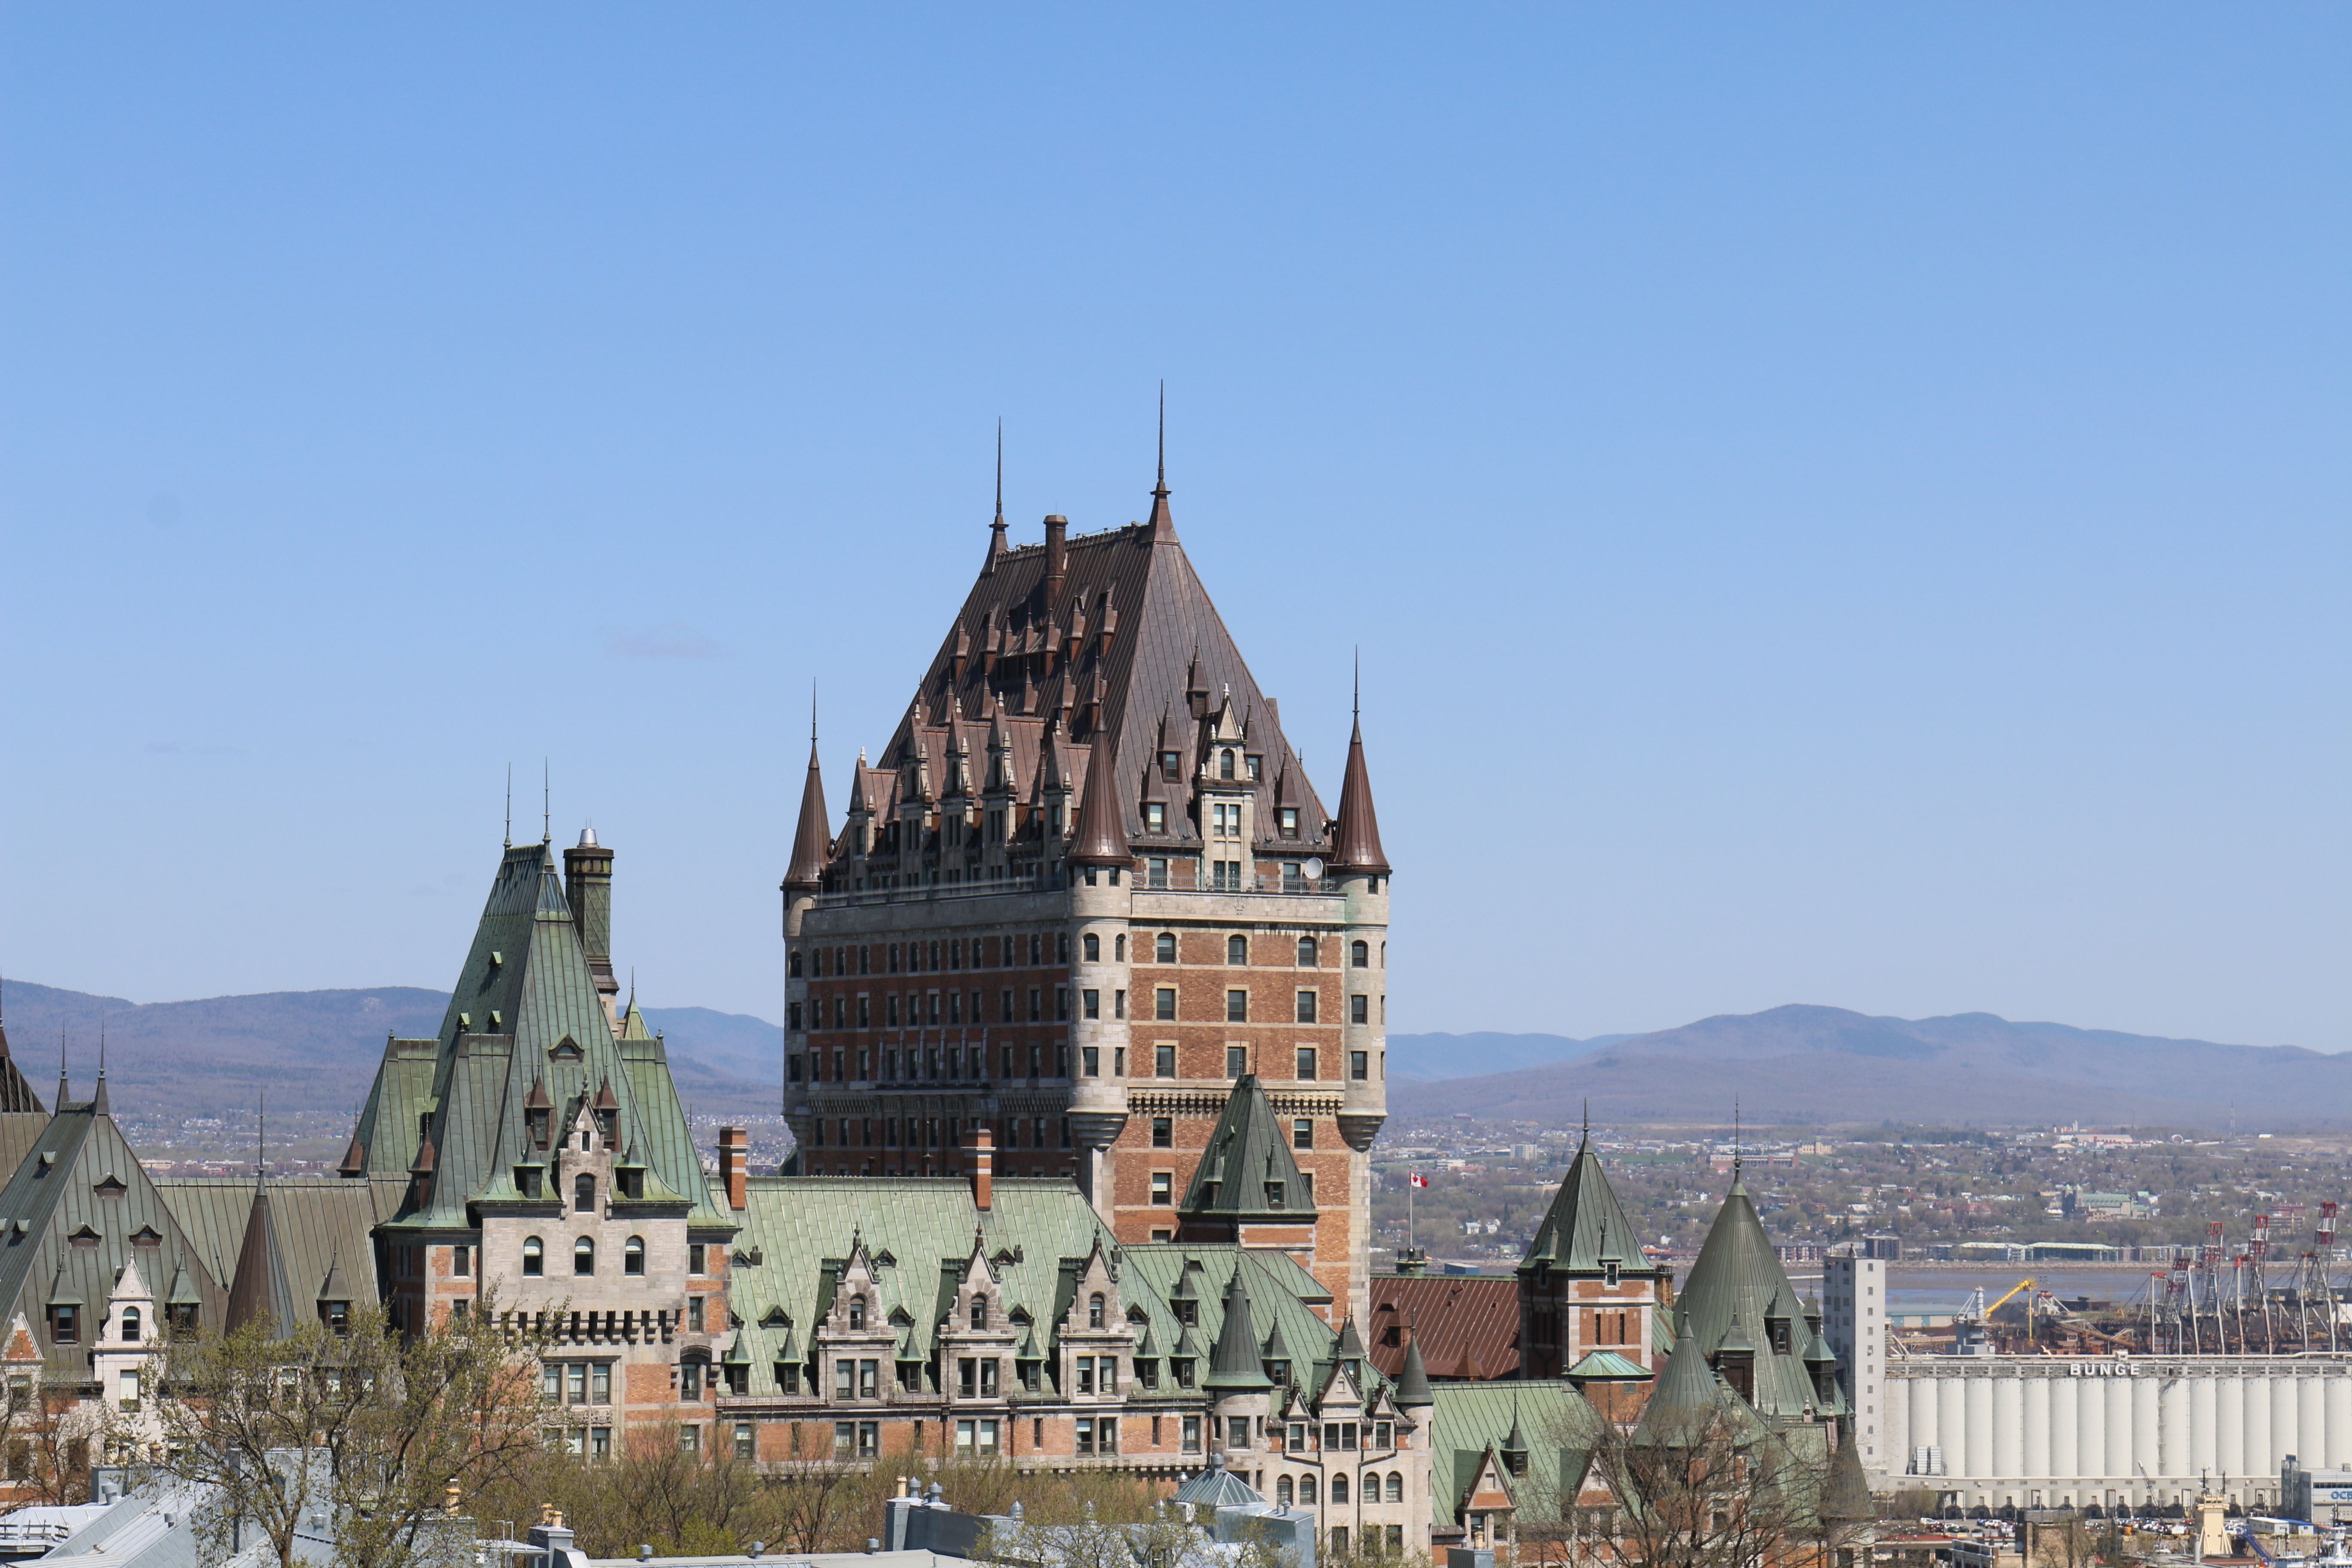
As a Joiner and a Preservation carpenter I always enjoy studying interesting architectural details. On a recent trip to Old Quebec I found a lot of interesting French influenced shutters that I wanted to share with you.

The Frontenac Hotel and Old Quebec

Living and working in New England and the mid-Atlantic the majority of what I come across are English, Dutch and some German inspired shutters.

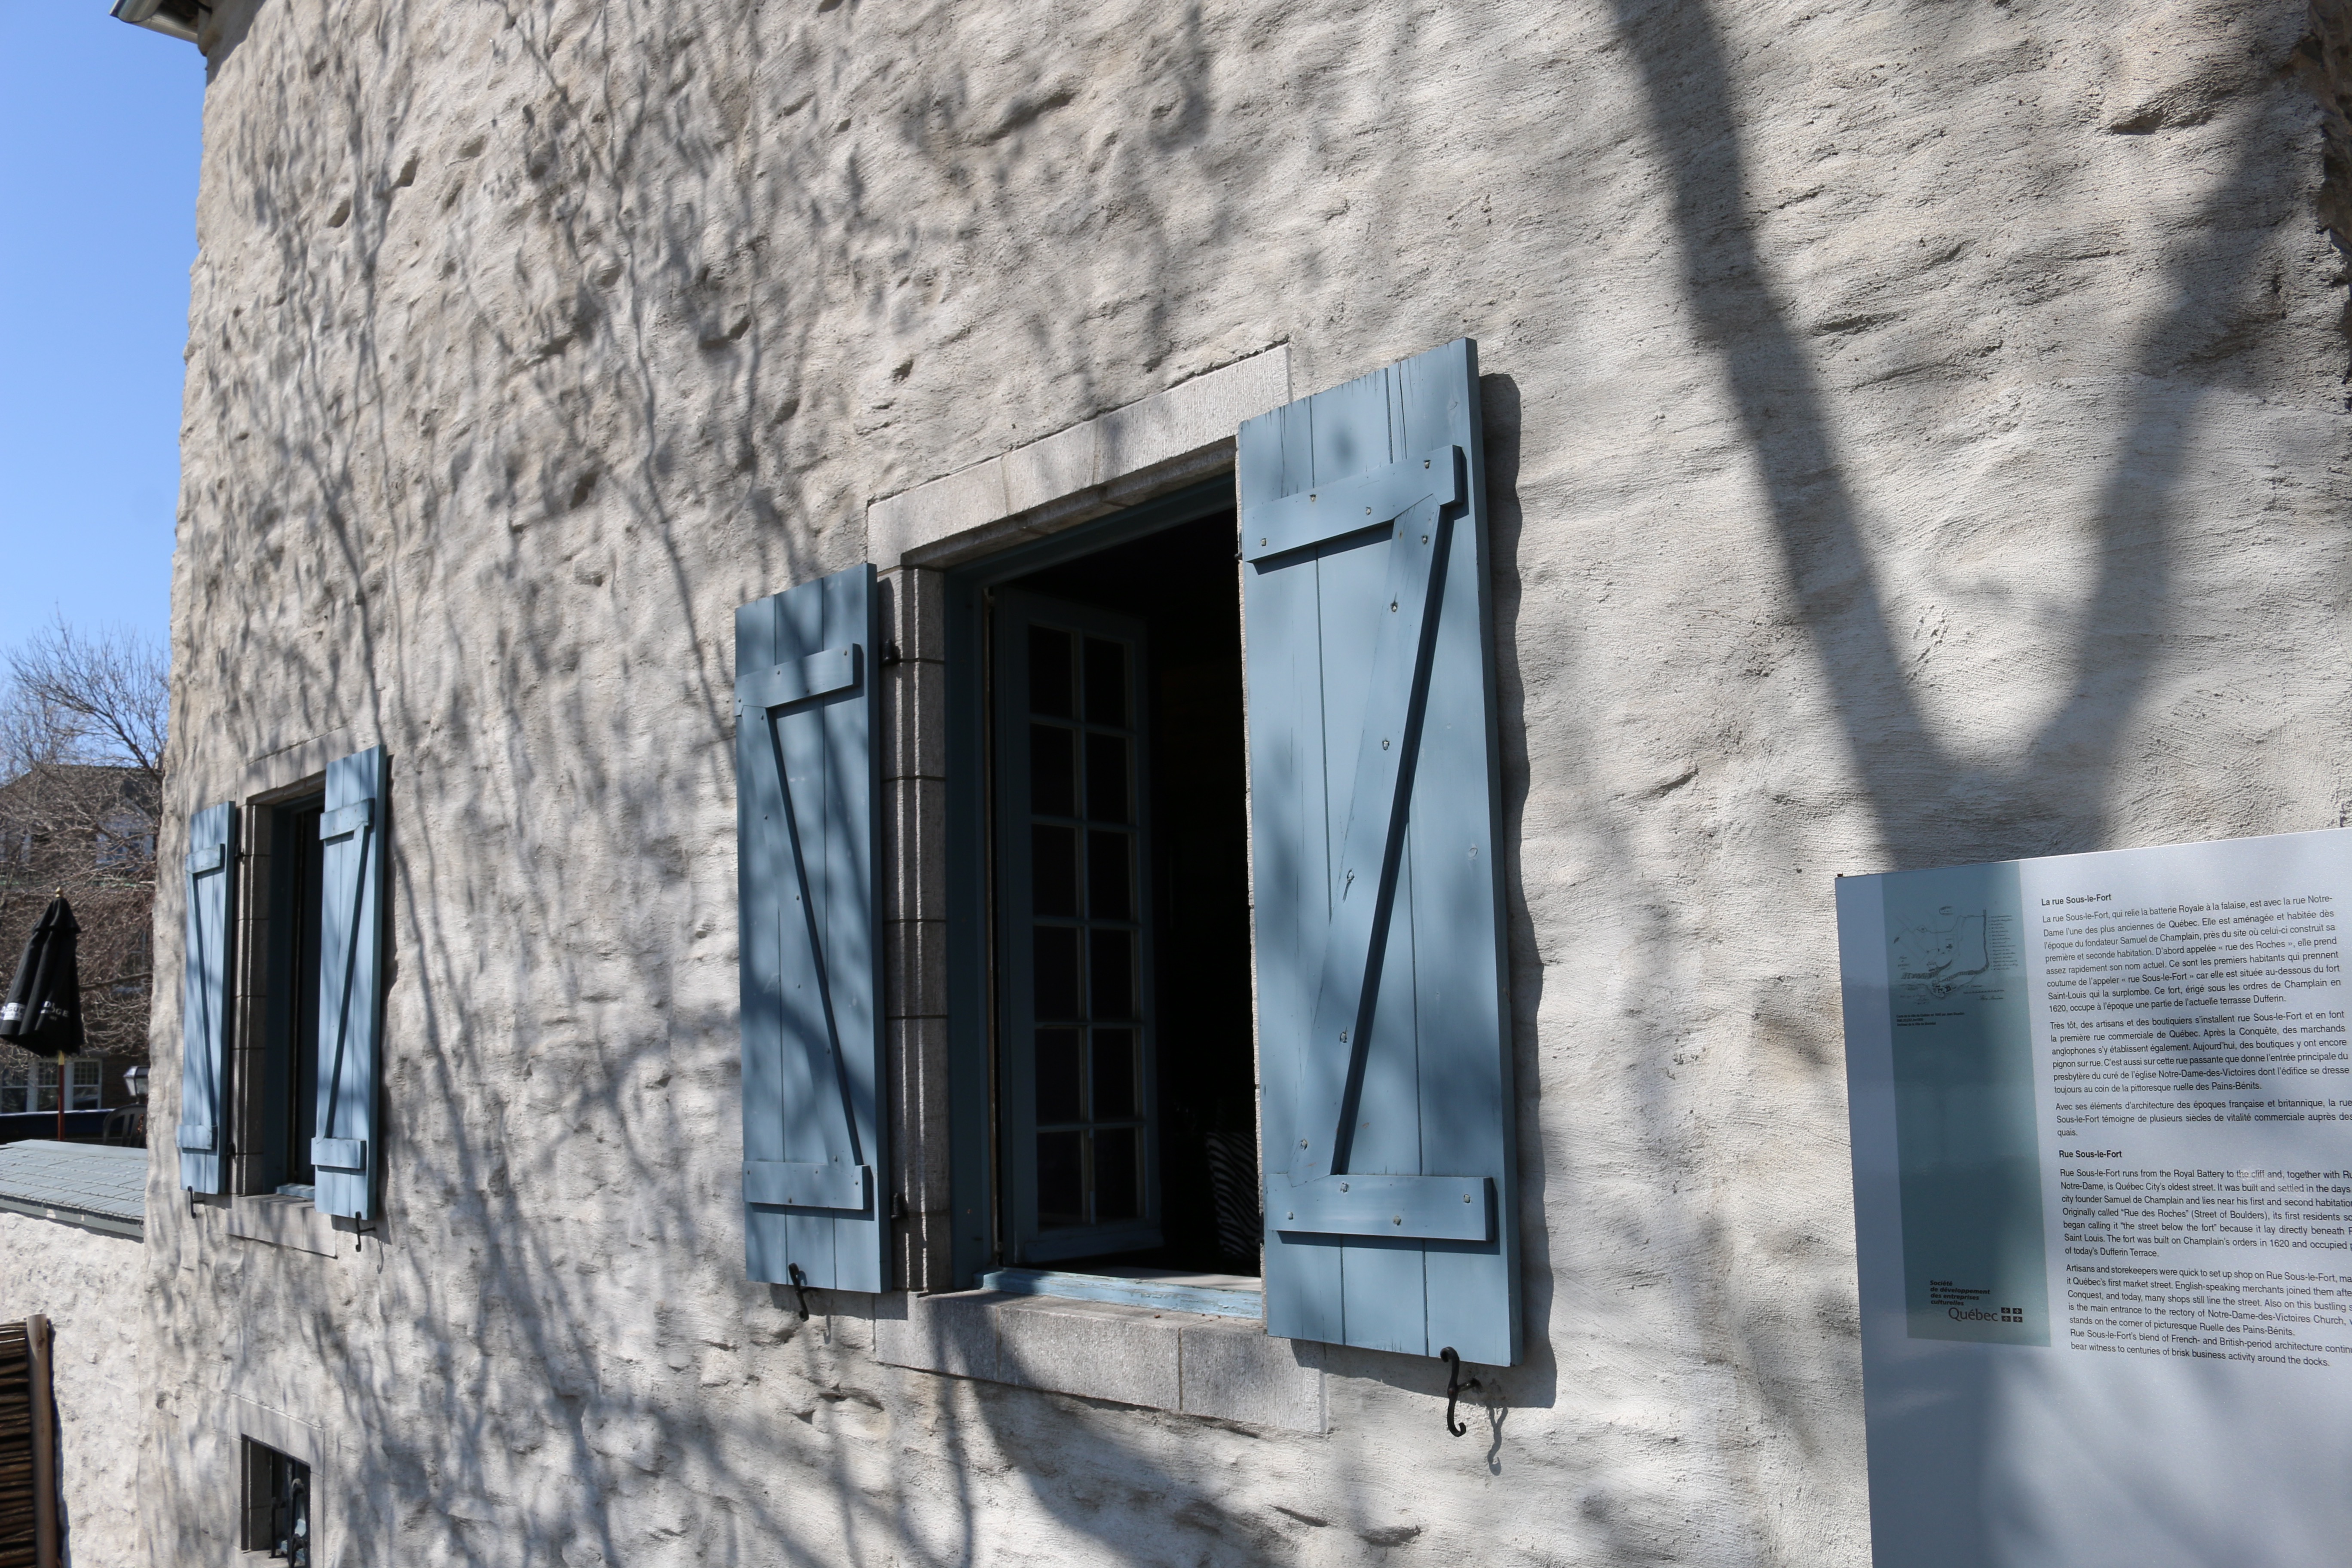
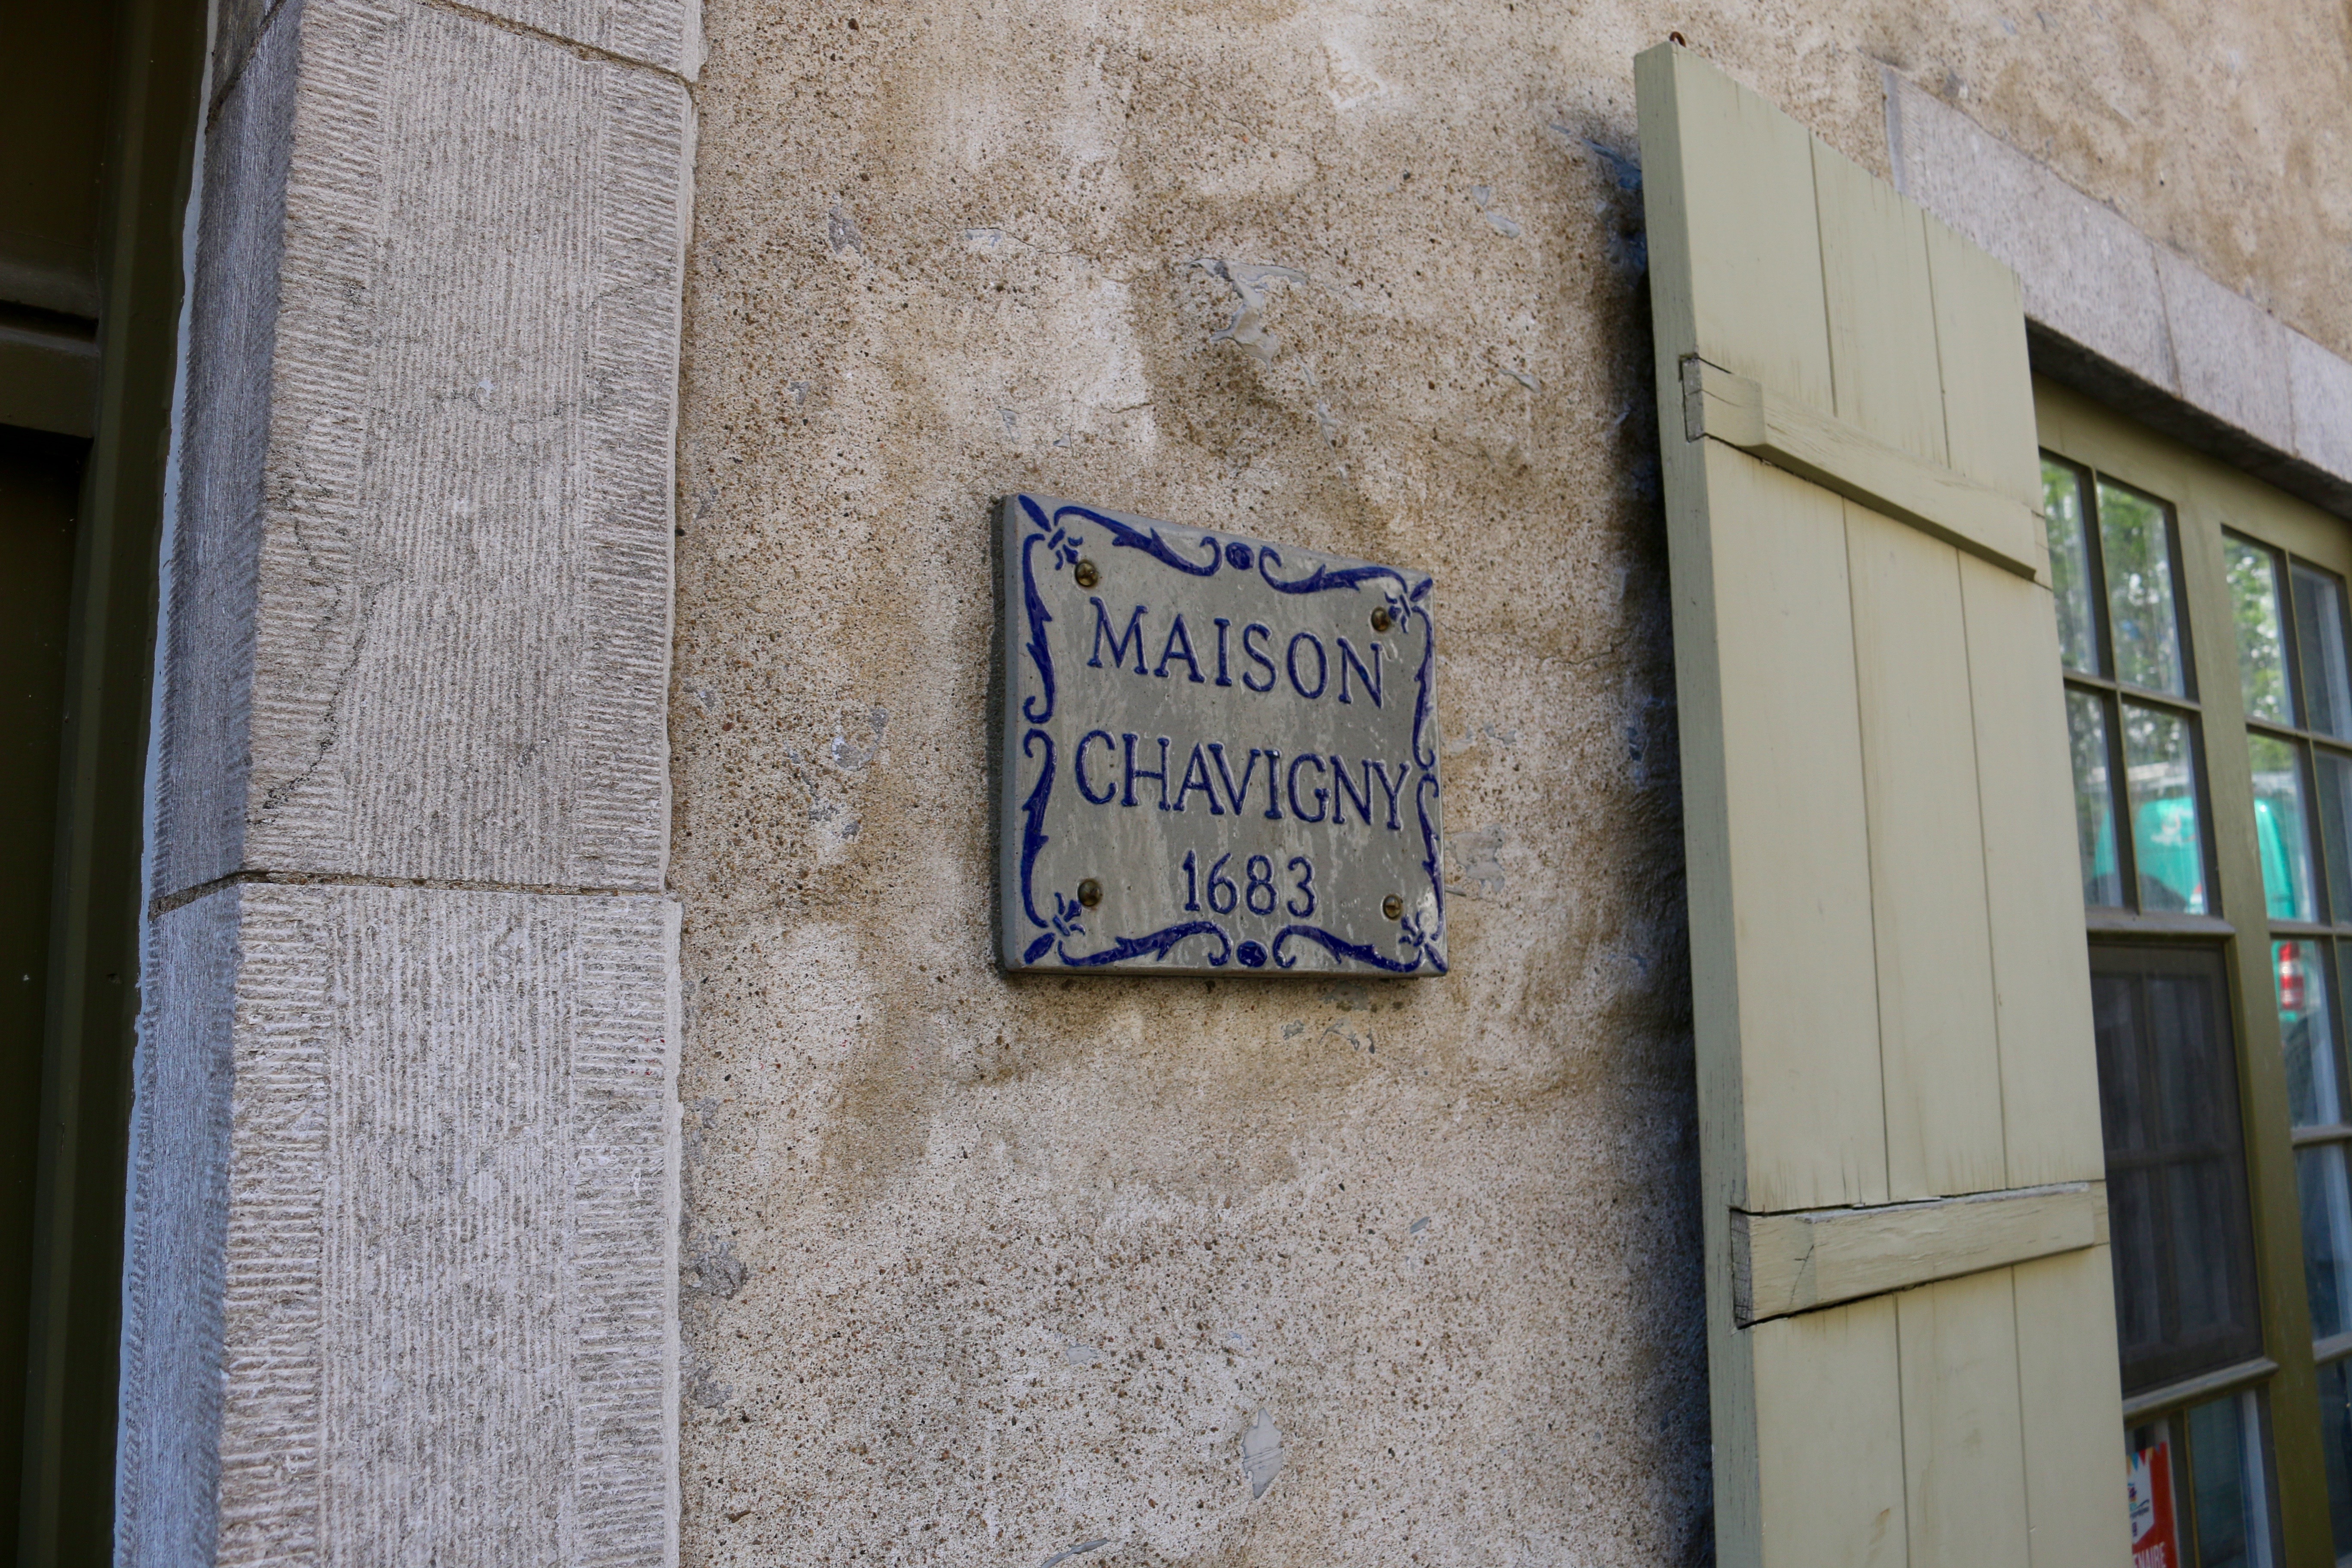
In Old Quebec many of the buildings date to the 17th and 18th centuries. Shown below is a great example of a board and batten (or sometimes called a ‘ledge’) shutter with ‘Z’ bracing. I like how the ‘Z’ brace was properly let into the batten (horizontal member). What was unusual to my eye was how the the nails used to clinch the boards to the batten were relatively large nails and relatively few in number compared to English versions of this type of shutter.

Z-braced Batten Shutter

Wandering around Place Royale Square you can visit many beautiful and historic buildings. The earlier 17th century French buildings had smaller panes in the windows and the 18th century English buildings had larger windows with larger panes as technology advanced and styles changed over time.

Smaller window panes are from earlier French buildings, the larger panes are from later English buildings (Place Royale Square -- Quebec)
Smaller window panes are from earlier French buildings, the larger panes are from later English buildings (Place Royale Square — Quebec)

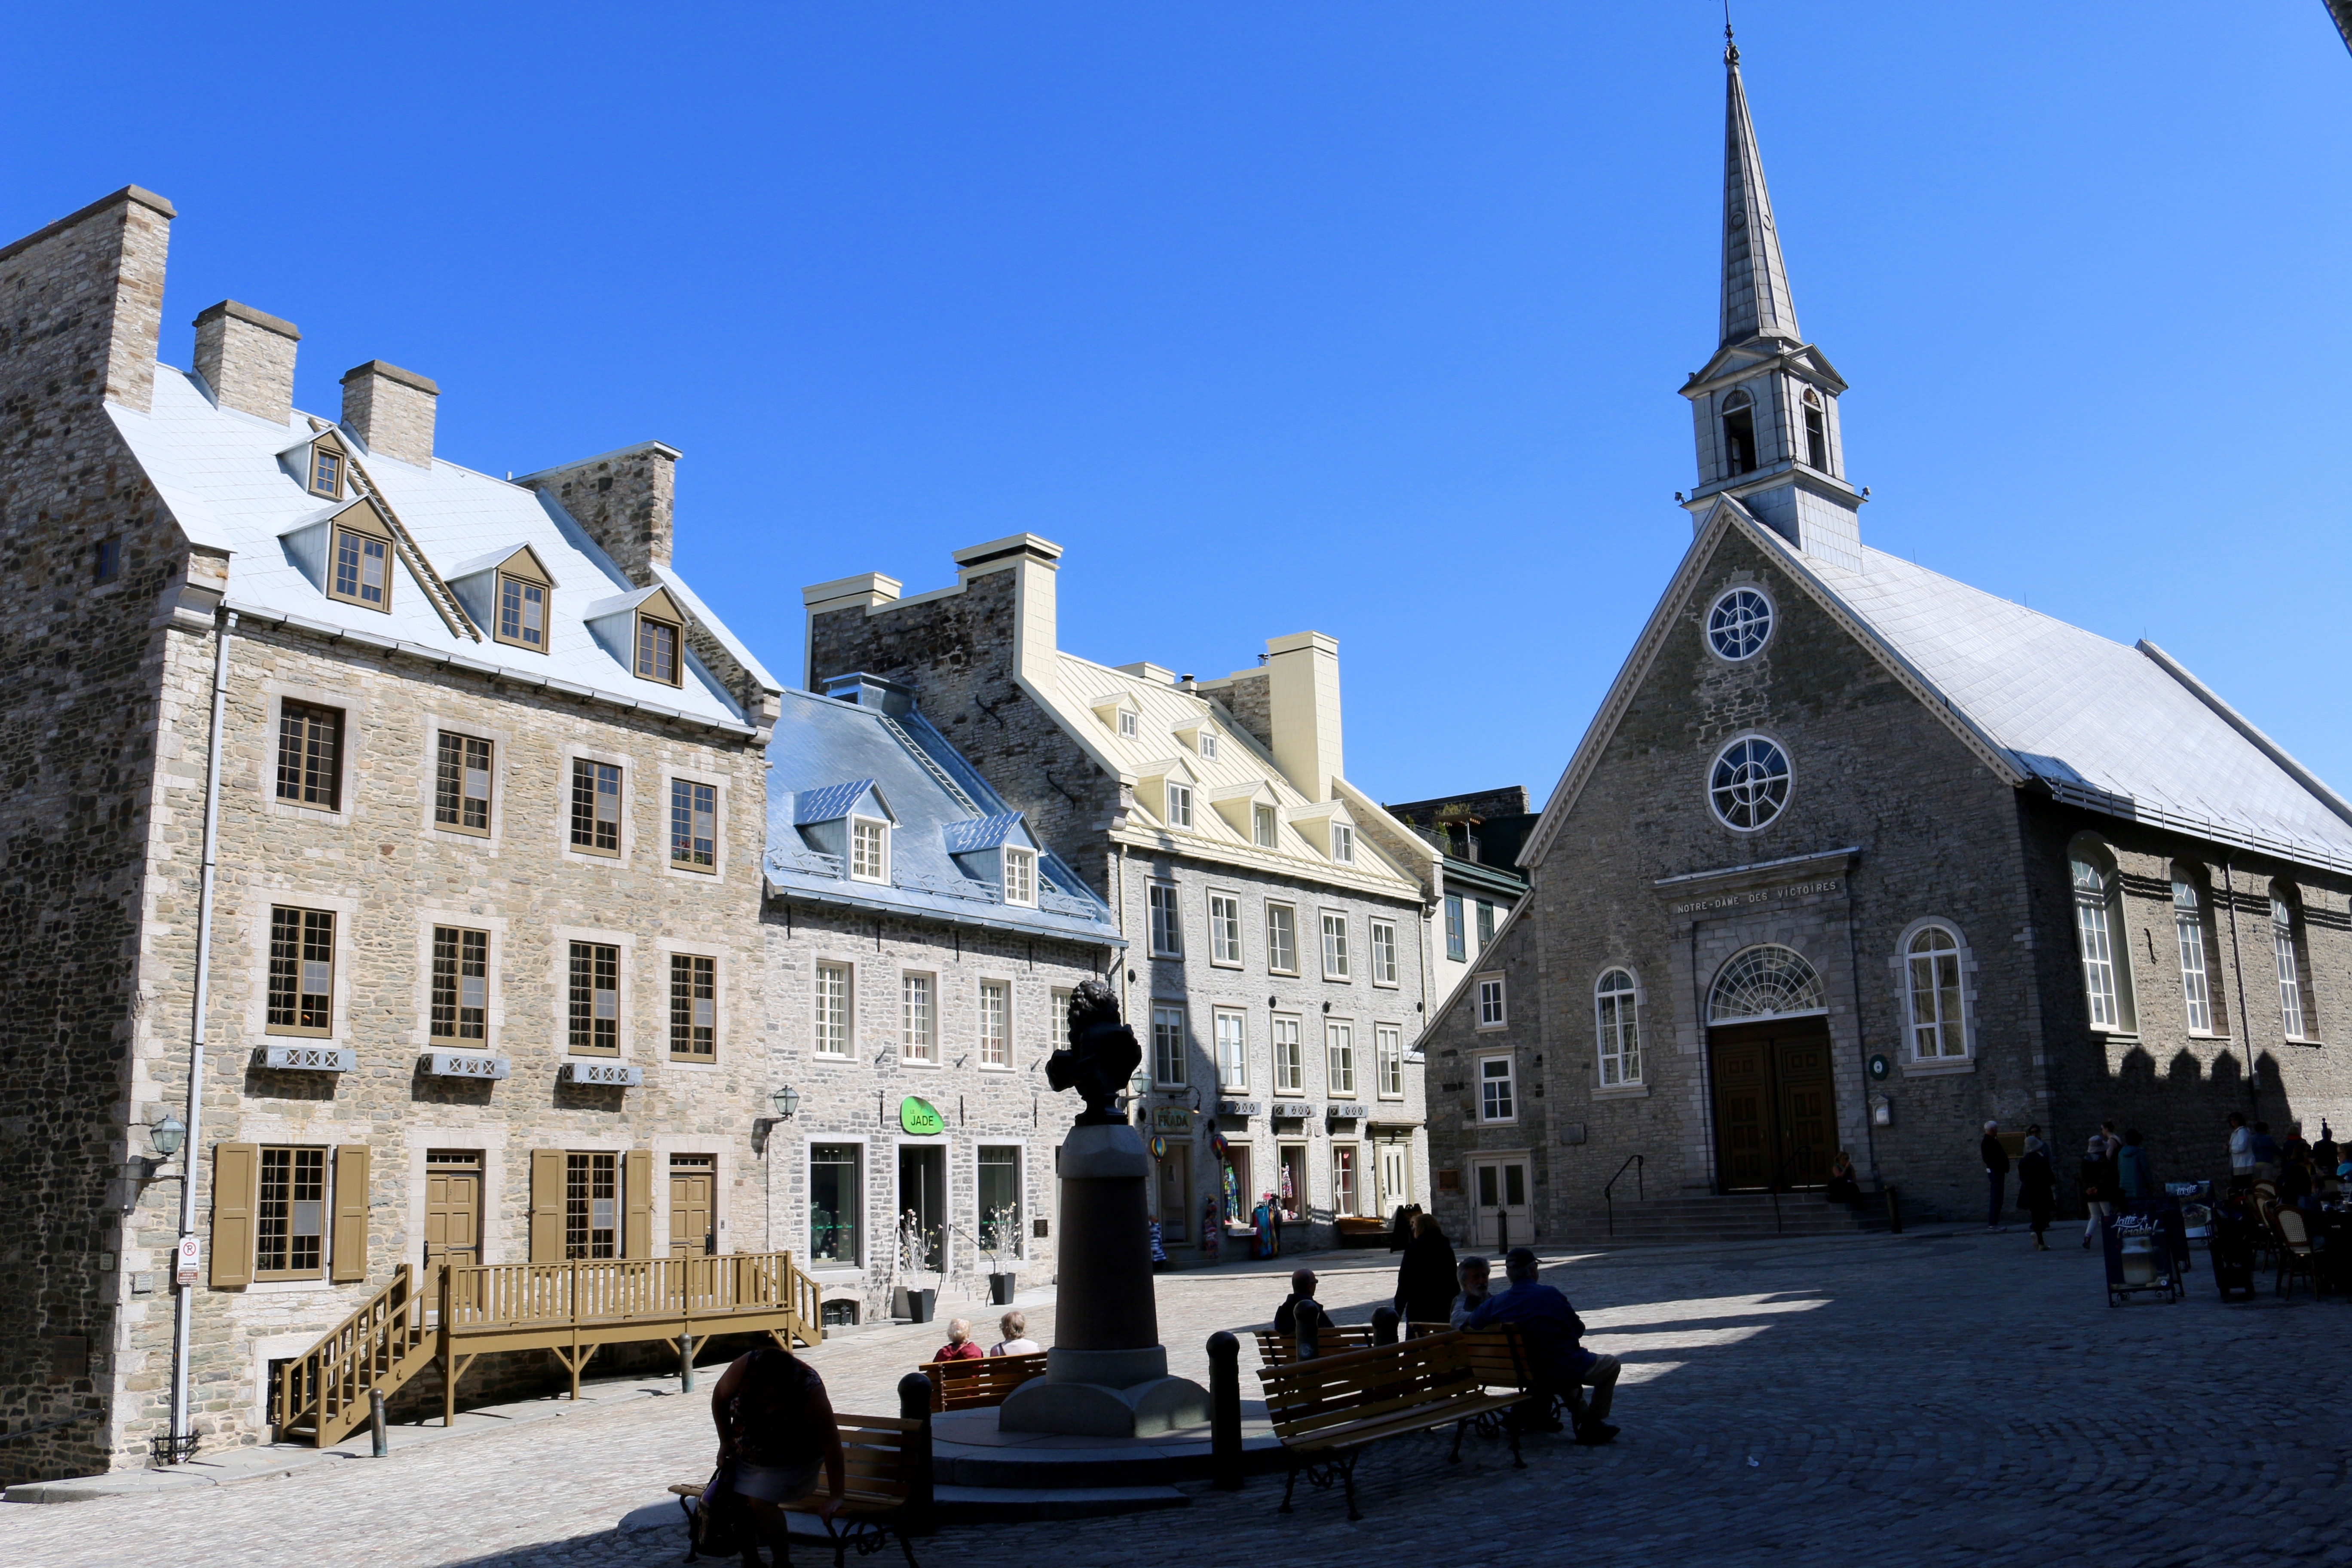
The doors, windows and trim on many of these buildings are painted in vibrant colors.  The tour guide for our group said many of these colors were reminders of the villages they came from in France where towns often had many buildings painted in the same color to help aid ships navigating — by the color they could tell what town it was. (I have nothing to back that statement other than her word, but interesting if true)

Breadboard ends and decorative cutouts

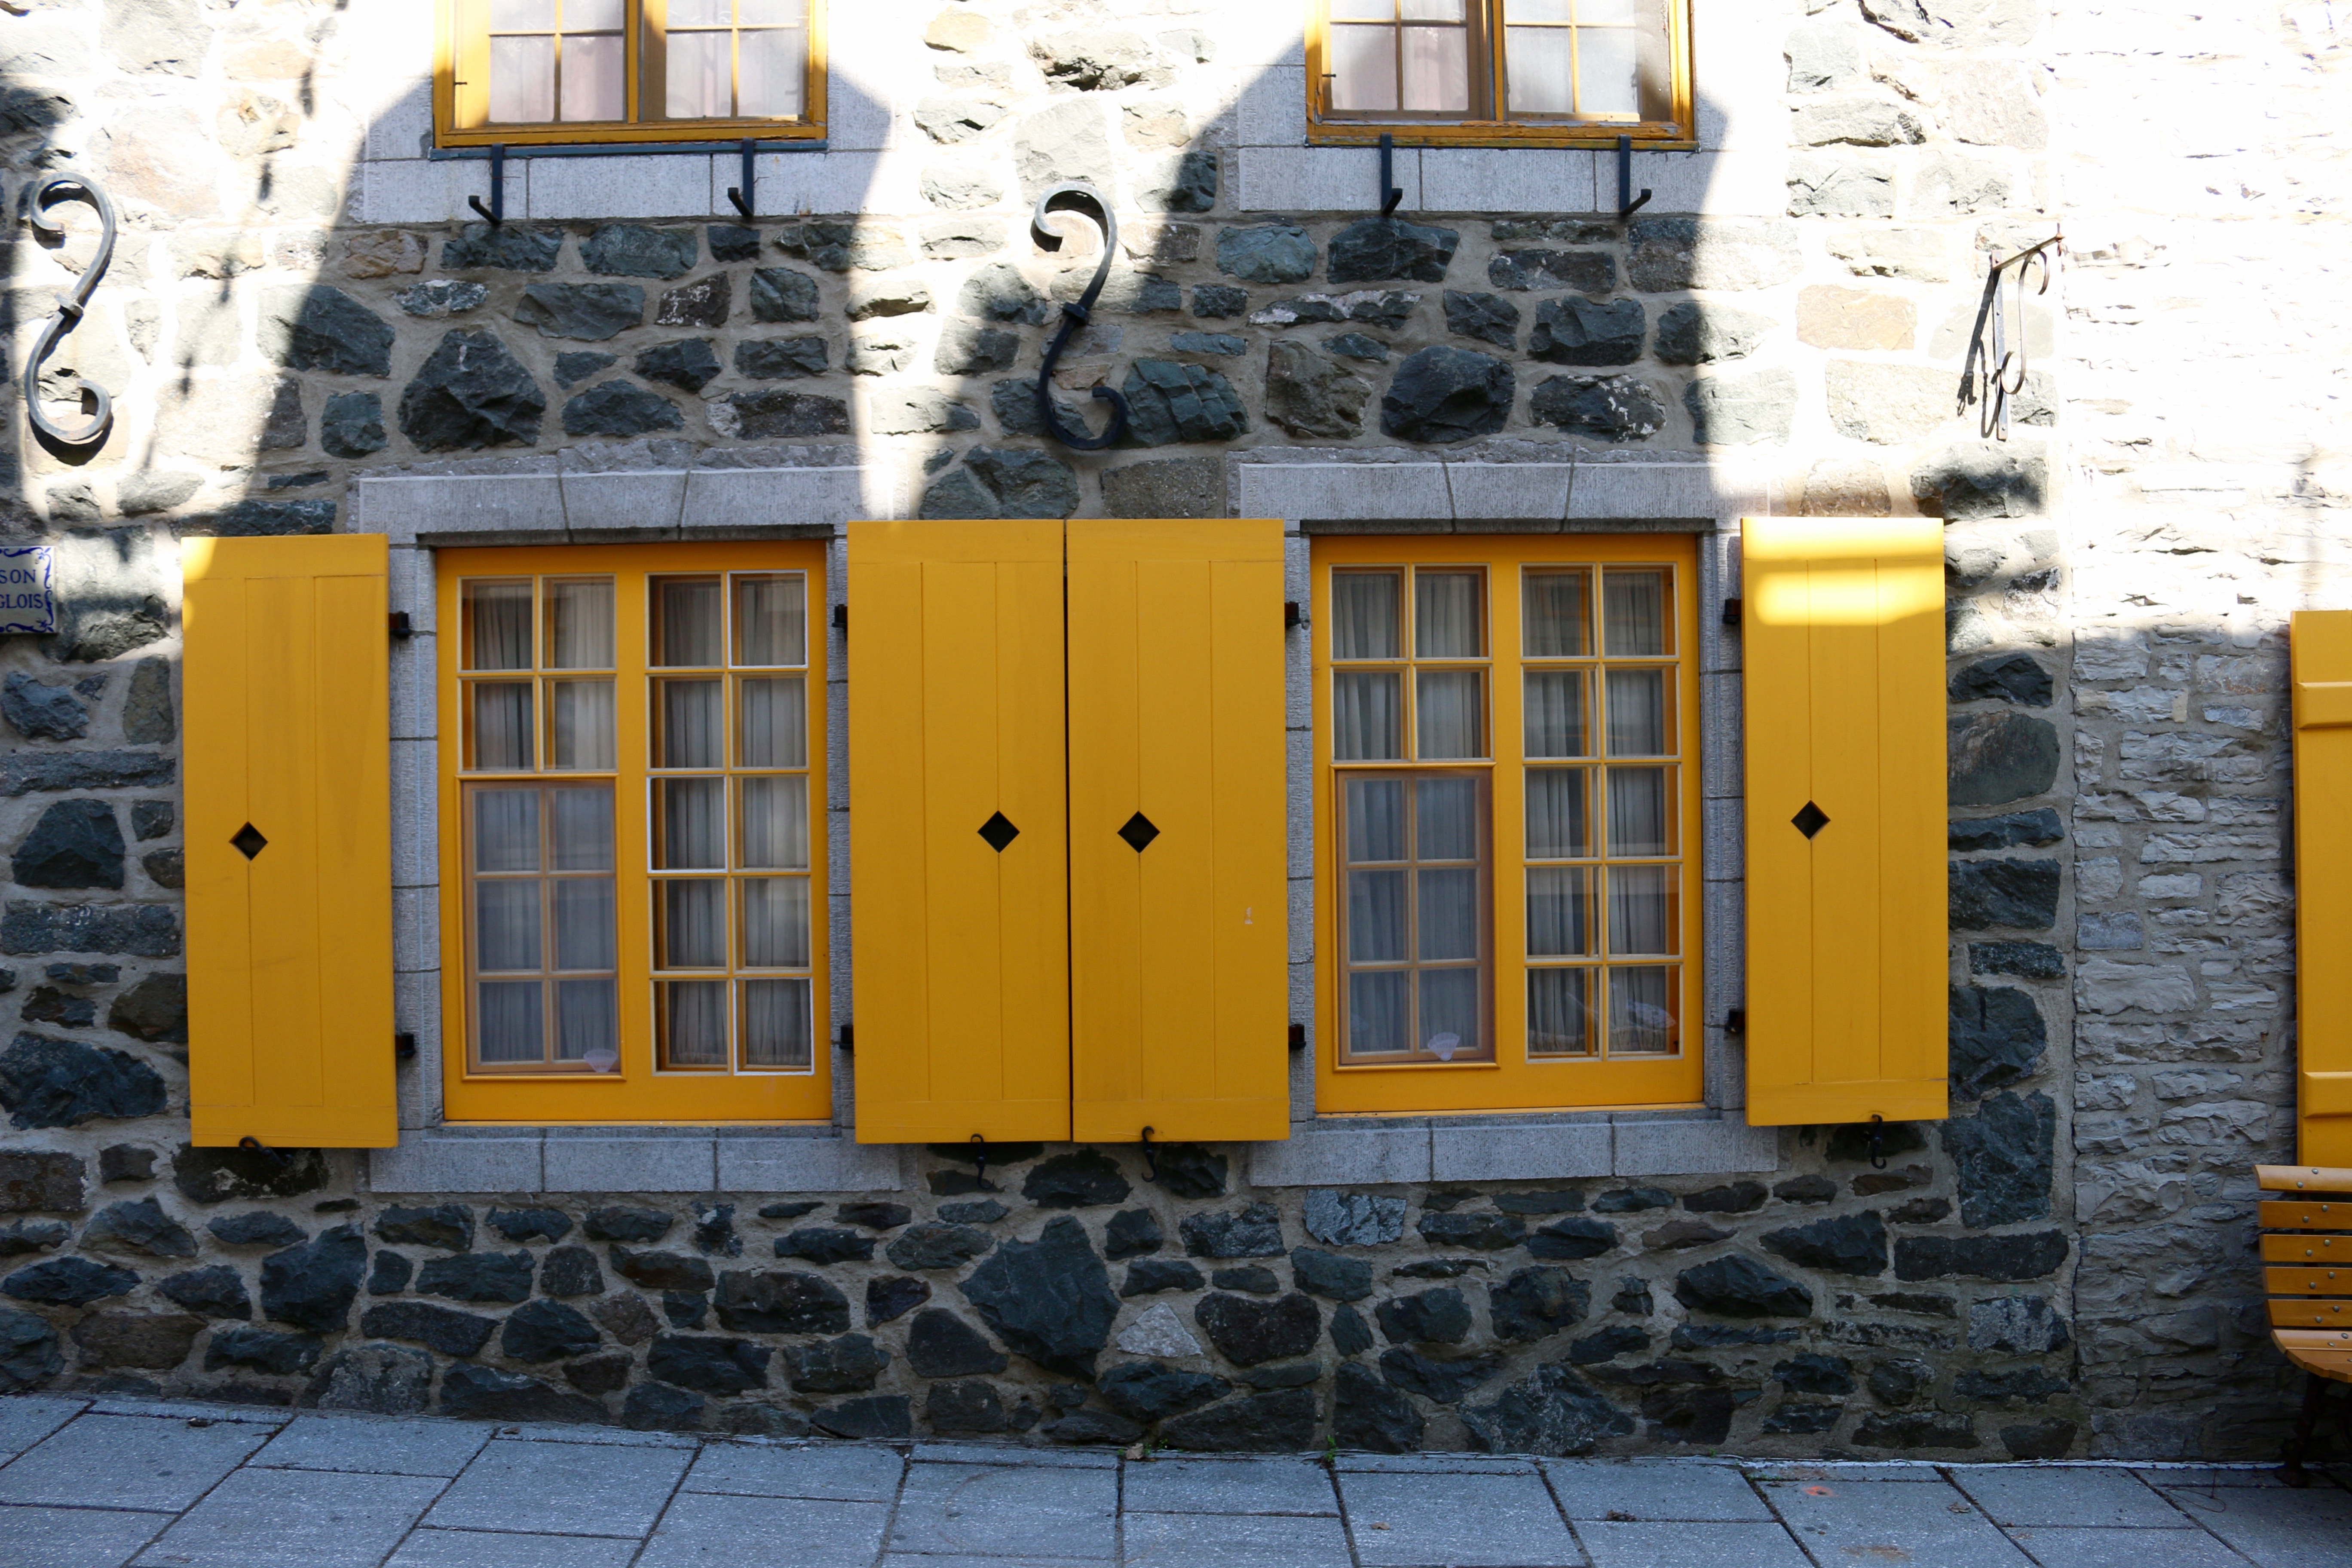
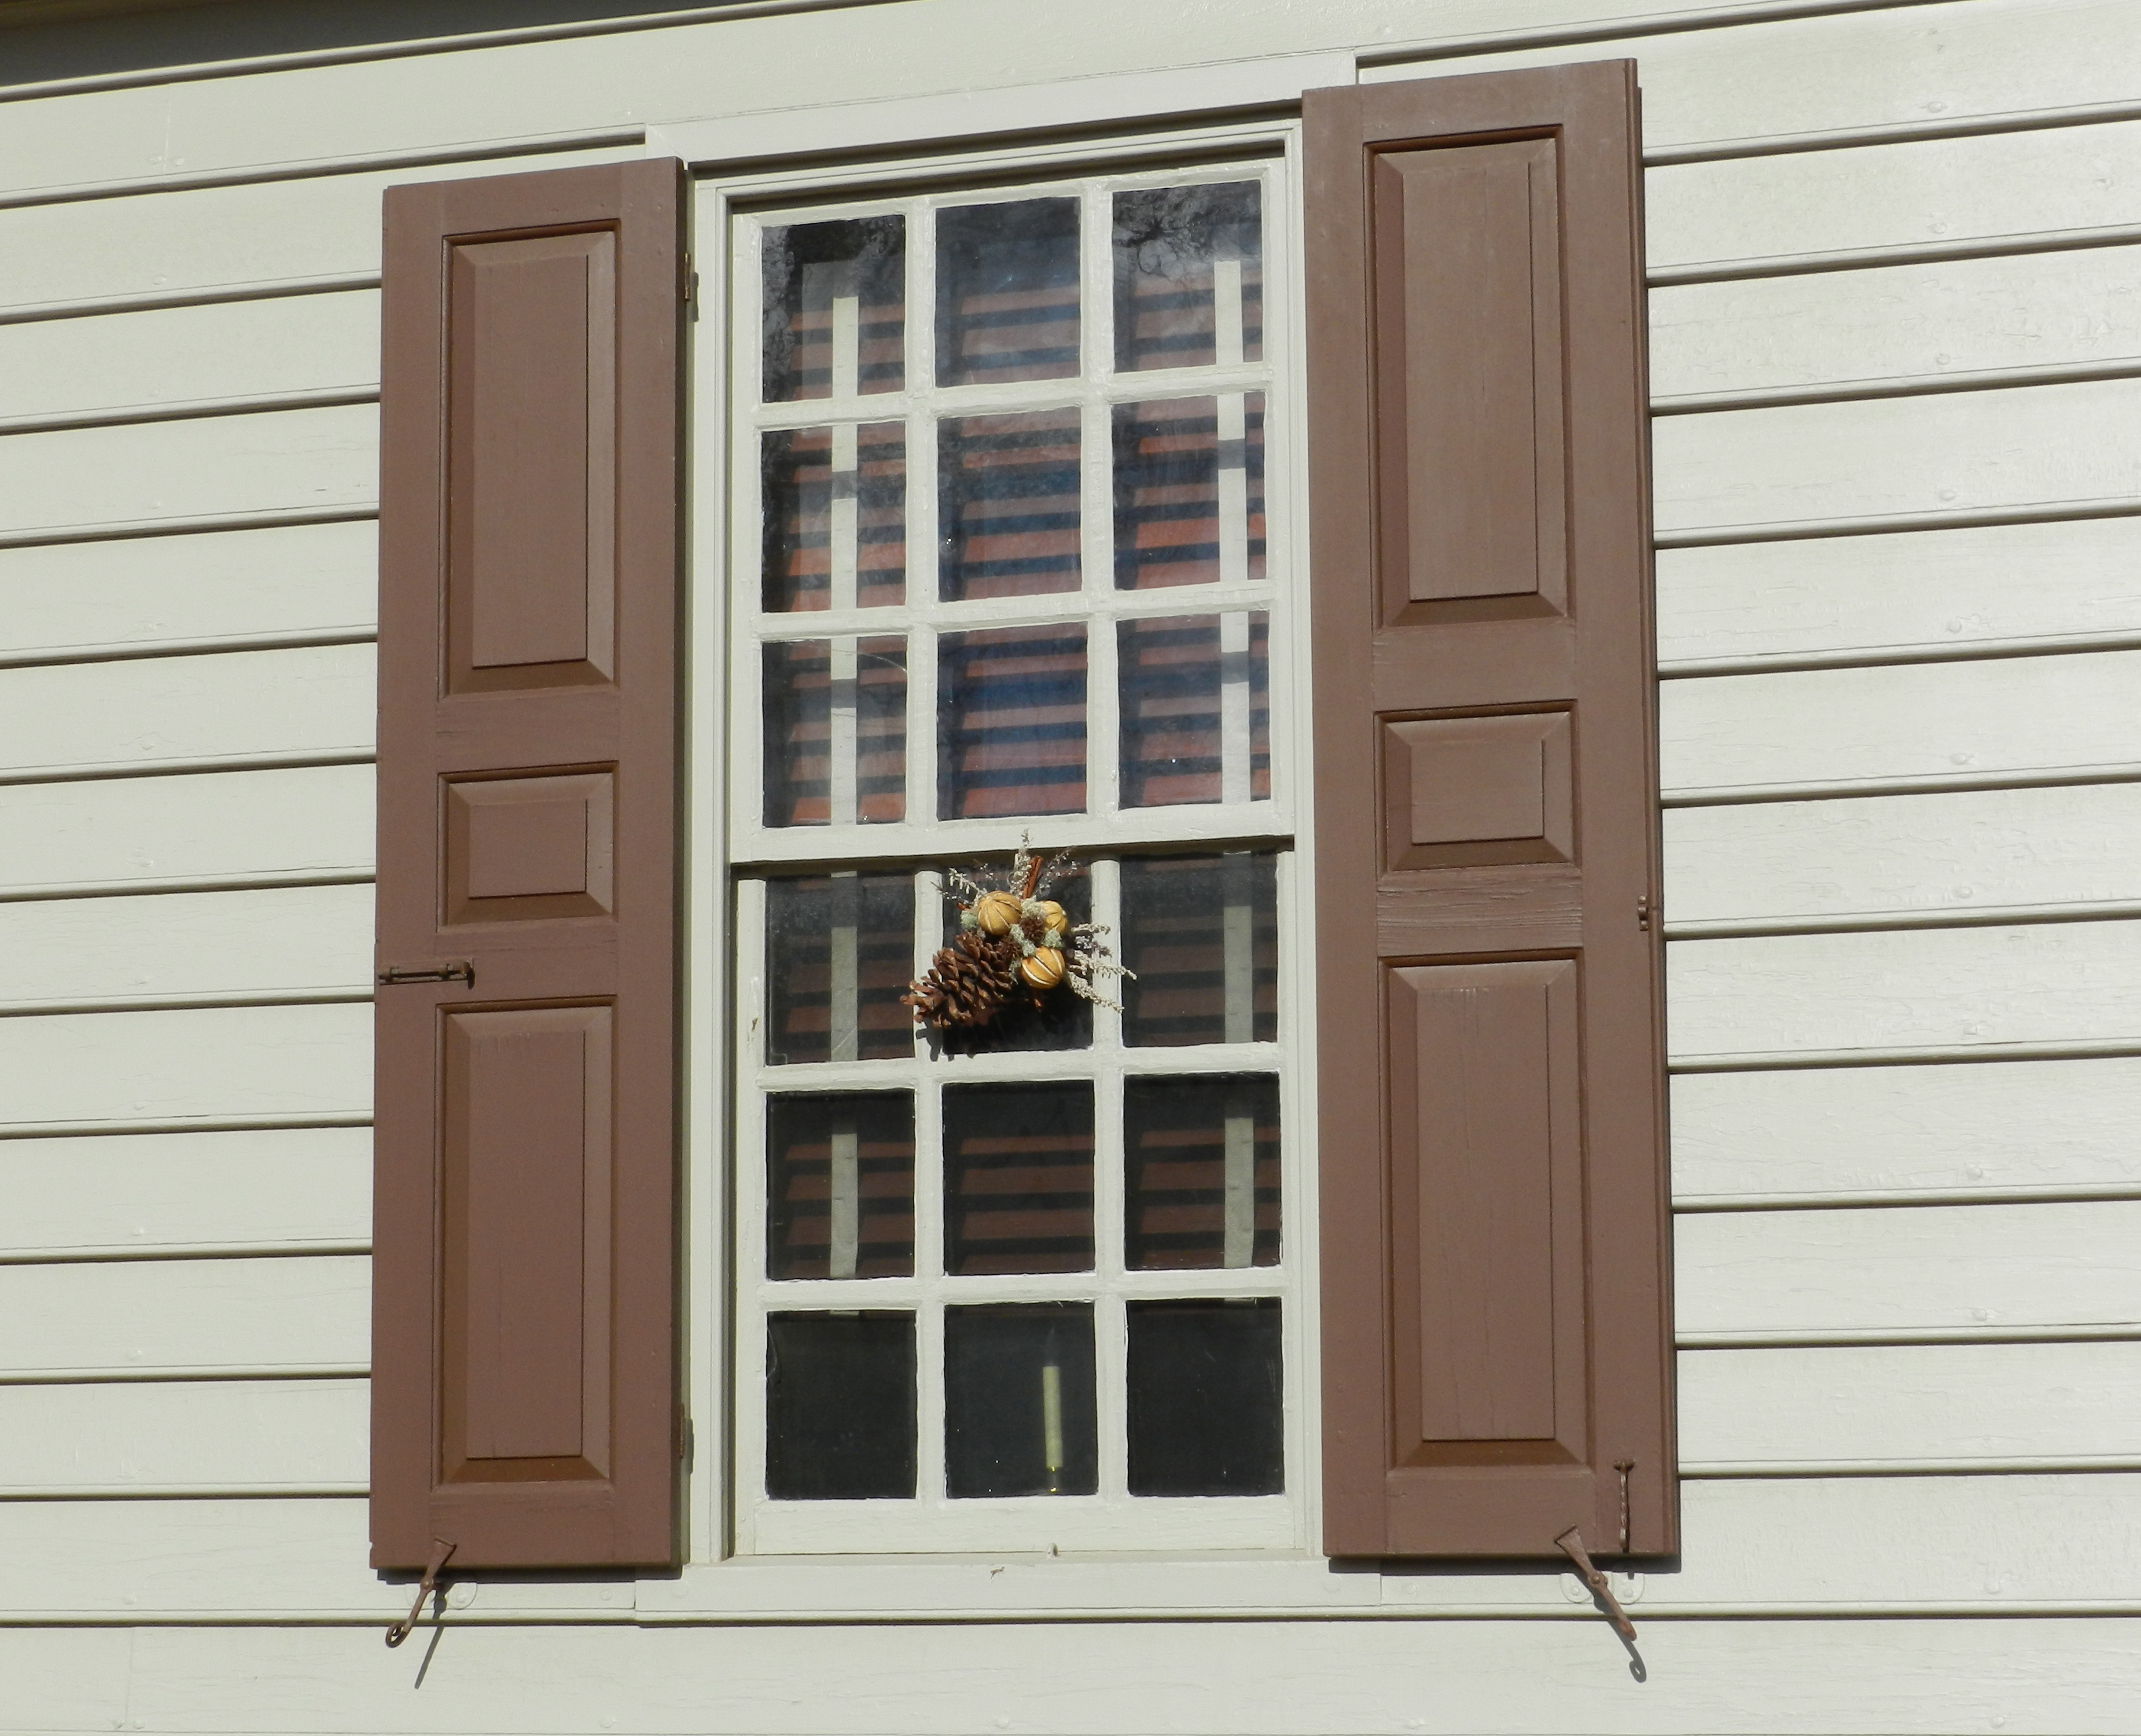
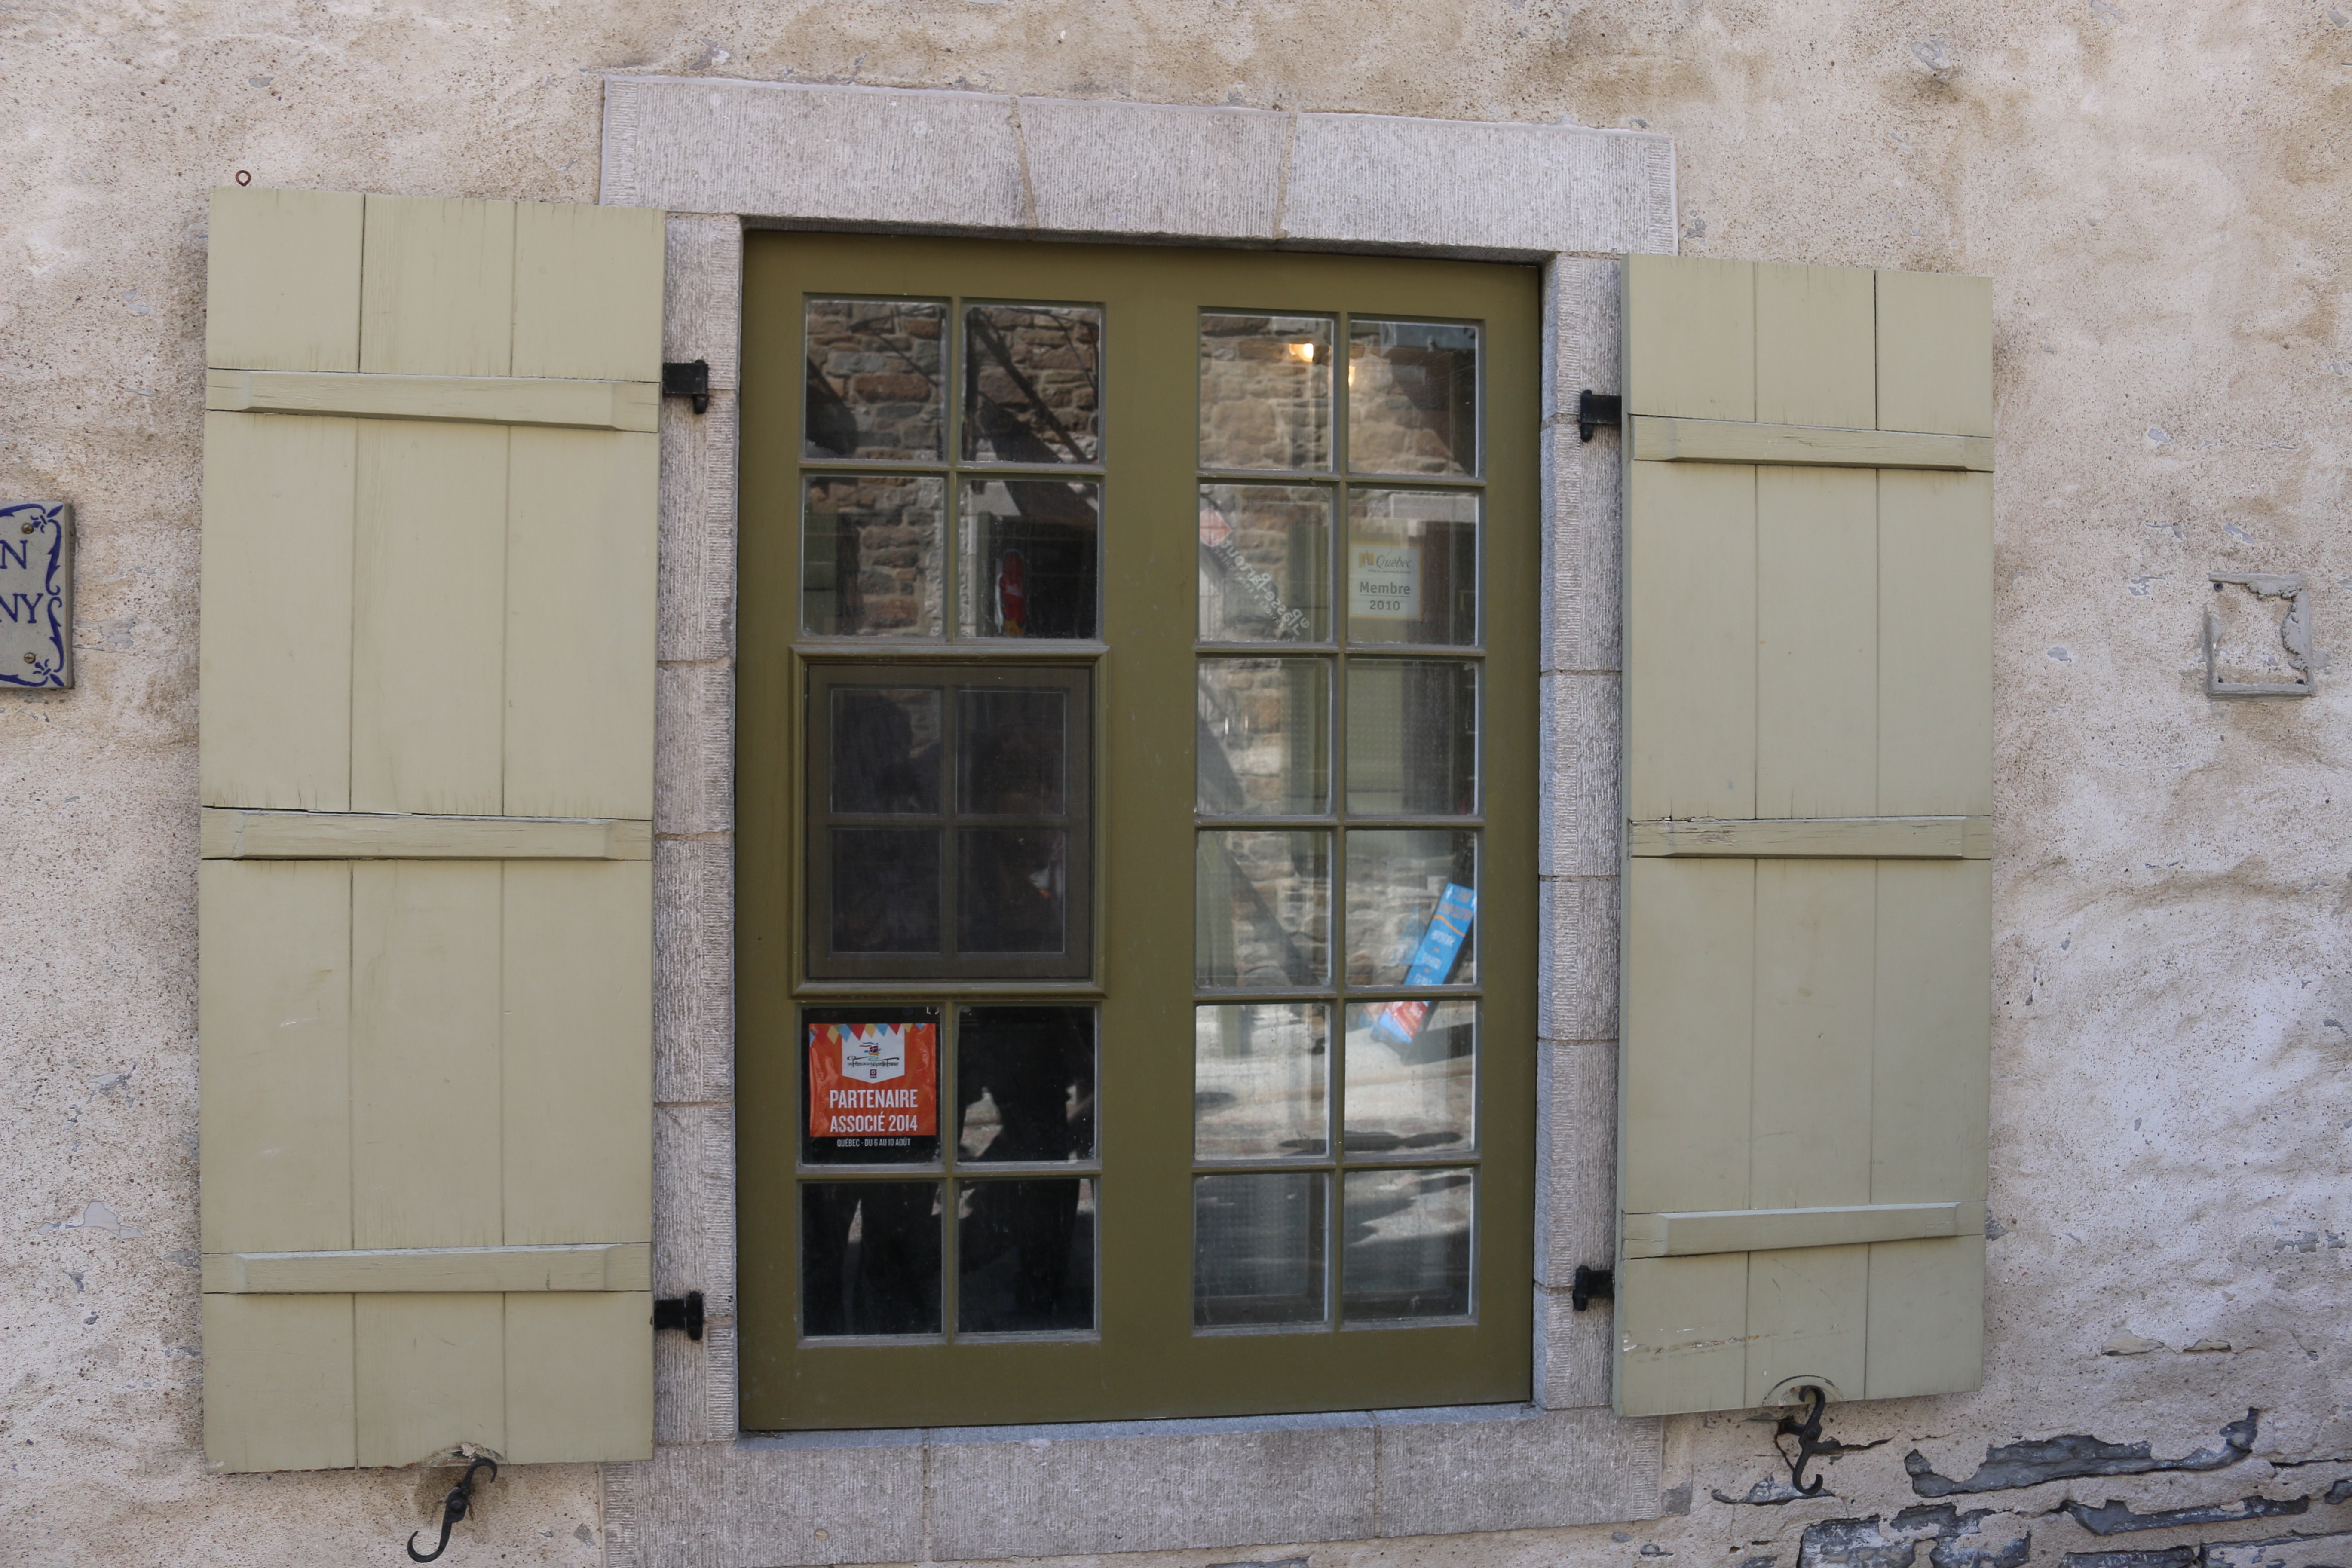
These beautiful bright yellow shutters had nice breadboard ends and decorative cutouts to dress up the otherwise relatively plain look and let in a bit of light so occupants could tell if it was day or night from inside the building.

Breadboard ends
Breadboard ends

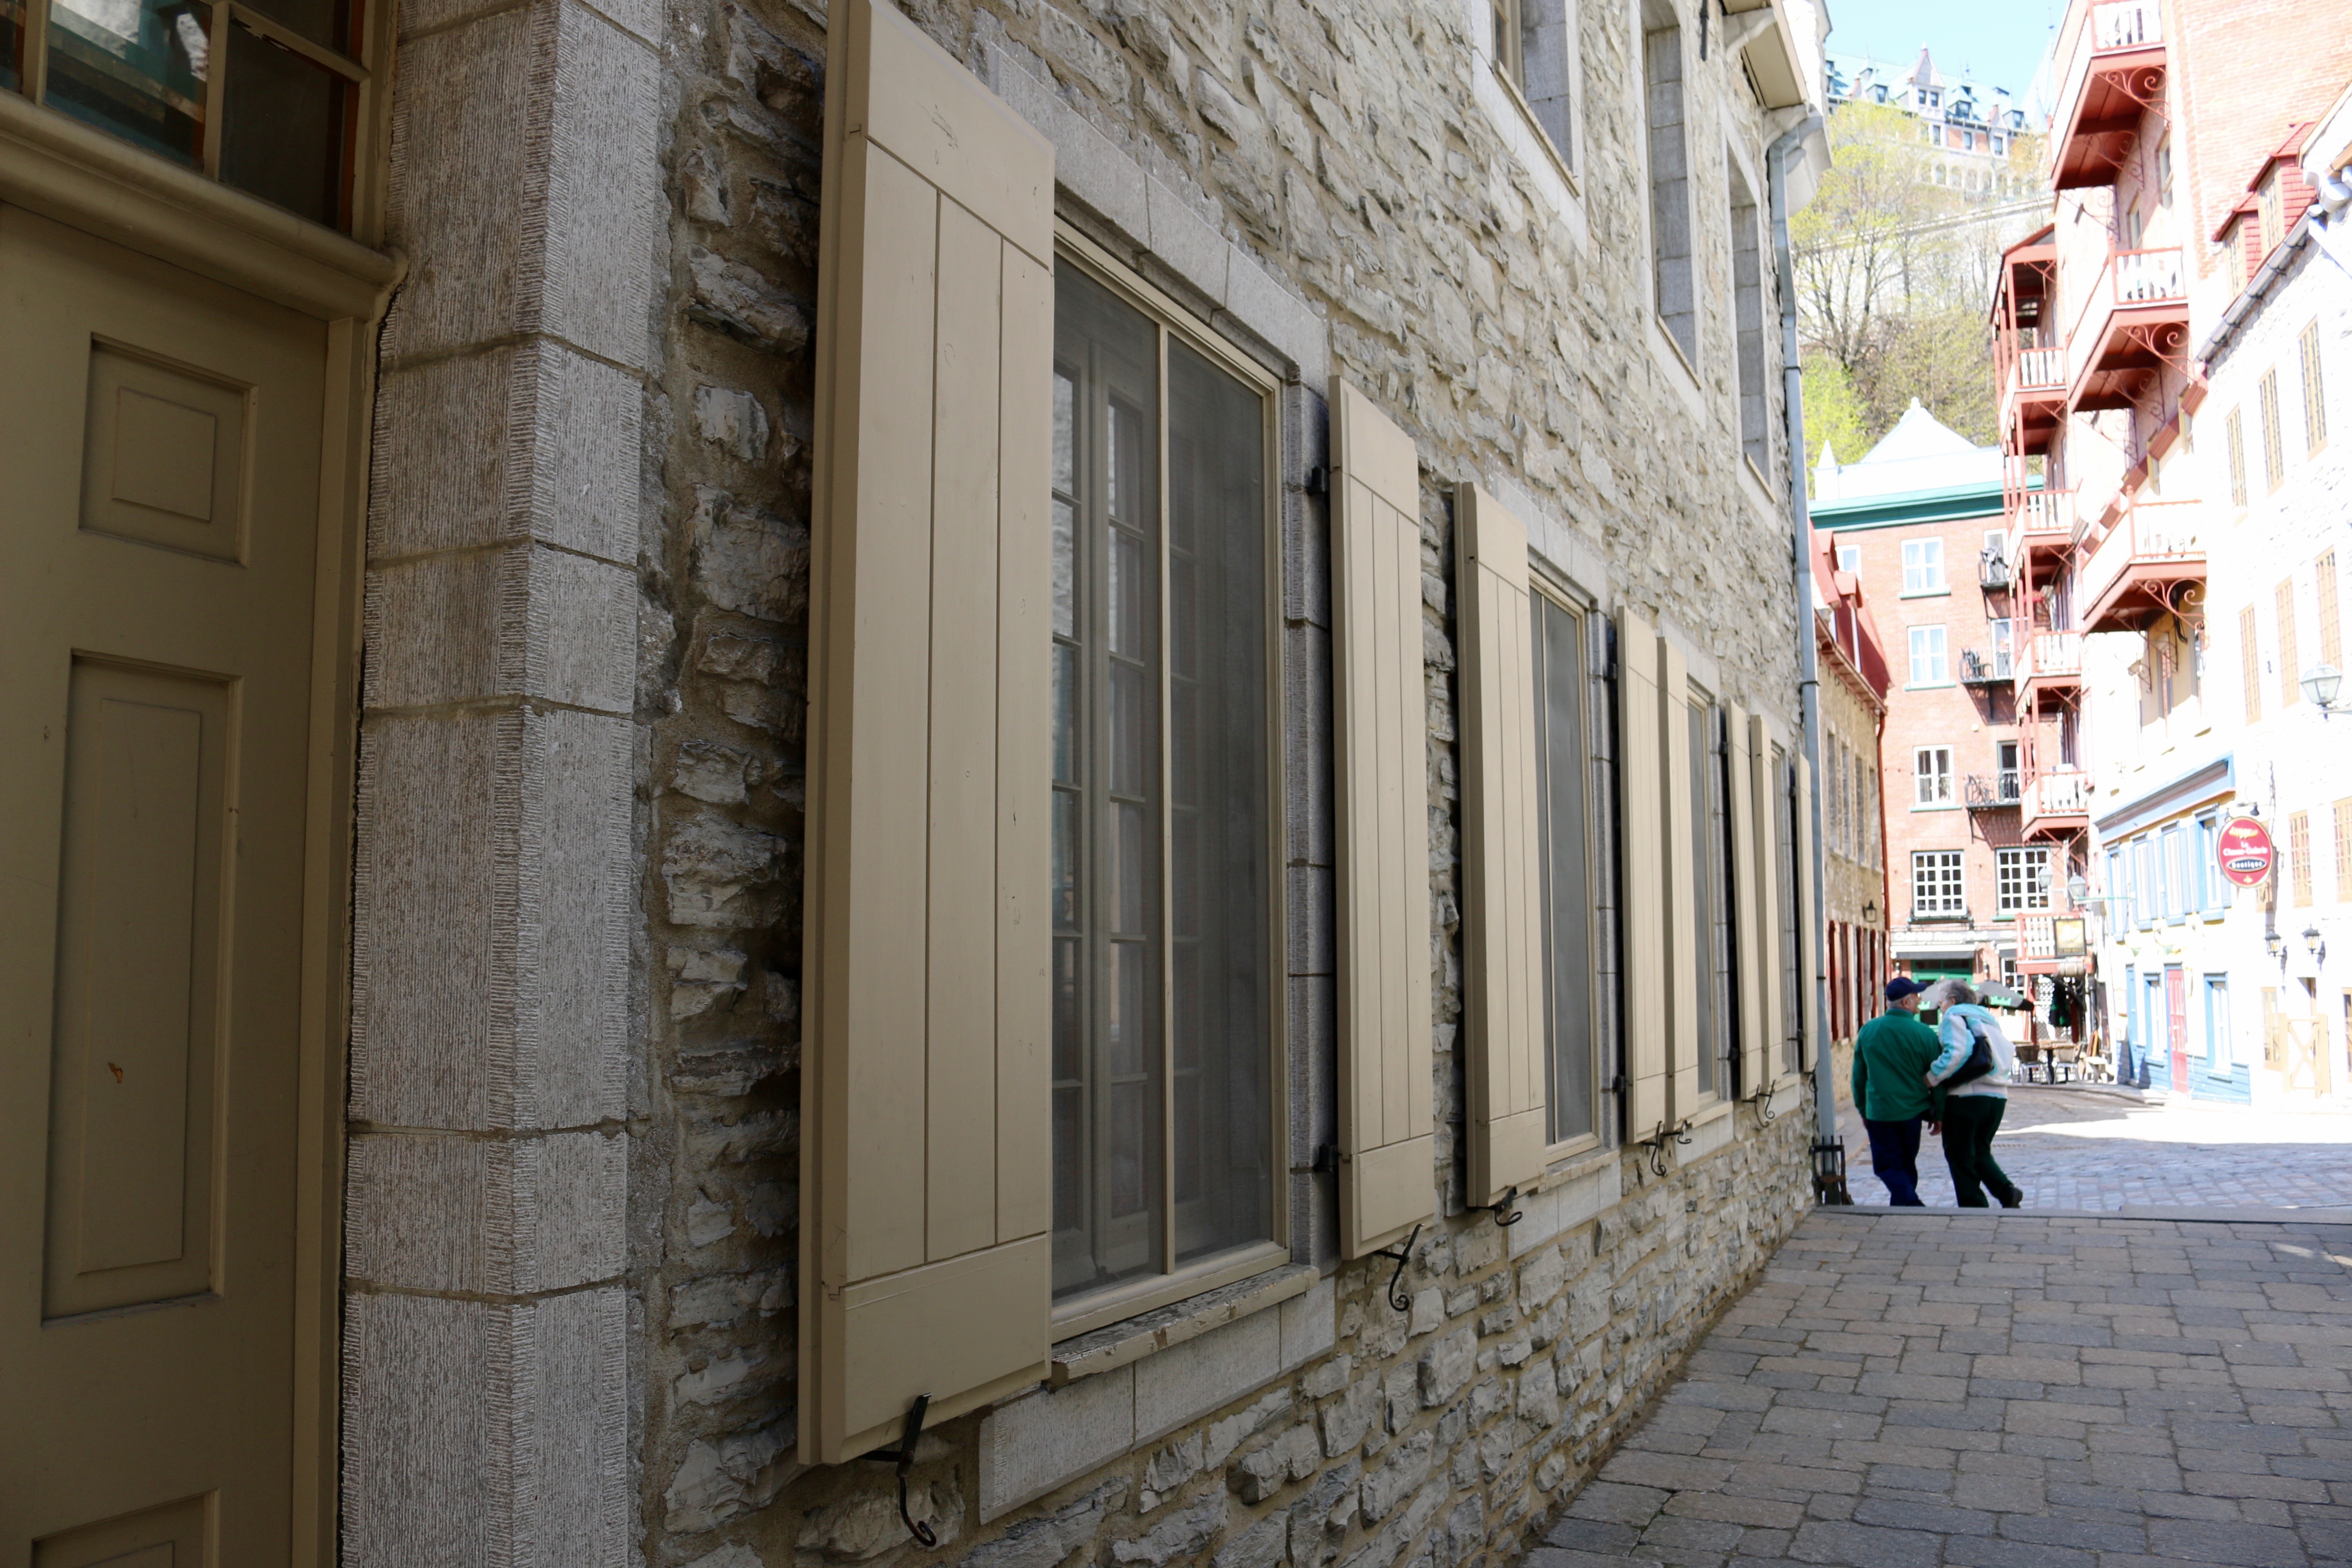
On this building the shutters also sport breadboard ends to help keep the vertical boards flat. These shutters were made from particularly thick stock and the outer edges are also fielded a bit which adds a nice detail and likely helps the shutter sit flush when closed.

Place Royale Square -- Quebec
Place Royale Square — Quebec

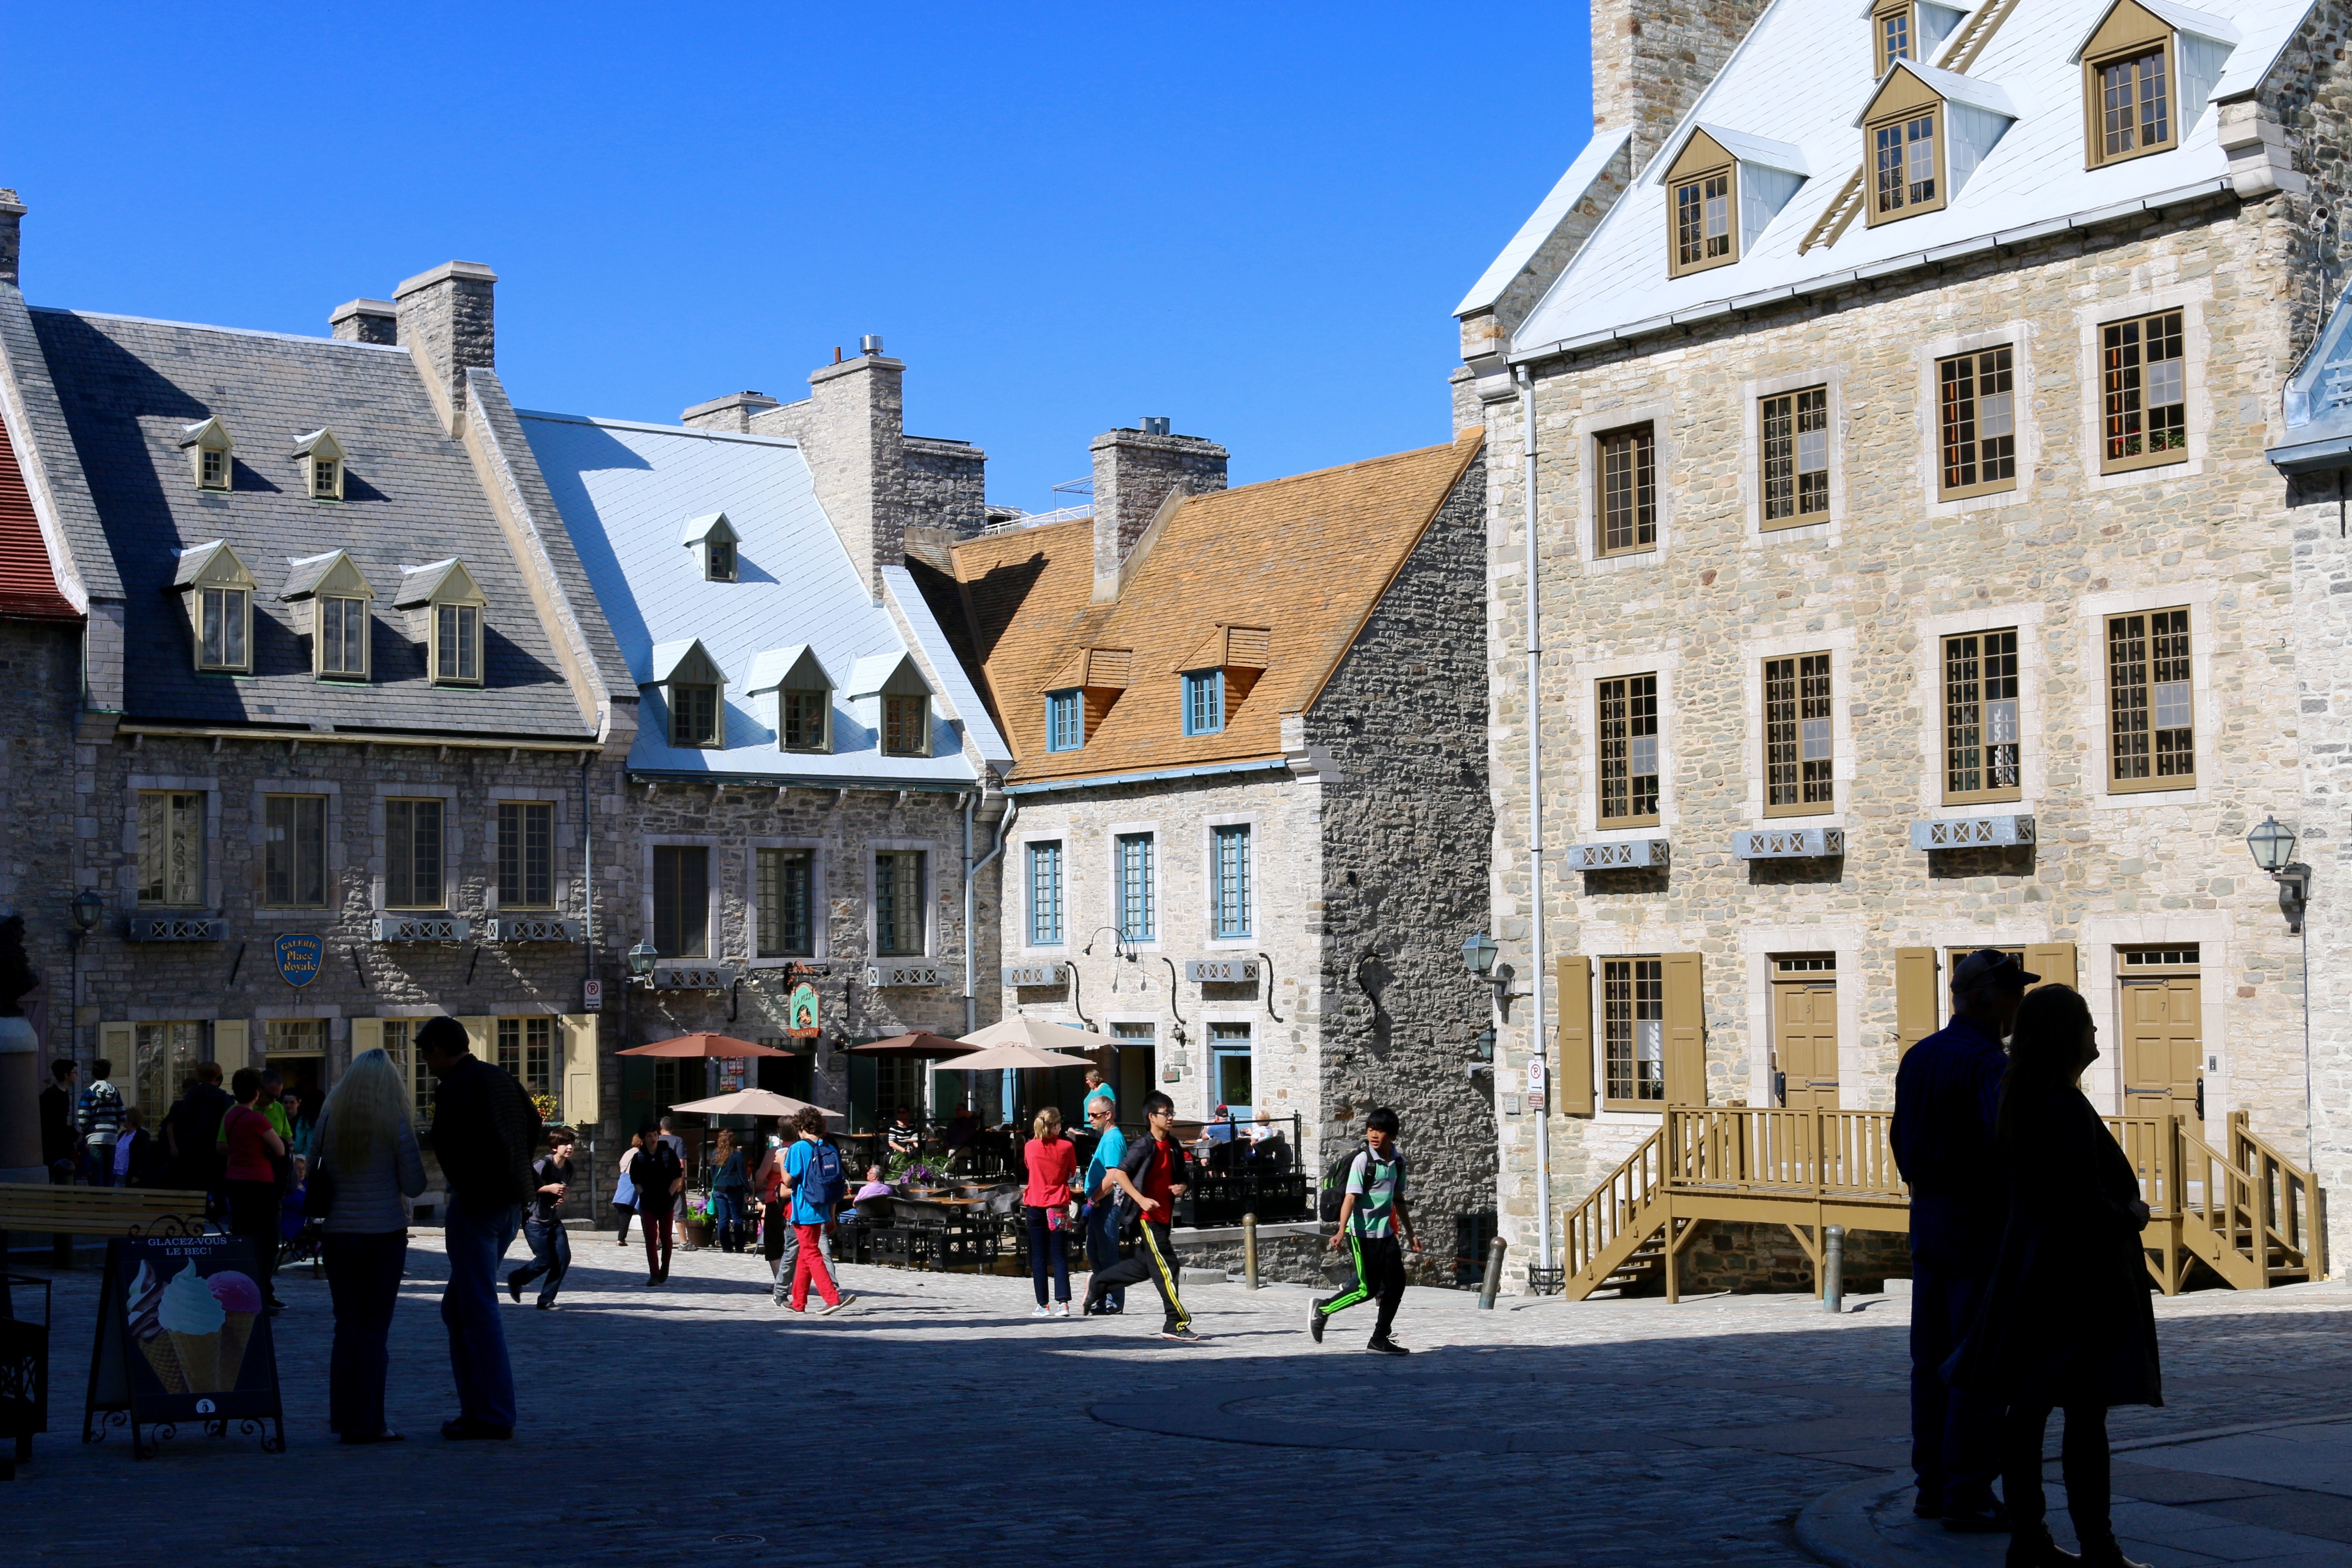
Wandering around Place Royale Square there were many great buildings to admire including some with traditional raised panels but we’ll skip those English style shutters since we’ve talked about them before in other posts.

Many of these buildings date back to the 17th century

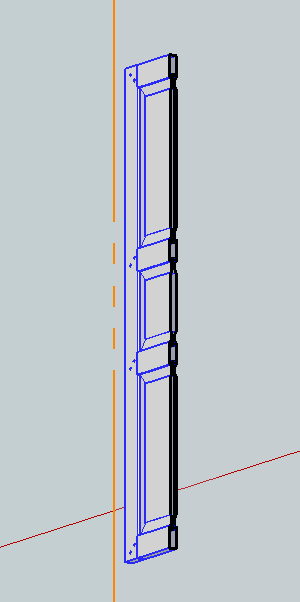
Here is were things really started to get interesting for me. The building shown here has tapered sliding dovetail battens to help keep the boards flat. A shutter is exposed to extreme conditions of sunlight, heat, weather, cold etc which will cause the boards to move a lot with the seasonal changes. If you look carefully at the photo above you can see how the sliding dovetail allows for that seasonal movement without any metal hardware to secure the batten to the boards.

Tapered dovetailed battens

Also note how the middle batten is tapered the opposite way compared to the upper and lower battens. This helps keep the battens and boards flat and keeps the boards from sliding off the battens.

Flush tapered dovetailed battens

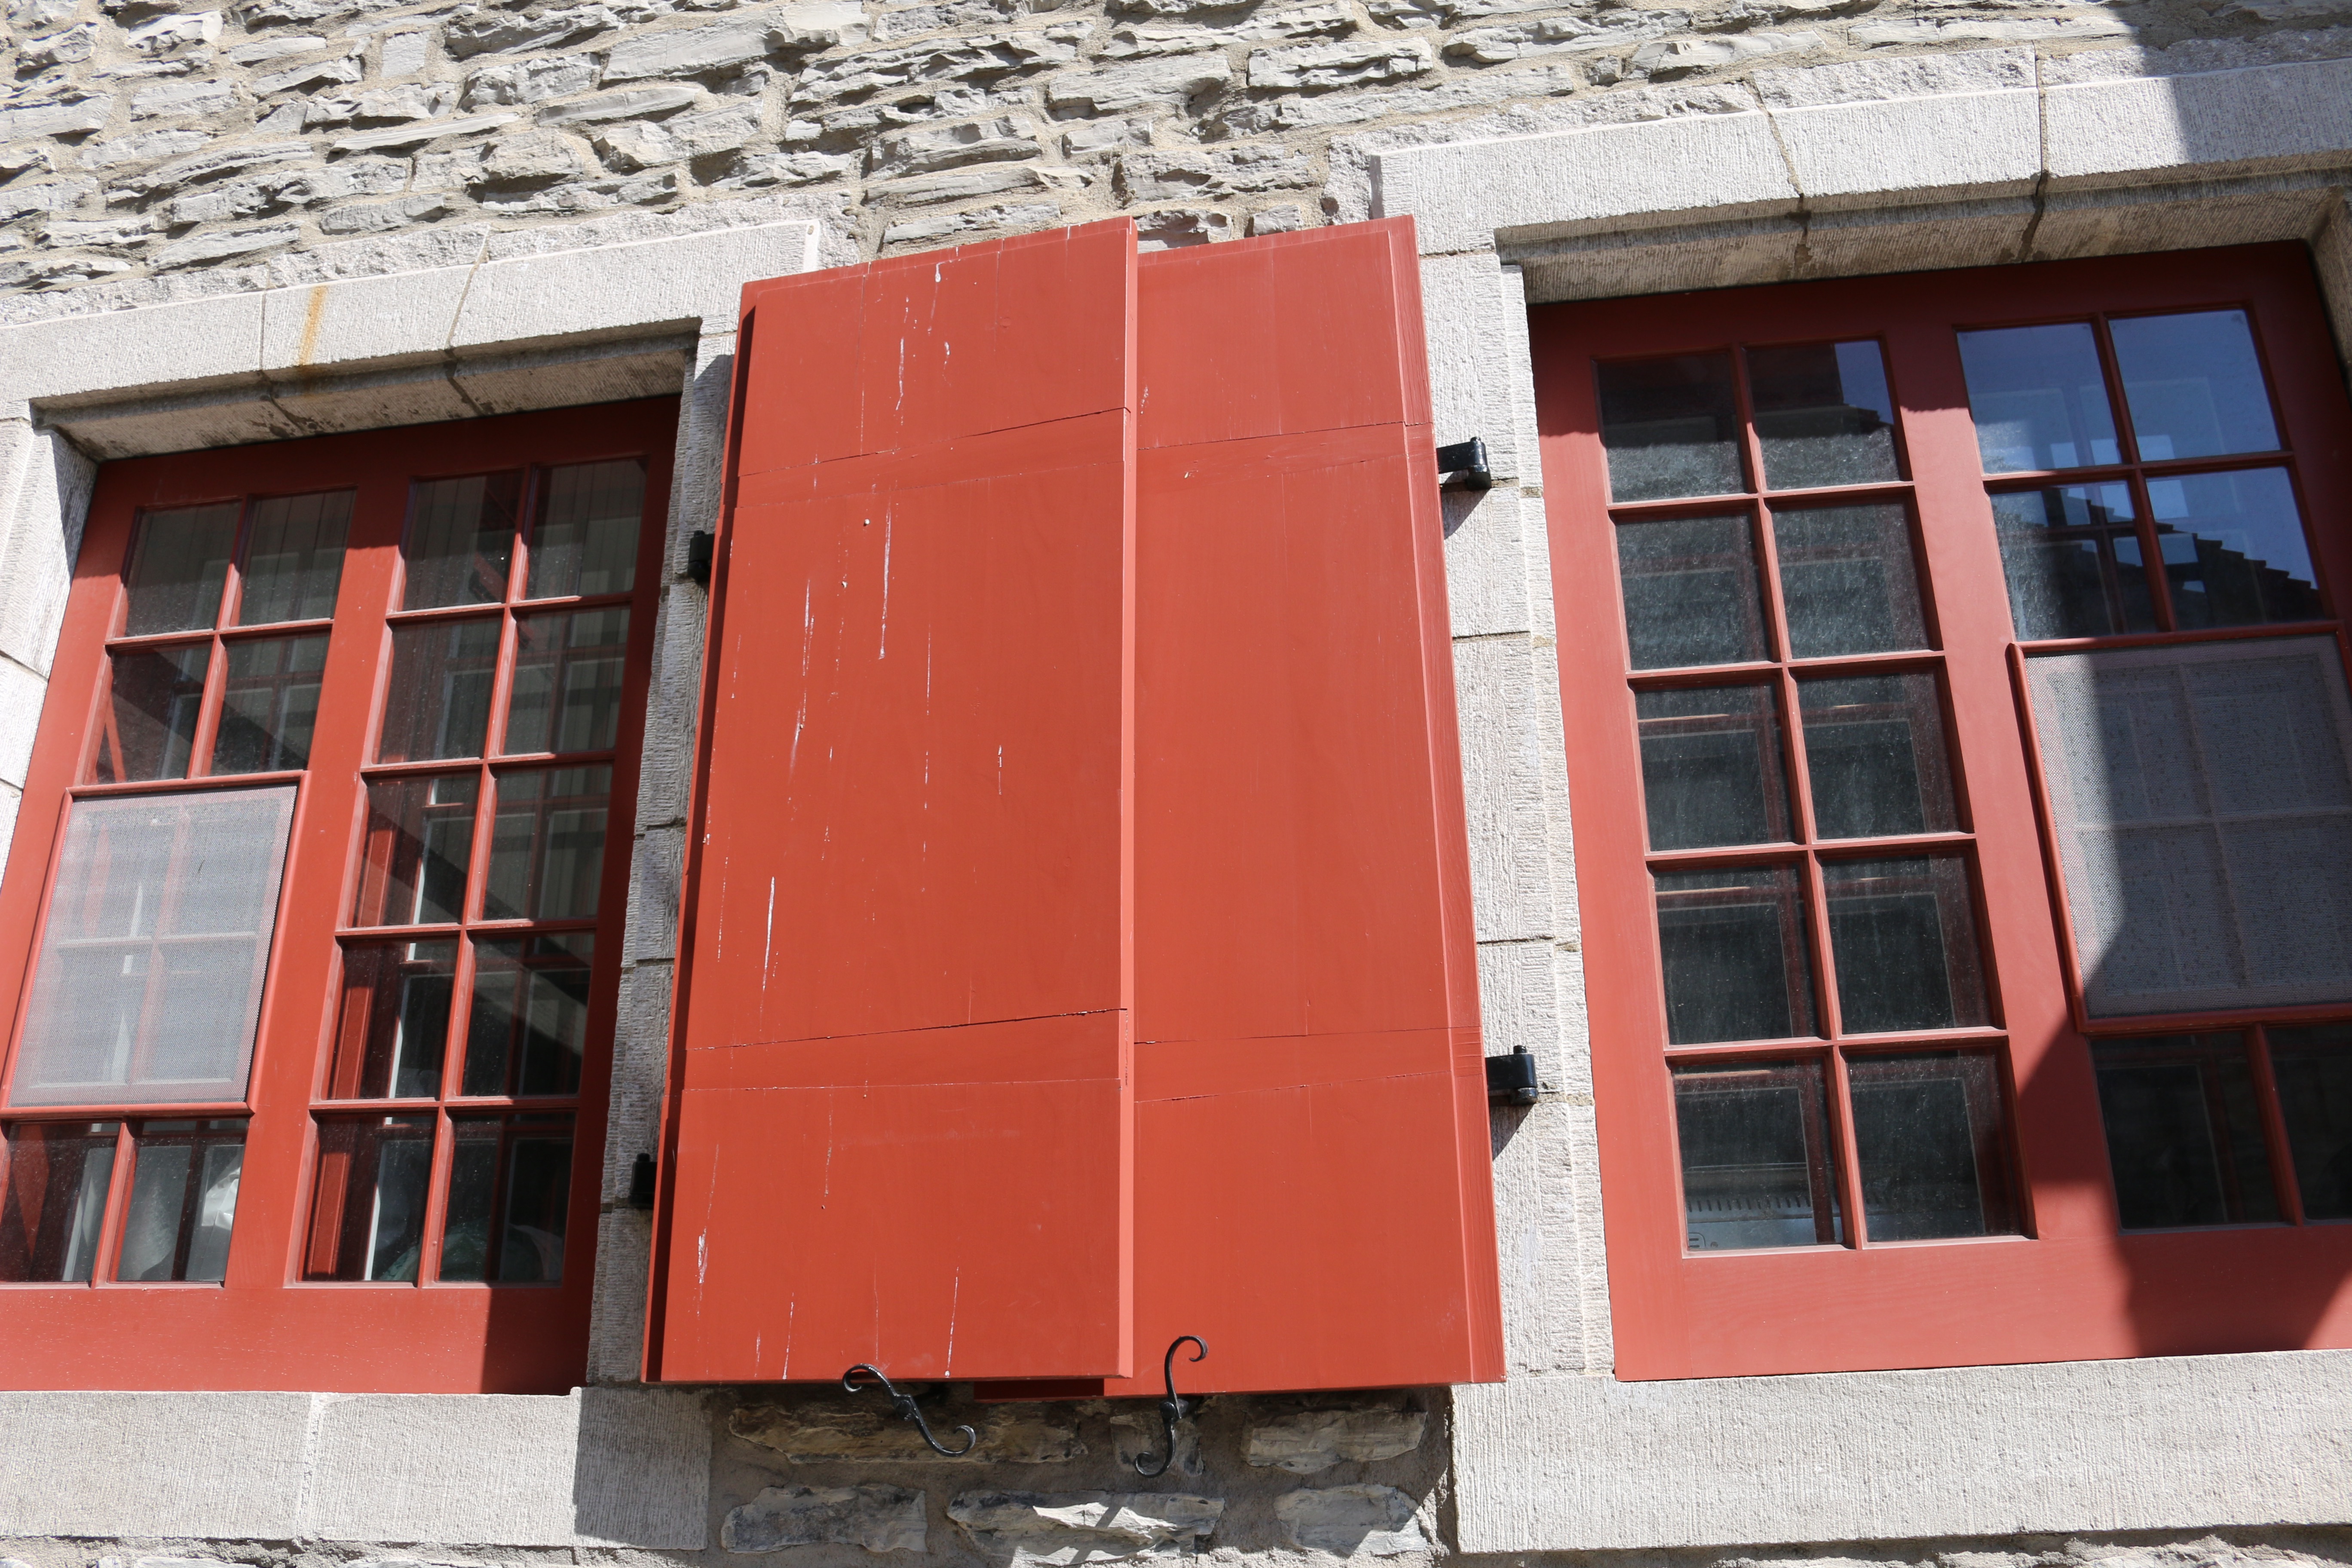
In another part of the city we saw the same style of tapered sliding dovetail battens that are flushed with the rest of the shutter. If you look carefully at the paint lines you can see how the battens were set into these nice thick boards.

Beautiful 'bead and butt' paneled door to go with those shutters
Beautiful ‘bead and butt’ style paneled door to go with those shutters. (Rather than a bead, looks like a simple V-joint)

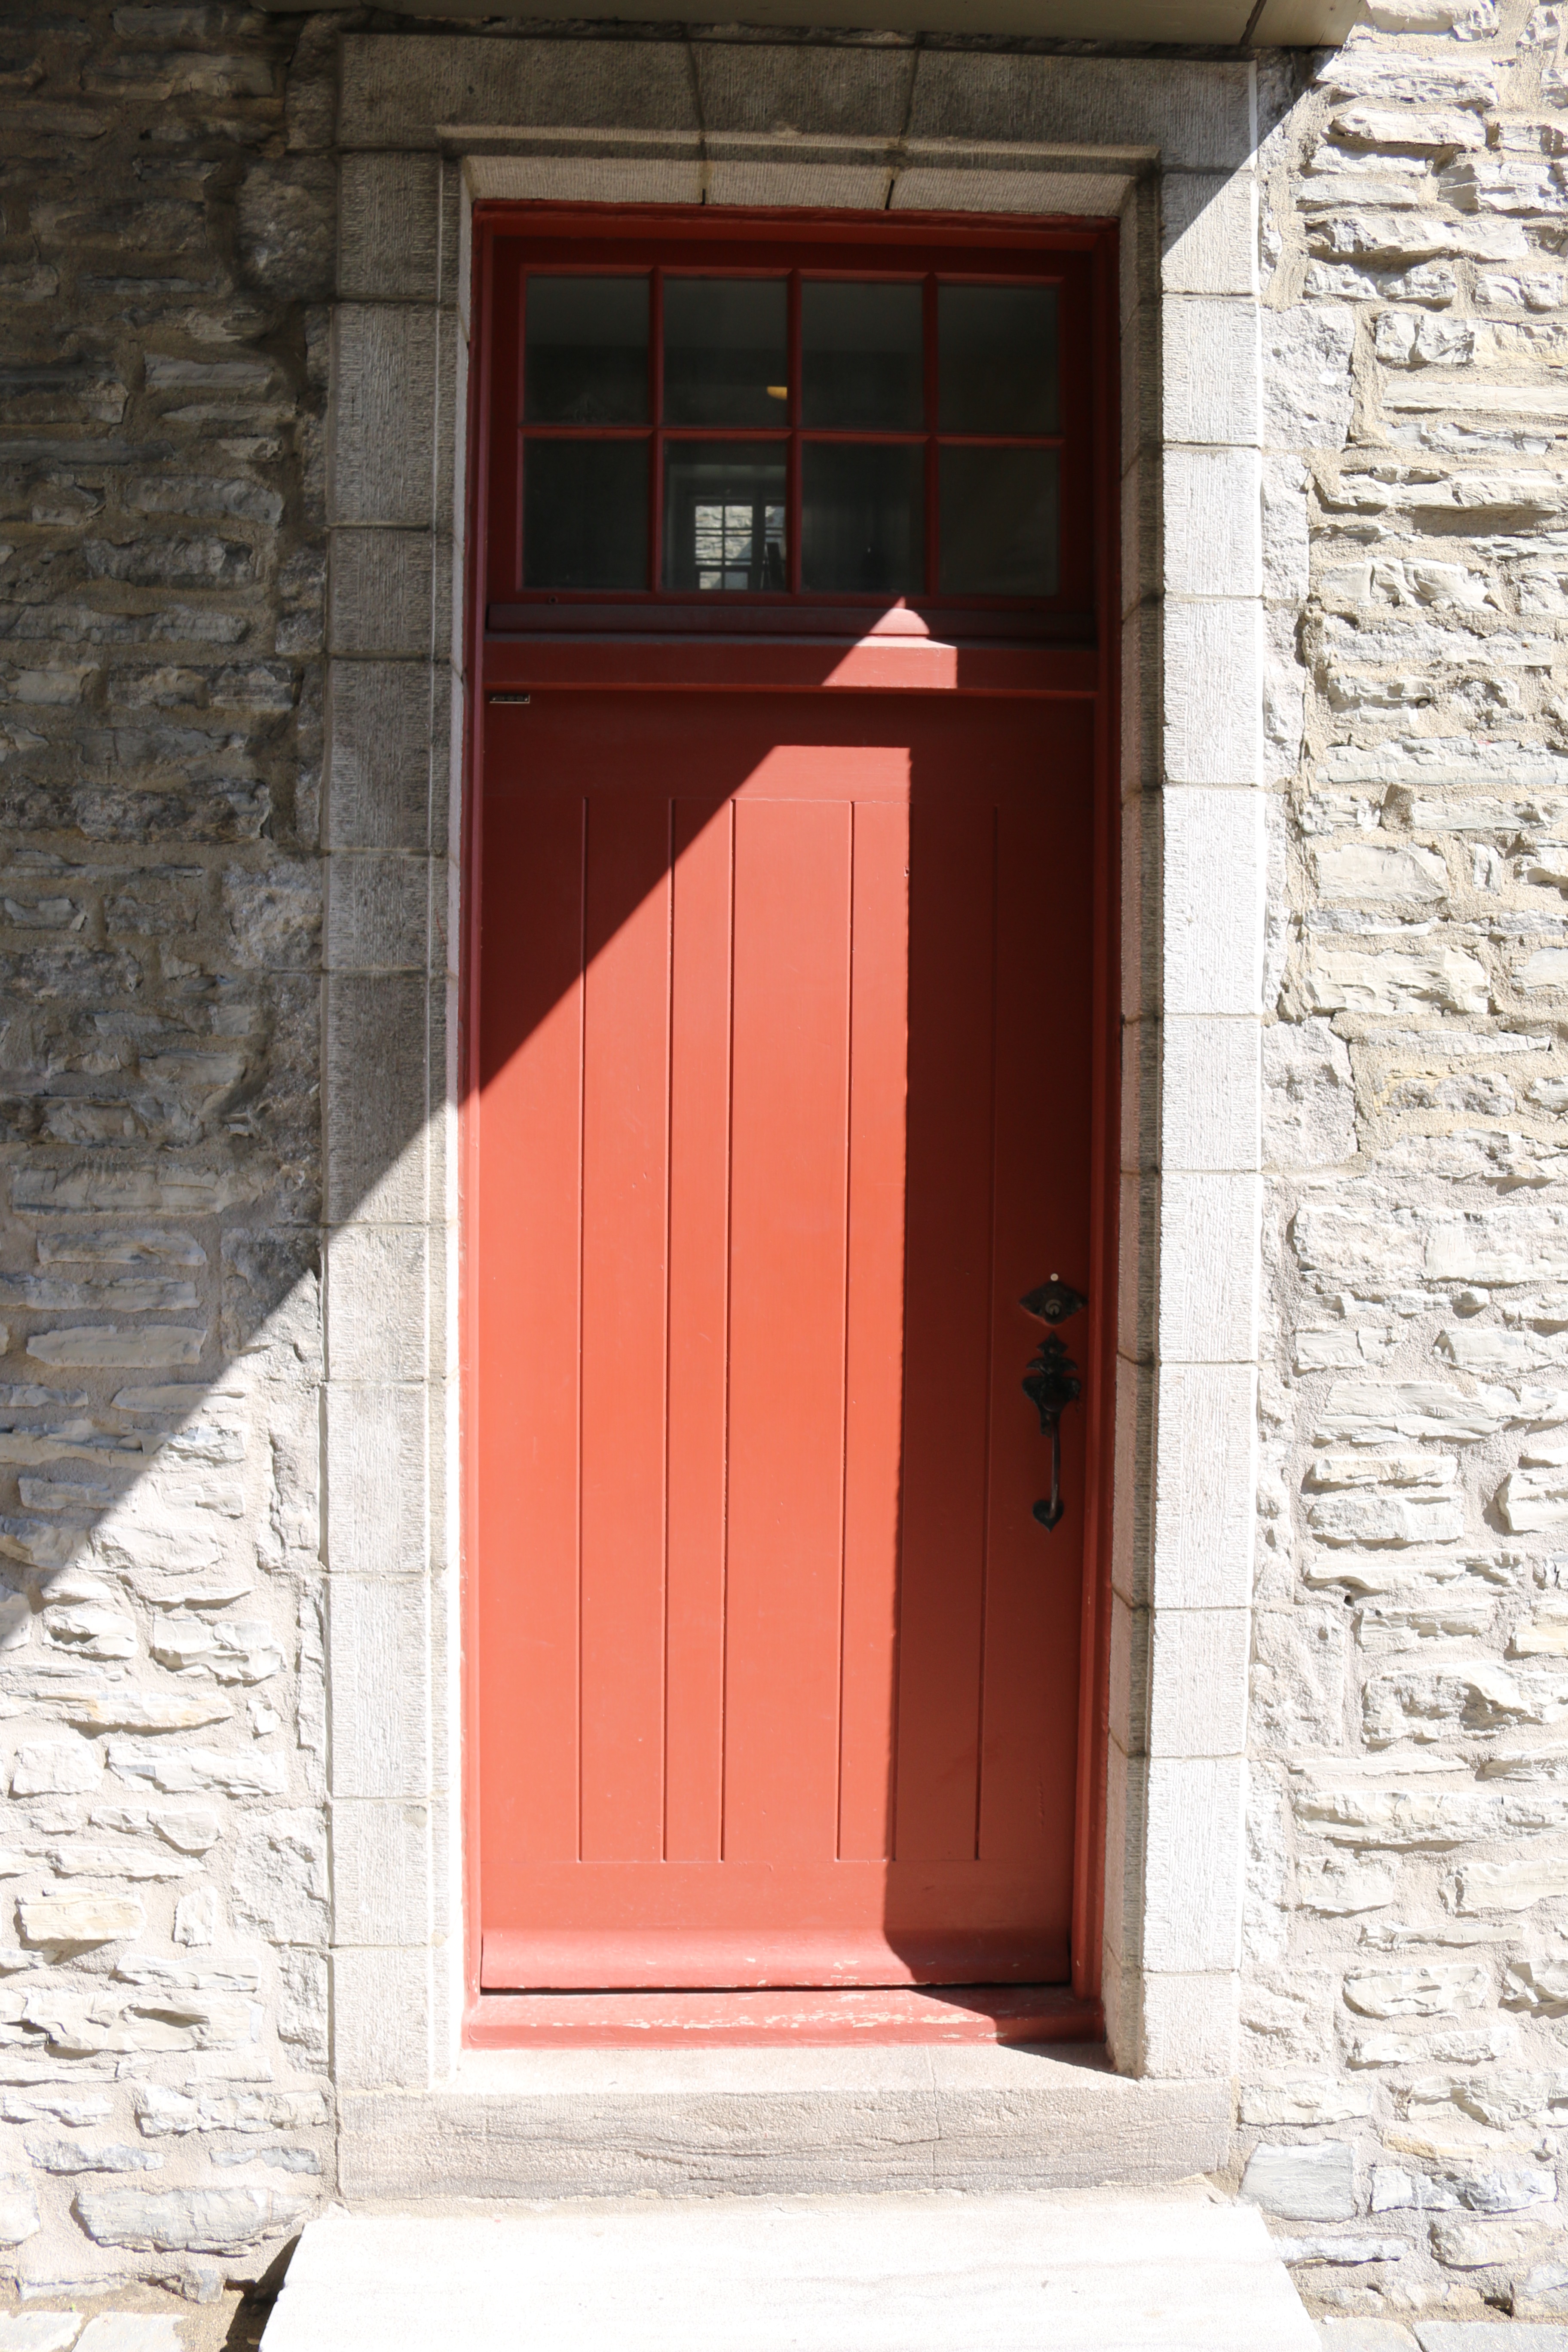
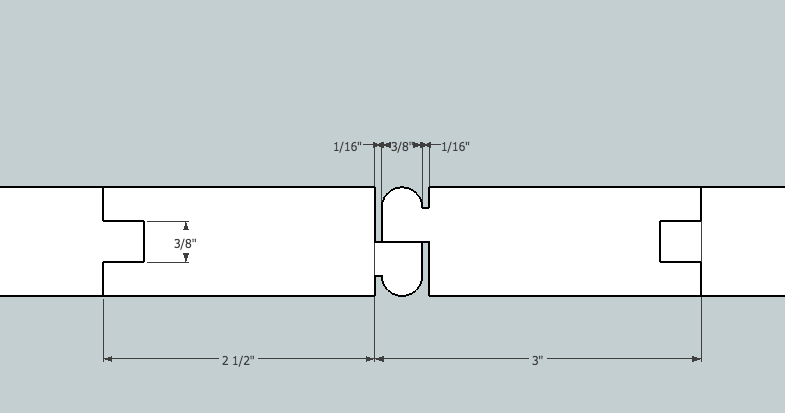
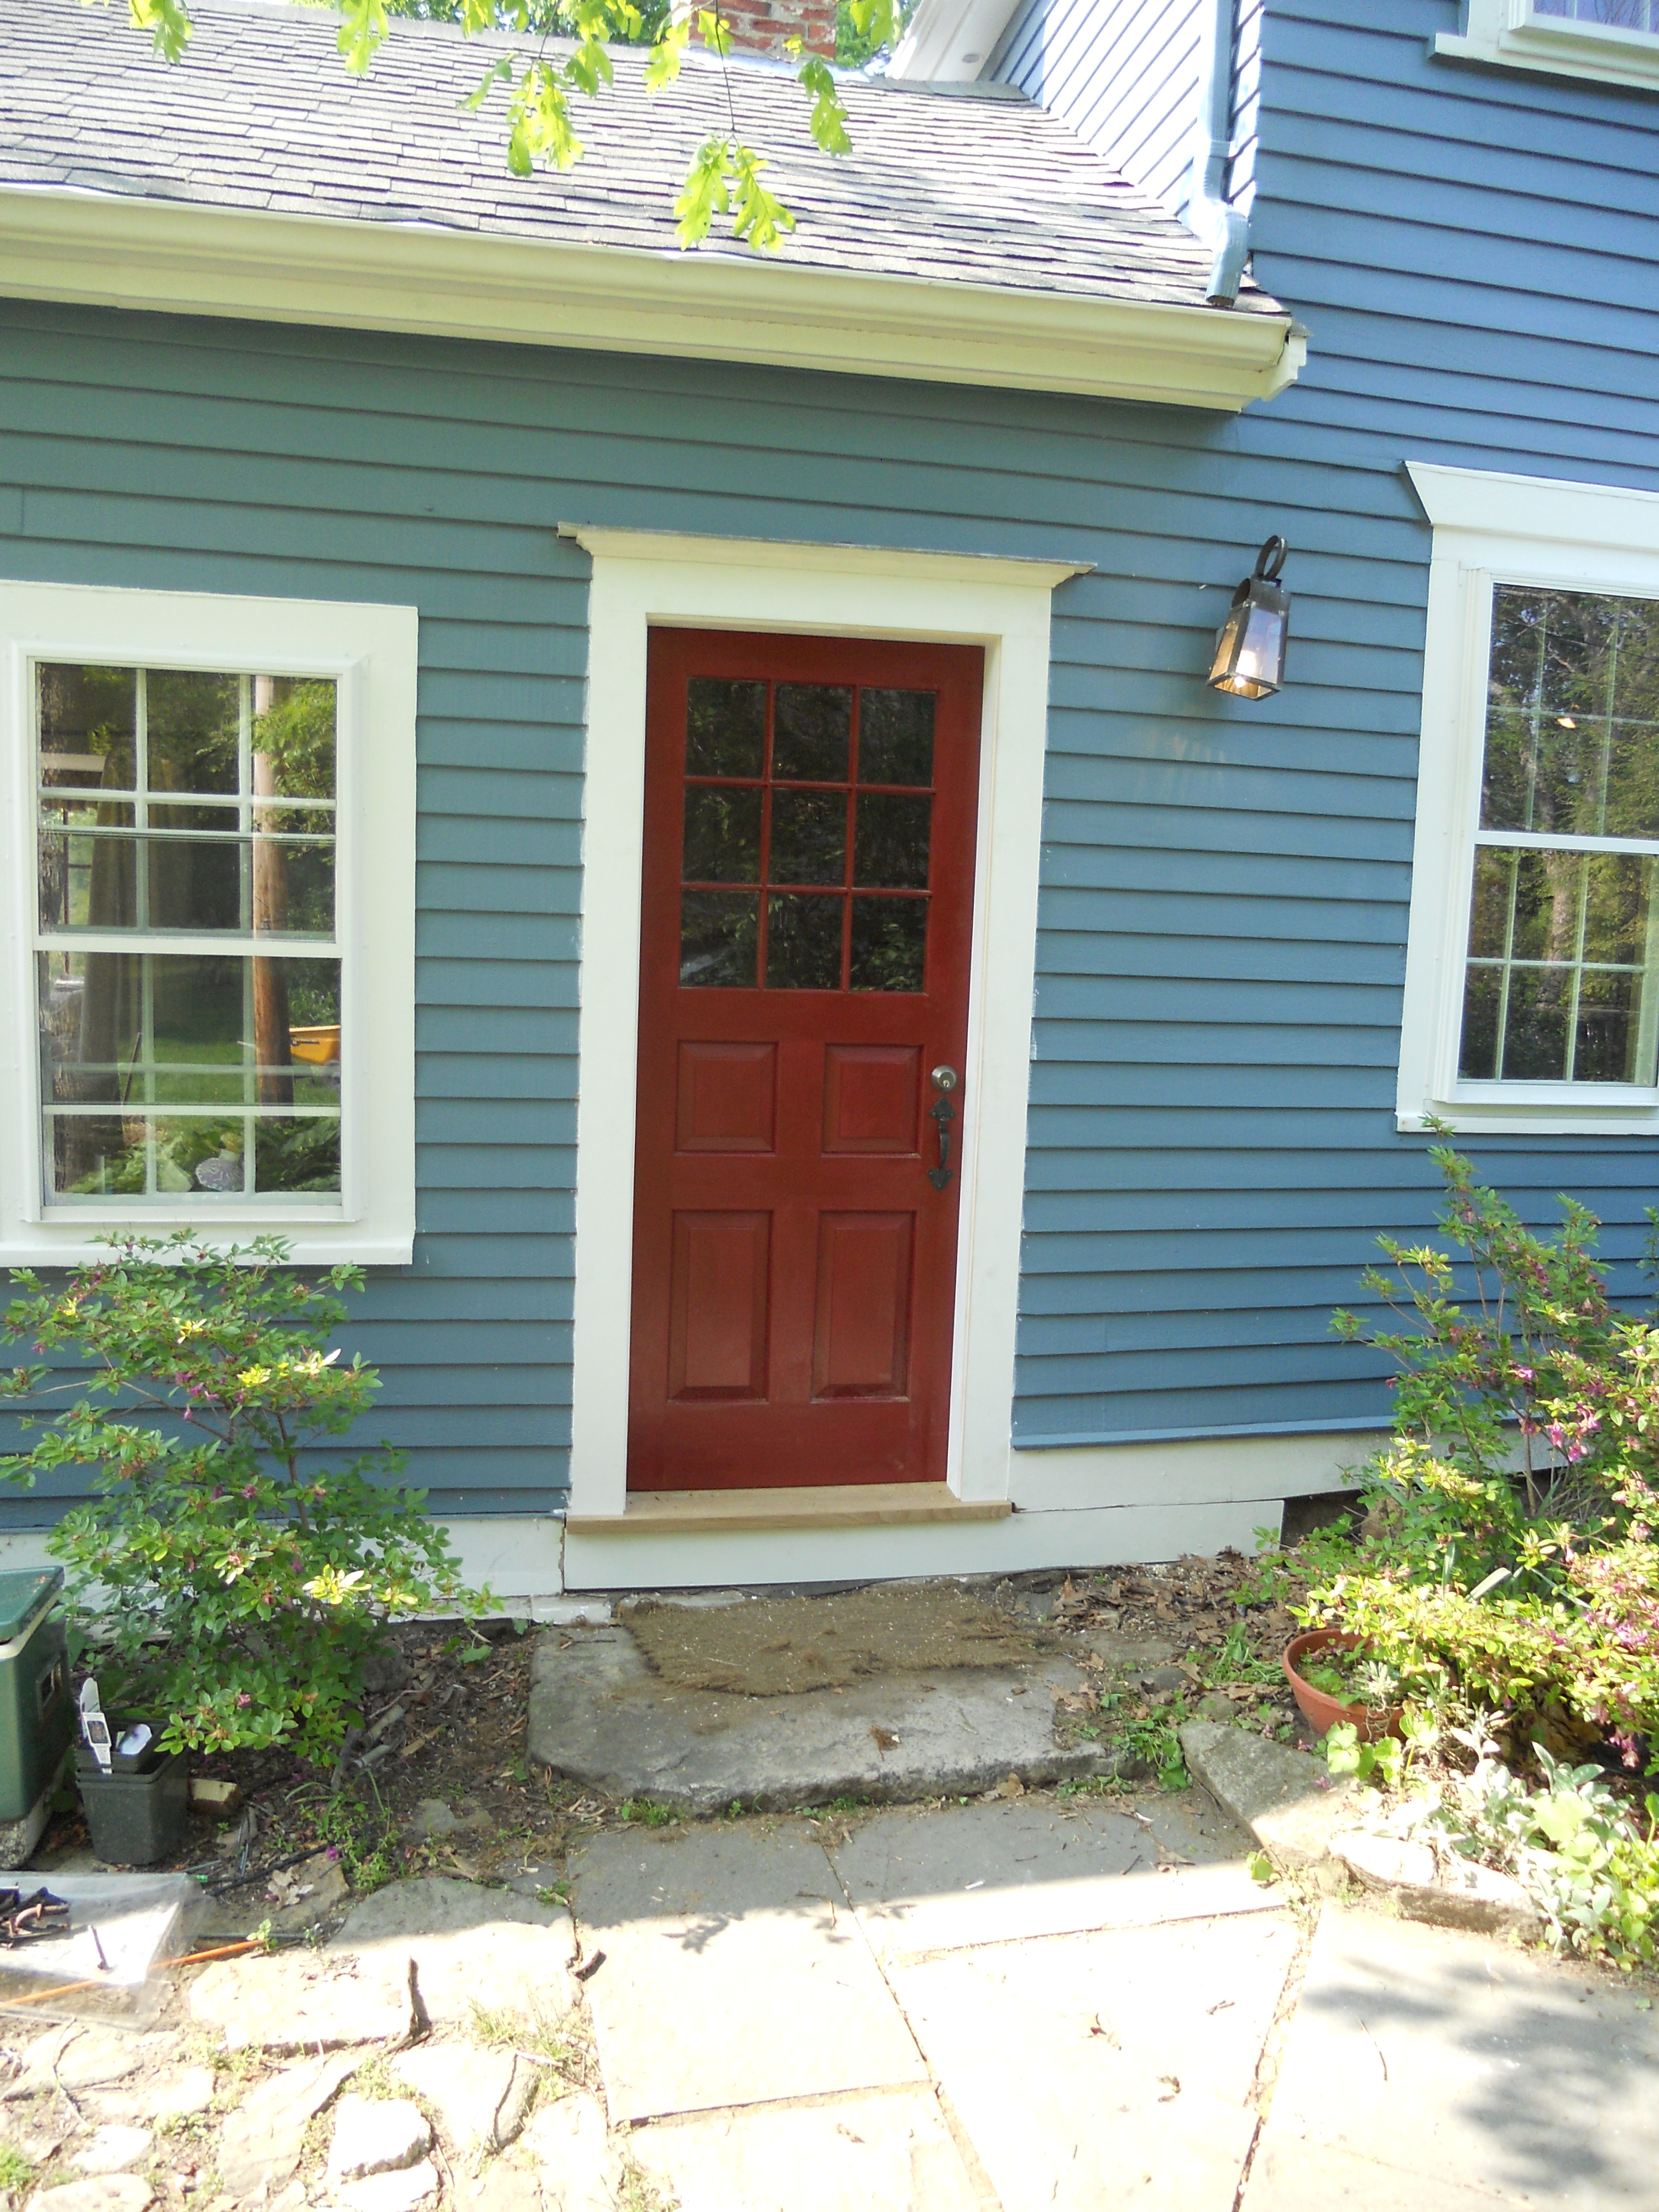
On that same building was a very nice butted panel door with a large transom above it that I had to share with you. Again the lines are very neat and plan, only dressed with a simple V-joint to accentuate the defect of the narrow panels meeting the rails and stiles.

Great door detail to help keep snow from getting under the door

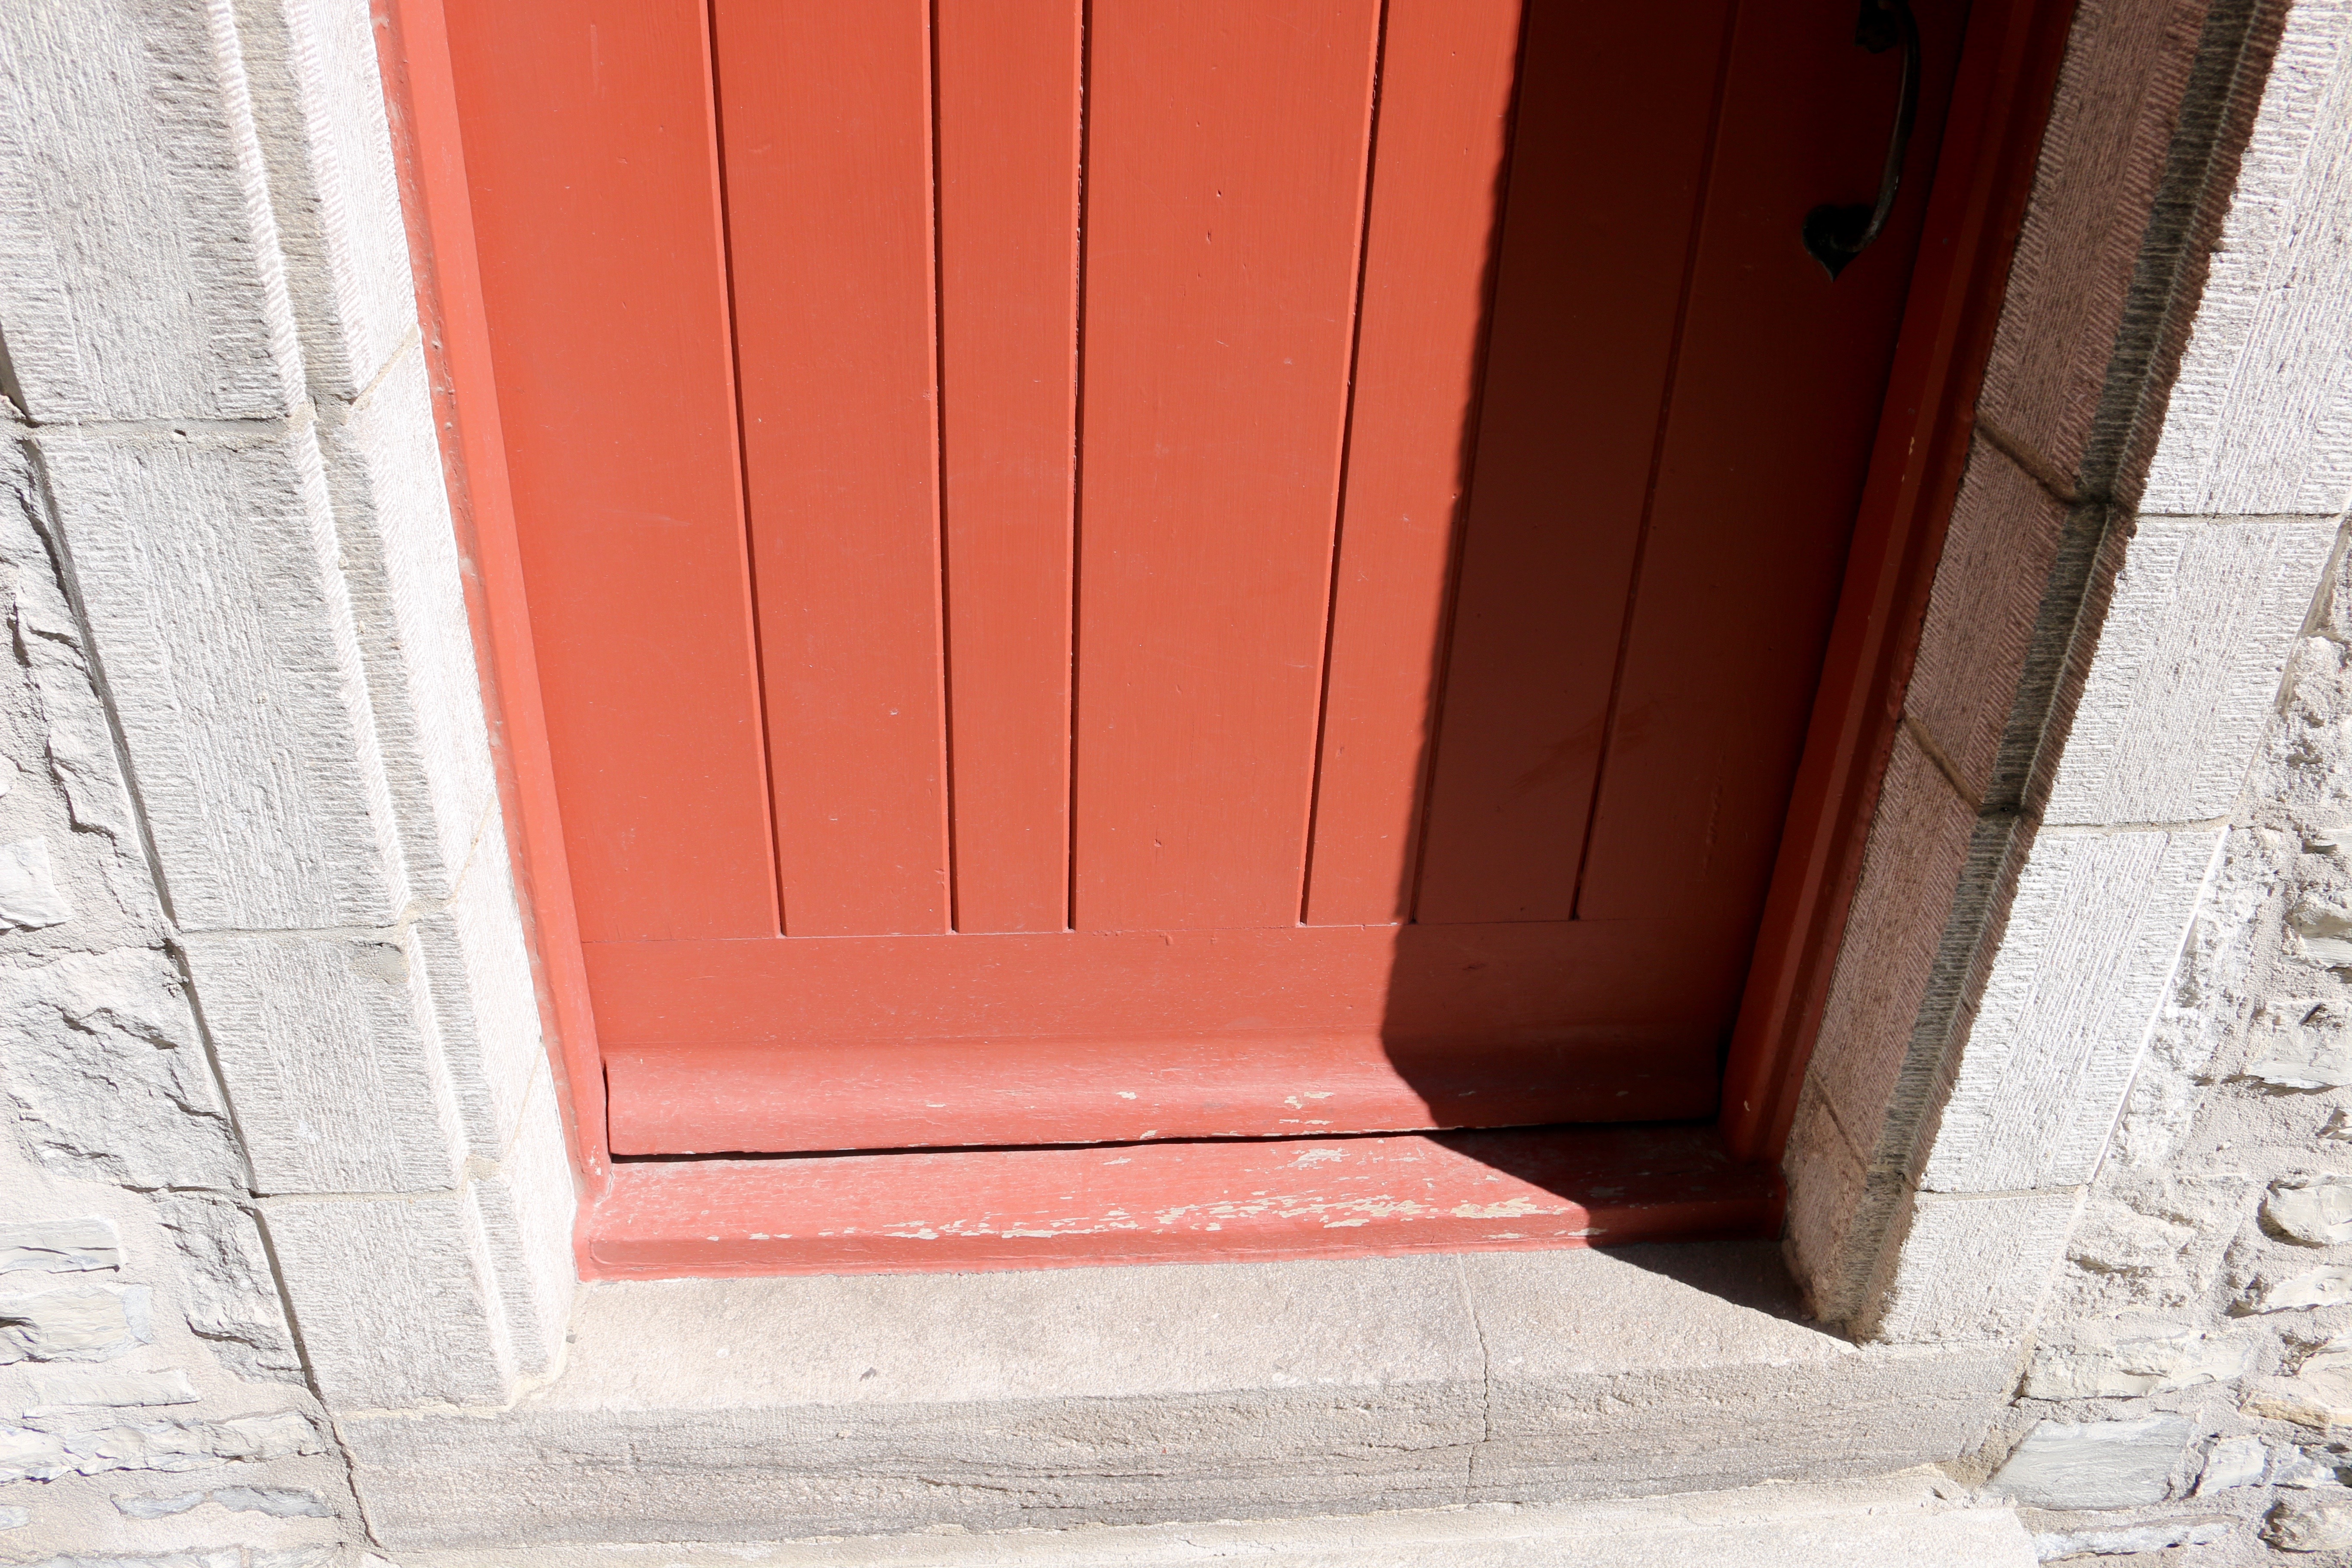
What really grabbed my eye was this detail on the bottom of the door that helps she snow away from the threshold during the harsh Quebec winters. This year in Boston we set local records for getting 10+ feet of snow this year. When talking to folks in Quebec they said they had over 20 feet of snow! So with larger snow piles reaching up to your door this detail presumably will help keep some of the snow from getting in.

It was great to see some architectural details that were uncommon to my area. If you live in an area with interesting shutter and door details, please share them in the comments.

Take care,
-Bill

P.S. If you want to learn more about traditional New England and Mid-Atlantic style shutters you may want to check out this earlier post here or an upcoming session of that workshop. During the course I talk about stylistic and regional variations we have here in New England, New York and Northern Virginia.

A Good Shutter Can Be Hard To Find

You don’t often see a good working pair of shutters on a newly constructed home. Most times you see a pre-fab set of vinyl shutters screwed on to the side of a house or no shutters at all. The vinyl shutters usually have no hardware and often are not properly sized for the windows they are adjacent to. I want to reverse that trend and make sure at least a few folks know how to make a traditional wooden shutter.

Shop plans for my Shutters Workshop

I designed and taught an Introduction to Shutters Workshop at the North Bennet Street School this past weekend which was a lot of fun. Beyond my usual hand drawn plans I also modeled this project in SketchUp. (You can read more about that effort here).

The class hard at work

In the class students learned how to make a shutter using traditional hand tools and via power equipment. They were able to weigh the pros and cons of each against their skill sets and use what was most appropriate to their project. (Some folks will be repairing a few shutters, others will be making enough for an entire home)

Making octagonal pins

After building the frames, cutting all the mortises and tenons, and fielding the panels, everyone learned about traditional draw-boring. By making and using tapered octagonal pins and driving them through the offset hole drilled into the tenon, the joint is drawn together. This joint uses no glue, is quite strong and can be serviced in the future if a rotten piece needs to be replaced.

John finishing up his shutter

We also discussed many design options, regional variations and examined several examples we had on hand. It was a busy two days, but I’m hopeful that we’ll see some proper new shutters start popping up in the area.

Group picture with some finished shutters

Take care,
-Bill

P.S. I have several more workshops coming up at NBSS over the next 3 months if you are interested in joining me — there are still a few seats available. Up next is Traditional Molding with wooden Molding Planes in April, Saw Horses and Saw Hurdles in May, and Making a Window Sash in June.  You can learn more about each of them here.

Drafting in the Digital Age

“An ounce of prevention is worth a pound of cure” — Benjamin Franklin

When it comes to design and drafting old Ben’s quote rings as today as it did in the 1700s. A good design and a clear set of plans can spare you from a lot of unnecessary frustration or wasted material. When I went to High School in the 1990’s I had the opportunity to take classes in traditional drafting on paper and using AutoCAD on old DOS based PCs that were old even at the time. The computer was viewed as the future, but the extra time for smaller projects and prices/availability of good software was a hindrance. For the sake of expediency and my wallet I generally broke out the drawing board when I needed to make a set of plans.

Workshop Shutters In Color + Perspective

Years later when I went to the North Bennet Street School they also espoused the use of traditional drafting with leads and full size drawings. No messing with expensive computers and ever-changing software. This works great for chairs and pieces with lots of complex curves. But for timber frames and buildings, often with many repeating elements a small change in the design could literally send you back to the drawing board for hours.

Workshop Shutters
Workshop Shutters

I recently got a copy of SketchUp and around the holidays found a real good deal on Robert Lang’s SketchUp for Woodworkers Shop Class on Demand Videos and watched them around Christmas. SketchUp took a bit of getting used to compared to my old AutoCAD days, but after watching Bob’s videos, and with my background as a software engineer and traditional draftsman I got up to speed quickly. (You may have noticed a proliferation in some computer generated renderings in recent posts) Bob Lang’s videos start with simple projects and tools and increase in complexity. I recommend getting both videos as the second video (‘Advanced Techniques’) was the most interesting to me wherein he shows the user how to create dovetails, work in the round, layout the model for printing dimensioned renderings etc.

Shutters Workshop
Hand Drawn Shutters

Save a Tree, Burn some Pixels

About a year ago I designed some traditional interior shutters for my workshop — I started out drafting them by hand. The plans sat on my TODO list for a few months and now with SketchUp in hand I decided to explore some other design possibilities with the raised panels.

Various Panel Options

Design Options Explored (Colors added for easier reference here, I’m not planning to build any shutters for a circus):

  1. Red — Raised, Sunk Fielded Panel
  2. Orange — Raised and Fielded Panel
  3. Green — Raised and Fielded Panel (rounded fielding)
  4. Brown — Flat Panel
  5. Purple — Raised Panel
  6. Blue — Bead and Butt
Panel Details
Panel Details

In the end I settled on #1 above which was part of my original design, but this software saved me from having to experiment with a few test panels to see how things looked from different angles — a nice time and effort saver which offset the perceived longer time it took me to draft this project in SketchUp in the first place. Each project I get a little faster with SketchUp and I think part of why I feel like it takes longer is you generally need to complete your model in most if not all details as opposed to some shortcuts I can take when drafting by hand. (Though I think I am getting a bit OCD as I created all the mortises, draw bored pins etc in full 3D)

Dimensioned Shutters in Color -- Rittenhouse Blue
Dimensioned Shutters in Color — Rittenhouse Blue

With SketchUp you can also experiment with colors and textures. Above you can see my shutters in Rittenhouse Blue to match my existing trim out in the shop. For other projects I’ve used actual textures which help give you a feel for how a surface would look with real wood grain etc.

Exploded View
Exploded View

The other big time saver is how fast you can generate other views — beyond top, bottom, front and back you can quickly generate an exploded view….

Section View
Section View

Or a section view…

Molding Details Dimensioned

or a dimensioned detail view. The dimensioning goes in quickly and the model can be probed in the future if you missed a dimension and want to see exactly how big a part or detail should be. All of these views help me create additional visual aids for this blog and for my teaching as I think a lot of woodworkers are visual learners. You can also share your models with other users or download thousands of models from the 3D Warehouse to save you some time.

I also like the fact that I can draft from the couch in front of the TV at night when I am too tired to be out in the shop and don’t want to be in another room hunched over the drafting board. If you have been waiting for a good reason to try out SketchUp, or draft something new you have no excuse — if you are reading this blog you are likely on a device that can be used to run SketchUp.  🙂

I look forward to seeing some of your new creations and hearing what others think about using the program.

Take care,
-Bill

P.S. If you’d like to build one of these shutters with me in person, there are still 1 or 2 seats left in my upcoming workshop at NBSS on this very topic. You can find more details here.
P.P.S. If you’d liked to check out Robert Lang’s SketchUp For Woodworker’s Shop Class on Demand Videos or DVDs  I bought my copies from here. (I don’t get any sort of kickback for this, just recommending a good resource)

A Few Good Carpenters

A good carpenter can be hard to find. Many of us like to think that in earlier times there were was an abundance of exceptional carpenters, but this sort of lament is not a new phenomenon. Check out the interesting except below from the 1850s:

“The Author’s Experience.

These facts and reflections have been impressing themselves upon the mind of the Author of this work for twenty years past, while he has been serving the Public as a practical carpenter. During much of this time it has been his fortune to have large jobs on hand, employing many journeymen mechanics, who claimed to understand their trade, and demanded full wages. But it has been one of the most serious and oppressive of his cares, that these journeymen knew so little of their business.

Few Good Carpenters

They had, by habit, acquired the use of tools, and could perform a job of work after it had been laid out for them; but not more than one man in ten could himself lay out a frame readily and correctly.

Why Apprentices do not Learn

Now, it is not commonly because apprentices are unwilling to learn, or incapable of learning, that this is so, but it is because they have not the adequate instruction to enable them to become master-workmen.”

— William E. Bell ‘Carpentry Made Easy: The Science and Art of Framing’ (1858)

I think Bell’s comments ring as true today as they did when he wrote the above in 1858. I won’t focus on the lazy workmen uninterested in learning, but I will focus on those who want to keep learning new skills. As with many of life’s pursuits, you’ll get out of it what you put into it, and there is much to be learned if you know where to look.

Finding a good carpenter

Most of the best carpenters and woodworkers I know get the majority of their work via word of mouth and are booking months out at a time and  thus don’t have to invest much in marketing. If you’re looking to find one of the ‘few good carpenters’, ask around at a local woodworking school, shop, guild, club or friends and family for referrals and interview your next carpenter.

Learning More

One of the best ways to learn a woodworking skill is to take a class or workshop.

I have a few upcoming workshops this spring at the North Bennet Street School (details below) and there are some seats available if you are interested in joining me.

Molding planes
Molding planes

Making Traditional Moldings Using Hand Planes @ The North Bennet Street School

Saturday, April 12 – Sunday April 13 2014

8:30 AM – 4:30 PM Register

Instructor: Bill Rainford
$365

Learn to use traditional molding and joinery planes to produce beautiful traditional molding profiles. Learn the basics of tuning and using these planes. Build a basic sticking board, used to hold the moldings you are making. Layout and execute historic profiles. We discuss the history of traditional moldings, examine planes/profiles students bring (optional) and, if there is time, an introduction to carved moldings.

Shutters Workshop
Shutters Workshop

Introduction To Shutters @ The North Bennet Street School

Saturday, March 15 – Sunday March 16, 2014

8:30 AM – 4:30 PM Register

Instructor: Bill Rainford
$365

Learn about traditional wooden shutters in this two-day workshop. Using traditional joinery, students build a sample shutter and learn the skills needed to layout and build shutters for custom projects. Discussion includes interior and exterior uses, fielded panels and louvered styles. Students should be able to plane and square up a board by hand and have some experience laying out and cutting traditional mortise-and-tenon joinery by hand. Some experience with tuned hand tools and power tools is required.

Traditional Shutters


If the above does not appeal to you, there are several schools around the country that teach solid woodworking and carpentry skills. I encourage your to explore classes at any of these schools: The North Bennet Street School in Boston, The College of the Redwoods in California, The Heartwood School, The Shelter Institute in Maine, Philadelphia Furniture Workshop, The Kelly Mehler School of Woodworking, Phil Lowe’s Furniture Institute of MassachusettsConnecticut Valley School of Woodworking, and Roy Underhill’s The Woodwright’s School

If you’re not able to make it to one of the above schools there are scores of books that can help you along your woodworking journey. I think every carpenter would benefit from reading all 4 volumes of Audel’s Carpenter’s Guide, Tage Frid Teaches Woodworking Vol 1-3, Bell’s Carpentry Made Easy: The Science and Art of Framing, and Get Your House Right.

Woodworking is a life long journey and I hope that you will continue pursuing new aspects of the craft.

Take care,
-Bill

New Workshops at NBSS Spring 2013

Just a quick note: I will be teaching some new workshops this spring at the North Bennet Street School’s Arlington, MA location.  My teaching schedule can be found here. I look forward to seeing some of you in class this spring or summer.

-Bill

Introduction to shutters @ The North Bennet Street School

Saturday, May 4 – Sunday May 5

8:30 AM – 4:30 PM Register

Instructor: Bill Rainford
$375

Shutters Workshop
Shutters Workshop

Learn about traditional wooden shutters in this two-day workshop. Using traditional joinery, students will build a sample shutter and learn the skills needed to layout and build shutters for your own home. Discussion includes interior and exterior uses, fielded panels and louvered styles Students should be able to plane and square up a board by hand and have some experience laying out and cutting traditional mortise and tenon joinery by hand. Some experience with tuned hand tools and power tools is required. PLEASE NOTE THIS CLASS WILL BE HELD IN ARLINGTON.

Traditional Shutters

Register

Hanging doors and windows: demo and discussion @ The North Bennet Street School

Saturday, June 8

8:30 AM – 4:30 PM Register

Instructor: Bill Rainford
$50

Completed door
Completed door

This one-day demonstration workshop includes installing a modern door, cutting to accommodate a door knob and lock set, mortising hinges, installing a modern window and related trim and flashing. We cover the proper tools for these projects and include ample time for questions throughout the day. PLEASE NOTE THIS CLASS WILL BE HELD IN ARLINGTON.

Register