Category Archives: Traditional Woodworking

Making a Tent Fly

It can take a long time to make a tent fly — but it’s worth it.

What is a Tent Fly?

fly refers to the outer layer of a tent or to a piece of material which is strung up using rope as a minimalist, stand-alone shelter. In basic terms, a fly is a tent without walls. Purpose-made stand-alone flies are also sometimes referred to as bivouacs, bivvies, tarpaulins, or hootchies. — Wikipedia

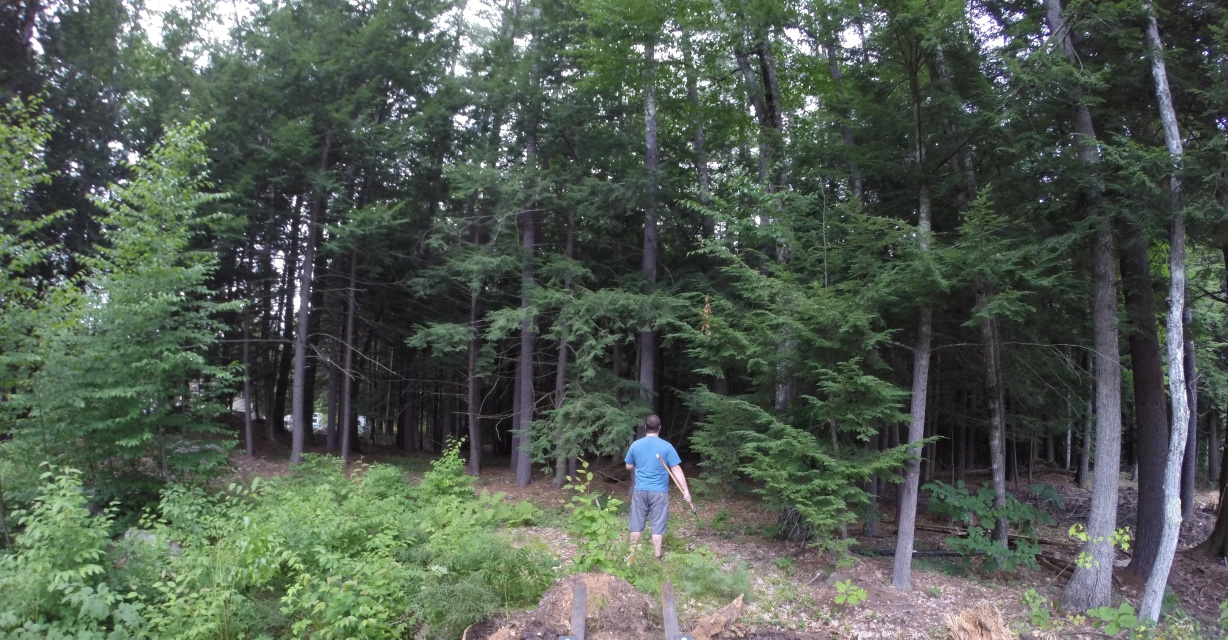
A few years ago I didn’t know what I tent fly was, at least not by name, but on one of my visits to Eastfield Village I saw a nice one that Billy McMillen built and used. On some visits to Colonial Williamsburg I also checked out a huge tent fly that Garland and Ted and the guys had and decided I wanted to build one for myself. I wanted a place to work on timber framing elements out of the sun and rain,  a tarpaulin for when we have a party in the yard, maybe a craft fair or a re-enacting event.

Tent Fly ready for use.

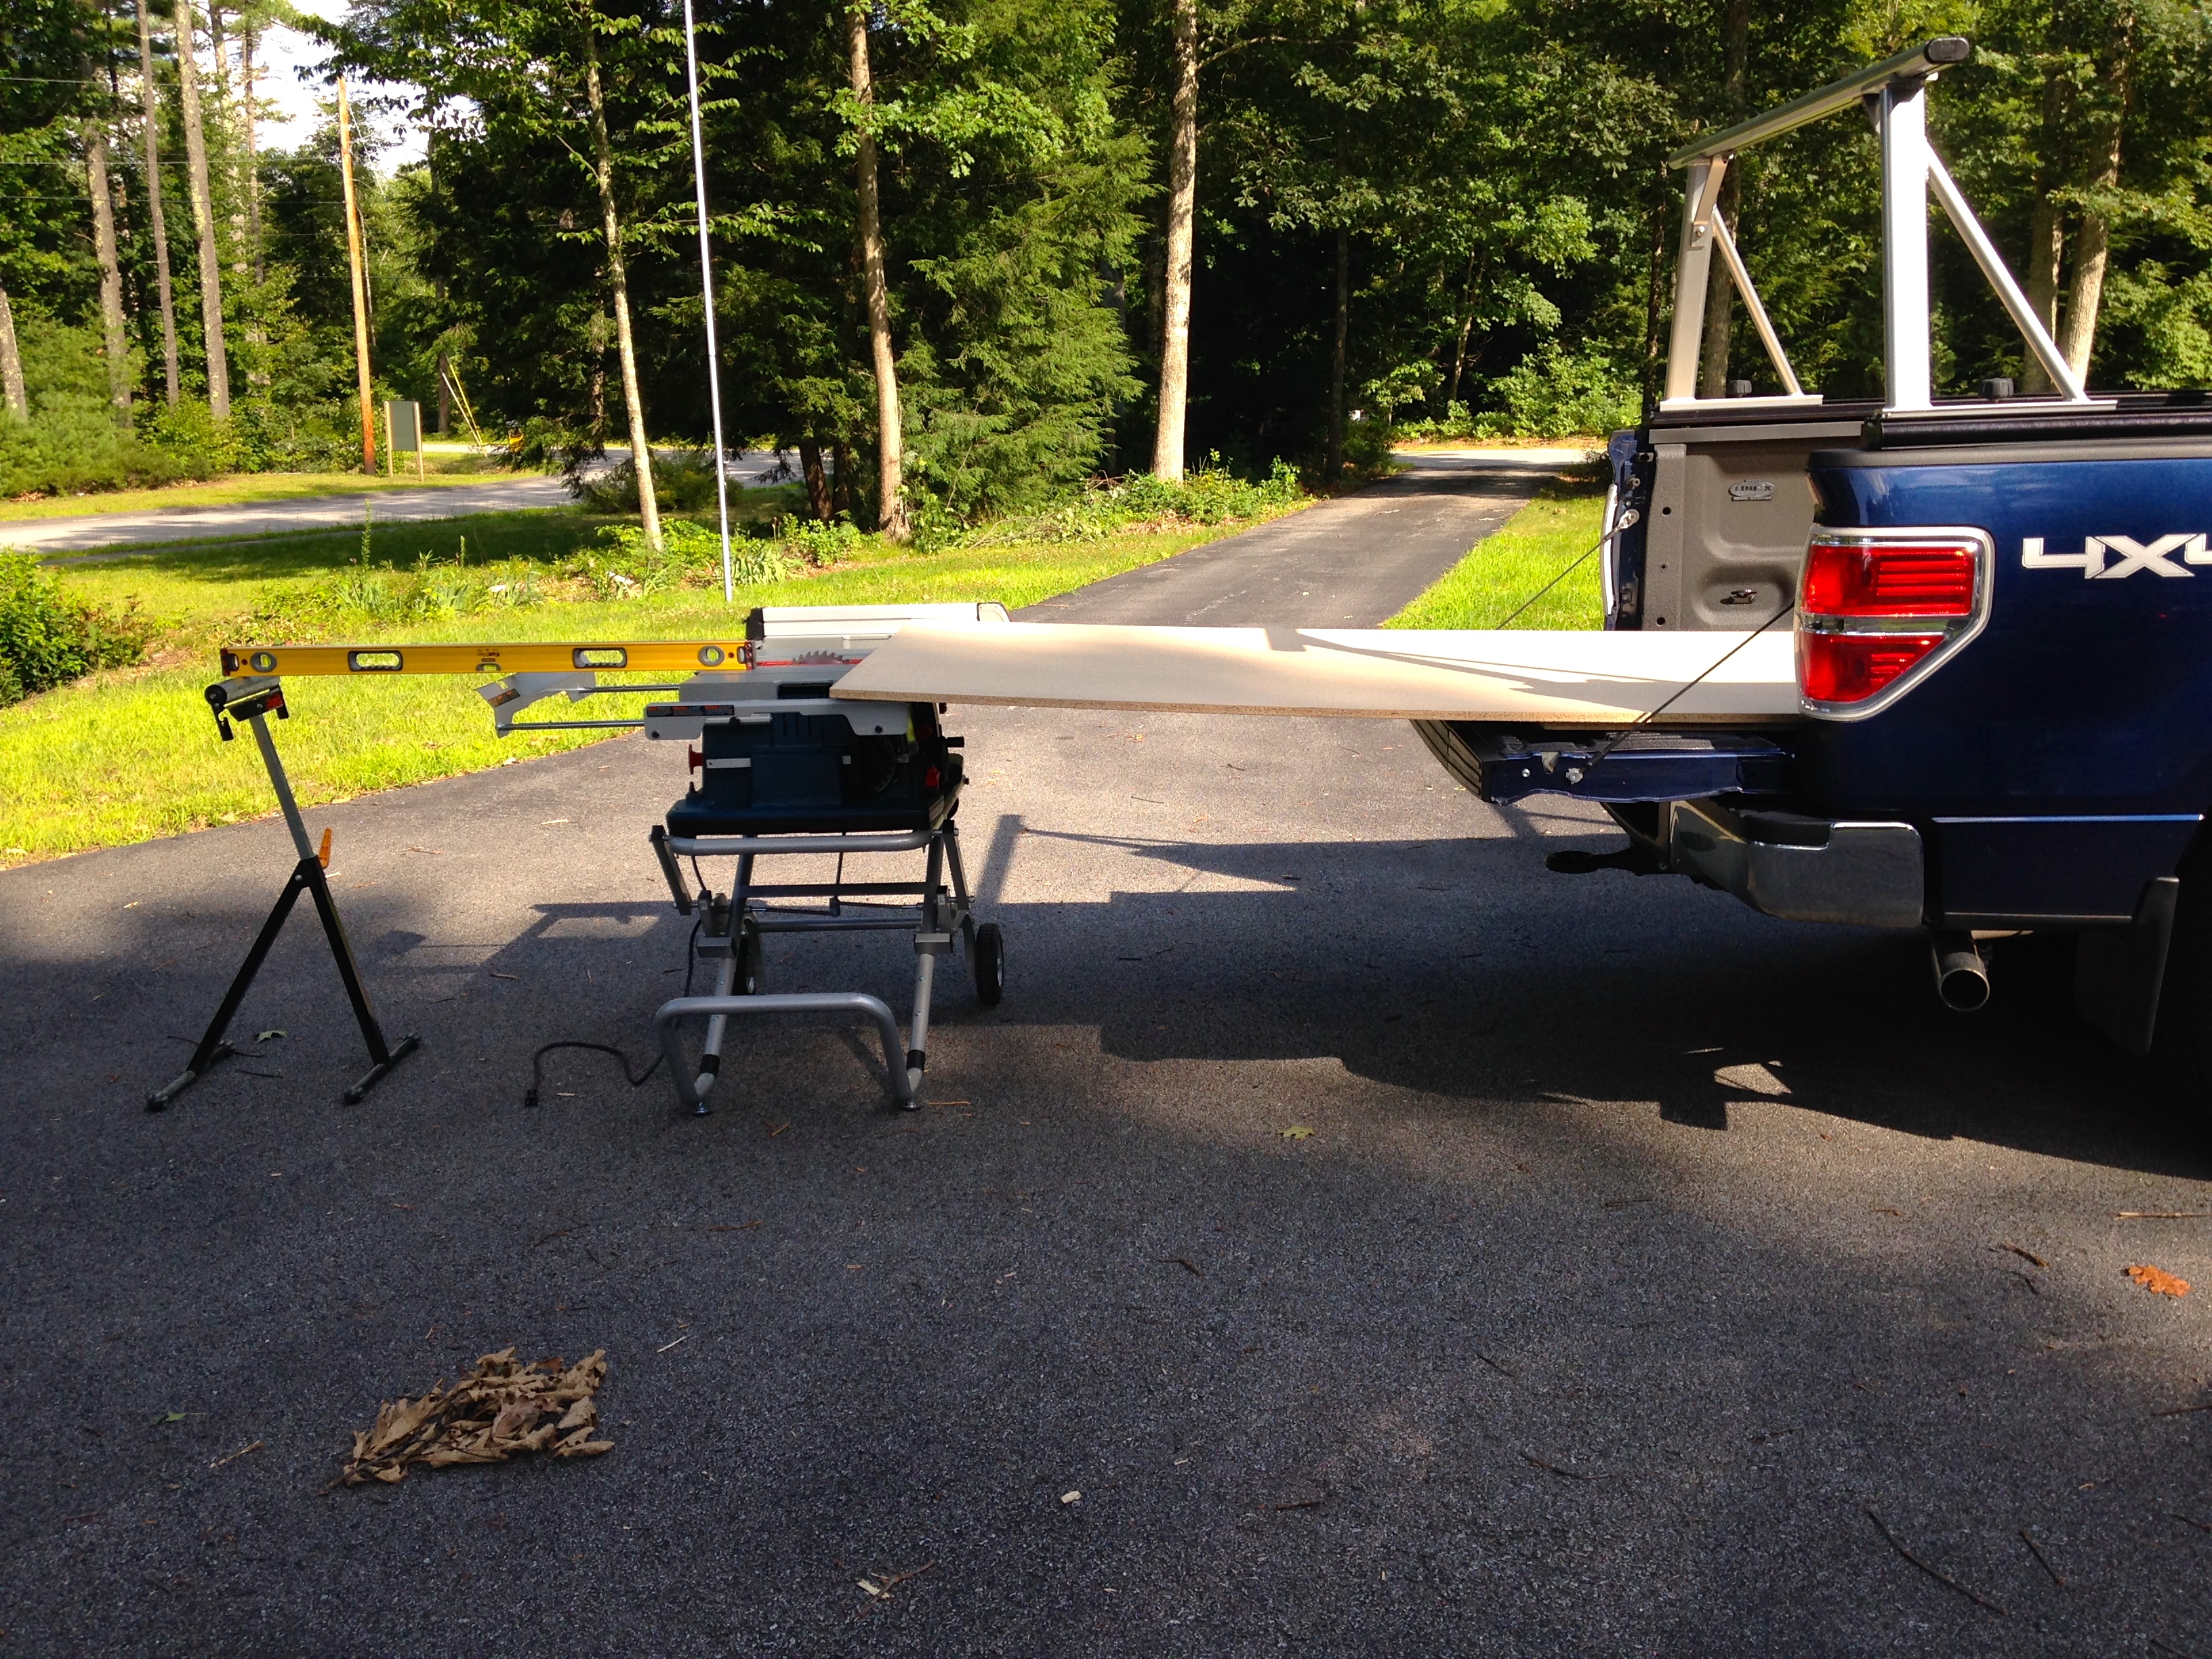
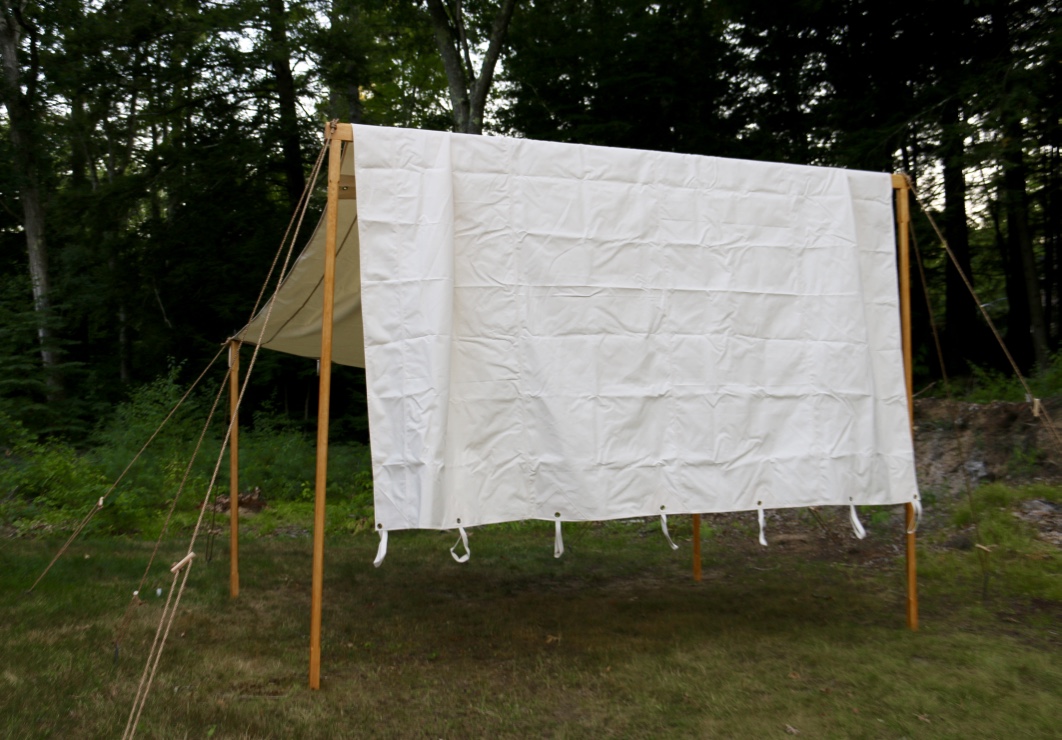
I decided to go with a custom made tent fly from Panther Primitives — an outfit Billy and Garland both recommended and big in the re-enacting community for making top quality tents.  I went with the 12’x16′ Tent Fly with the 13oz Flame Retardant Sunforger Heavy Duty Canvas. I also had a special request to have grommets and loops so I could support the outer edges of the tent with a series of posts or a post and beams depending on how the fly will be used.  I also ordered 16 manila rope sets, heavy duty stakes, a canvas bag for the ropes, bag for the tent and bag for the ropes. The folks at Panther were great to work with and make and excellent product — superior materials and craftsmanship.

The project starts at the wood supplier -- in this case Highland Hardwoods -- my favorite.
The project starts at the wood supplier — in this case Highland Hardwoods — my favorite.

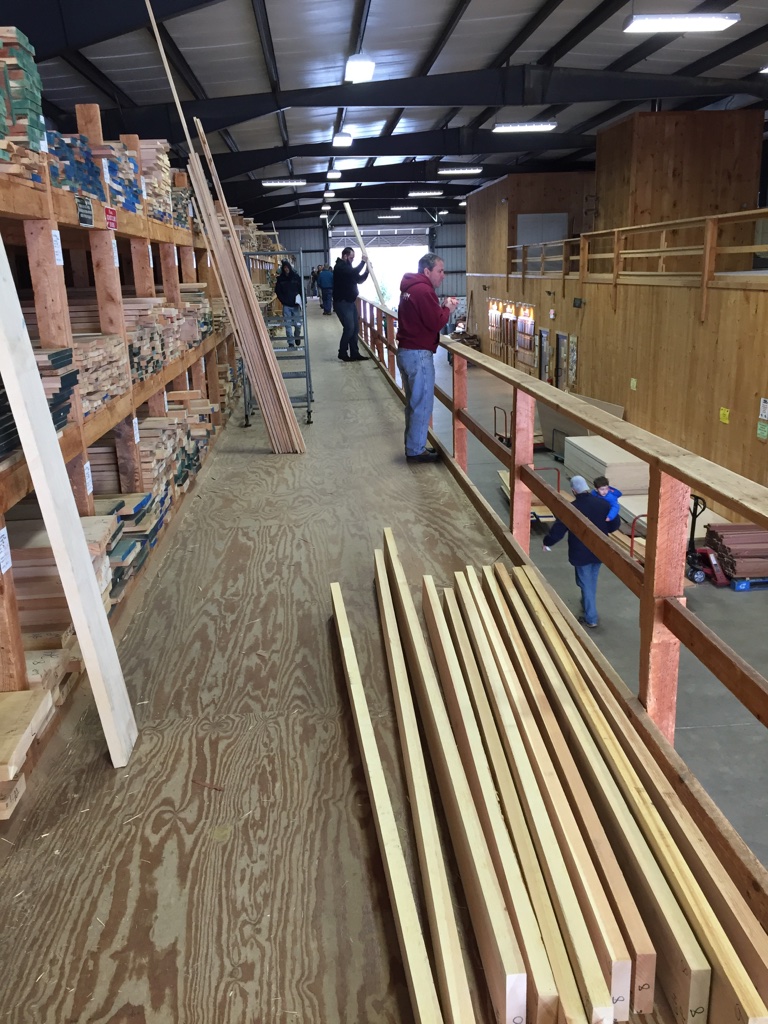
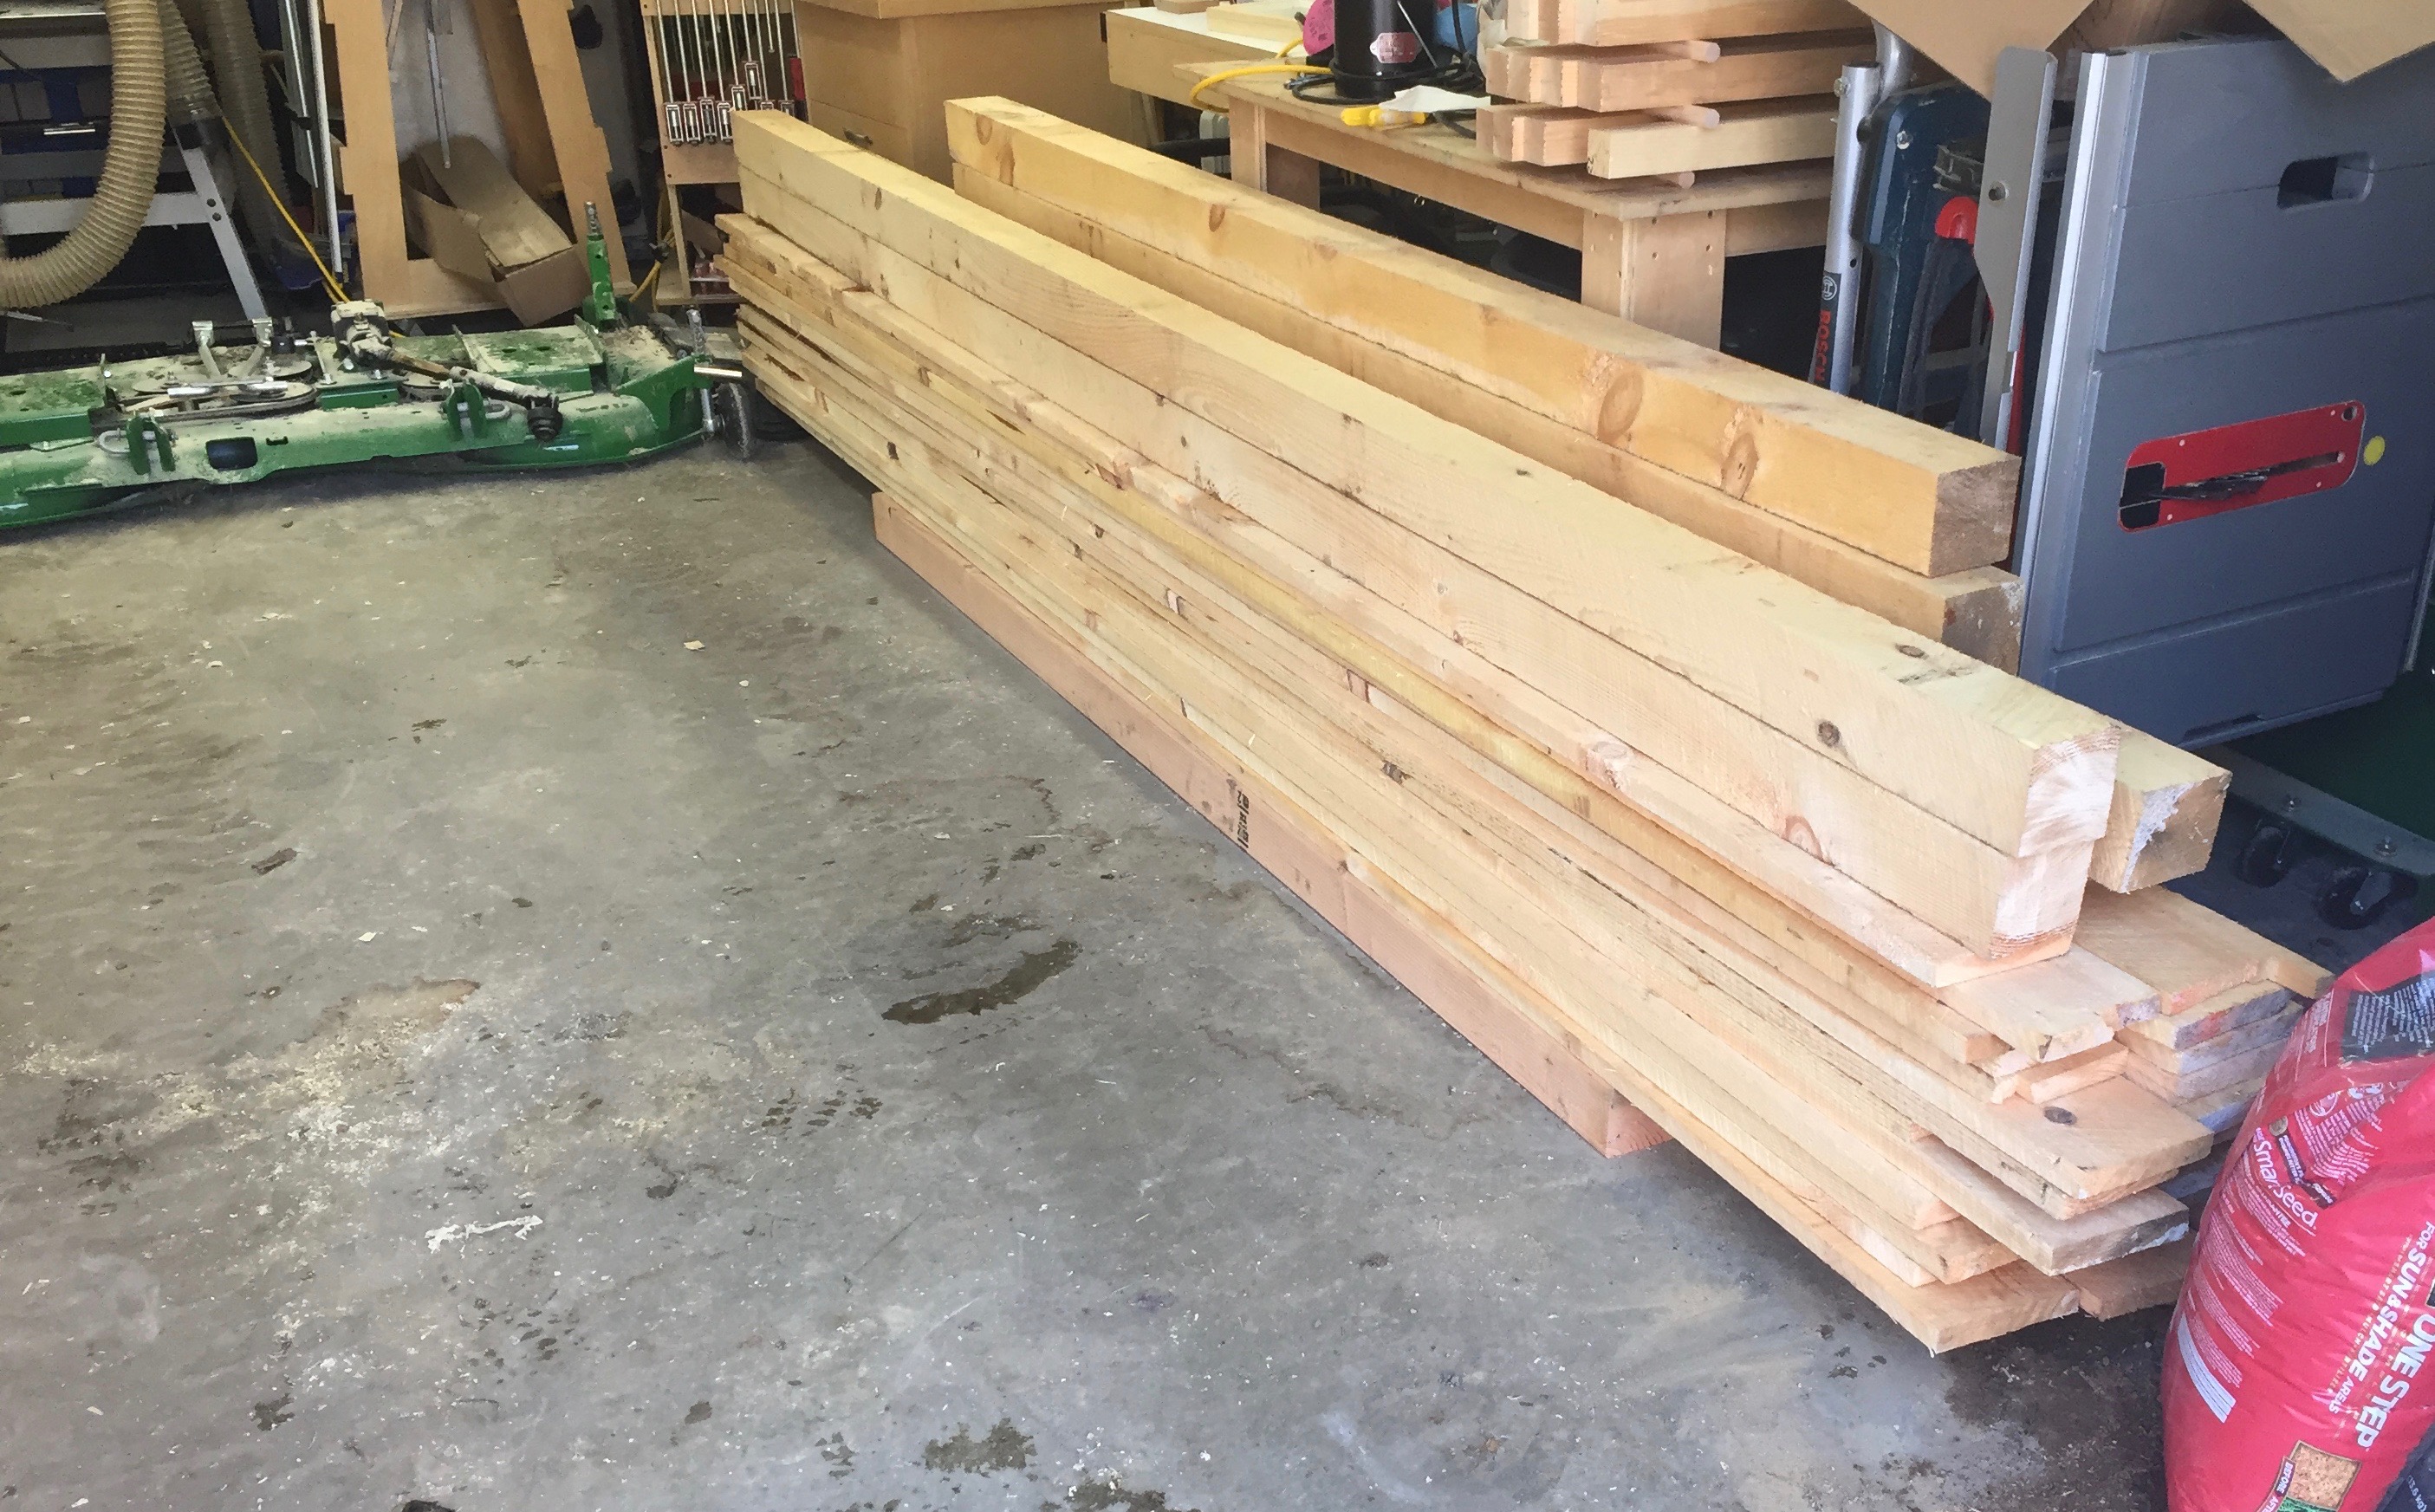
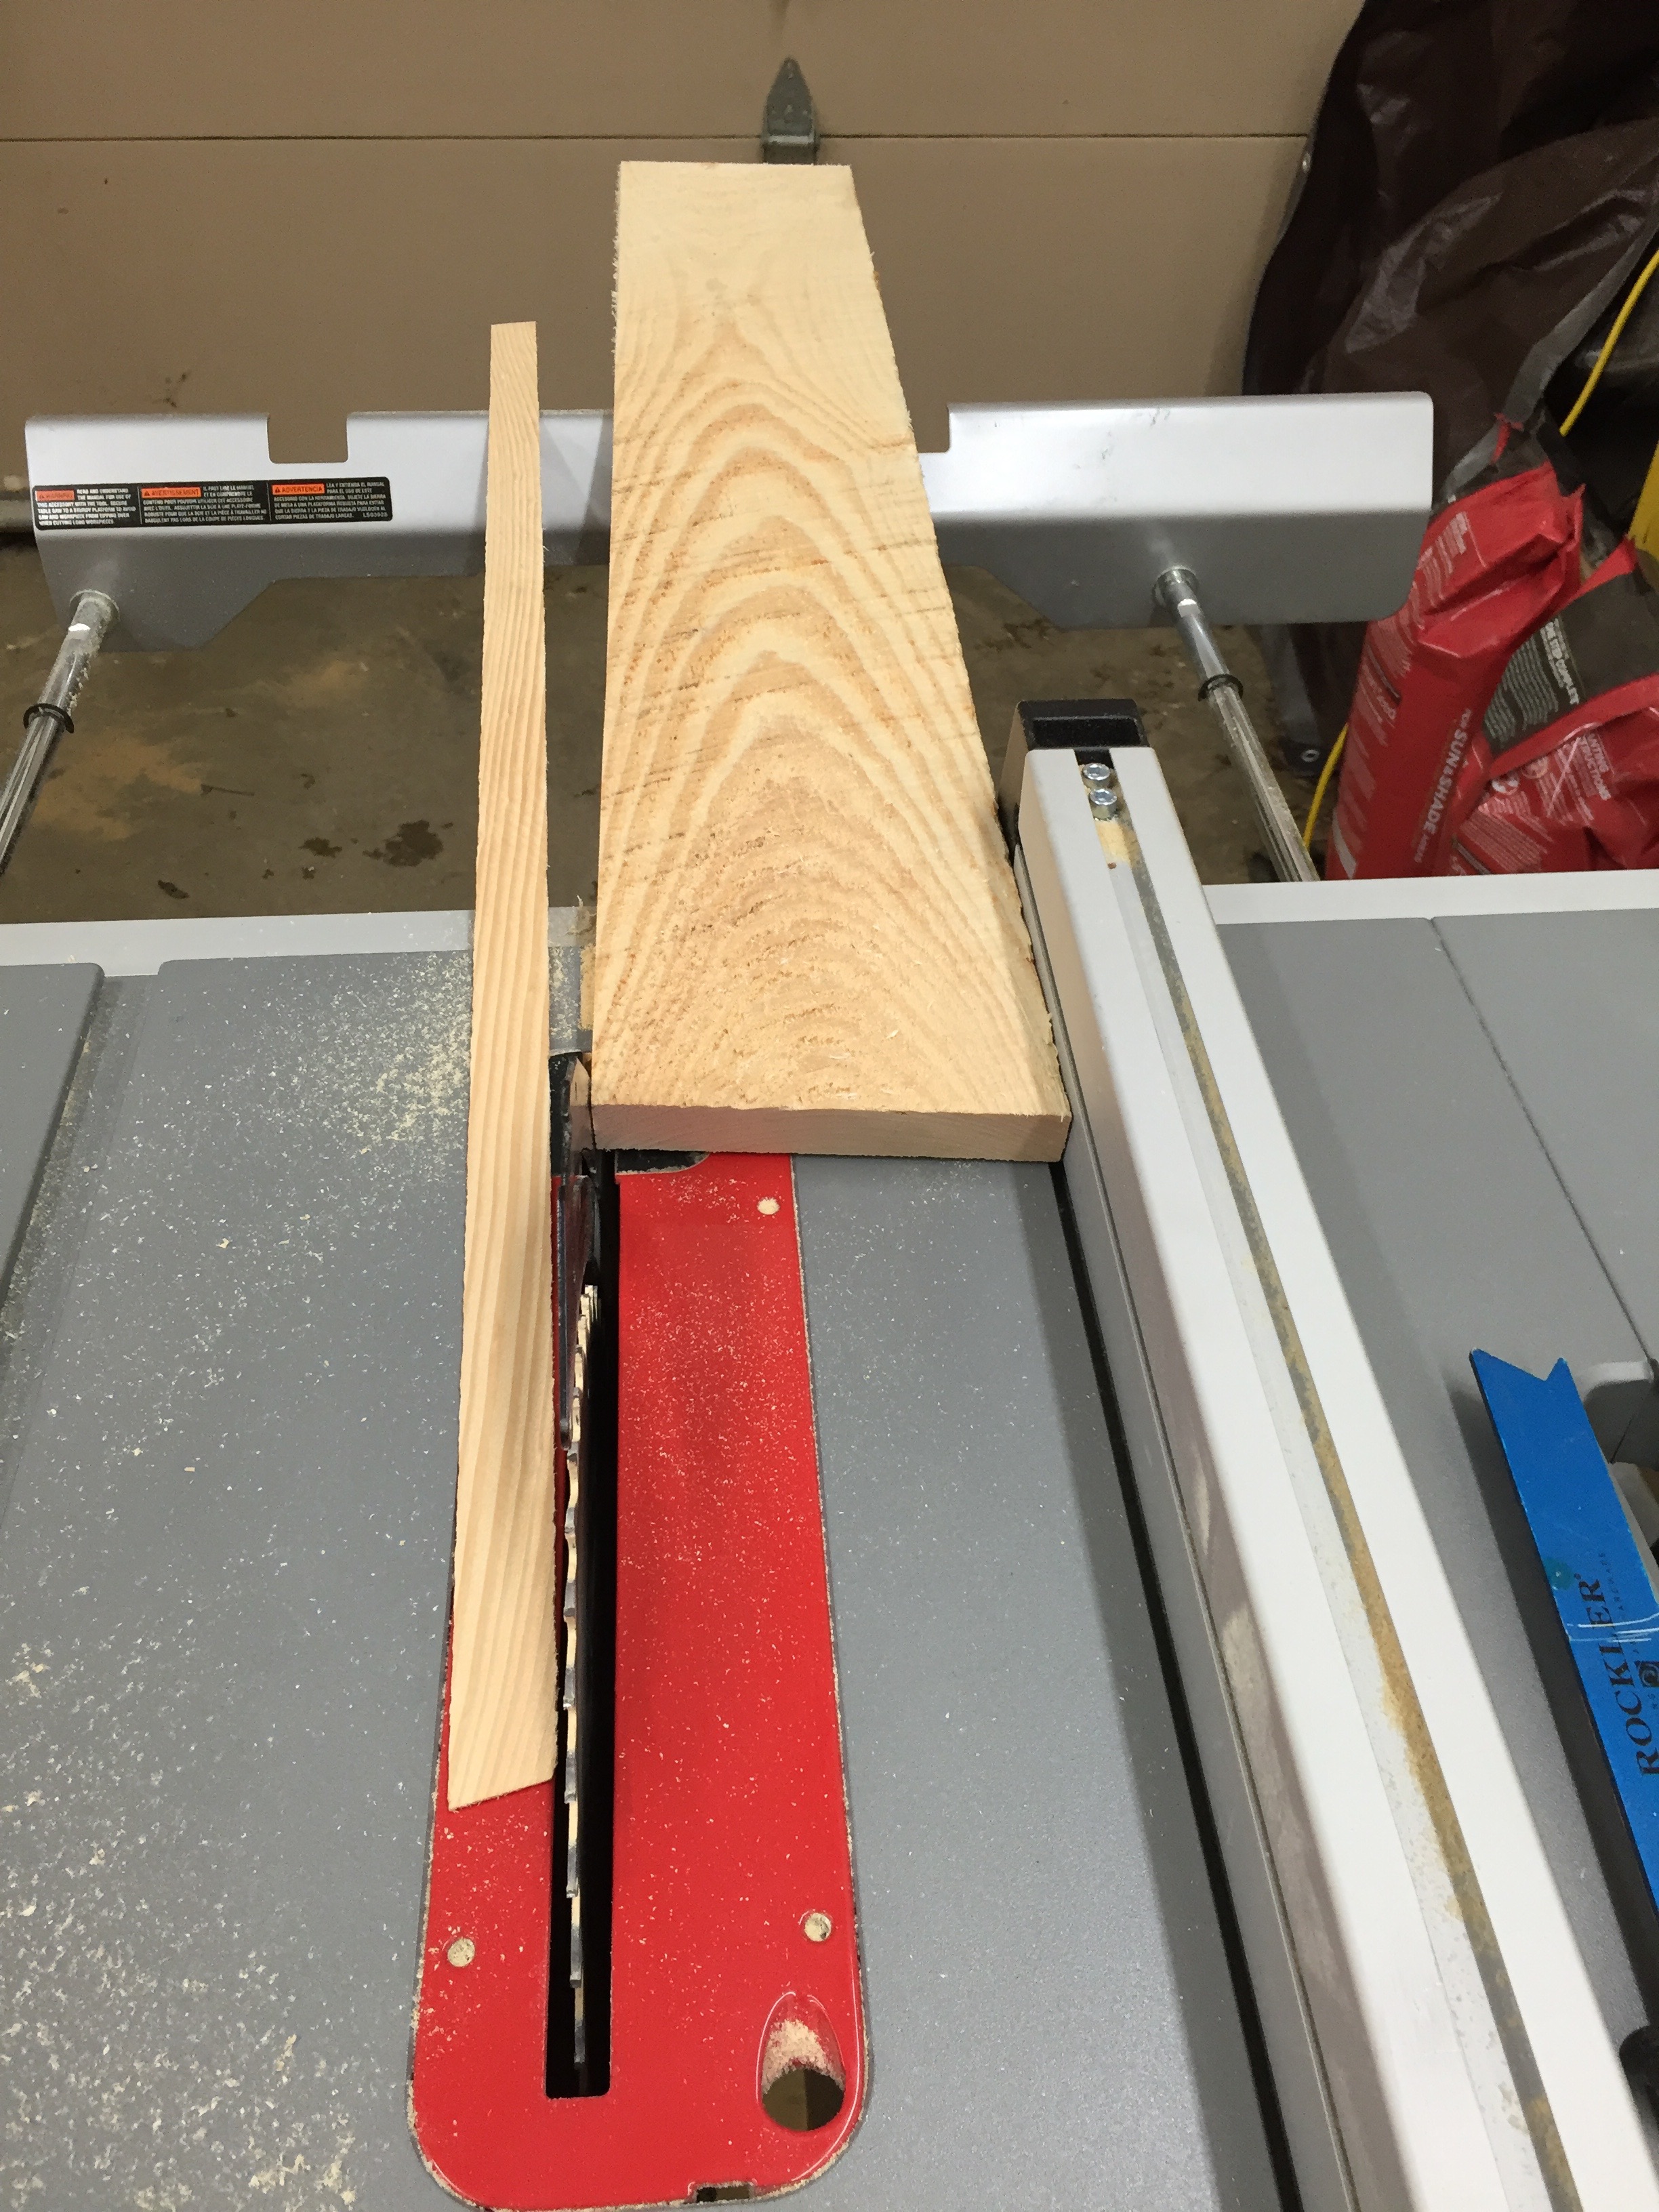
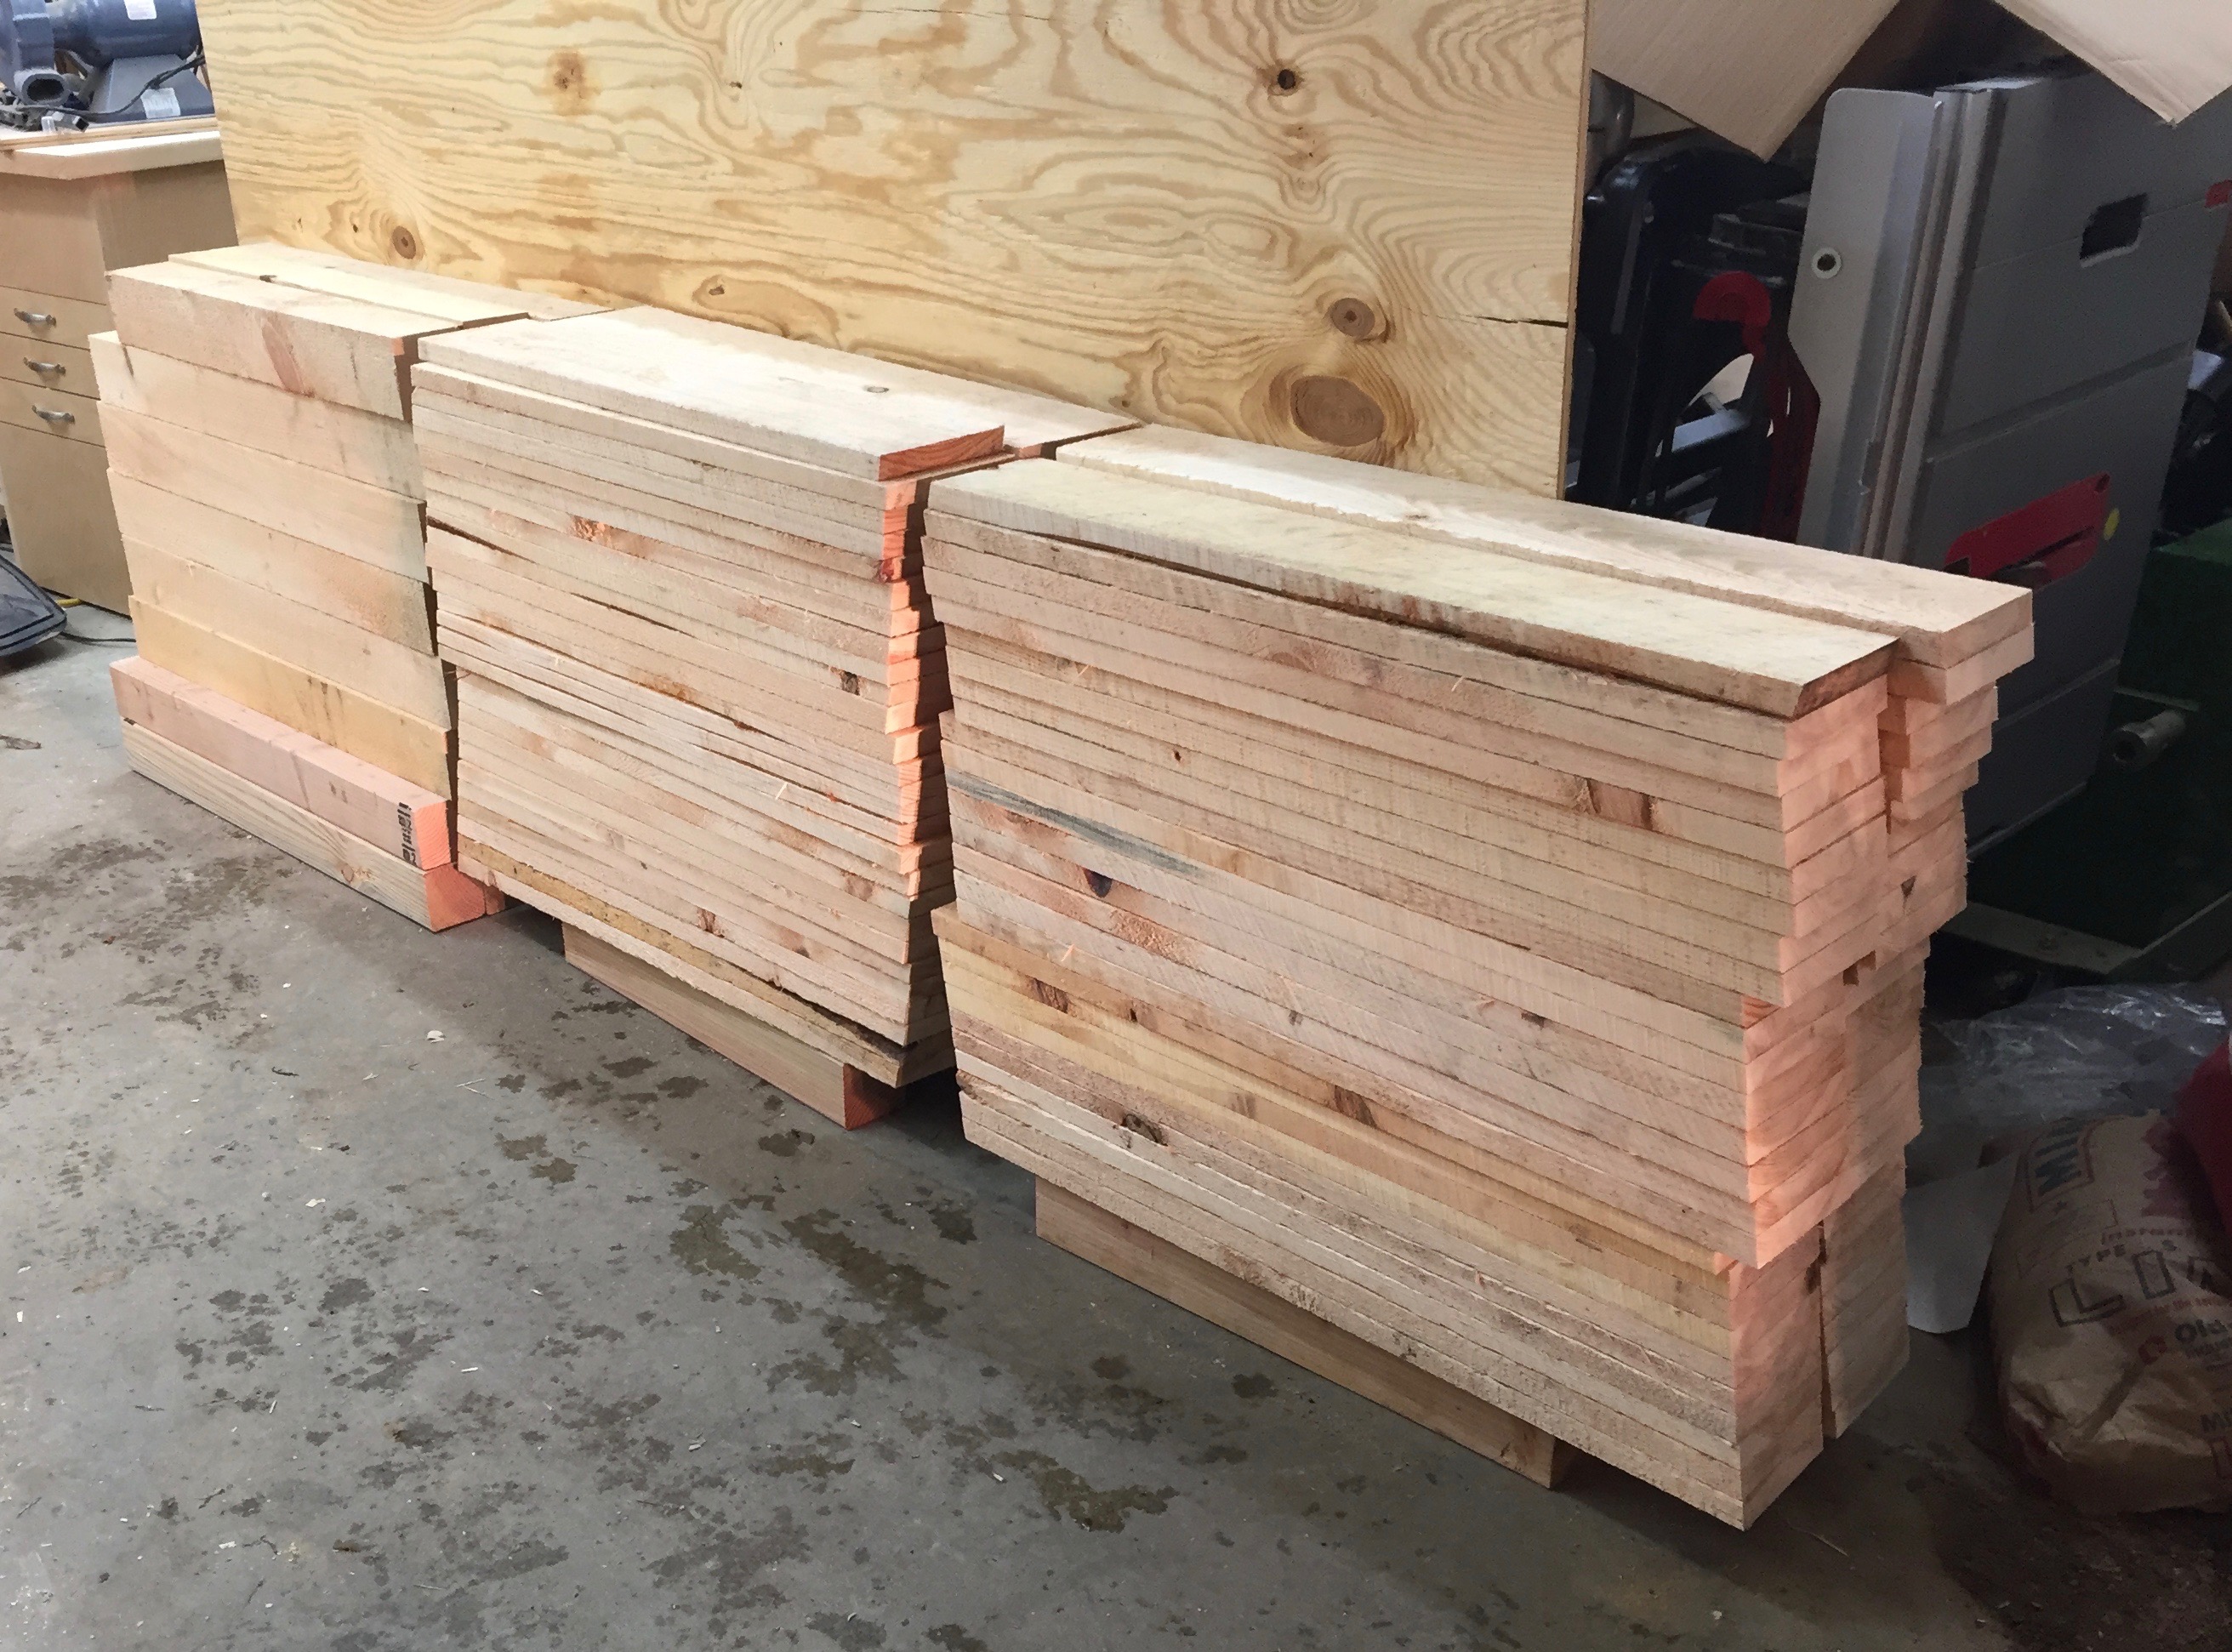
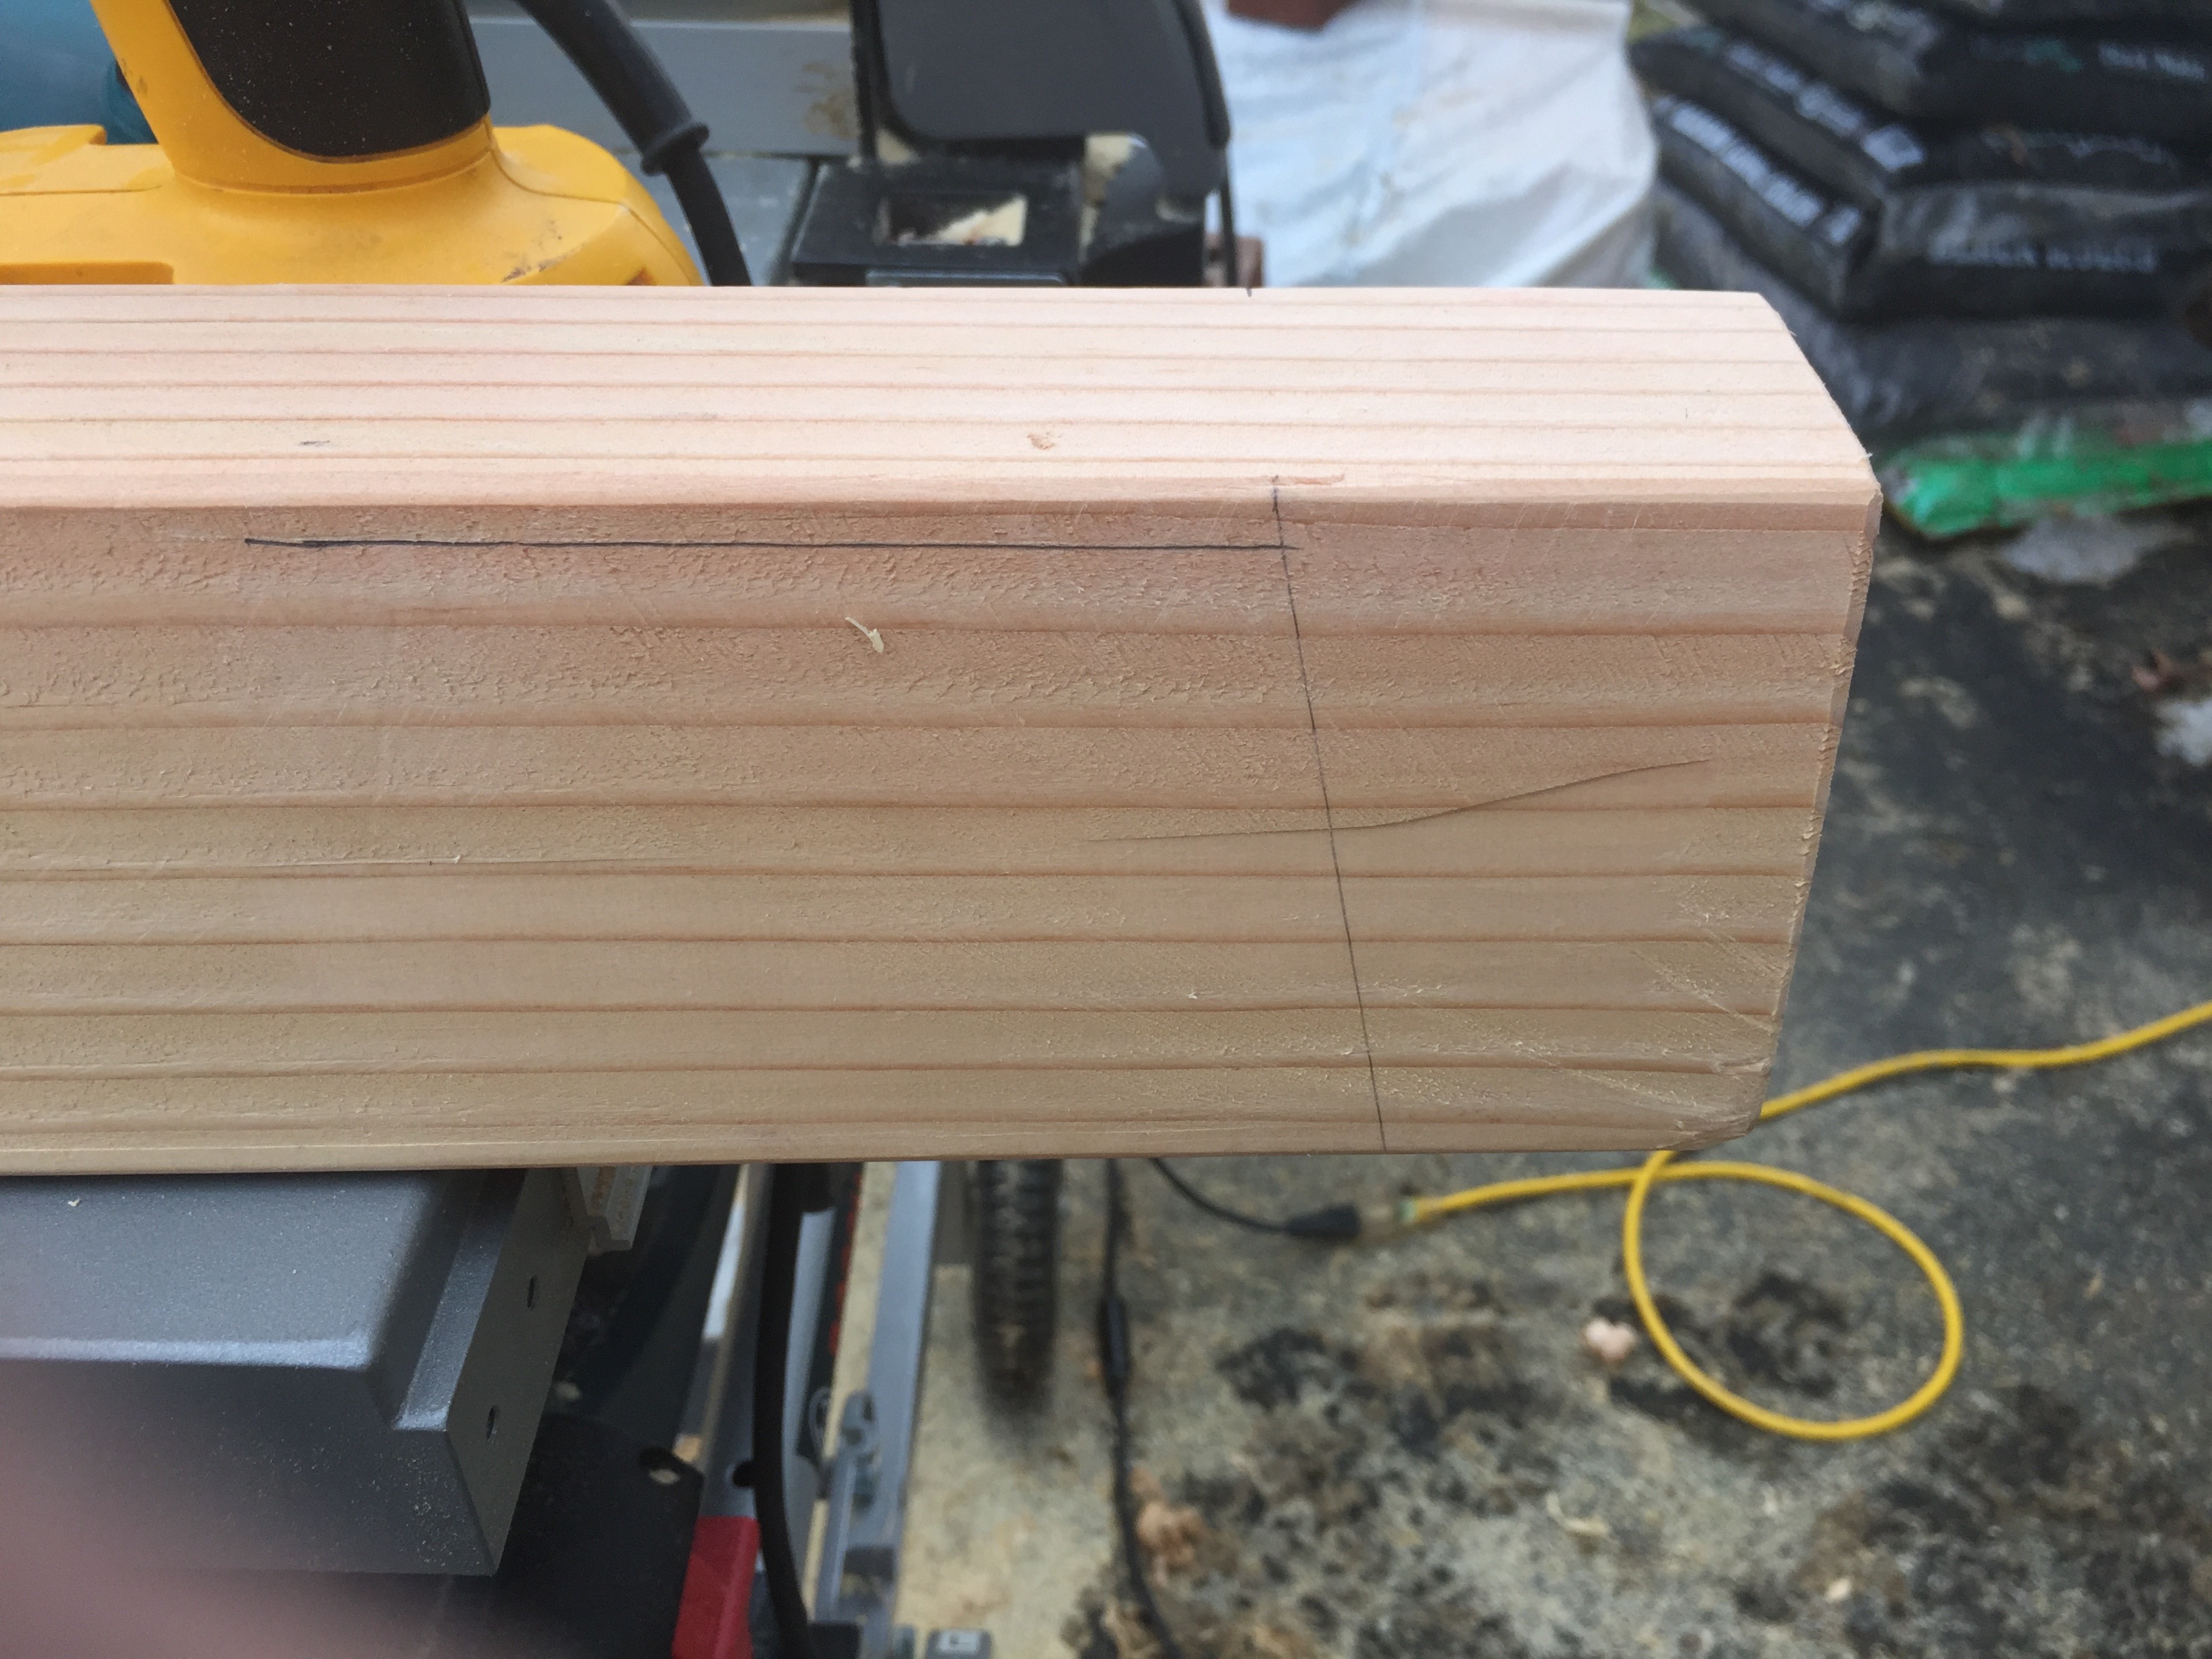
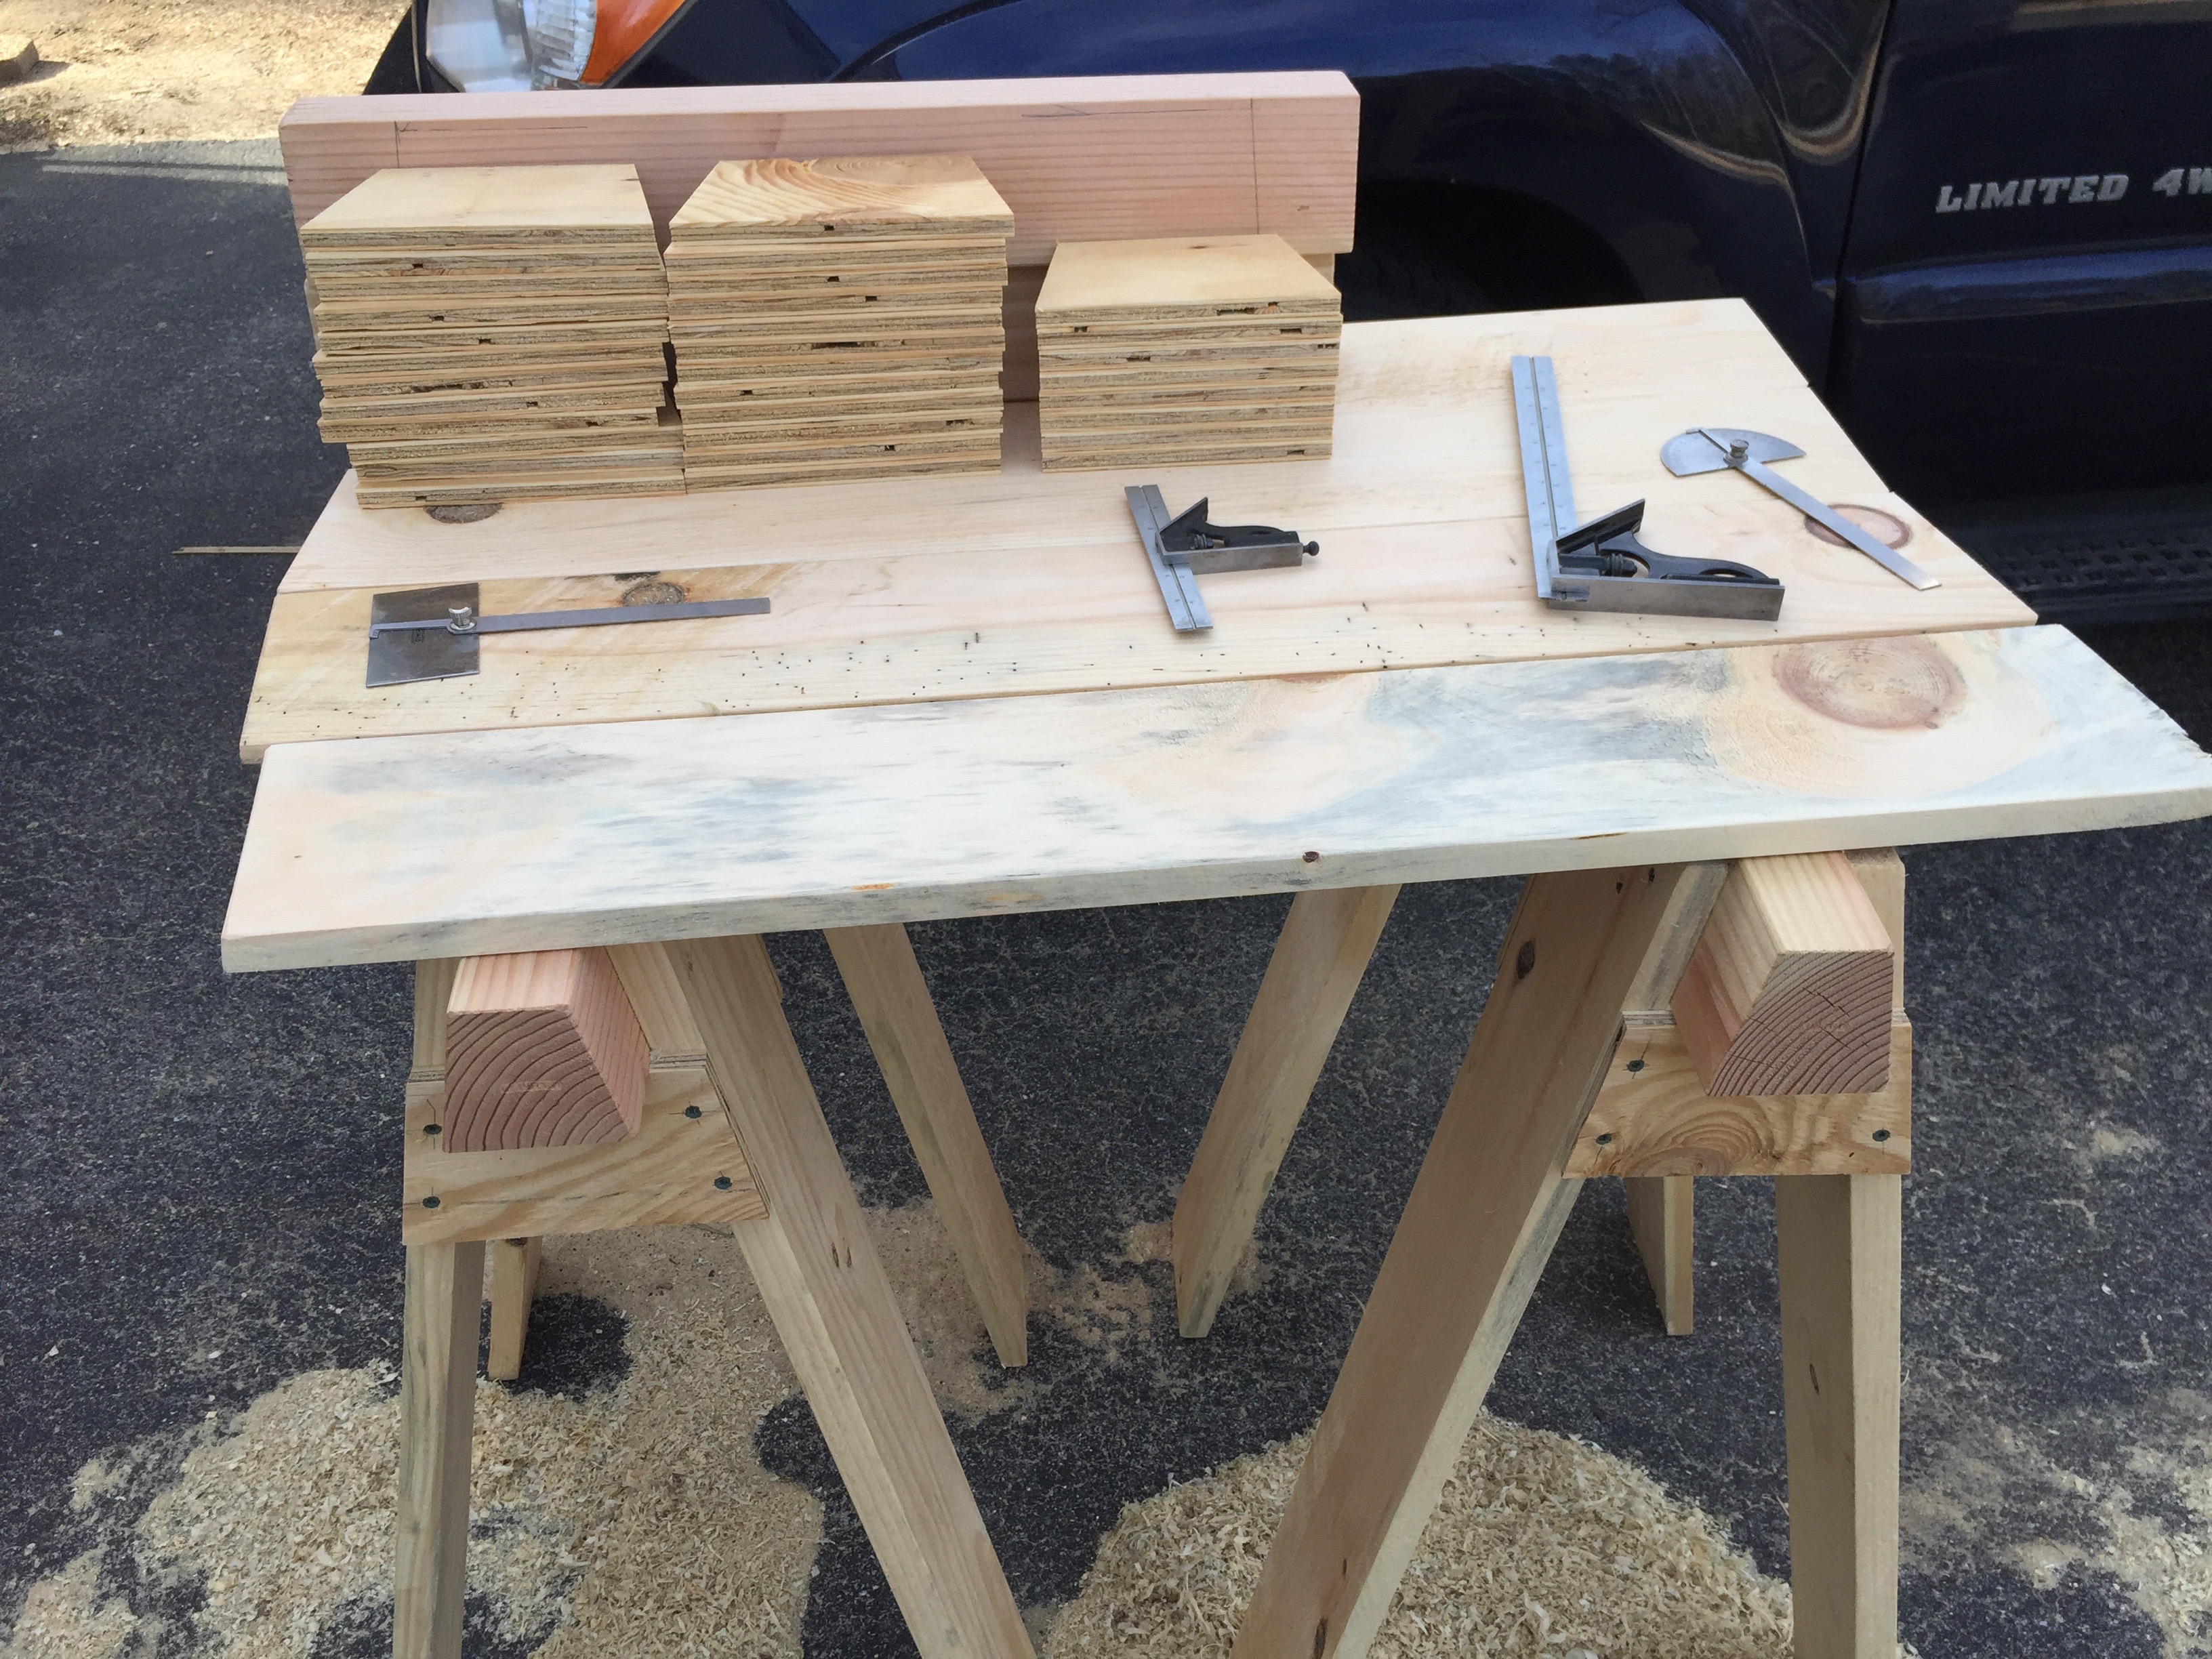
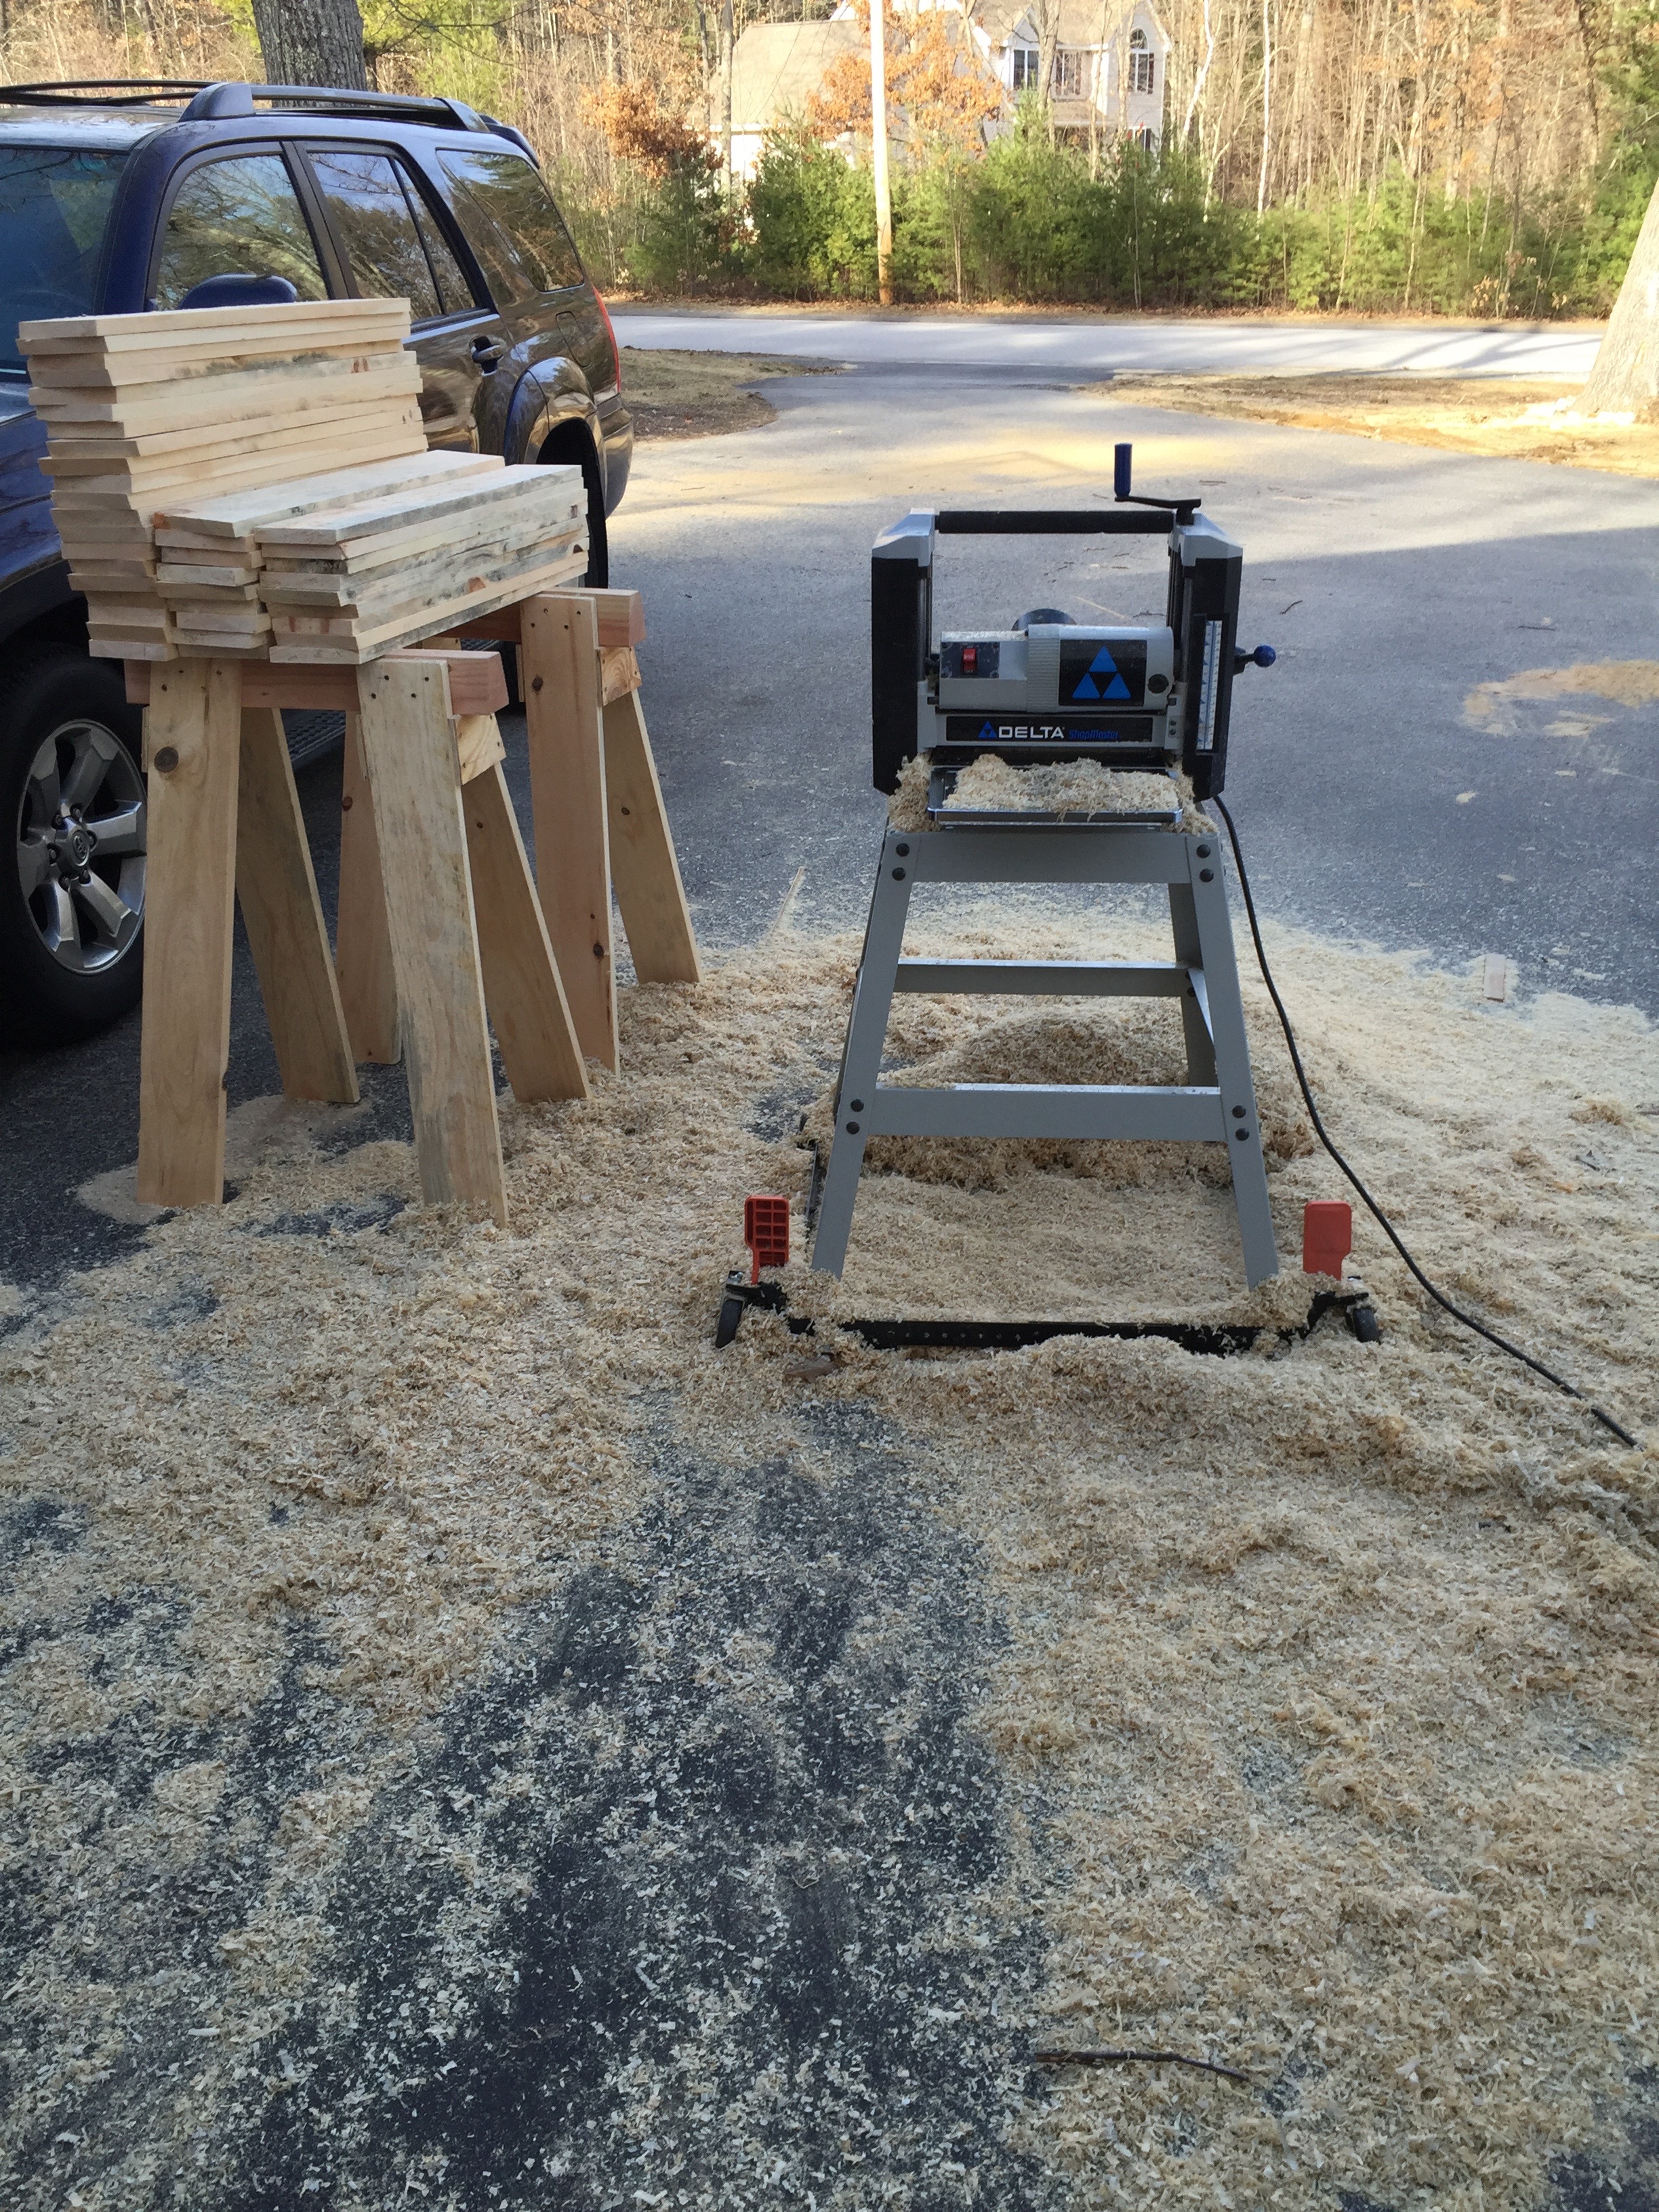
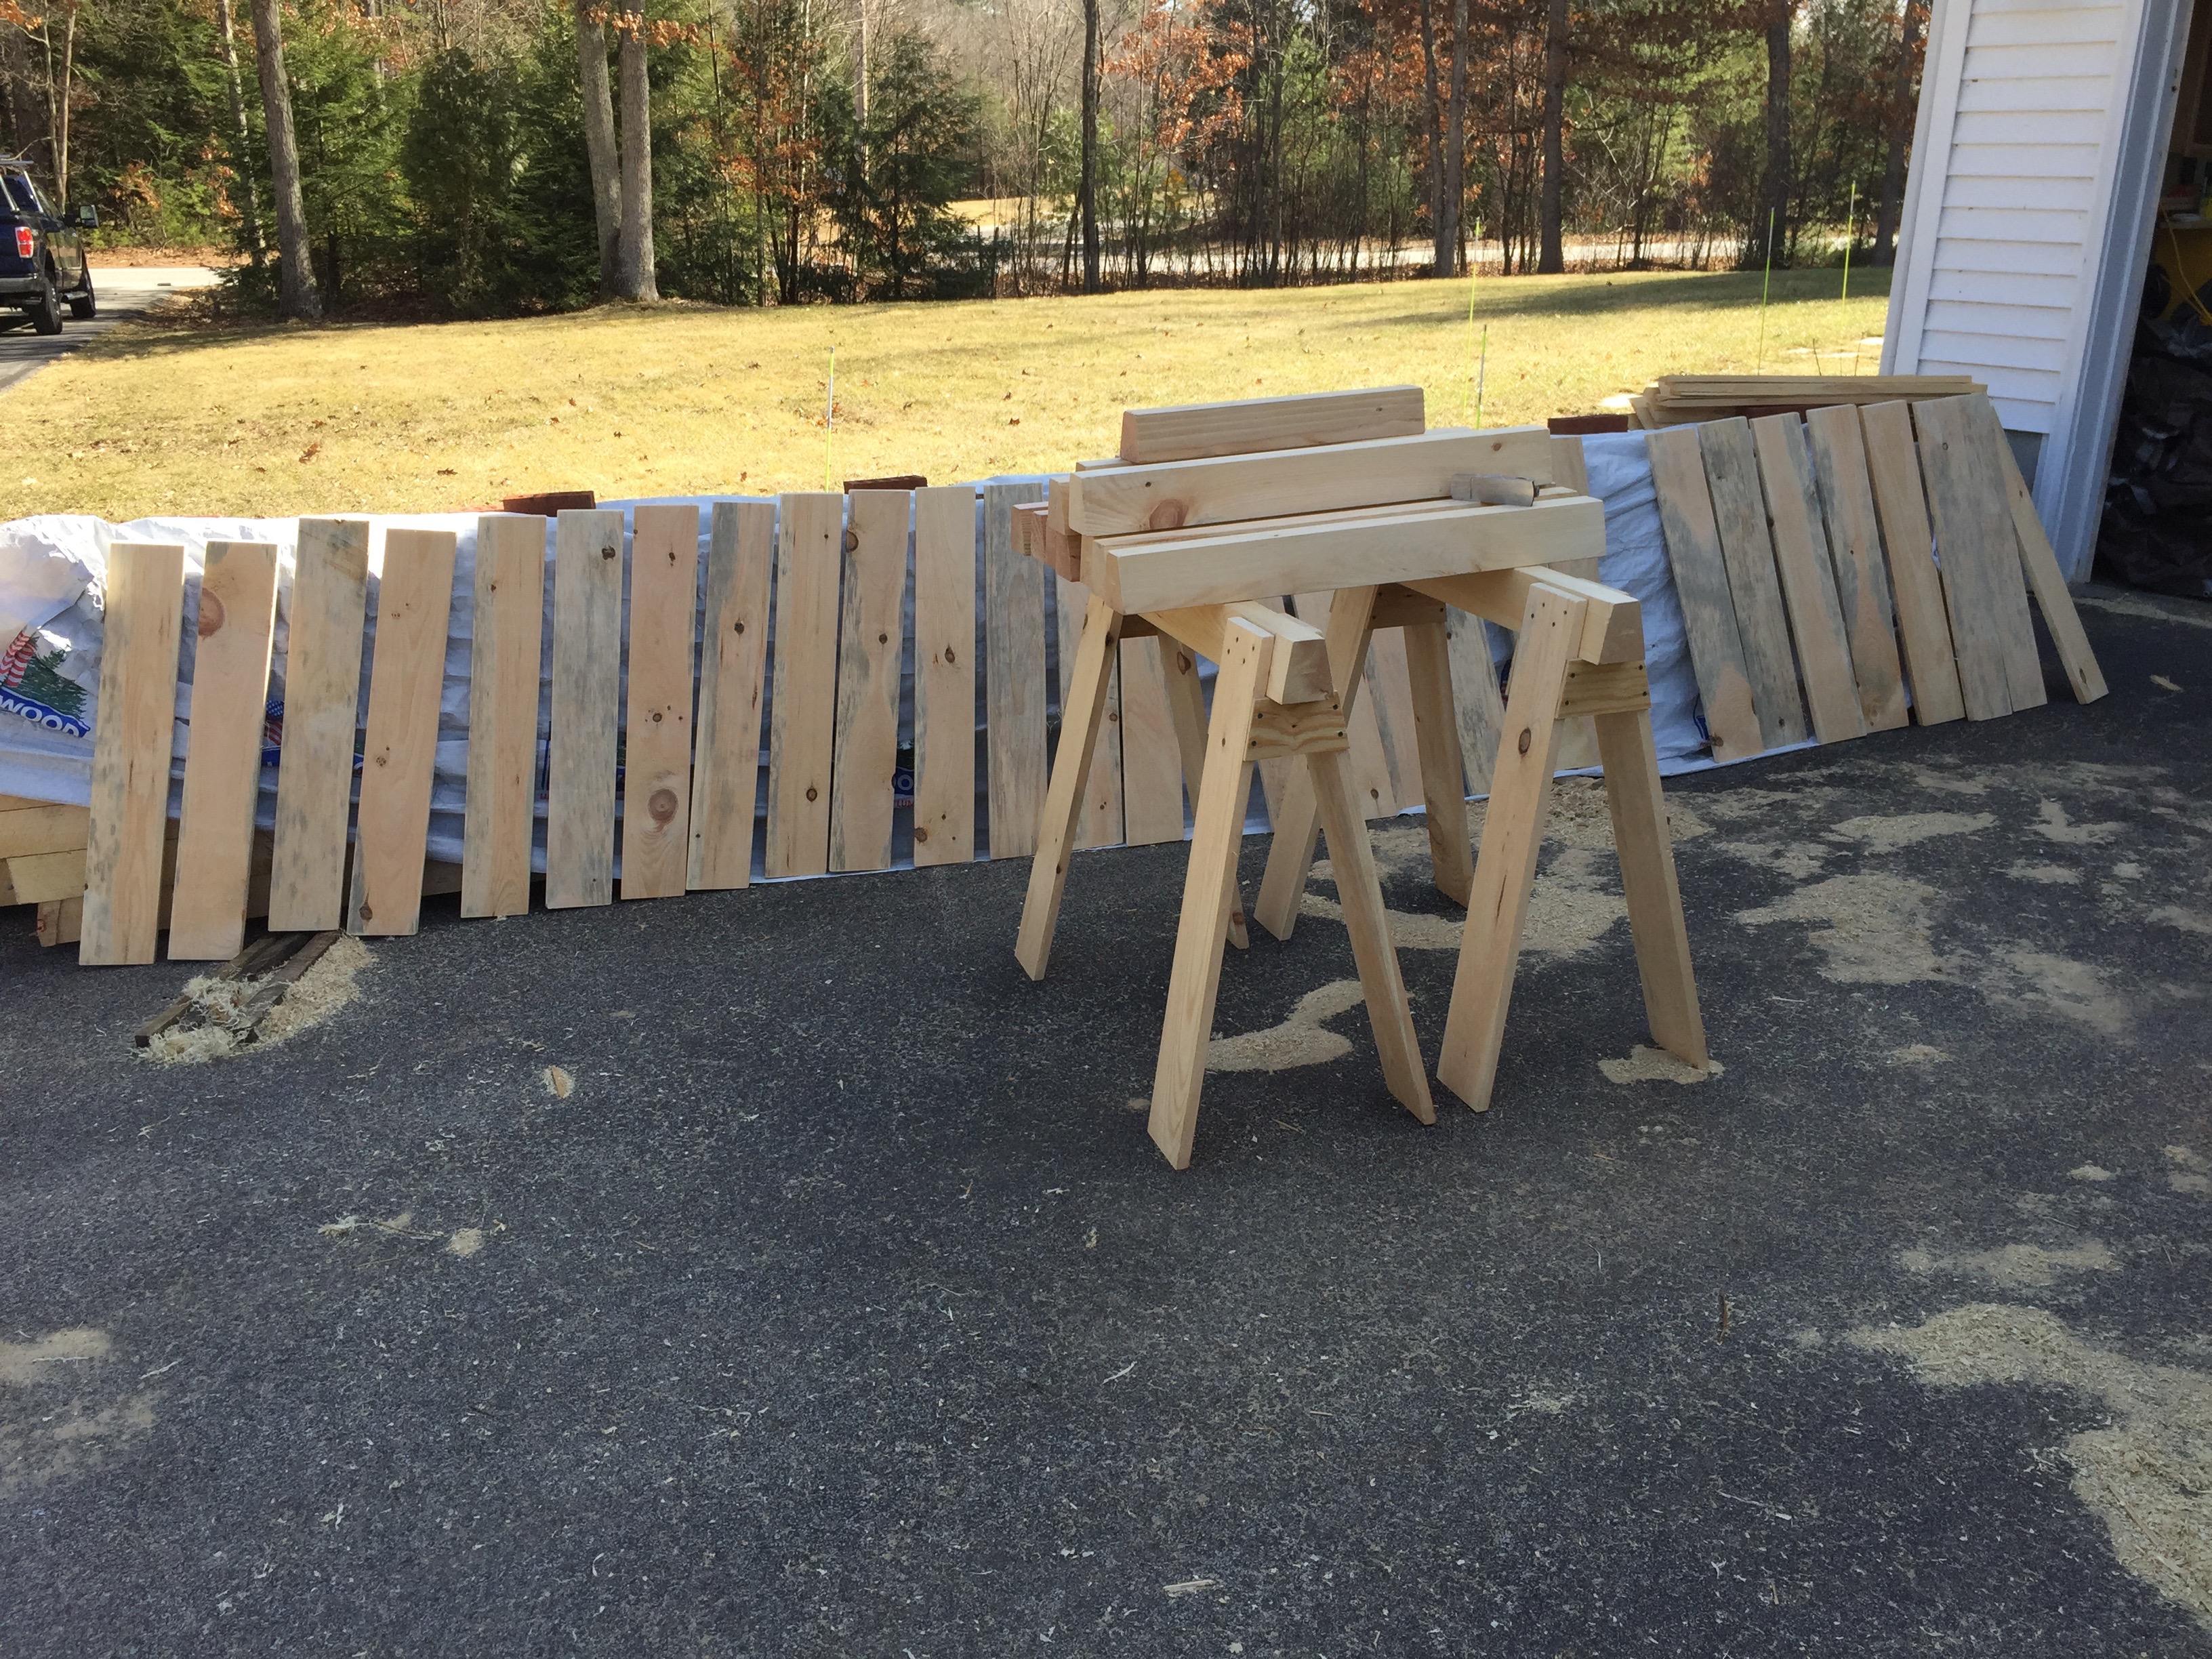
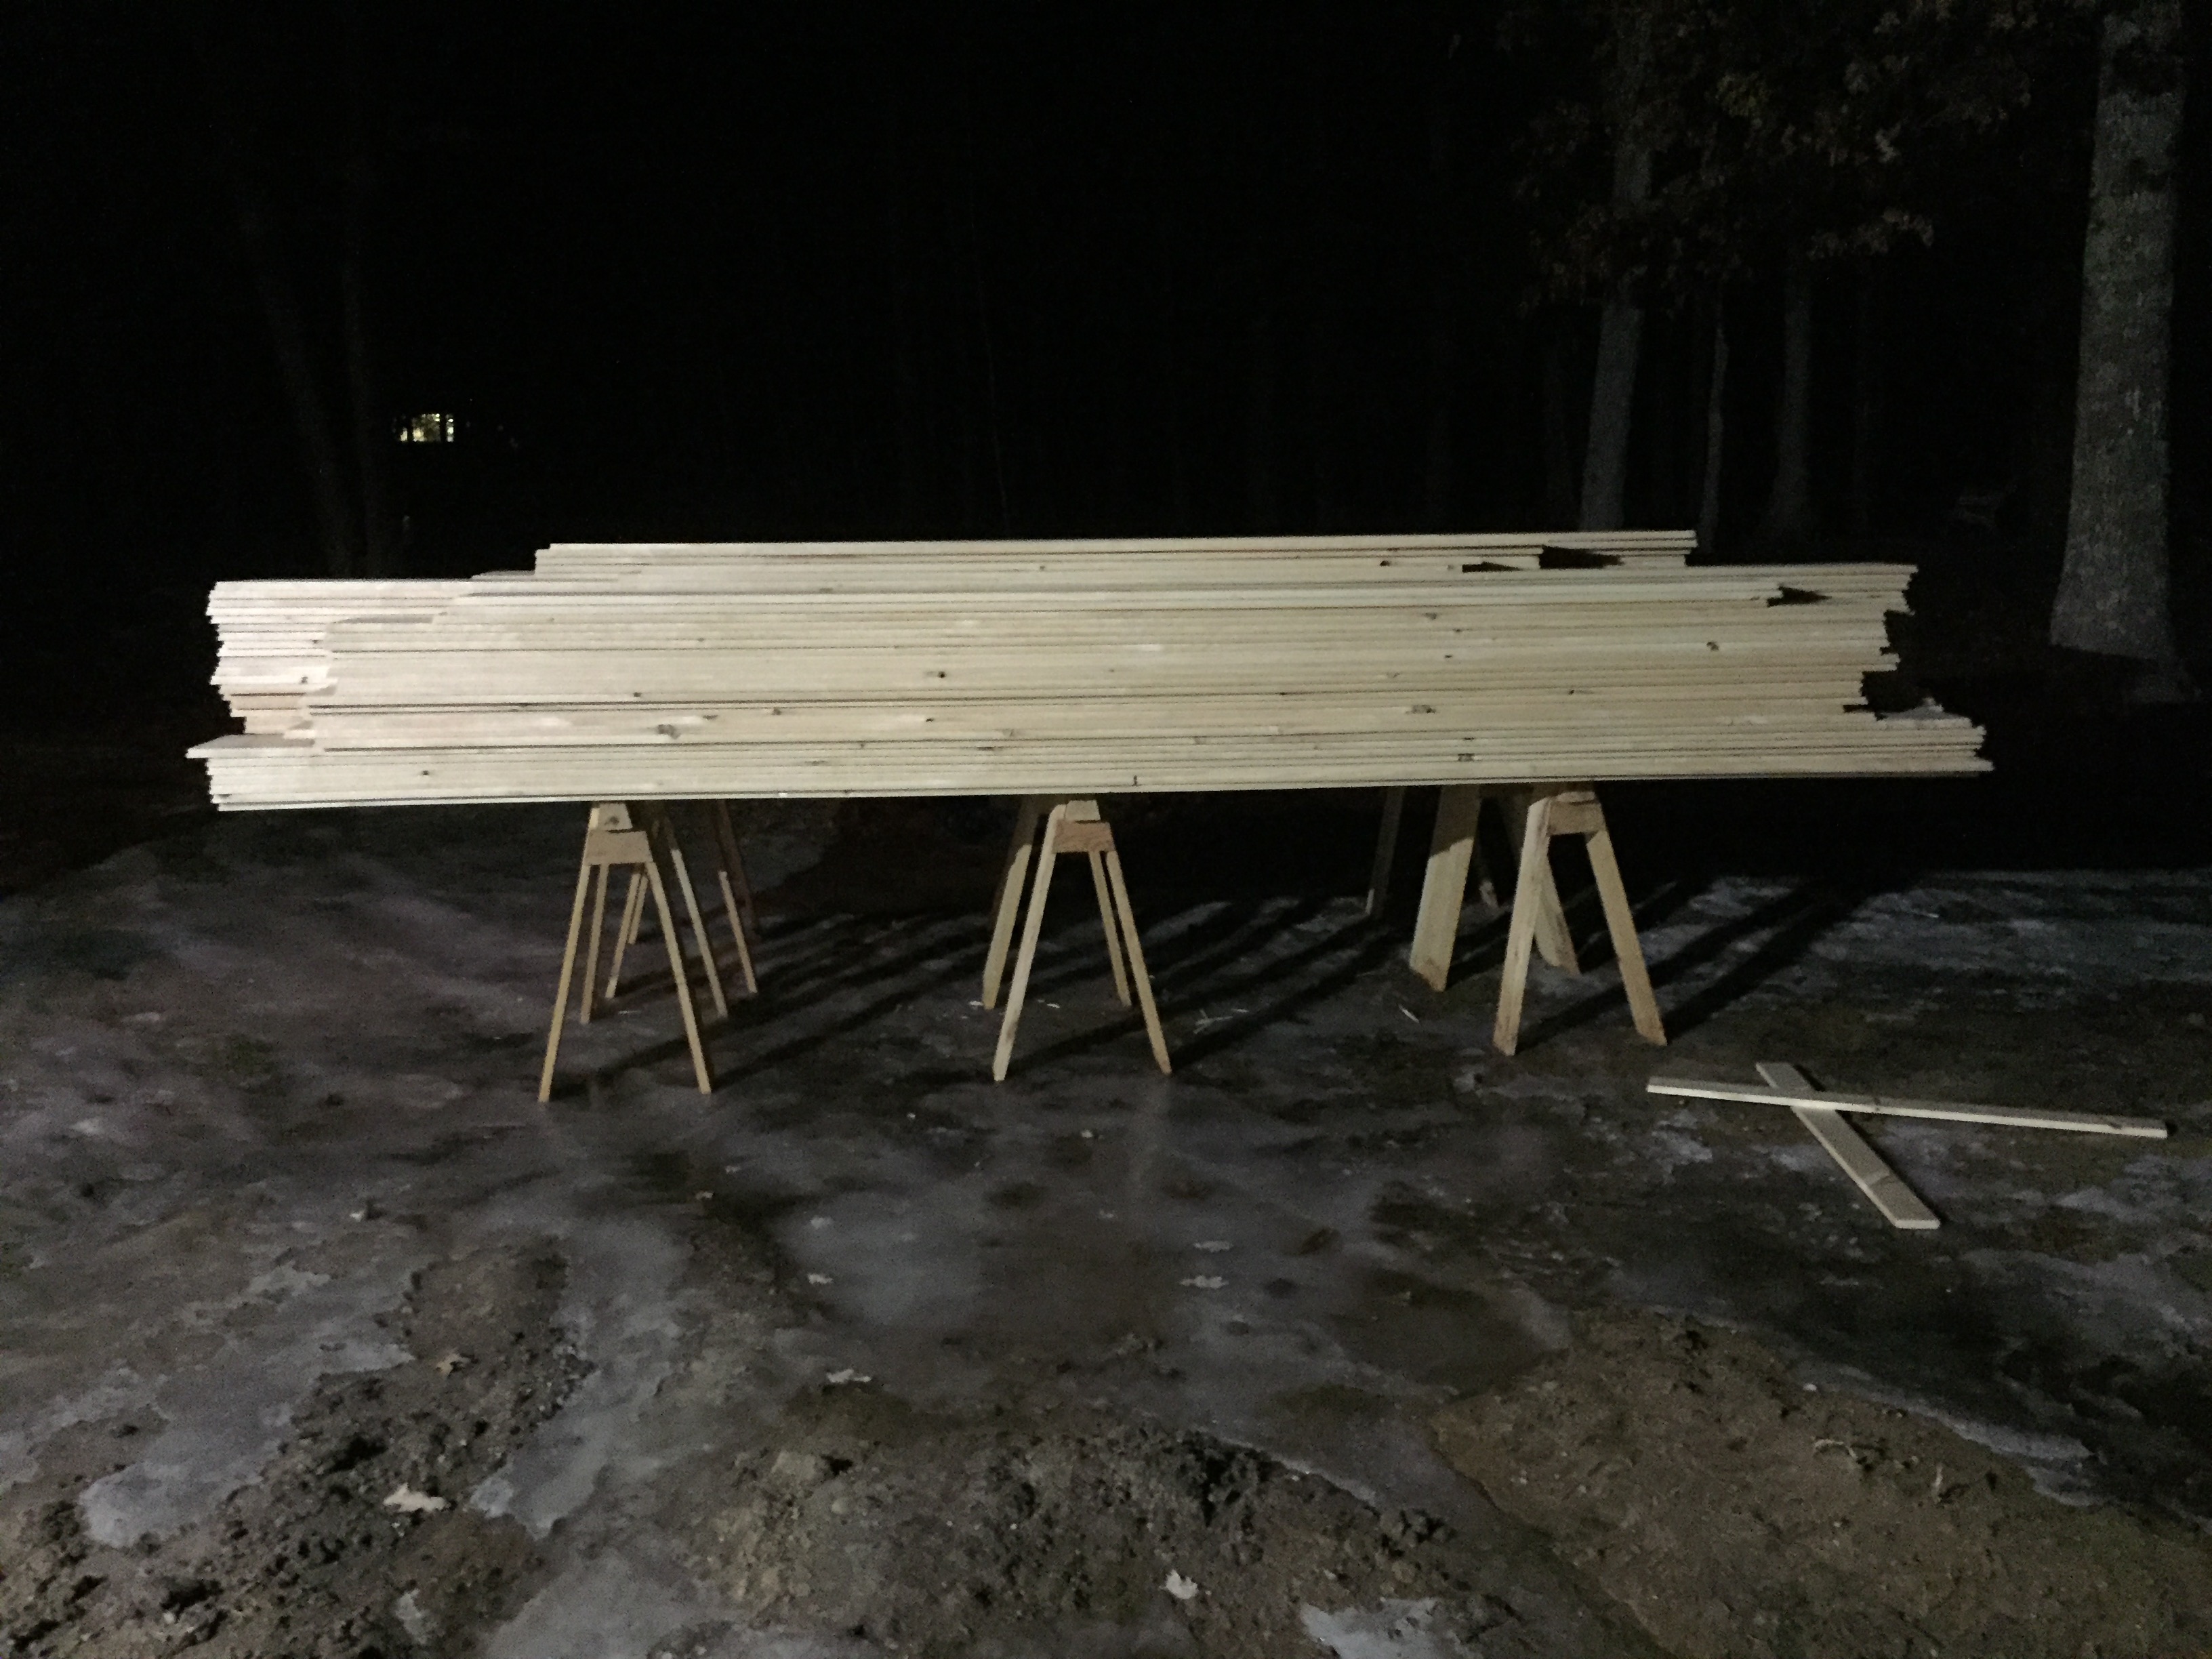
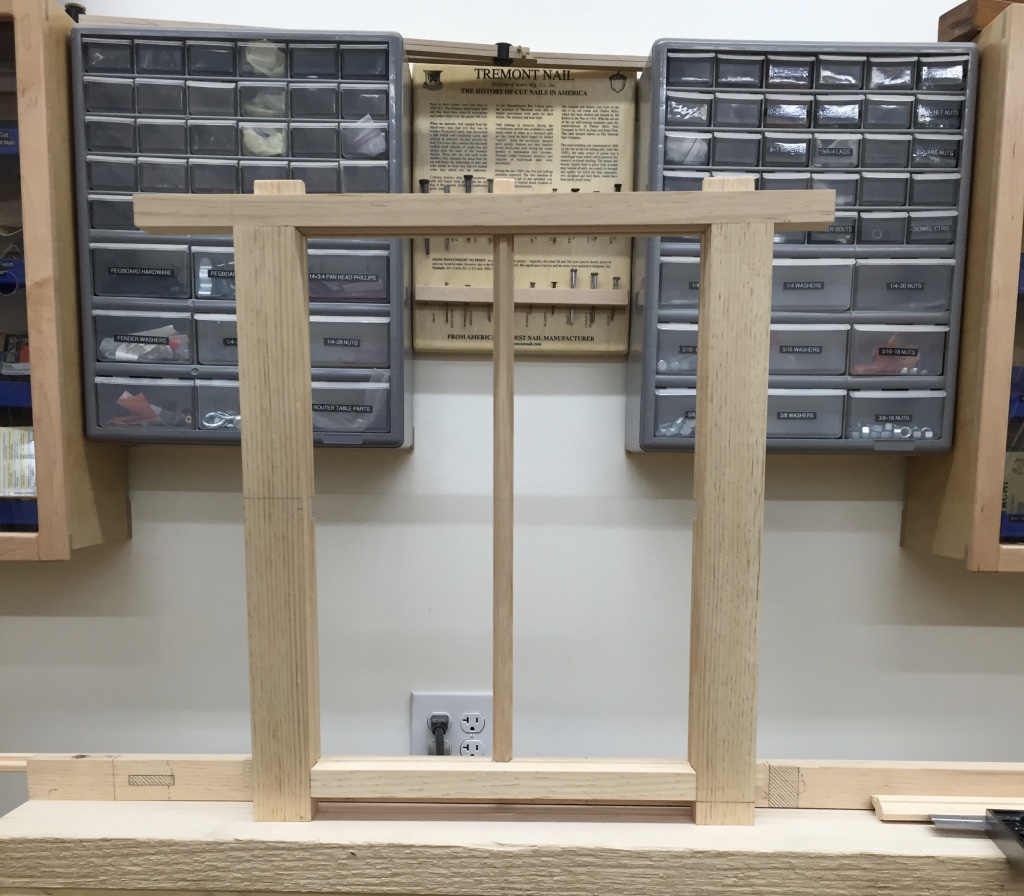
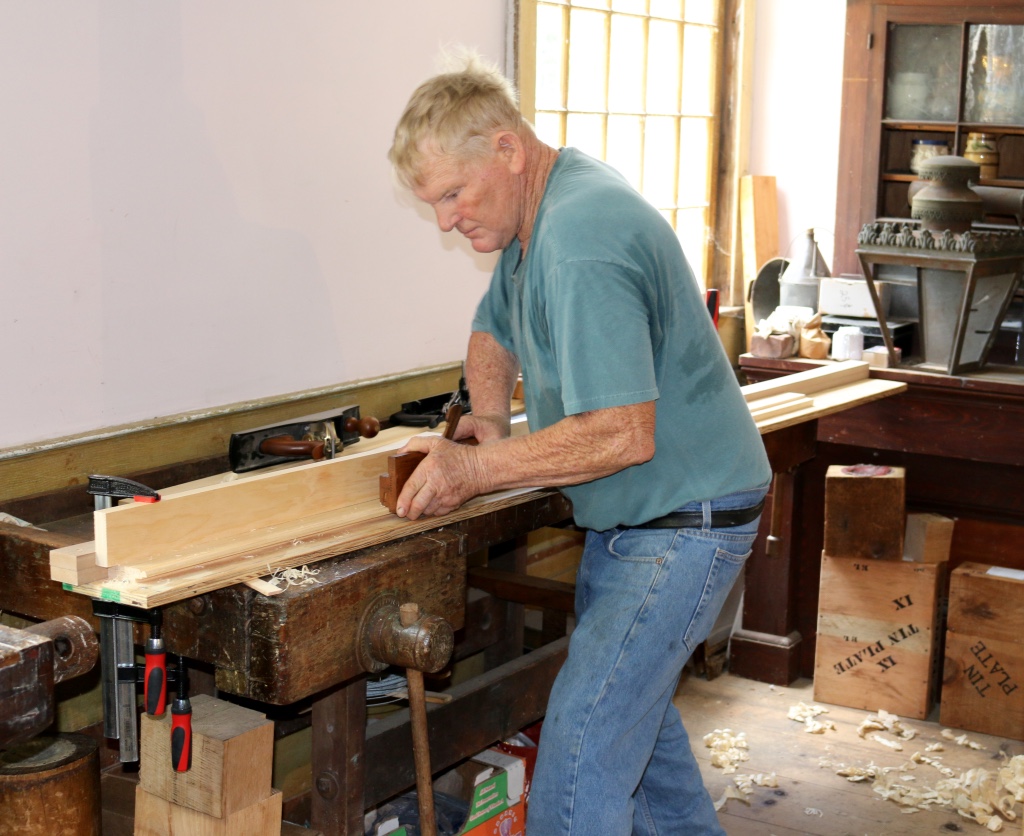
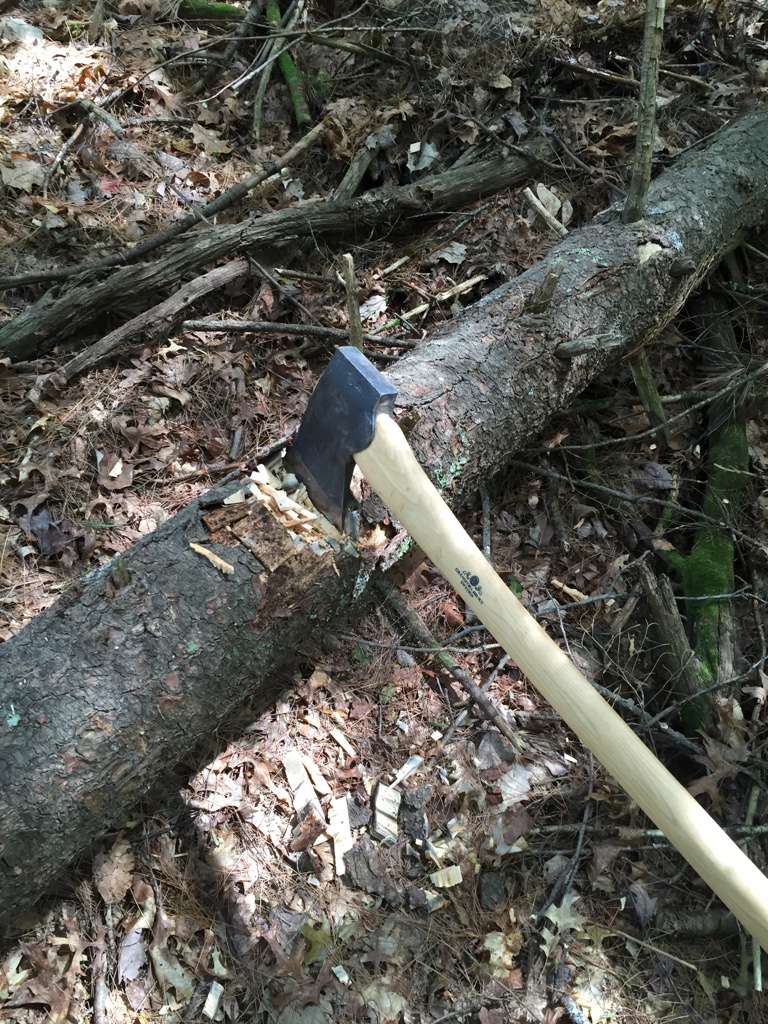
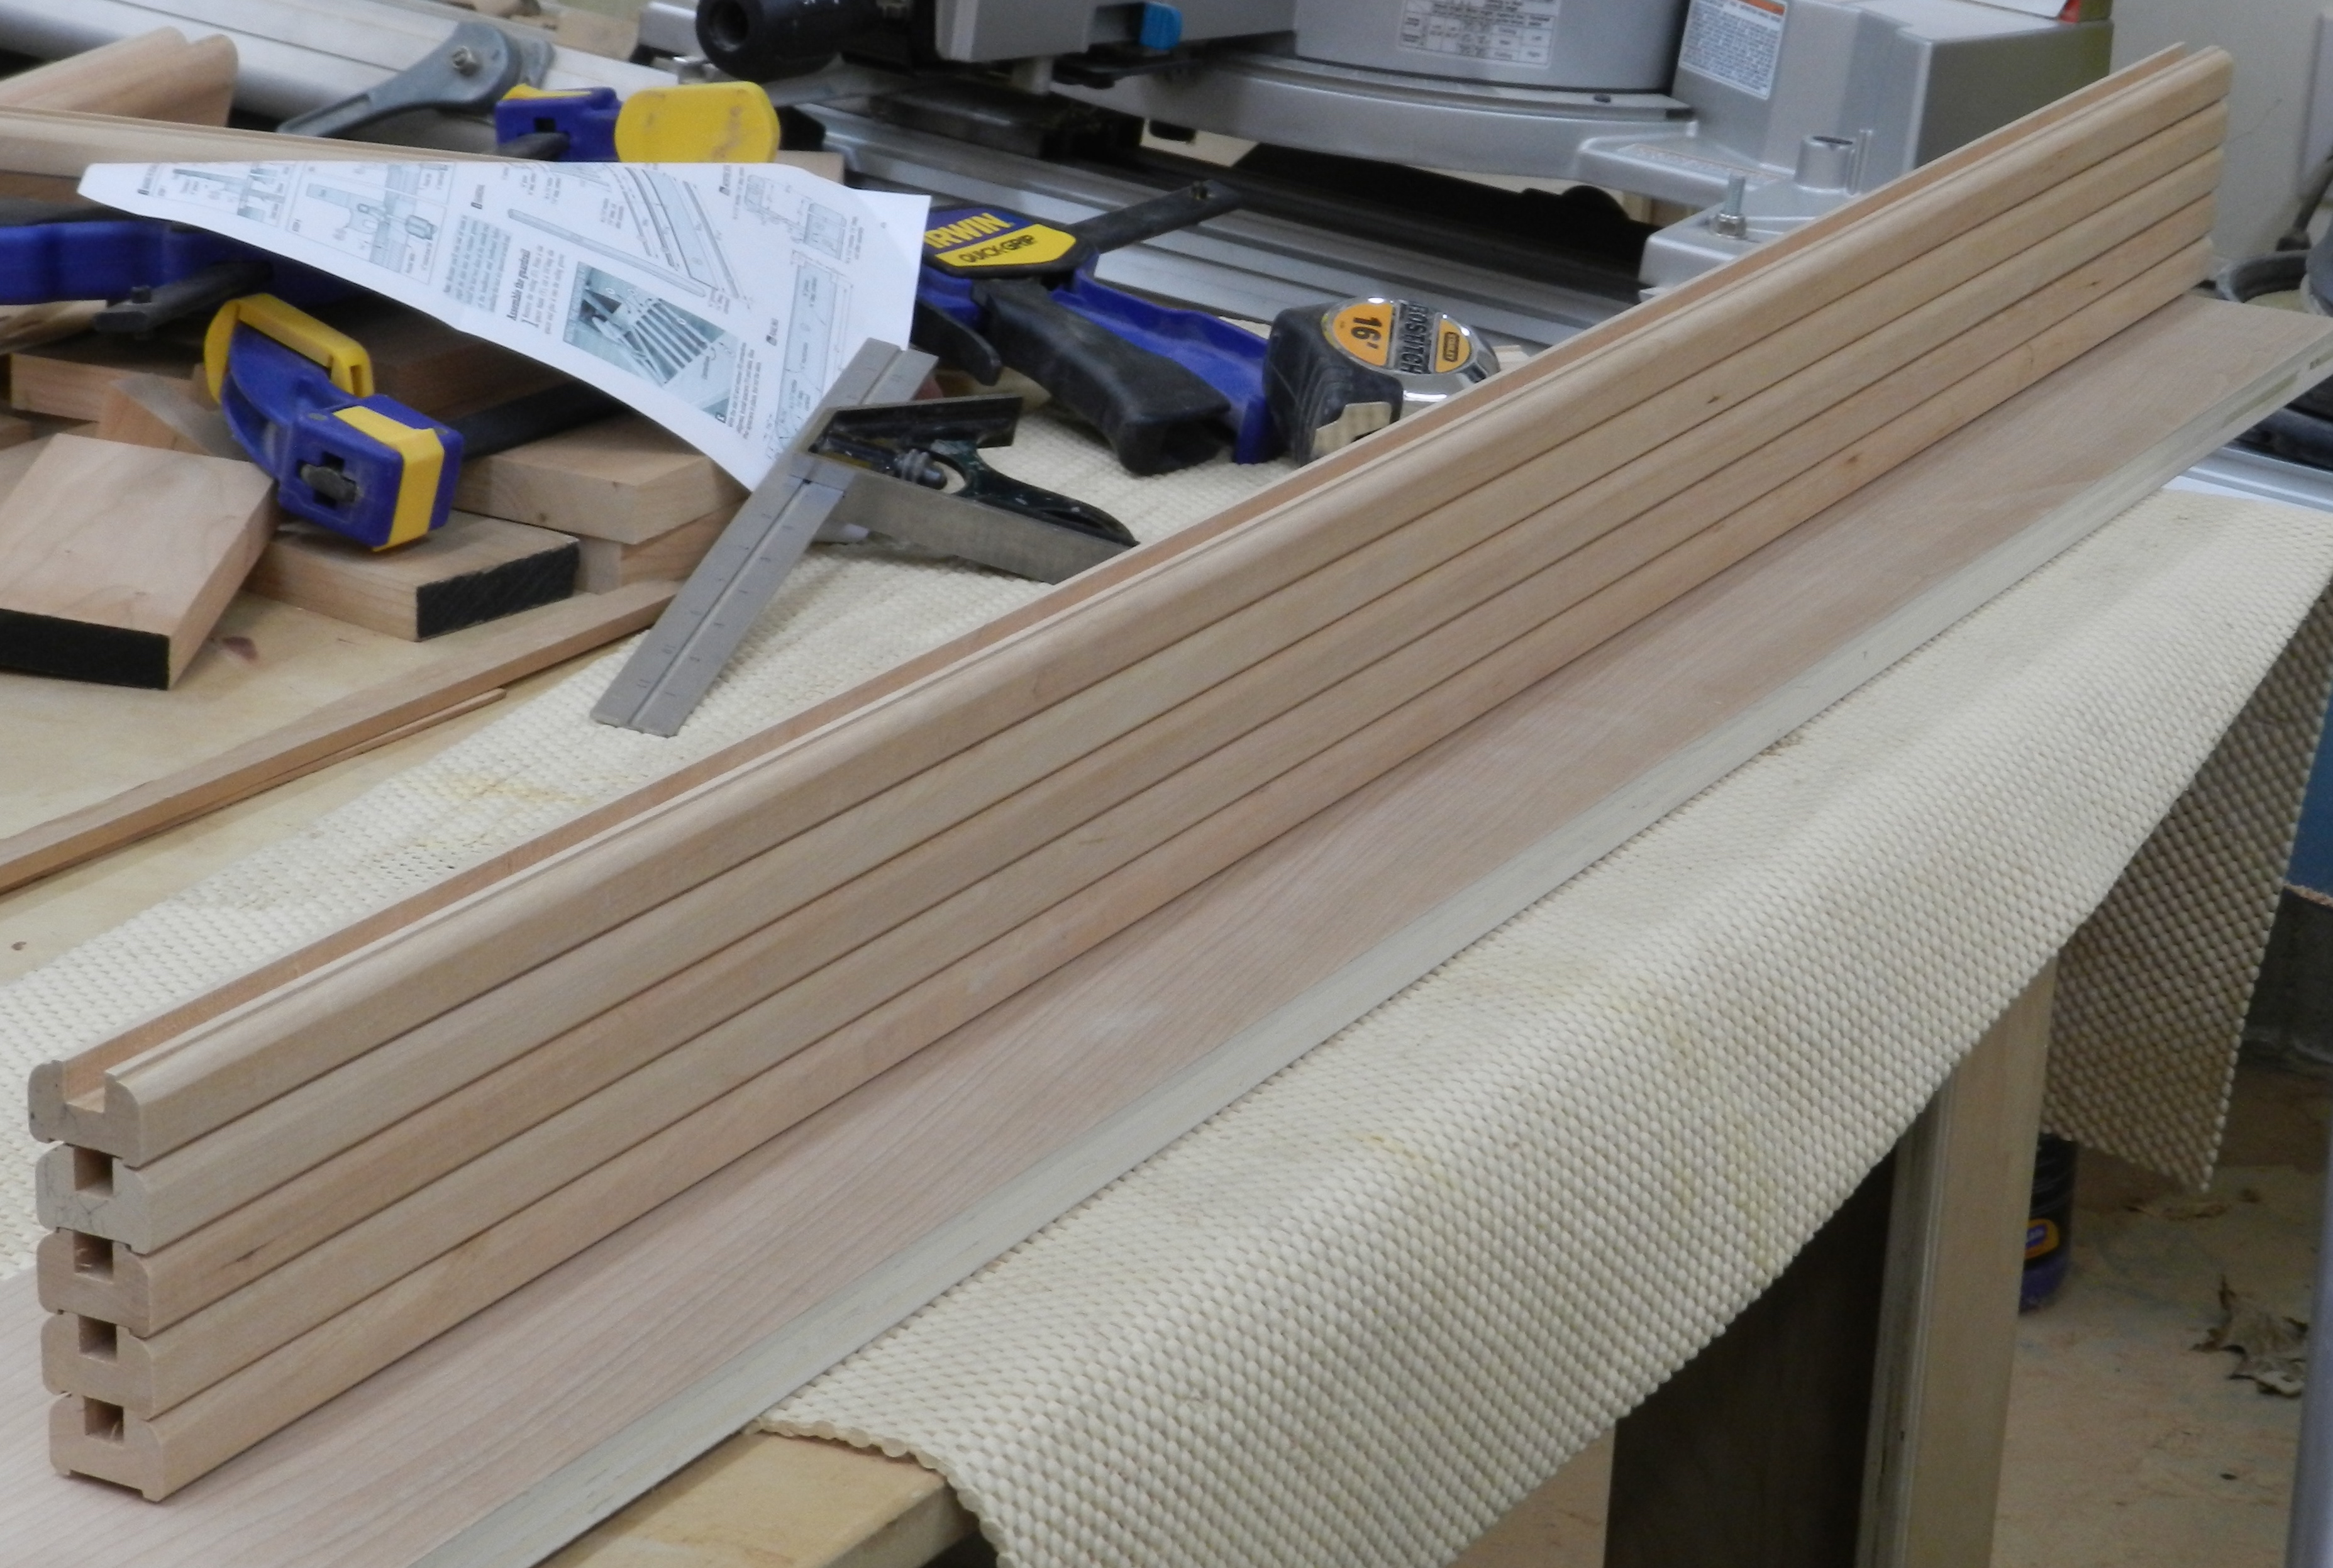
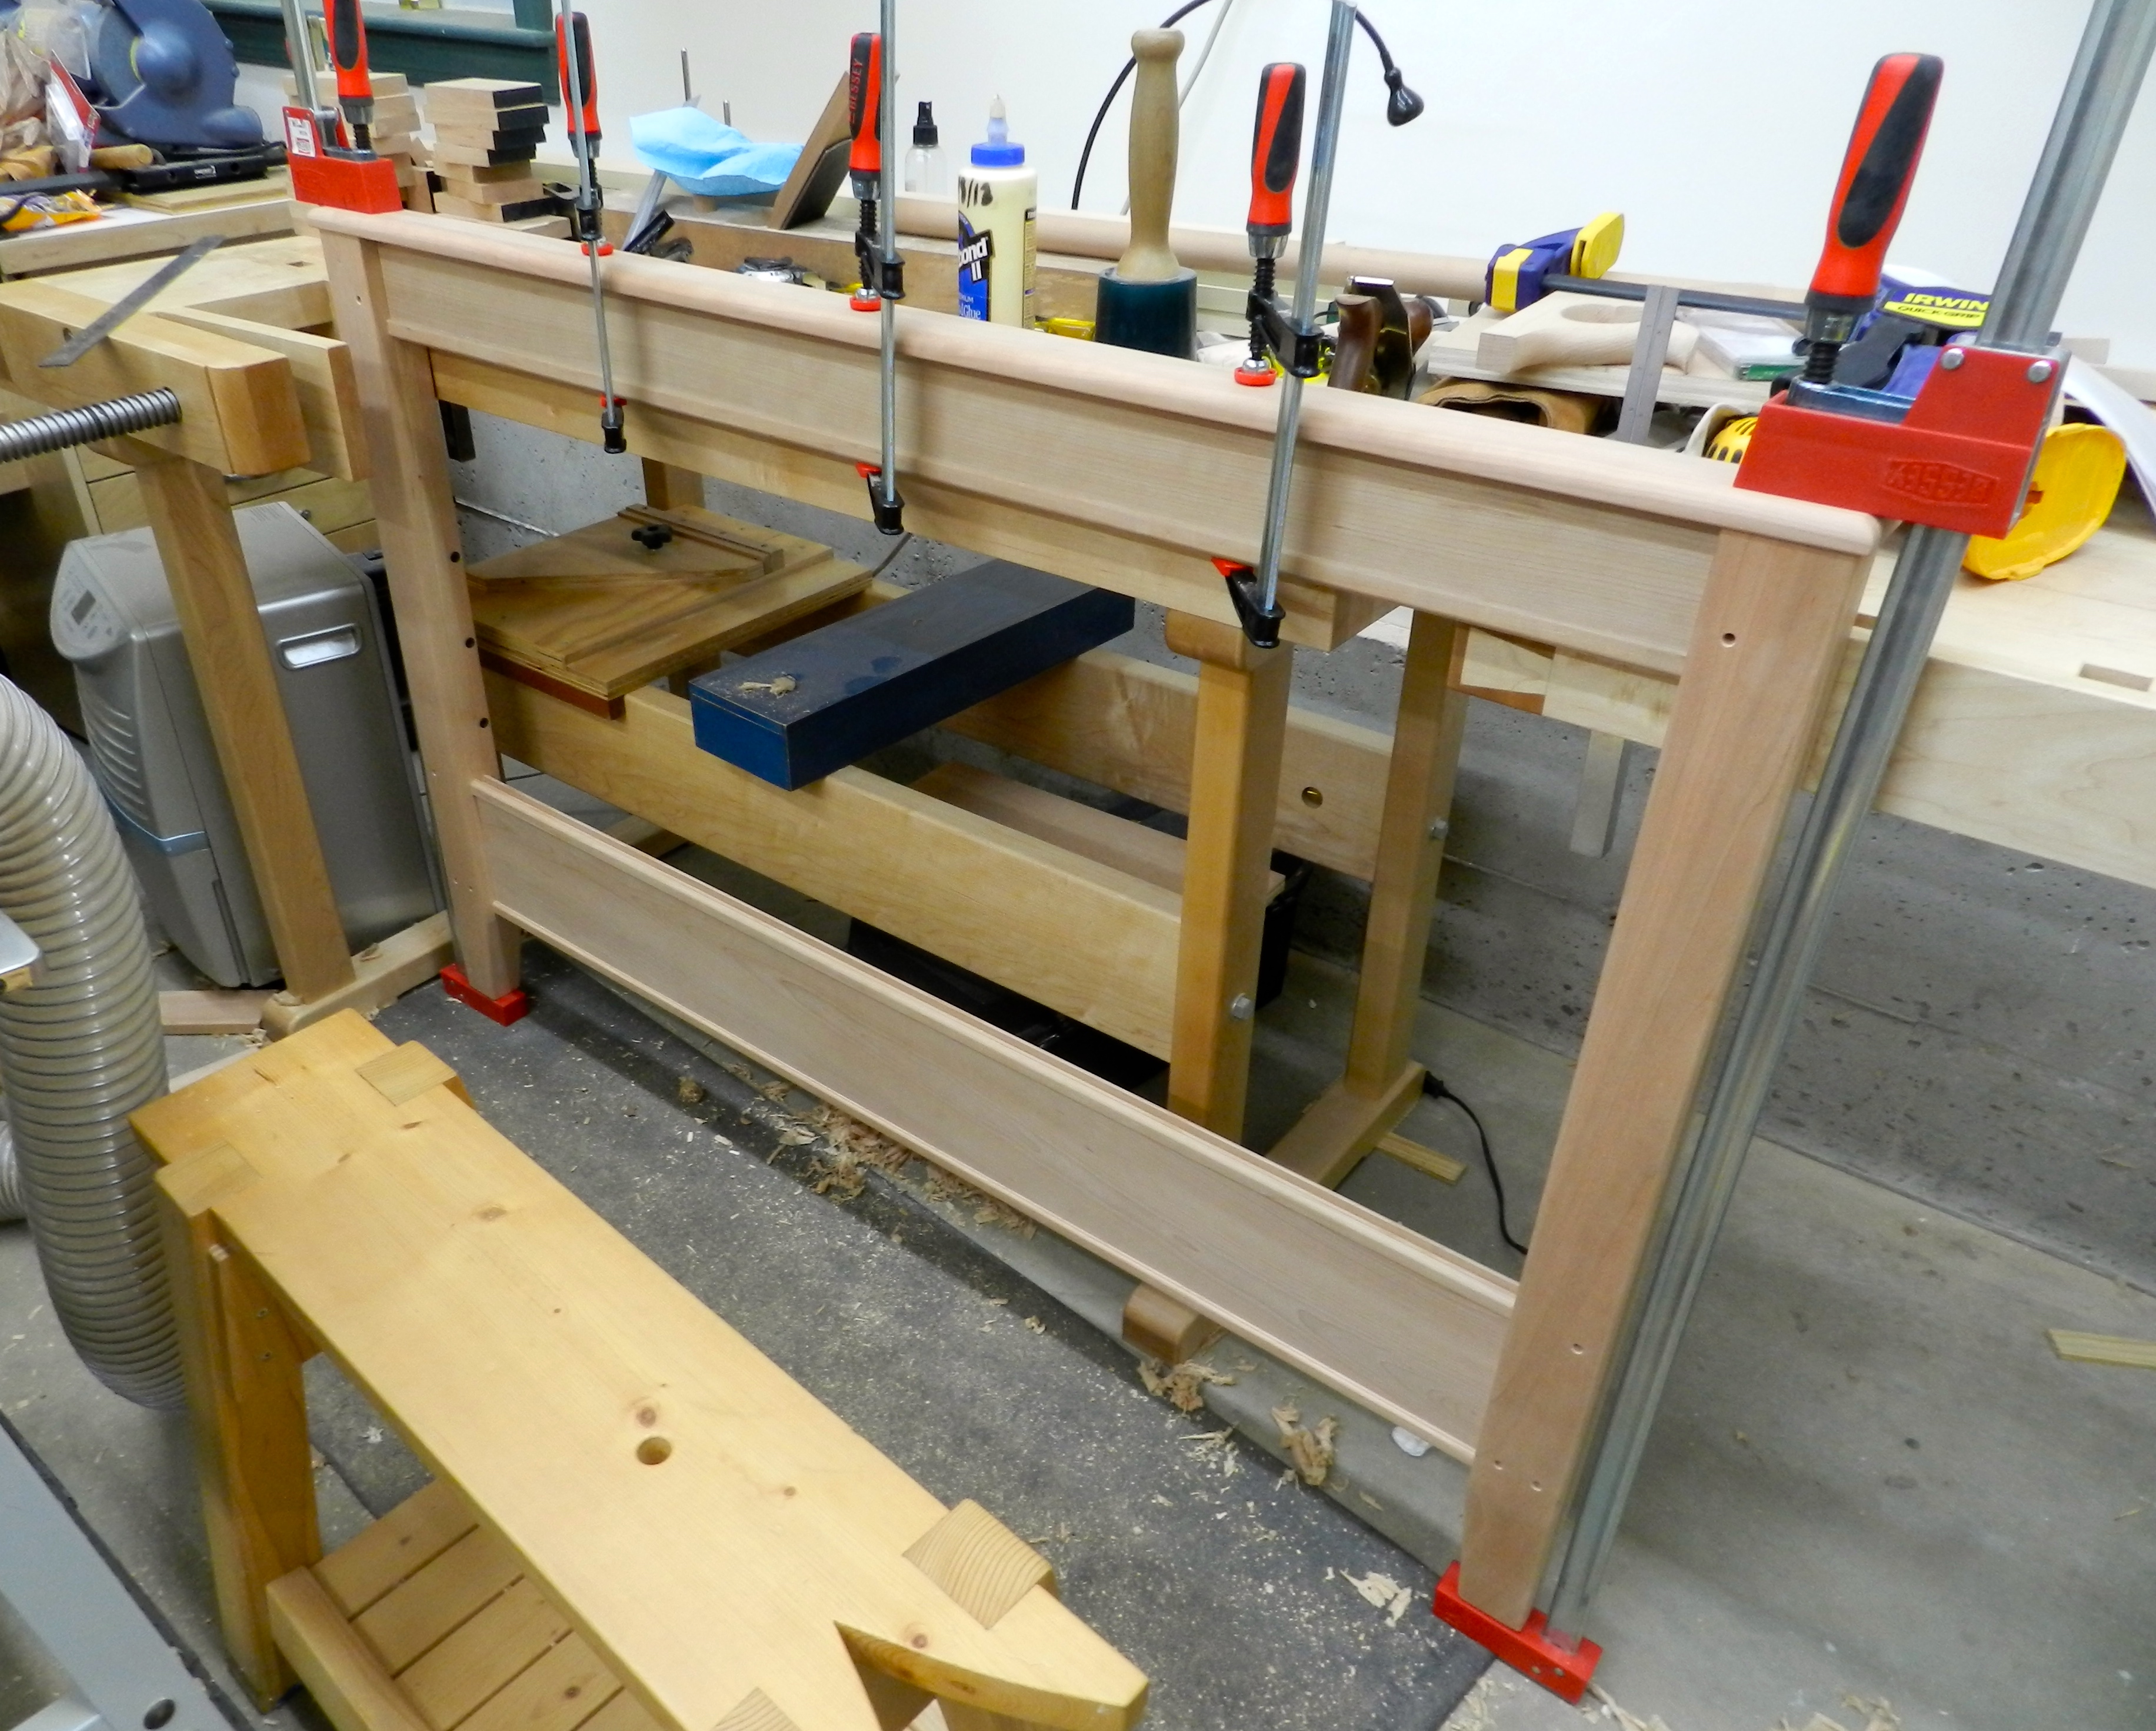
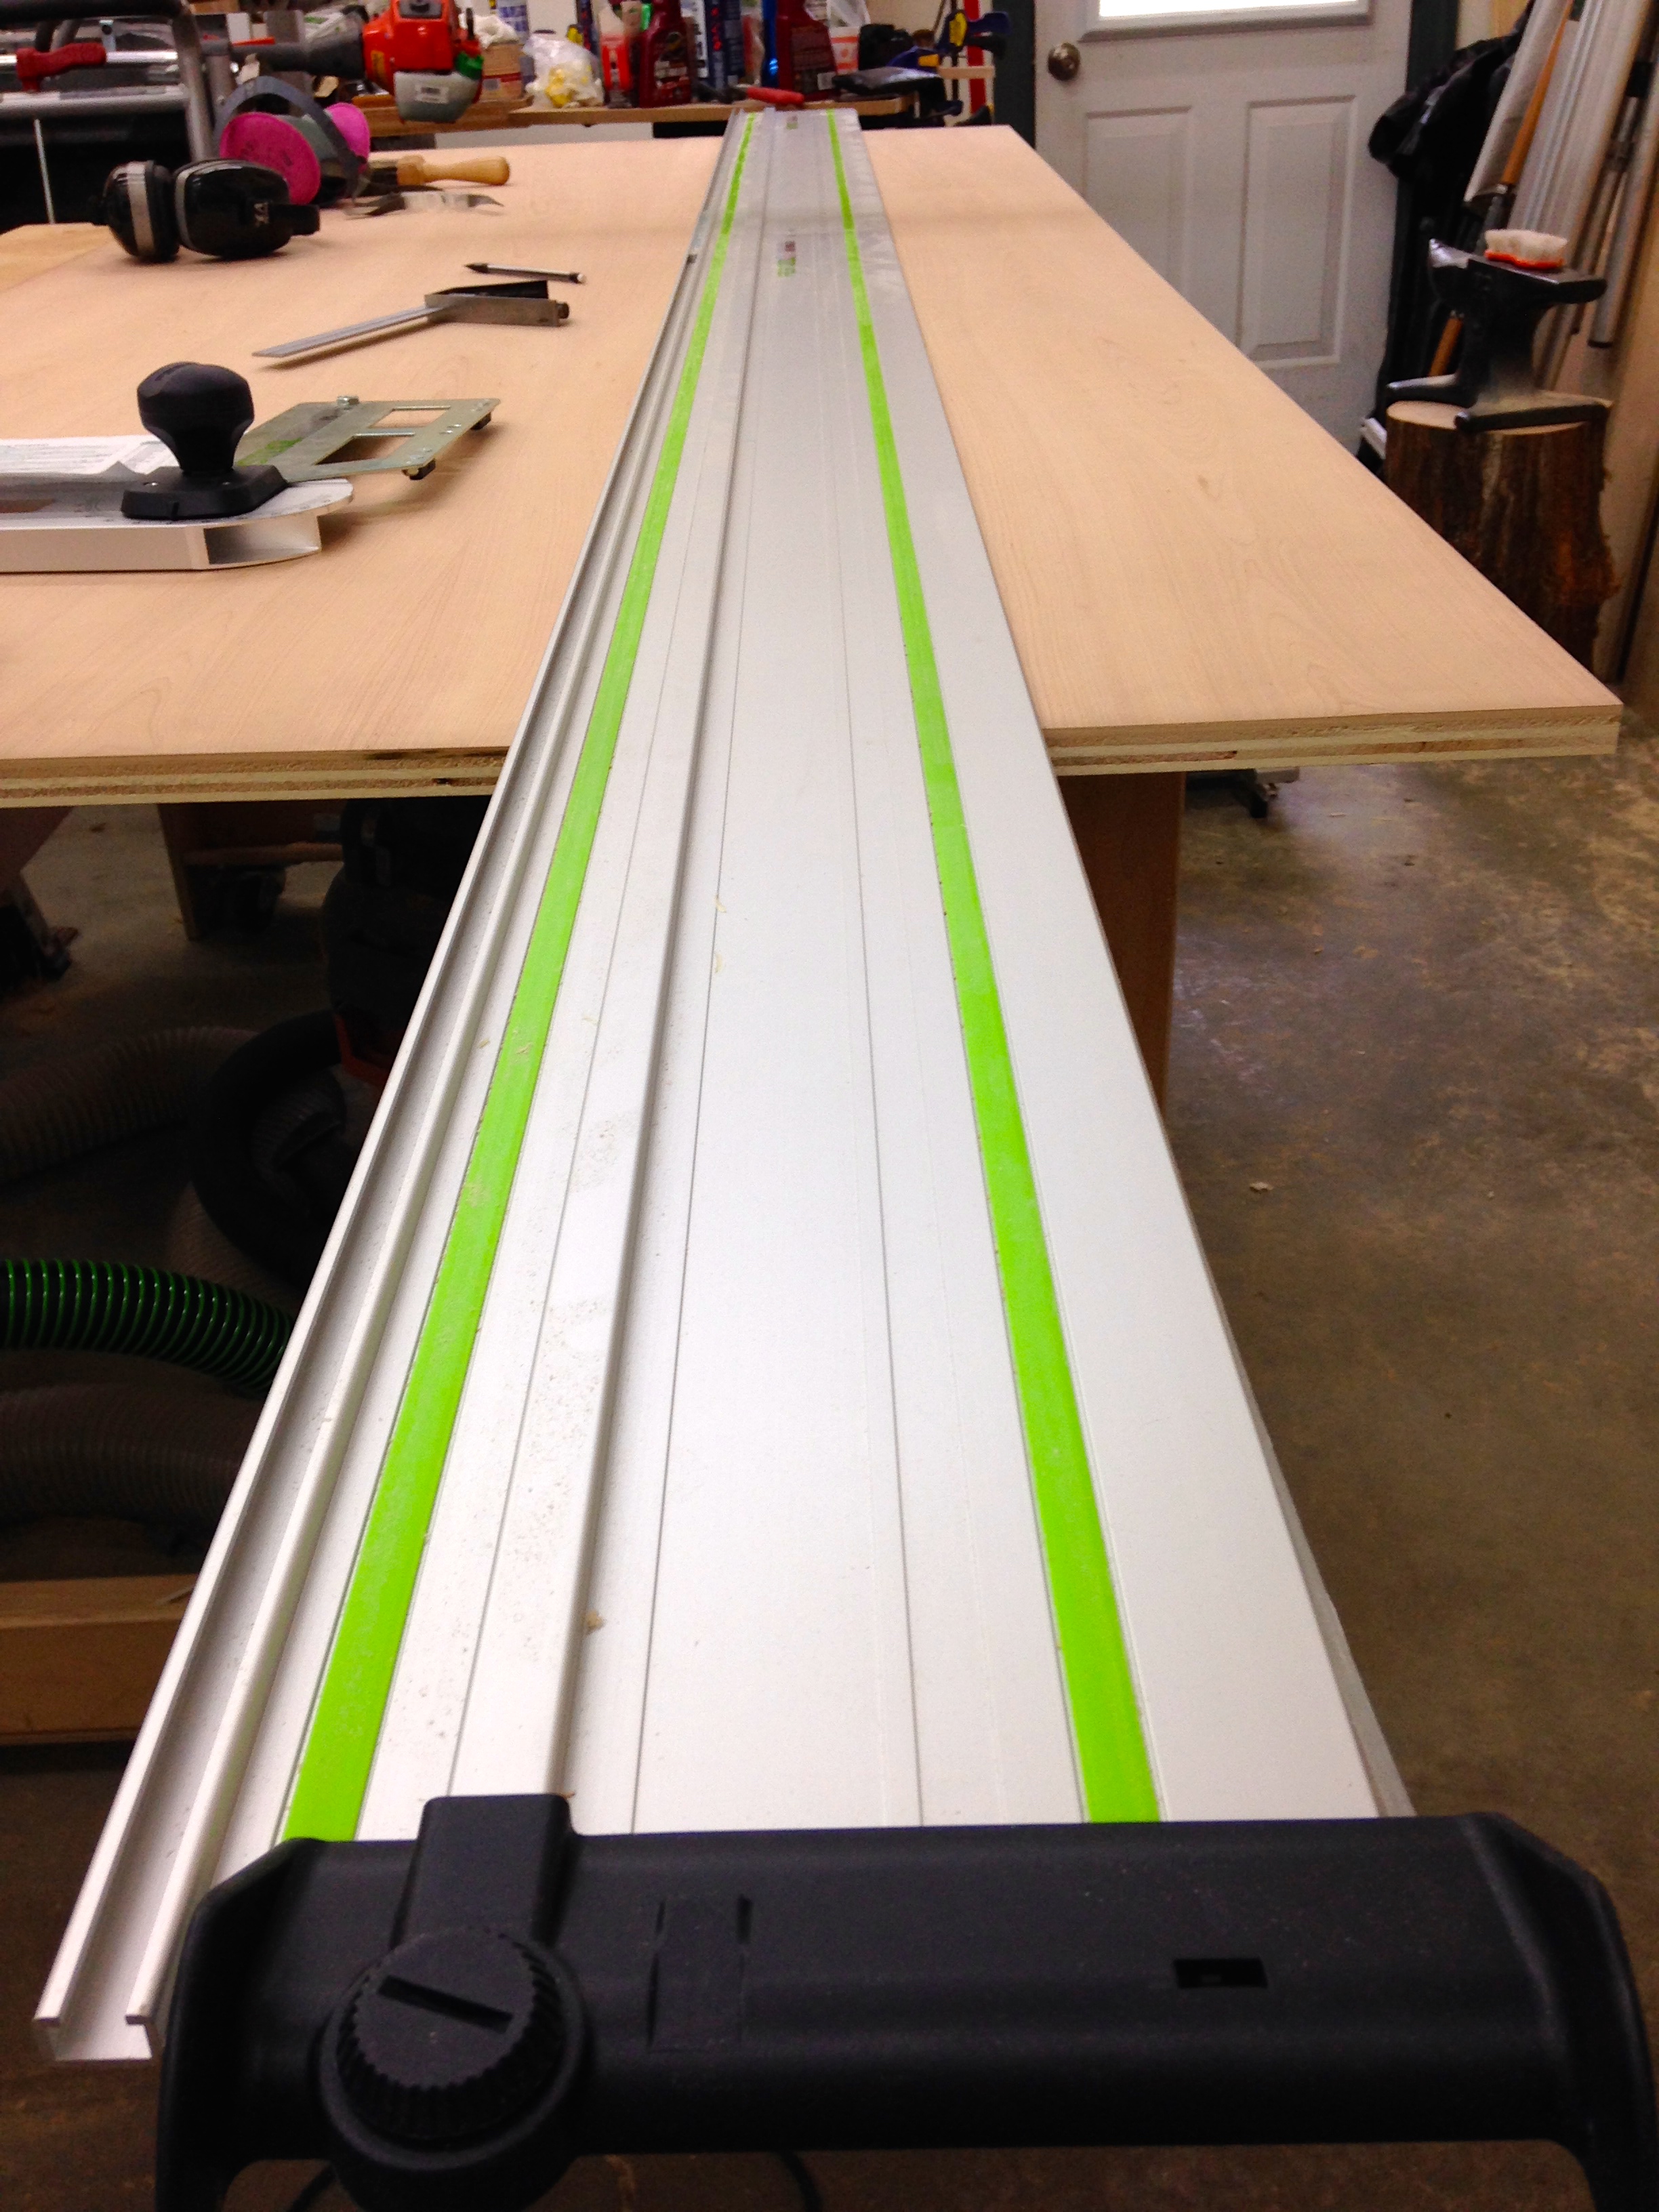
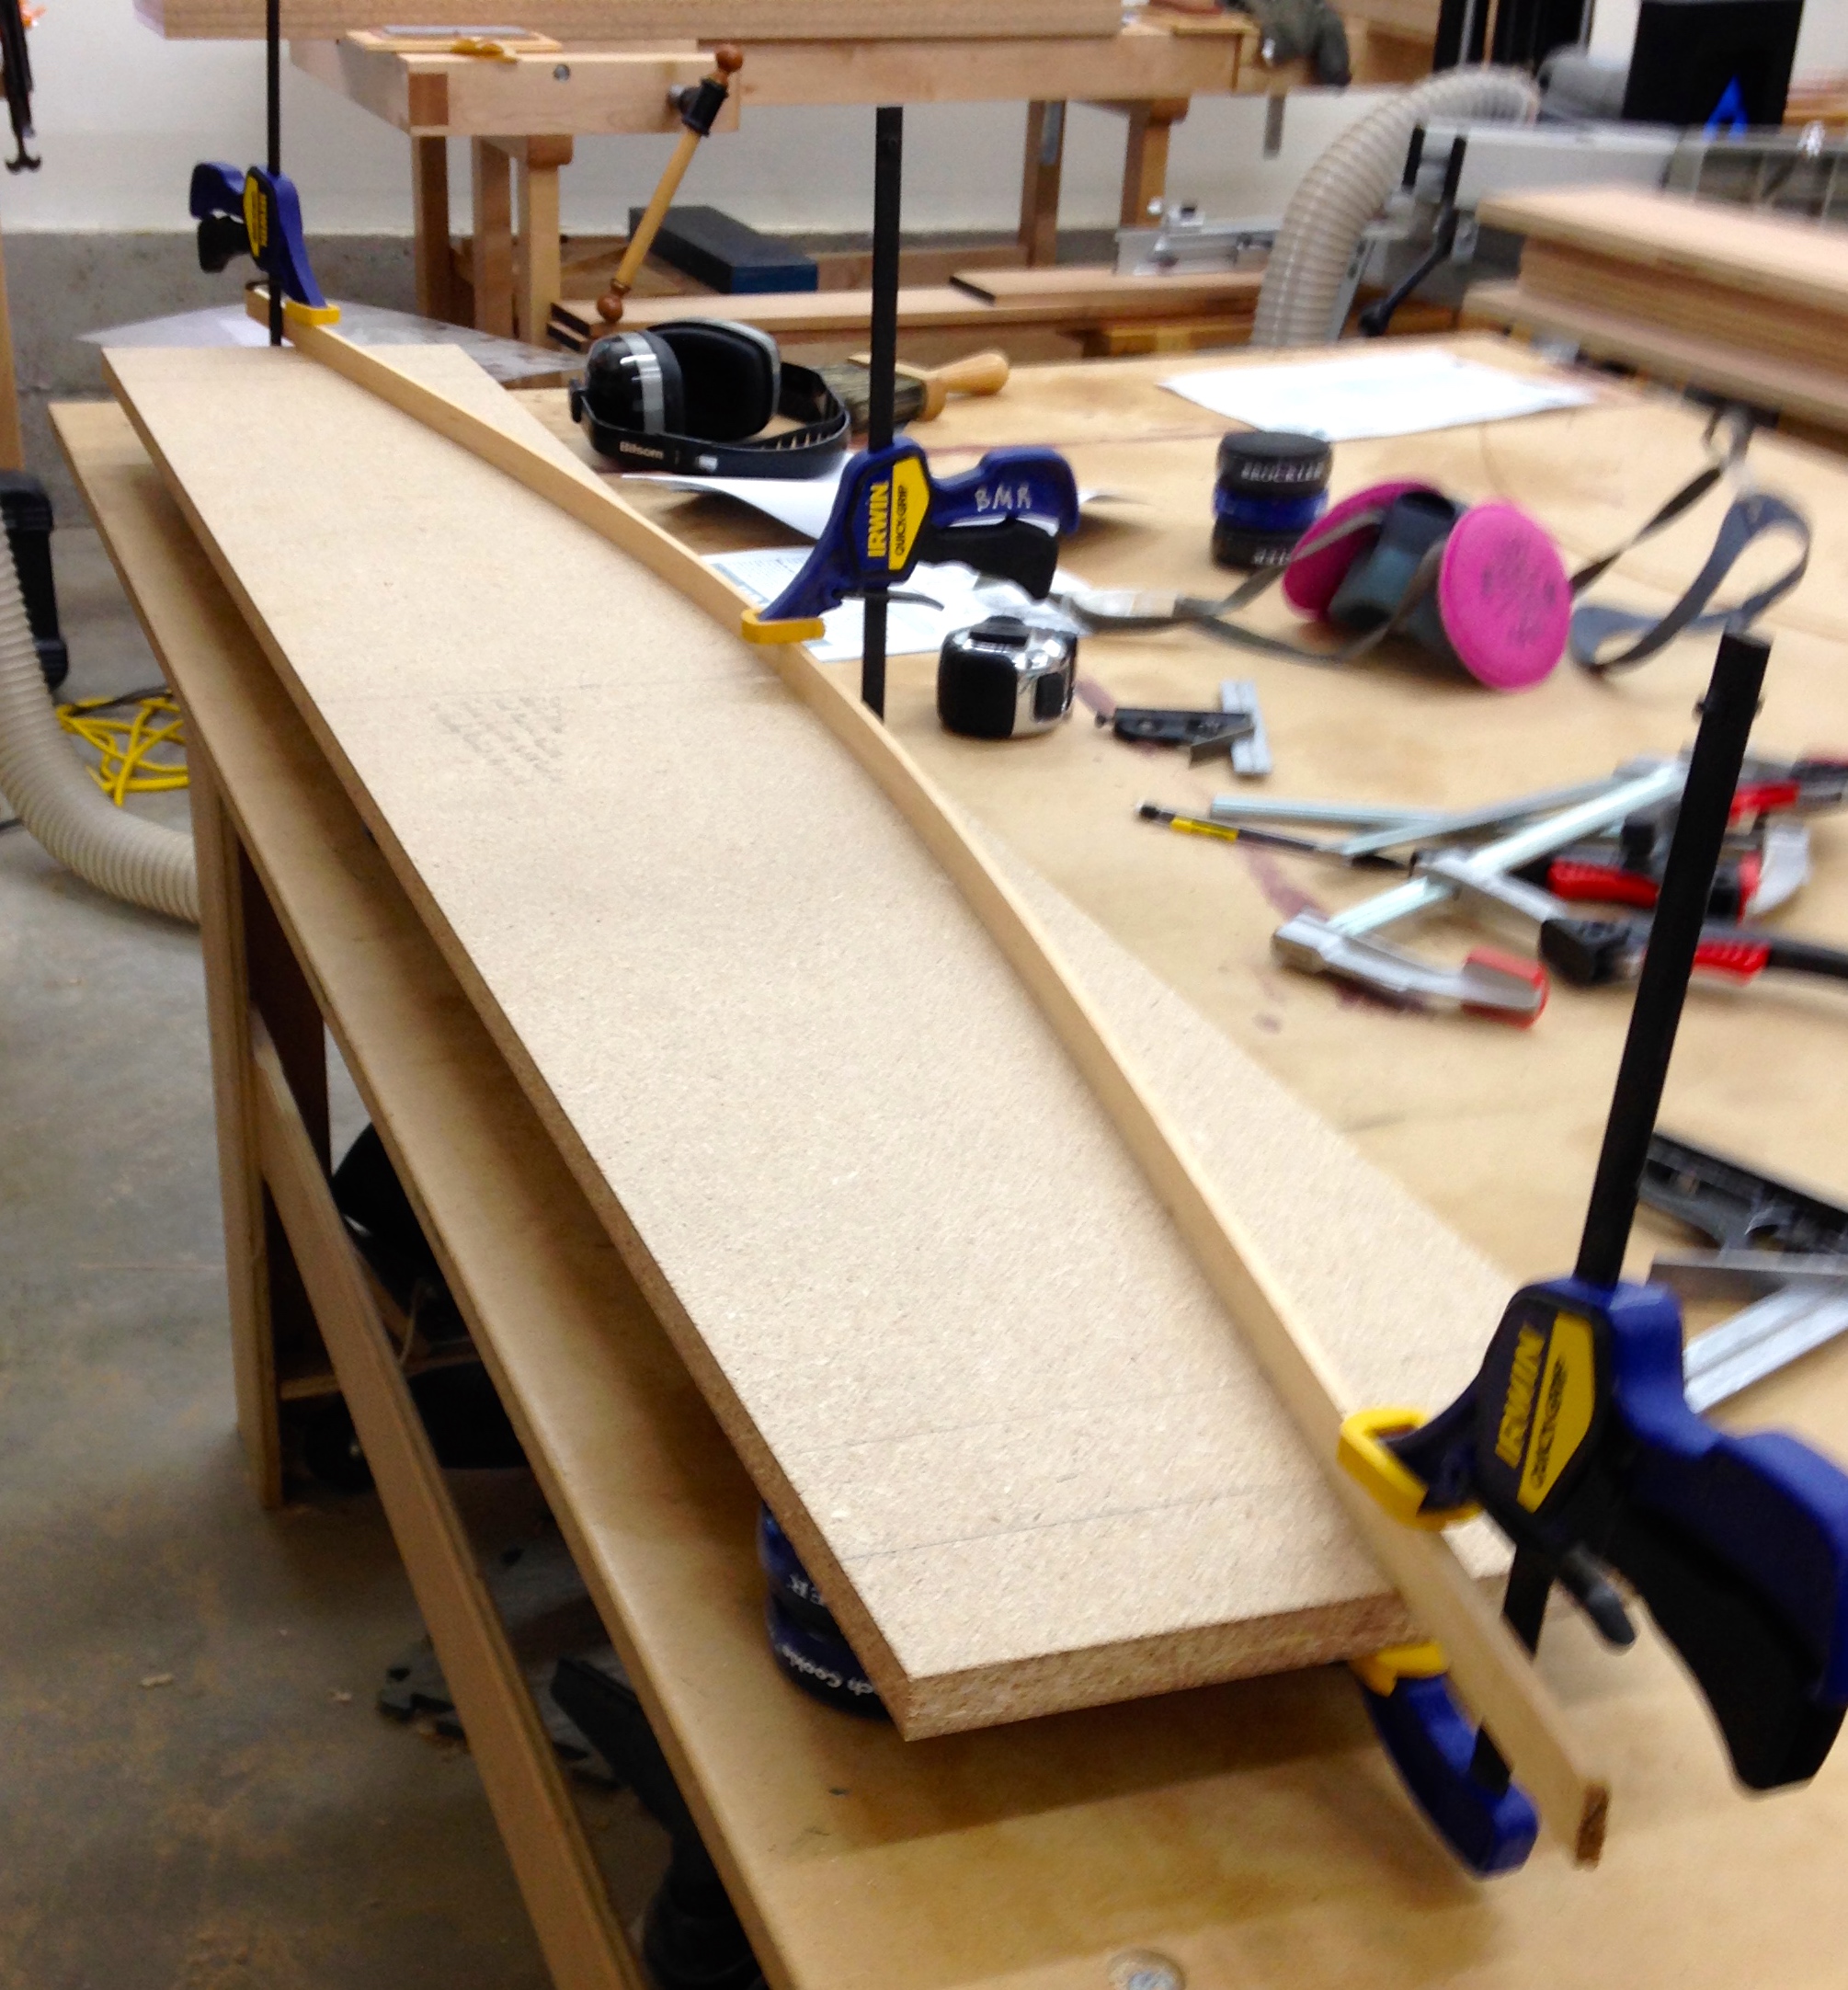
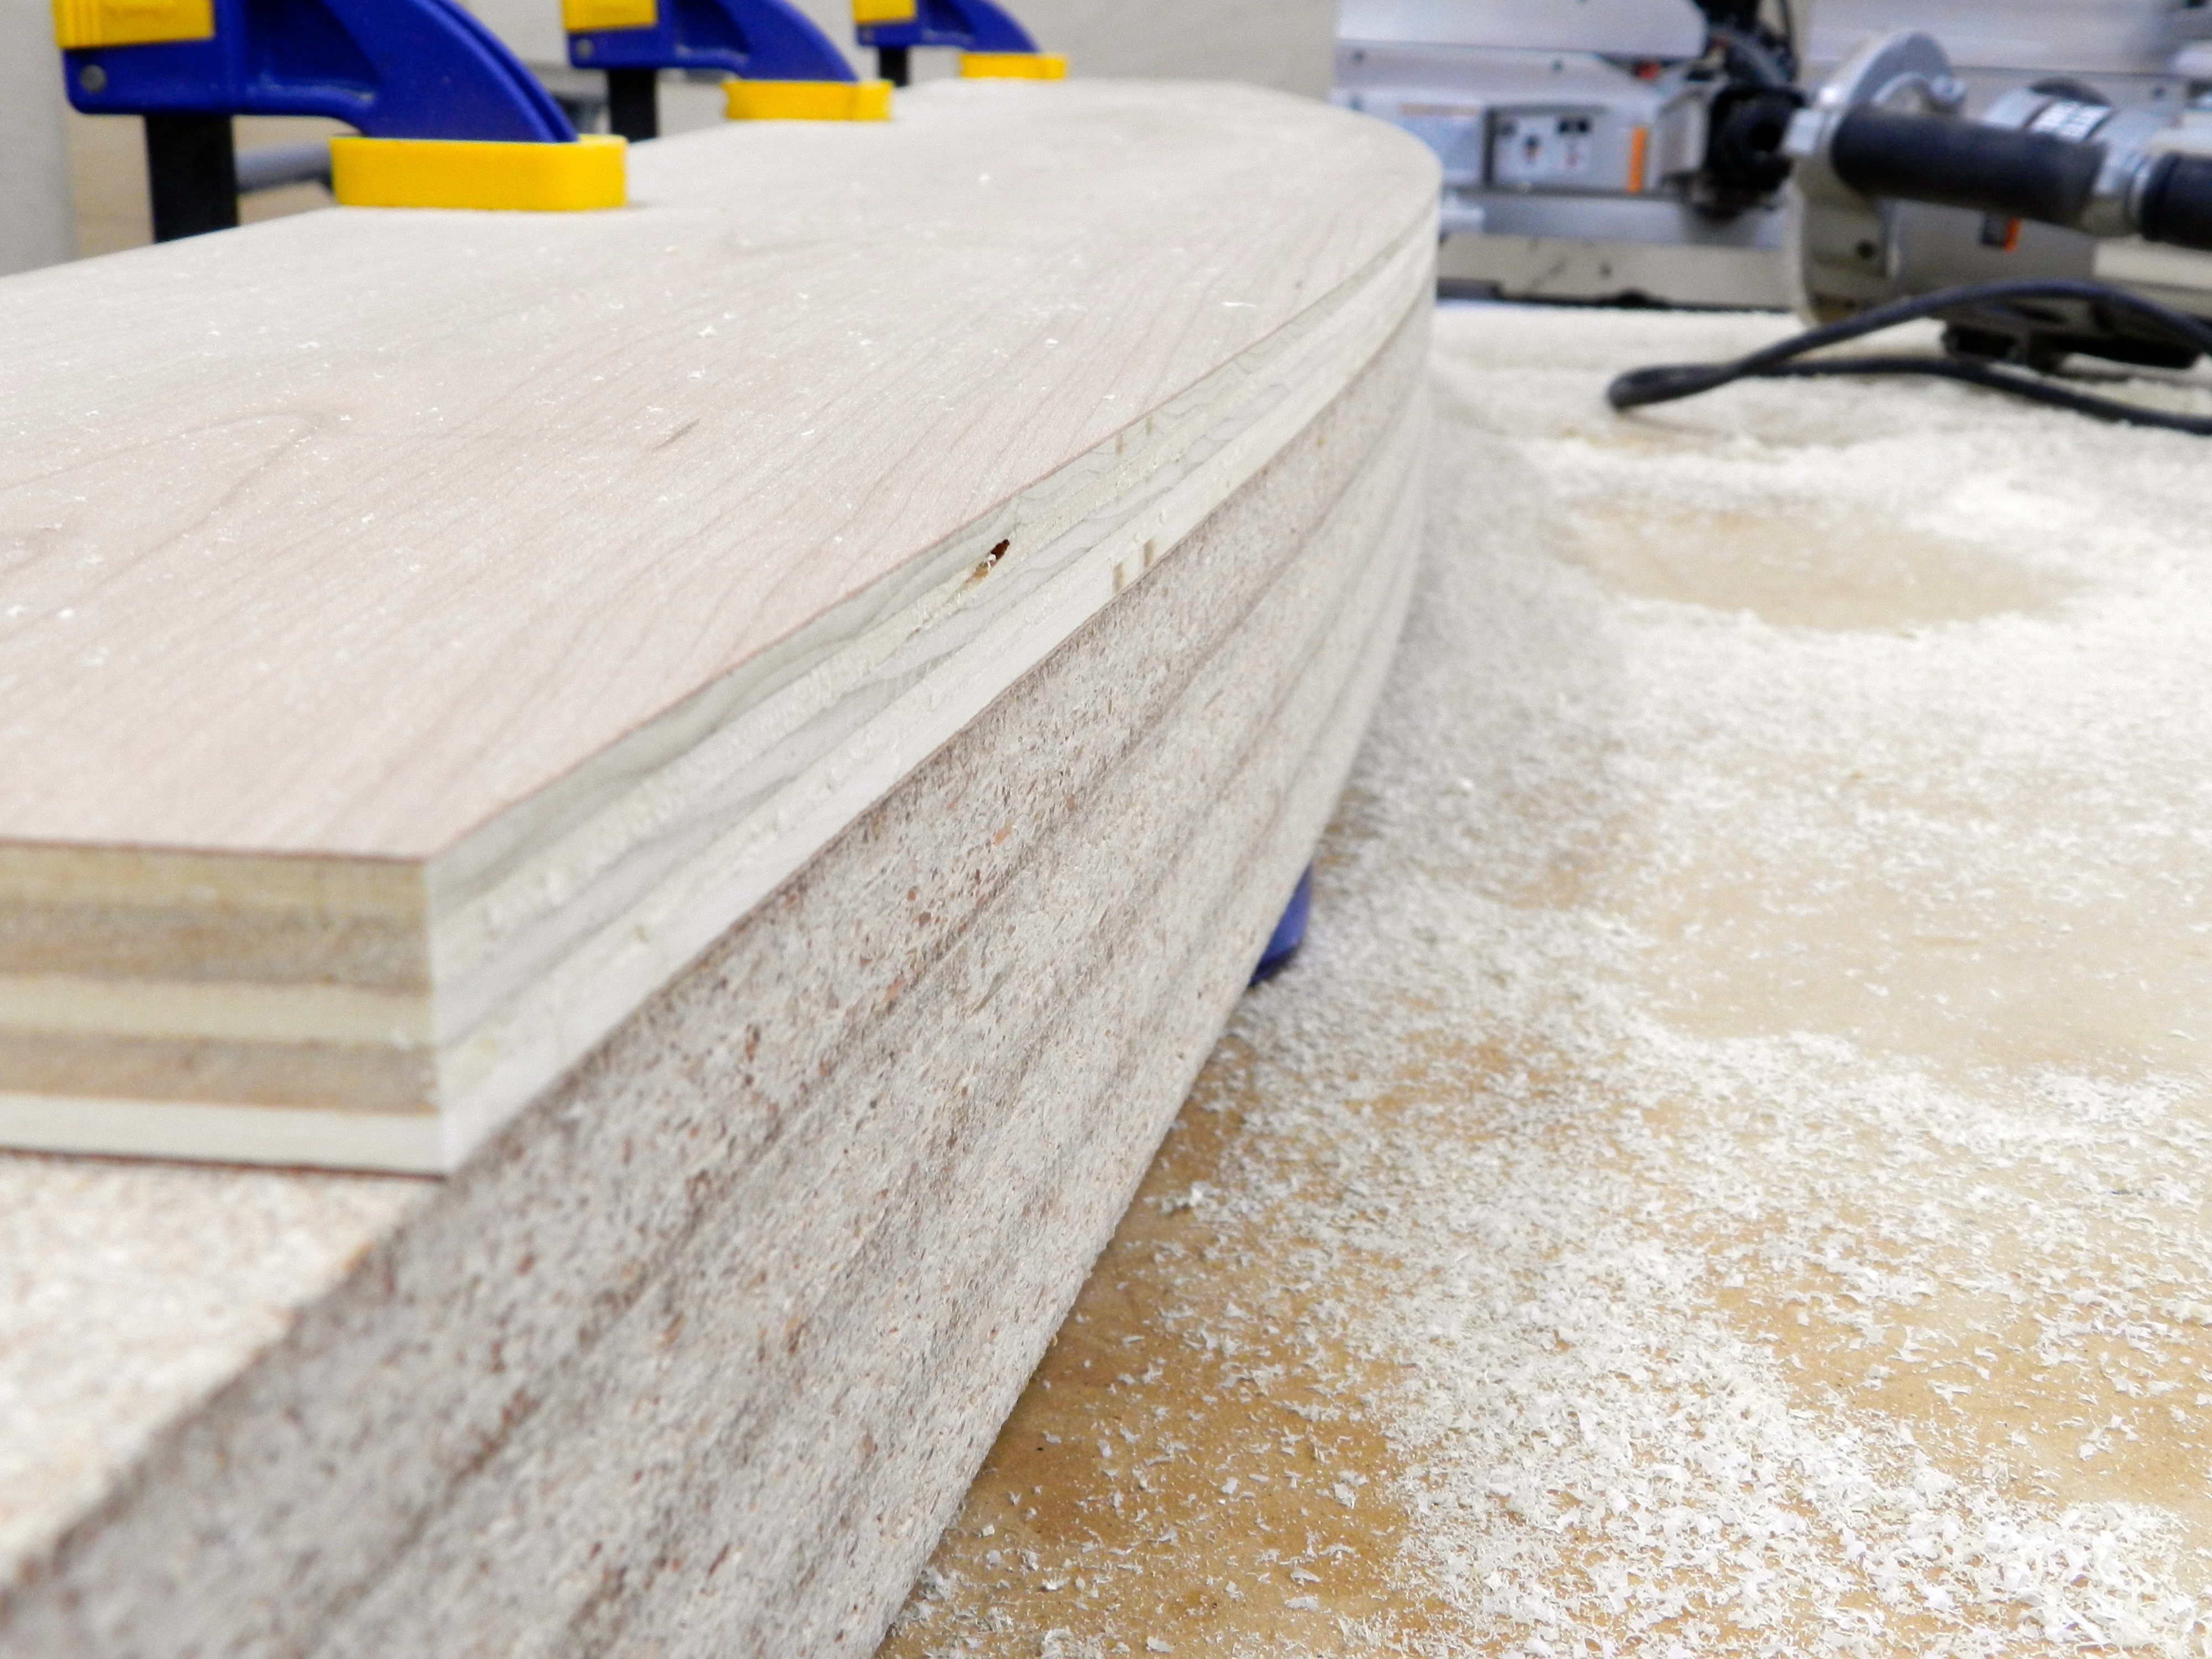
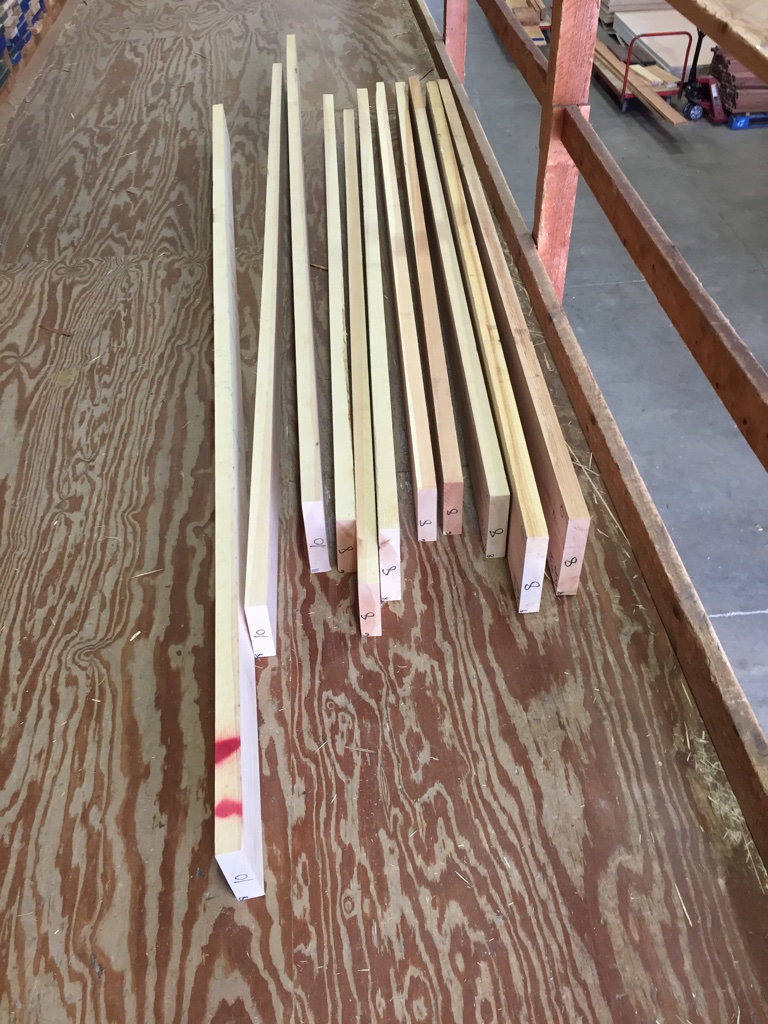
With the canvas taken care of it was time for me to build the necessary posts to support this tent. Like any good woodworking project it starts at your wood supplier. I went to my perennial favorite — Highland Hardwoods in Brentwood NH. I carefully selected some straight grained 8/4 Eastern White Pine. I ripped the pieces to rough size, power planed and jointed each of the pieces and removed the mill marks with a hand plane.

Carefully select straight grained easter white pine.

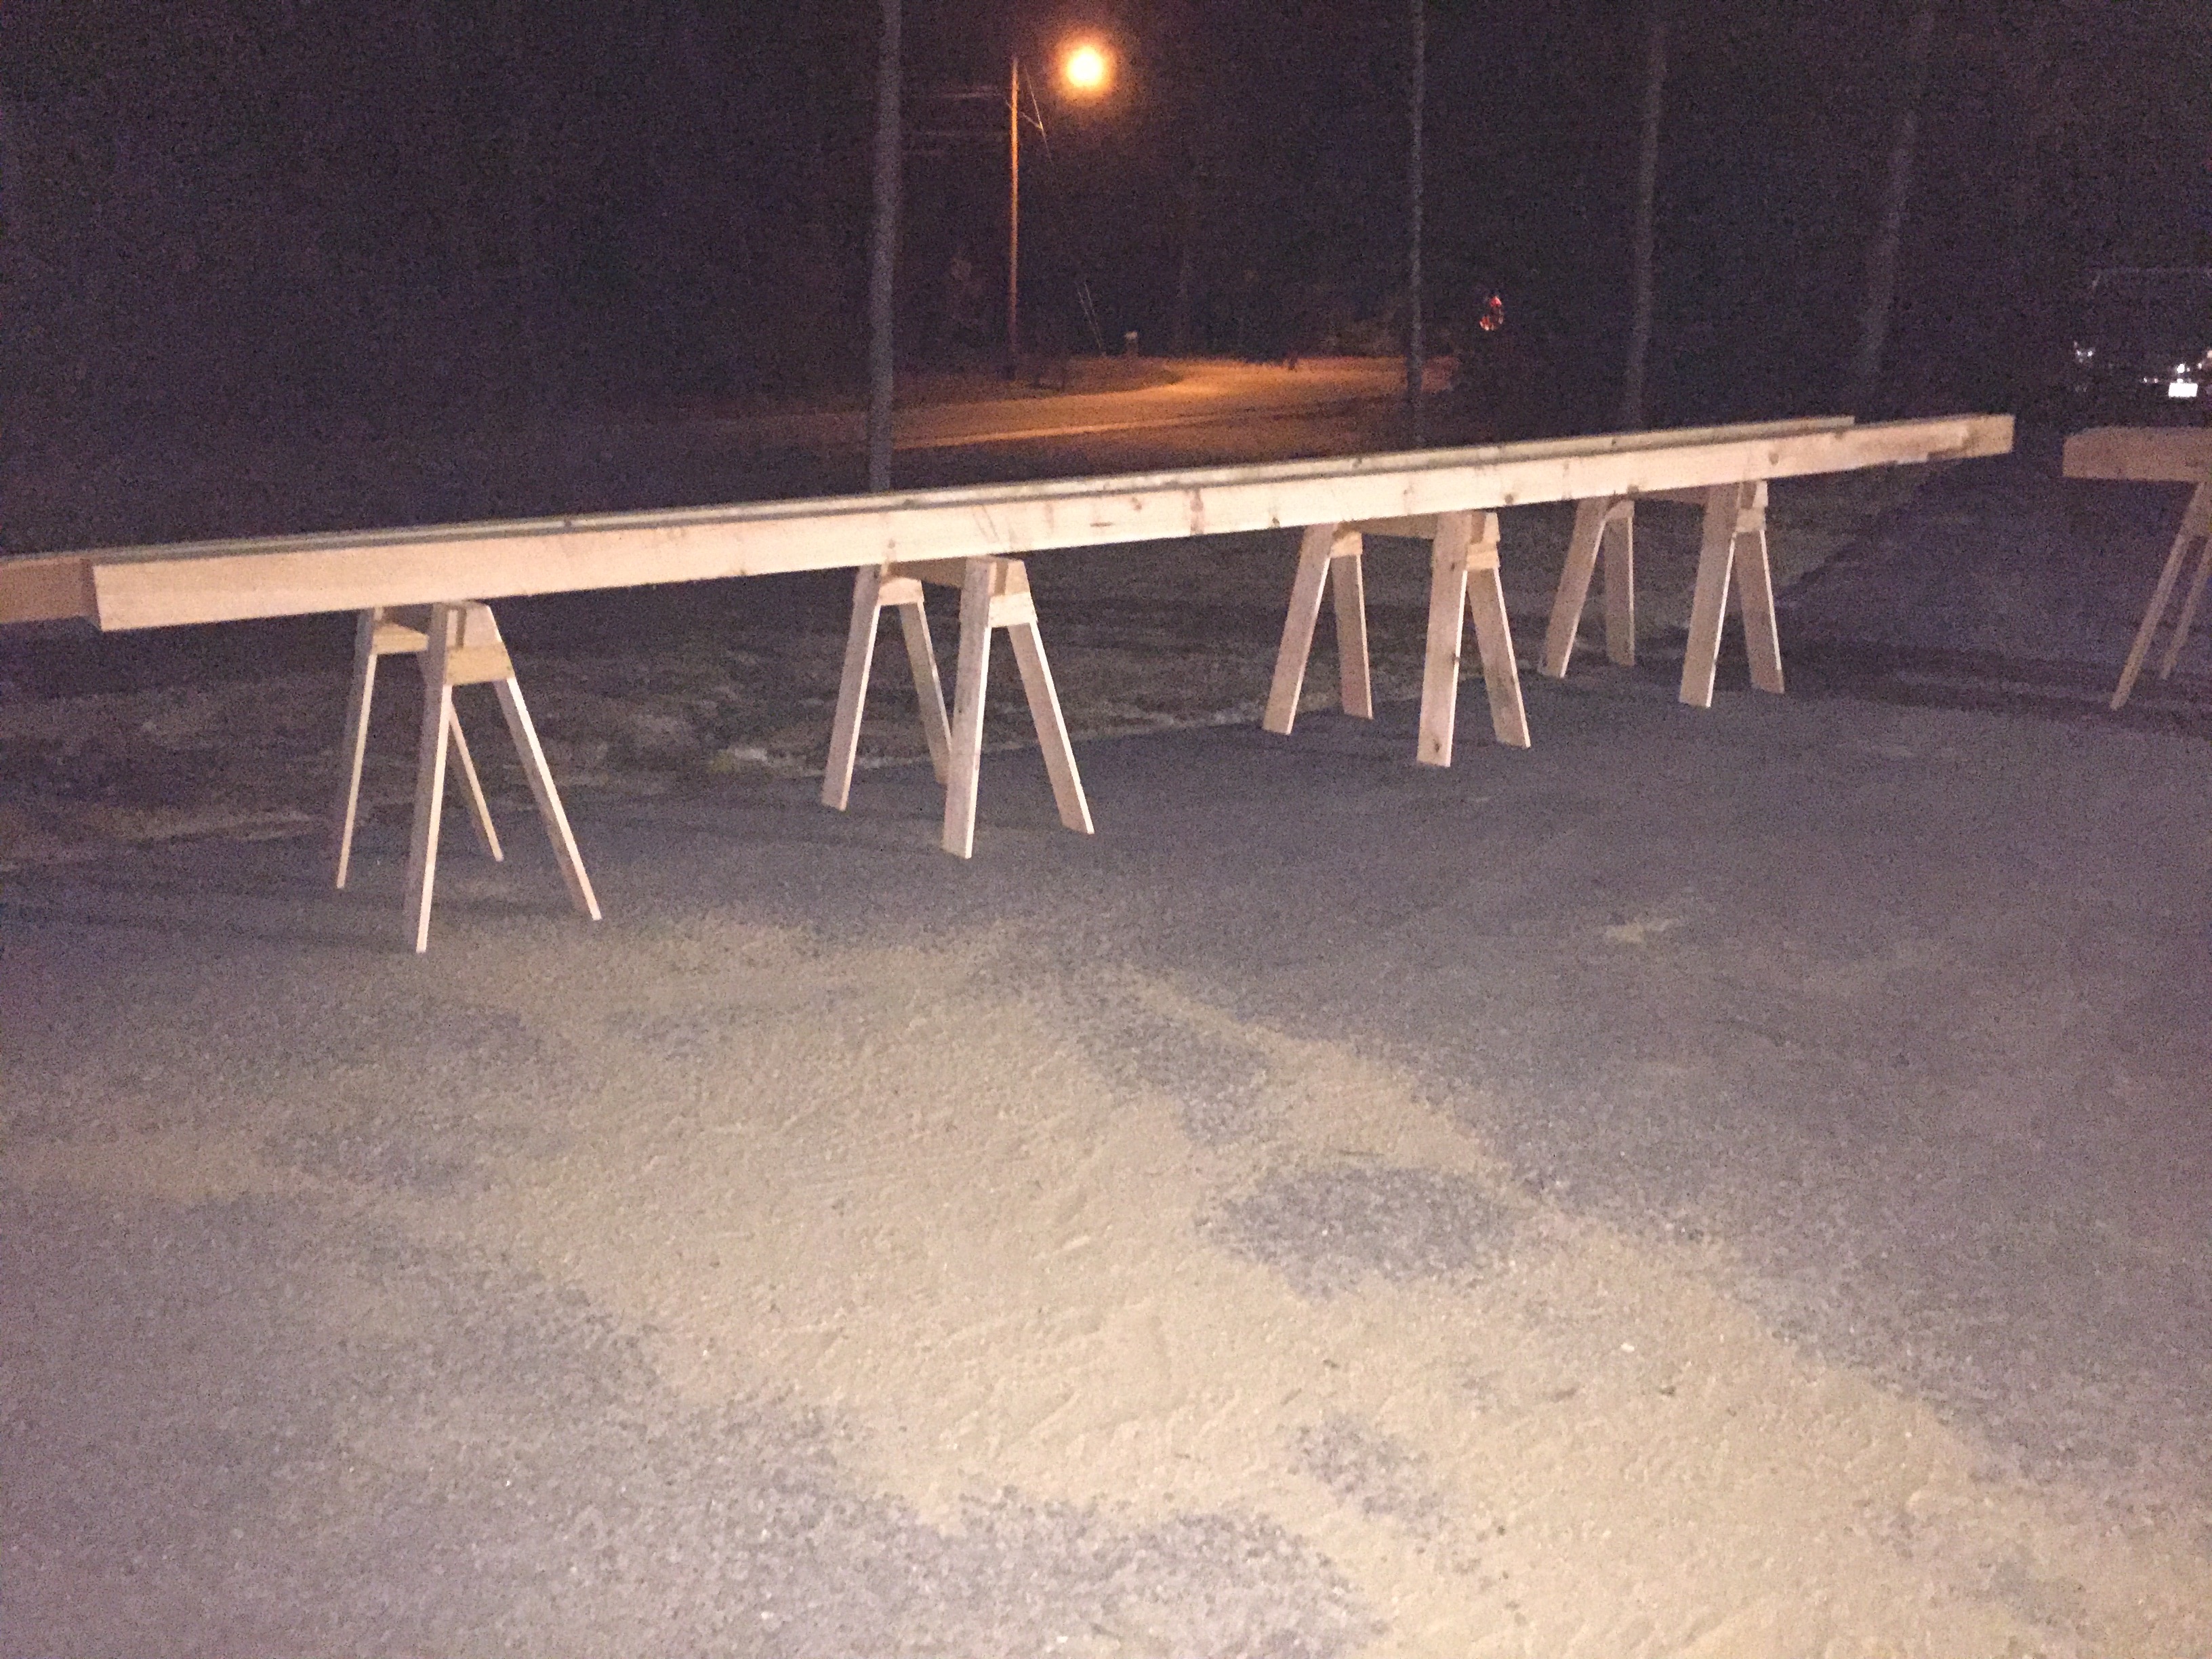
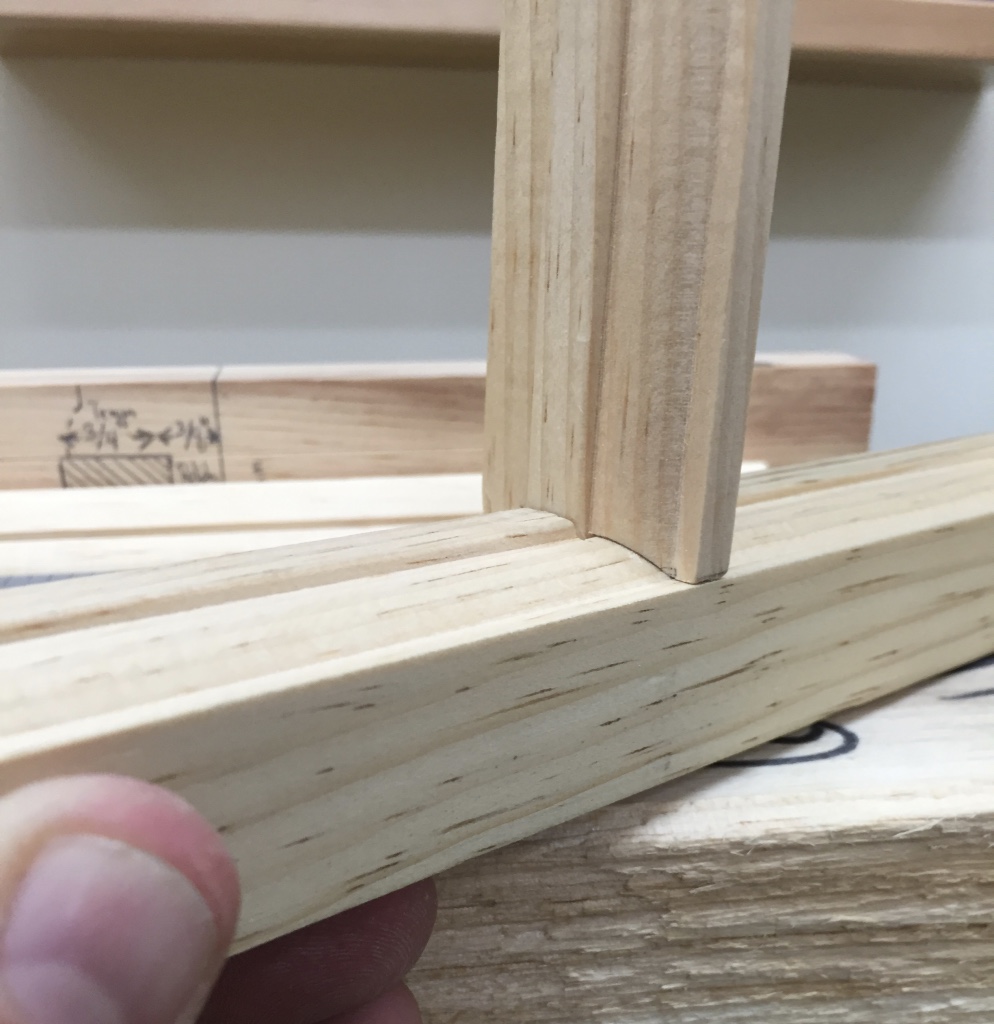
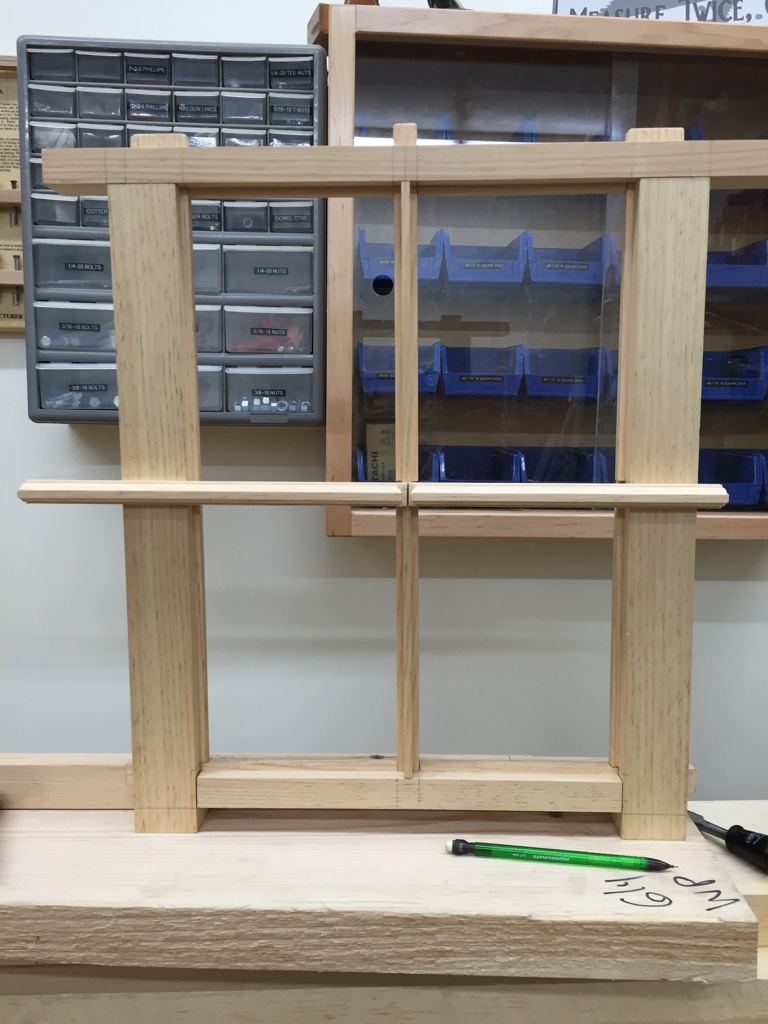
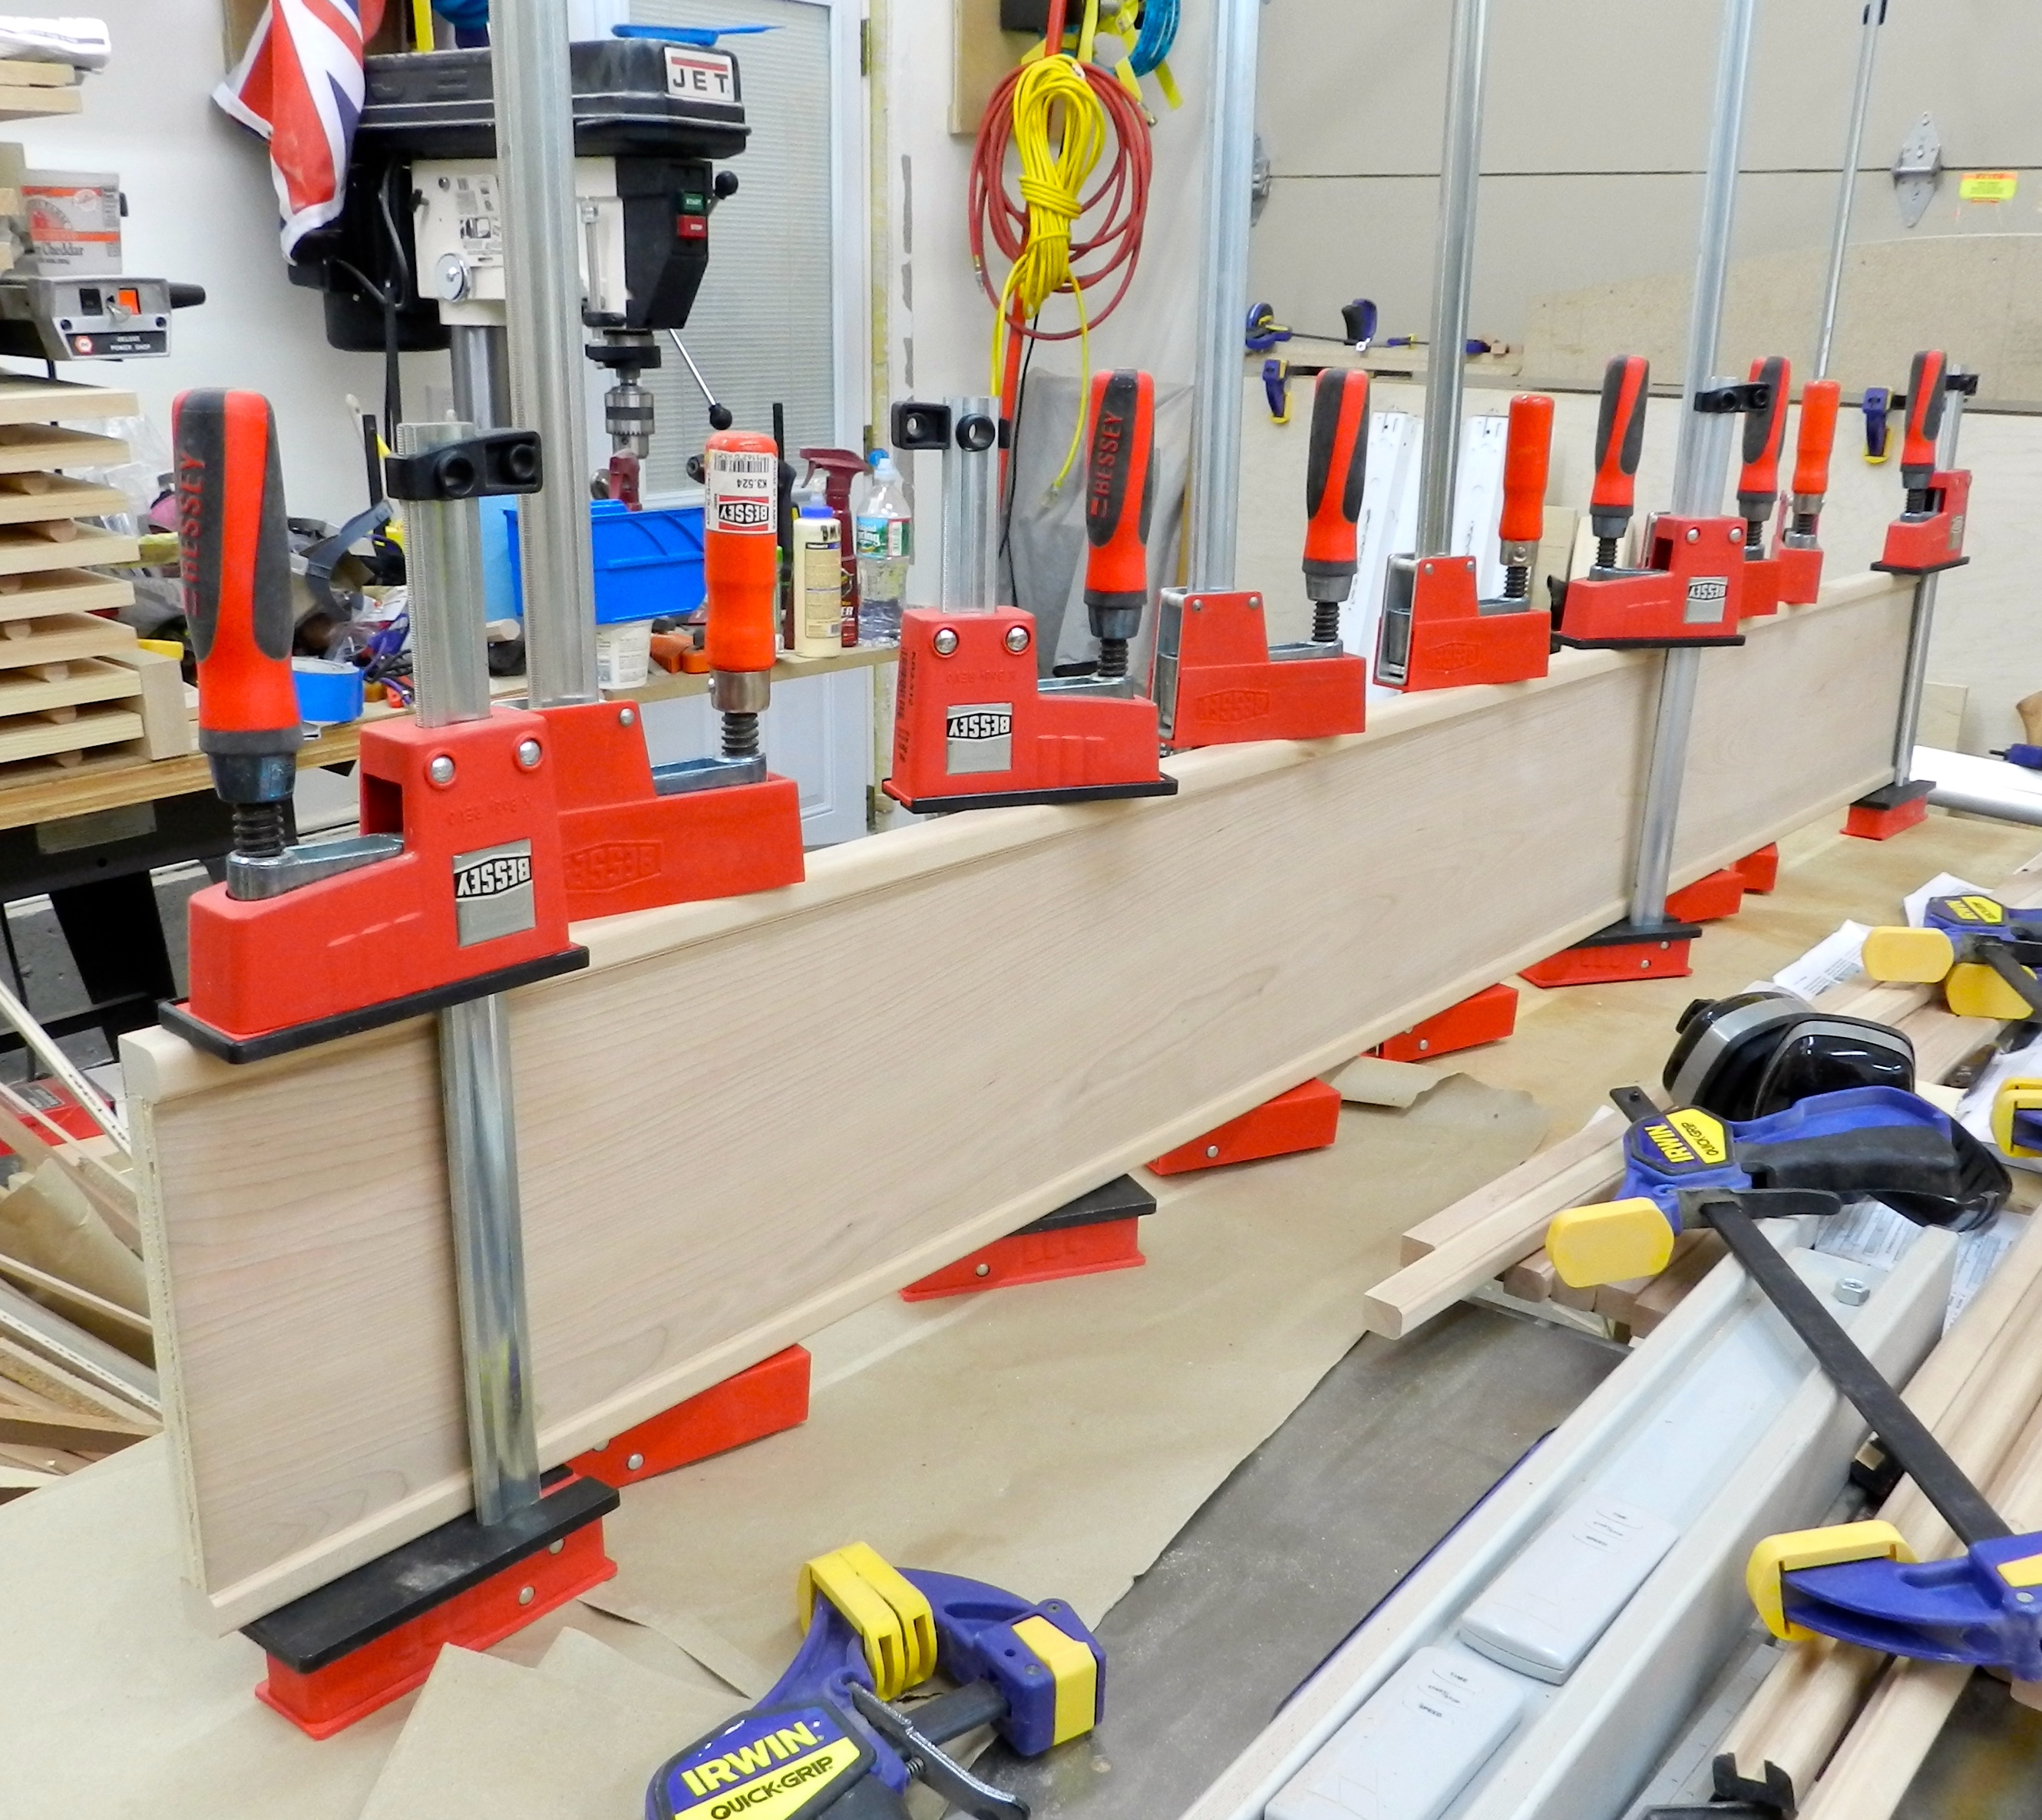
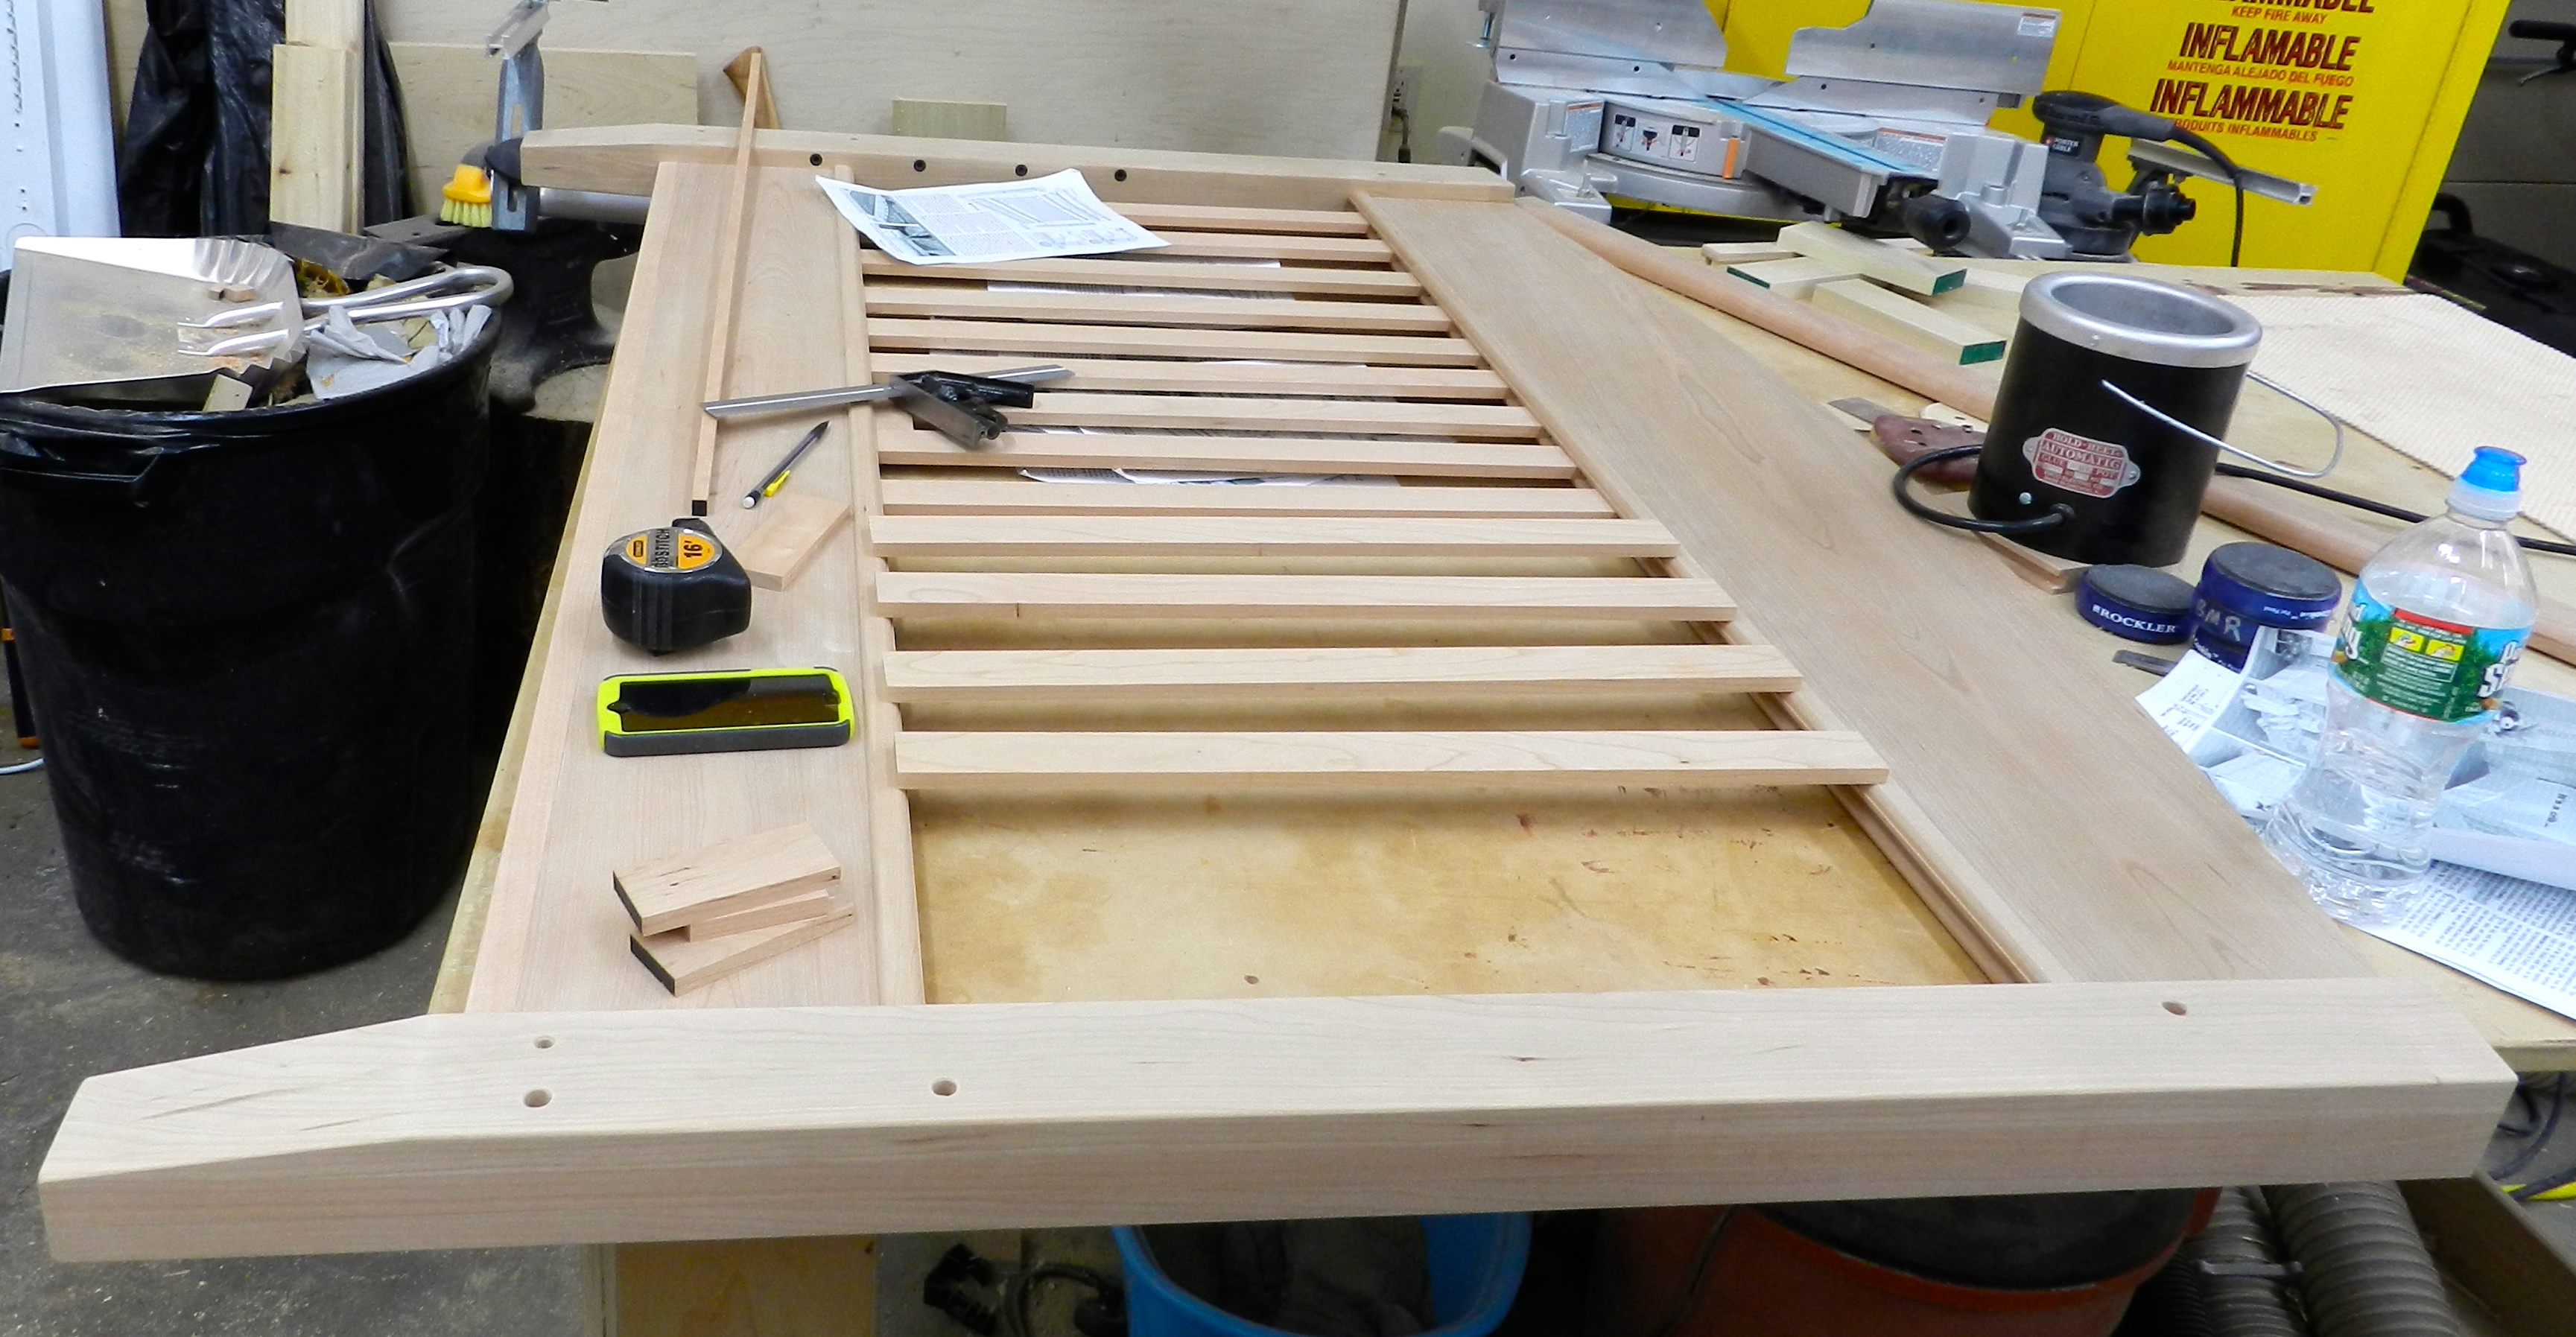
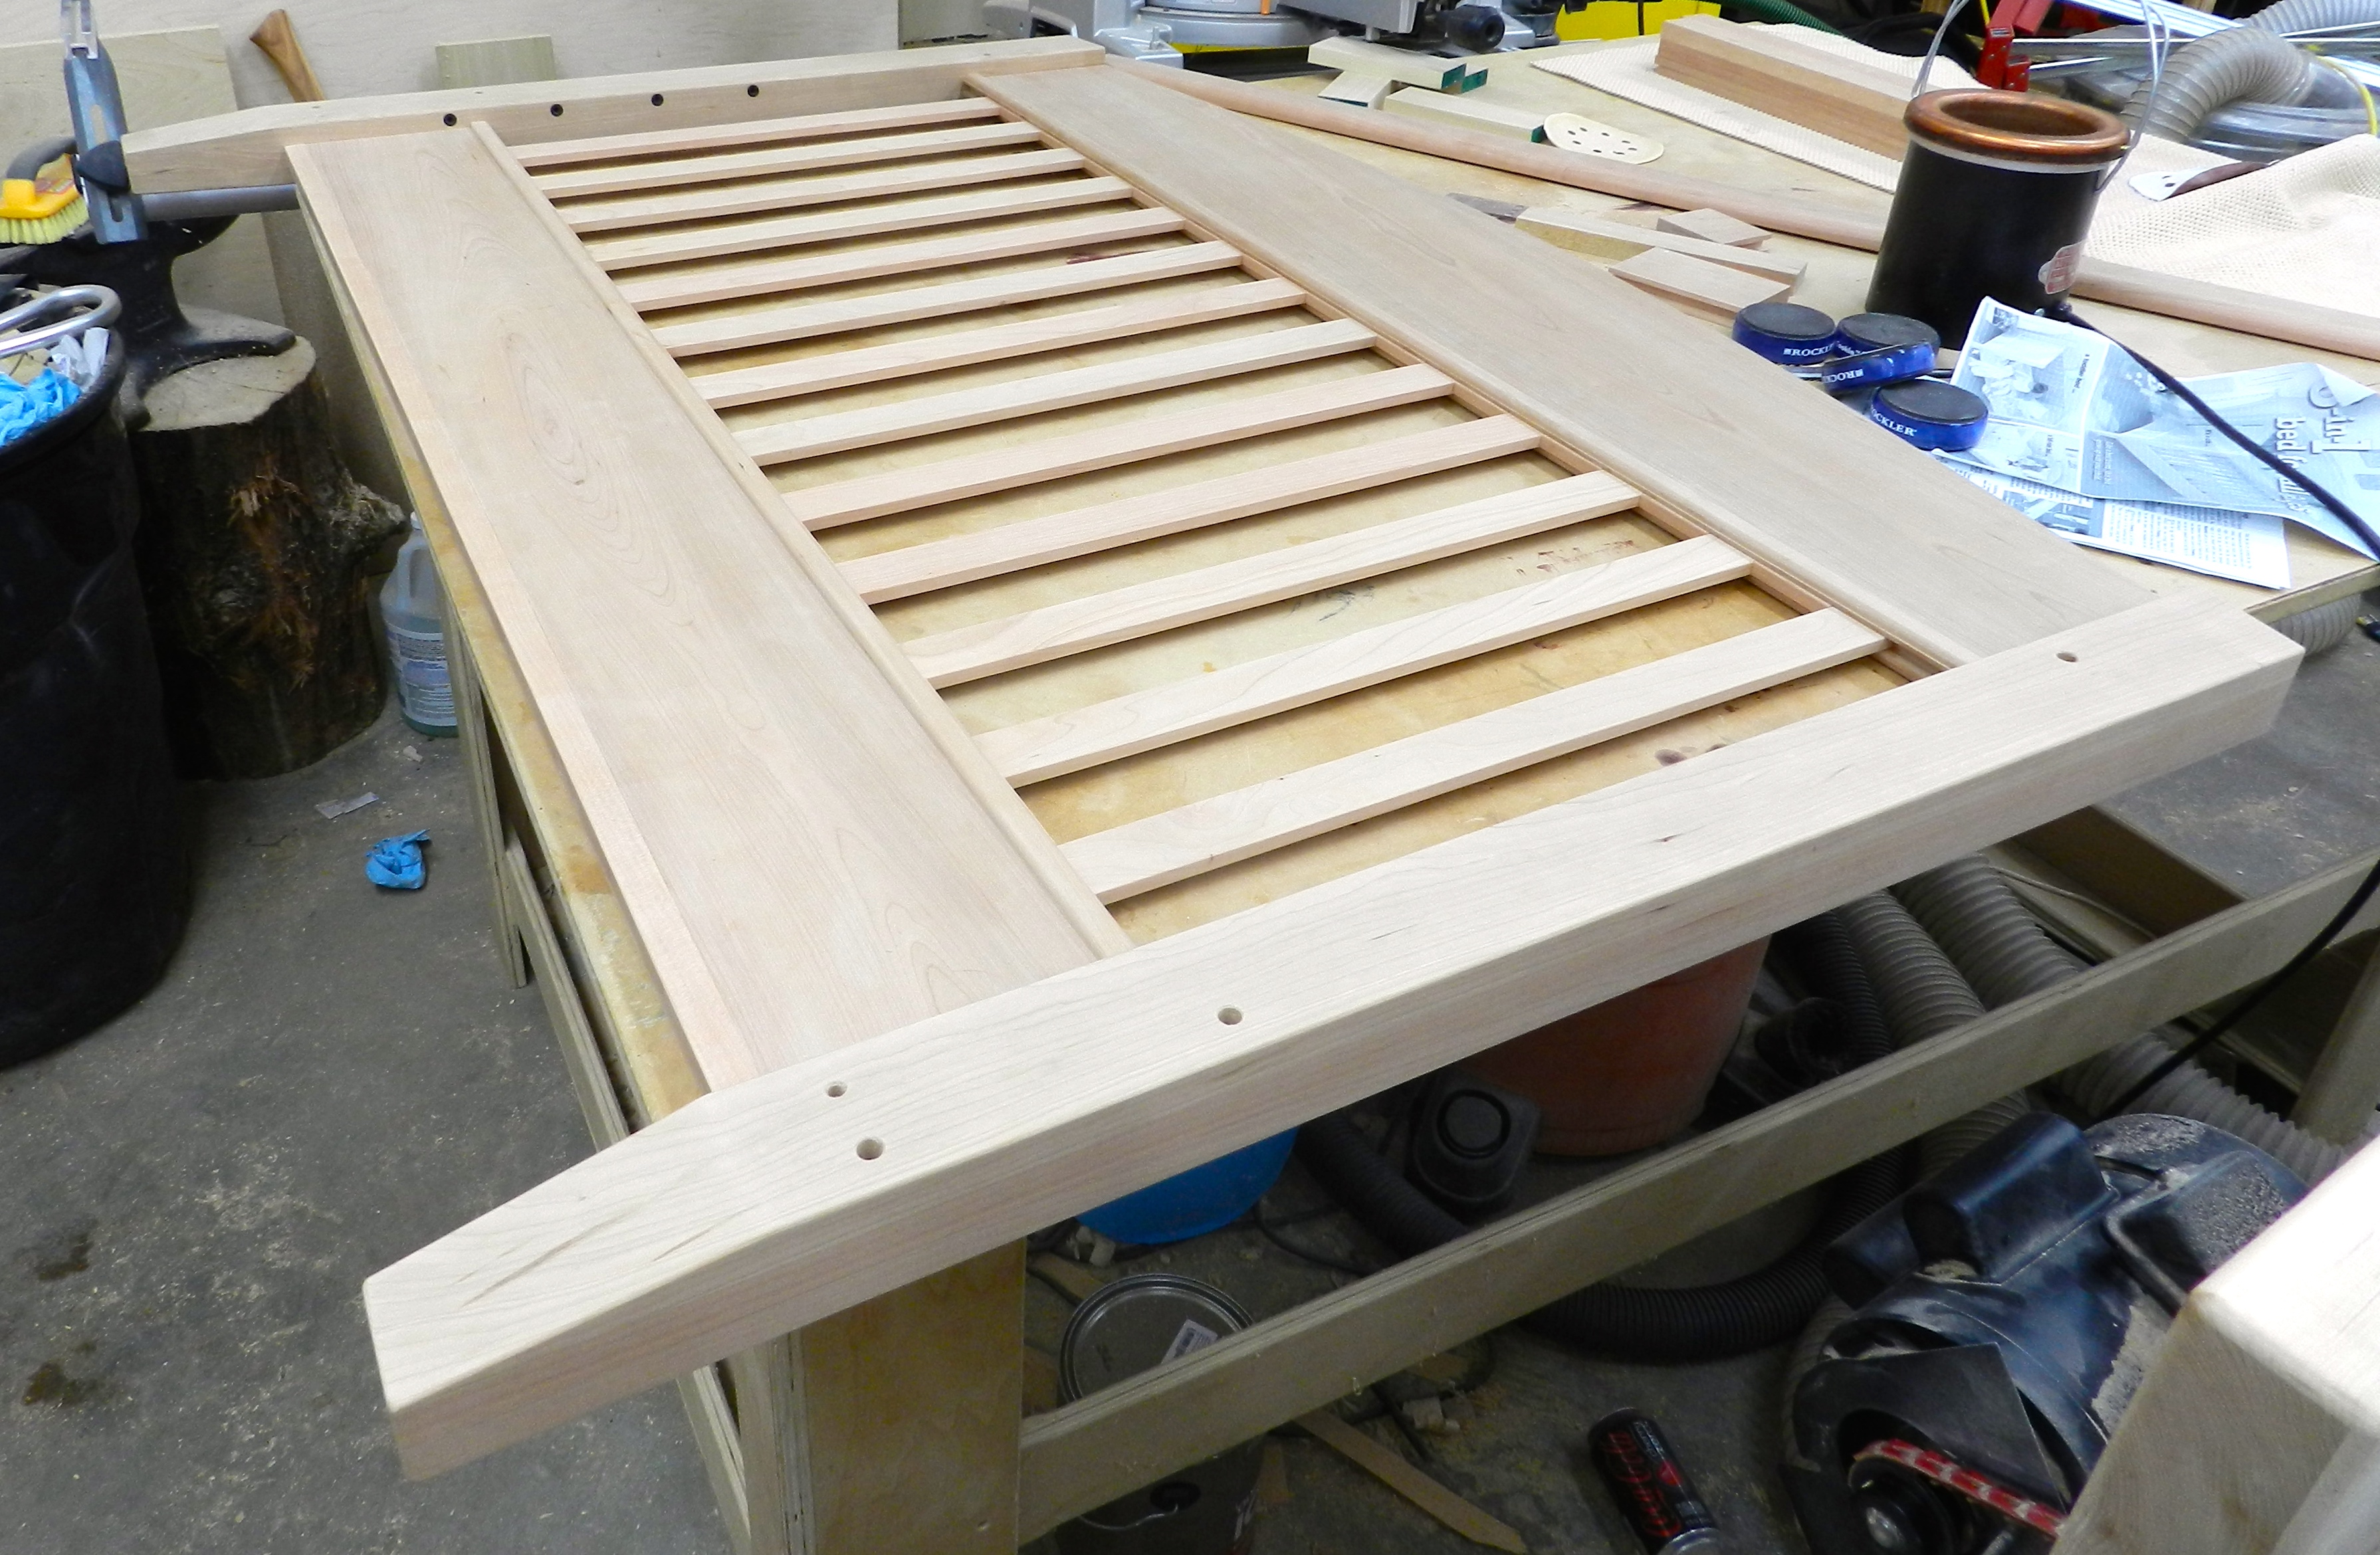
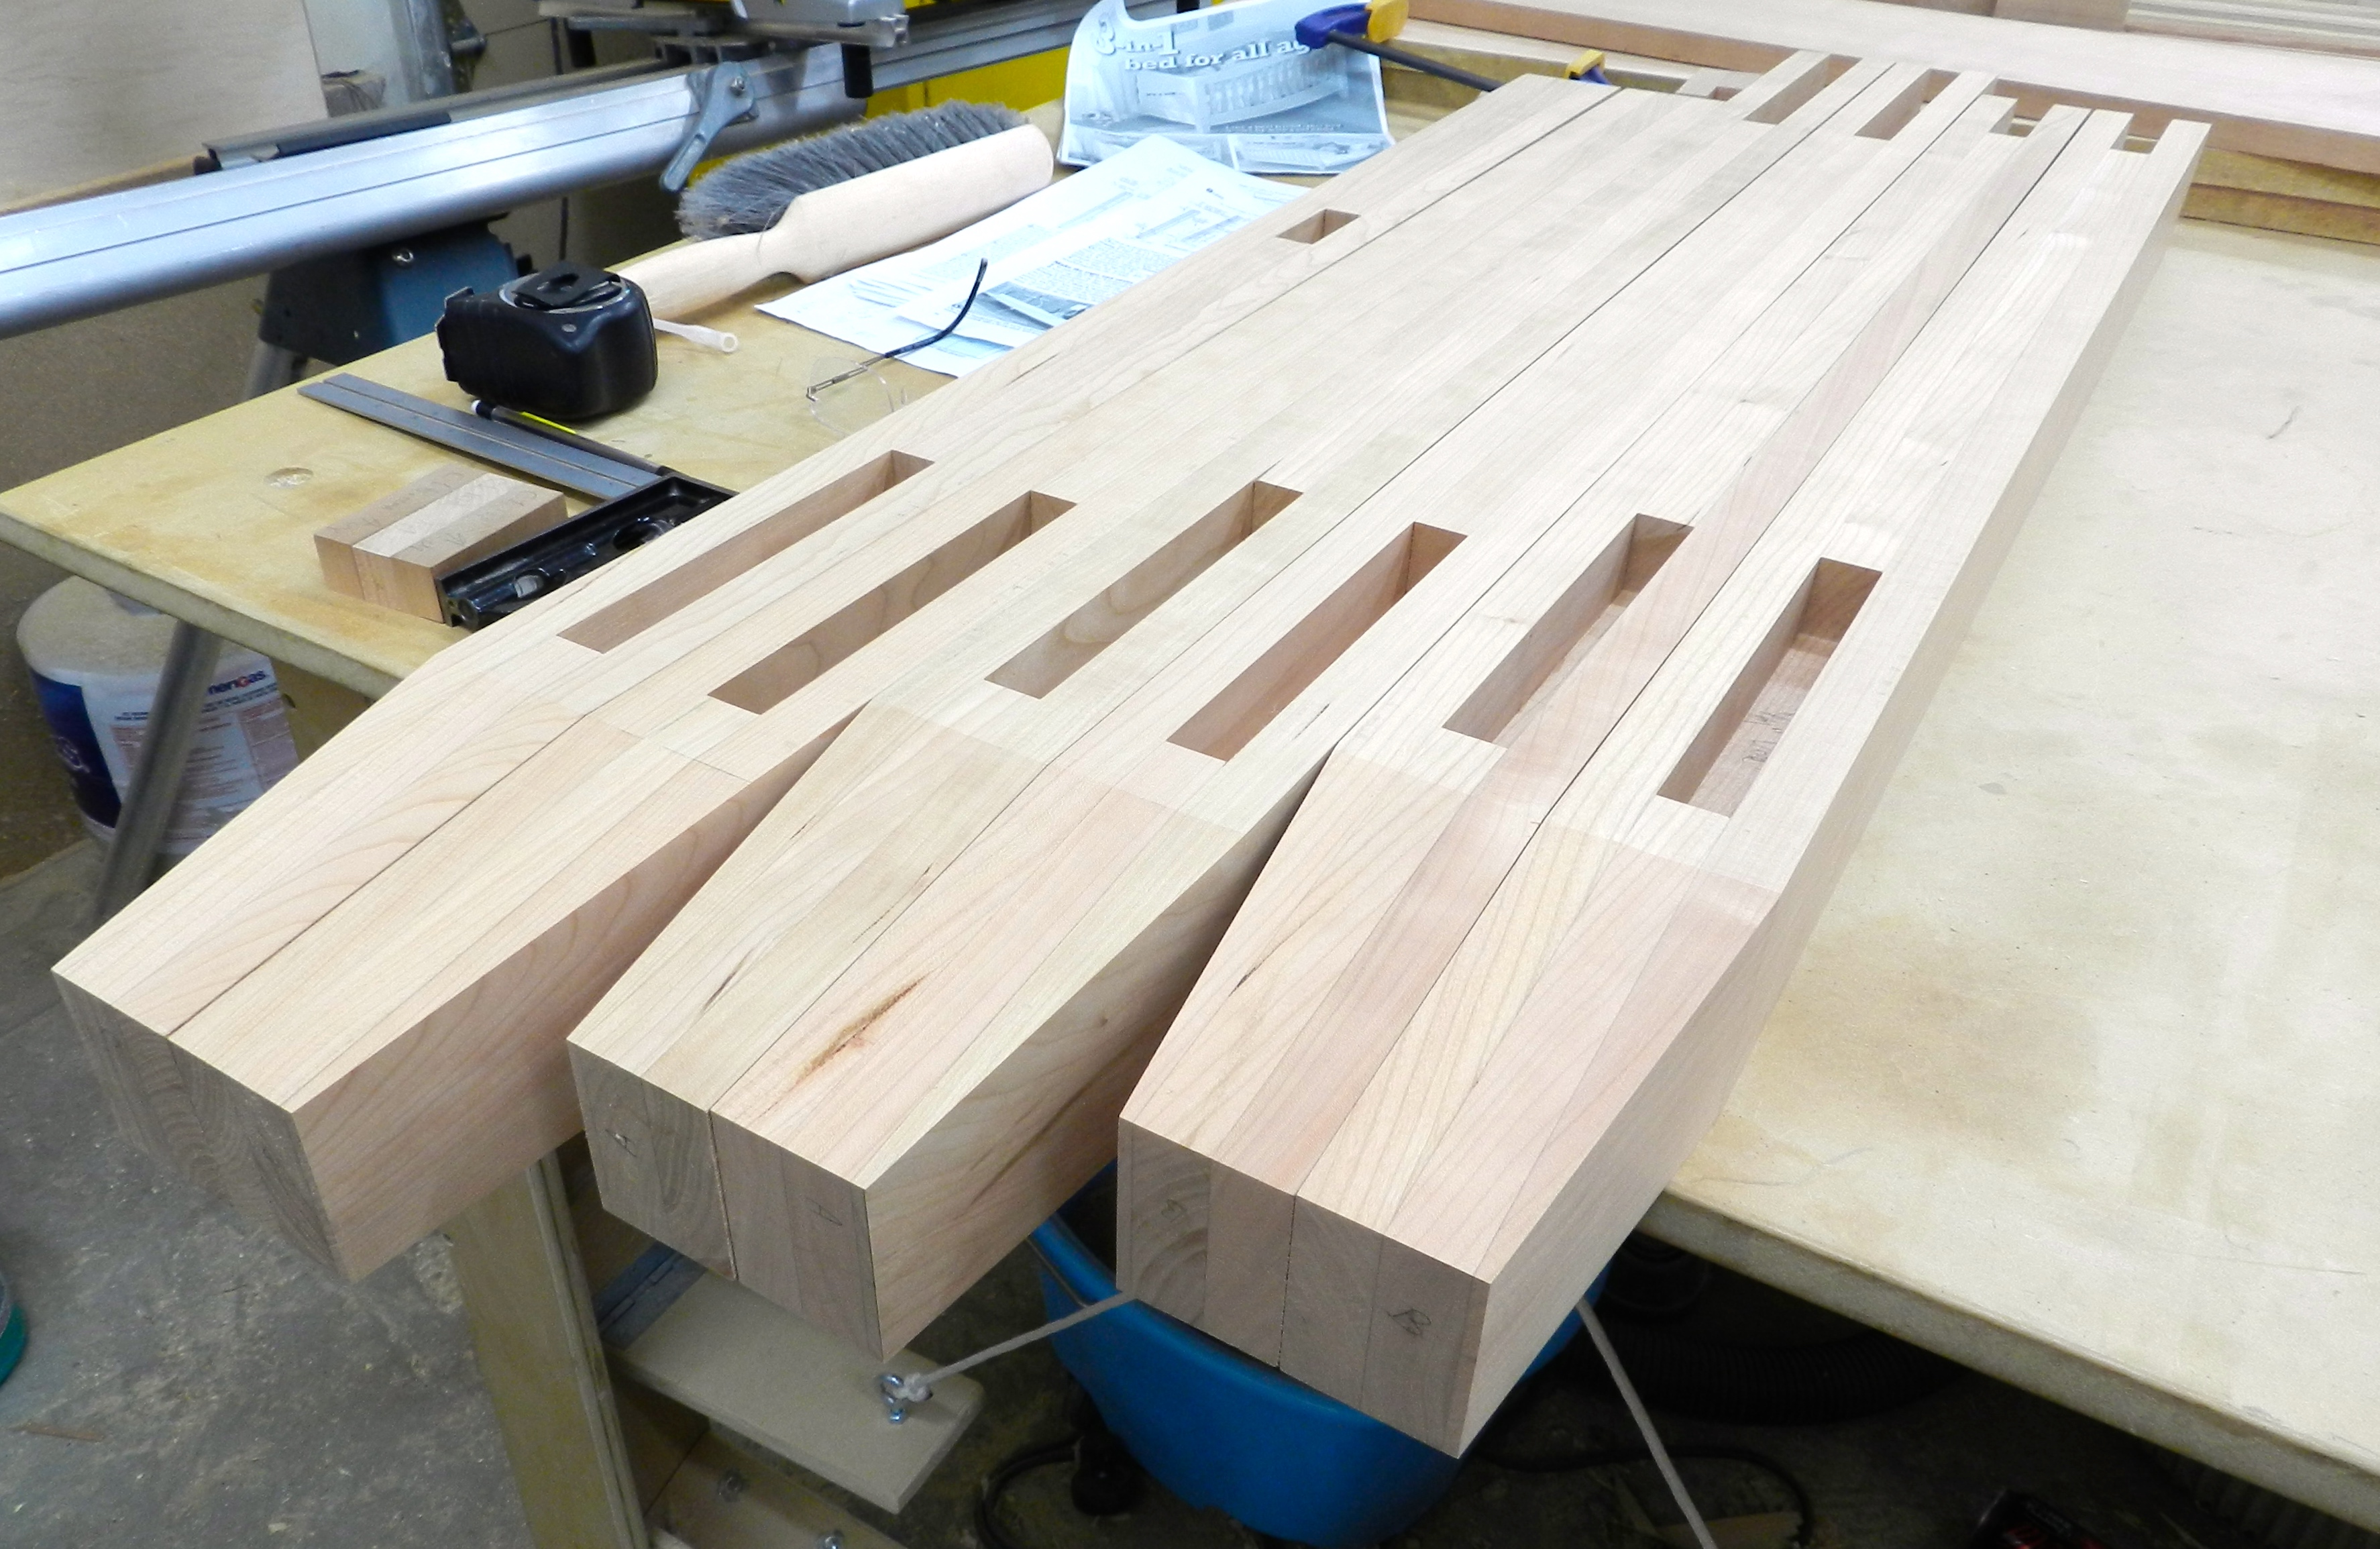
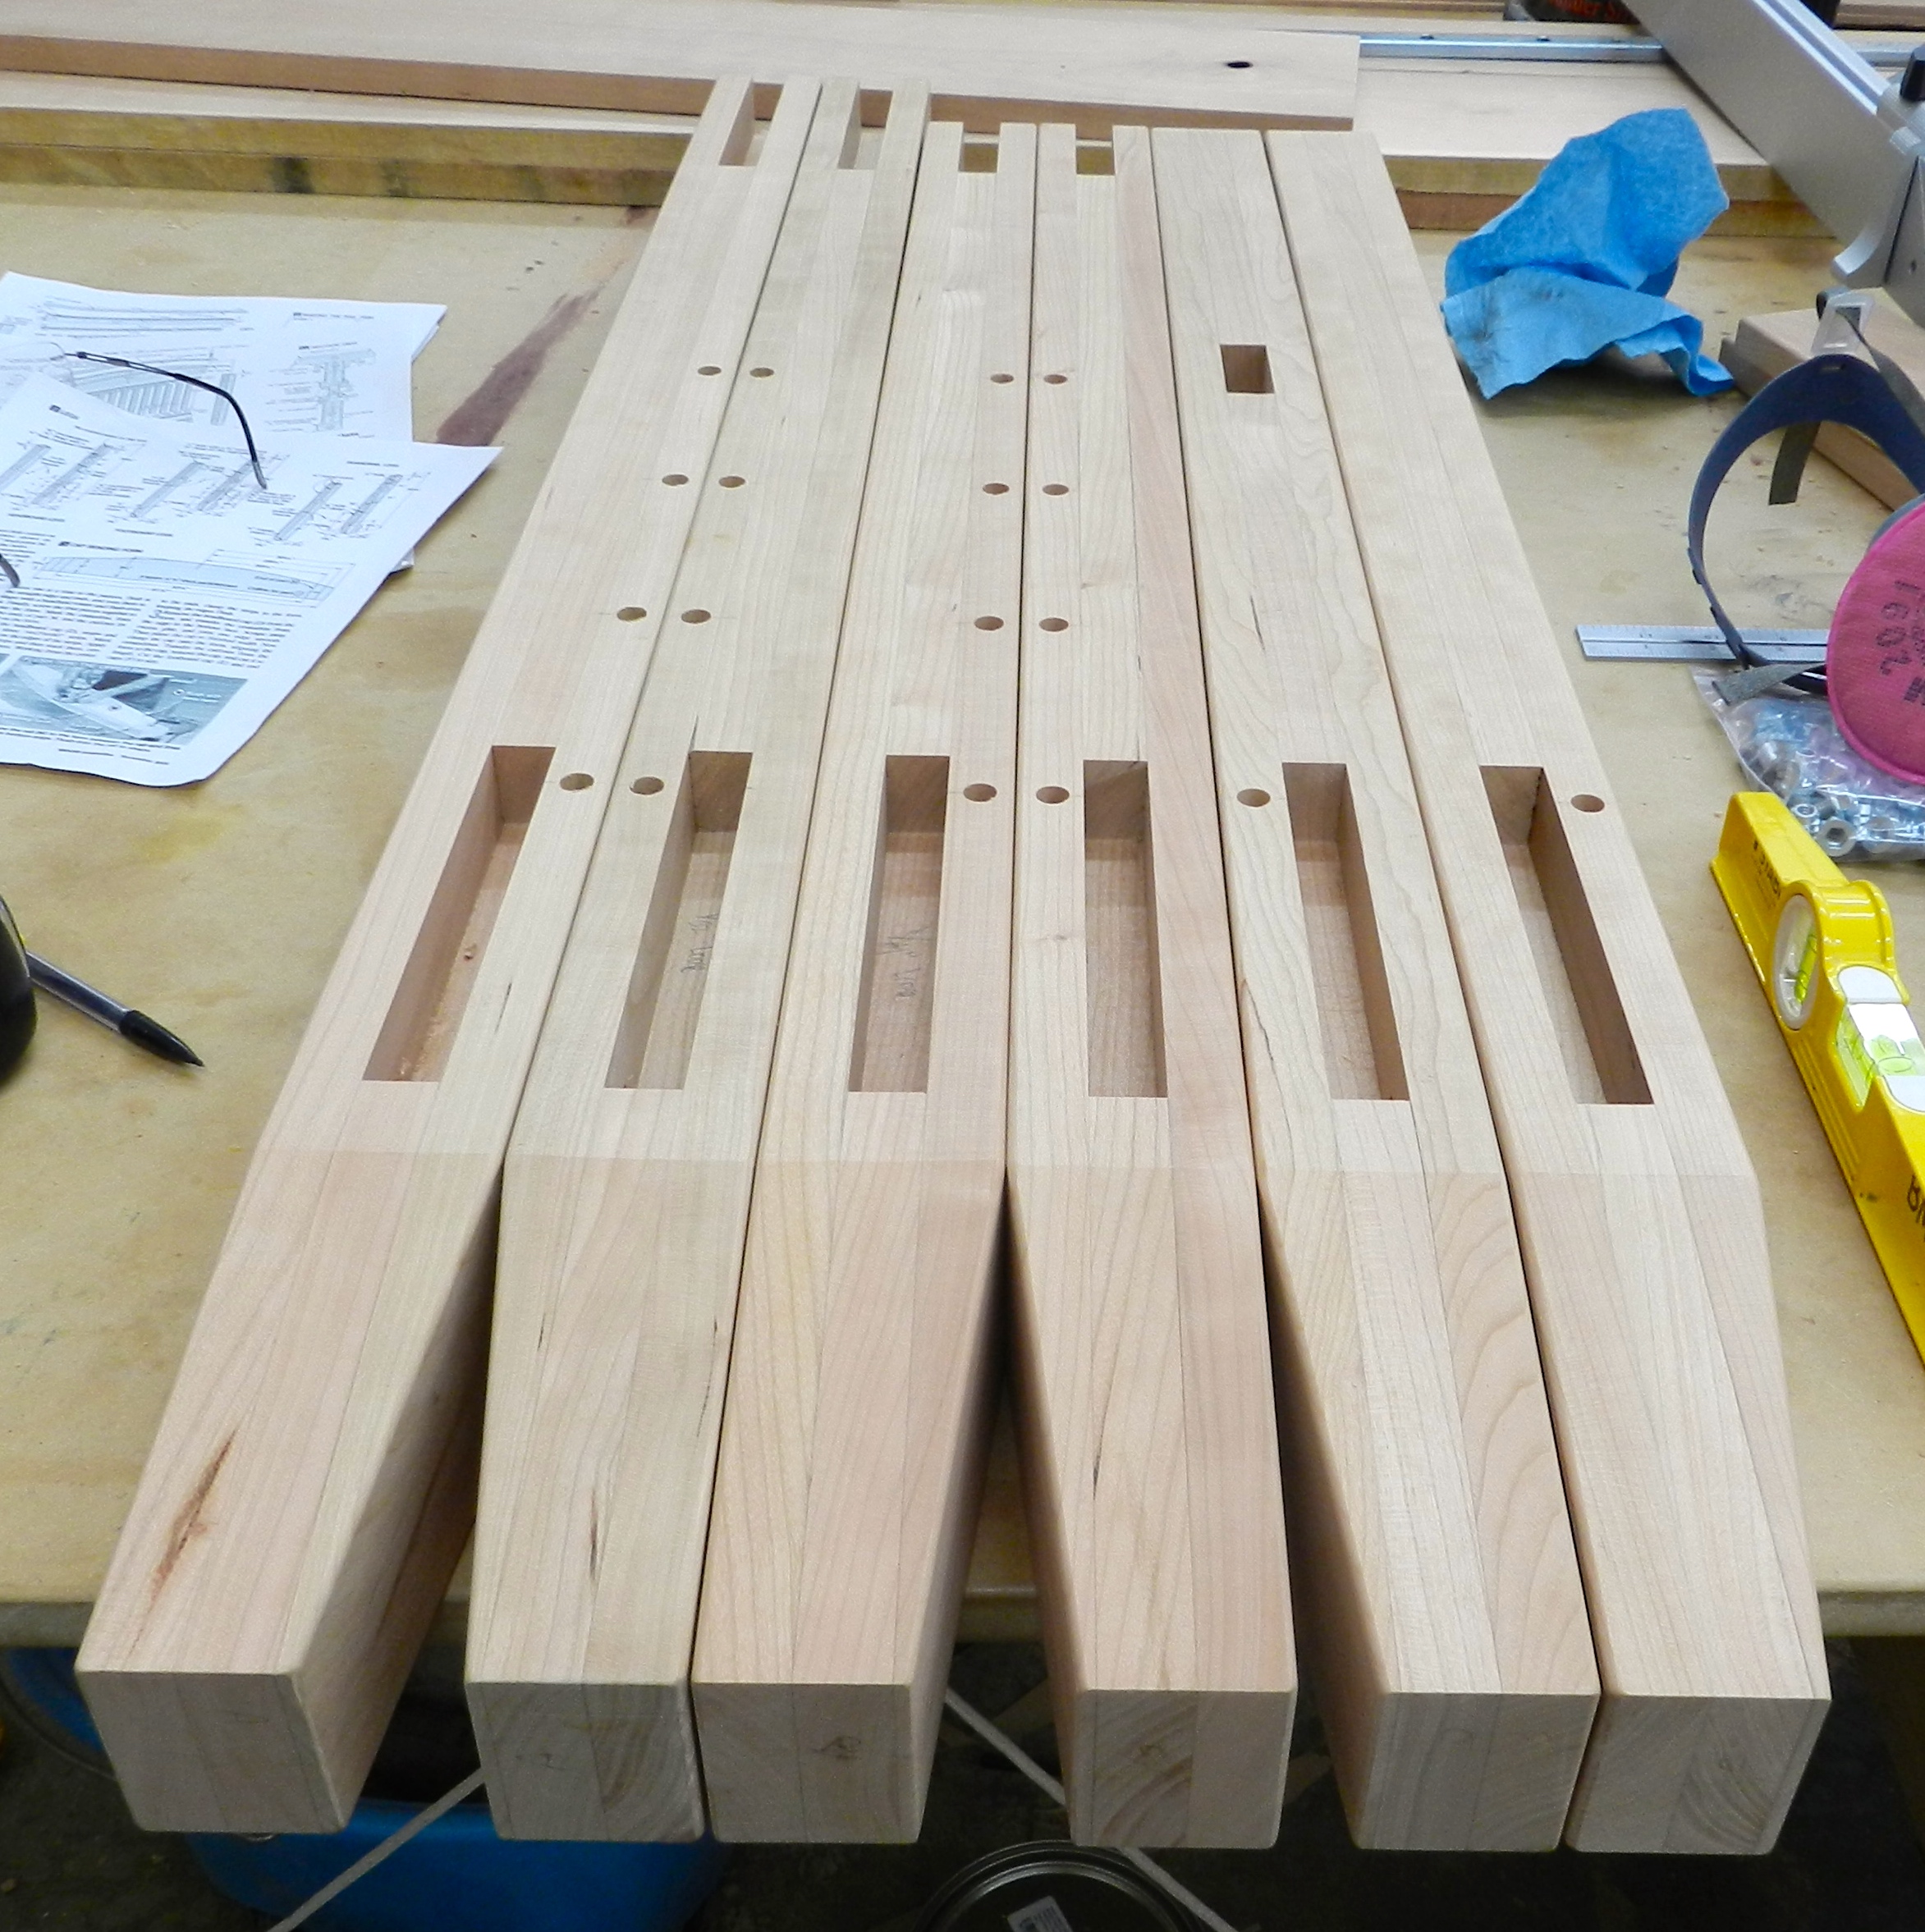
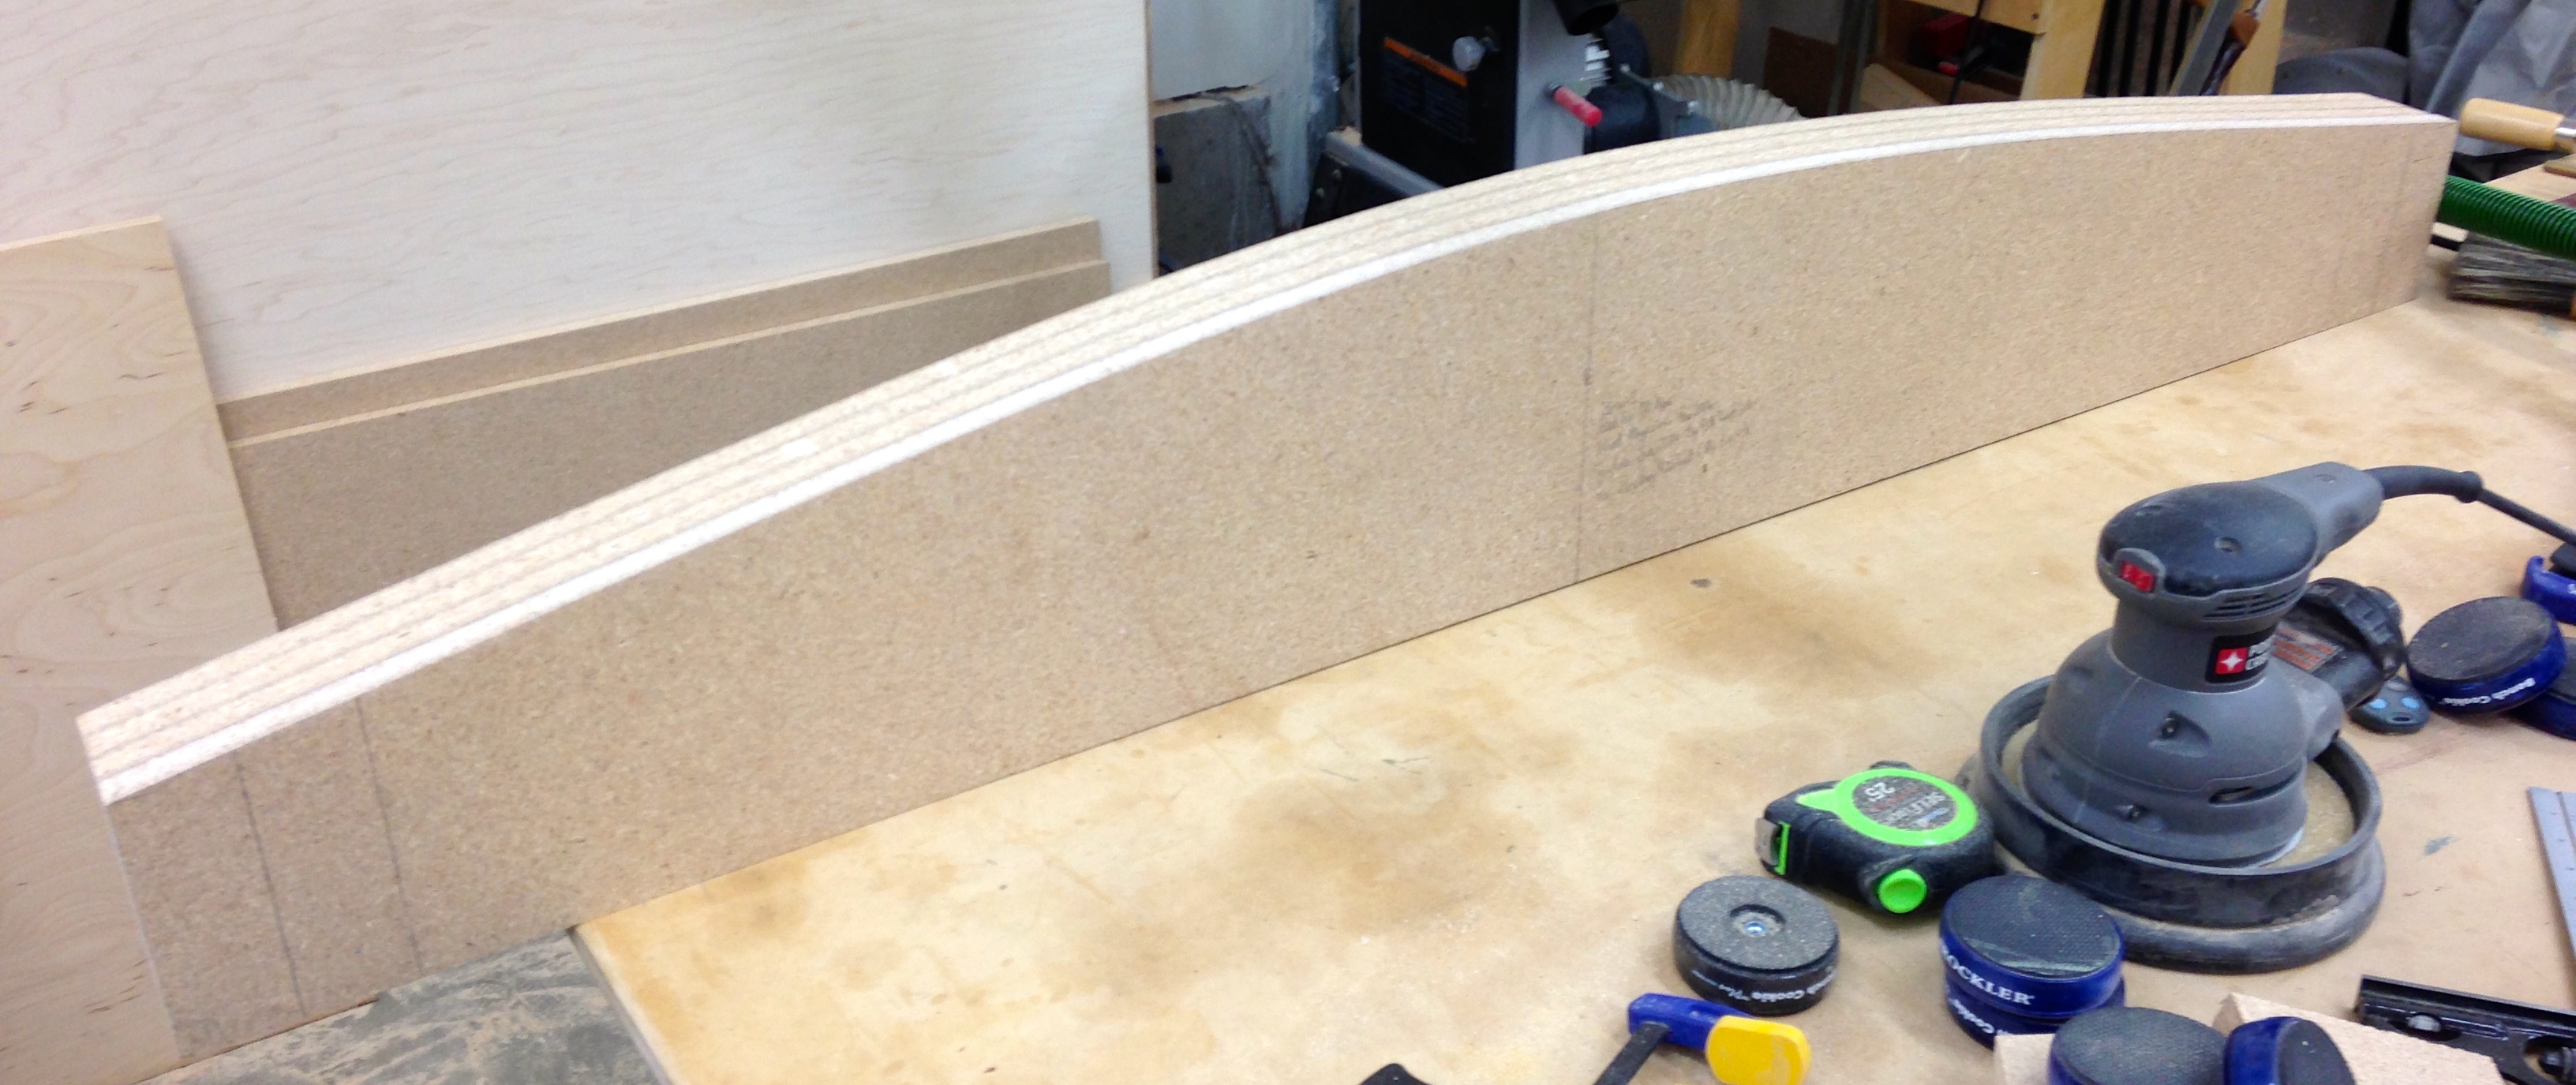
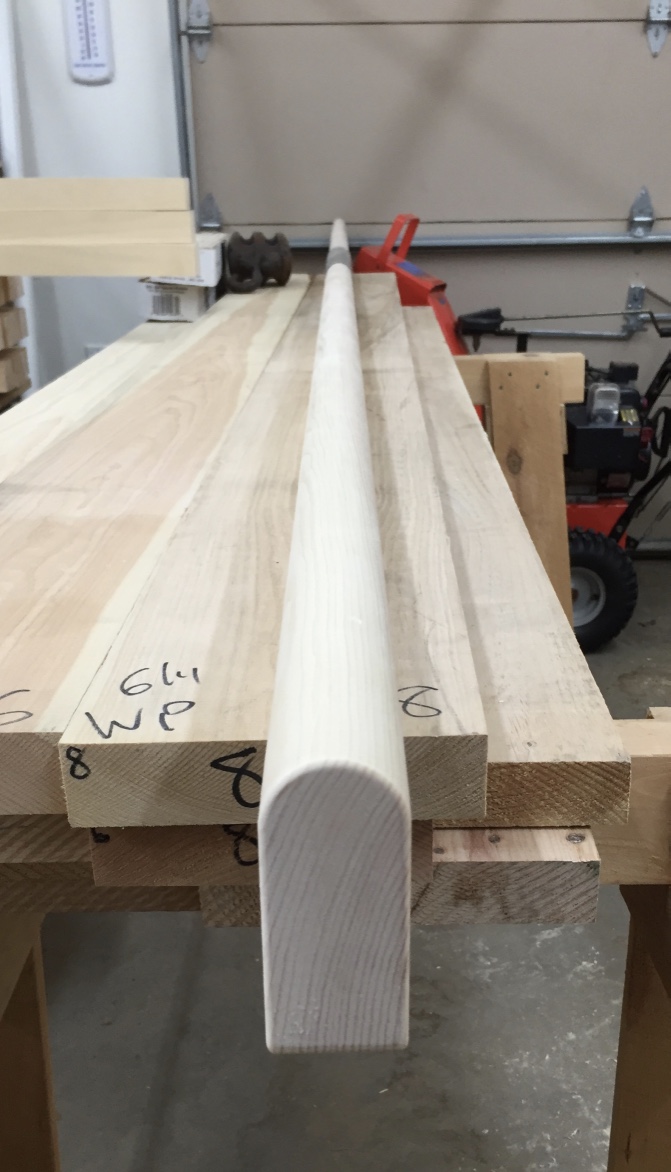
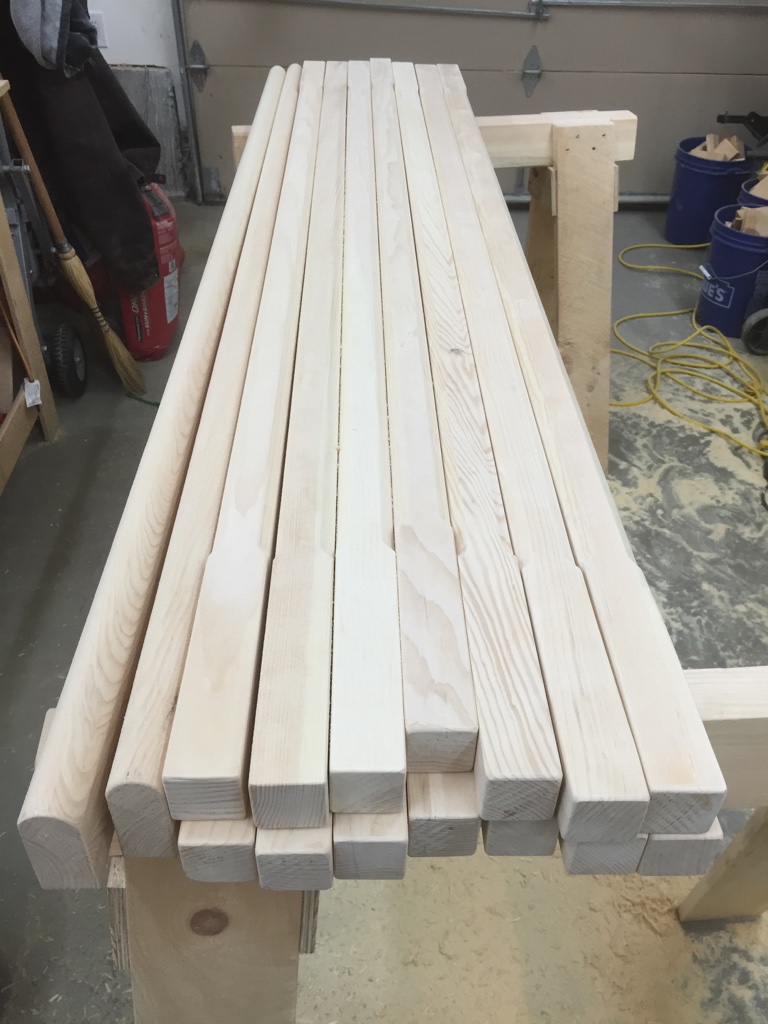
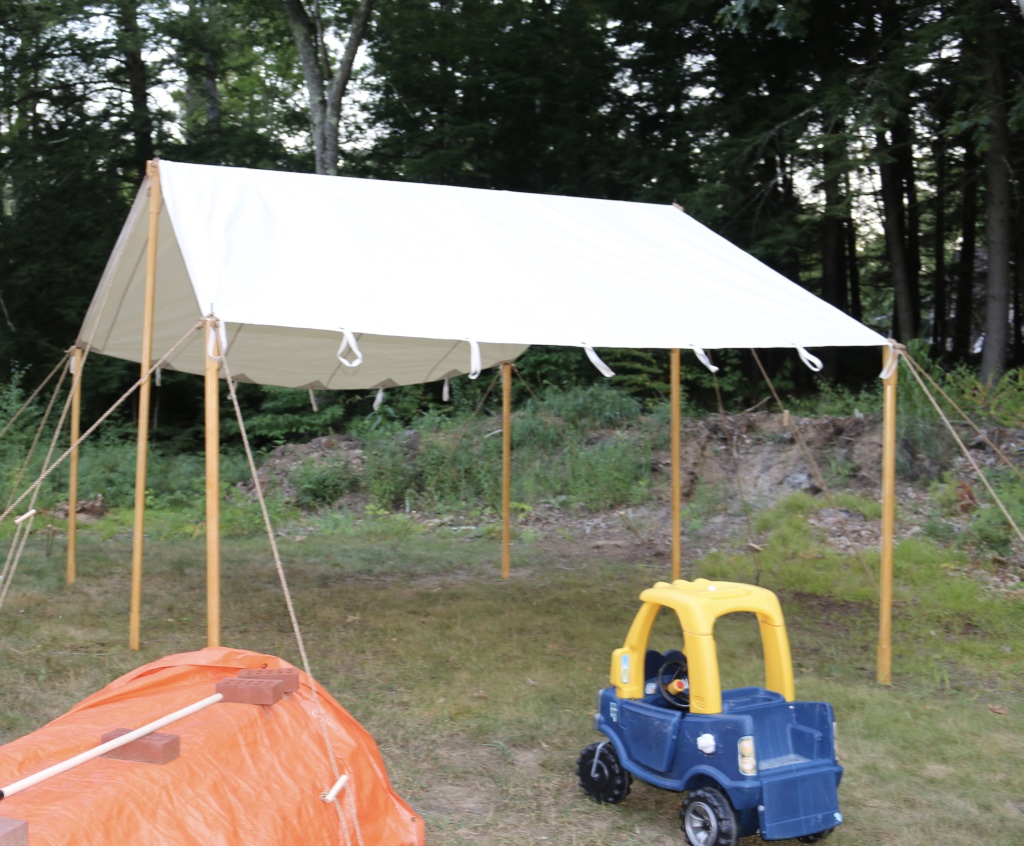
The center of the tent is supported by a larger beam –12.5′ long and roughly 2″x4″ — with a rounded over top. This beam is made from two pieces joined in the center with a simple metal connecting collar.

Stock getting ripped down to size and hand planed. Rounding over top of beam.

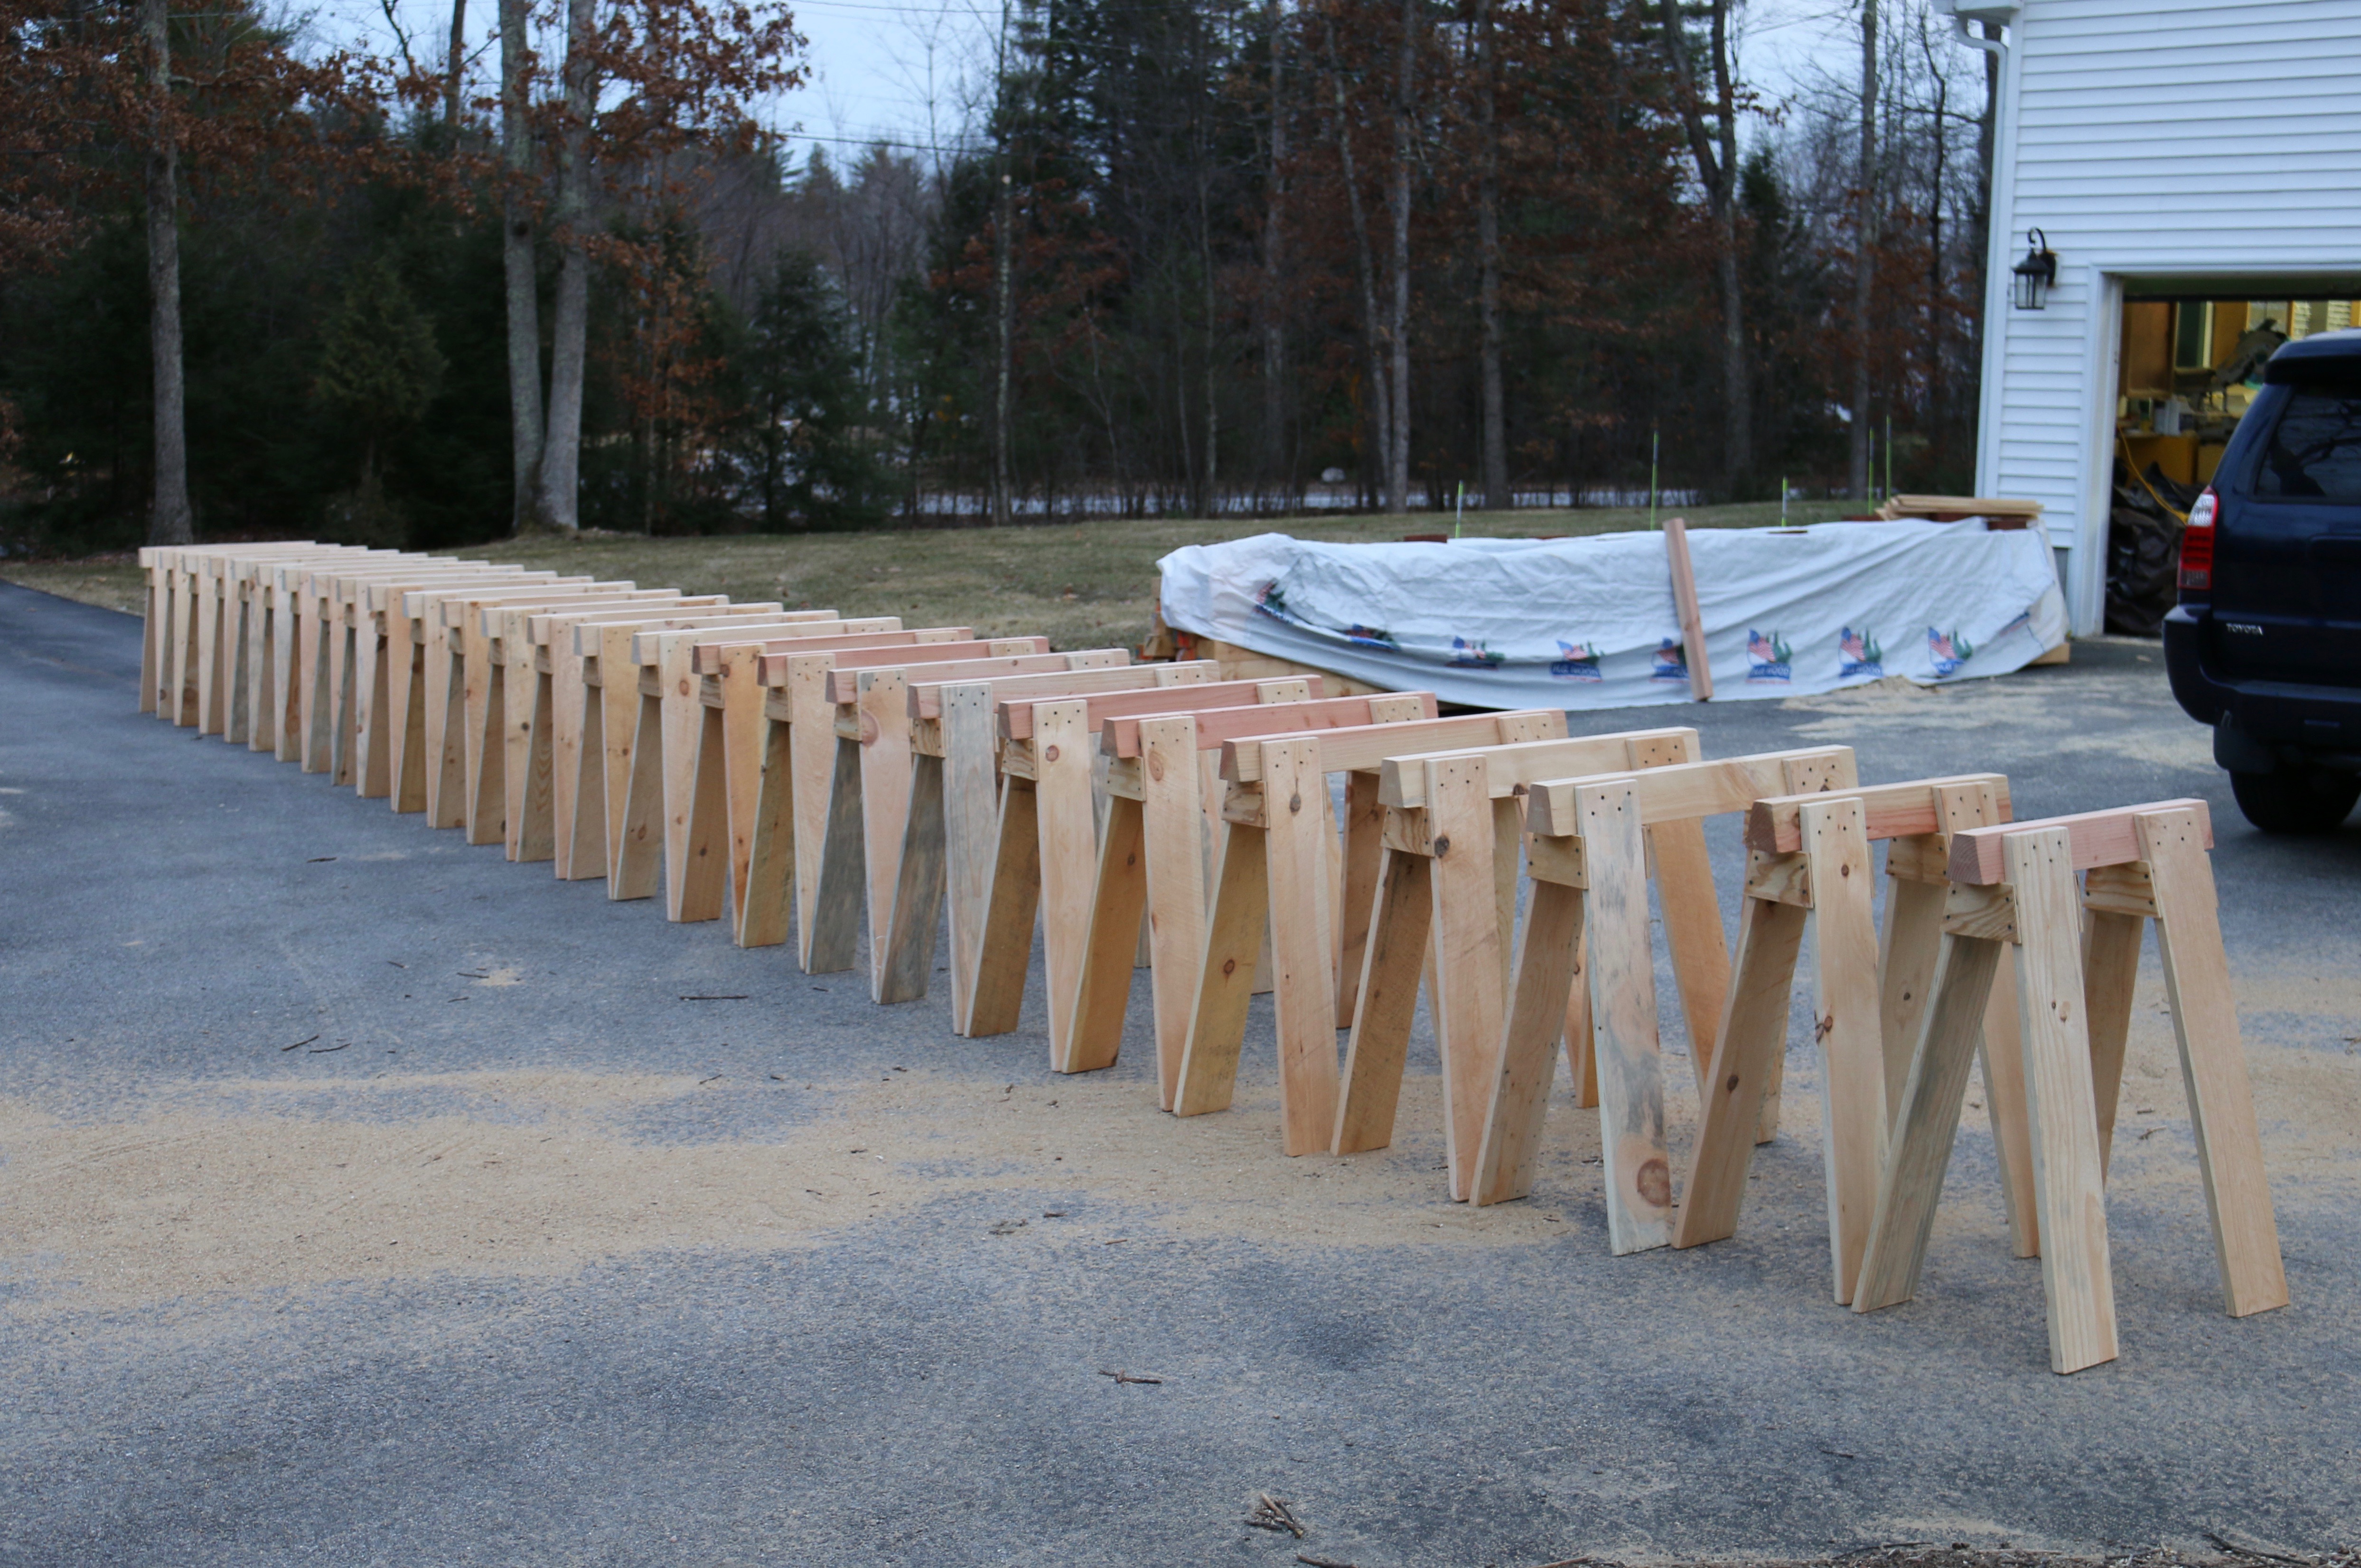
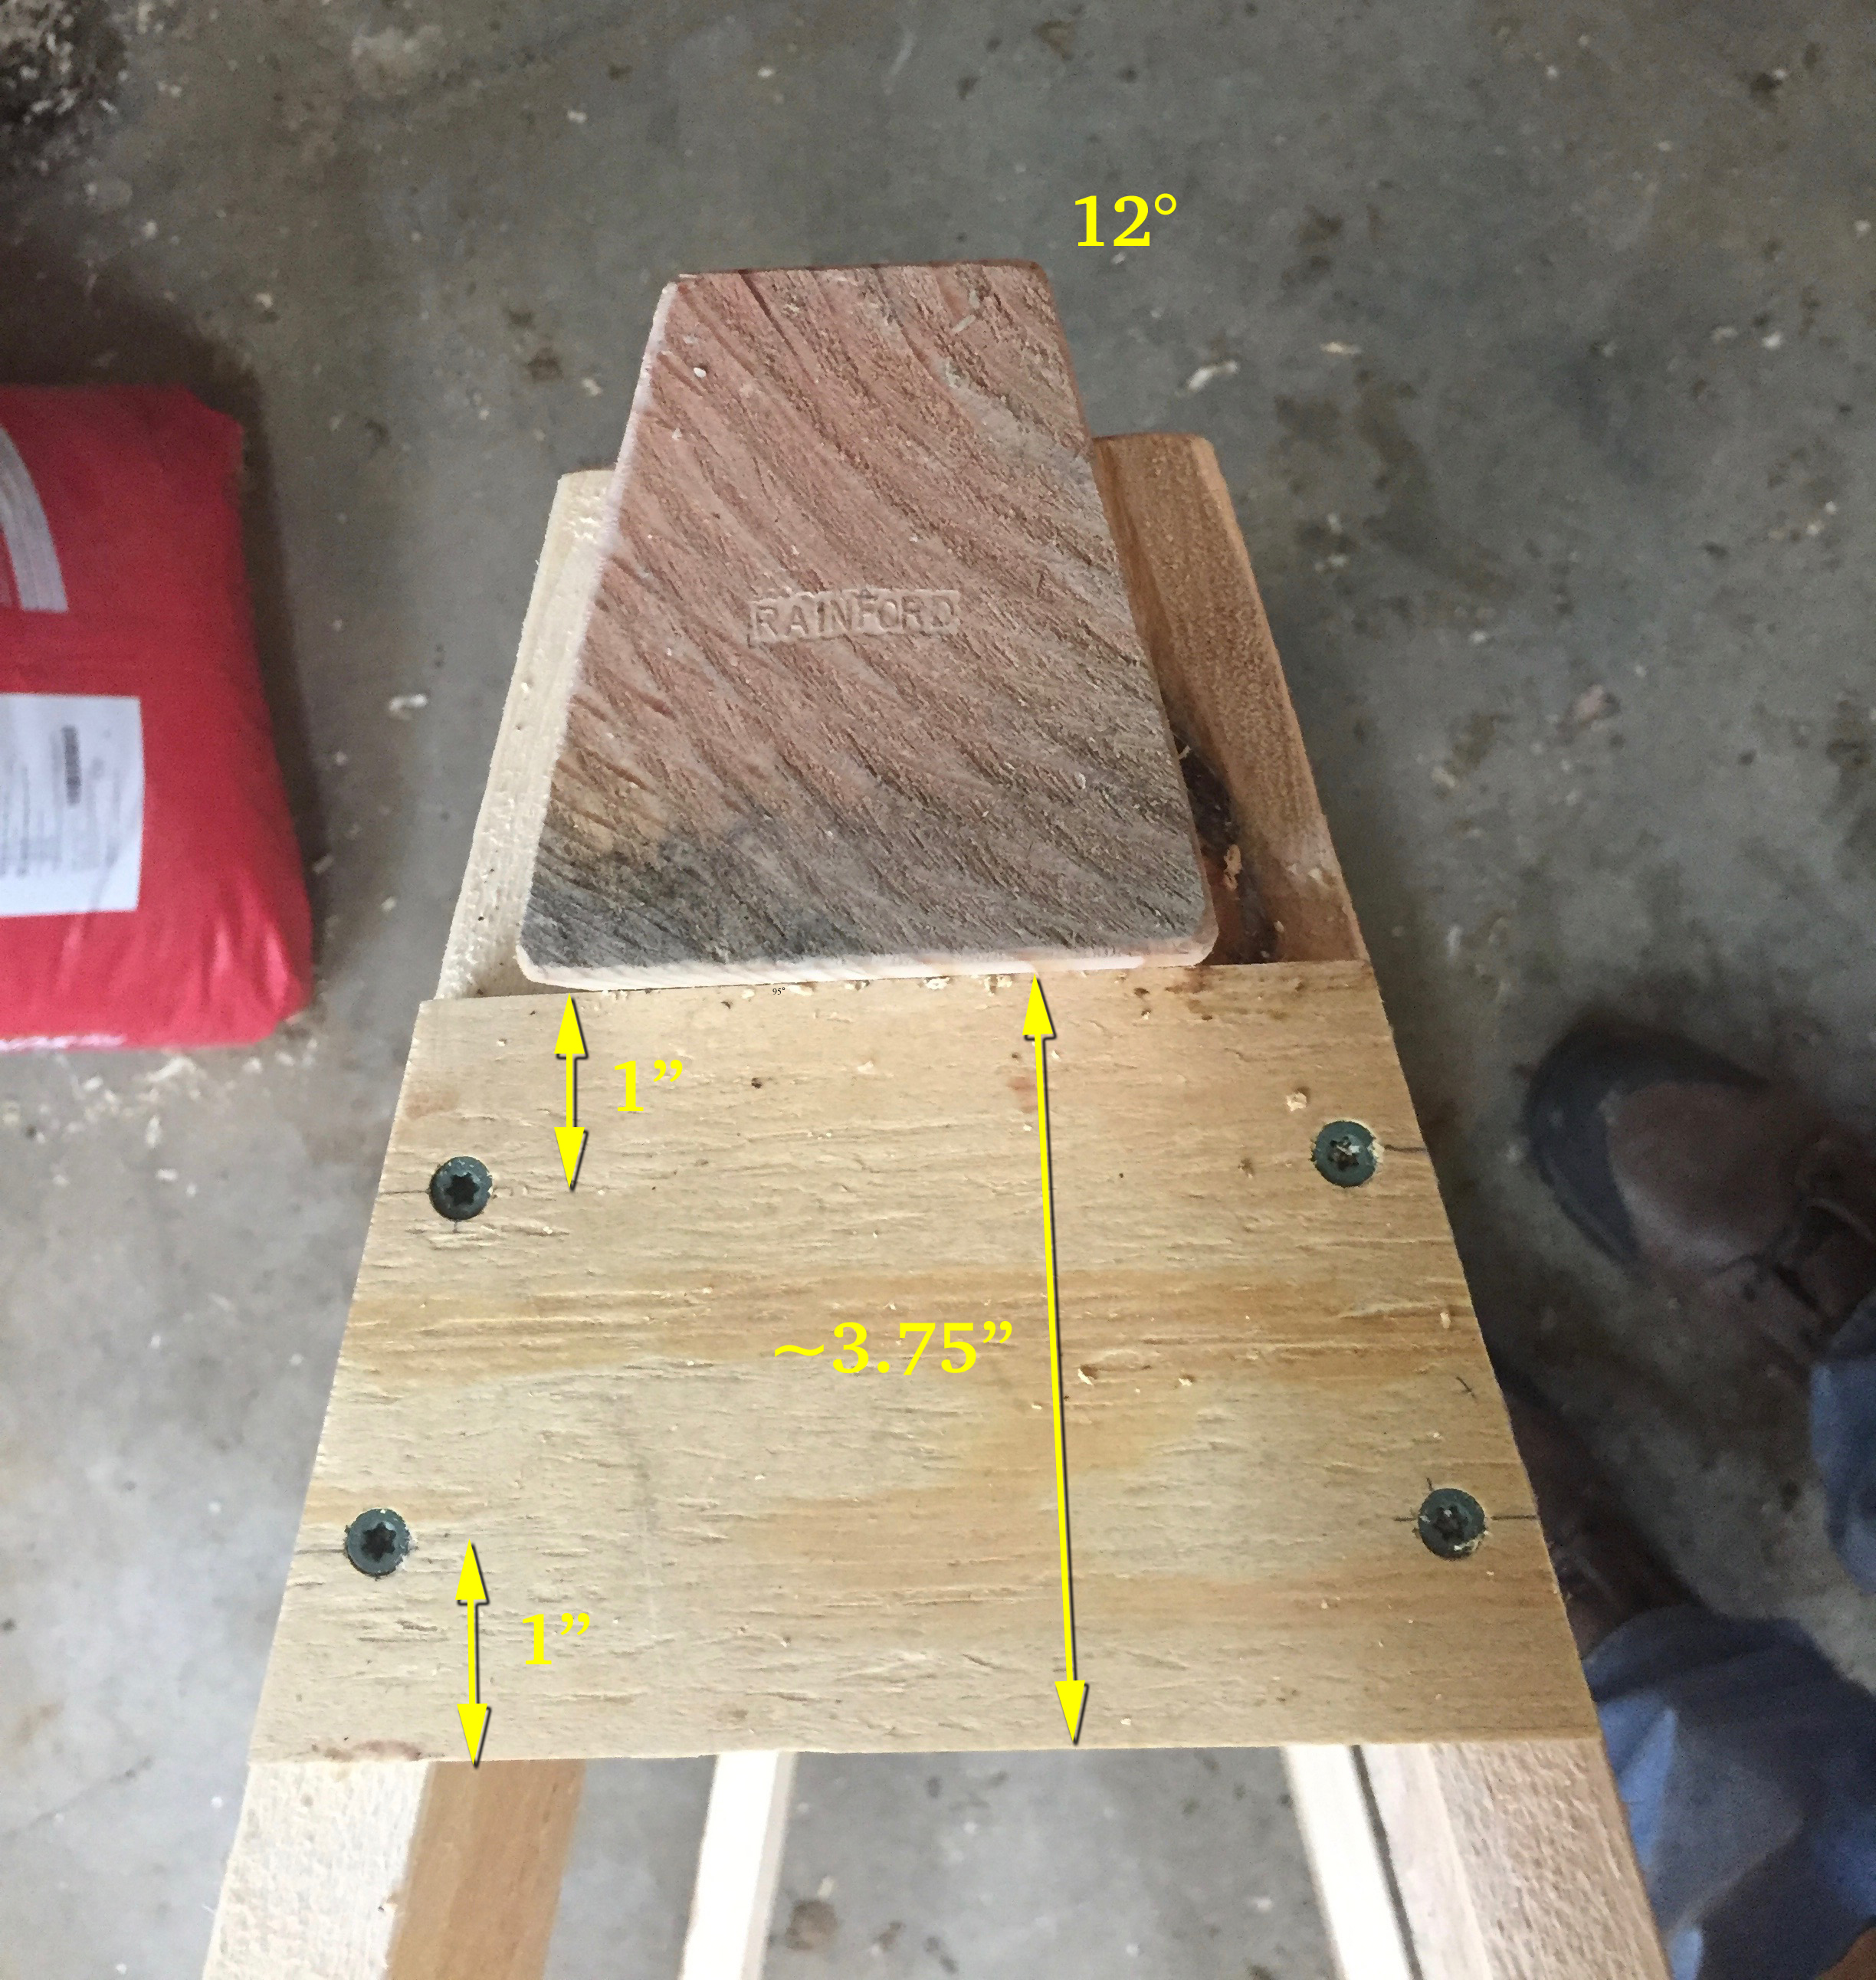
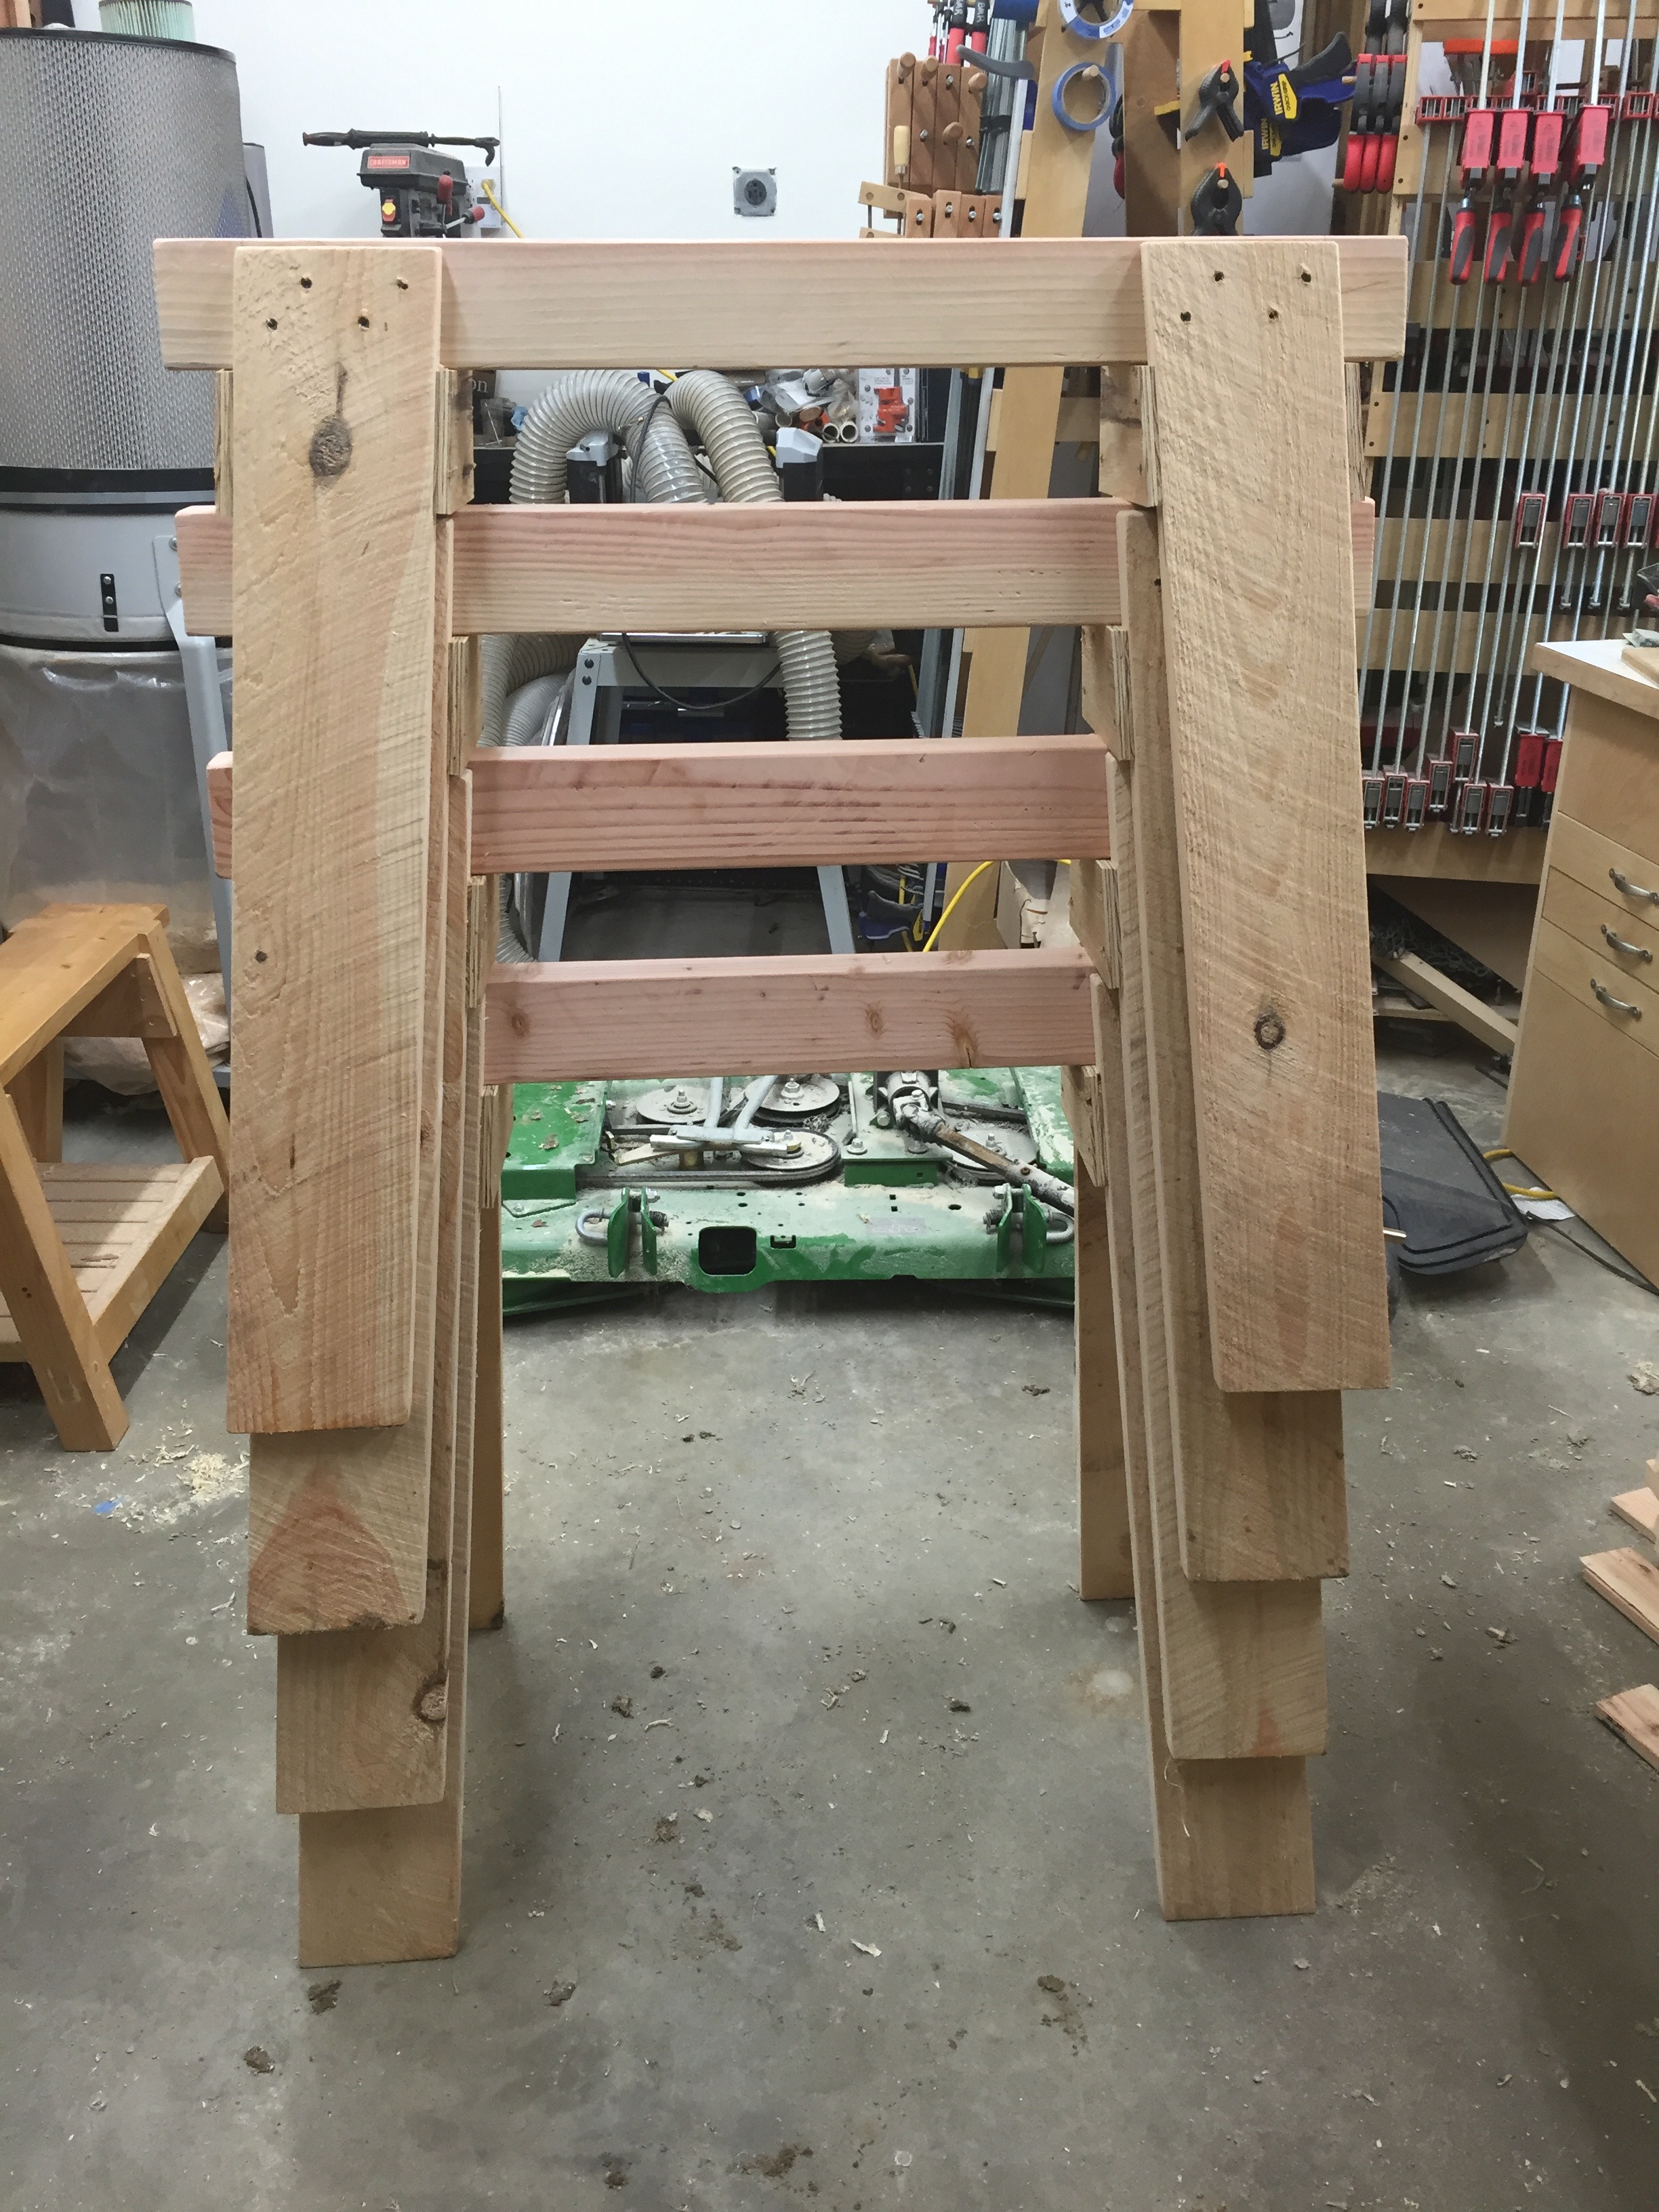
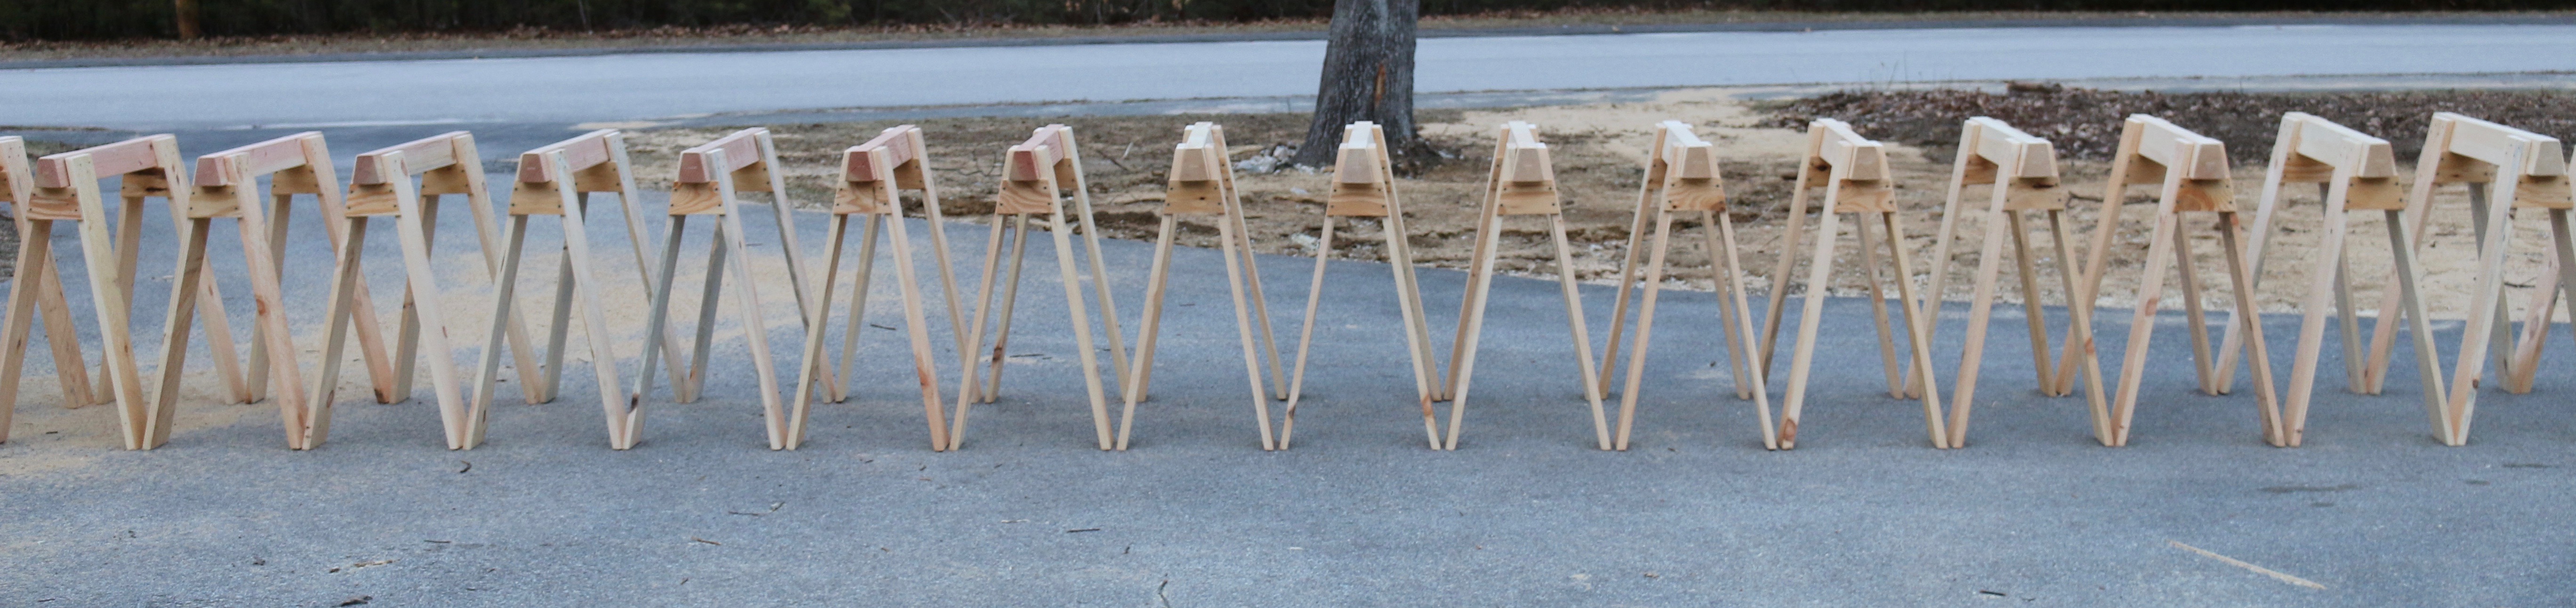
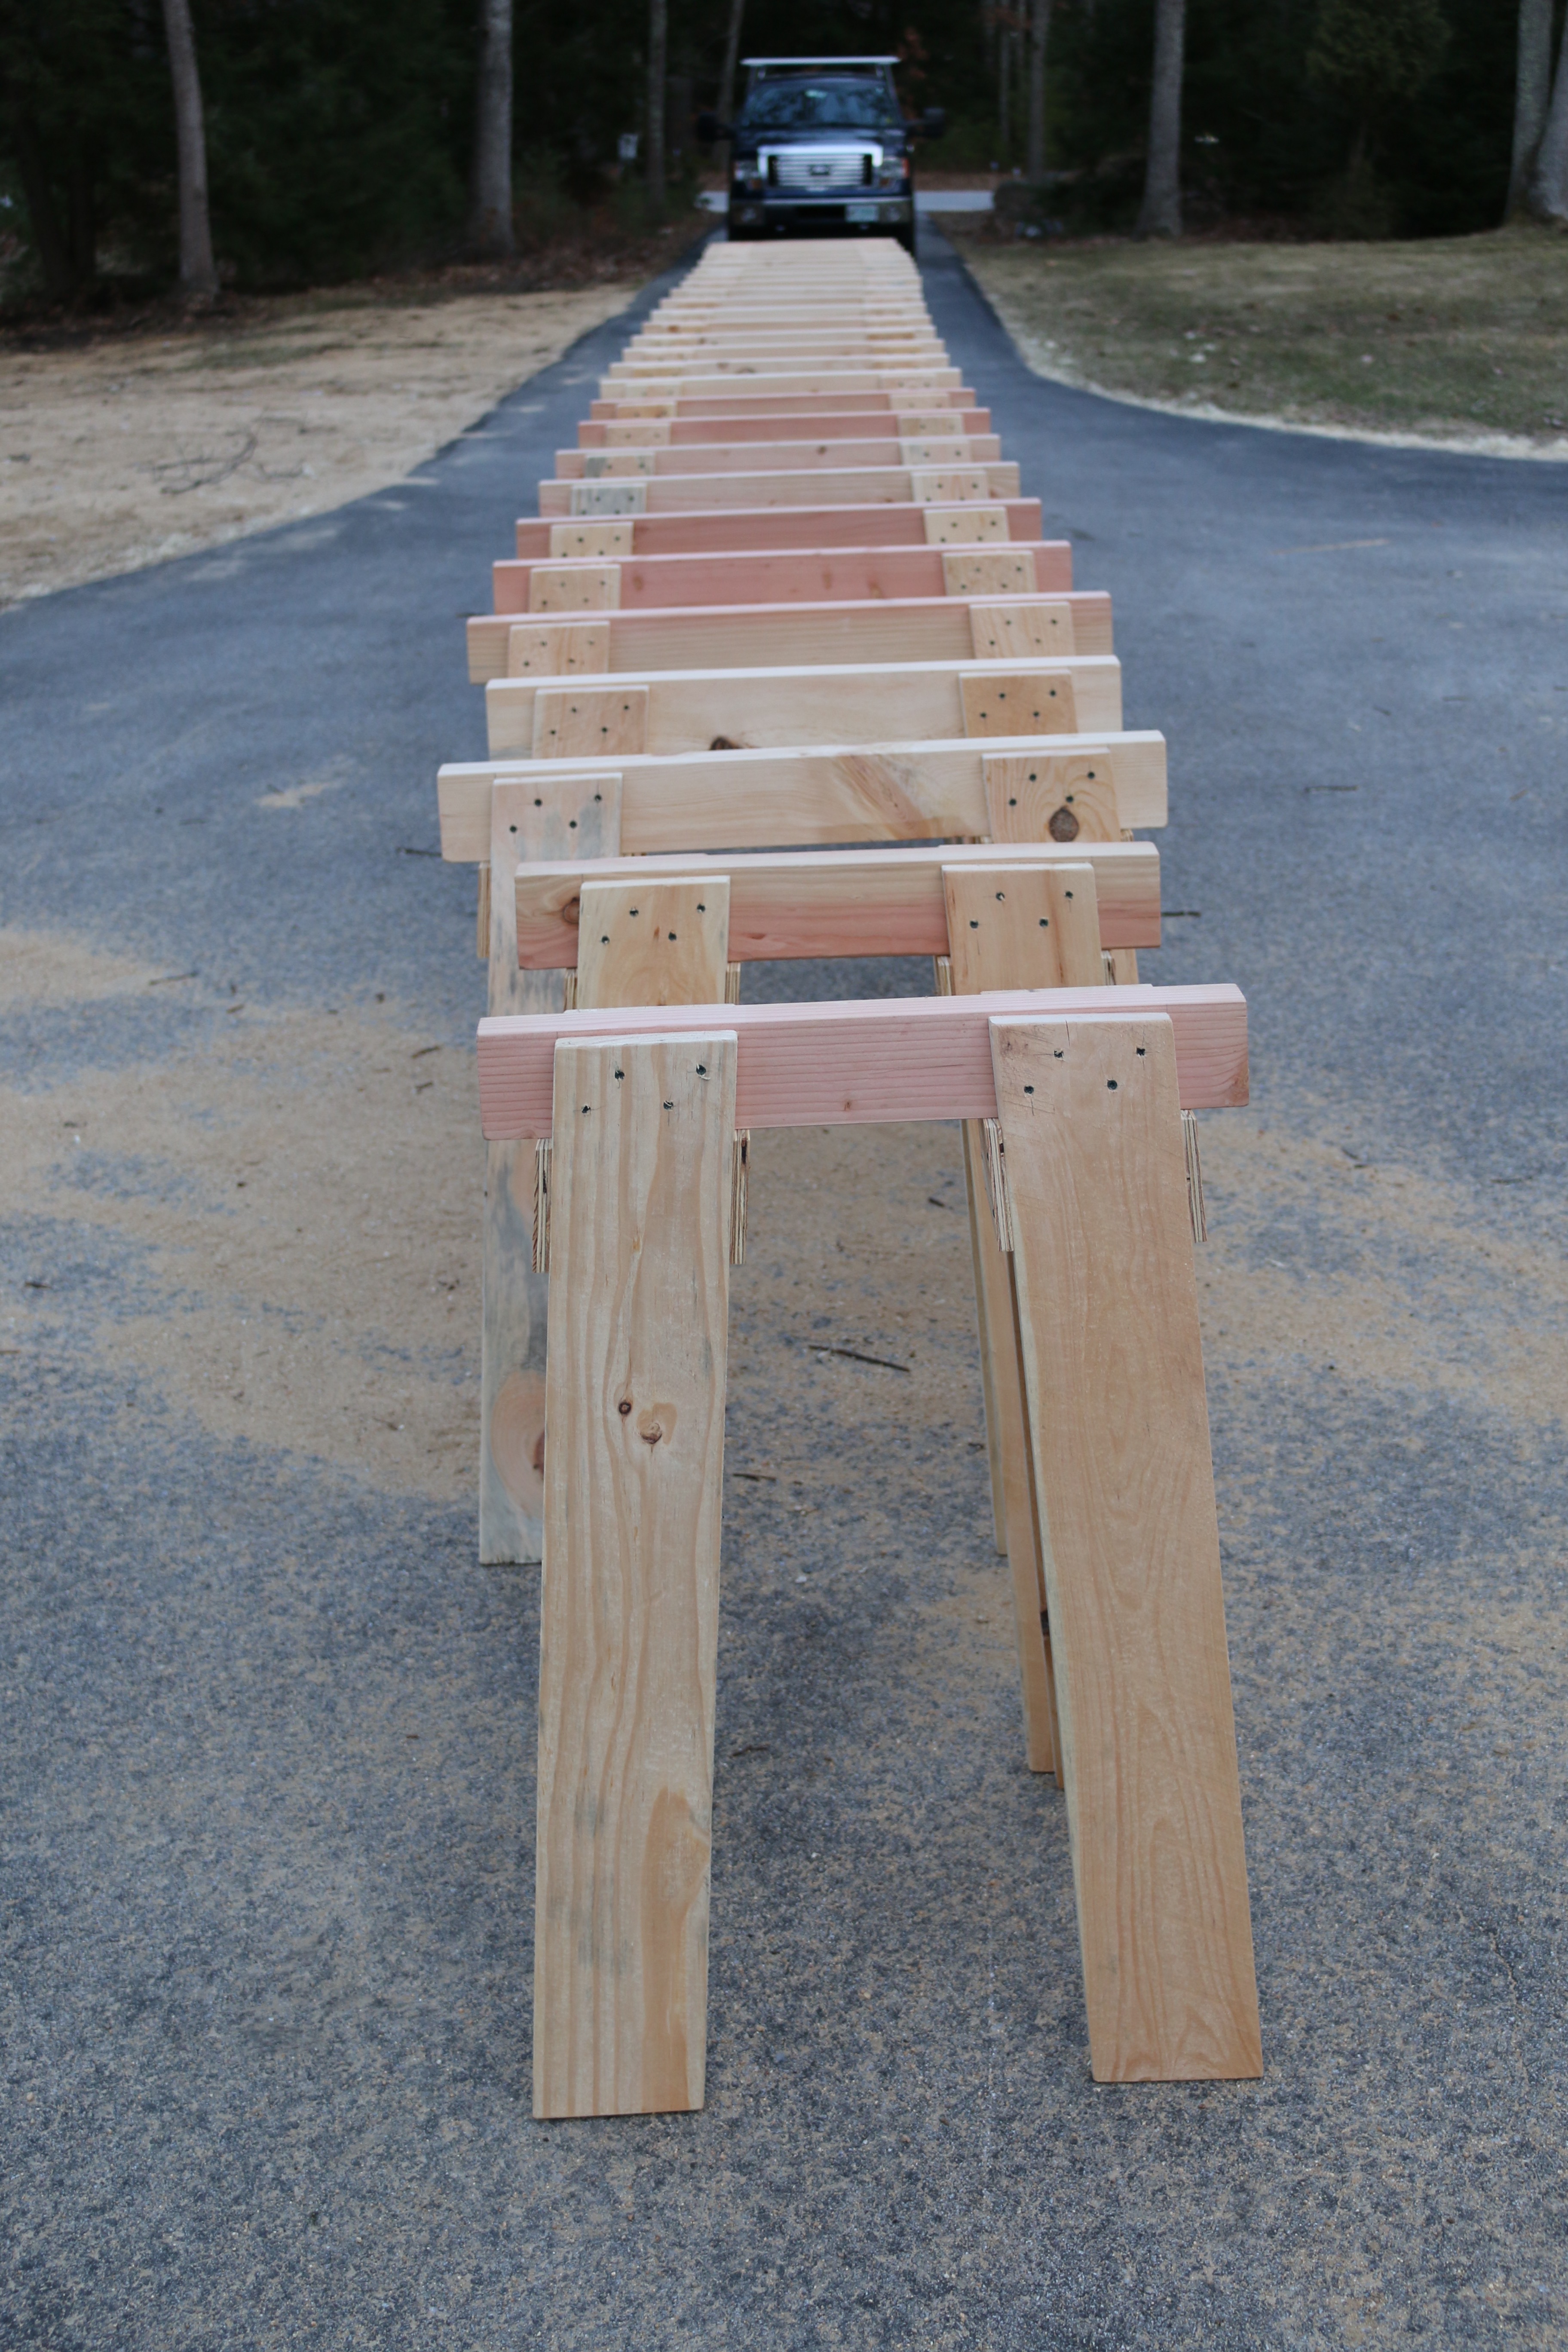
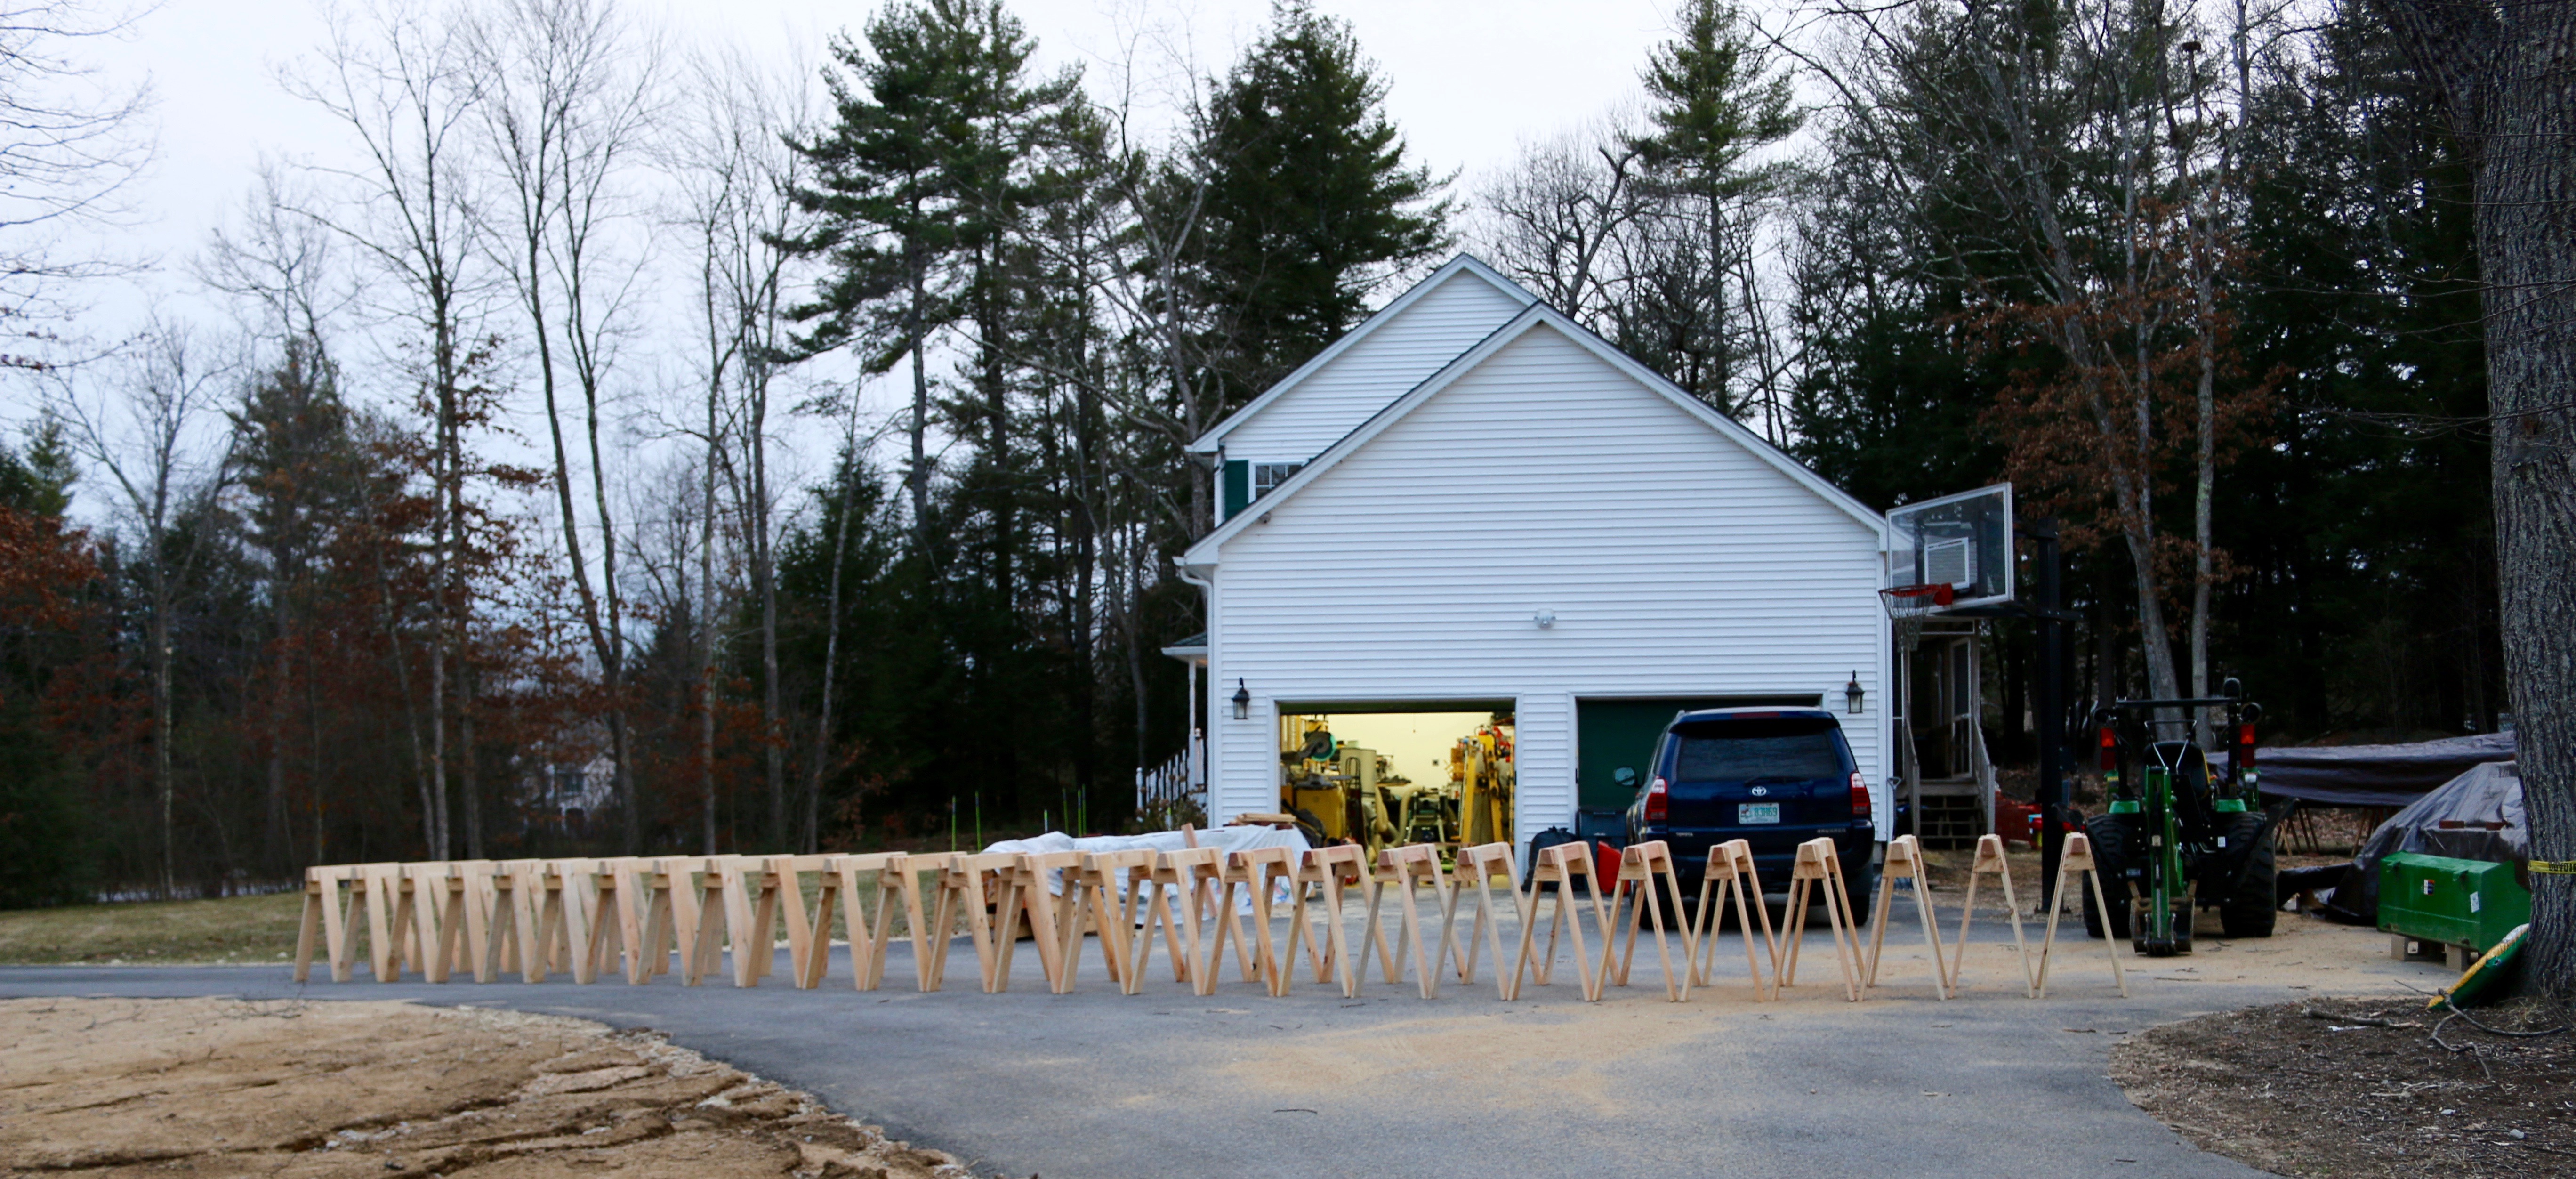
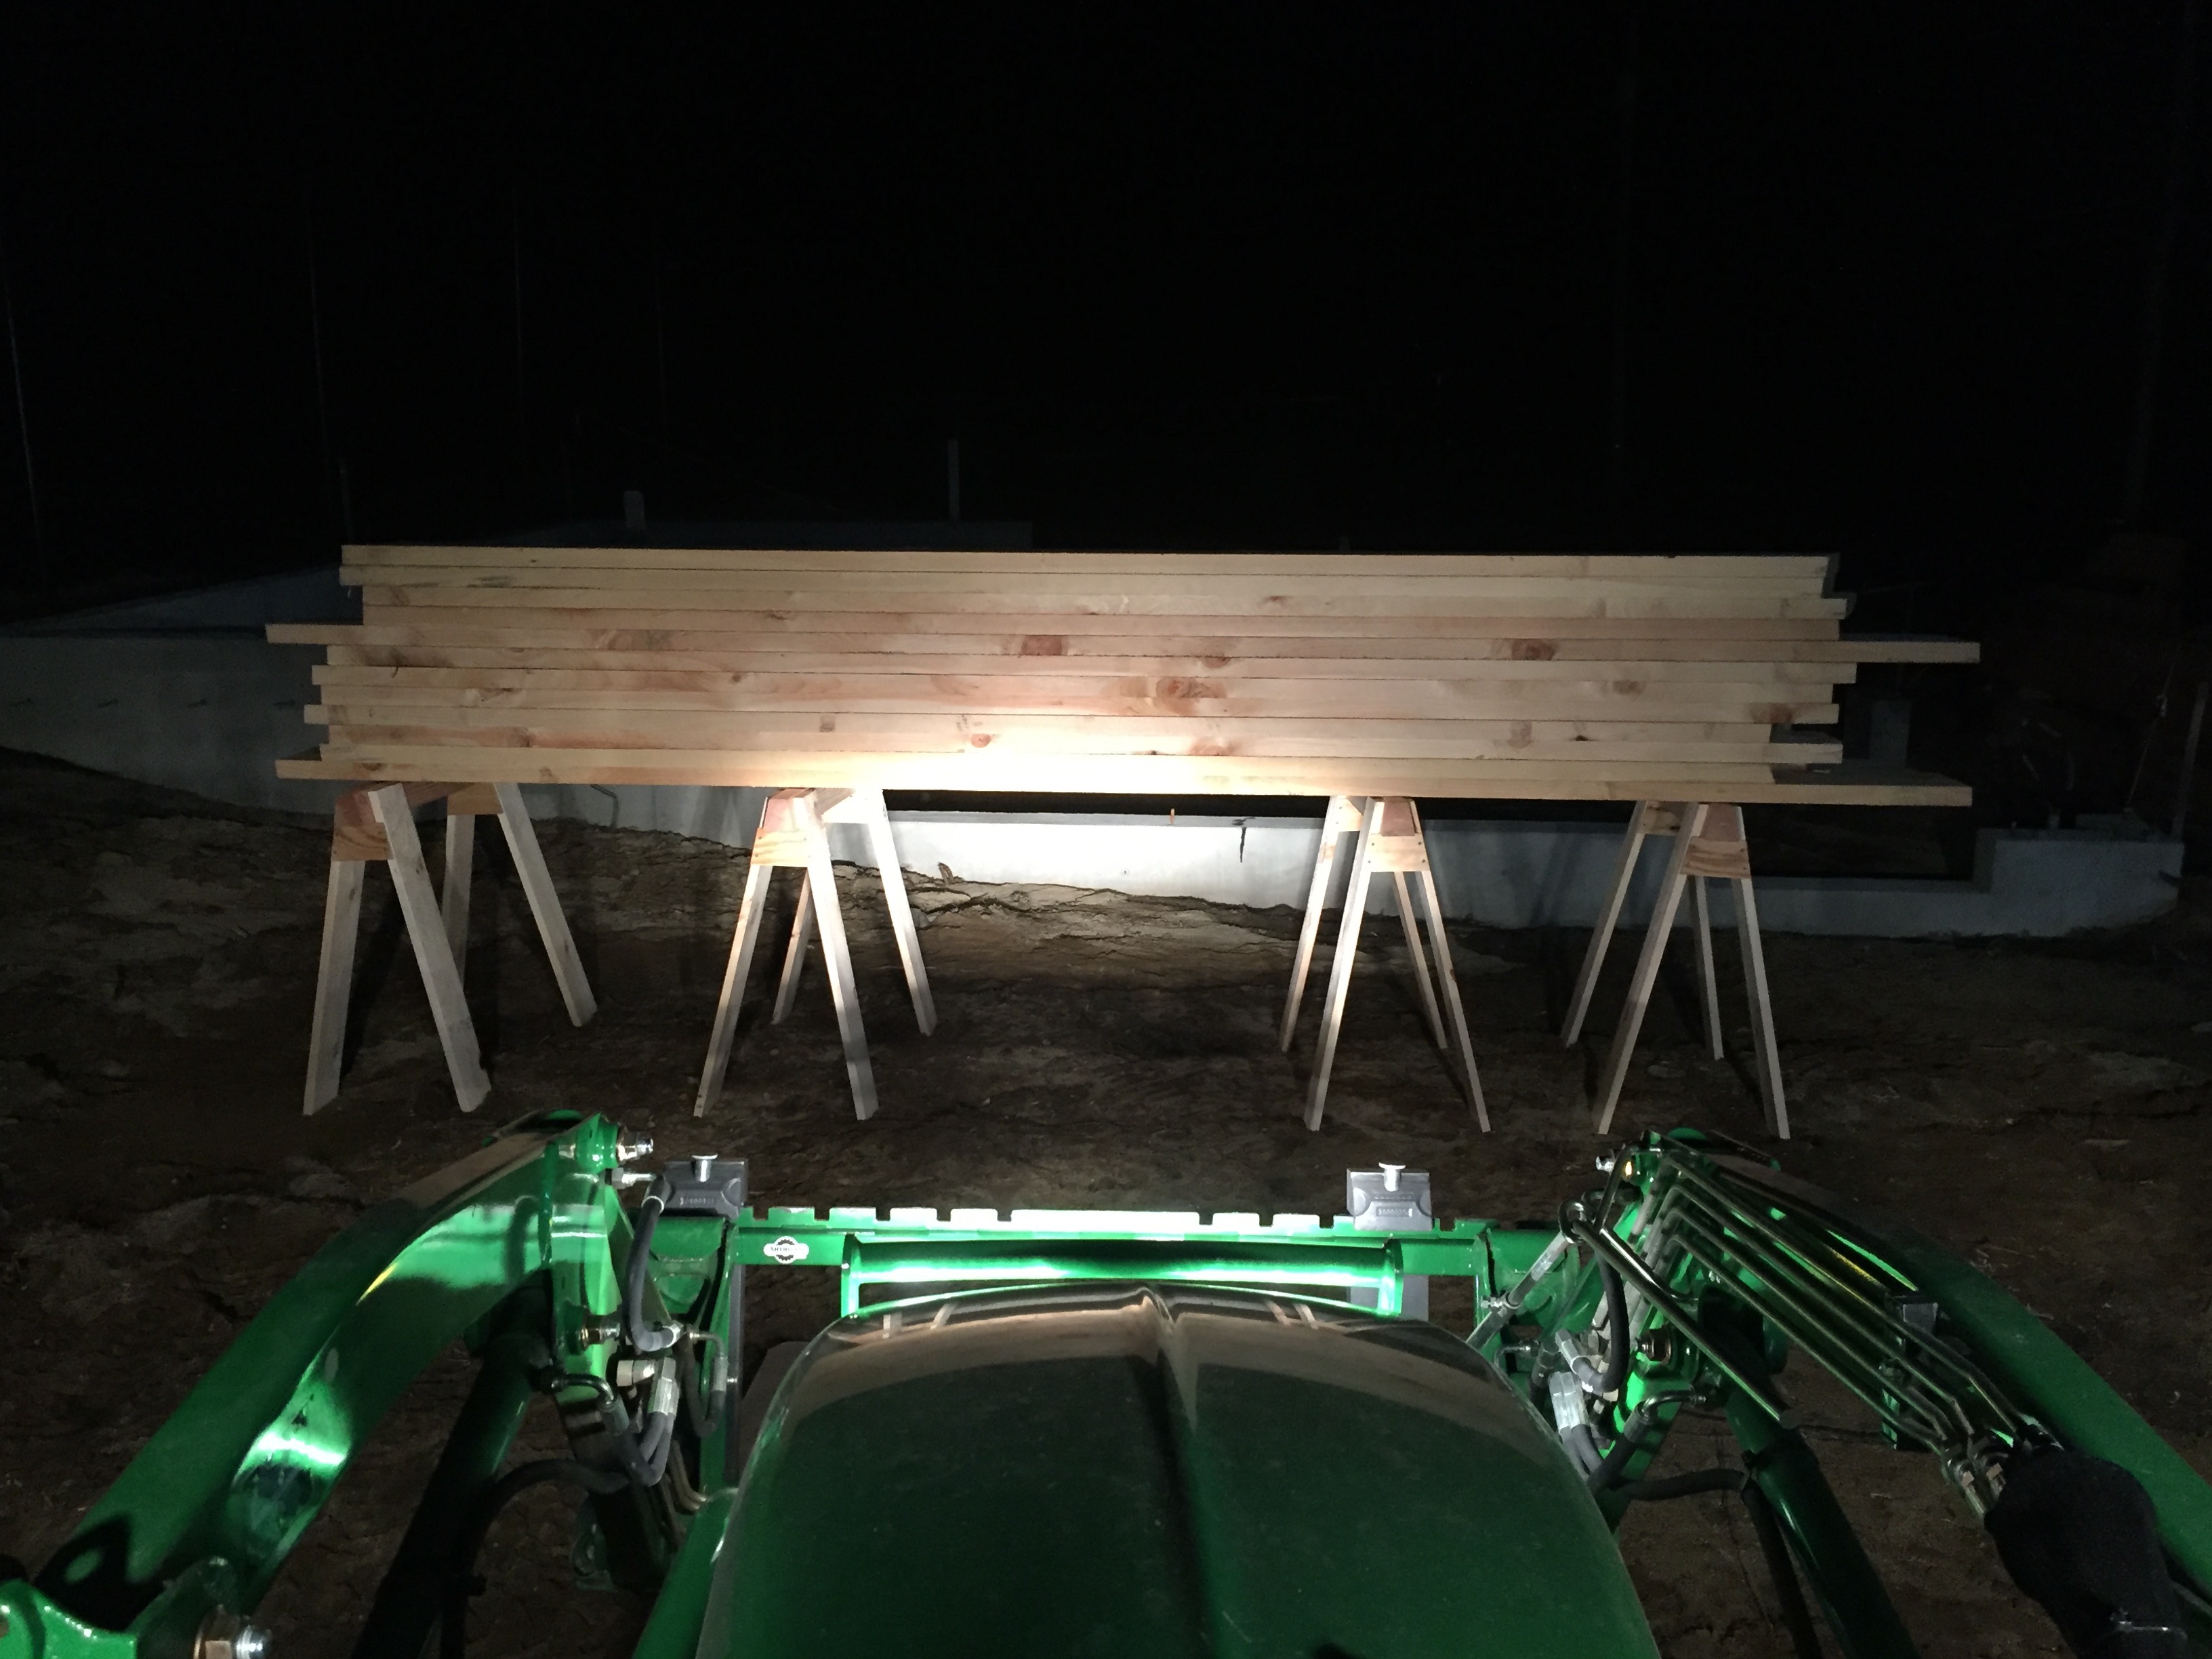
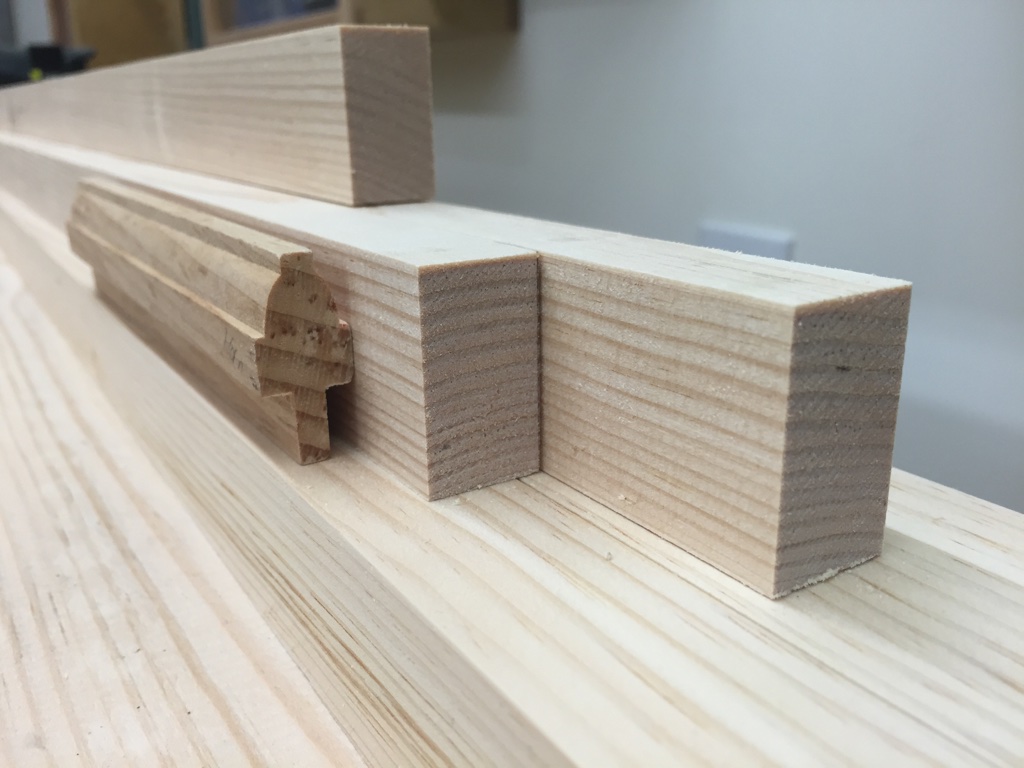
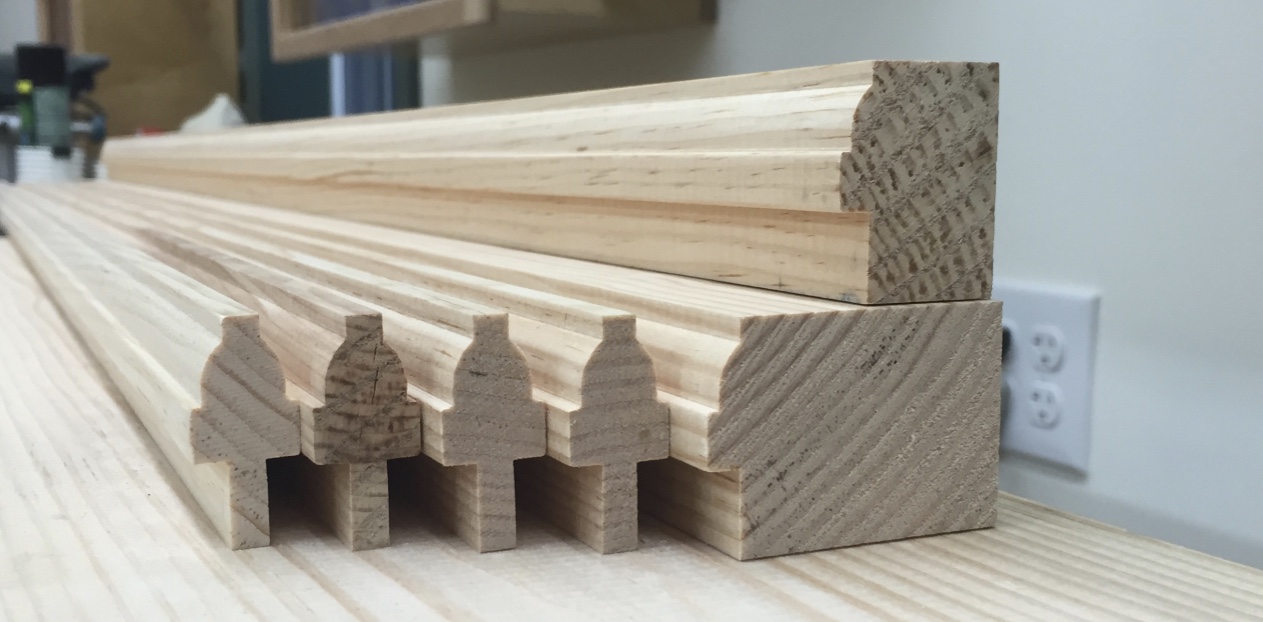
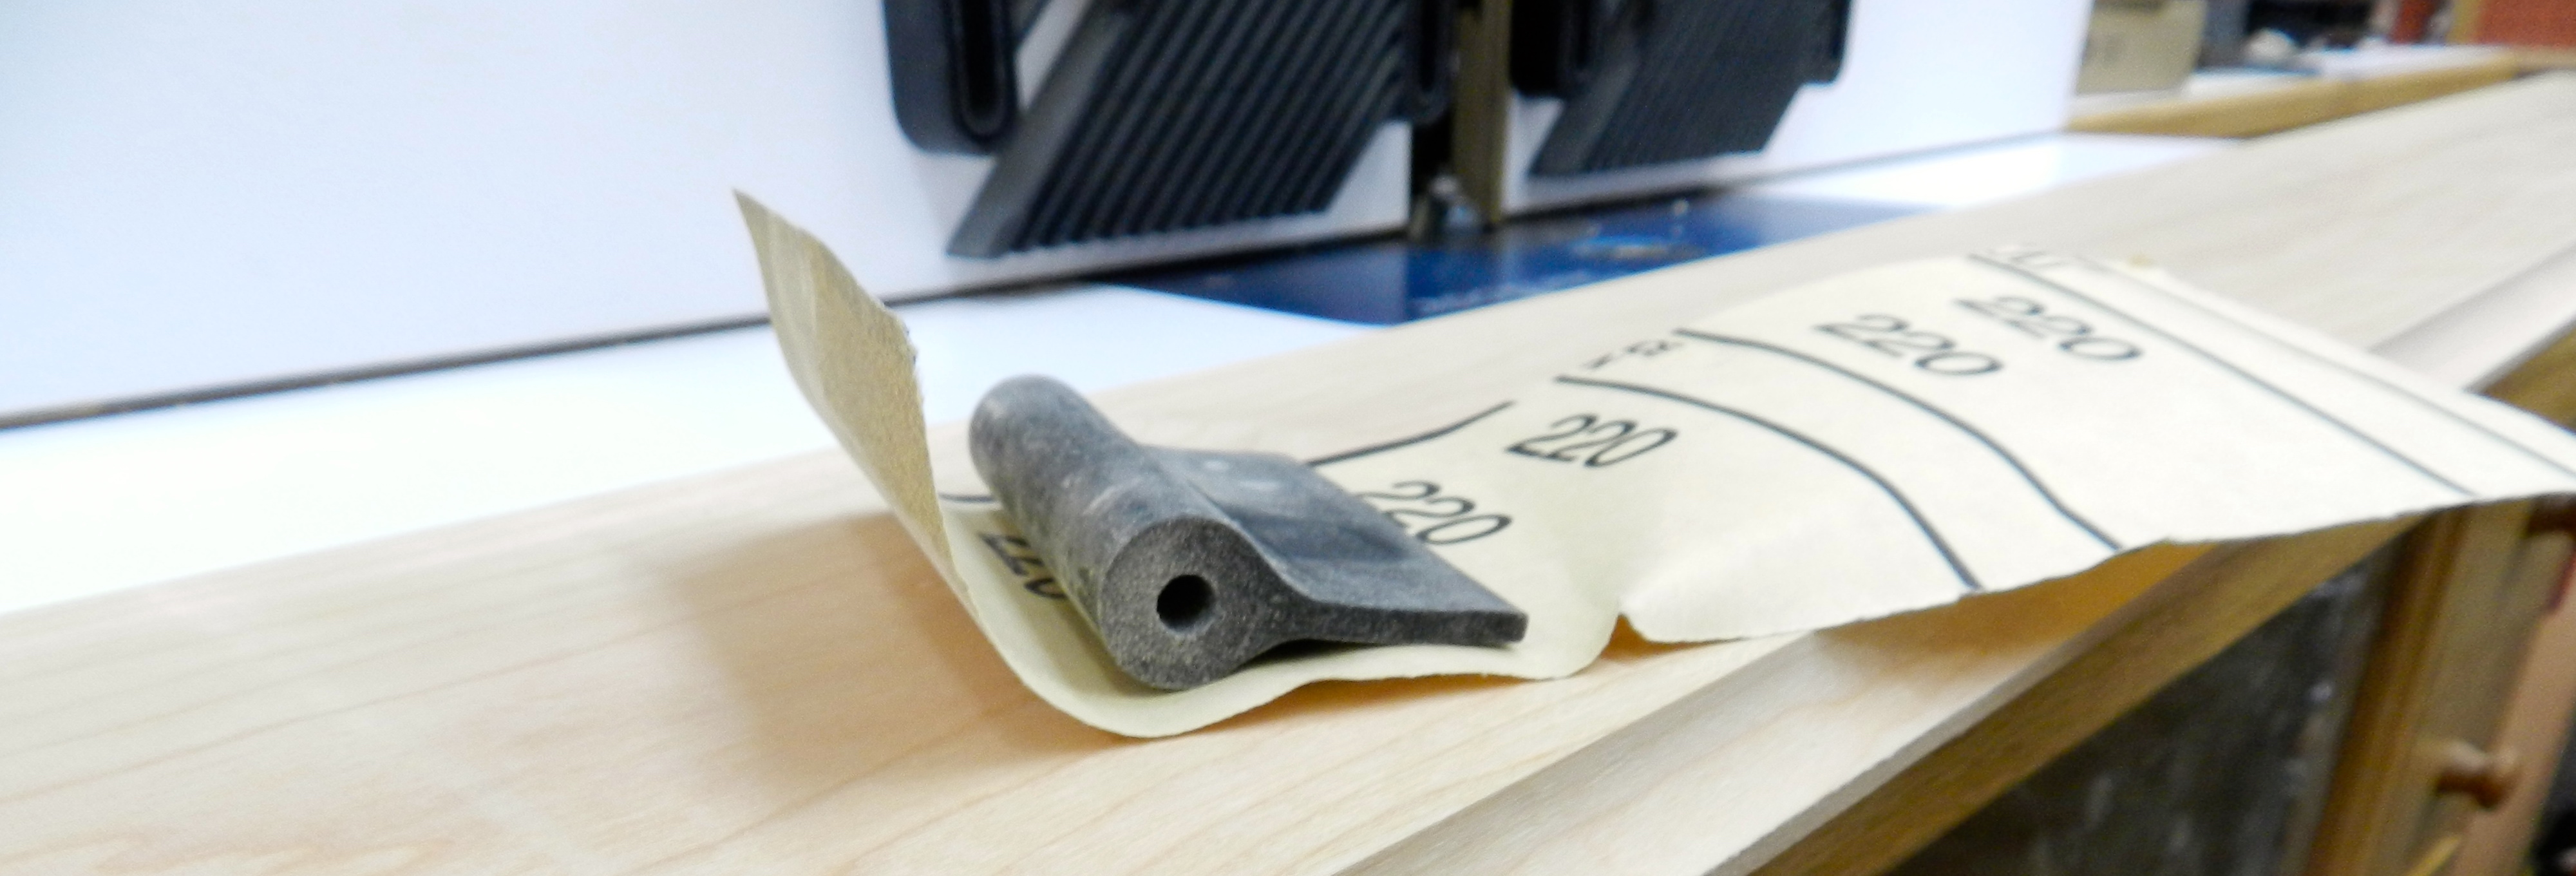
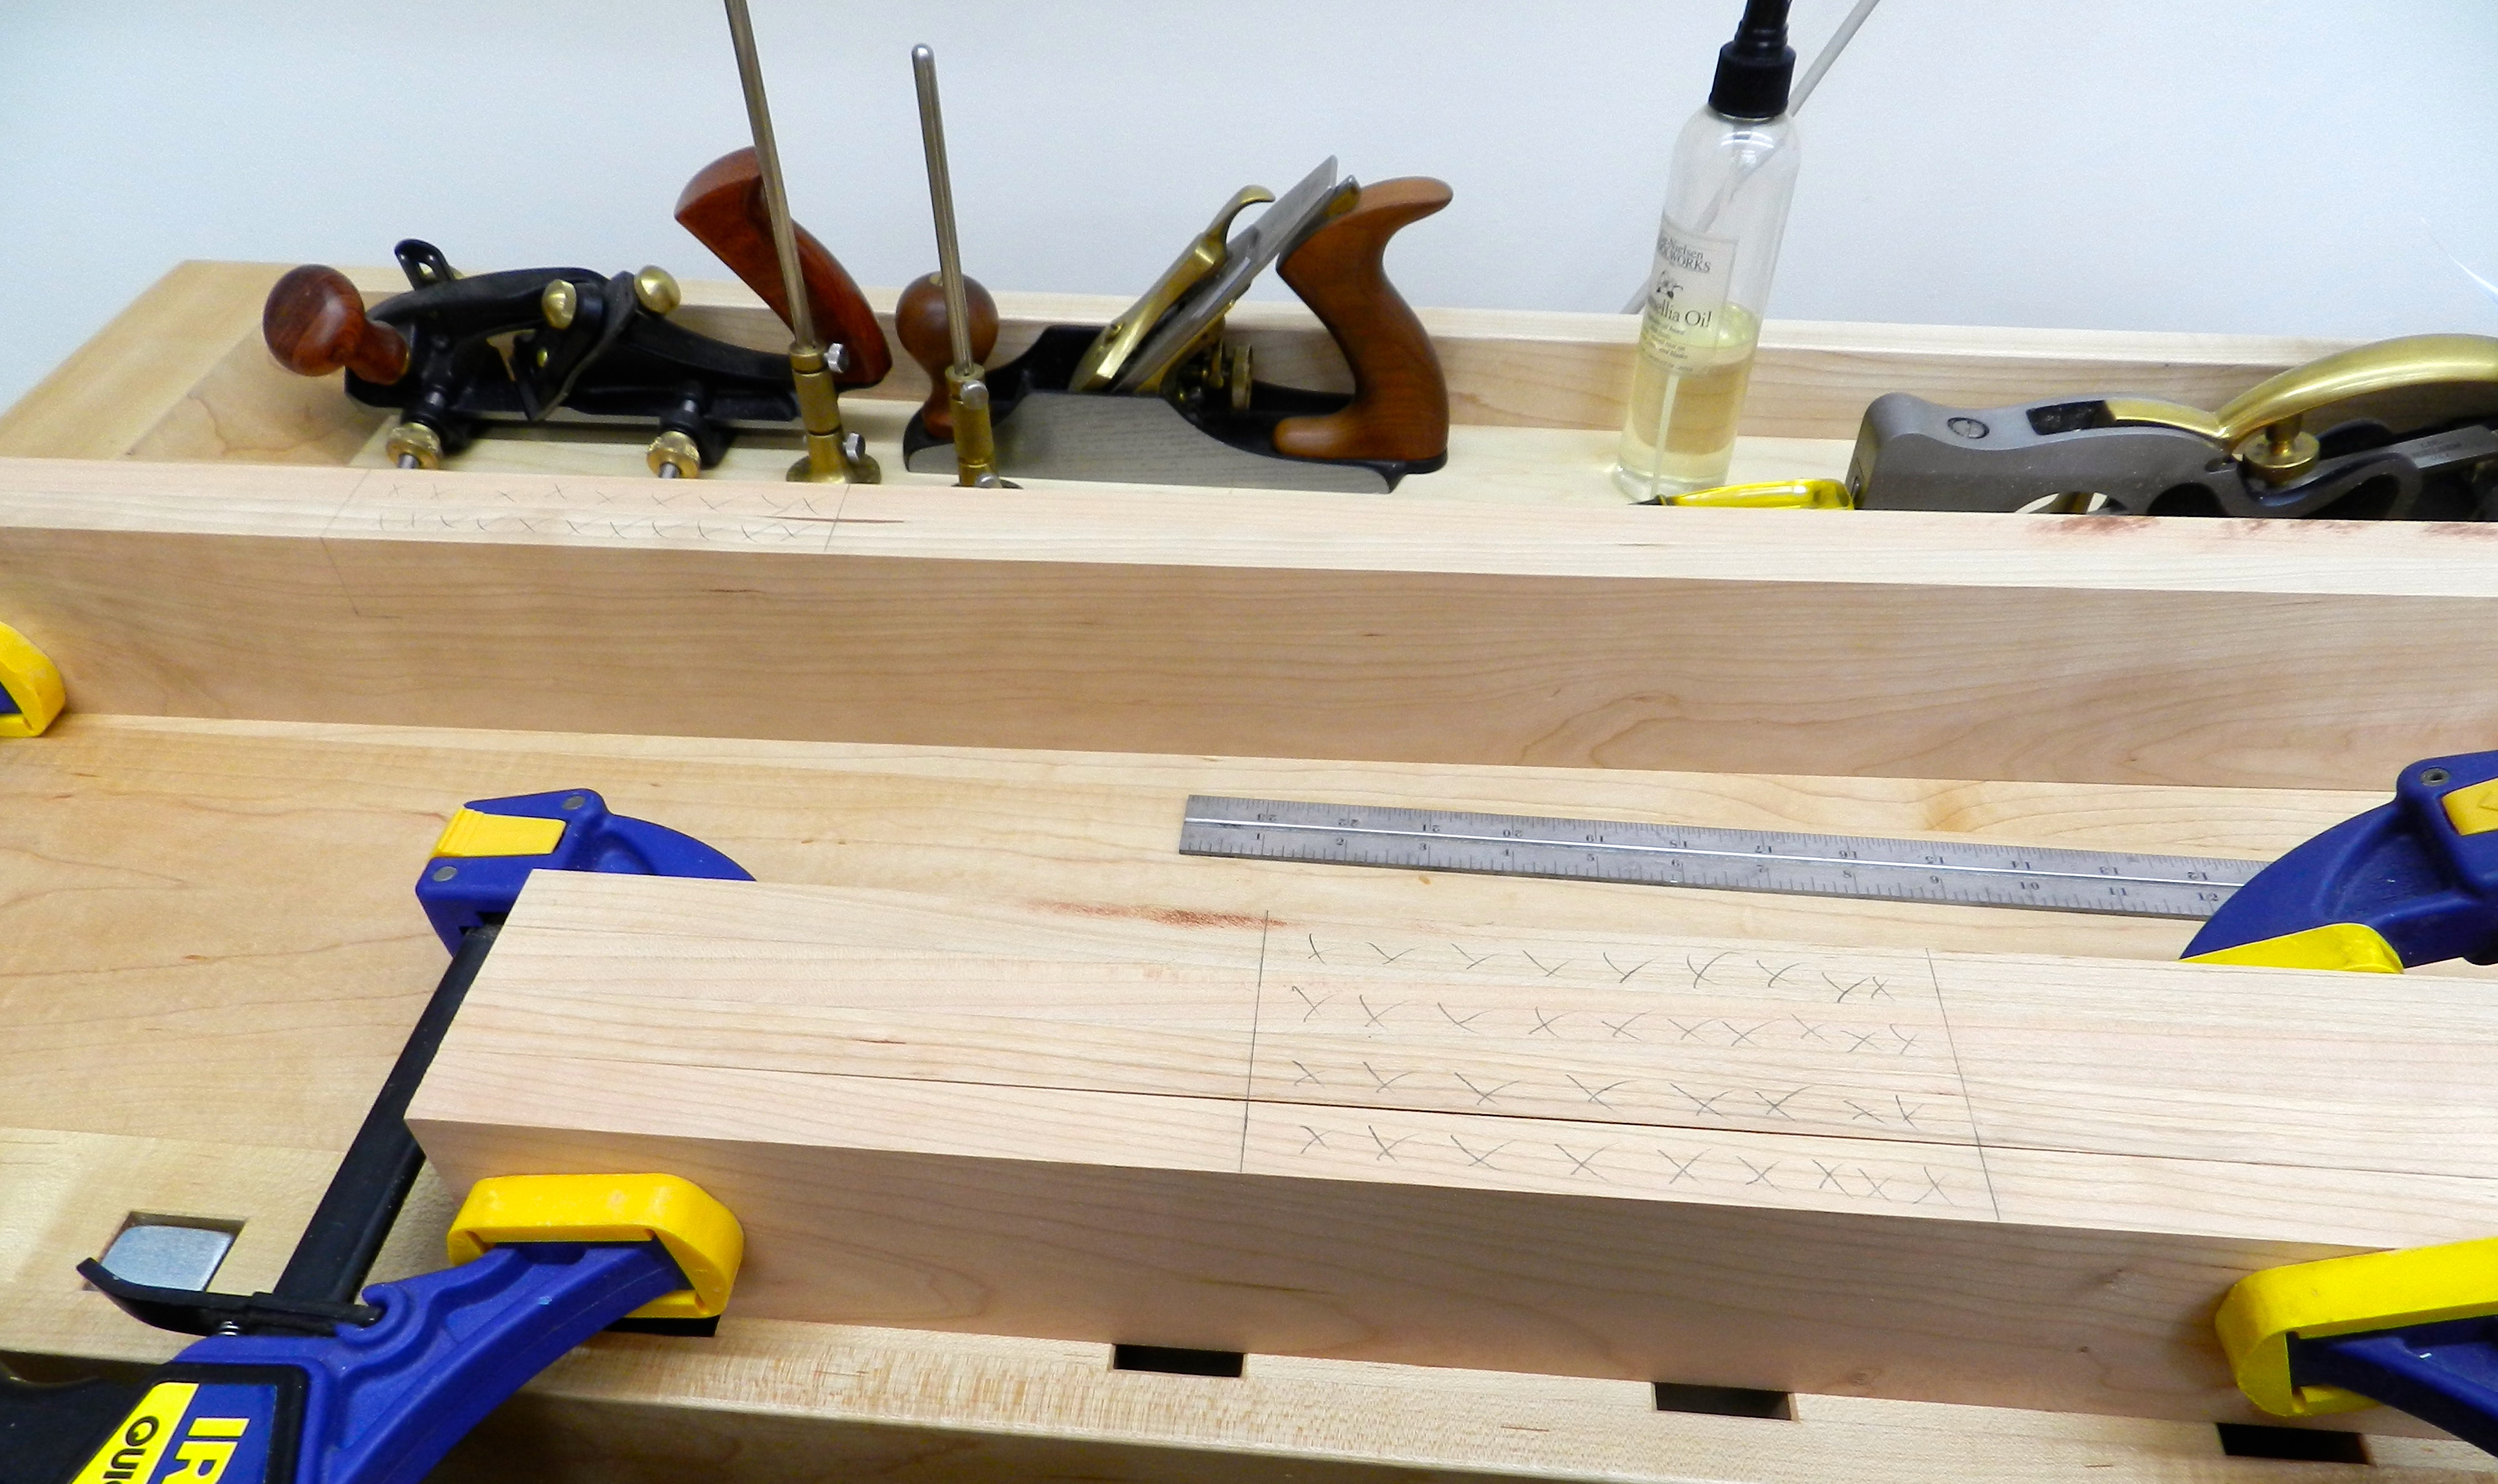
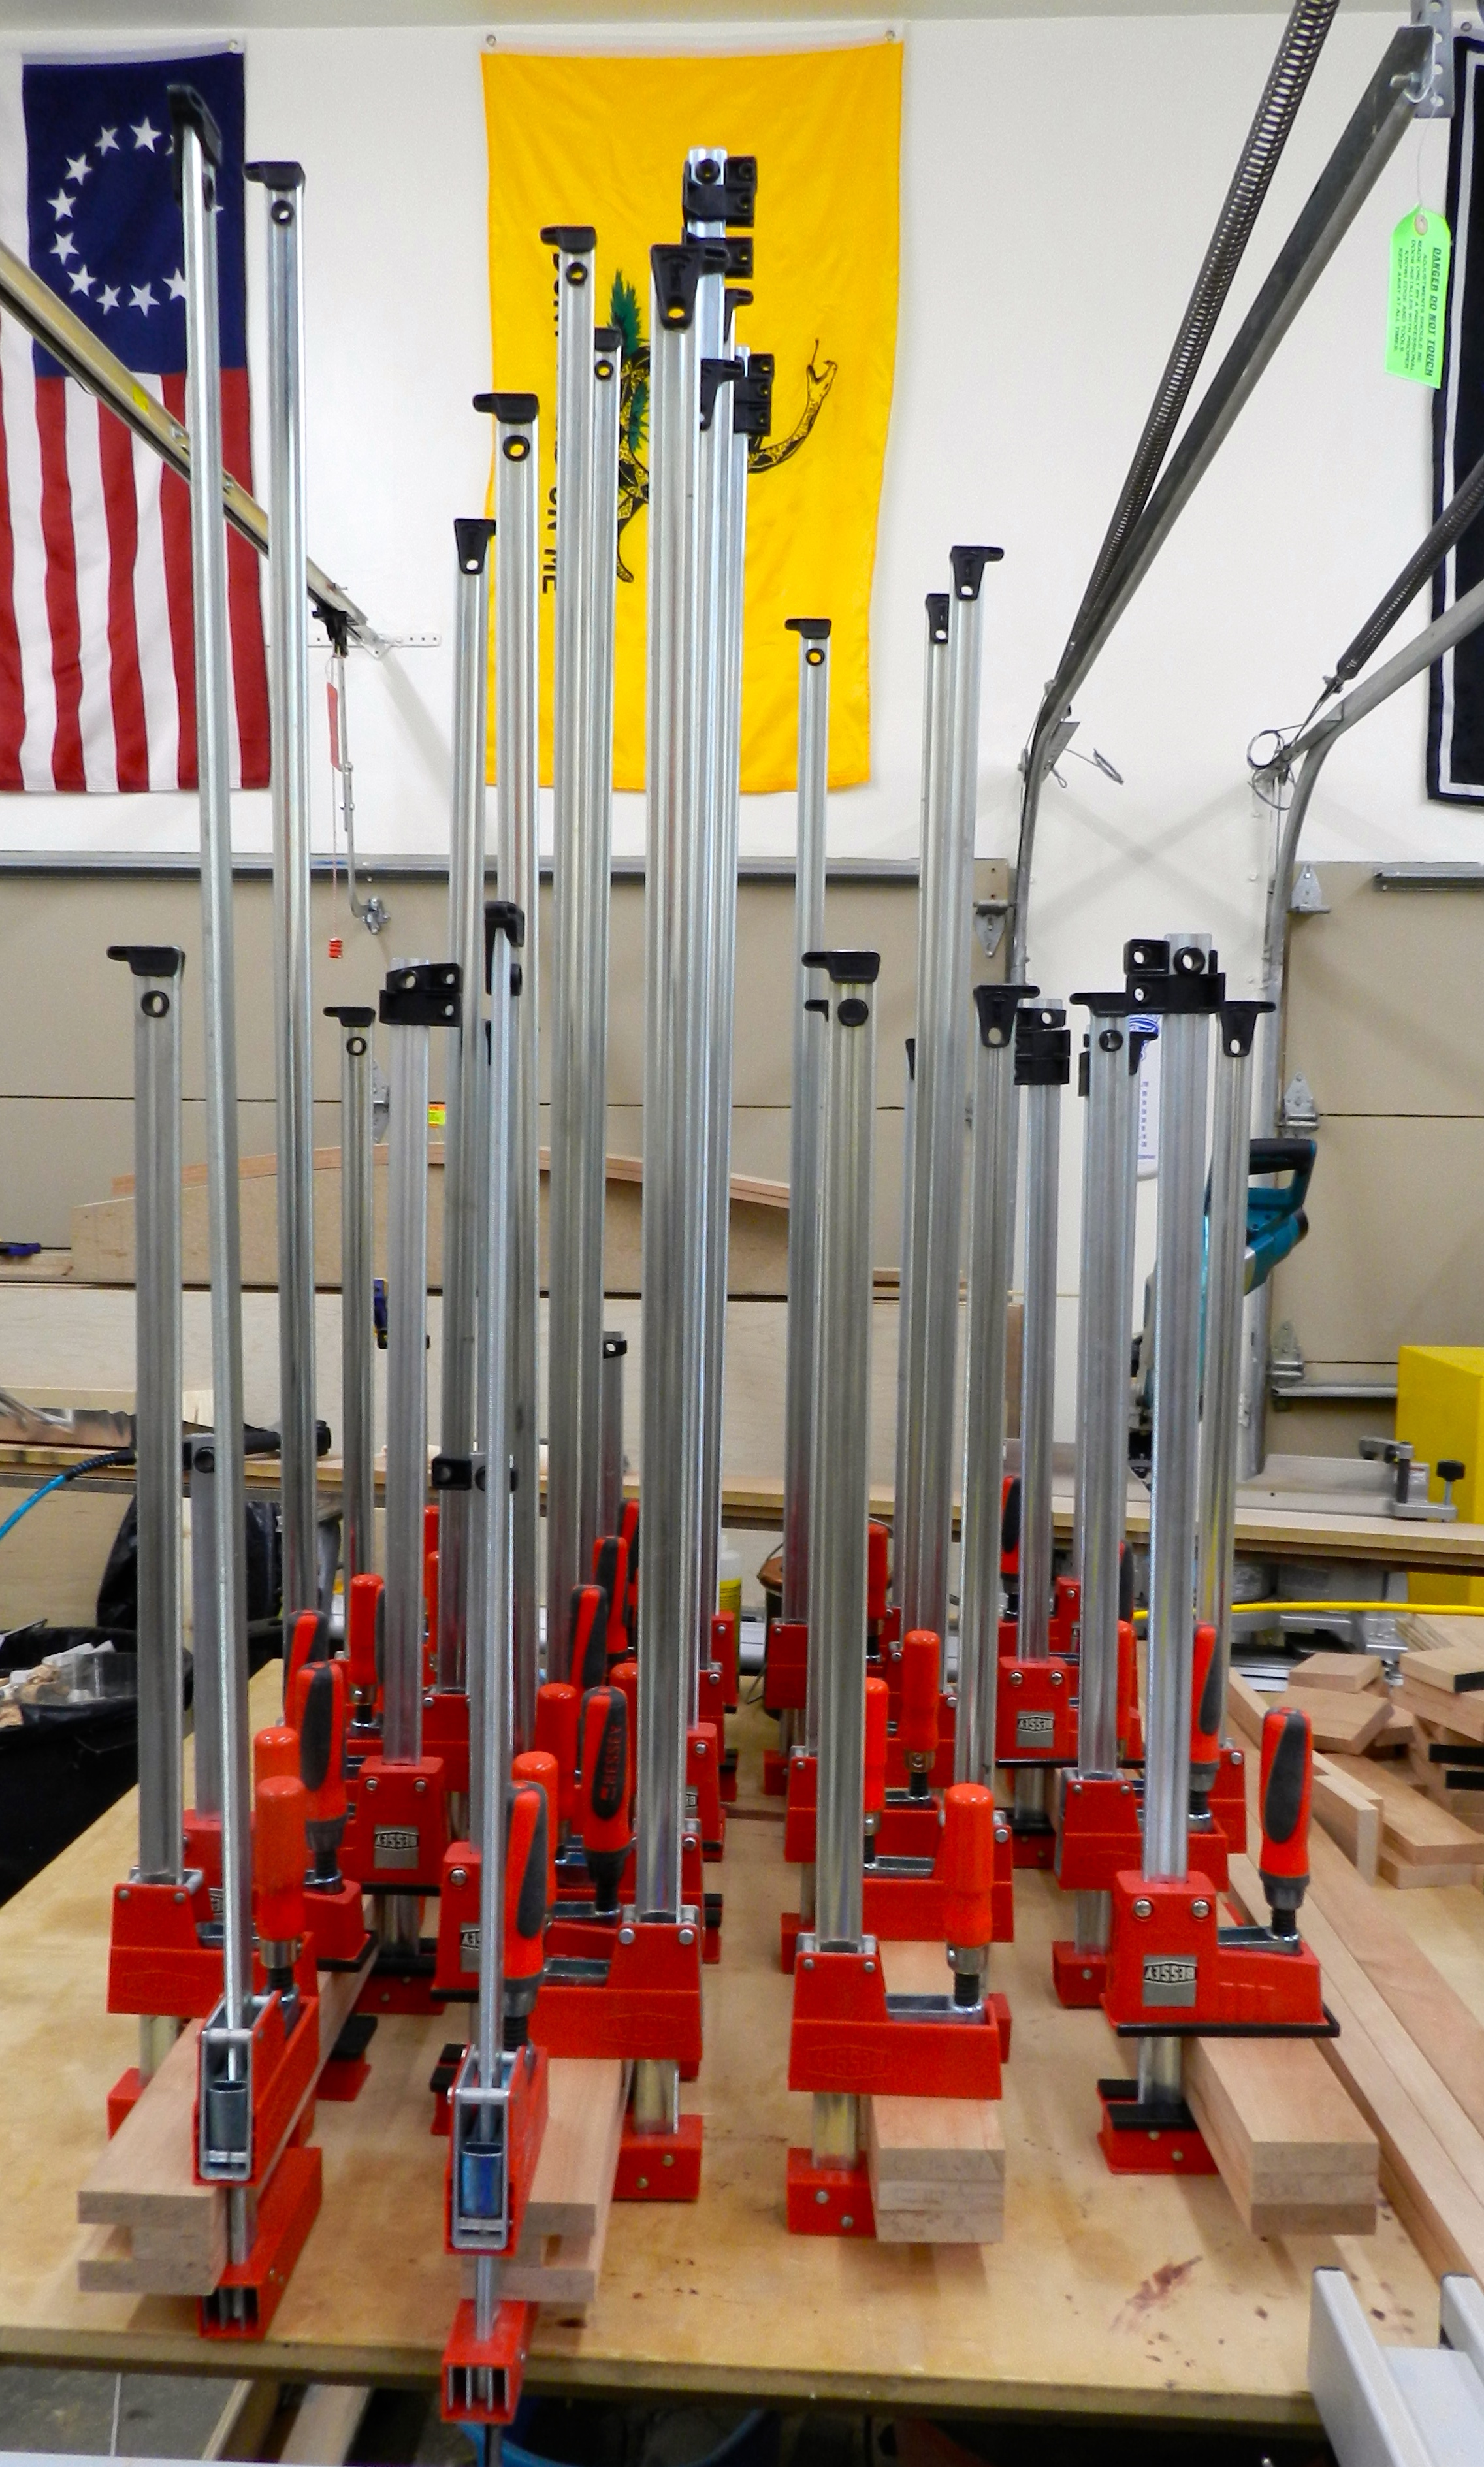
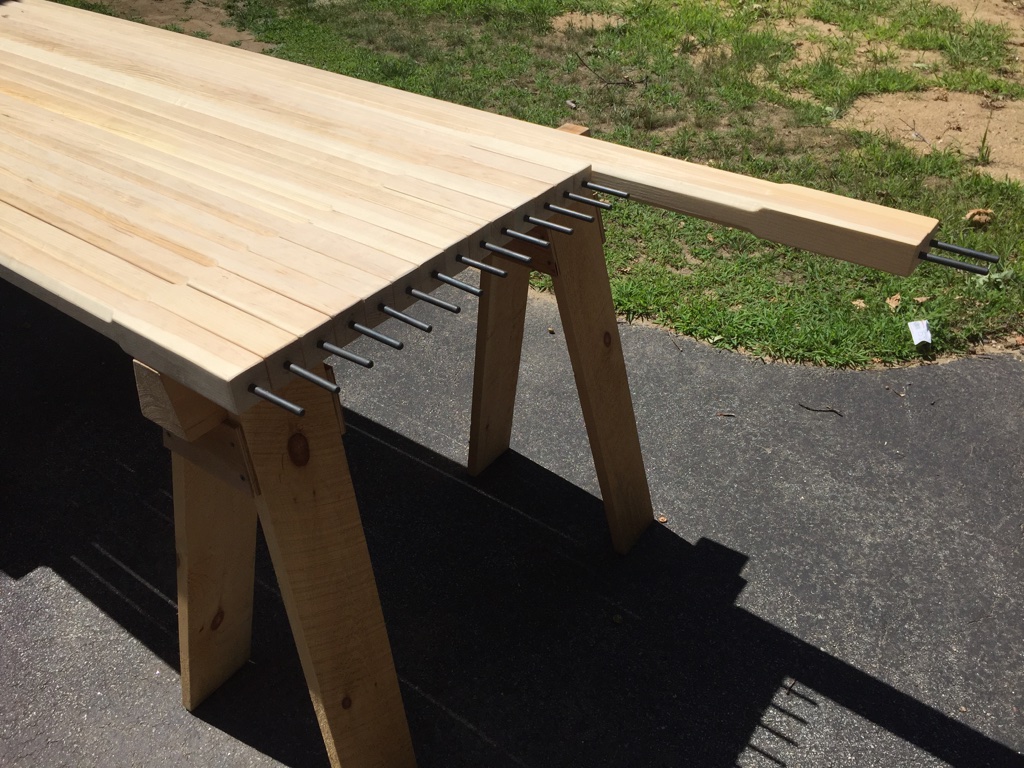
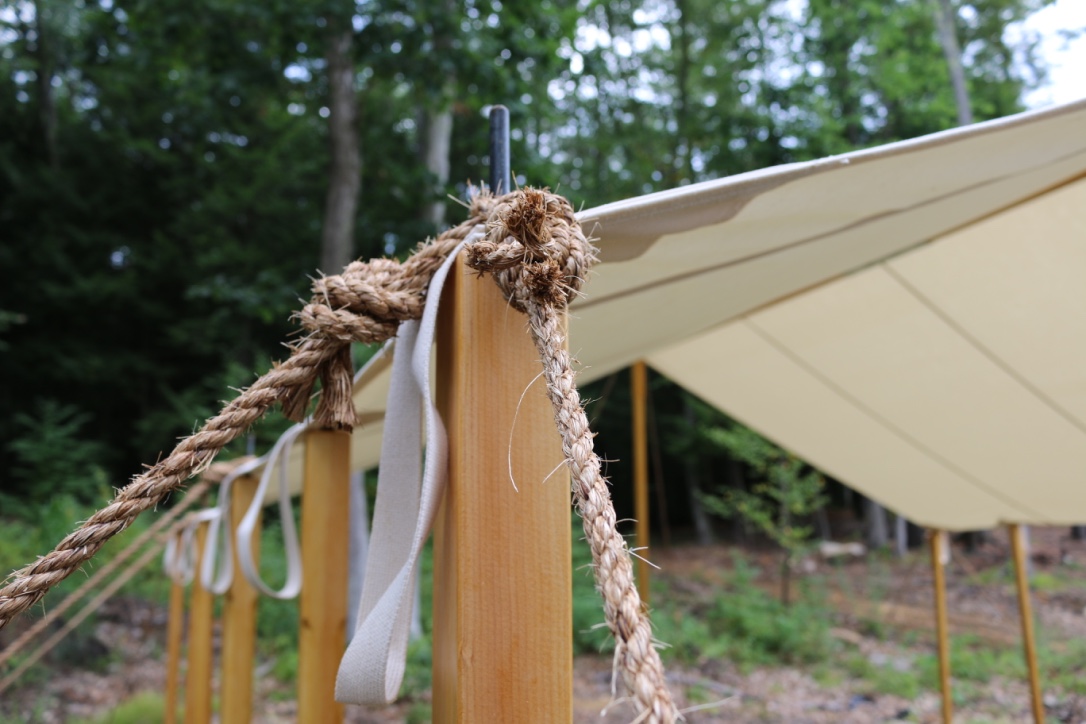
For each of the 2″x2″ upright support posts I routed in stop chamfers and used a 1/8″ radius rounding bit to break and square edges.

Creating stop chamfers on all the posts.

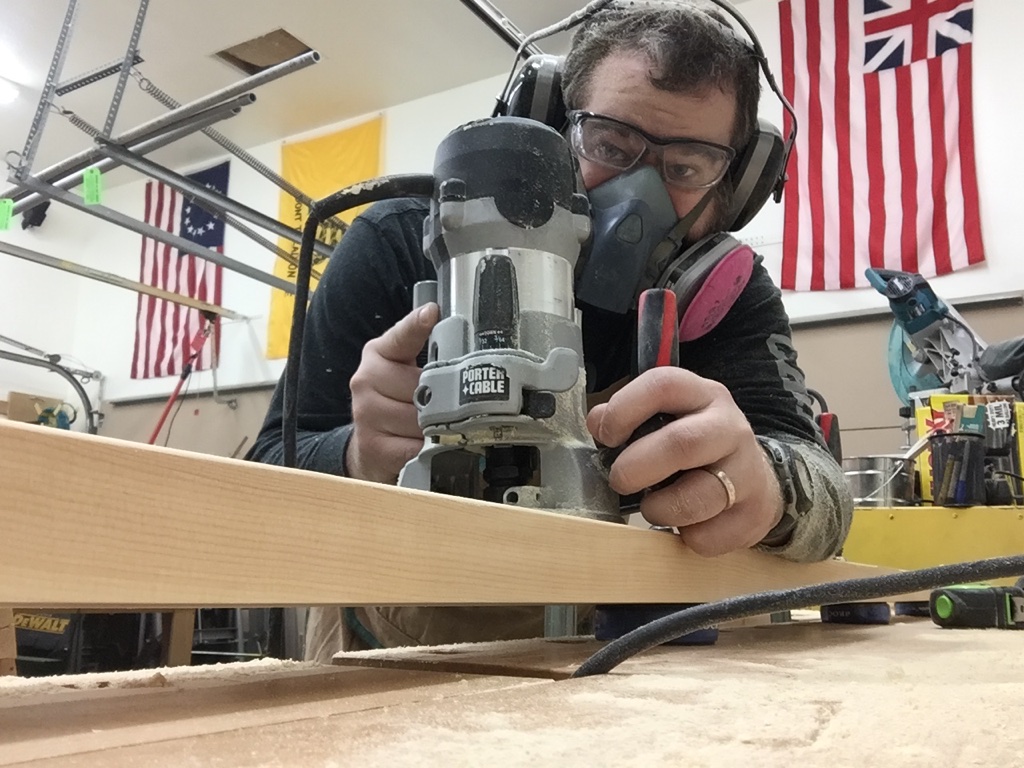
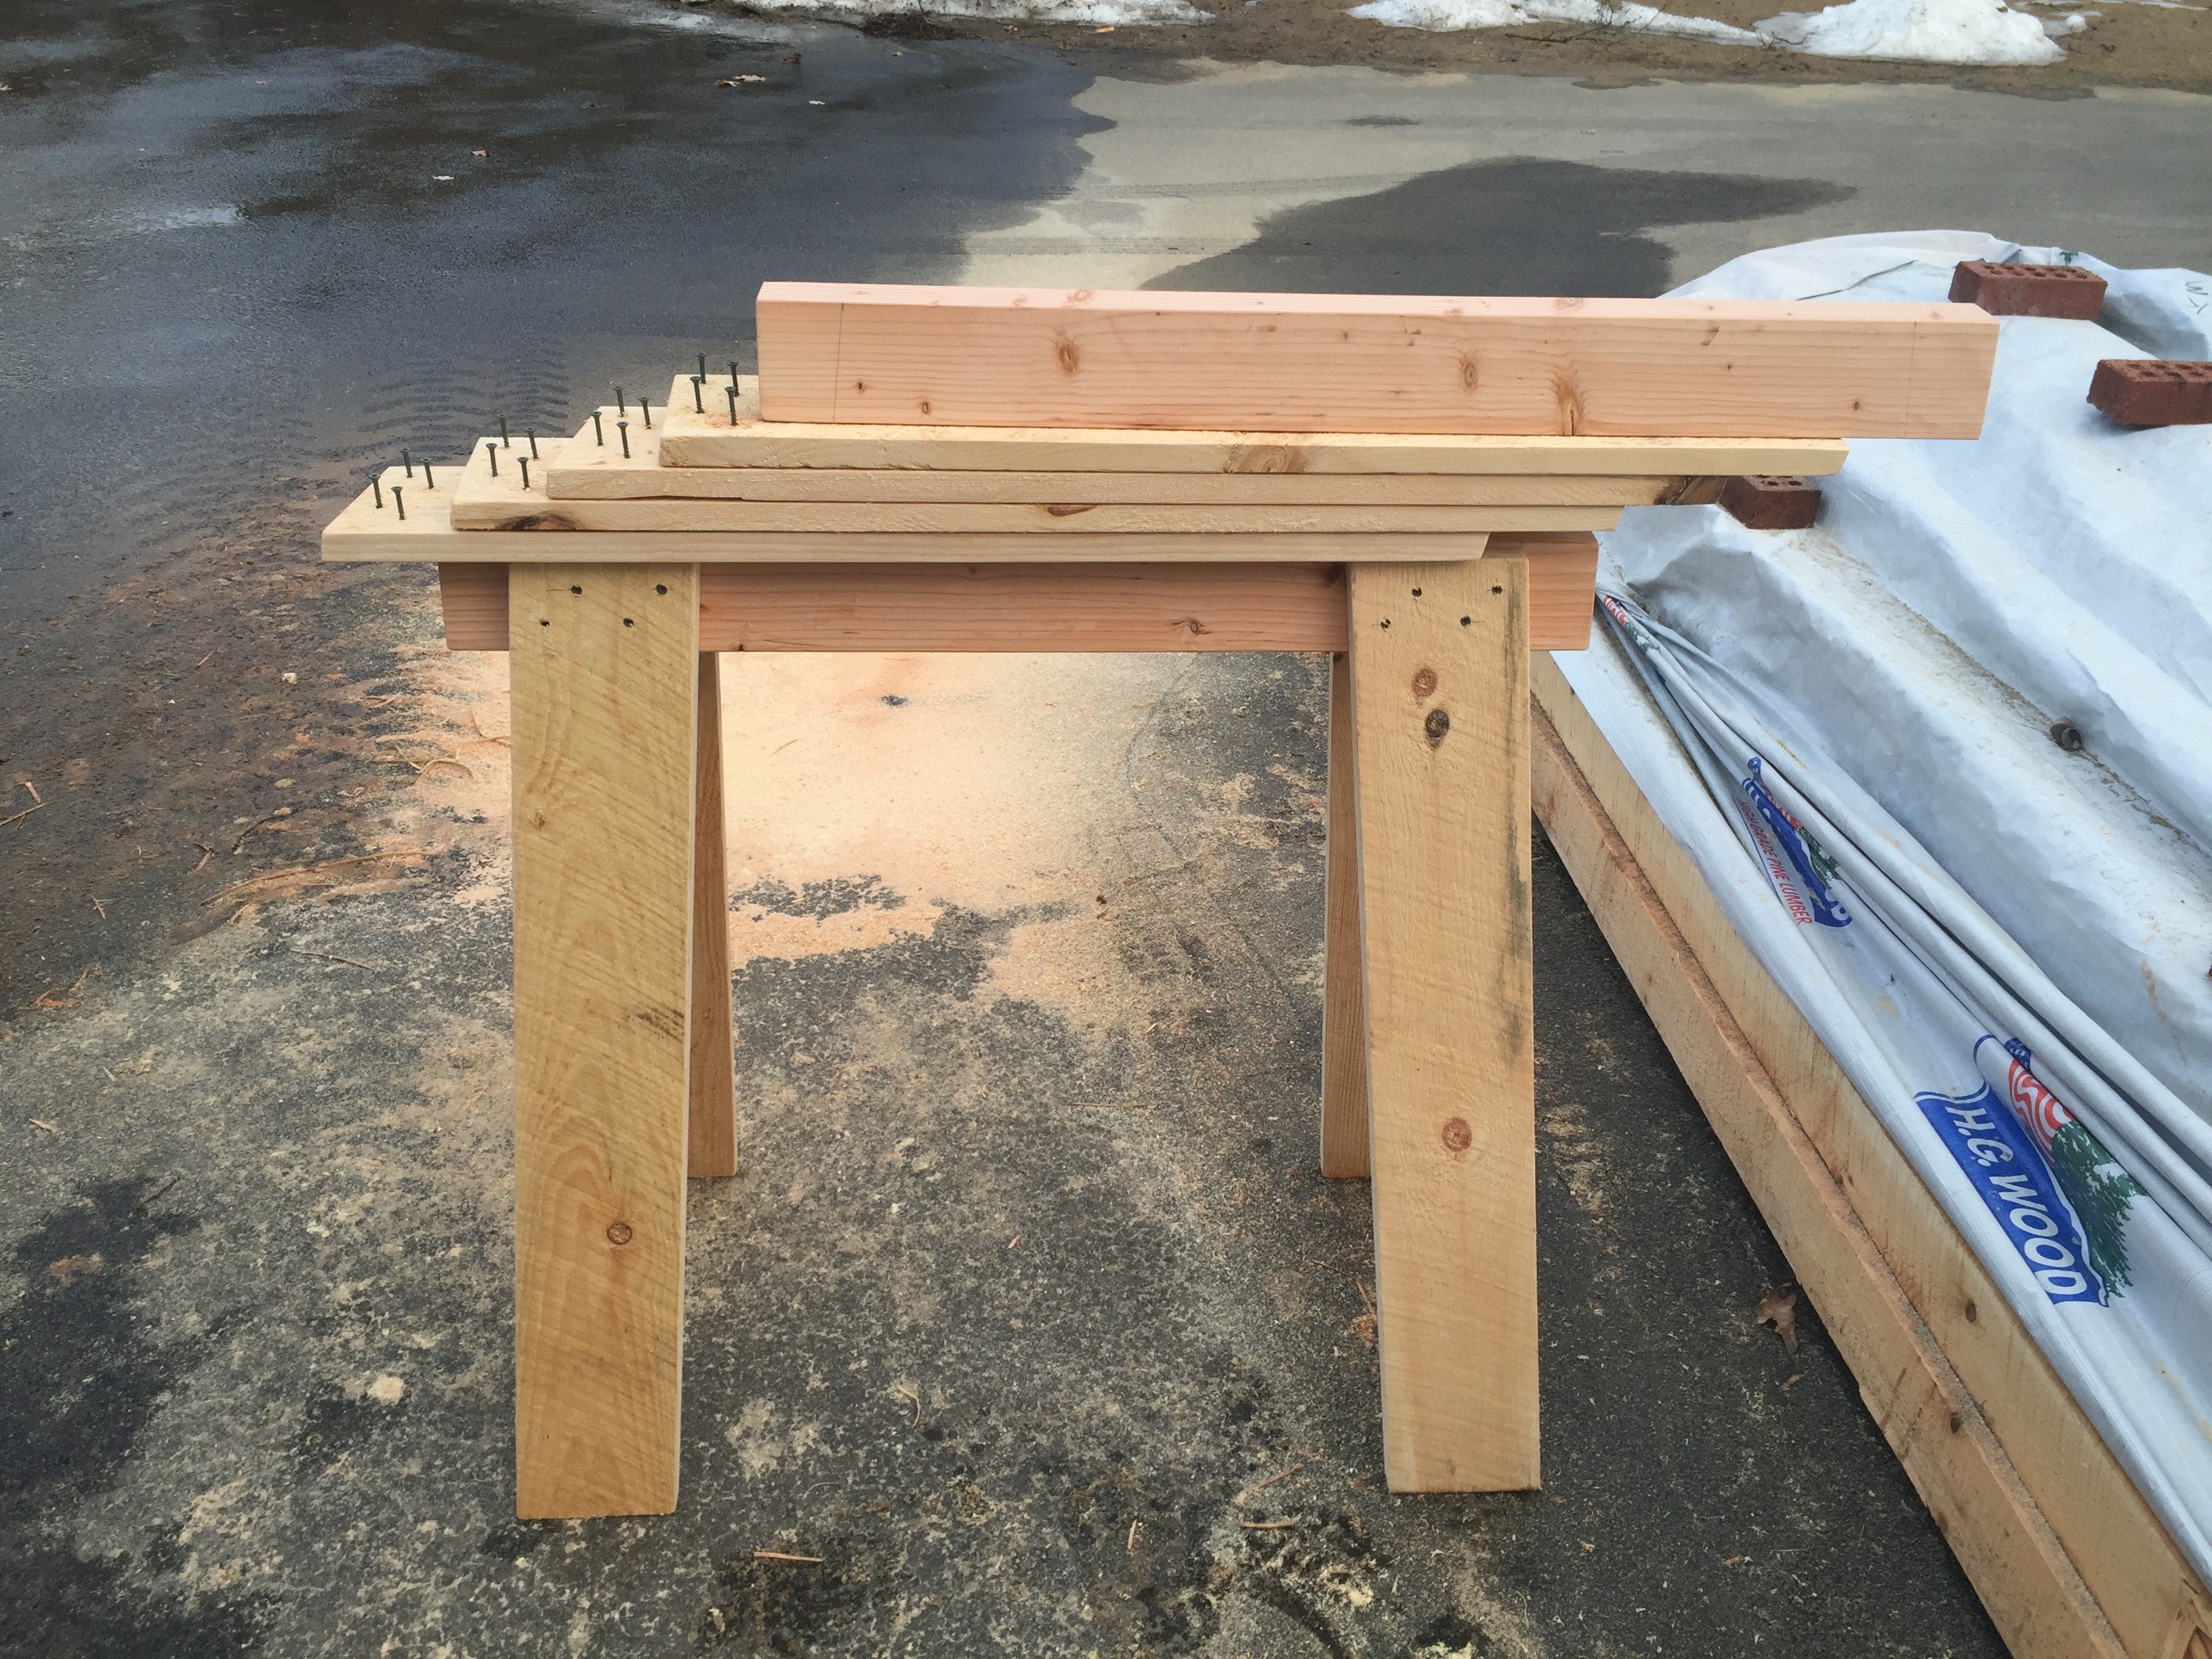
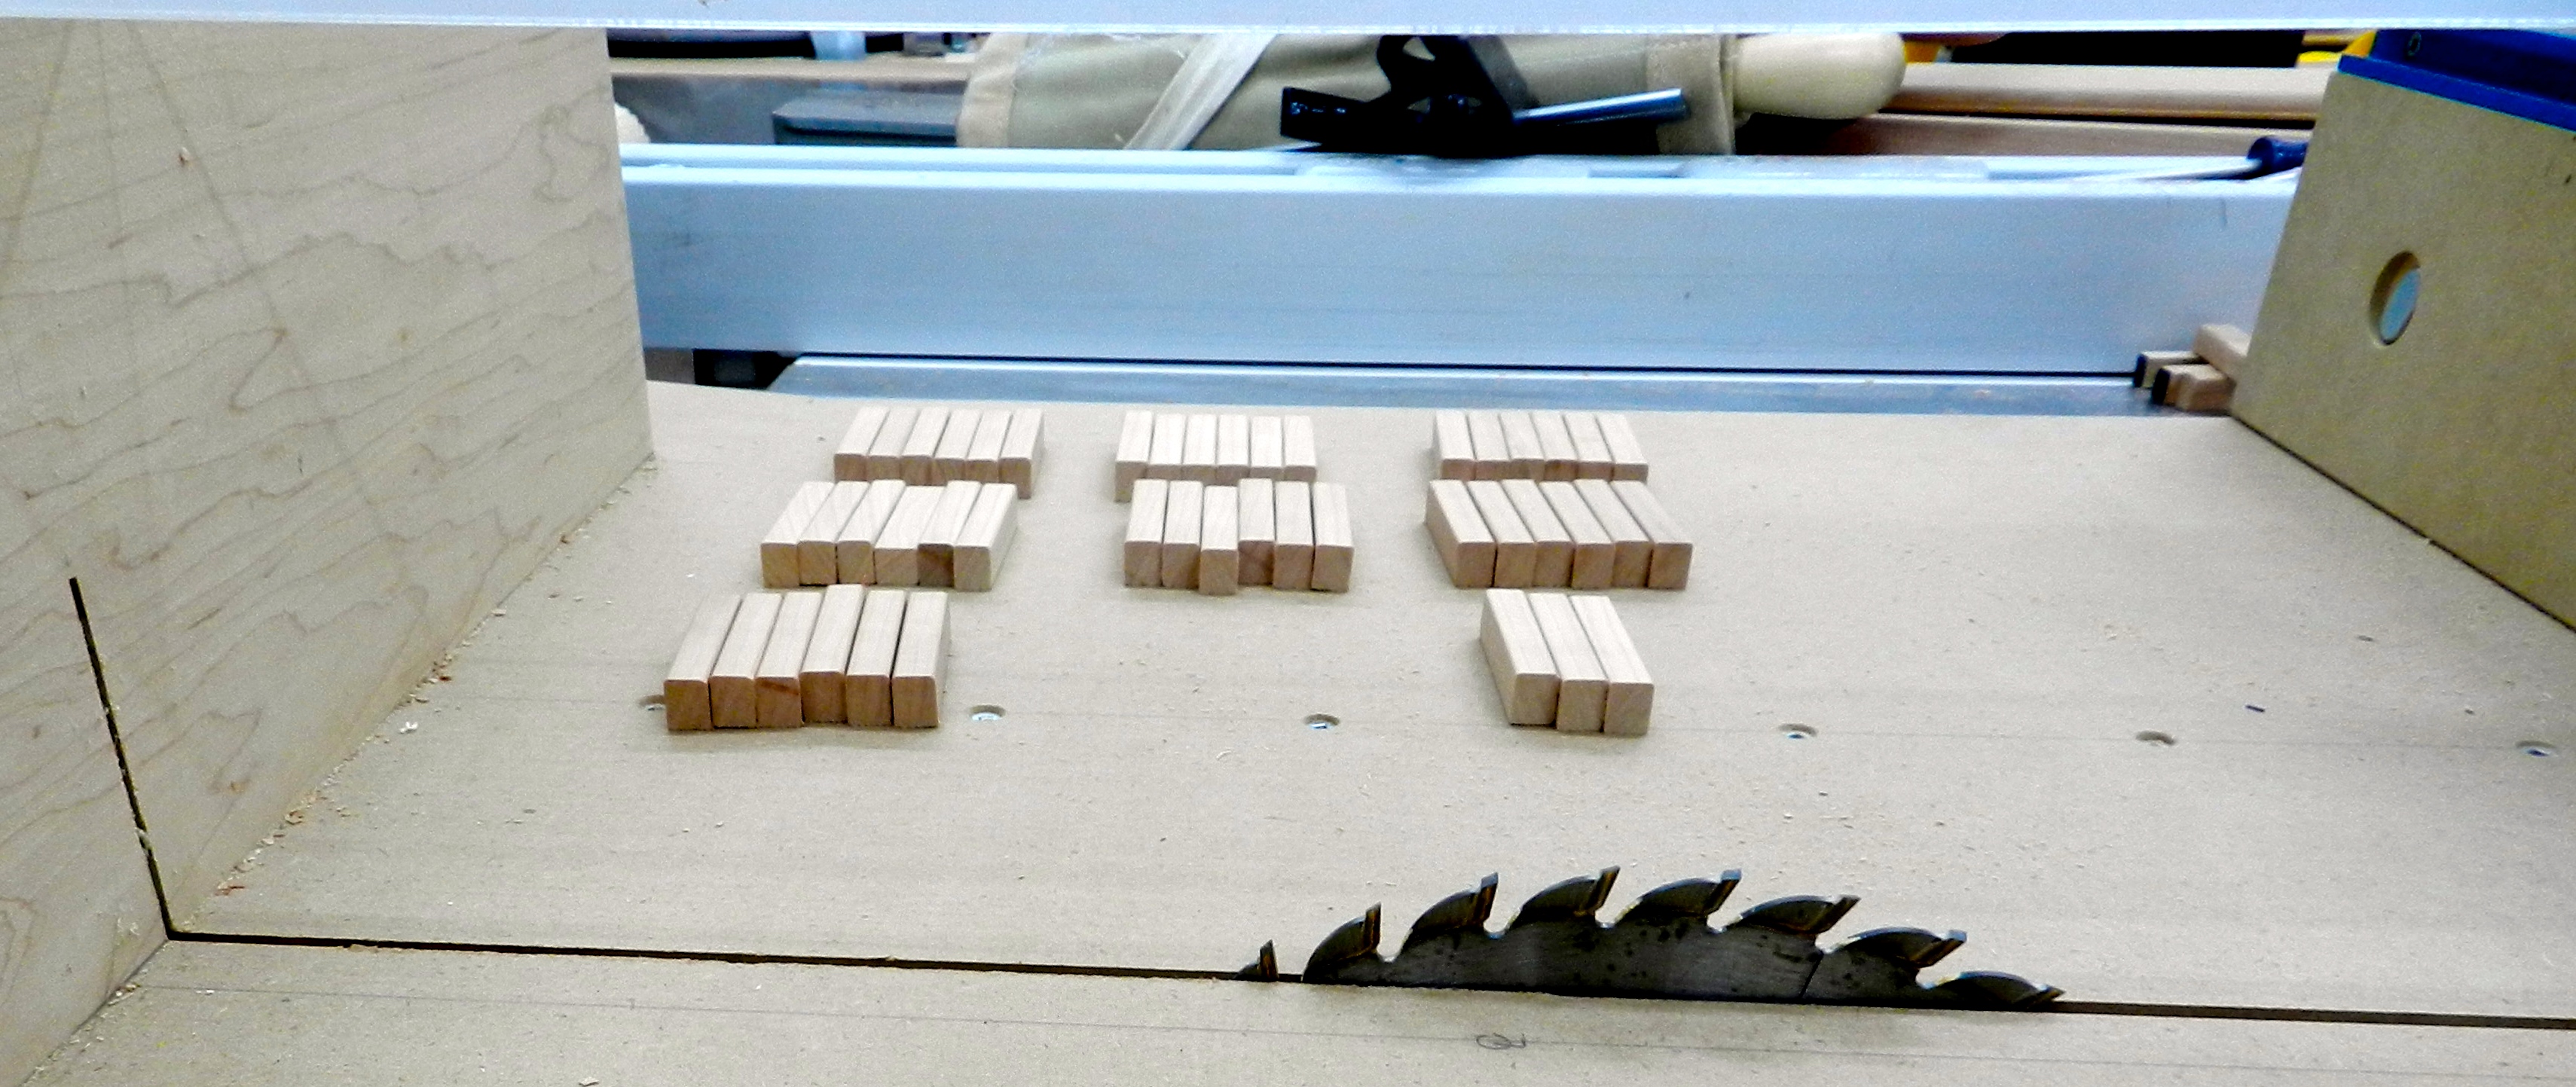
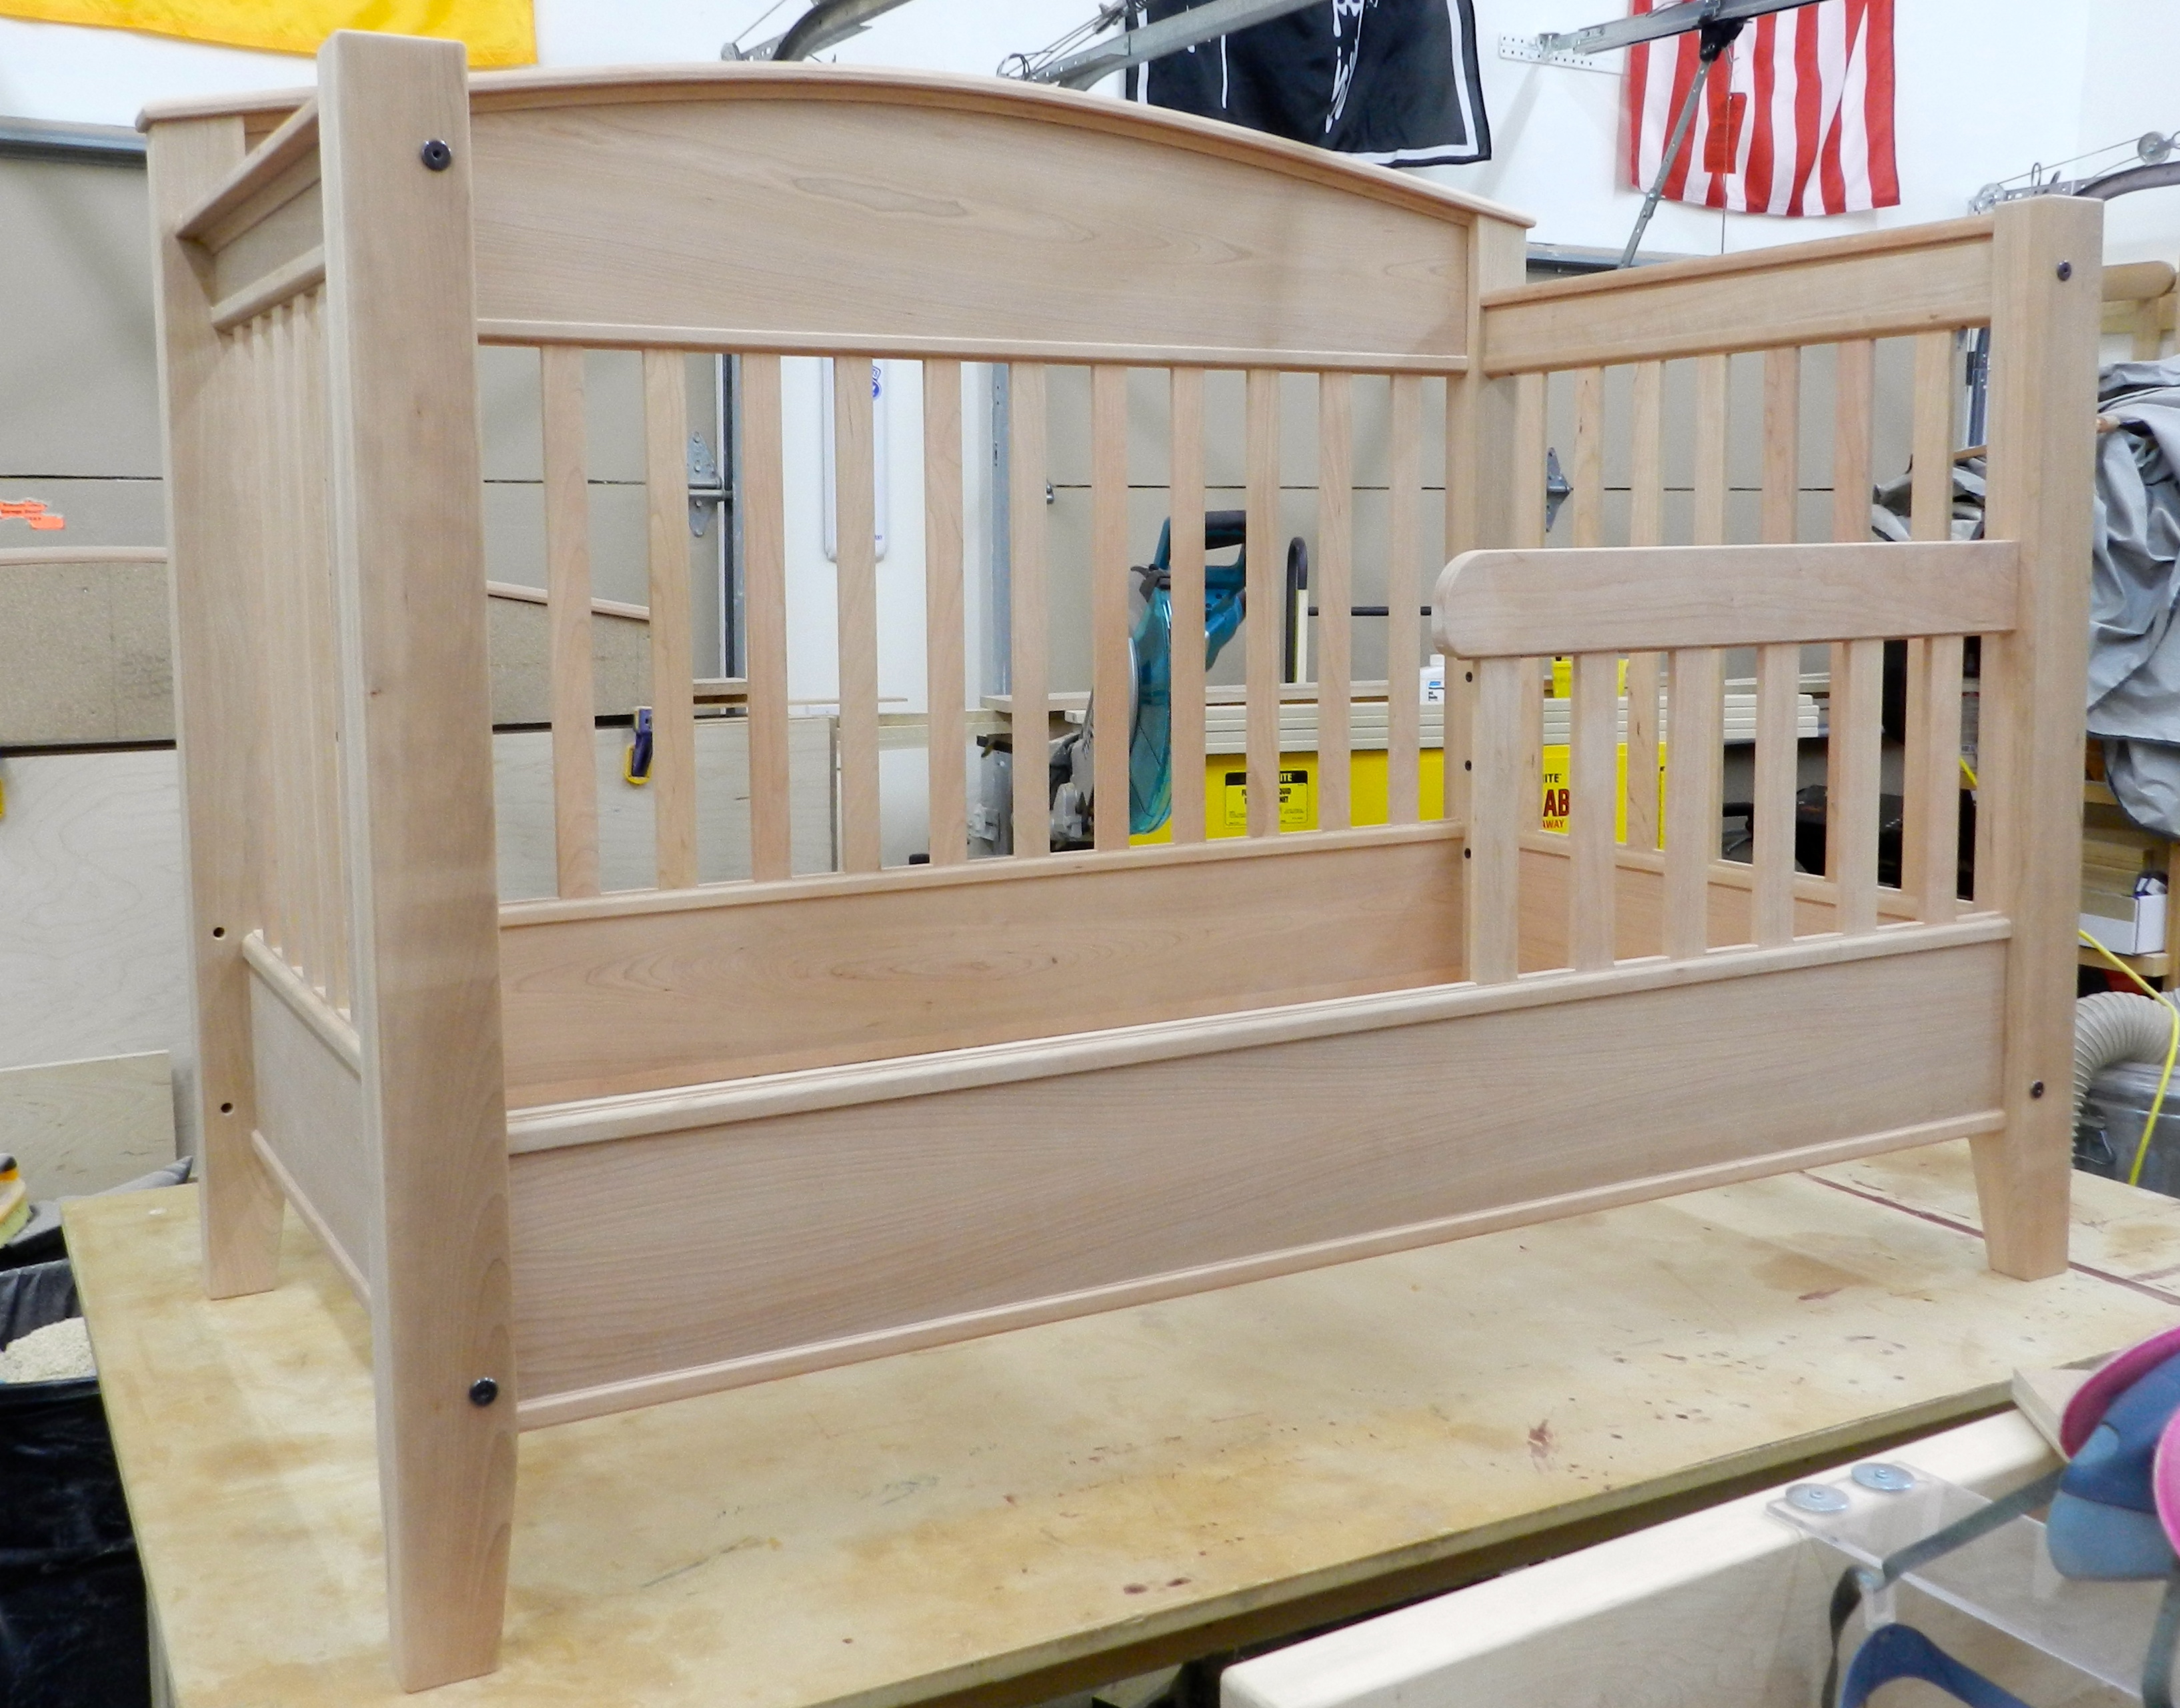
I then removed any mill marks from the routing. With 14 6′ tall posts and two 9′ tall posts it took a while to get all the woodworking up to this stage.

Shaping completed.
Shaping completed.

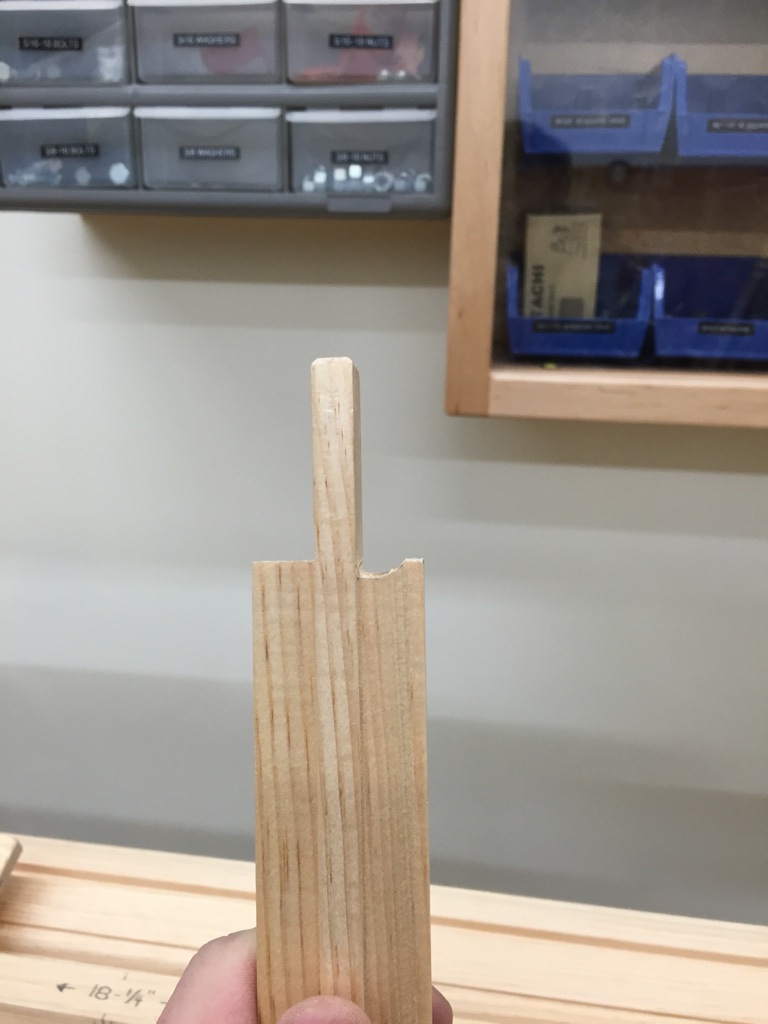
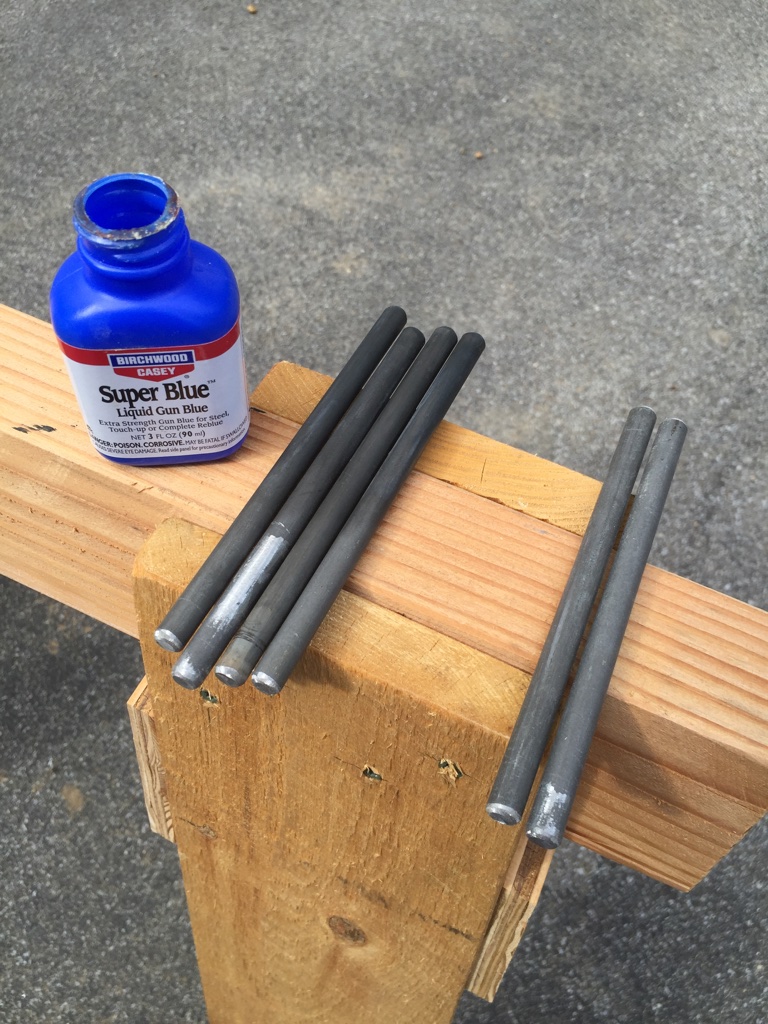
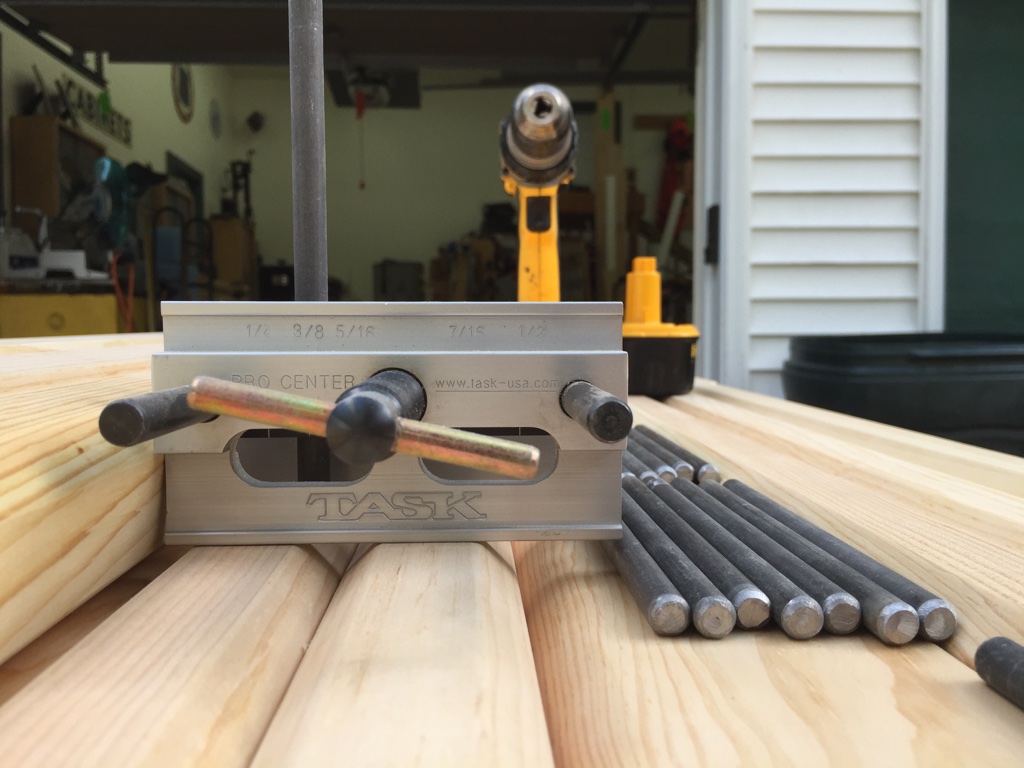
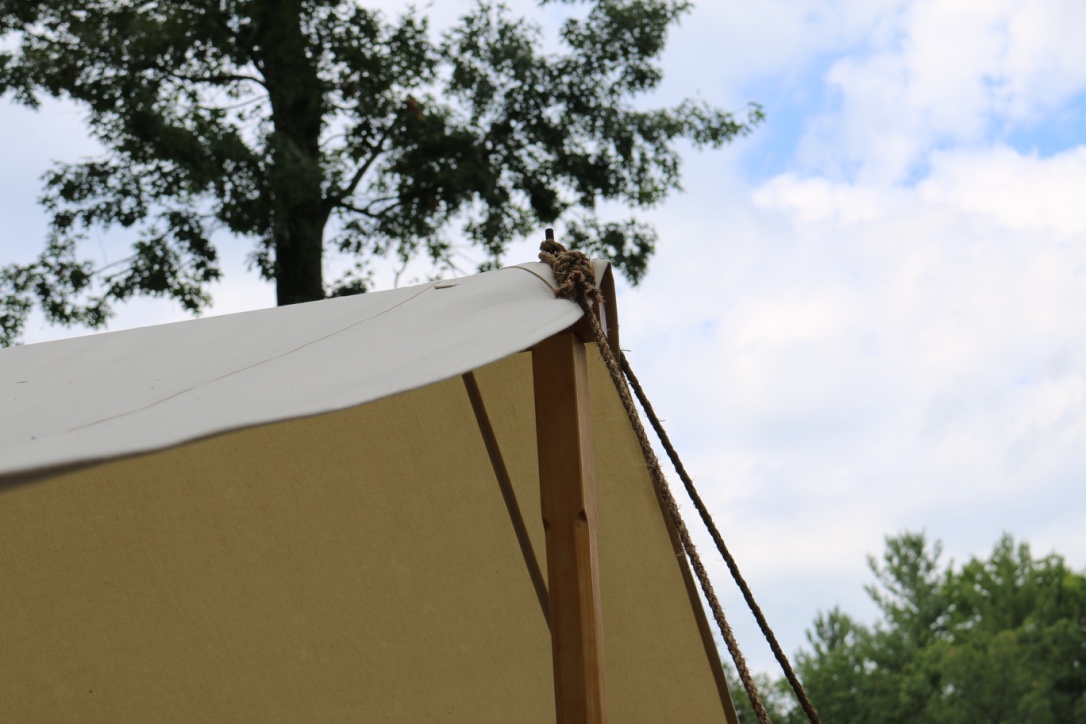
Next up was cutting 3/8″ metal rods to about 6″ long for each of the 6′ posts. The two 9′ tall posts needed 9″ long metal rods.

Rods cut with metal cut off saw and edges ground back on a slow speed grinder.

Once cut with an abrasive cut off wheel I rounded over the ends/corners of the rods on a slow speed grinder.

Ground rods for all the lower posts

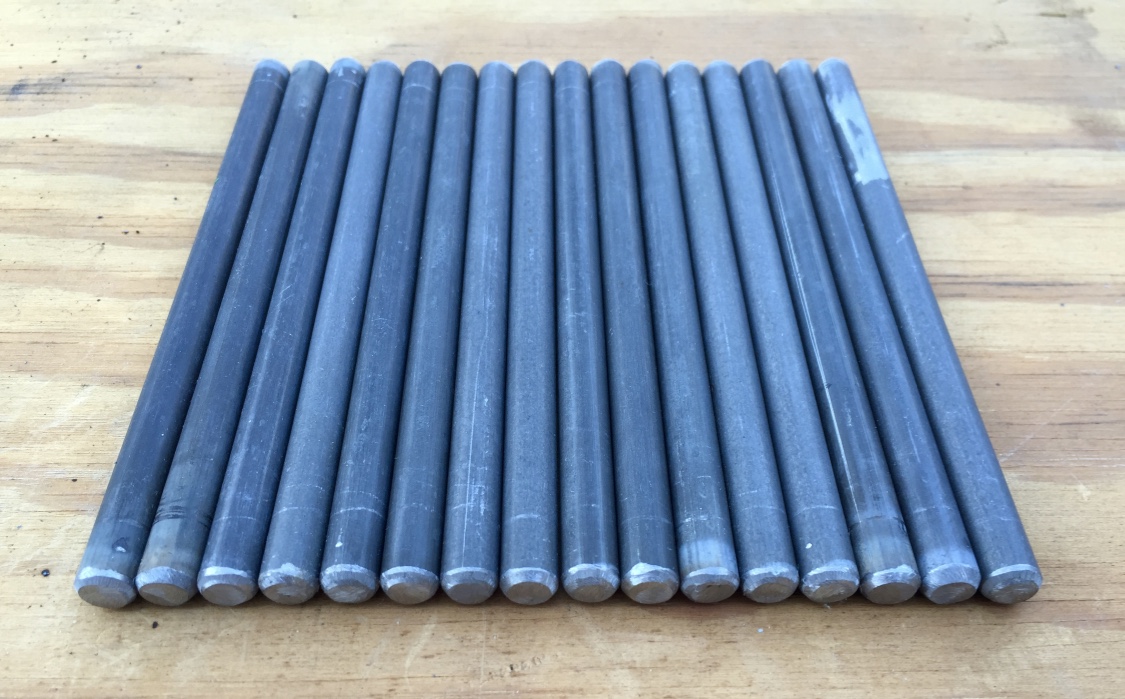
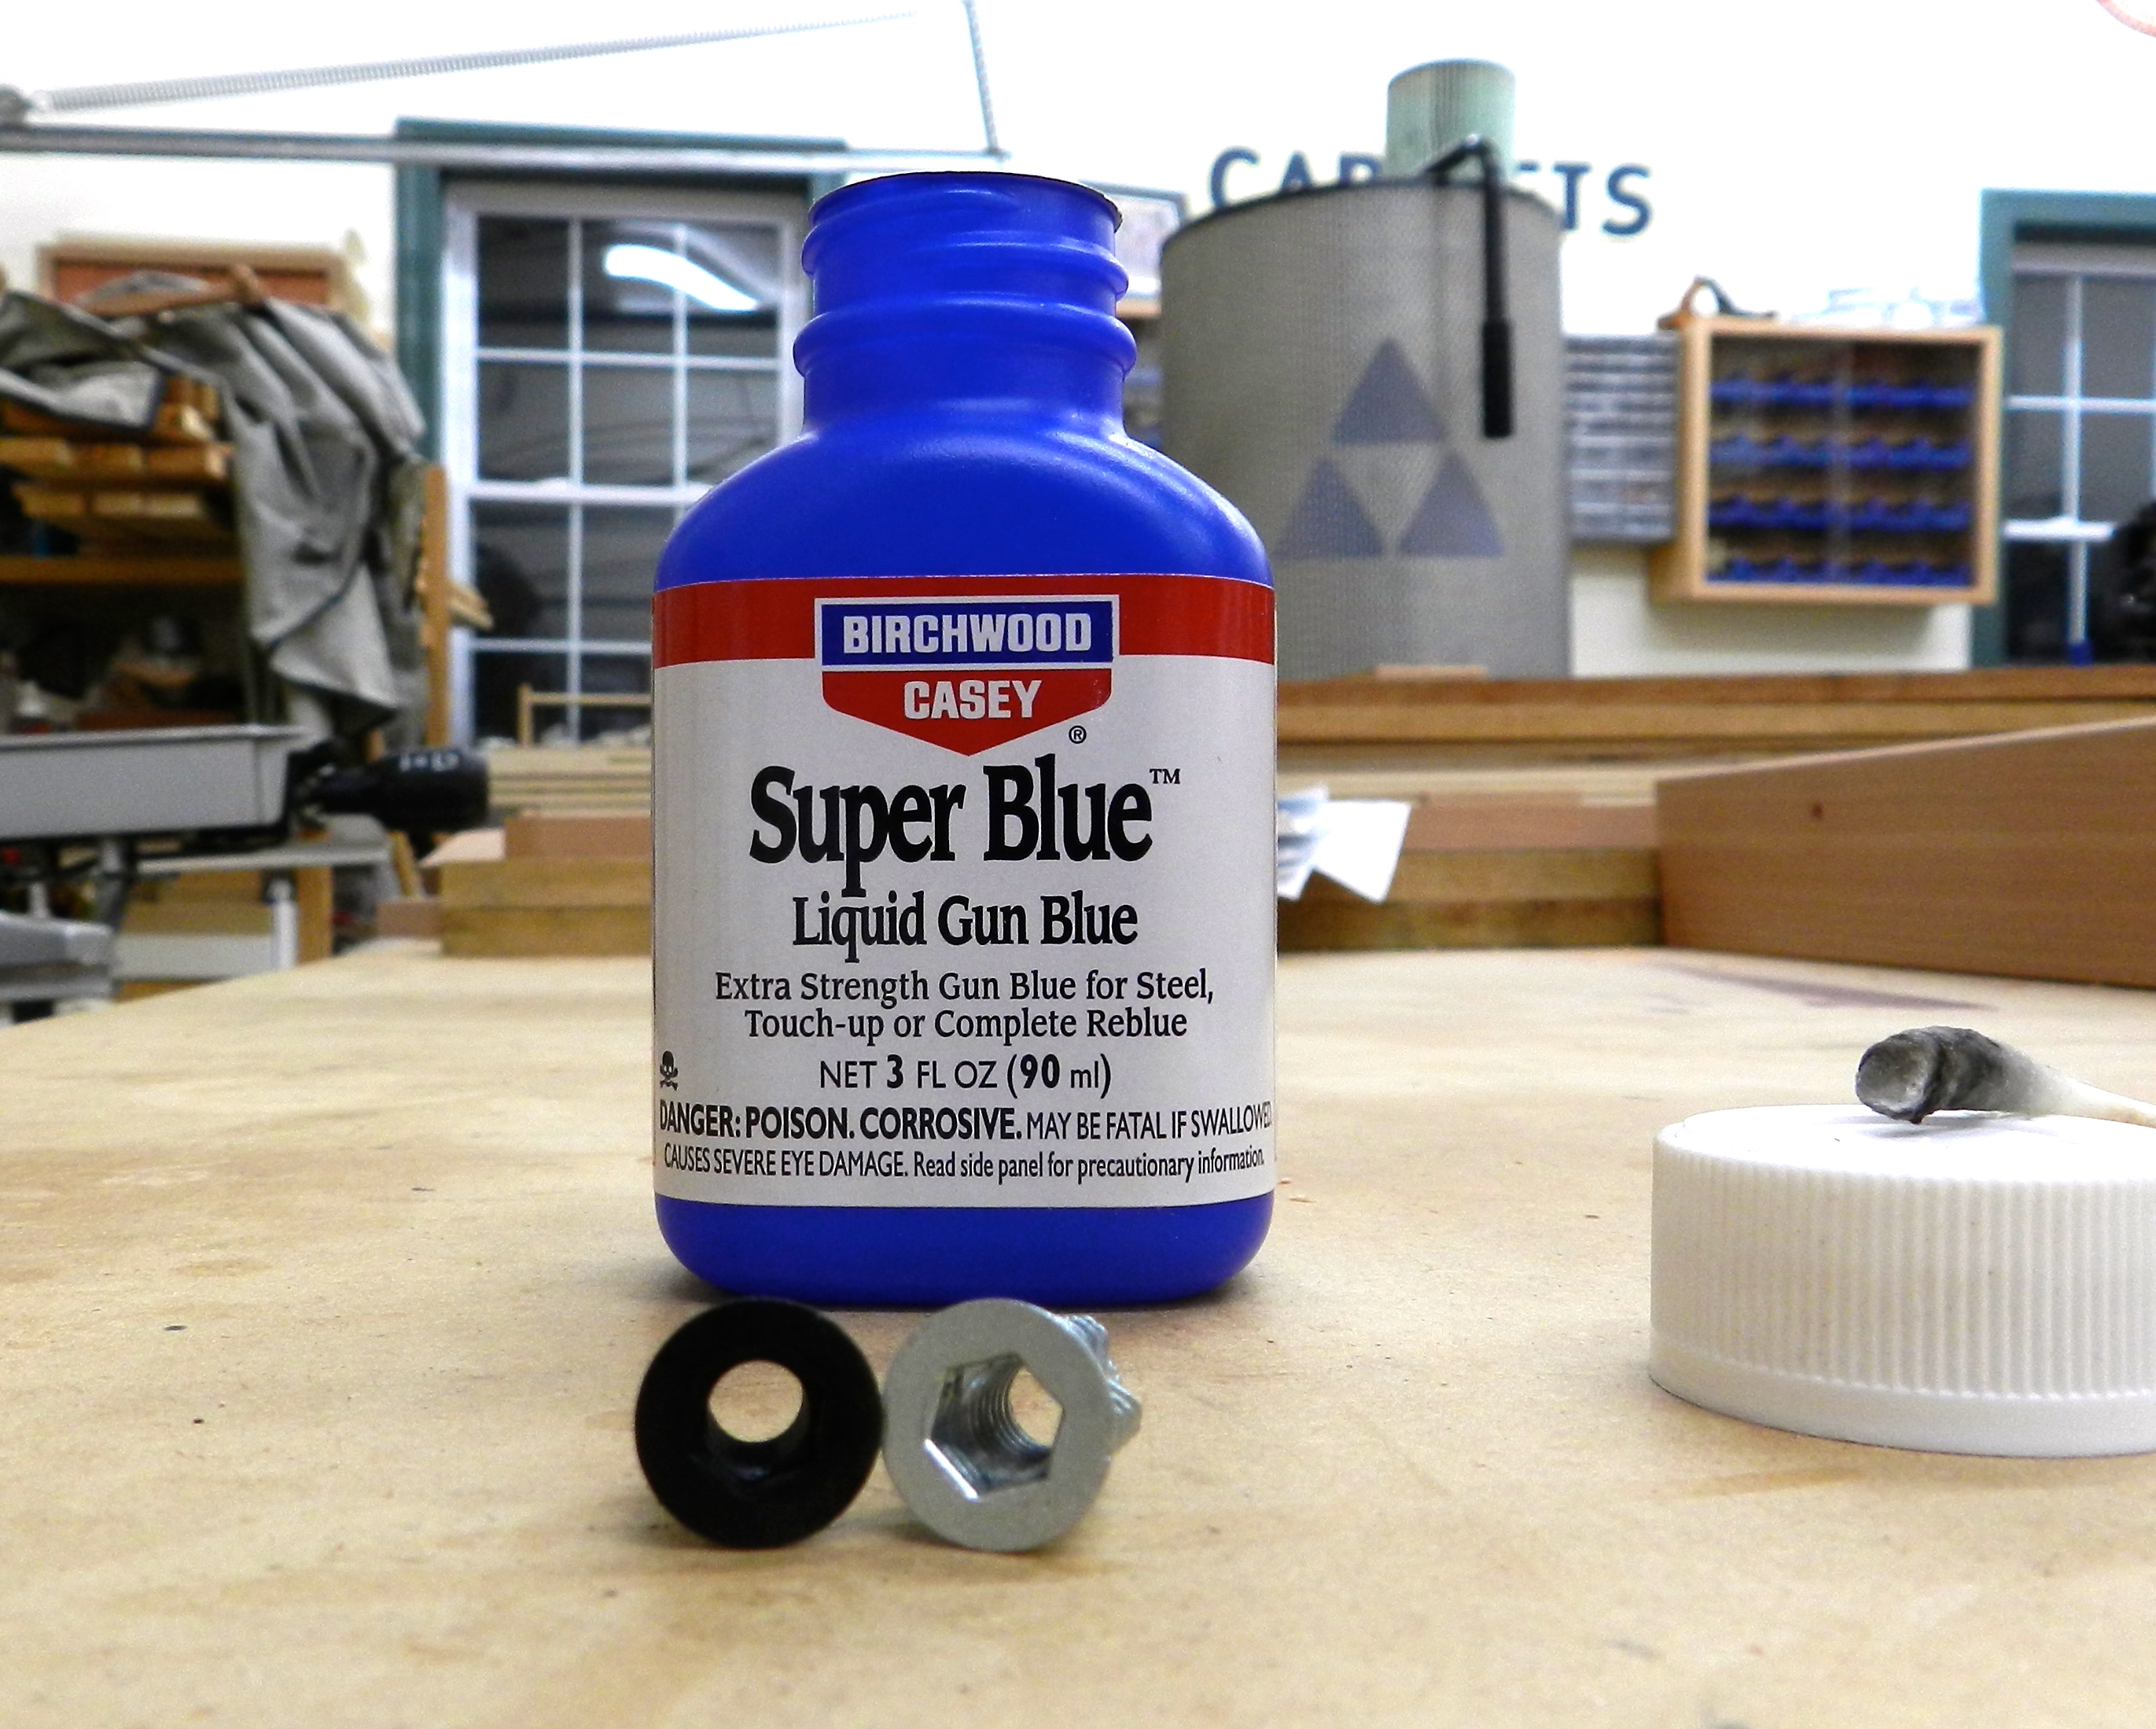
The mild steel rods from the hardware store are prone to rusting and have a bit of a modern look to my eye, so I cleaned them off with alcohol and then applied Super Blue (Gun Blue) to ends of the rod that would be exposed. The dark gray/black patina looked like older ironwork to my eye and at the least darkened all the freshly exposed steel from the cutting and grinding process. I’d also advise sealing it after that fact — with some lacquer or similar clear film finish that won’t react with he metal.

Using Gun Blue to give the the rods a black patina.
Using Gun Blue to give the the rods a black patina. (Left are blued and right are just cleaned with alcohol)

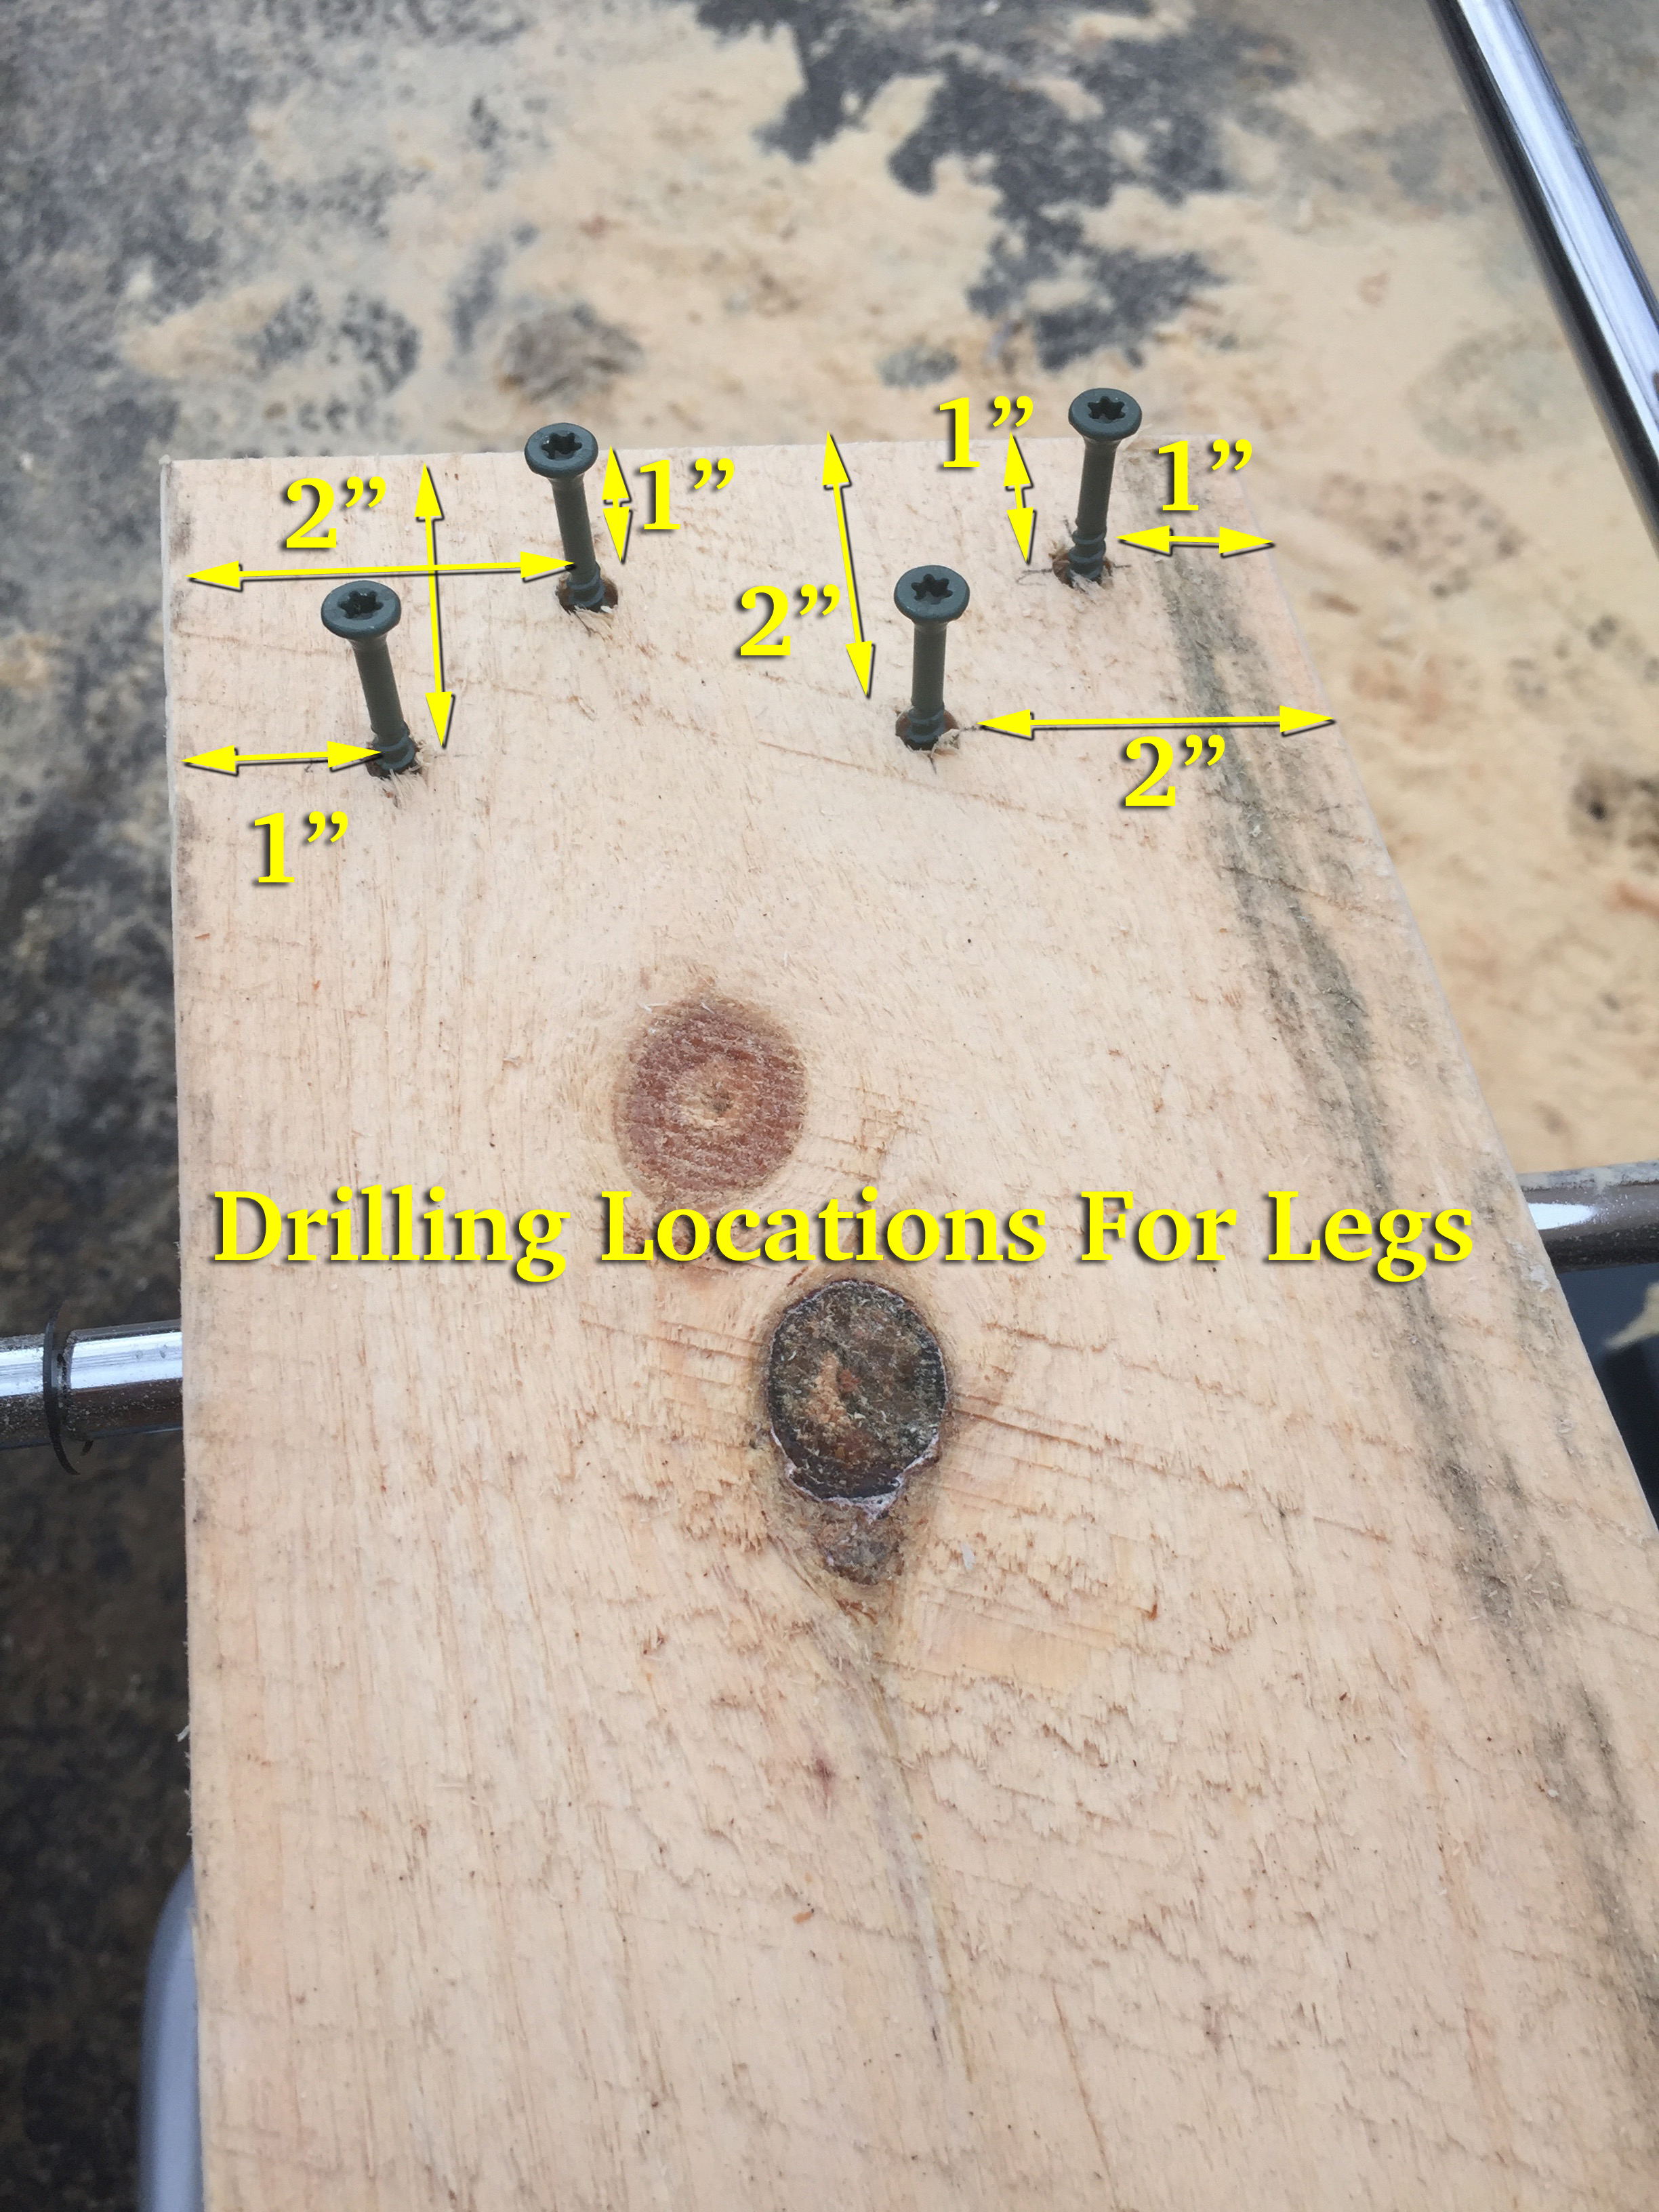
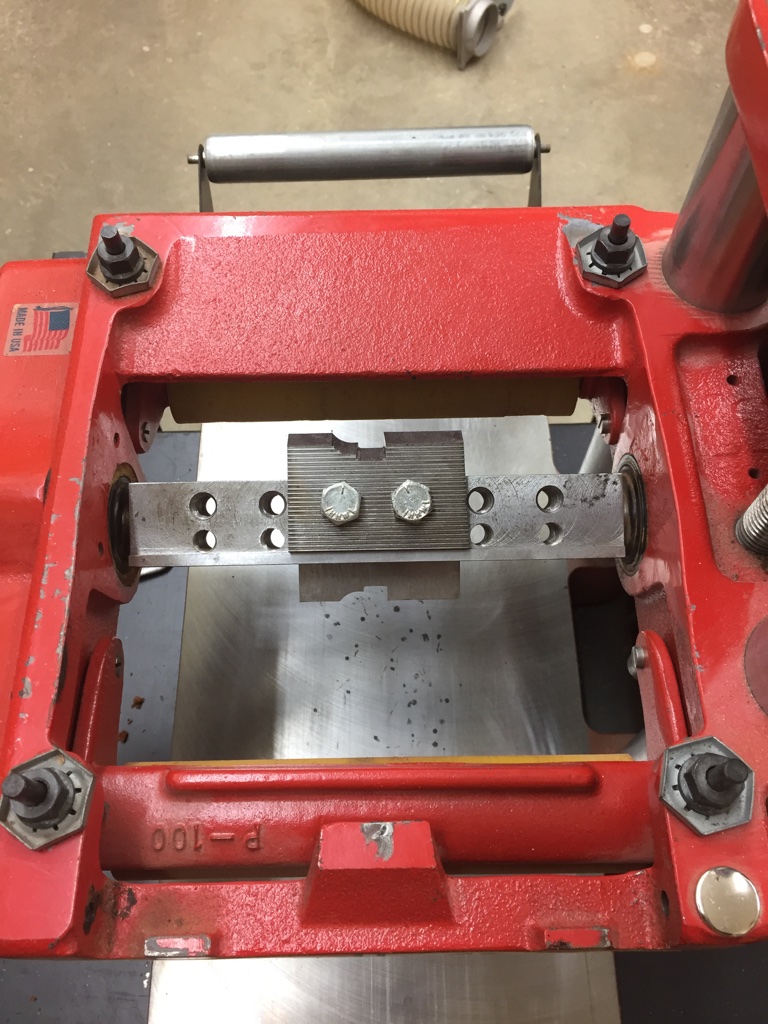
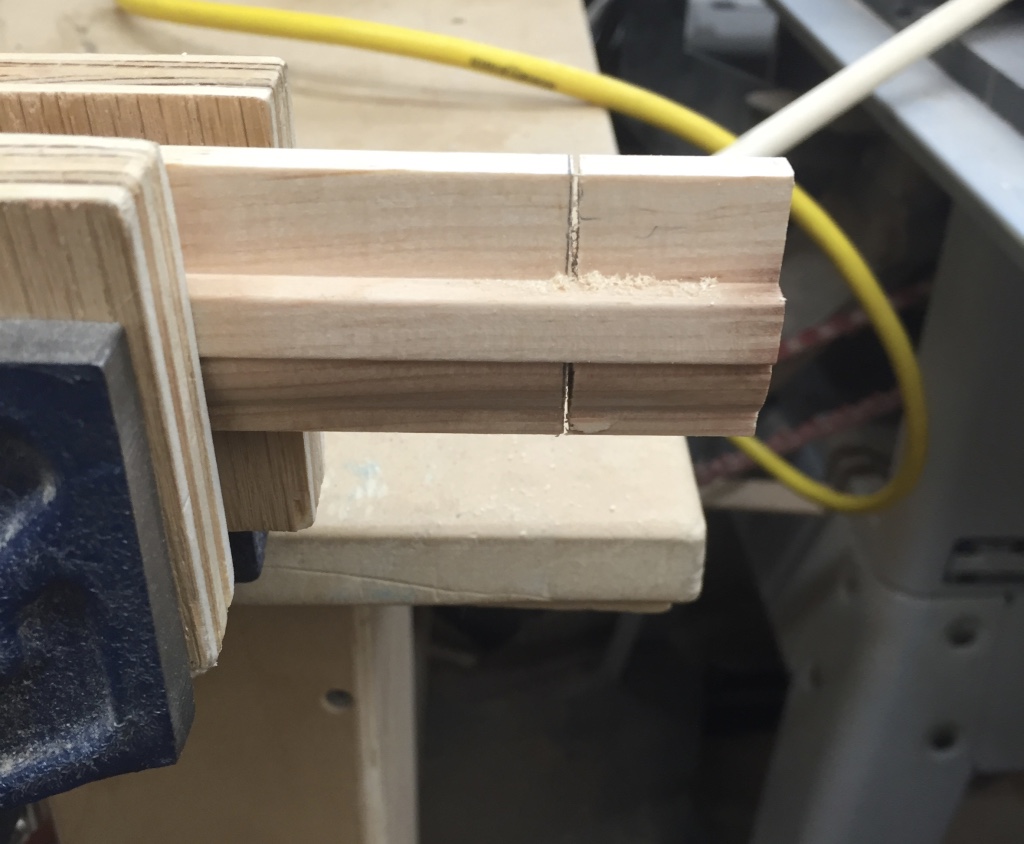
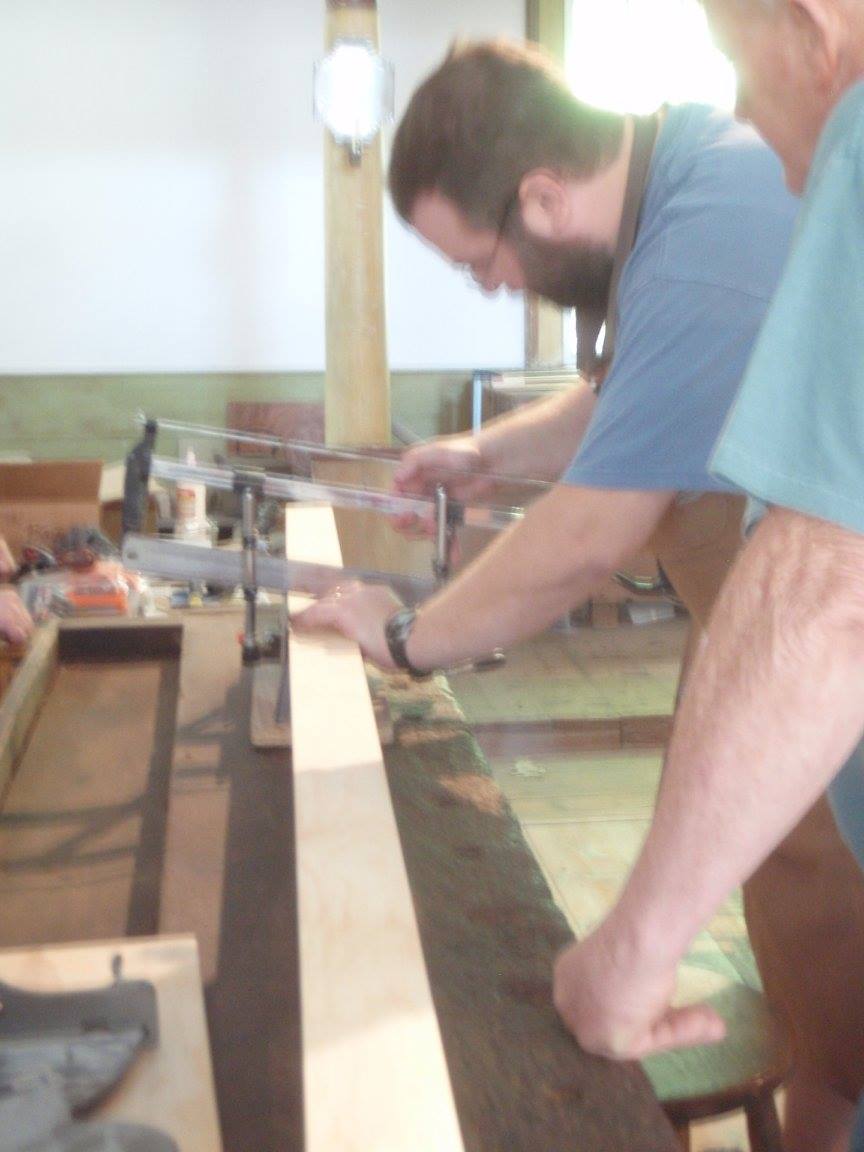
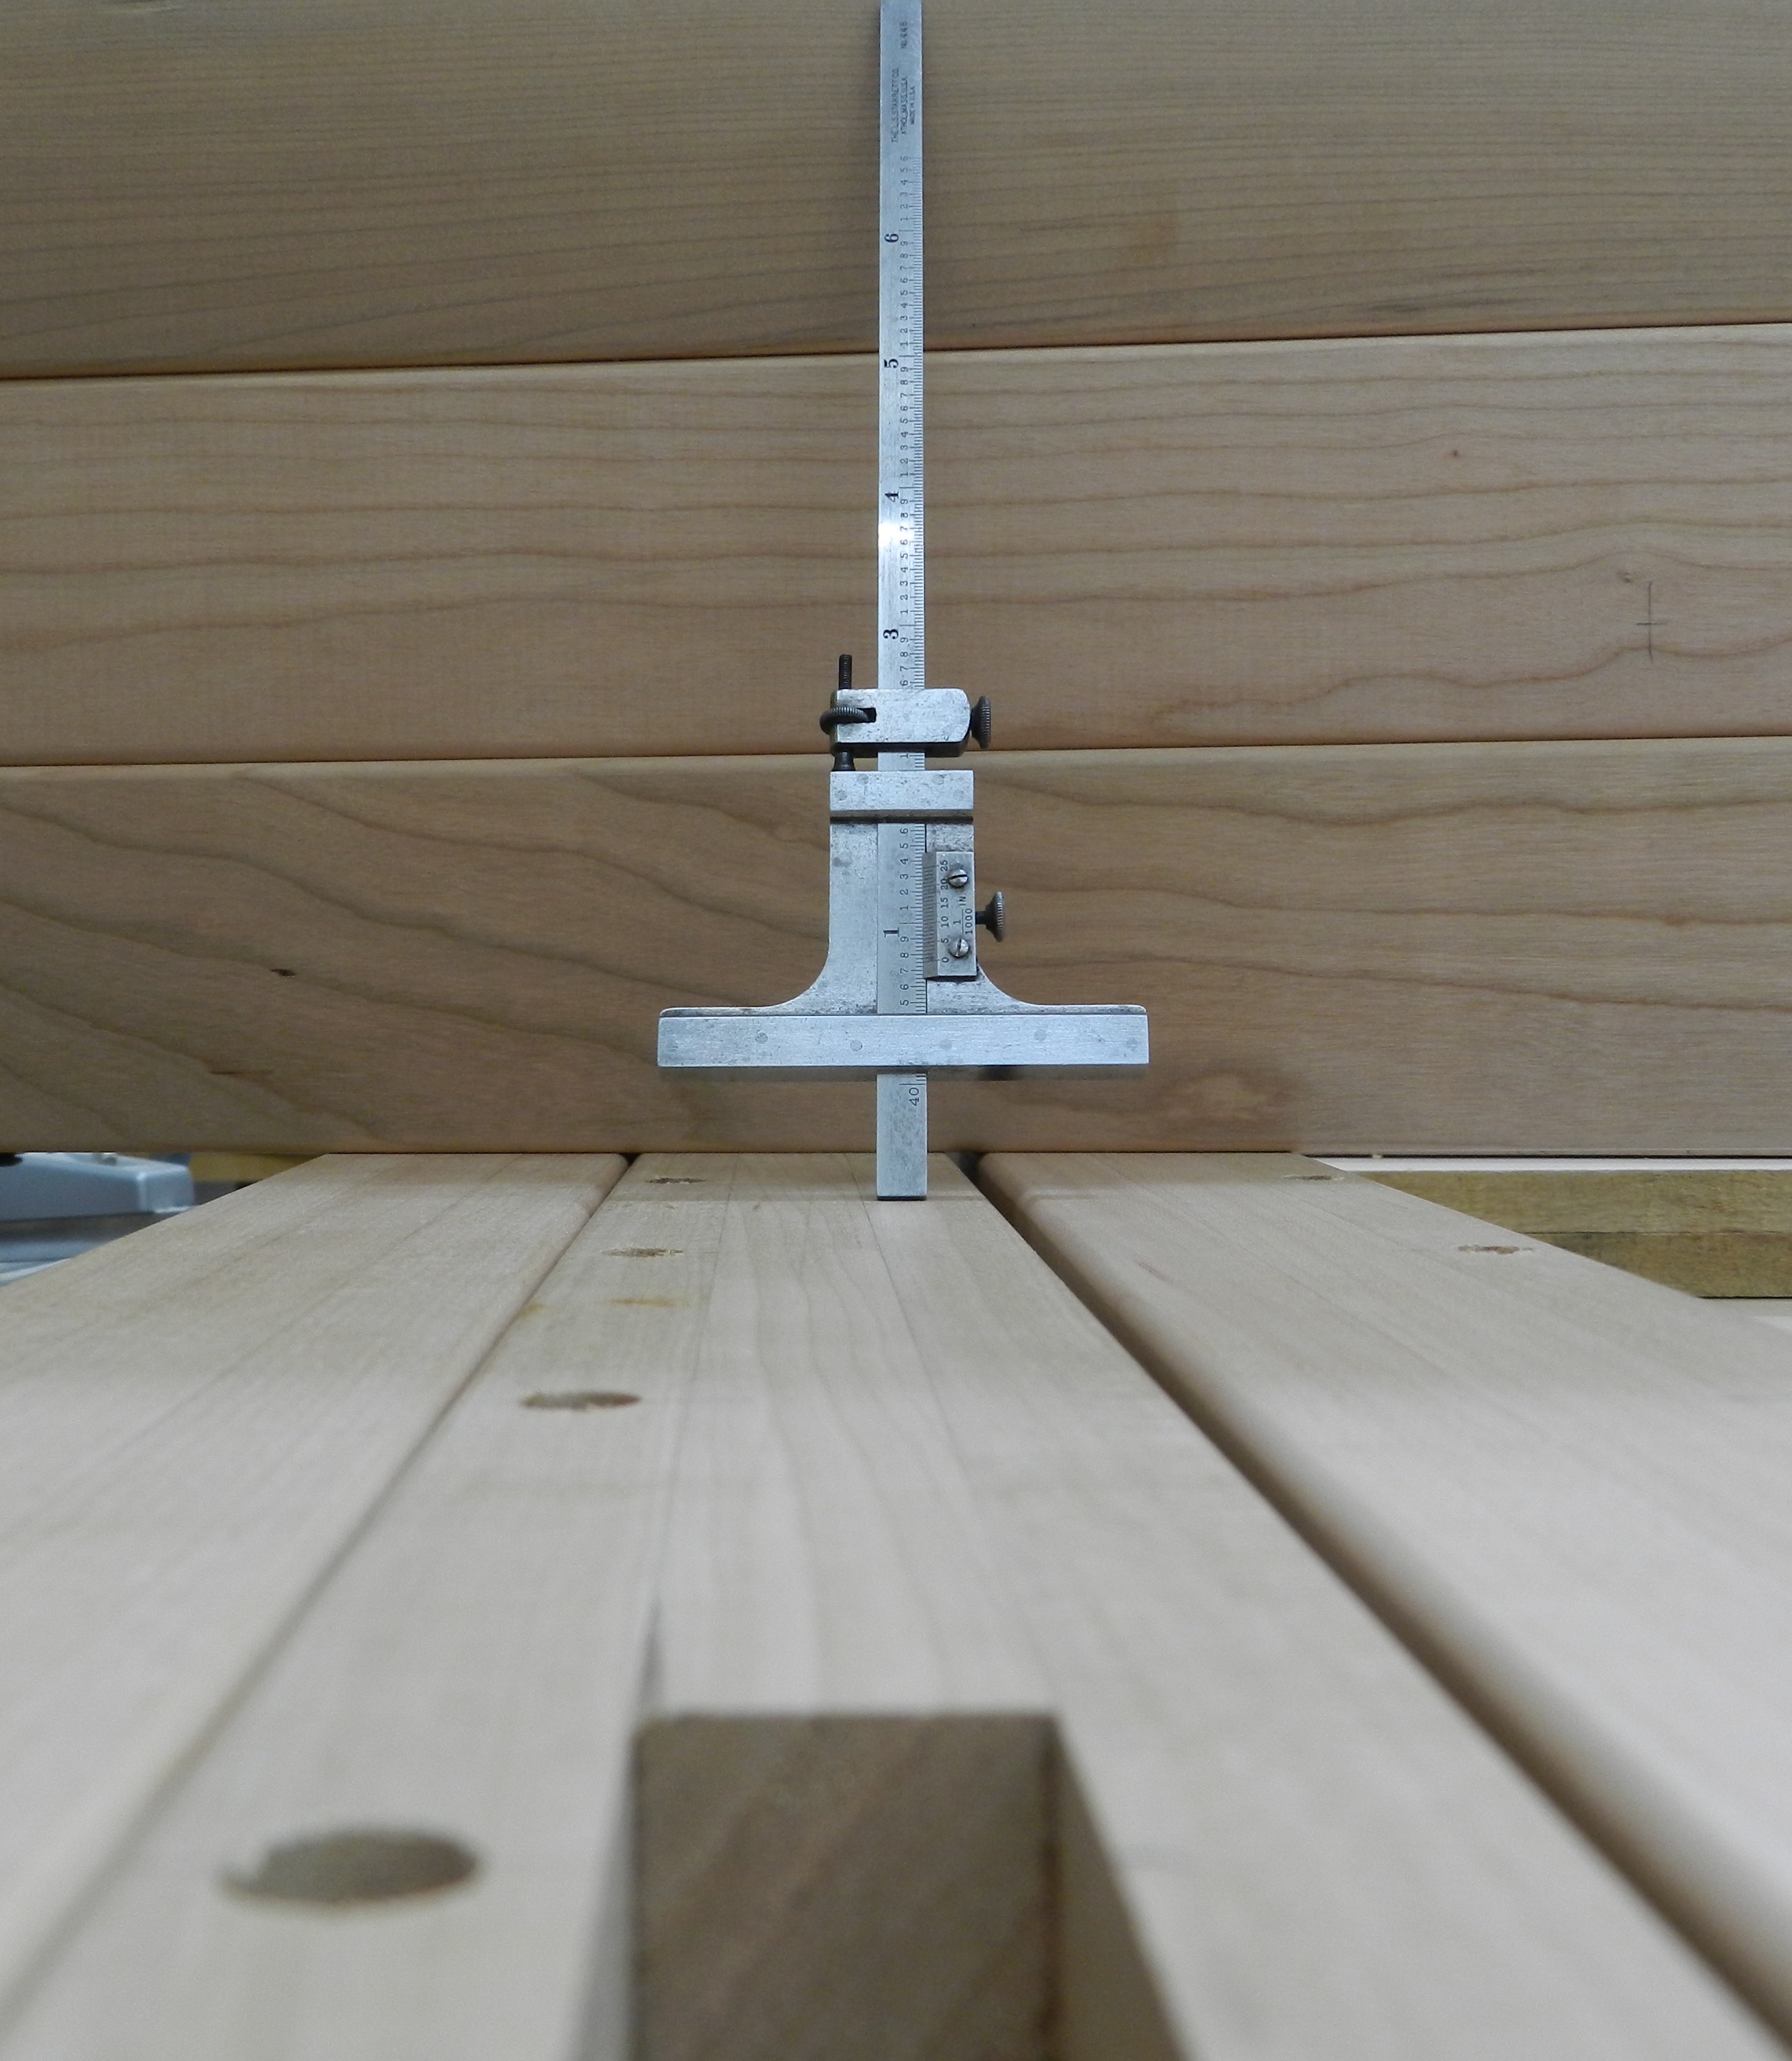
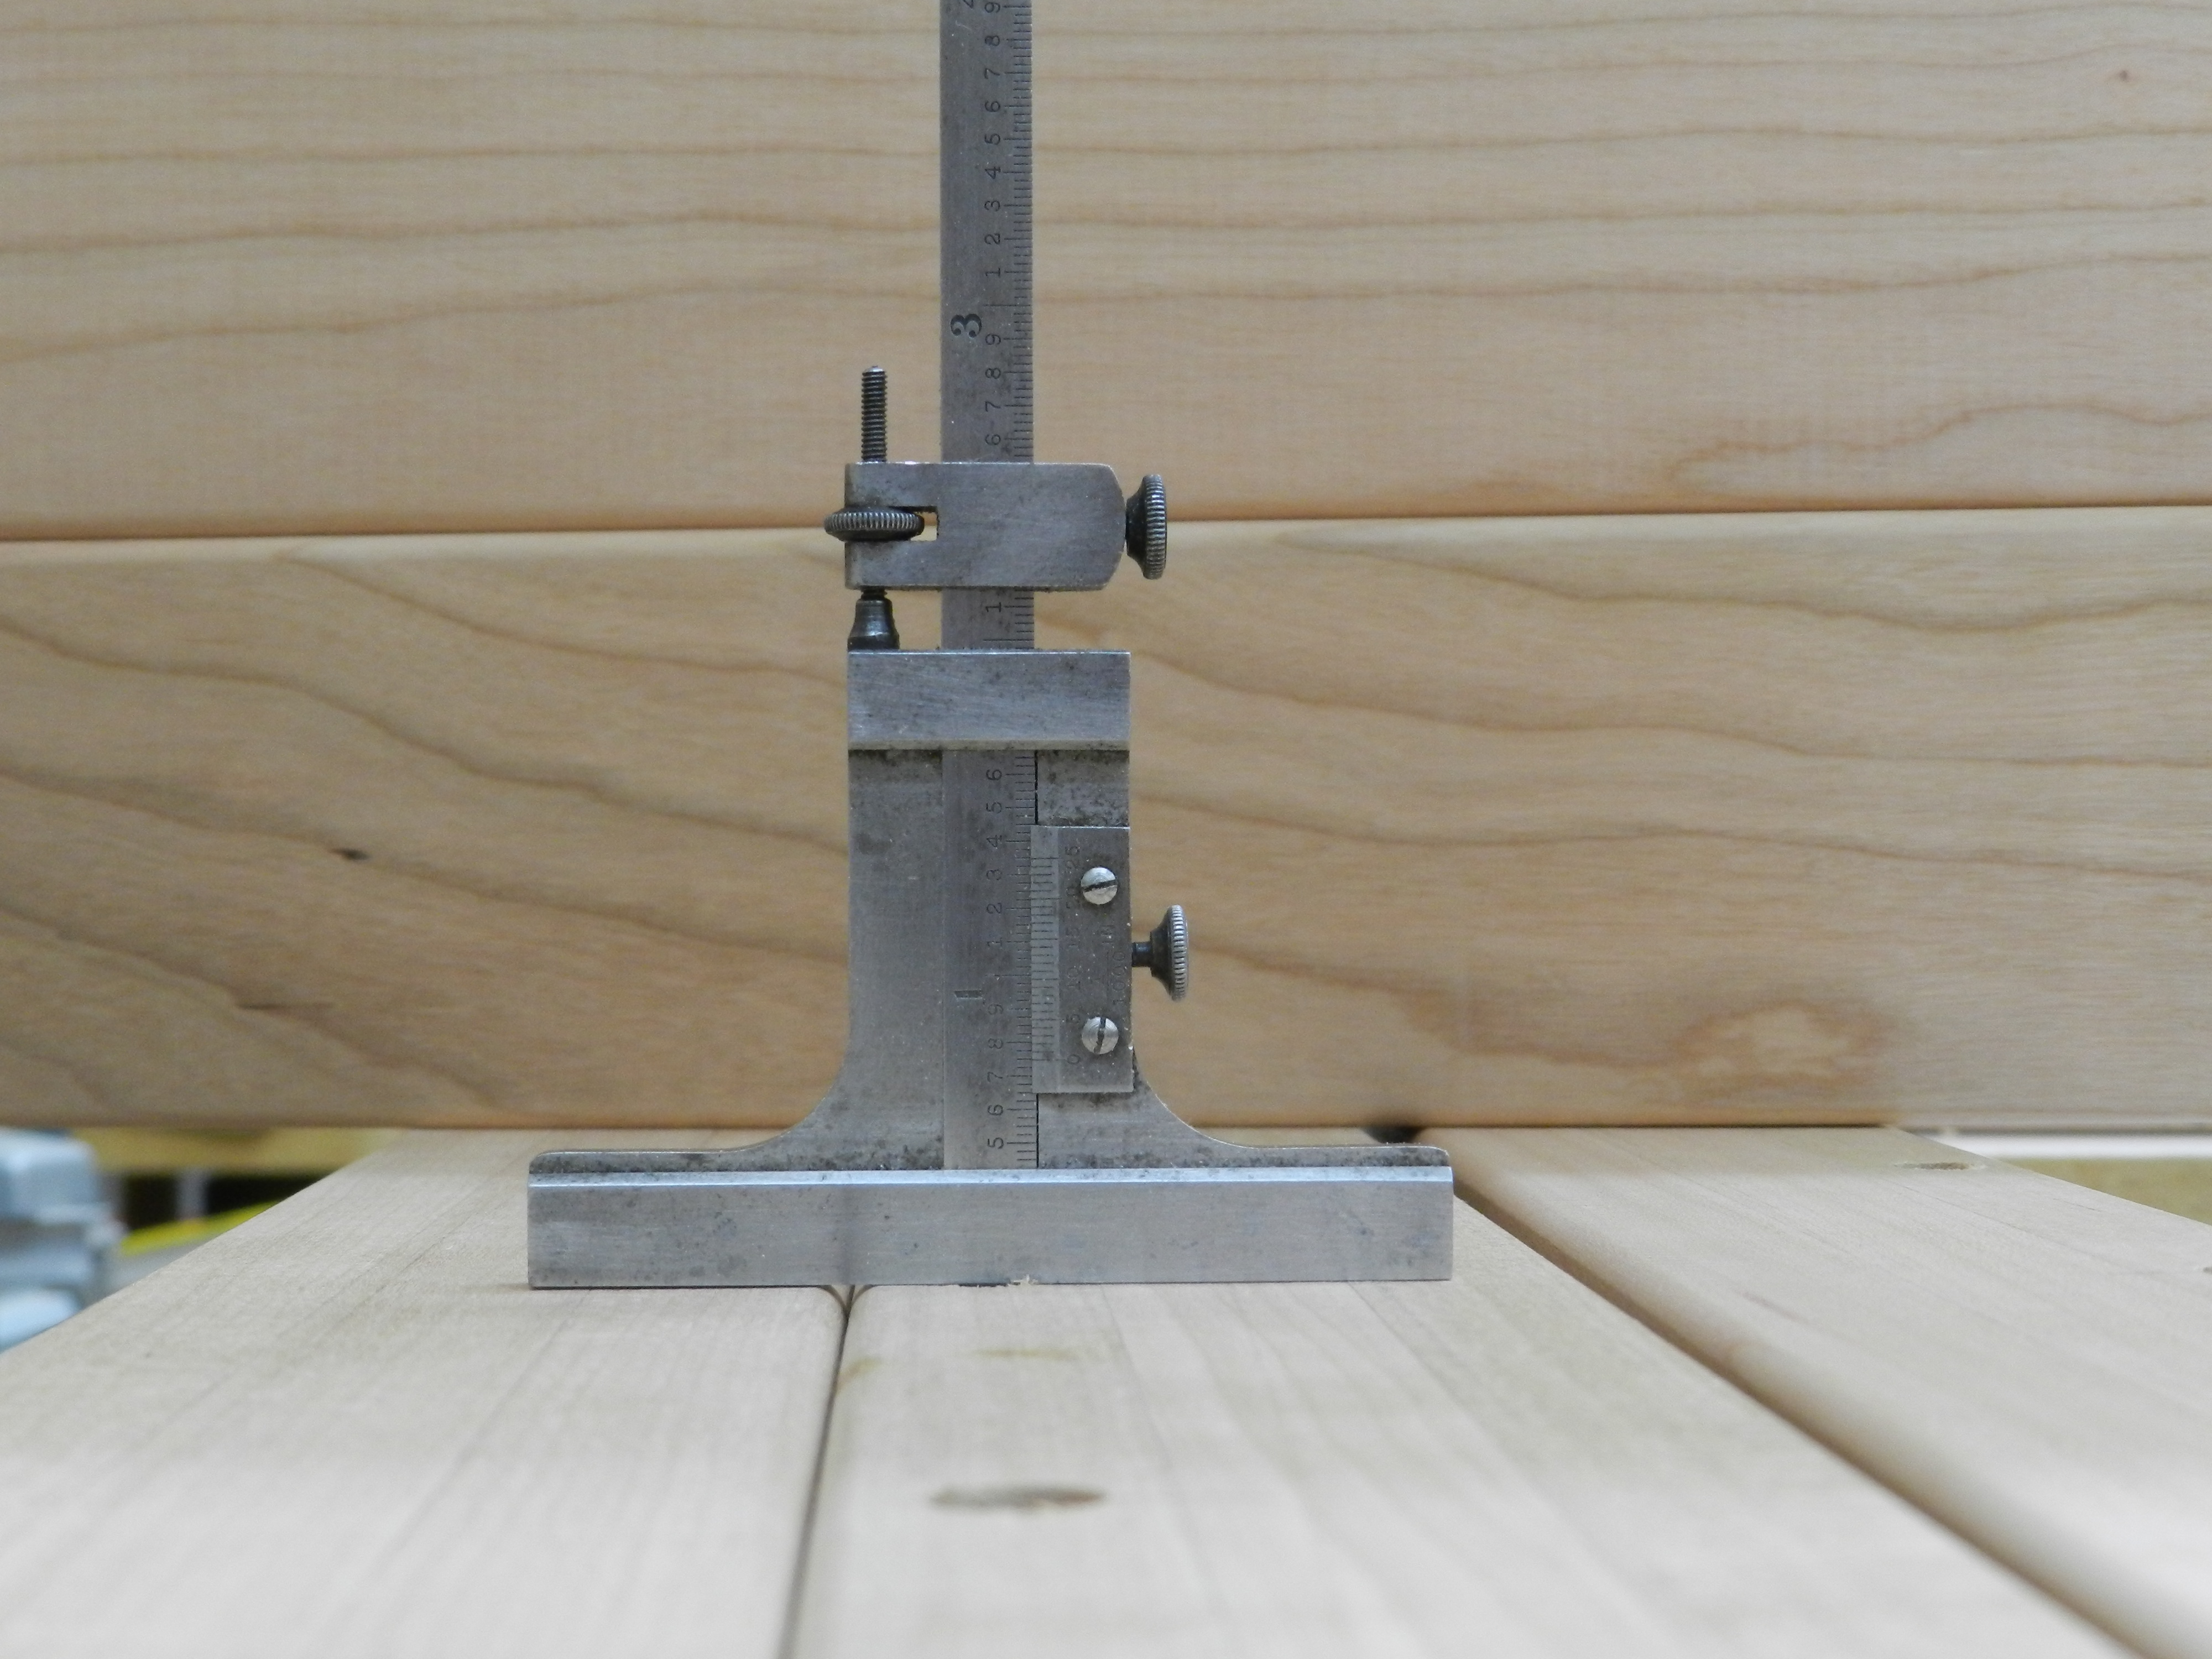
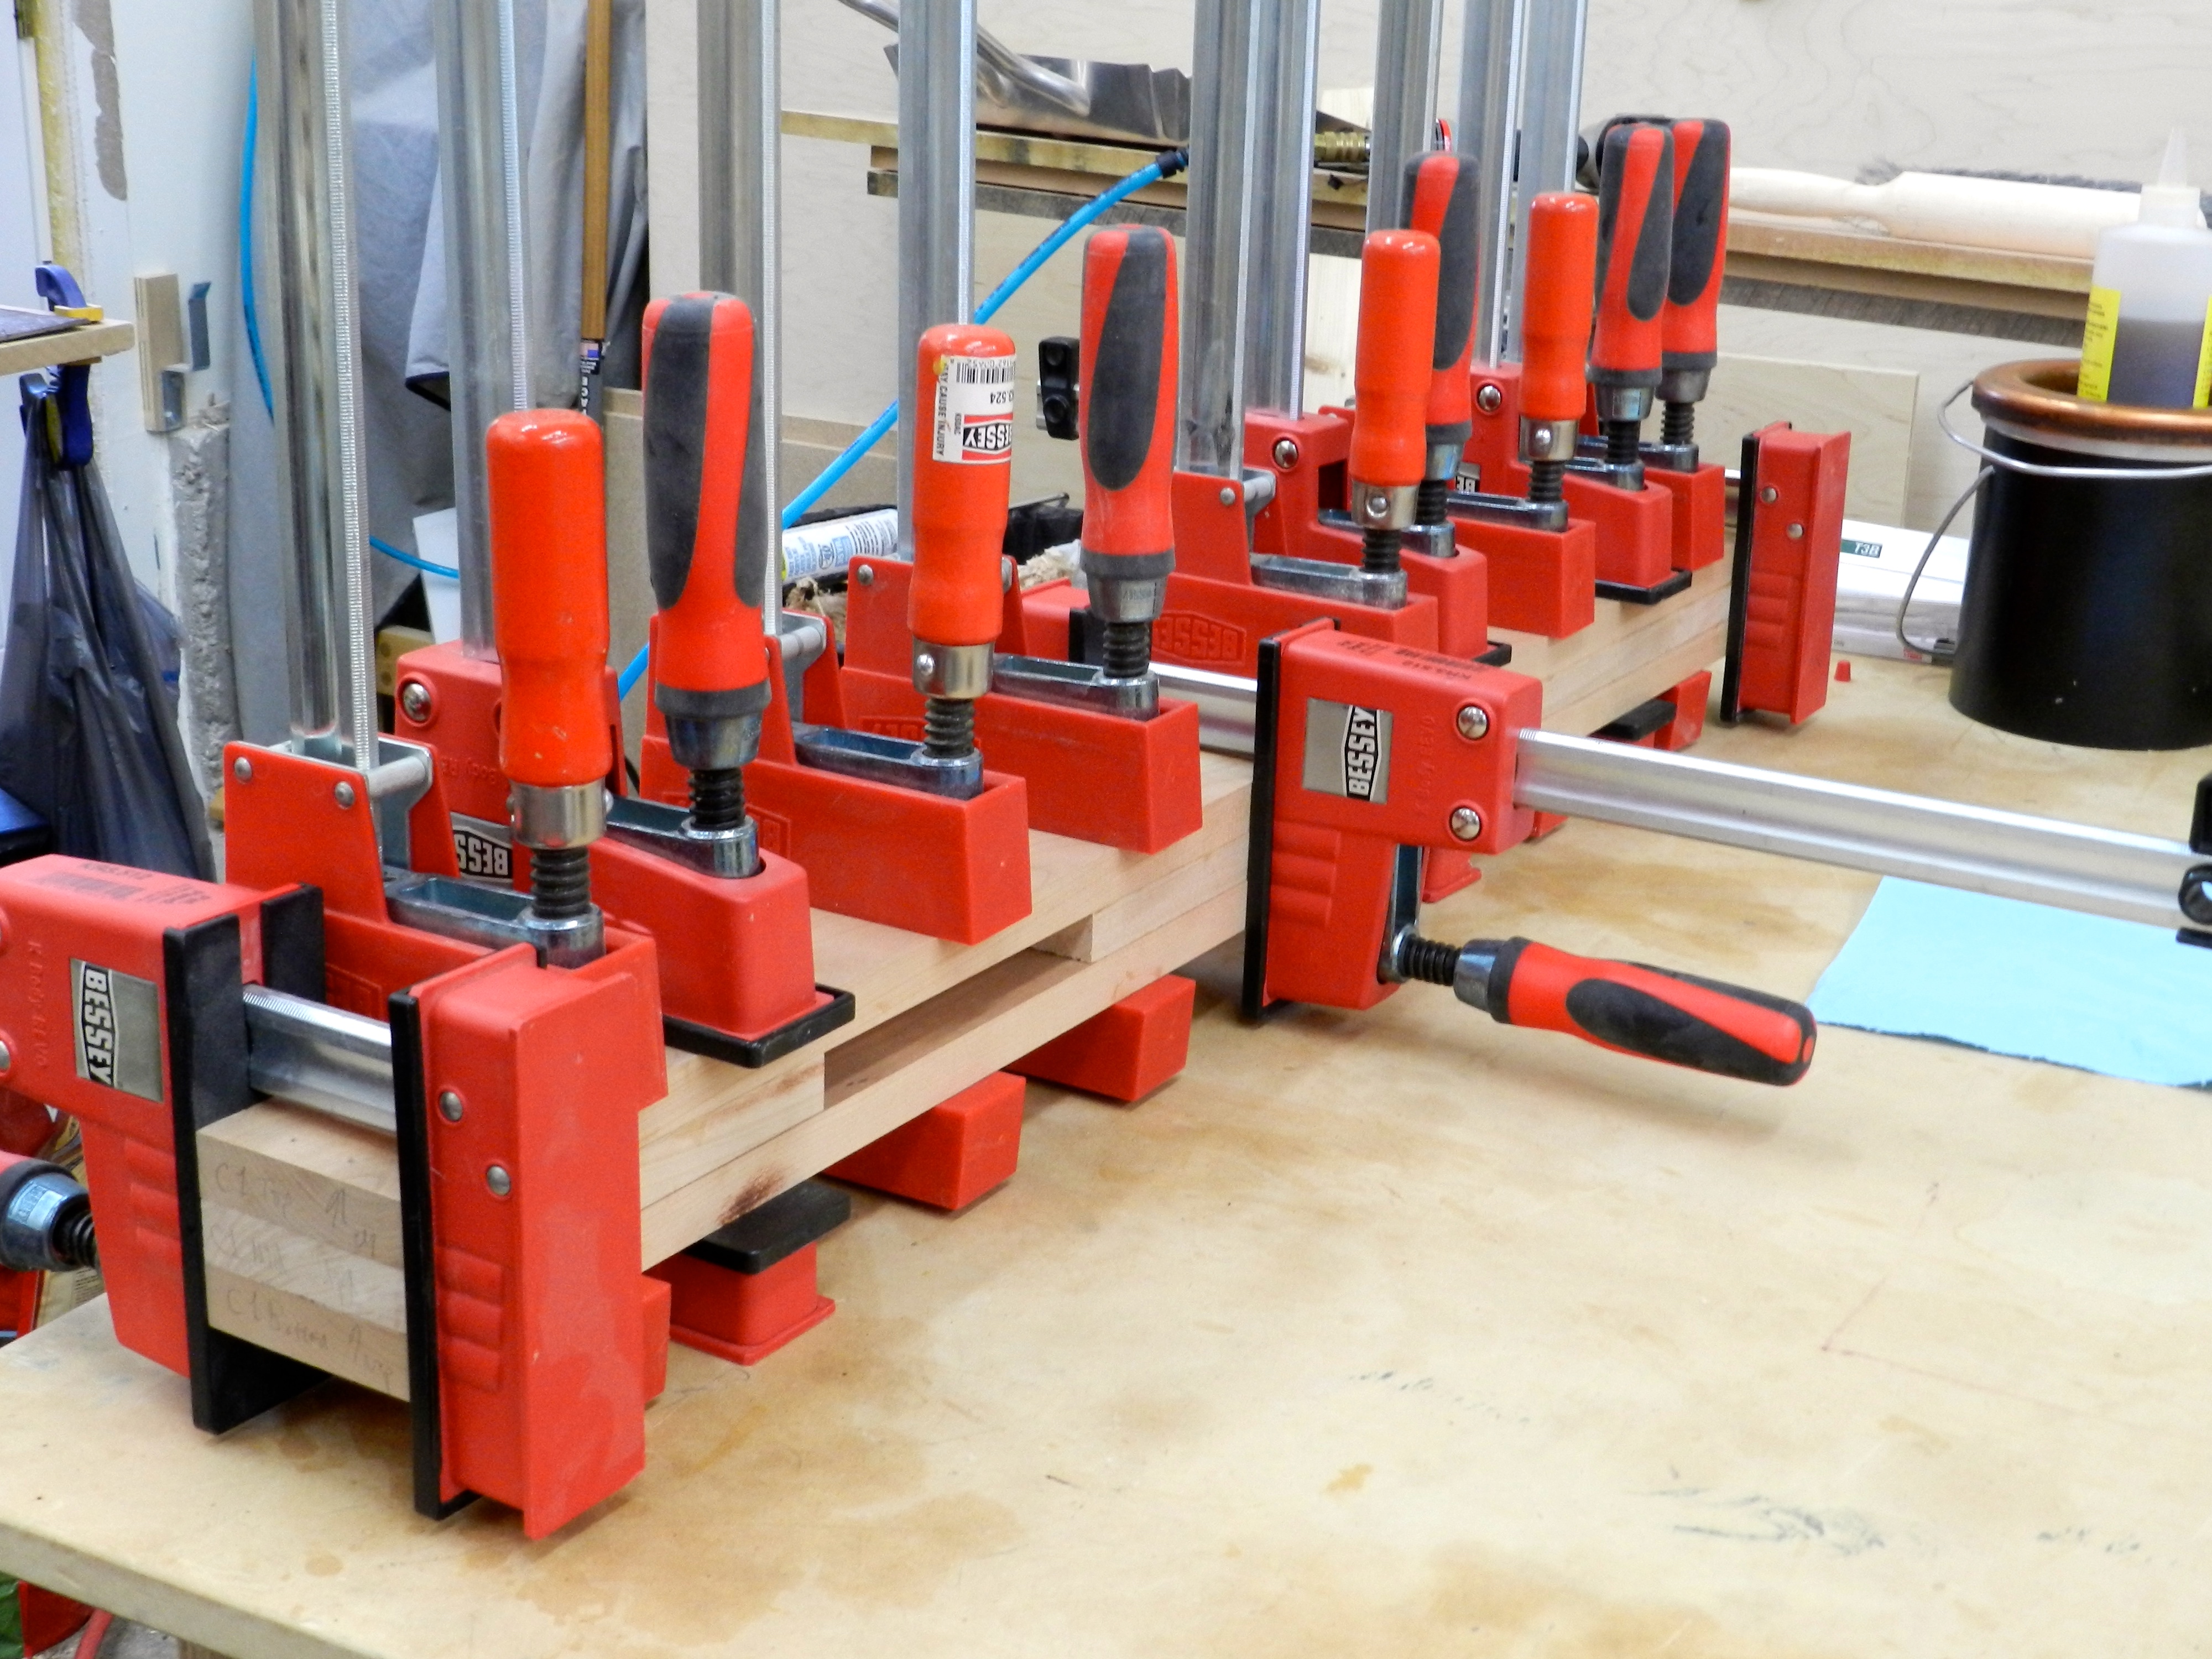
I used a center finder gauge to mark where I should be drilling a 3/8″ diameter hole, 3 inches deep into the end of the posts.

Marking centers on the posts

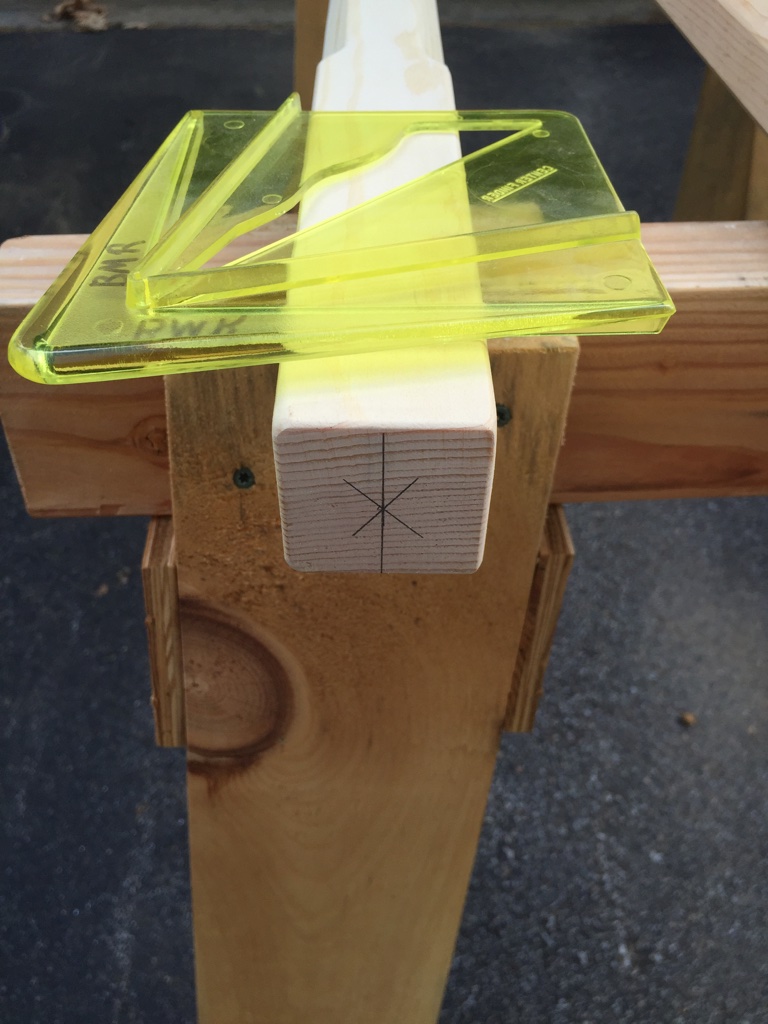
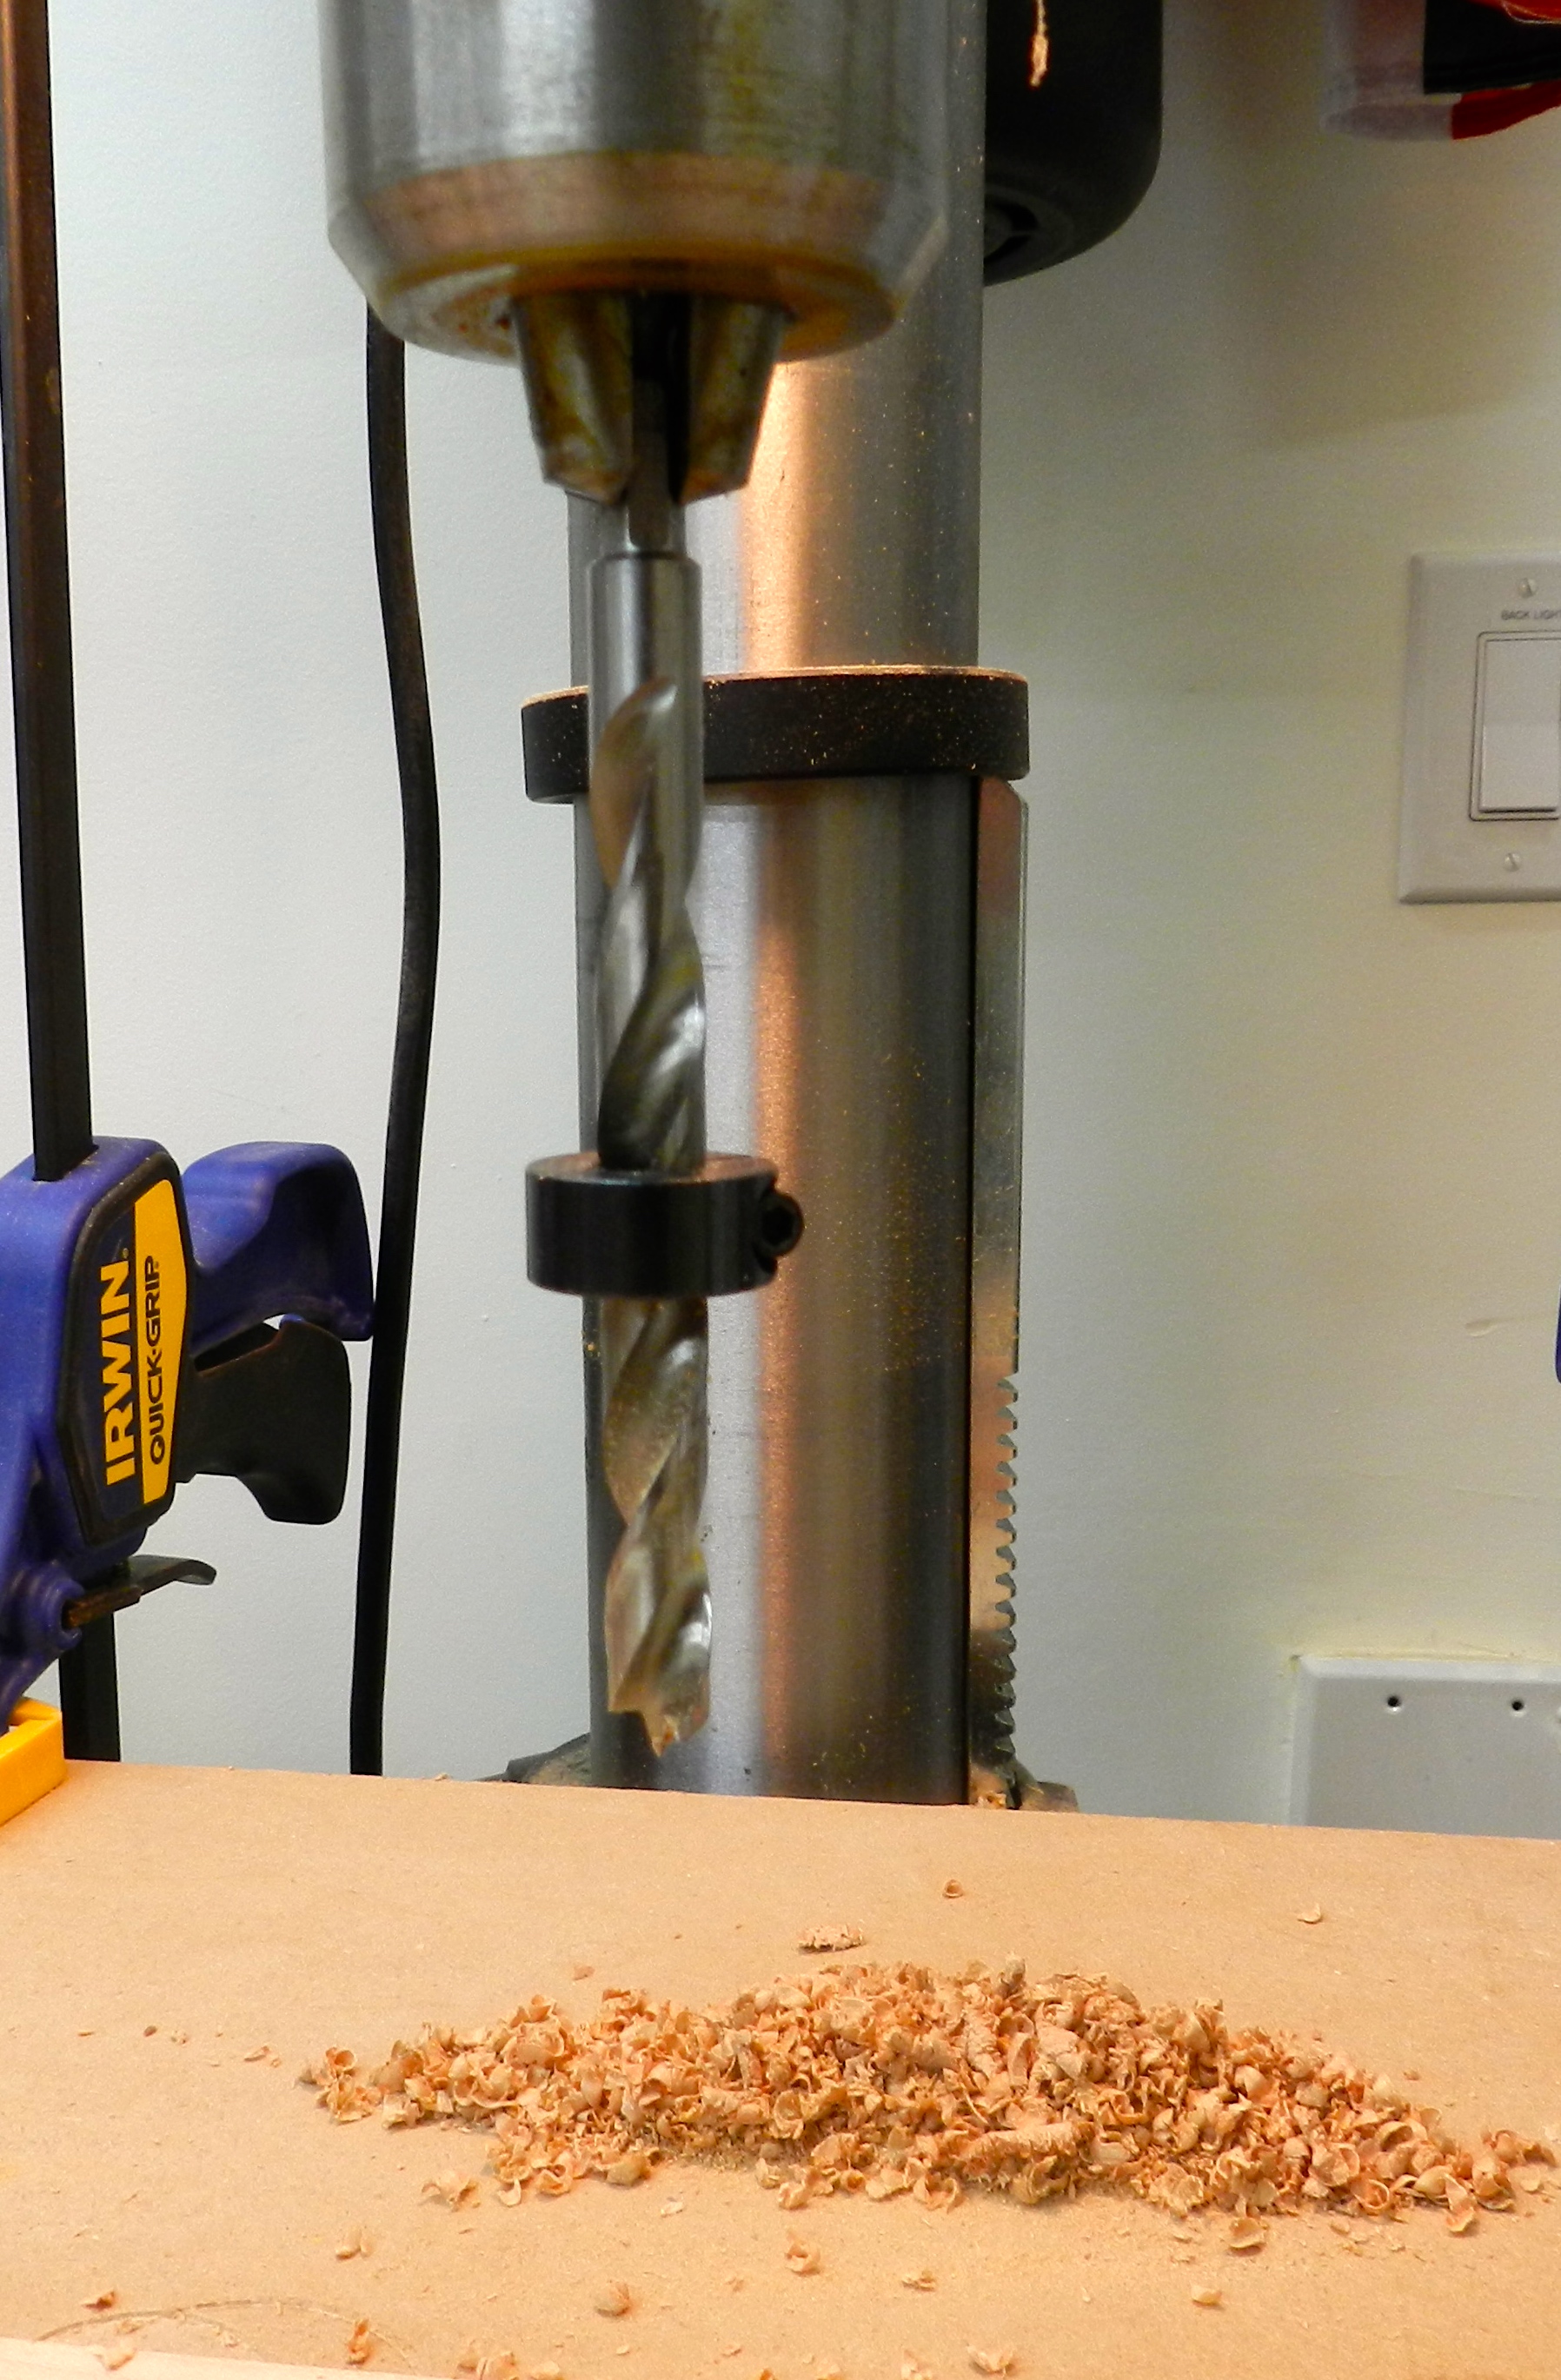
I also used a doweling jig keep the drill bit straight as I drilled into the ends of the posts.

Doweling jig used to center and guide holes drilled into the end of the posts.

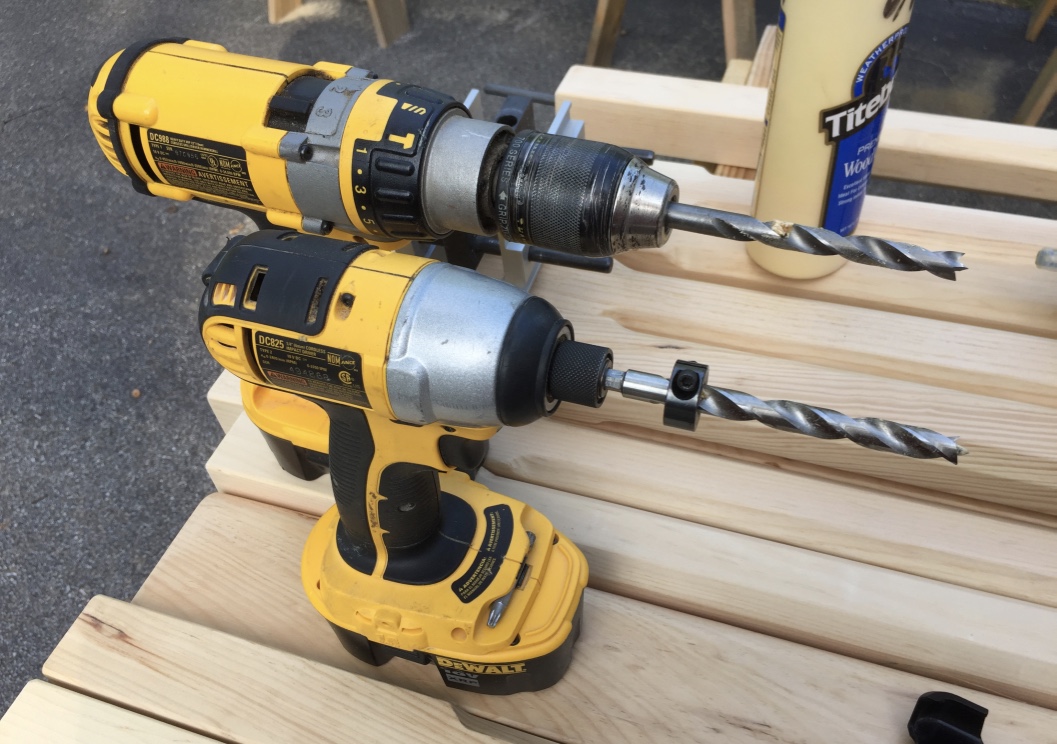
In order to accurately and repeatably drill to that depth and use the doweling jig which is pretty thick I needed to use two drills with the same size of bit. The drill (upper tool in photo below) is used with the jig to drill as deep as it will go. The drill is removed along with the jig. The impactor (lower tool in photo below) has a bit with an appropriately set stop collar to control the depth is used to complete the hole. The initial hole created using the drill and doweling jig provide a nice guide for the impactor + stop collared bit to reach the required depth.

(Upper) Drill used to drill most of the whole through the doweling jig. (Lower) Impactor (or second drill) with bit and stop collar used to complete the hole at the proper depth.

I then test fit/cleaned out the holes and glue the rods into place. (Make sure the blackened end is exposed). Ideally you want to use a high quality epoxy like the West System 2 part epoxy.  I also installed tapered rubber washers from Panther that will help keep water out and keep the grommets where you want them on the metal rods.

Rods glued and inserted into the ends of the poles.

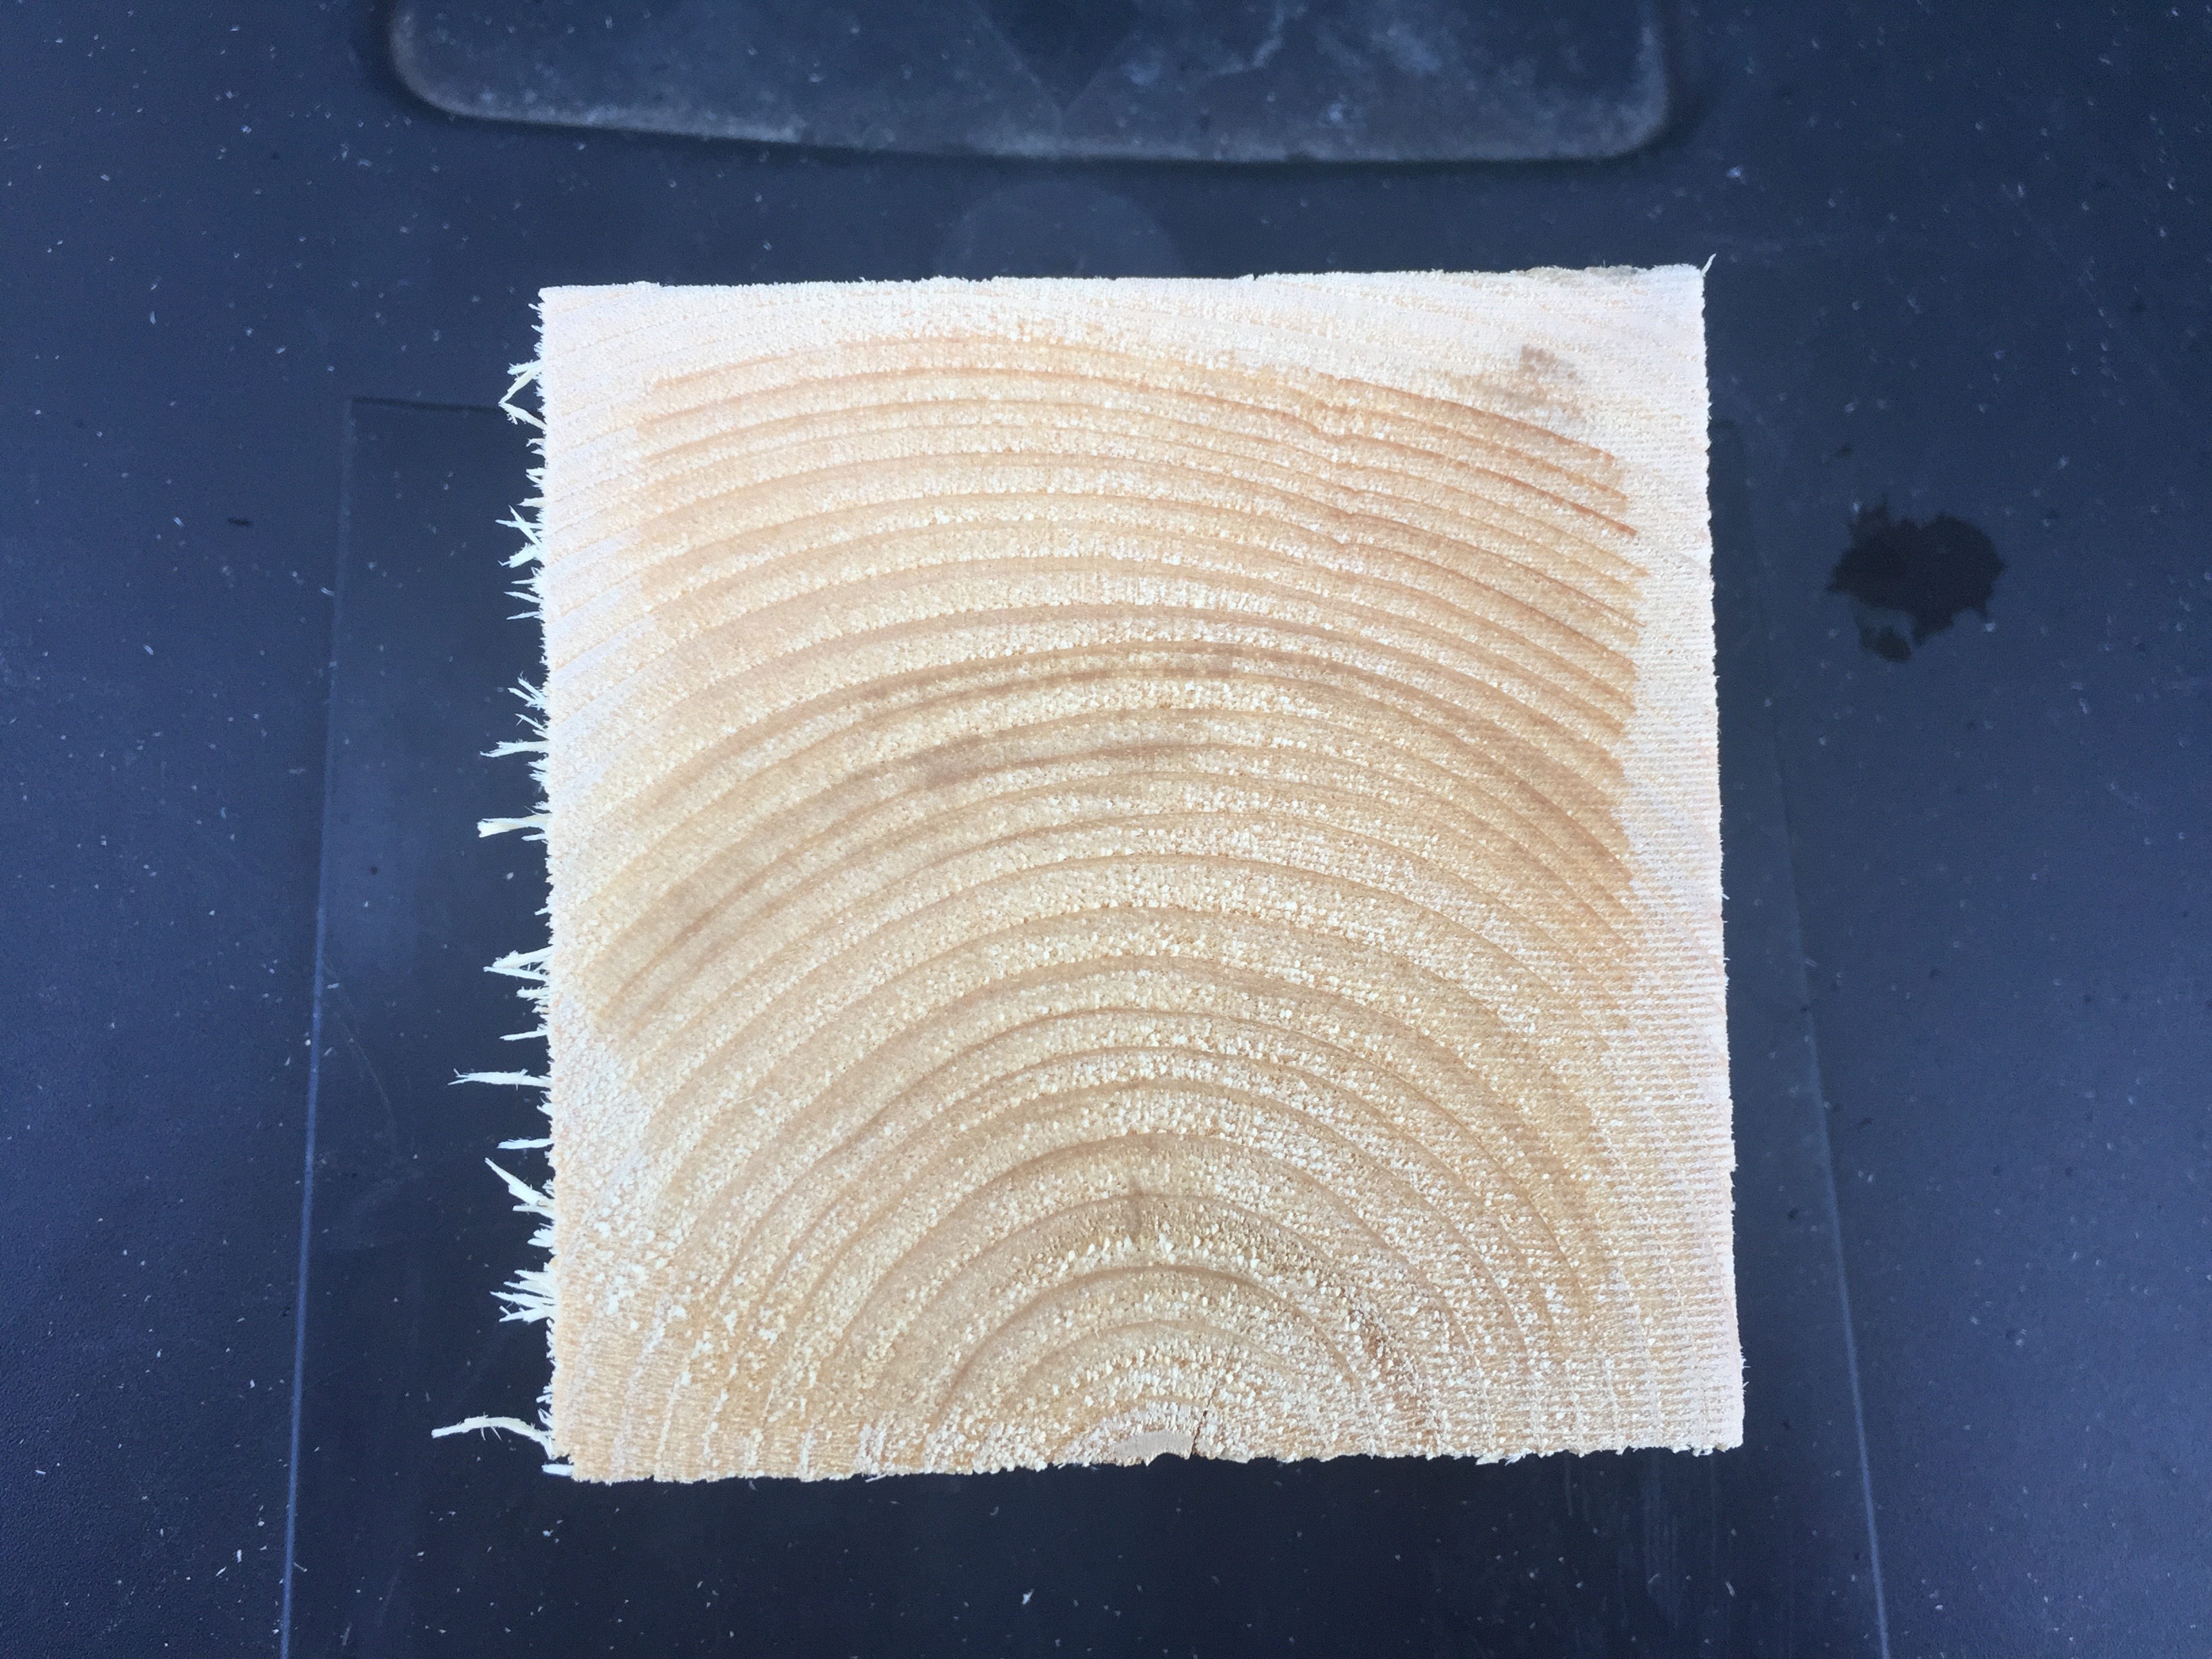
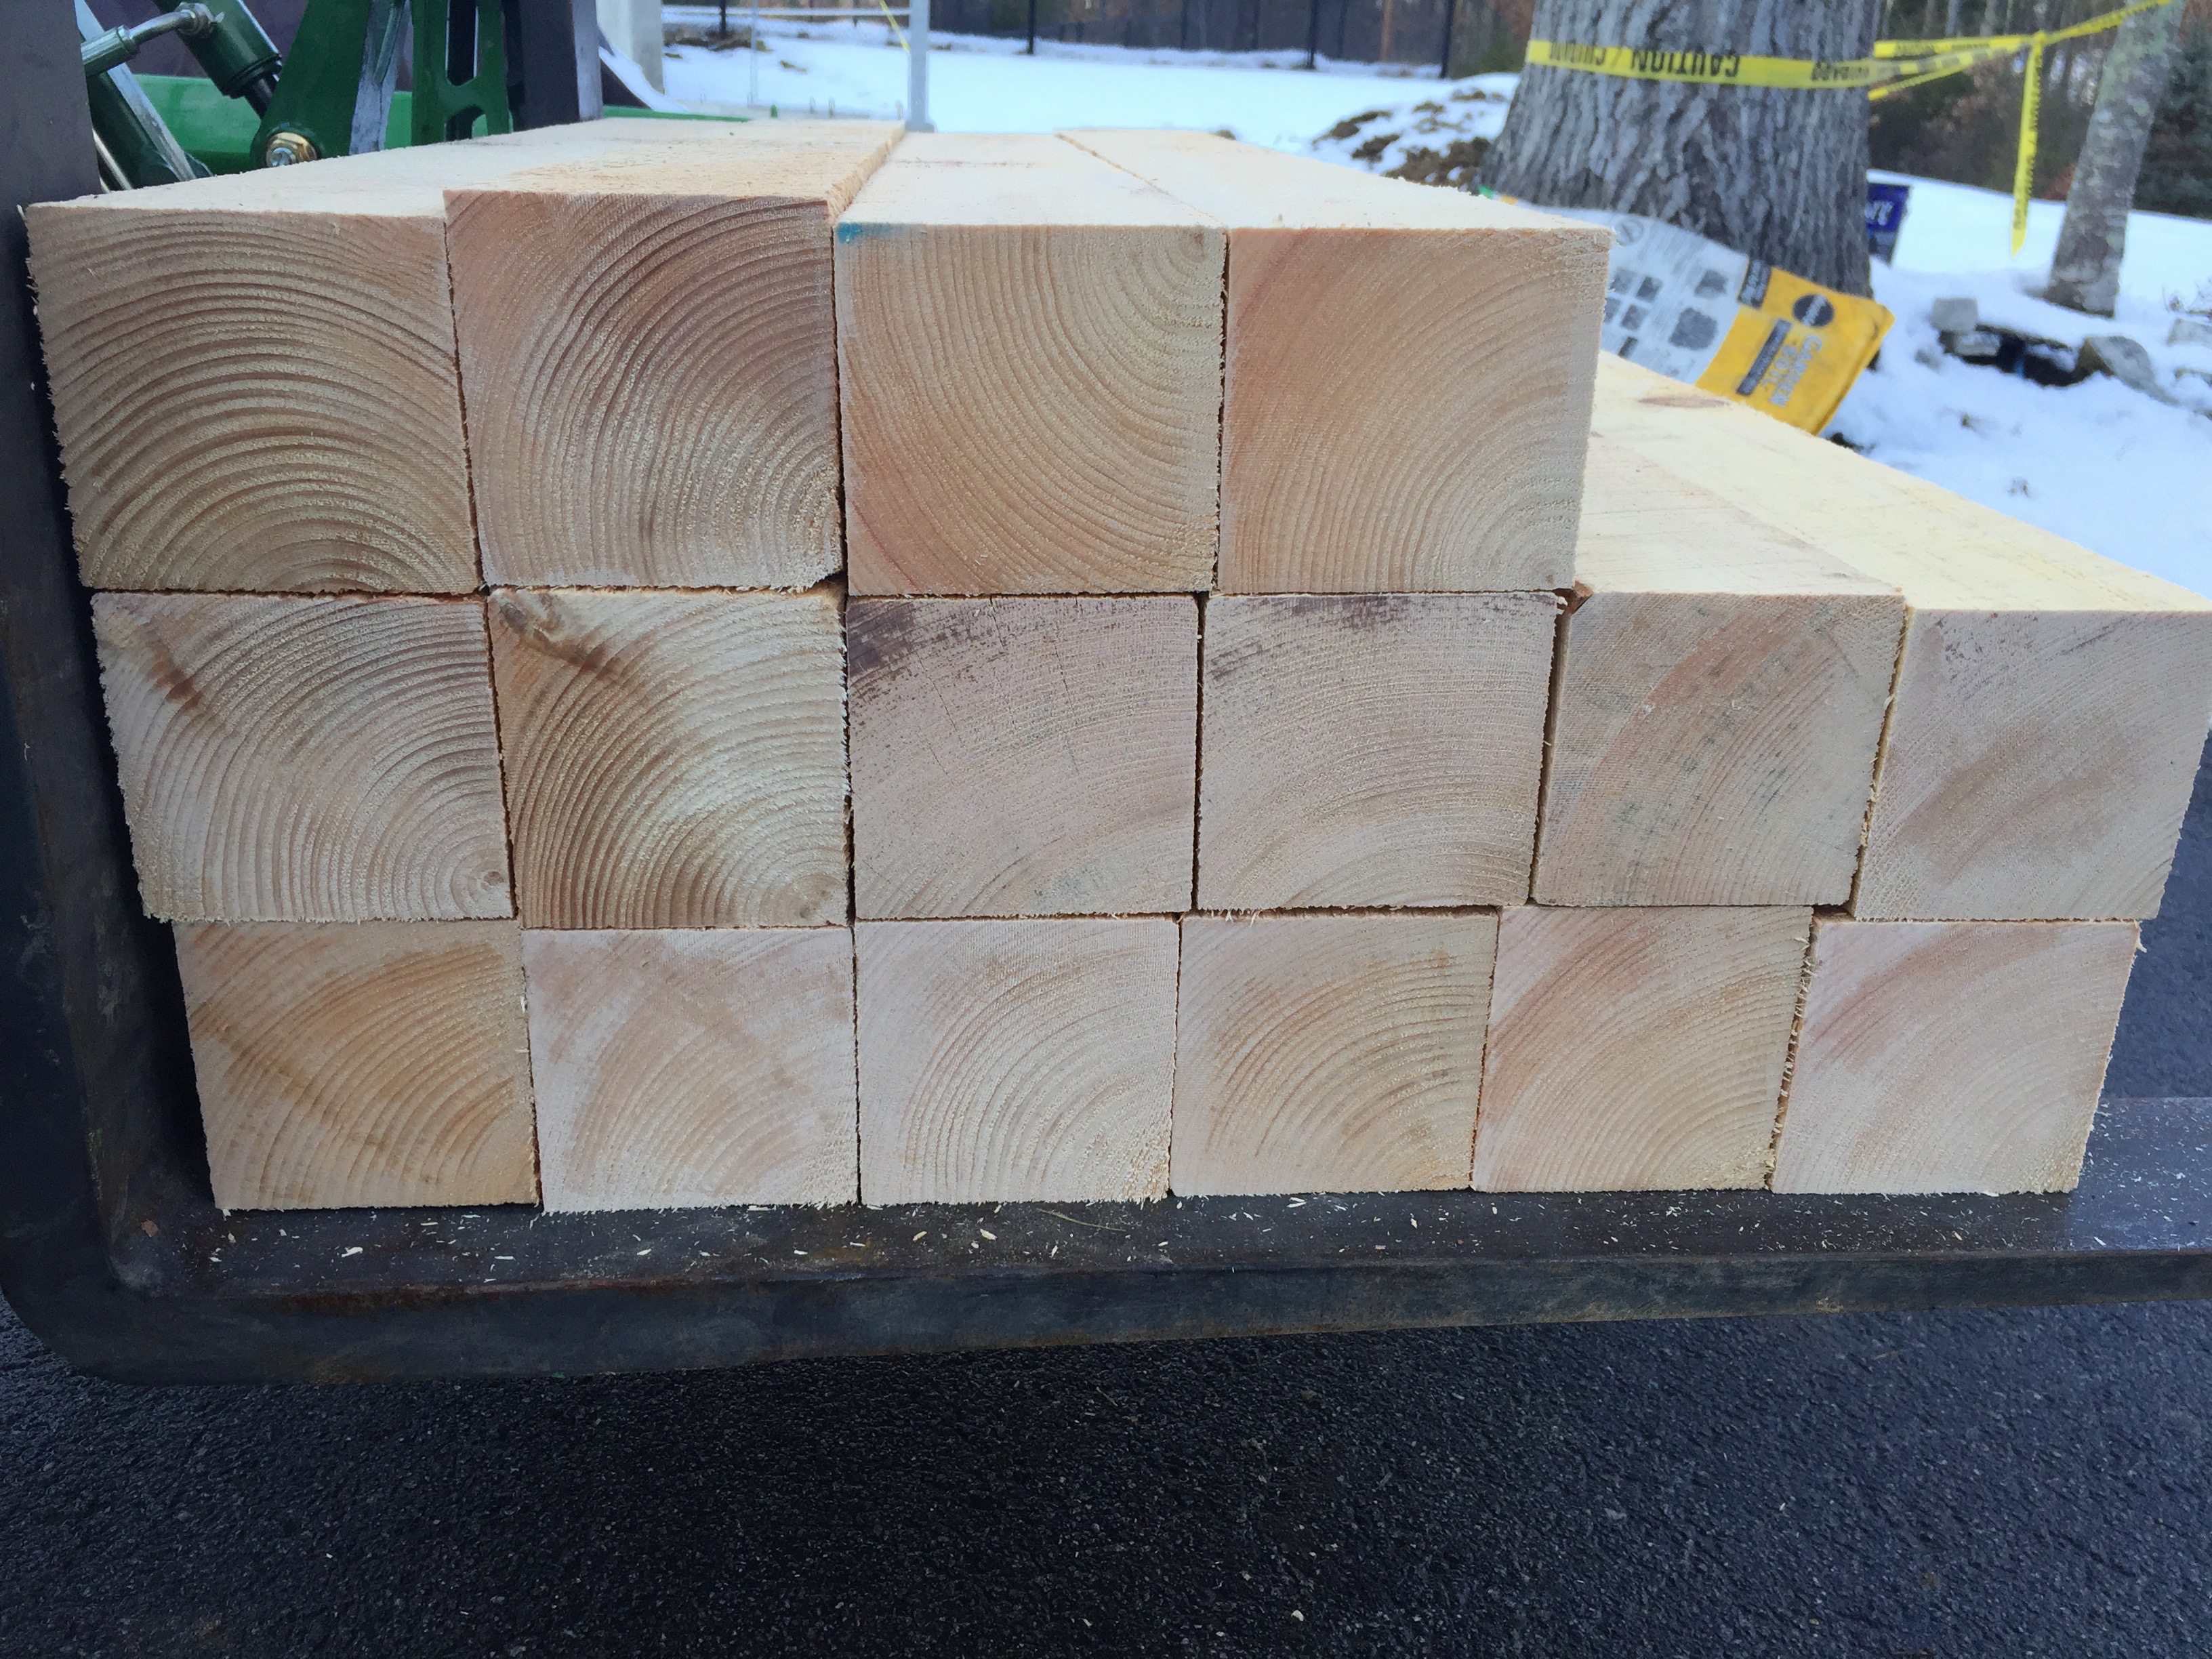
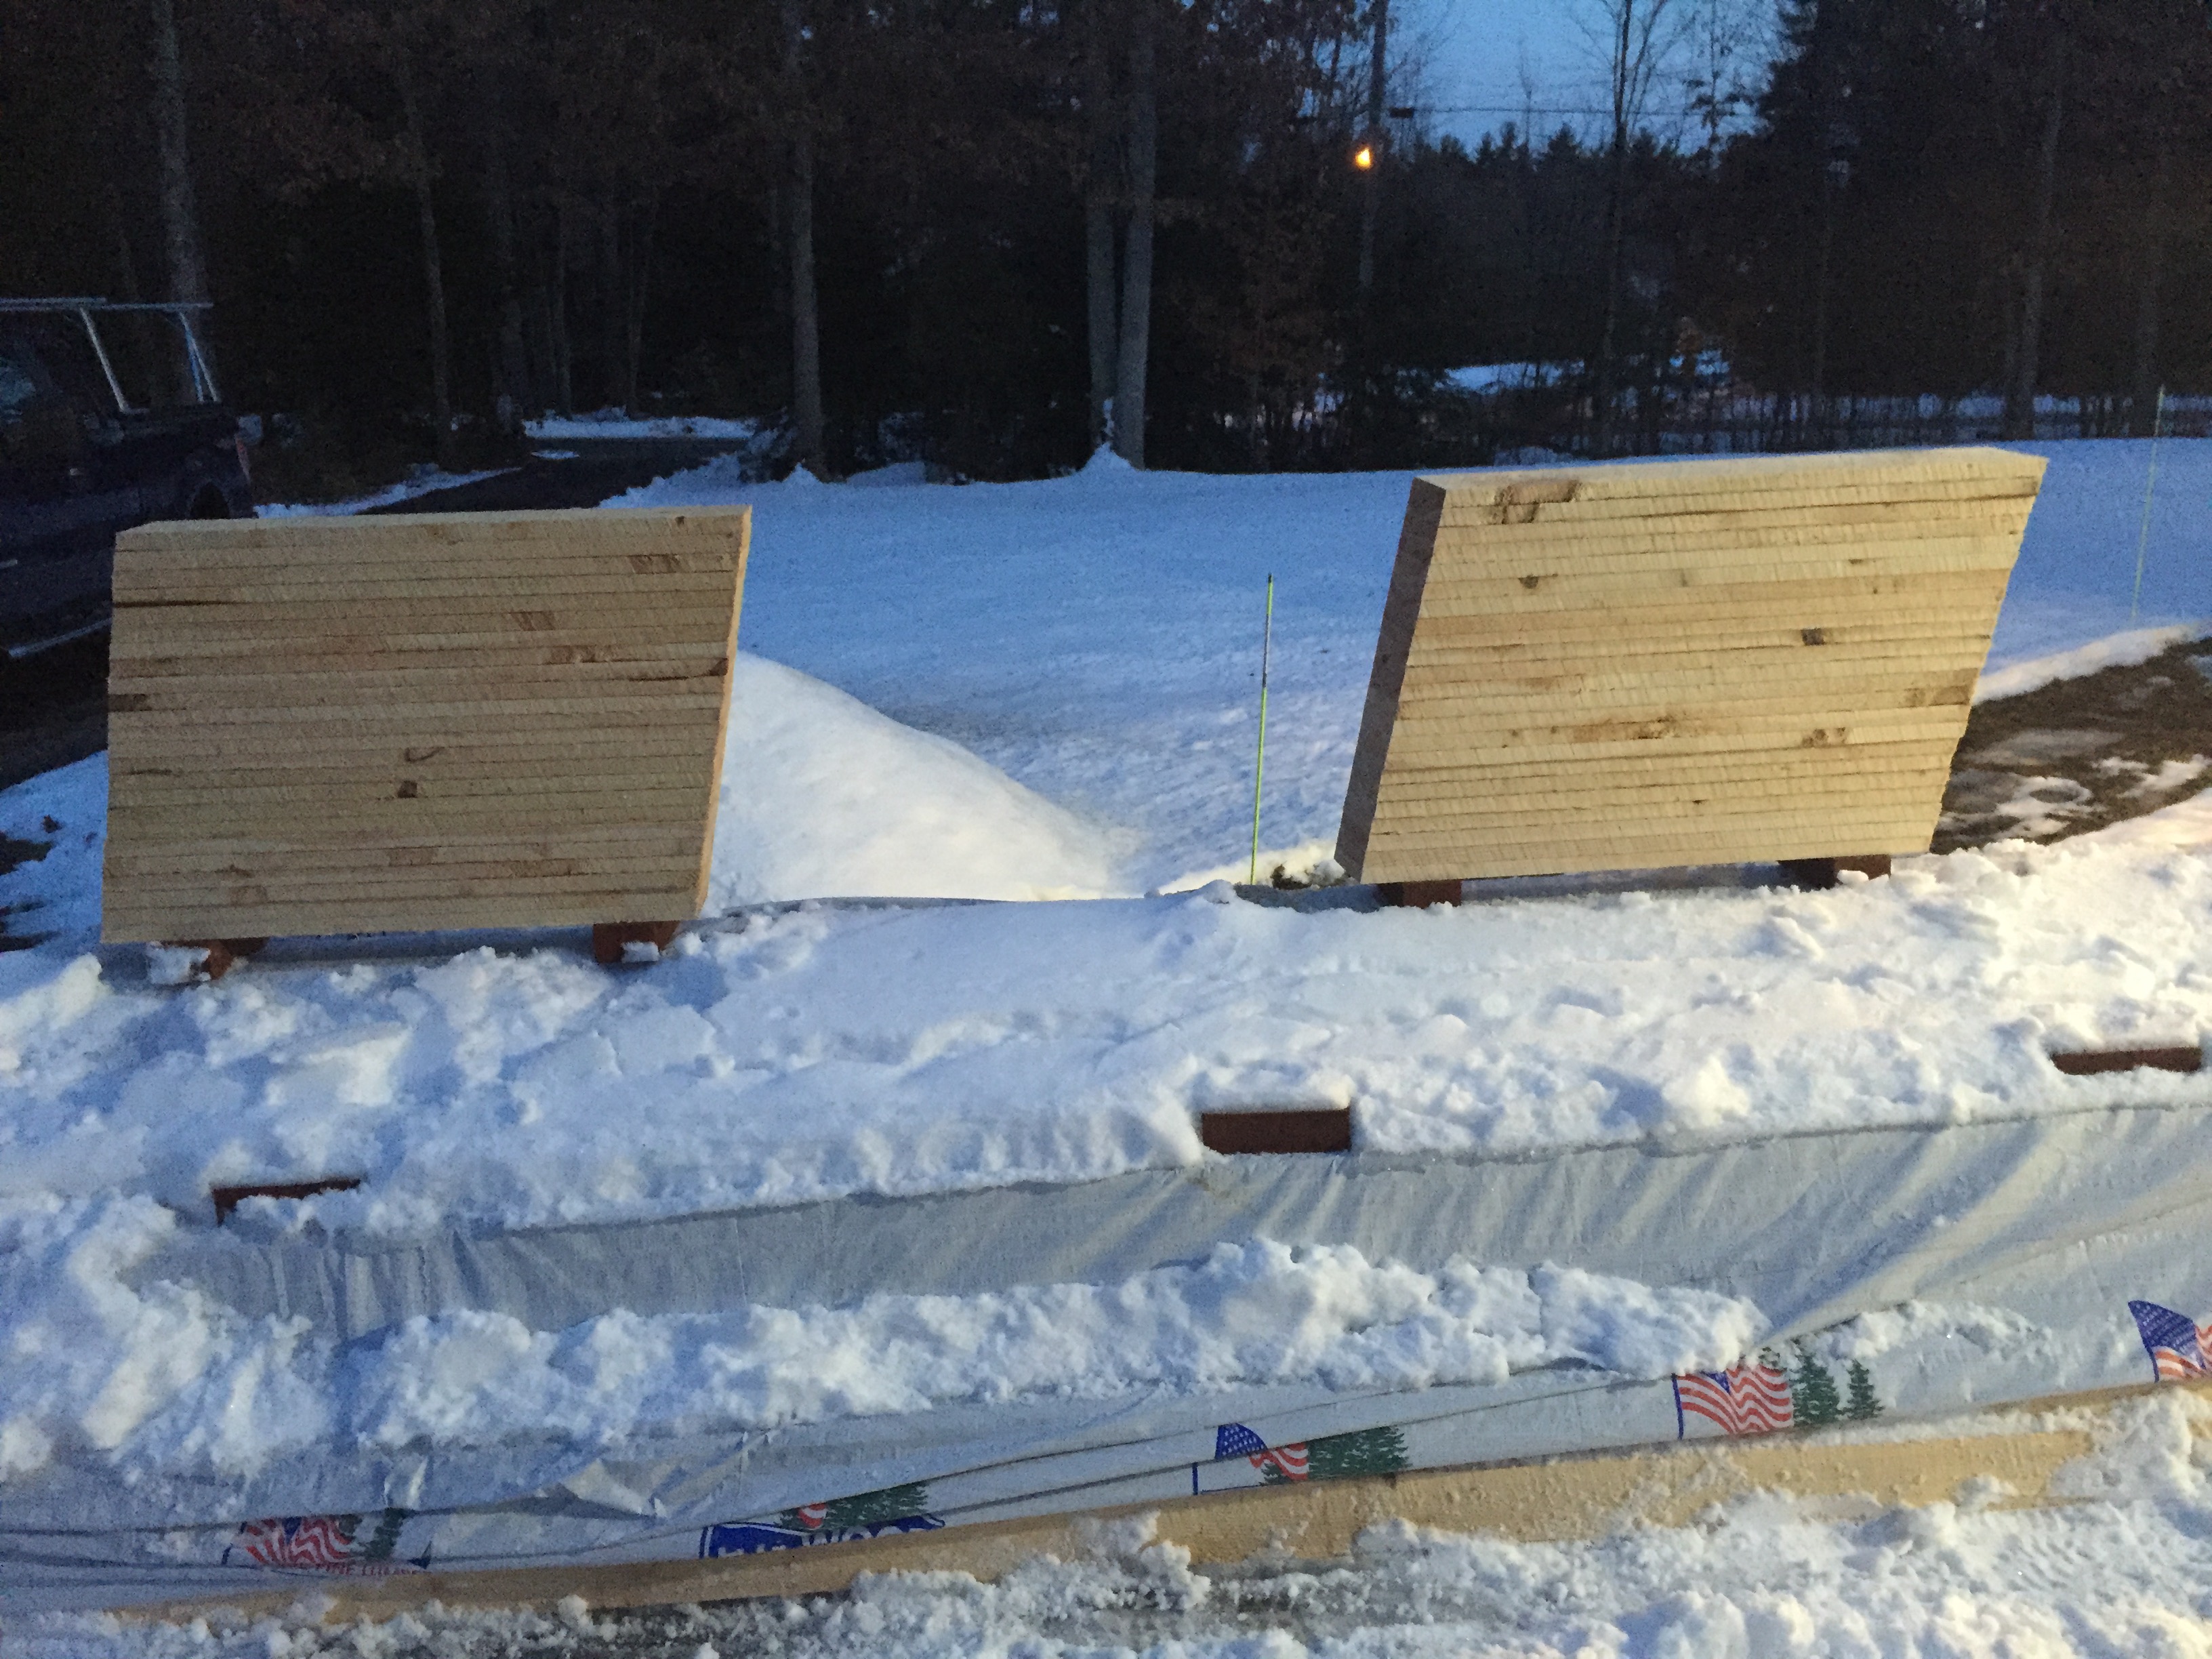
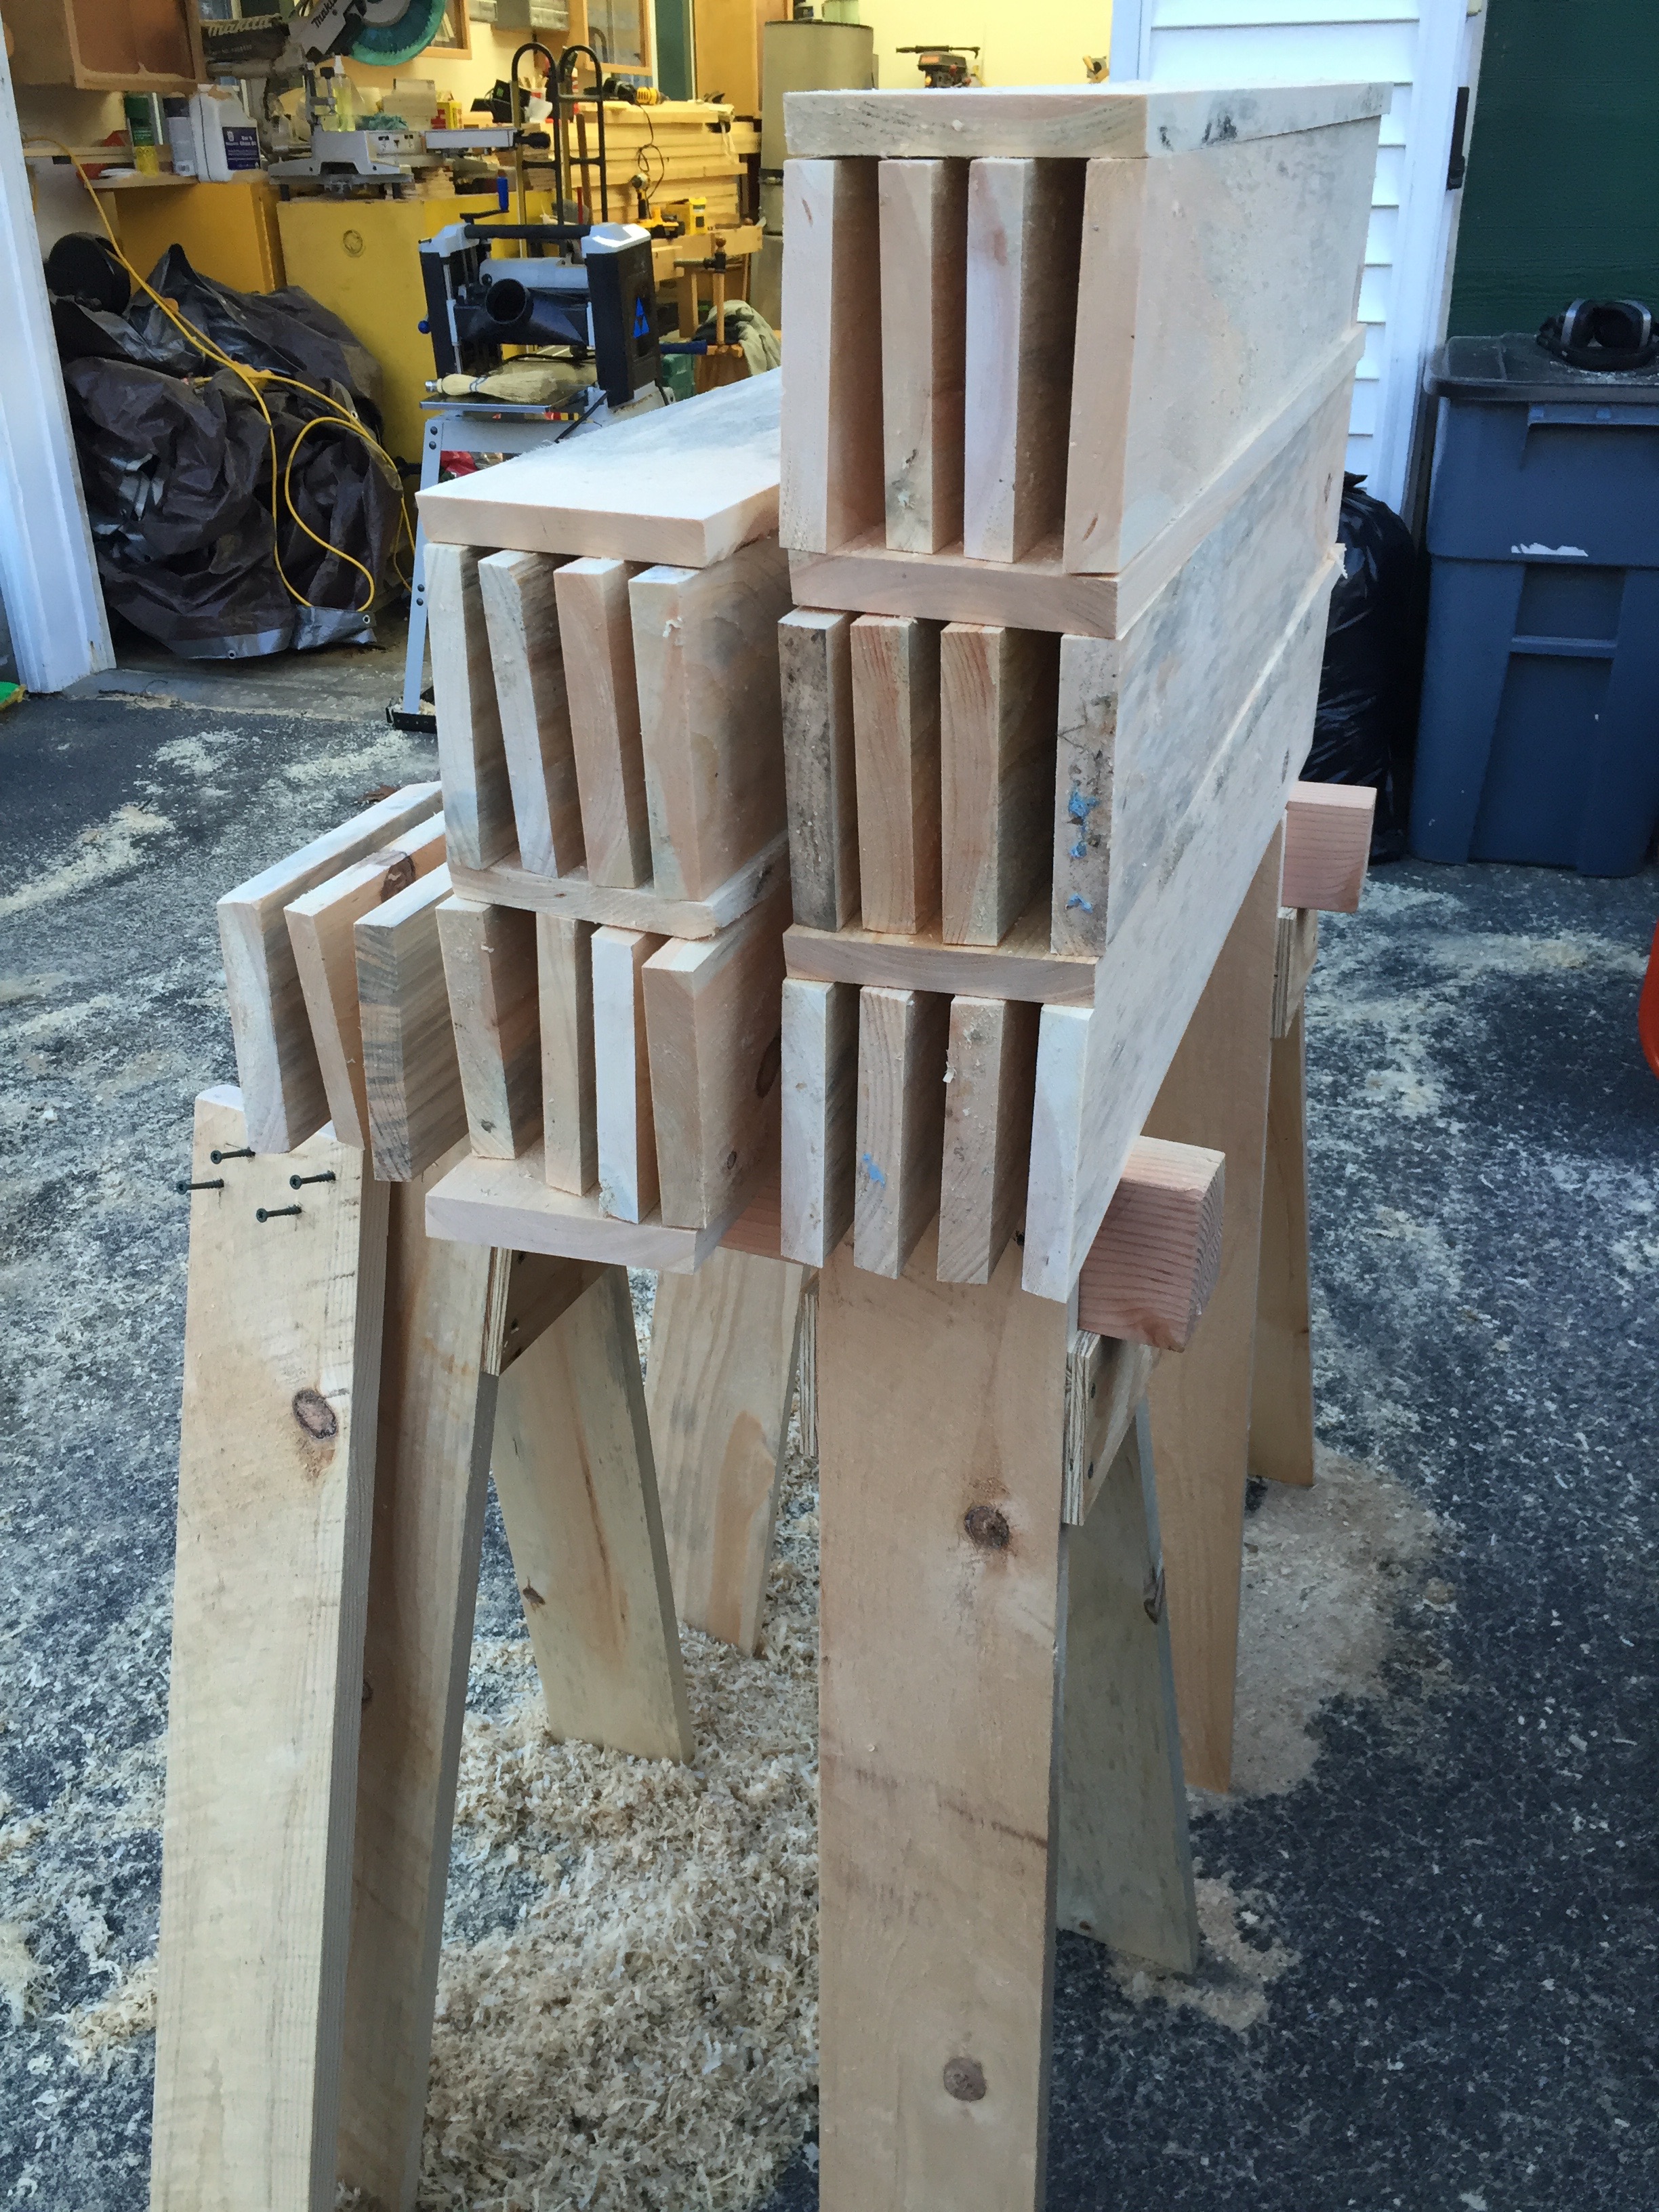
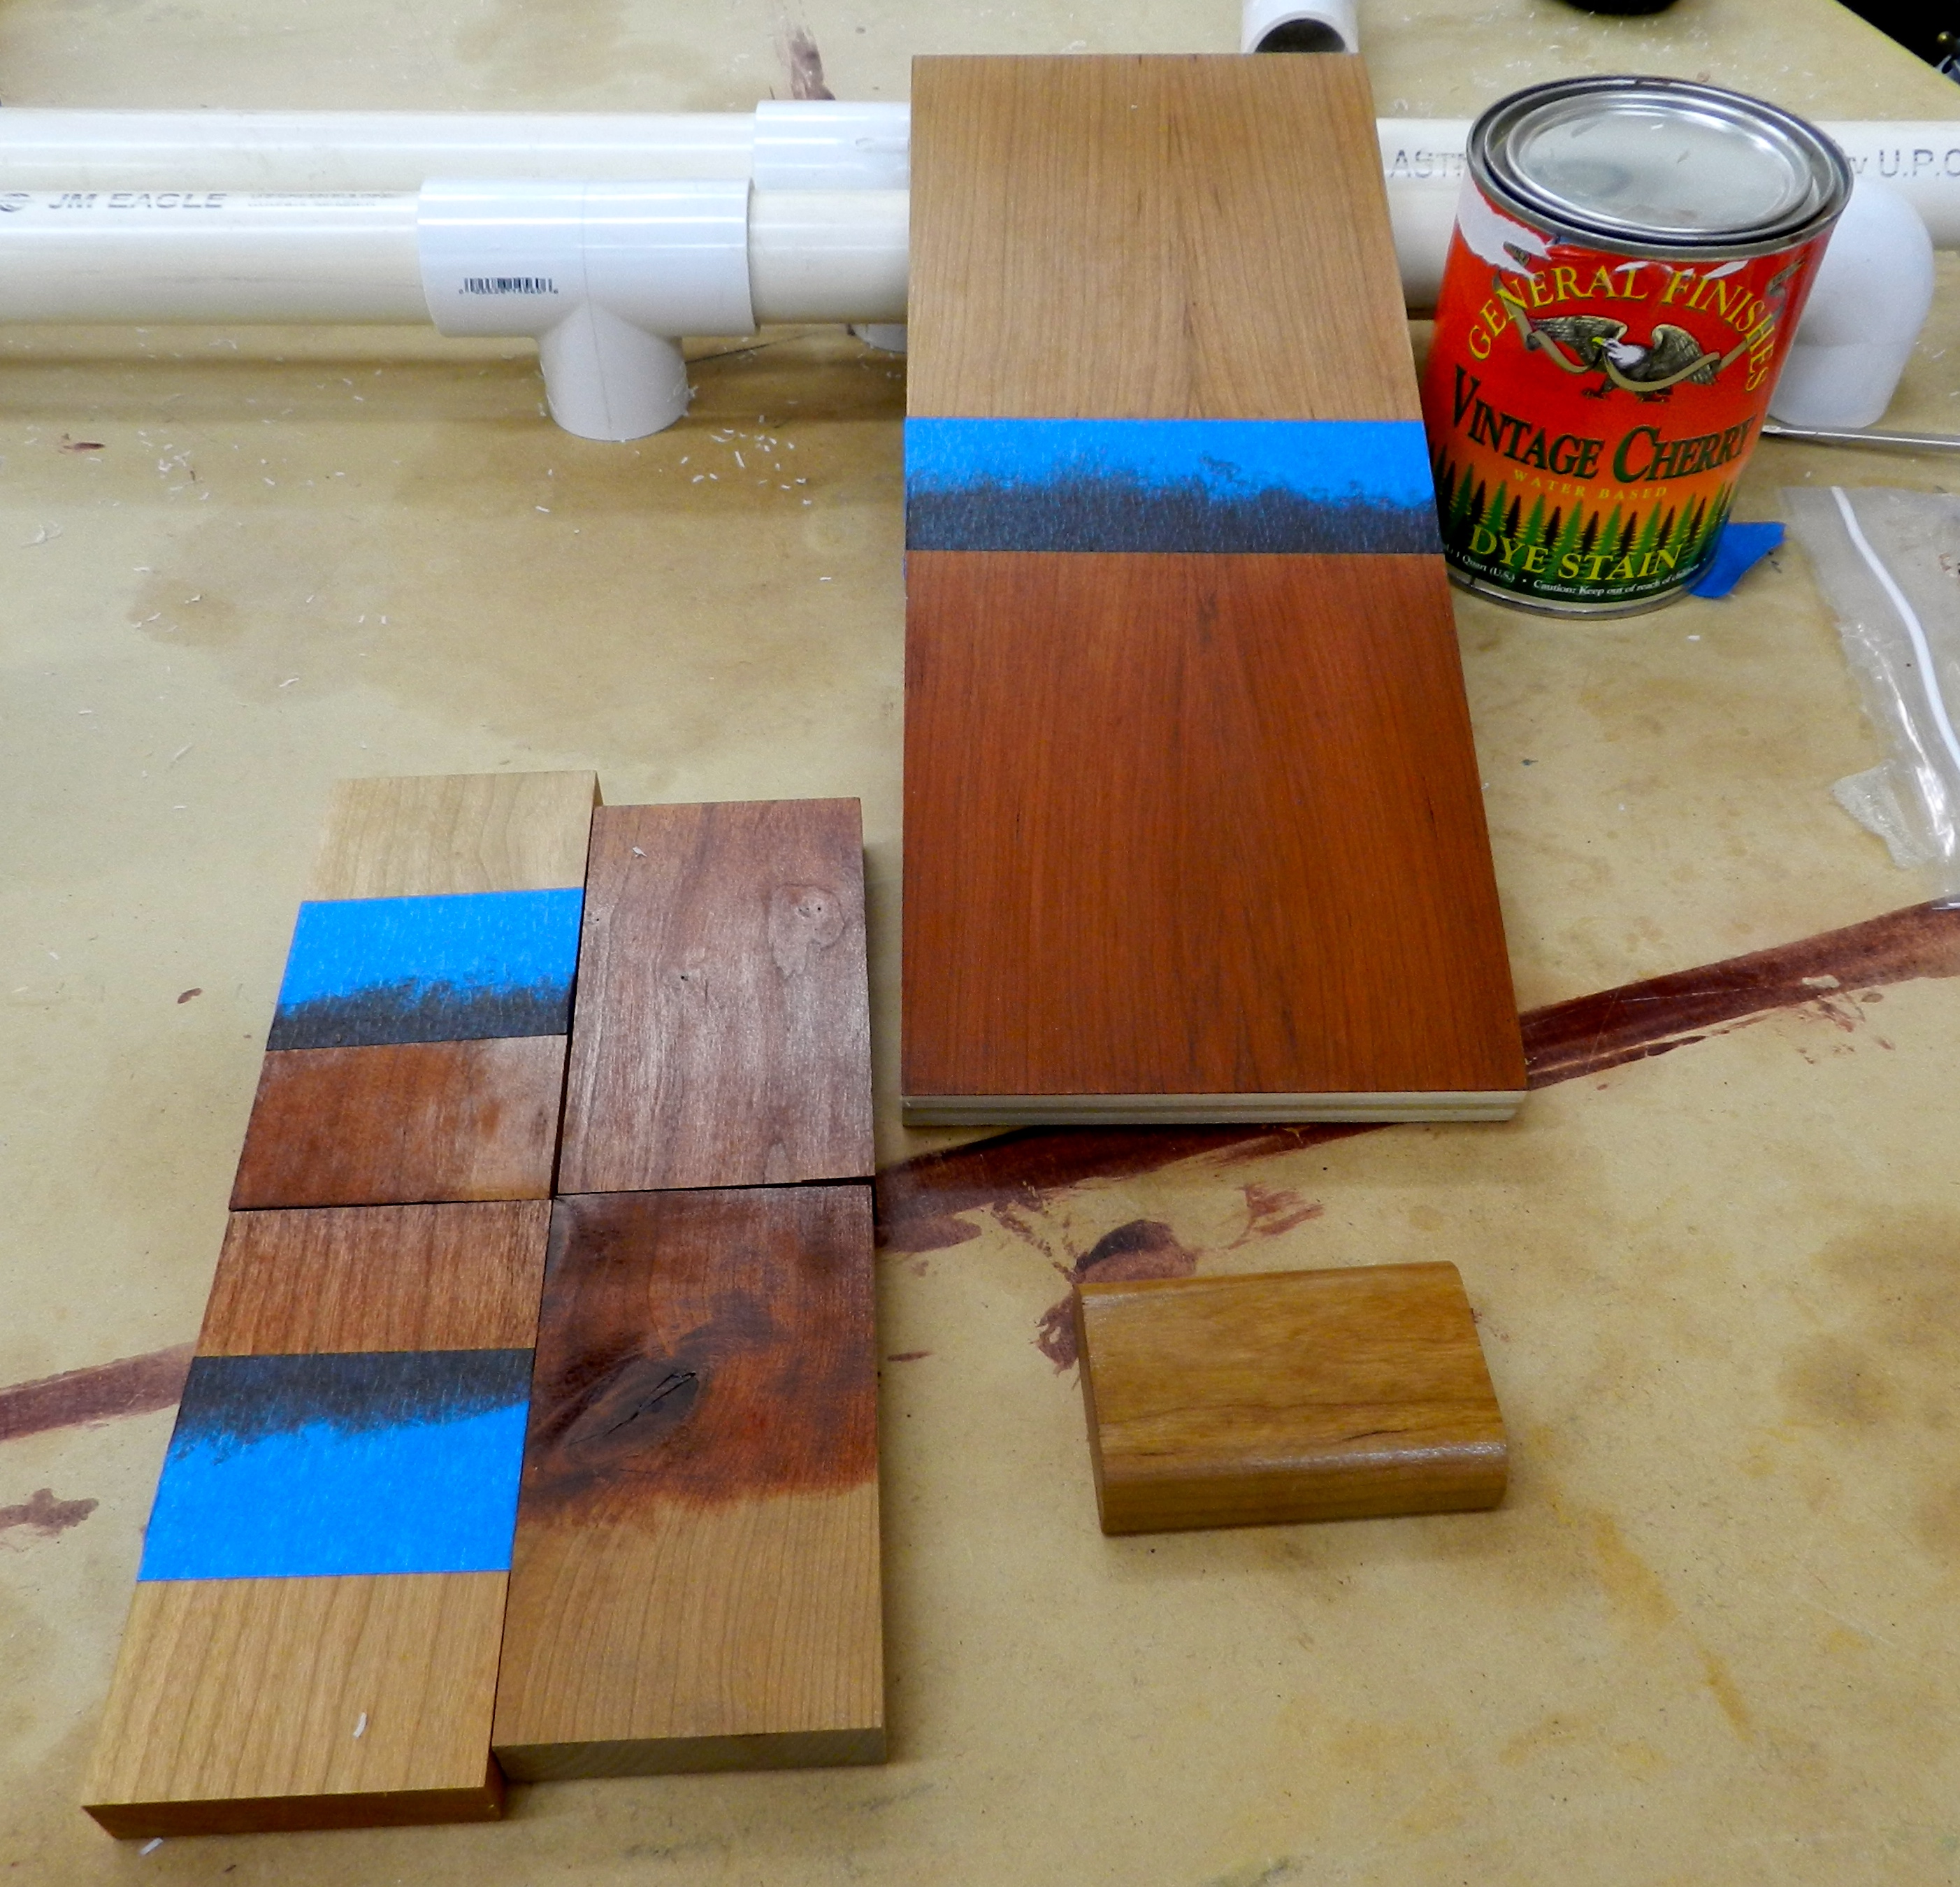
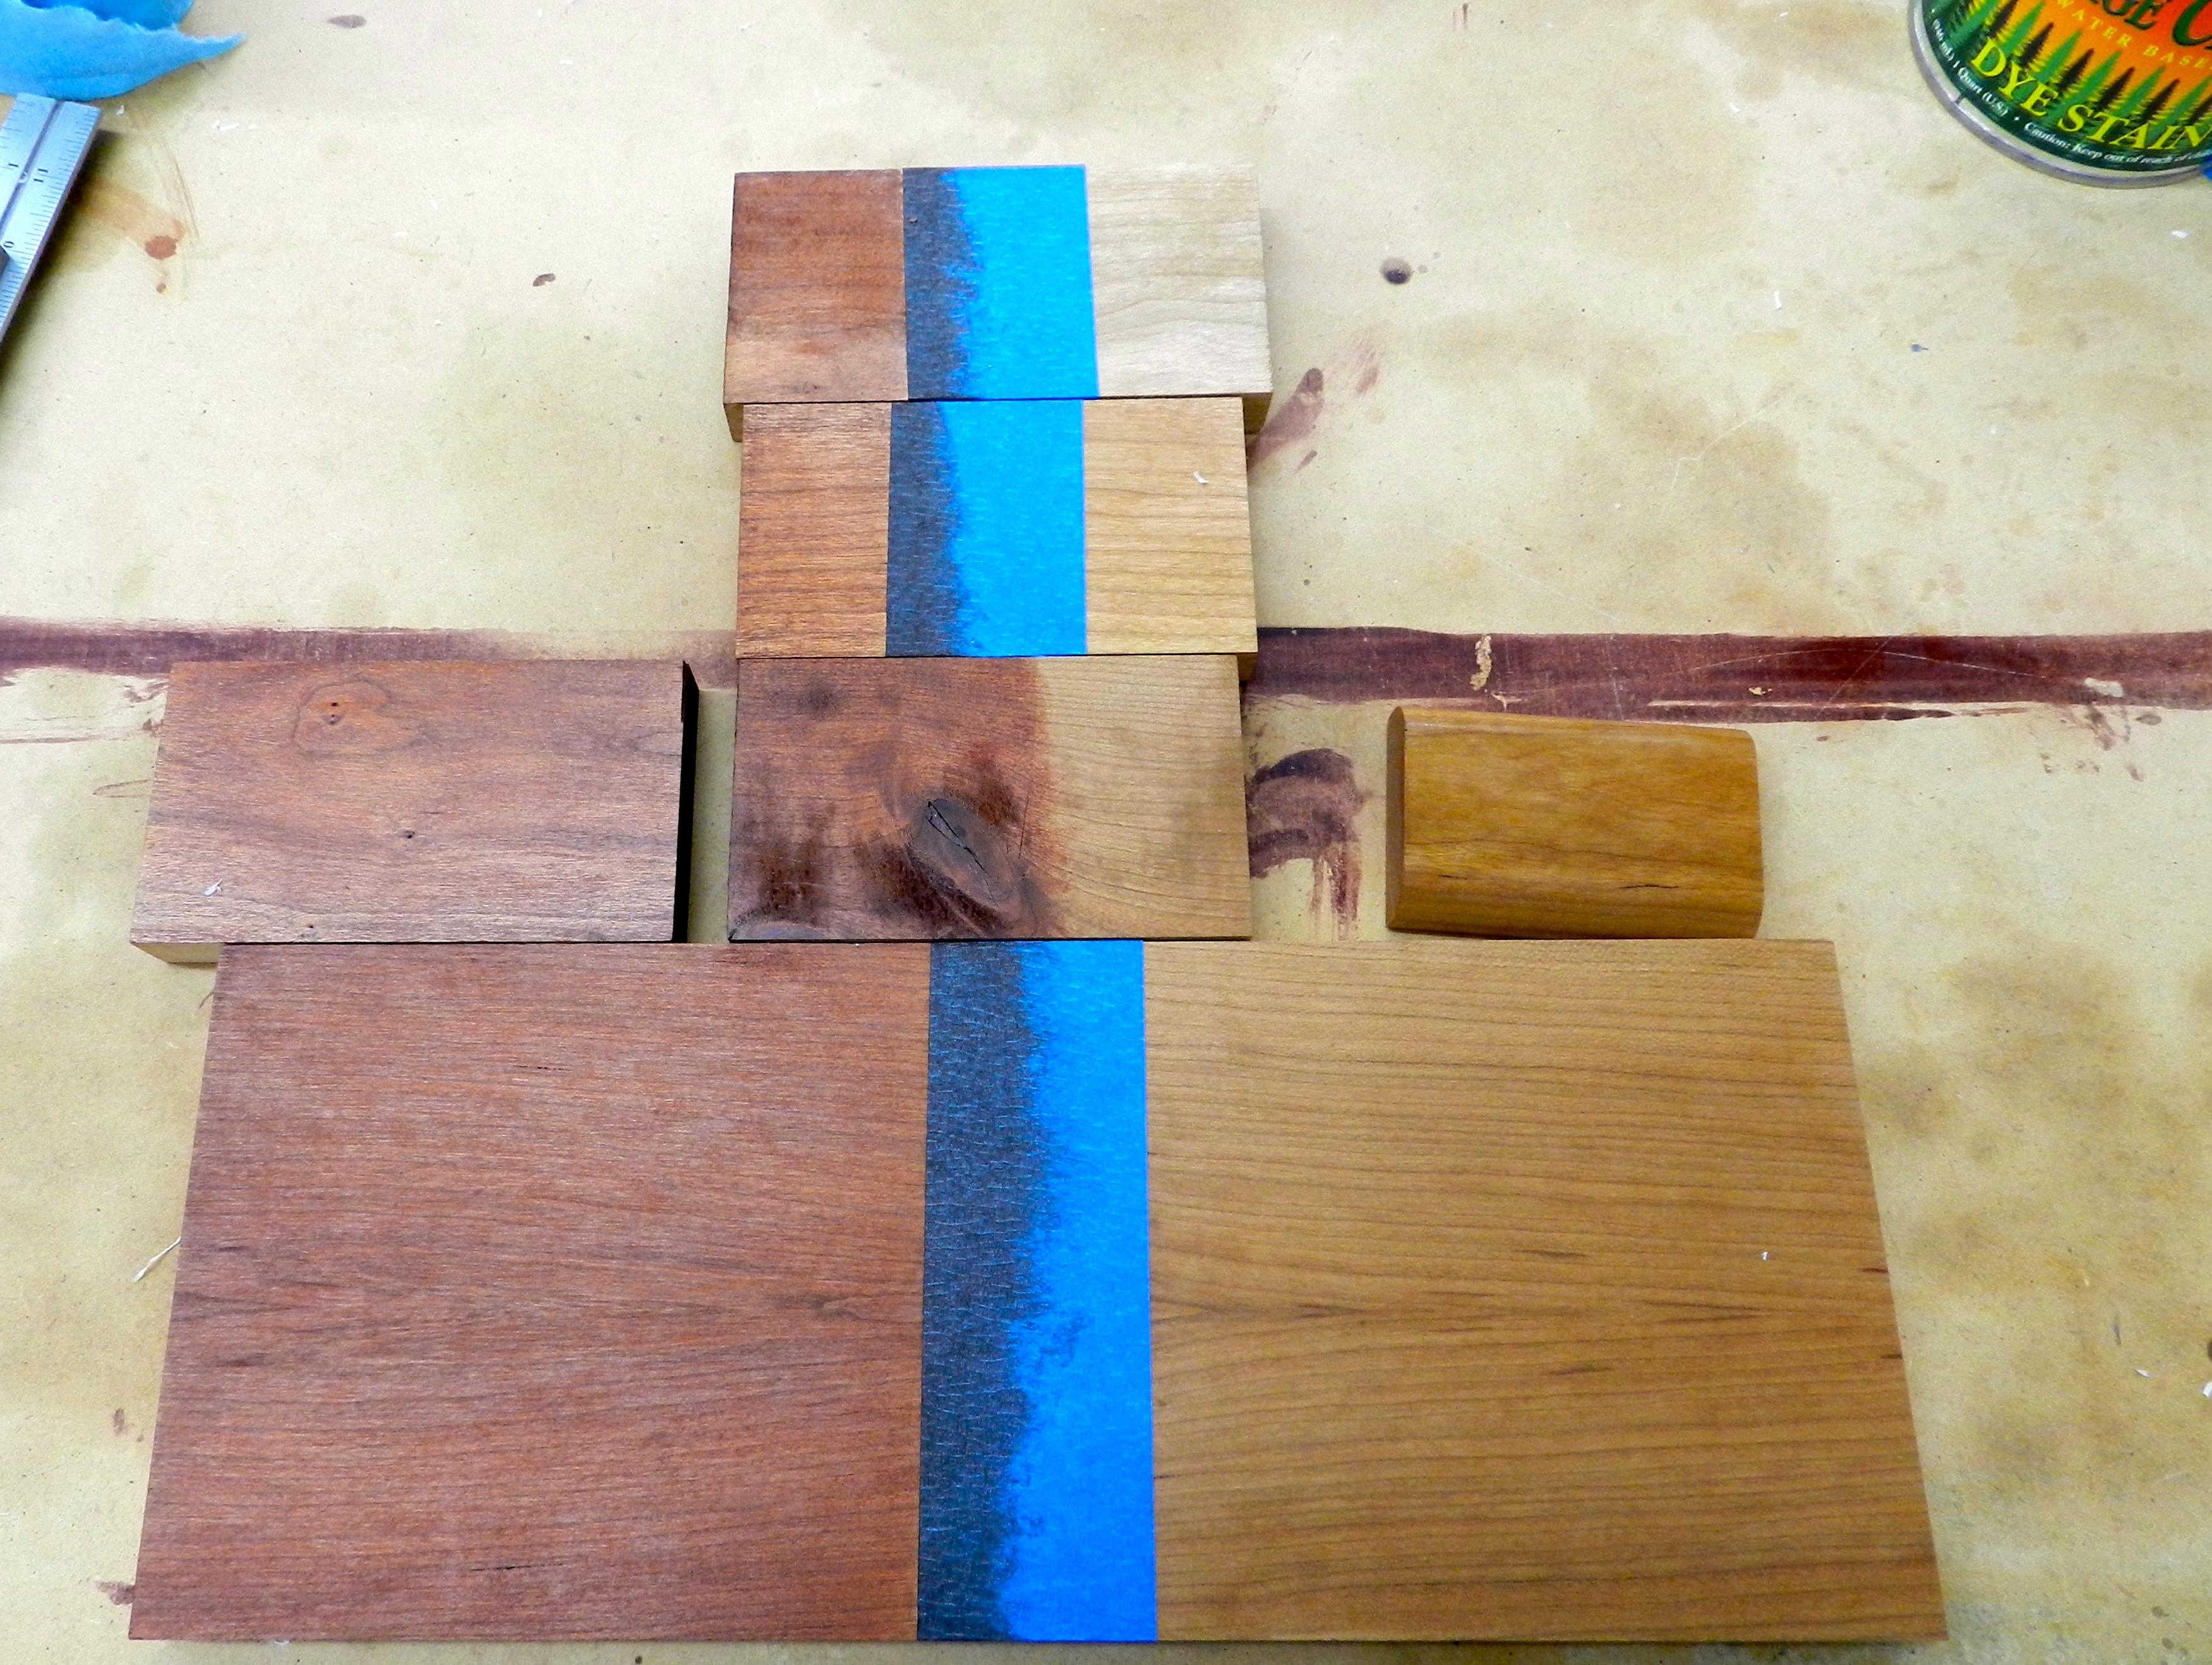
The freshly milled eastern white pine pine is a very pale white.

Applied amber shellac to give the pint some color. Followed this up with some UV stabilized satin water based polyurethane.

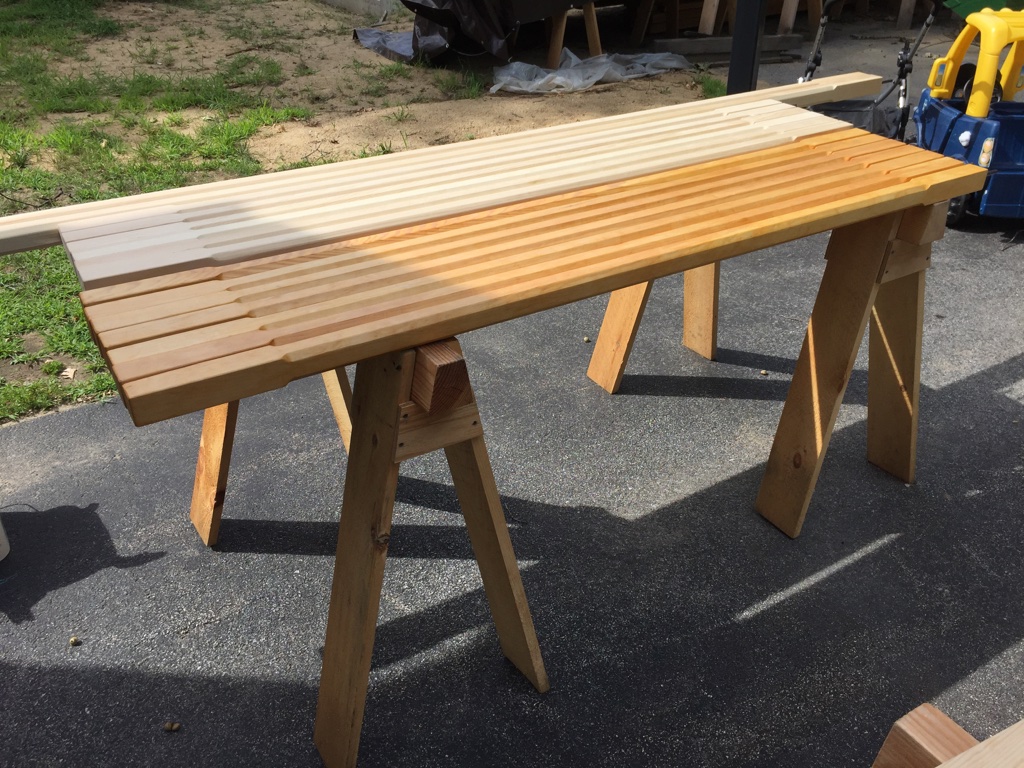
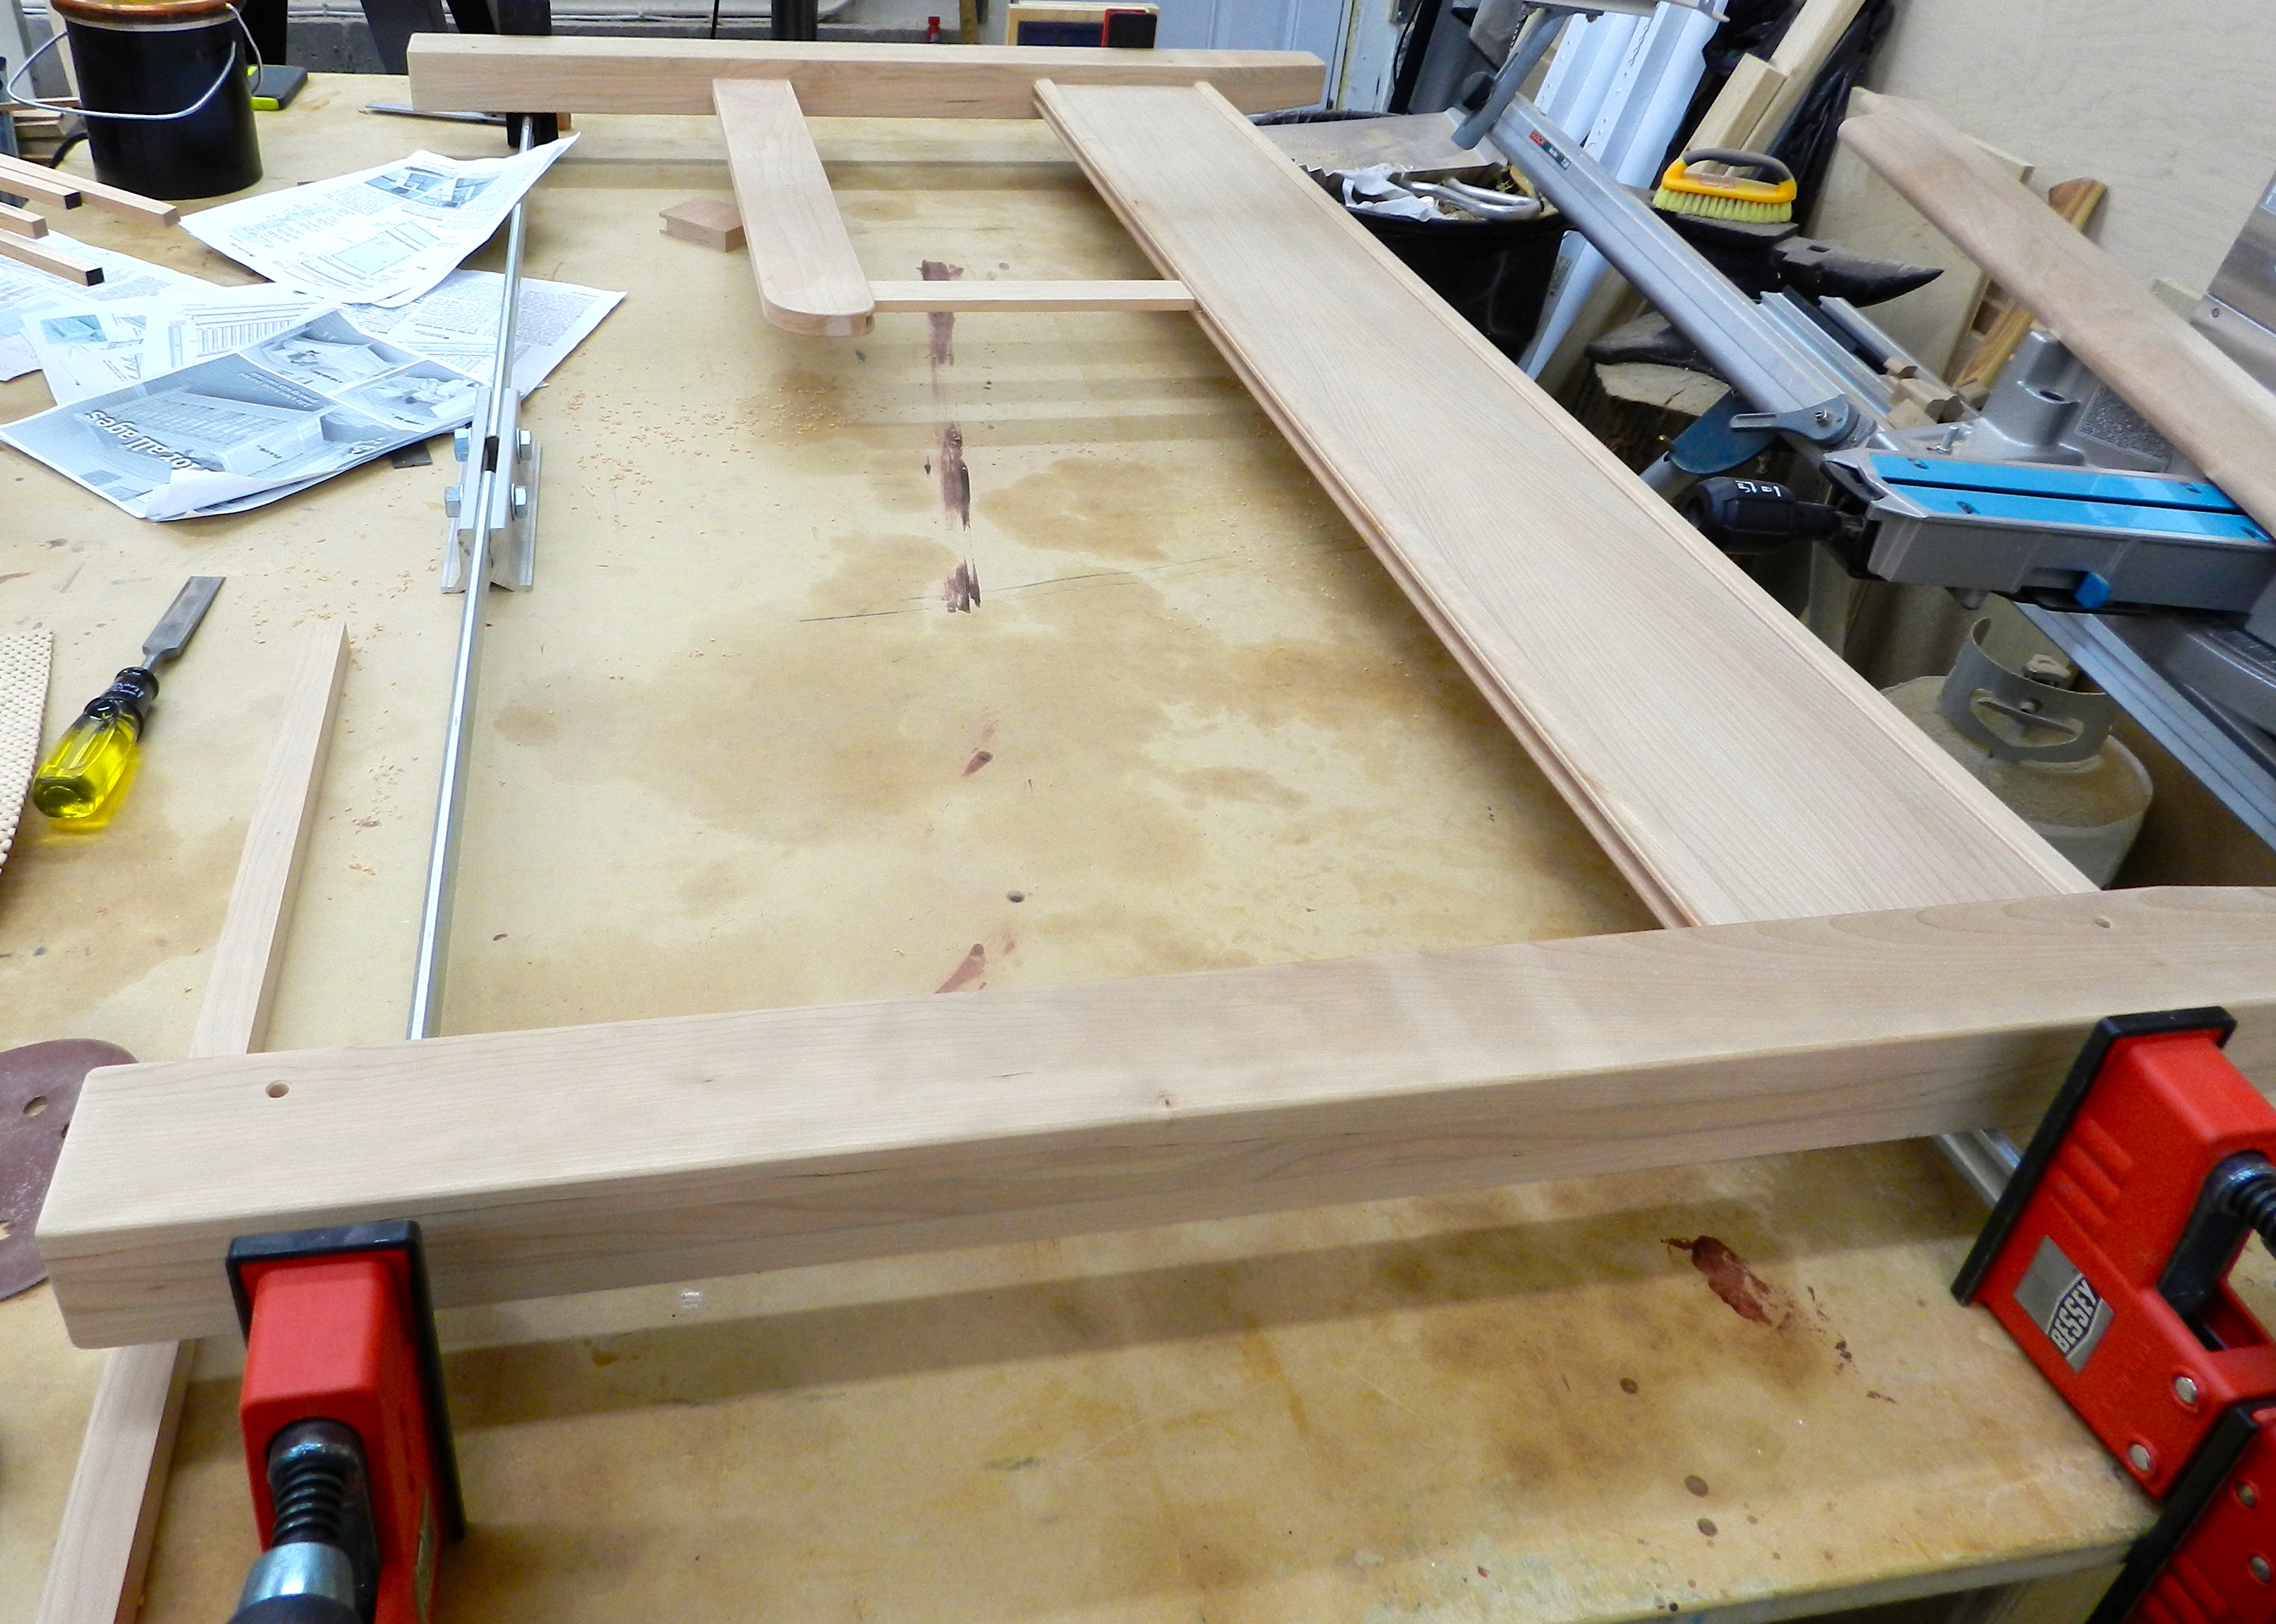
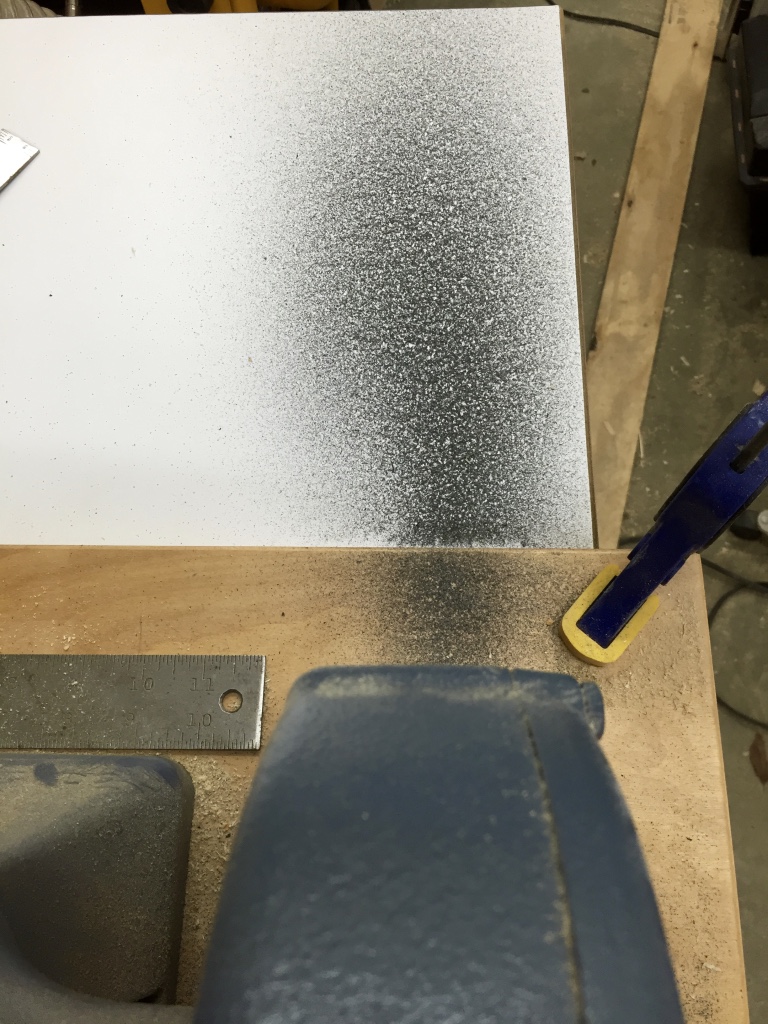
To give the wood a more pleasing color I gave it a coat or two of amber shellac. I then followed that up with two coats of a UV stabilized General Finishes satin polyurethane, sanding between coats as need.

Fitting the metal connector to support the top beams.

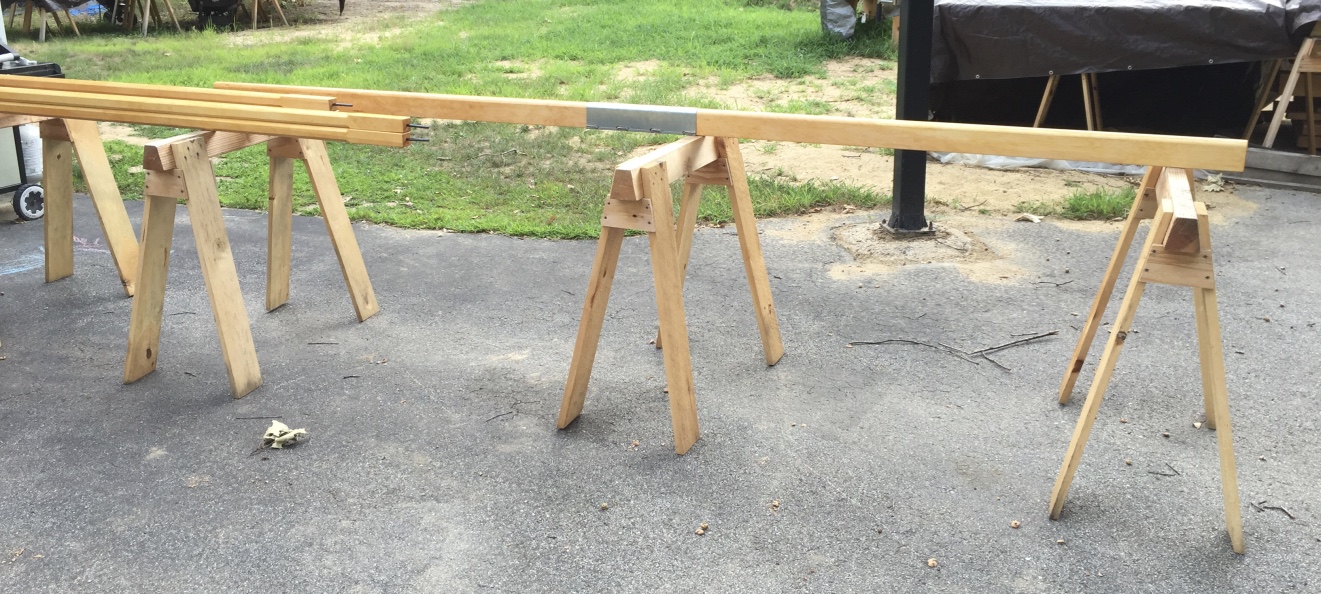
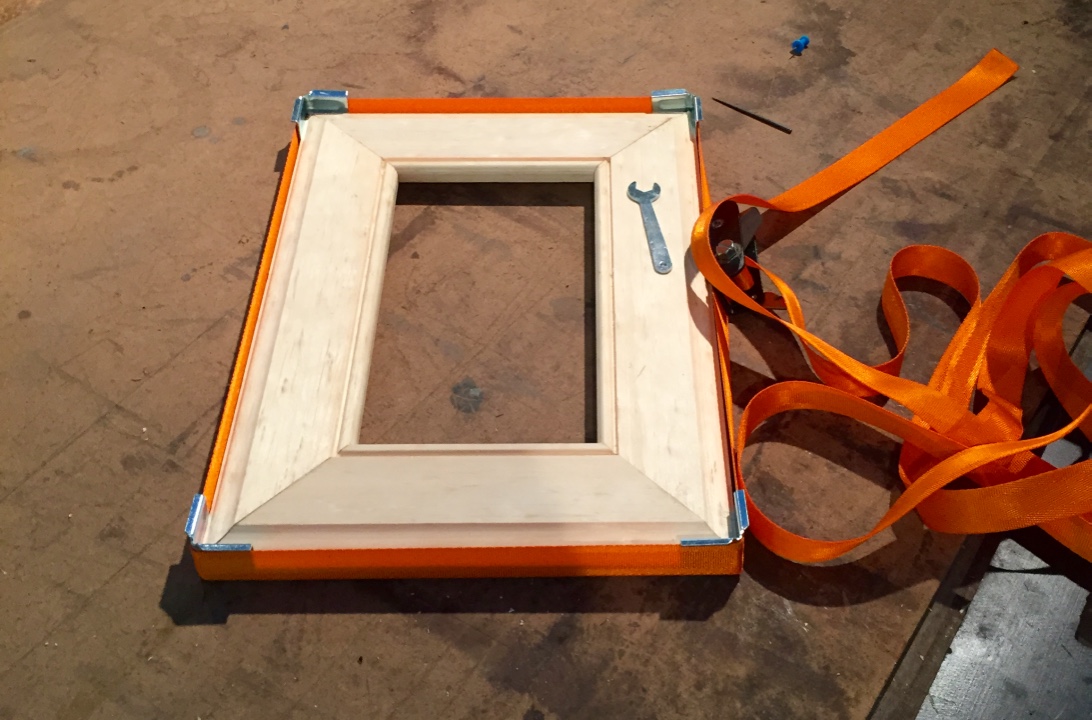
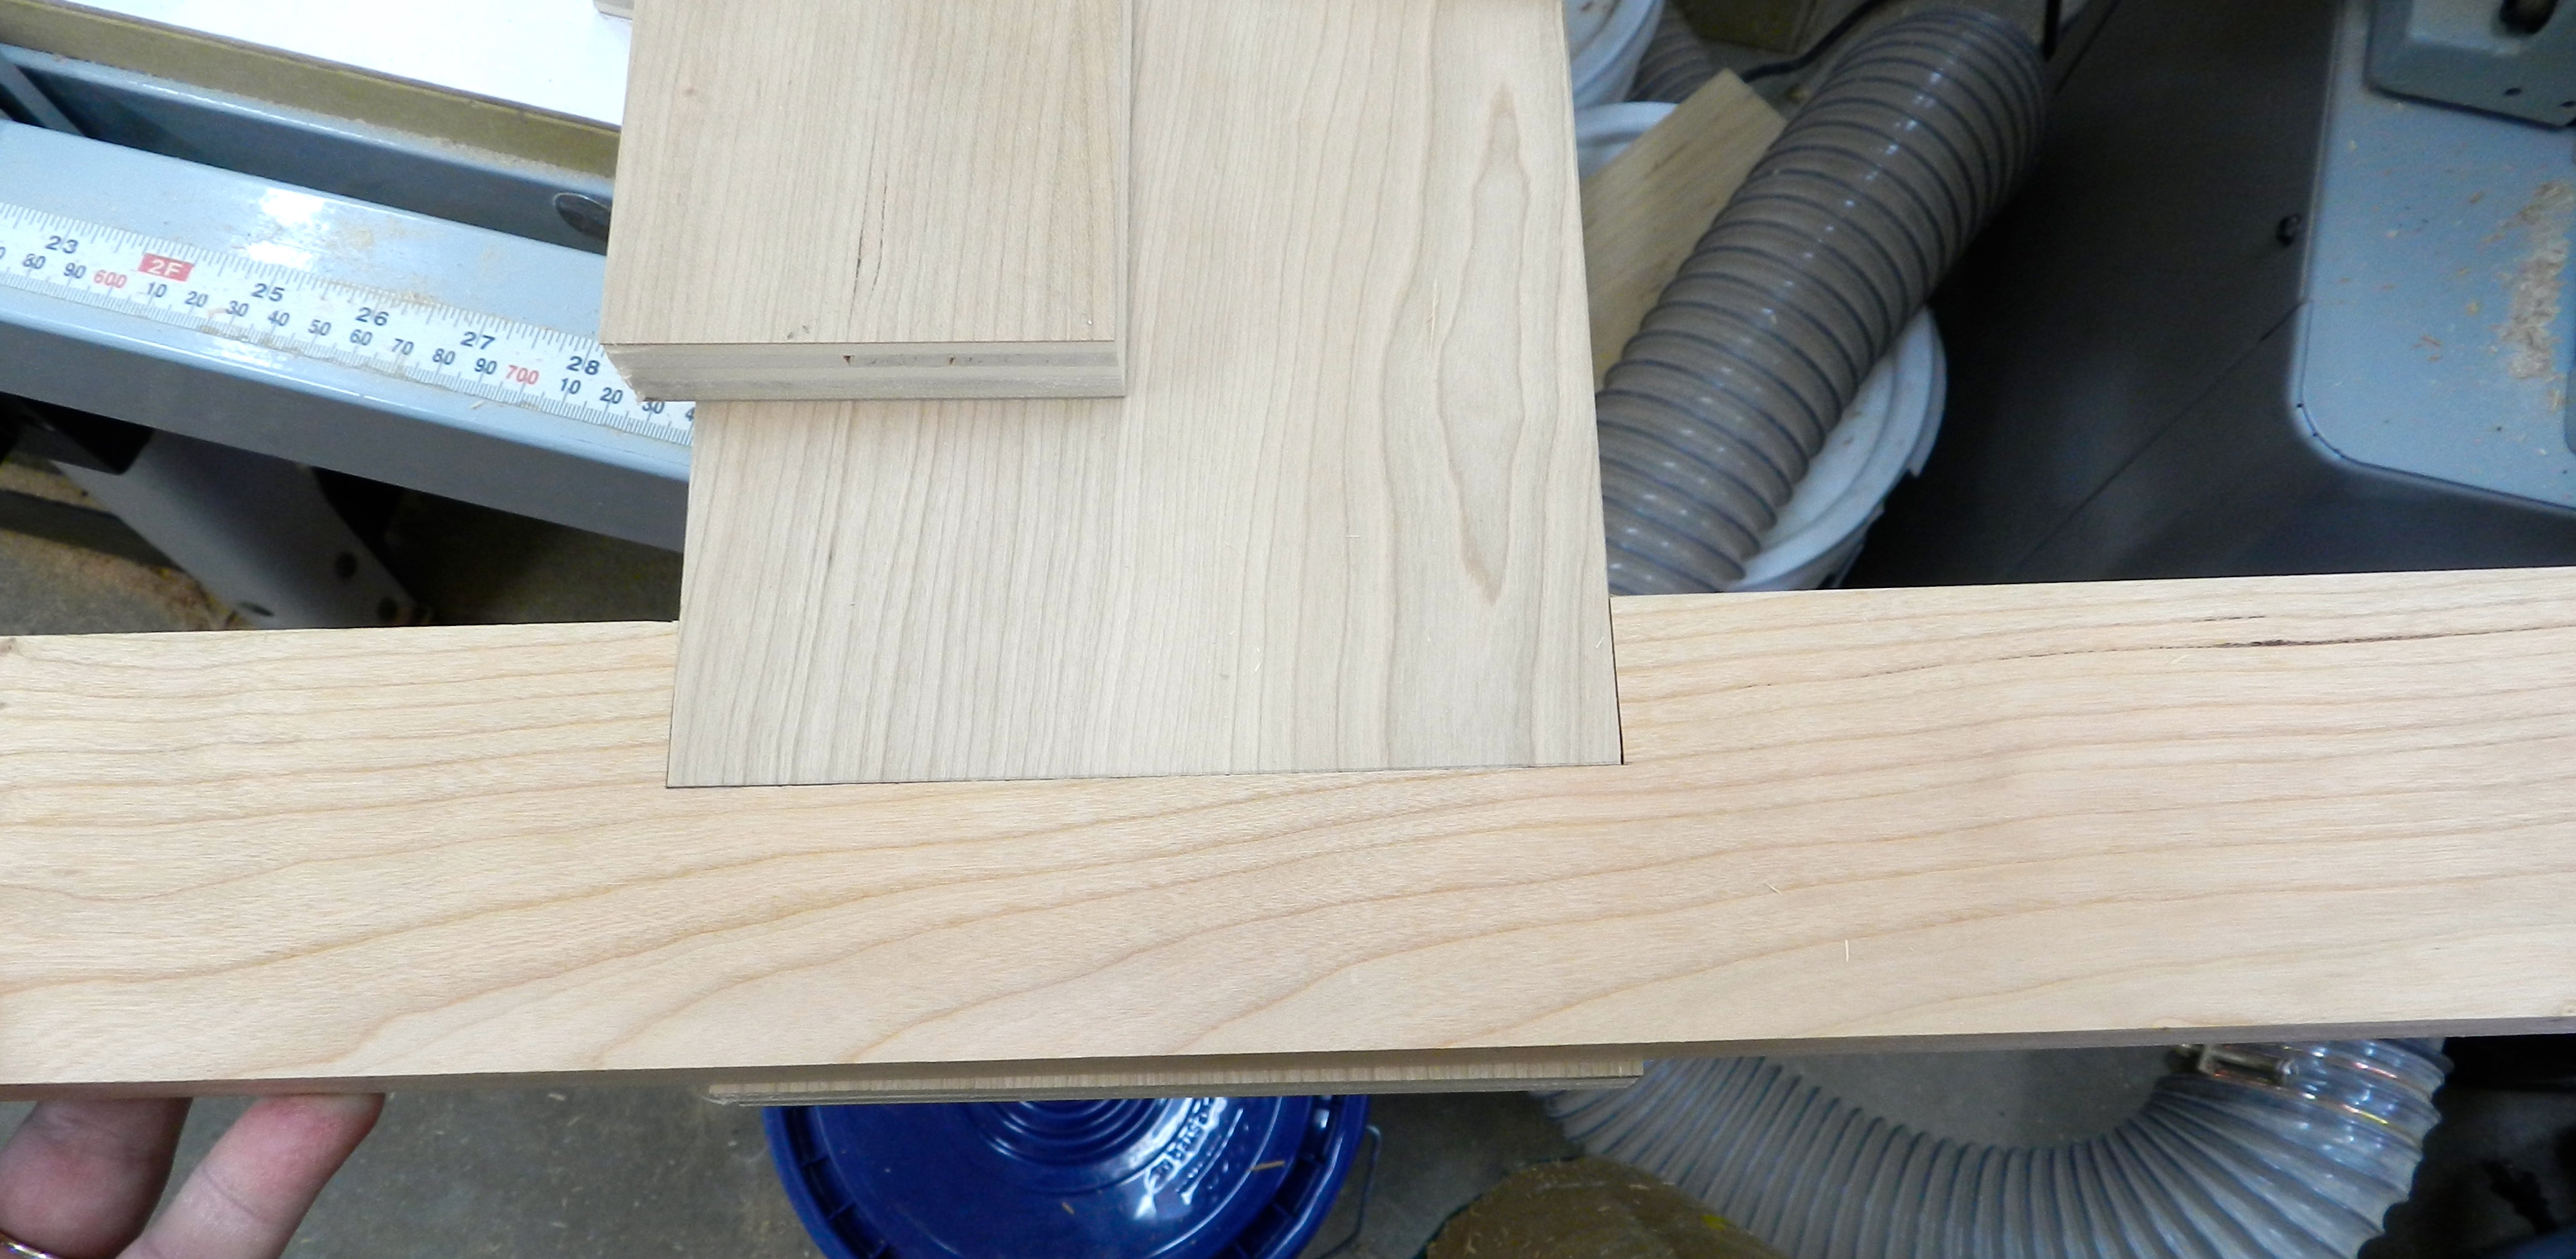
With the woodworking complete it was time to join the top beam together using the metal bracket. Use two large pan head screws to secure the wood into the connector. Also drill two holes through the top beam for the pins to pass through.

Insert the 9' poles into the center beam.
Insert the 9′ poles into the center beam.

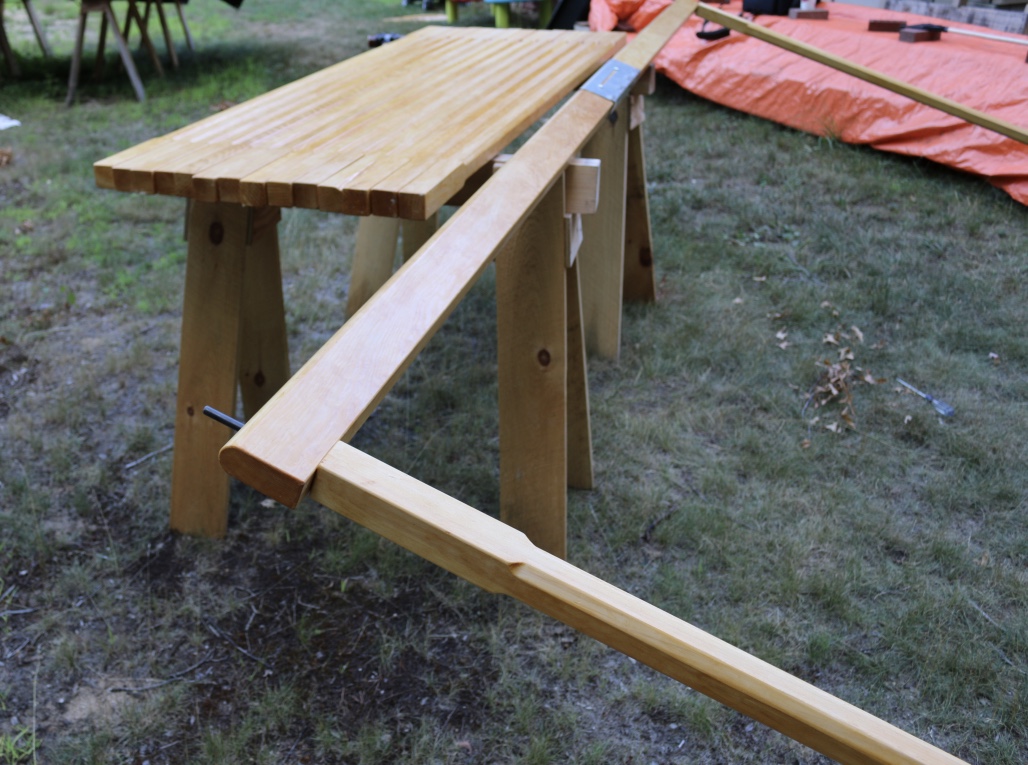
Insert the two 9′ posts into the vertical holes in the top beam. When I did the metal working I initially put the same 6′ metal rods into the 9′ tall posts, but realized the rod would not stick out the top of the beam, so I had to add 9″ rods to the other ends of the 9′ posts, but this worked out great as the accidental shorter rods now on the bottom of the tall posts help keeps the posts from kicking out when you are trying to stand up and secure the posts.

Drape the canvas evenly across the beam.

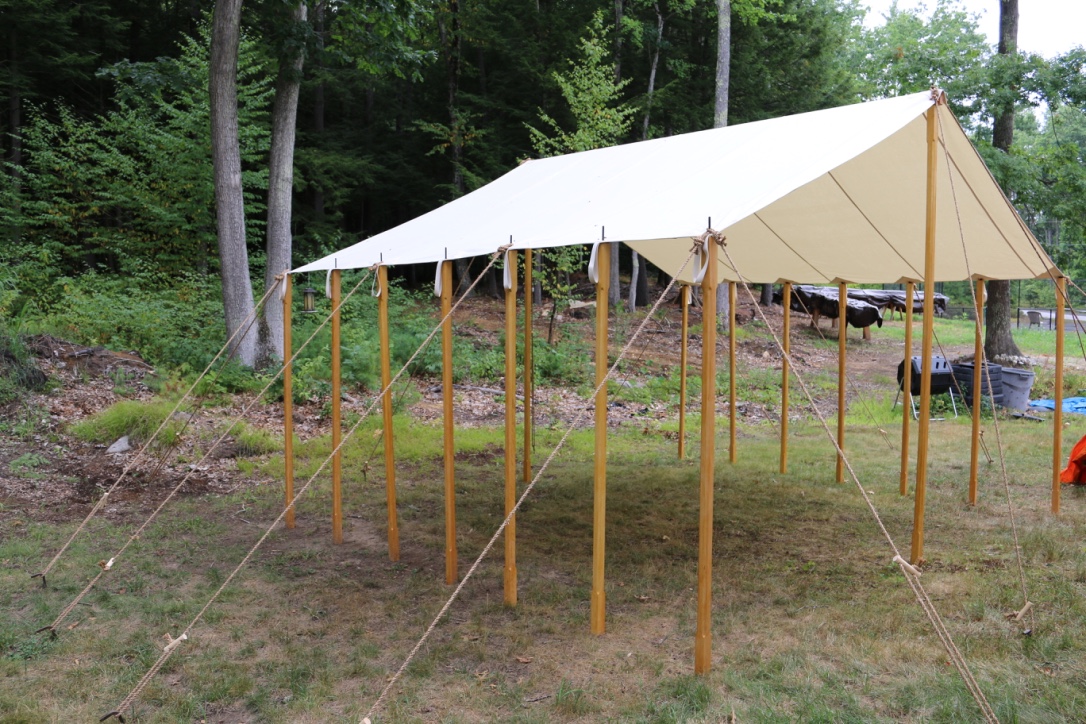
Drape the canvas over the top of the beam and carefully raise it to an upright position — you’ll want a helper for this. With the posts, beam and canvas in an upright position you’ll want your helper to keep it standing up while you secure the storm ropes — attaching them first to a stake you have to drive into the ground (with the stake angled away from the tent)  with a heavy mallet, then to the rod on top of the post. Then use the wood block on the rope set to tighten up the rope.

Raise the center beam, secure the support ropes and set the exterior posts and ropes.

Next install the corner posts and install 2 rope sets on each corner deployed at 90 degrees from each other.

Work your way around the corner posts.
Work your way around the corner posts. (My 2 year old son already likes parking his little tikes pickup under it next to my saw horses)

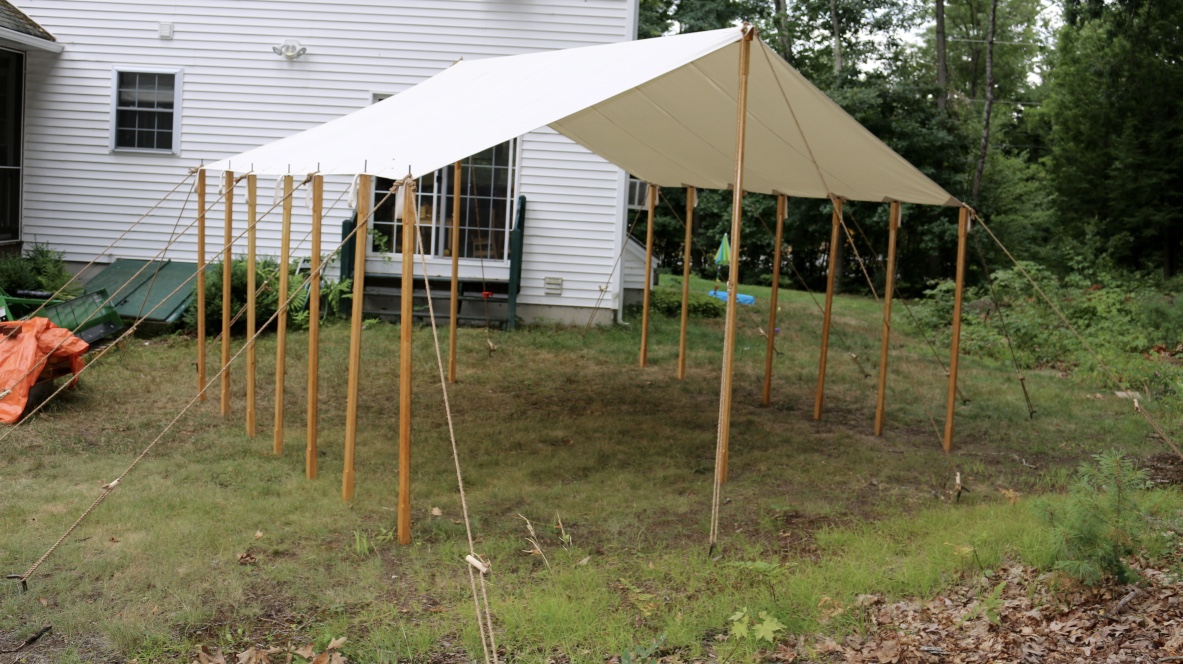
Then install any additional posts you want to use. I built enough posts to fill every grommet on the canvas. Every other post on the side of the tent also got a single rope set and stake to further anchor the test to the ground. If you find your self coming and going through the lower side of the ten you can remove 1 or more of those side posts to give you better access.

Completed test standing.

With a new canvas and rope sets you’ll want to check the ropes every day as things will stretch a bit and can get loose. Eventually they’ll stabilize and you can enjoy the use of your new tent fly.

Storm lines at the ridge.

The 9′ high ridge beam and 6′ high ends are a bit higher than average but allowed me to walk in and out of the tent with ease and gave me a good size work space under the protection of the tent.

Tie down ropes secured.

It was a lot of work and a lot of fun to put together and I look forward to a long useful life for this tent.

Take care,
-Bill

P.S. If you build your own tent fly, please tell us about it in the comments below.

26 Horses and 2 Ponies

The best saw horses cannot be bought in a store, you have to build them.  I’ve seen plastic saw horses bend and buckle under < 200 pounds of load.  I’ve seen 2×4 saw horses with sheet metal couplers deform and crush.

When I was a student at NBSS one of the first projects we completed was building a pair of solid wood saw horses that could meet the heavy demands of a preservation carpenter. The school would load them up with more material than I ever thought a simple horse could hold. I was so impressed with how well they turned out I built 10 more while I was there and they have served me well over the years.

28 horses out on parade

Right now as I build a 24’x30′ timber framed barn out in the yard I built another 28 horses to hold all the timber off the ground for sorting and working through the piles. The post below covers how I built these heavy duty horses.

For a large run of horses like this it is important to run through each operation like a small assembly line, though at times it can feel like a slog — after cutting 112 legs you become a master at optimizing all of your operations.

Large pile of green eastern white pine ready to go.

The wood of choice is green eastern white pine we buy from a local sawyer/lumber company. (Copeland And Sons Lumber).  The beams (the work surface of a horse) is cut from a 4x4x12′, the legs are made from 1x6x12′ boards and the gussets are made from 1/2″ CDX plywood.  Buying rough green stock like this from a sawyer helps keep the price per horse reasonable and the wood is full size, not nominal, so my 4×4 is 4″x4″ when I get it.  I estimate that they cost me < $10 each in terms of materials.

You can see how much moisture is still in the 4x4s

A note on working with green lumber, for horses or timber frames or similar projects — this wood was a tree possibly only a day or two before I get it, so if you use a power tool you may get some water spray on you. Be warned. Also make sure you wipe down and oil your tools appropriately so they do not rust. In the photo above you can see the outer 1/4″ or so that has dried a bit vs the wet center on this fresh cut off piece.

Stack of cut beams
Stack of cut beams

I start by cutting the beams to 36″ long. I then cut a 12 degree bevel on two sides. If your table saw cannot cut a full 4″ on an angle you can cut as much as you can, snap off most of the waste and then use a jointer or portable power planer (like 3-1/4″ Makita Door planer) to even out the side.

I also stamped my name into the end grain of each beam with my name stamp. It makes it easy to tell my horses apart from say another friend from the school.

Beam and gusset with dimensions. I also used my namespace on the beam end grain.

Next up I ripped my 4×8 sheet of 1/2″ CDX plywood into ~4″ wide strips. I then took a second pass on each strip with the blade set to a 5 degree angle. This allows the gussets to nestle up tightly against the beam during final assembly.

Cutting compound angles for the legs. 5 degrees and 12 degrees.

Next up I cut all the legs. I set the compound miter saw to cut at a left tilt of 5 degrees and a right rotation of 12 degrees. (See image above). The long side of each leg was cut to be 34.75″ long.

Ripping the legs to a consistent width

With all the legs cut I ripped the rough edge off of each board, then ripped the other side so all the boards landed at a consistent 5.5″ width.

Stacks of cut legs
Stacks of cut legs

You don’t have to plane the boards to thickness if you don’t want to. Leaving them as thick as possible added to the strength and I am not thrilled about passing green wood though my cast iron tools and into my dust collection system.  My site chop saw and portable table saw both have aluminum tops which deal better with the wet wood.

112 legs ready to go

All the legs are the same, though above I stacked them to make sure I had a correct number for all the horses I planned to build.  I also used a low angle block plane to break all the edges on the boards since they will be handled many times over the years and you don’t want any splinters.

Stacks of cut legs and beams back in the shop

I then brought my wood into the heated shop as we were getting some snow and stacked them as you see above. This was a big mistake as I’ll describe later. I planned to be out there the next day but with snow and a baby in the house they sat out there for a week. If you bring sopping wet/green wood into a heated shop, make sure you sticker them so air can flow around all the edges and the wood can dry evenly.

Layout for the 2" ceramic star drive deck screws.
Layout for the 2″ ceramic star drive deck screws.

With all the legs cut I started to layout for the screws. I grab two combination squares and set one to be 1″ and set the other to 2″. This allows for fast/efficient layout. (see above image). Each of the screws is either 1″ or 2″ from the edge or top of the board. The screws are staggered to help avoid splitting the wood. I used DeckMate 2″ ceramic coated deck screws that have a nice thick shaft and are rated for outdoor structural use and do not rust. Do NOT use drywall screws on this sort of project, they are far too weak and not meant for the outdoors. One 5lb box of #8 2″ screws was enough to attach all the legs. After layout I pre-drill each of the holes and start the screws into the boards — this makes it a lot easier to assemble the horse later on.

Laying out the beam. 5 degree angle is set in 2.5" from the end. The top of the legs should be 1/4" below the top of the beam.
Laying out the beam. 5 degree angle is set in 2.5″ from the end. The top of the legs should be 1/4″ below the top of the beam.

For the beams I make a tick mark 2.5″ in from each end on the top edge of the beam. Using a protractor I make a 5 degree line down the side of the beam — this splays the legs and gives use  nice stable horse. Having two protractors on hand is nice as I have one set for the right and one set for the left. I then set a combination square to 1/4″ and make a line along the top edge of the beam — this allows me to line up the legs during assembly. I also broke all the edges with a block plane.

Another horse ready to be assembled

Early on I made a few pairs of saw horses to work from and did the majority of the horses as a large run.

Attaching the legs — I added one leg at a time, usually only sinking 2 or 3 of the pre-started screws into the beam. I add one leg, then add the second leg on the same side of the beam. This makes it easier to stand the horse on those two legs and add the third leg. When adding the 4th leg you’ll want to make sure all 4 legs are properly resting on the ground. If your horse wobbles this is your chance to adjust the legs. When the horse is standing the way you want you can sink the rest of the screws on the legs. When using an impact gun you don’t want to sink the screws any further into the wood than you absolutely have to. Ideally the screw heads should come to rest in the same plane as the surface of the wood, but green pine can be a bit soft so some of them may go deeper before they have enough grip to pull the leg tight to the beam.

Mass producing gusset plates.

With a beam and set of legs ready to go and standing nicely you can take a plywood gusset blank, bring it over to the partially assembled horse and trace where it meets the legs. Ideally the gussets should not stick out farther than the legs, otherwise they might catch on things. Making them say 1/32″ inside of the surface of the legs is what I shoot for. Using that traced piece I cut it and label it as a the template and use that for laying out each of the subsequent gussets

Important Notes About Gussets:

1.) When cutting the gusset the beveled end is always ‘up’ on the installed gusset — it mates nicely to the underside of the beam.

2.) When installing a gusset make sure the 5 degree bevel is facing the correct way so that it rest tightly up against the beam.


Impromptu work table

With a few horses pressed into early service I was able to make a makeshift table that allowed me to layout/mark all the of the gussets. Each one is secured with 4 screws. I made a mark for each screw to be 1″ down from the top or the bottom of the gusset and centered on the thickness of the leg, so for most that would be ~3/8″ in from the mitered edge. I turn a horse on its side and place the marked gusset where it is going to go. I then pre-drill the gusset in place and drive the screws. I used #8 1-5/8″ Deckmate Ceramic Star-drive screws and again a 5lb box was enough for this project.

Each horse required 16 2″ screws and 16 1-5/8″ screws.

Saw horse with dimensions.

And now we have a completed horse! The image above has some more dimensional information for quick reference.

Lunchbox planer getting a workout

Now back to that mistake I mentioned earlier. By leaving the cut wet boards tightly stacked a mold/fungus quickly bloomed on half of the boards. I have a lot of allergies so I didn’t want to handle those boards any more than I’d have to, and it was unsightly, so I suited up and with my dust mask and fed them through my lunchbox planer. I also didn’t use my dust collector as I don’t want that wet fungus living in my filter. I planed the rough boards smooth and stickered them up to dry in the sun as I worked on other horses.

Letting the legs air dry a bit

That little mistake accidentally created ‘Denim Pine’ — pine boards with a blue tint that results from that fungus blooming and is desirable to some folks, presumably non-workers that like the look of it. (See above and below). With the mold/spores/fungus/grossness removed and stickered the legs will dry and be fine to use. As I completed each horse it will live out side where it can dry at a steady rate until the barn gets finished.

Some 'Denim Pine' Legs
Some ‘Denim Pine’ Legs

How do you store all of these horses? 

Mass producing gusset plates.
Stacked horses.

The horses stack nicely and even when stacked all the wood can dry nicely.

Wide angle view of the horses

This was the largest run of horses I’ve made to date so I set them all up out in the driveway just to see them all in one place.

2 ponies in the foreground 26 horses in the background

Two of the horses, my ponies,  had a 24″ beam as two of the 4x4s were a little short and I thought it would be nice to have a set that can fit into a tight place.

It looks like a TON of horses, but these 12, plus the 12 I already had will just barely be enough for the barn build.

What do you plan to do with all these horses?

A LOT of shiplap siding on horses. 10-12" wide 16' long pieces
A LOT of shiplap siding on horses. 10-12″ wide 16′ long pieces

Above and below you can see a couple thousand linear feet of 16′  shiplapped pine sheathing held with ease by these horses.

A LOT of shiplap siding on horses

In the photo below are 24 2″ thick 12″ wide green pine planks that will be used in the barn loft. I estimated this wood to weigh 1800lbs and the 4 horses below seem to hold it with ease.

4 horses holding over 1850+lbs of green pine planking

And below are some 6×9 25′ long timbers.

Horses holding 6"x9"x25' timbers
Horses holding 6″x9″x25′ timbers

As you can see these versatile horses are at home in the shop or out on a worksite and I hope that you’ll build a few pairs for yourself. If you do, please let me know in the comments.

Take care,
-Bill

Making a Window Sash Part 1

Building a window sash by hand can sound intimidating, but with some practice it can be an enjoyable experience. Early window sash were built by hand designed to be maintainable — if a component broke or rotted out it could be replaced — something that is not possible with most aluminum and vinyl windows you see on the market today.

Continuing Education Department at the North Bennet Street School, Boston, MA

A few weekends ago I taught a two day workshop I developed on building a window sash at the North Bennet Street School. This post and the next are a high level recap of the course with some photos from building the prototype in my workshop and what we did in the classroom

Nice quarter-sawn stock for muntins.

Stock selection is important. My wood of choice is Eastern White Pine, preferably quarter-sawn heart pine which is easy to work, weathers well and historically appropriate in my area — the greater Boston area.

Sticking Knife Profile in the Williams and Hussey

A profile can be run by hand using sash planes or using a router table. For larger runs a custom molding knife can make fast work of this often tedious task using a machine like the ‘Williams and Hussey’ molder. (Shown above and below)

Profiling the stock
Profiling the stock

We make a few passes to get near the finished size wanted and then a final cleanup pass at the end to leave the piece with a nice finish.

Profiled stock coming out of the molding machine

Rails, stiles and muntin stock are run using the same setup on the machine — this way all the profiles are consistent.

Rails, stiles and muntin stock profiled.

Next up is the use of a story stick — this traditional device is effectively a set of plans laid out on a piece of stock that matches the rest of your milled stock. Key locations like mortises are transferred to the work piece by using a marking knife and a combination square. The knife allows for accurate and consistent transfer of measurements to the work-piece.

Using the story stick to transfer measurements to the work piece

Shown below are mortises cut either with a hollow chisel mortiser or by hand with a mortising chisel. Also note that the work pieces are deliberately left long. These ‘horns’ allow for more relish to support mortise walls from blowing out and also allow the sash to sit in the shop and not ding or damage the piece as it is worked on and eventually glazed.

Mortises cut
Mortises cut

Once the mortises are cleaned up its on to cutting the tenons. Once the piece is laid out I start by cross-cutting the shoulders. (See below). I then use a chisel to pop off the waste or for larger tenons will make a second saw cut (This time ripping down to the shoulder cut) and clean it up with a chisel.

Cutting in to reveal the tenon

With the shoulders in place I can dry fit them (using the square shoulders that are on the exterior side of the sash) to make sure I have a tight fit as seen below.  Note that I am not fitting the tenon yet, just the shoulder to start.

Test fit the central muntin

Next up was the coping. I make use of a saddle block with a 45 degree ramp and some in-cannel chisels to cope the muntin stock as shown below.  With the cope in place I can now test the fit of each of the tenons into its mortise.

Tenon complete and profile coped

This creates a nice tight joint that allows the pieces to mate together in a pleasing manner that allows to profile to make that 90 degree transition from the horizontal to the vertical.

A nicely coped joint

I use a similar process for fitting the horizontal muntins — starting first with the center joint as this can be fussy at times. I want each horizontal muntin to meet cleanly in the center and have both tenons fill as much of the mortise as possible. I leave the stock long so if something goes wrong with the joint I can cut off that inch or so and try again without wasting a whole piece of stock. With the center joint in place I’ll cut the other shoulder and fit it as we did with the vertical muntin and then cope the joint and test those tenons.

Test fitting the shoulders for the horizontal muntins

With all the primary joinery completed its time to dry fit it all together and check for square. All the joints should fit together well and the shoulders and copes should be nice and tight.

Test fitting the primary joinery. Note the horns will remain until we paint the sash.

If your joints close up with some mild pressure don’t worry too much as the draw bored pins will help pull the joints together and keep them closed. With each stage in this process the sash becomes more and more rigid.

In the next post we’ll talk about making pins, draw-boring, cutting glass and glazing.

Take care,
-Bill

From Molding To Picture Frame

It’s always fun to travel back in time. This past weekend I traveled back to the 19th century as I participated in the Early American Industries Association Historic Trades Sampler Program at Eastfield Village.

On Saturday I taught a workshop on the use of traditional molding planes to make a picture frame.  In this post I’ll cover some of the highlights of the course and share some details for folks who might want to give it a try at home.

Demonstrating the use of a molding plane on a sticking board. (Photo by Carol Coutinho)

One of the joys of an event at Eastfield Village is to work by natural light in a beautiful and immersive setting — in this case Don Carpentier’s village of carefully moved and restored historic buildings — taverns, trade shops, homes and outbuildings.

Brian and Tom working with the molding planes.

After an orientation to the tools and classroom setup I demonstrated how to evaluate a molding plane and how to tune up an iron.  We also talked about the wide variety of profiles that can be created from even a very modest set of molding planes. The profiles below can be created using a beading plane, a pair of hollows and rounds (say #8) and a rabbet plane.

A sampling of how a few simple profiles can generate a large variety of frames.

And with hollows and rounds the profiles are only limited by your imagination.

Students tuned up their planes, squared up their stock, and tested their plane setup on some scrap and set about making the stepped rabbet needed to hold the glass in place and the plywood back.  The plywood back is carefully screwed in place and helps created a very solid/rigid frame compared to the floating backs held in by stamped metal retainers we see on many modern store bought frames. The  long piece of plywood with an MDF fence and screws at the end to secure the stock is called a ‘sticking board’ and can be as long or as short as your project stock requires.

Don making a profile on the edge of his frame stock.

Next up students started molding their chosen profile(s). We talked about how to work backwards withe the molding planes building on the work of an earlier swipe, how to adjust irons as needed and how to get a nice finish on the profile.

Making the miters with a miter box. (Photo by Carol Coutinho)

With a fully molded piece of stock now it was time to layout your cuts and cut the miters. In this case students left the line knowing that we could creep up on it by using my Lion Mitre-Master (large metal frame-makers guillotine) or a shooting board with 45 degree insert to clean up the corners and ensure we have a nice tight miter at each corner.

Frame baking in the band clamps

With the woodworking complete, next up was a test fit in the band clamps and then final gluing of the frame. While the frames baked in the clamps it was time to cut the glass to size and test fit it. We did this with a self-oiling glass cutter and a layout I made on the bench. Once the glass was fit it was time to layout and countersink the plywood back which was made if 1/4″ thick Baltic birch plywood and secured with #6 1/2″ waxed screws. We used bit braces and egg-beater drills to make quick work of this step.

Hanging hardware came in the form of a self leveling hanger (Think saw-tooth that hangs on single nail) which is affixed with two tiny brads.  An appropriate finish would be stain and shellac or a nice bright milk-paint.

Tom with his finished picture frame.

I’m happy to report that everyone in the class was able to complete their frame, and I had a great time working with Tom, Don, Carol and Brian. (Carol I’m sorry that I didn’t have any photos of you working to add to this post, but I did make use of some of those photos of me you share with me — thanks again) .

If you’d like to make a frame of your own the plans I put together for this workshop can be seen and downloaded from the link below.  The seemingly odd size of this frame was dictated by two factors — the smallest size glass I can get at my local home center is 10×12″ so if you cut it in half you wind up with two 6×10″ pieces which allows each student to have a spare in case their glass cutting didn’t go well and they need a spare or they find time to make a second frame. The size is also dictated by the sticking board and stock. I wanted something that would fit on the 8′ sticking boards I had and allow some extra space in layout and for cutting and to have a bit for testing/trial. The plans below could be scaled up or down to fit whatever size frame you desire.

Picture Frame Cutting Diagram

Click here to download PDF Version of the handouts I made for this class.

If you make a frame of your own and take some photos of it, please share it in the comments below. It’s a great project that can add some unique personality to your pictures and add valuable skills to your woodworking repertoire.

Take care,
-Bill

The Noble Ax

The ax is a noble tool. One of, if not the earliest tools used by man it has been by our side since time immemorial. Different cultures mythologize different axes as part of their cultural heritage, from prehistoric cave drawings, to vikings to Native Americans to western pioneers but at their core the ax and its purpose is the same.  All of these cultures had similar needs– to provide food, shelter, and protection for its citizens.

Over time this commonality seemed to fade away, relegated to a cob-webbed corner of the barn or missing from the home altogether as many people live in a world where providing for food, shelter, protection etc is derived from modern trade and conveniences.  For those that remember their father or grandfather using an ax and want to re-capture that piece of their heritage, even finding a decent ax in a modern store will often only turn up cheap caricatures of what an ax used to be.

Rather than lament this loss I fell down the hand-tool rabbet hole many years ago and I have no intention of returning to ignorant life I led when I thought power tools and jigs were the best way forward. Sure I still have plenty of power tools for some mundane tasks like thicknessing wood in volume, but more often than not I reach for a hand tool — to enjoy the relative quiet (always good as their is a baby in the house), the energy efficiency (I can stand to lose more weight so burning calories is better than burning kilowatts), the speed, the accuracy and connection to the past.

Wandering out into the woods with an ax....
Wandering out into the woods with an ax….

Nothing I wax on about in this post is new or novel in the woodworking community, but it strikes a nerve for me that can at times be hard to articulate. A quote from early in Roy’s first book aptly summarizes a core bit of his philosophy that is near and dear to my own heart:

“I teach traditional hand-tool woodworking — how to start with a tree and an axe and make one thing after another until you have a house and everything in it. The satisfactions of this work are immediate and personal. You find the tree, fell it, shape the wood, and join it together. The mistakes and successes, the accidents and discoveries are between you and the tree.” — Roy Underhill ‘The Woodwright’s Shop: A Practical Guide to Traditional Woodcraft’

I owe a big debt of gratitude to Roy Underhill for helping me get in touch with my inner Carpenter/Joyner via his show, his books and in person classes. At NBSS I got real familiar with a felling ax and a hewing ax for hewing timbers, but I never took down a tree by hand using an ax. Even though I had the axes on hand I always used my trusty chainsaw. On a recent weekend of clearing trees in the yard I decided to get an item off my bucket list, grab my trusty Gransfors Bruks felling ax (sharpened/maintained so that I could shave with it if need be), and fell a tree by hand.

Bucking a tree into a log

I wandered out in the woods and trimmed some dead branches to clear a bit of a path. Whack — nice clean cut and a lot less work compared to my tree saw on a pole. Let’s go bigger. I took down a small pine tree about 8′ tall. In a few minutes the tree was down. Still too easy. Let’s go bigger. A standing dead remnant of a tree. Now the blood is flowing and adrenaline is kicking in, but apparently there was no fear of death by crushing. Let’s go for something bigger still.  I found a medium sized (~40′ tall) eastern white pine that was between me and where I wanted to dump some stumps in the back acreage. I notched in where I wanted the tree to fall. Each strike with the ax severed fibers or popped out chunks as I worked my way into the tree. I then notched in from the opposite side, though higher, so the tree would hinge over where I wanted. Timber! Down it went. Time to de-limb it and buck it into a movable log size. Bucking the tree into logs was a similar process of working through the tree as I did when felling it, though this time I was going completely through rather than creating notches to pivot on.  Once I got the logs down to about 8′ sections I was able to drag them out of the way, put them up on some rocks to keep them off the ground and make use of this newly created path.  The logs will start to season over the dry winter and we’ll see if they become firewood or maybe some other use around the house or yard.

It was a great workout and came with a sense of accomplishment that stayed with me along with the realization that there are some muscles in my back and shoulders that clearly are not getting enough use. 😉 I felt more a part of a continuum dating back to those earlier generations who started at the tree and made all the items they needed to survive and eventually thrive. It also gave me a new appreciation for the amount of human energy invested in a lot of those earlier buildings.

If you have the opportunity to take down a tree by hand, I encourage you to learn how to do it safely and then give it a try and make something from some of that wood once it is seasoned. It’s good for the mind, the body and the environment.

If you’d like to learn more about the proper use of the ax or see the more eloquent and entertaining philosophizing of Roy Underhill you may want to check out some of these videos:

  1. Great Video Clip of Roy Underhill in Philosopher Mode talking about historic Axes. (I agree with Chris that Roy should have decimated that podium here.)
  2.  Roy’s Ted talk — ‘Have Broad Ax, Will Travel’  here.
Moving ever larger stumps

What have I been up to when I haven’t been swinging an ax?

I apologize that I have not been blogging as much this summer as I have in the past, but with work, teaching, a < 1 year old baby and a big project in the works I’ve been spread thin. My free time has been spent on a different sort of project — one that will have been worth the wait. Since April I’ve been spending most of my free time, nights and weekends clearing land out in the back yard to make room for a timber framed shed/barn and I am finally in the home stretch. I’ve removed about 50 stumps, some of them as heavy as the tractor I used to dig them out with and I have cleared about a quarter of an acre of dense woods. It was a LOT more work than I thought, but similar to tree felling experience has been good exercise and a personal accomplishment I am proud of. A little more grading/leveling and blending the transition from yard to woods and I’ll be ready to break ground on a barn/outbuilding.

Finally some clear land...
Finally some clear land…

I’ll be documenting the process from beginning to end in video, in photos on the blog and with some content partners so I hope you will stay tuned for that along with the regular stream of blog posts.

I hope everyone is enjoying the warm weather.

Take care,
-Bill

Building Bradley’s Crib Part 5 — Choosing the Right Finish

How do you choose the right finish? That is a question I’m often asked. In this final installment related to the 3 in 1 crib / toddler bed / adult bed building project I will walk through my own through process for how I picked the finish for this project.

Setting High Level Project Parameters:

Customer input — in this case, my wife Alyssa. We wanted something in that warm amber to medium brown color and tone range. She wanted something to potentially match a darker rocker and changing table we had and I wanted something more on the natural side given this wood was of higher quality and thought it would be a shame to hide all that figure.

I chose Cherry wood for this project as I like cherry’s grain, workability and warm tones once it has time to age. Given that the project is for my newborn son I wanted a child safe finish that would be durable. (So that has me think of shellacs, low or preferably no VOC finishes that cure to hard film that will protect the wood and be easy to clean)

Freshly milled cherry has a light, almost pink finish so I likely will dye or stain the project to get a jump on the aging process and even out the tones of the wood.

Cherry also has a tendency to blotch, so I always want to seal it with shellac as a sanding sealer to try and protect against blotching.

Color Sample Chips:

With some high level parameters in hand, I first take a look at the color chips and samples I have on hand.

I have a real nice collection of General Finishes samples that I use in my teaching and they are one of my go-to finish providers as I’ve found their products to be high quality and reliable.

Finish and color samples

PRO TIP: Whenever you test a sample on a cut-off or similar piece of wood, label it with the finish — maker, type, color, date, #coats and wood species. I keep a box of these sorts of samples in my shop and they can often help in this process as my samples are larger than the standard chips that are usually on paper or small bits of veneer plywood. As the samples age they provide that much more information on how the pieces you make will age with a given finish.

From looking at the chips in a few different lights and in the baby’s room we decided on the following three samples:

Cherry stains we liked

Test your top 2 or 3 choices:

In the photo below the wood is set up in pairs. The left piece of wood is raw cherry. The right piece of wood had a wash coat of blonde shellac applied to see how it would reduce the amount of blotching in the cherry.

Trying out the dye and gel stains I liked. Left samples are raw wood, right samples have a coat of shellac under the stain.


PRO TIP:
You can help jump-start the cherry aging process by exposing it UV light. With the above samples I kept them on a sunny window sill in the shop for a few weeks to get a feel for how the finishes might look as the project ages.


I didn’t love the results from the above experiments, I wanted a warmer tone, so I decided to mix up a batch of garnet shellac (described here) and continue my experimentation. On my next round of sample boards I experimented with a few coats of garnet shellac to see what I liked best. The garnet shellac alone did a fairly good job of warming up the cherry.

Trying my favorite stain from the last round, but trying it out with garnet shellac

The experiments continued with several pieces of wood scrap from the project to see how the recipe of garnet shellac and dye stain looked on knots, different grain orientations etc.

Testing the recipe with a range of woods on the project

In the end my wife and I both liked the same samples, so in the end I wound up going with two coats of garnet shellac with the second coat having a small amount of dye stain in the second coat. All of the above experimentation was well worth the time as I would not want ruin a project like this with a poorly executed finish.

Top coat:

I decided to go with General Finishes High Performance Water-based Polyurethane Top Coat in a Semi-gloss.  I like this finish as it’s easy to apply by hand or via sprayer, low VOC,  it’s UV stabilized and once cured is a durable child safe finish. For fine furniture when it comes to a top coat I adhere to the mantra of ‘if I wanted it to look like it was made out of plastic, I would have made it out of plastic’, but for this crib it’s very nice but not super fine furniture and from what I know about babies the ability to quickly and easily clean off any accidents makes this higher gloss sheen all the more worthwhile.

Crib outfitted with mattress, sheets, skirt and of course stuff animals

For this project I applied the poly by hand using a folded up lint-free white cotton rag. I worried the sprayer would cause too many drips around the many slats and after all the work I put into the project I didn’t want to foul it up in the finishing room.

I’m very happy with how this project turned out and look forward to seeing how the cherry ages in Bradley’s very sunny bedroom.

If you’d like to read some other posts related to this project please check out this link here.

Take care,
-Bill

P.S. How do you choose your finishes? Feel free to share your thoughts and tips in the comments section below.

Building Bradley’s Crib Part 4 – Final Assembly

Molding plays with light and shadow, it blends transitions and it can be pleasing to touch. I’m glad molding has so many positive features as I had to make a LOT of it to finish off this project. Below is a quick walk through of what it took to complete the woodworking on this project.

Making Molding:

Sampling of the MANY moldings

As you can see from the photo above a had to mill a lot of stock and produce a lot of profiles to produce all the moldings necessary for this project. I won’t go into the minutia of each profile, or how to create molding using a handheld or table mounted router as that has been covered to death elsewhere. I will talk about a few of the things I do to help get consistent results when using a router.

1.) Make sure your router bits are clean and sharp. Make sure to use a bit cleaner to remove any pitch left on the bits. A diamond card or file can also be used to tune up a bit that is not cutting as well as it used to.

2.) Feather-boards. Whether they are store bought or shop made a feather-board is a great way to help keep stock where you want it. This project required many thin moldings with several different profiles on the same piece of stock. To ensure that the stock stayed exactly where I wanted it I used feather-boards to keep the stock pressed firmly against the table top and against the fence, both before and after the cutter. Without this seemingly heavy handed setup the stock could flex and you’d have to run it a few times. A push stick is also nice to have nearby. For this project the blanks were 2 to 6′ long so I was able to safely move the stock through the cutter with my hands kept at a safe distance from the cutter by virtue of the feather boards.

Extensive use of feather-boards on the router station

3.) When possible, try to be aware of the grain orientation when passing it through the bit to minimize tear-out

Profiled sanding blocks

4.) After coming out of the router I hand sand the profiles to remove any scallops left by the bit. For tight or very complex profiles I will also use a profiled sander (a bit of formed rubber (shown above), piece of dowel or block of wood) that will help me get the sandpaper into the portion(s) of the profile I want to sand.

Molding profile details

5.) Use the right tool for the job. For the cap moldings above I used a dado set on the table saw (with feather-boards there as well) to create the dadoes, and round-over bits in the router table for the round-overs. (You certainly could use a straight bit to cut the dadoes on the router table, but it would involve taking a few passes which takes more time and could introduce error).

Assembly:

Gluing up the bed rails

With the moldings all milled, sanded and cut to size it was time to glue up the various assemblies. Shown above I am gluing up the top and bottom molding onto the adult bed rails.

Shop made jig for drilling centered holes

After the glue dried overnight on the rails it was time to drill holes for the through bolts using a shop made jig constructed out of plywood. This made it very easy to line up and drill consistently centered holes on the ends of the rails. I also made use of some of the stopped drilling techniques outlined here.

Clamping each section using extended bar clamps

Next up was gluing up all of the large sections of the bed — head-board, foot-boards, side panels etc. Given the width of this project I had to break out the Bessey K-Body rail extenders which allow me to bolt two K-Body clamps together to effectively make an even longer clamp. The connector section also works as an extra set of feet to keep the clamps level. I used hot hide glue again for its long open time and compatibility with finishes. Once in the clamps I checked everything for square, adjusted as needed and let the section dry overnight.

Attaching the cap.
Attaching the cap.

Once the panel was dry it was time to glue on the top cap/hand rail. Next I cut the cove molding to size and glued it in place with the help of some dowel cut-offs.

 Installing the slats:

Cutting spacers on the cross-cut sled

I milled and test fit the slat spacers when I produced the molding above. I gently eased the corners with some sandpaper and cut them to length using my crosscut sled on the table saw and a stop block that was clamped in place against the rear fence of the sled. My OCD side also kept them in order so the grain matched across each panel.

Installing the slats is a bit of challenge so I did a full dry fit/test run before doing it for real with glue. You start from the center slat which you mark with center lines on blue tape (that way you can remove the lines easily as they are only on the tape) on the slat and the panel and install at an angle to insert the slat and then straighten out when it is firmly in the top and bottom slot. I then install spacers to the left and right of the slat and repeat the process. When I get near the end of the assembly I install the last 3 slats at once (otherwise there would not enough room to angle them into place), move them to where they need to be and finish gluing in the spacer blocks.

Installing the slats

When laying out the slats in the dry run I also examined the individual pieces and laid them out so that the completed piece had even grain patterns and tones. I also made a few extra slats so I could swap in grain I liked etc. Some of those extra pieces were recycled into a baby blanket display rod here.

Slats installed
Slats installed

Once I completed all the assemblies, I test fit the bed in all three configurations. (You can see several photos of that process over on my public Facebook page here.)

Test fit
Test fit

Now it was time to pick a finish and head out to the finishing booth. To cap off this series, I’ll be talking about choosing and using a finish.

If you’d like to read some other posts related to this project as they get posted please check out this link here.

Take care,
-Bill

Building Bradley’s Crib Part 3 – Stopped Drilling and Hardware Finish Modification

When we last left our woodworking hero he completed the legs and was heading into the home stretch — installing the hardware. But wait….some of these things are not like the others. The bed bolts in the hardware kit were ordered in a nice antique bronze finish. The bed frame has a nice enameled finish in a similar dark brown metallic color. The threaded inserts and bolts that hold up the bed frame were a bright silver zinc finish. I worried these shiny bits would stand out like a sore thumb.

Then I remembered a trick I learned from my friend Chris Schwarz that he used on his Anarchist’s Tool Chest. I soaked the zinced hardware in a bath of citric acid for a couple hours, then brushed them off with a brass bristle brush, rinsed them in water and dried them off. I then applied some ‘Super Blue Liquid Gun Blue’ to the hardware with a Q-tip and rinsed the hardware in water and dried it off to complete the process. The Super Blue creates a chemical reaction that creates a nice patina on metals. In this case it made a dark brownish color that gets the threaded inserts into a color spectrum very close to the rest of the hardware. (Check out the photo below to see the before and after). I’m very happy with how that color treatment went.

Modifying the hardware's finish
Modifying the hardware’s finish

Next up I had to drill a large number of stopped holes for the various bits of hardware this project included — threaded inserts, bolts and barrel nuts. To accomplish this I made use of some of my favorite methods for drilling a fixed depth hole. The quickest and dirtiest way to drill a hole to a consistent depth out in the field is with some blue tape wrapped around your drill bit. When the excess tape wipes away all your shavings you know you reached the depth you set out to drill.

Blue tape depth stop

Next up is using a fixed metal stop collar. This gives a more precise stop, but if you press too hard the collar can mar the surface of the wood, so I mainly use the collar with a dowel centering jig (As the collar stops when it hits the jig) or in places where the wood rubbed by the collar will not be seen.

Metal Collar Depth Stop

When I have the luxury of a drill press at hand I can make use of the built in quill depth stop (left side of drill press in photo below). When buying a drill press make sure you get a heavy duty depth stop and easy to use depth setting mechanism. Even with a nice stop I don’t trust the scale on it other than for macro level adjustments. For checking hold depth with a higher level of accuracy I use a depth gauge.

Drill press depth stop

A depth gauge can be as simple as using your combo square with large holes, or a piece of dowel in smaller holes used to determine how deep the hole has been drilled. For real tiny holes or times I want a very high level of precision I use an old Starrett Machinist Depth Gauge I got at a tool show years ago. I like this gauge as it has its own macro and micro adjustment which is a very nice and completely overkill feature. 🙂

Old Starrett Depth Gauge with Micro-Adjustment

I set the gauge to the depth I want as shown above. I then place the gauge in the hole, as shown below, and tweak my drilling until I reach the depth I am going for. It’s a quick and easy process.

Depth Gauge In Use
Depth Gauge In Use

With all the holes drilled I was able to install all of the threaded inserts into the posts. As the natural cherry ages it will become a golden brown color that will blend in with the brown colored hardware.

Completed Legs With Hardware Installed

I’m very happy with how the hardware came out, and as you can see in the photo below, even on this freshly completed piece the hardware, and the threaded inserts and bolts in particular blend in quite well.

Mattress frame installed

Next up in this series I’ll be talking about final assembly and finishing.

If you’d like to read some other posts related to this project as they get posted please check out this link here.

Take care,
-Bill

Building Bradley’s Crib Part 2 – Tapered Legs

Today I’ll be talking about what it took to build the legs — 3 pairs — for Bradley’s crib and cover some of the more interesting techniques employed. This project was more of a ‘modern woodworking’ project compared to the period furniture and architectural details I am normally working on, but as I’ll show below there is a place for both styles of woodworking and they complement each other well.

Milling stock for 3 pairs of legs

Rather than having massive posts from a solid piece of cherry that needs to be mortised, this set of plans called for laminating up the stock from 4/4 pieces that were milled down to 3/4″ thick. For this project I tried to mill as many pieces as I could at a time, so for quite a while in the shop there were a lot of small piles of wood that would migrate around the shop as they were ripped, jointed and planed. I’m pretty sure my wife thought I was just moving the wood around like a child moving vegetables around on a plate to make it look like they are eating them. I’d mill things a bit heavy and let them sit stickered for a few days to acclimate further to the shop and mill to final size just before I’d use each piece.

Laying out in bulk
Laying out in bulk

By ganging blanks of the same type together I was able to mark them all at once saving layout time and helping to ensure they are all consistent.

Used a dado set and miter gauge with sacrificial fence to cut dadoes

By using a dado head cutter in my table saw with a zero clearance insert and a heavy duty miter gauge with a sacrificial block to help limit tear-out I am able to quickly create what will become the mortises in the laminated post. This not only saves some time, but produces a nice clean mortise bottom. Make sure you make your mortises a tiny bit deeper to allow room for glue, any crumbs and a tiny bit of wood movement in the post. Given that the panel is cherry veneer plywood it will not move much.

Making sure the rails have a nice tight fit

The goal is a nice square fit, and since the panels were already sized during the earlier ripping operations — see Part 1 — you could test fit them as you go.

Laminating the legs
Laminating the legs

With the mortises all cut, it was time to laminate up each leg. In picking the stock for the legs I was careful to choose the best grain orientations for the faces you’ll see. The pieces are all a little bit long and a little bit wide so the excess could be cut off after the glue dries. You want to be careful with your glue application, I applied warm hide glue to the both sides of the center piece of the lamination to make sure I didn’t get glue in any of the mortises.  I also shot a couple of finish nails into the inch or so of waste on each end as that helps stop the pieces from sliding around when clamping up the lamination and it will be cut off later.

You can never have too many clamps...if I had more I would have had more baking at the same time
You can never have too many clamps…if I had more I would have had more baking at the same time

I glued up as many legs as my clamps would allow. You want to use nice strong clamps like the Bessy K Body clamps shown above to eliminate any voids in the laminated pieces. After the glue cured overnight I cut the legs to length — thus getting rid of the nails that helped keep things aligned. Next up I jointed and planed each leg to thickness and laid out the tapers on each leg — the two inner faces were tapered to give the legs a slightly lighter look.

Legs after tapering the bottoms

I tapered the legs on the band-saw and then cleaned up the mill marks with a hand plane. The plane made quick work of that task and yielded better results than a disc sander would be able to produce.  Then using a palm router I rounded over all the appropriate edges using a 1/8″ round-over bit and cleaned up any mill marks from the router with 220 grit sand paper.

Completed Legs
Completed Legs

Next up in this series I’ll be talking about modifying and installing the hardware, followed by final assembly and finishing.

If you’d like to read some other posts related to this project as they get posted please check out this link here.

Take care,
-Bill

Building Bradley’s Crib Part 1 – The Curved Headboard

As promised I’ll be making a few posts covering some of the more interesting aspects of building the 3-n-1 crib, toddler bed and adult bed I recently finished for my son. In today’s installment I’ll be talking about what it took to make the curved headboard.

The first step in the process was to make the template and bending forms. For bending forms you want stock that is stable, cheap and dense — won’t dent when a template router bit passes over it (MDF would be too soft). So in this case I used 4’x8′ sheets of particle board.

Ripping Heavy Sheet Goods Straight From The Truck -- Saves space in a tight workshop
Ripping Heavy Sheet Goods Straight From The Truck — Saves space in a tight workshop

These sheets are heavy and make an incredible amount of dust when you cut into them so to save myself some headaches and shop cleanup I ripped the sheets to rough width right off the back of my pickup truck, through my job site table saw and onto rollers. Thankfully my wife Alyssa was on hand to help handle the offcuts as I pushed the stock through the saw. It worked out great.

Rail Saw made quick work of some long thin rips where I wanted to control veneer tearout and grain orientation

For ripping out cherry veneered plywood panels I used my rail saw to ensure accurate cuts, minimize grain tear-out and control grain orientation.

Using a fairing stick to lay out the curve for the headboard and templates

I used a fairing stick to lay out the curve on one of the bending form blanks. A fairing stick is a thin, flexible piece of wood that allows you to lay out a curve. (And if you thin out one or both sides you can adjust how it bends and thus change the curve to suit your project) With the fairing stick clamped in place I could trace the curve onto the stock. The next step was to cut out the curve on the band-saw and use belt and/or disc sanders to even out the curve and split the layout line. With that first pattern in hand it was time to work more like an assembly line. I’d trace the template onto the next blank, rough saw it out on the band saw and then clamp the two blanks together and use a router with a pattern bit quickly and easily produce another template. Once I had 4 templates in place I lined them up and screwed them all together. With the bending form all in one piece I cleaned things up a bit more with the disc sander, added center and end lines to the form and the bending form was now ready to go.

Completed bending form

To create the curved headboard panel I followed the same procedure I used for creating templates — traced the curve, rough band-sawed out the blank and used the form and a template bit to create a panel that exactly matched the bending form.

Using the form with a templating router bit to copy the curve

The next step was to re-saw a single cherry board into three 1/4″ thick strips for the cap, being careful to minimize any waste as I want the side and end grain to match up as close as I can get it in the laminated and curved headboard cap. The strips are left a bit longer and wider to allow for easy cleanup after the lamination process.

Gluing up one of the curved blanks

I used Old Brown Glue (Hide glue) warmed up in my double boiler to glue up this lamination. I used hide glue because of its long open time and friendliness to finish — I’m far less likely to see any hide glue in the finished piece when compared to PVA glue which sticks out like a sore thumb. With the glue applied to the lamination I started clamping it to the bending form working out from the center towards each end and let it sit in the clamps for 24 hours. Once removed from the clamps I was able to joint off any glue squeeze out and round over the edges using my router table and hand-held router with varying sizes of round-over bits.

Using dowels to help with clamping of the curved cove moldings

With the completed head-board cap in hand I was able to glue and screw it onto the headboard frame assembly. The screws were located at the ends of the cap and bite into the solid wood posts/legs. They’re set into countersunk holes that were plugged. I made the plugs from the same piece of wood I made the cap from and made sure to orient the plug grain direction to match the cap. The plugs blend in well. Next a nice cove molding is installed under the cap and after cutting it to size and matching the 10 degree angle on the ends there was a mild challenge of how to clamp it in place. The solution was to use small pieces of dowel stock to help transfer the clamping pressure from the clamp pad onto the molding — it worked out well.

Completed Headboards and Footboards

Overall I am very happy with how this process of cold bending cherry to make a curved headboard cap went. I made two caps just in case one got messed up in the process, and I’m happy to report that both turned out well, so I have a second curved cap ready to go if I ever have to make another crib for a second baby.

Next up in this series I’ll be talking about the challenges of making the legs and modifying the hardware.

If you’d like to read some other posts related to this project as they get posted please check out this link here.

Take care,
-Bill