Tag Archives: Toddler Bed

Building Bradley’s Crib Part 5 — Choosing the Right Finish

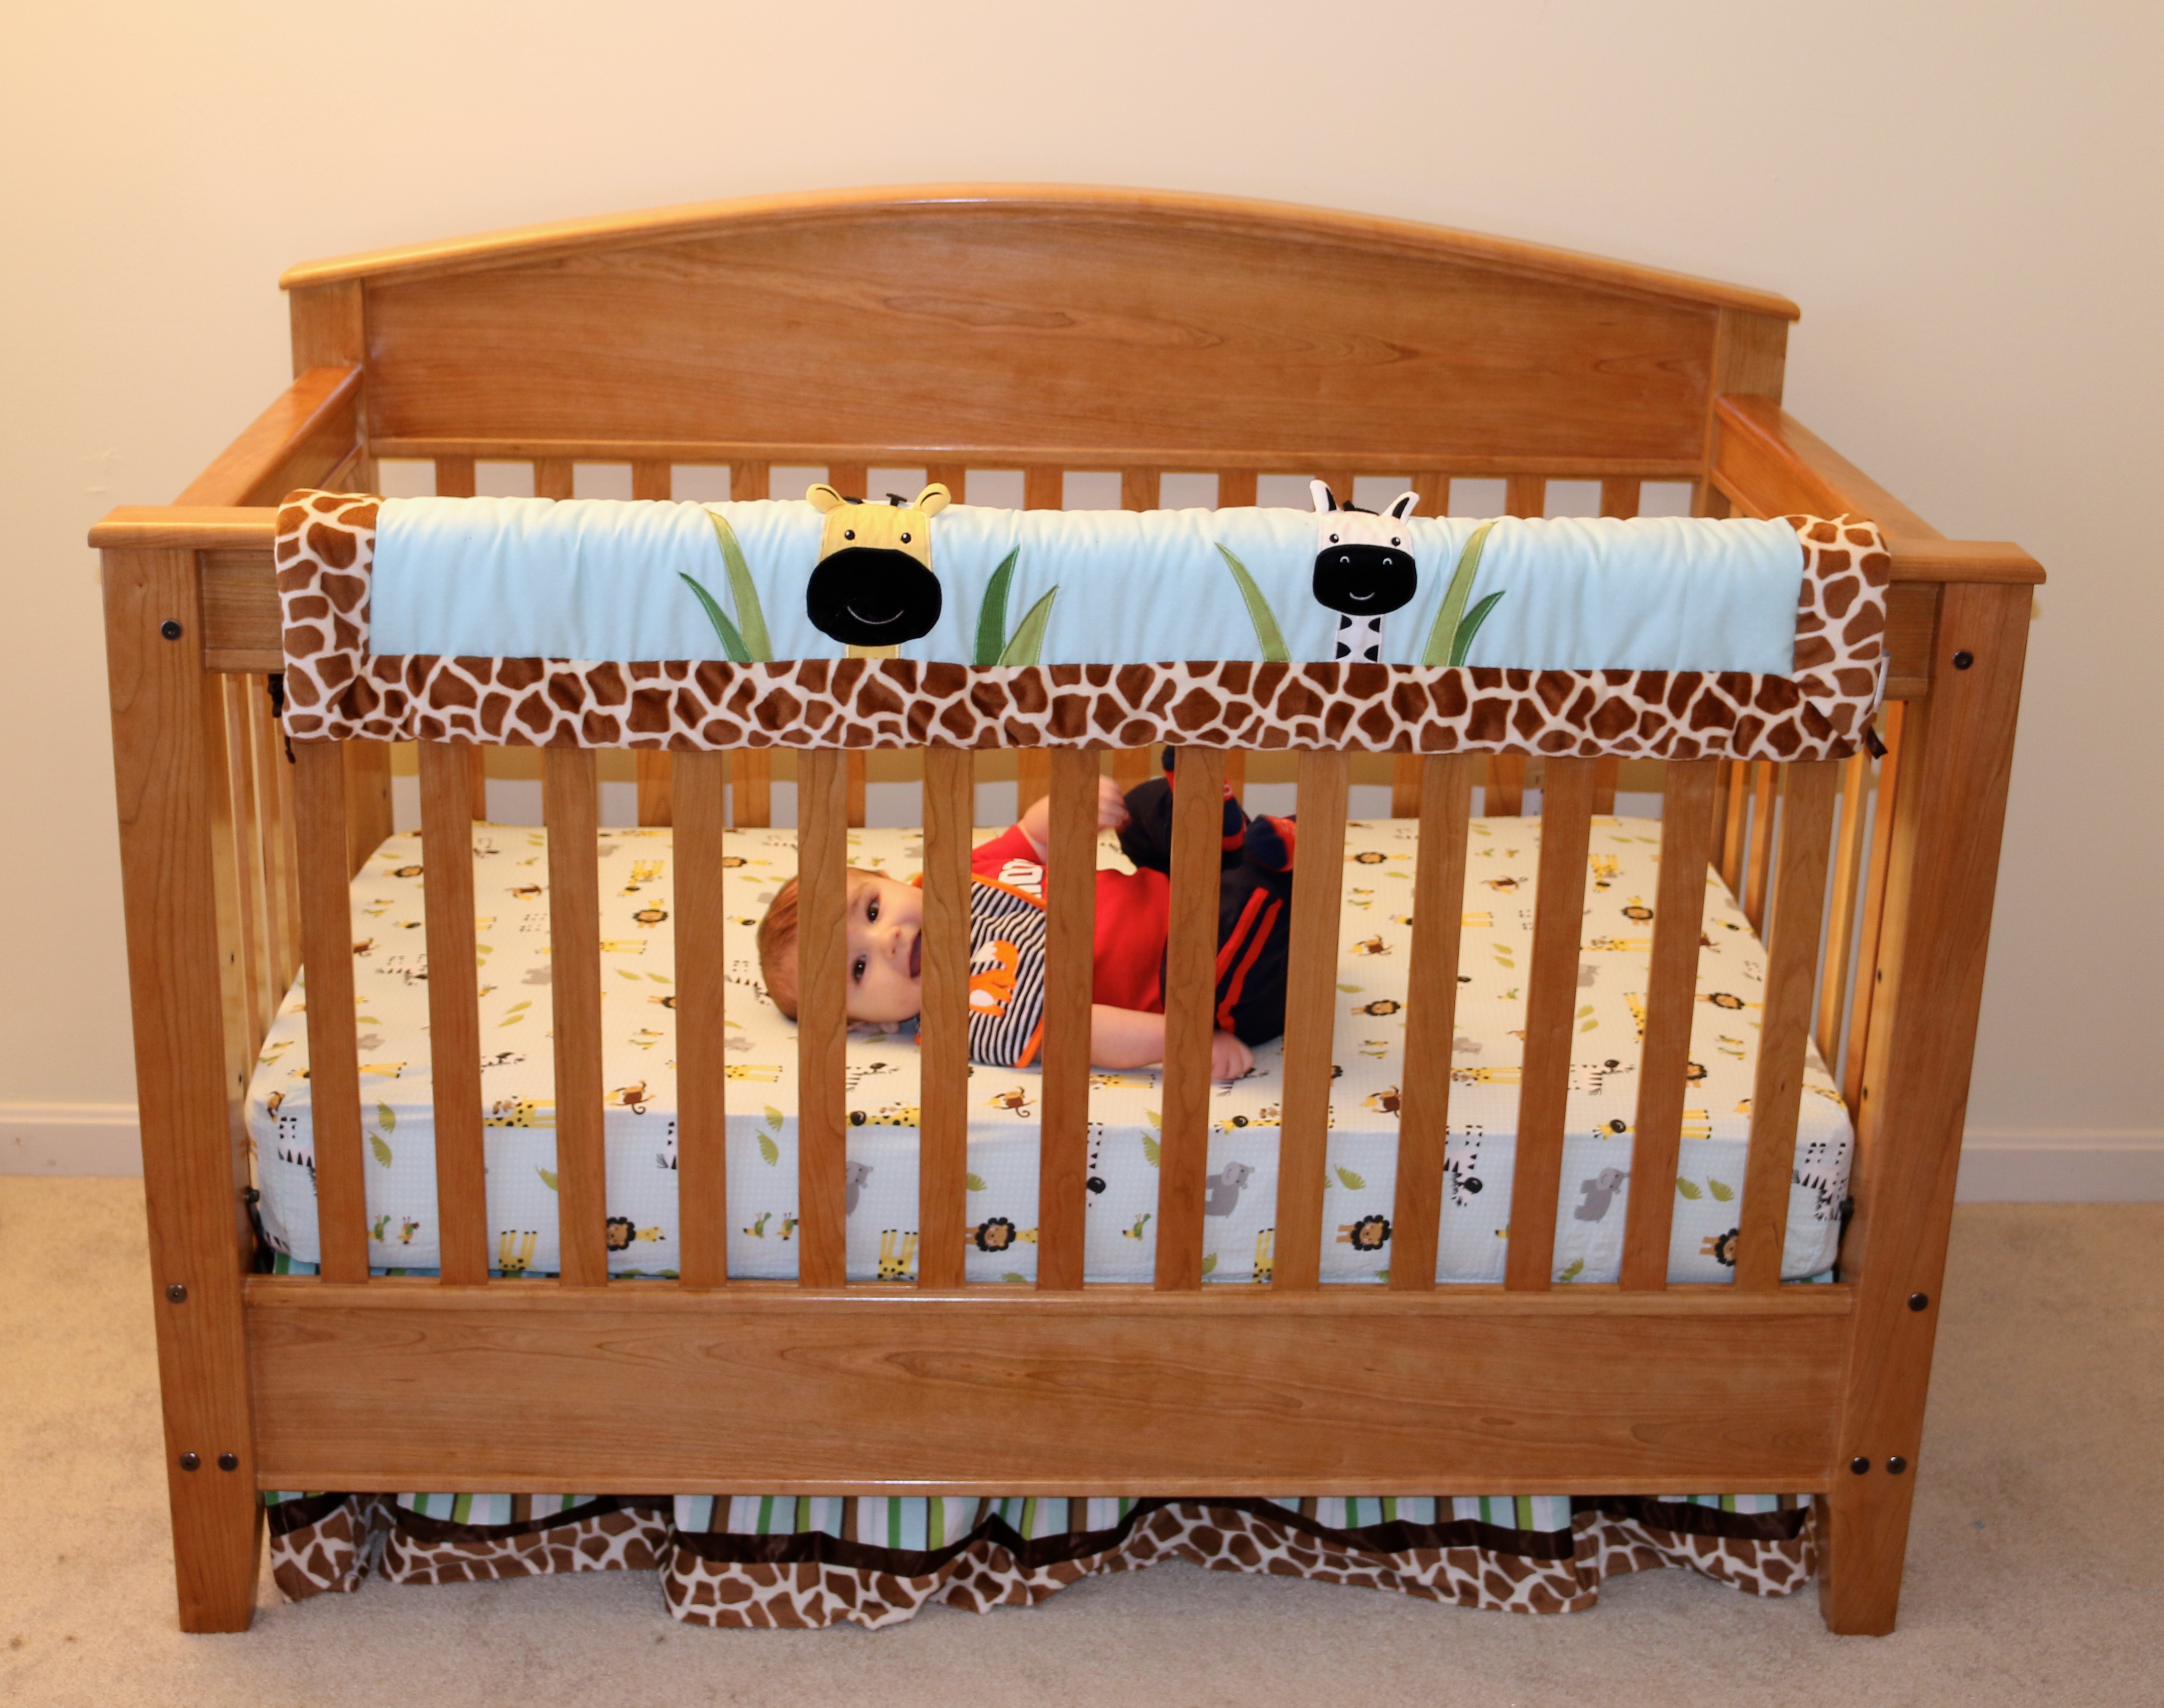
How do you choose the right finish? That is a question I’m often asked. In this final installment related to the 3 in 1 crib / toddler bed / adult bed building project I will walk through my own through process for how I picked the finish for this project.

Setting High Level Project Parameters:

Customer input — in this case, my wife Alyssa. We wanted something in that warm amber to medium brown color and tone range. She wanted something to potentially match a darker rocker and changing table we had and I wanted something more on the natural side given this wood was of higher quality and thought it would be a shame to hide all that figure.

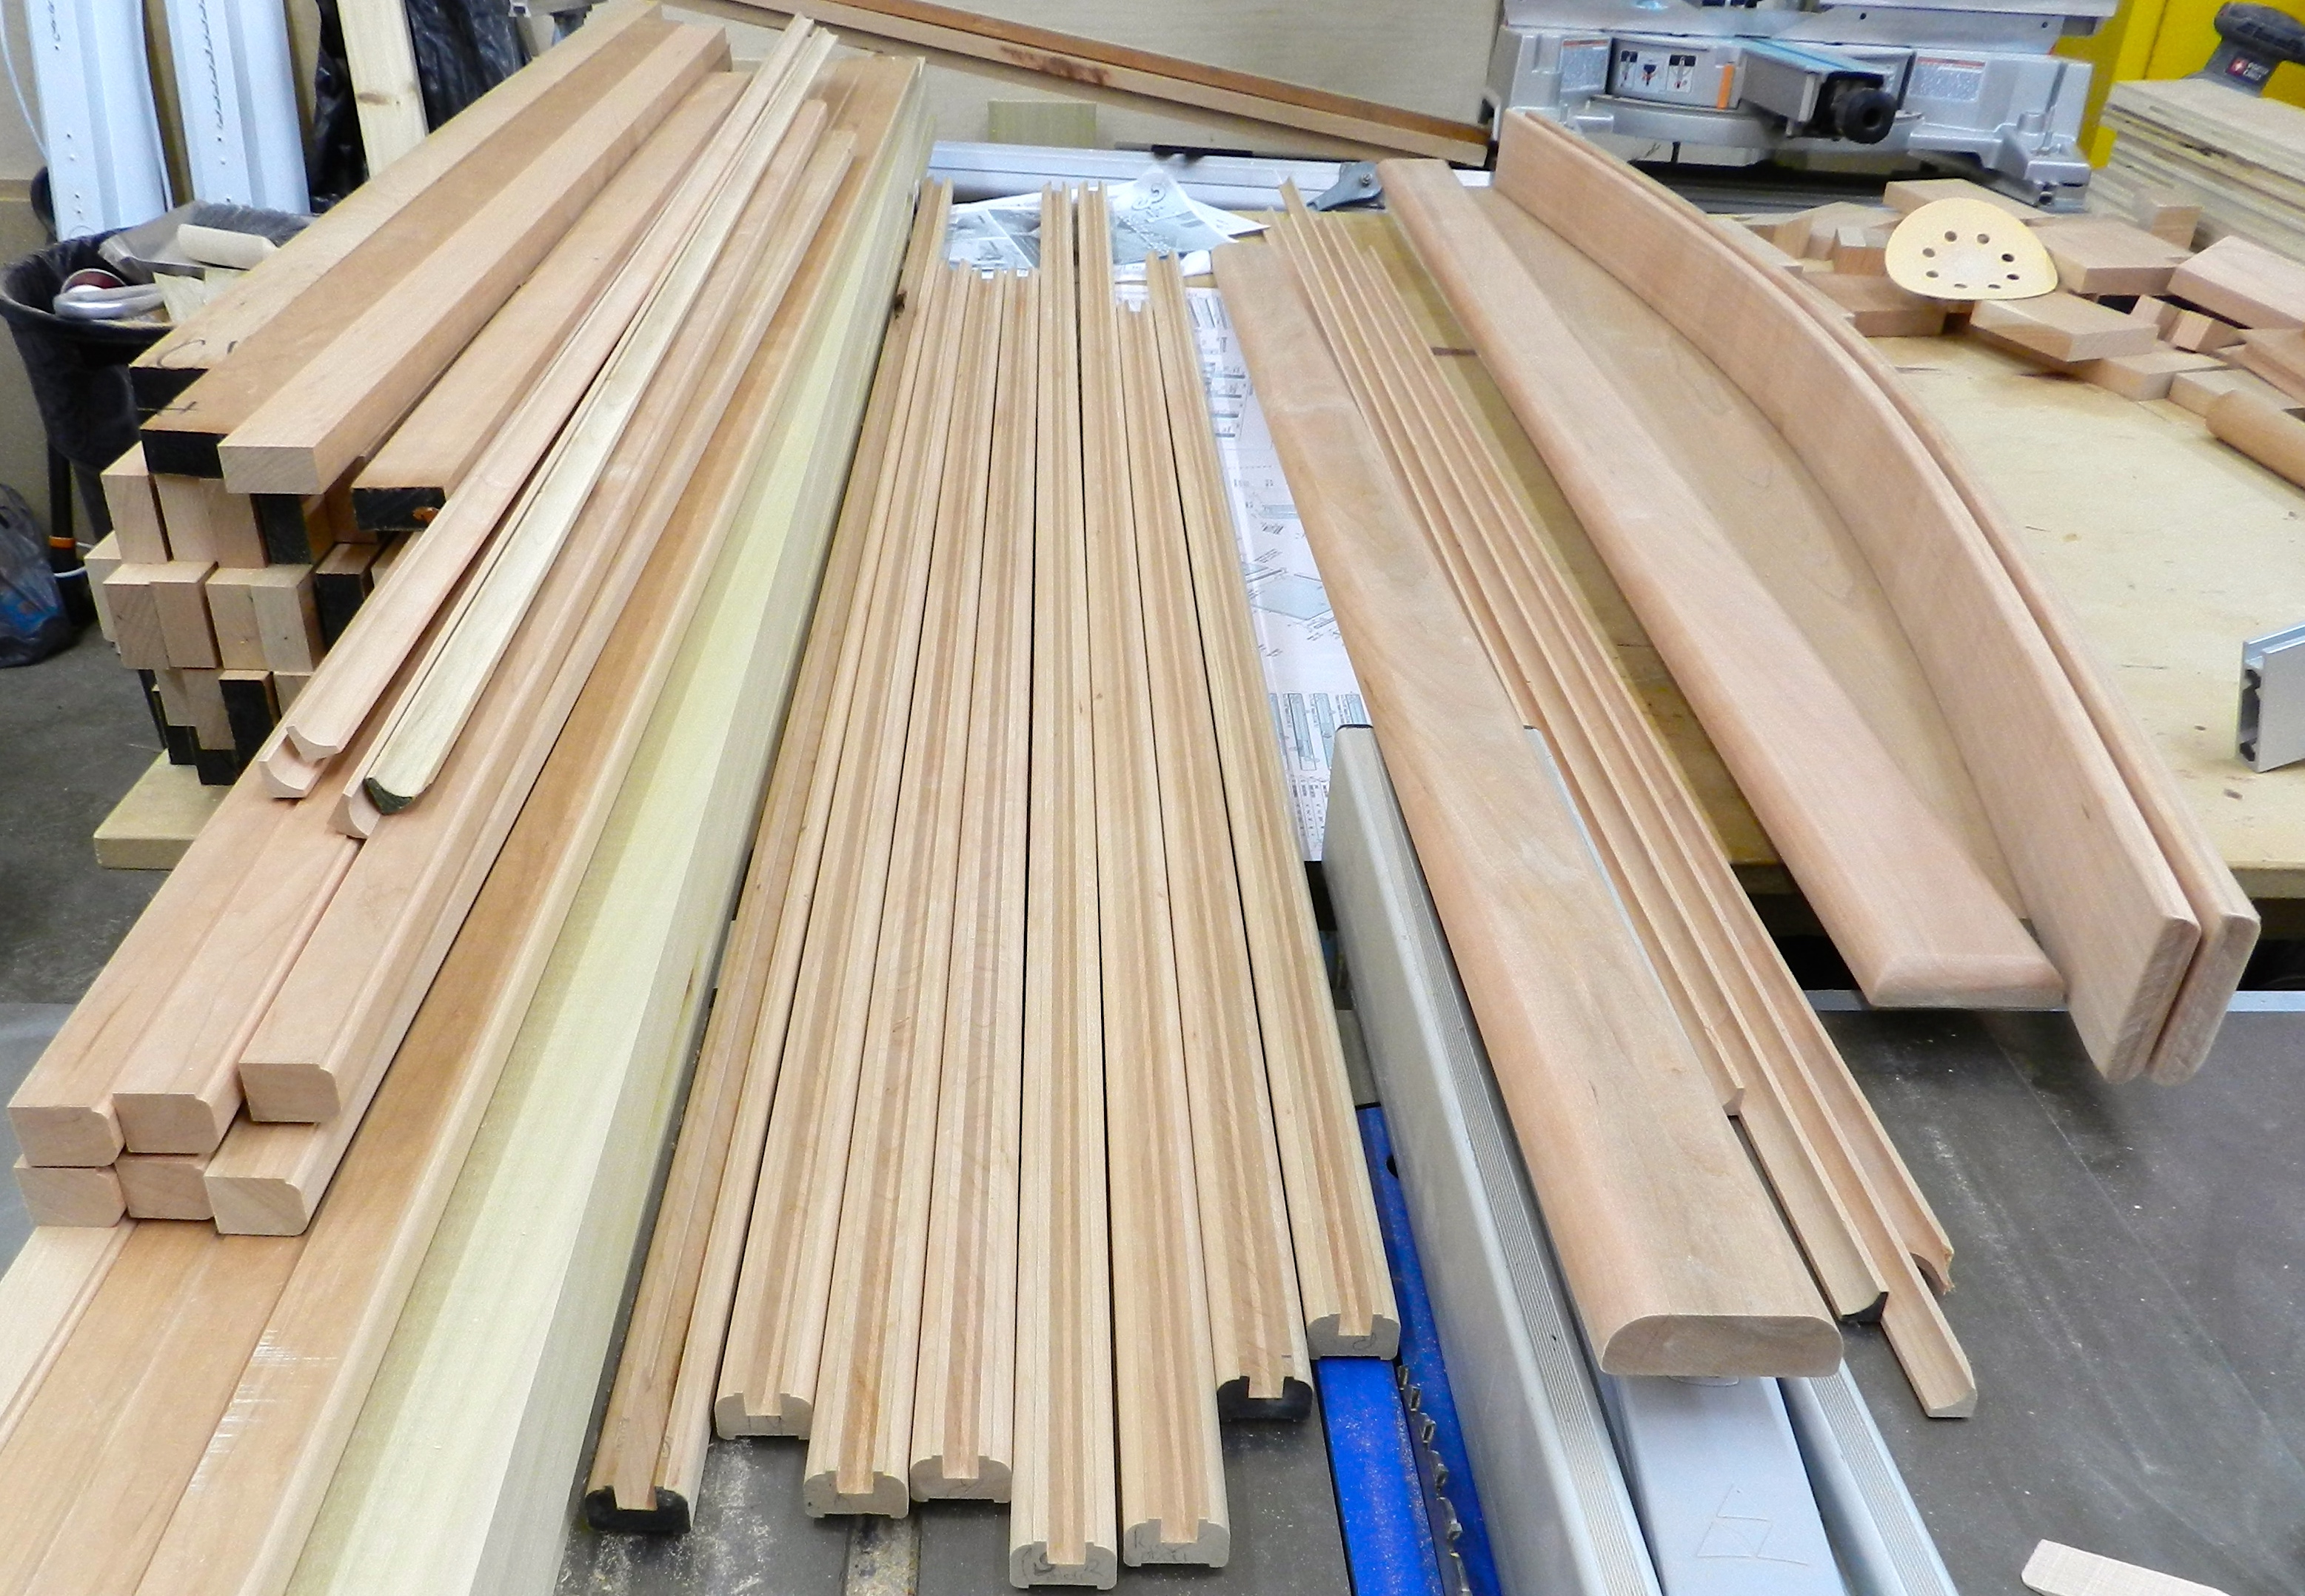
I chose Cherry wood for this project as I like cherry’s grain, workability and warm tones once it has time to age. Given that the project is for my newborn son I wanted a child safe finish that would be durable. (So that has me think of shellacs, low or preferably no VOC finishes that cure to hard film that will protect the wood and be easy to clean)

Freshly milled cherry has a light, almost pink finish so I likely will dye or stain the project to get a jump on the aging process and even out the tones of the wood.

Cherry also has a tendency to blotch, so I always want to seal it with shellac as a sanding sealer to try and protect against blotching.

Color Sample Chips:

With some high level parameters in hand, I first take a look at the color chips and samples I have on hand.

I have a real nice collection of General Finishes samples that I use in my teaching and they are one of my go-to finish providers as I’ve found their products to be high quality and reliable.

Finish and color samples

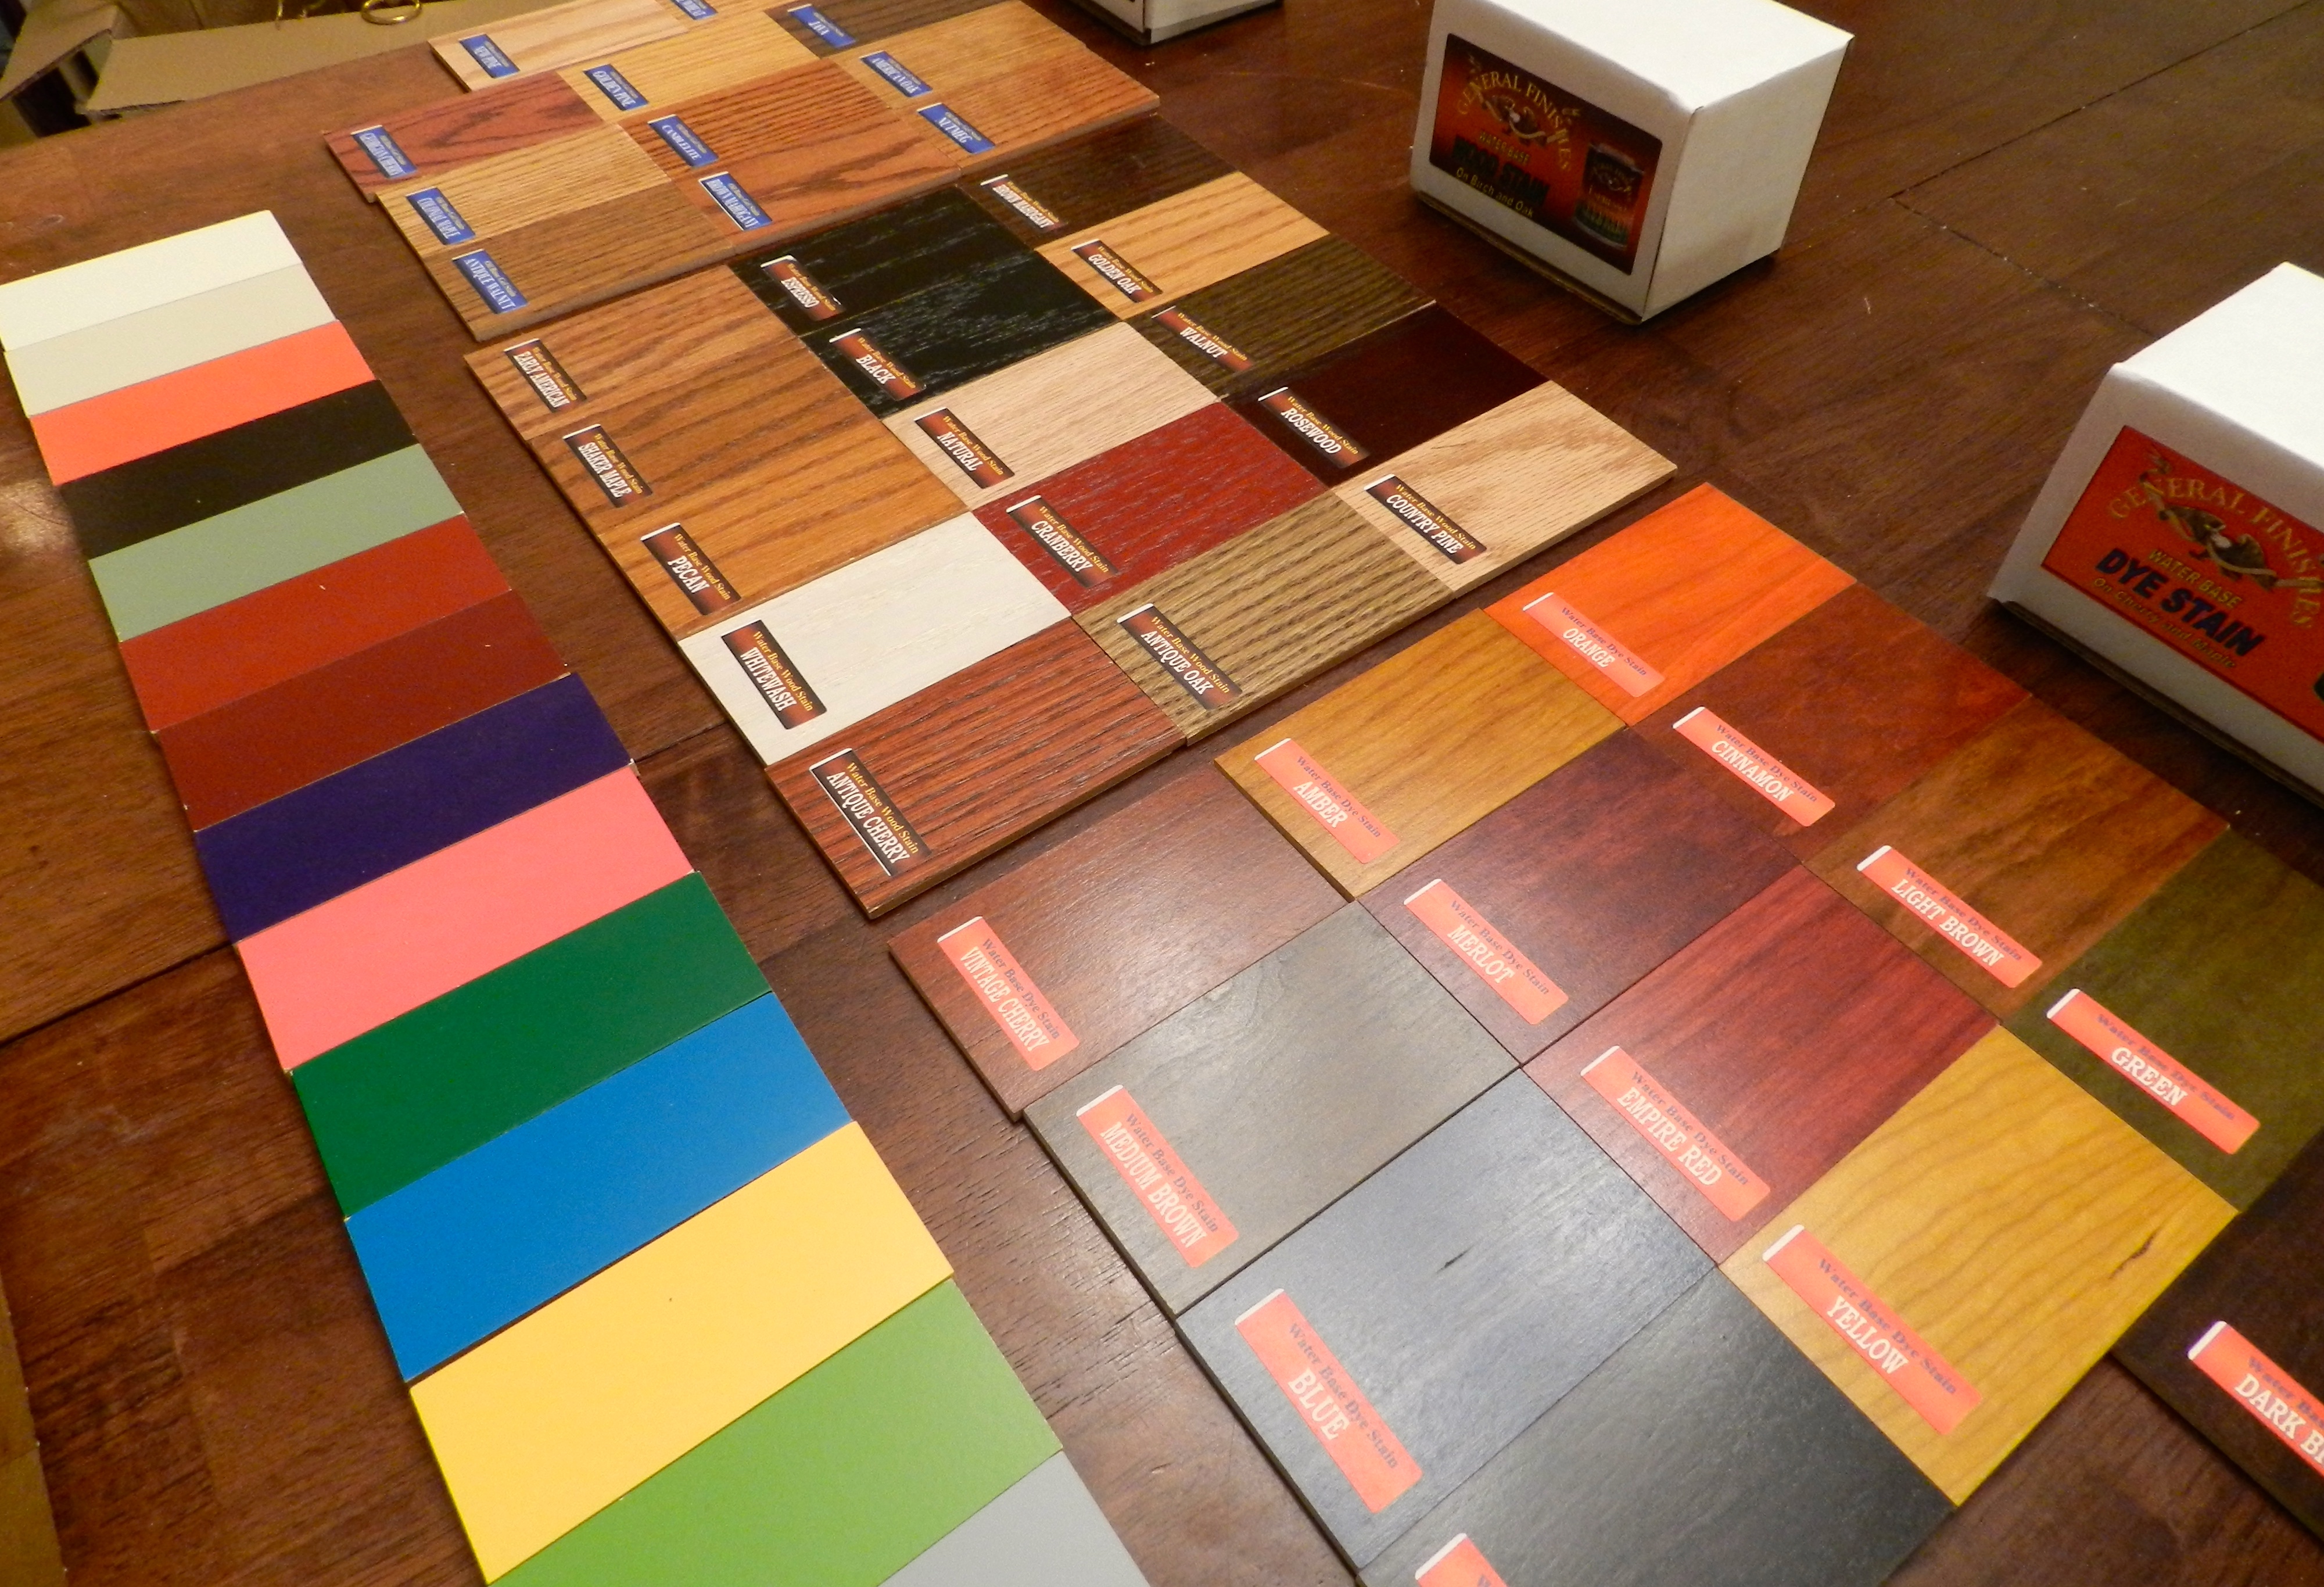
PRO TIP: Whenever you test a sample on a cut-off or similar piece of wood, label it with the finish — maker, type, color, date, #coats and wood species. I keep a box of these sorts of samples in my shop and they can often help in this process as my samples are larger than the standard chips that are usually on paper or small bits of veneer plywood. As the samples age they provide that much more information on how the pieces you make will age with a given finish.

From looking at the chips in a few different lights and in the baby’s room we decided on the following three samples:

Cherry stains we liked

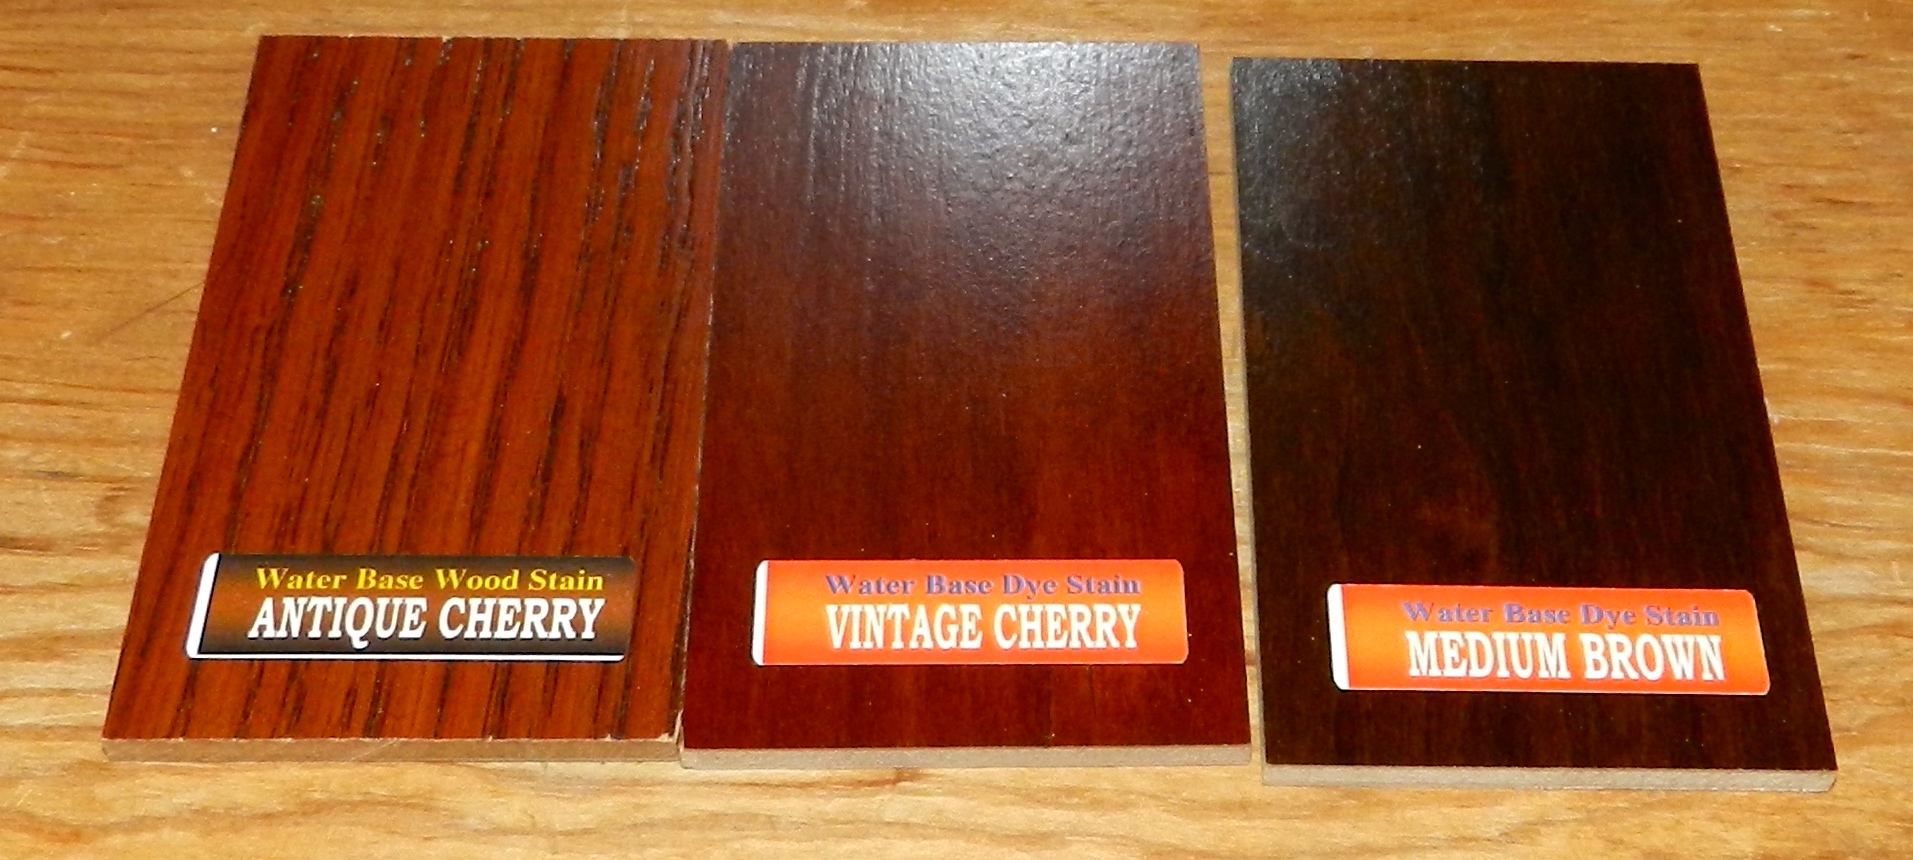
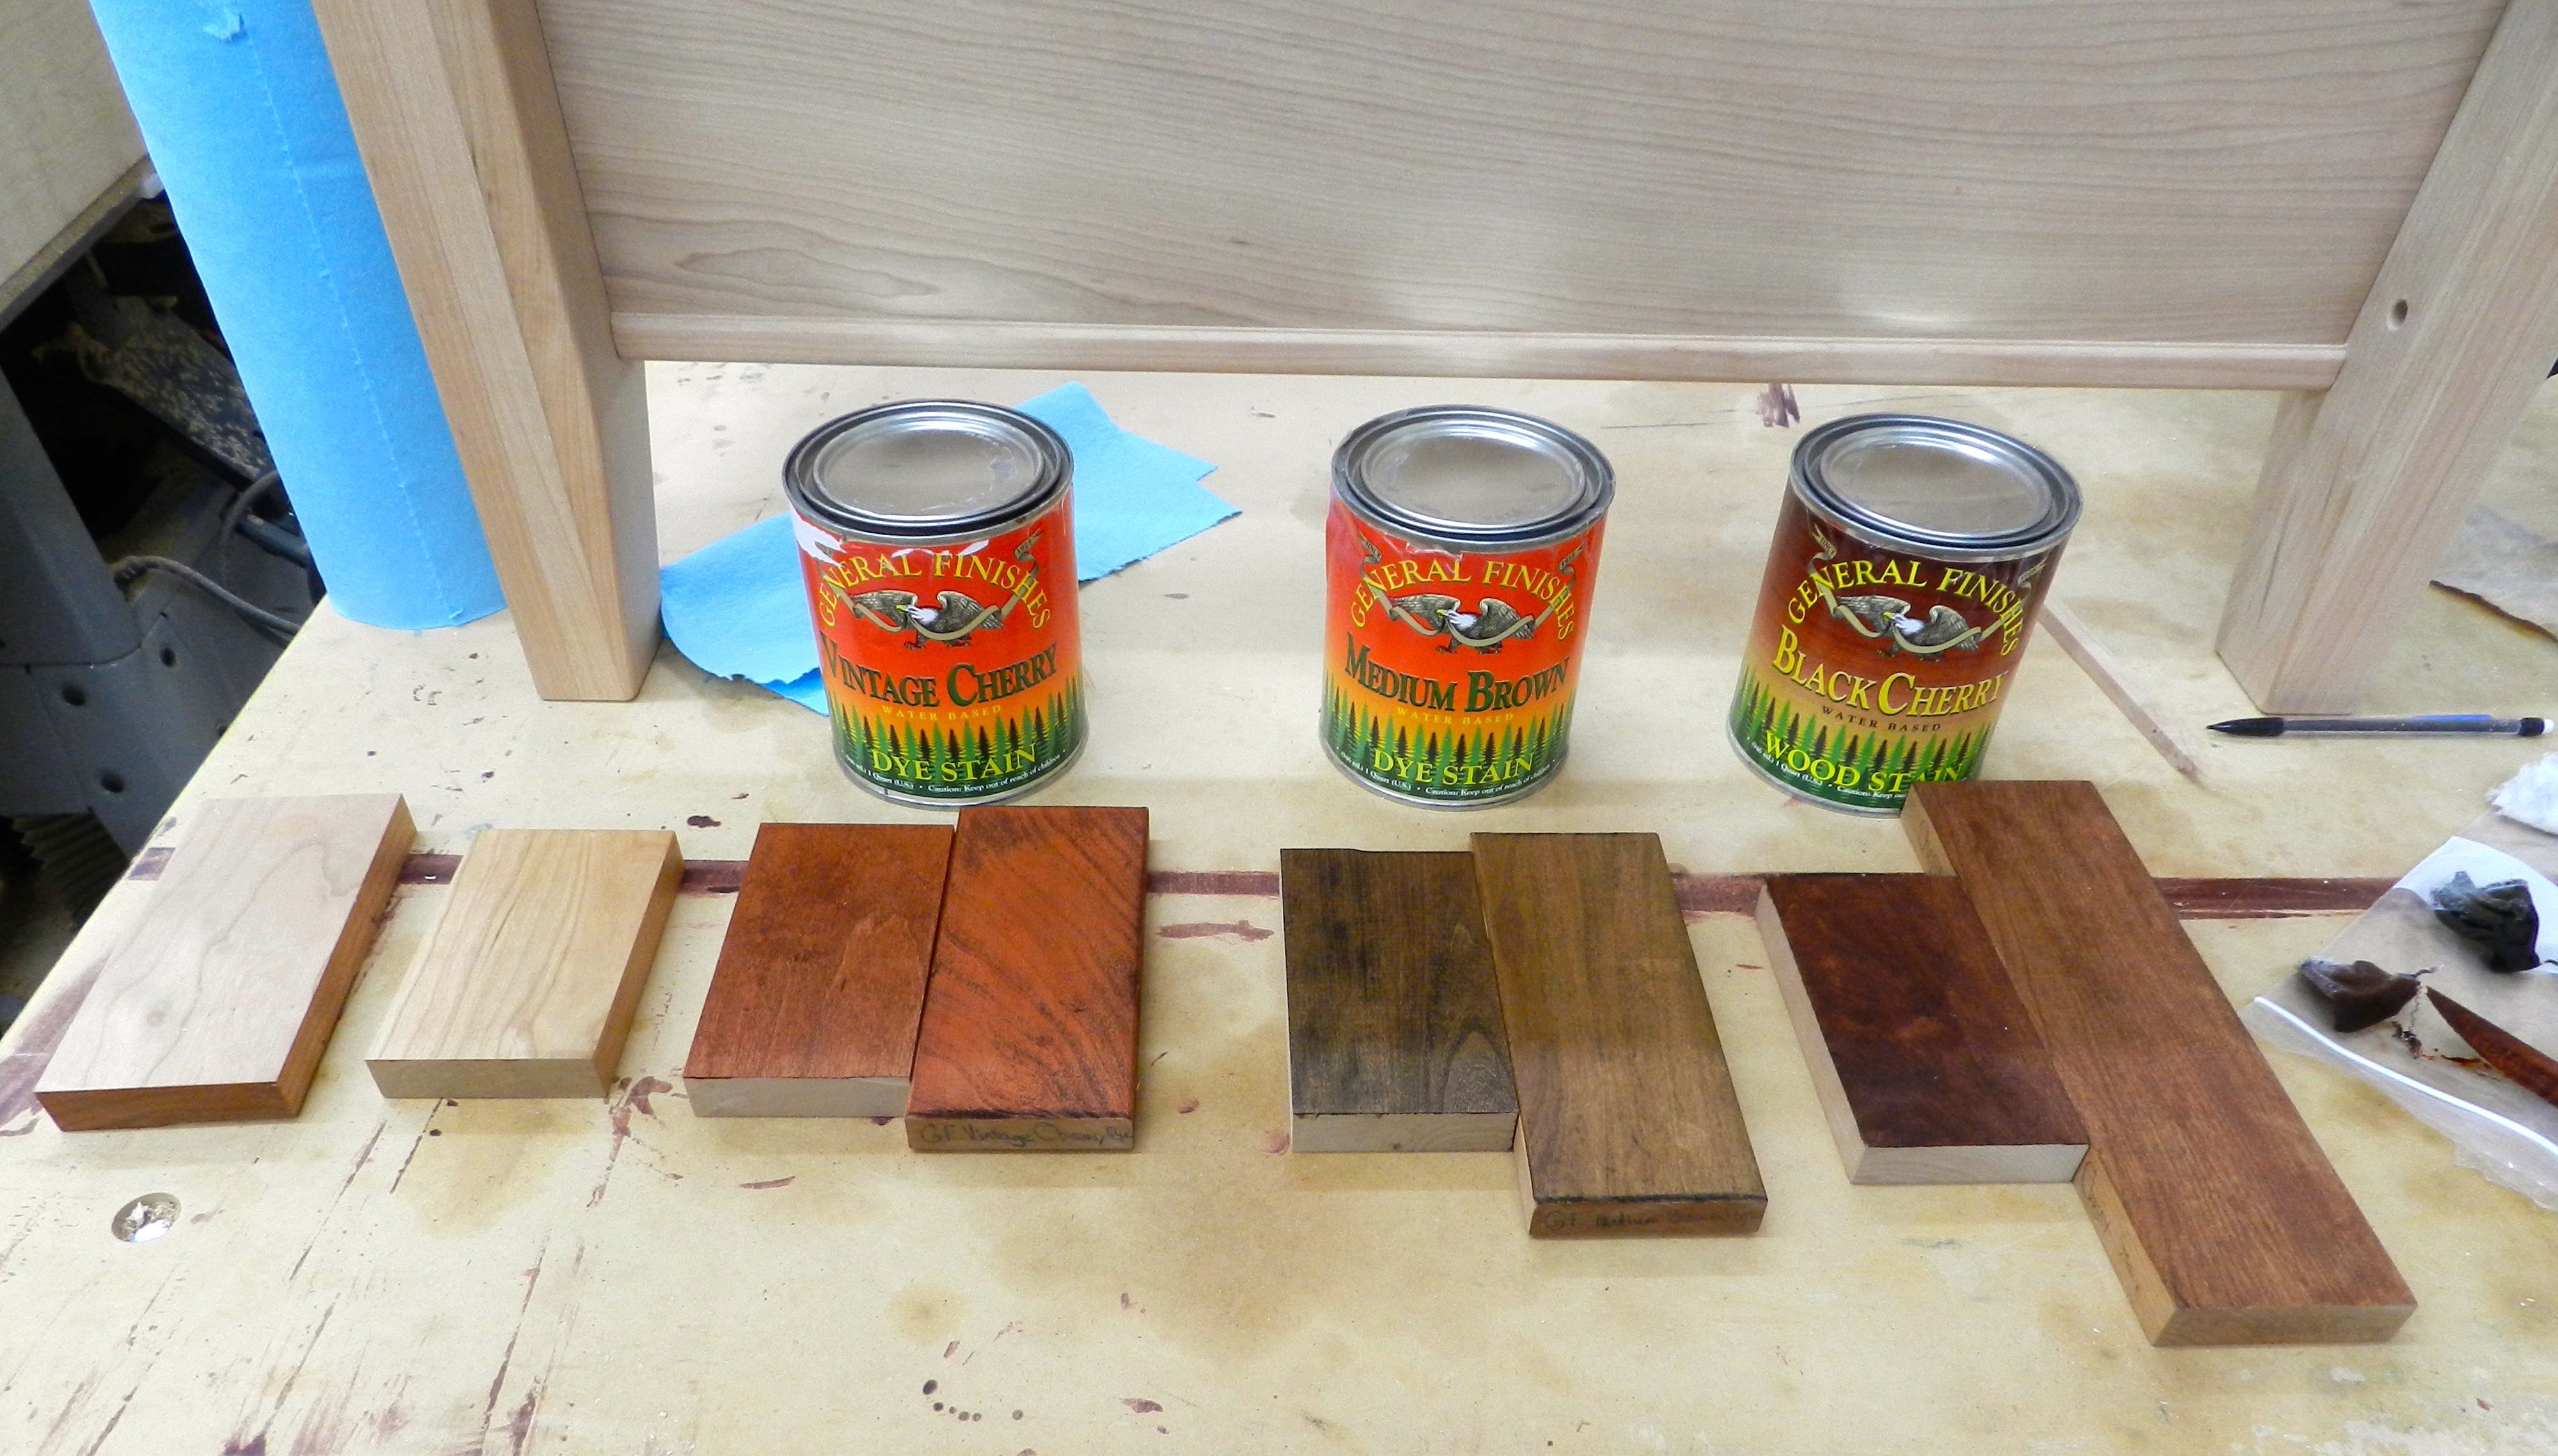
Test your top 2 or 3 choices:

In the photo below the wood is set up in pairs. The left piece of wood is raw cherry. The right piece of wood had a wash coat of blonde shellac applied to see how it would reduce the amount of blotching in the cherry.

Trying out the dye and gel stains I liked. Left samples are raw wood, right samples have a coat of shellac under the stain.


PRO TIP:
You can help jump-start the cherry aging process by exposing it UV light. With the above samples I kept them on a sunny window sill in the shop for a few weeks to get a feel for how the finishes might look as the project ages.


I didn’t love the results from the above experiments, I wanted a warmer tone, so I decided to mix up a batch of garnet shellac (described here) and continue my experimentation. On my next round of sample boards I experimented with a few coats of garnet shellac to see what I liked best. The garnet shellac alone did a fairly good job of warming up the cherry.

Trying my favorite stain from the last round, but trying it out with garnet shellac

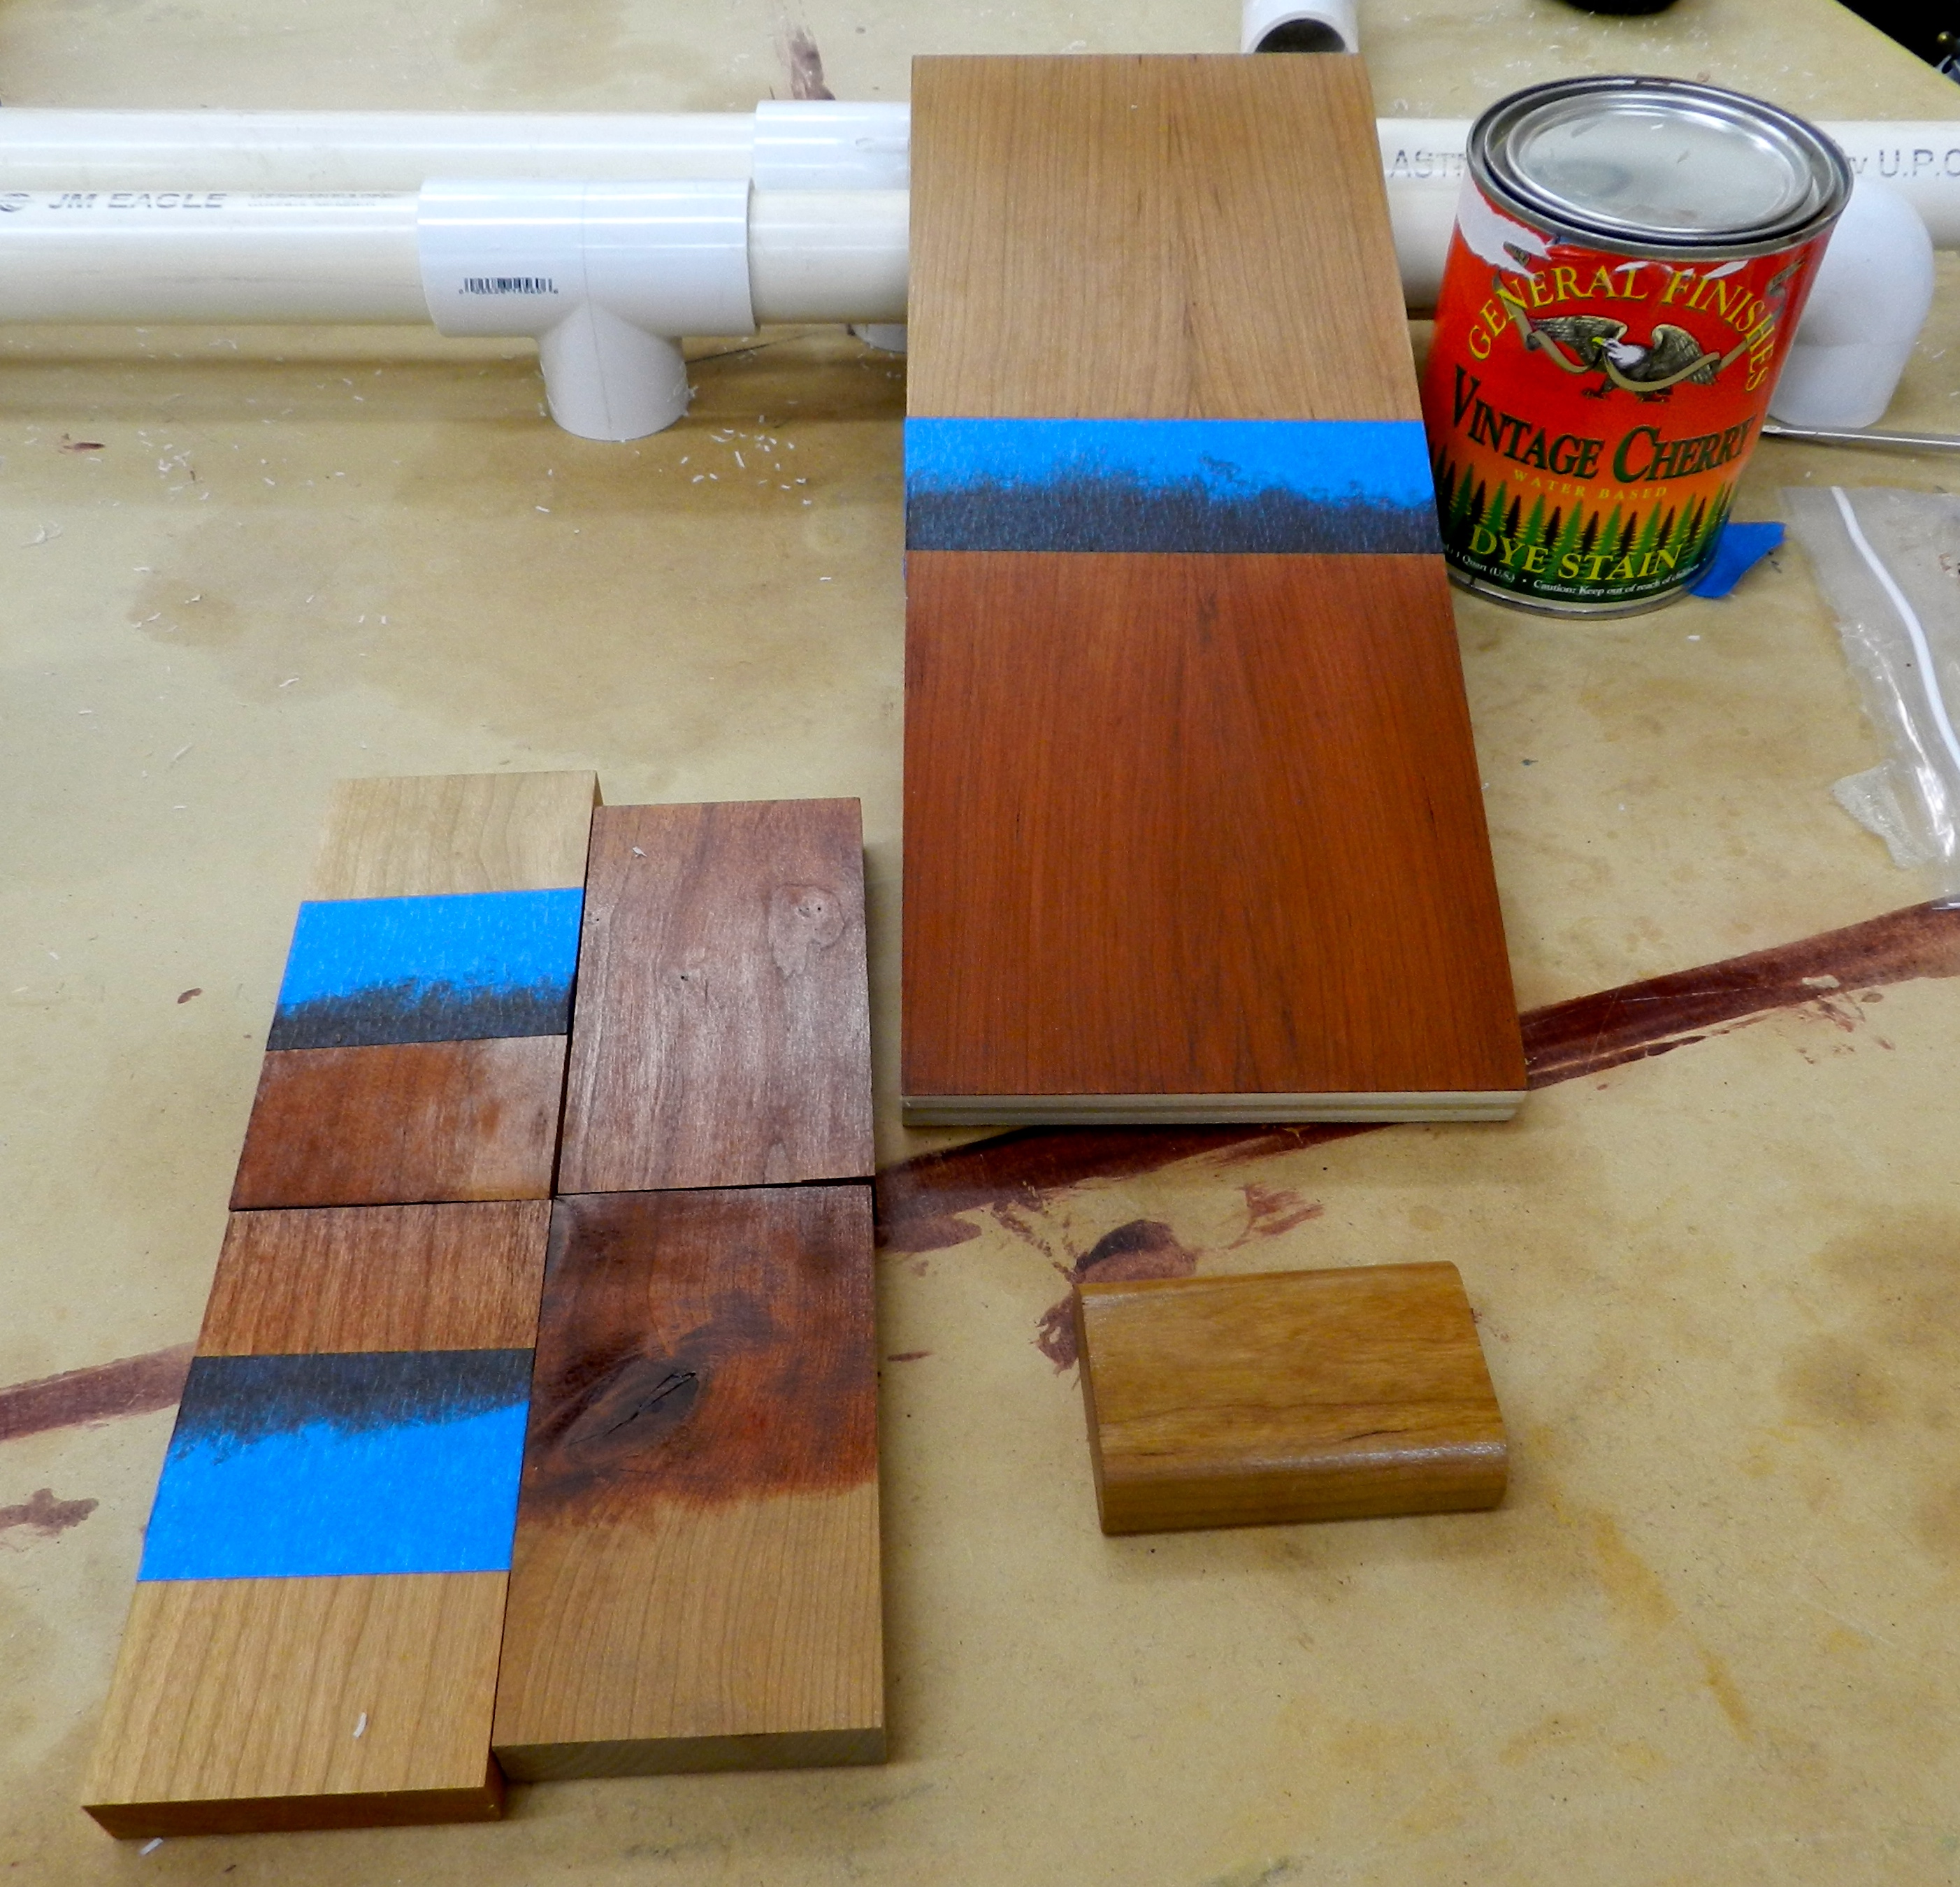
The experiments continued with several pieces of wood scrap from the project to see how the recipe of garnet shellac and dye stain looked on knots, different grain orientations etc.

Testing the recipe with a range of woods on the project

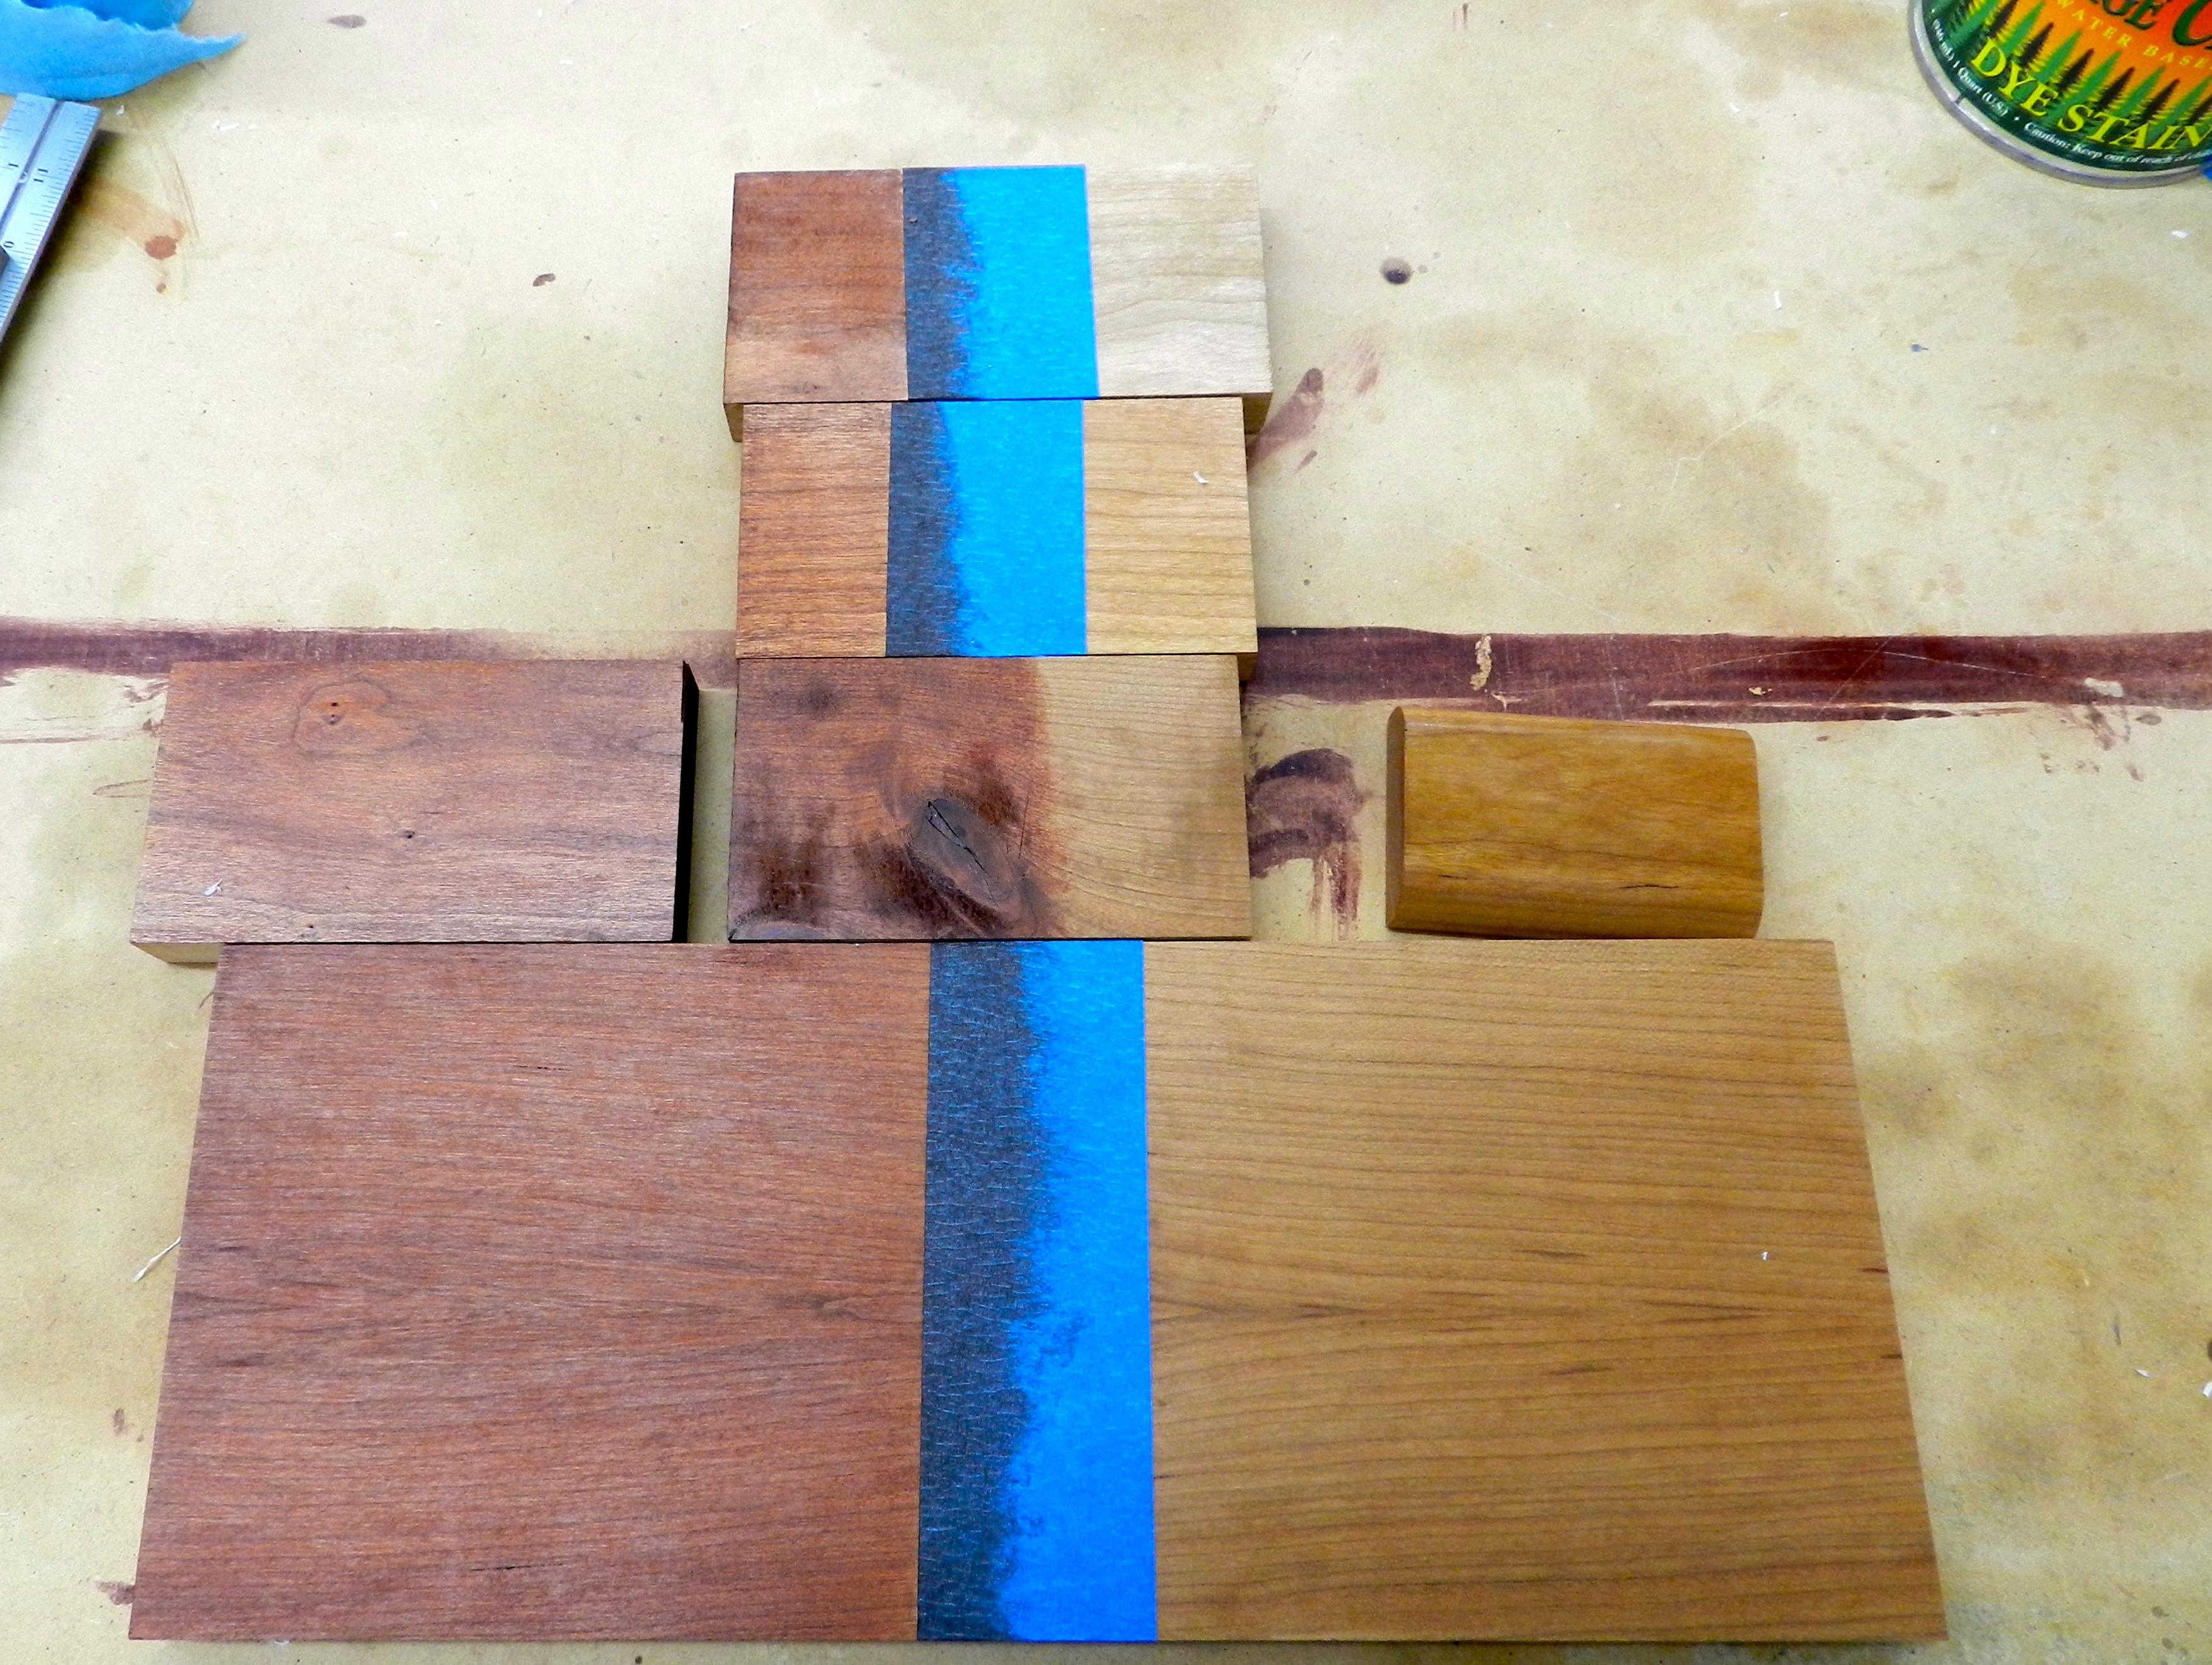
In the end my wife and I both liked the same samples, so in the end I wound up going with two coats of garnet shellac with the second coat having a small amount of dye stain in the second coat. All of the above experimentation was well worth the time as I would not want ruin a project like this with a poorly executed finish.

Top coat:

I decided to go with General Finishes High Performance Water-based Polyurethane Top Coat in a Semi-gloss.  I like this finish as it’s easy to apply by hand or via sprayer, low VOC,  it’s UV stabilized and once cured is a durable child safe finish. For fine furniture when it comes to a top coat I adhere to the mantra of ‘if I wanted it to look like it was made out of plastic, I would have made it out of plastic’, but for this crib it’s very nice but not super fine furniture and from what I know about babies the ability to quickly and easily clean off any accidents makes this higher gloss sheen all the more worthwhile.

Crib outfitted with mattress, sheets, skirt and of course stuff animals

For this project I applied the poly by hand using a folded up lint-free white cotton rag. I worried the sprayer would cause too many drips around the many slats and after all the work I put into the project I didn’t want to foul it up in the finishing room.

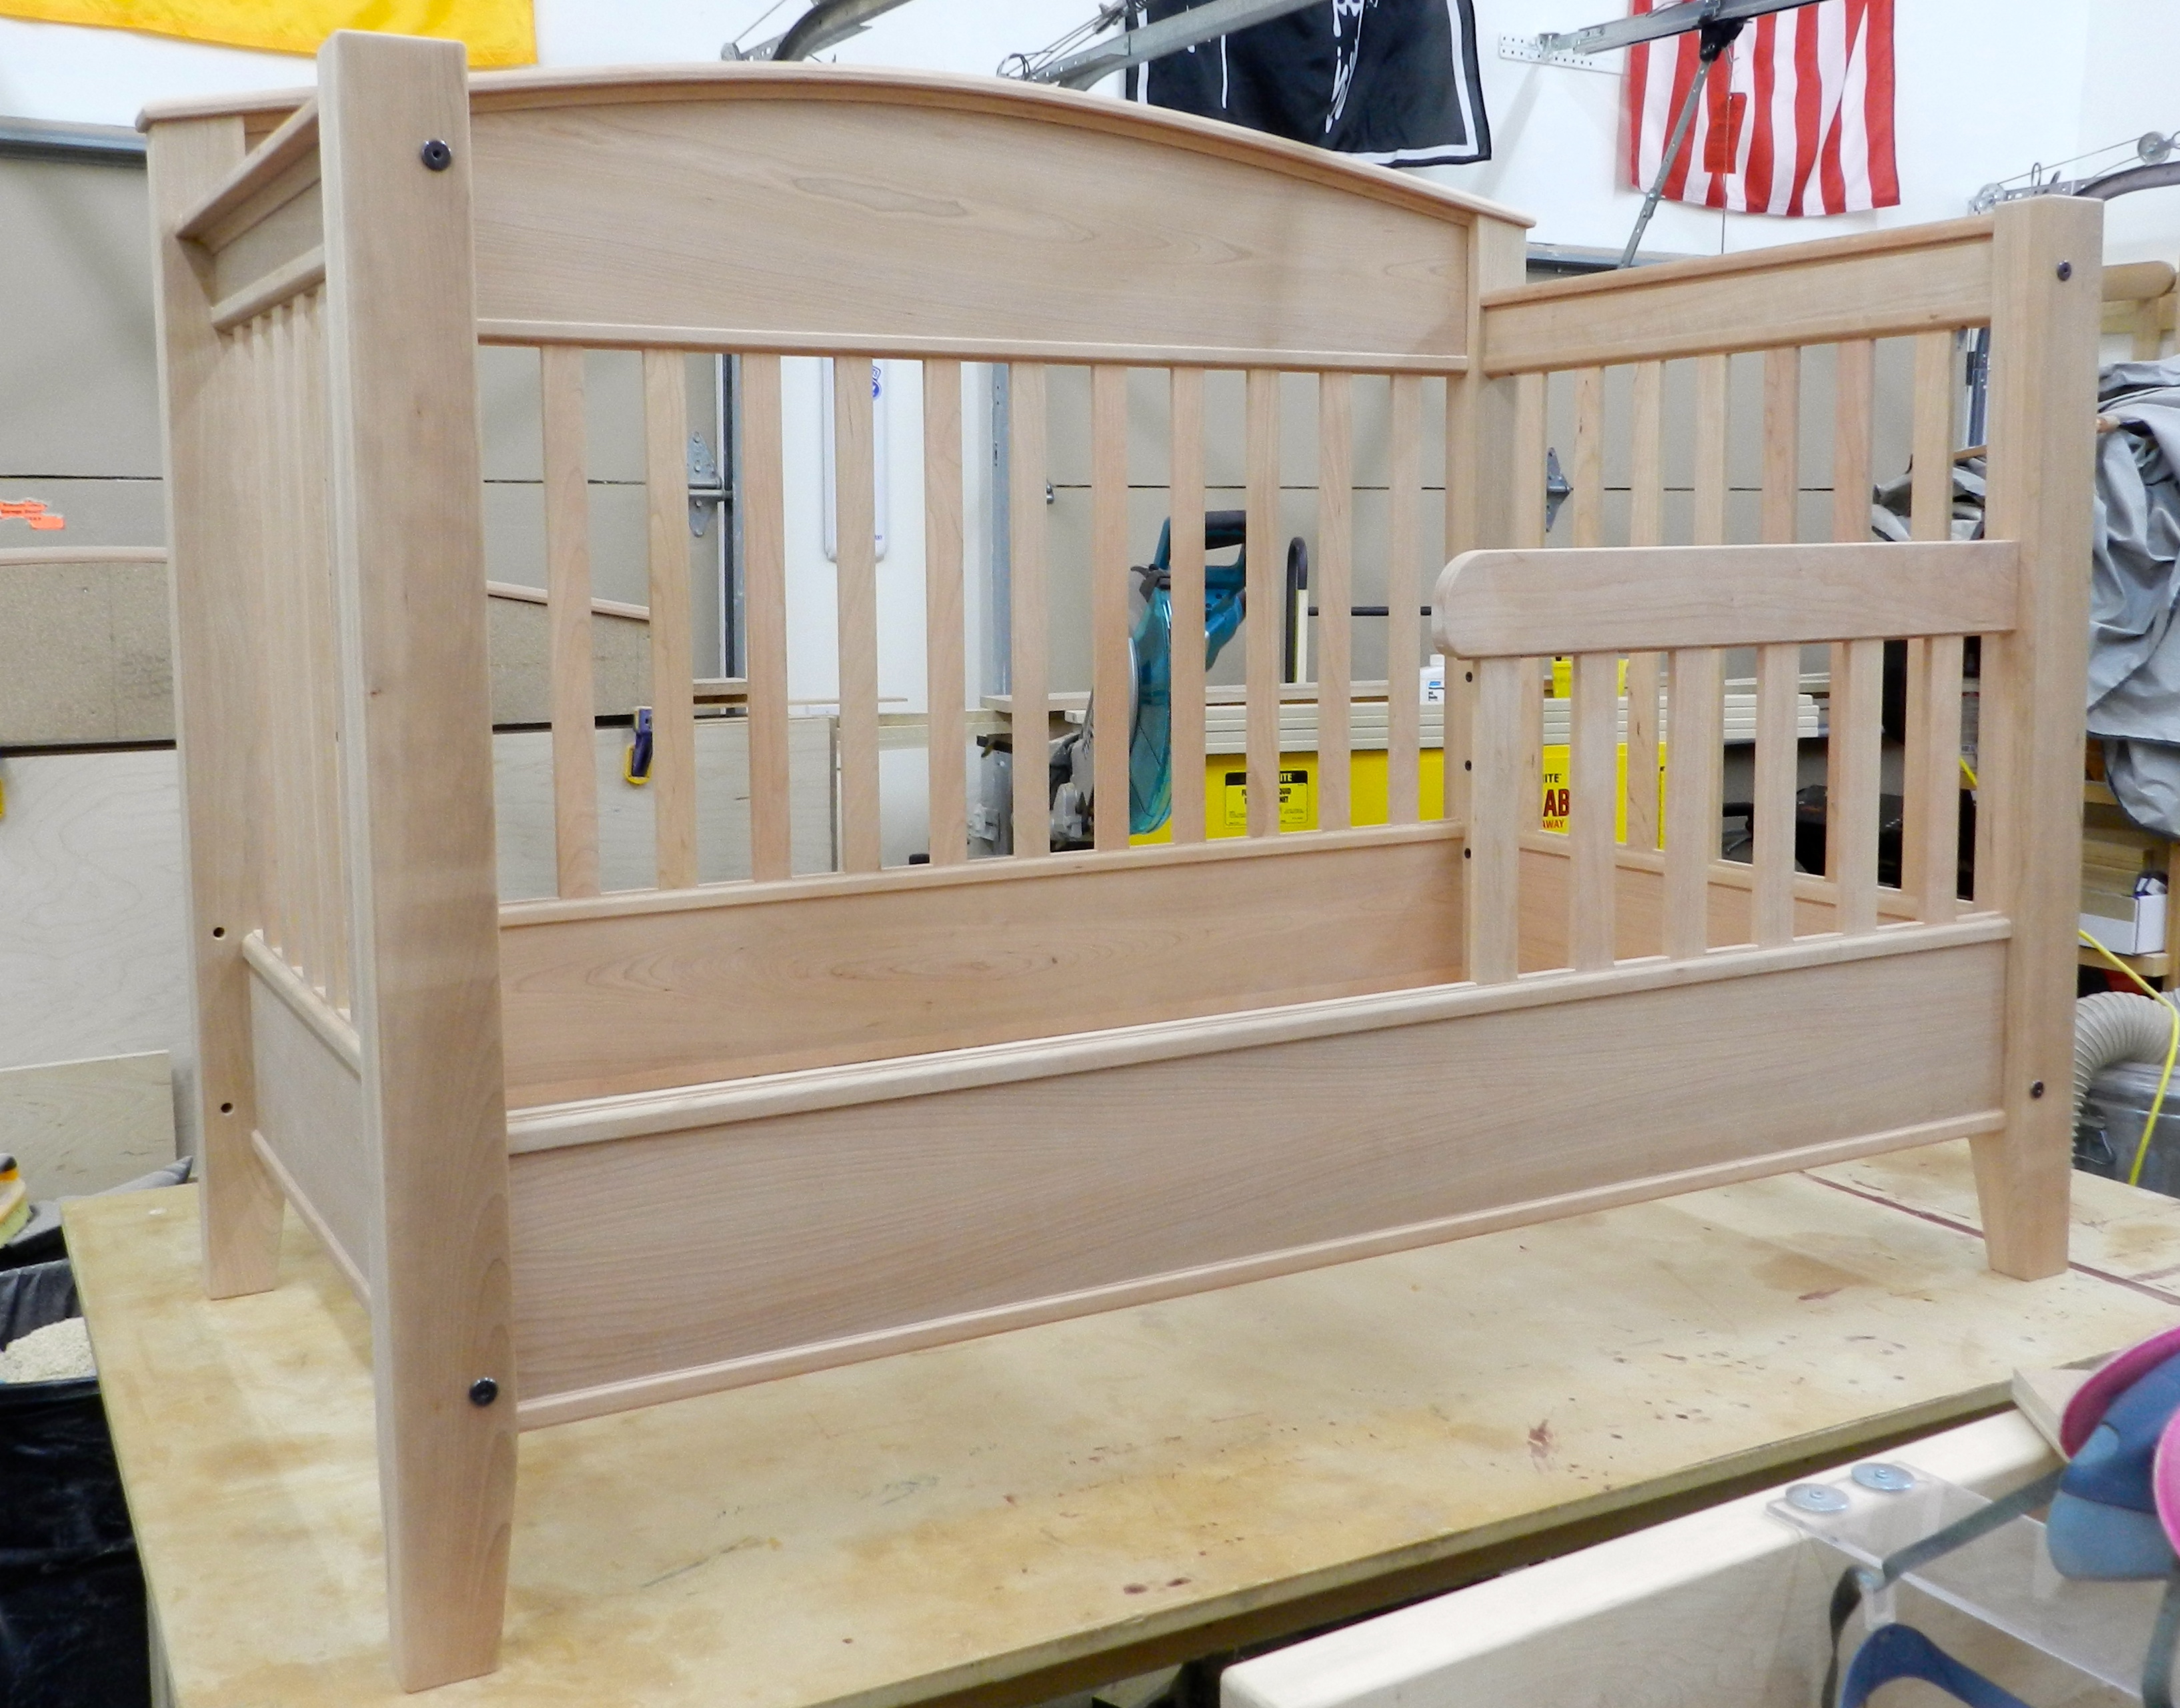
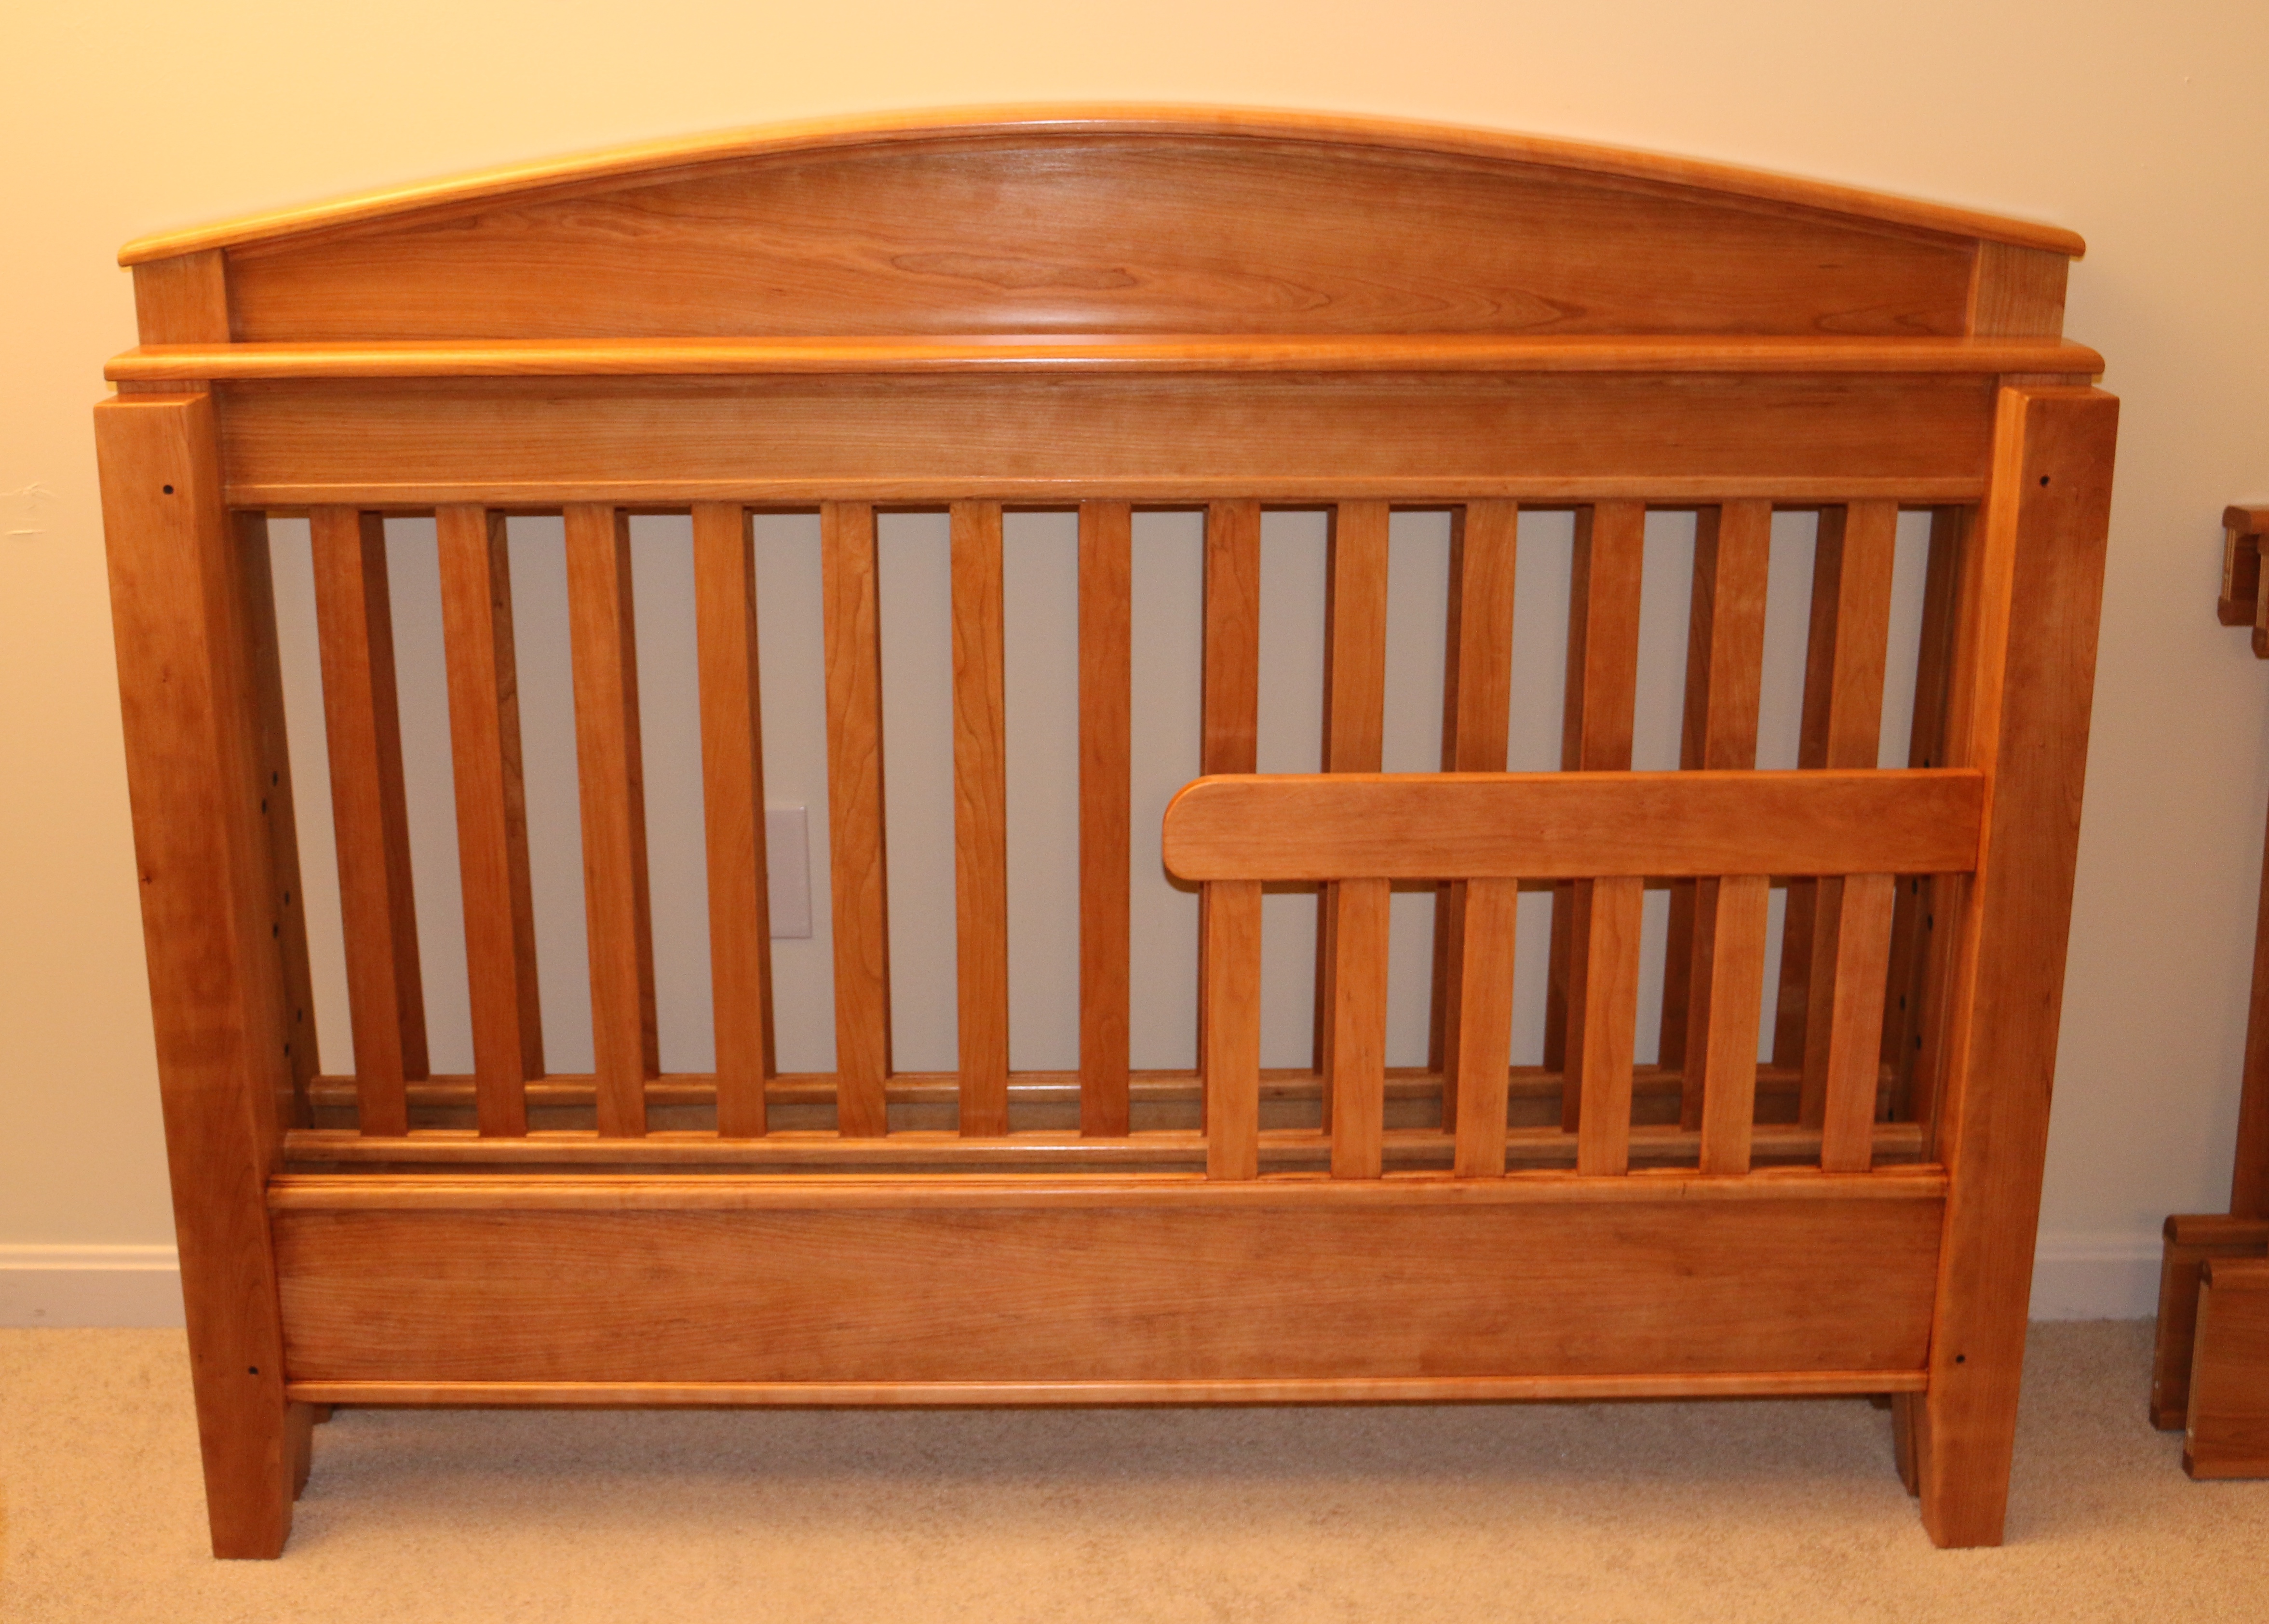
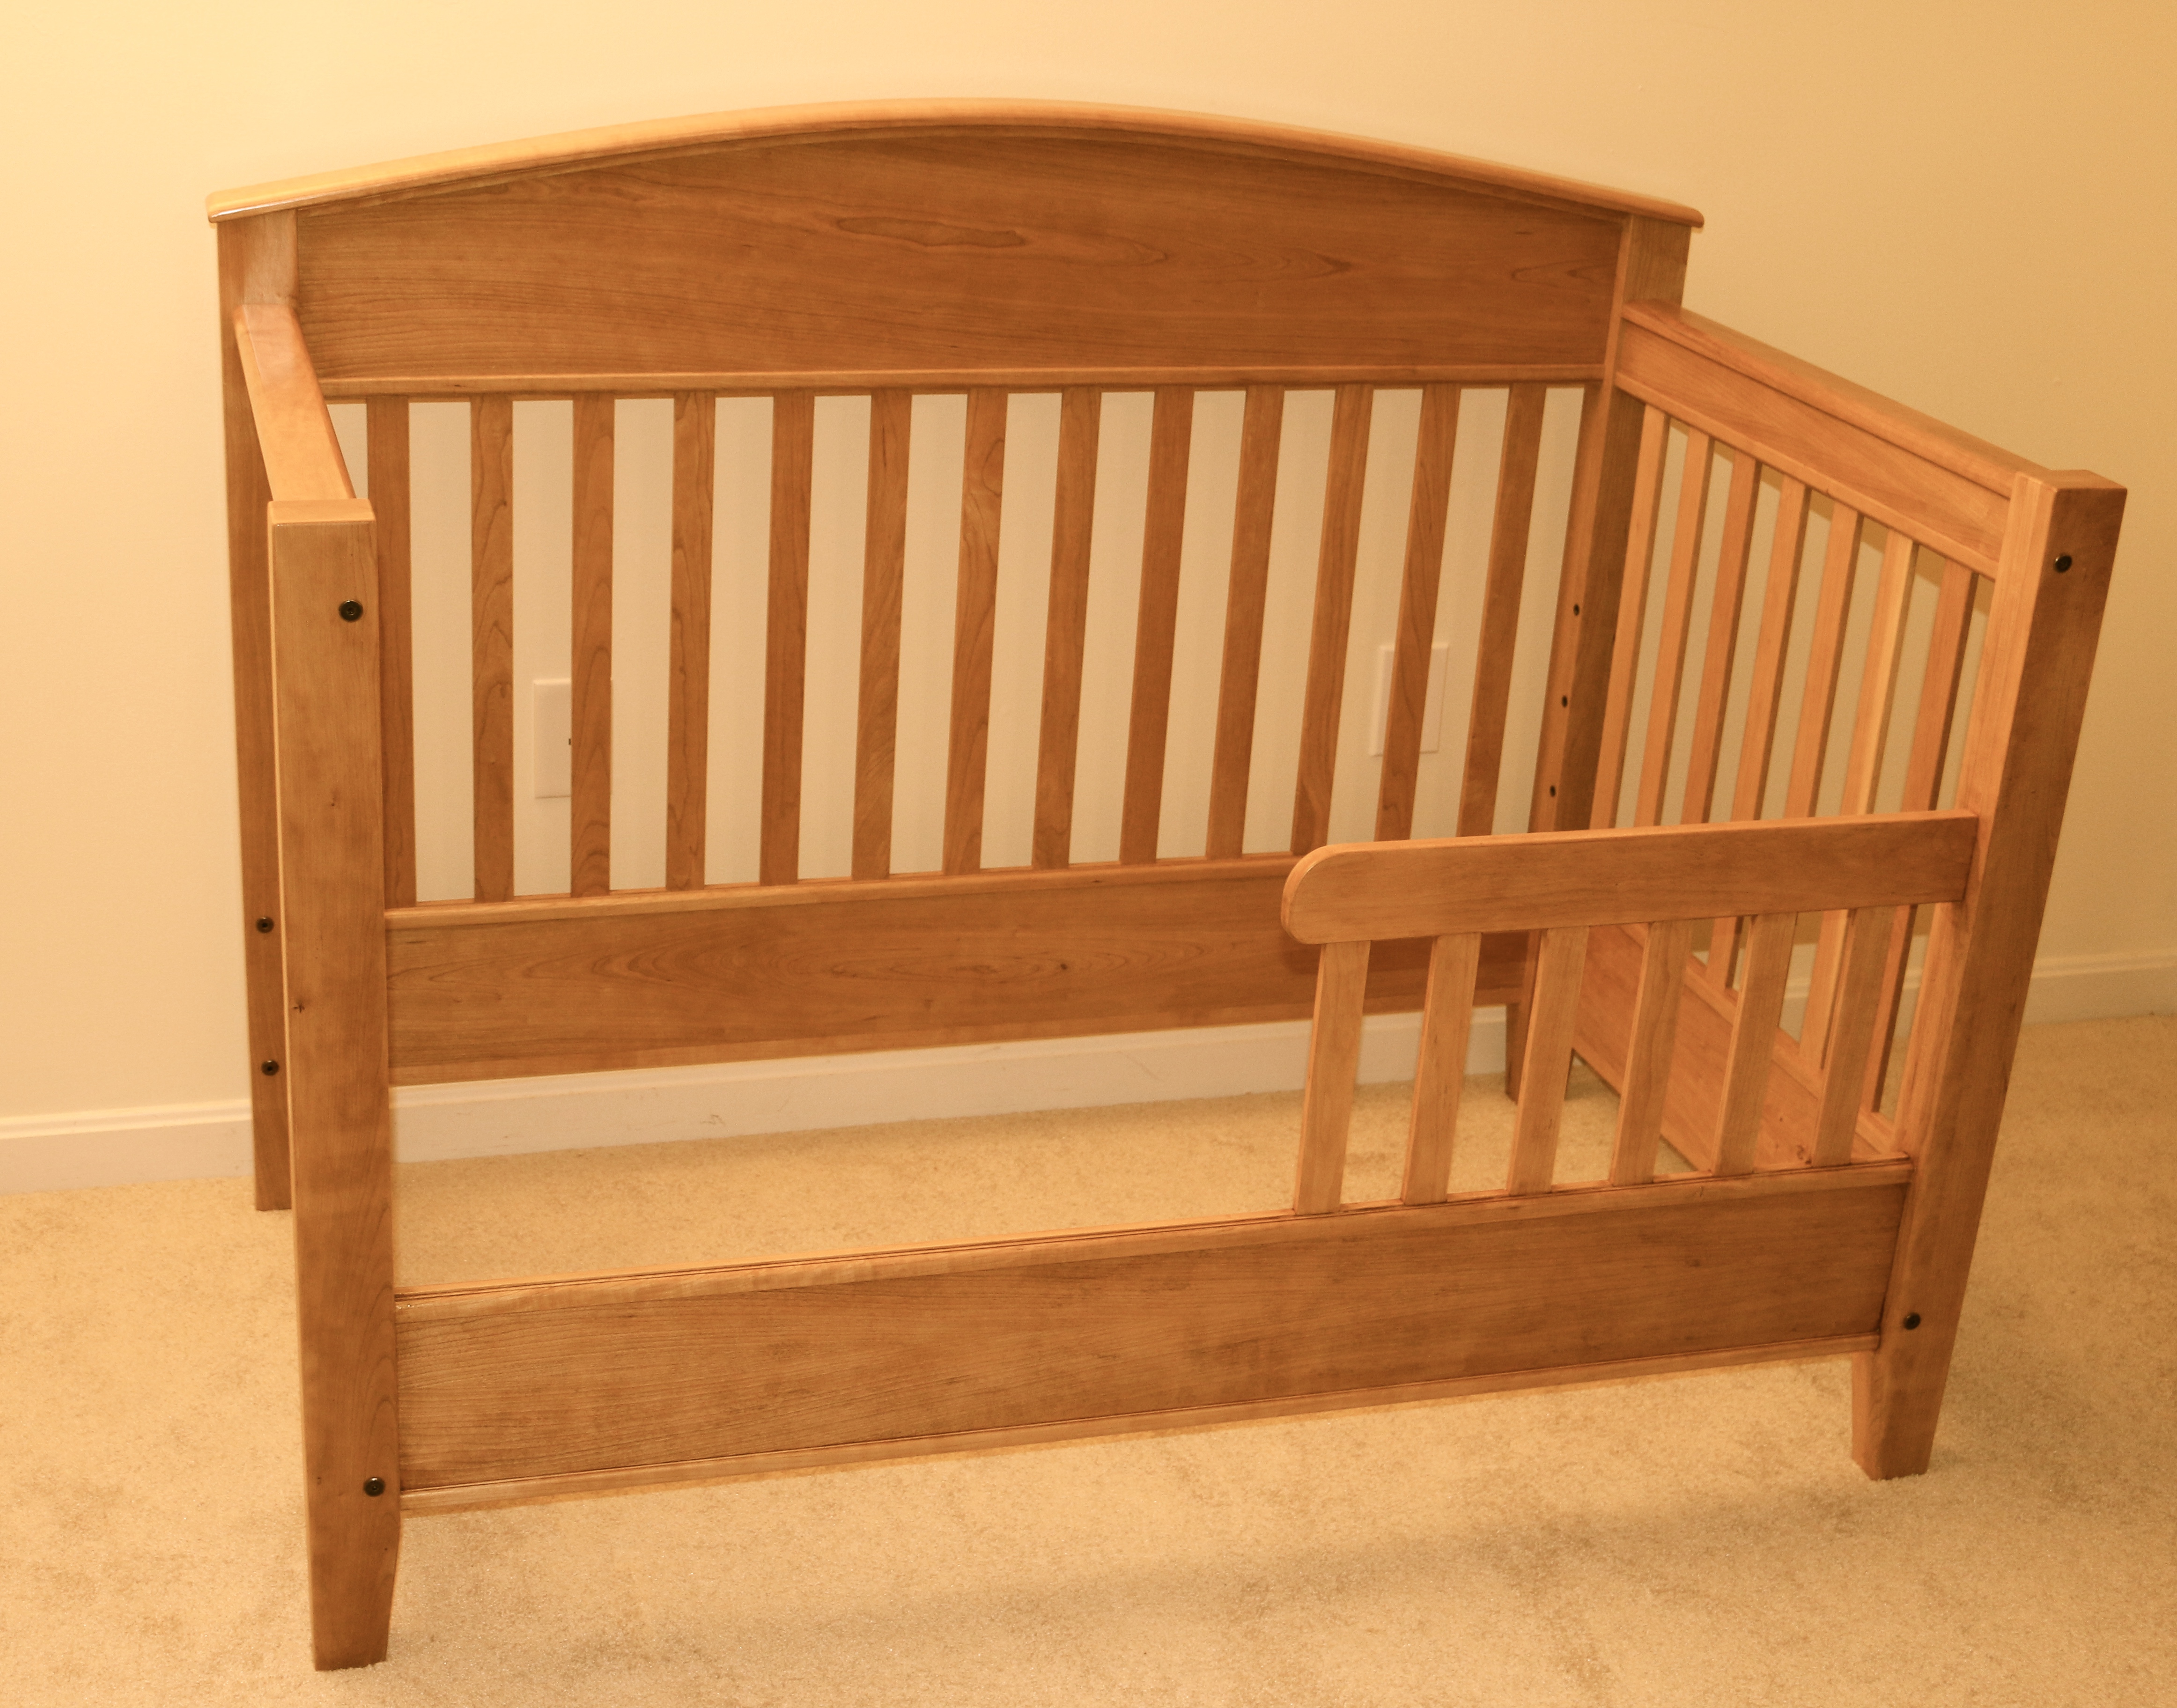
I’m very happy with how this project turned out and look forward to seeing how the cherry ages in Bradley’s very sunny bedroom.

If you’d like to read some other posts related to this project please check out this link here.

Take care,
-Bill

P.S. How do you choose your finishes? Feel free to share your thoughts and tips in the comments section below.

Building Bradley’s Crib Part 4 – Final Assembly

Molding plays with light and shadow, it blends transitions and it can be pleasing to touch. I’m glad molding has so many positive features as I had to make a LOT of it to finish off this project. Below is a quick walk through of what it took to complete the woodworking on this project.

Making Molding:

Sampling of the MANY moldings

As you can see from the photo above a had to mill a lot of stock and produce a lot of profiles to produce all the moldings necessary for this project. I won’t go into the minutia of each profile, or how to create molding using a handheld or table mounted router as that has been covered to death elsewhere. I will talk about a few of the things I do to help get consistent results when using a router.

1.) Make sure your router bits are clean and sharp. Make sure to use a bit cleaner to remove any pitch left on the bits. A diamond card or file can also be used to tune up a bit that is not cutting as well as it used to.

2.) Feather-boards. Whether they are store bought or shop made a feather-board is a great way to help keep stock where you want it. This project required many thin moldings with several different profiles on the same piece of stock. To ensure that the stock stayed exactly where I wanted it I used feather-boards to keep the stock pressed firmly against the table top and against the fence, both before and after the cutter. Without this seemingly heavy handed setup the stock could flex and you’d have to run it a few times. A push stick is also nice to have nearby. For this project the blanks were 2 to 6′ long so I was able to safely move the stock through the cutter with my hands kept at a safe distance from the cutter by virtue of the feather boards.

Extensive use of feather-boards on the router station

3.) When possible, try to be aware of the grain orientation when passing it through the bit to minimize tear-out

Profiled sanding blocks

4.) After coming out of the router I hand sand the profiles to remove any scallops left by the bit. For tight or very complex profiles I will also use a profiled sander (a bit of formed rubber (shown above), piece of dowel or block of wood) that will help me get the sandpaper into the portion(s) of the profile I want to sand.

Molding profile details

5.) Use the right tool for the job. For the cap moldings above I used a dado set on the table saw (with feather-boards there as well) to create the dadoes, and round-over bits in the router table for the round-overs. (You certainly could use a straight bit to cut the dadoes on the router table, but it would involve taking a few passes which takes more time and could introduce error).

Assembly:

Gluing up the bed rails

With the moldings all milled, sanded and cut to size it was time to glue up the various assemblies. Shown above I am gluing up the top and bottom molding onto the adult bed rails.

Shop made jig for drilling centered holes

After the glue dried overnight on the rails it was time to drill holes for the through bolts using a shop made jig constructed out of plywood. This made it very easy to line up and drill consistently centered holes on the ends of the rails. I also made use of some of the stopped drilling techniques outlined here.

Clamping each section using extended bar clamps

Next up was gluing up all of the large sections of the bed — head-board, foot-boards, side panels etc. Given the width of this project I had to break out the Bessey K-Body rail extenders which allow me to bolt two K-Body clamps together to effectively make an even longer clamp. The connector section also works as an extra set of feet to keep the clamps level. I used hot hide glue again for its long open time and compatibility with finishes. Once in the clamps I checked everything for square, adjusted as needed and let the section dry overnight.

Attaching the cap.
Attaching the cap.

Once the panel was dry it was time to glue on the top cap/hand rail. Next I cut the cove molding to size and glued it in place with the help of some dowel cut-offs.

 Installing the slats:

Cutting spacers on the cross-cut sled

I milled and test fit the slat spacers when I produced the molding above. I gently eased the corners with some sandpaper and cut them to length using my crosscut sled on the table saw and a stop block that was clamped in place against the rear fence of the sled. My OCD side also kept them in order so the grain matched across each panel.

Installing the slats is a bit of challenge so I did a full dry fit/test run before doing it for real with glue. You start from the center slat which you mark with center lines on blue tape (that way you can remove the lines easily as they are only on the tape) on the slat and the panel and install at an angle to insert the slat and then straighten out when it is firmly in the top and bottom slot. I then install spacers to the left and right of the slat and repeat the process. When I get near the end of the assembly I install the last 3 slats at once (otherwise there would not enough room to angle them into place), move them to where they need to be and finish gluing in the spacer blocks.

Installing the slats

When laying out the slats in the dry run I also examined the individual pieces and laid them out so that the completed piece had even grain patterns and tones. I also made a few extra slats so I could swap in grain I liked etc. Some of those extra pieces were recycled into a baby blanket display rod here.

Slats installed
Slats installed

Once I completed all the assemblies, I test fit the bed in all three configurations. (You can see several photos of that process over on my public Facebook page here.)

Test fit
Test fit

Now it was time to pick a finish and head out to the finishing booth. To cap off this series, I’ll be talking about choosing and using a finish.

If you’d like to read some other posts related to this project as they get posted please check out this link here.

Take care,
-Bill

Building Bradley’s Crib Part 3 – Stopped Drilling and Hardware Finish Modification

When we last left our woodworking hero he completed the legs and was heading into the home stretch — installing the hardware. But wait….some of these things are not like the others. The bed bolts in the hardware kit were ordered in a nice antique bronze finish. The bed frame has a nice enameled finish in a similar dark brown metallic color. The threaded inserts and bolts that hold up the bed frame were a bright silver zinc finish. I worried these shiny bits would stand out like a sore thumb.

Then I remembered a trick I learned from my friend Chris Schwarz that he used on his Anarchist’s Tool Chest. I soaked the zinced hardware in a bath of citric acid for a couple hours, then brushed them off with a brass bristle brush, rinsed them in water and dried them off. I then applied some ‘Super Blue Liquid Gun Blue’ to the hardware with a Q-tip and rinsed the hardware in water and dried it off to complete the process. The Super Blue creates a chemical reaction that creates a nice patina on metals. In this case it made a dark brownish color that gets the threaded inserts into a color spectrum very close to the rest of the hardware. (Check out the photo below to see the before and after). I’m very happy with how that color treatment went.

Modifying the hardware's finish
Modifying the hardware’s finish

Next up I had to drill a large number of stopped holes for the various bits of hardware this project included — threaded inserts, bolts and barrel nuts. To accomplish this I made use of some of my favorite methods for drilling a fixed depth hole. The quickest and dirtiest way to drill a hole to a consistent depth out in the field is with some blue tape wrapped around your drill bit. When the excess tape wipes away all your shavings you know you reached the depth you set out to drill.

Blue tape depth stop

Next up is using a fixed metal stop collar. This gives a more precise stop, but if you press too hard the collar can mar the surface of the wood, so I mainly use the collar with a dowel centering jig (As the collar stops when it hits the jig) or in places where the wood rubbed by the collar will not be seen.

Metal Collar Depth Stop

When I have the luxury of a drill press at hand I can make use of the built in quill depth stop (left side of drill press in photo below). When buying a drill press make sure you get a heavy duty depth stop and easy to use depth setting mechanism. Even with a nice stop I don’t trust the scale on it other than for macro level adjustments. For checking hold depth with a higher level of accuracy I use a depth gauge.

Drill press depth stop

A depth gauge can be as simple as using your combo square with large holes, or a piece of dowel in smaller holes used to determine how deep the hole has been drilled. For real tiny holes or times I want a very high level of precision I use an old Starrett Machinist Depth Gauge I got at a tool show years ago. I like this gauge as it has its own macro and micro adjustment which is a very nice and completely overkill feature. 🙂

Old Starrett Depth Gauge with Micro-Adjustment

I set the gauge to the depth I want as shown above. I then place the gauge in the hole, as shown below, and tweak my drilling until I reach the depth I am going for. It’s a quick and easy process.

Depth Gauge In Use
Depth Gauge In Use

With all the holes drilled I was able to install all of the threaded inserts into the posts. As the natural cherry ages it will become a golden brown color that will blend in with the brown colored hardware.

Completed Legs With Hardware Installed

I’m very happy with how the hardware came out, and as you can see in the photo below, even on this freshly completed piece the hardware, and the threaded inserts and bolts in particular blend in quite well.

Mattress frame installed

Next up in this series I’ll be talking about final assembly and finishing.

If you’d like to read some other posts related to this project as they get posted please check out this link here.

Take care,
-Bill

Building Bradley’s Crib Part 2 – Tapered Legs

Today I’ll be talking about what it took to build the legs — 3 pairs — for Bradley’s crib and cover some of the more interesting techniques employed. This project was more of a ‘modern woodworking’ project compared to the period furniture and architectural details I am normally working on, but as I’ll show below there is a place for both styles of woodworking and they complement each other well.

Milling stock for 3 pairs of legs

Rather than having massive posts from a solid piece of cherry that needs to be mortised, this set of plans called for laminating up the stock from 4/4 pieces that were milled down to 3/4″ thick. For this project I tried to mill as many pieces as I could at a time, so for quite a while in the shop there were a lot of small piles of wood that would migrate around the shop as they were ripped, jointed and planed. I’m pretty sure my wife thought I was just moving the wood around like a child moving vegetables around on a plate to make it look like they are eating them. I’d mill things a bit heavy and let them sit stickered for a few days to acclimate further to the shop and mill to final size just before I’d use each piece.

Laying out in bulk
Laying out in bulk

By ganging blanks of the same type together I was able to mark them all at once saving layout time and helping to ensure they are all consistent.

Used a dado set and miter gauge with sacrificial fence to cut dadoes

By using a dado head cutter in my table saw with a zero clearance insert and a heavy duty miter gauge with a sacrificial block to help limit tear-out I am able to quickly create what will become the mortises in the laminated post. This not only saves some time, but produces a nice clean mortise bottom. Make sure you make your mortises a tiny bit deeper to allow room for glue, any crumbs and a tiny bit of wood movement in the post. Given that the panel is cherry veneer plywood it will not move much.

Making sure the rails have a nice tight fit

The goal is a nice square fit, and since the panels were already sized during the earlier ripping operations — see Part 1 — you could test fit them as you go.

Laminating the legs
Laminating the legs

With the mortises all cut, it was time to laminate up each leg. In picking the stock for the legs I was careful to choose the best grain orientations for the faces you’ll see. The pieces are all a little bit long and a little bit wide so the excess could be cut off after the glue dries. You want to be careful with your glue application, I applied warm hide glue to the both sides of the center piece of the lamination to make sure I didn’t get glue in any of the mortises.  I also shot a couple of finish nails into the inch or so of waste on each end as that helps stop the pieces from sliding around when clamping up the lamination and it will be cut off later.

You can never have too many clamps...if I had more I would have had more baking at the same time
You can never have too many clamps…if I had more I would have had more baking at the same time

I glued up as many legs as my clamps would allow. You want to use nice strong clamps like the Bessy K Body clamps shown above to eliminate any voids in the laminated pieces. After the glue cured overnight I cut the legs to length — thus getting rid of the nails that helped keep things aligned. Next up I jointed and planed each leg to thickness and laid out the tapers on each leg — the two inner faces were tapered to give the legs a slightly lighter look.

Legs after tapering the bottoms

I tapered the legs on the band-saw and then cleaned up the mill marks with a hand plane. The plane made quick work of that task and yielded better results than a disc sander would be able to produce.  Then using a palm router I rounded over all the appropriate edges using a 1/8″ round-over bit and cleaned up any mill marks from the router with 220 grit sand paper.

Completed Legs
Completed Legs

Next up in this series I’ll be talking about modifying and installing the hardware, followed by final assembly and finishing.

If you’d like to read some other posts related to this project as they get posted please check out this link here.

Take care,
-Bill

Building Bradley’s Crib Part 1 – The Curved Headboard

As promised I’ll be making a few posts covering some of the more interesting aspects of building the 3-n-1 crib, toddler bed and adult bed I recently finished for my son. In today’s installment I’ll be talking about what it took to make the curved headboard.

The first step in the process was to make the template and bending forms. For bending forms you want stock that is stable, cheap and dense — won’t dent when a template router bit passes over it (MDF would be too soft). So in this case I used 4’x8′ sheets of particle board.

Ripping Heavy Sheet Goods Straight From The Truck -- Saves space in a tight workshop
Ripping Heavy Sheet Goods Straight From The Truck — Saves space in a tight workshop

These sheets are heavy and make an incredible amount of dust when you cut into them so to save myself some headaches and shop cleanup I ripped the sheets to rough width right off the back of my pickup truck, through my job site table saw and onto rollers. Thankfully my wife Alyssa was on hand to help handle the offcuts as I pushed the stock through the saw. It worked out great.

Rail Saw made quick work of some long thin rips where I wanted to control veneer tearout and grain orientation

For ripping out cherry veneered plywood panels I used my rail saw to ensure accurate cuts, minimize grain tear-out and control grain orientation.

Using a fairing stick to lay out the curve for the headboard and templates

I used a fairing stick to lay out the curve on one of the bending form blanks. A fairing stick is a thin, flexible piece of wood that allows you to lay out a curve. (And if you thin out one or both sides you can adjust how it bends and thus change the curve to suit your project) With the fairing stick clamped in place I could trace the curve onto the stock. The next step was to cut out the curve on the band-saw and use belt and/or disc sanders to even out the curve and split the layout line. With that first pattern in hand it was time to work more like an assembly line. I’d trace the template onto the next blank, rough saw it out on the band saw and then clamp the two blanks together and use a router with a pattern bit quickly and easily produce another template. Once I had 4 templates in place I lined them up and screwed them all together. With the bending form all in one piece I cleaned things up a bit more with the disc sander, added center and end lines to the form and the bending form was now ready to go.

Completed bending form

To create the curved headboard panel I followed the same procedure I used for creating templates — traced the curve, rough band-sawed out the blank and used the form and a template bit to create a panel that exactly matched the bending form.

Using the form with a templating router bit to copy the curve

The next step was to re-saw a single cherry board into three 1/4″ thick strips for the cap, being careful to minimize any waste as I want the side and end grain to match up as close as I can get it in the laminated and curved headboard cap. The strips are left a bit longer and wider to allow for easy cleanup after the lamination process.

Gluing up one of the curved blanks

I used Old Brown Glue (Hide glue) warmed up in my double boiler to glue up this lamination. I used hide glue because of its long open time and friendliness to finish — I’m far less likely to see any hide glue in the finished piece when compared to PVA glue which sticks out like a sore thumb. With the glue applied to the lamination I started clamping it to the bending form working out from the center towards each end and let it sit in the clamps for 24 hours. Once removed from the clamps I was able to joint off any glue squeeze out and round over the edges using my router table and hand-held router with varying sizes of round-over bits.

Using dowels to help with clamping of the curved cove moldings

With the completed head-board cap in hand I was able to glue and screw it onto the headboard frame assembly. The screws were located at the ends of the cap and bite into the solid wood posts/legs. They’re set into countersunk holes that were plugged. I made the plugs from the same piece of wood I made the cap from and made sure to orient the plug grain direction to match the cap. The plugs blend in well. Next a nice cove molding is installed under the cap and after cutting it to size and matching the 10 degree angle on the ends there was a mild challenge of how to clamp it in place. The solution was to use small pieces of dowel stock to help transfer the clamping pressure from the clamp pad onto the molding — it worked out well.

Completed Headboards and Footboards

Overall I am very happy with how this process of cold bending cherry to make a curved headboard cap went. I made two caps just in case one got messed up in the process, and I’m happy to report that both turned out well, so I have a second curved cap ready to go if I ever have to make another crib for a second baby.

Next up in this series I’ll be talking about the challenges of making the legs and modifying the hardware.

If you’d like to read some other posts related to this project as they get posted please check out this link here.

Take care,
-Bill

Bradley’s Crib

The past few months out in the workshop I’ve been building a crib, and a toddler bed and a full size adult bed for our new baby — Bradley. The story of how I wound up building this crib is an interesting tale about baby furniture in America today…

Completed Crib
Completed Crib

With a baby in the house, we had a clear need for a crib. I wanted to build a crib, but with everything going on in our lives — our work, my teaching, writing, preparing the house for the baby etc my wife Alyssa and I were all set to buy a crib for the baby before he arrived. We went to all the usual baby stores — Baby’s R Us, Baby Depot, Buy Buy Baby, Target etc — all the cribs were poorly made imported junk that looked terrible on display and were more than I was willing to pay for such junk. Then we tried all the usual furniture stores in the area and while the price tags went up exponentially the quality was only marginally better and I could not find anything I was willing to buy at any price. Eventually we found a brand and product line we liked by ‘Young America’ —  a company that specialized in higher end youth furniture, made in the USA from American Woods. With a 25+ year history in the marketplace and long running product lines you could keep adding pieces as your child grows — all things I liked. It was expensive, but I found a way to get it at a reasonable price via a buying club my parents were part of. We were all set to place our order and the week we finally went to enter the order the manufacturer said it was no longer accepting new orders. From searching online we found out that the parent company Stanley decided to shut down the factory (and with it eliminate about 400 jobs).  If only I placed my order a week earlier…

Toddler Bed
Toddler Bed

So it was back to the hunt. If I couldn’t find anything American, maybe a European brand? Some friends recommended Bellini — an Italian company with a good reputation that specializes in baby and youth furniture. They had some nice designs and pricing was a little higher than that of Young America — but from reading reviews and looking at the current product line I learned that recent years the furniture was no longer made in Italy, but made in Asia and had a decrease in fit and finish quality – yet the prices remained just as high as ever. If I am going to pay European prices I at least want it to be made in Europe. Quickly running out of time and patience I decided the only way I was going to get a crib that made me happy was to build it myself.

Adult Bed -- Full Size Mattress
Adult Bed — Full Size Mattress

After a lot of searching I finally settled on a set of plans from Wood Magazine — the 3 in 1 bed which you can find here. The cheap Yankee in me liked the concept of these three in one cribs/beds and figured it would mean less furniture to store in the attic. It starts out as a crib, then converts into a toddler bed and finally converts to a full size adult bed by way of some nice hardware (decorative metal bolts and barrel nuts). The hardware — bolts and nice heavy metal bed frame are made in the USA and available from Products America here. The folks there are friendly and they produce hardware used by other baby furniture manufacturers.

Crib outfitted with mattress, sheets, skirt and of course stuff animals

I modified the design a bit by making the short side sections slatted — just like the front and back — being careful to adhere to government safety guidelines for cribs. I’m happy I did as I really prefer this look and the baby seems to like the extra light as well. I built the bed from Cherry instead of the maple you see in the article. I hand selected the cherry to have nice looking grain patterns and even tones. It took longer to build than I would have liked, as life, the birth and other obligations got in the way, but I am happy I finally finished this project and Bradley has a nice place to sleep. I am also happy with how rock solid this bed feels compared to the models we saw in the stores which felt flimsy in comparison.

A note for Bradley
A note for Bradley

On the bottom of the headboard is a small note — “For Bradley M. Rainford — Love Dad” for Bradley to find someday when he’s older.

Bradley enjoying his new crib

Now the trick will be getting the baby to sleep in it — it’s only been a day or two and he loves playing in the crib more than sleeping in it, but he’s used to sleeping in the master bedroom. Thankfully the bed will be there waiting for him to play, grow and eventually sleep.

In a couple of upcoming posts I’ll talk a bit about how I built this project and some other modifications I made (baby safe finish, hardware patina modification, jigs) and other interesting construction challenges. If you’d like to read some other posts related to this project as they get posted please check out this link here.

Now its time to build him a dresser….

Take care,
-Bill