

As promised I’ll be making a few posts covering some of the more interesting aspects of building the 3-n-1 crib, toddler bed and adult bed I recently finished for my son. In today’s installment I’ll be talking about what it took to make the curved headboard.
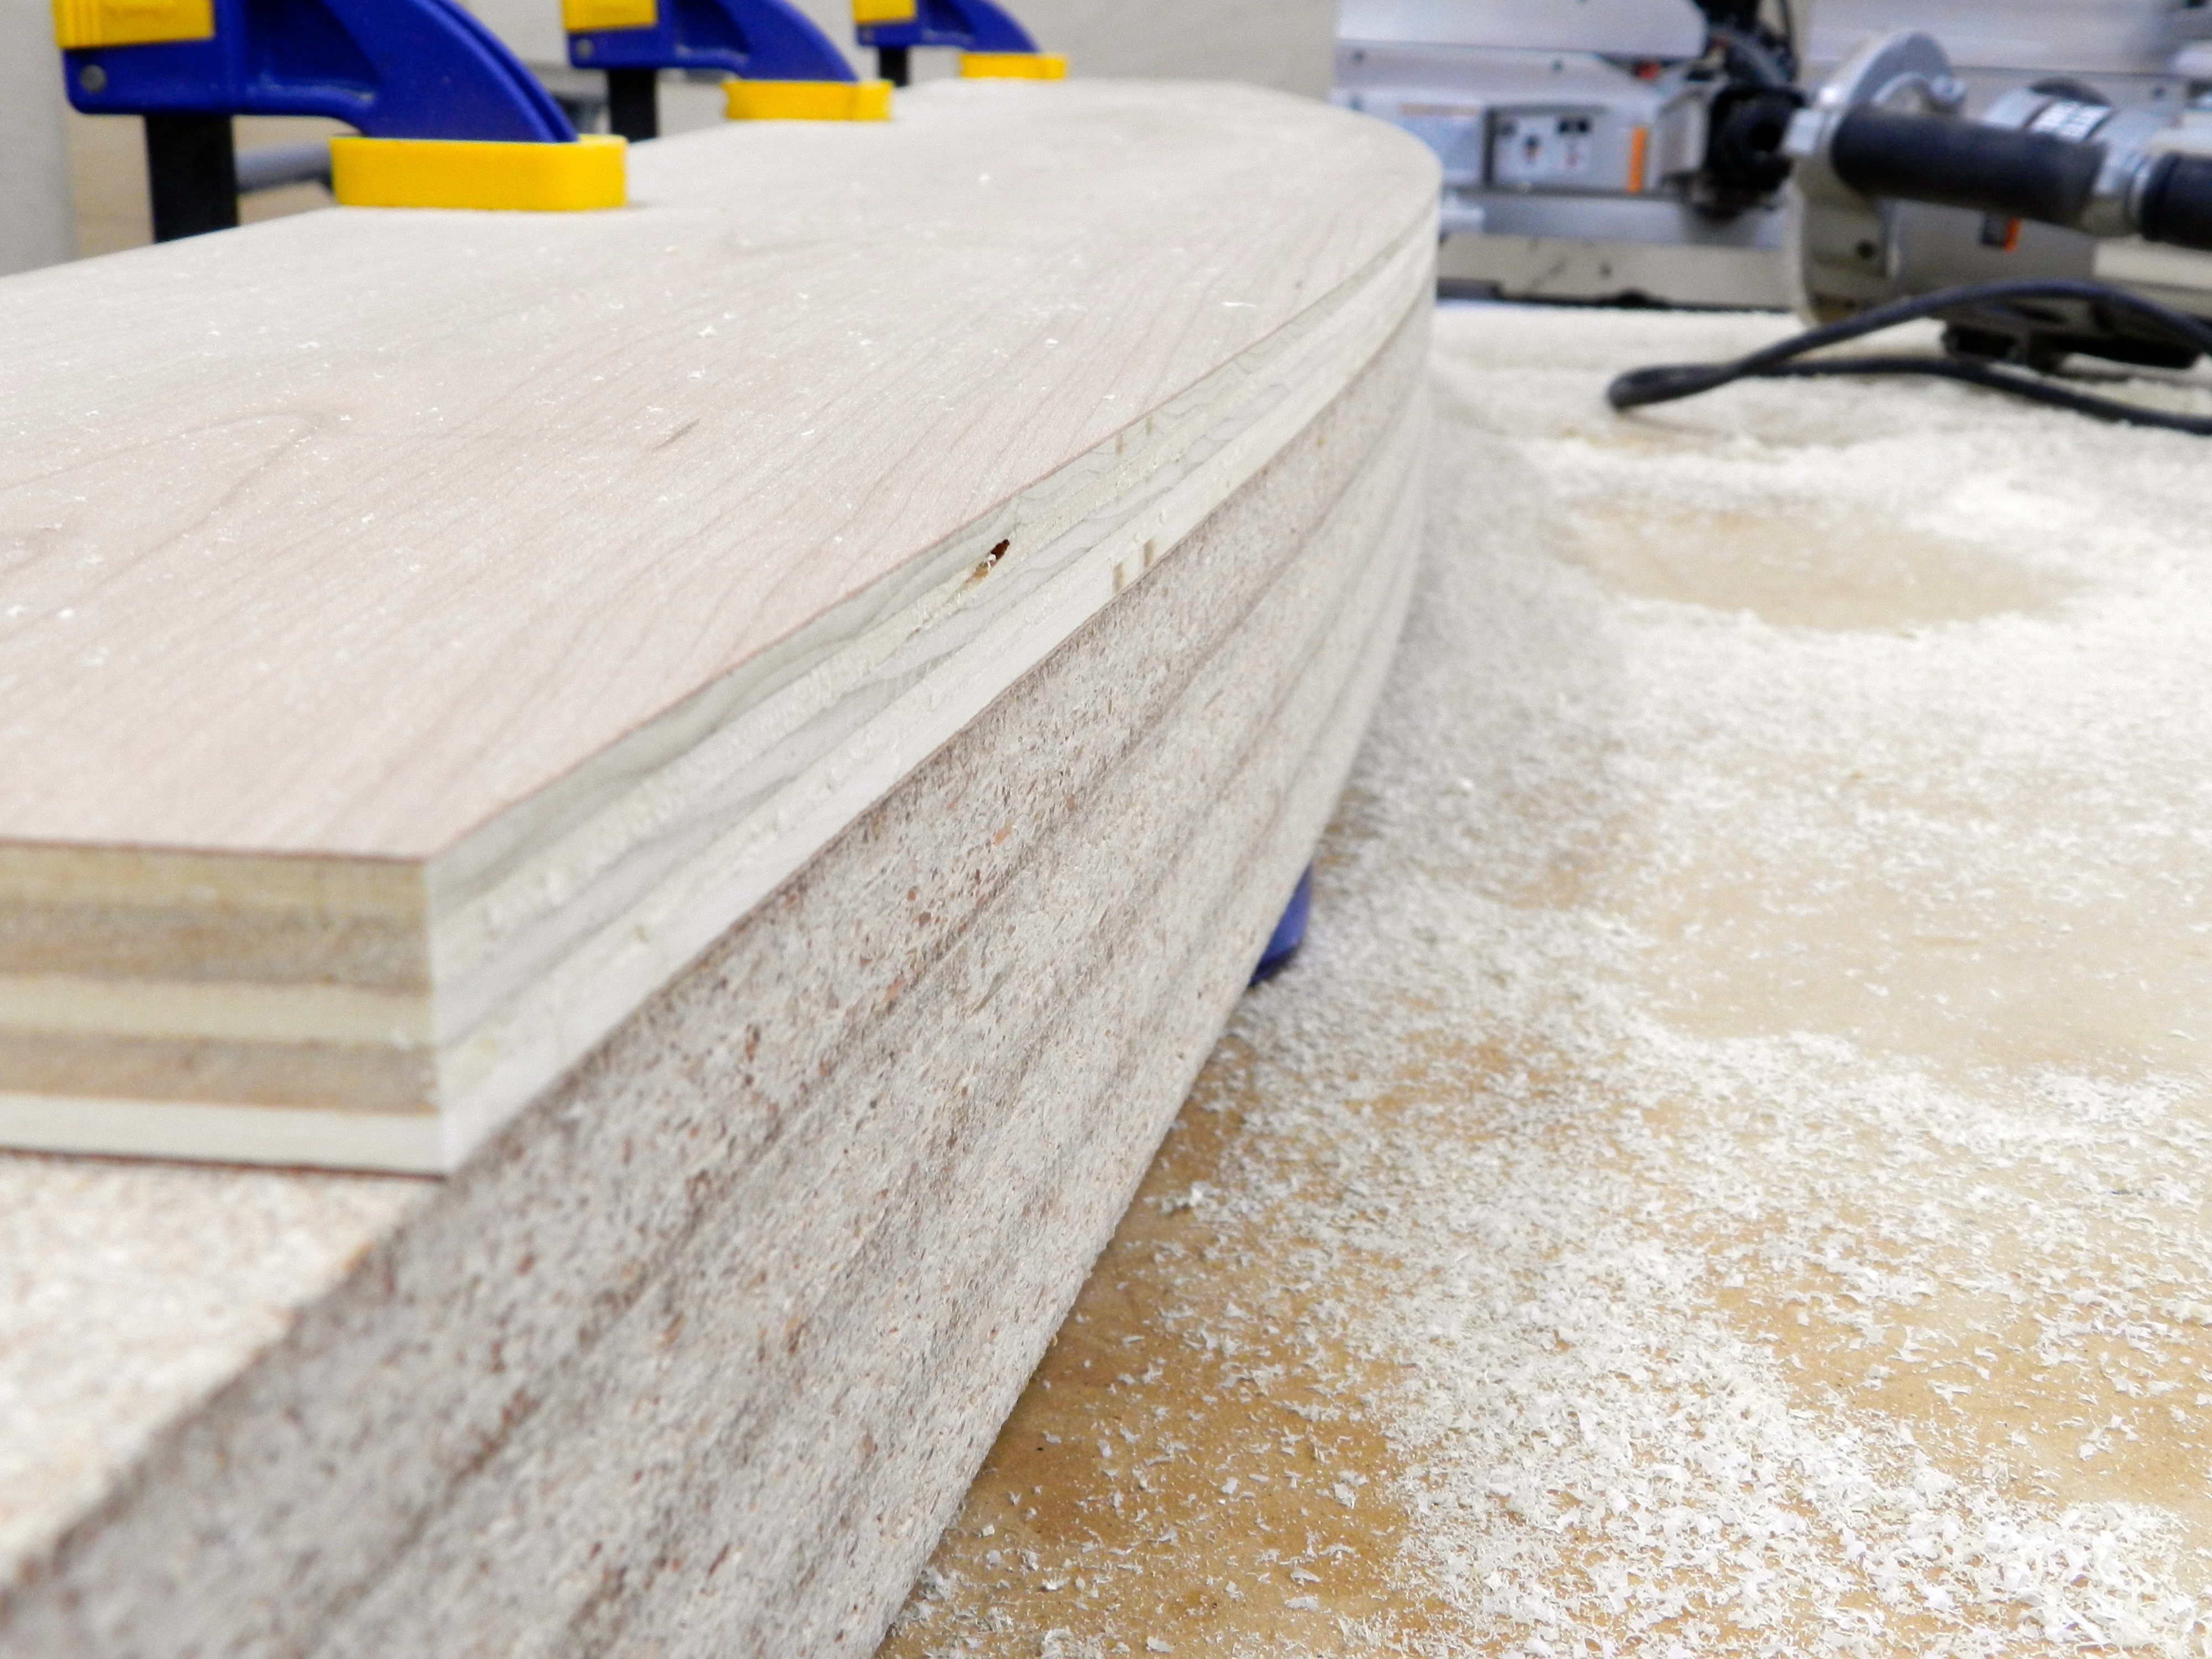
The first step in the process was to make the template and bending forms. For bending forms you want stock that is stable, cheap and dense — won’t dent when a template router bit passes over it (MDF would be too soft). So in this case I used 4’x8′ sheets of particle board.
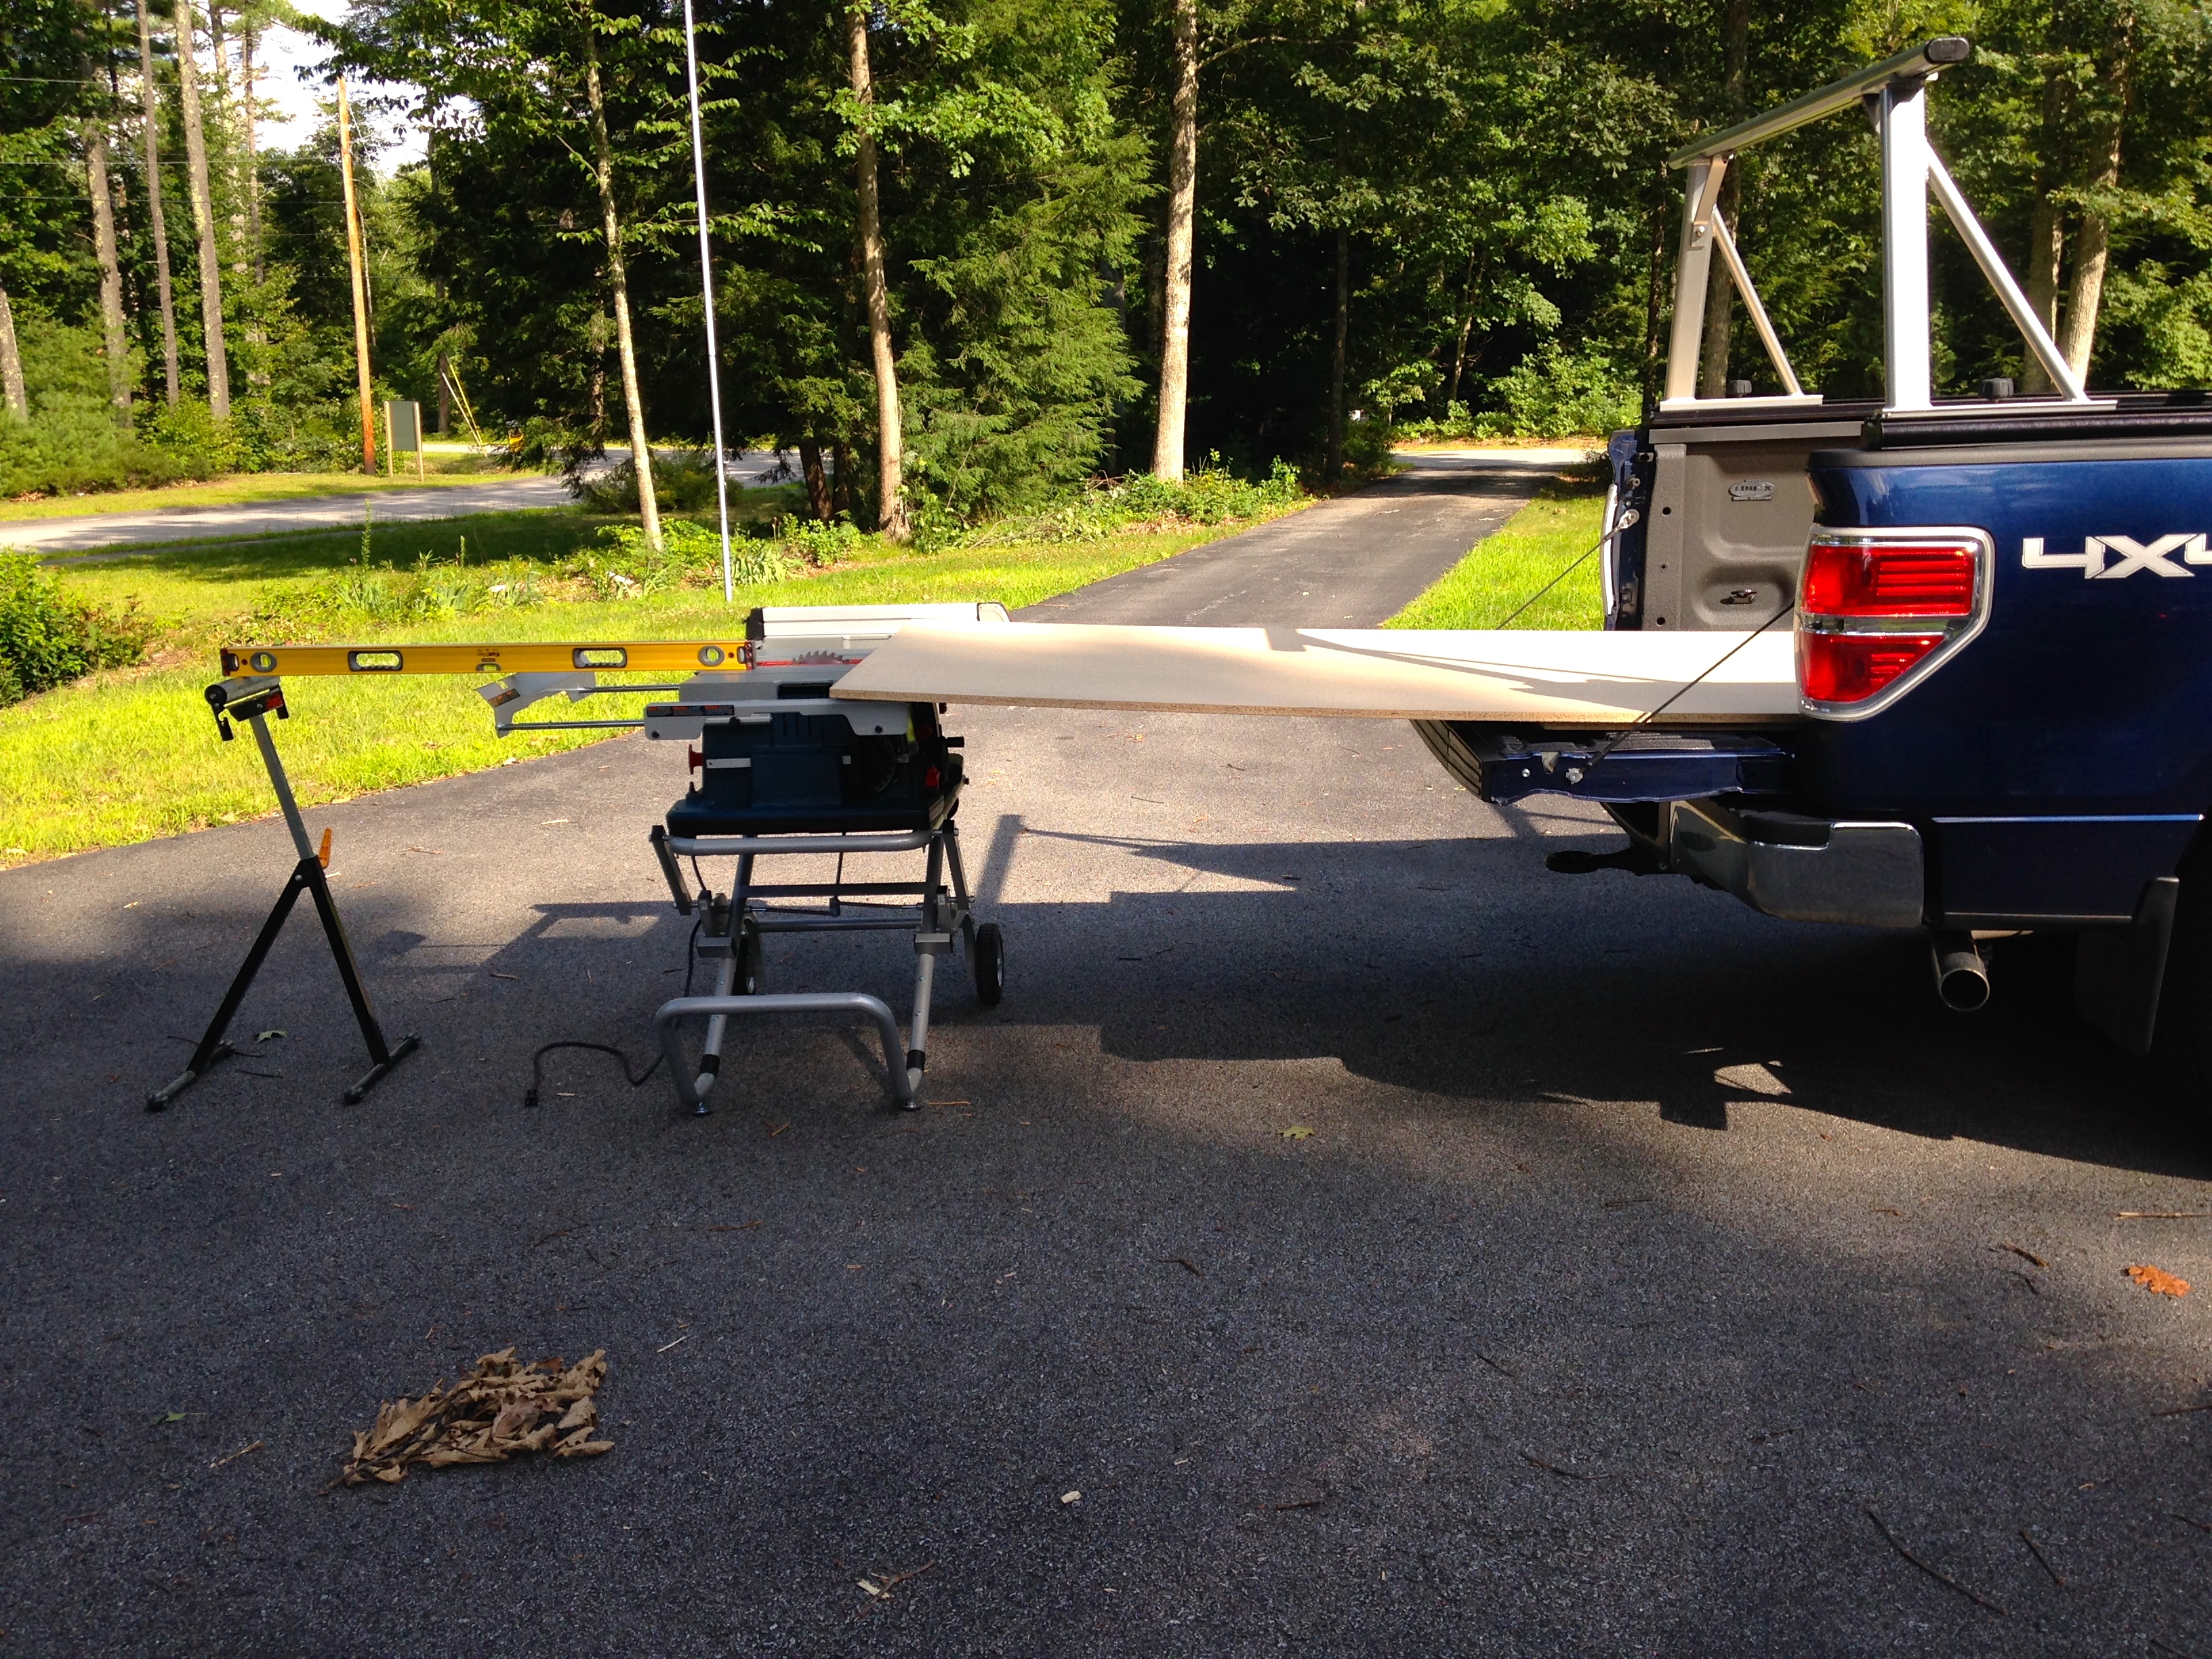
These sheets are heavy and make an incredible amount of dust when you cut into them so to save myself some headaches and shop cleanup I ripped the sheets to rough width right off the back of my pickup truck, through my job site table saw and onto rollers. Thankfully my wife Alyssa was on hand to help handle the offcuts as I pushed the stock through the saw. It worked out great.
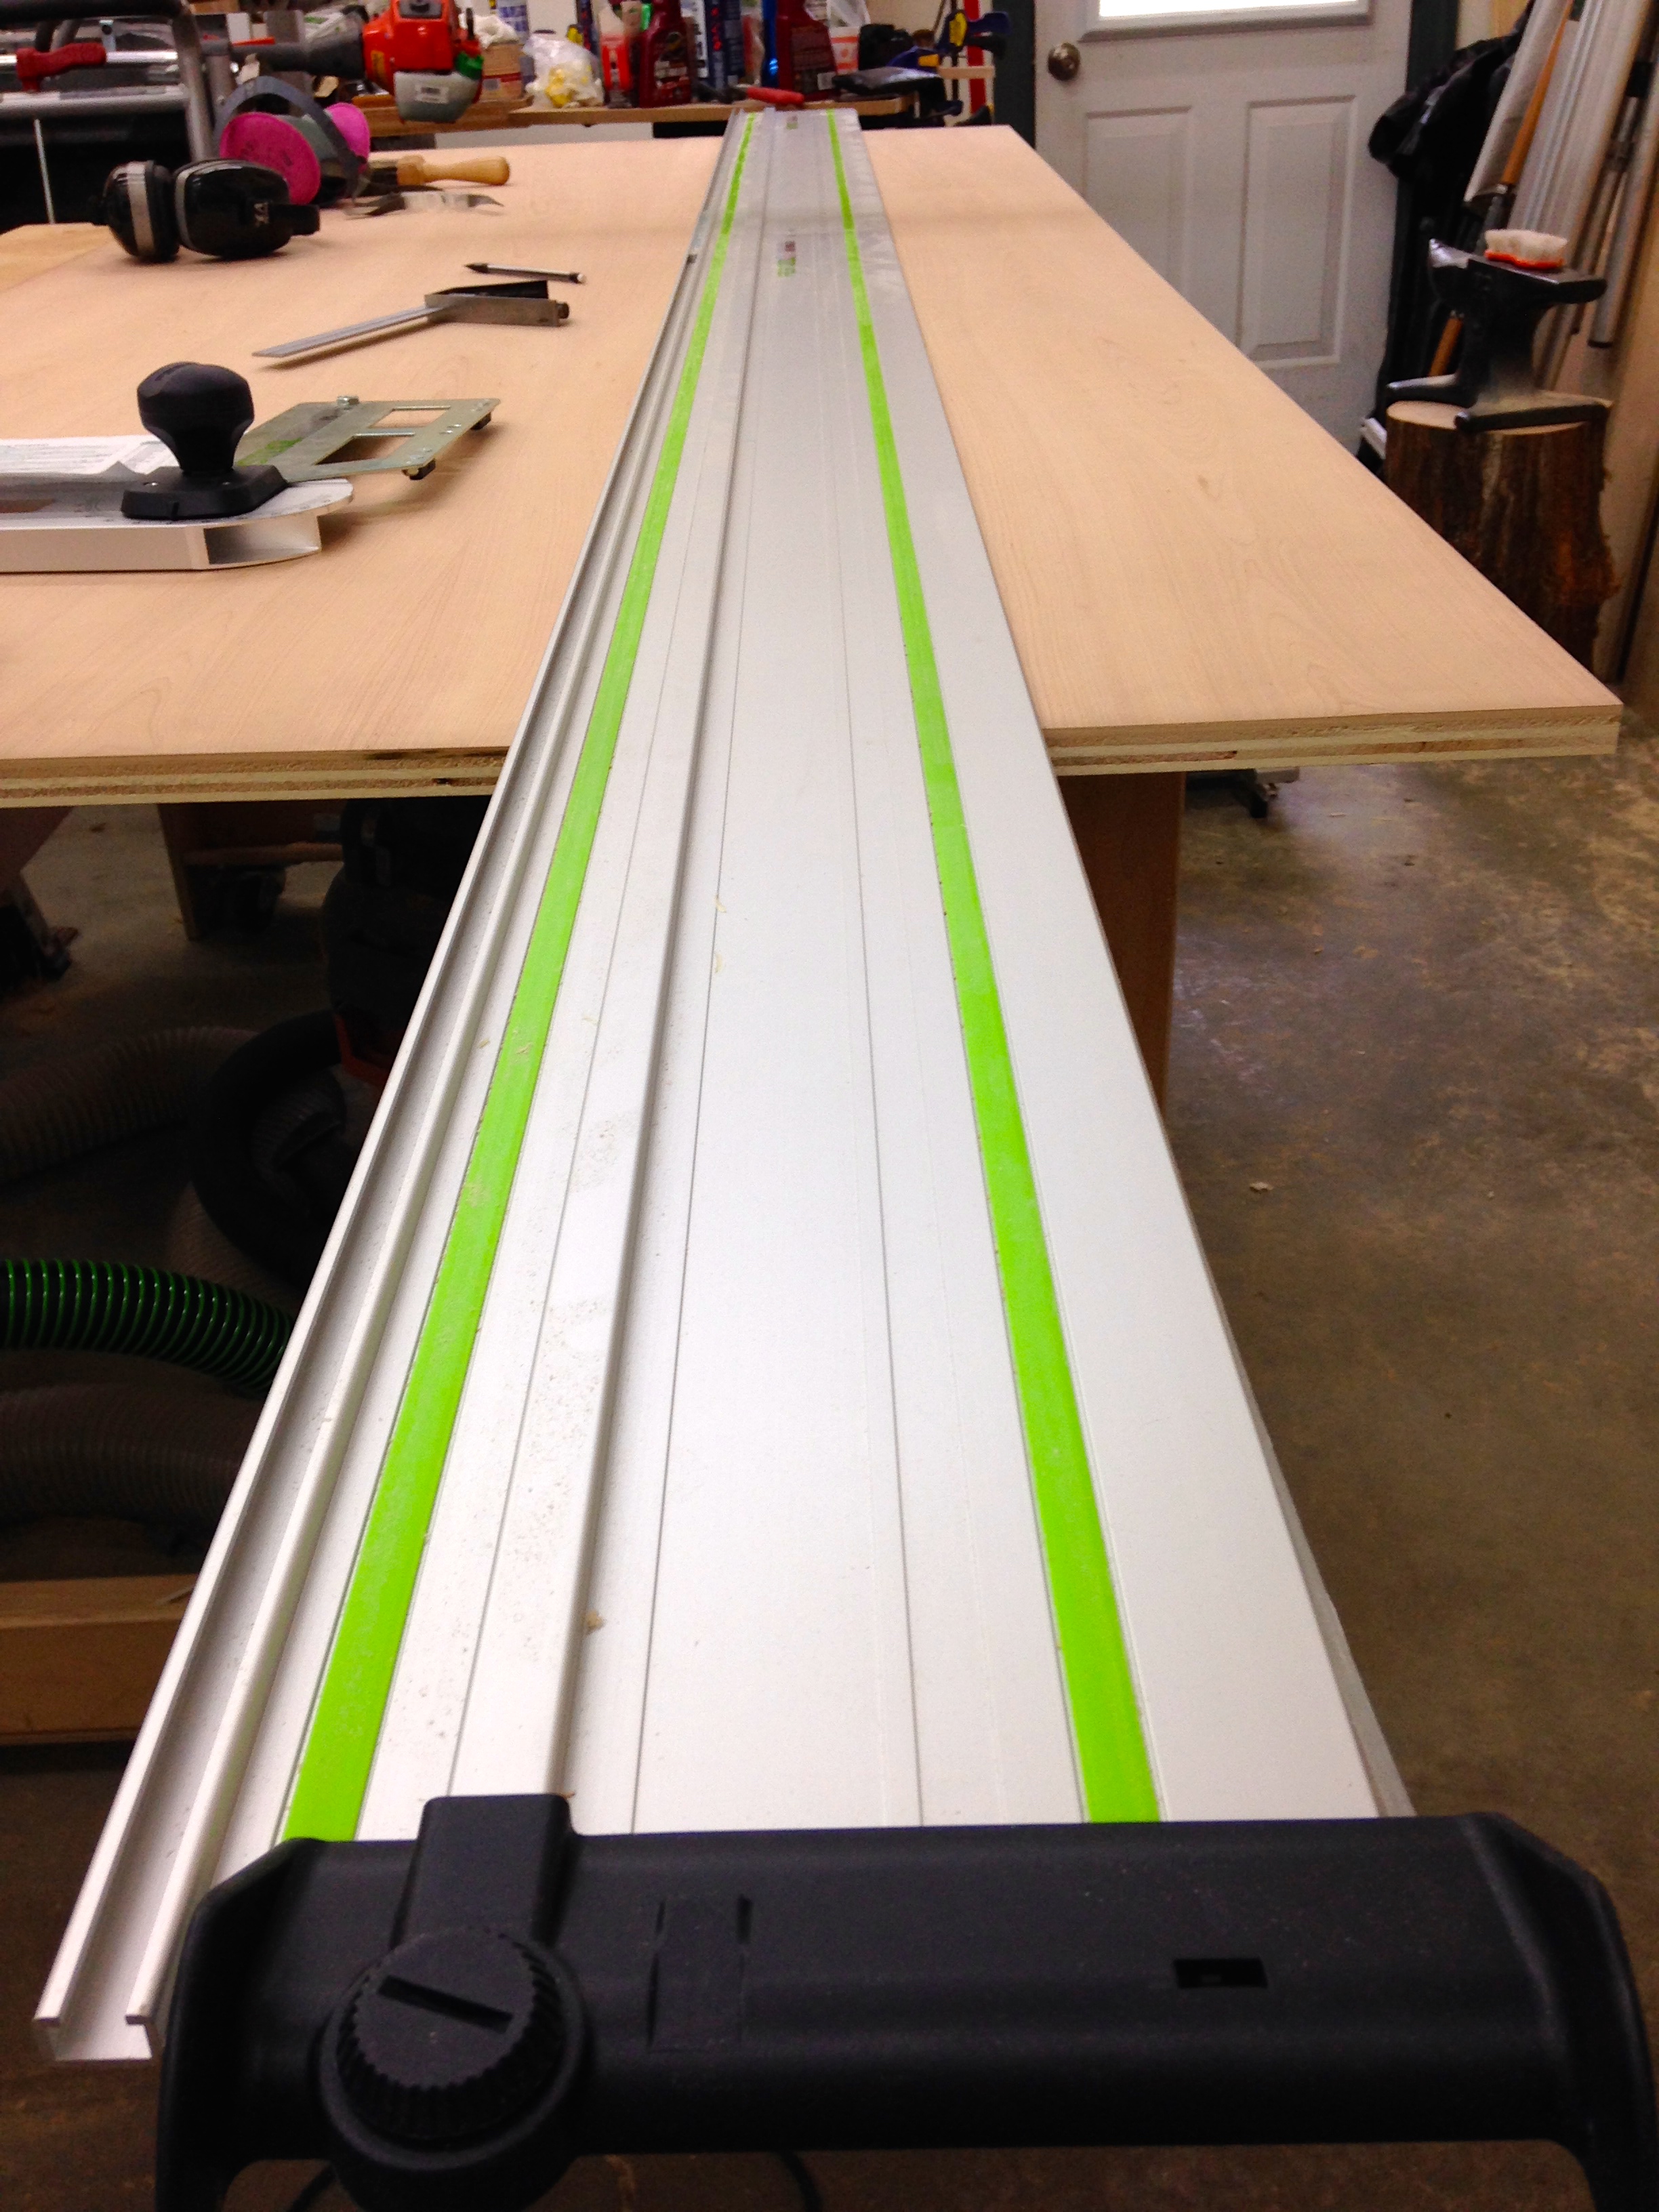
For ripping out cherry veneered plywood panels I used my rail saw to ensure accurate cuts, minimize grain tear-out and control grain orientation.
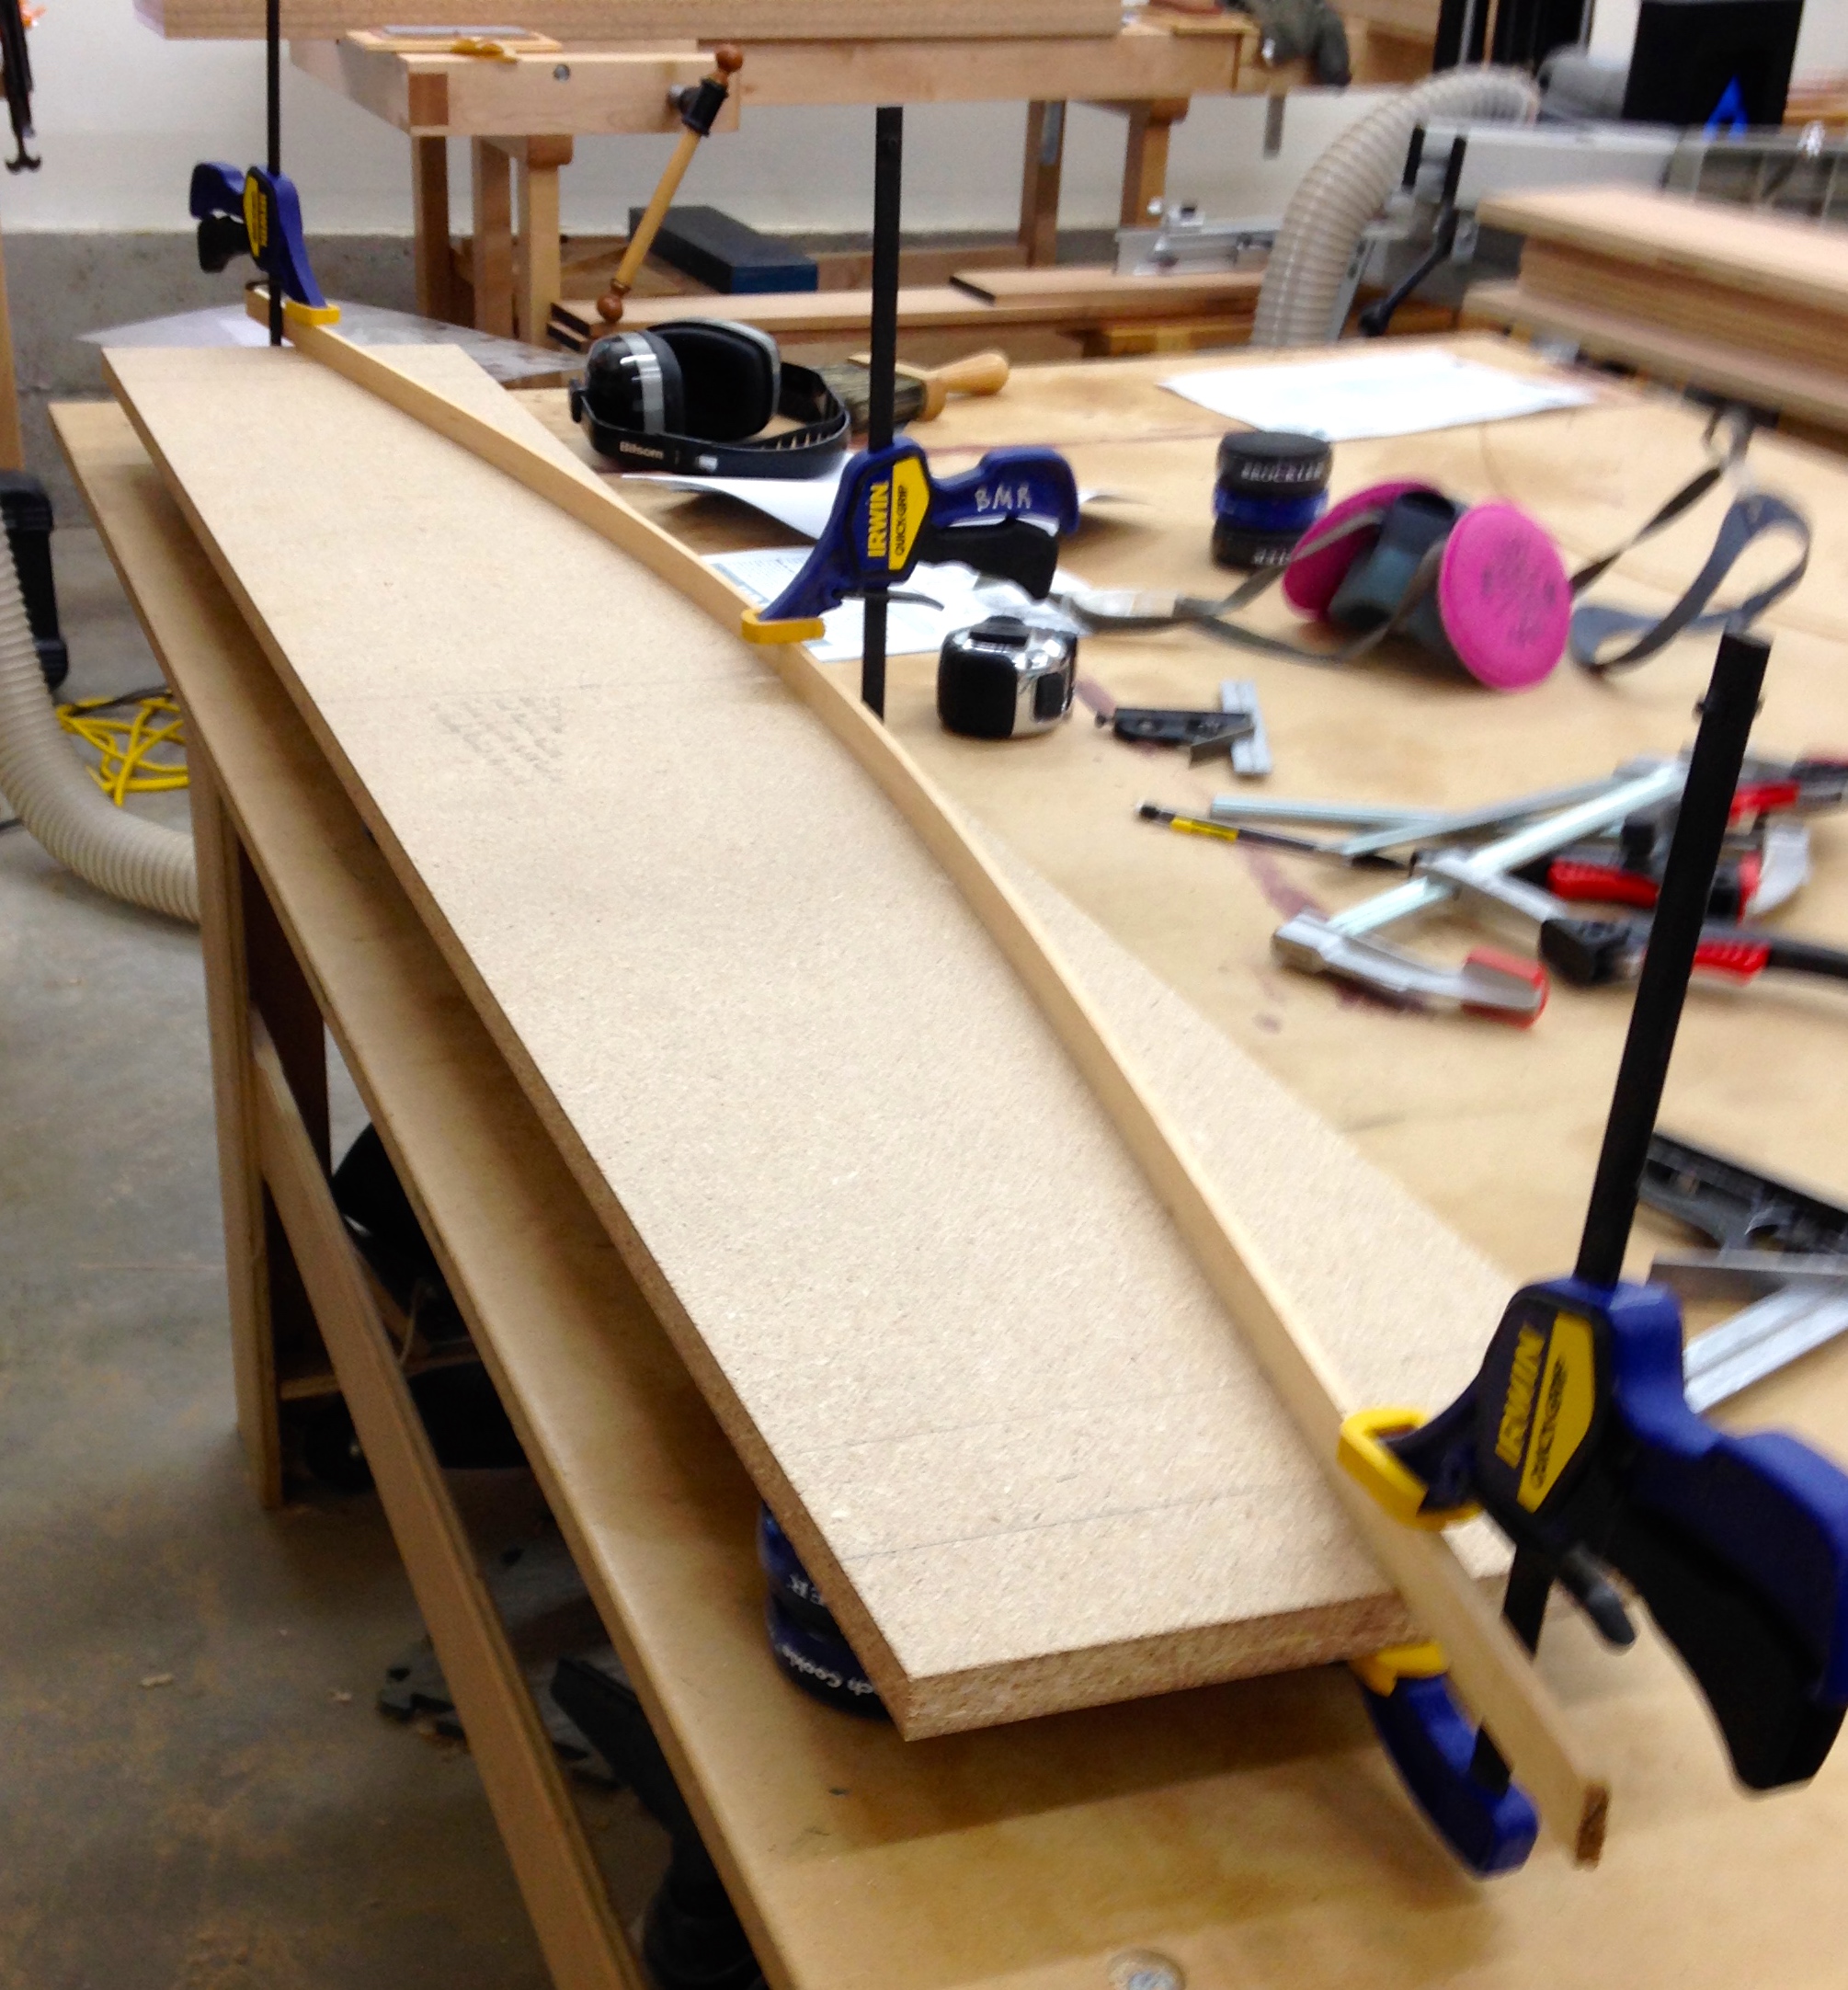
I used a fairing stick to lay out the curve on one of the bending form blanks. A fairing stick is a thin, flexible piece of wood that allows you to lay out a curve. (And if you thin out one or both sides you can adjust how it bends and thus change the curve to suit your project) With the fairing stick clamped in place I could trace the curve onto the stock. The next step was to cut out the curve on the band-saw and use belt and/or disc sanders to even out the curve and split the layout line. With that first pattern in hand it was time to work more like an assembly line. I’d trace the template onto the next blank, rough saw it out on the band saw and then clamp the two blanks together and use a router with a pattern bit quickly and easily produce another template. Once I had 4 templates in place I lined them up and screwed them all together. With the bending form all in one piece I cleaned things up a bit more with the disc sander, added center and end lines to the form and the bending form was now ready to go.
To create the curved headboard panel I followed the same procedure I used for creating templates — traced the curve, rough band-sawed out the blank and used the form and a template bit to create a panel that exactly matched the bending form.
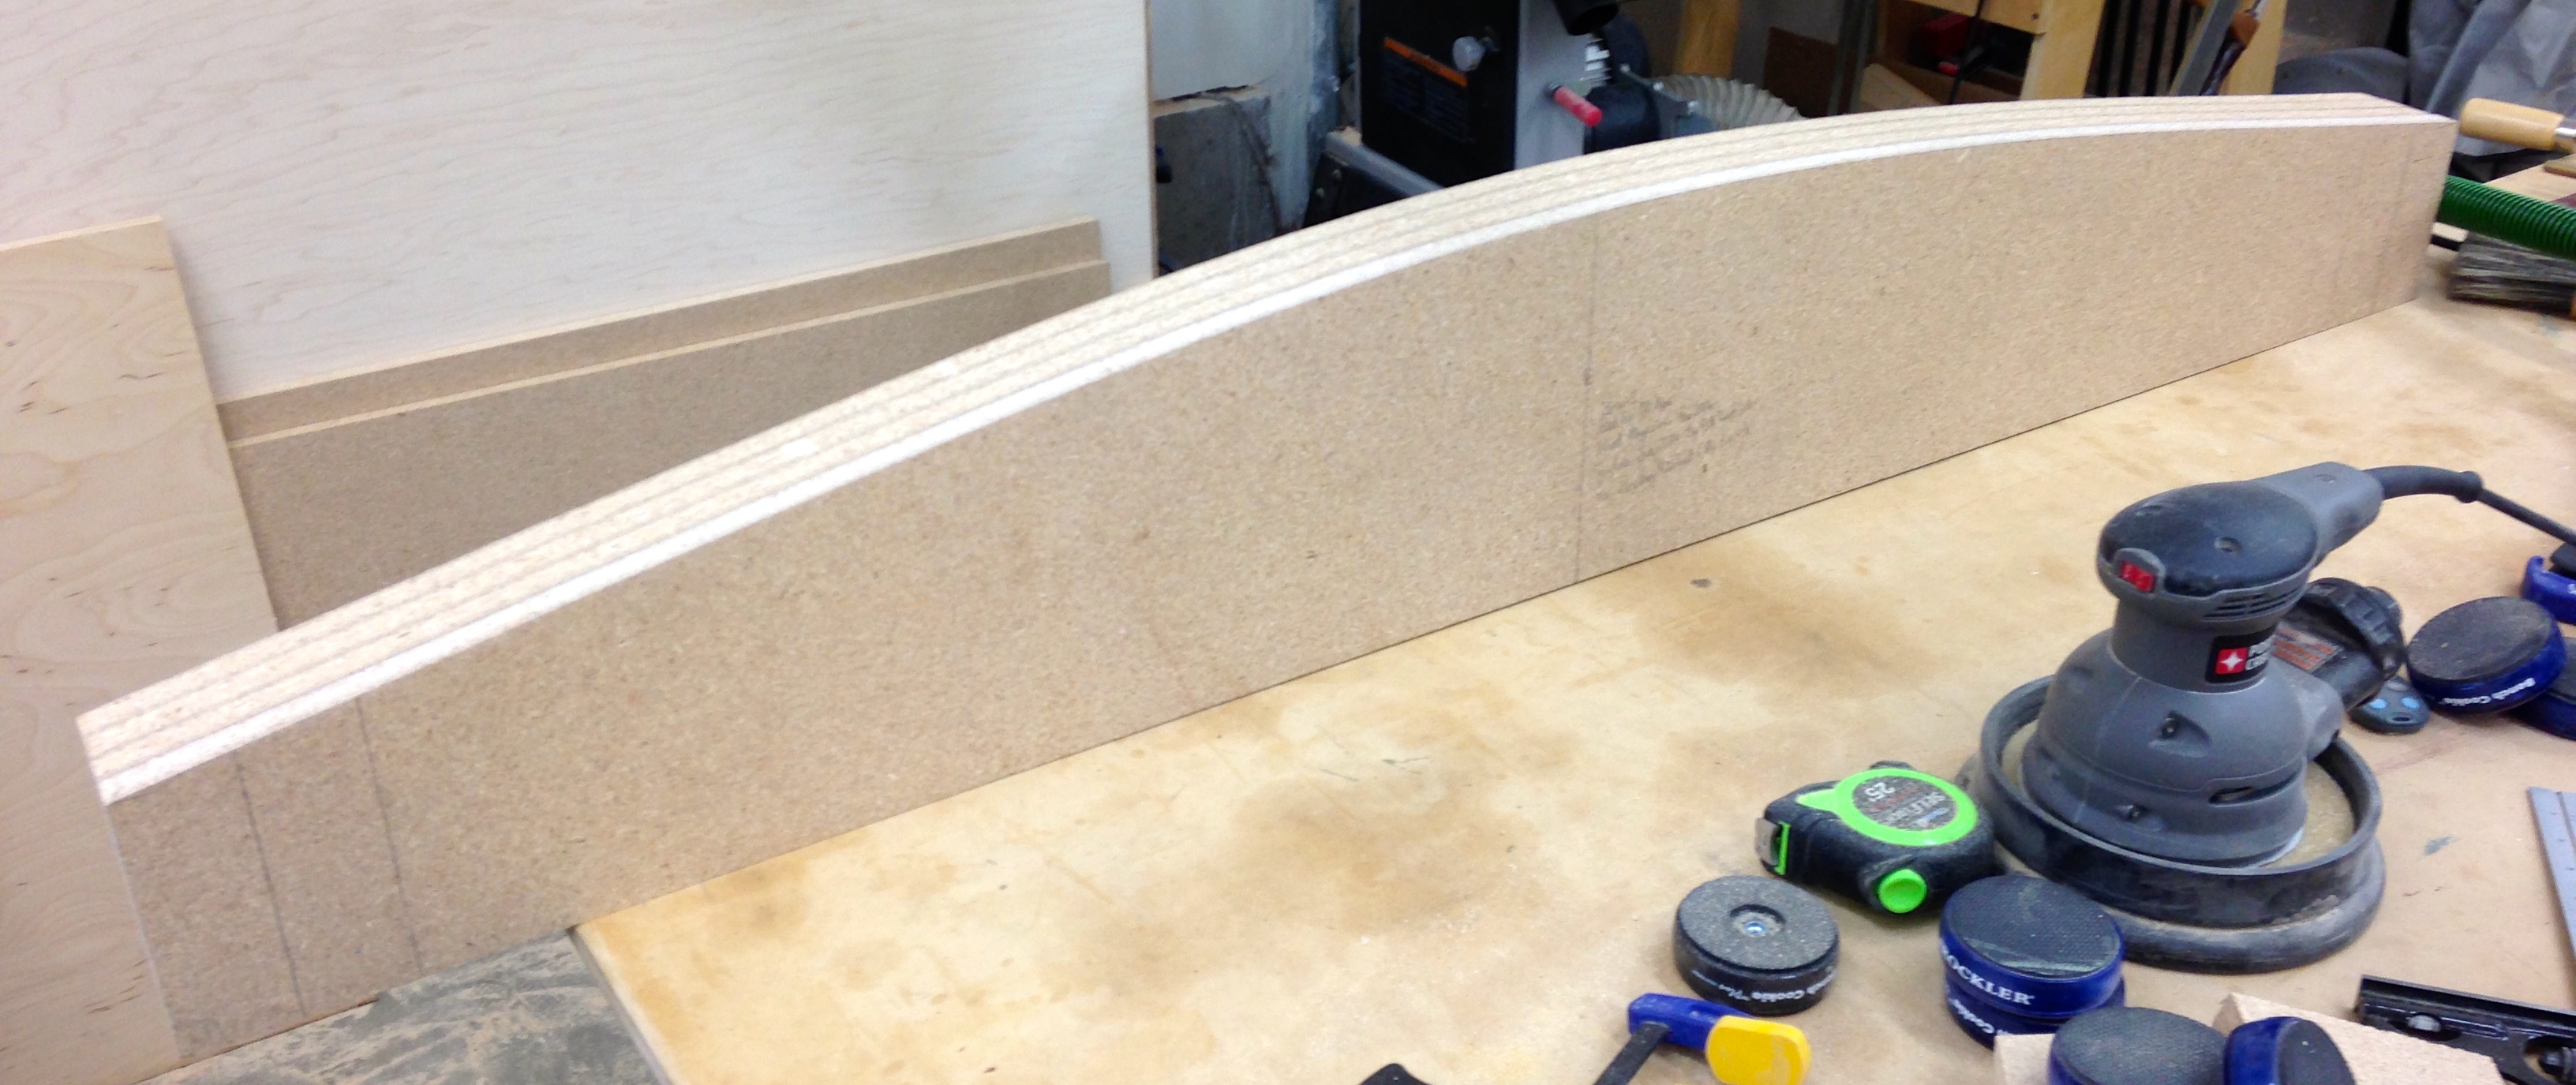
The next step was to re-saw a single cherry board into three 1/4″ thick strips for the cap, being careful to minimize any waste as I want the side and end grain to match up as close as I can get it in the laminated and curved headboard cap. The strips are left a bit longer and wider to allow for easy cleanup after the lamination process.
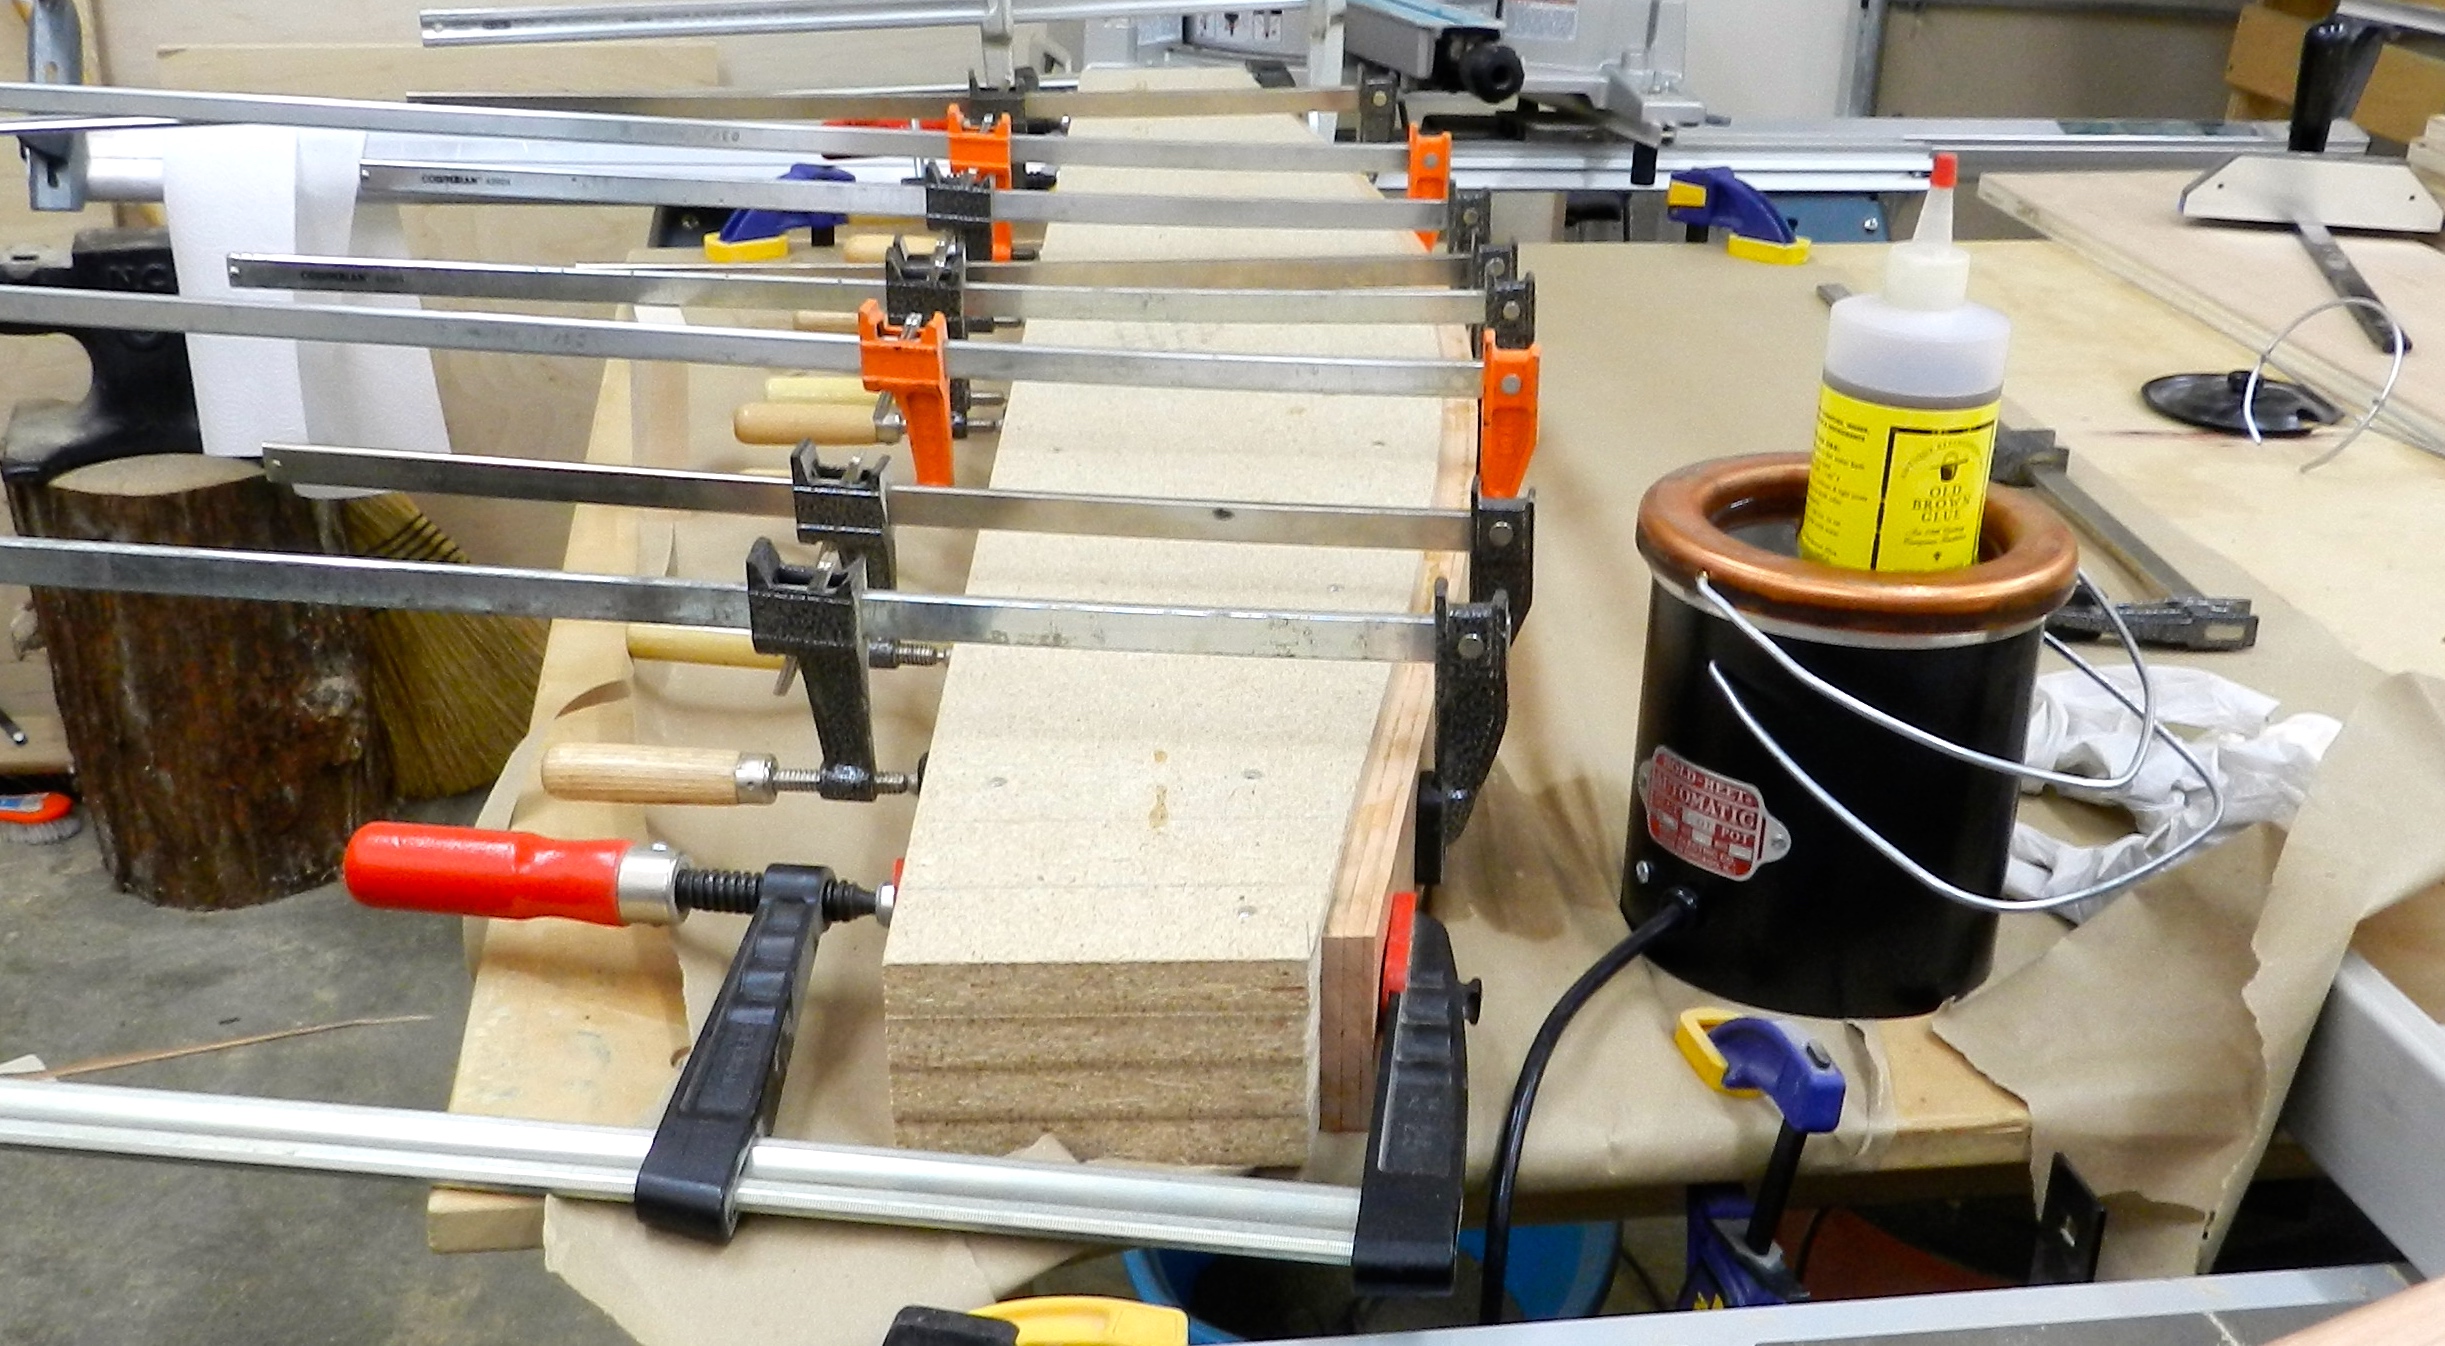
I used Old Brown Glue (Hide glue) warmed up in my double boiler to glue up this lamination. I used hide glue because of its long open time and friendliness to finish — I’m far less likely to see any hide glue in the finished piece when compared to PVA glue which sticks out like a sore thumb. With the glue applied to the lamination I started clamping it to the bending form working out from the center towards each end and let it sit in the clamps for 24 hours. Once removed from the clamps I was able to joint off any glue squeeze out and round over the edges using my router table and hand-held router with varying sizes of round-over bits.
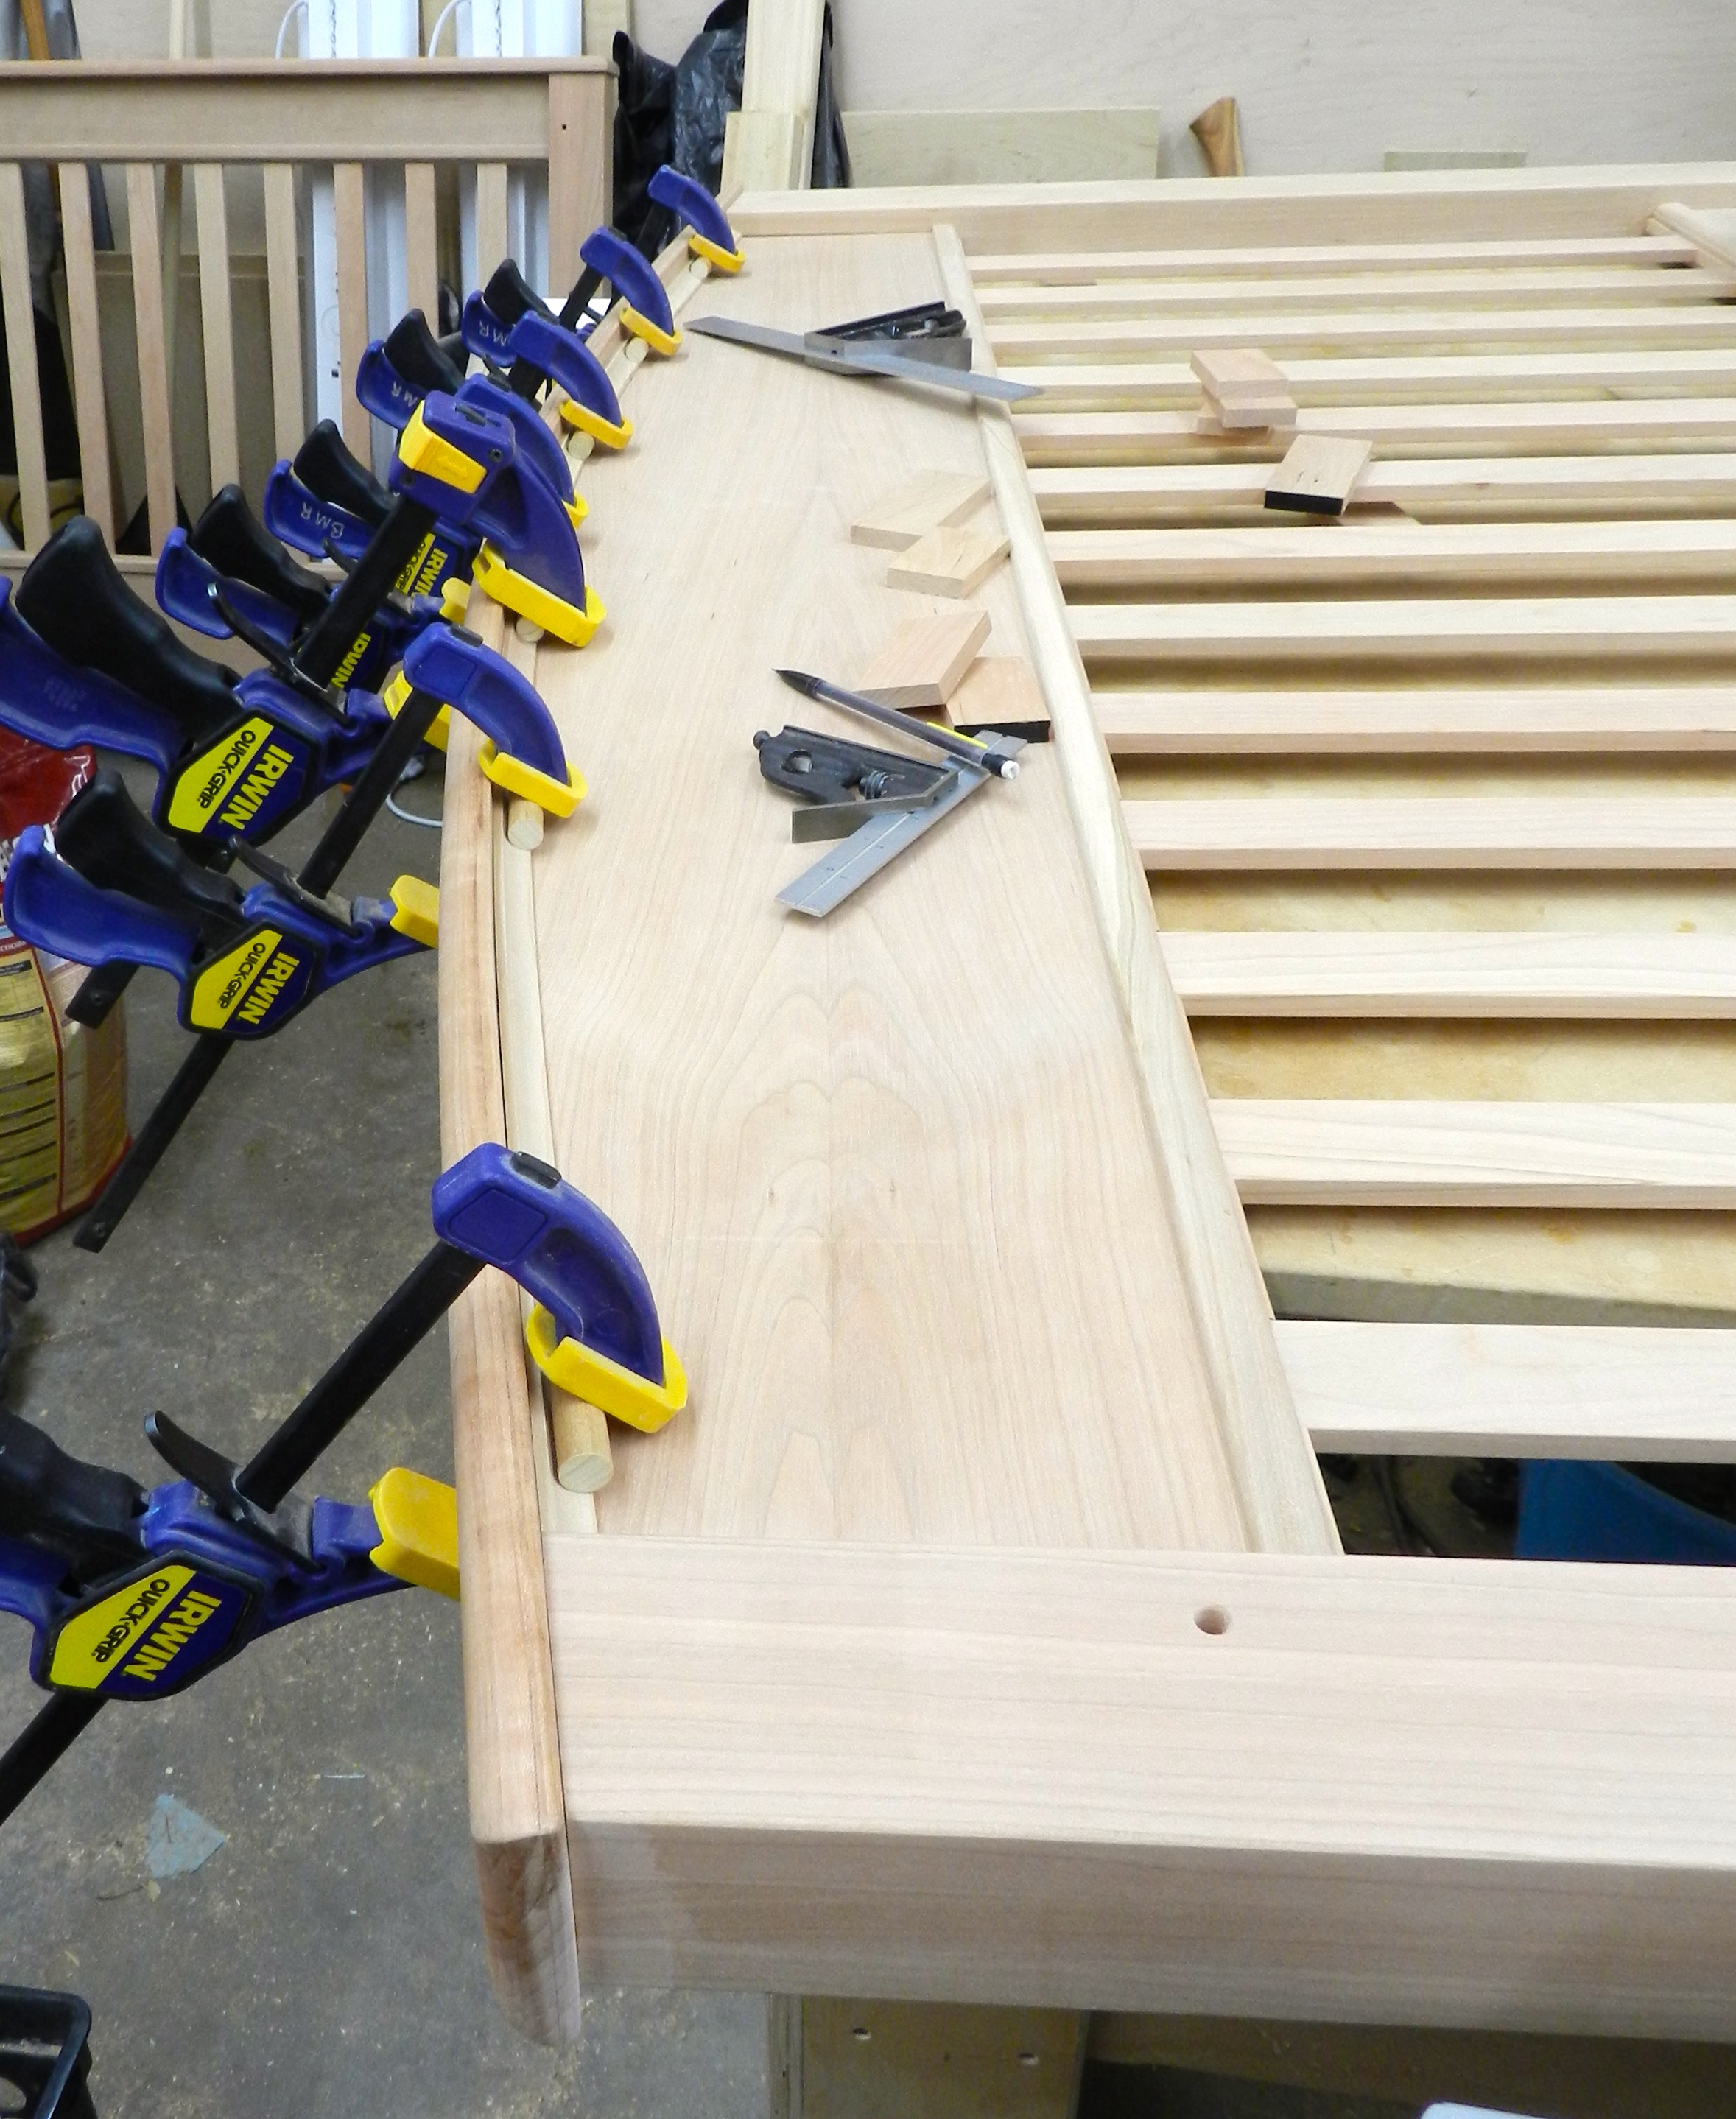
With the completed head-board cap in hand I was able to glue and screw it onto the headboard frame assembly. The screws were located at the ends of the cap and bite into the solid wood posts/legs. They’re set into countersunk holes that were plugged. I made the plugs from the same piece of wood I made the cap from and made sure to orient the plug grain direction to match the cap. The plugs blend in well. Next a nice cove molding is installed under the cap and after cutting it to size and matching the 10 degree angle on the ends there was a mild challenge of how to clamp it in place. The solution was to use small pieces of dowel stock to help transfer the clamping pressure from the clamp pad onto the molding — it worked out well.
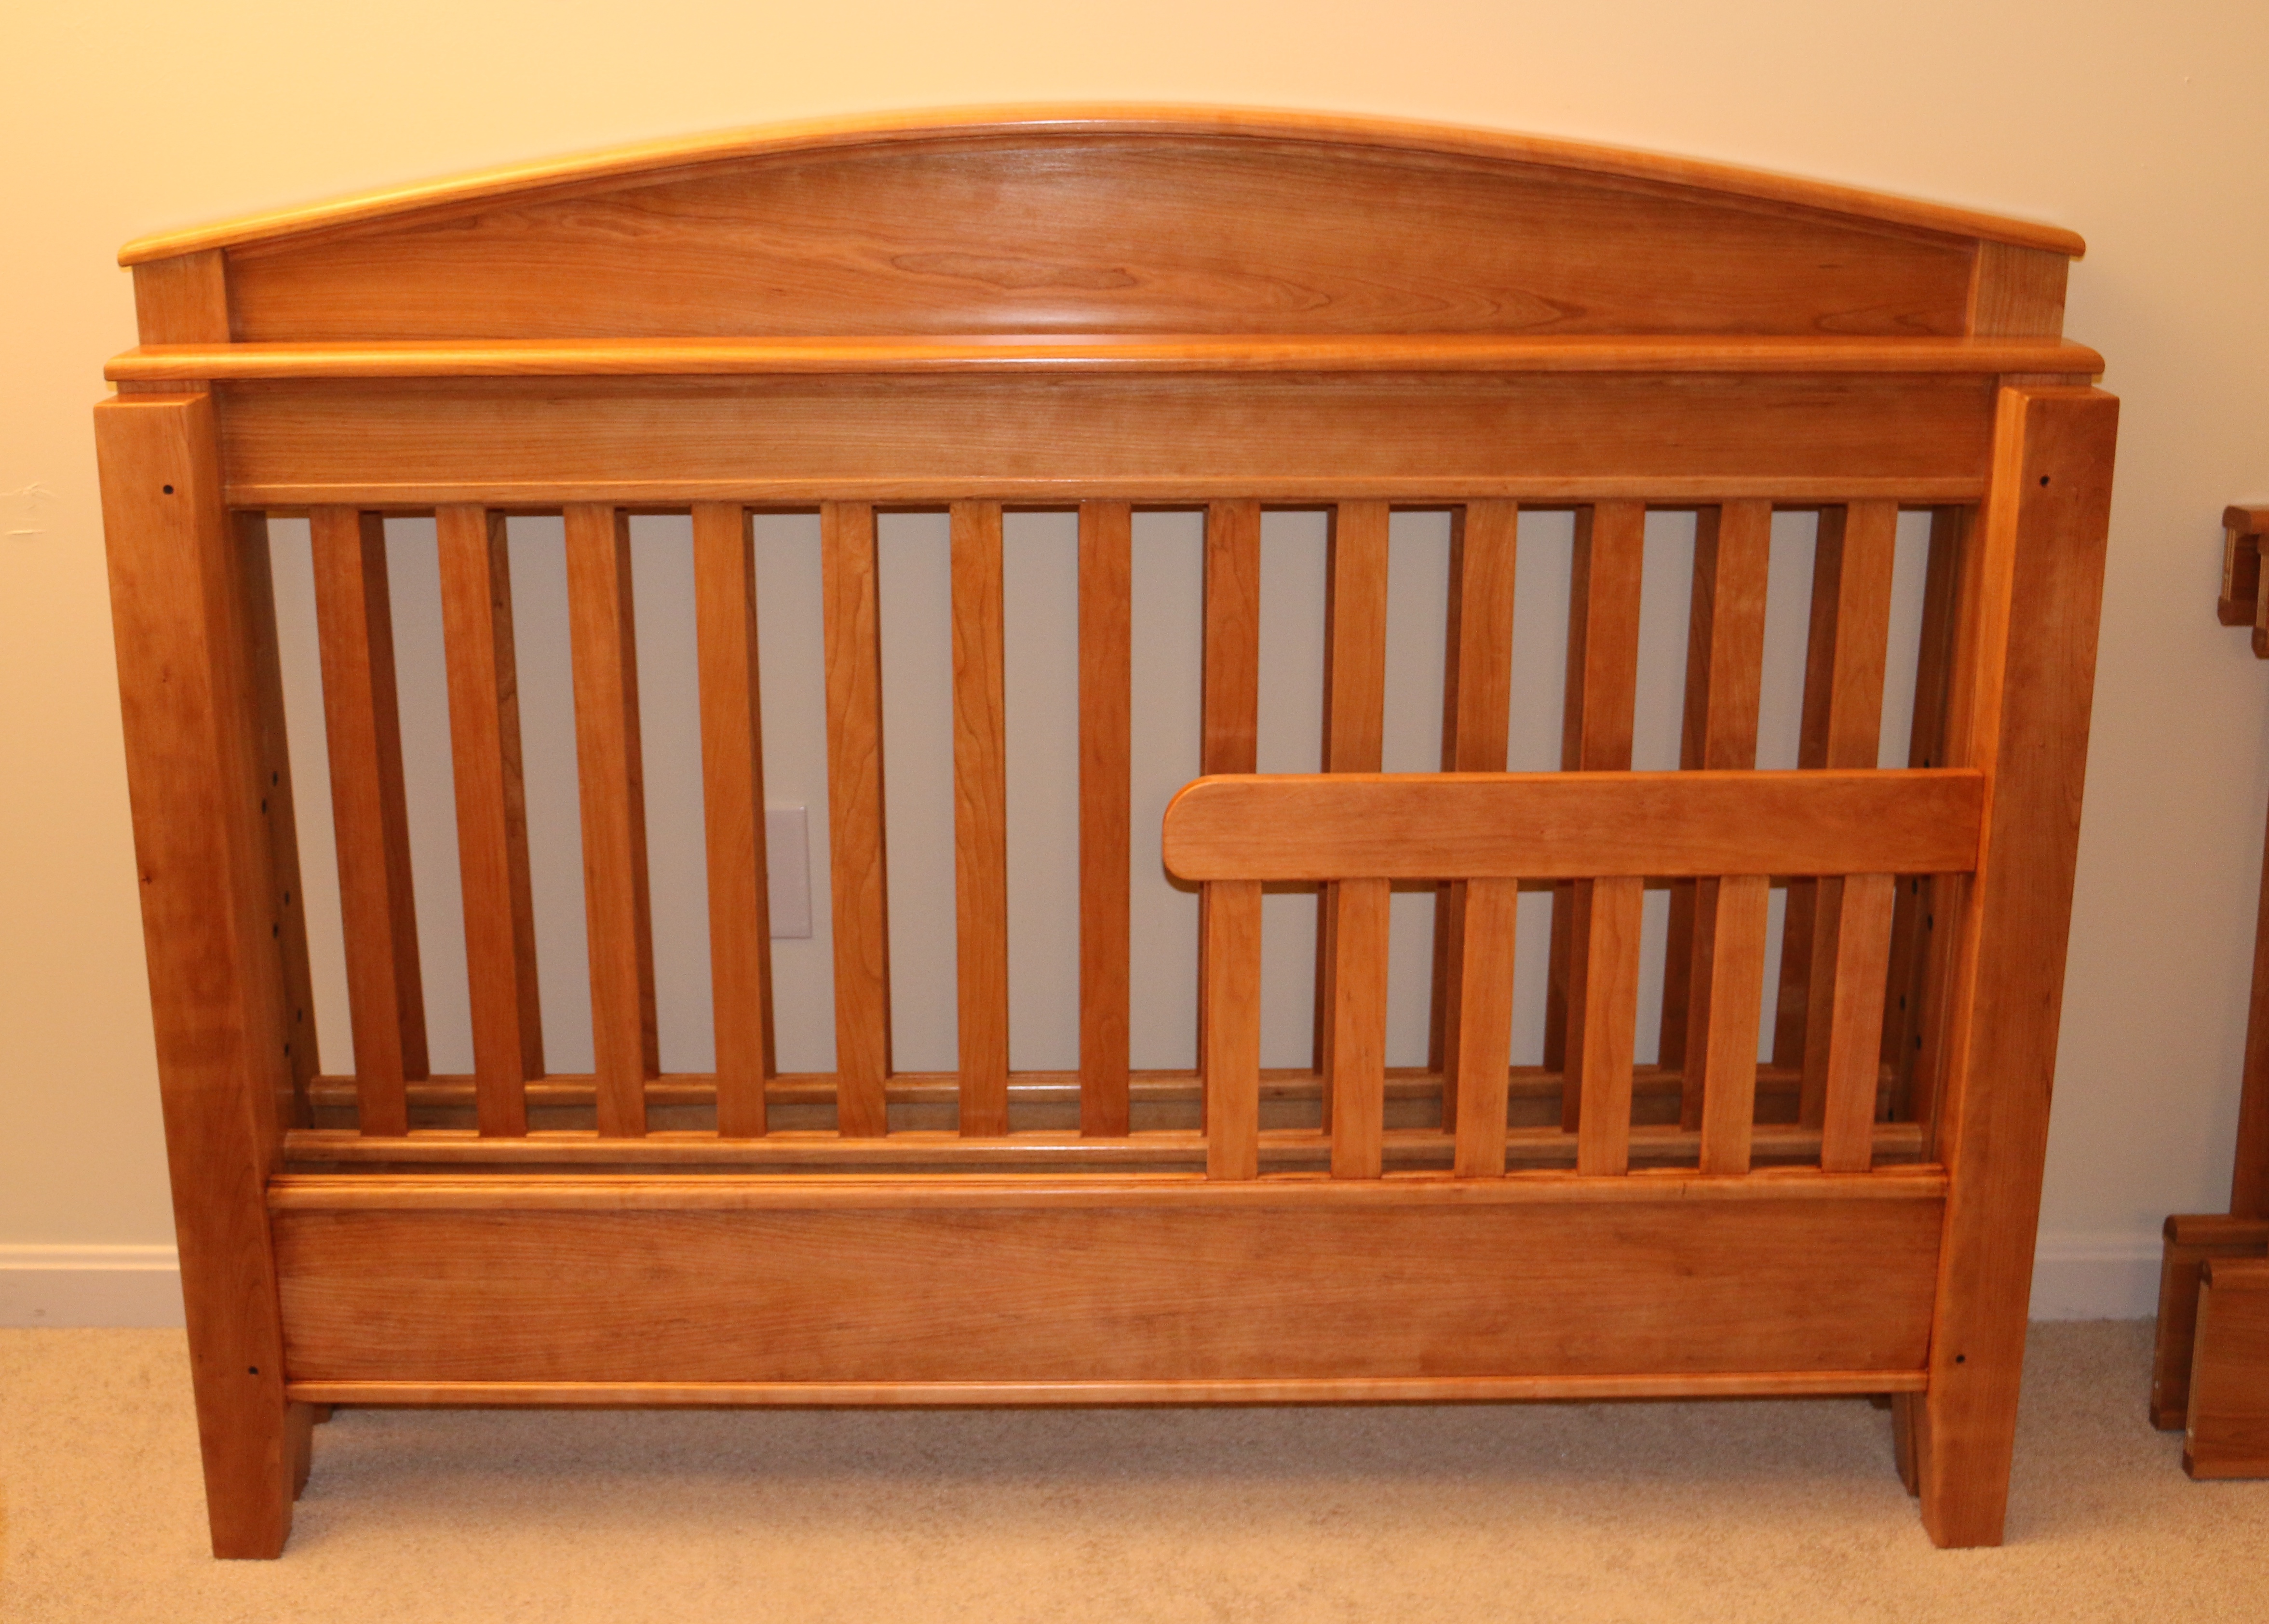
Overall I am very happy with how this process of cold bending cherry to make a curved headboard cap went. I made two caps just in case one got messed up in the process, and I’m happy to report that both turned out well, so I have a second curved cap ready to go if I ever have to make another crib for a second baby.
Next up in this series I’ll be talking about the challenges of making the legs and modifying the hardware.
If you’d like to read some other posts related to this project as they get posted please check out this link here.
Take care,
-Bill

Wow, very ambitious project & the completed parts look great.
Thank you 🙂