You can listen to the interview here, along with several others from WIA including Caleb James and Tony Rousseau.
I had been friends with Dyami online for several years but this was the first time I got to meet him in person. He’s a real nice guy and also loves to share his passion for woodworking.
If you are not already subscribed to the MWA mailing list or podcast I highly encourage you to do so. It is an all volunteer organization that strives to help keep the craft of woodworking alive and growing.
Every family has its own unique holiday traditions. For my wife and I we seem to spend Thanksgiving replacing door hardware and adjusting doors. We did this several years ago in our condo when we lived in Kirkland, WA and again in our home here in New Hampshire. Both times I was swapping out builder grade brass Schlage hardware for nicer Schlage ‘Georgian’ style knobs and hinges with a satin nickel finish.
We’re lucky in that our house is from 1999 and has had a minimal amount of settling — especially compared to the 1910 Craftsman Bungalow we used to rent wherein virtually no door closed properly until I spent a Thanksgiving break adjusting all those doors as well.
With all that door tweaking I’ve refined my method for adjusting the doors and wanted to share a few tips on how I tune up a sagging door.
Evaluate the door:
* Does it close? (and stay closed)
* Do you feel the door rub against the jamb at all? (Are there visible wear marks from rubbing?)
* Is the hardware securely fastened? (Any stripped out or cammed out screws? Lift the door handle a bit and see how the hinges react — do you see slop in their movement? Are some of the screws loose?)
* Has the door been modified? (Anything removed to make room for a crooked or settled door frame? Has the hardware been modified?)
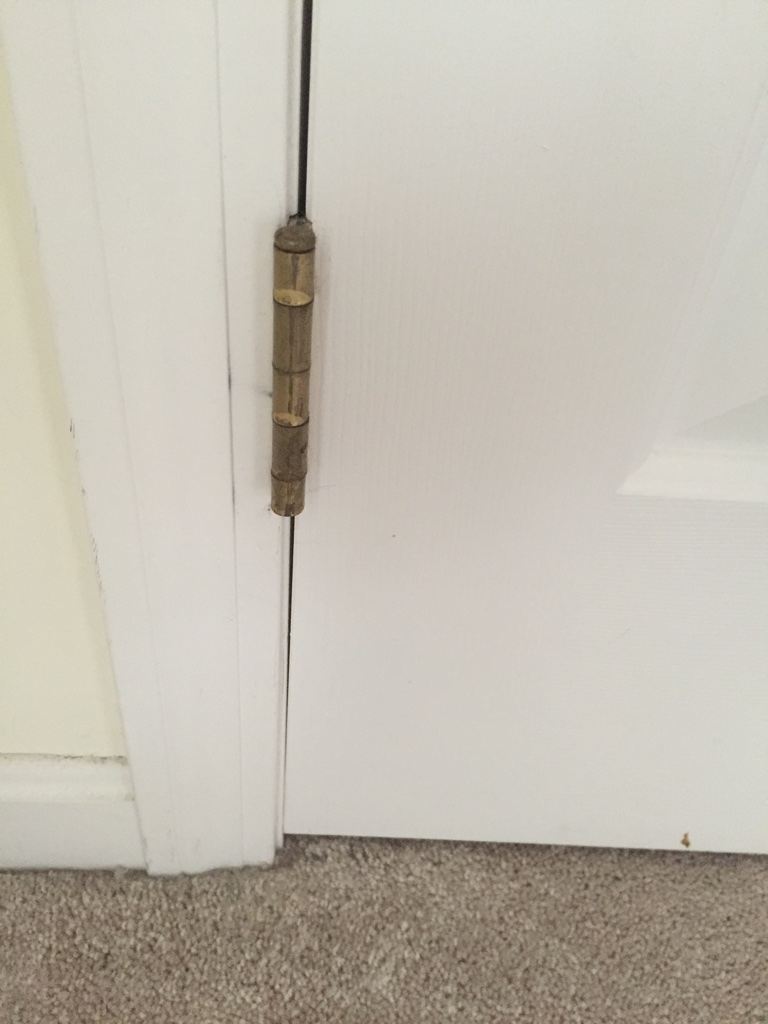
BEFORE: Existing door with brass hardware sagging
The above door is door to my upstairs hall closet. It rubs a little bit when you open or close it. Let’s take a look and see why.
Example of lower left side of door rubbing as door sagged.
Looking at the lower left side of the door I can see the door is pressing against the jamb. At the bottom you can see the spacing between the door and the frame tapers off into the place where they are touching.
Top right of door rubbing against the frame.
As is no real surprise if we look at the top right of the door we can see where the door is touching and rubbing on the right jamb. If I pull up on the door handle I can see the door go back into the position it should be — looks like the top most hinge is a little loose.
How do we fix this problem?
In my case I want to examine the doors as they were and also swap out the hardware so anything brass is a ‘before’ photo and anything nickel is an ‘after’ photo.
The first thing I like to do is make sure the screws holding the hinges in place are nice and tight. The default screw most hinges come with are short ~3/4″ screws. After years of use or abuse (say something heavy like a shoe tree hanging from the inside of a door) the screws can come loose and/or strip the wood that once held them securely.
Brushed nickel screws. Better hinge sets will include some longer screws that are helpful in correcting/preventing door sag when used.
Better hinge sets will often include some longer screws — usually enough for 1 long screw in each hinge. I’ll start by installing 2 screws — one each in the top and bottom of each leaf. As I screw them in firmly — and by hand — I can feel how well the screw is gripping into the wood of the jamb and the wood of the door. If any of the screws just keep spinning then the screw has been stripped out and is now a candidate for one of the longer screws. If the screws are holding then I will use the longer screw in the center hole on the hinge leaf that is on the jamb. This longer screw should go through the jamb and into the heavier framing and provide a strong and longer lasting connection. If the center screw hole was sound but one of the others was stripped out I will put the longer screw into that hole.
Pro-Tip: The hinge leaf with three knuckles should be installed on the door jamb and the leaf with two knuckles should be installed on the door itself. (This will provide a better bearing surface for the door’s hinge leaf to ride on and make it easier to remove the door and put it back in the future). If the pin is removable you can drive it out with a transfer punch and install it the opposite way for a door that opens in the opposite direction.
What do to if the long screws won’t grip either?
Sounds like the screw hole has been damaged too much. If you don’t want to replace the door and/or jamb a reasonable fix can be made using a small diameter dowel. You’ll want to drill out a bigger hole, say 1/4″ diameter, through the stripped out screw hole. Then glue and hammer in a small length of 1/4″ dowel to fill the new hole. Allow the glue to dry and cut it flush with the hinge mortise. Then mark the hole using the hinge as a template and re-drill the hole with a bit that is narrower than the screw you are using. Ideally the bit should be the size of the shank (the solid core) of the screw, thus allowing the threads to get a nice grip into sound/solid wood.
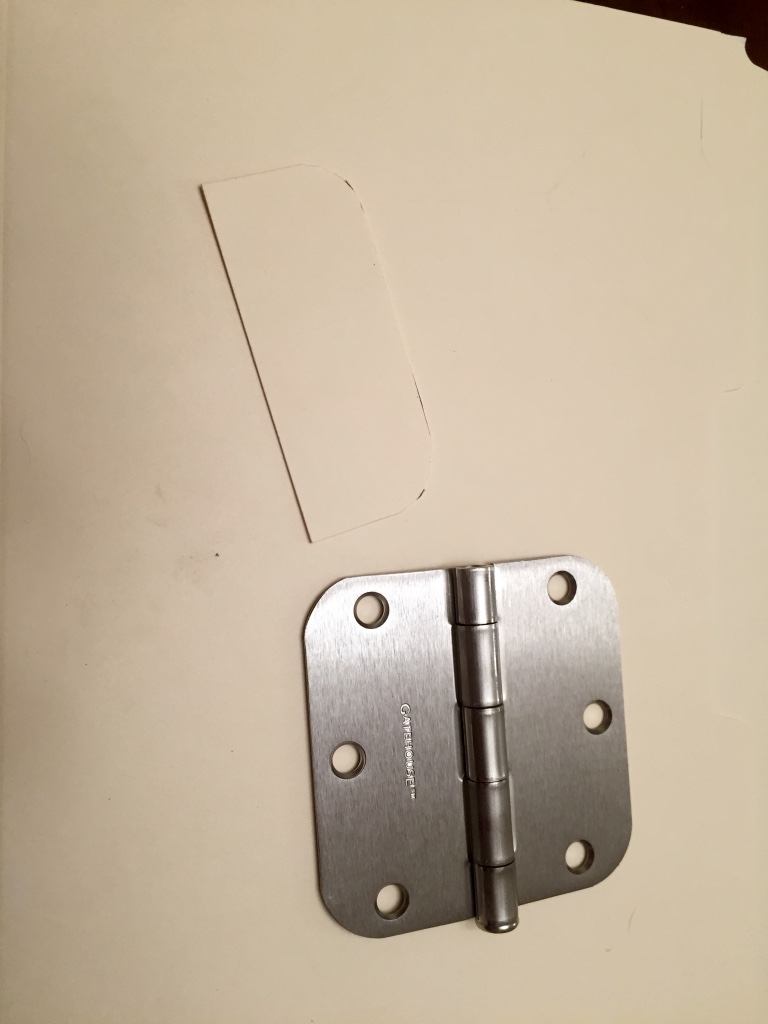
Use one of the hinges as a template.
Securely affixing the new hardware fixed the issue on that particular door, but other doors in the house still didn’t line up the way I wanted and/or the hinge was set too deep and needed something more — some shims — to get the door back into proper alignment.
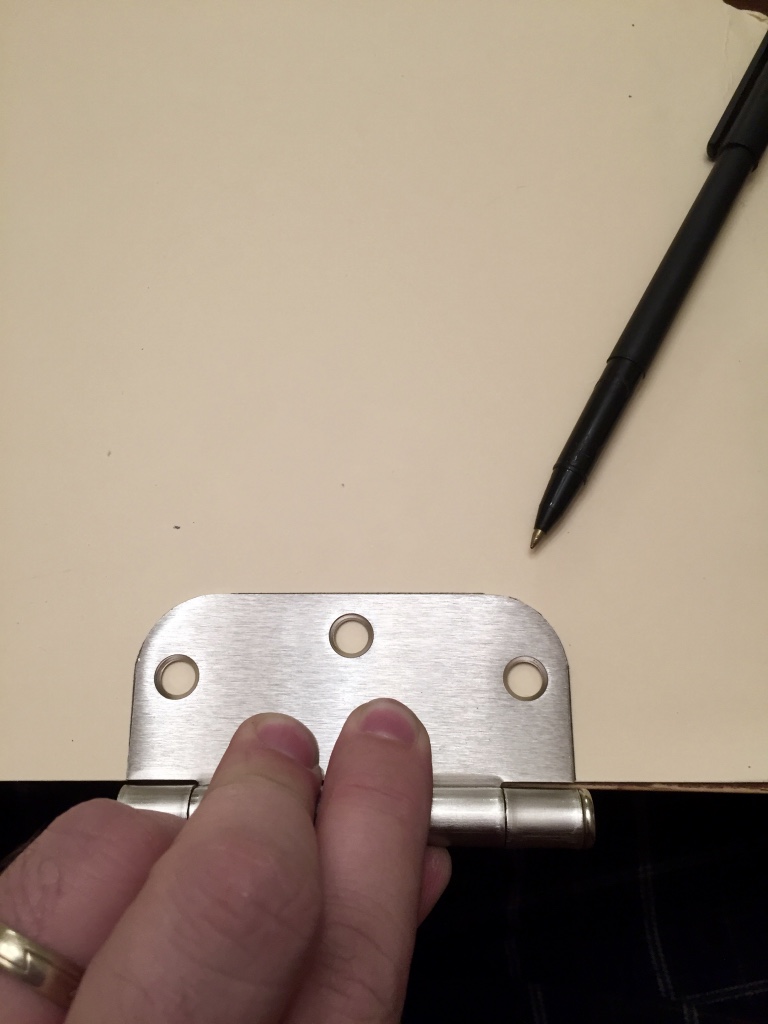
Easy to make shims
I grabbed a manila folder and traced one of the hinge leaves onto the folder. I then cut out what I traced being sure to ‘take the line’ that way I could be sure the template would fit. Also by leaving the folder folded up I could get two shims from each cutting operation. I would test fit the shim and use one as the template for subsequent operations. Also make sure the shim only fills the area where wood would be under the hinge, you don’t want the shims going all the way out to the knuckle of the hinge where they would be visible. Once I had a small stack of these shims I could take a few test fittings and see how many I needed to pad out the hinge so it would be flush with the door jamb or door surface. I would then scotch tape the shims (if I needed to use more than 1) to each other and into the jamb using a small loop of tape. With the shim(s) in place the I’d use the same screw installation procedure described above.
Completed template.
What about the hinge pin door bumper?
A hinge pin door bumper is the little metal bracket with adjustable rubber pads on it used to stop a door from opening too wide and potentially damaging walls or furniture. Once you have your hinges installed you can use a transfer punch (or in a pinch a nail set, nail or another hinge pin) to drive the pin up and out of your hinge. You then put the pin through the bumper and gently tap it back down into the knuckles of the hinge. Once installed you’ll want to adjust the bumper so that the door only opens as far as you want — the bumper may have some spring to it so if you have some heavy handed folks in your house you may want to test it so folks are not over powering the bumper and denting your walls. I put the adjustable side of the bumper facing the trim and the fixed side against the door.
Pro-Tip: Oftentimes I see these hinge pin bumpers installed on the top most hinge. In my view the top and bottom most hinges are under the most stress and when the bumper is used its putting even more stress on the hinge and screws. I prefer to put the bumper on the middle hinge as feel that it is in the best position to deal with the additional stresses.
Note that the spacing between the door and the jamb is consistent.
Mind the Gap
As you are making these adjustments to the door you’ll want to watch the gap between the door and the jamb. Ideally you want this to be even all around — see photo above.
What to do if the gaps aren’t perfect?
Your house may have settled a bit causing the jamb to go out of square or it may never have been installed perfectly in the first place. If that is the case, use your judgement to do the best that you can. Ideally you want at least some space around the door on all sides so that it can swing freely, but you don’t need to obsess over it as houses will often continue to settle over time and functionality should be your top objective.
AFTER: Properly adjusted door with new Schlage ‘Georgian’ style knobs. The knobs and hinges are finished in brushed nickel.
What if all the gaps look good, but now the door knob won’t catch on the strike plate?
If the strike plate is now way off, say 1/4″ or more– double check to make sure you haven’t misaligned anything. If you are confident in your work and happy with your gaps you could remove the strike plate, use the doweling repair method above, cut a new mortise and re-install the strike plate. This can take a lot of time and work and gets ugly as you don’t want to chew up a lot of the wood in the door jamb, graft on wood dutchmen or shims to fill gaps left by the old mortise nor do you want a lot of putty to fill the gap left by the old location. If the strike plate is only off by say 1/8″ or so you may want to consider filing the strike plate. You can take the strike plate off, put it in a vise and file the opening a bit so that the latch now properly catches in the strike plate. Just be careful not to remove so much metal that you weaken the mounting screws’ ability to securely hold the strike plate in place.
Pro-Tip: Files only cut on the push stroke. After each push you should lift the file slightly and then pull back so that you don’t prematurely dull your file(s). Also be mindful that you don’t leave any burs and make sure you are cutting straight up and down in line with the existing opening in the strike plate.
By working through the above steps you should be able to fix most of the common problems you’ll encounter with interior doors. I know I am a lot happier to have all my doors properly closing and staying closed now. And the new hardware color also makes my OCD happy as the older brass hardware always bothered me as I have been slowly replacing/upgrading other hardware around the house to match that more modern design aesthetic and get rid of any remaining brass.
Take care,
-Bill
P.S. This post will be the first in an occasional series of Handyman 101 and/or Woodworking 101 posts to help folks new to this sort of work get acclimated to doing common projects.
If you have specific requests for topics you want to see covered, please let me know in the comments or via the form on the contact page.
Woodworking is a lifelong journey of discovery and rediscovery. Along the way you’ll meet a lot of great folks and interesting characters who are surprisingly willing to share advice and help you out. The craft has been passed down this way for millenia.
Everything Old is New Again
Modern woodworking media seems to go in cycles much like clothing styles or car designs. Right now it’s popular to study the early works of Moxon, Roubo and Nicholson etc., or prove you have the best router or table saw trick. Others are interested in espousing the mix of old and new tools and techniques which is not a new concept. Manual training programs like those at NBSS have been doing it for over 125 years and the Shakers before them etc.
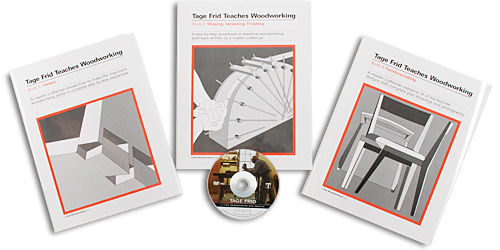
I want to buck the current trend and take a trip back to the 20th century. When I got started in traditional woodworking one of the first teachers I had was Tage Frid via the ‘Tage Frid Teaches Woodworking’ 3 volume set with its iconic white covers. I haven’t seen these books or Tage’s work come up much lately and thought it would be helpful to blow the dust off those books hopefully re-kindle some interest as I think they are a great resource.
Tage Frid
Tage (Pronounced ‘Tay’) taught me and countless other woodworkers the basics via his books and teaching. He grew up in Denmark and apprenticed as a cabinetmaker. His time as a journeyman took him to various other shops including the Royal Danish Cabinetmakers. In 1948, at the age of 33, the American Craft Council persuaded him to immigrate to New York and teach woodworking. Tage lead the woodworking program at the School for American Craftsman in Alfred NY which was later moved to the Rochester Institute for Technology. From 1962-1985 Tage was a professor of Woodworking and Furniture Design at RISD helping to propel that program to national prominence.
Tage Frid
Also notable was Tage’s involvement with Fine Woodworking where he worked as an editor from it’s inception in 1975, through 171 issues until his passing in 2004. Described as having a sharp tongue and an ‘impish’ smile you can get a small taste it it through his writing and interviews which often have some memorable nuggets.
He could cut a dovetail while joking and flirting with the ladies. He referred to nails in furniture as ‘Swedish dowels.’ When critiquing a piece of work, which was nerve-wracking for students, the blow was slightly blunted by his sarcastic humor. Hank Gilpin recounts some memorable zingers:
“Oh, good curve. Too bad it’s the wrong one” “Nice dovetails. What’d you use — a chainsaw?” “Beautiful legs Henry. What were you thinking about — an elephant?”
And the classic: “Congratulations, you’ve just figured out the most complicated way to hold a board 30 inches off the floor.” [*]
The goal was not to put anyone down, it was to help each student stay humble and push him or herself to reach new heights in a fatherly kind of way. I had a similar experience during my own training and find myself rehashing some Frid one liners and Rich Friberg-isms in my own shop and classroom. Thankfully the flavor of sarcasm I learned from Rich is a little less harsh, but still fun.
Tage Frid Teaches Woodworking Boxed Set by The Taunton Press
Teaching
When asked about teaching repetitive topics Frid had the following to say:
Don’t you get bored demonstrating the same old dovetail? “Maybe you left too early. I always demonstrate difficult joints and techniques depending on what the audience wants. The dovetail is just the overture. What I like about teaching is that I learn something new every day. A student asks me, ‘Why can’t I do it this way?’ and I think, ‘Why not?’ Then we figure it out.” — Tage Frid (excepted from an old interview in Fine Woodworking you can read here.)
Levity aside, Frid’s teachings focused on teaching solid joinery — form should follow function, wood has a beautify of its own that should be enhanced and not hidden and instilling an innate sense if proportion via a keen eye for detail.
“The best tool is the eye. Train the eye. The eye guides your hands to achieve the form. If the eye says ‘It’s right’, it is right” — Tage Frid [*]
With a solid grounding in the basics and exposure to a wide range of tools and techniques students are able to take on whatever challenge a project or shop can throw at them. During his lengthy career as a teacher, writer, editor and studio craftsman Frid helped teach several generations of woodworkers. You can see his work live on through his students and their students.
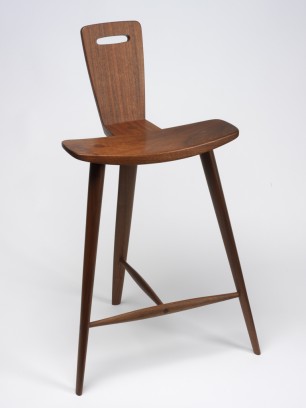
Tage Frid 3 Legged Stool
Design
Working in the Danish-modern style a lot of Frid’s pieces had a distinctive look compared to many of his American contemporaries. They were generally lighter looking with delicate lines and curves that celebrated the grain. The designs are especially interesting when you view them in the context of the time they were produced — the 1940s-1980s. Many of them were years ahead of what we think of as the the mainstream designs of the time .
For me, one of his most iconic pieces is the now famous 3 legged stool. If you read his 3rd book you’ll learn about how he came up with the design while watching a horse show and sitting on a fence. It was an interesting case study as he explains some of the revisions he went through to hone the design. These stools have been on my mental to-do list for about a decade now and I hope to eventually build some for myself.
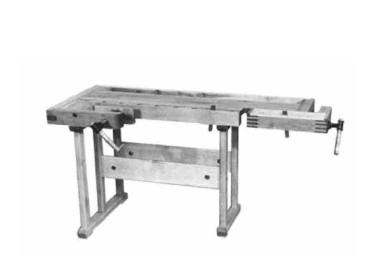
When he first arrived in the US in the 1940s there were no good places to get a solid workbench. As a result Frid had to design and build a bench for himself and for his classrooms. Based on a traditional continental design with a shoulder vise and a tail vise the bench below was well suited for a cabinet maker. Over the years many a student, both in person and via his writing, would build and use one of these benches or a similar variant. In some upcoming posts you’ll see me build a scaled up version for my own shop.
Tage Frid Workbench
What’s with the book report on Tage Frid?
Tage Frid’s work has shaped several aspects of my woodworking, design and teaching and I had a laundry list of odds and ends I wanted to share with you here. I also have been working to finish off my Tage Frid inspired bench and wanted to set the stage for it. And lastly because once I saw it, I could not un-see it — my Dad (who was my first woodworking instructor) is a bit of a doppelganger for Tage Frid. (Check out the picture below and compare it to the first picture of Tage Frid in this post) They both have very similar body shapes, taste in glasses, hairline and half smiles. I can’t talk too much because I look a lot like my Dad, I’m just the taller model at 6′-2″, so I suspect there will be a similar picture of me someday in the shop.
William D. Rainford — My Dad — And Tage Frid Lookalike
If you are interested to learn more about Tage Frid please check out the links below, it’s worth the time.
Other Tage Frid Resources:
From Fine Woodworking Issue #1
Tage’s thoughts on the history of the chair, designers and craftsmen, good designs and joints of today will becomes classical furniture of the future
Time to get back out into the shop — it’s cold outside.
Take care,
-Bill
P.S. I never got to meet Tage Frid in person, he passed away while I was living out in Seattle but I would have loved to meet him. If anyone knew him personally I’d be curious to know a few things I haven’t been able to find online:
What happened to his shop, bench and tools? Are they in a museum somewhere? Did they go to his grandson?
Anyone have a picture of him in the classroom near the iconic benches he used to build?
A good carpenter can be hard to find. Many of us like to think that in earlier times there were was an abundance of exceptional carpenters, but this sort of lament is not a new phenomenon. Check out the interesting except below from the 1850s:
“The Author’s Experience.
These facts and reflections have been impressing themselves upon the mind of the Author of this work for twenty years past, while he has been serving the Public as a practical carpenter. During much of this time it has been his fortune to have large jobs on hand, employing many journeymen mechanics, who claimed to understand their trade, and demanded full wages. But it has been one of the most serious and oppressive of his cares, that these journeymen knew so little of their business.
Few Good Carpenters
They had, by habit, acquired the use of tools, and could perform a job of work after it had been laid out for them; but not more than one man in ten could himself lay out a frame readily and correctly.
Why Apprentices do not Learn
Now, it is not commonly because apprentices are unwilling to learn, or incapable of learning, that this is so, but it is because they have not the adequate instruction to enable them to become master-workmen.”
— William E. Bell ‘Carpentry Made Easy: The Science and Art of Framing’ (1858)
I think Bell’s comments ring as true today as they did when he wrote the above in 1858. I won’t focus on the lazy workmen uninterested in learning, but I will focus on those who want to keep learning new skills. As with many of life’s pursuits, you’ll get out of it what you put into it, and there is much to be learned if you know where to look.
Finding a good carpenter
Most of the best carpenters and woodworkers I know get the majority of their work via word of mouth and are booking months out at a time and thus don’t have to invest much in marketing. If you’re looking to find one of the ‘few good carpenters’, ask around at a local woodworking school, shop, guild, club or friends and family for referrals and interview your next carpenter.
Learning More
One of the best ways to learn a woodworking skill is to take a class or workshop.
I have a few upcoming workshops this spring at the North Bennet Street School (details below) and there are some seats available if you are interested in joining me.
Molding planes
Making Traditional Moldings Using Hand Planes @ The North Bennet Street School
Learn to use traditional molding and joinery planes to produce beautiful traditional molding profiles. Learn the basics of tuning and using these planes. Build a basic sticking board, used to hold the moldings you are making. Layout and execute historic profiles. We discuss the history of traditional moldings, examine planes/profiles students bring (optional) and, if there is time, an introduction to carved moldings.
Shutters Workshop
Introduction To Shutters @ The North Bennet Street School
Learn about traditional wooden shutters in this two-day workshop. Using traditional joinery, students build a sample shutter and learn the skills needed to layout and build shutters for custom projects. Discussion includes interior and exterior uses, fielded panels and louvered styles. Students should be able to plane and square up a board by hand and have some experience laying out and cutting traditional mortise-and-tenon joinery by hand. Some experience with tuned hand tools and power tools is required.
“The Oriental philosophy of contemplation involves forsaking all work; the European does his meditating while relaxing from work, but the American seems to think things out best while working. So the stone walls of New England may be thought of as monuments to the thoughts that occurred while they were being built, for those were the days of great decisions and profound planning. The thoughts one thinks while sawing a tree or making a stone wall are surprising. It is almost as if the mind becomes ashamed of the work the body is doing and starts doing a little “showing off” by itself. Lincoln said he did some of his deepest thinking while splitting rails. The plain farmer of two hundred years ago was weaving the fabric of a new nation and although there are no marble statues to his patriotism now, there are still his stone walls.” — Eric Sloane American Barns and Covered Bridges, 1954
Oak trees in the way of my barn…
I live on a heavily wooded street in New Hampshire that is lined with stone walls. As I pass them each day I think about what it took to clear all this land and build those walls. While most of the neighborhood is covered with second and third growth trees that were not actively managed, and new housing developments, there are still a few pockets of small family farms with cleared farmland that looks like an idealistic painting of yesteryear and reminds us how this was all farmland about 100 years ago. As the leaves changed this season I found it amusing to see tourists snapping pictures in front of some of these farms with their stone walls and weathered barns. In the book referenced above Sloane encouraged his readers to keep an eye out for early barns also made several interesting observations about stone walls. They were designed to keep animals in and not to keep humans out. When a wall fell over you had all the stones needed to rebuild it as opposed to a wooden fence that could have rotted away. I like the sense of inviting simplicity, using what you had on hand and building for the long term.
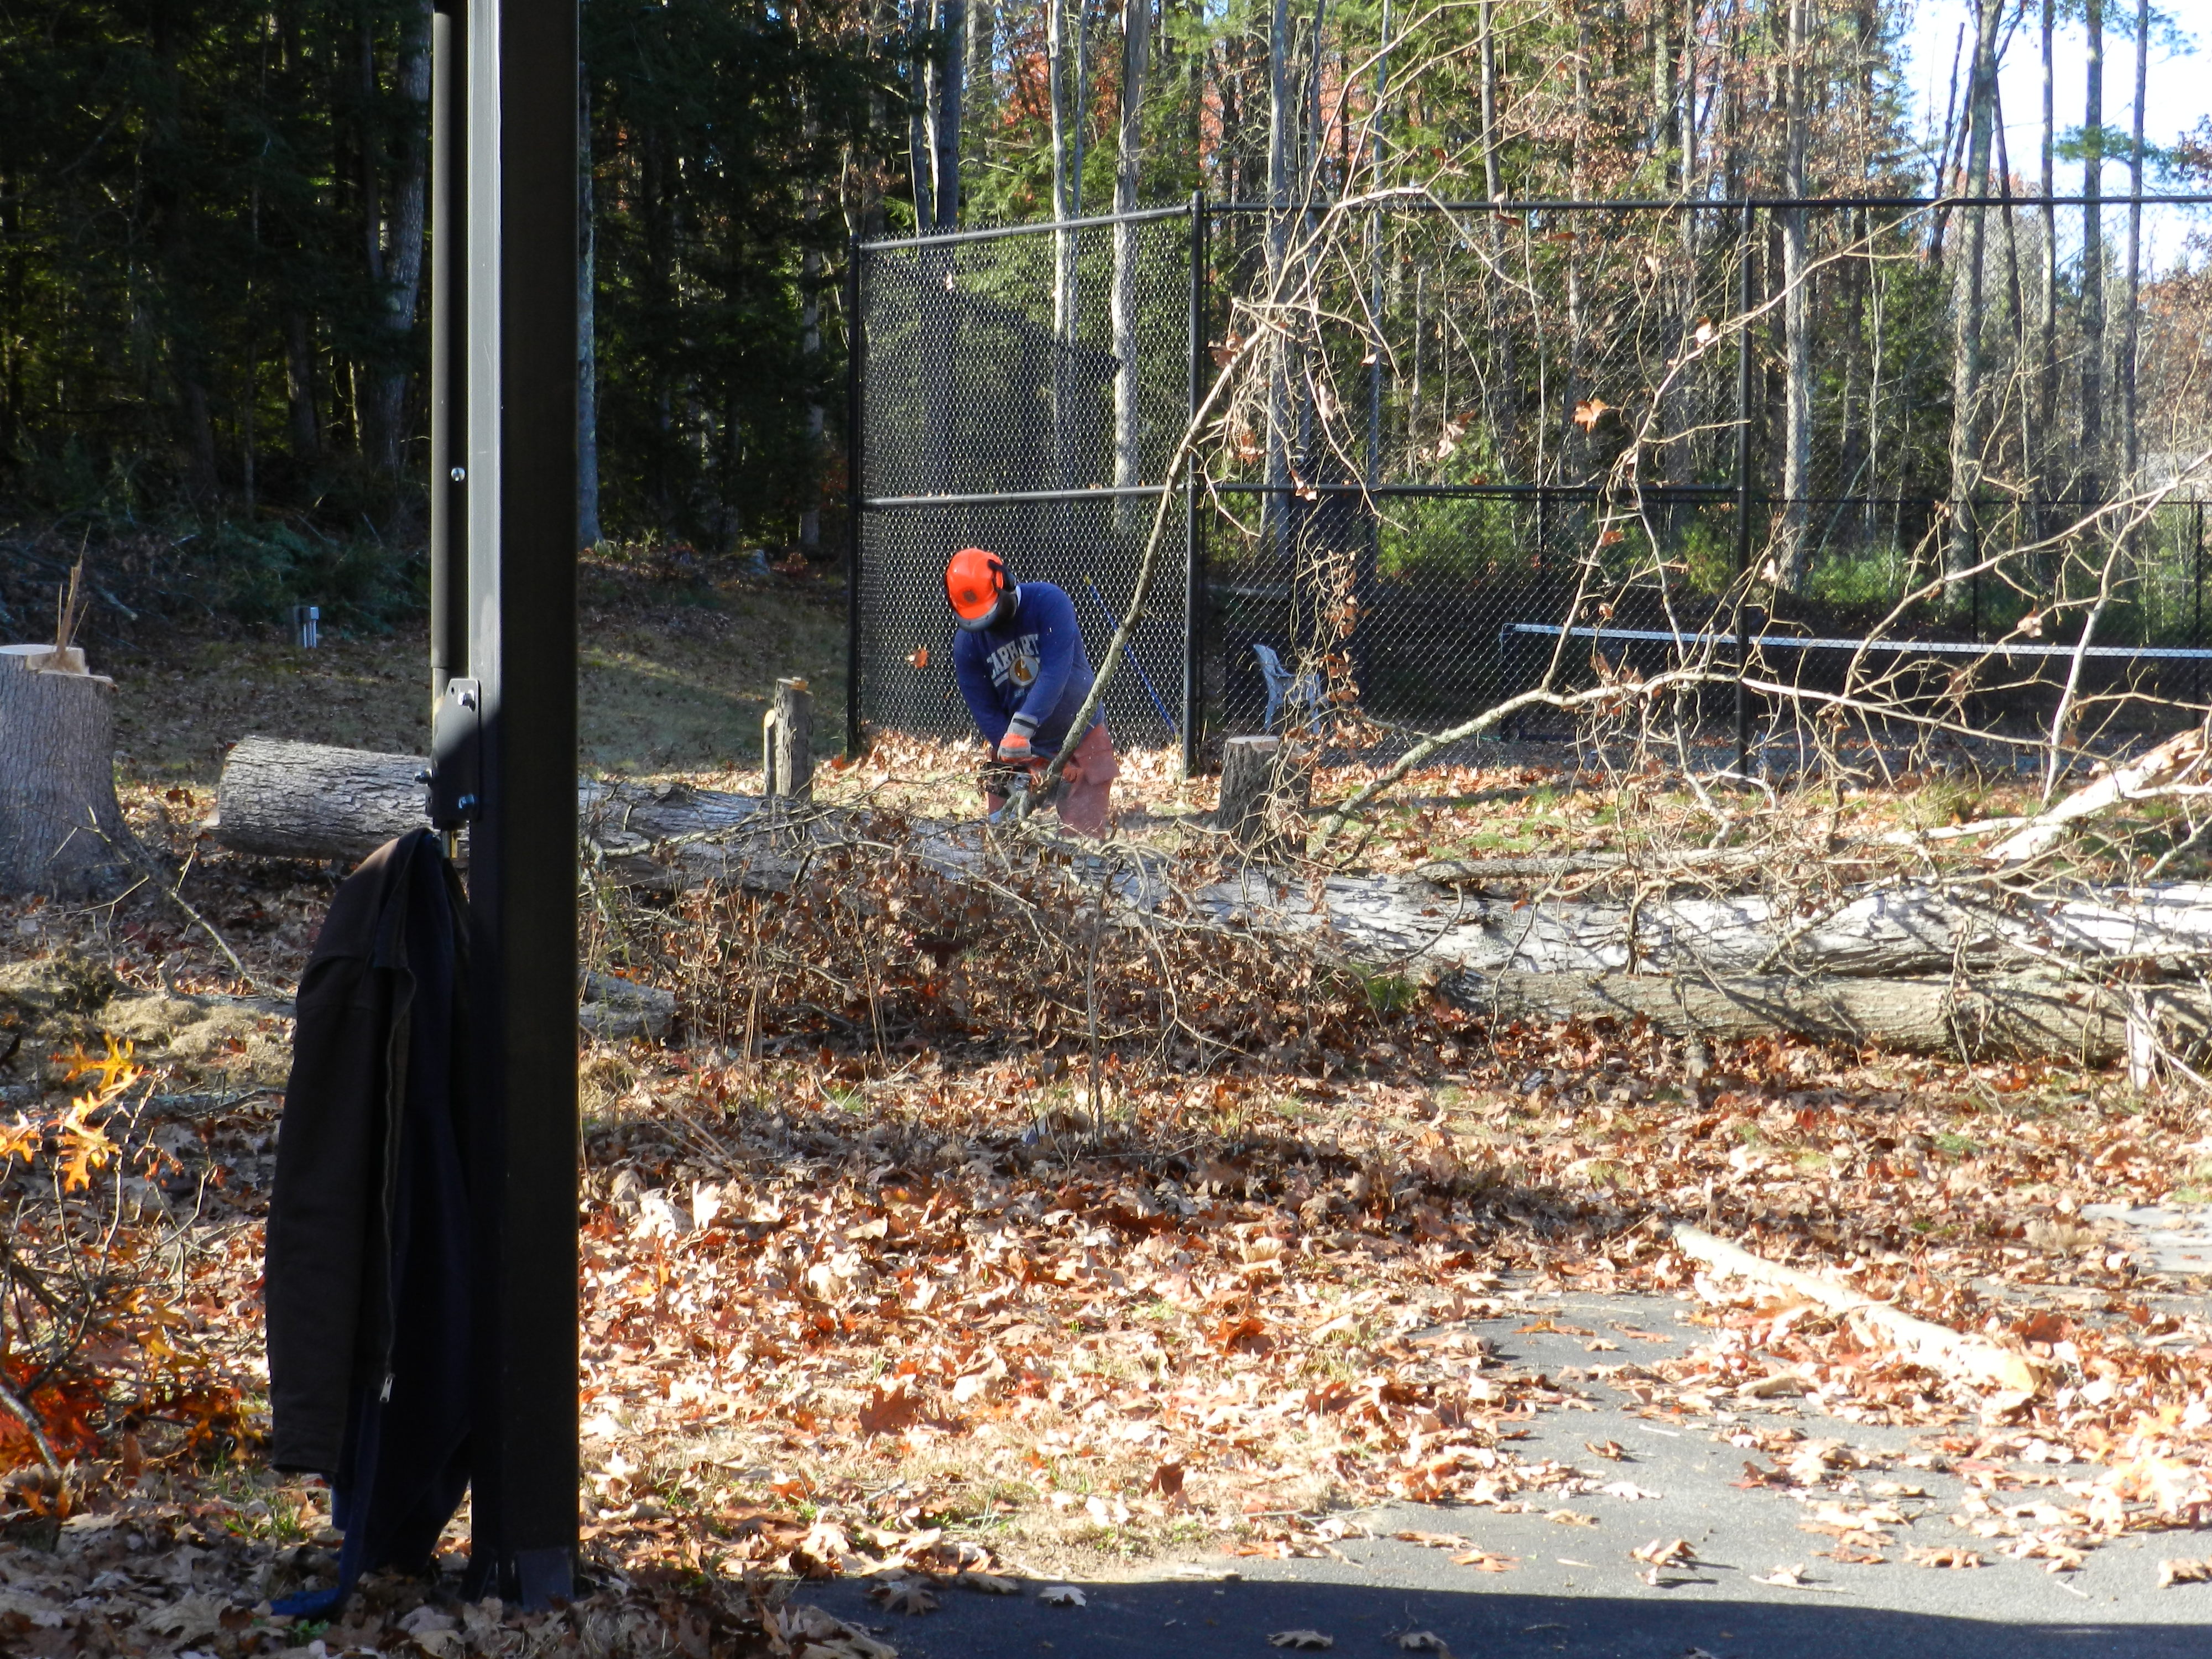
I recently set out to clear some trees out of my backyard and make room for a 12’x24′ timber framed shed/small barn to store extra wood and yard equipment. I’ve cleared about 35 trees so far, knocked off a bucket list item — taking down a full size tree with a felling axe, and still have a few more to go.
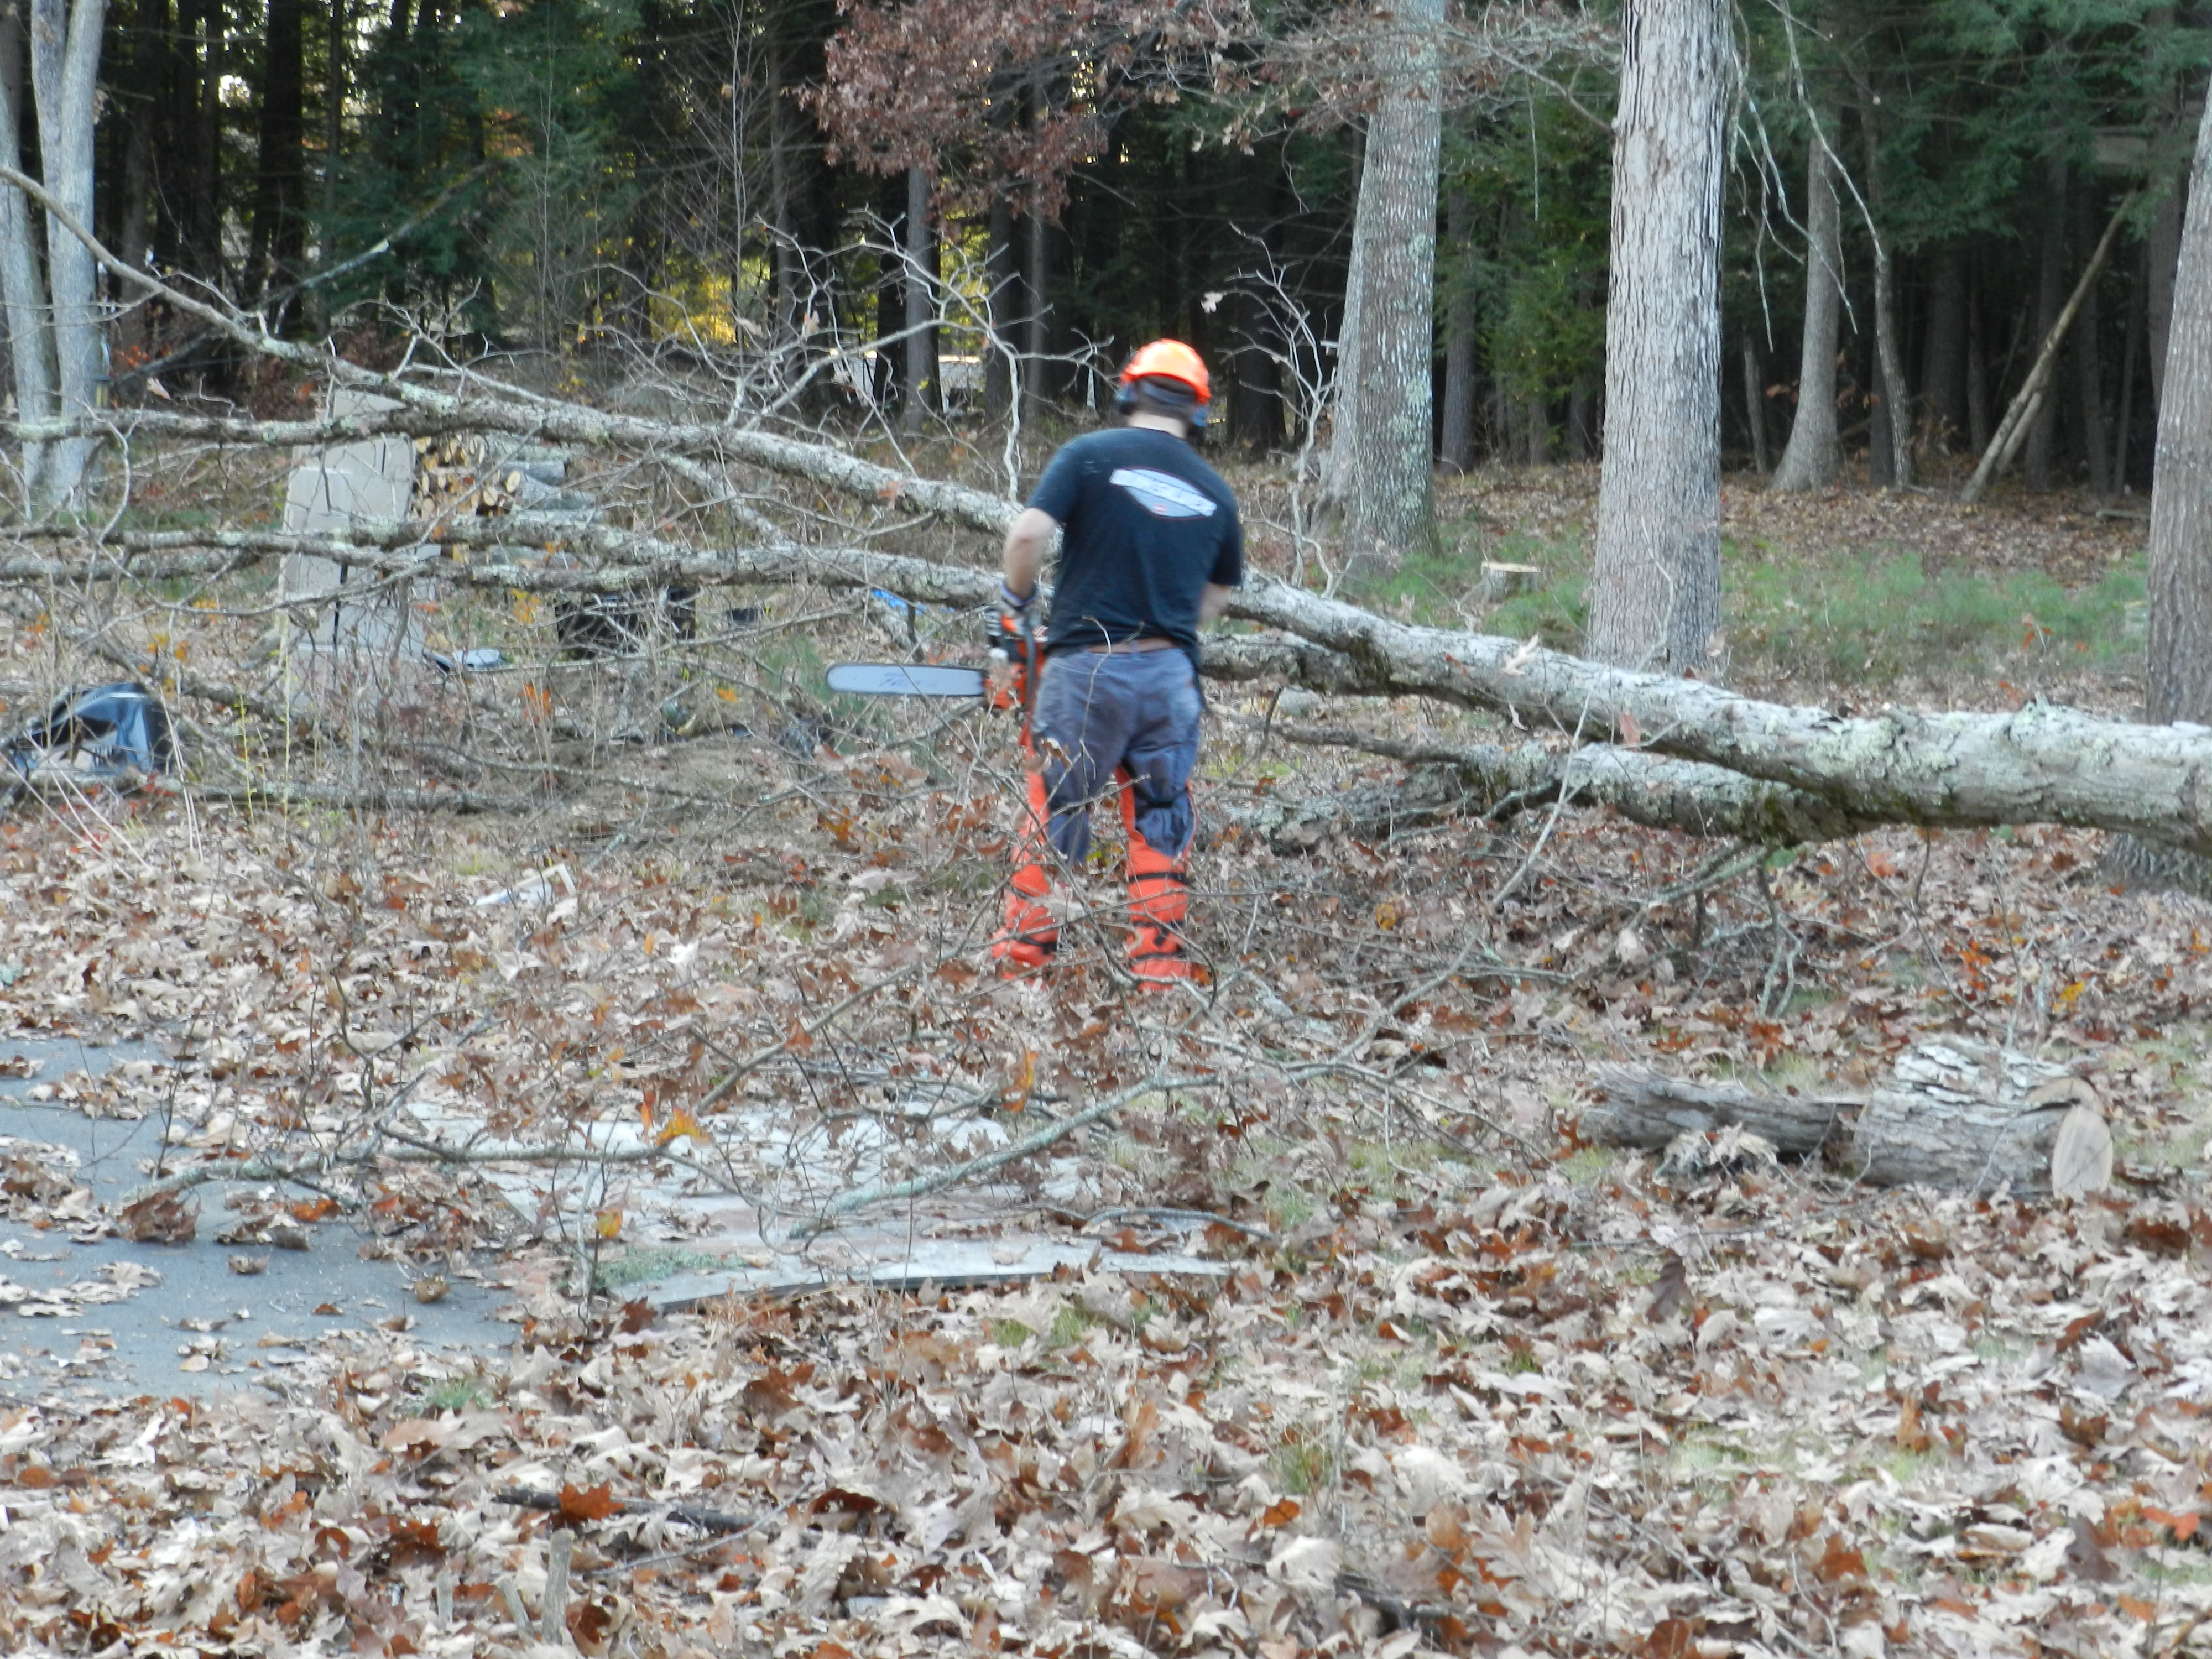
Felling oak trees
Safety Tip:
When working with large trees and high powered saw, make sure to ALWAYS wear the appropriate safety gear. Above you can see me wearing my steel toe boots, Kevlar chaps, eye protection, helmet with hearing protection and face shield and Kevlar reinforced gloves. The chaps are like wearing an insulating blanket and rough to wear in the summer, but in cooler months they help you stay warm.
Limbing the tree
How do I cut down a larger tree?
I start by walking around the tree from all sides, sighting up at it to see what way it leans and were the mass is held by the limbs. I then mentally think about what direction I have enough space to drop to the tree without hitting houses, other trees, people or fences. With a plan in place I set about felling the tree. The process is much the same whether I use an axe or a chainsaw. I cut in at an angle on the side of the tree facing the way I want it to fall. I then make a horizontal cut to remove that wedge of wood. It should only be about 1/3 of the way through the tree. You want the intersection of those two cuts to land right on each other so you have a smooth hinging surface and a controlled drop.
90 Foot tall oak trees take a LOT of work to break down
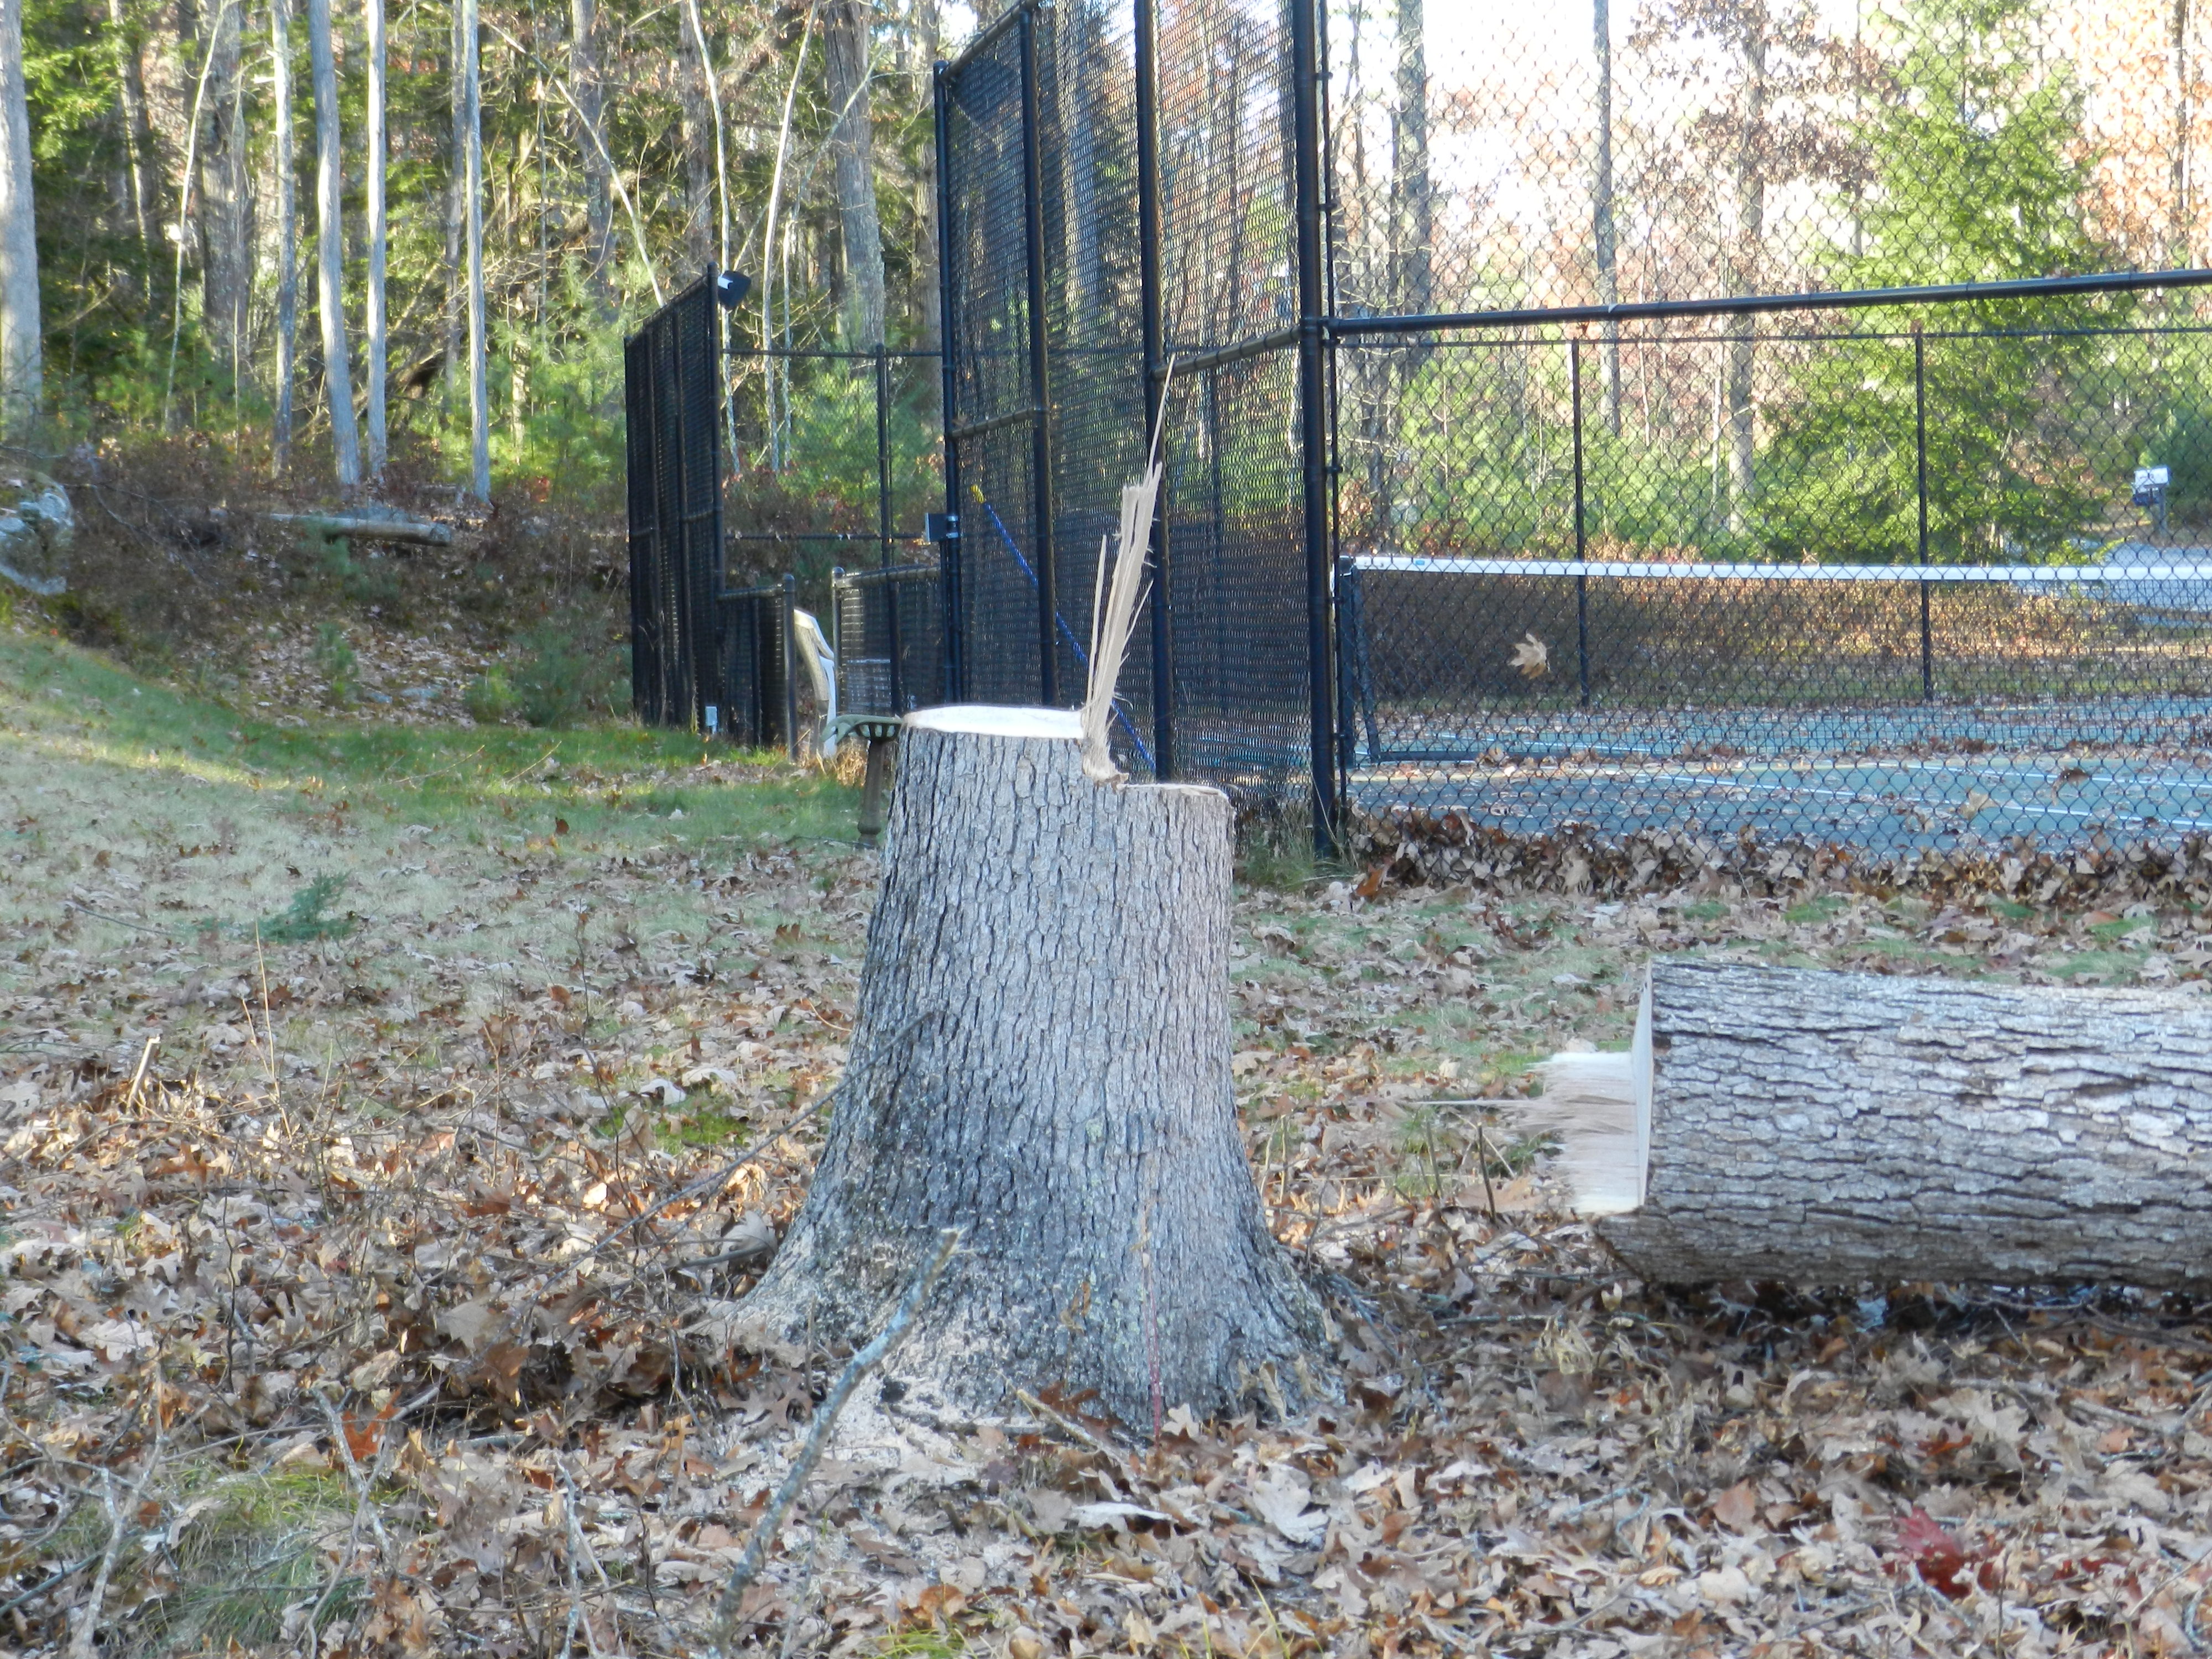
I then come from behind the tree and make a horizontal cut until I leave about a 1.5″” wide hinge of wood that will help control the fall. This cut should be about 2″ above the bottom of the wedge cut (As seen in the photo below). If done properly the tree should slowly start to fall over exactly where you want it. The tree shown here was a 90 foot tall oak, so when it hit the ground it shook the ground with an incredible thud — anything in it’s path will get crushed. When cutting a tree like this make sure you have a clear retreat path, usually 45 degree from the way you expected the tree to fall, that way you are not in the path of a falling or splitting tree or anything it kicks up.
Notch cut and hinge used for a controlled drop
Once on the ground I start removing all the limbs from the tree. I start with all the limbs that are not holding the trunk up off the ground to make room to better access the trunk. Any limbs or branches that are holding up the trunk are likely going to bind on your chainsaw if you are not careful. Being mindful of where the tree may move as you release that tension you can use a sharp axe to remove these limbs or careful wedge cuts that will not bind the saw. When doing this sort of work you need to be thinking about where the trunk is likely to fall after removing this limb, so you’ll want to mind your legs and feet.
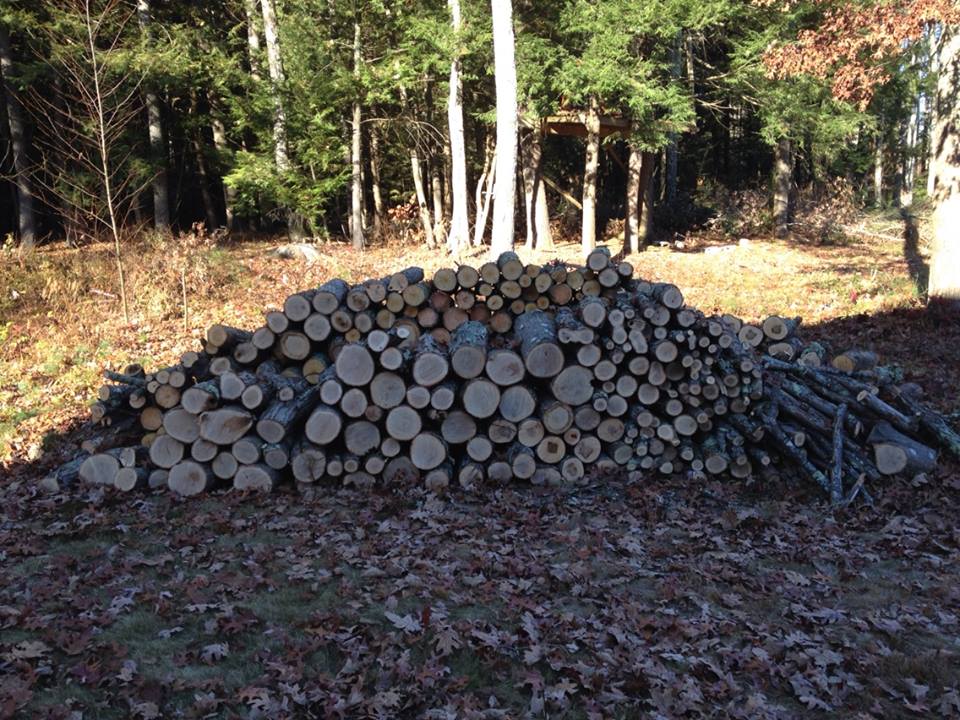
Breaking down the de-limbed tree into firewood
Once the limbs are removed I break the tree trunk down into either firewood or whatever I am looking to use the wood for. These trees will be processed down into several projects — a few bowl blanks, a new base for my anvil, a few chopping benches for the shop, a stump to split firewood on and of course firewood. The incredible amount of brush and branches will be ground up into chips and distributed elsewhere on the property.
More Tips on cutting trees:
Try to cut tree during the colder months or winter as there will be less sap and thus less weight and cleaner cuts
Use plastic wedges when cutting a larger stump so that it does not bind on your saw’s bar and the wedge will not damage the chain
Use plastic or even larger metal wedges to help a cut tree (notched and ready to hinge) that is not falling. You can use a large mallet or beetle to drive in a wedge and help give it that little push it needs to start going over.
The result of a weekend of hard work
Even with all of the above information running through my head, and the sometimes backbreaking labor to break down these trees, there was still a lot of time to think. As I was doing the above work I was building the timber framed barn over and over again in my head, so by the time I actually get around to cutting the frame it will be like second nature. Unfortunately the snowy weather is creeping up on me fast, so it will be a race to see if I can get the shed put up this fall/winter or if it will get delayed until spring.
I’ve been keeping my local haberdasher busy as I often find myself wearing a wide variety of hats in the course of my work. I regularly have to function as a preservation carpenter, cabinet maker, turner, tailor, timber framer, historian, carver, draftsmen, author, instructor, blogger, handyman and traditional hat aficionado.
That’s a bit of a mouthful to rattle off when you meet someone new. To simplify I usually tell people I work as a traditional joiner. Often there is a bit of a pause and some clarifying questions. Many folks realize that most of the epithets above generally revolve around a core of skilled woodworking, but they cannot articulate what makes it a true specialty.
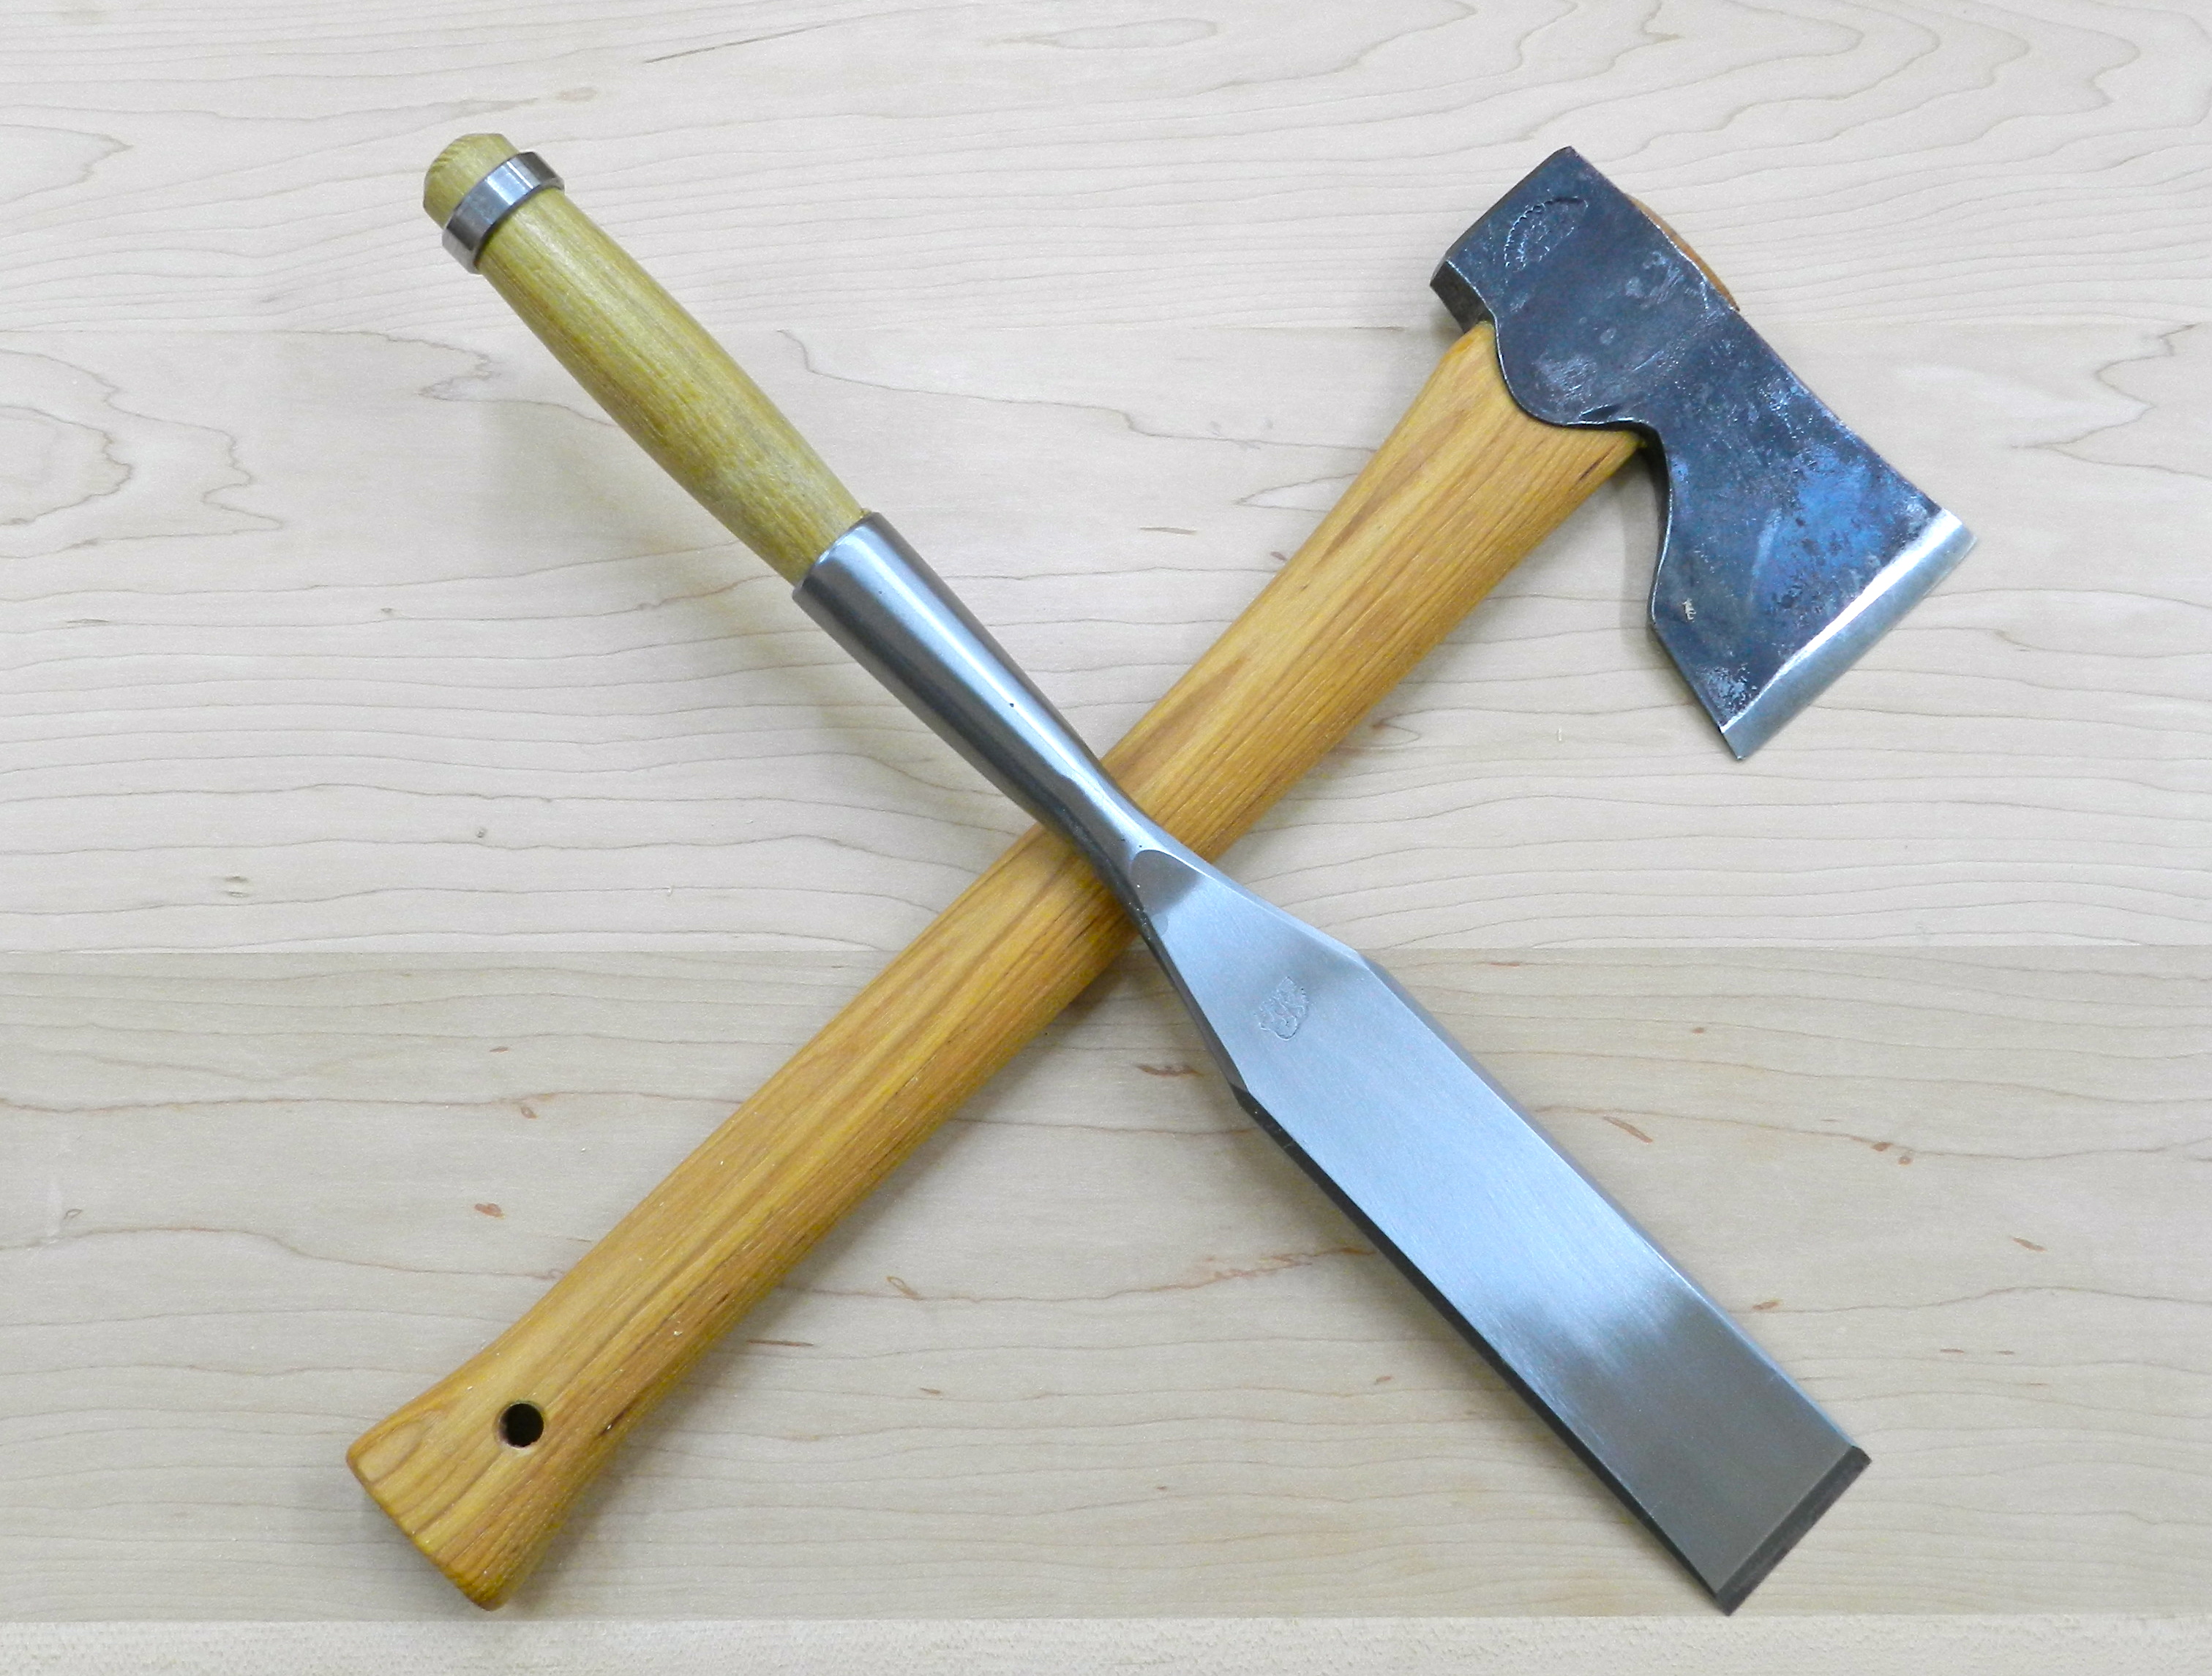
Symbols of a Joiner — Carpenter’s Axe for Rough Work and Chisel for Fine Work and Joinery
What does it mean to be a joiner?
Let’s consult our trusty friend the dictionary:
join·er
noun
1. a person who constructs the wooden components of a building, such as stairs, doors, and door and window frames. *
That’s a start, but doesn’t capture the whole of what makes someone a joiner…
In a traditional sense a carpenter often works on the frame and envelope of the building. The joiner is a specialized type of carpenter who literally ‘joins wood’ often focusing on the production of windows, doors, staircases, wainscoting, built-in case goods and other items that make up a home and require a higher degree of skill compared with regular or ‘rough carpentry.’ A joiner’s work often starts in the shop and ends out in the field as it gets installed in the client’s home or business location. In more rural locales a joiner often functioned as a part time cabinet-maker regularly delving into finer work that required a high level of skill. Many traditional ‘country’ style pieces of furniture were often made by joiners using the same tools and techniques as any other cabinetmaker. In urban areas where there was enough demand to support specialized trades and full time cabinetmakers we can still find records demonstrating how joiners were able to compete and straddle the line between fine finish carpenter and cabinetmaker.
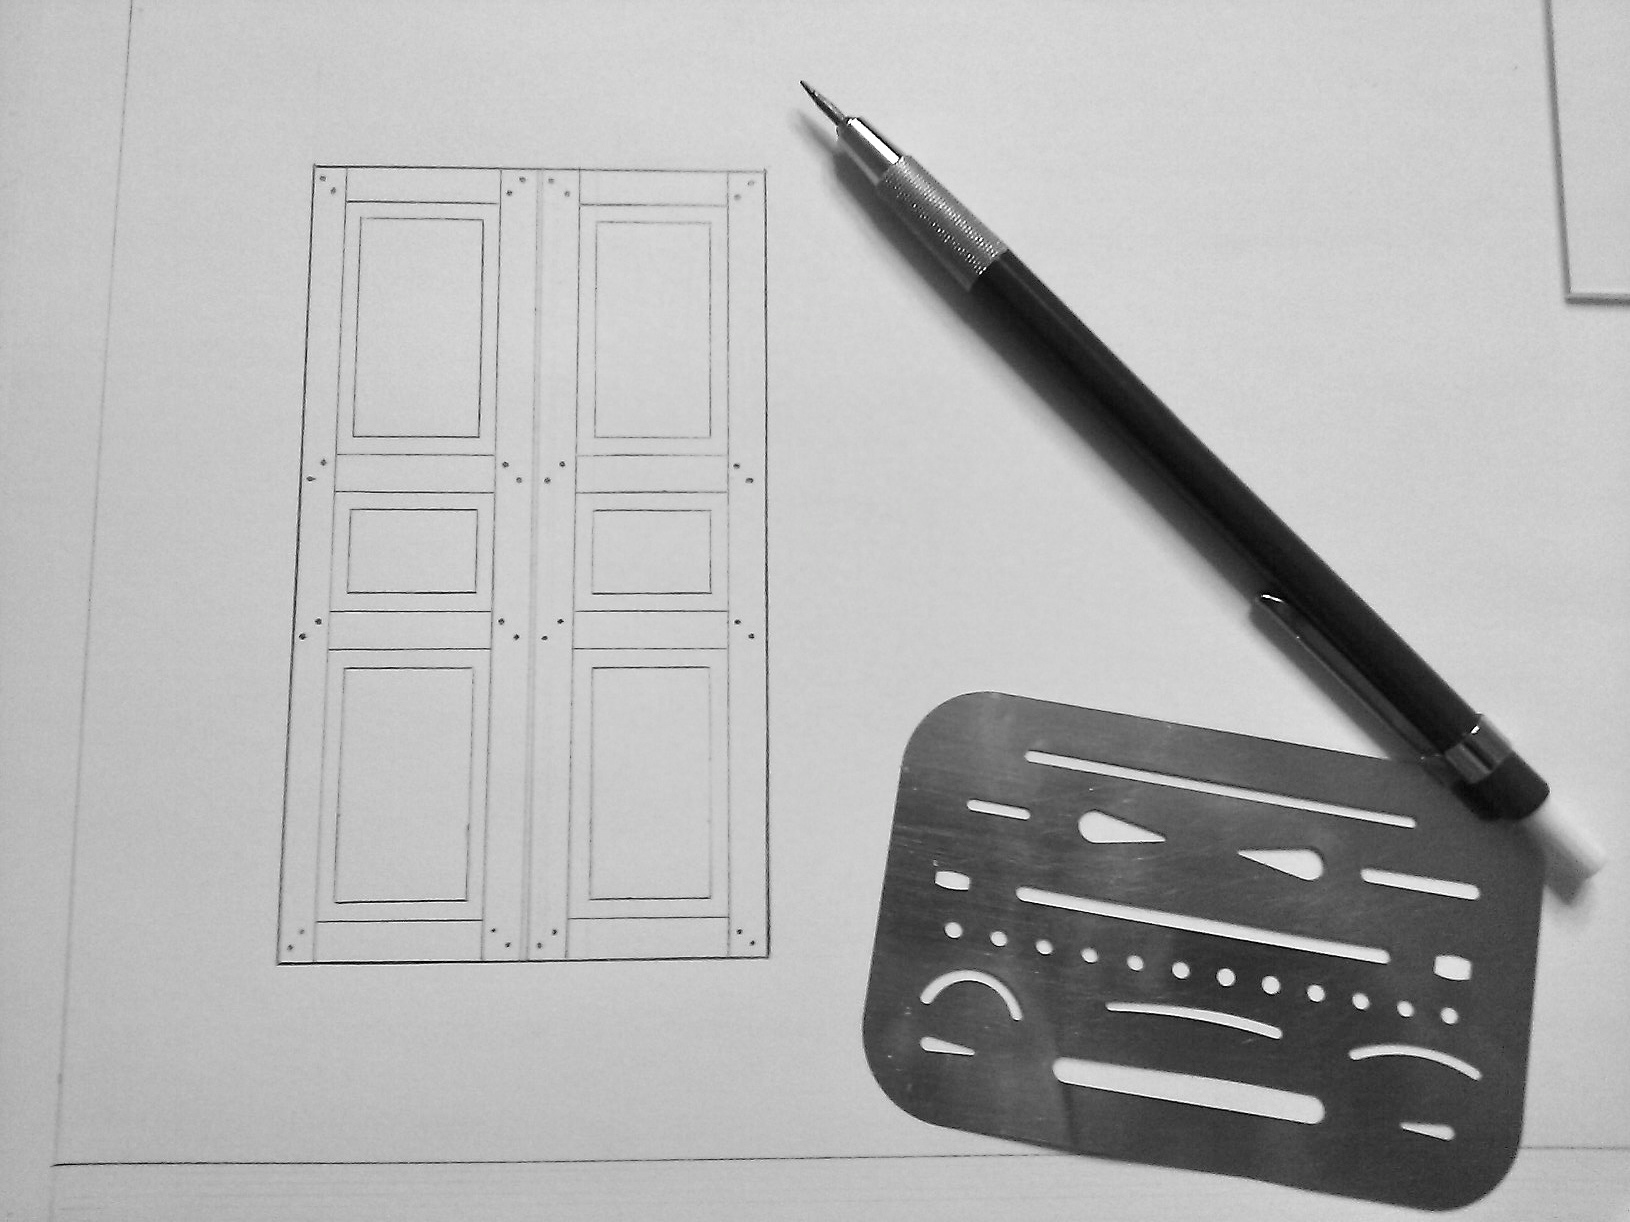
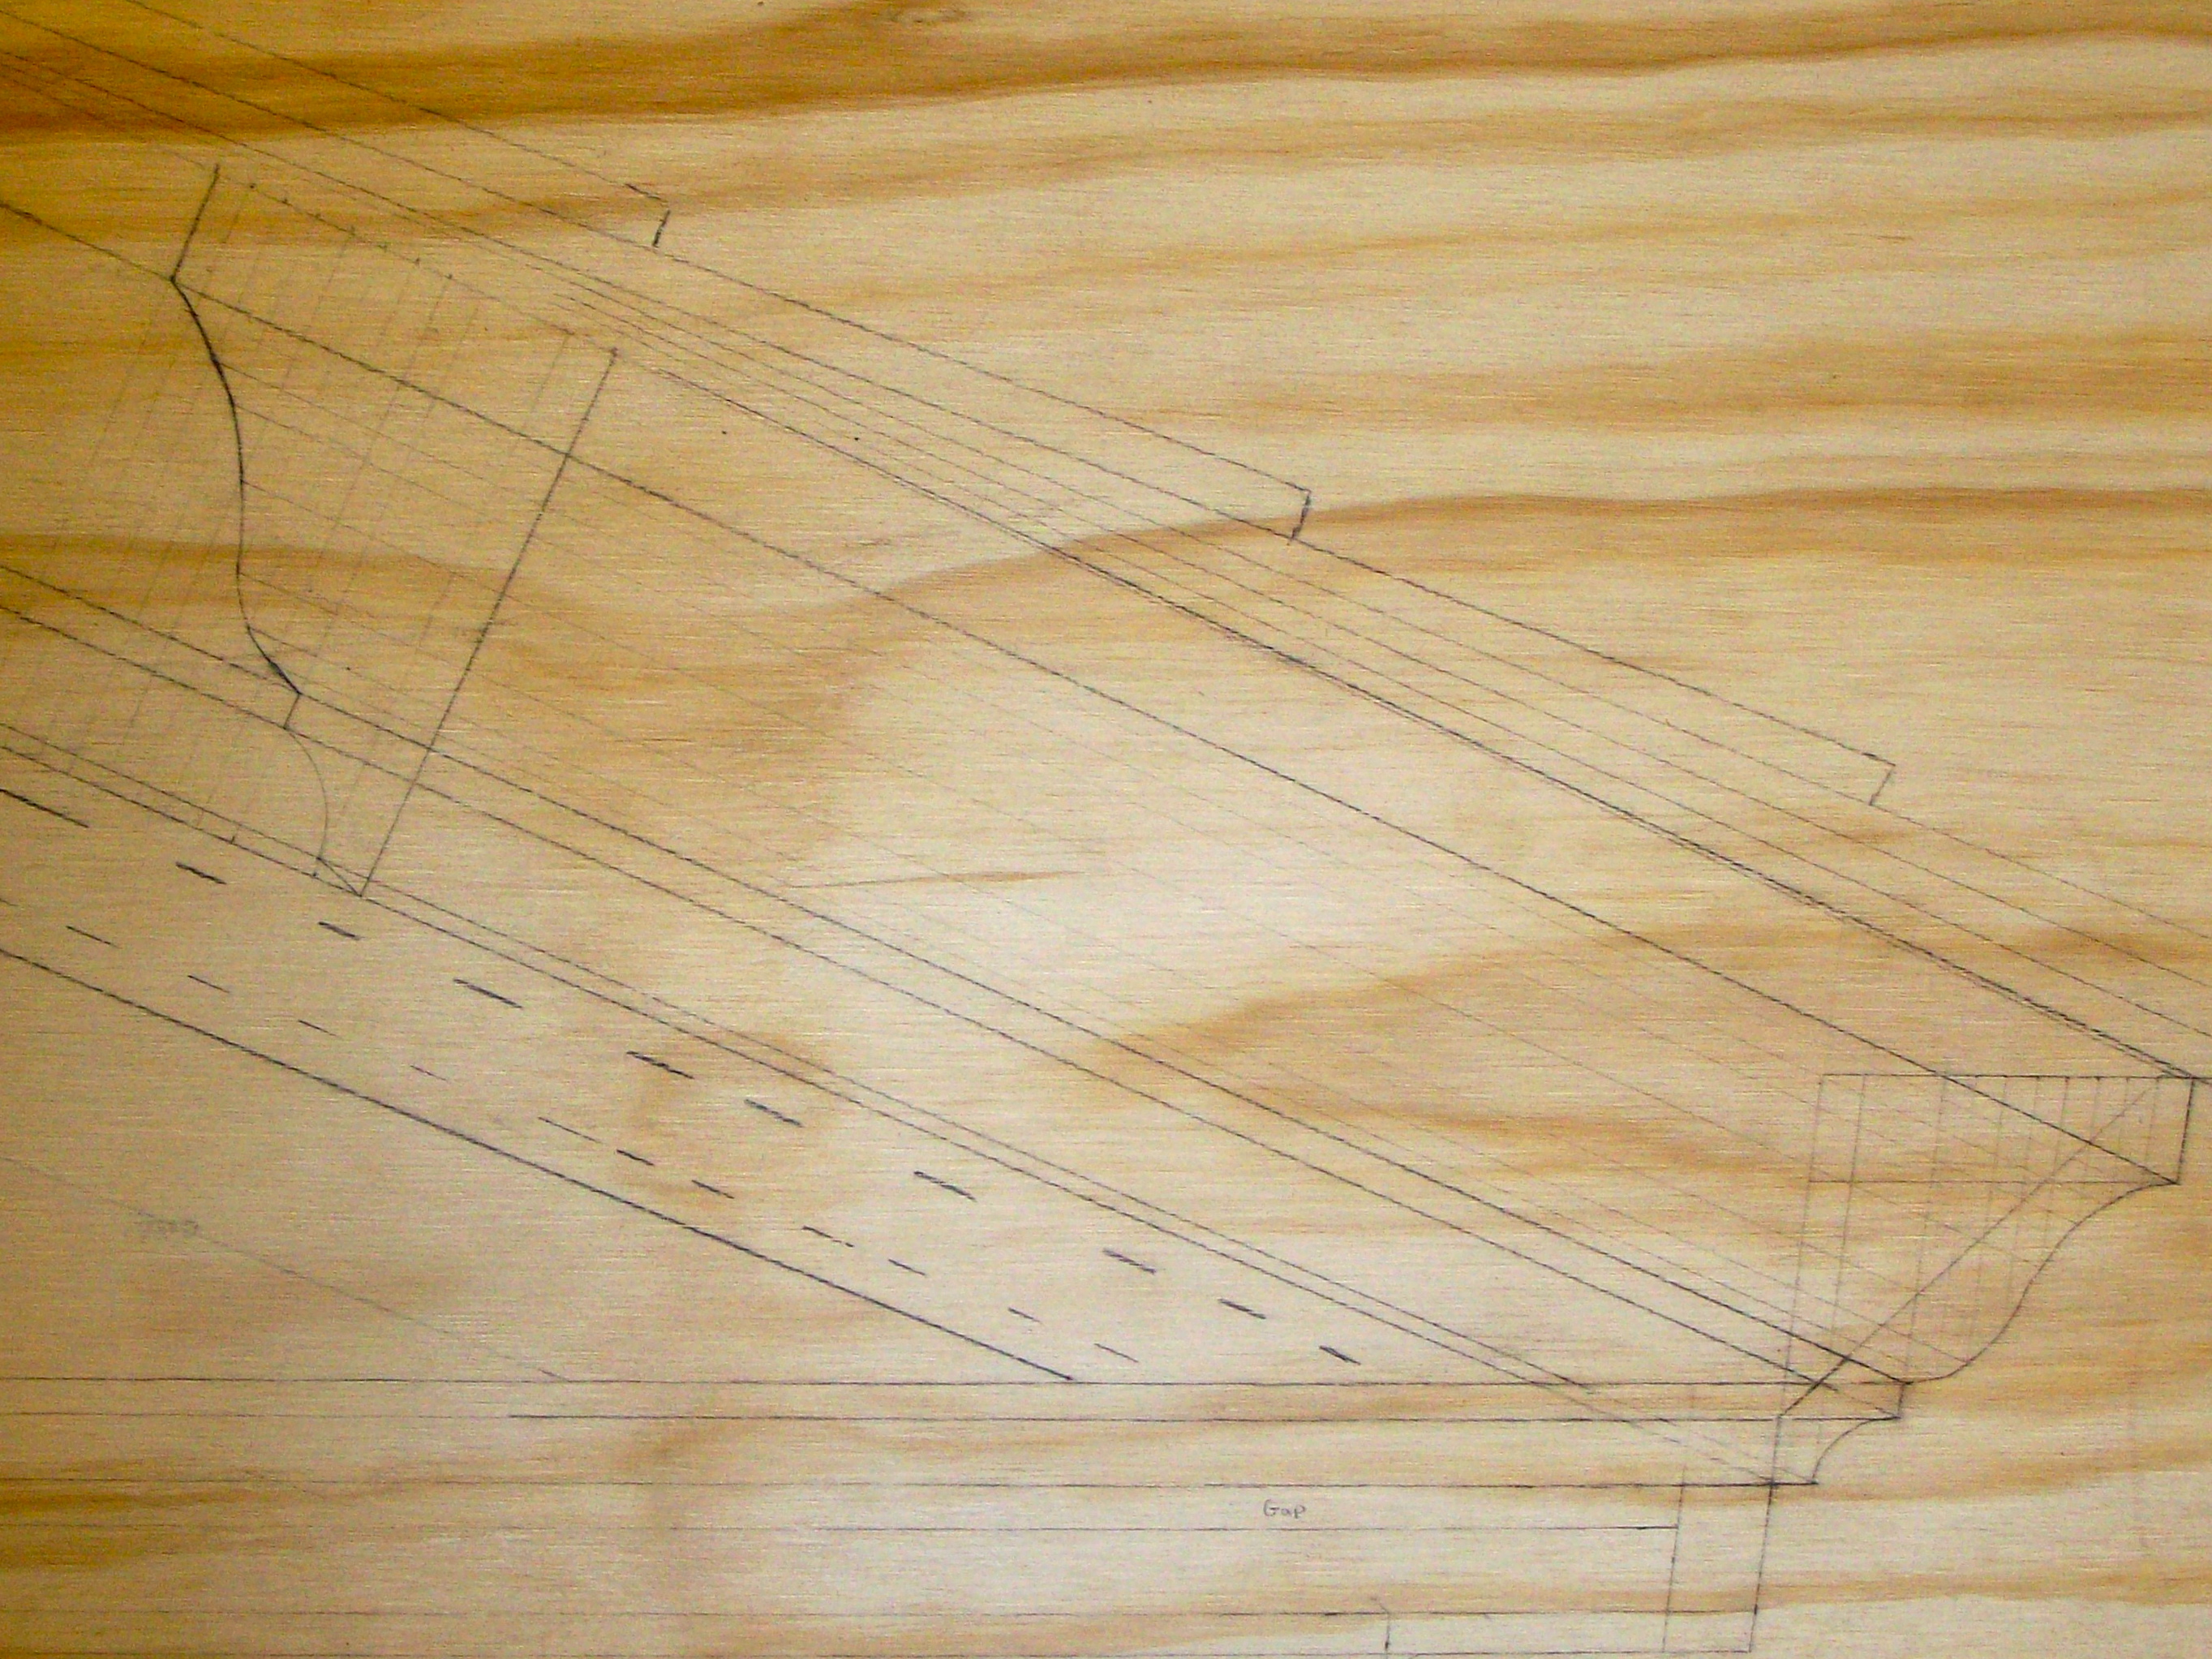
Full size story board for a door pediment
How does this relate to modern day woodworkers? Are joiners simply modern finish carpenters?
A ‘modern day’ Carpenter generally starts with materials procured from big box stores and lumber yards that are manufactured and uses them to build homes largely by assembling those pieces, using modern fasteners and possibly customizing a few of the details. All of this lends itself well to the use of modern tools and methods.
In contrast, many of today’s ‘Preservation Carpenters’ occupy the space between a carpenter and dedicated cabinetmaker, thus effectively taking on the role of a Joiner — equally at home in front the bench or on the construction site. A joiner often starts with raw materials (wood etc) and has to fabricate the items he or she needs to produce — doors, windows, built-ins, large case pieces etc. using traditional joinery, tools and techniques. Sure some modern and powered conveniences can simplify a few tasks, but often the most expedient way to generate the intricate joinery and intended results is to use the same tools and techniques our forefathers used. Routers and sand-paper cannot reproduce the same results you get from a sharp plane iron and a skilled hand. All the fancy tech-laden measuring devices on the market cannot beat the simple efficiency and accuracy of a story stick and a marking knife. Biscuits and dominoes are no replacement for through mortises and draw-boring.
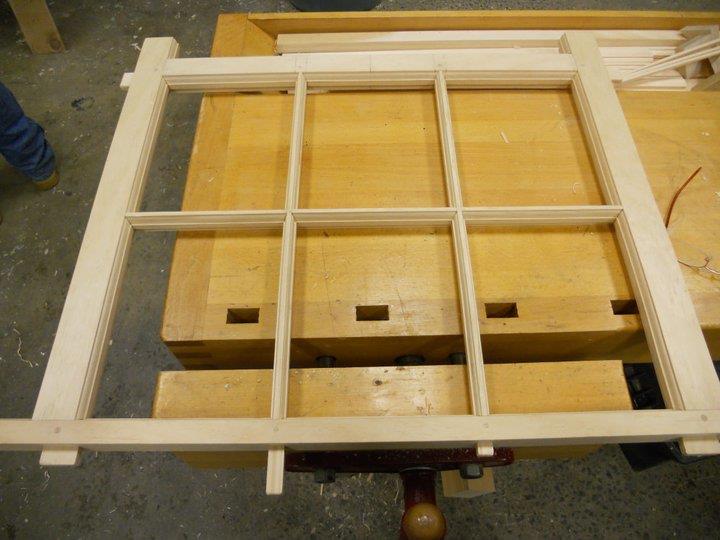
Hand made window sash
Other hallmarks of a good joiner is an attention to detail and knowledge of classical orders (especially with respect to moldings), layout and proportion. If you get the proportions wrong on a piece of furniture you can potentially hide it in a corner, if you mess up a cornice or fenestration on a building you cannot hide it. A joiner’s work is joinery on the large scale, out in public view and it demands that you stay on top of your game from layout through execution.
What’s next?
My goal is to help preserve the ancient trade of being a Joiner for future generations. I am attempting to accomplish this via my travels and in my teaching. I hope to continue helping others learn how to be good joiners, cabinetmakers, carpenters and hobbyists. No matter what you call yourself or what you specialize in, woodworking requires creativity and hand skills which are taught through practice and maintained through continued use and passion for the craft.
If you are interested in learning more about traditional joiners, please stay tuned to this blog. In the meantime if you have any questions, you can contact me here.
-Bill
* The definition above was taken from here. The rest is based on my own life experiences. Your mileage may vary.
The Woodwright’s School is already hallowed ground for a lot of woodworkers, but hovering above workshop is Ed Lebetkin’s Antique Tool store….
Up the stairs and take a right at the large model plane
Before heading up there, I was warned to leave my wallet behind as there would be a lot of temptation at the top of the stairs….Ed’s store is filled with just about every kind of traditional woodworking tool and accessory you could want.
Wide angle view of Ed’s Antique Tool Store
An amazing assortment of chisels, planes of every kind, marking gauges, braces and bits.
Wall of molding planes
One whole wall of the shop is filled with molding planes .
Chisels, mallets, auger bits etc.
New stuff is always coming and going so you’ll want to visit often — or see about renting a space to camp out and be first to check out the new arrivals. 😉
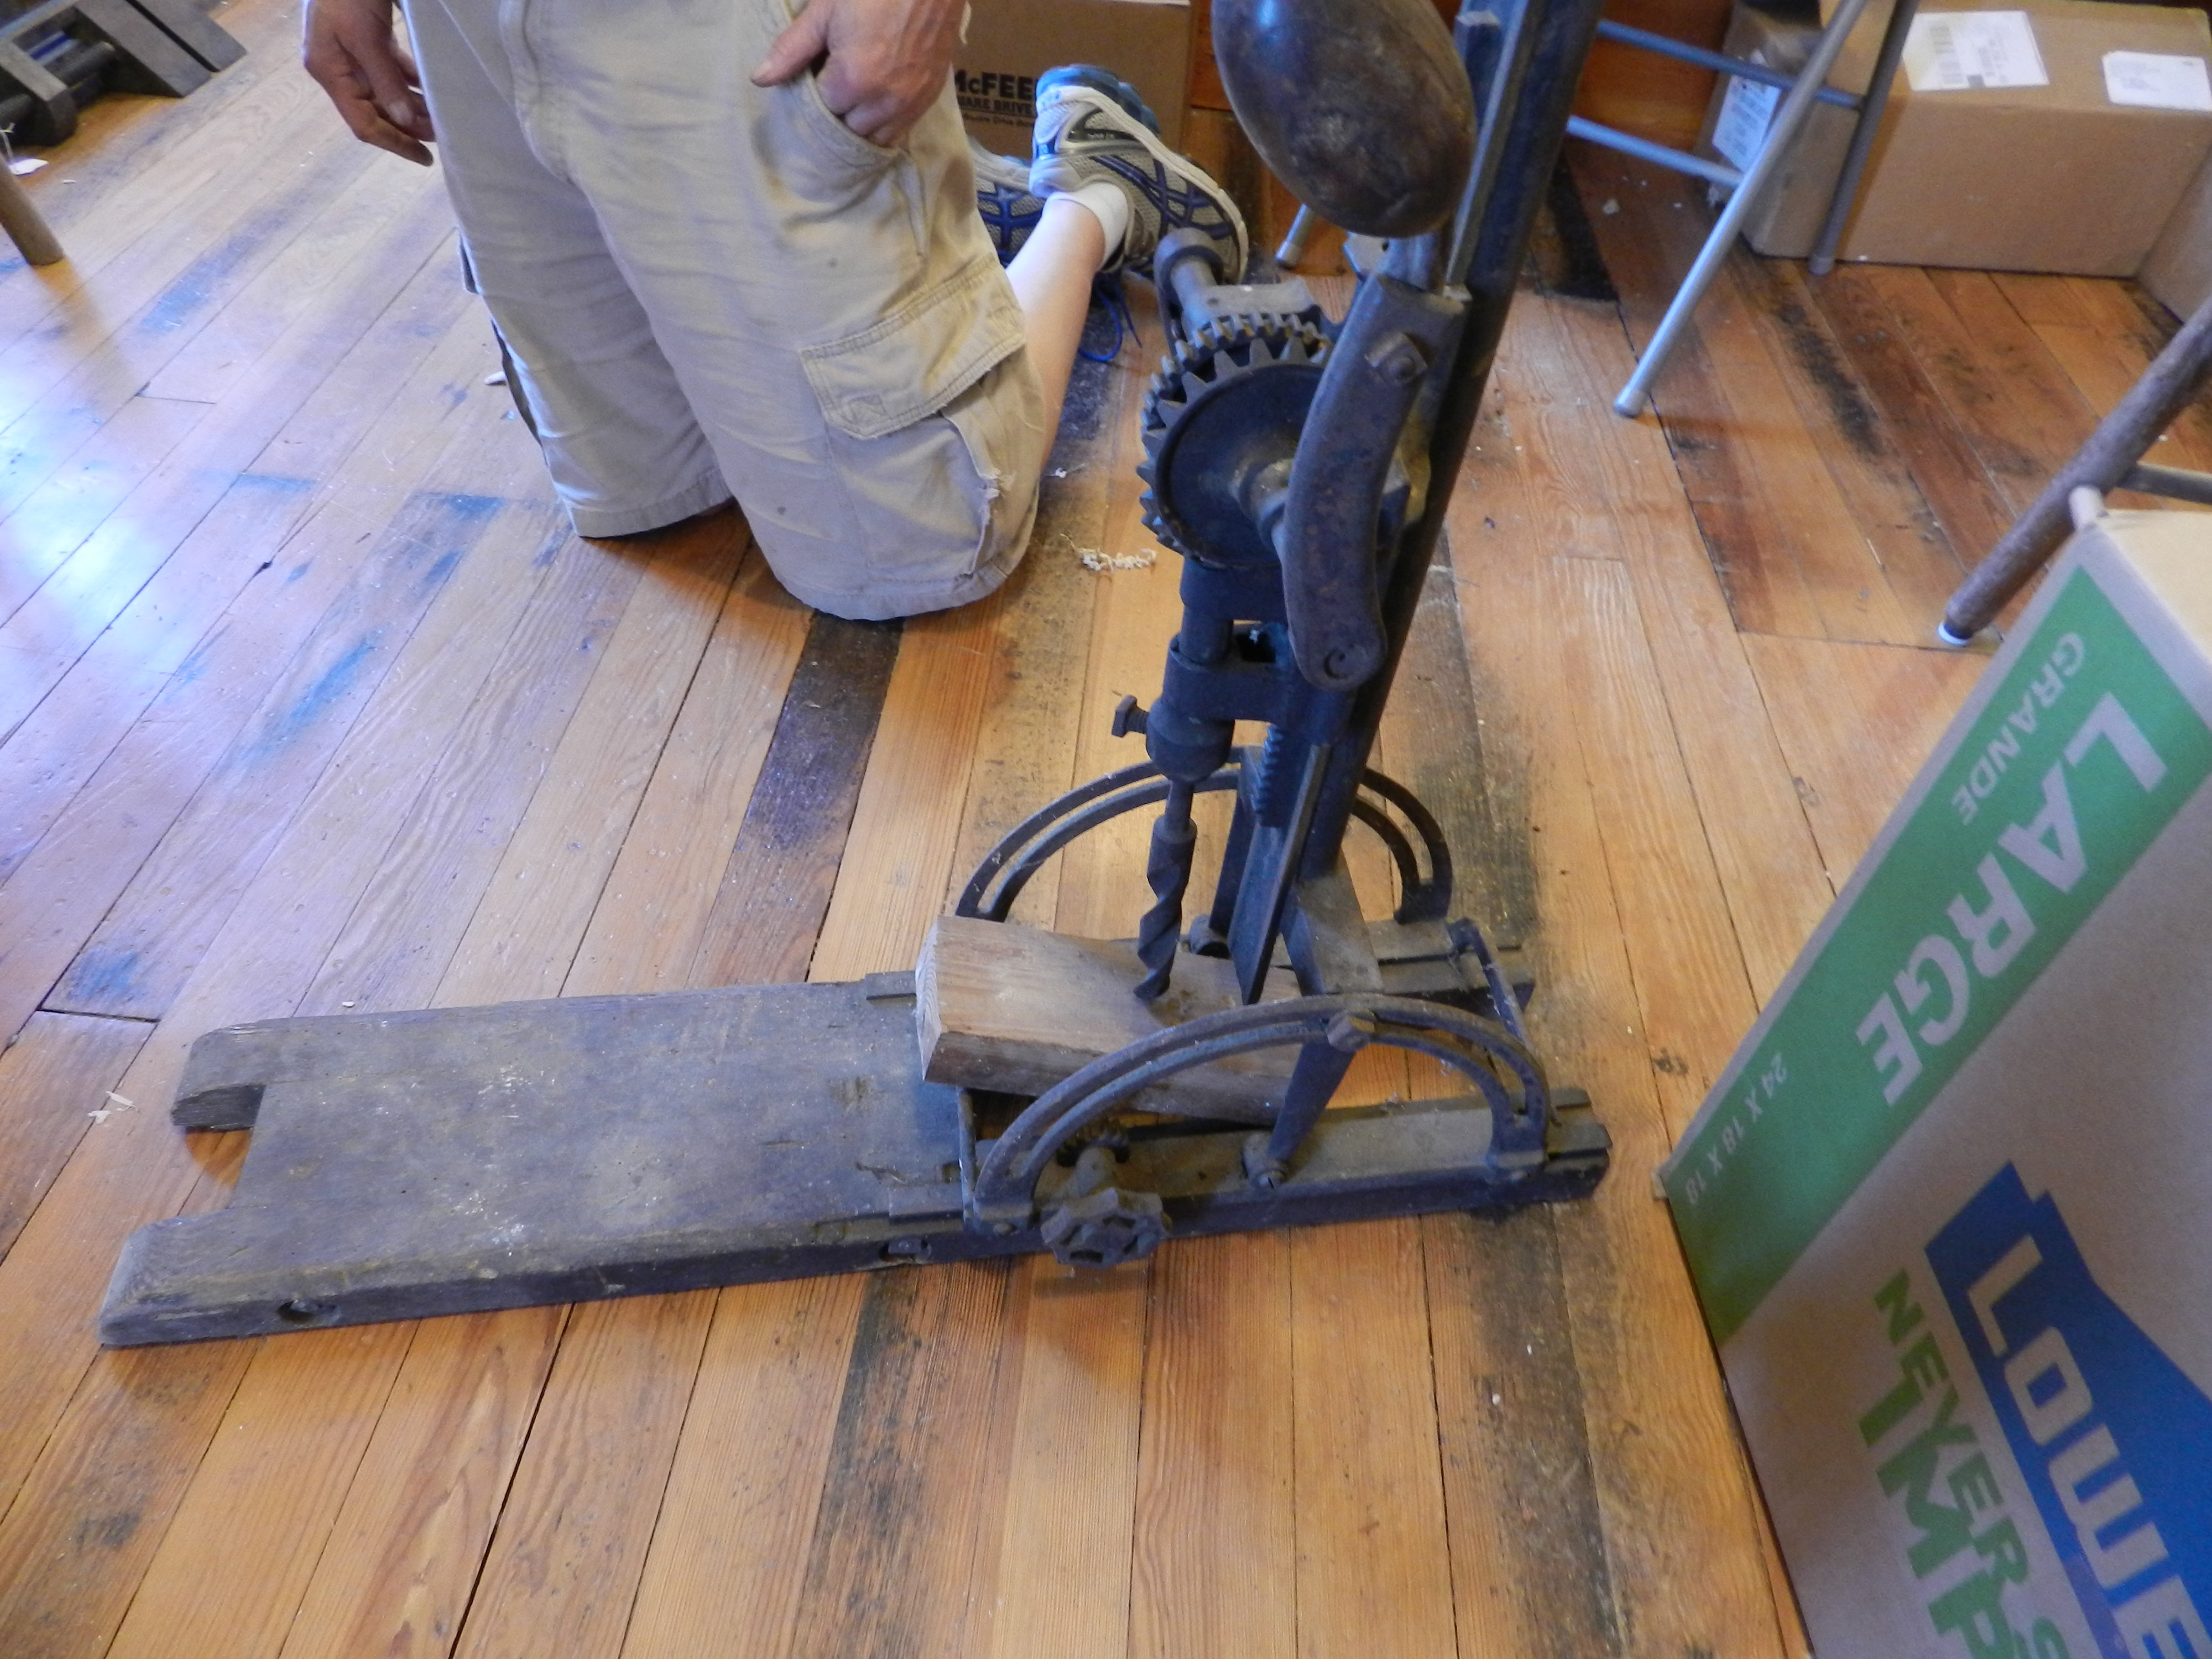
Self-advancing Boring Machine
During my visit I was enamored with an unusual boring machine. The castings on the tilt mechanism look similar to my old Swan boring machine but what made this machine unusual was the mechanism to advance the business end of the unit horizontally via the large knob on the bottom — rather than the whole dance of shimmying yourself and the unit up the timber and re-aligning the auger to make the next hole. The runners and support structure for it was all metal which leads me to believe it was a later design towards the end of that era.
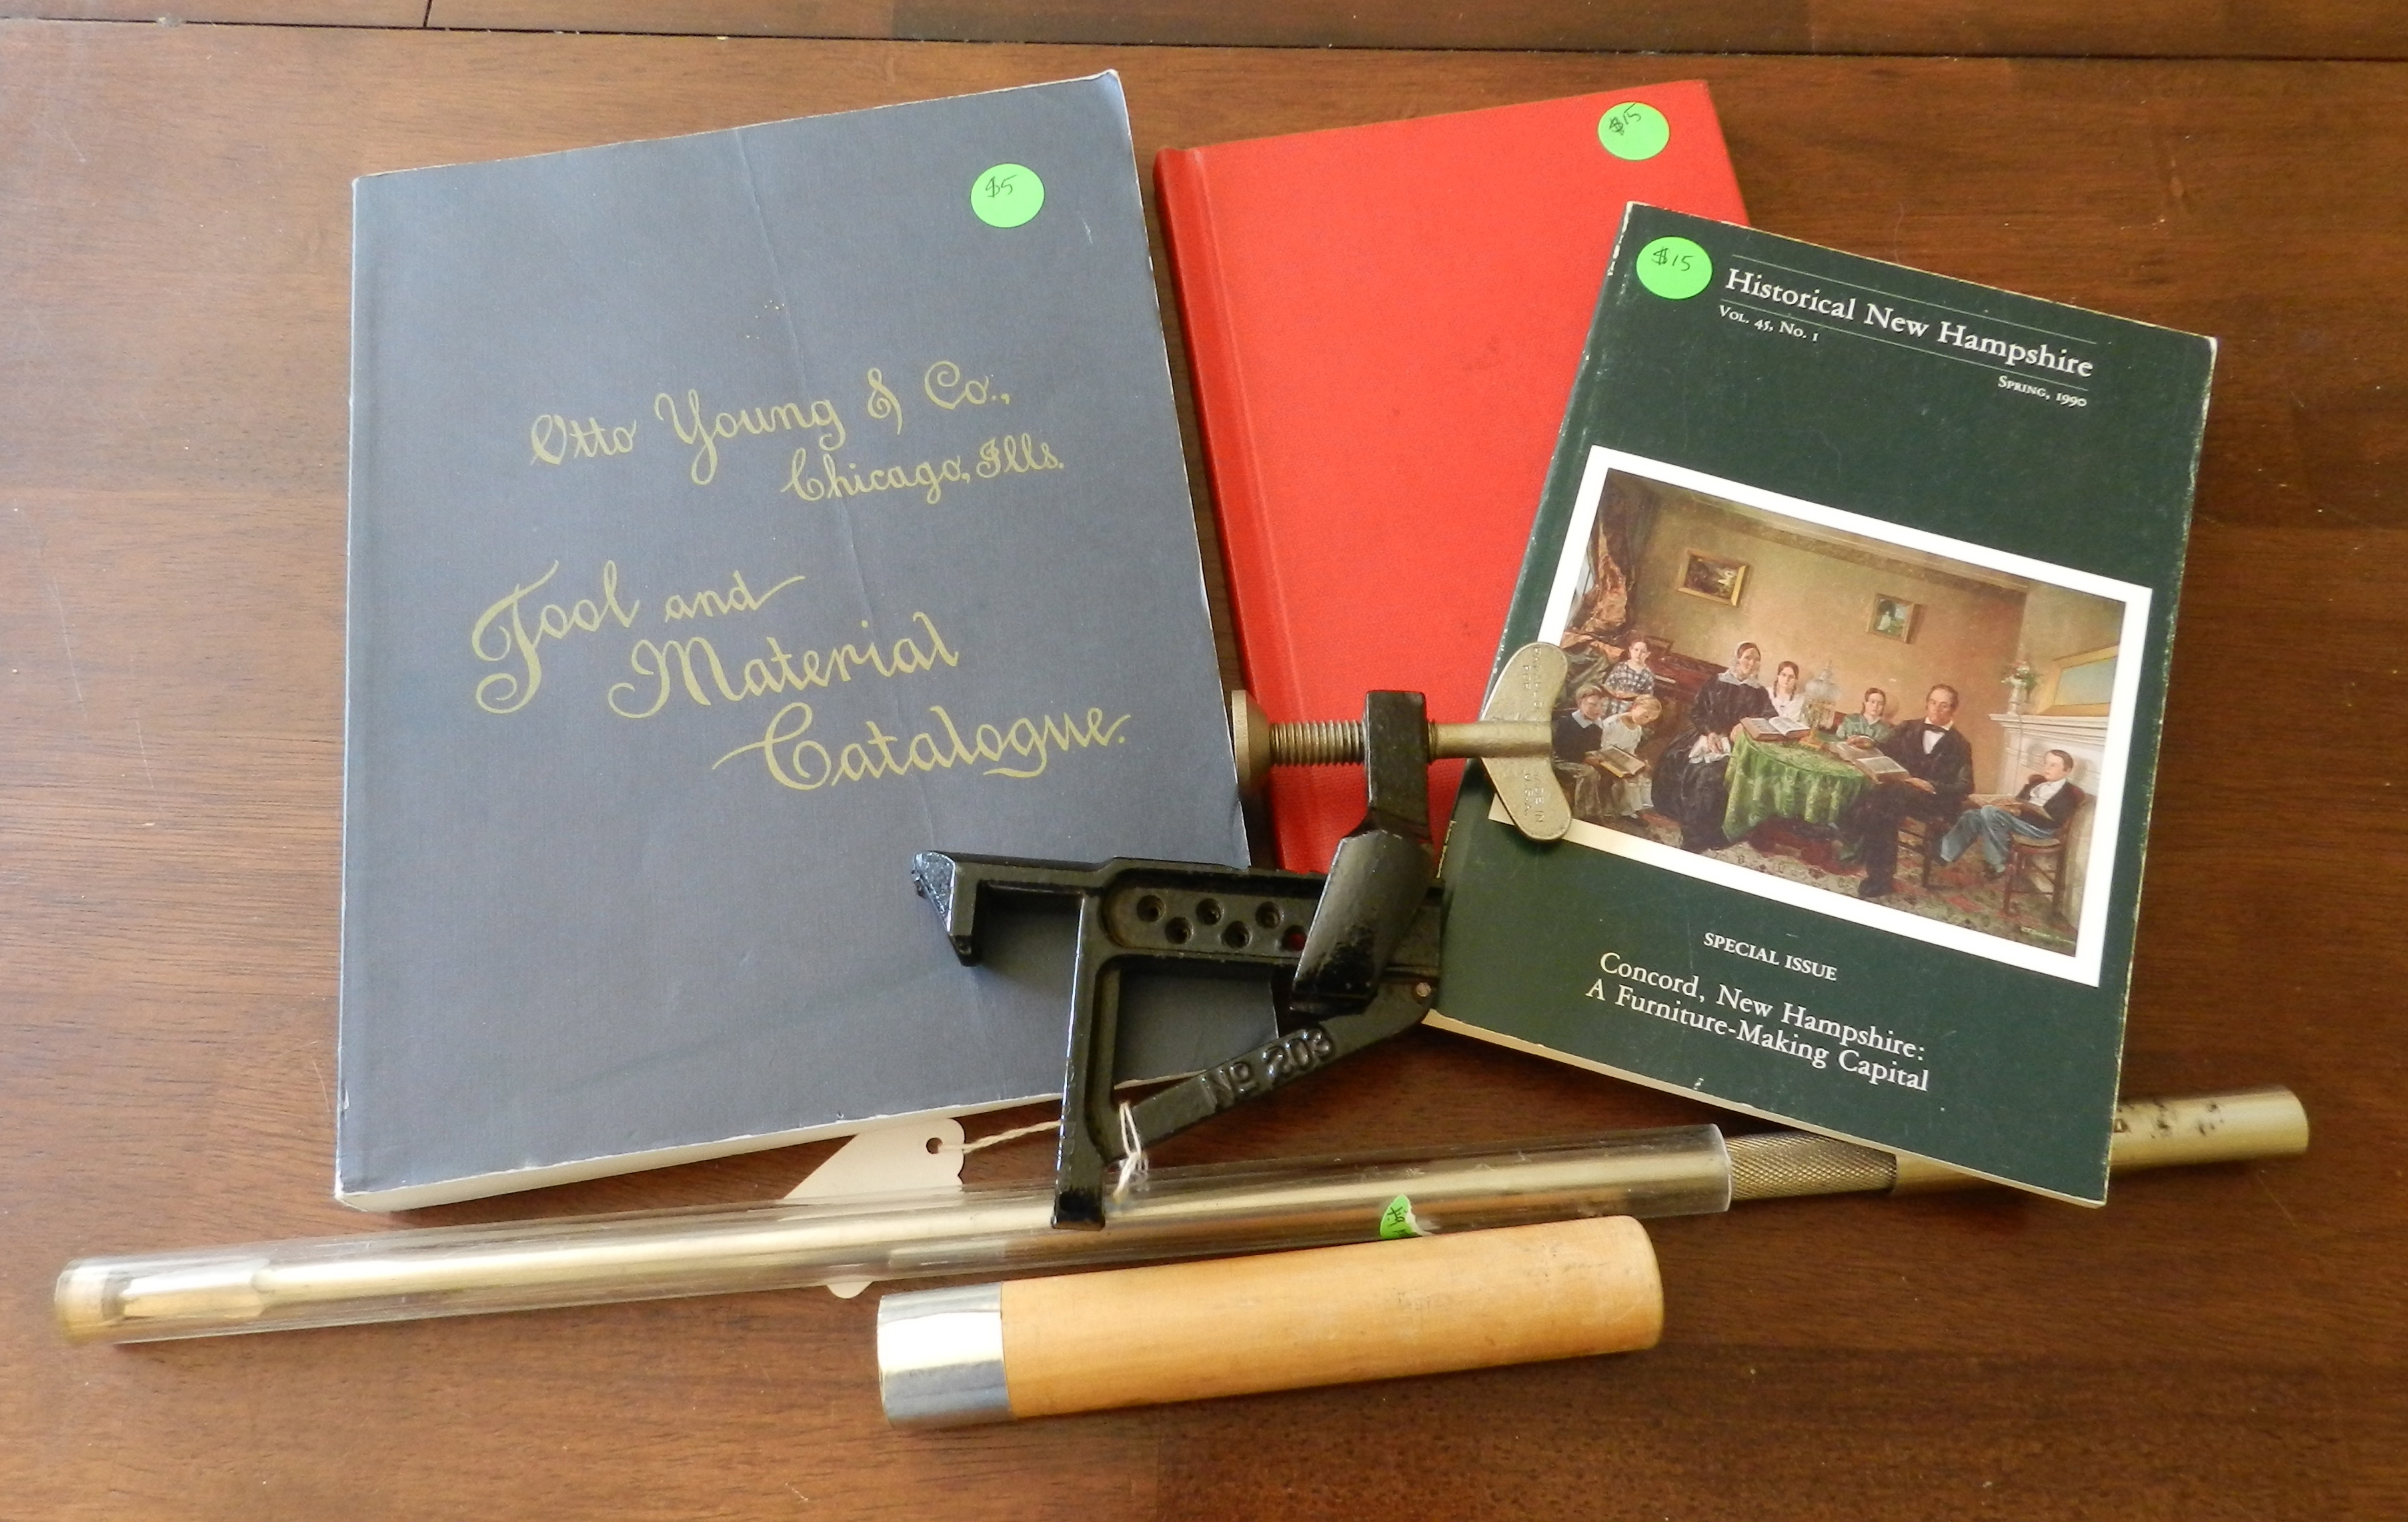
New toys from Ed’s tool shop
I tried my best to get out without buying anything — especially since the Nashua Live Free or Die Tool Show and Auction is coming up in a couple of weeks, but it’s like Ed knew I was coming. I found a great reprint book on Concord NH furniture makers, a book on the Shaker Barn full of tools at the Shelburne Museum in VT which I wrote about here, a MWTCA reprint of a tool catalog, a nice old Stanley auger bit extension for use with a bit brace, and a Stanley 203 bench clamp. This neat little clamp is something I’ve looked at in the past — and makes a nice addition to any bench with a sliding deadman. I look forward to giving it a try.
I’m looking forward to my next visit. If you’d like to plan a visit to the tool store or contact Ed you can find his contact info on the store’s web page here. Ed’s a great guy. If you meet him, be sure to tell him I sent you. 🙂
Most people relax on their summer vacation. After a day on a beach I get antsy and need to keep moving, exploring and building. For the second year in a row I spent my vacation last week sharing my passion for the craft by teaching the 8 day intensive that is part of the semester long ‘Traditional Building’ class I teach at the Boston Architectural College (BAC) in association with the North Bennett Street School.
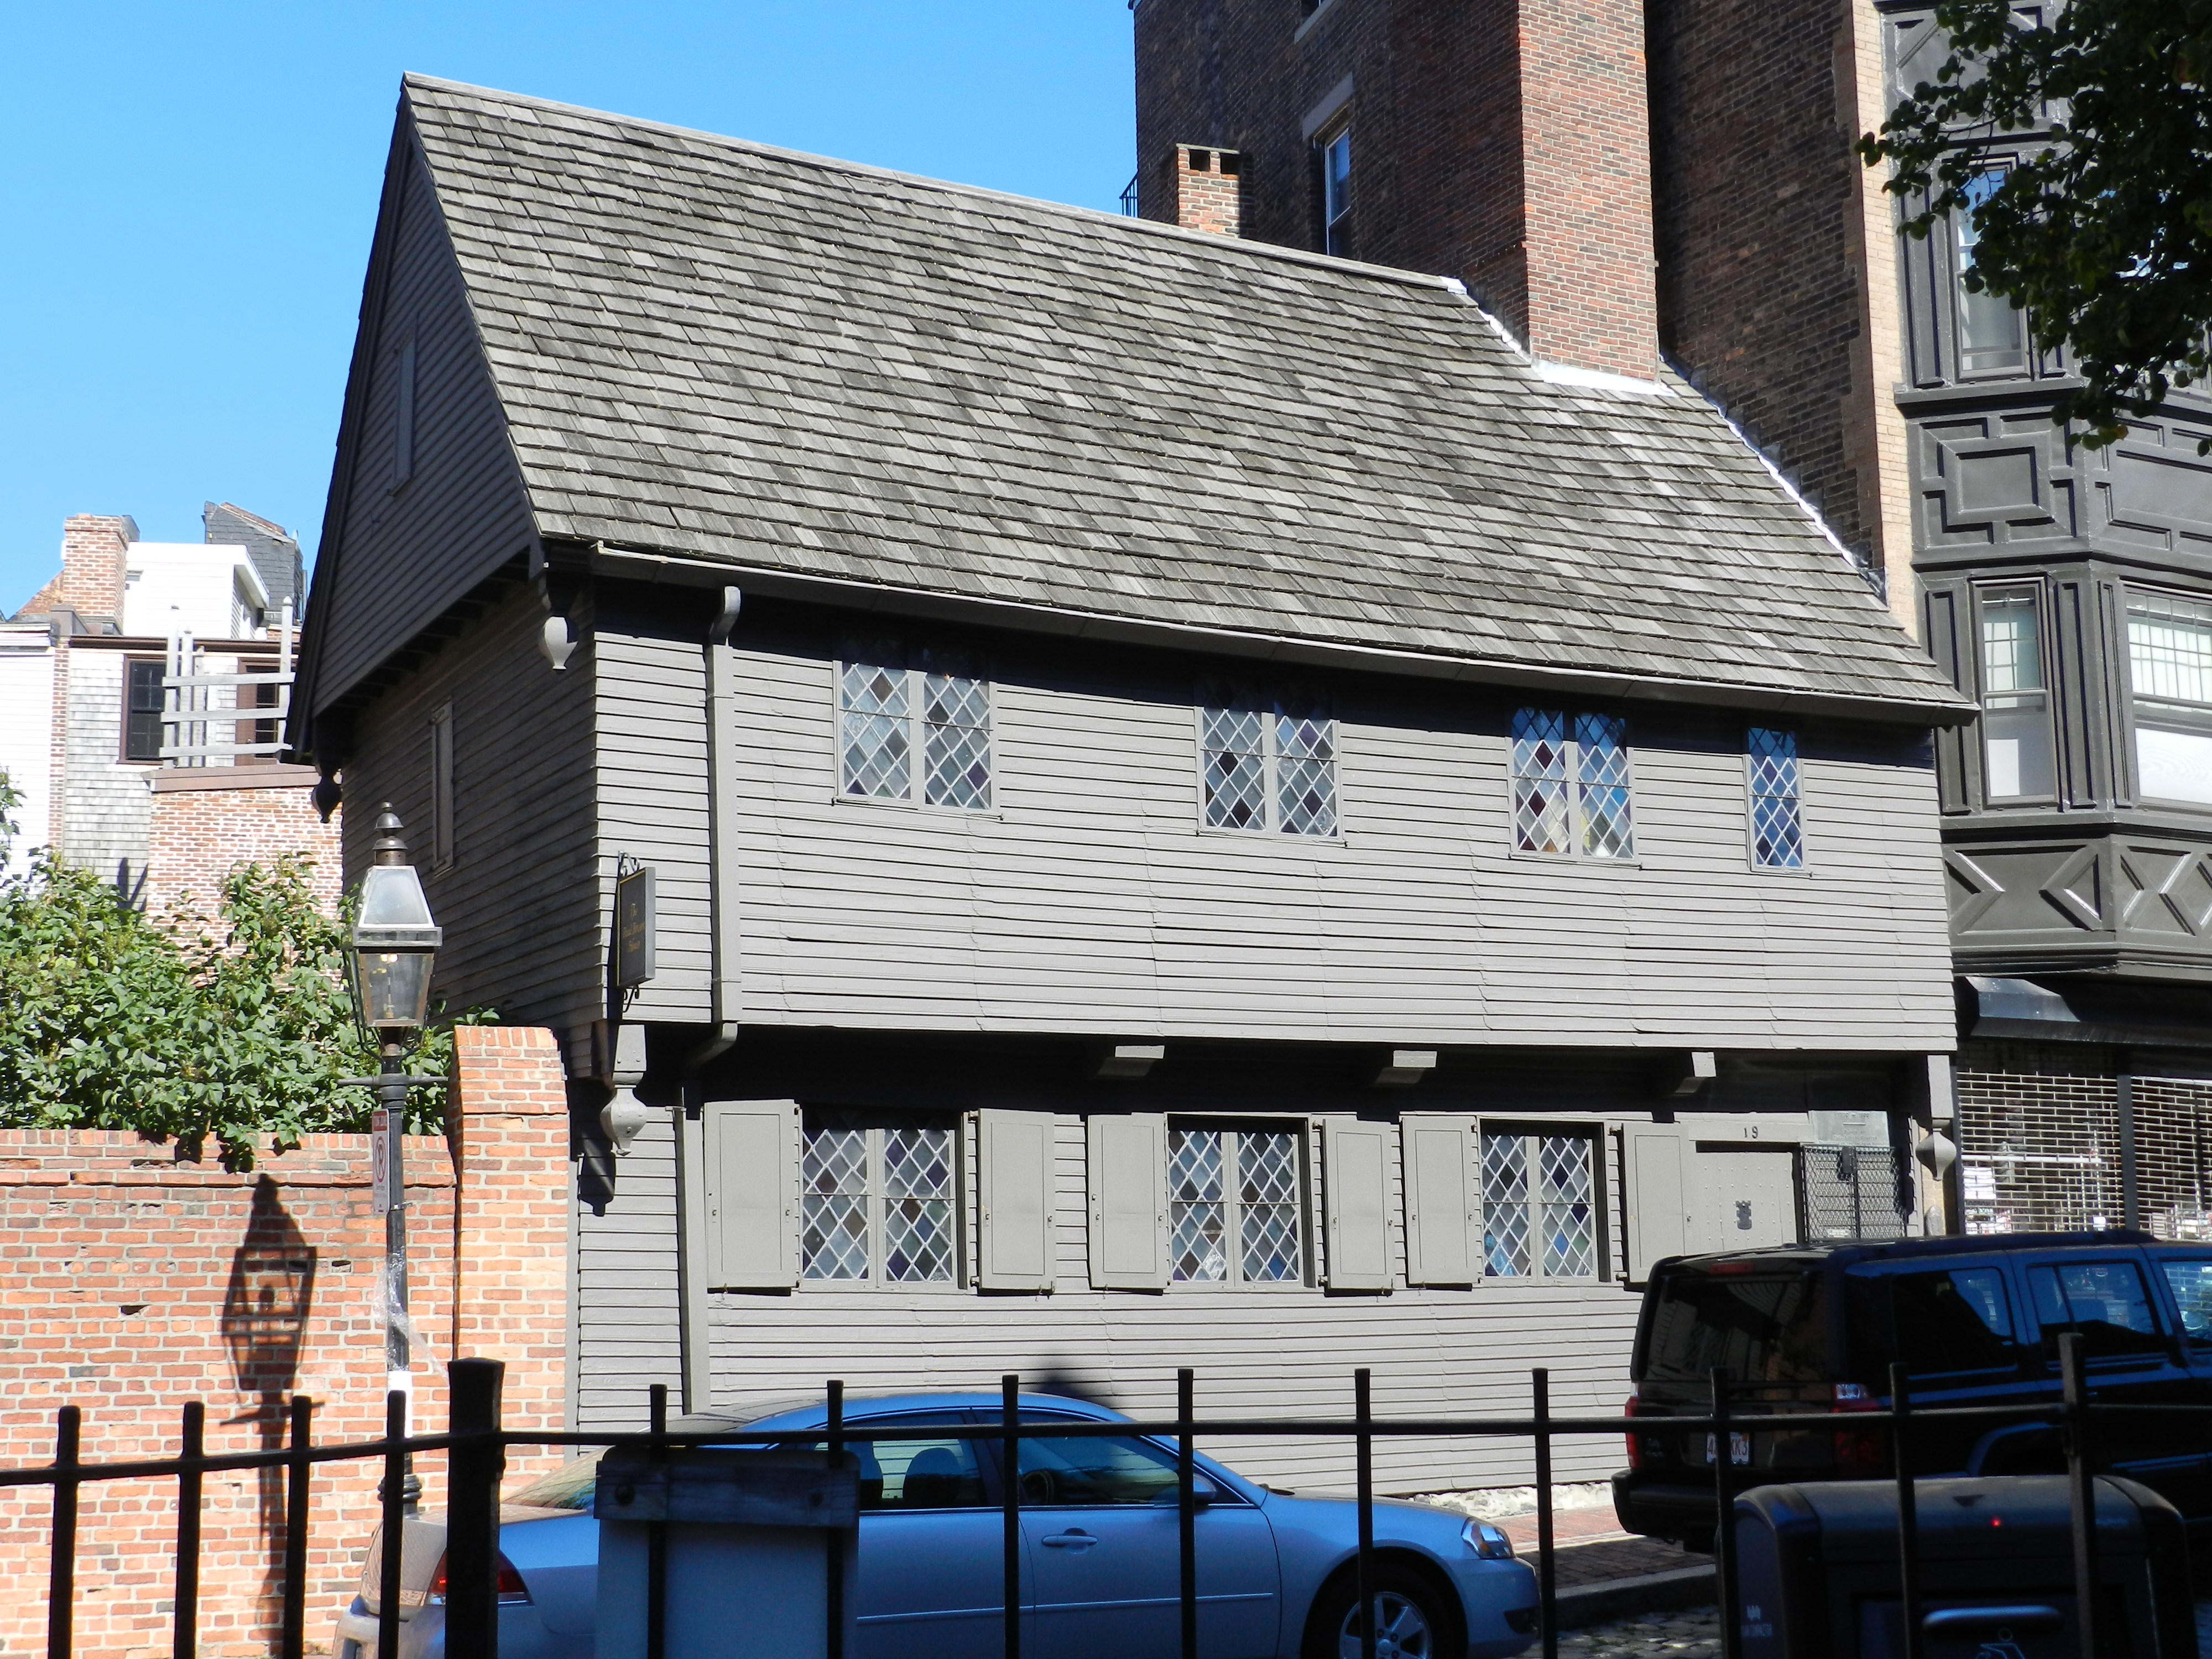
The Paul Revere House, Boston, MA
The class is part of the low residency Master’s Degree in Historic Preservation at the BAC. In this 8 week long class, 7 weeks are online with a series of interactive lectures/discussions and traditional coursework and one 8 day week is spent with the entire class in Boston participating in a hands on format. This works great for students who need to juggle work, family and other obligations while also seeking a quality degree on the way to a new or expanded career path.
Touring historic homes and buildings with Steve O’Shaughnessy
On the first full day of class we took a walking tour of the city with Steve O’Shaughnessy (NBSS Preservation Carpentry Instructor) visiting several historic house museums and notable structures in Boston. Having worked for Historic New England, Steve is an excellent tour guide with a lot of great information to share.
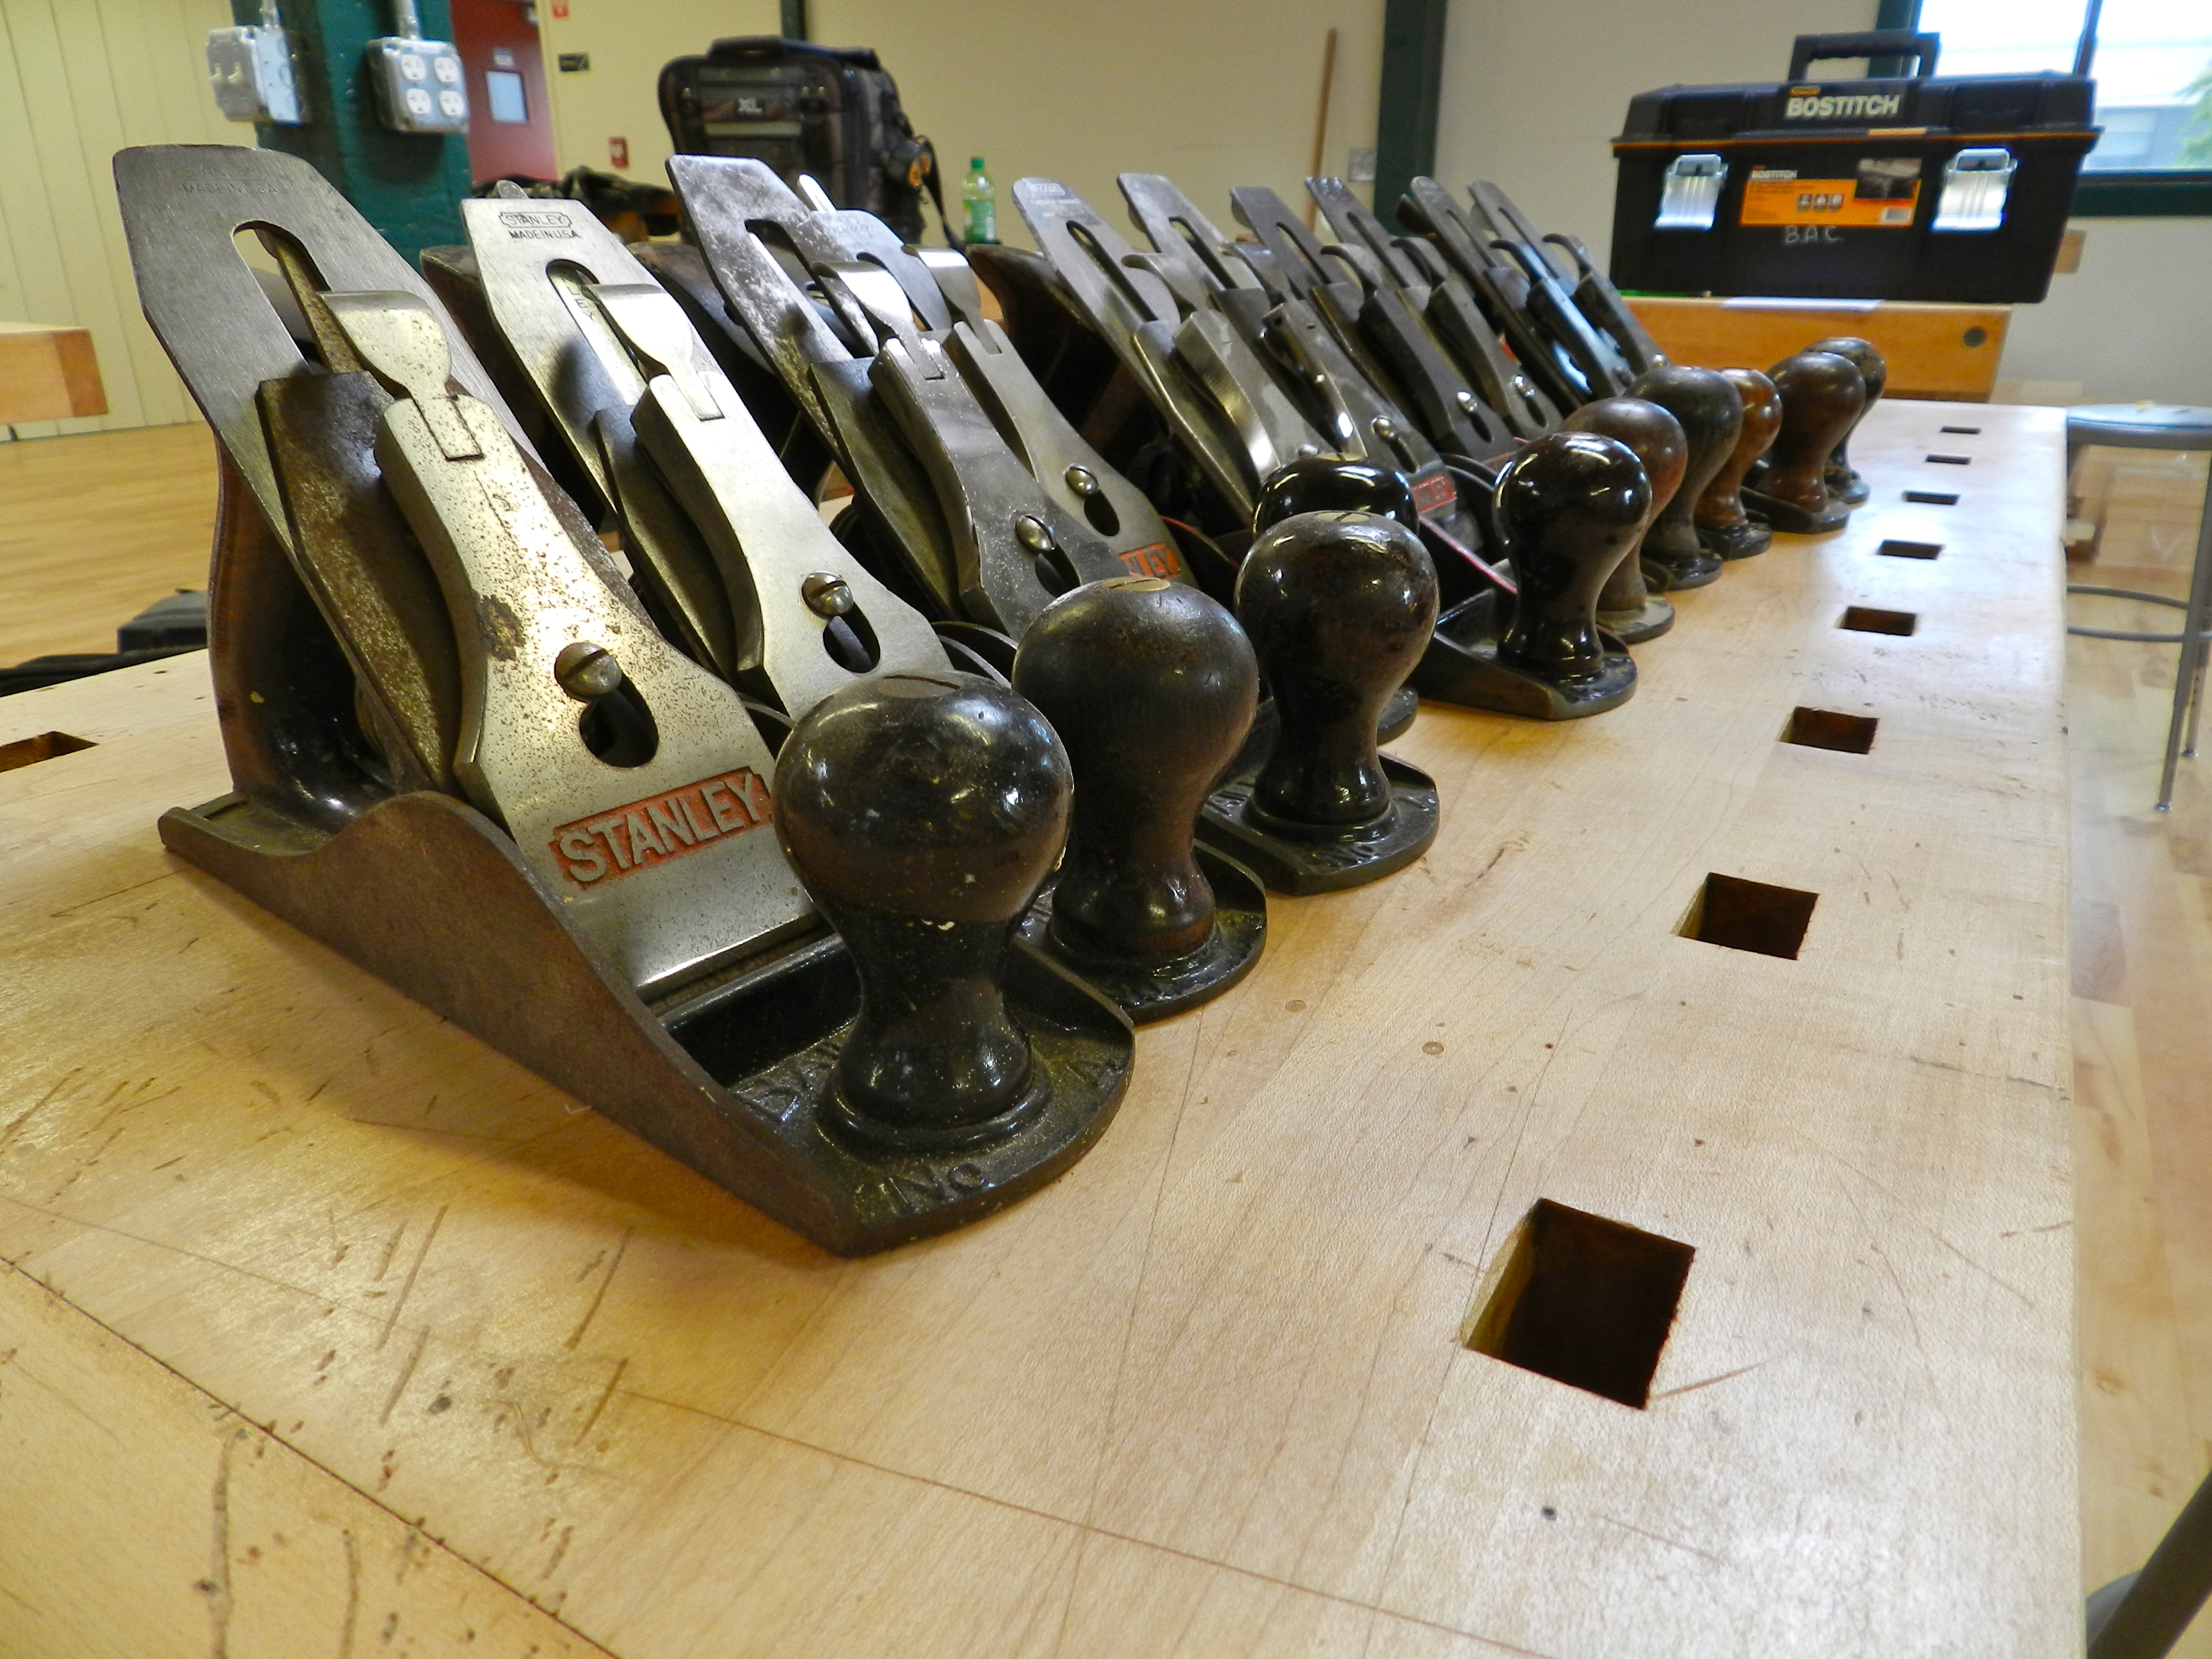
Traditional Woodworking with Bill Rainford
The second day I spent the morning teaching the basics of traditional woodworking — using a smoothing plane, molding planes, drilling, chiseling and other basic bench work.
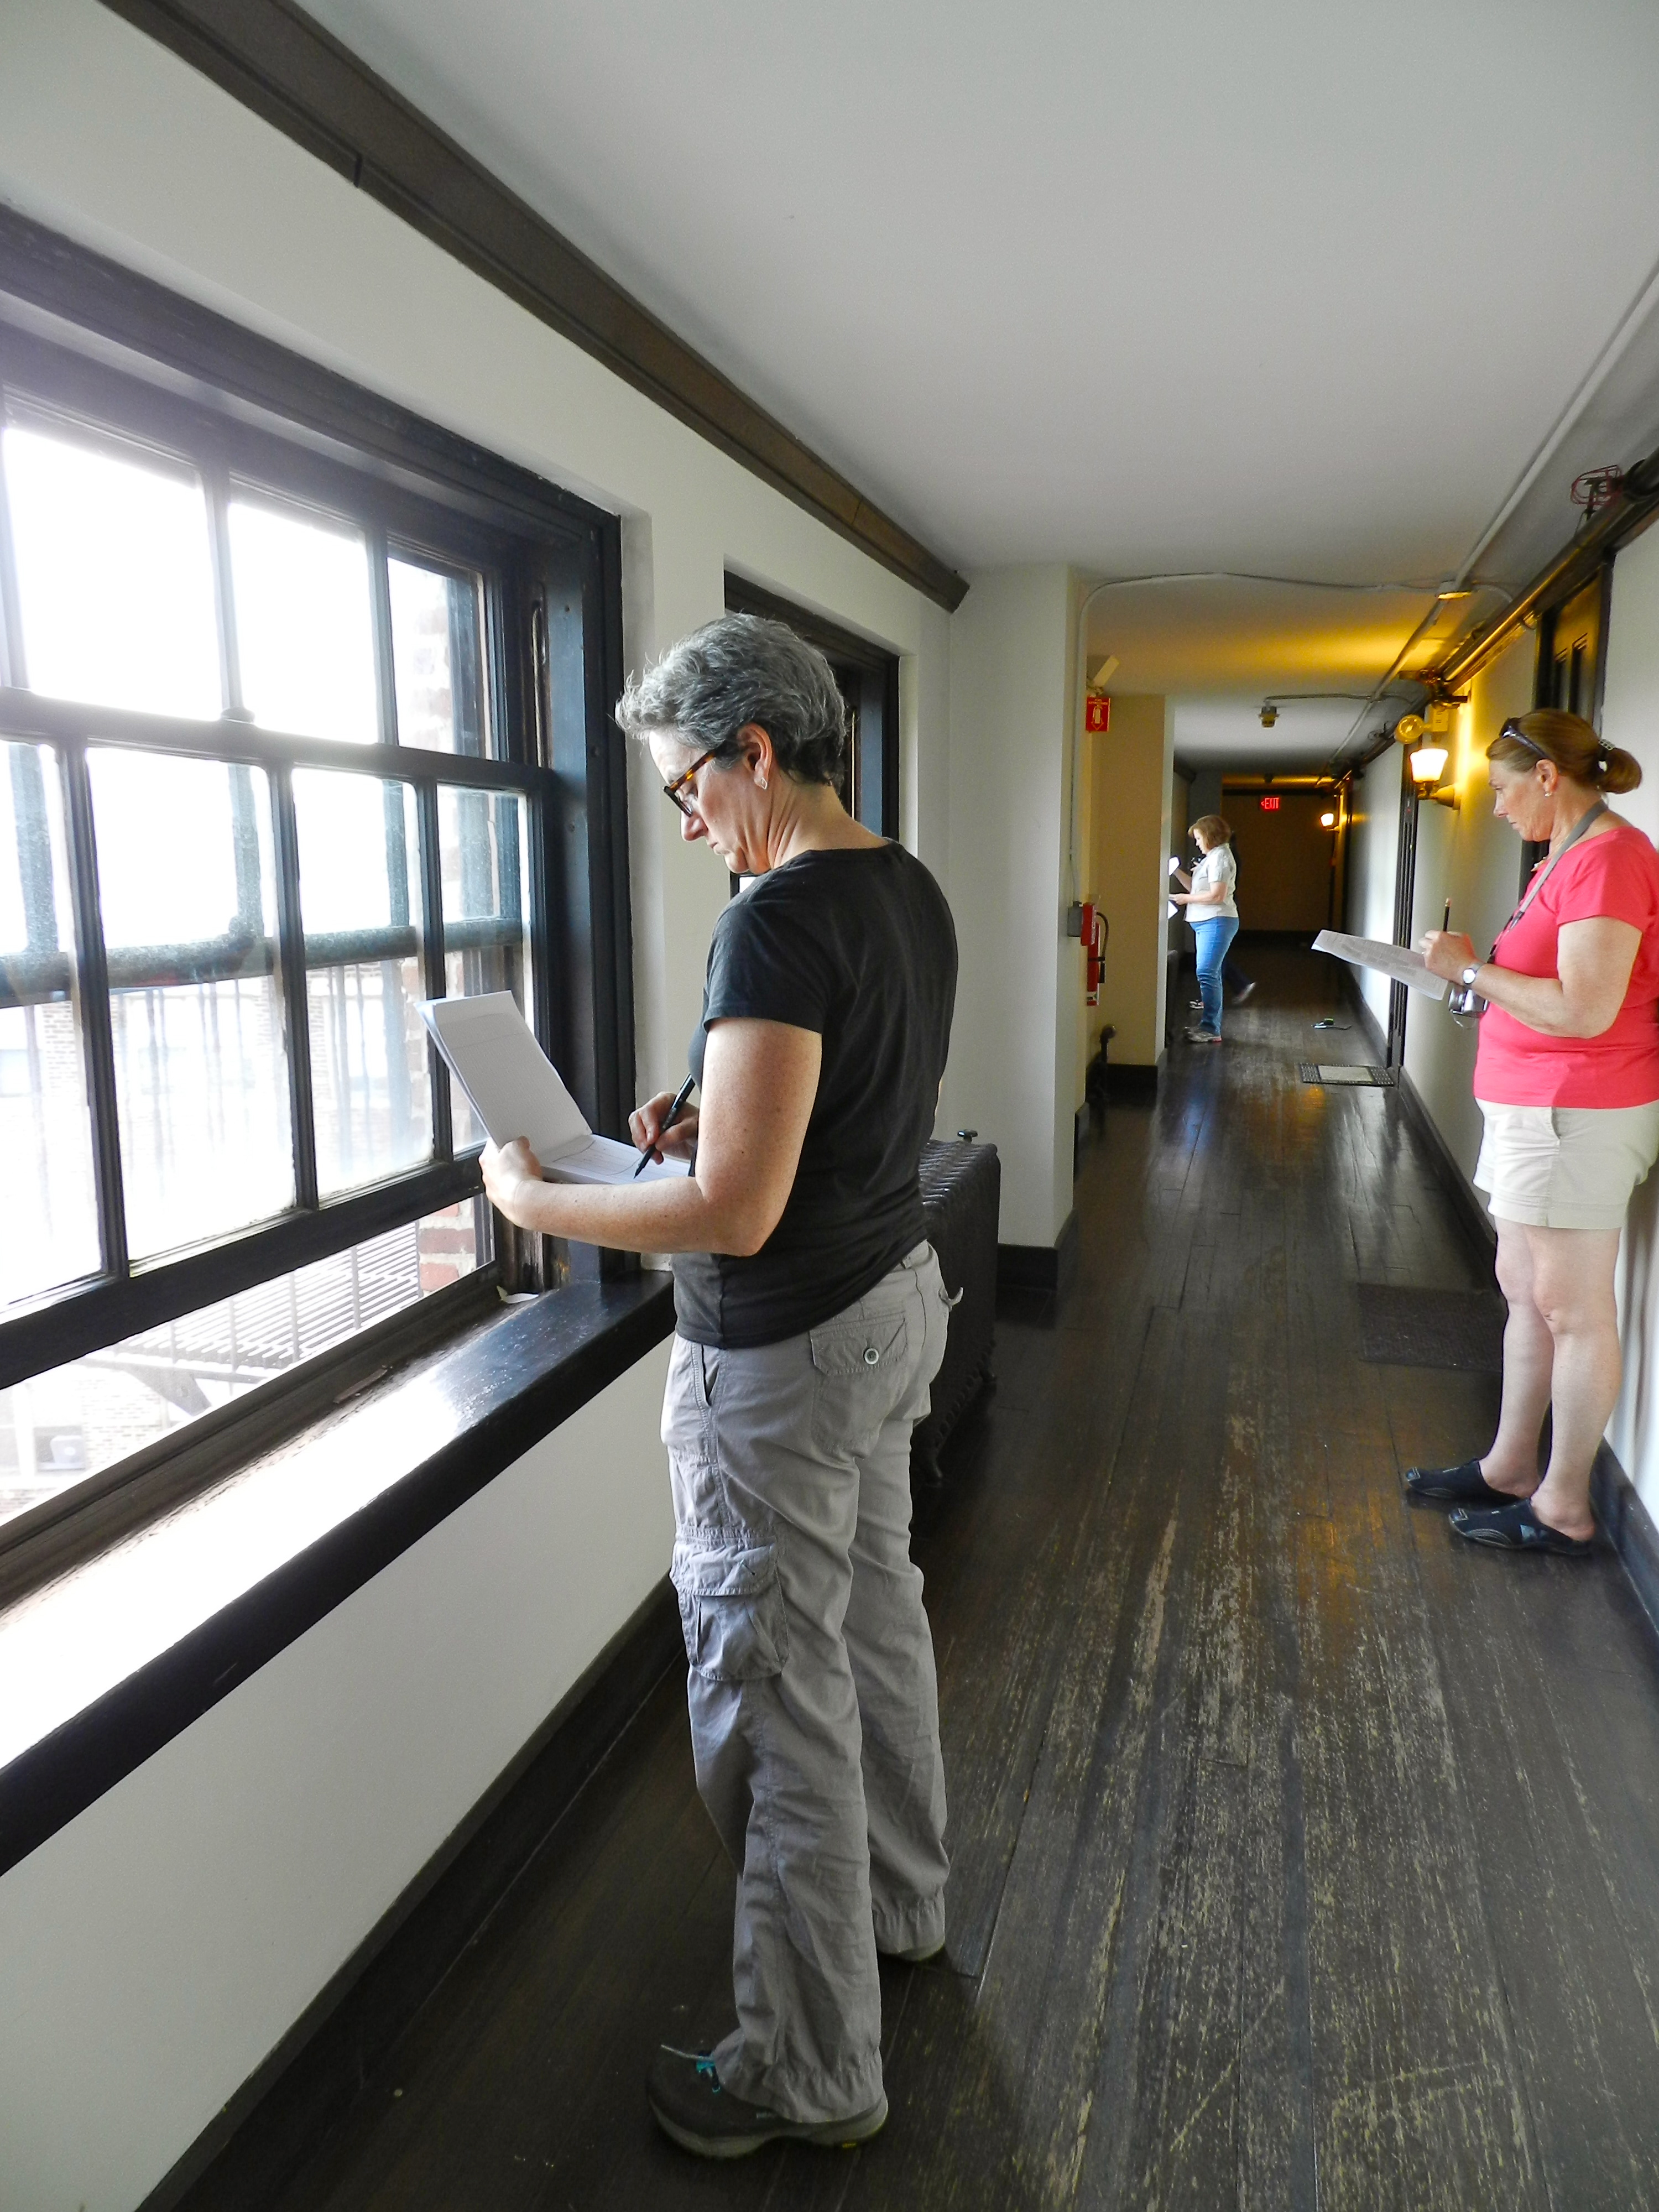
Field Work at Fenway Studios
In the afternoon I taught the class about window restoration, window reproduction and condition assessment reports. We then went out to do some field work at the historic Fenway Studios.
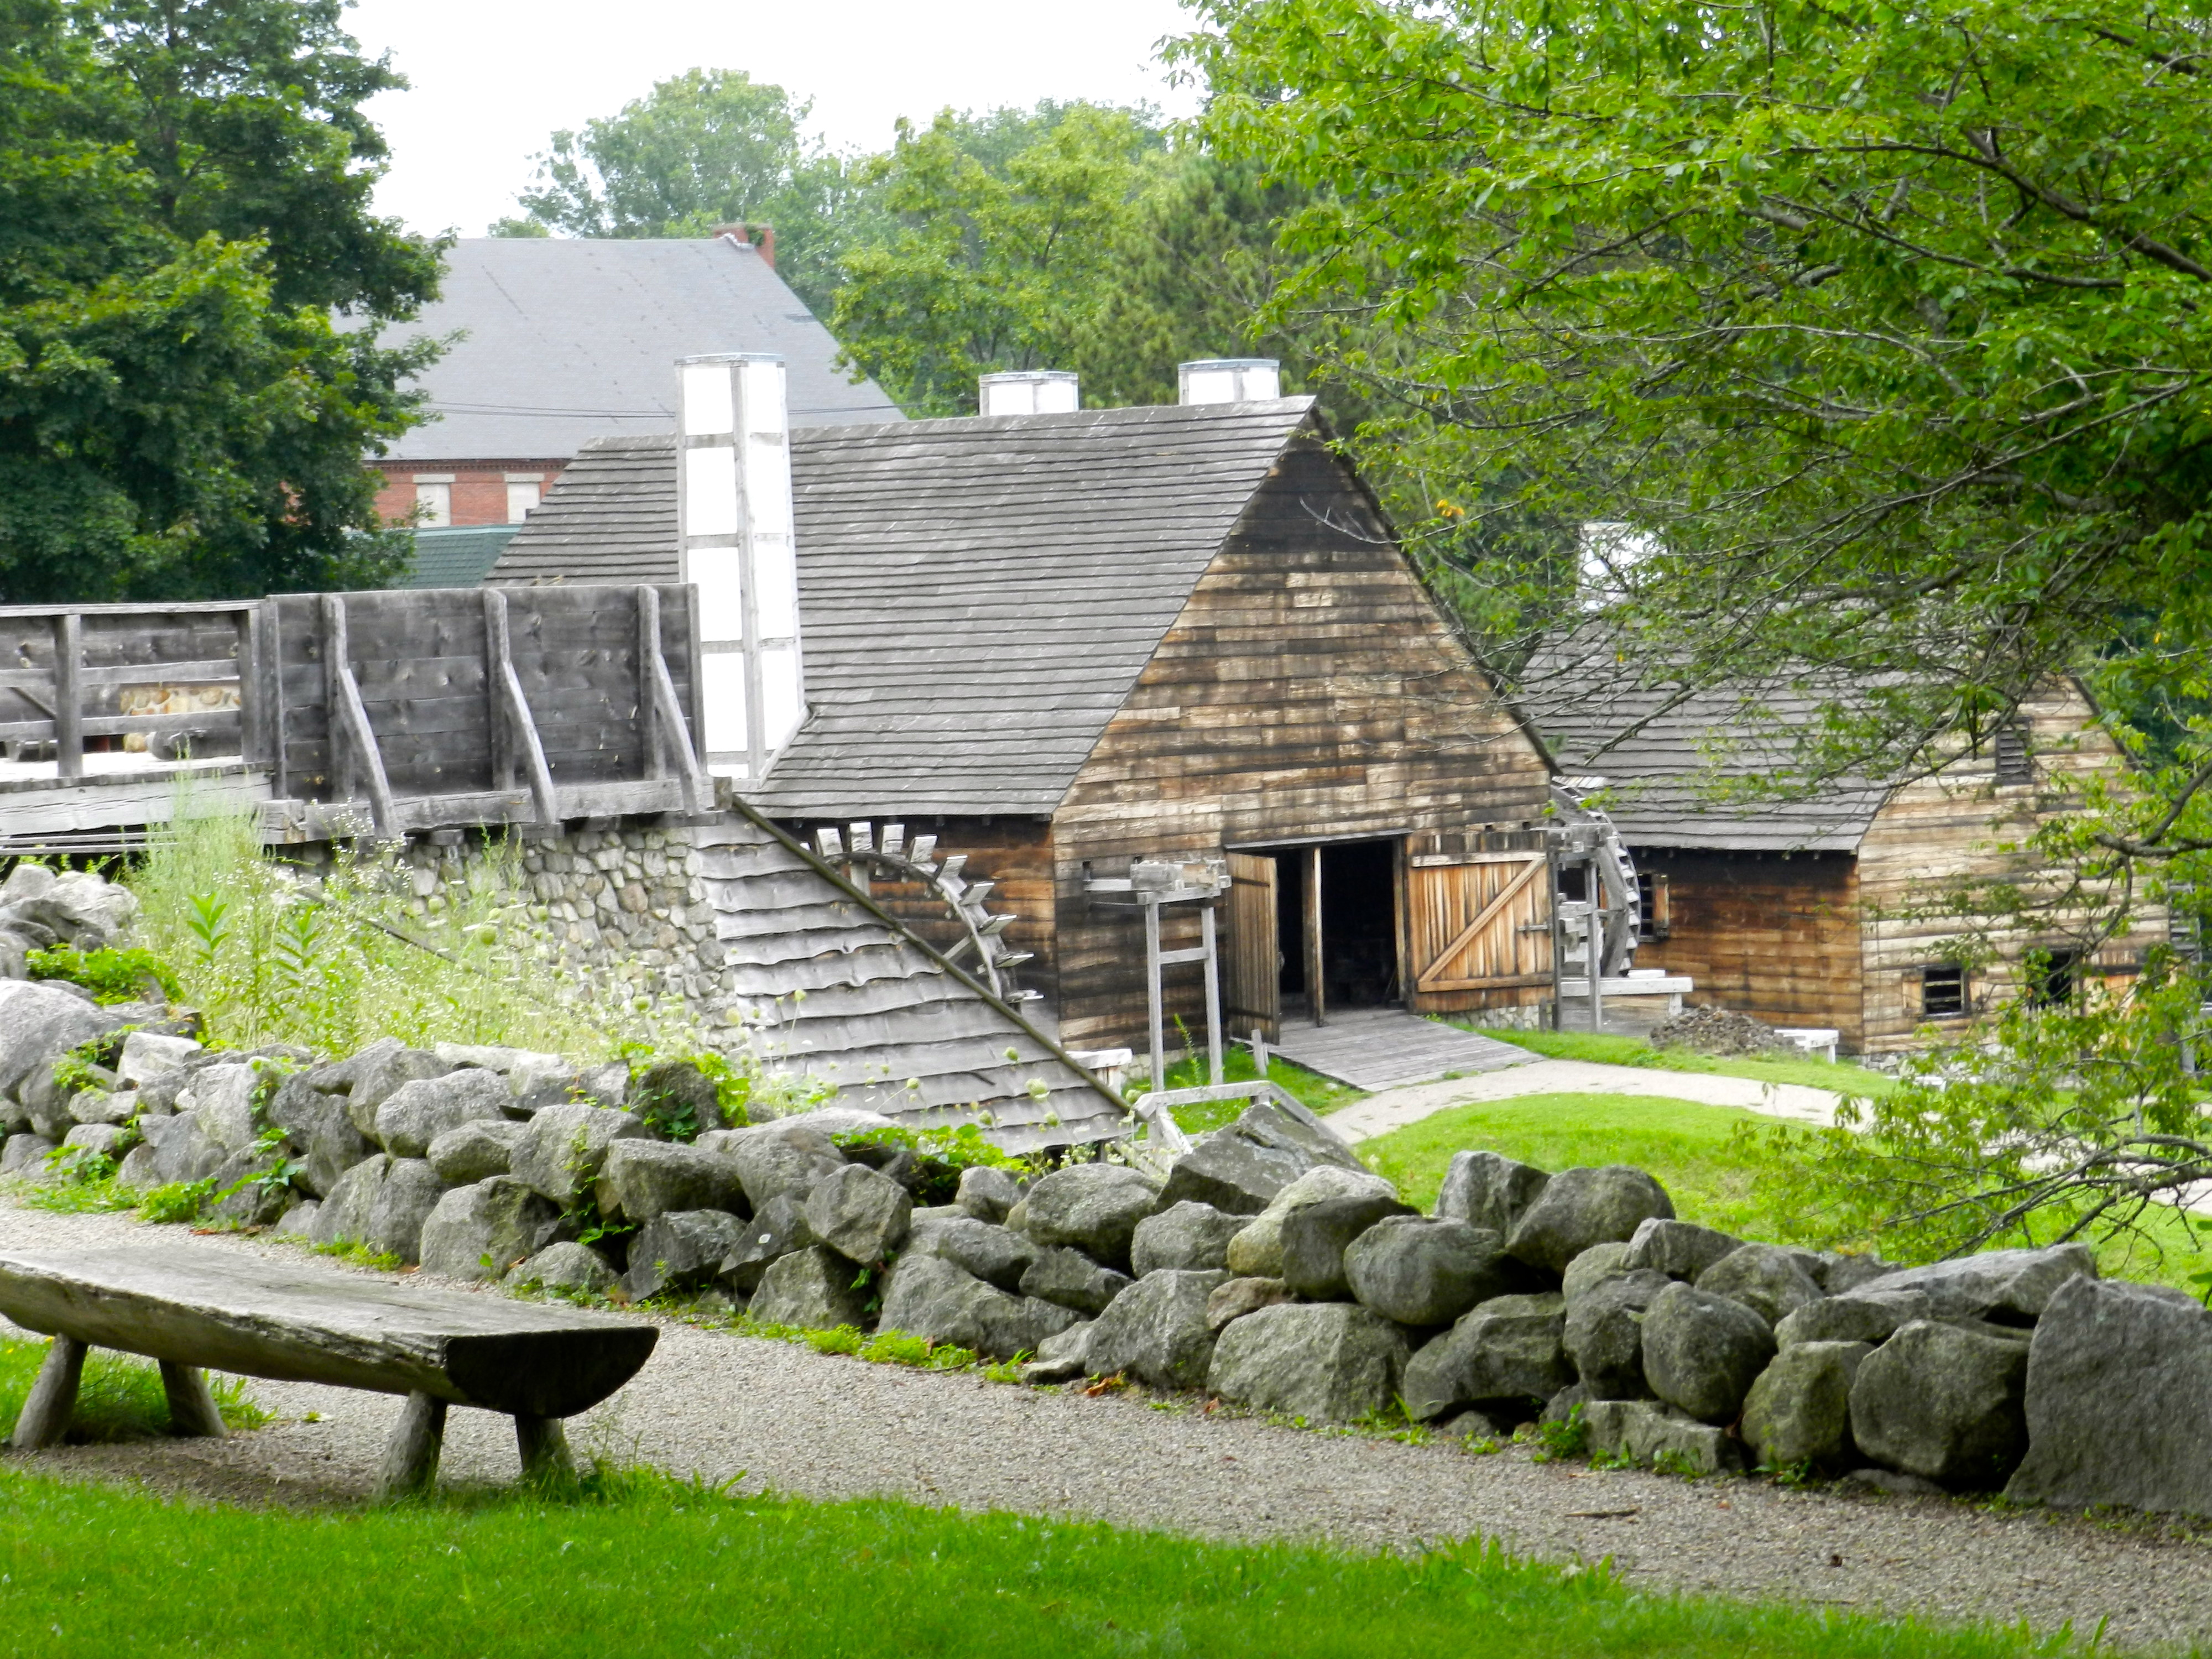
The Saugus Ironworks
Next up we visited the Saugus Ironworks which is a National Historic Park. Senior Park Ranger Curtis White was on hand to guide us through this landmark site and enthusiastically share with us his latest research about historic ironwork. (He’s a great resource and if you ever visit the park and run into him, tell him I sent you. )
Ranger Curtis White explaining how the ironworks produced iron
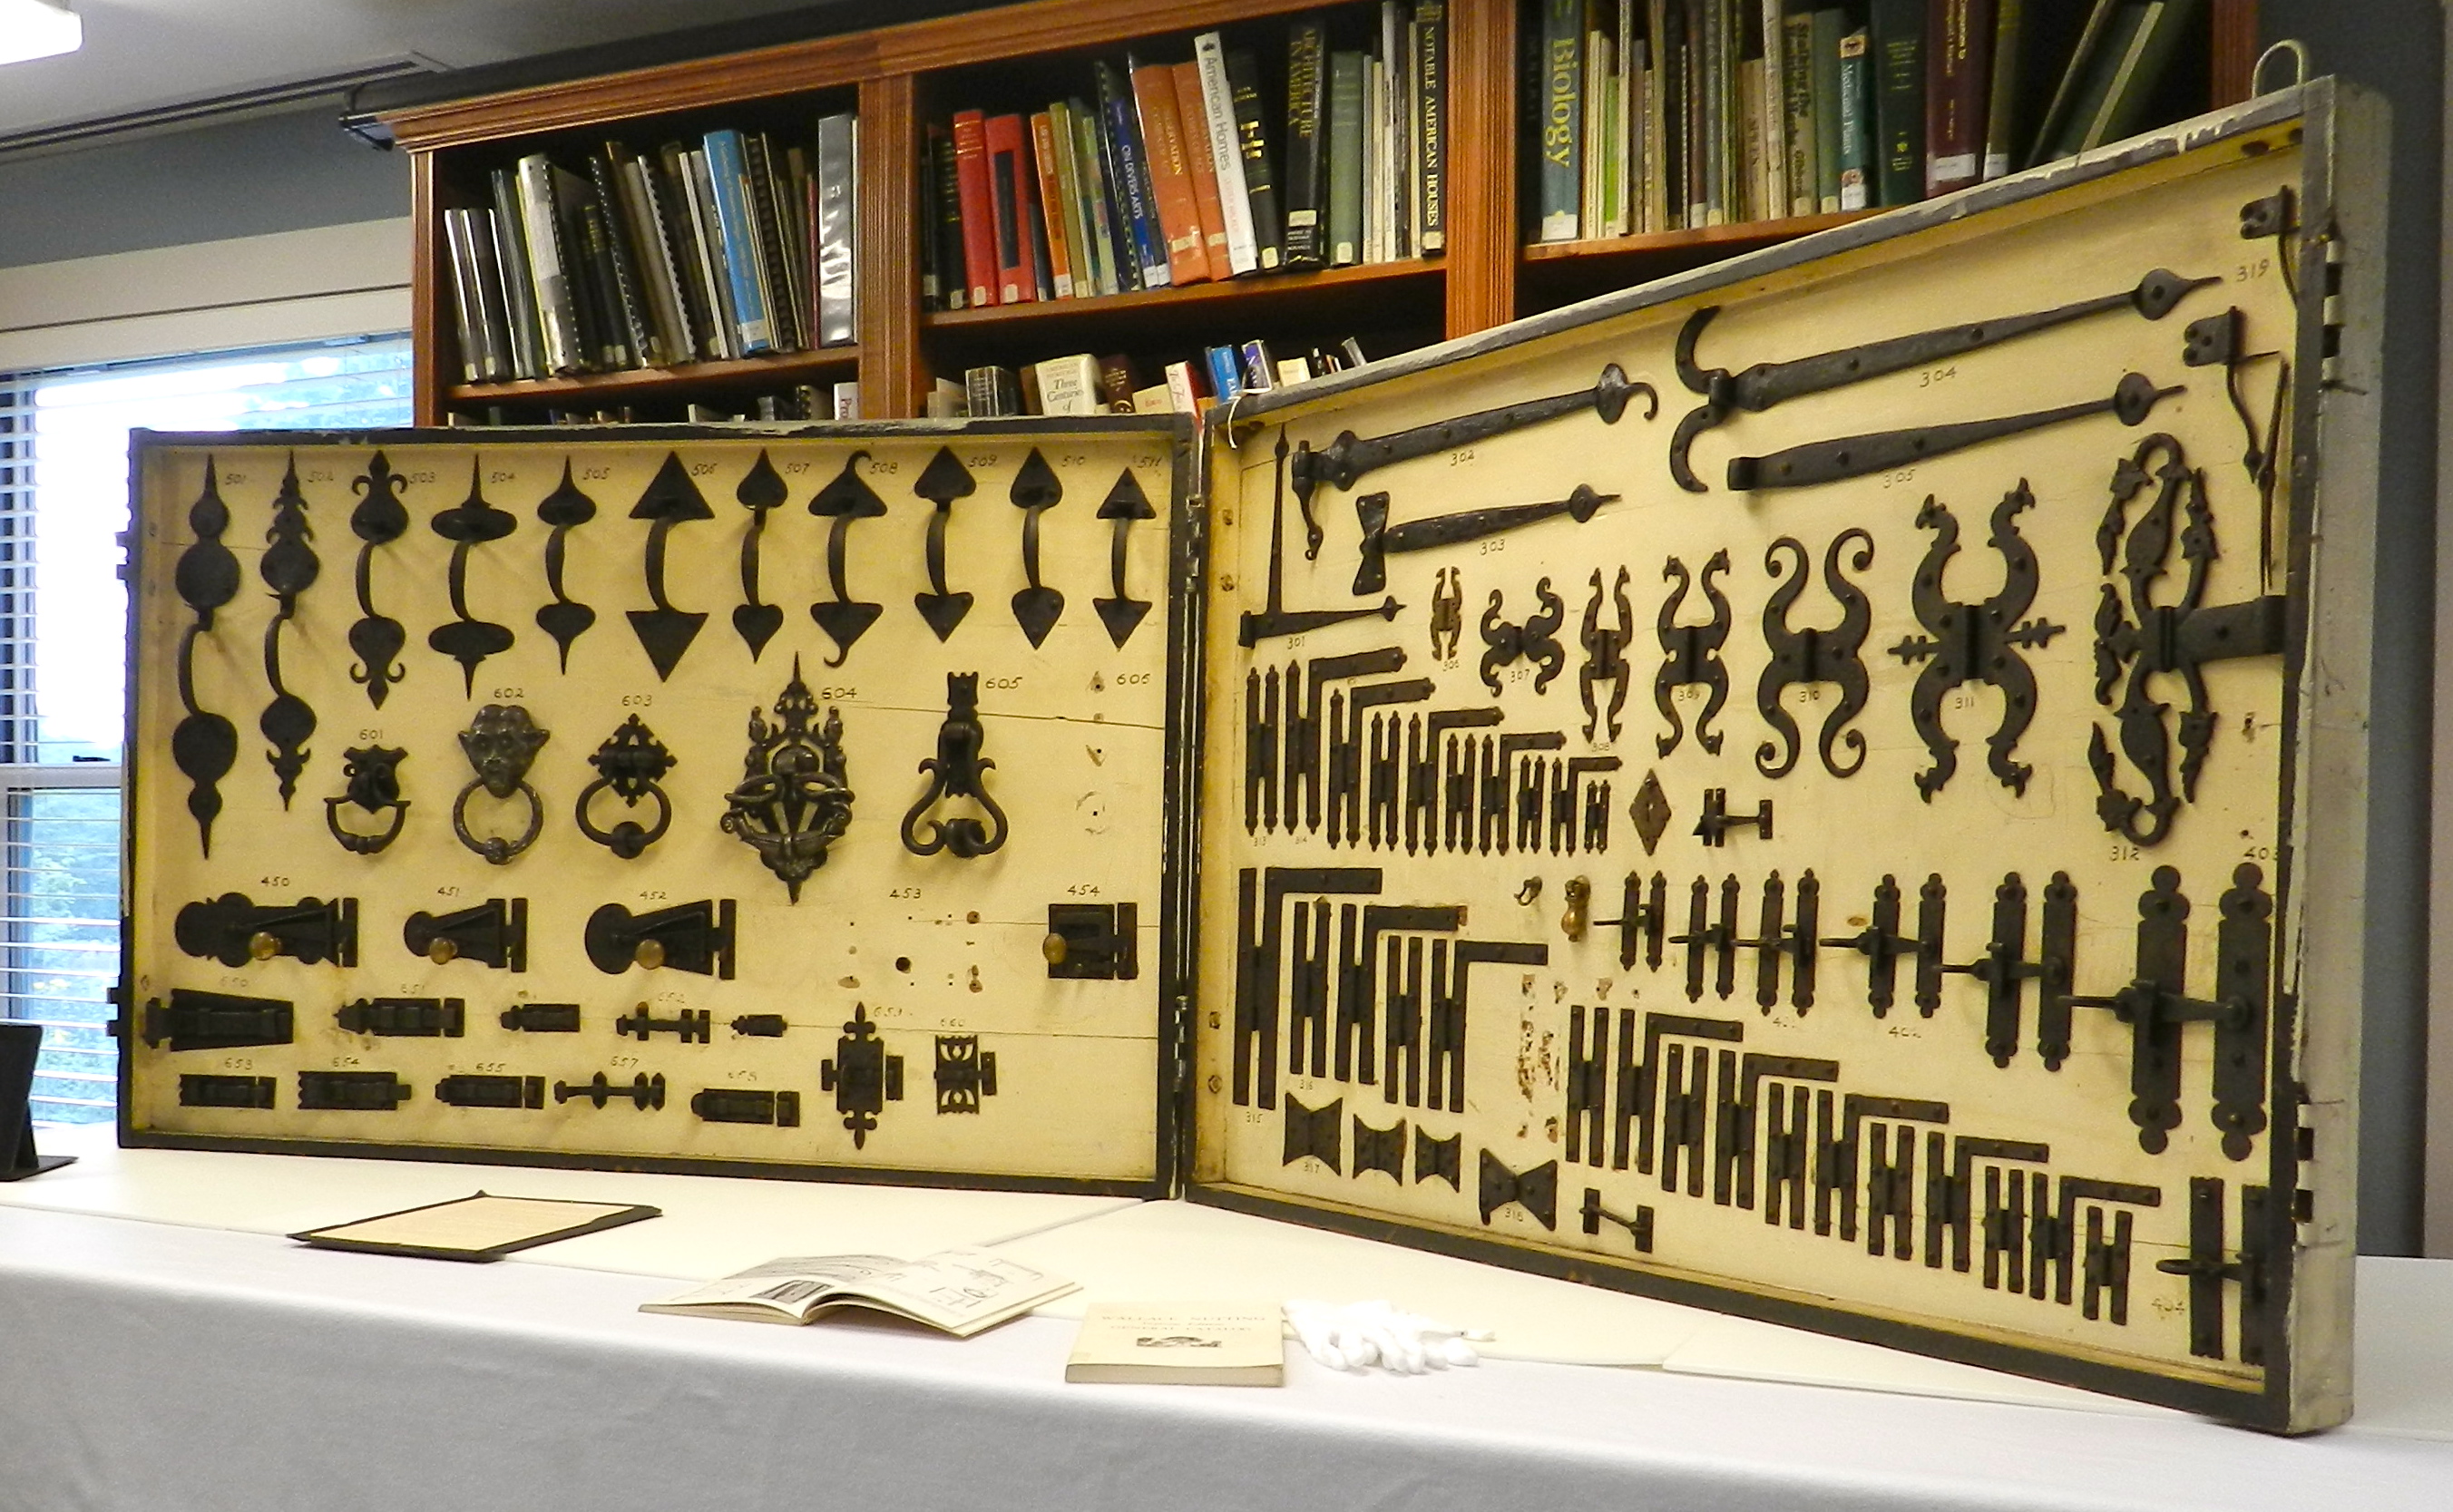
Robert Adam (Who started the Preservation Carpentry program at NBSS and is a noted preservation consultant) lectured about historic hardware and fasteners.
Robert Adam talking about historic hardware and fasteners
Robert’s brings a portion of his comprehensive collection of historic hardware and fasteners allowing students to closely examine these items up close and differentiate fine details.
Historic Hardware by Edward Guy
Sara Chase, a nationally known paint analysis expert and preservation consultant (+ advisor to the NBSS Preservation Carpentry Program) taught a session on traditional paints and their manufacture.
Making paint with Sara Chase
During this hands on session students not only learned how to identify various kinds of historic paints they also had the chance to mix their own paints in a traditional way and try their hand at applying them.
Mulling historic paint with Sara Chase
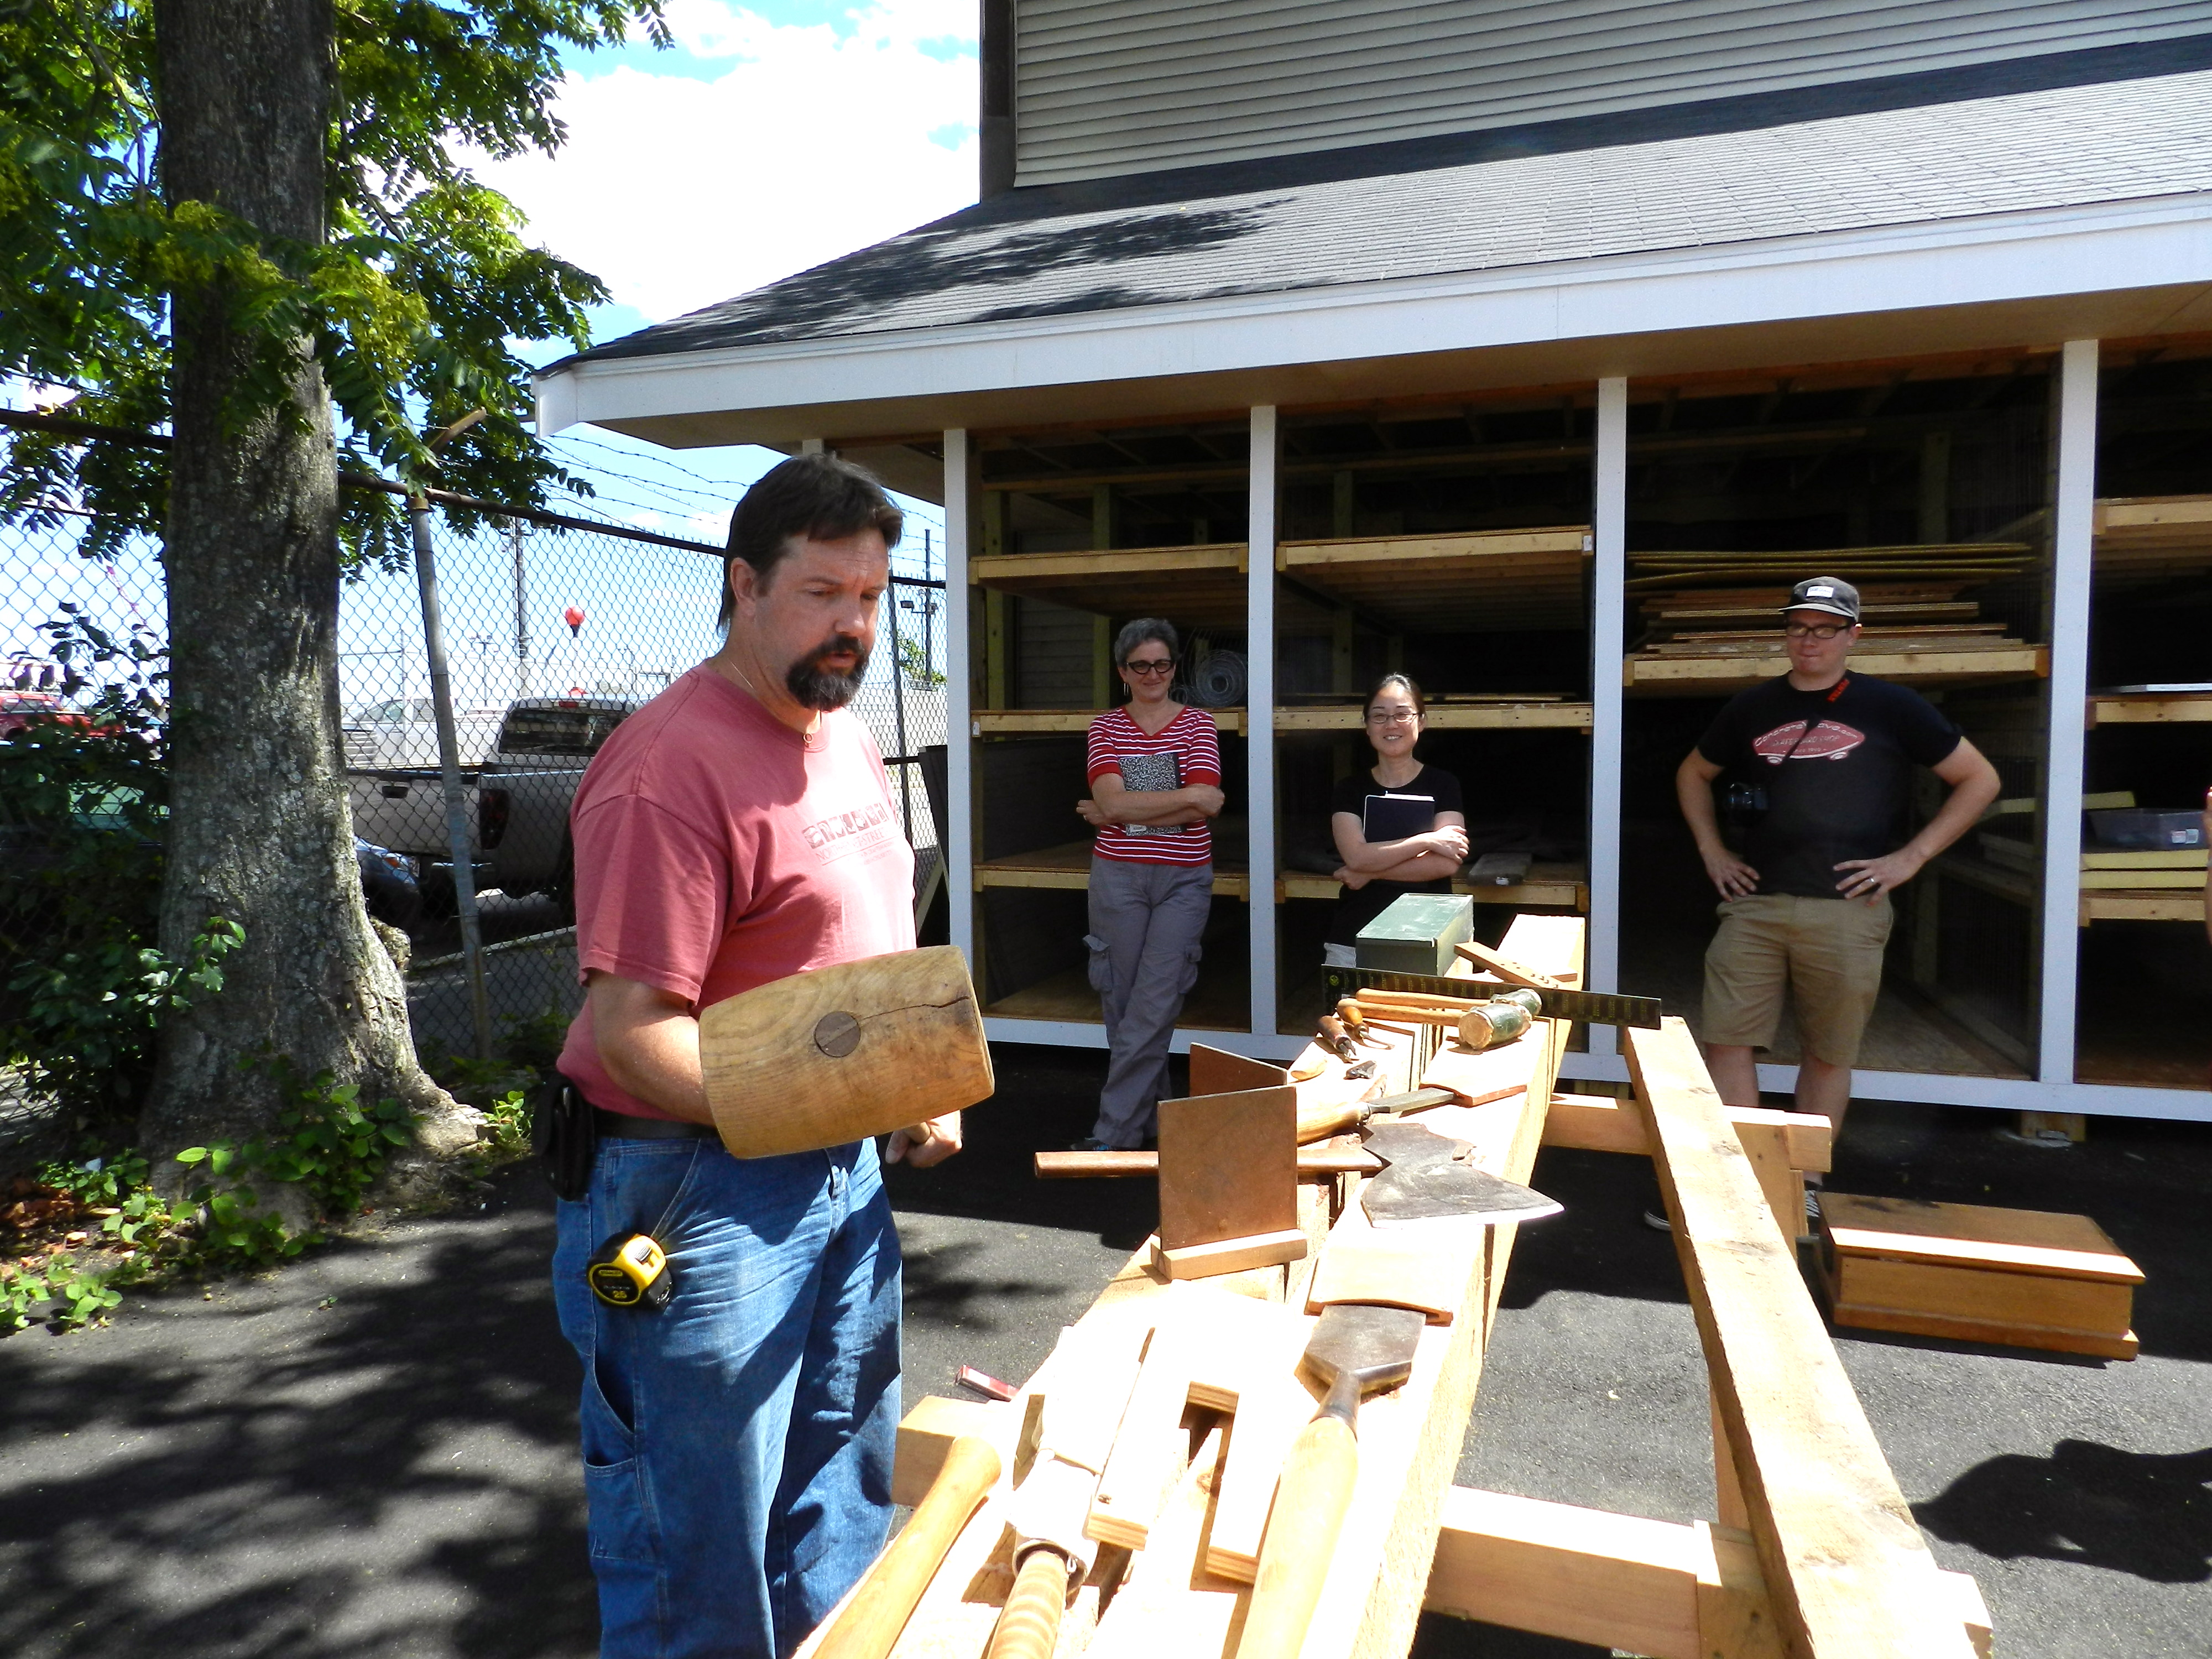
After a visit to the MFA in Boston, next up was NBSS Preservation Carpentry Instructor Rich Friberg to teach the basics of Timber Framing.
Rich Friberg Timber Framing Lesson
Rich brings with him a deep well of knowledge and a passion for teaching this craft.
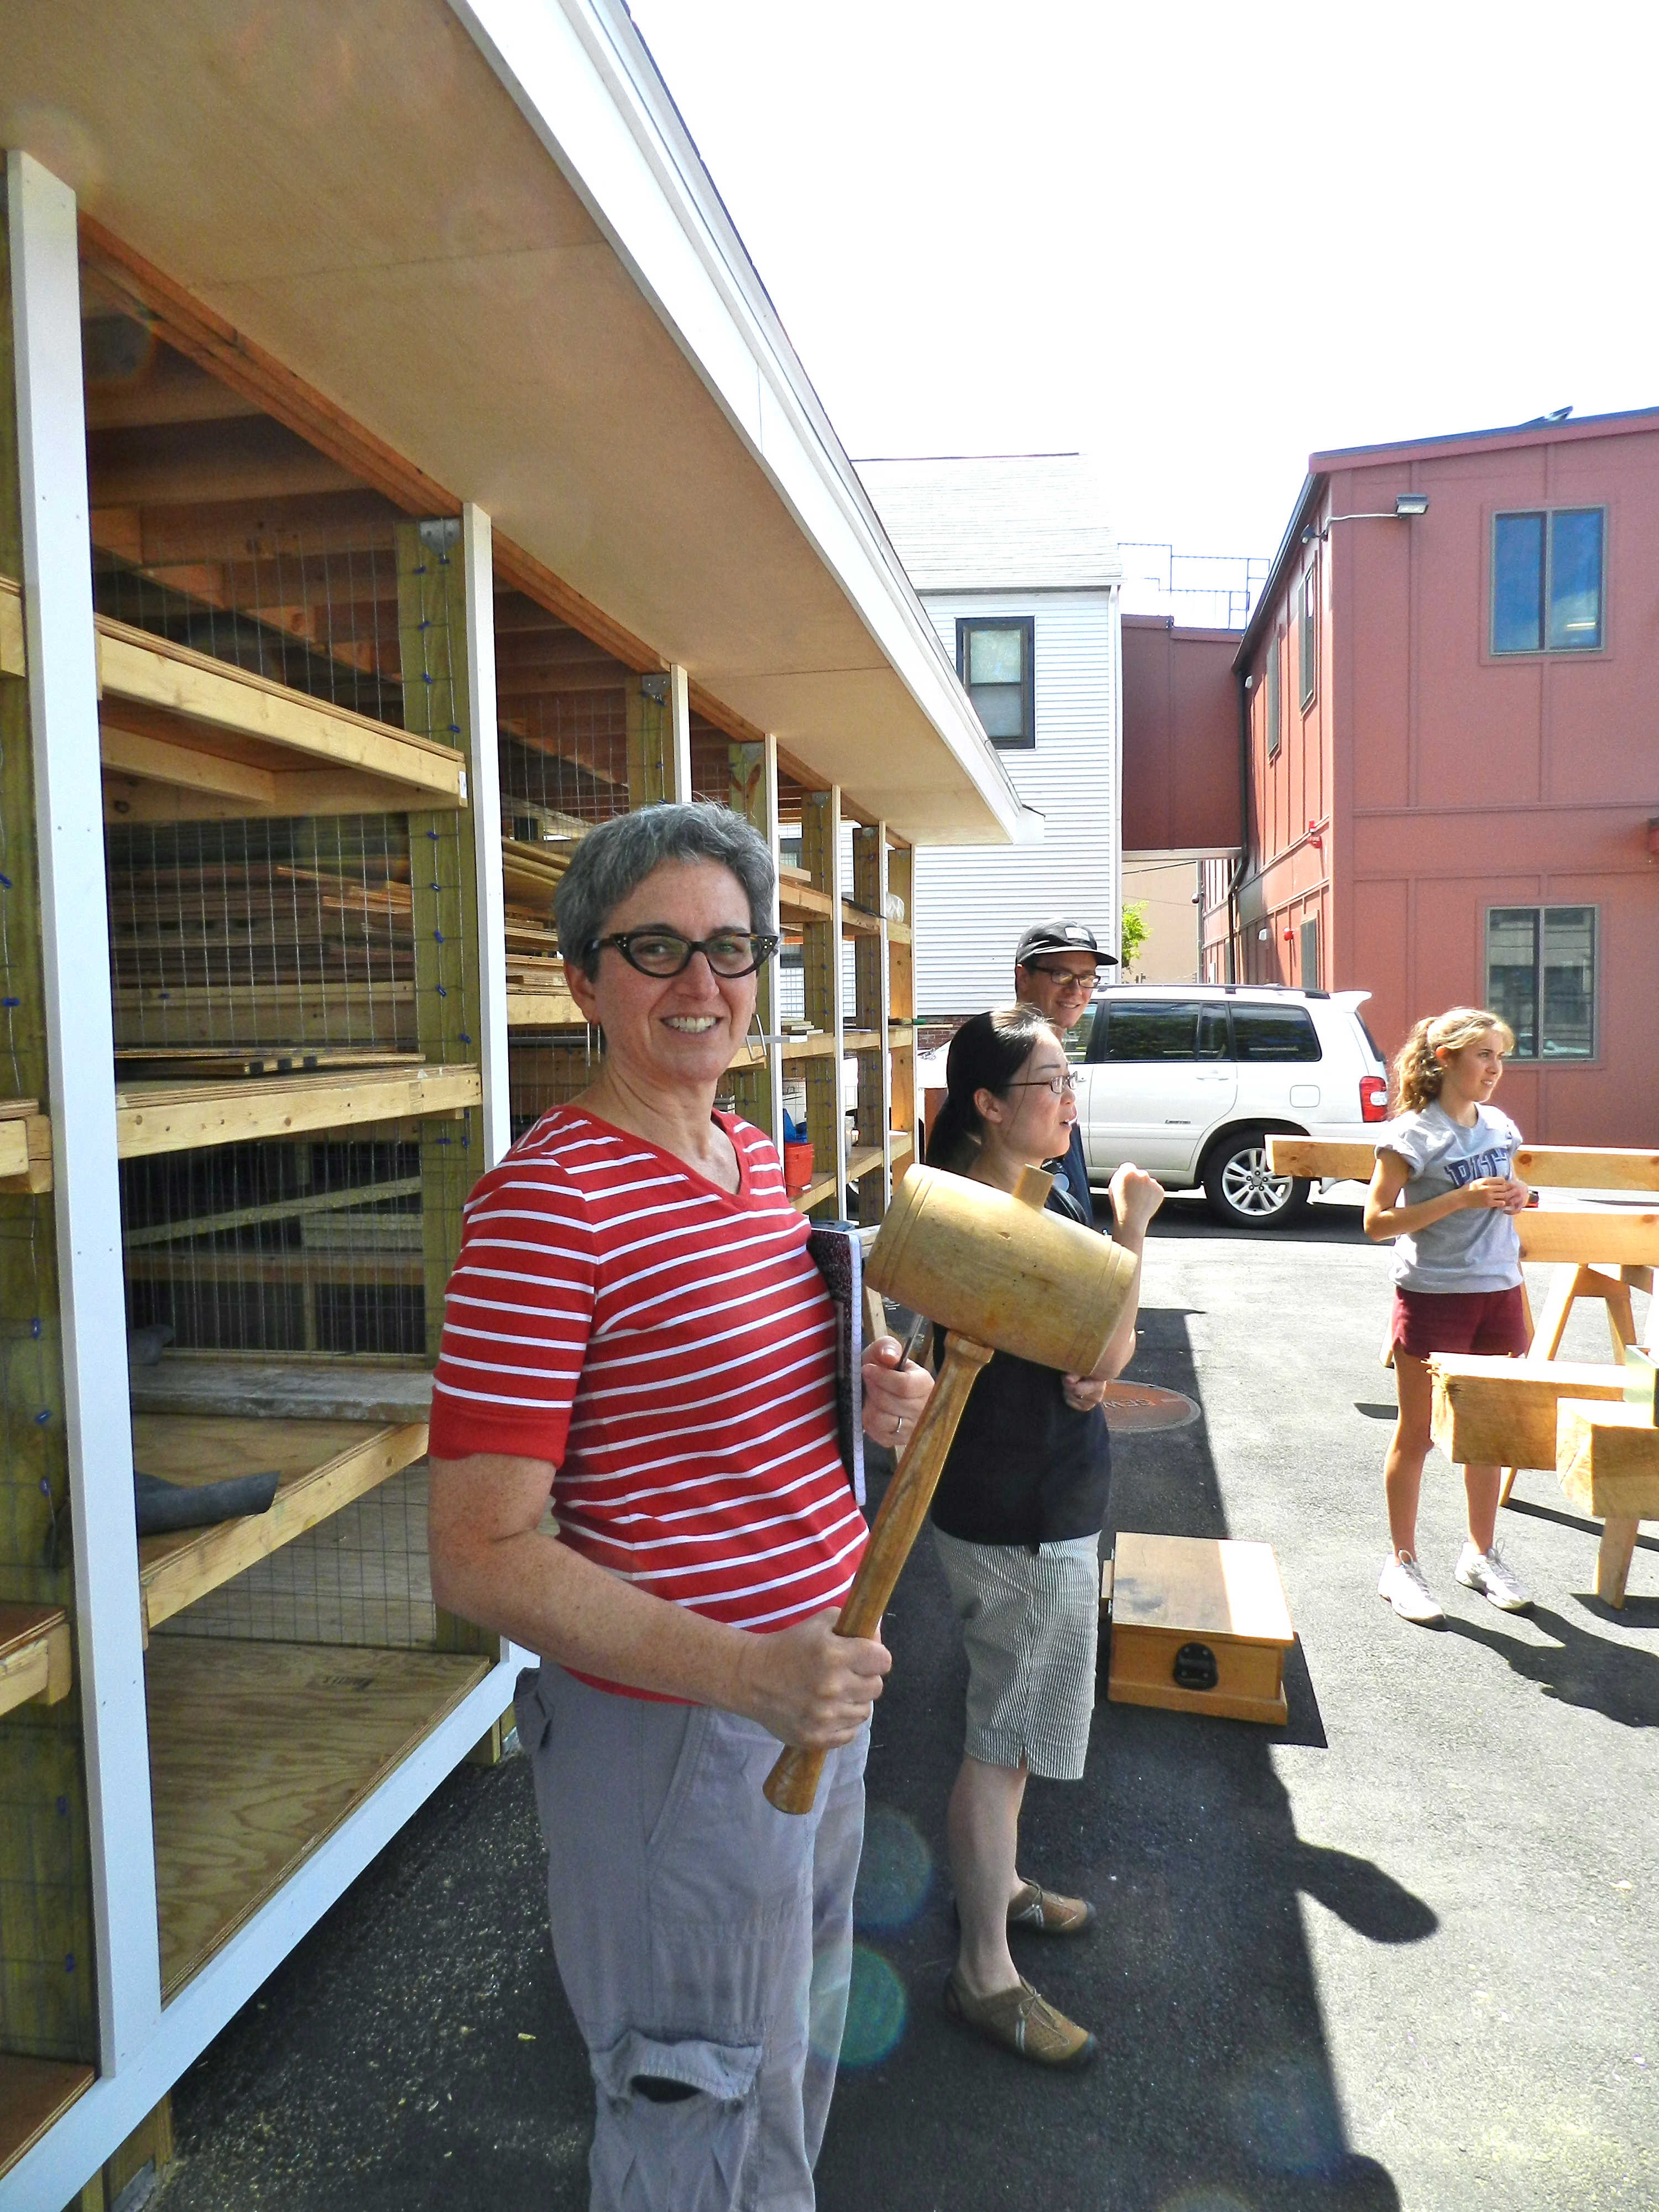
Jennifer wielding the ‘Beetle’ mallet
Students had a chance to layout and cut mortise and tenon joints….
Joey with the ‘Commander’ mallet
try out some joinery on the large scale with traditional timber framing tools…
Lisa mortising
and fit the joints they made.
Completed Timber Frame Sill
The completed 8′ x 10′ sill shown above would be the first major element of a modest sized barn or outbuilding.
Matt Gillard teaching some basics of Masonry
Preservation Mason Matt Gillard (owner of Colonial Brick Works) and Matt Blanchette gave a great lecture on traditional masonry tools, techniques and evolution.
Rachel cleaning off some recovered bricks
This hands on session allowed students to mix traditional mortar, clean bricks, re-point, repair, lay brick and joint mortar.
Masonry group shot
At the end of the week the students also shared their presentations and research proposals. To celebrate the end of this very intensive week the Director of the Historic Preservation (HP) program Robert Ogle presented each student with an ‘I survived the HP intensive week 2013 @ the BAC’ Tee Shirt to commemorate the occasion. This well earned reward is one of three major intensives they will need to survive in order to complete the program.
‘I survived the BAC Historic Preservation Intensive 2013’ Tee Shirts
Given that we all survived this very intensive week and you survived reading this marathon blog post, I think it’s time for all of us to rest up and prep for next year. 🙂
You can learn more about this class and the program here or go direct to the video here.
After drafting a new project or case piece but before you head to the lumber yard, you have to make a stock list. This inglorious bit of work is a necessary evil if you want to get all the necessary supplies on your first trip. The past few weeks I’ve been working on drafting up several upcoming projects and as I used this spreadsheet a few times and thought it was worth sharing with you.
Empty Stock List
Back when I was a student at the North Bennet Street School they had a nice little photocopy of a stock list that looked like it was originally made in Excel. We’d enter all the details for our project and then calculate the board footage for our projects by hand with a calculator. This often tedious work was susceptible to the occasional human error so I’d usually wind up checking and rechecking my calculations as I went. After doing this a few times, the computer scientist in me thought ‘Wait a minute, I can code this up in Excel and let it do all the work for me’ — plus printing this spreadsheet for a customer or when dealing with a supplier looks better than a hand written version.
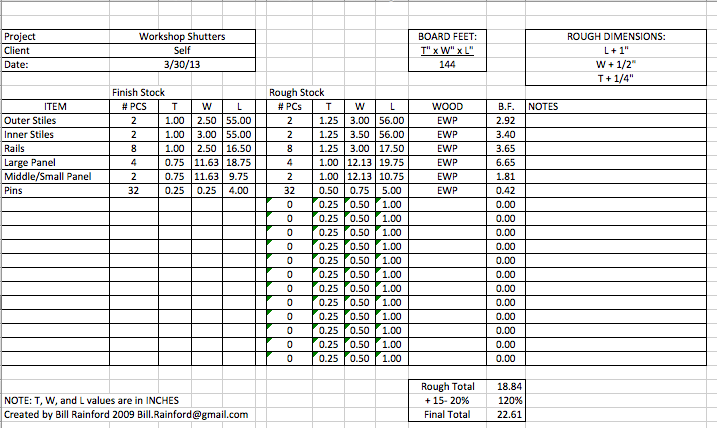
Example Stock List For Shutters
Highlights:
Keeps track of name of pieces, quantity
All values are in inches
Automatically calculates board footage
Adds common extra length (+1″), width (+1/2″) and thickness (+1/4″)
Totals up board footage
Adds extra at the end to take care of test cuts, small amount of scrap etc
This spreadsheet has worked well for me over the years and I hope you will benefit from using it as well. You can find a copy of it here (*.XLSX format):
Woodworking comes in many forms and has many specialties. One of the more interesting niche areas of woodworking is the dedicated group of craftsmen restoring and maintaining Woodie Wagons. (The iconic cars of the 1950s and popularized by many a movie and the surfer culture) One such craftsman is my friend Steve O’Shaughnessy who is also the head of the Preservation Carpentry Department at the North Bennet Street School.
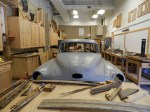
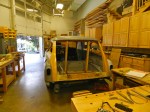
When visiting the the shop the other day I took some quick pics of his current project which is the restoration of a 1952 Buick Roadmaster Estate Wagon. Back in the 1950s some of this woodworking and maintenance was performed by the local Buick dealership — imagine that today?
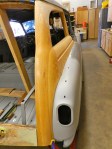
Steve has been meticulous in going through all the body and mechanical systems and cataloging all of the original wooden parts of the car. Since then he has systematically been replicating the wood pieces from Ash using a combination of his duplicarver system, skill and perseverance — as many of the pieces have delicate compound angles that have to fit just right in order for everything to line up. He was able to consolidate the original pieces and use them as templates when fabricating the new parts, but even with those templates on hand it still takes a lot of work to get it all fitting tight.
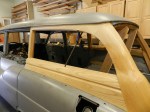
When he’s done he’ll have a classic show car and a piece of fine furniture he can drive down the highway at 55MPH — I can’t wait to see it completed.
Front End
Rear View
Rear Quarter
Other Rear Quarter View
The Goal
A Joiner's Guide To Traditional Woodworking and Preservation