

Every family has its own unique holiday traditions. For my wife and I we seem to spend Thanksgiving replacing door hardware and adjusting doors. We did this several years ago in our condo when we lived in Kirkland, WA and again in our home here in New Hampshire. Both times I was swapping out builder grade brass Schlage hardware for nicer Schlage ‘Georgian’ style knobs and hinges with a satin nickel finish.
We’re lucky in that our house is from 1999 and has had a minimal amount of settling — especially compared to the 1910 Craftsman Bungalow we used to rent wherein virtually no door closed properly until I spent a Thanksgiving break adjusting all those doors as well.
With all that door tweaking I’ve refined my method for adjusting the doors and wanted to share a few tips on how I tune up a sagging door.
Evaluate the door:
* Does it close? (and stay closed)
* Do you feel the door rub against the jamb at all? (Are there visible wear marks from rubbing?)
* Is the hardware securely fastened? (Any stripped out or cammed out screws? Lift the door handle a bit and see how the hinges react — do you see slop in their movement? Are some of the screws loose?)
* Has the door been modified? (Anything removed to make room for a crooked or settled door frame? Has the hardware been modified?)

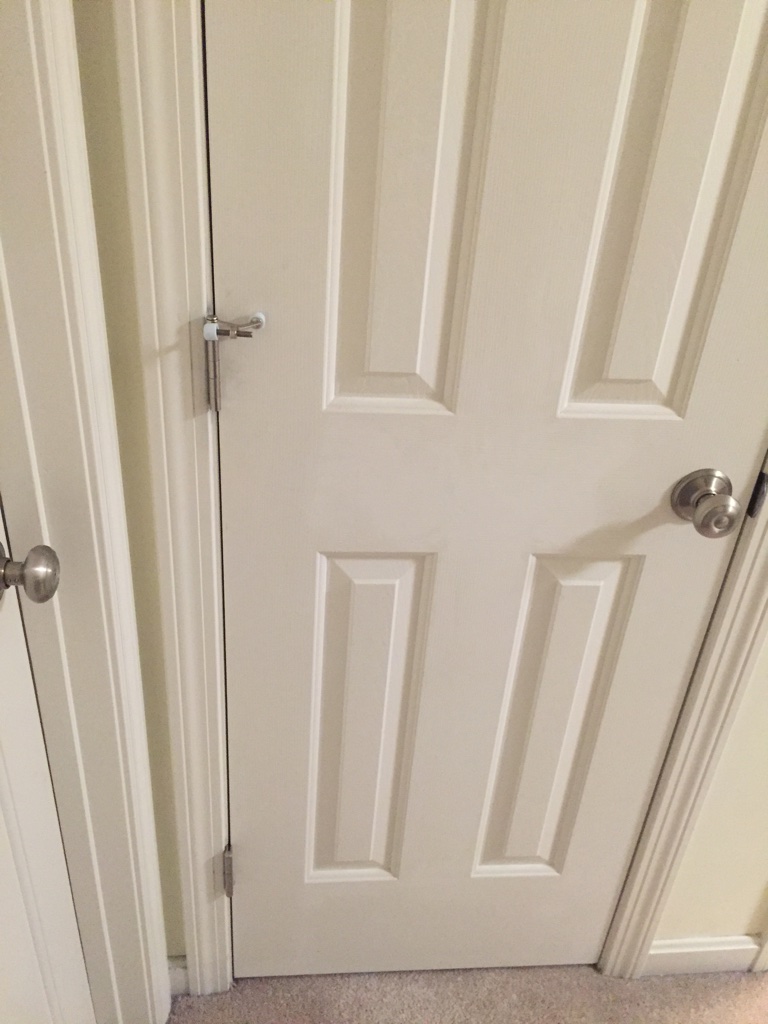
The above door is door to my upstairs hall closet. It rubs a little bit when you open or close it. Let’s take a look and see why.
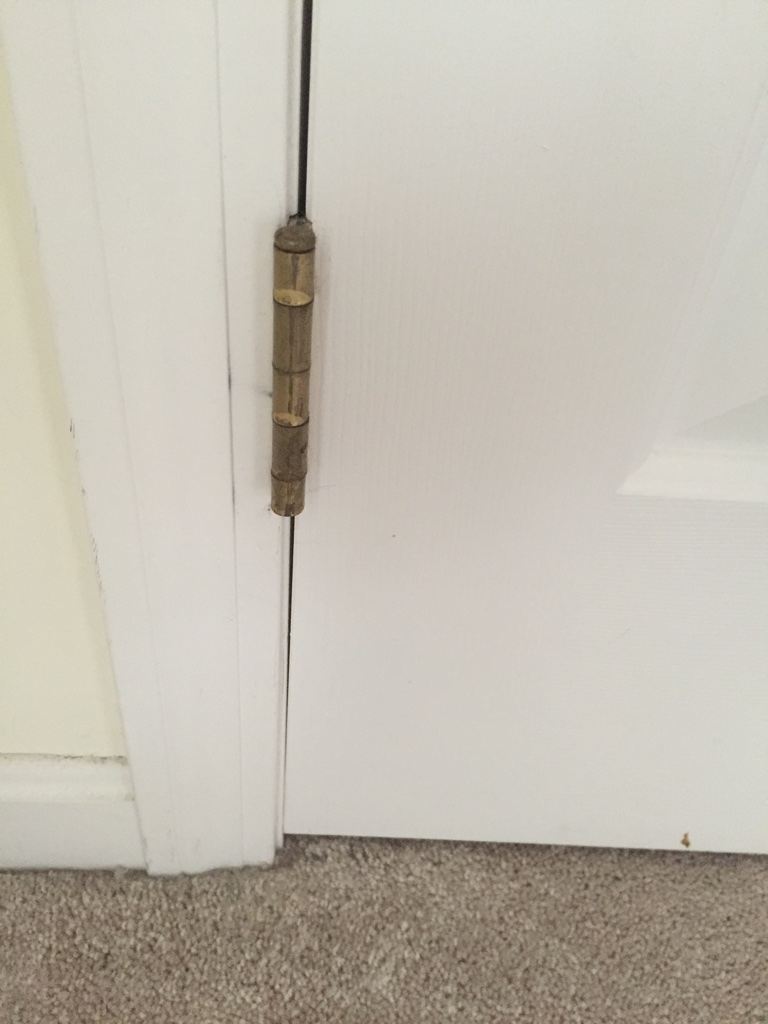
Looking at the lower left side of the door I can see the door is pressing against the jamb. At the bottom you can see the spacing between the door and the frame tapers off into the place where they are touching.
As is no real surprise if we look at the top right of the door we can see where the door is touching and rubbing on the right jamb. If I pull up on the door handle I can see the door go back into the position it should be — looks like the top most hinge is a little loose.
How do we fix this problem?
In my case I want to examine the doors as they were and also swap out the hardware so anything brass is a ‘before’ photo and anything nickel is an ‘after’ photo.
The first thing I like to do is make sure the screws holding the hinges in place are nice and tight. The default screw most hinges come with are short ~3/4″ screws. After years of use or abuse (say something heavy like a shoe tree hanging from the inside of a door) the screws can come loose and/or strip the wood that once held them securely.
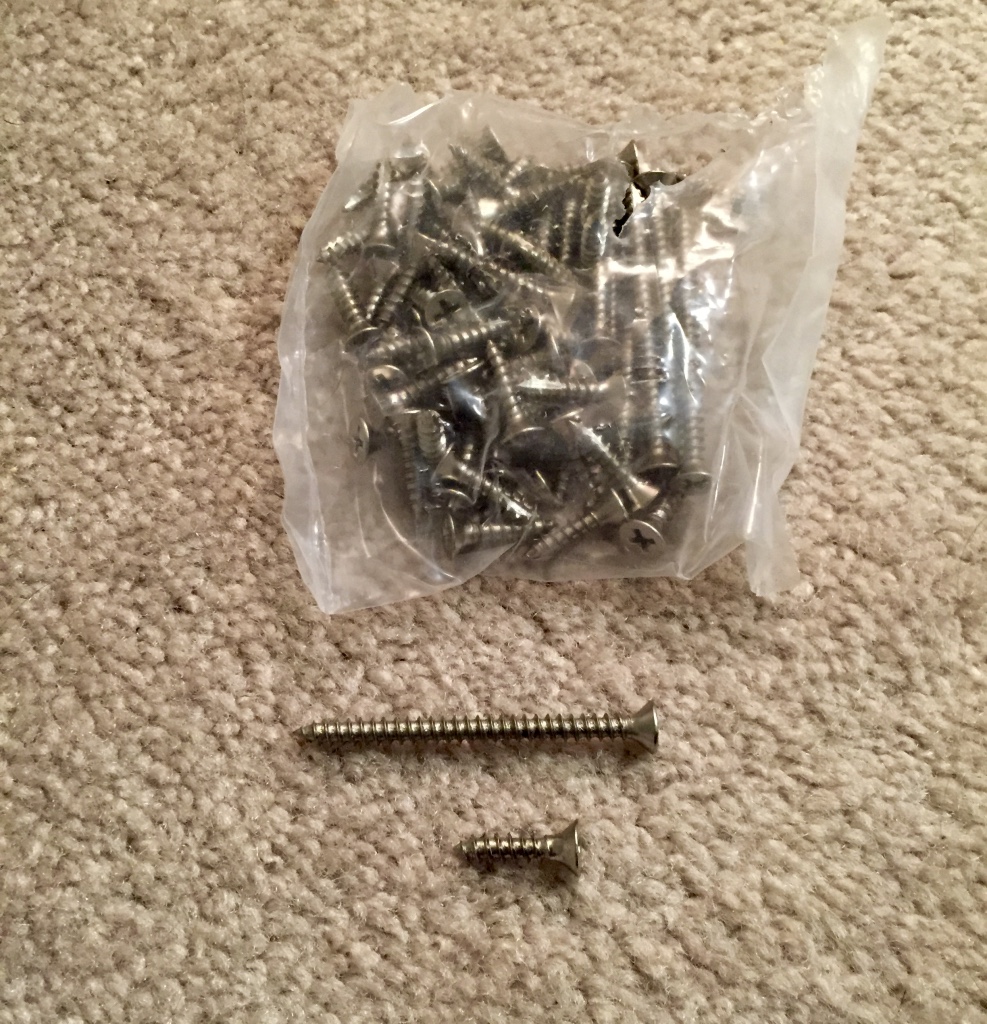
Better hinge sets will often include some longer screws — usually enough for 1 long screw in each hinge. I’ll start by installing 2 screws — one each in the top and bottom of each leaf. As I screw them in firmly — and by hand — I can feel how well the screw is gripping into the wood of the jamb and the wood of the door. If any of the screws just keep spinning then the screw has been stripped out and is now a candidate for one of the longer screws. If the screws are holding then I will use the longer screw in the center hole on the hinge leaf that is on the jamb. This longer screw should go through the jamb and into the heavier framing and provide a strong and longer lasting connection. If the center screw hole was sound but one of the others was stripped out I will put the longer screw into that hole.
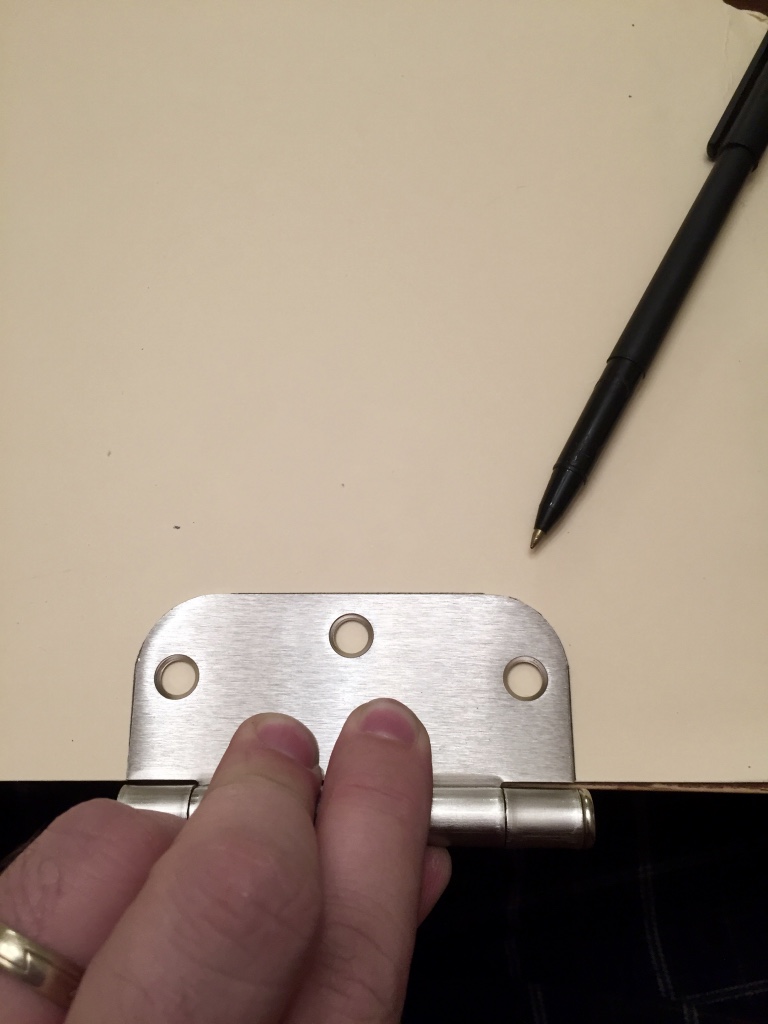
Pro-Tip: The hinge leaf with three knuckles should be installed on the door jamb and the leaf with two knuckles should be installed on the door itself. (This will provide a better bearing surface for the door’s hinge leaf to ride on and make it easier to remove the door and put it back in the future). If the pin is removable you can drive it out with a transfer punch and install it the opposite way for a door that opens in the opposite direction.
What do to if the long screws won’t grip either?
Sounds like the screw hole has been damaged too much. If you don’t want to replace the door and/or jamb a reasonable fix can be made using a small diameter dowel. You’ll want to drill out a bigger hole, say 1/4″ diameter, through the stripped out screw hole. Then glue and hammer in a small length of 1/4″ dowel to fill the new hole. Allow the glue to dry and cut it flush with the hinge mortise. Then mark the hole using the hinge as a template and re-drill the hole with a bit that is narrower than the screw you are using. Ideally the bit should be the size of the shank (the solid core) of the screw, thus allowing the threads to get a nice grip into sound/solid wood.
Securely affixing the new hardware fixed the issue on that particular door, but other doors in the house still didn’t line up the way I wanted and/or the hinge was set too deep and needed something more — some shims — to get the door back into proper alignment.
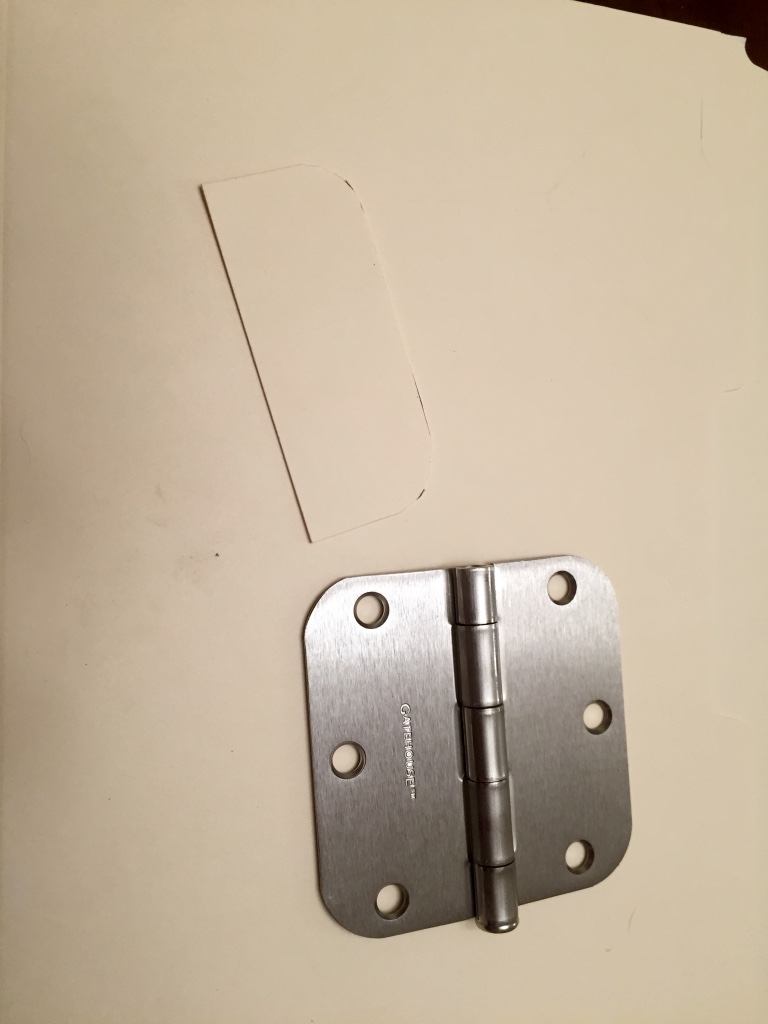
Easy to make shims
I grabbed a manila folder and traced one of the hinge leaves onto the folder. I then cut out what I traced being sure to ‘take the line’ that way I could be sure the template would fit. Also by leaving the folder folded up I could get two shims from each cutting operation. I would test fit the shim and use one as the template for subsequent operations. Also make sure the shim only fills the area where wood would be under the hinge, you don’t want the shims going all the way out to the knuckle of the hinge where they would be visible. Once I had a small stack of these shims I could take a few test fittings and see how many I needed to pad out the hinge so it would be flush with the door jamb or door surface. I would then scotch tape the shims (if I needed to use more than 1) to each other and into the jamb using a small loop of tape. With the shim(s) in place the I’d use the same screw installation procedure described above.
What about the hinge pin door bumper?
A hinge pin door bumper is the little metal bracket with adjustable rubber pads on it used to stop a door from opening too wide and potentially damaging walls or furniture. Once you have your hinges installed you can use a transfer punch (or in a pinch a nail set, nail or another hinge pin) to drive the pin up and out of your hinge. You then put the pin through the bumper and gently tap it back down into the knuckles of the hinge. Once installed you’ll want to adjust the bumper so that the door only opens as far as you want — the bumper may have some spring to it so if you have some heavy handed folks in your house you may want to test it so folks are not over powering the bumper and denting your walls. I put the adjustable side of the bumper facing the trim and the fixed side against the door.
Pro-Tip: Oftentimes I see these hinge pin bumpers installed on the top most hinge. In my view the top and bottom most hinges are under the most stress and when the bumper is used its putting even more stress on the hinge and screws. I prefer to put the bumper on the middle hinge as feel that it is in the best position to deal with the additional stresses.
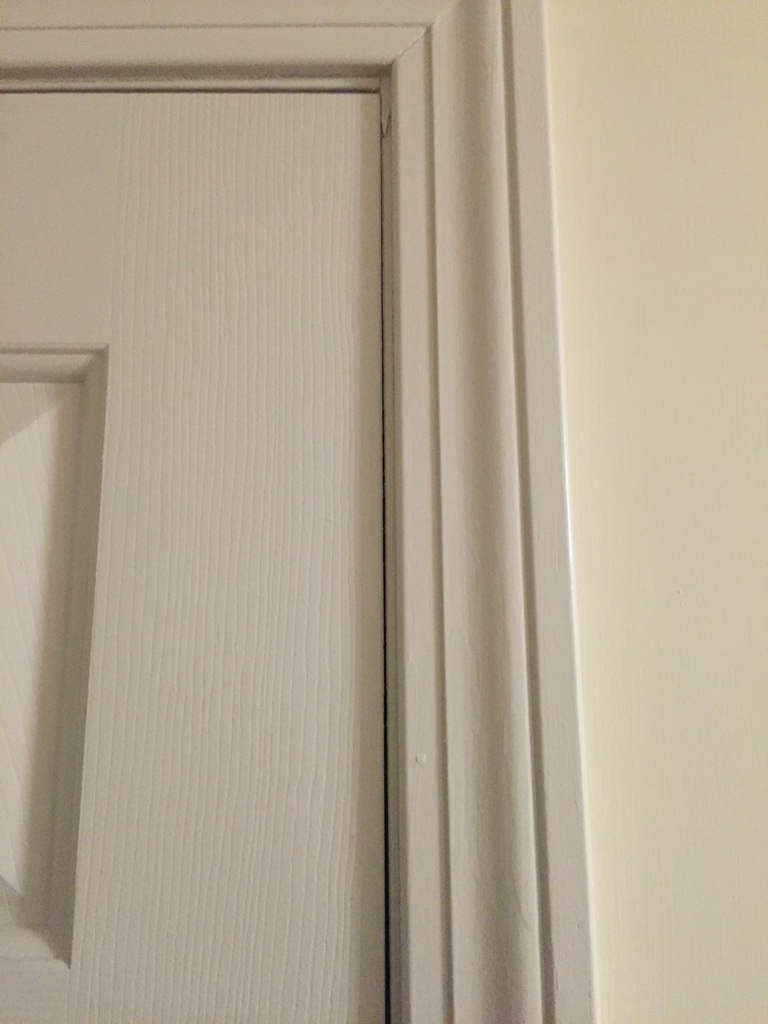
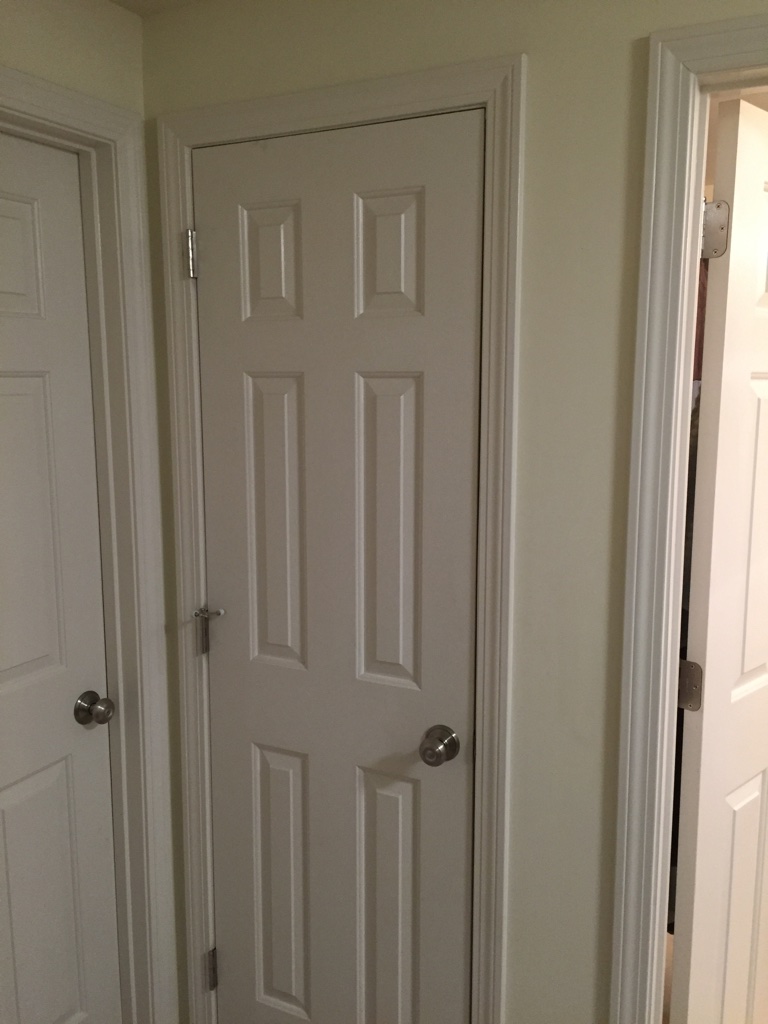
Mind the Gap
As you are making these adjustments to the door you’ll want to watch the gap between the door and the jamb. Ideally you want this to be even all around — see photo above.
What to do if the gaps aren’t perfect?
Your house may have settled a bit causing the jamb to go out of square or it may never have been installed perfectly in the first place. If that is the case, use your judgement to do the best that you can. Ideally you want at least some space around the door on all sides so that it can swing freely, but you don’t need to obsess over it as houses will often continue to settle over time and functionality should be your top objective.
What if all the gaps look good, but now the door knob won’t catch on the strike plate?
If the strike plate is now way off, say 1/4″ or more– double check to make sure you haven’t misaligned anything. If you are confident in your work and happy with your gaps you could remove the strike plate, use the doweling repair method above, cut a new mortise and re-install the strike plate. This can take a lot of time and work and gets ugly as you don’t want to chew up a lot of the wood in the door jamb, graft on wood dutchmen or shims to fill gaps left by the old mortise nor do you want a lot of putty to fill the gap left by the old location. If the strike plate is only off by say 1/8″ or so you may want to consider filing the strike plate. You can take the strike plate off, put it in a vise and file the opening a bit so that the latch now properly catches in the strike plate. Just be careful not to remove so much metal that you weaken the mounting screws’ ability to securely hold the strike plate in place.
Pro-Tip: Files only cut on the push stroke. After each push you should lift the file slightly and then pull back so that you don’t prematurely dull your file(s). Also be mindful that you don’t leave any burs and make sure you are cutting straight up and down in line with the existing opening in the strike plate.
By working through the above steps you should be able to fix most of the common problems you’ll encounter with interior doors. I know I am a lot happier to have all my doors properly closing and staying closed now. And the new hardware color also makes my OCD happy as the older brass hardware always bothered me as I have been slowly replacing/upgrading other hardware around the house to match that more modern design aesthetic and get rid of any remaining brass.
Take care,
-Bill
P.S. This post will be the first in an occasional series of Handyman 101 and/or Woodworking 101 posts to help folks new to this sort of work get acclimated to doing common projects.
If you have specific requests for topics you want to see covered, please let me know in the comments or via the form on the contact page.
