Category Archives: Masonry Techniques

Posts related to Masonry Techniques

Bricks, Diamonds and False Starts

Working on historic homes and buildings often requires the application of techniques employed by several trades. In recent years I’ve been learning more about preservation masonry. For an upcoming project wherein I’ll have to precisely cut a lot of bricks out in the field I decided to invest in a 7″ angle grinder and a diamond masonry blade.

I’ve been a fan of Makita tools as I use many of them in my work. (From large portable power jointers, angle grinders, chop saws, circular saws etc. and they have all served me well).  The 4″ angle grinder I had would not have the depth of cut I wanted to make fast work of brick and block cutting. I bought the Makita GA7021 15amp, 7″ angle grinder at my local Home Depot as it was the largest grinder they stocked, had the specs I was looking for and the Makita website showed this model using a diamond blade on masonry.

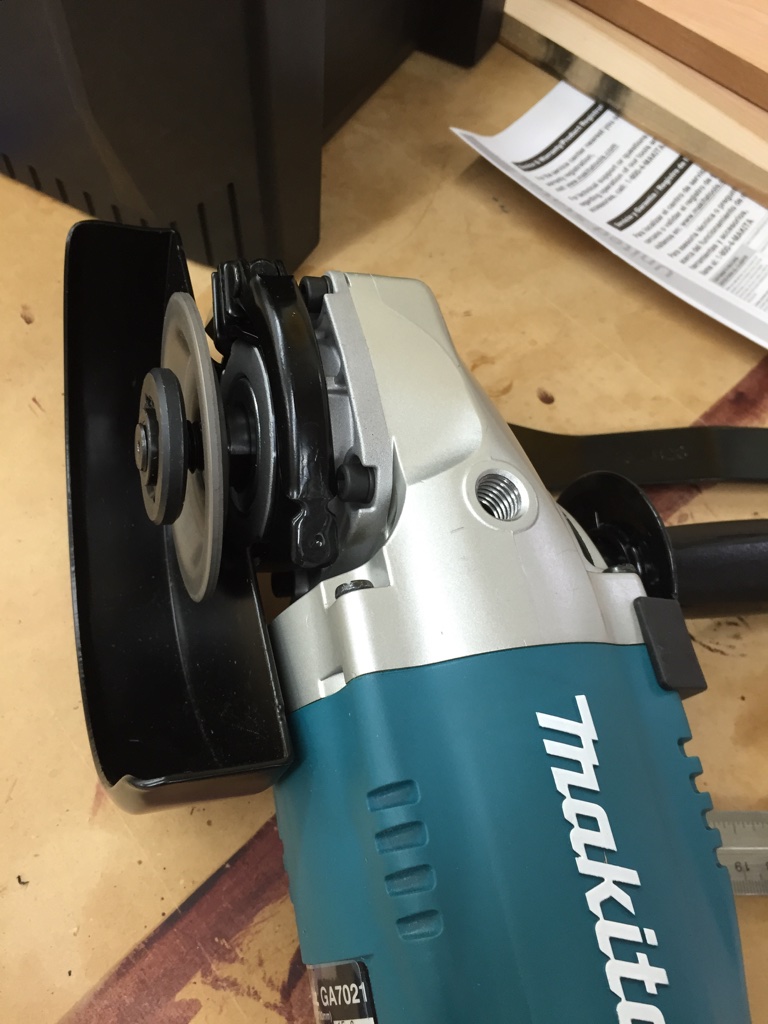
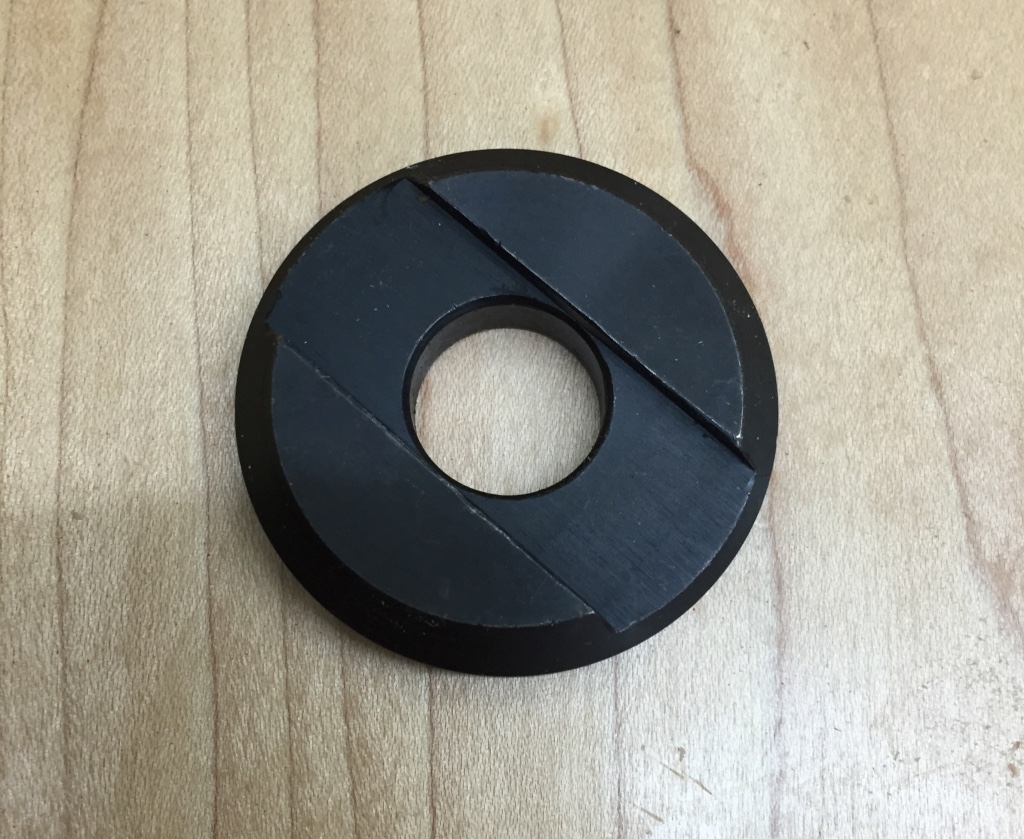
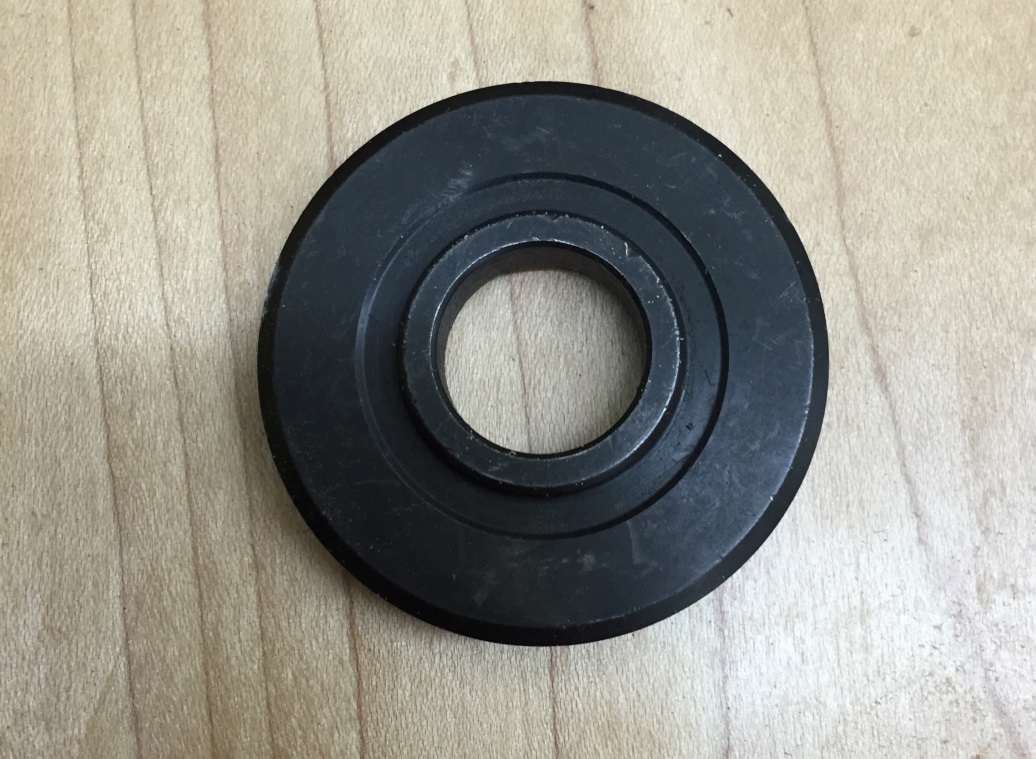
When I got it home, opened the box and read the manual I saw that it only included the domed inner flange and lock nut shown below. The instructions made no mention of using flat blades in the tool.  I had concerns about support of the blade given my smaller grinders had a separate flat inner flange for use with flat cut off wheels.

Inner flange and outer nut that come with the grinder.

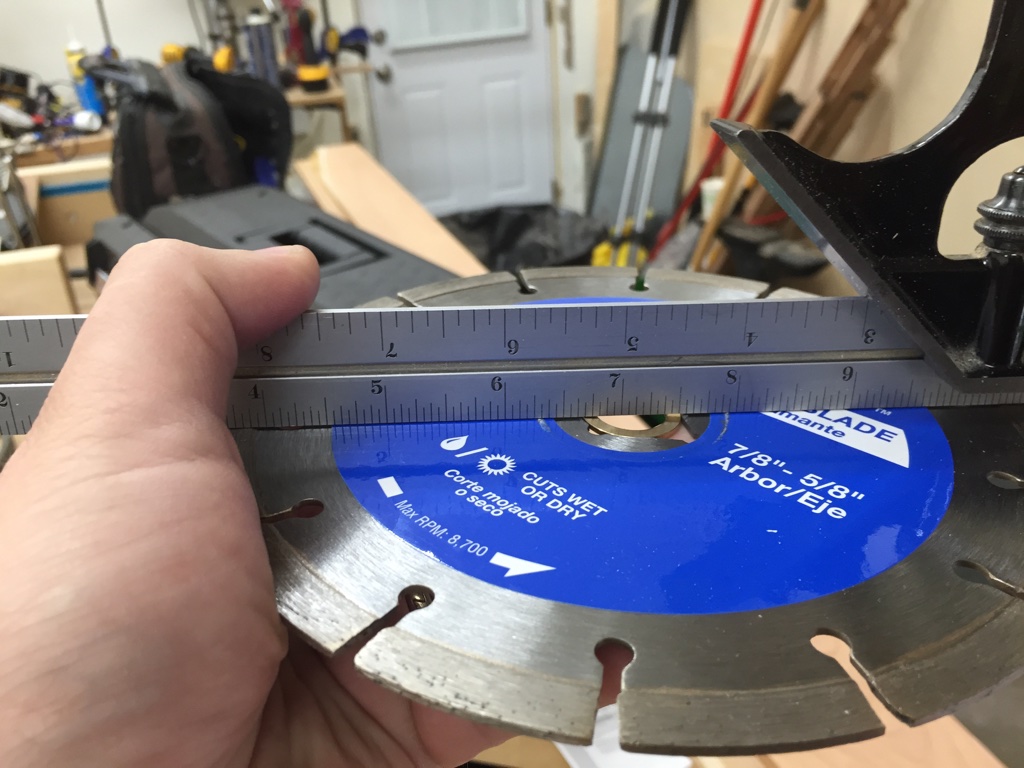
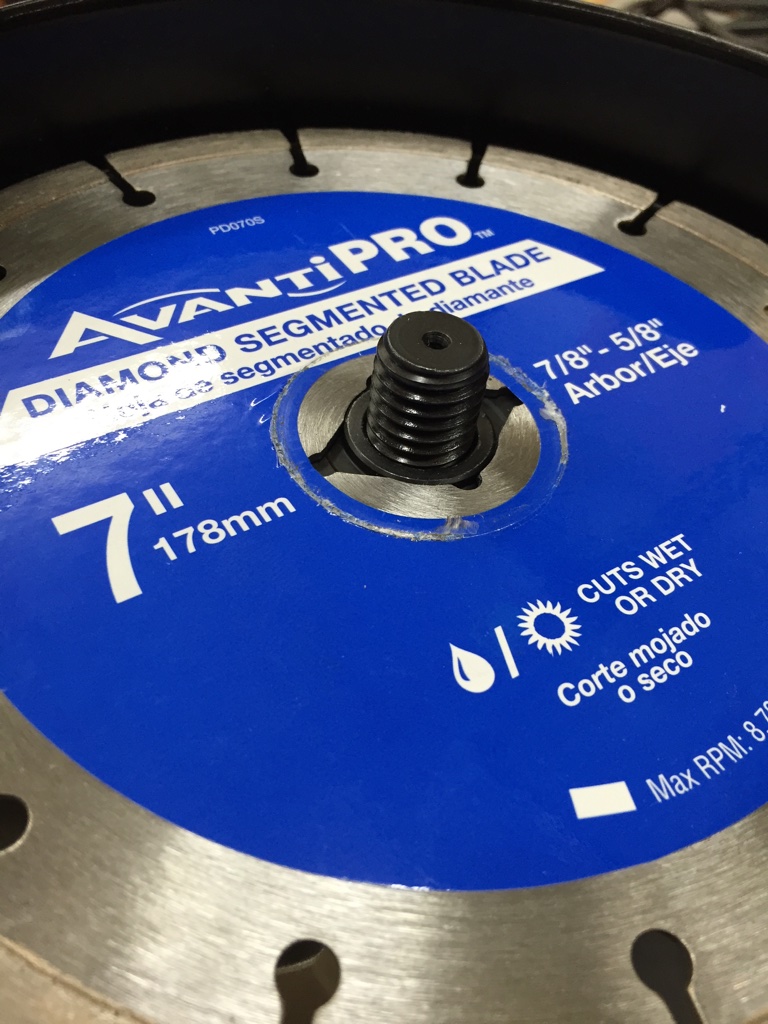
I opened up the Avanti Pro segmented diamond blade and wanted to make sure the blade was dead flat, which it was.

Diamond blade is flat.

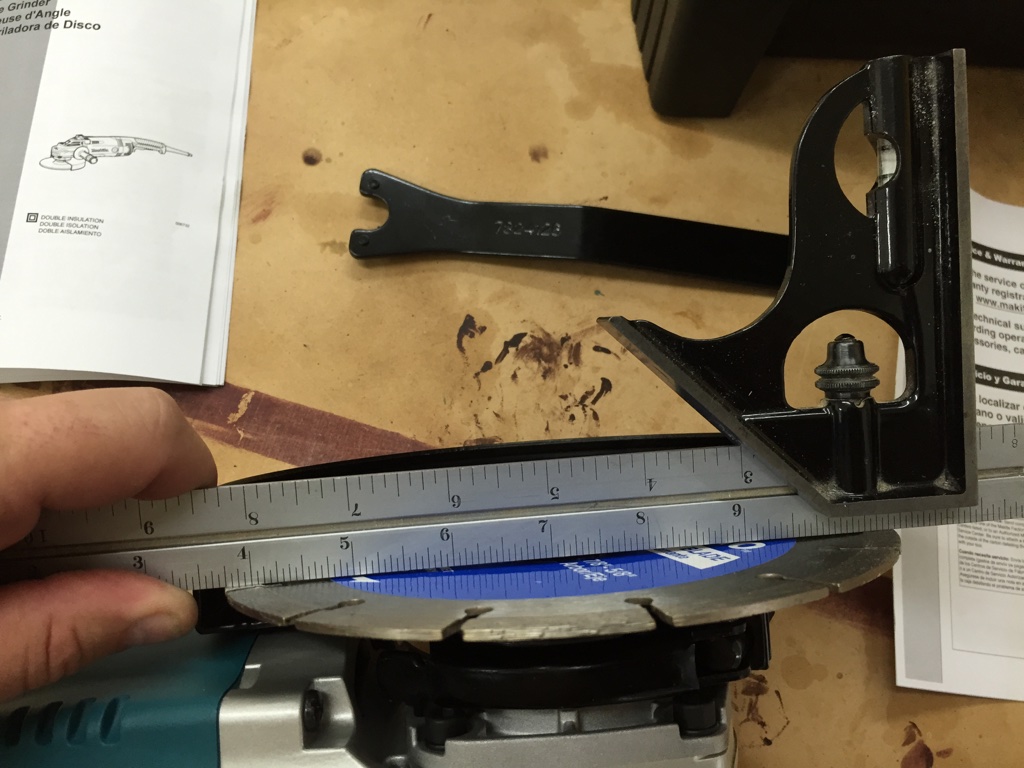
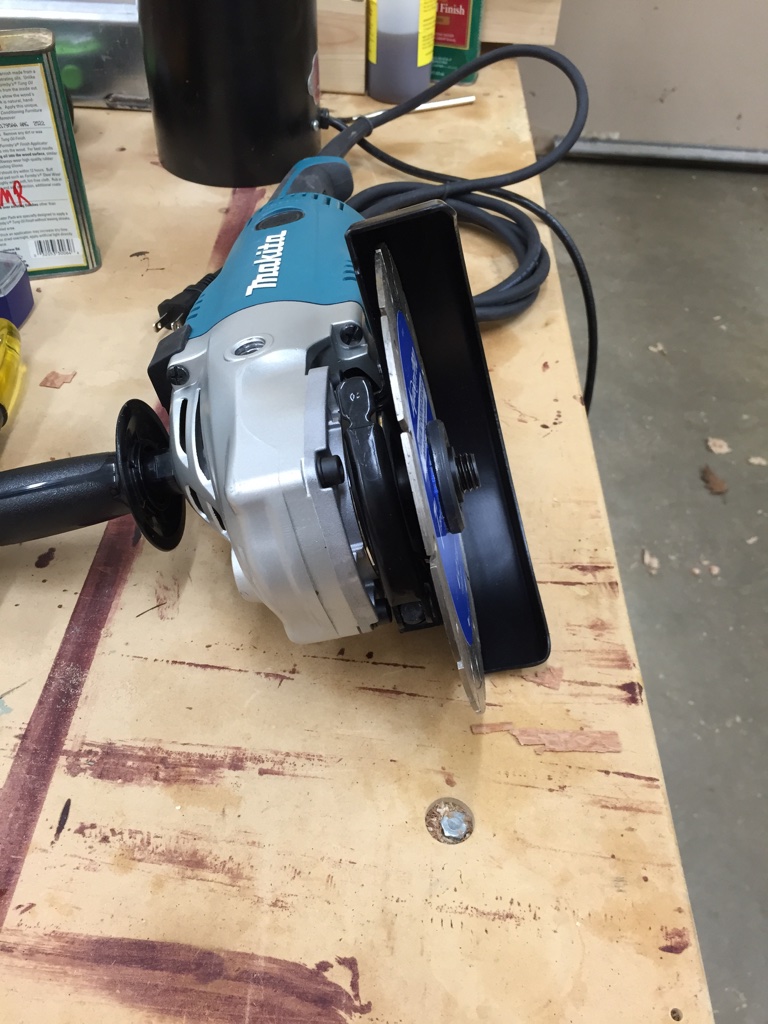
When installing the blade given the included domed inner flange the pressure the lock nut applied was sufficient to deform the blade. I did not feel this was safe and would not use it in such a configuration.

Diamond blade deformed by nut and lack of support from inner flange.

I called Makita’s tech support and the gentleman I spoke with said the above configuration would be the approved way to use a 7″diamond blade with this grinder. I argued that this was unsafe and a deformed blade would likely bind in the kerf and asked repeatedly if there was a flat inner flange available for this unit. As far as he could tell, he said no, but as a follow up I offered to send photos so he could escalate as I could not believe that answer given all the smaller Makita grinders came with both types of flange and Makita itself sells 7″ diamond masonry blades which they show being used in this grinder. I sent the above three photos and a detailed description and never heard anything more back from them. I was ready to return the unit and get a Rigid or DeWalt but they all seem to come with the same default flange setup out of the box. For DeWalt the unit cost more and had a lower amperage motor but could special order a set of flat flanges for an additional fee.

In pricing out alternative units I stumbled across this link on Home Depot’s website which included a hard to find Q&A section wherein someone else asked the same question about an inner flange for flat blades and someone at Makita responded to his question with the following reply: “Yes, the correct flange you would want to use to install specialty blades on the Makita 15-Amp 7 in. Angle Grinder (GA7021) is the Makita Inner Flange (224378-9). To purchase this flange, please contact our Customer Service line at 1-800-4Makita (1-800-462-5482).” I looked up the part in more detail and it looks like the flat inner flange was made for other Makita units with the same size spindle and in all their official documents don’t show it being listed as a part for nor compatible with the GA7021 but looked like it would do the job and I figured it would be worth a try. It was annoying that the Makita Tech Support person I spoke to did not have access to the above information.

Inner flange side that engages with the spindle

The fact that a part exists was good news and I tried calling Makita to order it, but it was 6pm and the person who answered said they could not take orders at that time. My frustration level was definitely high at this point so I ordered the flat inner flange from a 3rd party tool part vendor via Amazon.com and it arrived in a few days.

Inner flange side that engages with the blade

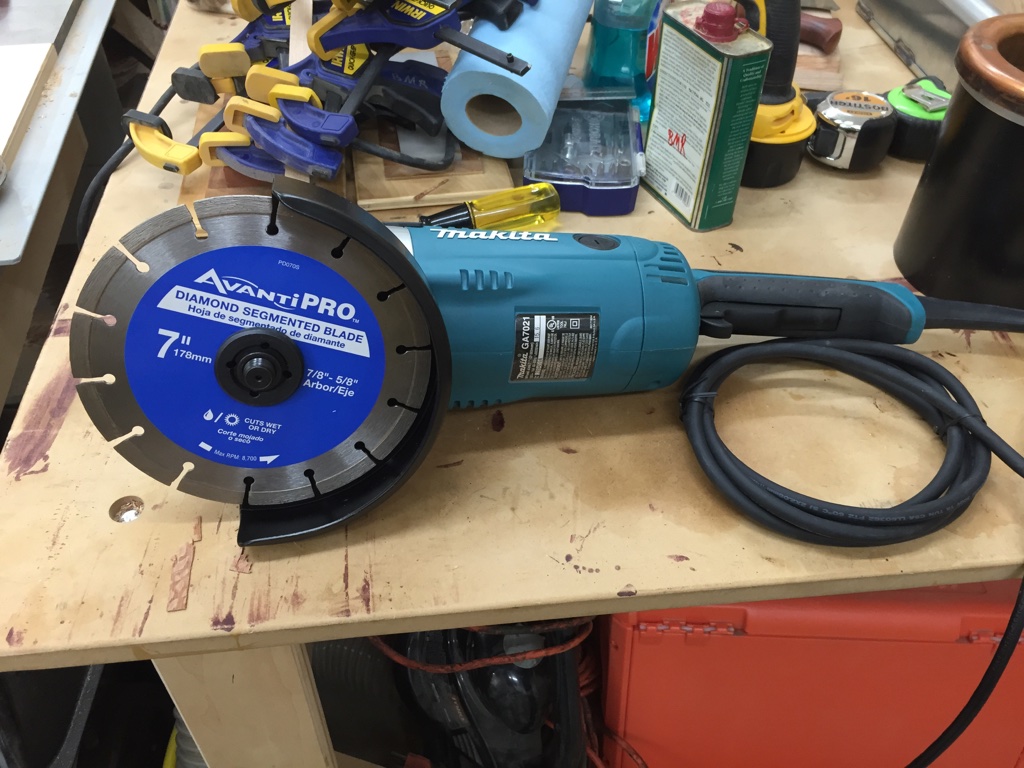
I installed the flat inner flange and the blade fit perfectly.

Blade mounted on arbor, making use of new inner flange

No deformation of the blade.

Blade held tightly between two proper flanges. (No deformation)

Great, now time to go use this new tool…

Diamond blade properly mounted in the grinder

Unfortunately the heavy housing/guard and mechanism reduce this 7″ blade to a 1-3/4″ cutting depth, but I need 2-1/4″+ to clear cut a brick, so after all of this the grinder and blades will be going back to the store and I’ll have to special order a 9″ grinder and diamond blade online. The good news is the 9″ model is virtually the same machine, just with a bigger safety housing that can accommodate the 9″ blade so the flat inner flange should work with that unit as well.  The Makita 9″ model grinder only seems to cost about $10 more, though the diamond blades are more expensive in the 9″ size.  I’ll  be sure to post about the actual cutting when I have the new machine in hand.  🙂

I hope that this post saves someone else from the headaches I had. If so, please let me know in the comments below.

Take care,
-Bill


Making Brickbats and Fireplaces

Have you ever wanted to build your own fireplace and beehive oven? It’s not for everyone, but it is something I’ve wanted to tackle for a long time. I’ve talked to a few masons, read all the new and old masonry books I could find, but still didn’t feel comfortable building my own.  I could not find a good source that showed the end to end process. I also don’t want to end up burning my house down.

Completed Fireplace and Oven

To rectify this situation I figured I’d take a trip back in time. I just got back from spending a week at Historic Eastfield Village in Nassau NY (not far from Albany). If you’ve never been to Eastfield Village it’s a restored colonial village full of buildings and artifacts from the 18th and 19th century. What’s great about the village is that it is a hands on preservation laboratory where  you can stay for free in the tavern and live with all the antiques and artifacts that are normally behind glass in a museum setting. What’s the catch? Well you are living as they did in earlier times. There is no electricity or bathroom. You live by candlelight — make sure to bring white taper candles — and you can cook your meals in one of the many fireplaces and ovens. After a long day of working out in the village it was a lot of fun to have a meal in the tavern, have a drink and play some tavern games by candlelight. Some folks were carving wood, some we playing dominoes with Billy’s ‘Eastfield Rules’ and others were enjoying a good conversation with folks from another part of the country. Staying at Eastfield is always a memorable experience.

Tools Of The Masonry Trade

This 5 day class on building a traditional brick masonry fireplace and beehive oven was a special request from me and was filled with students and alumni from the North Bennet Street School’s Carpentry and Preservation Carpentry programs. We used all hand tools much as our forefathers would have used. Mortar mixed by hand with a hoe, bricks cut by hand with brick hammers — making some brickbats as we went, rubbing the face of a cut brick on a stone, setting and pointing with trowels and testing your work with levels. As I am predominantly a woodworker it was interesting to learn the skills required to tackle this project and as the week went on you could see the class pick up speed and some finesse. And I’m sure the next project we work on will be even better.

Group Shot of the Class

The class was taught by my friends Bill McMillen, his son John McMillen and Don Carpentier who is the founder of Eastfield Village — the village is set on his father’s ‘East Field’ and is Don’s long time home. Billy is also a master Tinsmith and preservationist having worked/taught/lead the preservation efforts at Old Richmond Town on Staten Island NY, taught at the Tinsmith Shop at Colonial Williamsburg and countless other venues. Don Carpentier moved and restored all the buildings in the village — an incredible undertaking and is also a well known historian and craftsmen having worked in wood, tinsmithing, blacksmithing and pottery. Don is also well known for his incredible Mochaware. John grew up around all this and is a skilled craftsman working in the NYC area.

If you’d like to see how we spent the week building these fireplaces, please check out the video below which walks you through the week at a high level (If you are reading my blog via email or some mobile phones you may have to click over to the actual post to watch the video):

You can also learn more about Eastfield Village’s current class schedule via their website here and the village in general via this nice video from Martha Stewart that you can watch here. If you can make the trip out to Eastfield Village for a class I highly encourage you to do so — it’s an experience you will never forget.

Take care,
-Bill

2013 BAC Traditional Building Intensive

Most people relax on their summer vacation. After a day on a beach I get antsy and need to keep moving, exploring and building. For the second year in a row I spent my vacation last week sharing my passion for the craft by teaching the 8 day intensive that is part of the semester long ‘Traditional Building’ class I teach at the Boston Architectural College (BAC) in association with the North Bennett Street School.

The Paul Revere House, Boston, MA

The class is part of the low residency Master’s Degree in Historic Preservation at the BAC. In this 8 week long class, 7 weeks are online with a series of interactive lectures/discussions and traditional coursework and one 8 day week is spent with the entire class in Boston participating in a hands on format. This works great for students who need to juggle work, family and other obligations while also seeking a quality degree on the way to a new or expanded career path.

Touring historic homes and buildings with Steve O'Shaughnessy
Touring historic homes and buildings with Steve O’Shaughnessy

On the first full day of class we took a walking tour of the city with Steve O’Shaughnessy (NBSS Preservation Carpentry Instructor) visiting several historic house museums and notable structures in Boston. Having worked for Historic New England, Steve is an excellent tour guide with a lot of great information to share.

Traditional Woodworking with Bill Rainford

The second day I spent the morning teaching the basics of traditional woodworking — using a smoothing plane, molding planes, drilling, chiseling and other basic bench work.

Field Work at Fenway Studios

In the afternoon I taught the class about window restoration, window reproduction and condition assessment reports. We then went out to do some field work at the historic Fenway Studios.

The Saugus Ironworks

Next up we visited the Saugus Ironworks which is a National Historic Park. Senior Park Ranger Curtis White was on hand to guide us through this landmark site and enthusiastically share with us his latest research about historic ironwork. (He’s a great resource and if you ever visit the park and run into him, tell him I sent you. )

Ranger Curtis White explaining how the ironworks produced iron

Robert Adam (Who started the Preservation Carpentry program at NBSS and is a noted preservation consultant) lectured about historic hardware and fasteners.

Robert Adam talking about historic hardware and fasteners

Robert’s brings a portion of his comprehensive collection of historic hardware and fasteners allowing students to closely examine these items up close and differentiate fine details.

Historic Hardware by Edward Guy

Sara Chase, a nationally known paint analysis expert and preservation consultant (+ advisor to the NBSS Preservation Carpentry Program) taught a session on traditional paints and their manufacture.

Making paint with Sara Chase

During this hands on session students not only learned how to identify various kinds of historic paints they also had the chance to mix their own paints in a traditional way and try their hand at applying them.

Mulling historic paint with Sara Chase

After a visit to the MFA in Boston, next up was NBSS Preservation Carpentry Instructor Rich Friberg to teach the basics of Timber Framing.

Rich Friberg Timber Framing Lesson

Rich brings with him a deep well of knowledge and a passion for teaching this craft.

Jennifer wielding the 'Beetle' mallet
Jennifer wielding the ‘Beetle’ mallet

Students had a chance to layout and cut mortise and tenon joints….

Joey with the 'Commander' mallet
Joey with the ‘Commander’ mallet

try out some joinery on the large scale with traditional timber framing tools…

Lisa mortising
Lisa mortising

and fit the joints they made.

Completed Timber Frame Sill

The completed 8′ x 10′ sill shown above would be the first major element of a modest sized barn or outbuilding.

Matt Gillard teaching some basics of Masonry

Preservation Mason Matt Gillard (owner of Colonial Brick Works) and Matt Blanchette gave a great lecture on traditional masonry tools, techniques and evolution.

Rachel cleaning off some recovered bricks

This hands on session allowed students to mix traditional mortar, clean bricks, re-point, repair, lay brick and joint mortar.

Masonry group shot
Masonry group shot

At the end of the week the students also shared their presentations and research proposals. To celebrate the end of this very intensive week the Director of the Historic Preservation (HP) program Robert Ogle presented each student with an ‘I survived the HP intensive week 2013 @ the BAC’ Tee Shirt to commemorate the occasion. This well earned reward is one of three major intensives they will need to survive in order to complete the program.

'I survived the BAC Historic Preservation Intensive 2013' Tee Shirts
‘I survived the BAC Historic Preservation Intensive 2013’ Tee Shirts

Given that we all survived this very intensive week and you survived reading this marathon blog post, I think it’s time for all of us to rest up and prep for next year. 🙂

You can learn more about this class and the program here or go direct to the video here.

-Bill

Turning Wood Into Stone — Rustication at Mount Vernon

Why would someone want to turn wood into stone?

A stone building or home often conveyed a sense of lasting presence, wealth, and a connection to the many famous stone structures of antiquity that we so often try to emulate and incorporate into our architectural designs. So why not just build with stone in the first place?

The answer is usually economics — wood is a lot cheaper, easier to move and shape compared to stone — so if you could make your wooden home look like stone you’ll be keeping up with the Jones’ and not break the bank.

I just returned from a  trip down to Washington D.C. where we also visited  Mount Vernon — the home of George and Martha Washington with amazing views of the Potomac — and the most famous example of Feigned Rustication I am aware of.

George and Martha Washington's Home -- Mount Vernon
George and Martha Washington’s Home — Mount Vernon

What is Rustication?

Rustication is a term from the world of Masonry wherein the individual stones are squared off or beveled so as to accentuate the textured edges of each block.  You can learn more about it on Wikipedia here. You can often see this feature on the lower and/or first levels of large masonry structures like banks and older stone office buildings. It provided a sense of grounding and provided a stark contrast to the smoother ashlar work on upper stories.

Close up of the Mansion

What is Feigned Rustication?

Feigned Rustication is the process of taking wood siding — carving/shaping it so that it looks like a series of rusticated stones, priming and painting it, and then when the paint is still wet covering it with fine sand so that the board takes on the color/shape/texture of stone.

Rustication Process
Rustication Process as shown in stages on a sign out on the grounds of Mount Vernon. (Click to enlarge)

Here is a close up view of this technique applied to the exterior siding and trim:

Close up detail of Rustication

While not alchemy, this technique got the job done and from a distance it’s hard to tell the building is not made from stone until you get up close — and even then you have to know what you are looking at.

The Rusitcation lets the home look like as if it is made of stone
The Rustication lets the home look like as if it is made of stone

So while George and Martha Washington were generally quite wealthy during their time, they did make decisions that weighed materials vs. appearance vs. cost much the same way we do in our own homes today and stretched the dollar as much as they could. As you can see in the picture below, for secondary buildings they only applied this technique to the fronts of the buildings — around the corner you can see the siding reverts back to a nice beaded clapboard detail. You can also see some other more common faux finishes like artificial grain applied to some doors in the home — to make them look like expensive mahogany.  This was a fairly common practice and not looked down upon the way some readers may be interpreting this.

Note the transition from Rustication back to beaded claps on the side of this secondary building

Now that you’ve seen how we can transform wood into stone — were you fooled by the illusion? Are you going to work some similar alchemy on your own home’s exterior?

I highly recommend visiting Mount Vernon if you are in the Northern VA/Washington D.C. Area. You can find out more about this historic home, museum and grounds here.

In your travels if you find some other examples of Feigned Rustication, let me know here on the blog.  (Another famous place with this treatment is Monticello also in Virgina)