I’m happy to report that the companion video series for my recent Fine Homebuilding article ‘Master Carpenter: Reproducing Traditional Moldings’ went online today.
Behind the scenes. (Photo courtesy of the Taunton Press)
I had a great time making the videos and I hope you will enjoy watching them. Several of them are free, though a few of them are reserved for FineHomebuilding.com (FHB) members only.
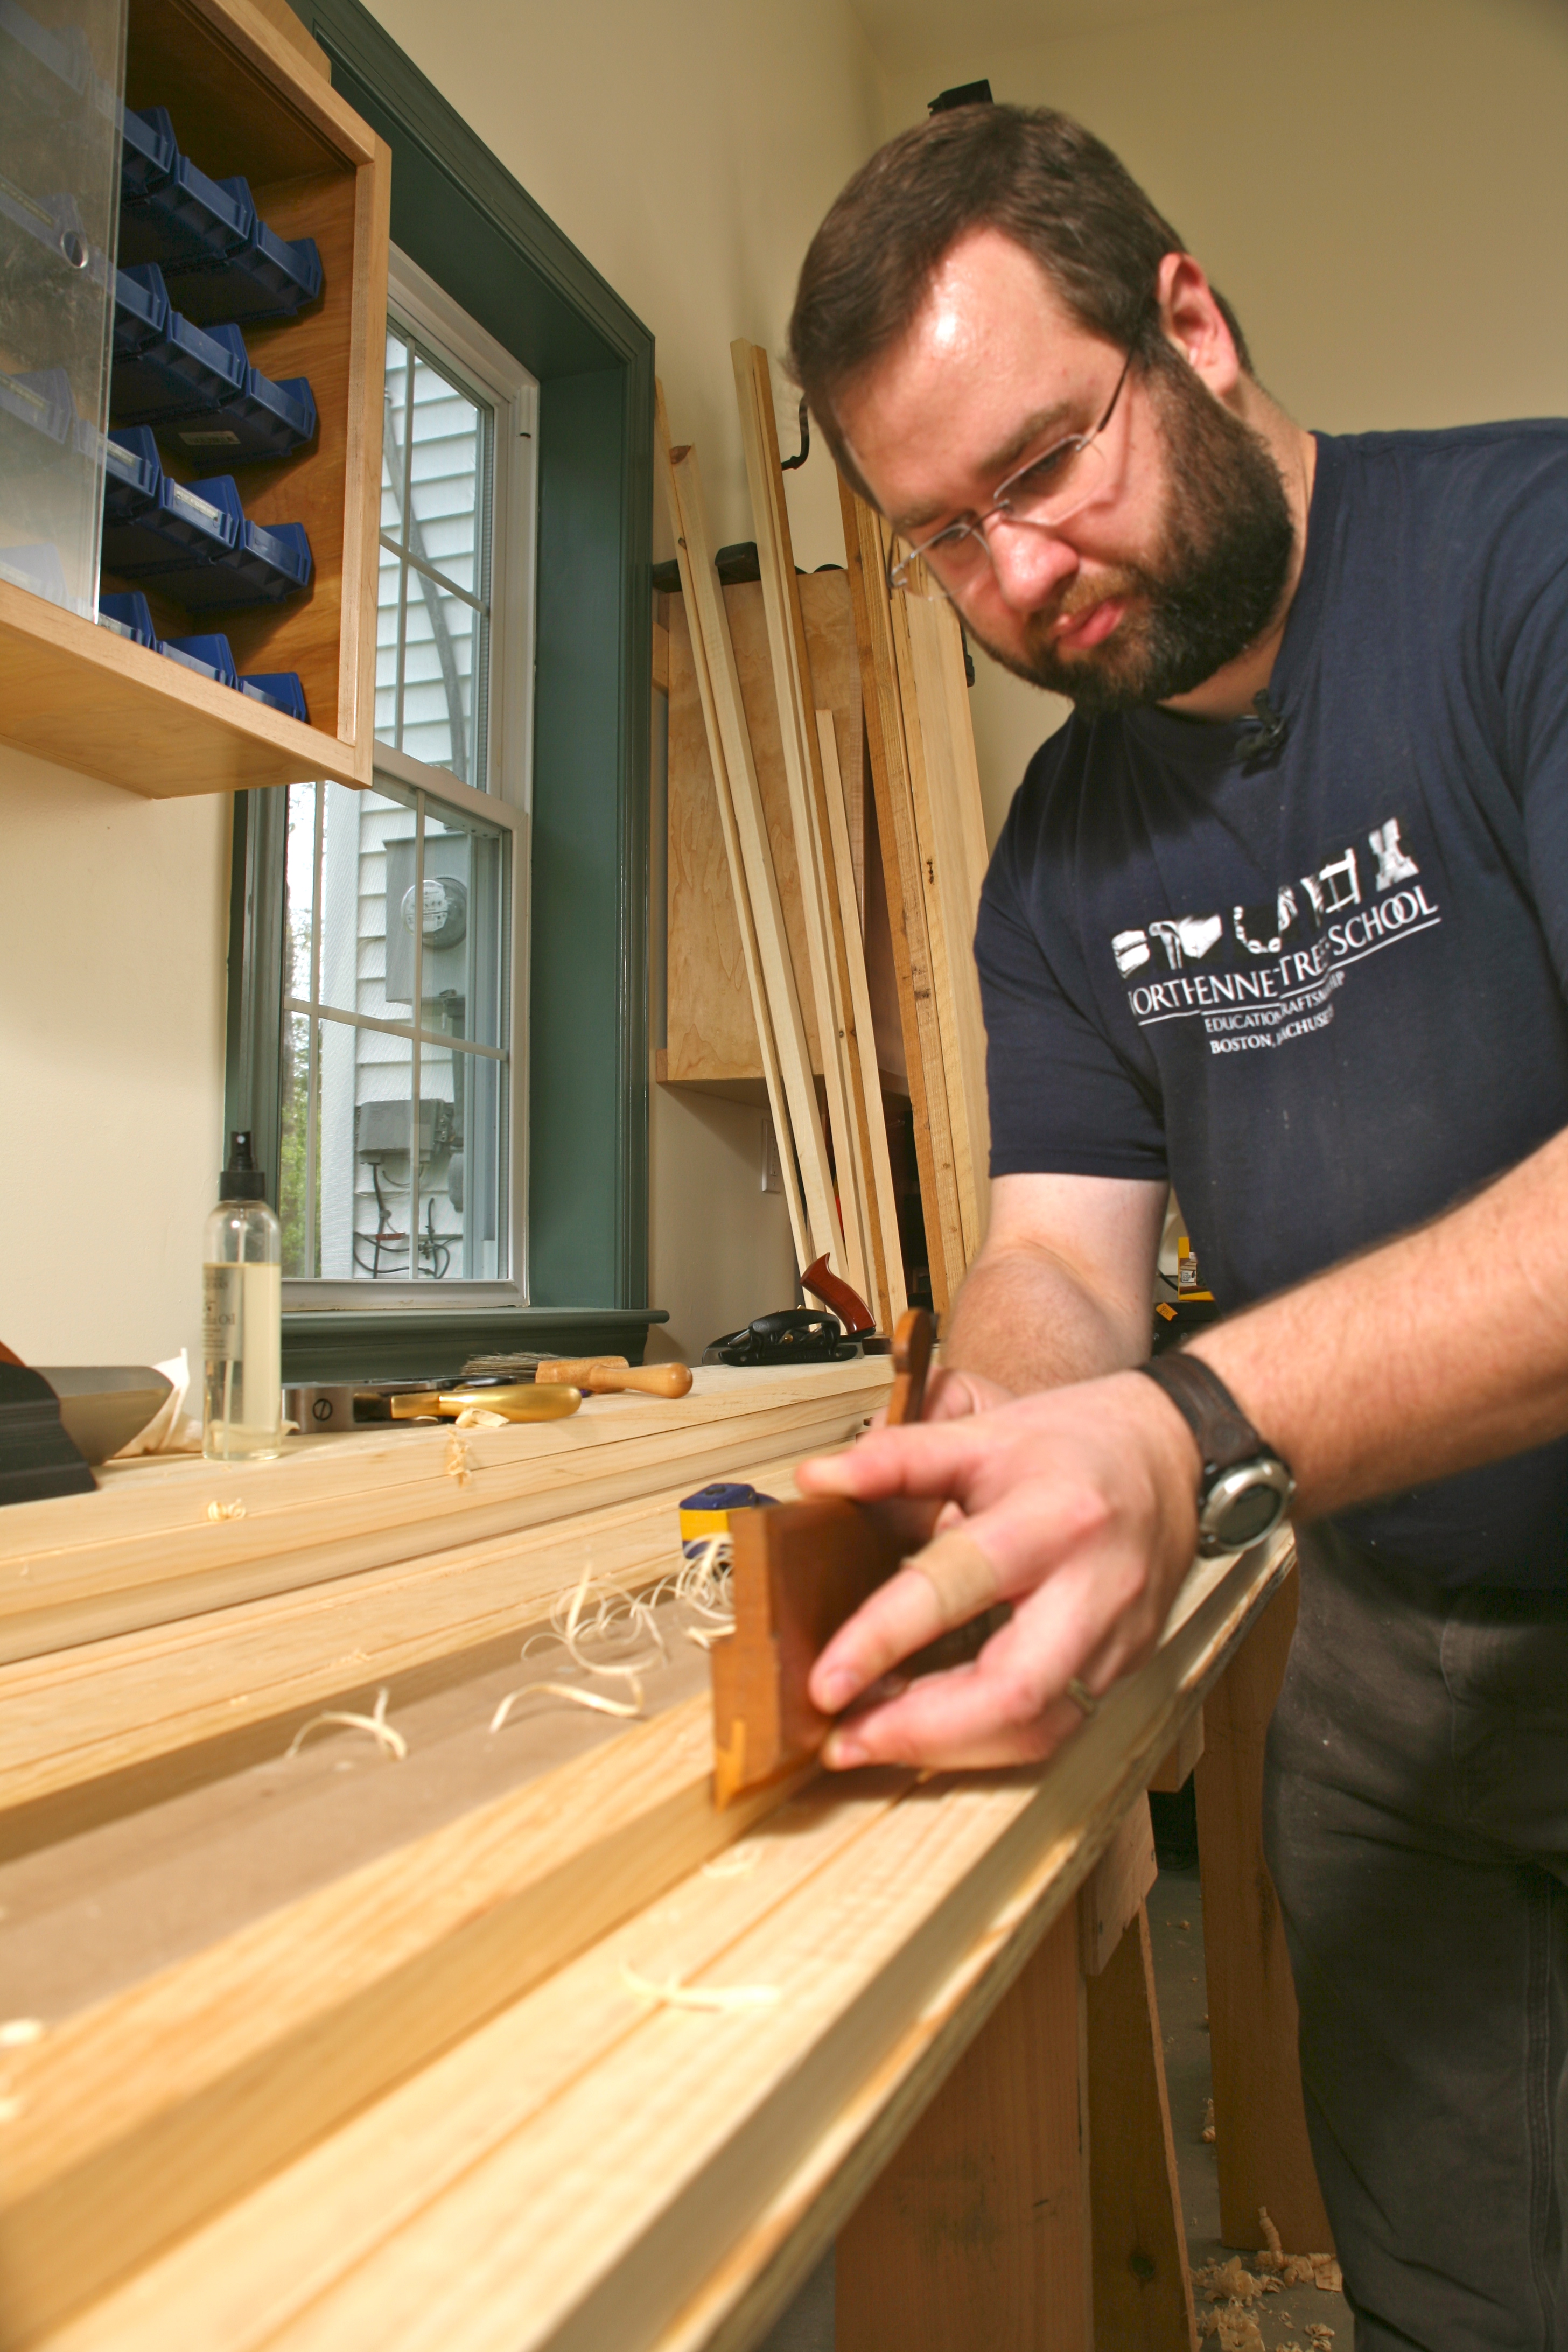
Bill Rainford using molding planes to reproduce traditional molding profiles. (Photo courtesy of the Taunton Press)
Details below as they were presented this morning in Fine Homebuilding’s e-newsletter and where to find the videos:
Plus watch more free episodes from this series:
• Interview with the craftsman
Bill chats about how traditional carpentry is better for his body and soul
• An inside look at old-fashioned home building
Bill and senior editor Chuck Bickford visit the Alvah Kittredge House and dig into its traditional construction details
The Alvah Kittredge House in Roxbury Massachusetts is a great example of high style Greek Revival architecture in Boston and a tangible link to the city and the nation’s early history.
Alvah Kittredge House in the 1880s (Photo Courtesy of Historic Boston Inc)
The Greek Revival Style was most popular in the United States during the second quarter of the 19th century. (Approximately 1820-1850) During this time period the population and economy was also growing by leaps and bounds. The United States was still a young nation and many folks wanted to show off their new found affluence. During this period of great optimism there was a strong belief in the American Democracy and many associated the ideals of the new nation with those of early Greek Democracy. Around this time, access to Greece and the designs of antiquity were also coming into the mainstream as influential citizens like Thomas Jefferson read books like ‘The Antiquities of Athens‘, Benjamin Latrobe and others built out Hellenistic monuments and public buildings in Washington D.C. and other large east coast cities, and builder’s guides like Asher Benjamin’s ‘The Practical House Carpenter’ proliferated the tool chests of local joiners and carpenters. Given this atmosphere many folks wanted to have their own building look like a Greek temple. For most of the ‘middling’ Americans, especially those in more rural and western locales the scale and details would be simplified down to keeping classical proportions and greatly simplifying details to meet their budgets — pilasters instead of columns, simplified moldings or even flat boards attempting to echo the pediment and other design elements of a Greek temple.
Looking up at the portico of the Alvah Kittredge House (Photo by Bill Rainford)
In places with money — like public buildings and mansions — the builders could afford to go big with design elements like a colonnaded portico and carved relief details in the pediment etc. The Alvah Kittredge house is a great example of a high style Greek revival home which reflected the wealth of its original owner, and of Boston and the US in general at that time. Not only is the house unusual given how the city has grown up around this once grand country estate, but the scale of the front facade needs to be seen in person to be properly appreciated. The two story portico with its double hung windows and high ceilings required wide and detailed moldings in order to be the appropriate scale for such a magnificent home.
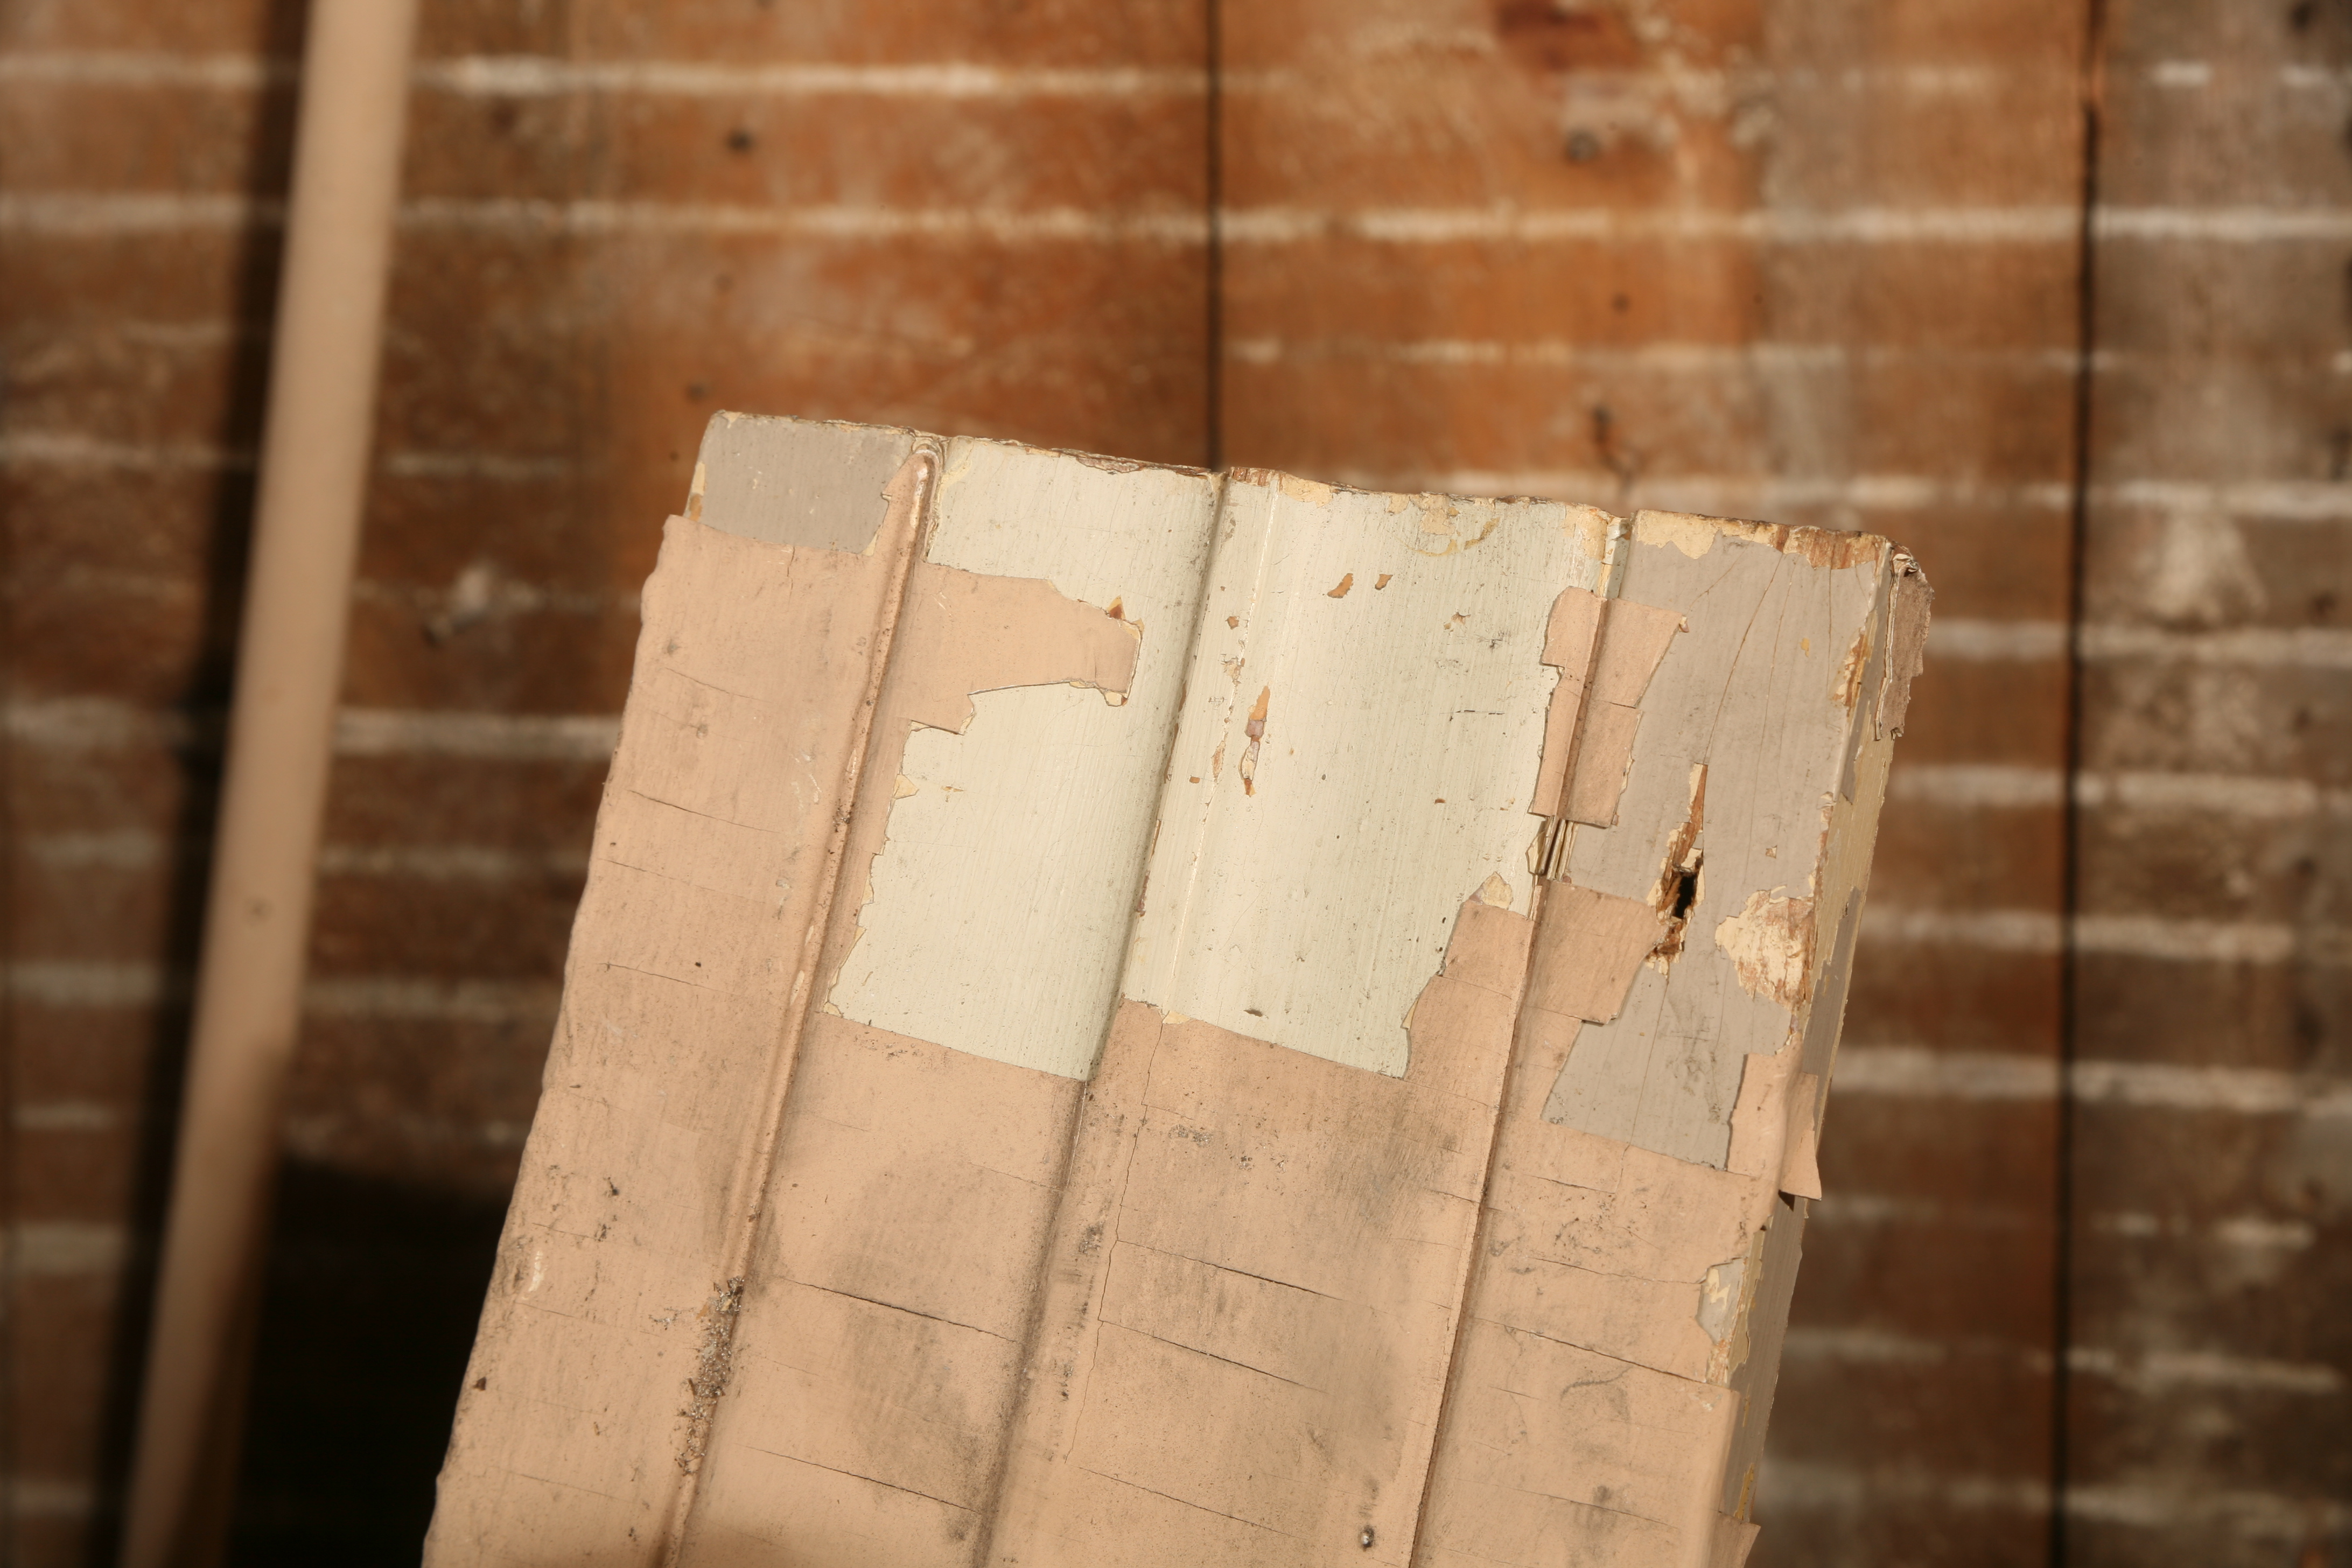
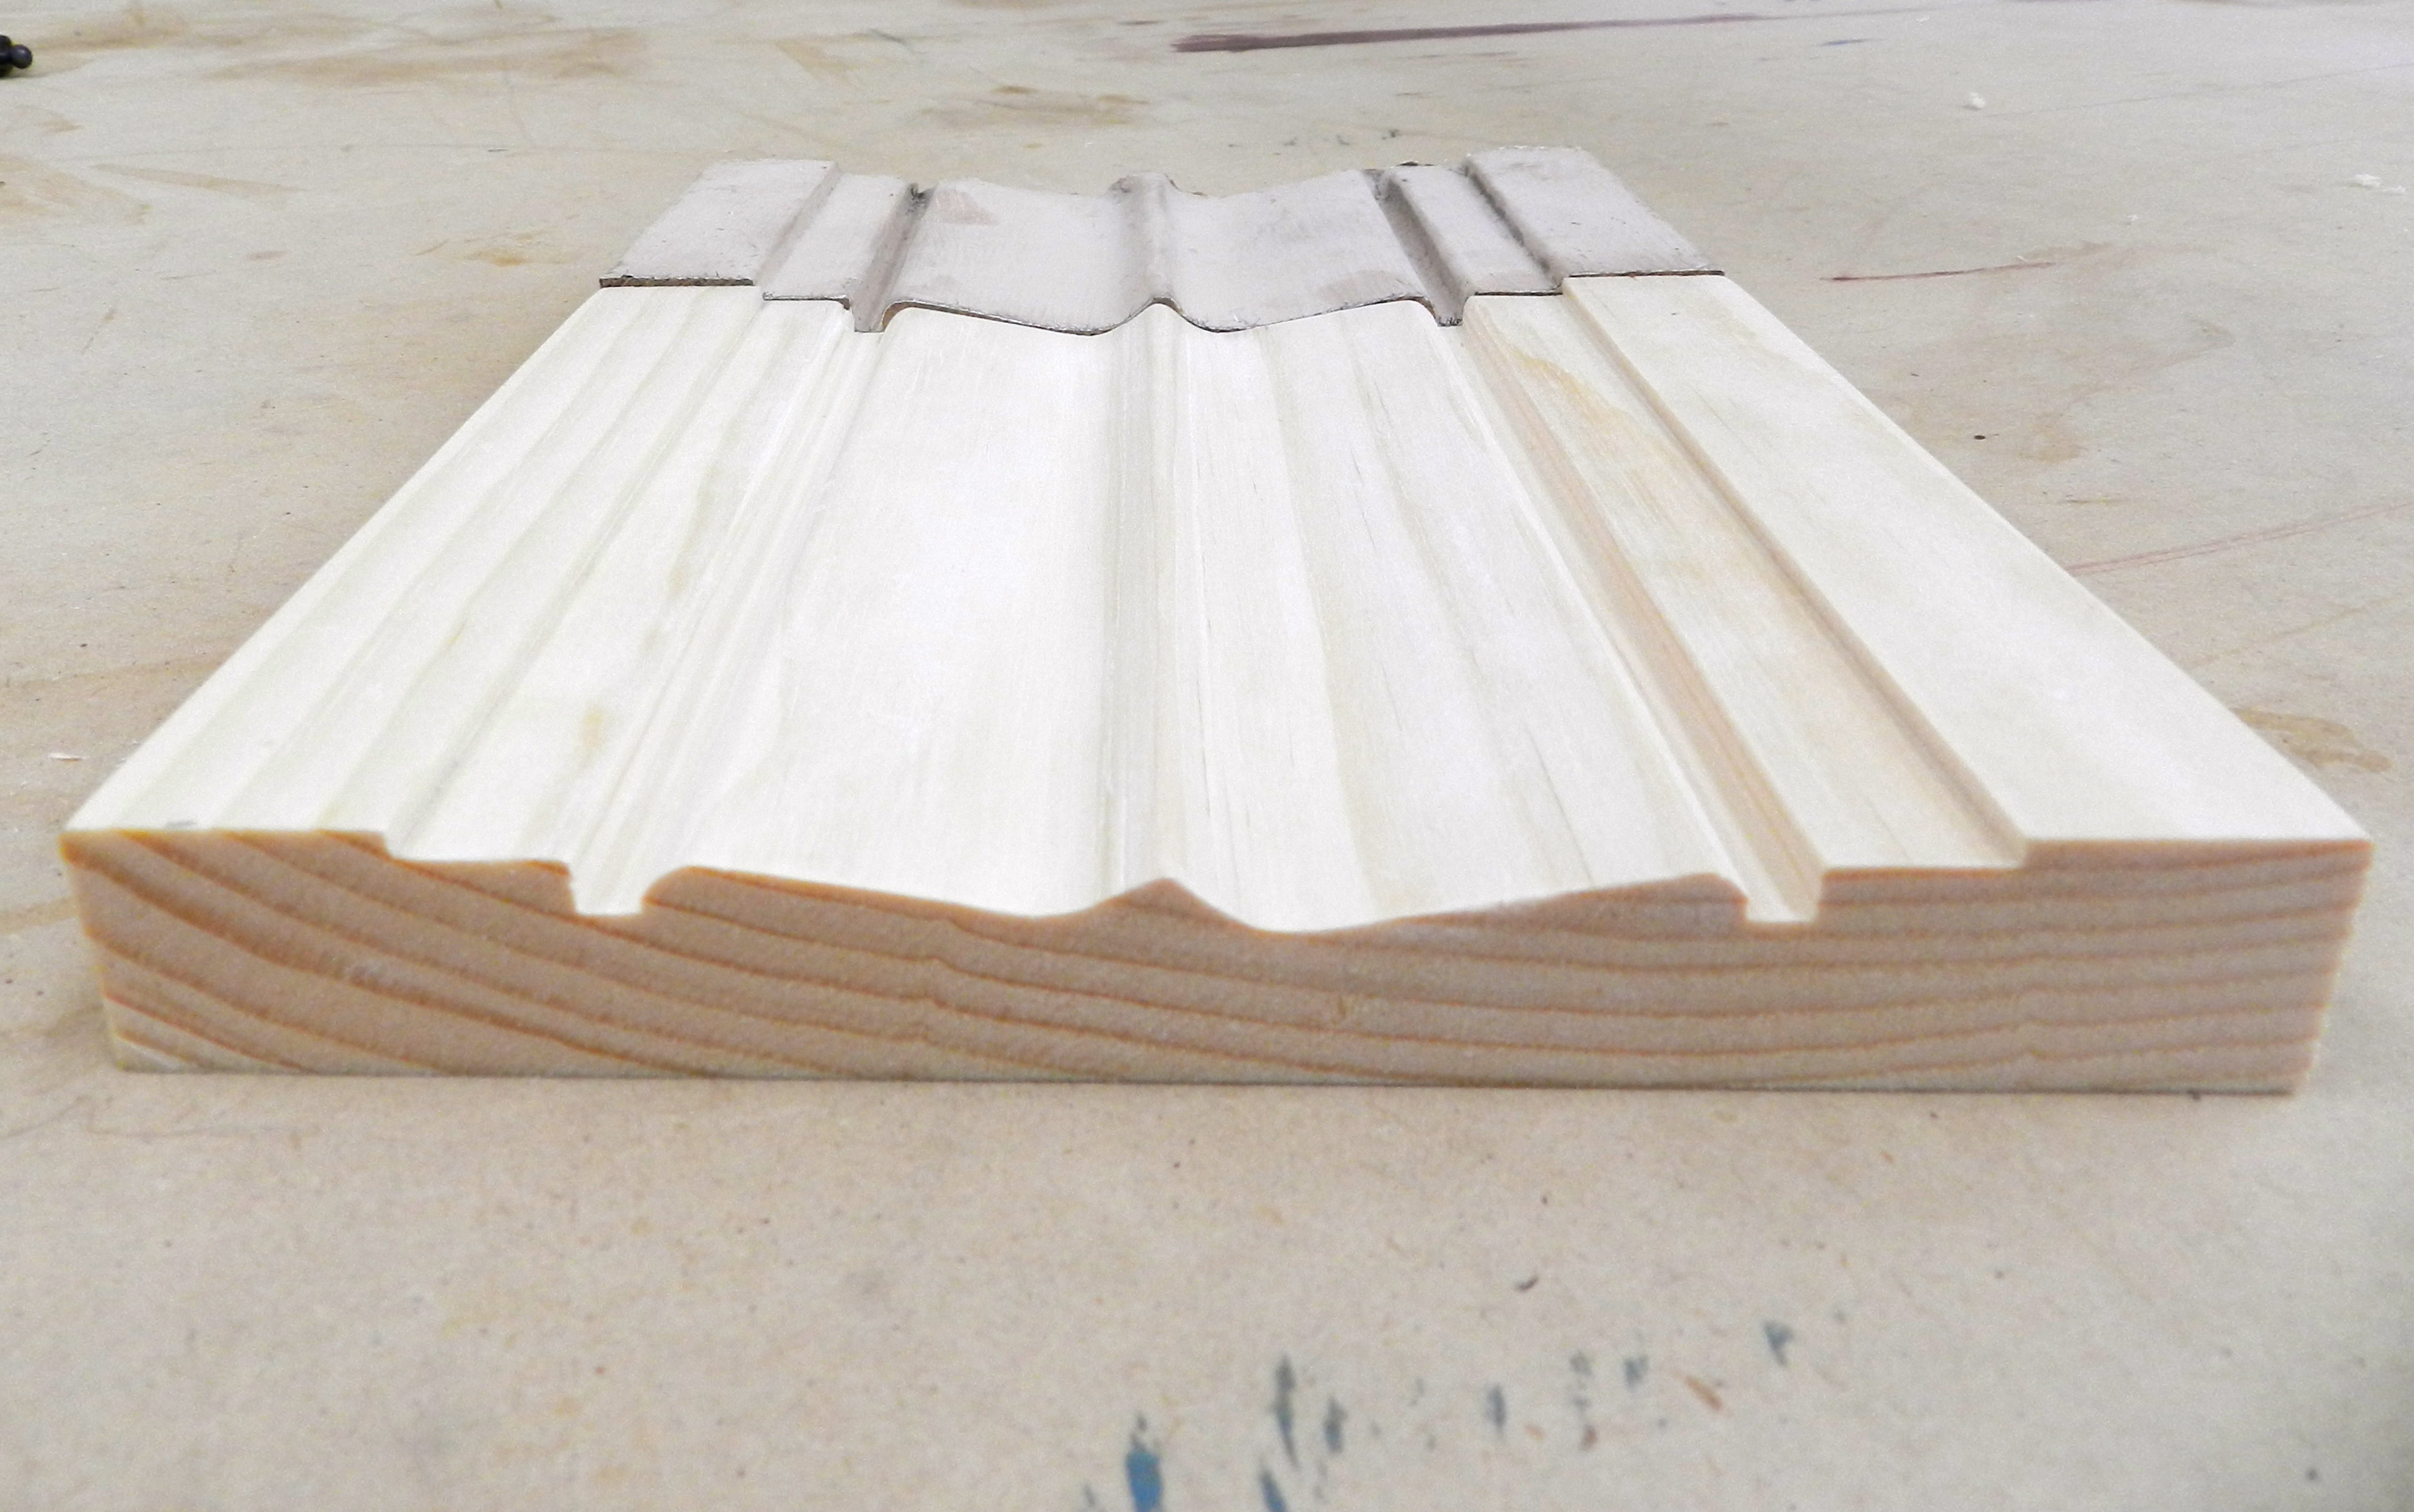
The original crisp detail of this hand run molding is obscured by the many layers of paint over the generations. (Photo courtesy of the Taunton Press)
This 8 inch wide molding was made by hand using traditional wooden molding planes likely on site and from eastern white pine. This is not the sort of thing you can buy at a local big box store, or millworks supply company. The best way to replicate this sort of casing is to make it from the same materials and in the same manner as the original joiner….
Using a molding comb to capture the profile. (Photo courtesy of the Taunton Press)
I started by capturing the molding profile via molding comb or profile gauge which aids in transferring the profile to the newly prepared stock.
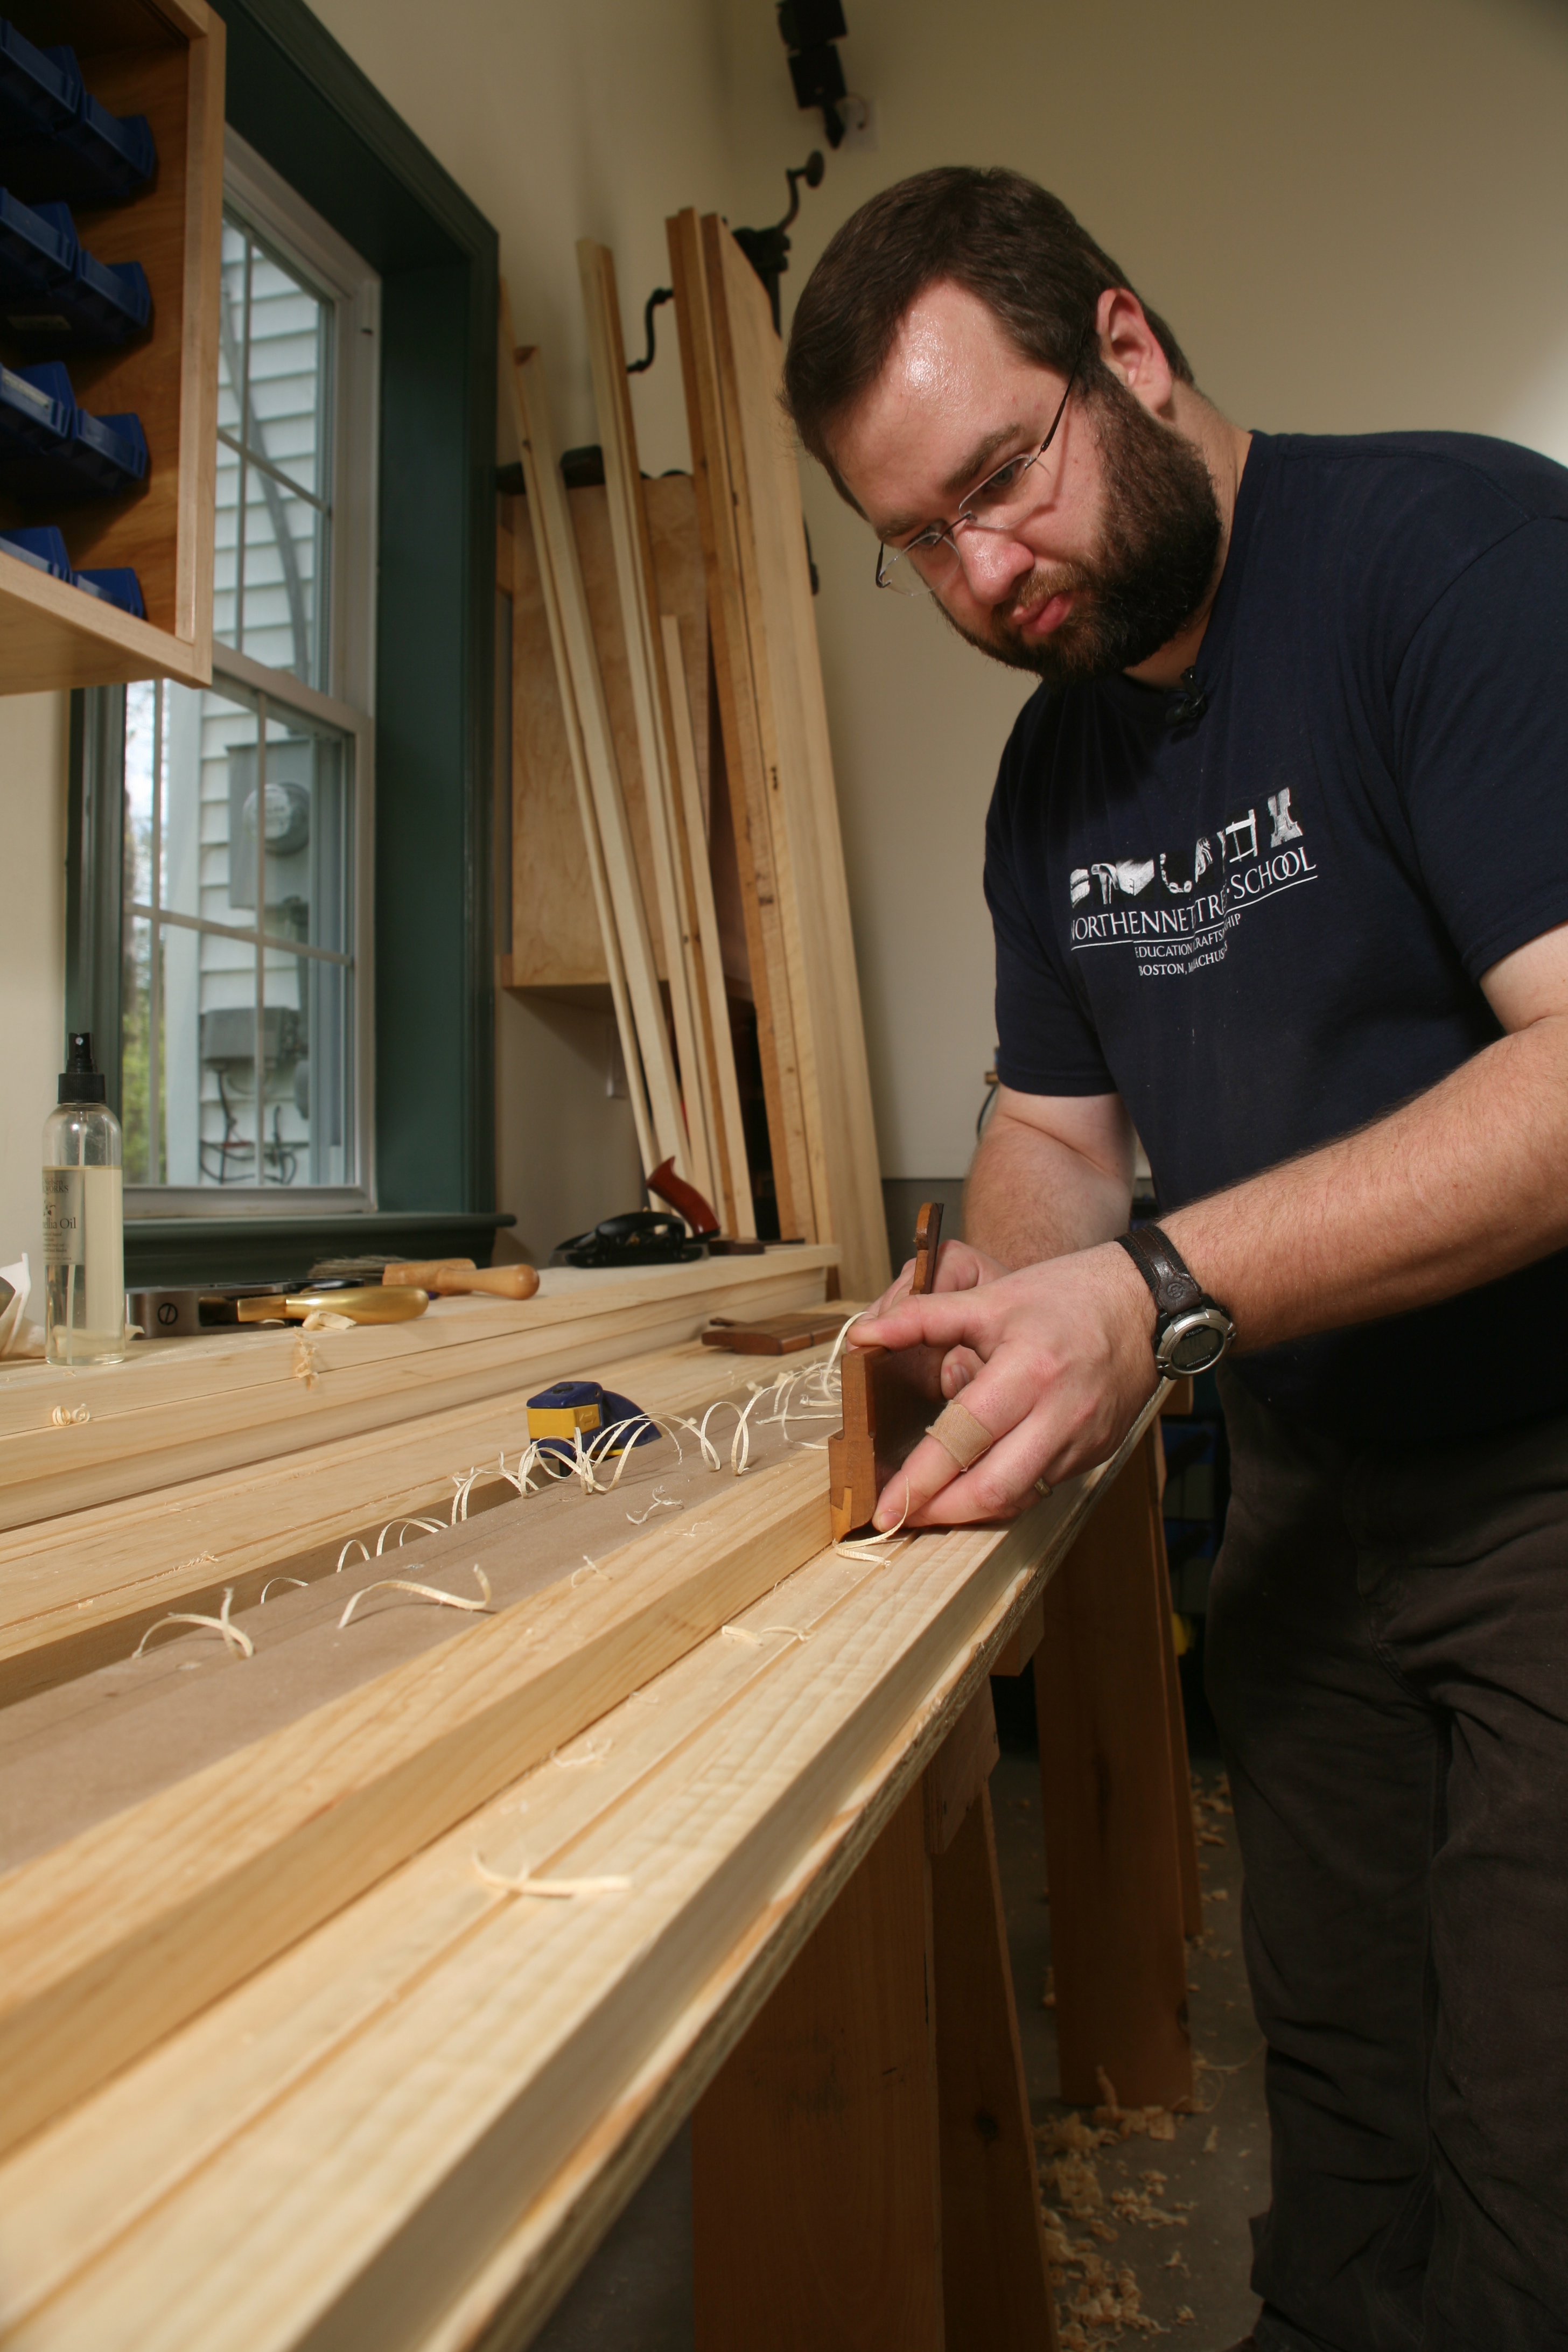
Setting in the details with a Snipe’s Bill plane. (Photo courtesy of the Taunton Press)
Next by using traditional wooden molding planes I carefully set in all the major transitions in the profile
Using traditional molding planes to replicate the profile. (Photo courtesy of the Taunton Press)
Many of these planes I use date back to the time period when the Kittredge house was actually built and yields results that simply cannot be duplicated by machine. The original handwork had variations and facets which catch the light differently when compared to stock that is milled by a machine.
Section of new molding alongside an original sample — a nice match. (Photo by Bill Rainford)
The end result is a near identical match that will help insure that future generations living in the Kittredge house will be able to enjoy it’s many details in much the same way as Alvah did when the house was first built.
If you’d like to learn more about how to make traditional moldings, please check out the related article ‘Master Carpenter Series:Traditional Molding’ I wrote for FineHomebuilding which can be found here (There is also a related video series which you can find on www.finehomebuilding.com/extras for the Sept 2013 issue)
P.S. The above post was written for my friends at Historic Boston Inc here. You can learn more about Historic Boston and specifically about the Alvah Kittredge House here.
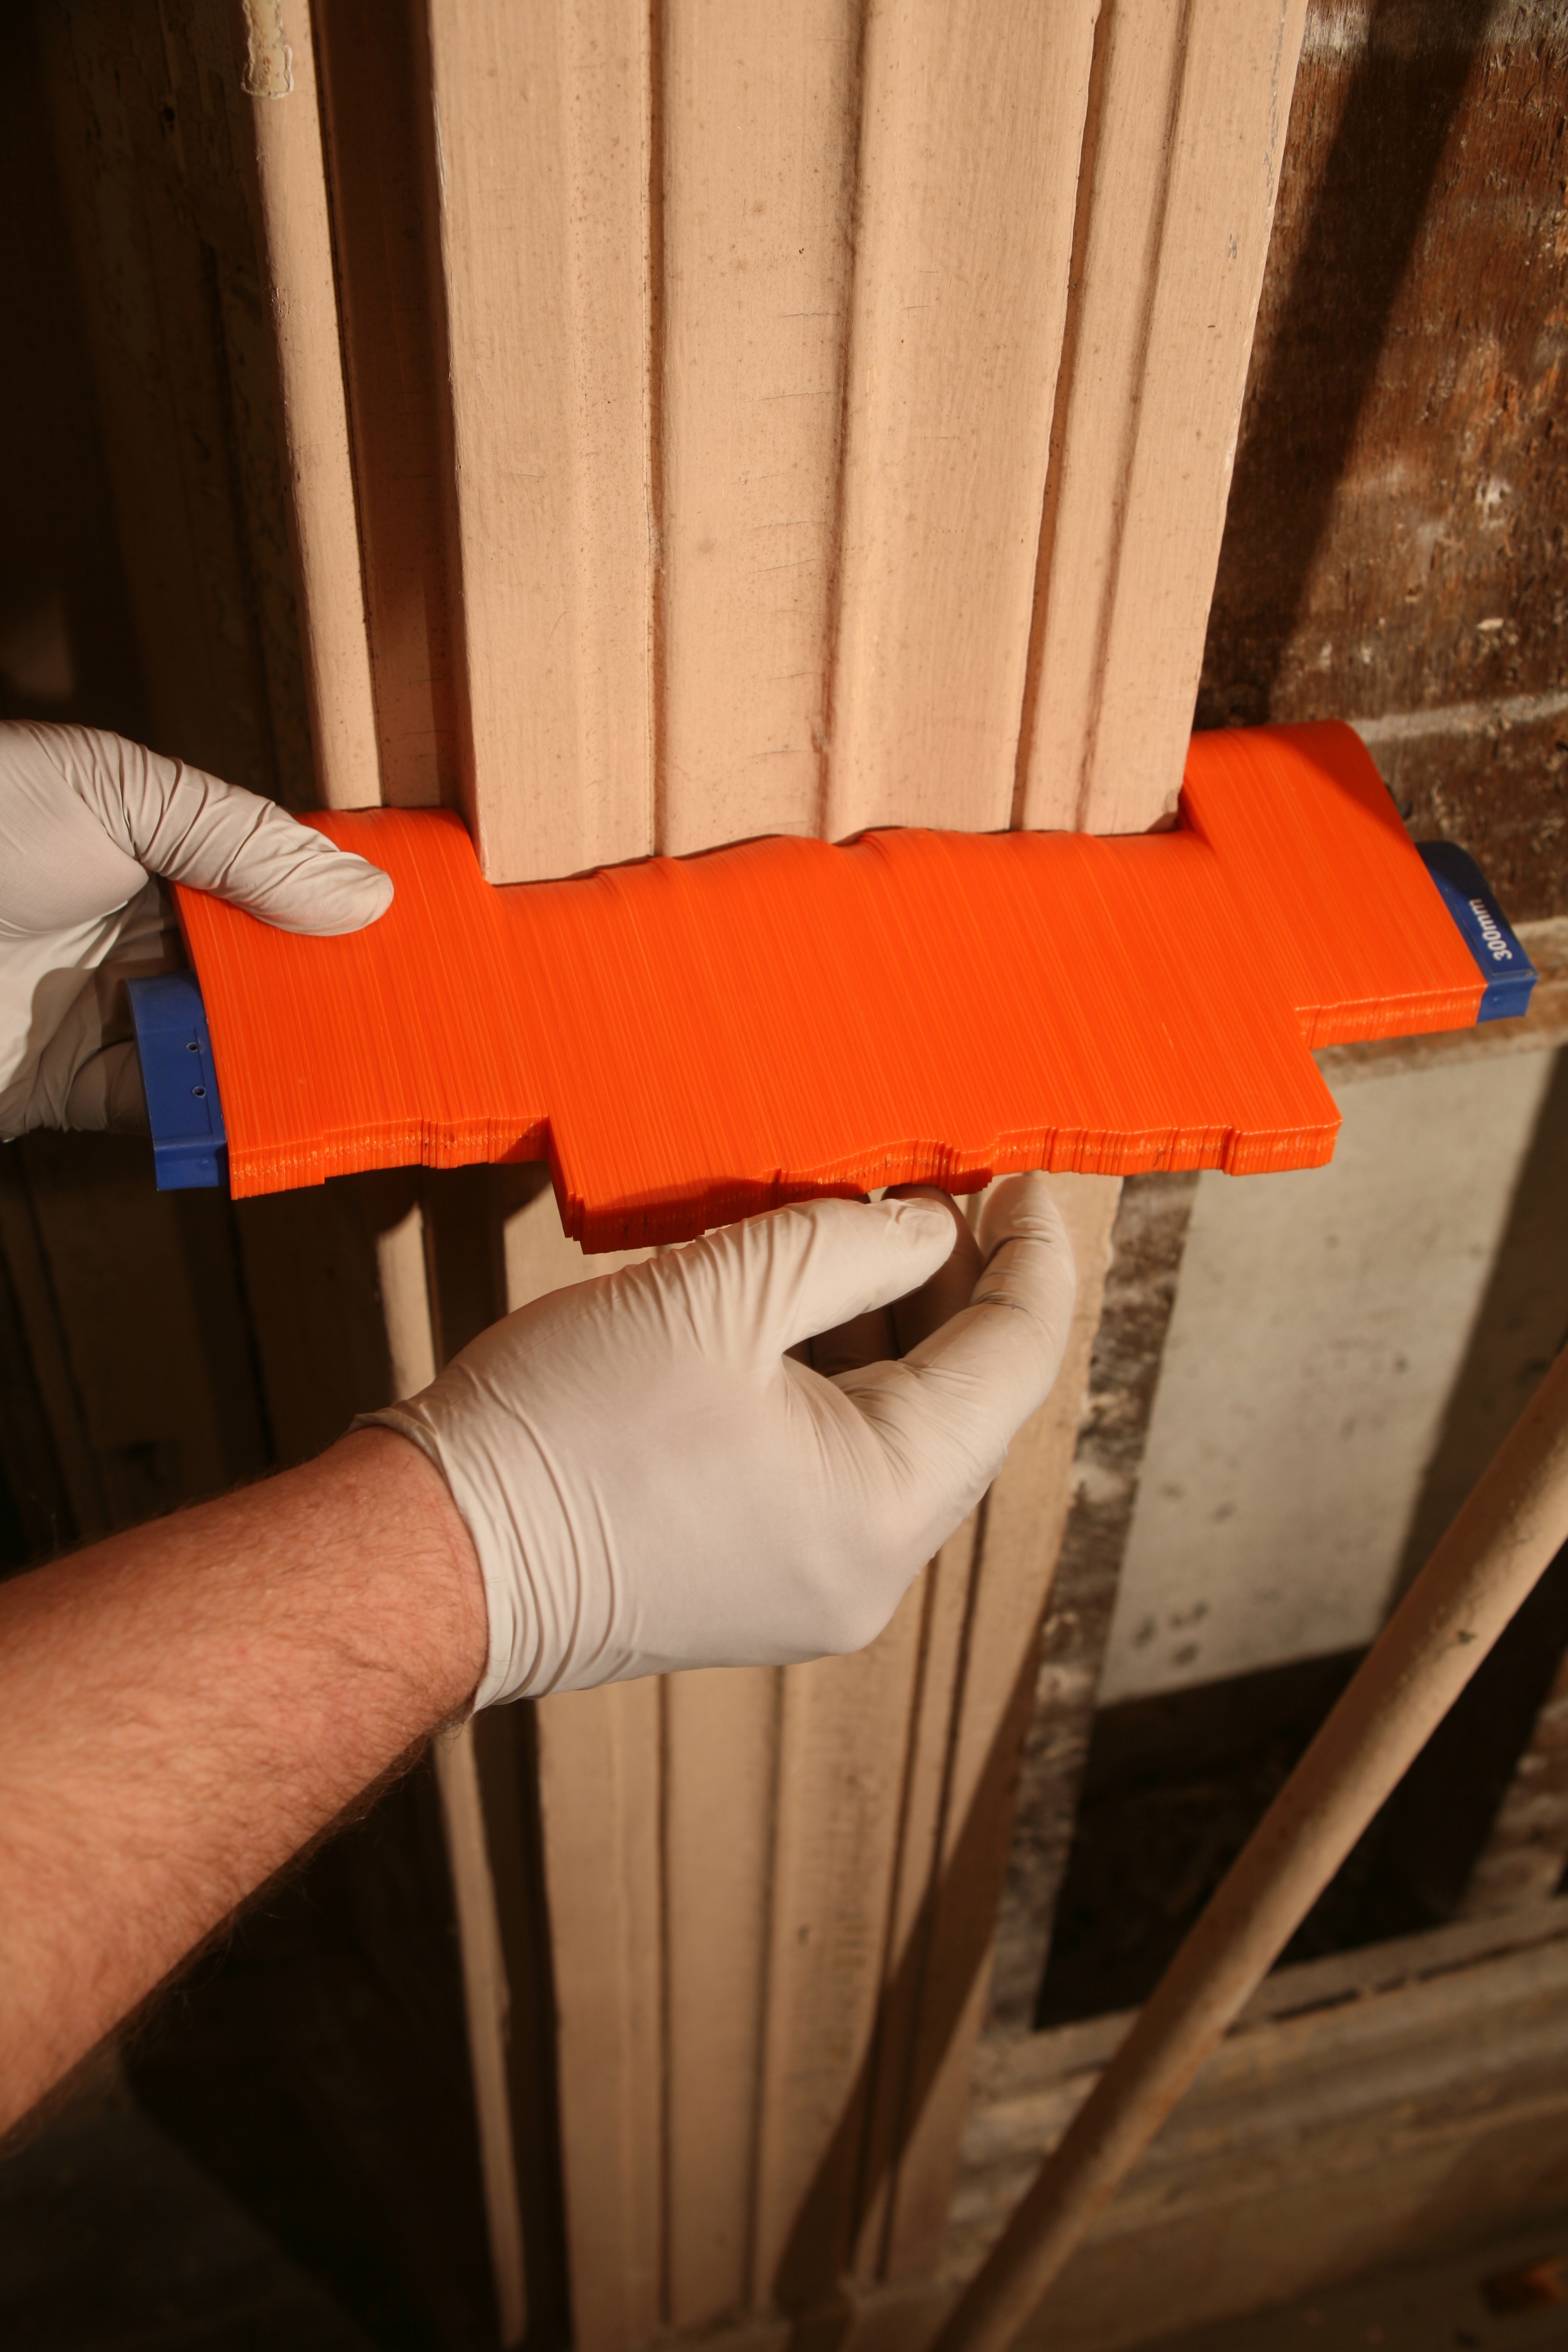
As a preservation carpenter or cabinet maker a common task that comes up is replicating a molding you find out in the world. Unfortunately most historic sites, museums and stores will not let you pop off a piece of molding to directly trace its profile — no matter how politely you ask. That’s where the molding comb, a.k.a profile gauge, comes in handy. This seemingly simple tool works by pressing it up against the molding you want to capture, and pressing the little feelers against the pieces so they take on the shape of what it’s pressed against. This works much the same way as a common desktop toy from the 1980s with a ton of metal pins held in a grid that can capture whatever you press into it. Once you have the profile you can take the gauge and trace it onto paper thus transferring the profile. This tool also works well for wood turners.
When it came time for me to try and find my own molding combs, I was surprised by how few are even on the market, let alone quality versions. As a kid I remember playing with some versions of this tool made from a series of metal pins, they were often very stiff to use and once a pin got bent, rusty or lost the tool usually became very hard to use. When looking for one of these tools you’ll want to seek out a model that has pins or blades that move smoothly but are kept under sufficient tension to retain the shape you are tracing. You also want to have the finest/thinnest blades you can find as the higher resolution will result in smoother curves. Some of the cheap import models yield results that look like an old 8-bit video game with jagged edges.
All 3 Sizes Of Molding Comb
Molding Comb Capturing a Chair Rail Profile
Transferring profile to paper
Documenting which side of the profile is captured in the wood
Larger scale, like this newel post
Transferring the newel post profile
Labeling the profiles you captured
The best ones I could find on the market today I bought from GarrettWade.com, and you will pay a premium to get a quality tool you may not use everyday, but I believe the much higher quality results are worth the extra expense in this case. Pictured above are all 3 sizes they offer, and coming from Europe they are in metric sizes roughly on the order of 6″, 12″ and 18″. What I like about them is the fairly fine granularity of the blades, the nice amount of tension on the blades which hold a profile well, and the way one side is triangular and one side is round making it easier to get into odd places. For exterior work the plastic surfaces will not rust which comes in handy when working out in the weather.
An important part of the Preservation Carpentry curriculum at the North Bennet Street School is working with traditional window sash. In earlier posts we’ve talked a lot about restoring old window sashes, but what about new work? Or a sash that is too far gone or not worth restoring? The best option is likely fabricating traditional window sash yourself. The task may seem formidable, but with some practice anyone with the time and determination can do it. I find the work to be quite enjoyable.
Completed sash with glazing in place
Having worked on many historic windows, and new factory made windows I definitely prefer earlier period windows (17th and 18th century). In our modern ‘throw away’ world most folks look at an old wooden window with disdain and are eager to toss them in the trash and get vinyl replacement windows. If I had my way that would be a crime against historic buildings. The media has everyone believing that modern windows are far more energy efficient and easier to live with compared to old windows and that is a view based on ignorance and marketing greed. I spent several years living in a rental house with brand new replacement vinyl windows and while they were only mid-range windows they were disgustingly drafty, hard to operate, could not be fixed if you broke a pane, and took away from the appearance of the home. A properly built and maintained traditional window can last for 100 years or more — a claim no modern window supplier would ever dare to claim. The key to the system is that ALL the pieces of traditional windows were of wood and designed so they could be regularly serviced and easily replaced — and since they are primarily wood the replacement parts are easily fabricated. Good luck finding a part of a manufactured window that far into the future.
Rich Friberg and Brom Synder fine tuning a muntin
Even though wooden sash may look delicate, you’d be surprised how strong they really are. The profiles are designed to look lighter than they really are, and when you start to add the glazing etc you’d be amazed how solid the sash will feel. A properly built window will have the necessary flashing in place and will not have any drafts or leakage. As the seasons change, open up and regularly inspect your windows. If you are concerned about stirring up lead dust on old windows, contact a window restoration or preservation specialist — and make sure they are EPA RRP licensed to do the work in accordance with the law. If your windows are sound but you’d like to try and bump up the efficiency of your home’s envelope, consider adding traditional style storm windows — which can be either interior or exterior style or both and should be divided light patterns that match your existing windows — try to avoid the aluminum clad plate glass style they have in the big box stores.
PRESERVATION TIP:
If you are living with an old window in your home that sticks — remove and inspect the sash. The sides of the window sash (aka the stiles) should NOT have any paint on the edges that run against the jamb. If you find your sticky window has paint on it, you should look to remove the paint from that edge and the jamb (in accordance with EPA RRP regulations) and then carefully wax those surfaces. The paint has thickness which makes it harder to move the window and with humidity can often get sticky/gummy. Make sure that you are careful when removing the paint from your sash that you do not also remove wood — you can’t replace it once its gone and you don’t want to wind up with a drafty window.
Setting the mirror with glazing points
The skills you learn when making a window sash can be applied to make other areas of woodworking. Above is a nice little wall hung mirror I made for my wife out of some extra materials I had. This same skills can be used to make glass cabinet doors, full size mirrors, cases, doors, etc.
If you’d like to see the process of building your own window sash, please check out the slideshow below which walks through the process (you can see many NBSS PC2 students in action):
This slideshow requires JavaScript.
A Joiner's Guide To Traditional Woodworking and Preservation