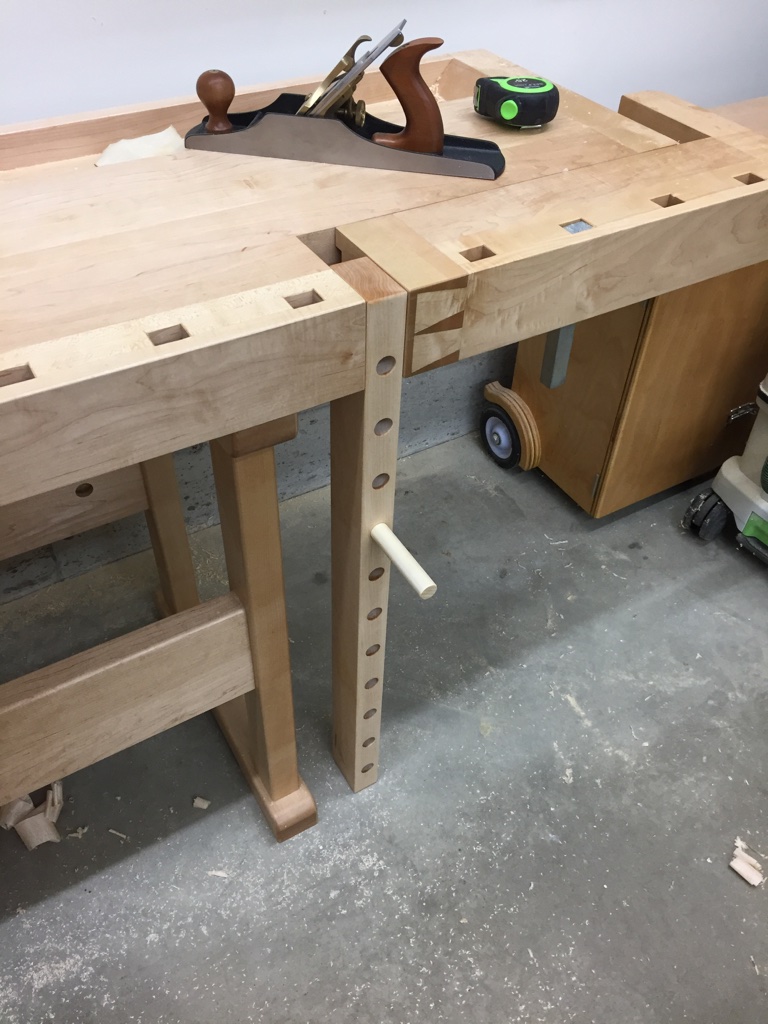
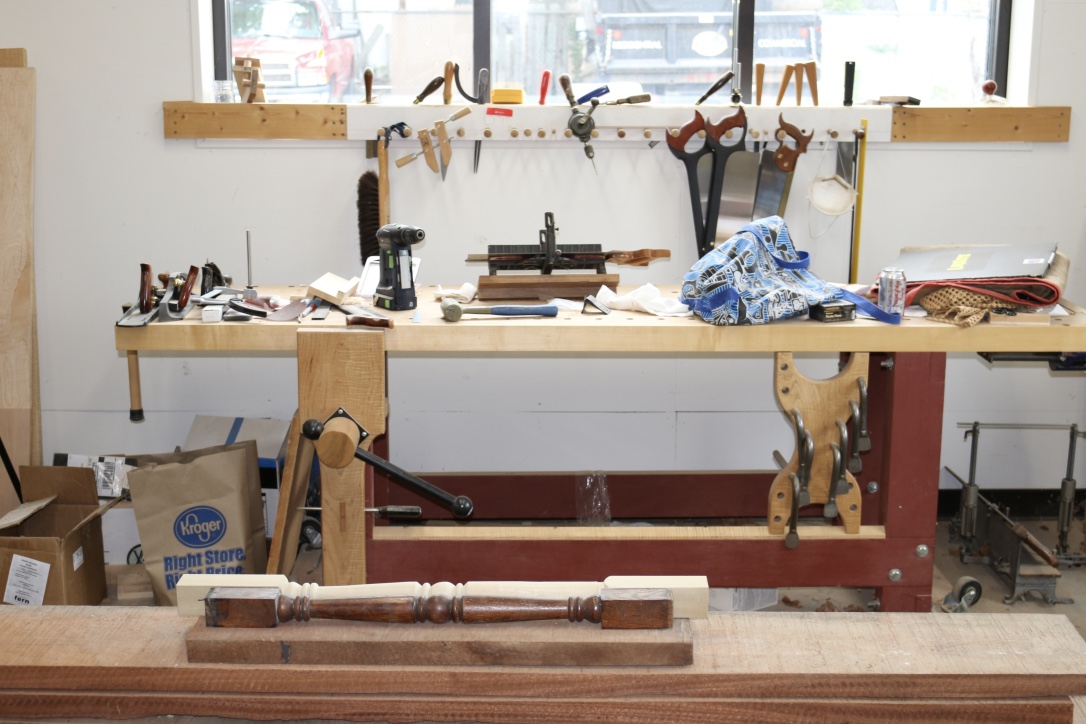
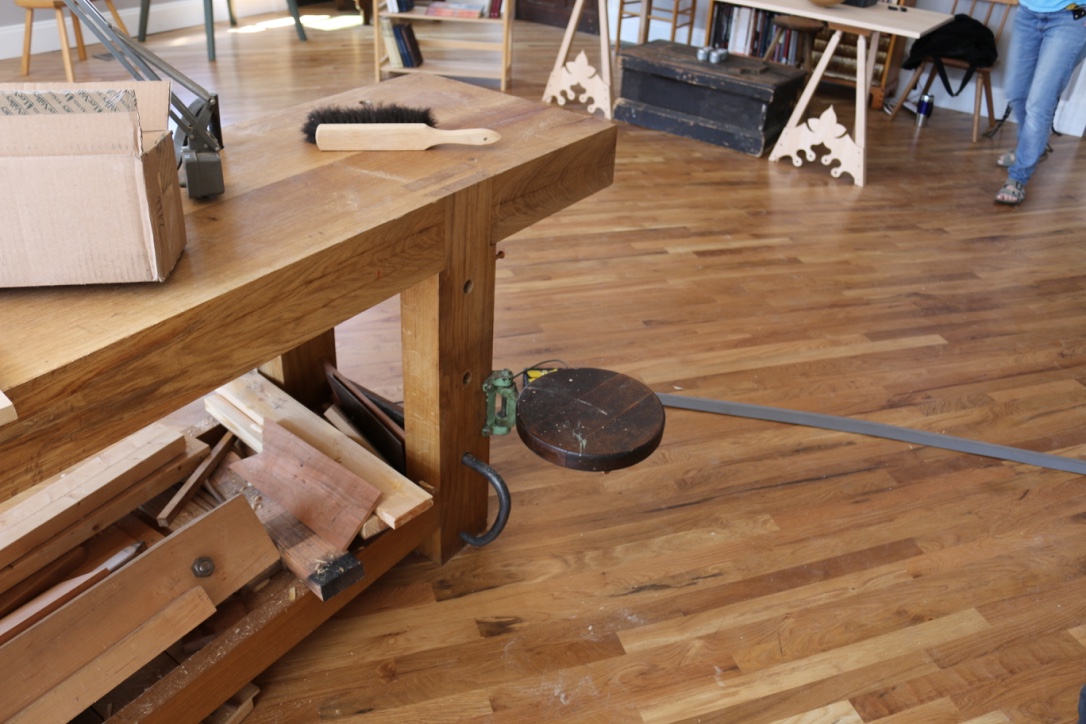
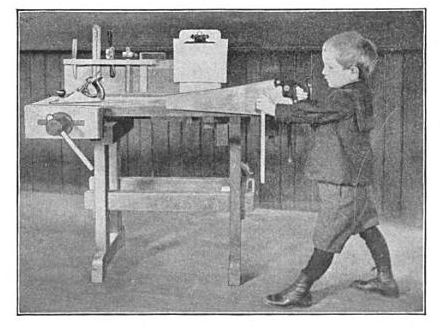
In building my workbench I also built a simple traditional deadman to help support long boards at the bench.
Workbench Deadman
This simple to build workbench accessory is as a great addition to any bench with a tail vise.
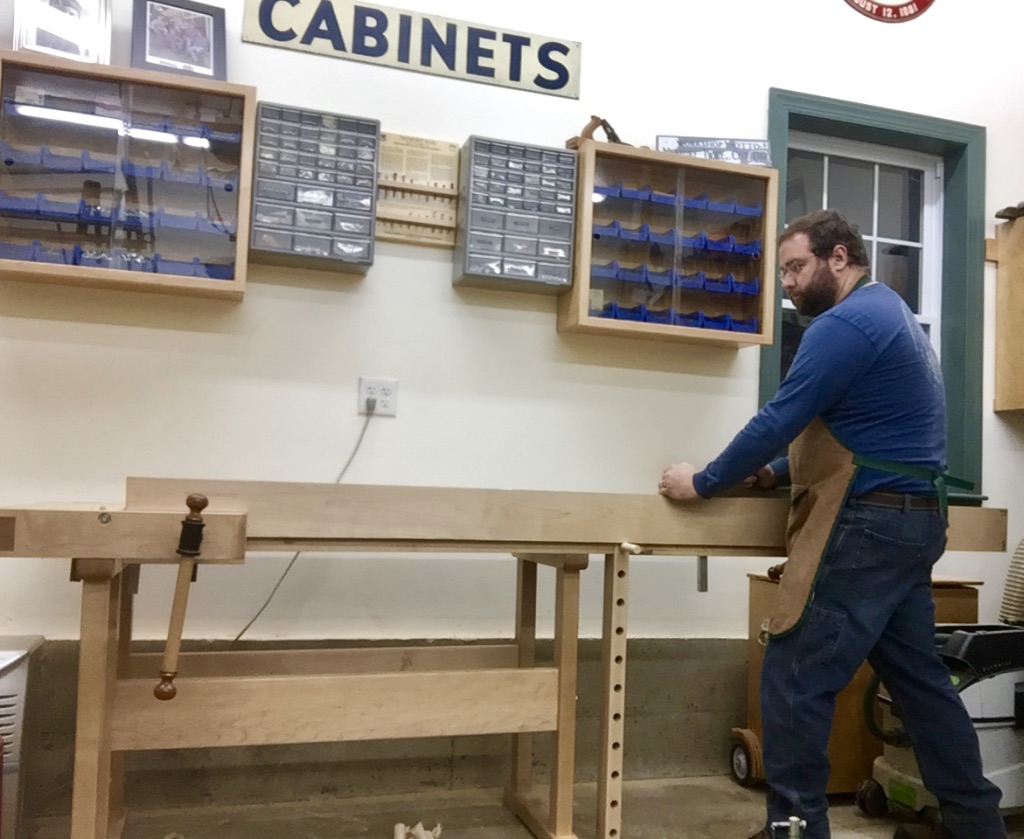
Bill demonstrating the use of his deadman
If you’d like to learn more about this bench and how to build one for yourself, please check out my blog post on this topic over on the Popular Woodworking site here.
Here’s a recap of Saturday and Sunday (days 2 &3) of Woodworking in America 2016. Saturday was a fun day of workshops and lectures. I watched a great talk by Caleb James on Danish Modern furniture. Chris Schwarz had a talk about Chairmanning and a talk about his Roman Workbenches. Roy Underhill demonstrated how to make a classic coffin. Mary May demonstrated how to carve volutes, C-Scrolls and other similarly projects. I also had some fun guarding Chris’ low Roman workbench as I helped Roy get it out to his van.
I got to see some more old friends, meet some new ones and meet several friends I knew from being online, but not in person. I got to meet Mike Flaim and had a brief interview with Dyami Plotke of MWA.
In the evening we had an event where we went Rhinegeist Brewery for some very good beer and BBQ followed by a tour of some of the massive underground brewing and beer storage tunnels that are under much of Cincinnati.
Click on any of the images below to click through the images as a slideshow. (if you are viewing this post in an email browser, please click on the post title above to view the post on the website itself)
Another great view of the Cincinnati waterfront.
Caleb James’ excellent presentation on Danish Modern furniture.
Caleb’s traveling tool chest with a large collection of the planes he’s made.
Great Hans Wegner quote
Caleb James
Nicely proportioned stool
A table from Caleb’s presentation we all hope to see in an article at some point.
George Walker
George Walker’s talk on Designing With Curves
George Walker with his string 2.0
George Walker demonstrating some great, and traditional ways of working with curves
Mary May’s class on carving volutes, C-scrolls and similar things
Sample of a violin scroll
Carving a volute
Mary May Carving a C-Scroll
Mike Siemsens’s Anarchist Tool Chest
Zach Dillinger with his very nice reproduction ottoman.
Zach Dillinger taking questions as the end of one of his workshops.
Quick selfie with my hero, Roy Underhill. It’s always great to see him and he’s very nice to all of us fans.
You know Roy Underhill’s presentation killed — there were a LOT of coffins all over the room.
Chris Schwarz’ talk on Roman Workbenches
Chris demonstrating how versatile the low bench is for preparing stock.
Taller Roman Workbench with Chris hand rasped nuts.
Chris Schwarz’ talk on making a straightforward chair (showing how you don’t need to invest in a lot of fancy chairmanning tools to make a comfortable and nice looking chair)
Chris cutting wedges for his chair leg tenons.
Vampire vise made by my friend Peter Ross for Chris Schwarz’ tall Roman workbench
Double wedged tenons in the Roman Workbenches to close up any gaps.
The nicest bus stop bench in Covington, KY. Guarding Chris’ low Roman workbench as Roy went to get his van.
Selfie while laying on a Roman bench in the middle of a city sidewalk.
Couldn’t help but think of the beginning of the Woodwright’s Shop as Roy walked to the parking garage that looks almost a bit like the streets of Durham, NC 😉
Rhinegeist Brewery in Cincinnati
Enjoying my time at Rhinegeist Brewery with Zach, Jake and others. They even had a beer called ‘Steve’
It was OctoberFest weekend in Cincinnati — the largest outside of Germany. Made my German ancestors happy to try all the brews and see all the folks in Lederhosen and Dirndls.
Folks jousting American Gladiator style in full on lederhosen.
One of our tour guides of the many underground brewery buildings in Cincinnati
Cincinnati Connector Street Cars
Great old sign dating back to the first days of electric in the city (At least according to our guide who was quite a character)
Pig sticker fence. I also really like how the guy restoring this row house painted the CDX on the door to look like a door and even layered it on the windows and painted them to look a bit like sash. Nice touch.
About to enter a spooky underground brewing cave that has even been in some recent movies.
Gives and idea of how big some of these brewers were back in the day, under a large hill in the city.
There might even be a ghost in this photo….
Inside of the hotel lobby. A very big open space
Testing out my new Timbuk2 camera backpack. Worked out great on this trip
A paddlewheel sightseeing boat out on the river.
If you’d like to see my photo recap of the first day of WIA 2016, please check out this earlier post here.
I had a great time at the event and hope to see many of you there next year.
Here’s a recap of my first day at Woodworking In America 2016 — held at the Northern Kentucky Convention in Covington Kentucky which is part of the greater Cincinnati Ohio area.
Greetings from Popular Woodworking in America 2016
This was my first time attending this conference and other than a nightmare of a time getting there by plane from NH (Thursday night flight cancelled, the second set of flights Friday at the crack of dawn, missing the connection due to ground staff incompetence and fighting to get on another flight later in the day) and missing the 2/3 of the day’s lectures I still had a very nice first day watching Freddy Roman’s presentation, exploring the brew and browse event, meeting a ton of friends old and new and meeting several online friends in person. I also had a great dinner with a great bunch of folks — Zach Dillinger, Mary May, George Walker and many others.
Click on any of the images below to click through the images as a slideshow. (if you are viewing this post in an email browser, please click on the post title above to view the post on the website itself)
Greetings from Popular Woodworking in America 2016
John A. Roebling Suspension Bridge
Street leading to the Northern Kentucky Convention Center, home to WIA 2016
Freddy Roman giving a talk on sand shading and inlay.
Some of Freddy’s banding stock samples.
Freddy Roman demonstrating some fine detail work.
Sand shaded blanks
Very neat sample board of some incredibly tiny and intricate banding Freddy acquired and has worked from.
Carving close up on big screen
David Thiel of popular woodworking tweaking his camera. I always think photographs of other photographers are fun.
My friend Zach Dillinger at the Mortise and Tenon booth
The new Crucible Tools — hold fast and dividers. Very nice looking.
Paper sector by George Walker and Jim Tolpin
Brendan Bernhardt Gaffney and George walker looking at Brendan’s new sector prototype.
Prototype Sector by Brendan. Definitely going to get one soon.
Joshua Klein and his most excellent Mortise and Tenon Magazine booth
Tico Vogt Toolworks
The large Lee Valley/Veritas booth. Always fun to try out their latest and greatest tools
SAPFM booth with the hand tool olympics. I’m proud to say I did will with my cutting events.
Lie Nielsen Toolworks with Mr. Lie Nielsen himself.
Deneb Puchalski of Lie Nielsen Toolworks giving a demo. Deneb is a great guy and I’ve been buying tools from LN for many years and he’s been my main point of contact for most of it.
Knew concepts marquetry saw
Some of the very nice work by Texas Heritage Woodworks
Jason Thigpen of Texas Heritage Woodworks making a great face.
Some of the very nice work by Texas Heritage Woodworks
Plate 11 Workbench Company
Plate 11 Workbench Company with leg vise and real nice planing stop
Plate 11 Workbench Company planing stop
A nice rocking chair by ne of the exhibitors. Wish I could recall his name, but he was offering online courses, one of which was on making this chair.
The Superior Works 🙂
Up next is a post about the second two days of the conference. I had a great time and hope I can attend it again in 2017.
“Pay no attention to that man behind the curtain.” — Wizard of Oz
Back in May I spent a couple of days in Cincinnati Ohio on my way down to Harrodsburg Kentucky for the EAIA Annual Meeting and a quick stop in Covington Kentucky on my way home to visit with some of my woodworking friends in the area.
My first stop was at the Popular Woodworking offices and studio to see Megan Fitzpatrick and David Thiel who graciously showed me around.
Popular Woodworking Sign
The office building while nondescript from the outside contained an interesting space on the inside. A mixture of office space, editing bays, studio/soundstage and a woodworking shop.
Me in one of the locations you’ve seen in Popular Woodworking videos
I visited the shop area with backdrop you may recognize from several woodworking videos. The timber framer in me wants to push up that simulated plate and add some braces. 🙂
Furniture from earlier magazine projects
In the warehouse space you could see several projects from Popular Woodworking and American Woodworker magazine. If only we had room in the car to buy one and bring it home.
A live shoot & recording session in the studio
In the studio area I was able to see another F+W project video being recorded.
Megan’s workbench in the corner of the workshop
Out in the woodworking shop I felt right at home. There was a large machine and bench room. In the corner I could see Megan’s workbench and the windows you may recognize from many an article and post from Popular Woodworking over the years.
I was too busy talking David’s ear off and didn’t take a picture of him to include in the post, but I’ll make sure to take one next time I am in town.
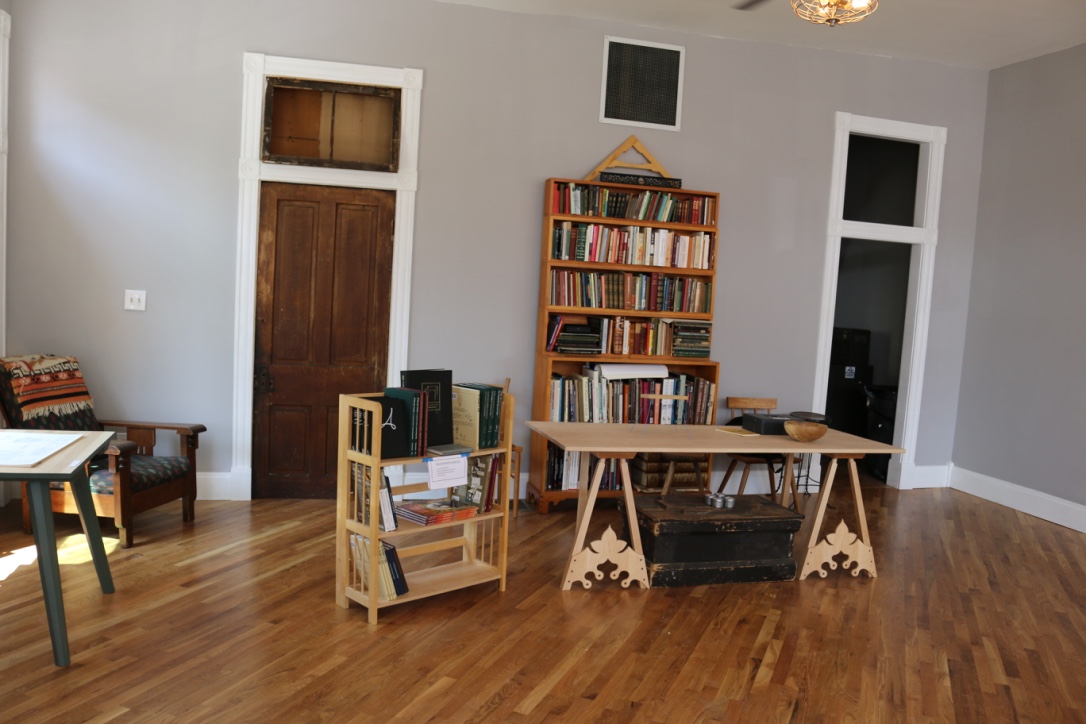
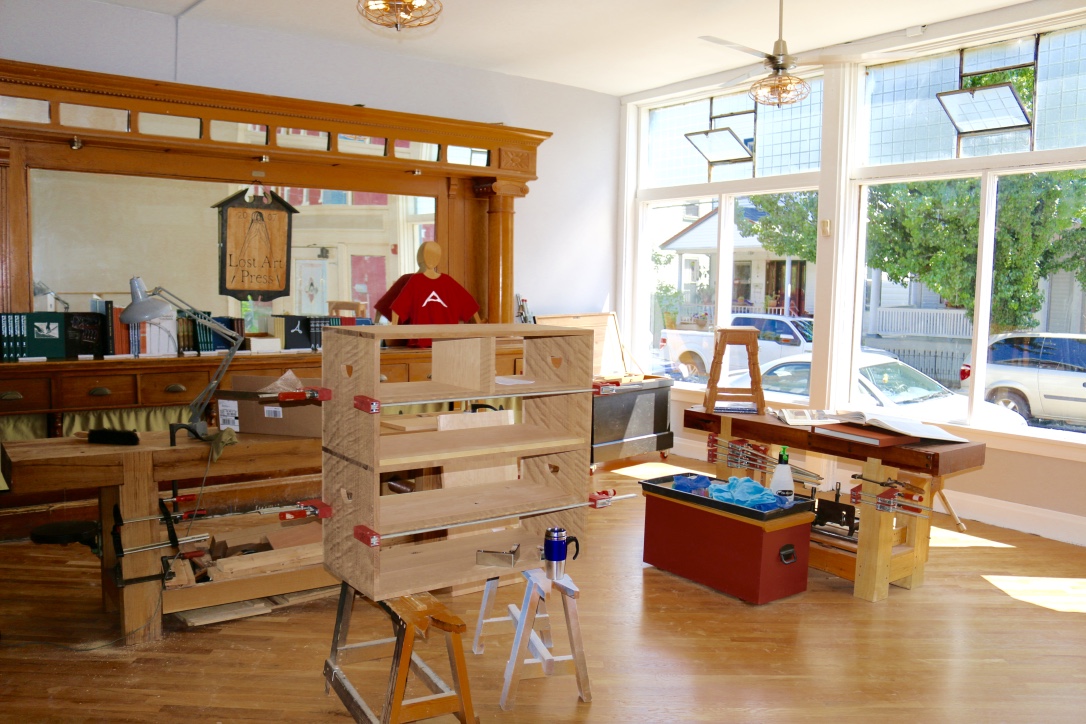
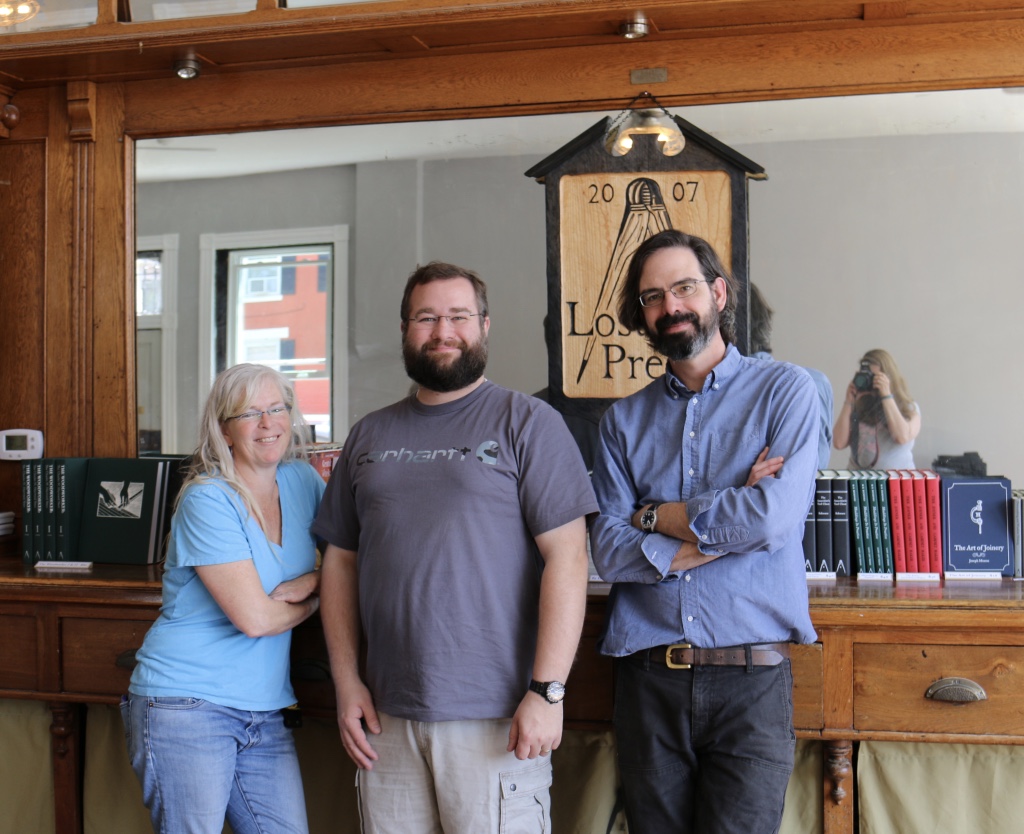
On the way home from our trip I also stopped in Covington KY (right across the Ohio river from Cincinnati OH) to visit Chris Schwarz at the Lost Art Press storefront. The storefront is a nice historic building that used to be a saloon in a part of Covington that reminds me a bit of Brooklyn — lots of history, artists, hipsters, good restaurants etc.
Inside of the Lost Art Press Storefront
After watching the build out via many of Chris’ blog posts it was neat to see it in person and to see several of Chris’ recent pieces in person.
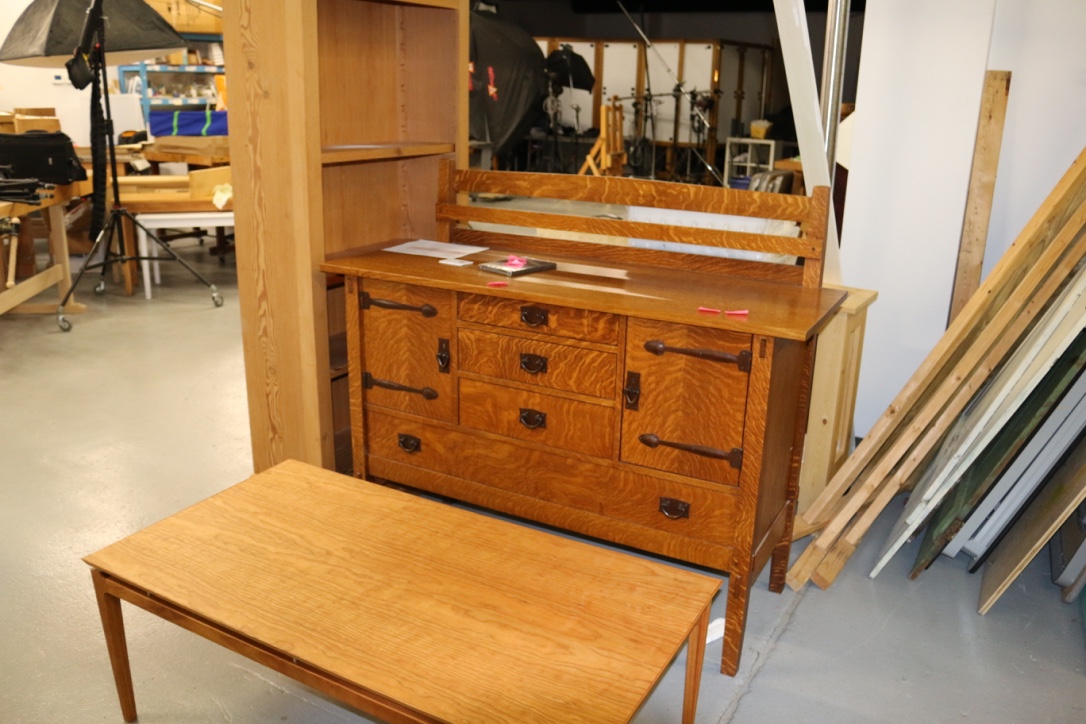
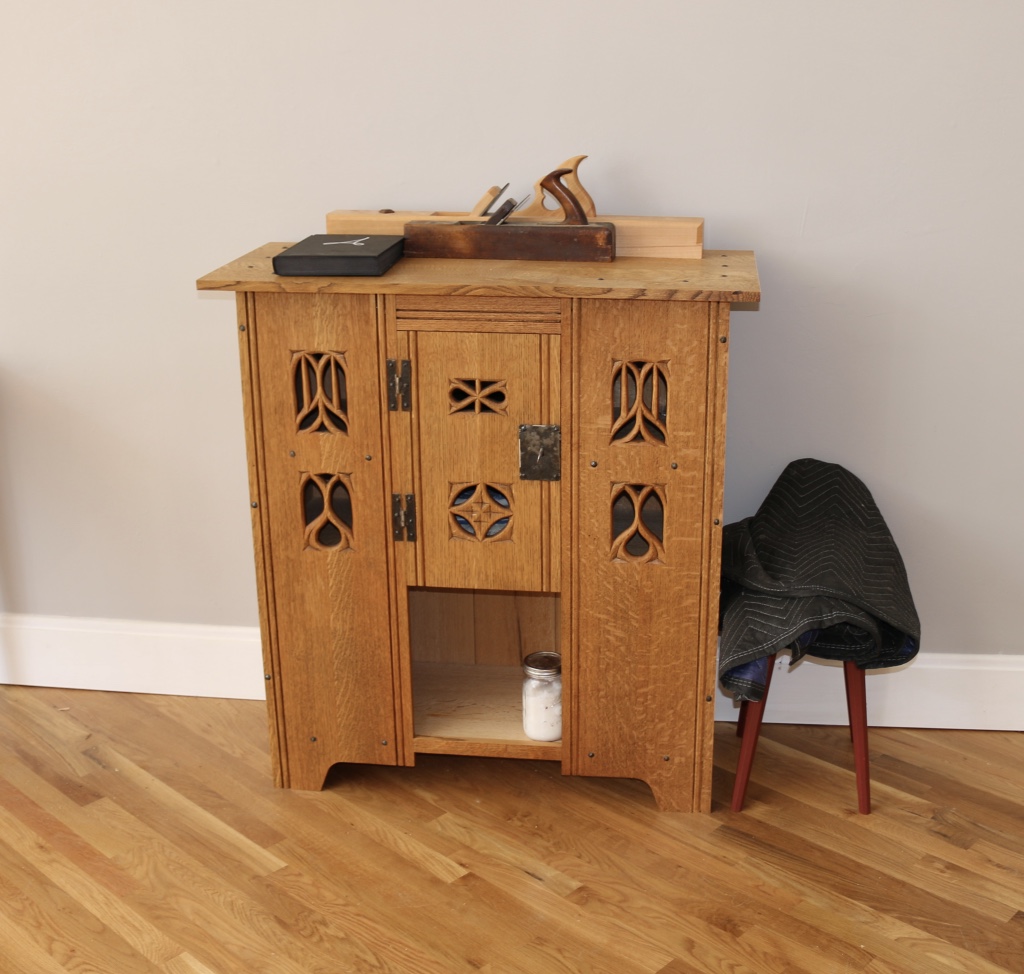
Aumbry from the Anarchist’s Design Book
You may recall the Aumbry above from the cover of a Popular Woodworking issue earlier this year and from the Anarchist’s Design Book.
I had fun talking shop with Chris and Megan and checking out some of the recent bits of hardware he picked up.
Nice swing out adjustable seat attached to the workbench leg
The adjustable swing out seat he added to his bench was a nice addition I’d love to have on my own bench someday for carving and other detail and design work on the bench.
Megan Fitzpatrick, Bill Rainford and Chris Schwarz
This was my first trip to Cincinnati and I had a great time exploring the city. In fact I’ll be in the area again in September for Popular Woodworking in America.
A big thank you to Chris, Megan and David for showing me around and a big thank you to my wife Alyssa for wrangling the babies while I geeked out with fellow woodworkers.
Take care,
-Bill
For more information on the Lost Art Press you can check out their website here.
For more information on Popular Woodworking you can check out the magazine’s website here.
For information on Popular Woodworking in American 2016 you can check out their site here.
It’s that wonderful time of year — after Thanksgiving and before Christmas — where the Black-Friday and Cyber-Monday frenzy has died down and last minute shoppers are coming to the realization they’ll have to visit a brick and mortar store or start clicking on expedited shipping if they want their gifts to arrive in time for holidays. It’s also the time of year where bloggers offer their holiday gift guides, last minute project ideas and holiday drink recipes.
Fear not, I’m willing to attempt the holiday blogging trifecta with this post.
Sharpening a lead
Gift Idea for the Woodworker In Your Life — Learn the basics of Drafting by hand
Earlier this year I made a 2 hour video ‘webinar’ for Popular Woodworking titled “Hand Drafting Skill Builder” wherein I talked about the basic tools and techniques required to draft by hand. I started with a terminology and supply overview, then walked through several samples and discussed appropriate practice exercises.
From the course description:
With the basic drafting skills covered in this course you can quickly and efficiently communicate ideas and generate working plans.With a solid set of plans in hand, your woodworking in the shop will benefit from all the design details you worked out on the drawing board, where changes are easier to make. Your wood rack and your wallet will also benefit from the decreased waste.
Course Highlights:
What constitutes a basic drafting tool kit
How to layout a good working drawing with standard elevations, scales etc.
How to properly draw lines and make use of line weights
How to dimension a drawing
Basic lettering
Correcting mistakes
Where to find more information
The recorded version of this course is now available online and you can learn more about the course and see a sample video here on ShopWoodworking.com
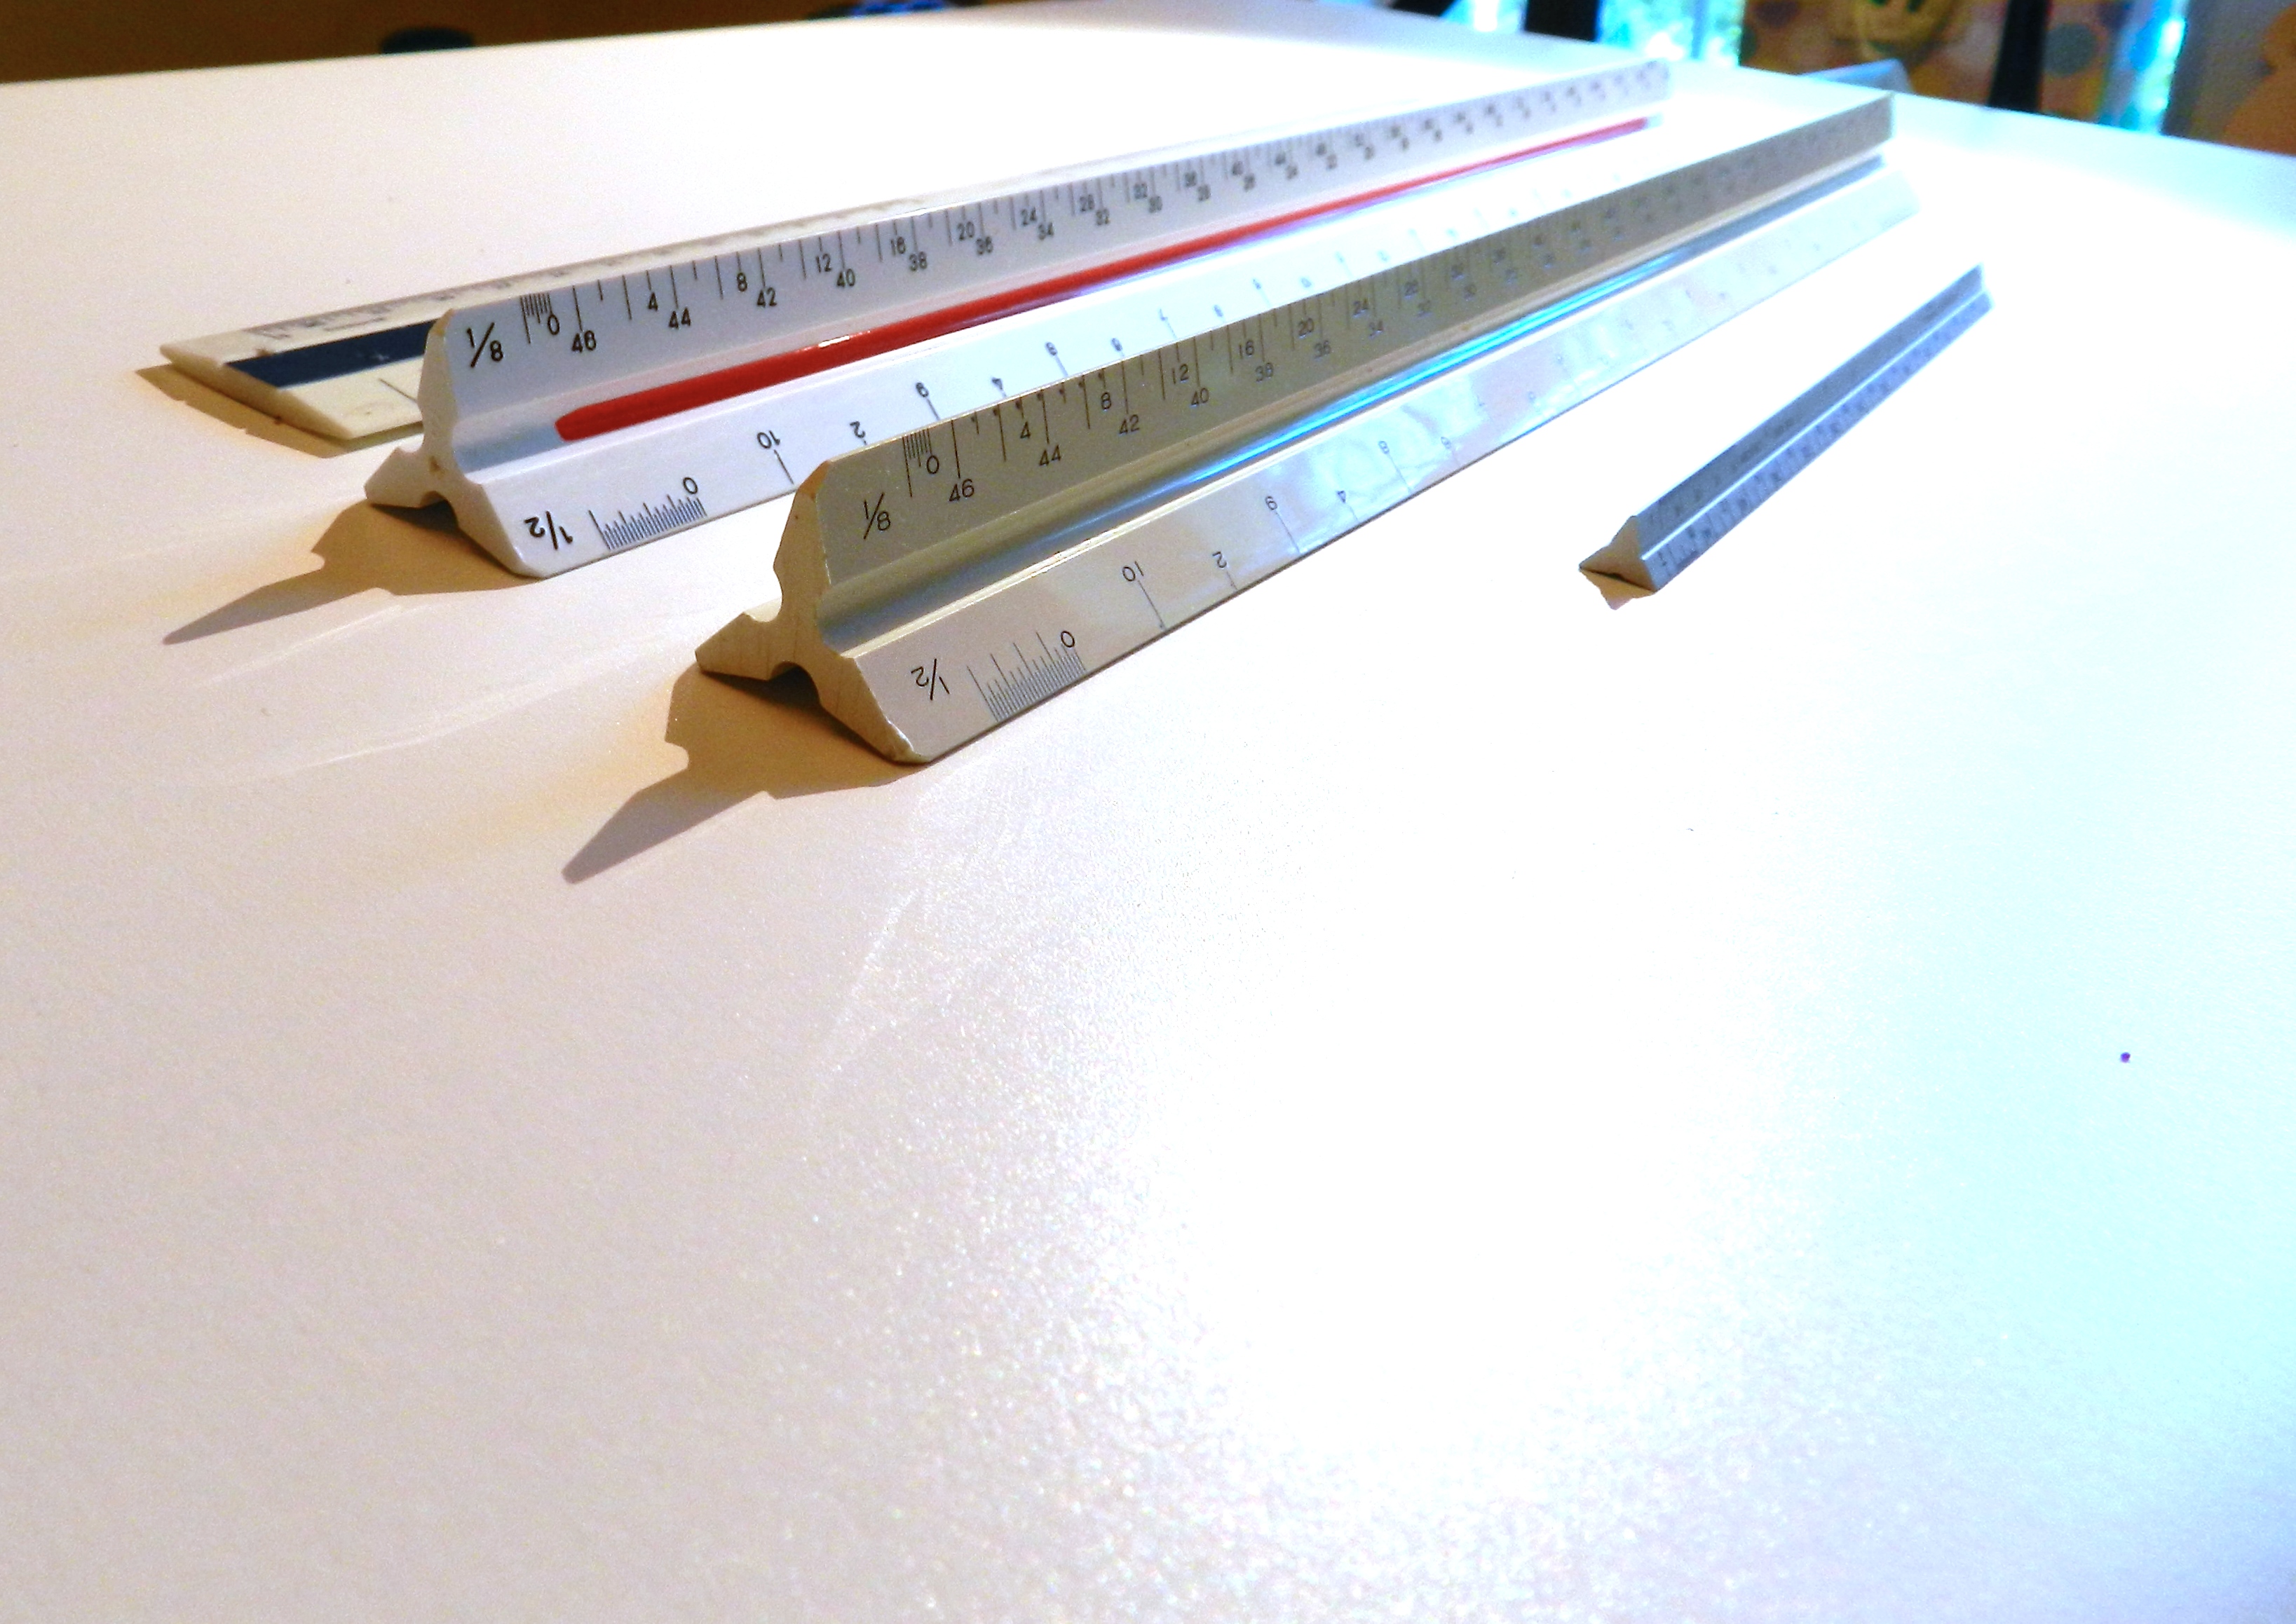
Drafting Scales
The above content is also available as part of a 9 piece bundle called ‘9 Key Tools For Better Furniture Design’ which includes a lot of other great resources for anyone interested in stepping up their furniture design skills and sells for half off of what the 9 items would cost individually. This bundle can be found online here.
Both of the above are digital download content so there is no waiting or shipping necessary.
Last Minute Holiday Project Idea — Cutting Boards
I bet you have a lot of scrap around your workshop — most woodworkers are also wood hoarders. A cutting board is a great way to use up some of that scrap stock that has been haunting your woodpile for way too long. It’s also a great way to make room for the next project.
Holiday Drink — Gløgg
This classic warm Scandinavian holiday drink is great at a party and everyone seems to have their own recipe for it. Here’s a good starting recipe.
With the holidays quickly approaching it’s time to don the holiday sweater, have a warm drink and a snack and start drafting the next project.
Learning to draw is akin to learning how to compose music. Everyone has to start somewhere and the rough earlier work will help you build up to more complex pieces. As a kid I loved to sketch — I would copy comic book images by hand. As I got older I wanted to flesh out designs in more detail which required the accuracy of technical drawing or drafting. In High School I first learned the basics of drafting. I took a quarter of mechanical drawing, a quarter of architectural drawing, and a quarter each of the AutoCAD version of each. The drafting skills I learned there have served me well ever since — both with pencil and paper and on a computer. Back then we had a machine that made actual ‘blue’ prints from our drawings and an old DOS version of AutoCAD that was even old by 1990s standards but the basics learned there served me well in later versions and even when using SketchUp today. I can still remember riding my bike 2 towns over with my best friend Jesse to pick up some drafting supplies including architectural templates so we could design houses in our free time. I still use those templates today.
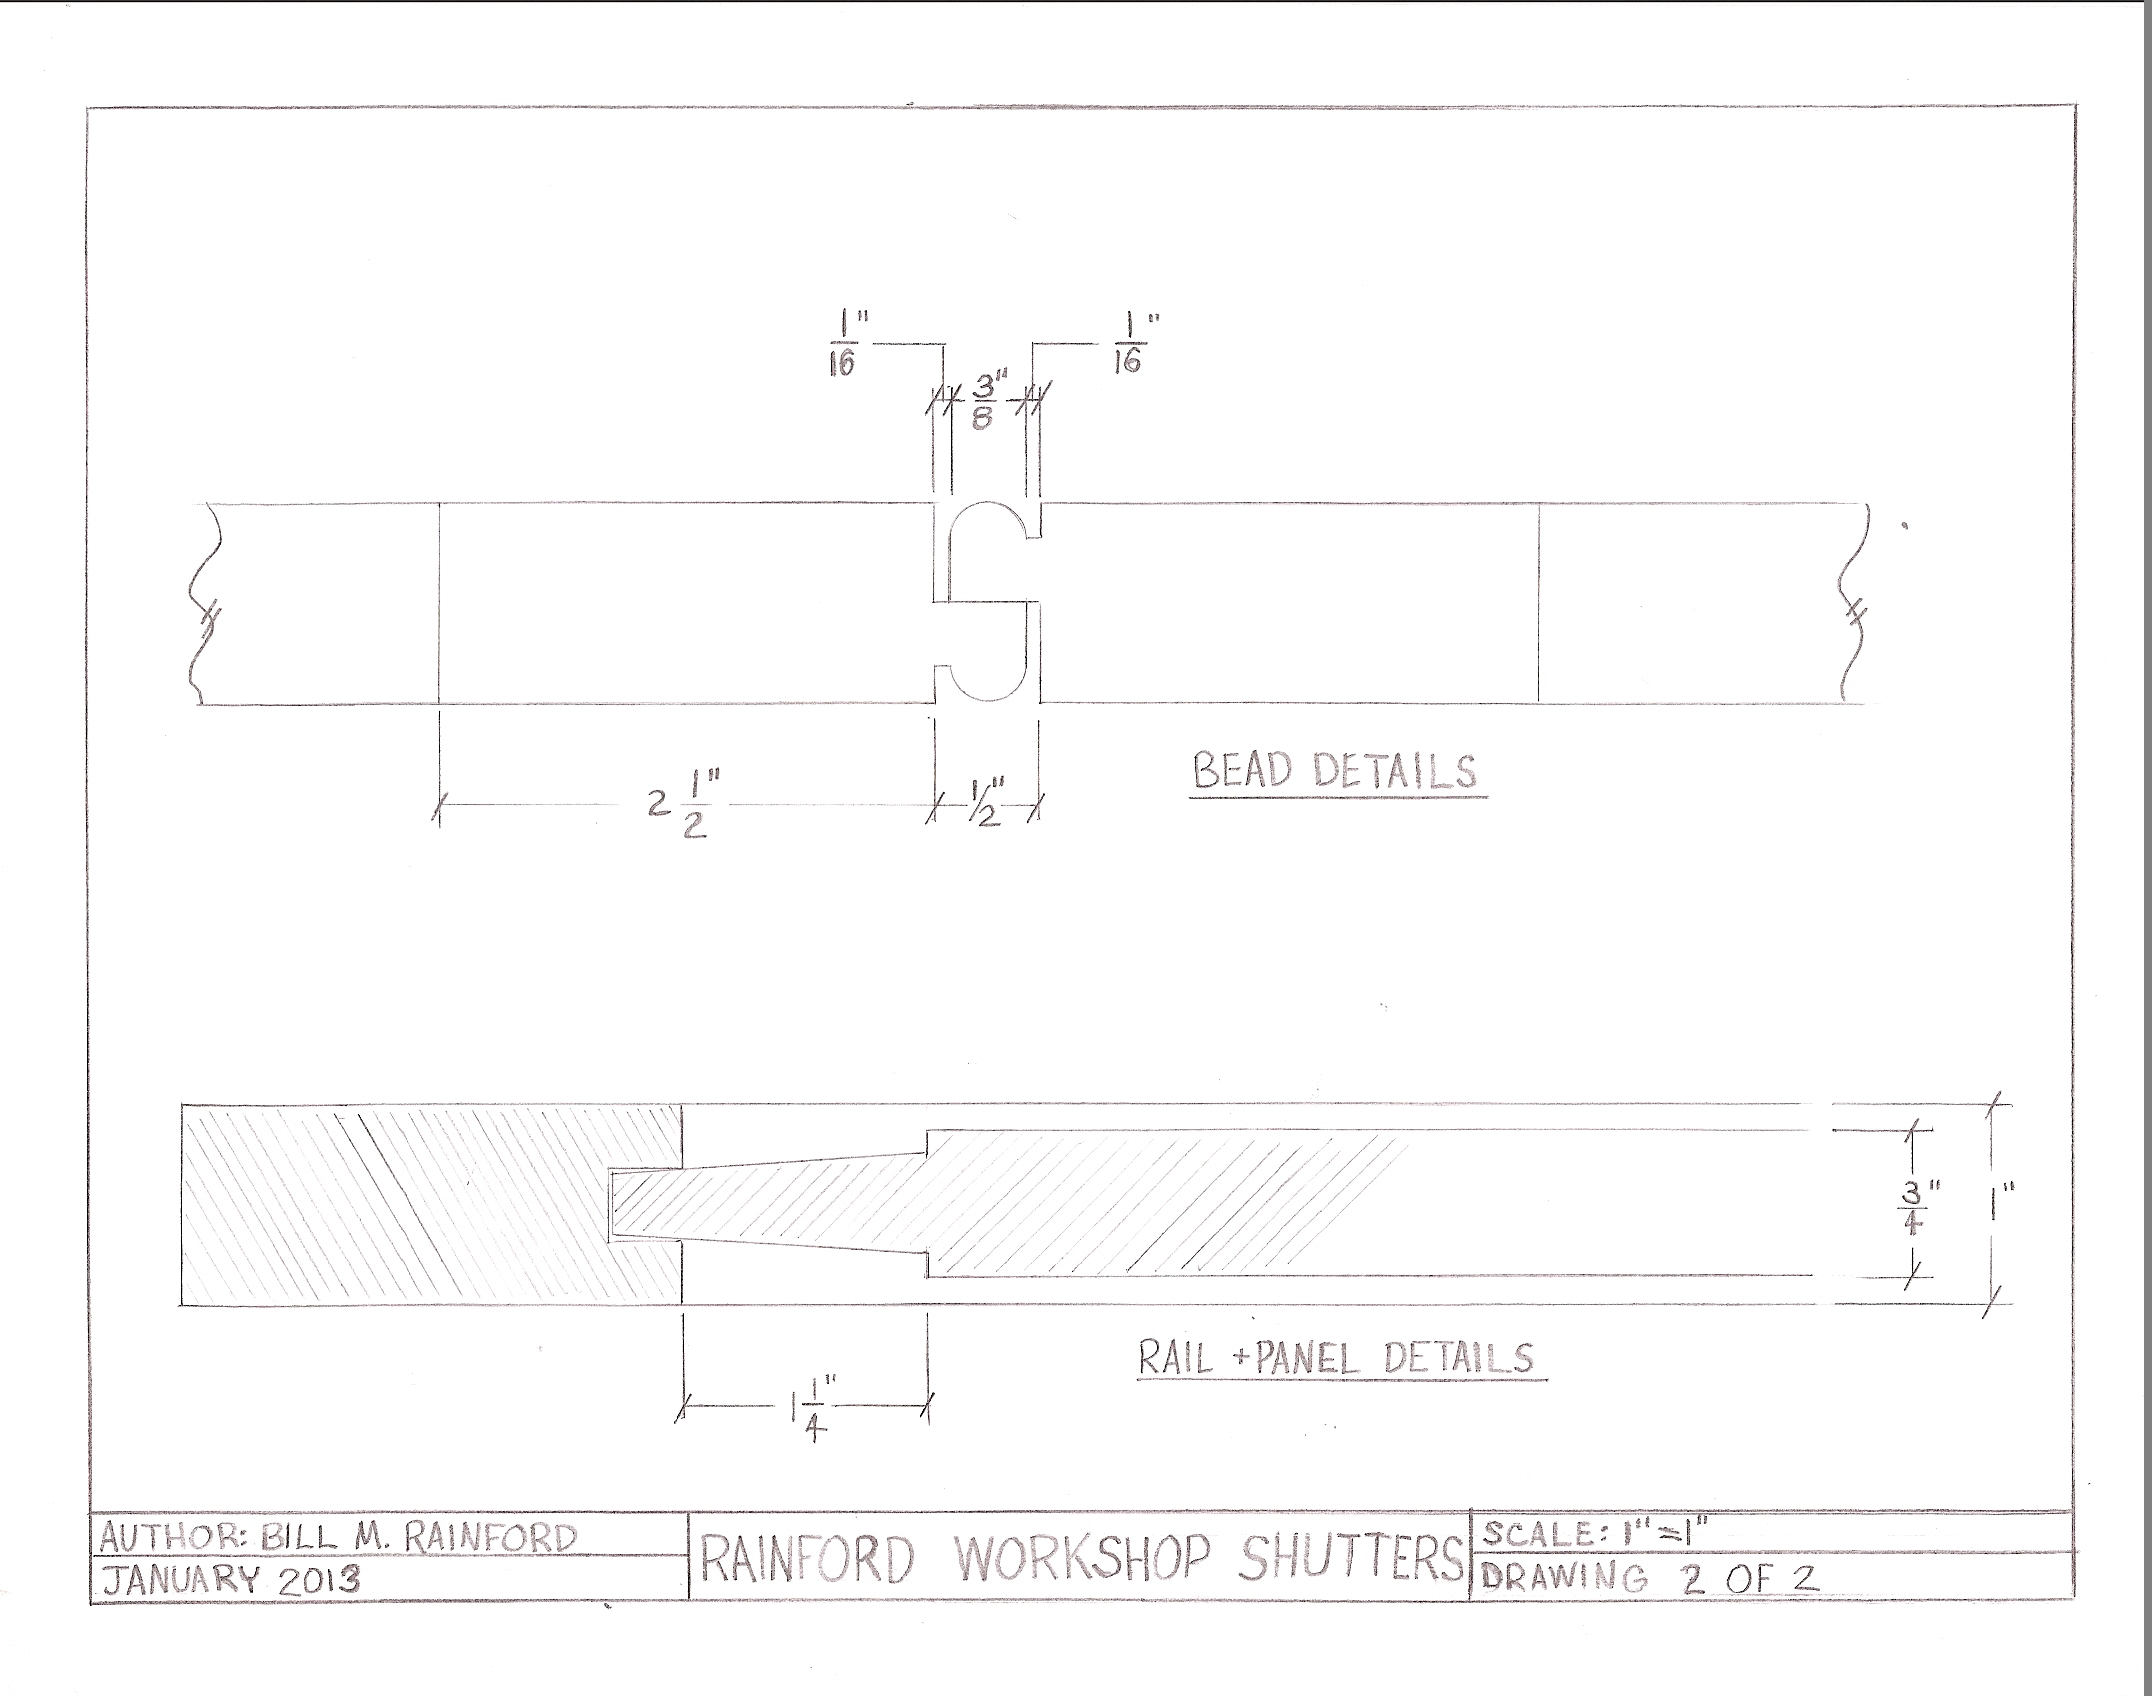
Sample Drawing
I’m thankful that in the late 1990s the West Islip High School (NY) had a technology wing offering classes in drafting, electronics, woodshop, autoshop etc and that I had some great teachers — Mr. Gerard Weick and Mr. Edwin Ermanovics who taught Industrial Arts and fostered creativity. I loved taking those courses and I still have the ‘Industrial Technology’ award from graduation somewhere — likely at my mother’s house. 🙂
5 years later when I bought my first house I put the skills to use in designing a loft and a custom mantel. When it came time to pull a permit I had all my documentation ready to go. I had my plans reviewed the building inspector — he didn’t make a mark on them and said ‘Wow, I wish we had more people in town like you’ setting the stage for a great working relationship. Meanwhile at the table to my left I could see a professional contractor getting his rear handed to him by another inspector who apparently was not happy with that guys’ plans as it was covered in red ink and there was a lot of heated discussion going on. It goes to show that some careful planning and a clear drawing can go a long way to helping you efficiently go about the work you are interested in completing.
Architectural Scales
5 more years down the road when I entered the North Bennet Street School I was able to apply those lessons to my drafting exercises and much like riding a bike it comes back to you quite fast. While in the program we had to draft every major project we worked on by hand — that not only helped with speed and accuracy in drafting but it also created a body of work that is handy to refer back to when needed. I still have many plans and story sticks from my time at the school.
Today in my work I usually draft an project by hand on paper — I can get my ideas down faster that way. Most of the time the hand rendered drawing is sufficient. Occasionally I’ll take my drawing and enter it into SketchUp — either to poke around a bit more in 3D, but most often just for the 3D renderings to dress up a blog post or presentation.
The ability to capture you thoughts and designs in a visual representation is quite powerful. A well thought out design on paper can save you considerable time and expense out in the shop. It’s much cheaper to fix a problem on paper than it is in wood — both the cost of the material and the labor involved. A clear working drawing also allows you to communicate to someone else how to fabricate your design.
If you are looking to learn the basics of drafting by hand, I encourage you to check out the Webinar I am teaching on September 10, 2014 8:30pm for Popular Woodworking University here. During the live event participants will have the opportunity to ask me questions etc. If you cannot make the event live the folks at Popular Woodworking will also offer a downloadable recorded version of the Webinar.
Sharpening
The course will cover the basic toolkit for drafting by hand, talk about how to draw a line, line weights, sharpening your leads, cleaning up your mistakes, laying out a basic drawing, lettering, adding dimensions and basic skill building exercises that will get you on the path to generating your own plans. With this basic set of skills under your belt you’ll soon be on your way to composing a great set of plans that will serve you well and make you a better, more efficient woodworker.
If you’d like to learn more about this course, please check out the official description on ShopWoodworking.com here. [Editorial Note: Live event link removed since the course ran as a live event. The link now will take you to where you can purchase the recorded version of the webinar]
I look forward to seeing you there.
Take care,
-Bill
P.S. Mr. Weick and Mr. Ermanovics — Thanks again for all that you taught me — I hope that I am making you both proud as I look to share these skills with the next generation of woodworkers and craftsmen.
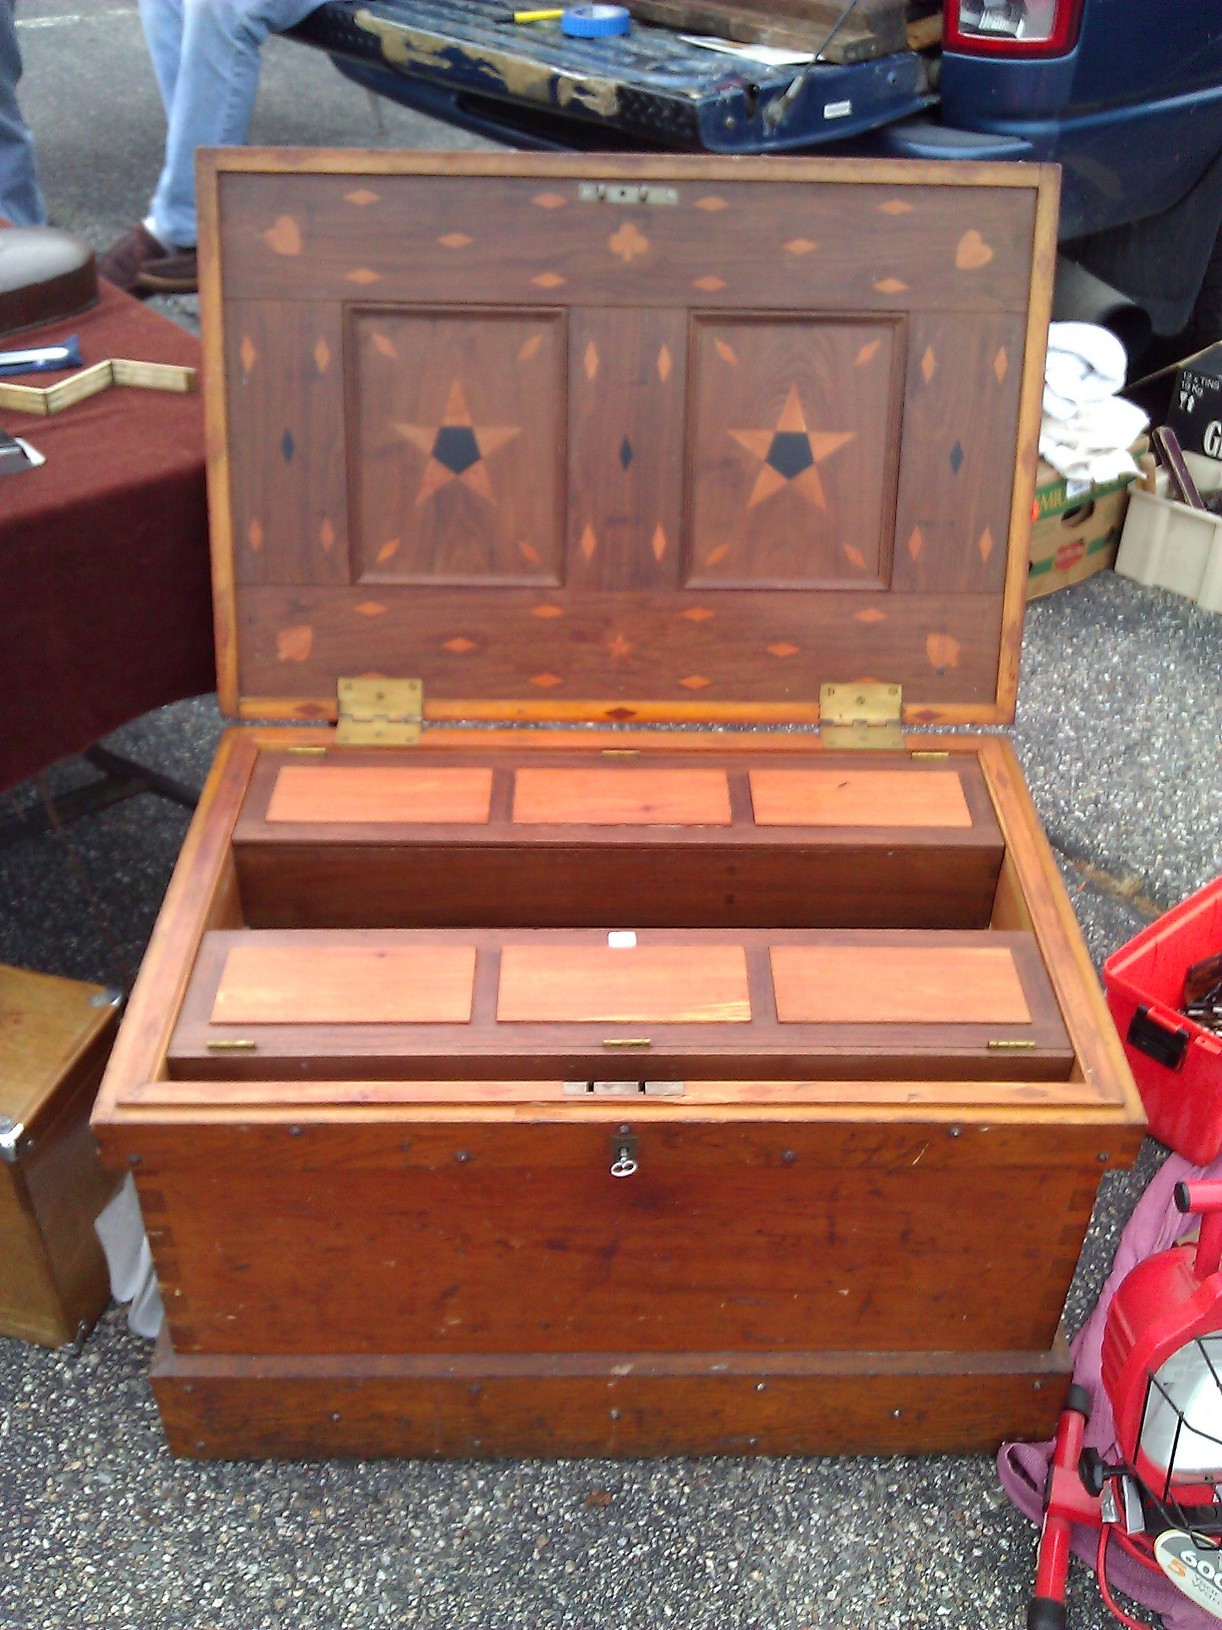
The spartan exterior of many traditional tool chests was as much a security system as it was a design element. When closed the clean lines and rugged exterior looked did not draw your attention and looked much the same as many other stoutly built traveling chests and trunks you’d see on a given day. While unassuming in travel or quietly sitting in the back of the shop, many of these chests contained a far more interesting interior.
Beautiful Tool Chest from 1849 with extensive inlay work, divided tills, half lock etc. (The maker of this chest clearly must have loved card games)
How often do you see carpenter with a bucket of rusty tools and a paint splattered truck and wondered about ‘If this is how they take care of their tools and truck, what kind of slapdash work would they do for me?’
Beyond just a safe and secure place to store your tools, the way you build and customize your chest says a lot about you and how you work. A clean and orderly chest, worksite, and truck can be a great advertisement for the quality of work you do. I’ve found folks are drawn to a nice chest like moths to a light bulb.
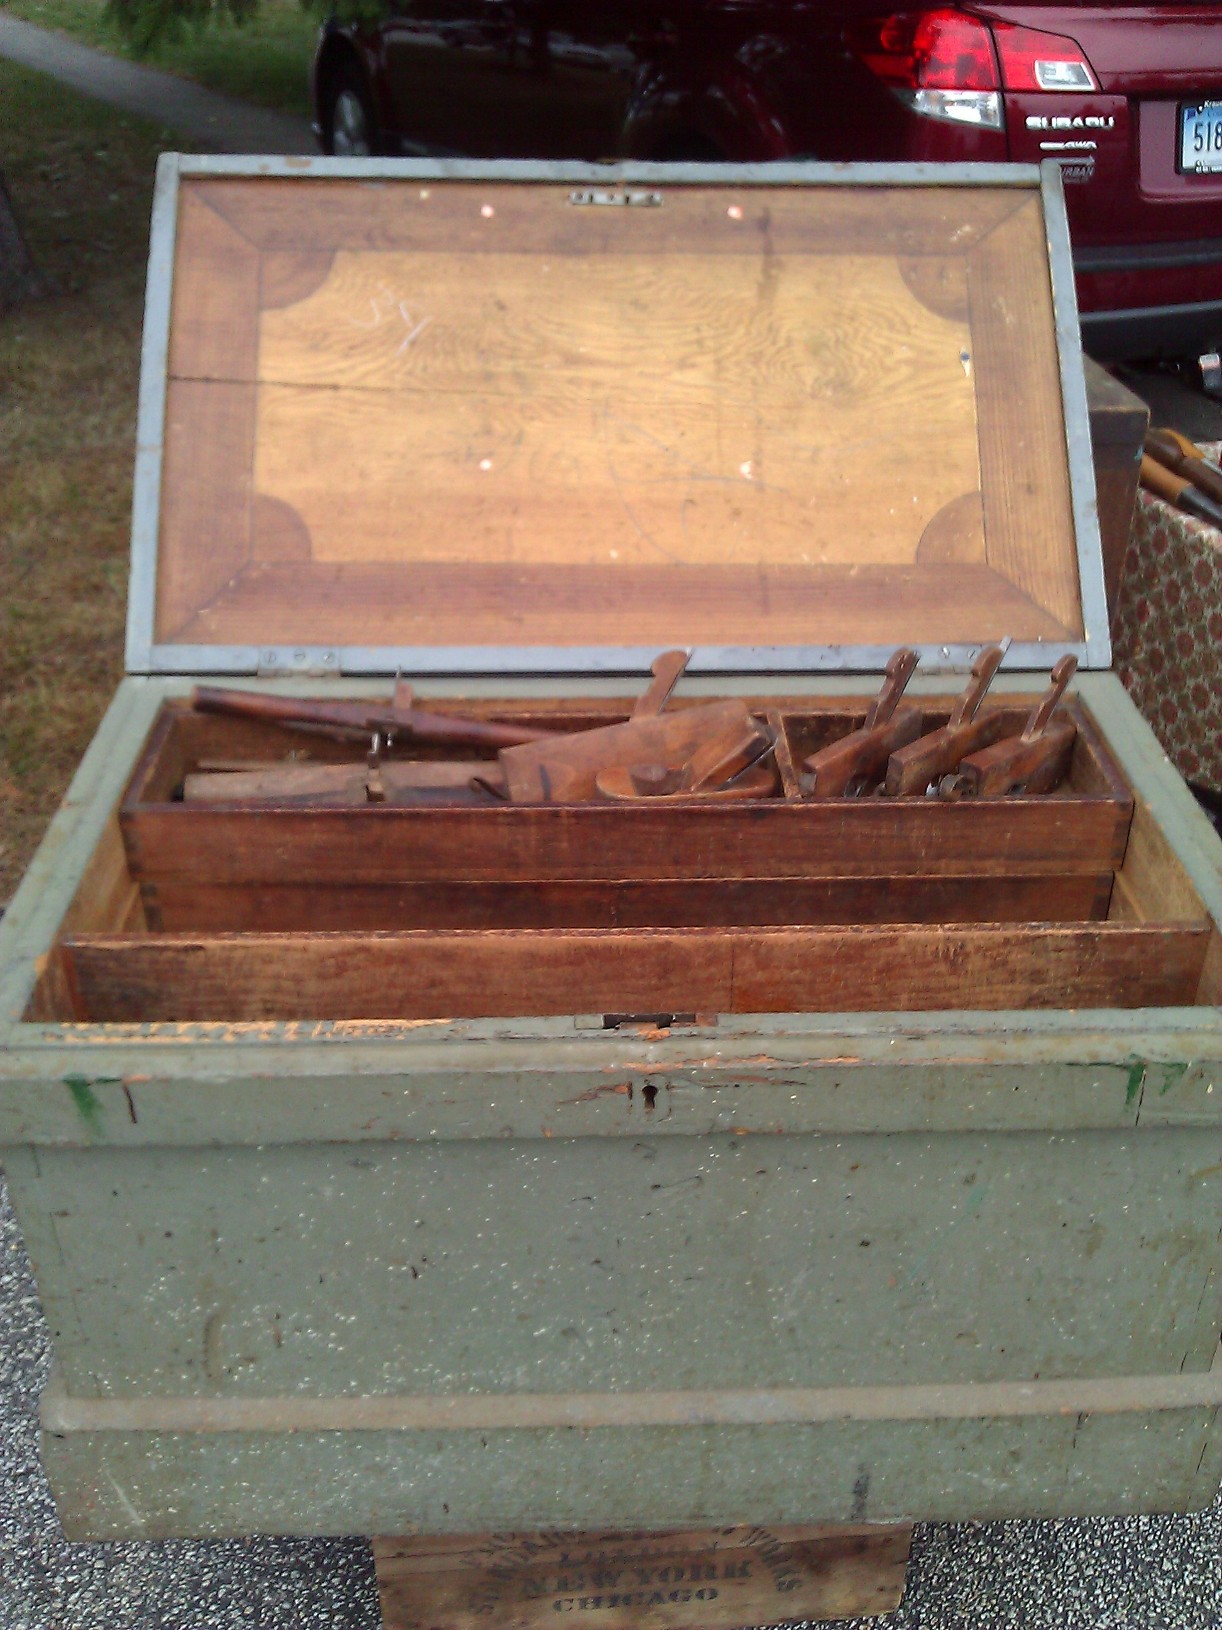
Large joiner’s chest with inlaid lid
What do you look for in a solid chest?
It should be easy to find the tools you want to use and quickly pack and unpack them
Invest in strong but light materials like Eastern White Pine and use denser woods only for wear parts
Do not get caught up with fancy inlays, hidden compartments and nest after nest of drawers
Don’t skimp on the hardware, screws and finish — they will see a lot of hard use over the life of the chest
A strong lid, well secured with a tight fitting dust seal
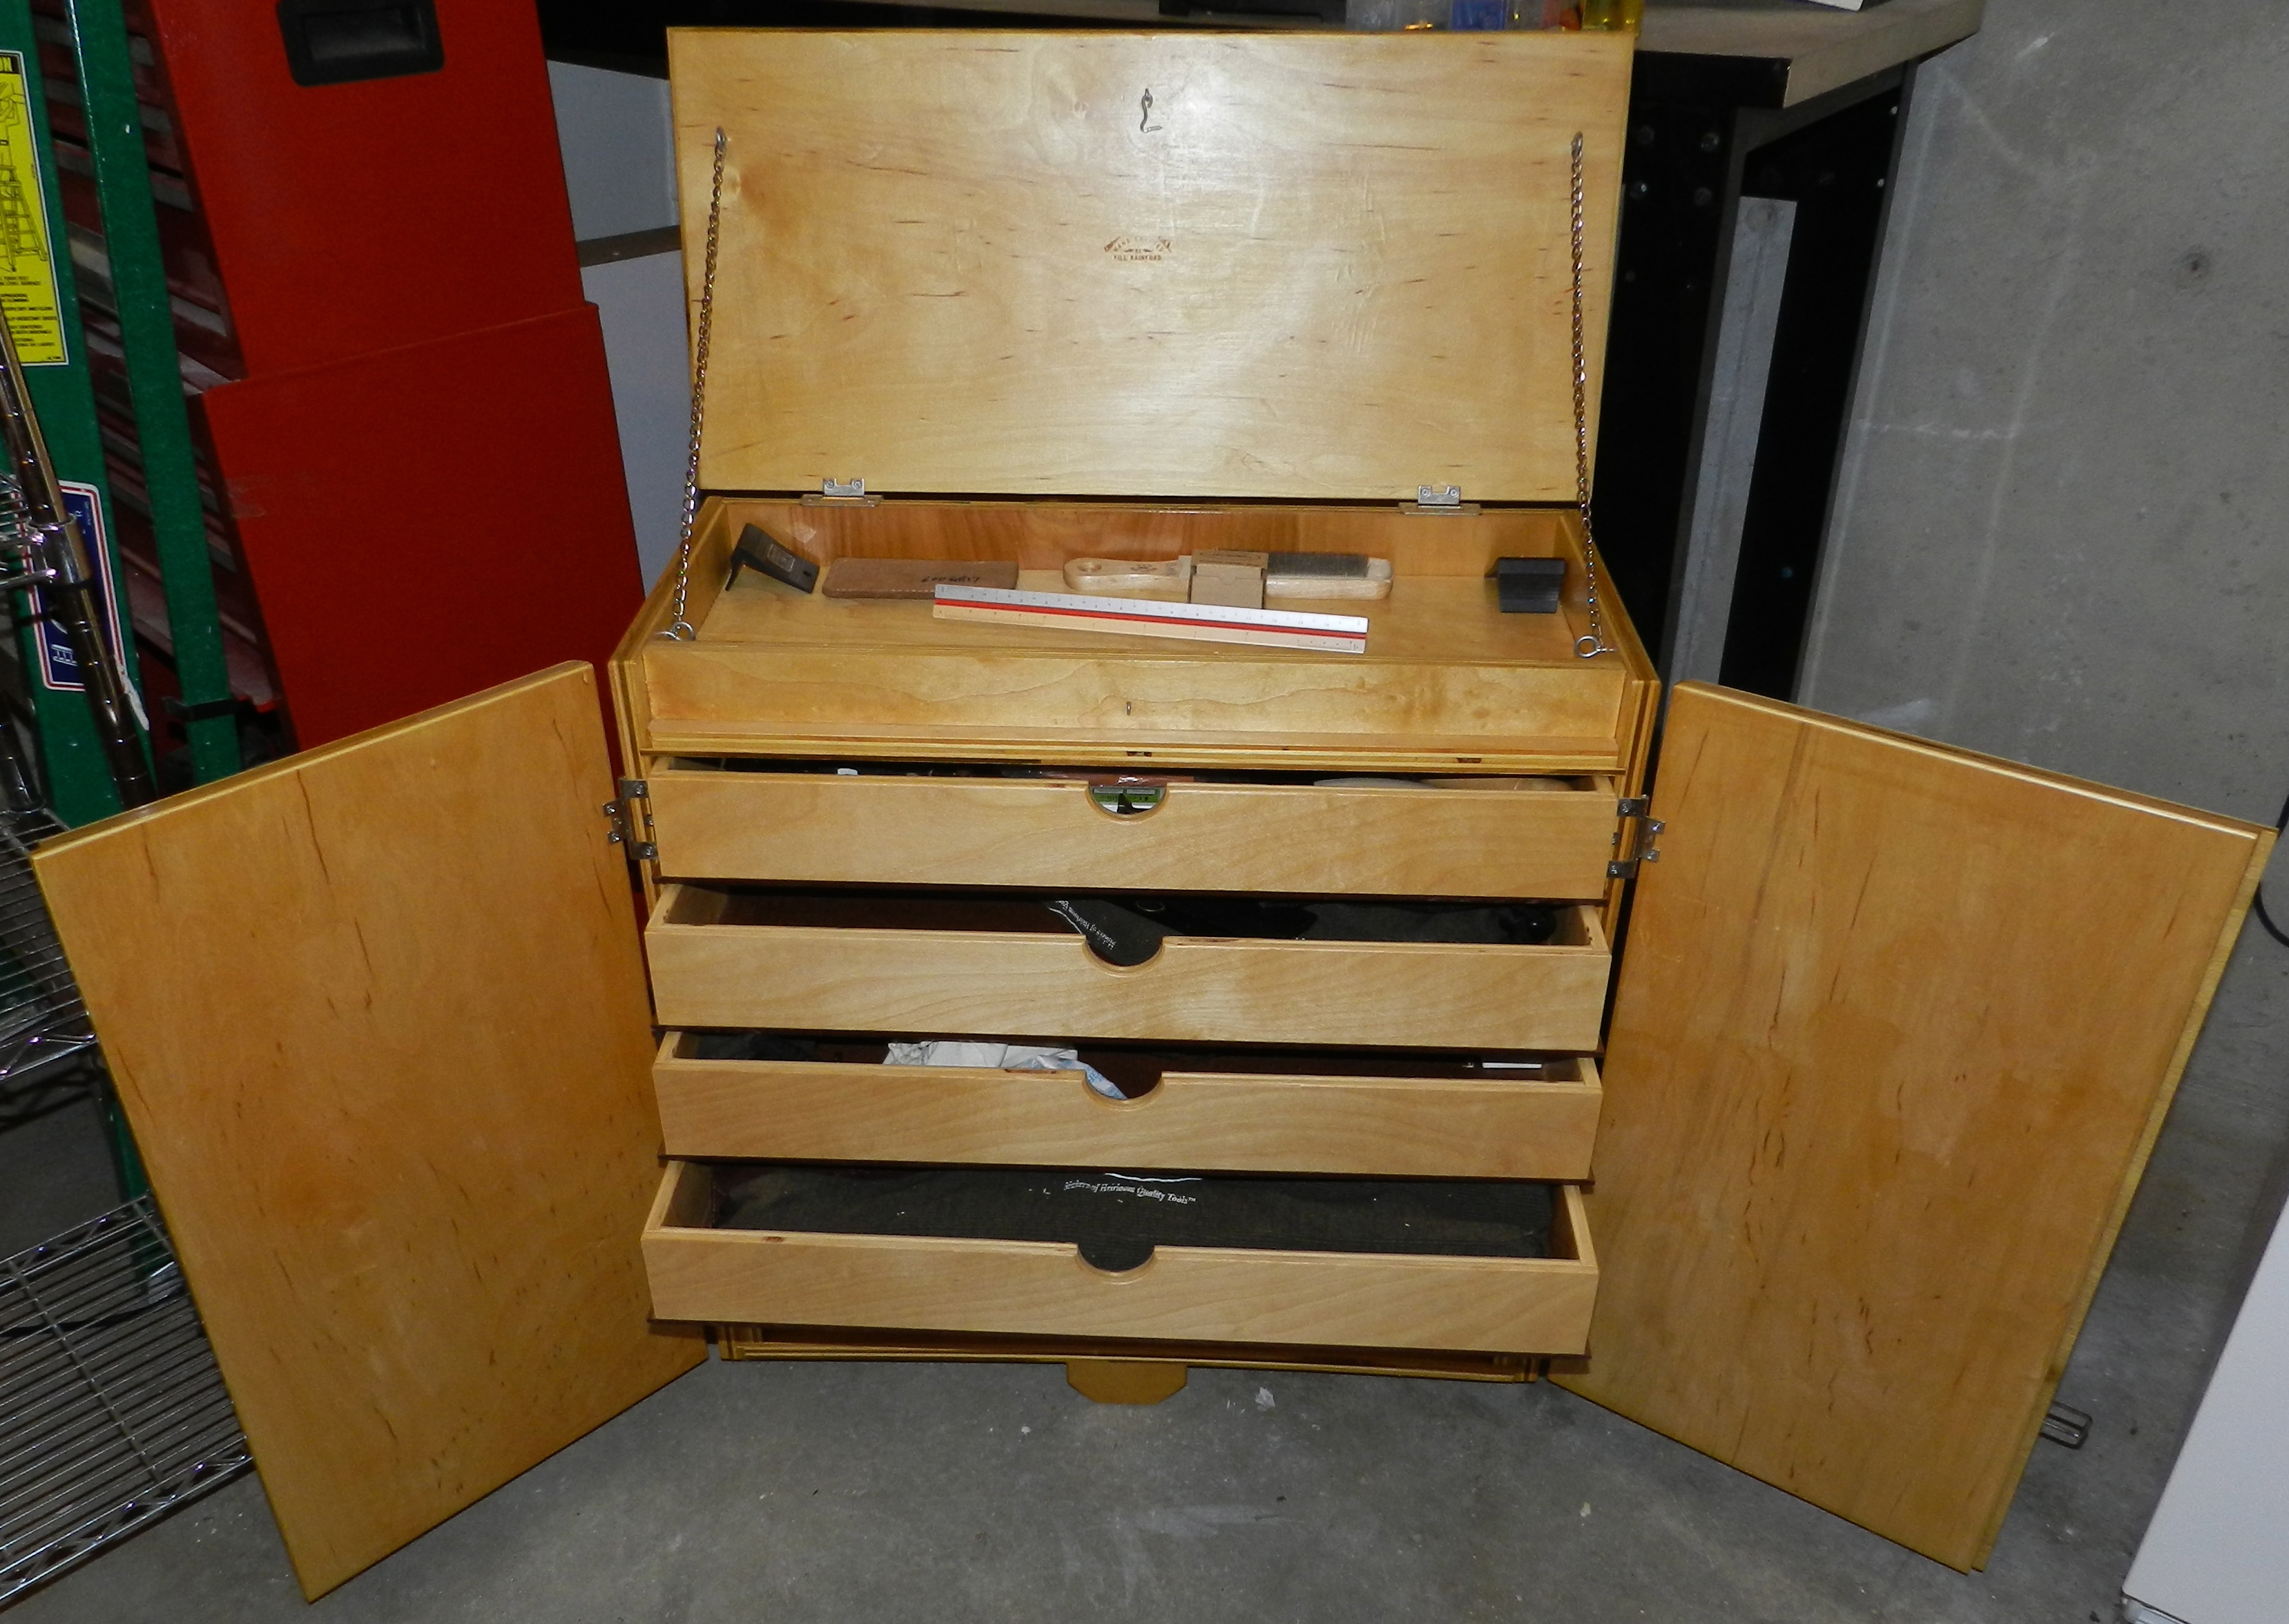
Front view with drawer’s opened
When I built a traveling toolchest for my own work I went with a utilitarian design that functioned much like rolling luggage of today. Inside there is a tray on top, a series of removable drawers to hold planes and small items and some open cubbies that were easily accessible and could be secured behind locking doors. The heavy chest lifts, telescoping handle and wheels make it manageable to move. The drawers can be swapped out depending on the needs of the current project and I could vary the height as needed — having a double deep drawer etc.
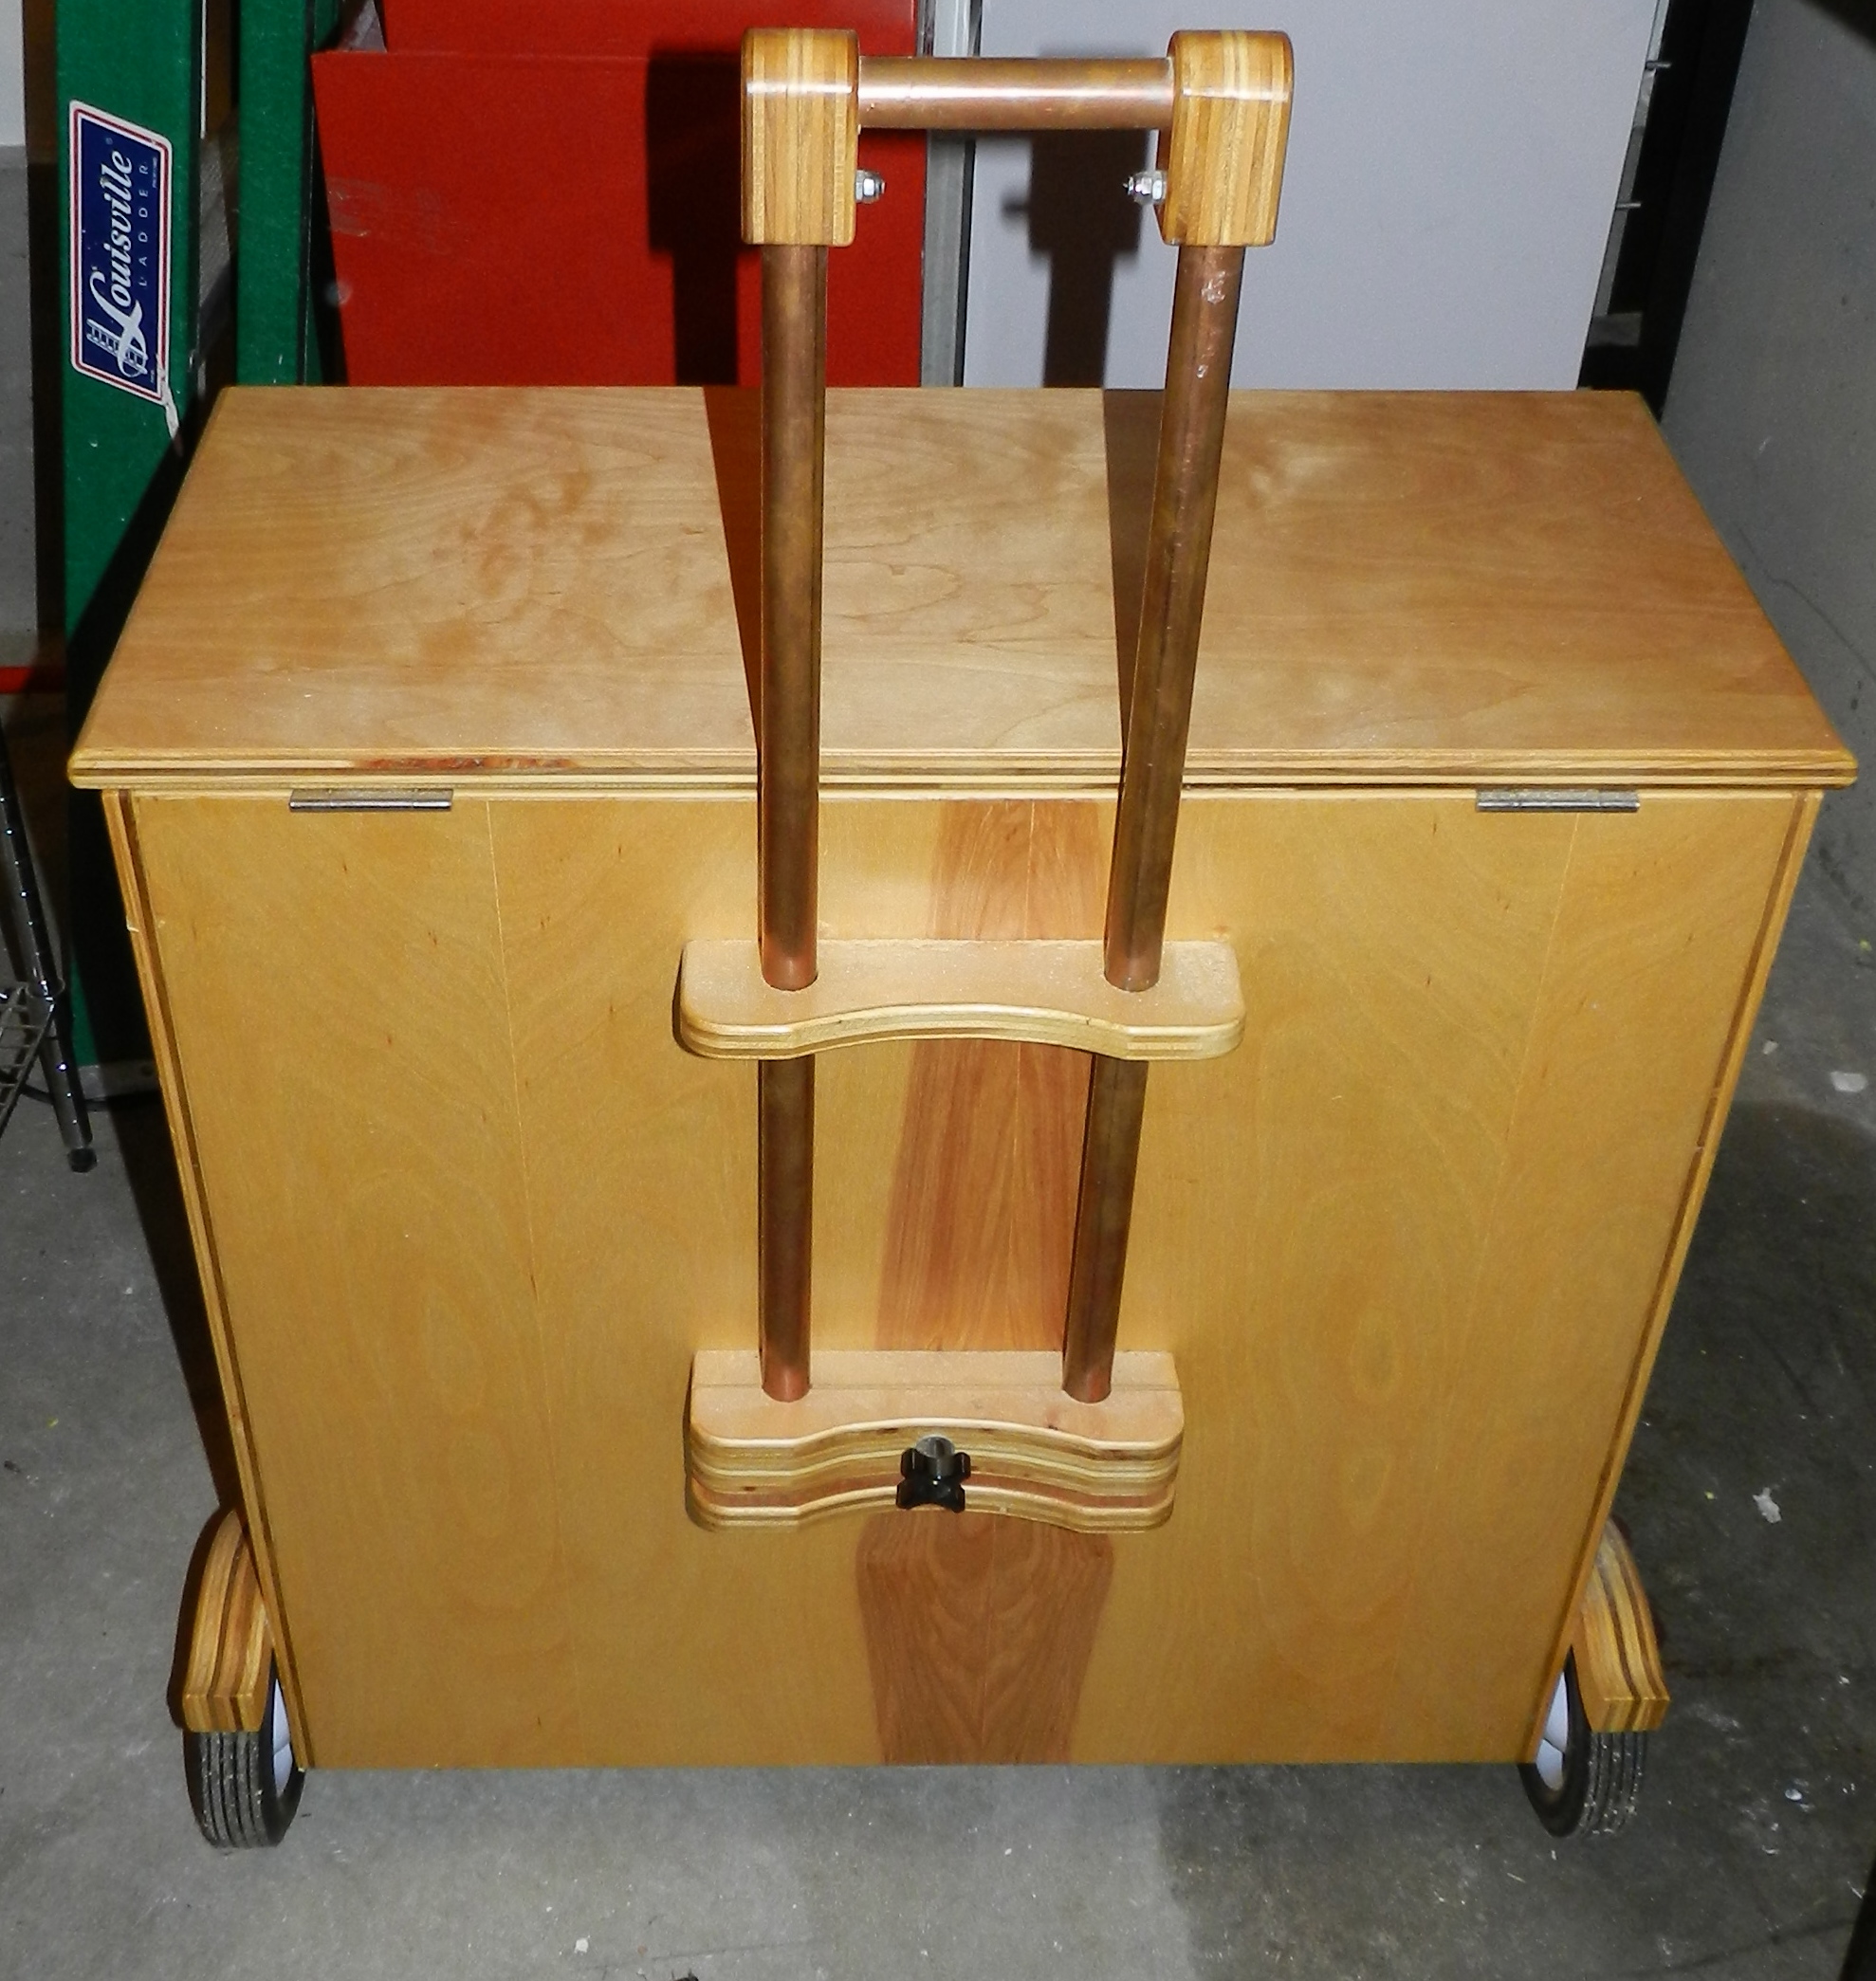
Rear view with luggage style handle extended
Tips for laying out the interior of your own chest:
Design your chest from the inside out to fit your current tools and leave room to grow or modify as your tools and interests change over the years
Start with your largest tool — for most it is a No. 7 or No.8 Jointer Plane or panel saws — and segment from there
Tools you use most often should be the easiest to find — marking tools, squares, bench chisels, saws etc
Make something you are proud of — you’ll be using this chest for years to come and it will be regularly inspected by all your woodworking friends
Don’t be afraid to experiment — the great chests all evolved from earlier models, but temper that by remembering that simplicity and expressed construction will often serve you better than lots of glitz without substance
The above principles guide me as I build my own tool chests I and I hope they will help you as get out into the shop and build a chest that is a reflection of your woodworking skills and personality.
You can learn more about my thoughts on Tool Chests on my blog here.
-Bill Rainford
P.S. The above post is an extended version of what I wrote up for my friends over at Popular Woodworking as part of their Daily Woodworking Blog which you can find here.
I recently had the opportunity to make a post to the Popular Woodworking online community which is edited by Dan Farnbach the PWM online editor.
Below is an extended version of that first post:
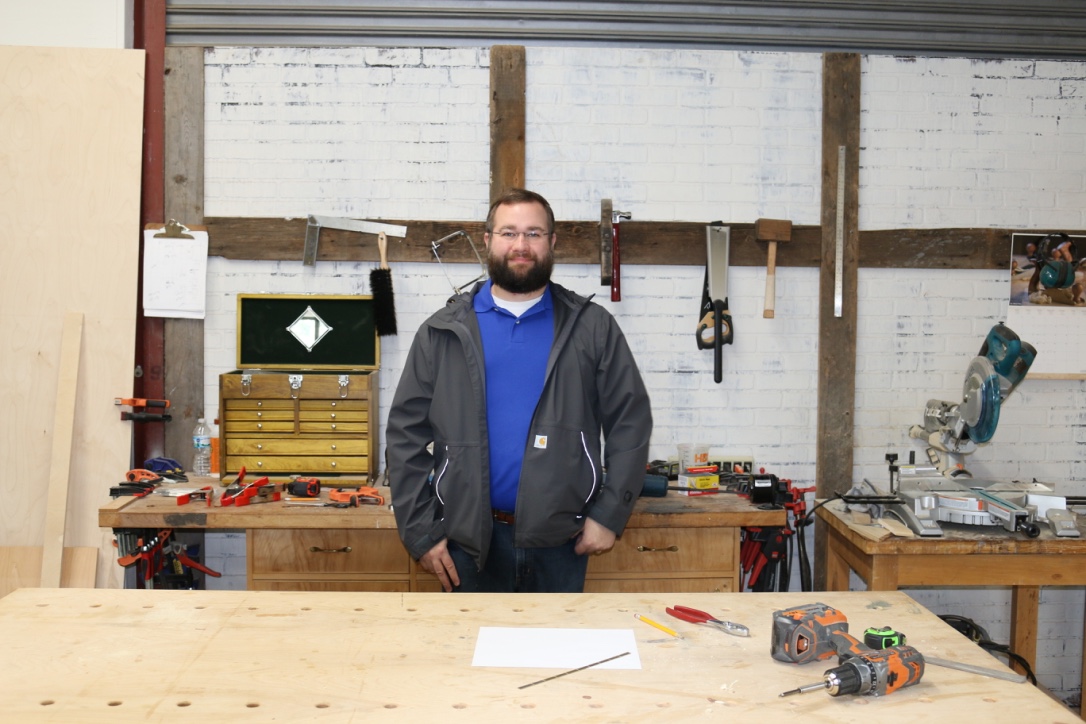
Bill Rainford — Preservation Carpenter, Joiner, Instructor
Bill Rainford is a young and driven craftsman in whom I think you’ll find a lot in common. Voraciously self-taught at first, Bill went on to graduate from the Preservation Carpentry Program at one of New England’s premier craft schools. He now teaches workshops at that school (North Bennet Street) and serves as adjunct faculty at the Boston Architectural College, in addition to developing his own body of commissioned work, building his blog and holding down a day job in software. I want to welcome Bill to the community as an occasional guest writer. He’s going to bring us a little history and several techniques from his area of expertise, which he describes as traditional joinery –though Bill’s skills do not fit neatly in just one category.
We may also do a project plan over the course of the next few months. Please welcome Bill by reading this newsletter and then visiting his blog! Of particular interest is Bill’s recent collaboration with Roy Underhill – more on that at the bottom of this e-mail.
–Dan
What Sloyd Did For Me and My Woodworking Apprenticeship
Part of what made my training in preservation carpentry so rewarding was the way in which it was taught. We followed a system of educational handwork derived from what was originally developed at Nääs in Sweden and known as the ‘Educational Sloyd System.’ Sloyd is the Swedish word for ‘craft’ and most commonly associated with skilled manual craft work. In the early years of the school in the late 19th century, there was a strong need in Boston and America as a whole to help new immigrants learn the skills needed to acclimate to this new country and develop skills to support oneself. This Sloyd System trained students by building a series of useful models/items each of which introduced basic tools and skills, built confidence to tackle more advanced work, and fostered the ability to evaluate your own work and push yourself to reach new levels of accomplishment.
Elementary Sloyd Training based on traditional woodworking techniques
When Otto Aaron Salomon wrote ‘The Theory of Educational Sloyd‘ (page 7) he described the goals one should strove for in teaching and learning within this system.
The focus was not simply the ‘utilitarian aim’ :
To directly give dexterity to the use of tools
To execute exact work
There was also a larger, more ‘formative aim’ to the education:
To instill a taste for, and love of, labour in general
Inspire a respect for rough, honest, bodily labour
Develop independence and self-reliance
Train habits of order, exactness, cleanliness and neatness
Train the eye and sense of form. To give a general dexterity of hand and to develop touch
To accustom attention, industry, perseverance and patience
To promote the development of physical powers
The goal of all this training was not just to help find a job, but to help round out the person. Students may never pick up a tool again, but they will forever have the knowledge of how to make and evaluate things with your hand and your eye and appreciate the labor of others – something I often feel is lacking in members of my generation.
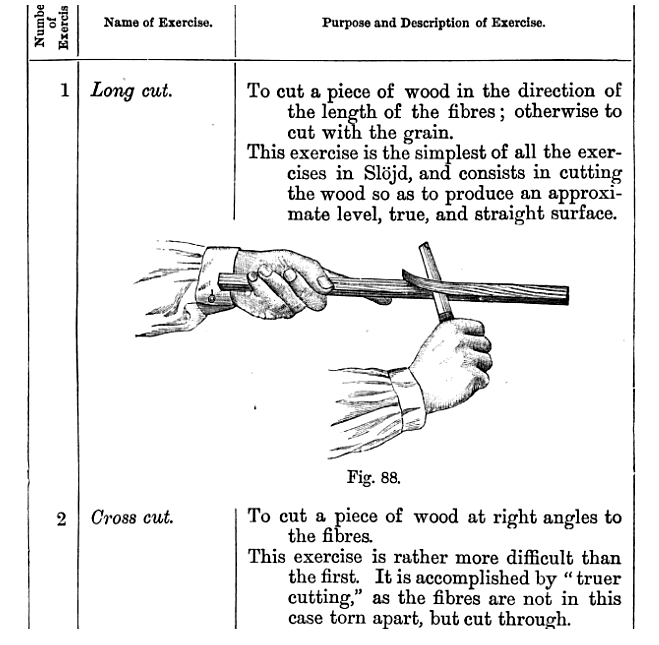
Sloyd Knife grain direction exercise
Students in this sort of program would often start with a simple block of wood and a Sloyd knife and learn to make controlled cuts. From this modest exercise they will absorb 3 of the most important lessons a woodworker will ever learn:
Cutting with the grain
Cutting against the grain
Splitting wood
From this most basic of exercises students are able to make usable objects like a pencil sharpener, letter opener, penholder etc. which they are able to keep, evaluate and use. As the training progresses the students will have more freedom to implement their own designs and apply the skills they have learned.
Fast Forward to Today
This sort of learning by doing, ability to be self critical, self-sufficient, and continually push oneself is still present at the school. In the current programs at NBSS students work under the supervision of a master craftsman who will start with the basics and guide students through their training. By the end of the 1, 2, or 3-year program, depending on major, students will demonstrate proficiency in many tasks, and while there is always more to learn they will be well situated to seek out and tackle the next big project.
After graduating from my training, I remained interested in Sloyd and did further research on the topic. I learned that many of the benches and hanging tool cabinets designed and produced for early Sloyd programs were based on the designs of Gustaf Larsson of The Boston Sloyd School and produced locally in Boston. Some of the benches are still in use by the school and you can find some second hand every now and then on eBay, but the hanging tool cabinet was news to me.
Sloyd Tool Cabinet advertisement from the late 19th/early 20th century
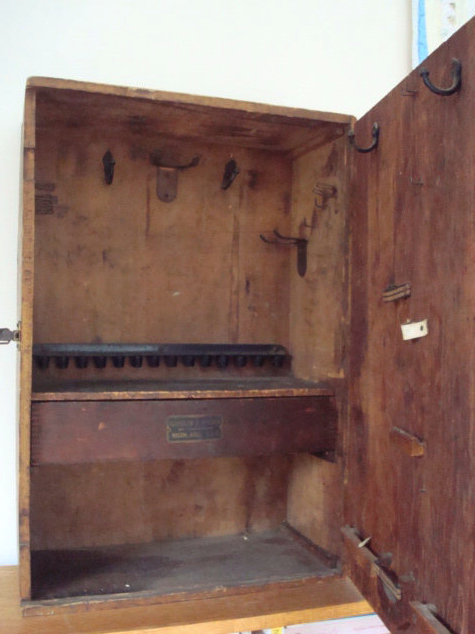
Shortly after learning about the Larsson tool cabinet I made a serendipitous discovery at a local pawn shop in New Hampshire – I actually found one of these cabinets and in very good shape given its age. All the hardware was intact, and only the front door was rebuilt. It was clear that this cabinet was used for a very long time by someone who cared about it, as the replacement door inherited the hardware and layout of the original.
My antique Sloyd tool cabinet
I am working on a reproduction of this piece, and will be presenting parts of that project here and on the Popular Woodworking blog. Future posts will include a bit on how the cabinet was made, interesting details on the tools that once inhabited this cabinet, as well as notes and prices on modern equivalents. If there is interest I will also make some explorations into some of the Sloyd exercises which can help improve your own hand skills.
Roy Underhill is a fellow Sloyd enthusiast and has been inspirational to me in my research. I caught up with him this week and he offered even more wisdom on the topic, saying:
“Everyone human likes to move, so we came up with yoga, dance and sport to make movement more engaging and expanding. So too with woodworking and Sloyd. The exercises of Sloyd can bring every modern woodworker along a thoughtful path of liberating discipline, of progress and accomplishment — and reconnection with the good feelings of our ancient craft.”
Using your Sloyd Training
If you’d like to join me in re-connecting with the joy of our ancient craft of woodworking I will be taking some classes at Roy’s Underhill’s ‘The Woodwright’s School’ in Pittsboro NC this July 9-12. The first class is Making a Traditional Jointer plane with Bill Anderson and the second class is Making a Traditional Metal Namestamp with Peter Ross. Both of these classes are a great way to learn some basic Sloyd skills and experience the satisfaction of using a high quality tool you made yourself for years to come. If you’d like more information on one or both of these classes, please check out my post on this topic here. If you are interested in attending, please do not wait to sign up — there is a minimum number of students needed to sign up by mid-June in order for the classes to run.
-Bill
A Joiner's Guide To Traditional Woodworking and Preservation