Here’s a recap of my first day at Woodworking In America 2016 — held at the Northern Kentucky Convention in Covington Kentucky which is part of the greater Cincinnati Ohio area.
Greetings from Popular Woodworking in America 2016
This was my first time attending this conference and other than a nightmare of a time getting there by plane from NH (Thursday night flight cancelled, the second set of flights Friday at the crack of dawn, missing the connection due to ground staff incompetence and fighting to get on another flight later in the day) and missing the 2/3 of the day’s lectures I still had a very nice first day watching Freddy Roman’s presentation, exploring the brew and browse event, meeting a ton of friends old and new and meeting several online friends in person. I also had a great dinner with a great bunch of folks — Zach Dillinger, Mary May, George Walker and many others.
Click on any of the images below to click through the images as a slideshow. (if you are viewing this post in an email browser, please click on the post title above to view the post on the website itself)
Greetings from Popular Woodworking in America 2016
John A. Roebling Suspension Bridge
Street leading to the Northern Kentucky Convention Center, home to WIA 2016
Freddy Roman giving a talk on sand shading and inlay.
Some of Freddy’s banding stock samples.
Freddy Roman demonstrating some fine detail work.
Sand shaded blanks
Very neat sample board of some incredibly tiny and intricate banding Freddy acquired and has worked from.
Carving close up on big screen
David Thiel of popular woodworking tweaking his camera. I always think photographs of other photographers are fun.
My friend Zach Dillinger at the Mortise and Tenon booth
The new Crucible Tools — hold fast and dividers. Very nice looking.
Paper sector by George Walker and Jim Tolpin
Brendan Bernhardt Gaffney and George walker looking at Brendan’s new sector prototype.
Prototype Sector by Brendan. Definitely going to get one soon.
Joshua Klein and his most excellent Mortise and Tenon Magazine booth
Tico Vogt Toolworks
The large Lee Valley/Veritas booth. Always fun to try out their latest and greatest tools
SAPFM booth with the hand tool olympics. I’m proud to say I did will with my cutting events.
Lie Nielsen Toolworks with Mr. Lie Nielsen himself.
Deneb Puchalski of Lie Nielsen Toolworks giving a demo. Deneb is a great guy and I’ve been buying tools from LN for many years and he’s been my main point of contact for most of it.
Knew concepts marquetry saw
Some of the very nice work by Texas Heritage Woodworks
Jason Thigpen of Texas Heritage Woodworks making a great face.
Some of the very nice work by Texas Heritage Woodworks
Plate 11 Workbench Company
Plate 11 Workbench Company with leg vise and real nice planing stop
Plate 11 Workbench Company planing stop
A nice rocking chair by ne of the exhibitors. Wish I could recall his name, but he was offering online courses, one of which was on making this chair.
The Superior Works 🙂
Up next is a post about the second two days of the conference. I had a great time and hope I can attend it again in 2017.
“Pay no attention to that man behind the curtain.” — Wizard of Oz
Back in May I spent a couple of days in Cincinnati Ohio on my way down to Harrodsburg Kentucky for the EAIA Annual Meeting and a quick stop in Covington Kentucky on my way home to visit with some of my woodworking friends in the area.
My first stop was at the Popular Woodworking offices and studio to see Megan Fitzpatrick and David Thiel who graciously showed me around.
Popular Woodworking Sign
The office building while nondescript from the outside contained an interesting space on the inside. A mixture of office space, editing bays, studio/soundstage and a woodworking shop.
Me in one of the locations you’ve seen in Popular Woodworking videos
I visited the shop area with backdrop you may recognize from several woodworking videos. The timber framer in me wants to push up that simulated plate and add some braces. 🙂
Furniture from earlier magazine projects
In the warehouse space you could see several projects from Popular Woodworking and American Woodworker magazine. If only we had room in the car to buy one and bring it home.
A live shoot & recording session in the studio
In the studio area I was able to see another F+W project video being recorded.
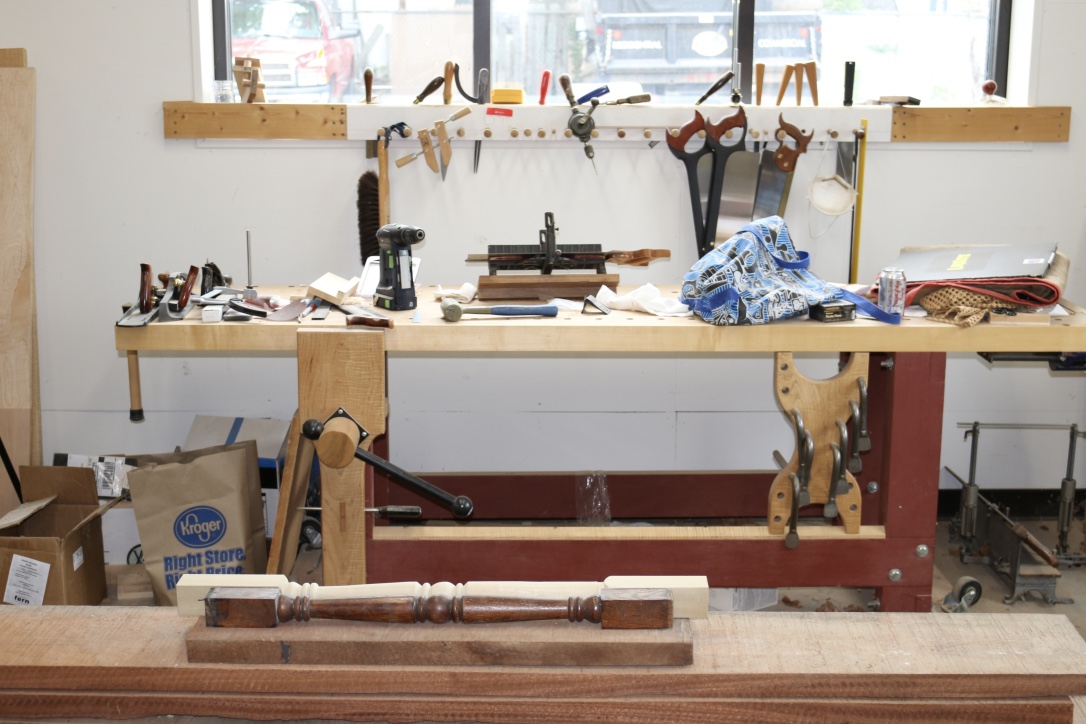
Megan’s workbench in the corner of the workshop
Out in the woodworking shop I felt right at home. There was a large machine and bench room. In the corner I could see Megan’s workbench and the windows you may recognize from many an article and post from Popular Woodworking over the years.
I was too busy talking David’s ear off and didn’t take a picture of him to include in the post, but I’ll make sure to take one next time I am in town.
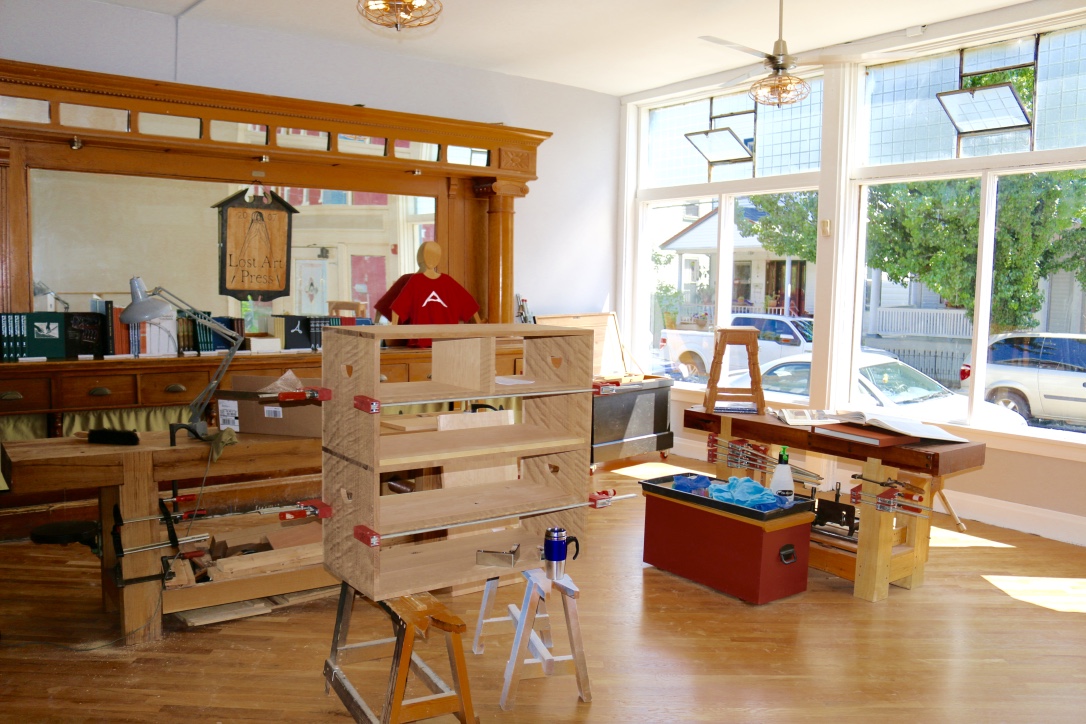
On the way home from our trip I also stopped in Covington KY (right across the Ohio river from Cincinnati OH) to visit Chris Schwarz at the Lost Art Press storefront. The storefront is a nice historic building that used to be a saloon in a part of Covington that reminds me a bit of Brooklyn — lots of history, artists, hipsters, good restaurants etc.
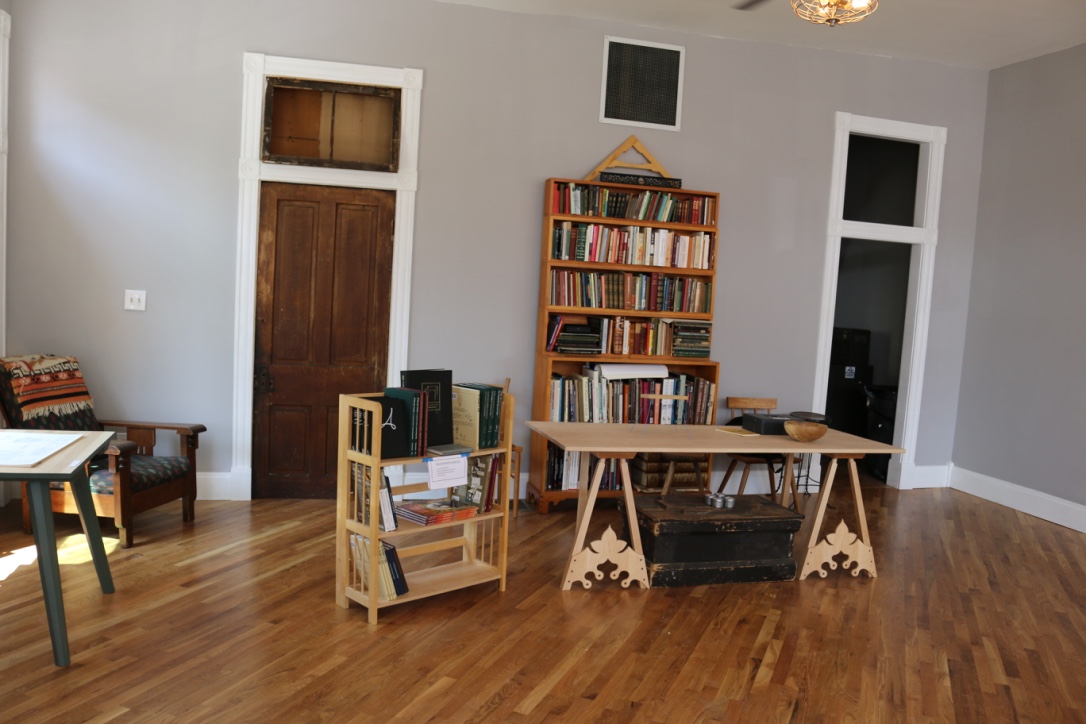
Inside of the Lost Art Press Storefront
After watching the build out via many of Chris’ blog posts it was neat to see it in person and to see several of Chris’ recent pieces in person.
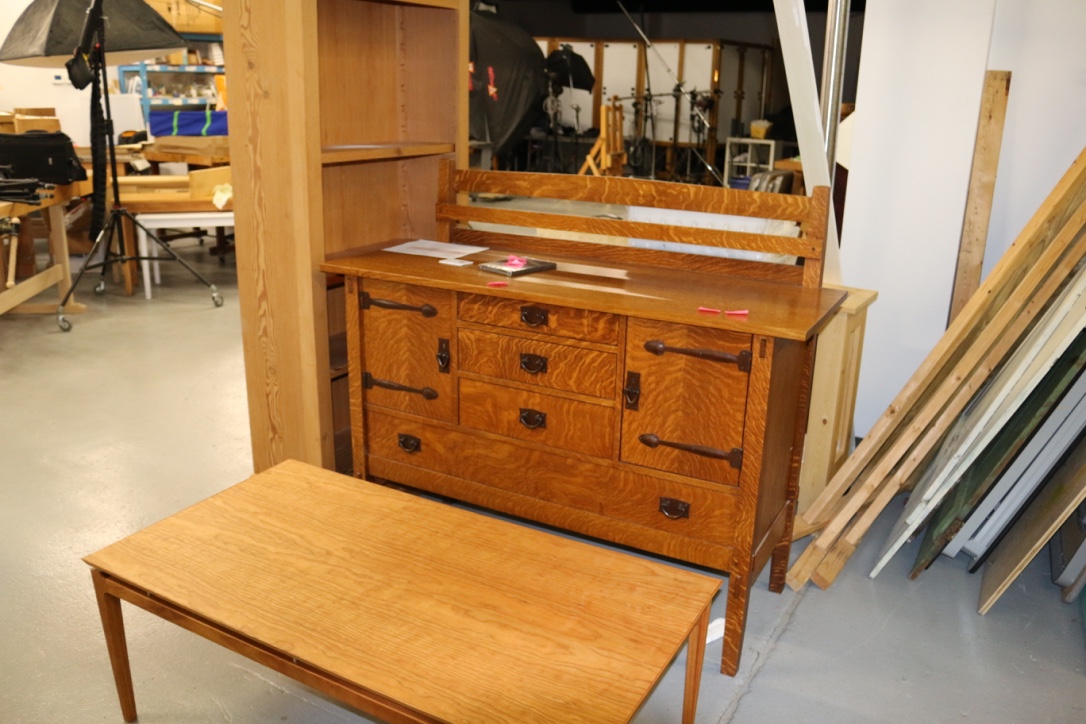
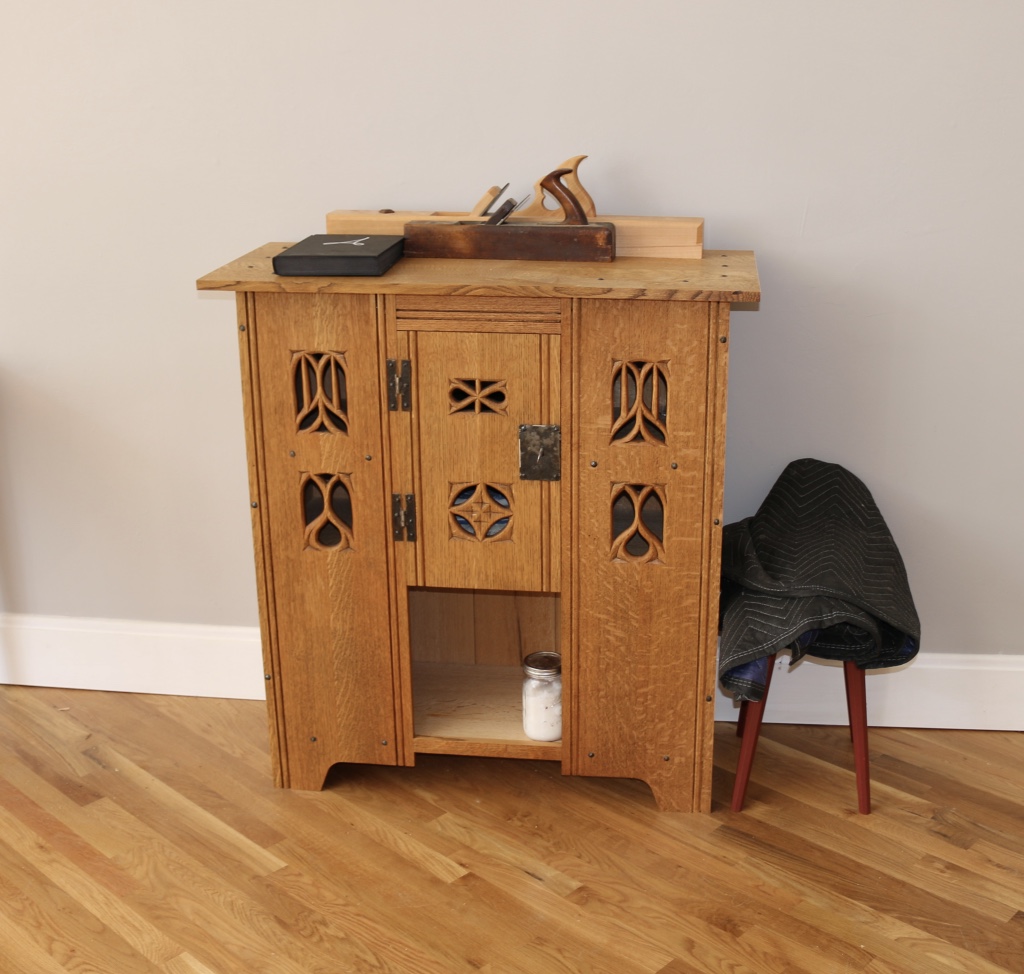
Aumbry from the Anarchist’s Design Book
You may recall the Aumbry above from the cover of a Popular Woodworking issue earlier this year and from the Anarchist’s Design Book.
I had fun talking shop with Chris and Megan and checking out some of the recent bits of hardware he picked up.
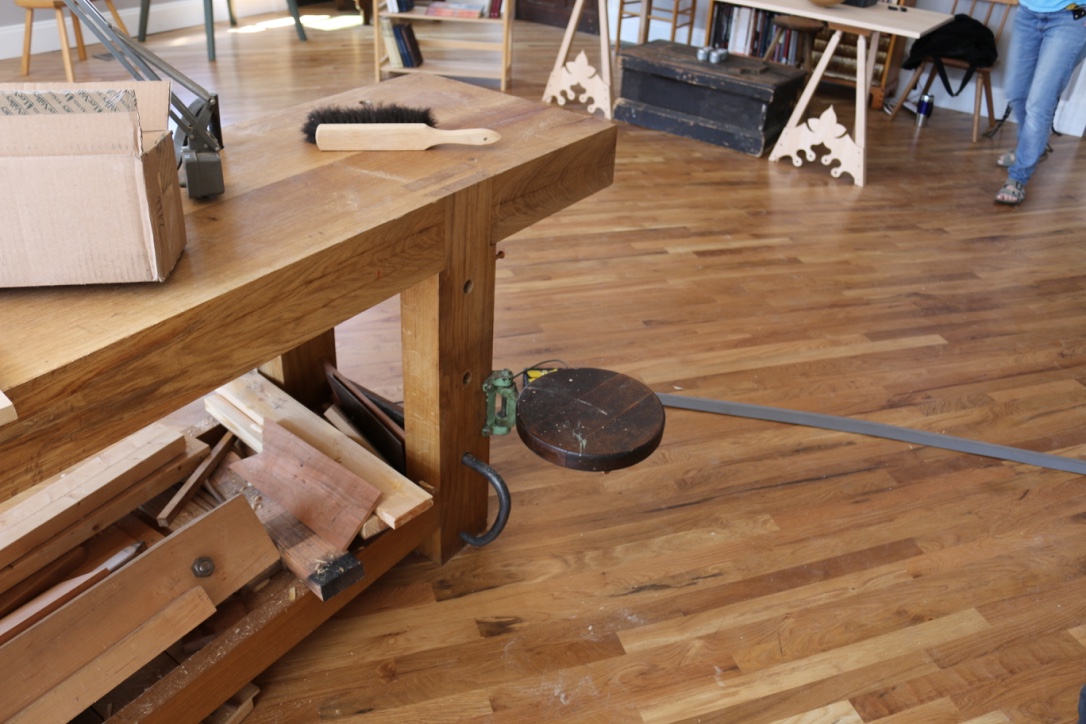
Nice swing out adjustable seat attached to the workbench leg
The adjustable swing out seat he added to his bench was a nice addition I’d love to have on my own bench someday for carving and other detail and design work on the bench.
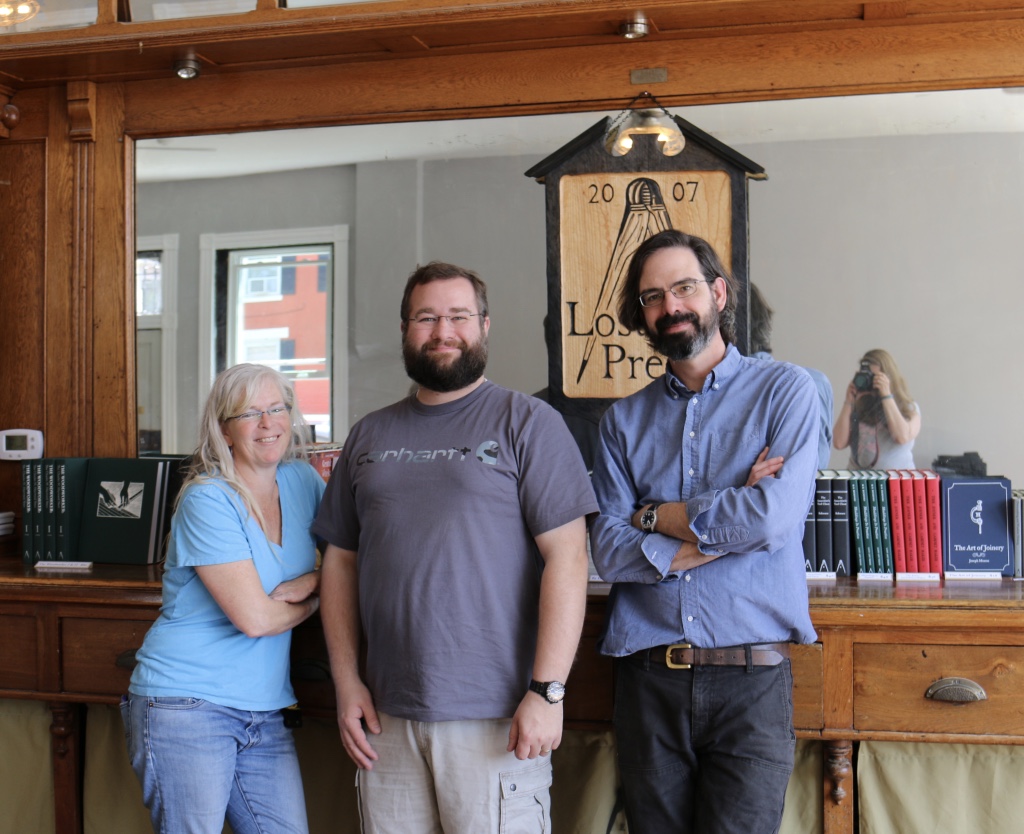
Megan Fitzpatrick, Bill Rainford and Chris Schwarz
This was my first trip to Cincinnati and I had a great time exploring the city. In fact I’ll be in the area again in September for Popular Woodworking in America.
A big thank you to Chris, Megan and David for showing me around and a big thank you to my wife Alyssa for wrangling the babies while I geeked out with fellow woodworkers.
Take care,
-Bill
For more information on the Lost Art Press you can check out their website here.
For more information on Popular Woodworking you can check out the magazine’s website here.
For information on Popular Woodworking in American 2016 you can check out their site here.
The Studley Tool-Cabinet and Workbench are the stuff of woodworking legend. I’ve seen the now famous poster of the cabinet in many woodworking shop, school and store. It’s the benchmark by which every other tool cabinet is compared. I know it ran through my head when I was researching the Chandler and Barber Sloyd tool cabinet.
To gaze upon this woodworking masterpiece in person is to be in awe…
Or so I’ve heard. The cabinet has been in private hands in recent years and other than a grainy New Yankee Workshop DVD and the FWW Poster and Article there were not a lot of places to see it or learn about it.
Earlier this year Donald C. Williams and others organized an exhibit to coincide with Handworks 2 wherein a limited number of folks could visit the cabinet and bench in person. I would have loved to have seen it in person but New Hampshire is a LONG way away from Amana, Iowa and with an infant son at home I could not make a trip of that distance.
I did pre-order Don’s book “Virtuoso: The Tool Cabinet and Workbench of Henry O. Studley” by the Lost Art Press which can be described as high class tool porn. 🙂 It provides lots of background, research and in depth photographic record of each tool in the cabinet along with vivid photographs by Narayan Nayar. The comprehensive book is well worth the read and can be inspirational to even non-woodworkers. There are several reviews of it on other well known websites.
But for those wanting more instant gratification or those of us who don’t have as much reading time as we used to — these days with the baby I’m lucky if I can get an exhausted hour or so in front of a screen to watch something enjoyable, so I figured I’d take a gamble and check out the companion DVD — “Virtuoso: The Tool Cabinet and Workbench of Henry O. Studley” also by Lost Art Press.
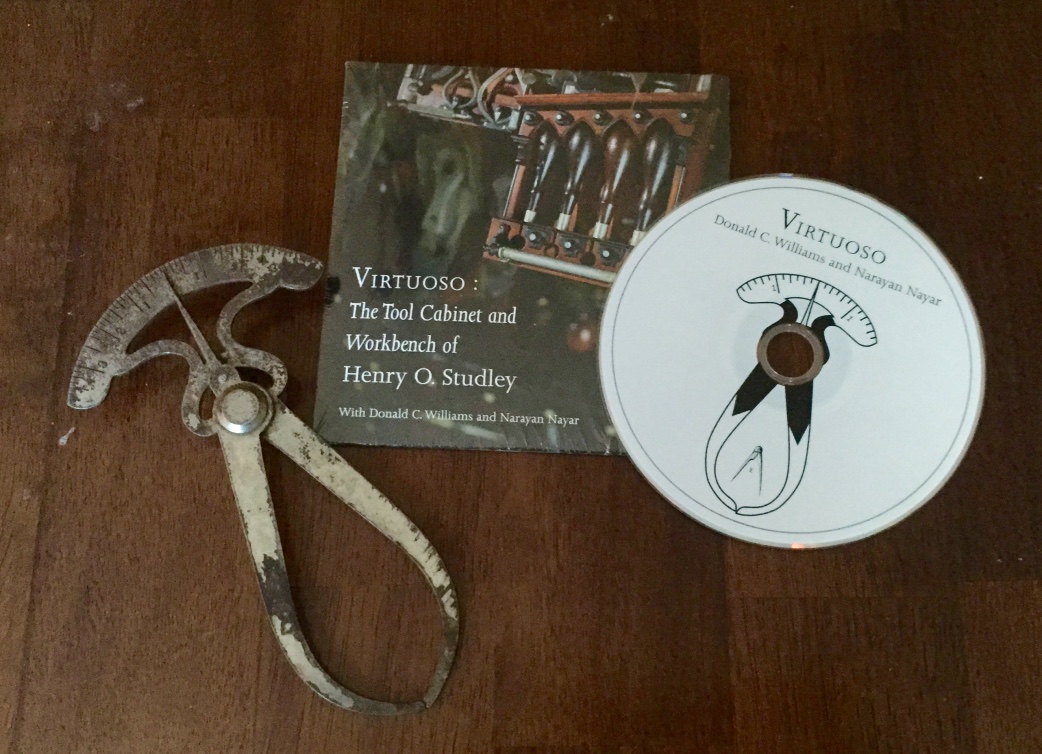
Virtuoso DVD + Studley Style Caliper
The DVD runs for about an hour and fifteen minutes and feels a bit like a PBS style documentary. (Which is something I often enjoy). It’s interesting to see how much emotion folks close to this project felt as they worked with the cabinet and its tools. Don Williams, Chris Schwarz and Narayan Nayar talk about what moved them, their favorite tools from the cabinet, their adventures in researching the cabinet and Studley and even some of the open questions they’d like to learn about if someone out there is sitting on a cache of Studley documents. The disc also has a section wherein Don removes all of the tools from the main compartments of the cabinet and shows each tool to you — basically everything except the drawers. It was very interesting to watch that happen in video as it gives an idea of how well the various trays, doors and holders held in their respective tools and how Studley layered the tools to make an incredible visual composition. Given how hard some were to locate and get in and out I don’t think Studley loaded up his tools each day and night as part of his regular work as I am in the camp that views this as something he did at the end of his career to make a statement/preserve some of the tools, but it was interesting to see some areas did have some wear from repeated use. The video reinforced the inspirational value the cabinet provides and helps to showcase the quiet beauty found in these high quality and time worn tools.
My criticisms about the DVD are all pretty minor: The disc comes in a cardboard sleeve — I’d rather have had a plastic case so it doesn’t get lost on my DVD shelf or a digital download option instead. The chapter transitions all use the same cover image with different text and were a bit slow to transition — and again that is likely just me being a tech nerd. Having attempted to edit a few videos for YouTube and for classes I have a lot of respect for anyone attempting to edit video as it is a VERY tedious process and everyone is a critic. 🙂
So, if you missed the Studley Exhibit in Amana, Iowa this video is the next best thing to seeing the cabinet and workbench in person and I’d recommend watching it. Feel free to share your thoughts on the video in the comments section below.
Take care,
-Bill
P.S. I bought the caliper shown in the featured image at this year’s Nashua Tool Show thinking of the Studley Tool Cabinet.
P.P.S. I bought the now famous poster from Robin Lee as part of the EAIA Annual Meeting Auction — now I just have to find some time to make a proper frame for it, so I can proudly hang it up out in the shop.
P.P.P.S I don’t have a direct association with the Lost Art Press other than Chris being a friend of mine and having bought a ton of stuff from LAP over the years. The links above generate no income for me and are provided for your ease in finding the book and DVD.
How do you choose the right finish? That is a question I’m often asked. In this final installment related to the 3 in 1 crib / toddler bed / adult bed building project I will walk through my own through process for how I picked the finish for this project.
Setting High Level Project Parameters:
Customer input — in this case, my wife Alyssa. We wanted something in that warm amber to medium brown color and tone range. She wanted something to potentially match a darker rocker and changing table we had and I wanted something more on the natural side given this wood was of higher quality and thought it would be a shame to hide all that figure.
I chose Cherry wood for this project as I like cherry’s grain, workability and warm tones once it has time to age. Given that the project is for my newborn son I wanted a child safe finish that would be durable. (So that has me think of shellacs, low or preferably no VOC finishes that cure to hard film that will protect the wood and be easy to clean)
Freshly milled cherry has a light, almost pink finish so I likely will dye or stain the project to get a jump on the aging process and even out the tones of the wood.
Cherry also has a tendency to blotch, so I always want to seal it with shellac as a sanding sealer to try and protect against blotching.
Color Sample Chips:
With some high level parameters in hand, I first take a look at the color chips and samples I have on hand.
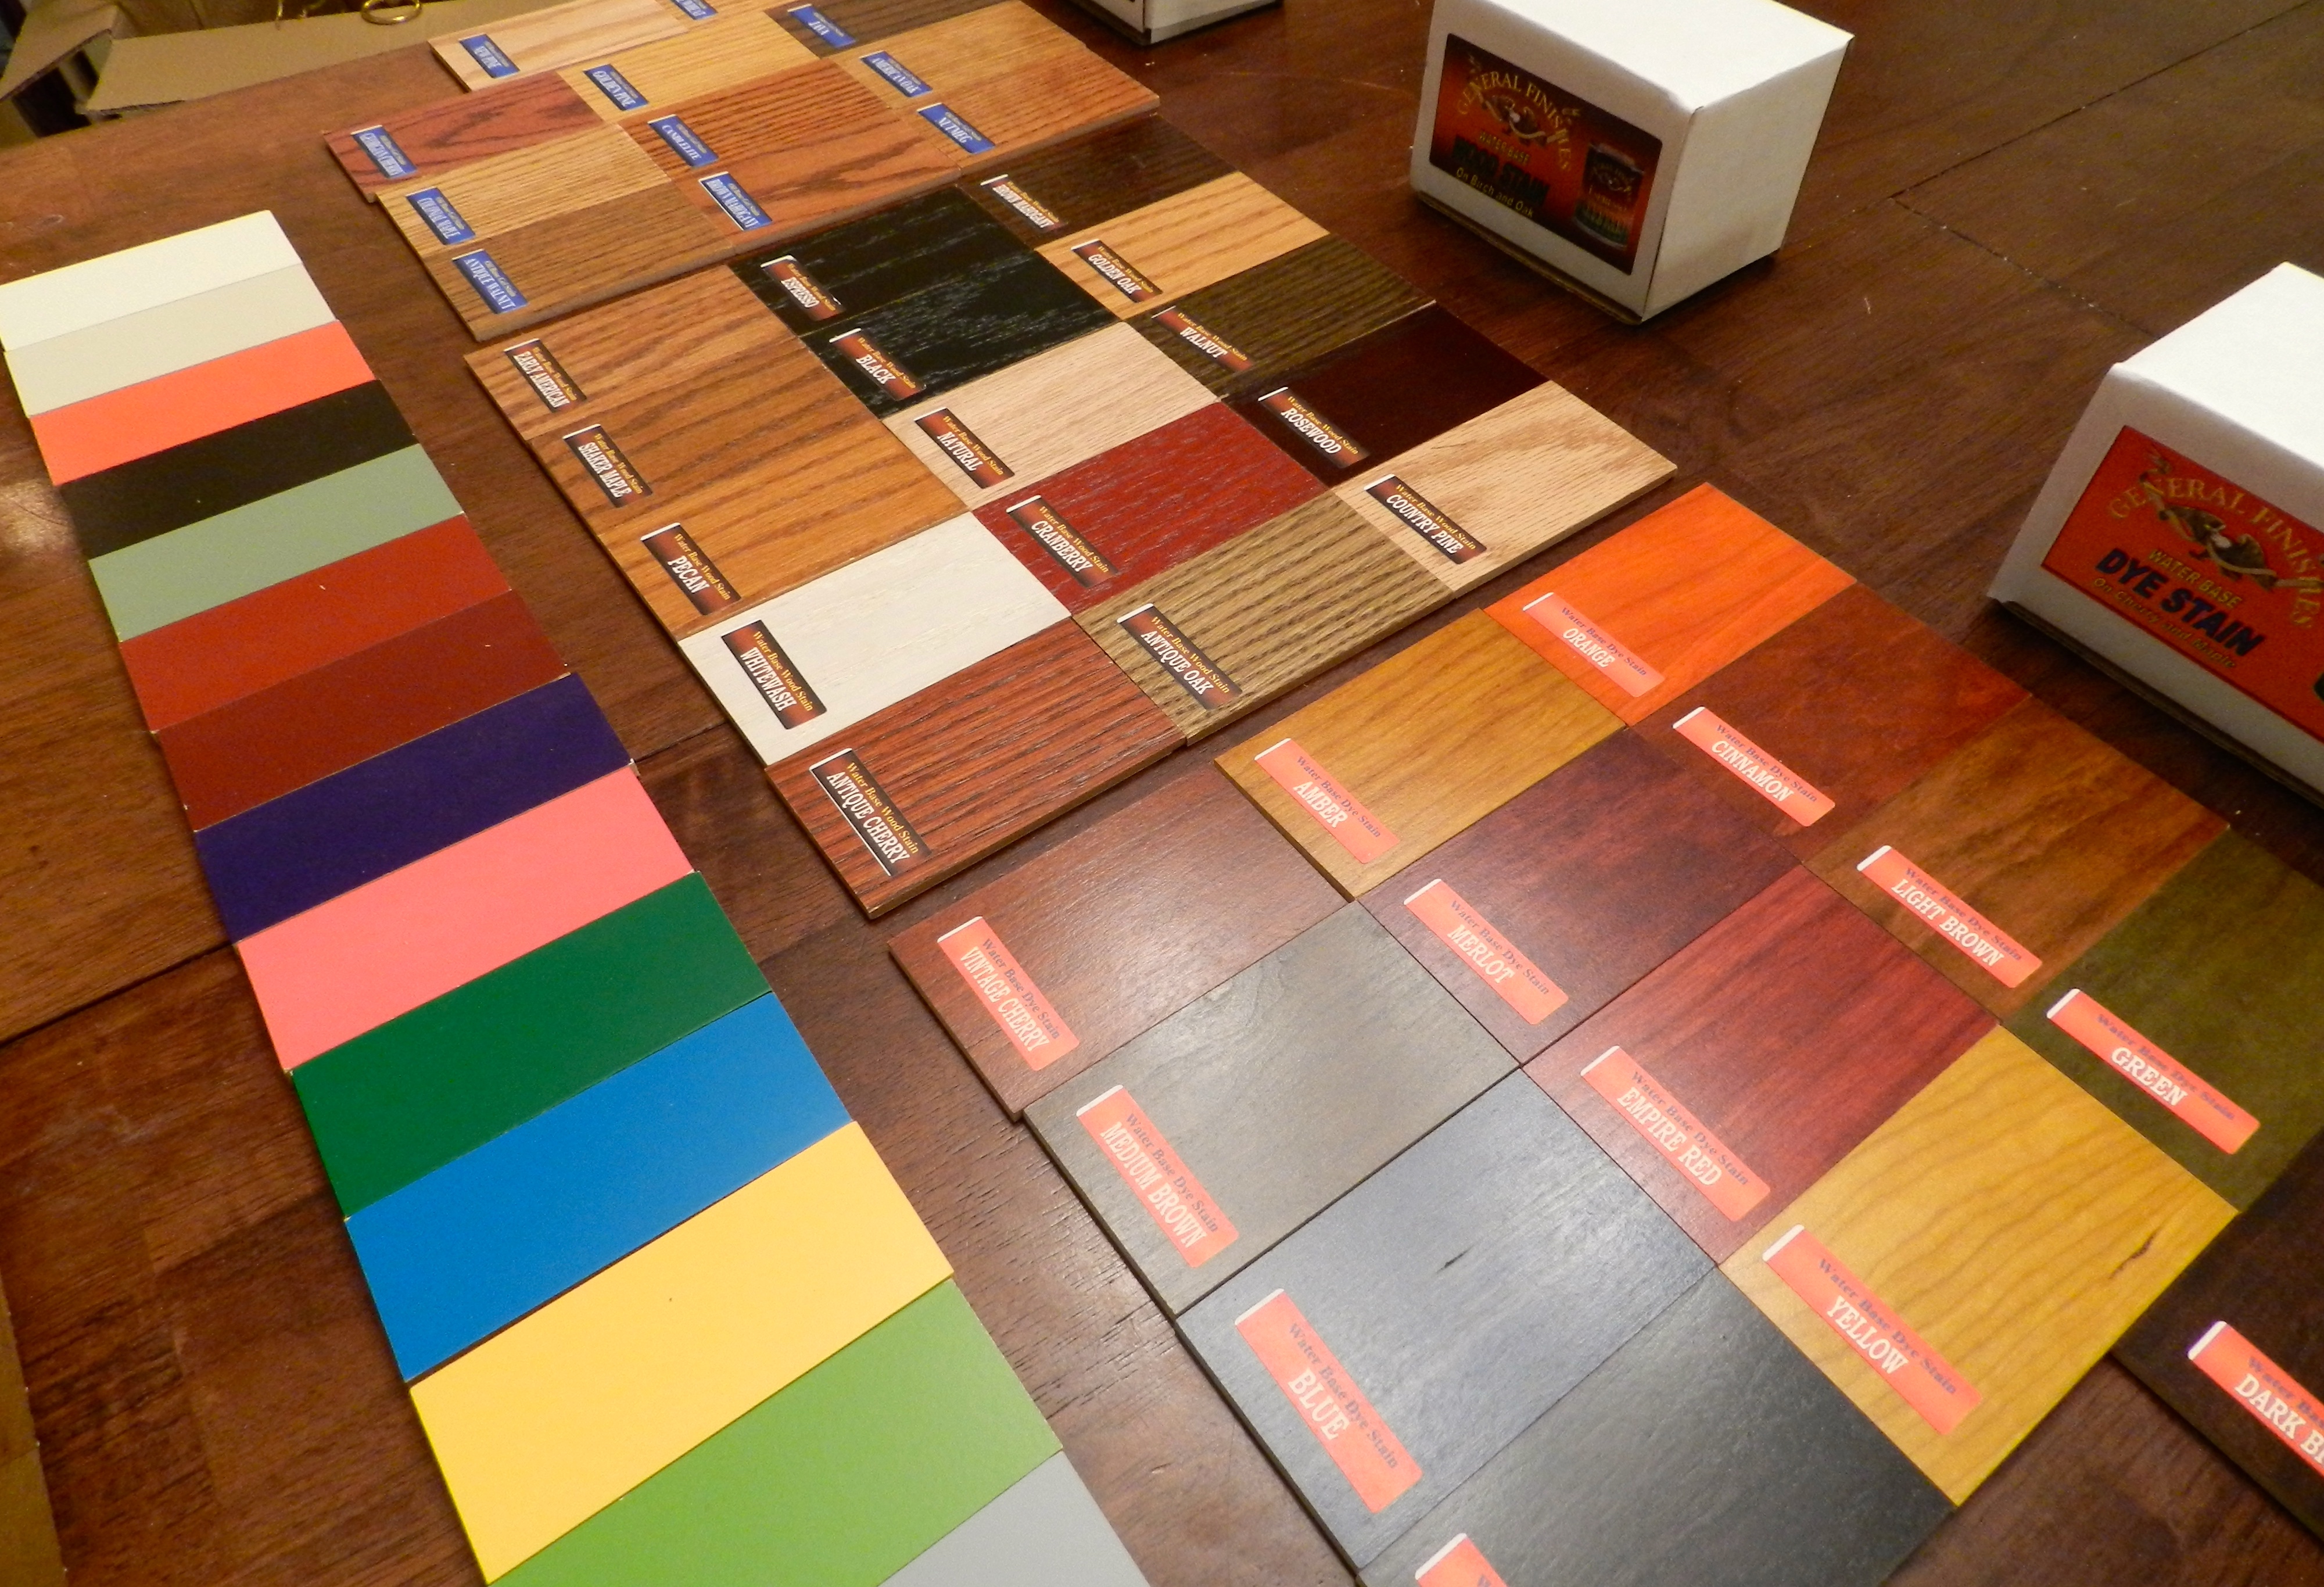
I have a real nice collection of General Finishes samples that I use in my teaching and they are one of my go-to finish providers as I’ve found their products to be high quality and reliable.
Finish and color samples
PRO TIP: Whenever you test a sample on a cut-off or similar piece of wood, label it with the finish — maker, type, color, date, #coats and wood species. I keep a box of these sorts of samples in my shop and they can often help in this process as my samples are larger than the standard chips that are usually on paper or small bits of veneer plywood. As the samples age they provide that much more information on how the pieces you make will age with a given finish.
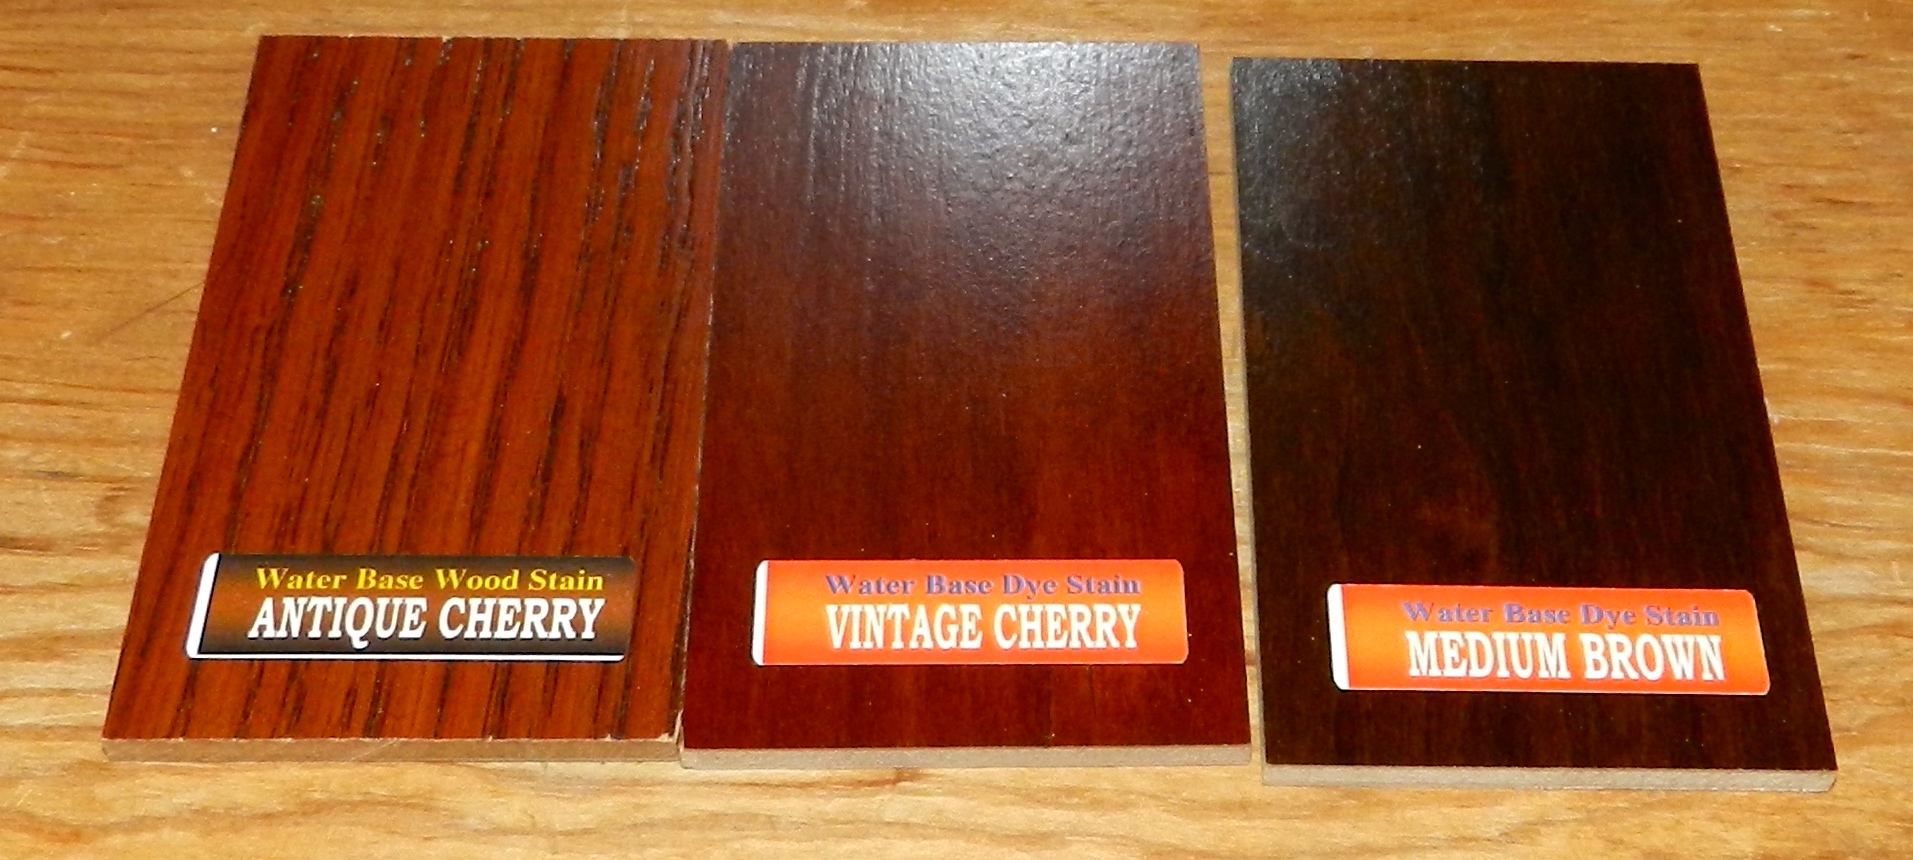
From looking at the chips in a few different lights and in the baby’s room we decided on the following three samples:
Cherry stains we liked
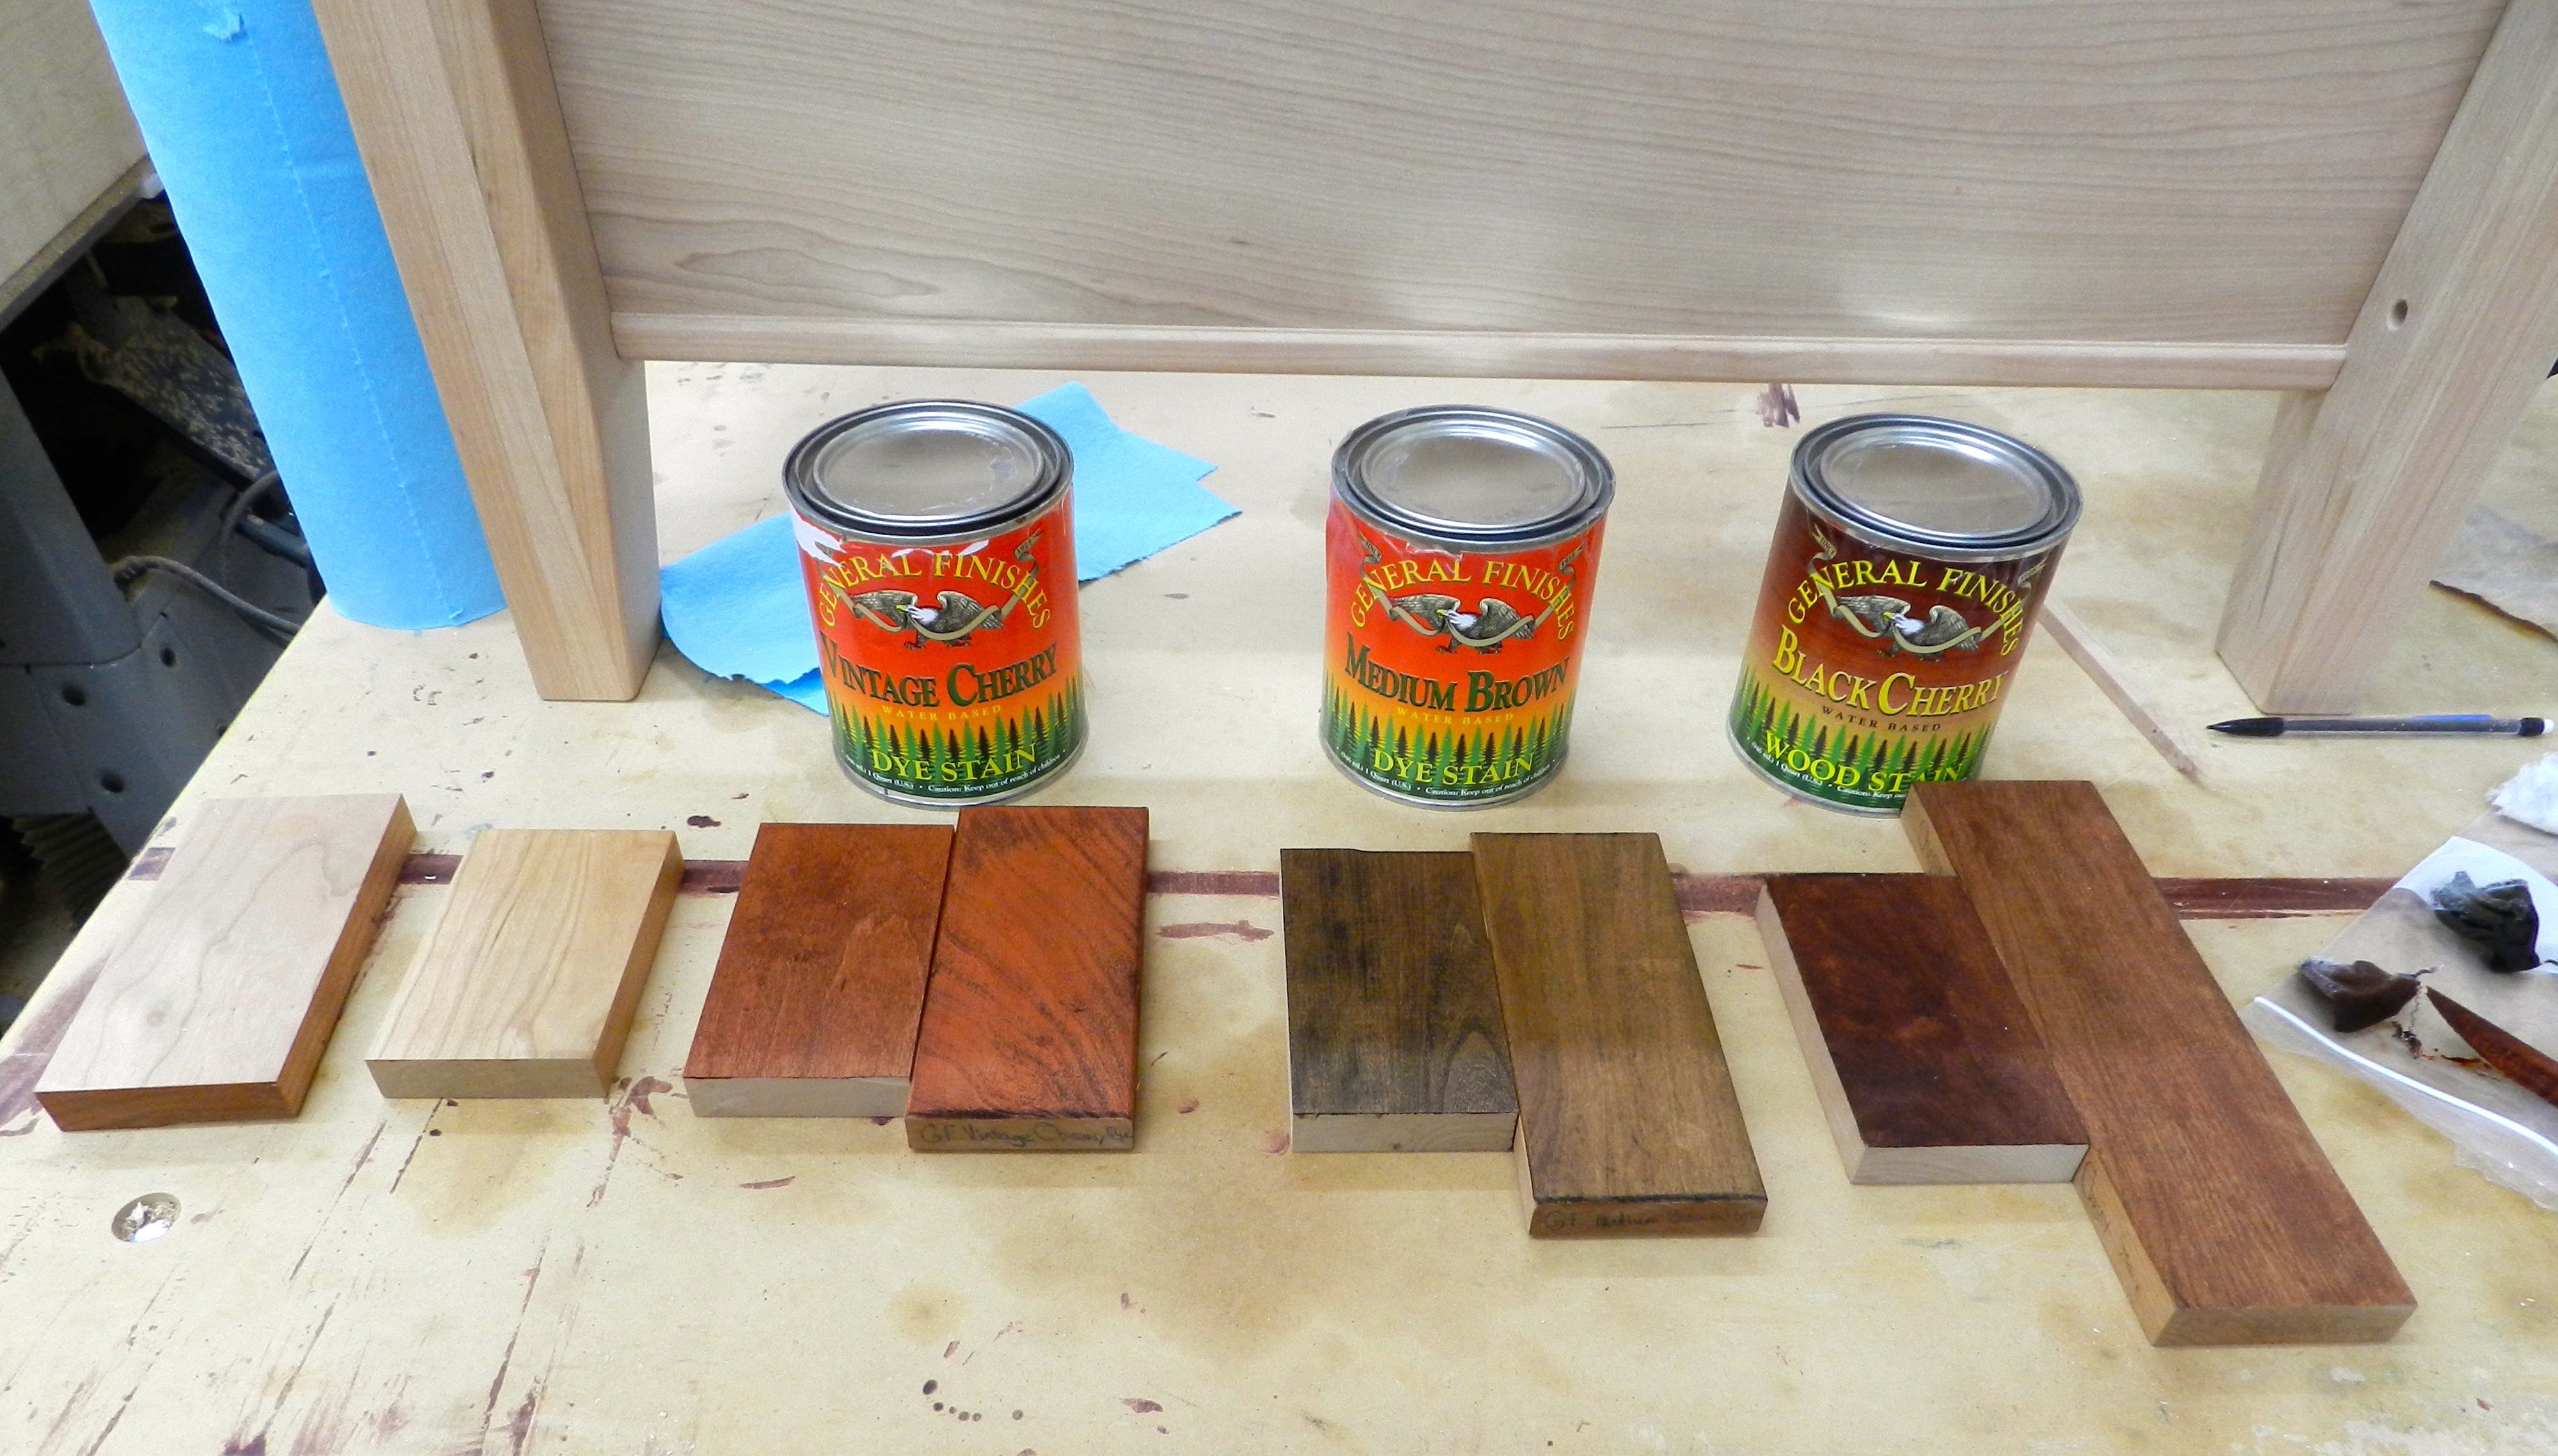
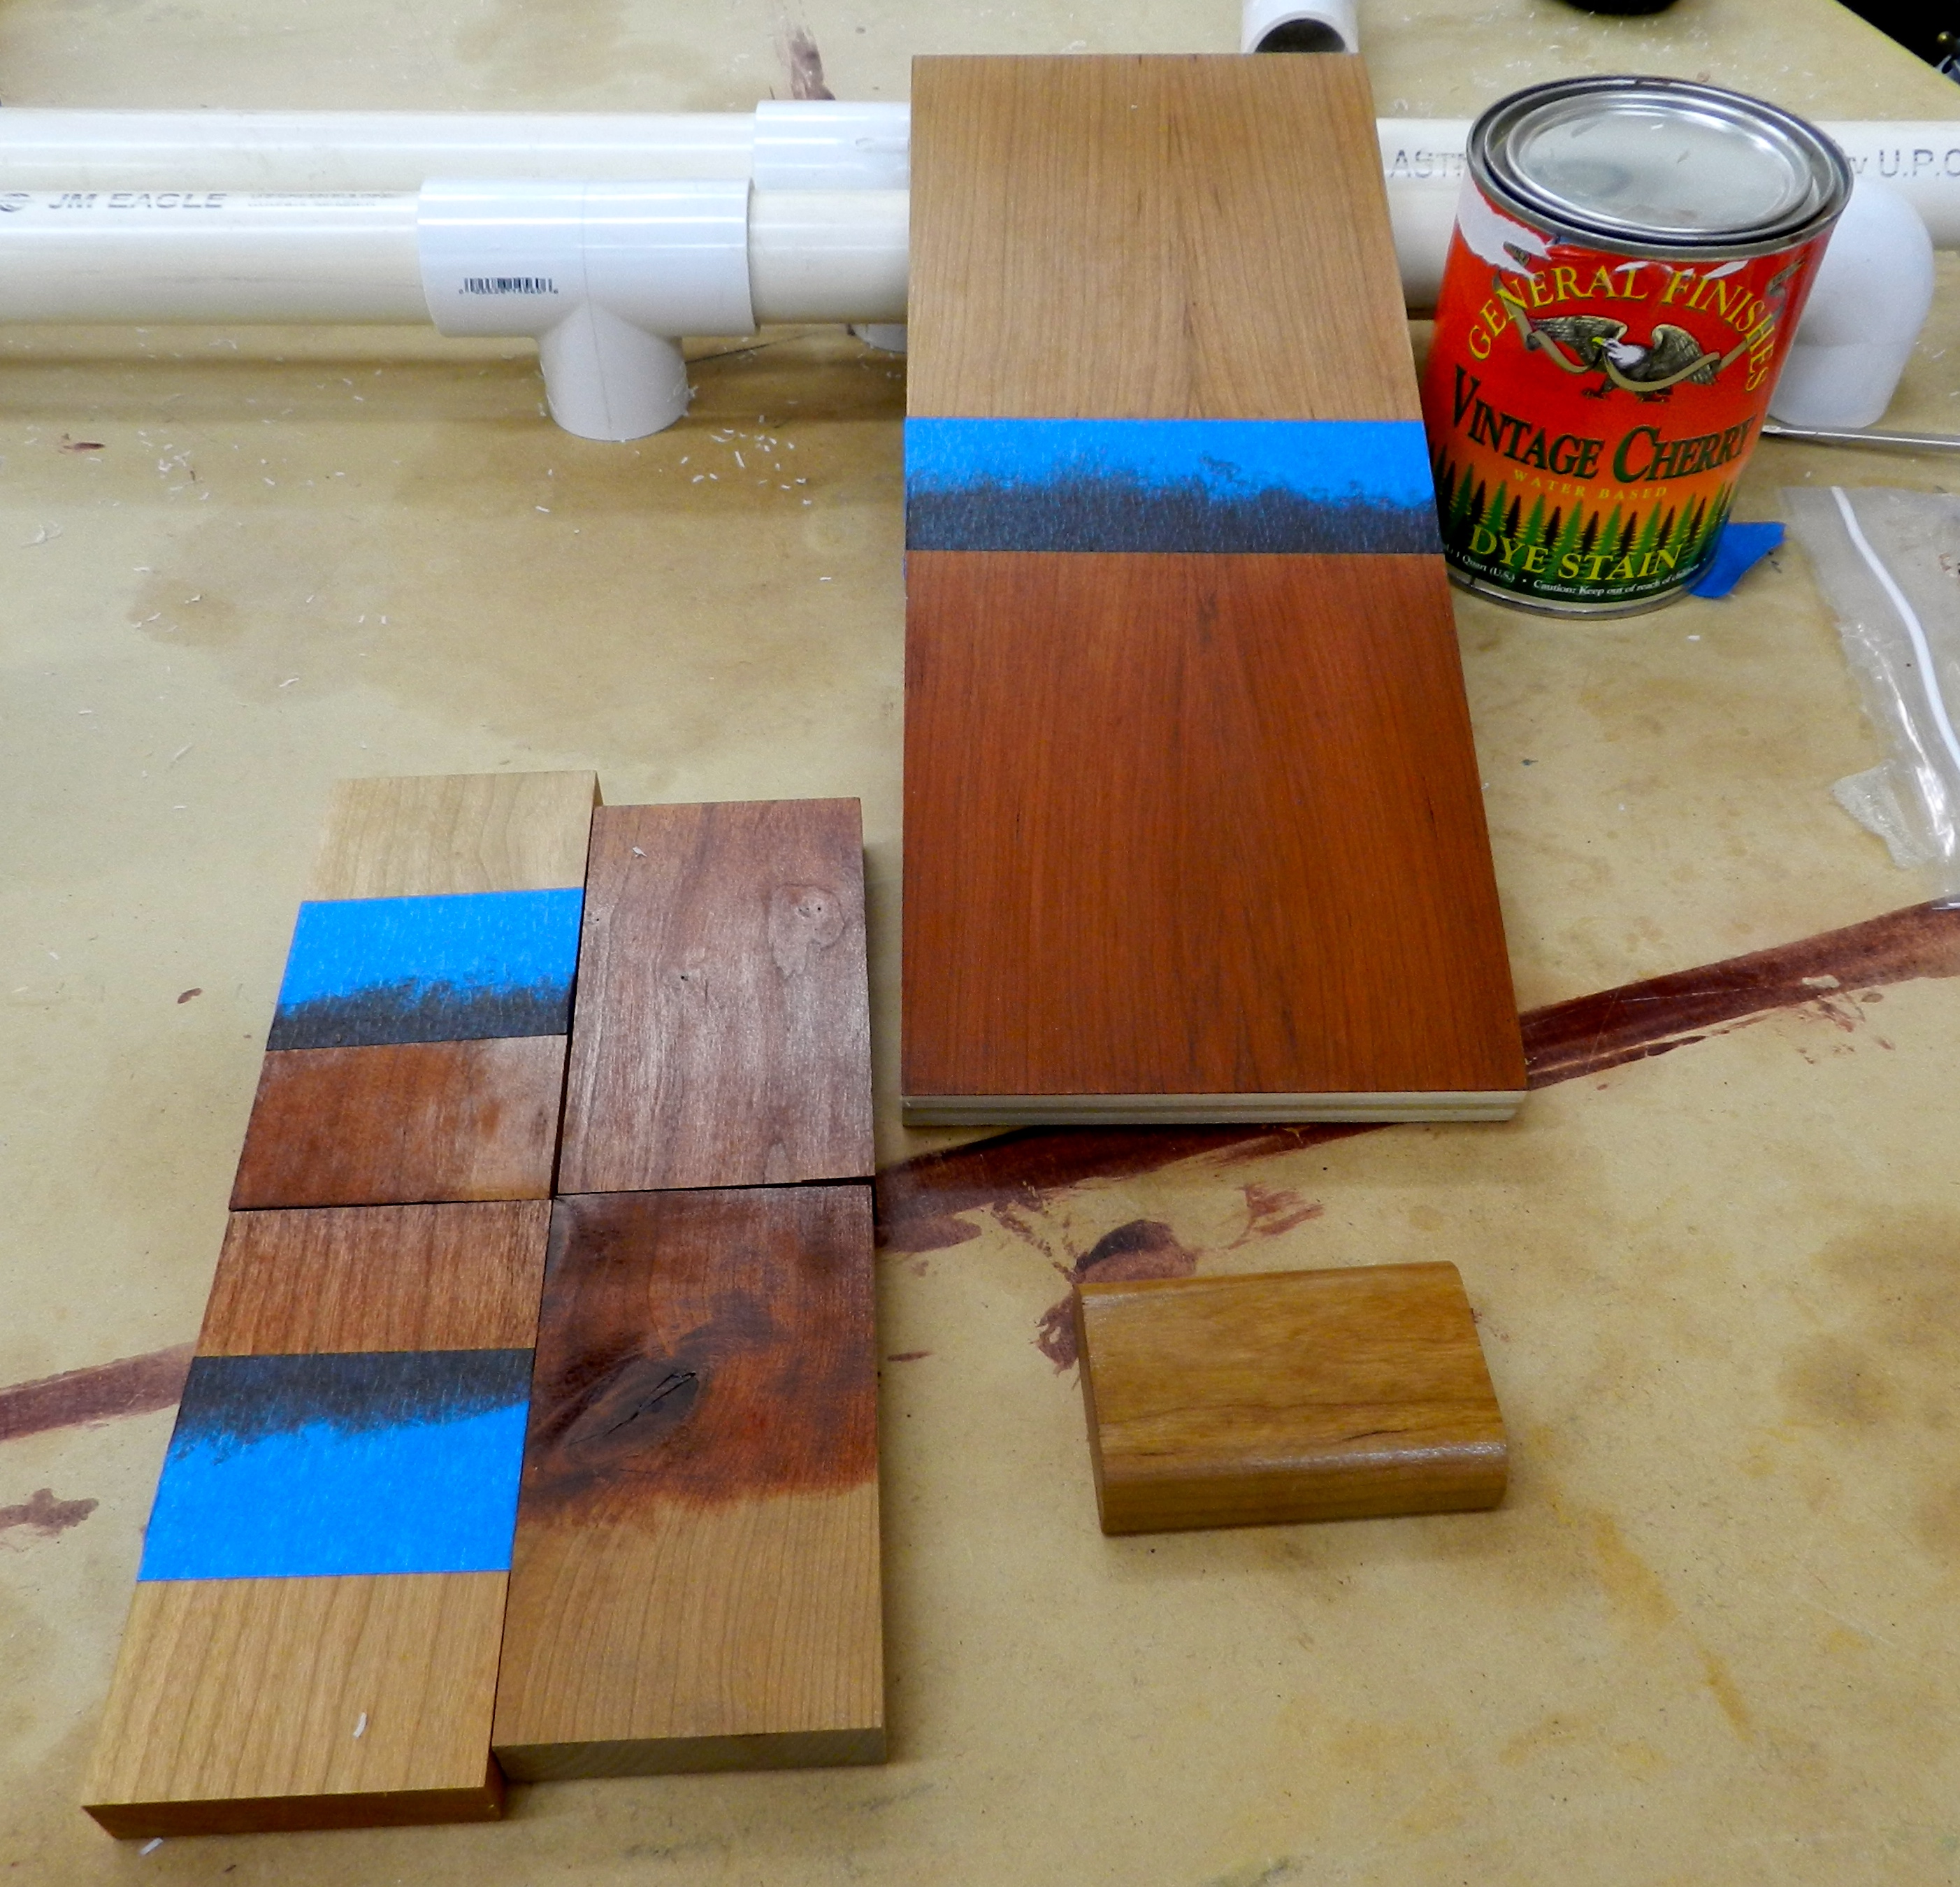
Test your top 2 or 3 choices:
In the photo below the wood is set up in pairs. The left piece of wood is raw cherry. The right piece of wood had a wash coat of blonde shellac applied to see how it would reduce the amount of blotching in the cherry.
Trying out the dye and gel stains I liked. Left samples are raw wood, right samples have a coat of shellac under the stain.
PRO TIP:
You can help jump-start the cherry aging process by exposing it UV light. With the above samples I kept them on a sunny window sill in the shop for a few weeks to get a feel for how the finishes might look as the project ages.
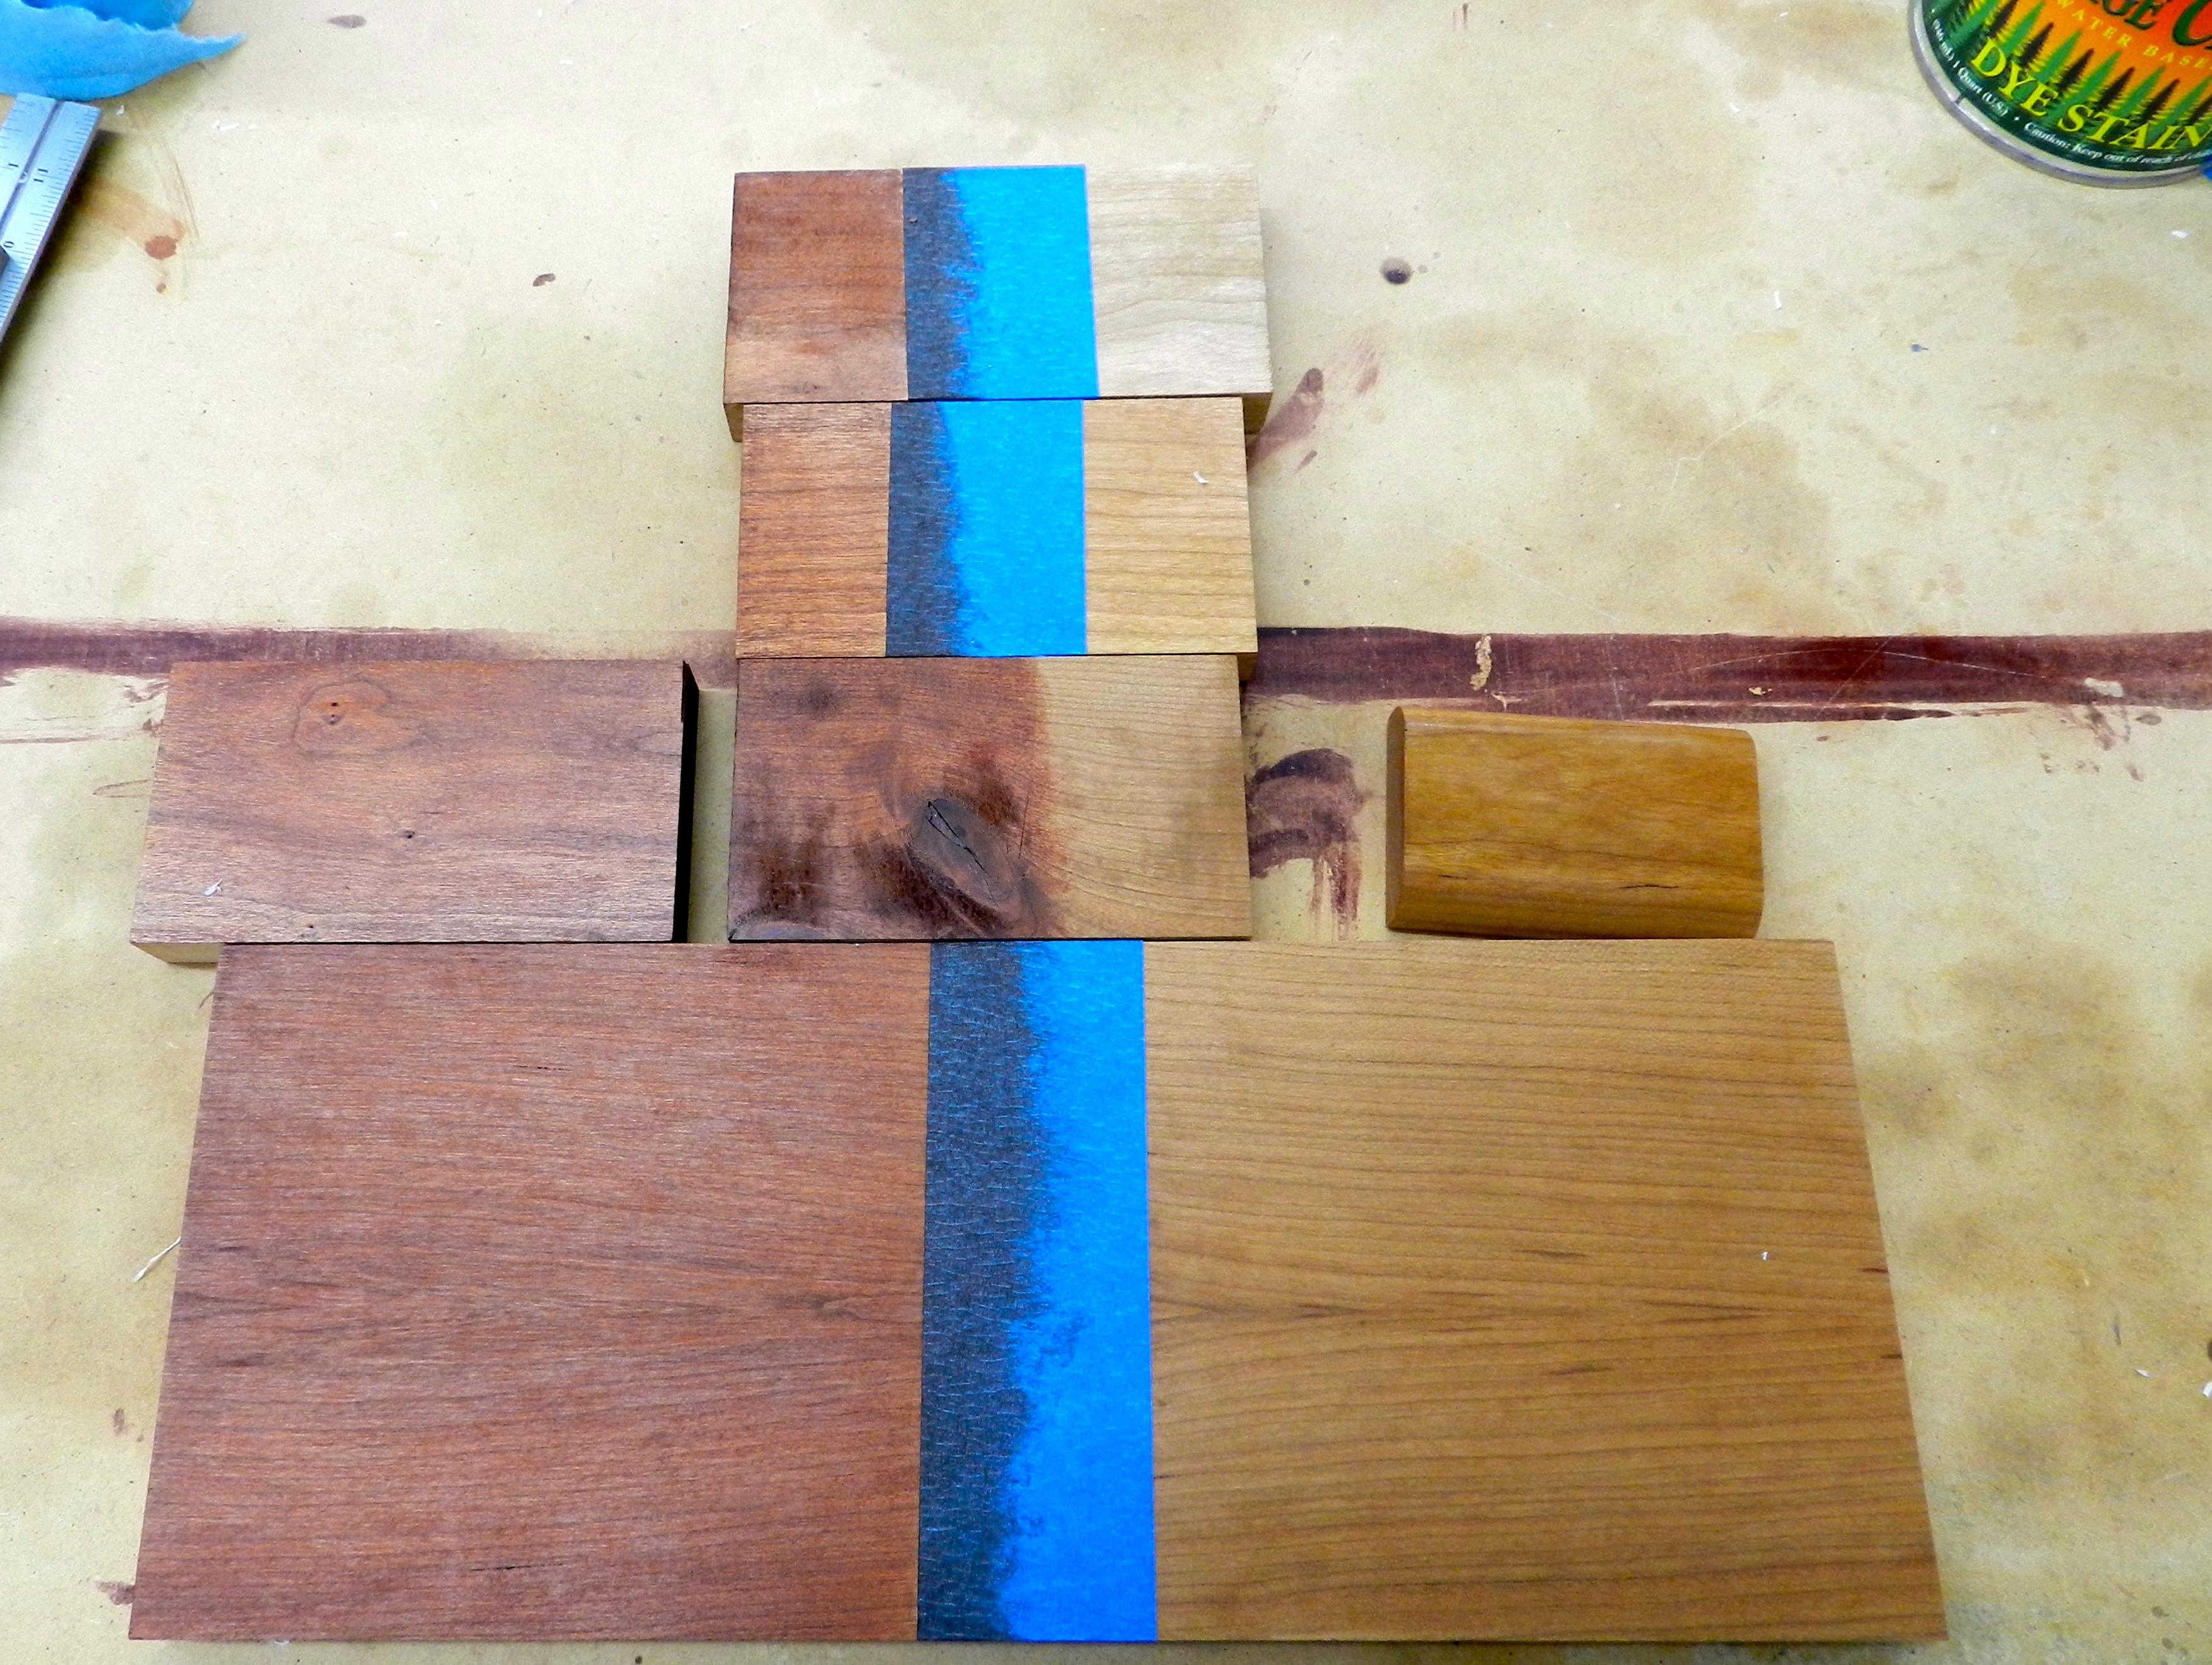
I didn’t love the results from the above experiments, I wanted a warmer tone, so I decided to mix up a batch of garnet shellac (described here) and continue my experimentation. On my next round of sample boards I experimented with a few coats of garnet shellac to see what I liked best. The garnet shellac alone did a fairly good job of warming up the cherry.
Trying my favorite stain from the last round, but trying it out with garnet shellac
The experiments continued with several pieces of wood scrap from the project to see how the recipe of garnet shellac and dye stain looked on knots, different grain orientations etc.
Testing the recipe with a range of woods on the project
In the end my wife and I both liked the same samples, so in the end I wound up going with two coats of garnet shellac with the second coat having a small amount of dye stain in the second coat. All of the above experimentation was well worth the time as I would not want ruin a project like this with a poorly executed finish.
Top coat:
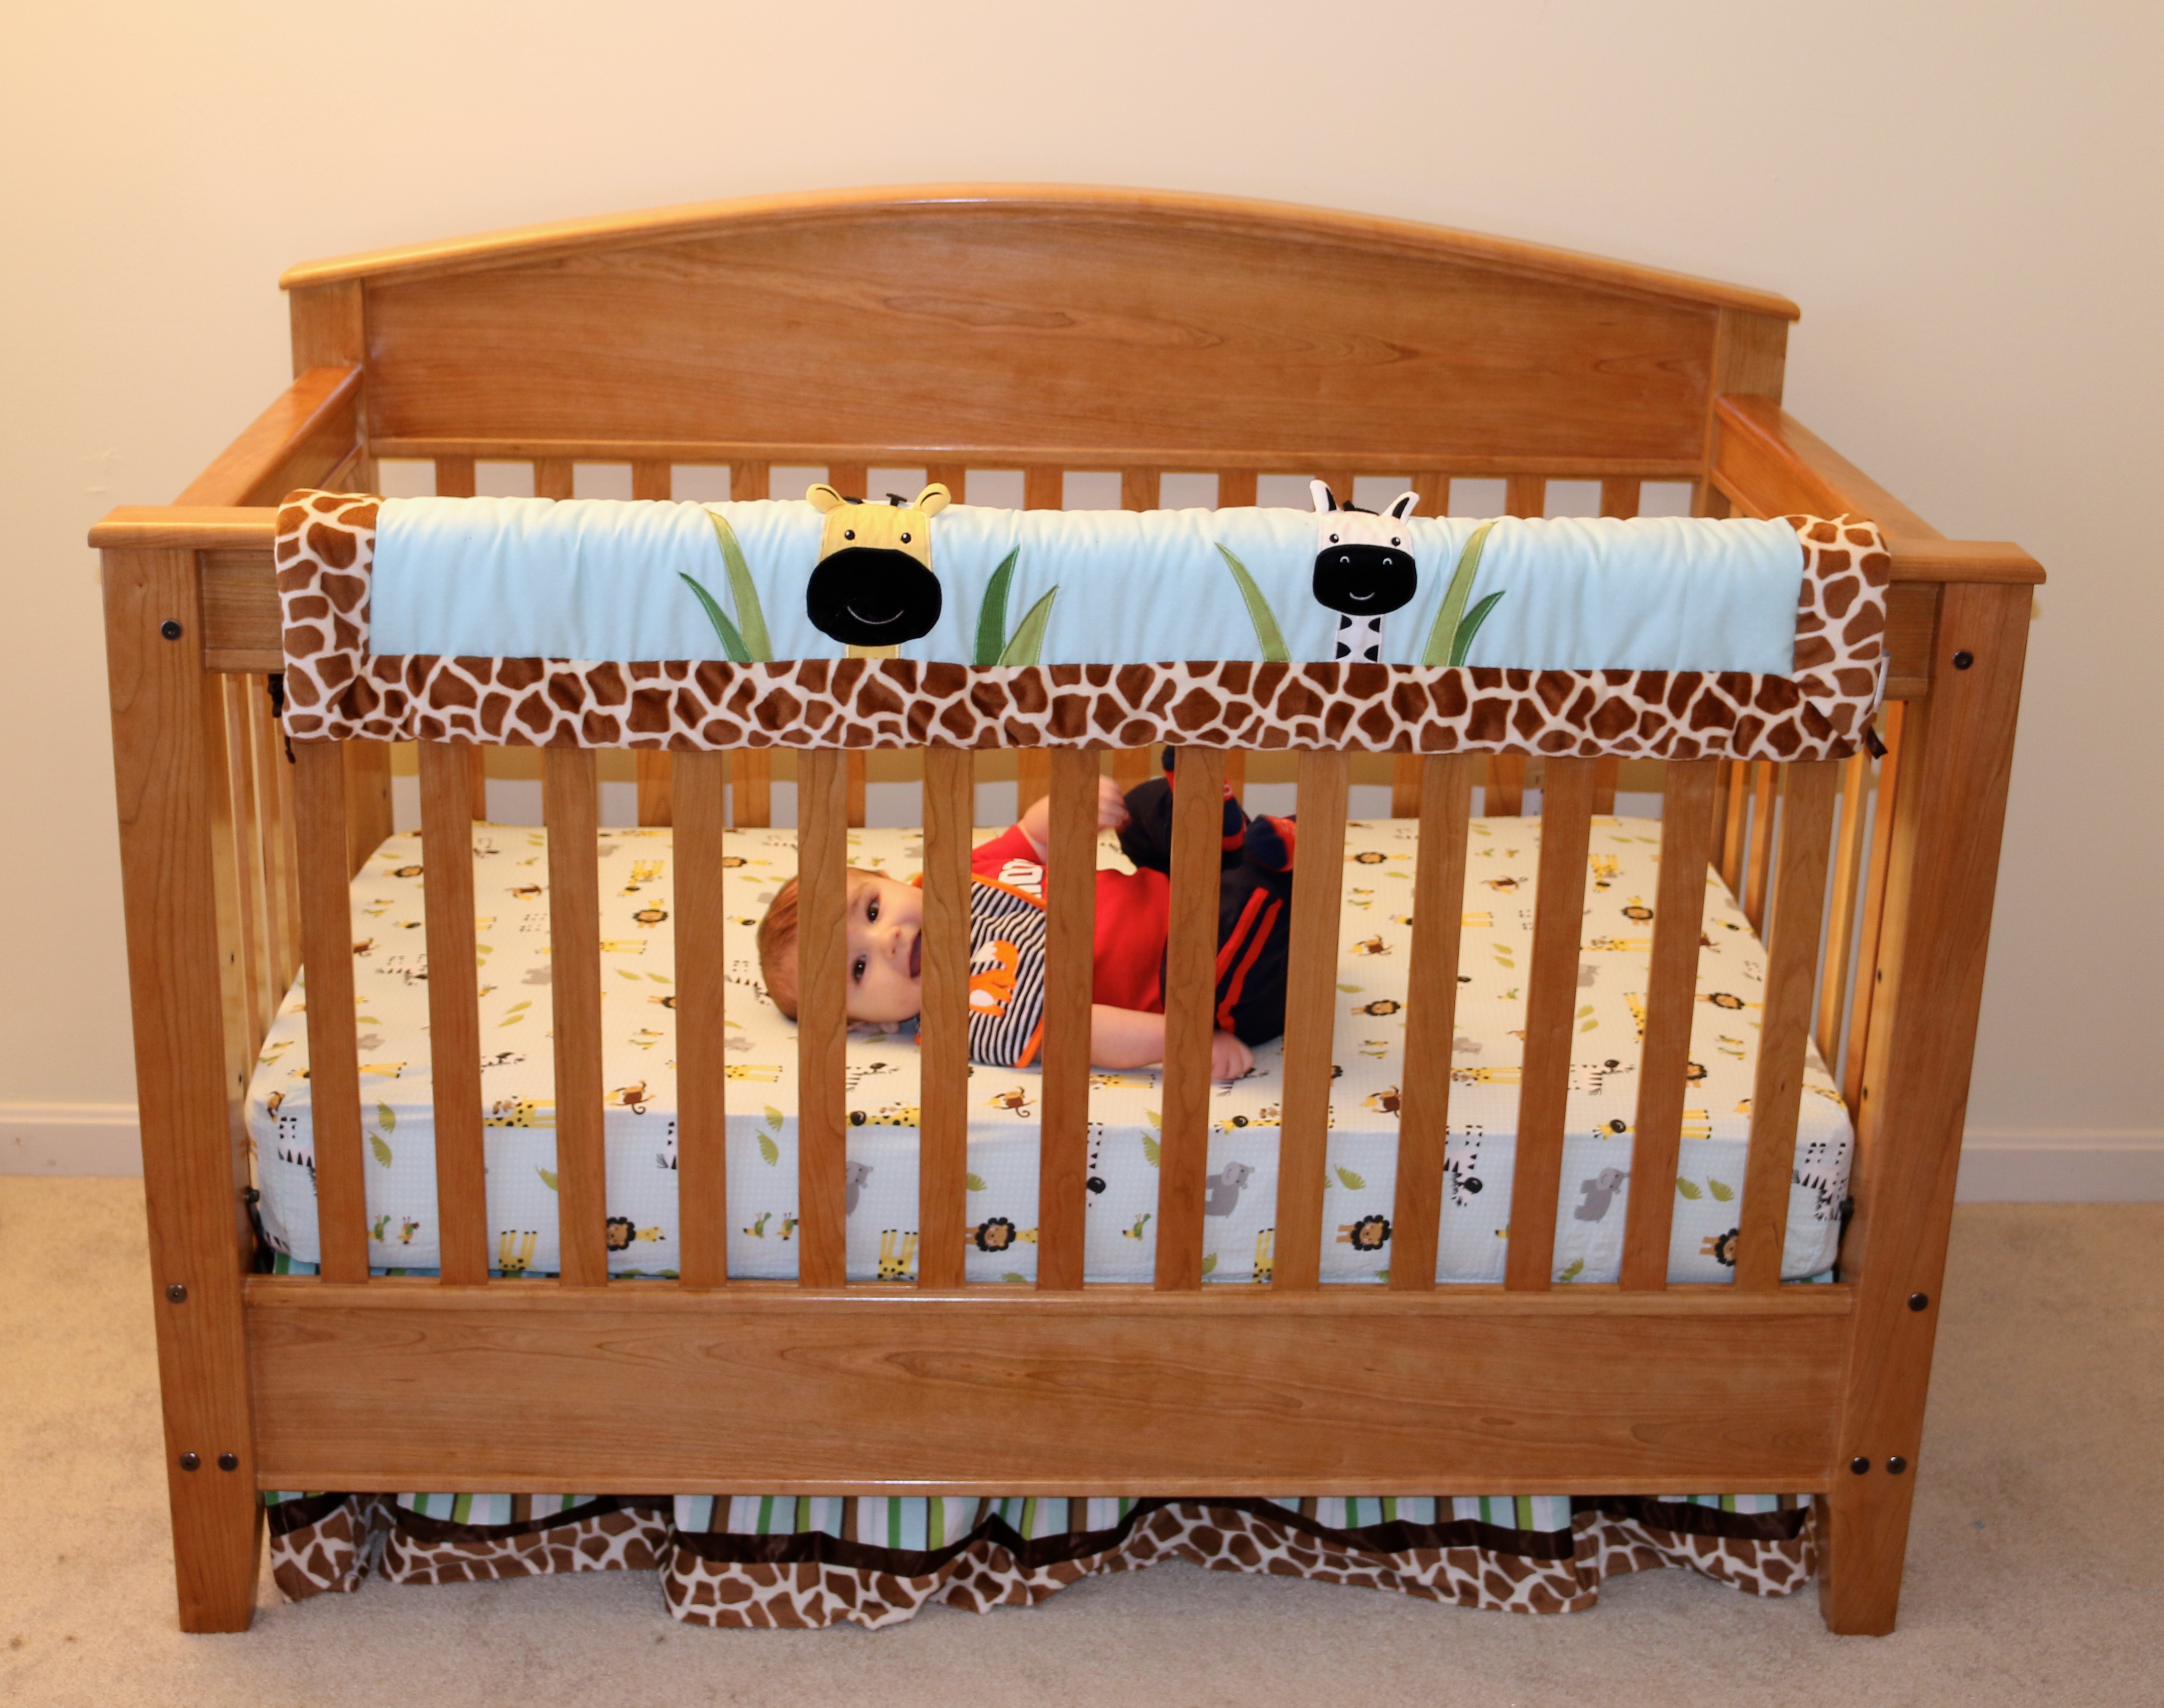
I decided to go with General Finishes High Performance Water-based Polyurethane Top Coat in a Semi-gloss. I like this finish as it’s easy to apply by hand or via sprayer, low VOC, it’s UV stabilized and once cured is a durable child safe finish. For fine furniture when it comes to a top coat I adhere to the mantra of ‘if I wanted it to look like it was made out of plastic, I would have made it out of plastic’, but for this crib it’s very nice but not super fine furniture and from what I know about babies the ability to quickly and easily clean off any accidents makes this higher gloss sheen all the more worthwhile.
Crib outfitted with mattress, sheets, skirt and of course stuff animals
For this project I applied the poly by hand using a folded up lint-free white cotton rag. I worried the sprayer would cause too many drips around the many slats and after all the work I put into the project I didn’t want to foul it up in the finishing room.
I’m very happy with how this project turned out and look forward to seeing how the cherry ages in Bradley’s very sunny bedroom.
If you’d like to read some other posts related to this project please check out this link here.
Take care,
-Bill
P.S. How do you choose your finishes? Feel free to share your thoughts and tips in the comments section below.
Molding plays with light and shadow, it blends transitions and it can be pleasing to touch. I’m glad molding has so many positive features as I had to make a LOT of it to finish off this project. Below is a quick walk through of what it took to complete the woodworking on this project.
Making Molding:
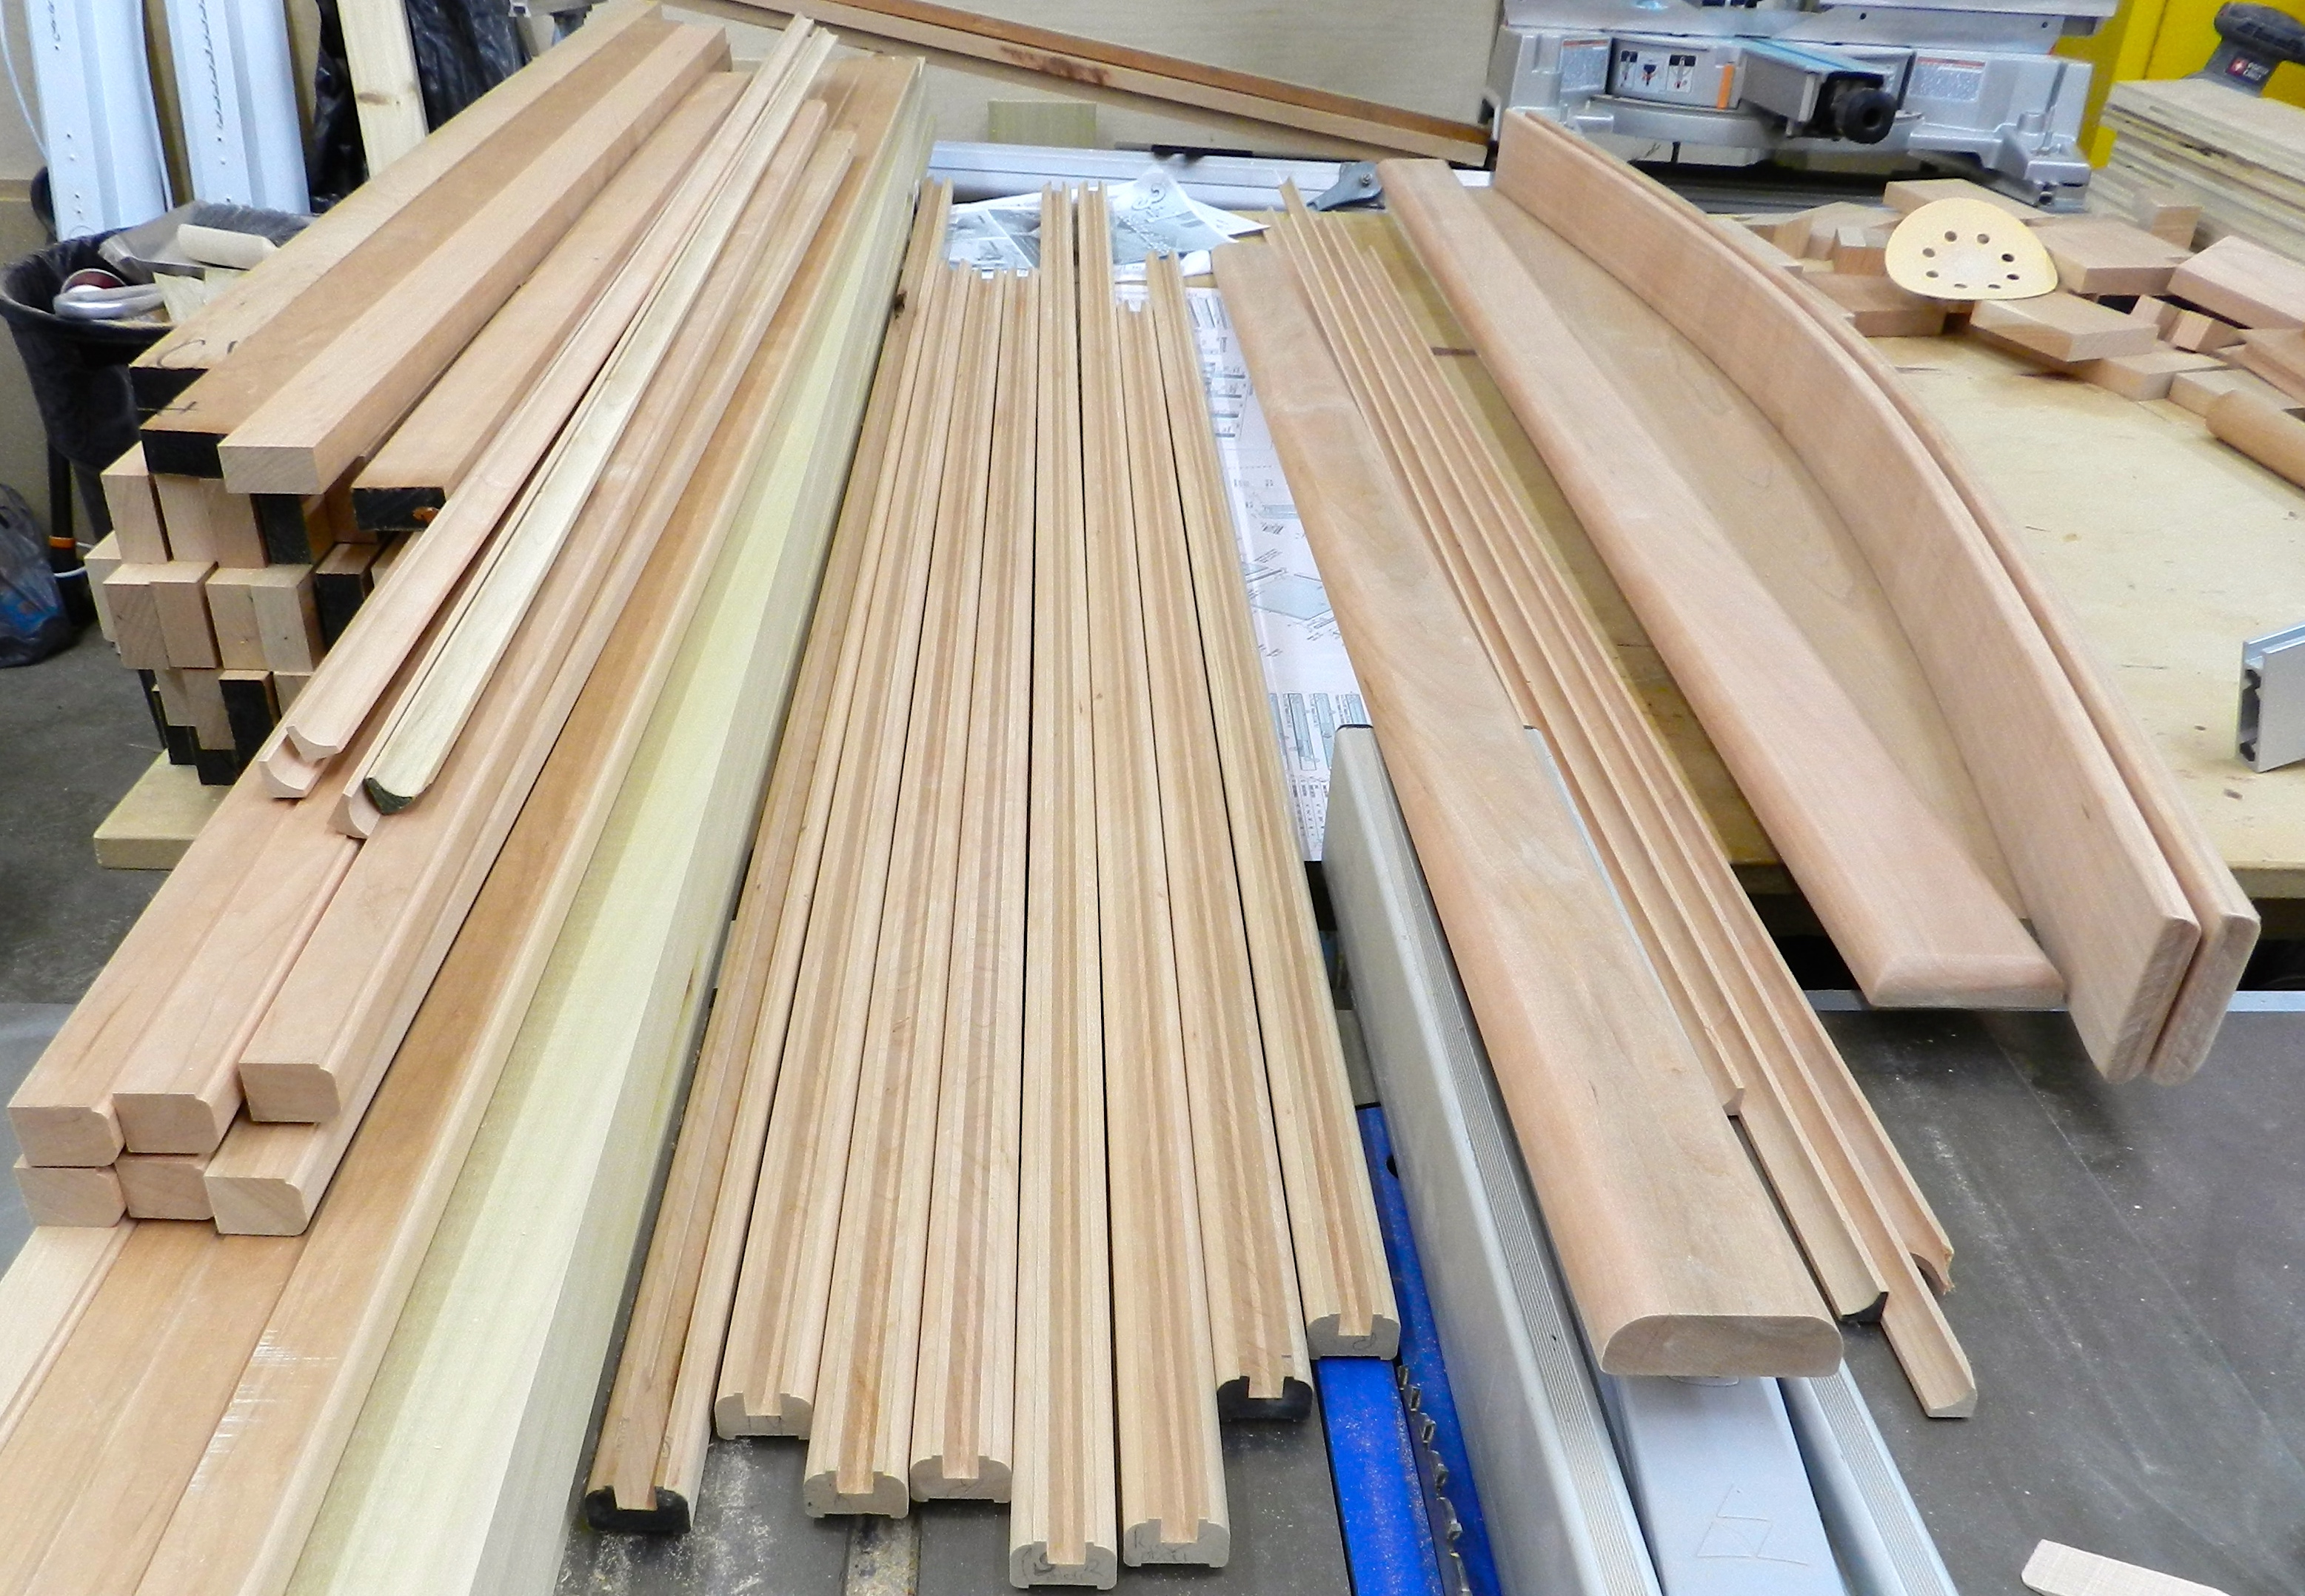
Sampling of the MANY moldings
As you can see from the photo above a had to mill a lot of stock and produce a lot of profiles to produce all the moldings necessary for this project. I won’t go into the minutia of each profile, or how to create molding using a handheld or table mounted router as that has been covered to death elsewhere. I will talk about a few of the things I do to help get consistent results when using a router.
1.) Make sure your router bits are clean and sharp. Make sure to use a bit cleaner to remove any pitch left on the bits. A diamond card or file can also be used to tune up a bit that is not cutting as well as it used to.
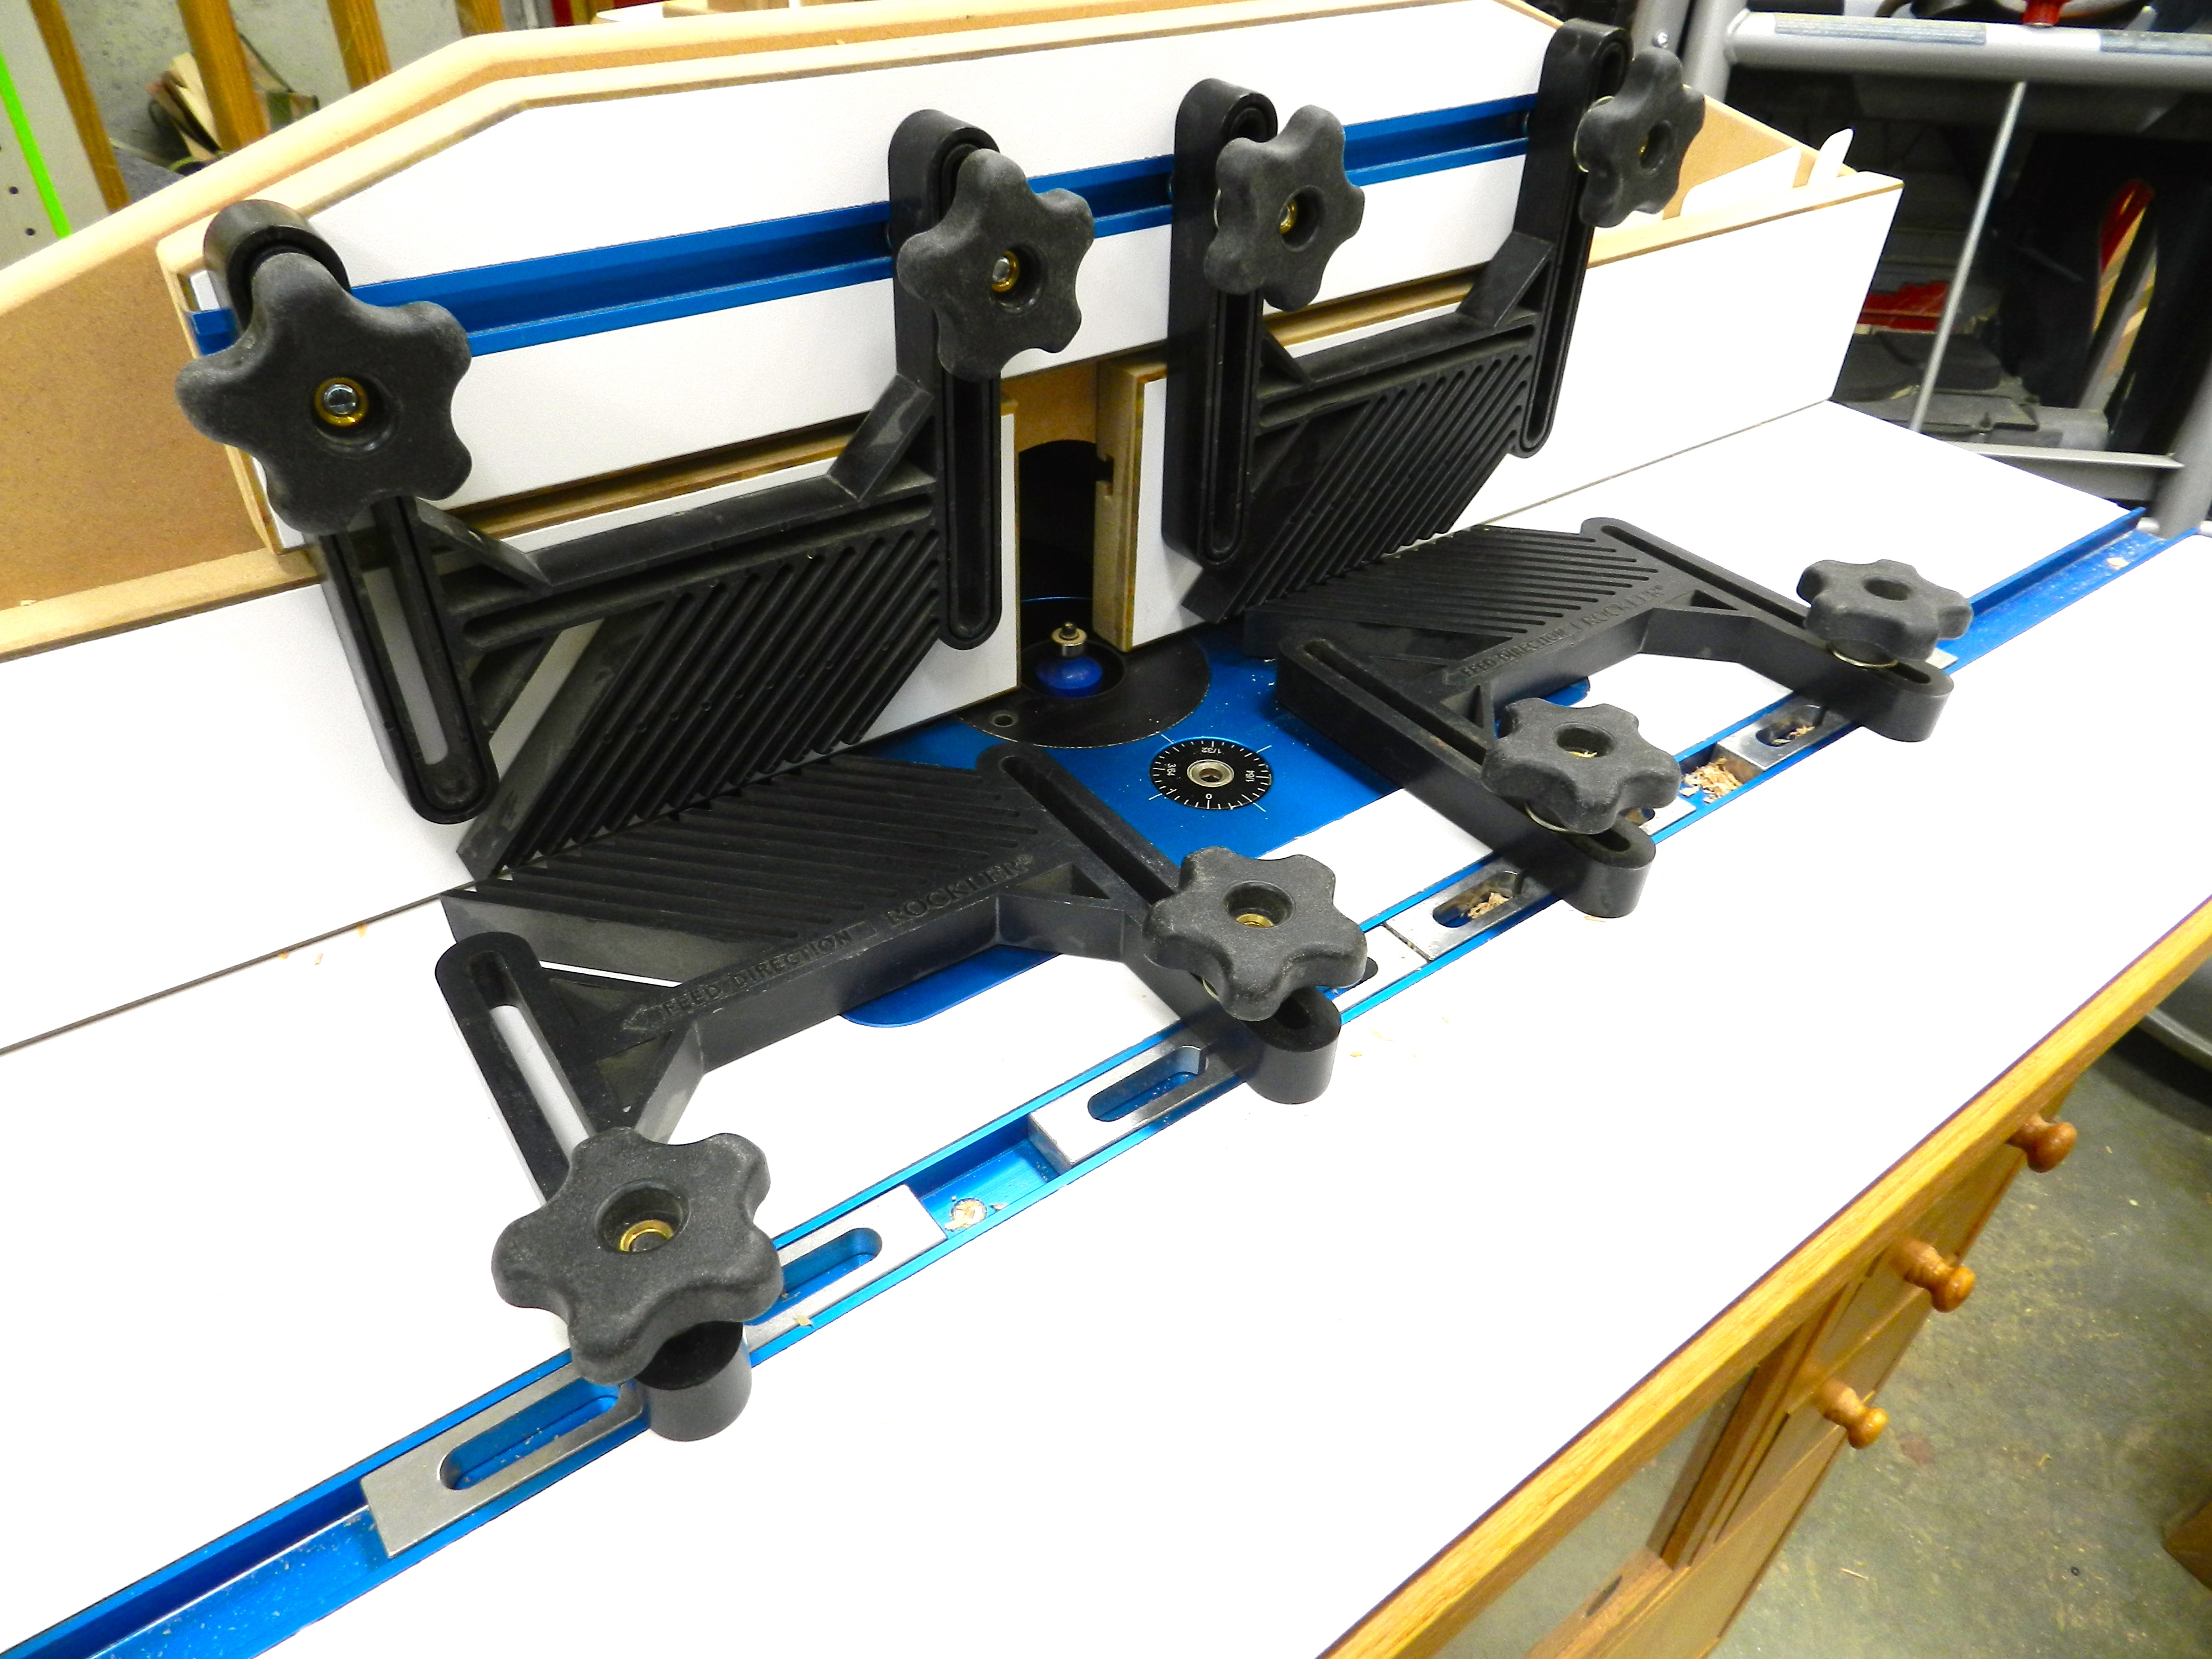
2.) Feather-boards. Whether they are store bought or shop made a feather-board is a great way to help keep stock where you want it. This project required many thin moldings with several different profiles on the same piece of stock. To ensure that the stock stayed exactly where I wanted it I used feather-boards to keep the stock pressed firmly against the table top and against the fence, both before and after the cutter. Without this seemingly heavy handed setup the stock could flex and you’d have to run it a few times. A push stick is also nice to have nearby. For this project the blanks were 2 to 6′ long so I was able to safely move the stock through the cutter with my hands kept at a safe distance from the cutter by virtue of the feather boards.
Extensive use of feather-boards on the router station
3.) When possible, try to be aware of the grain orientation when passing it through the bit to minimize tear-out
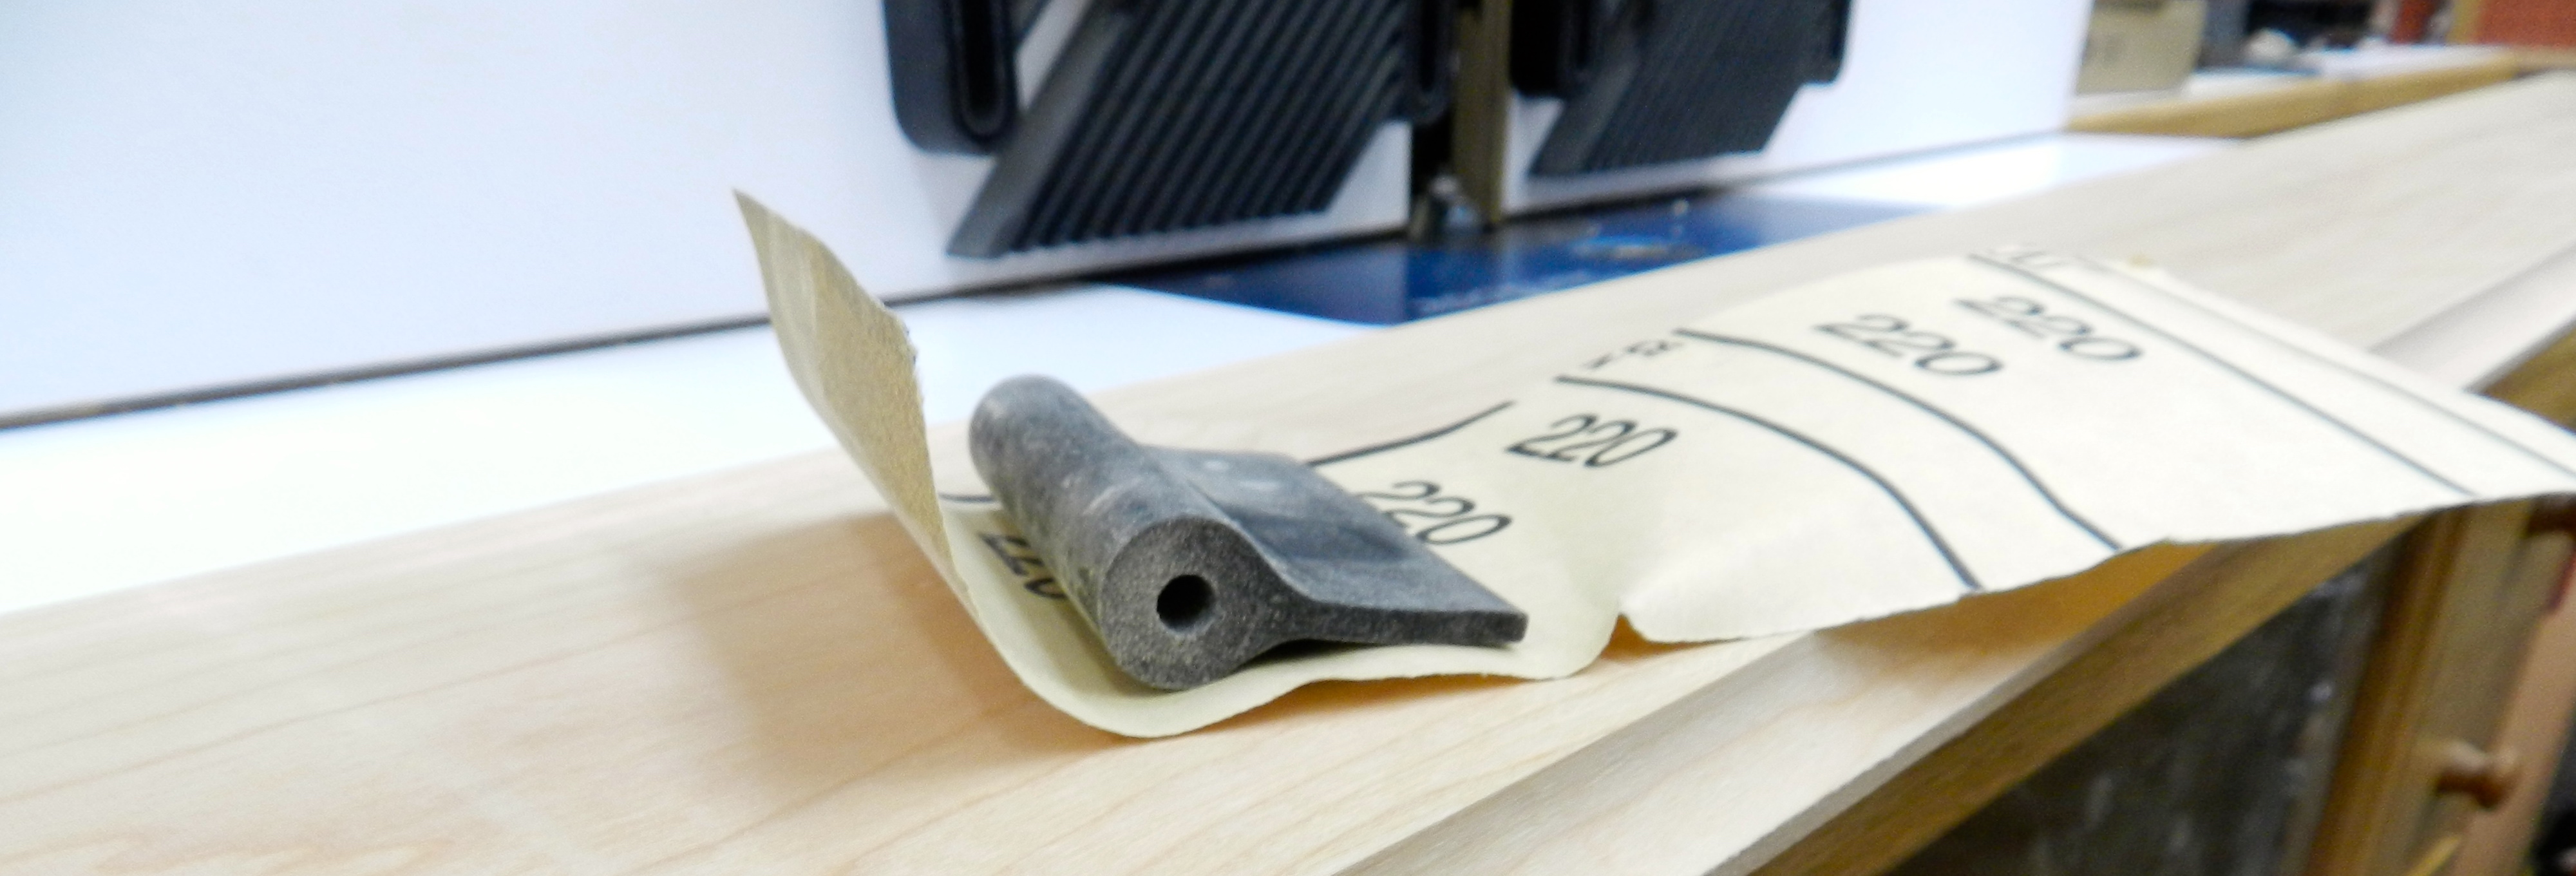
Profiled sanding blocks
4.) After coming out of the router I hand sand the profiles to remove any scallops left by the bit. For tight or very complex profiles I will also use a profiled sander (a bit of formed rubber (shown above), piece of dowel or block of wood) that will help me get the sandpaper into the portion(s) of the profile I want to sand.
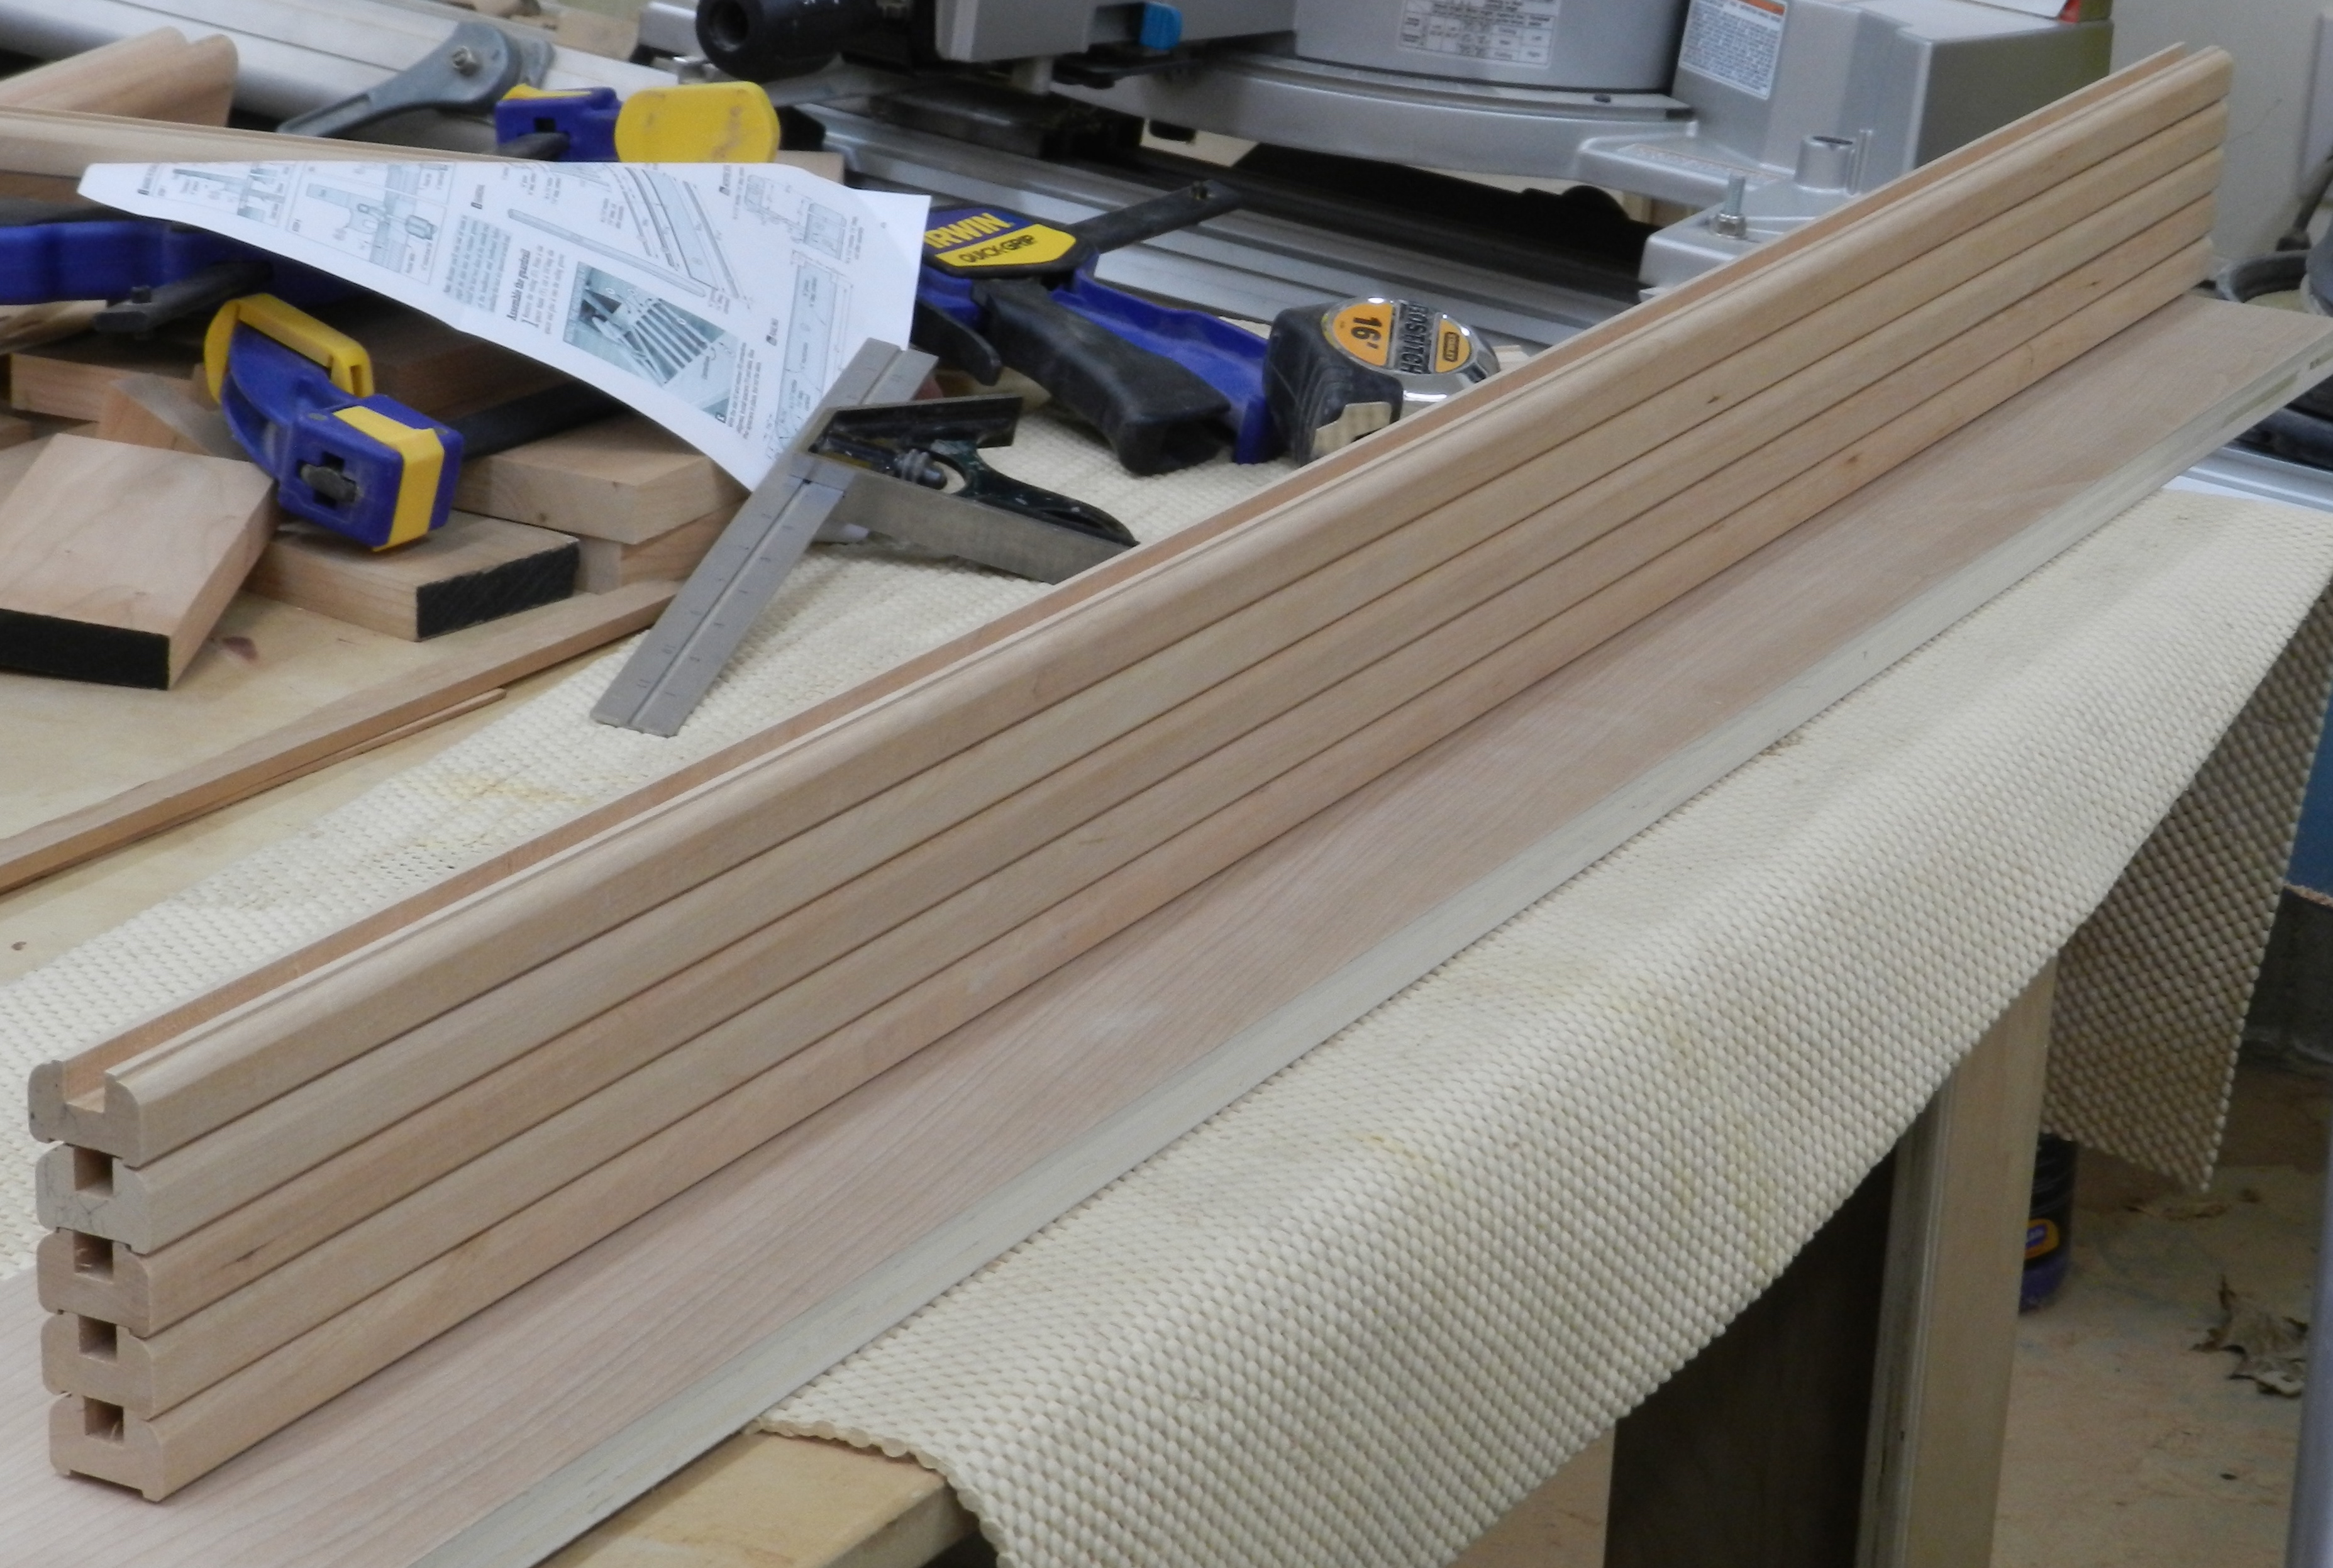
Molding profile details
5.) Use the right tool for the job. For the cap moldings above I used a dado set on the table saw (with feather-boards there as well) to create the dadoes, and round-over bits in the router table for the round-overs. (You certainly could use a straight bit to cut the dadoes on the router table, but it would involve taking a few passes which takes more time and could introduce error).
Assembly:
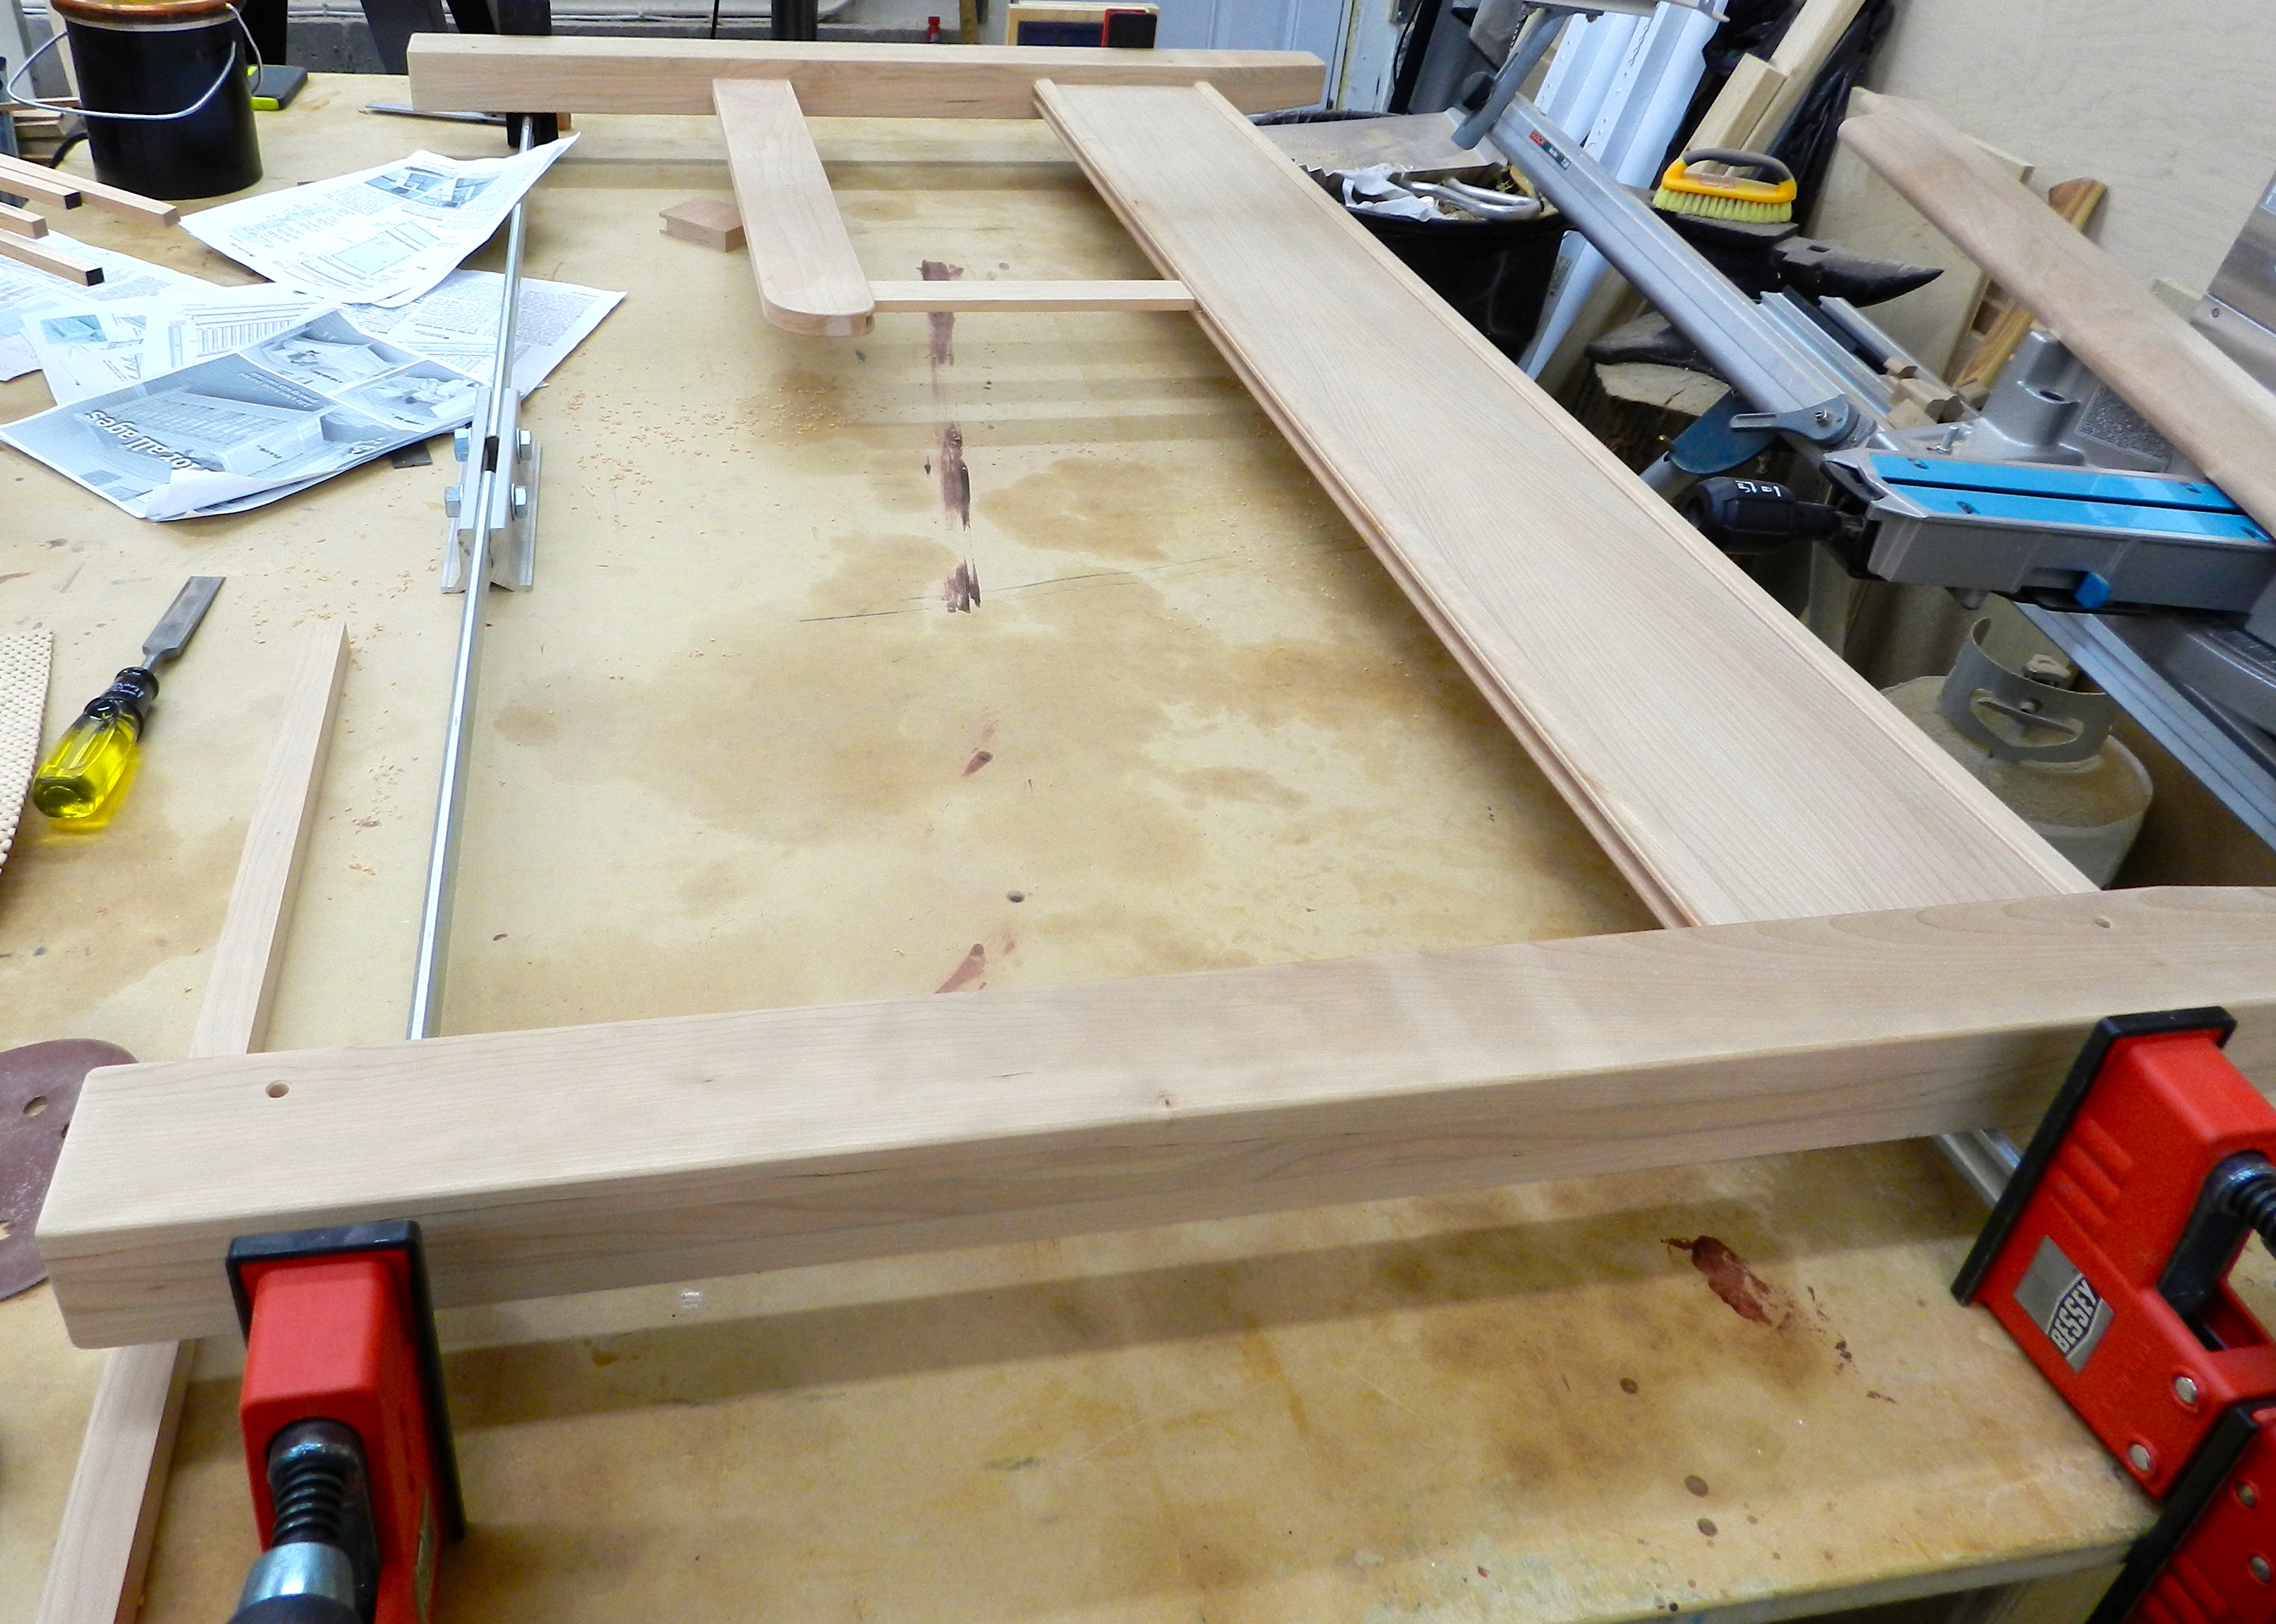
Gluing up the bed rails
With the moldings all milled, sanded and cut to size it was time to glue up the various assemblies. Shown above I am gluing up the top and bottom molding onto the adult bed rails.
Shop made jig for drilling centered holes
After the glue dried overnight on the rails it was time to drill holes for the through bolts using a shop made jig constructed out of plywood. This made it very easy to line up and drill consistently centered holes on the ends of the rails. I also made use of some of the stopped drilling techniques outlined here.
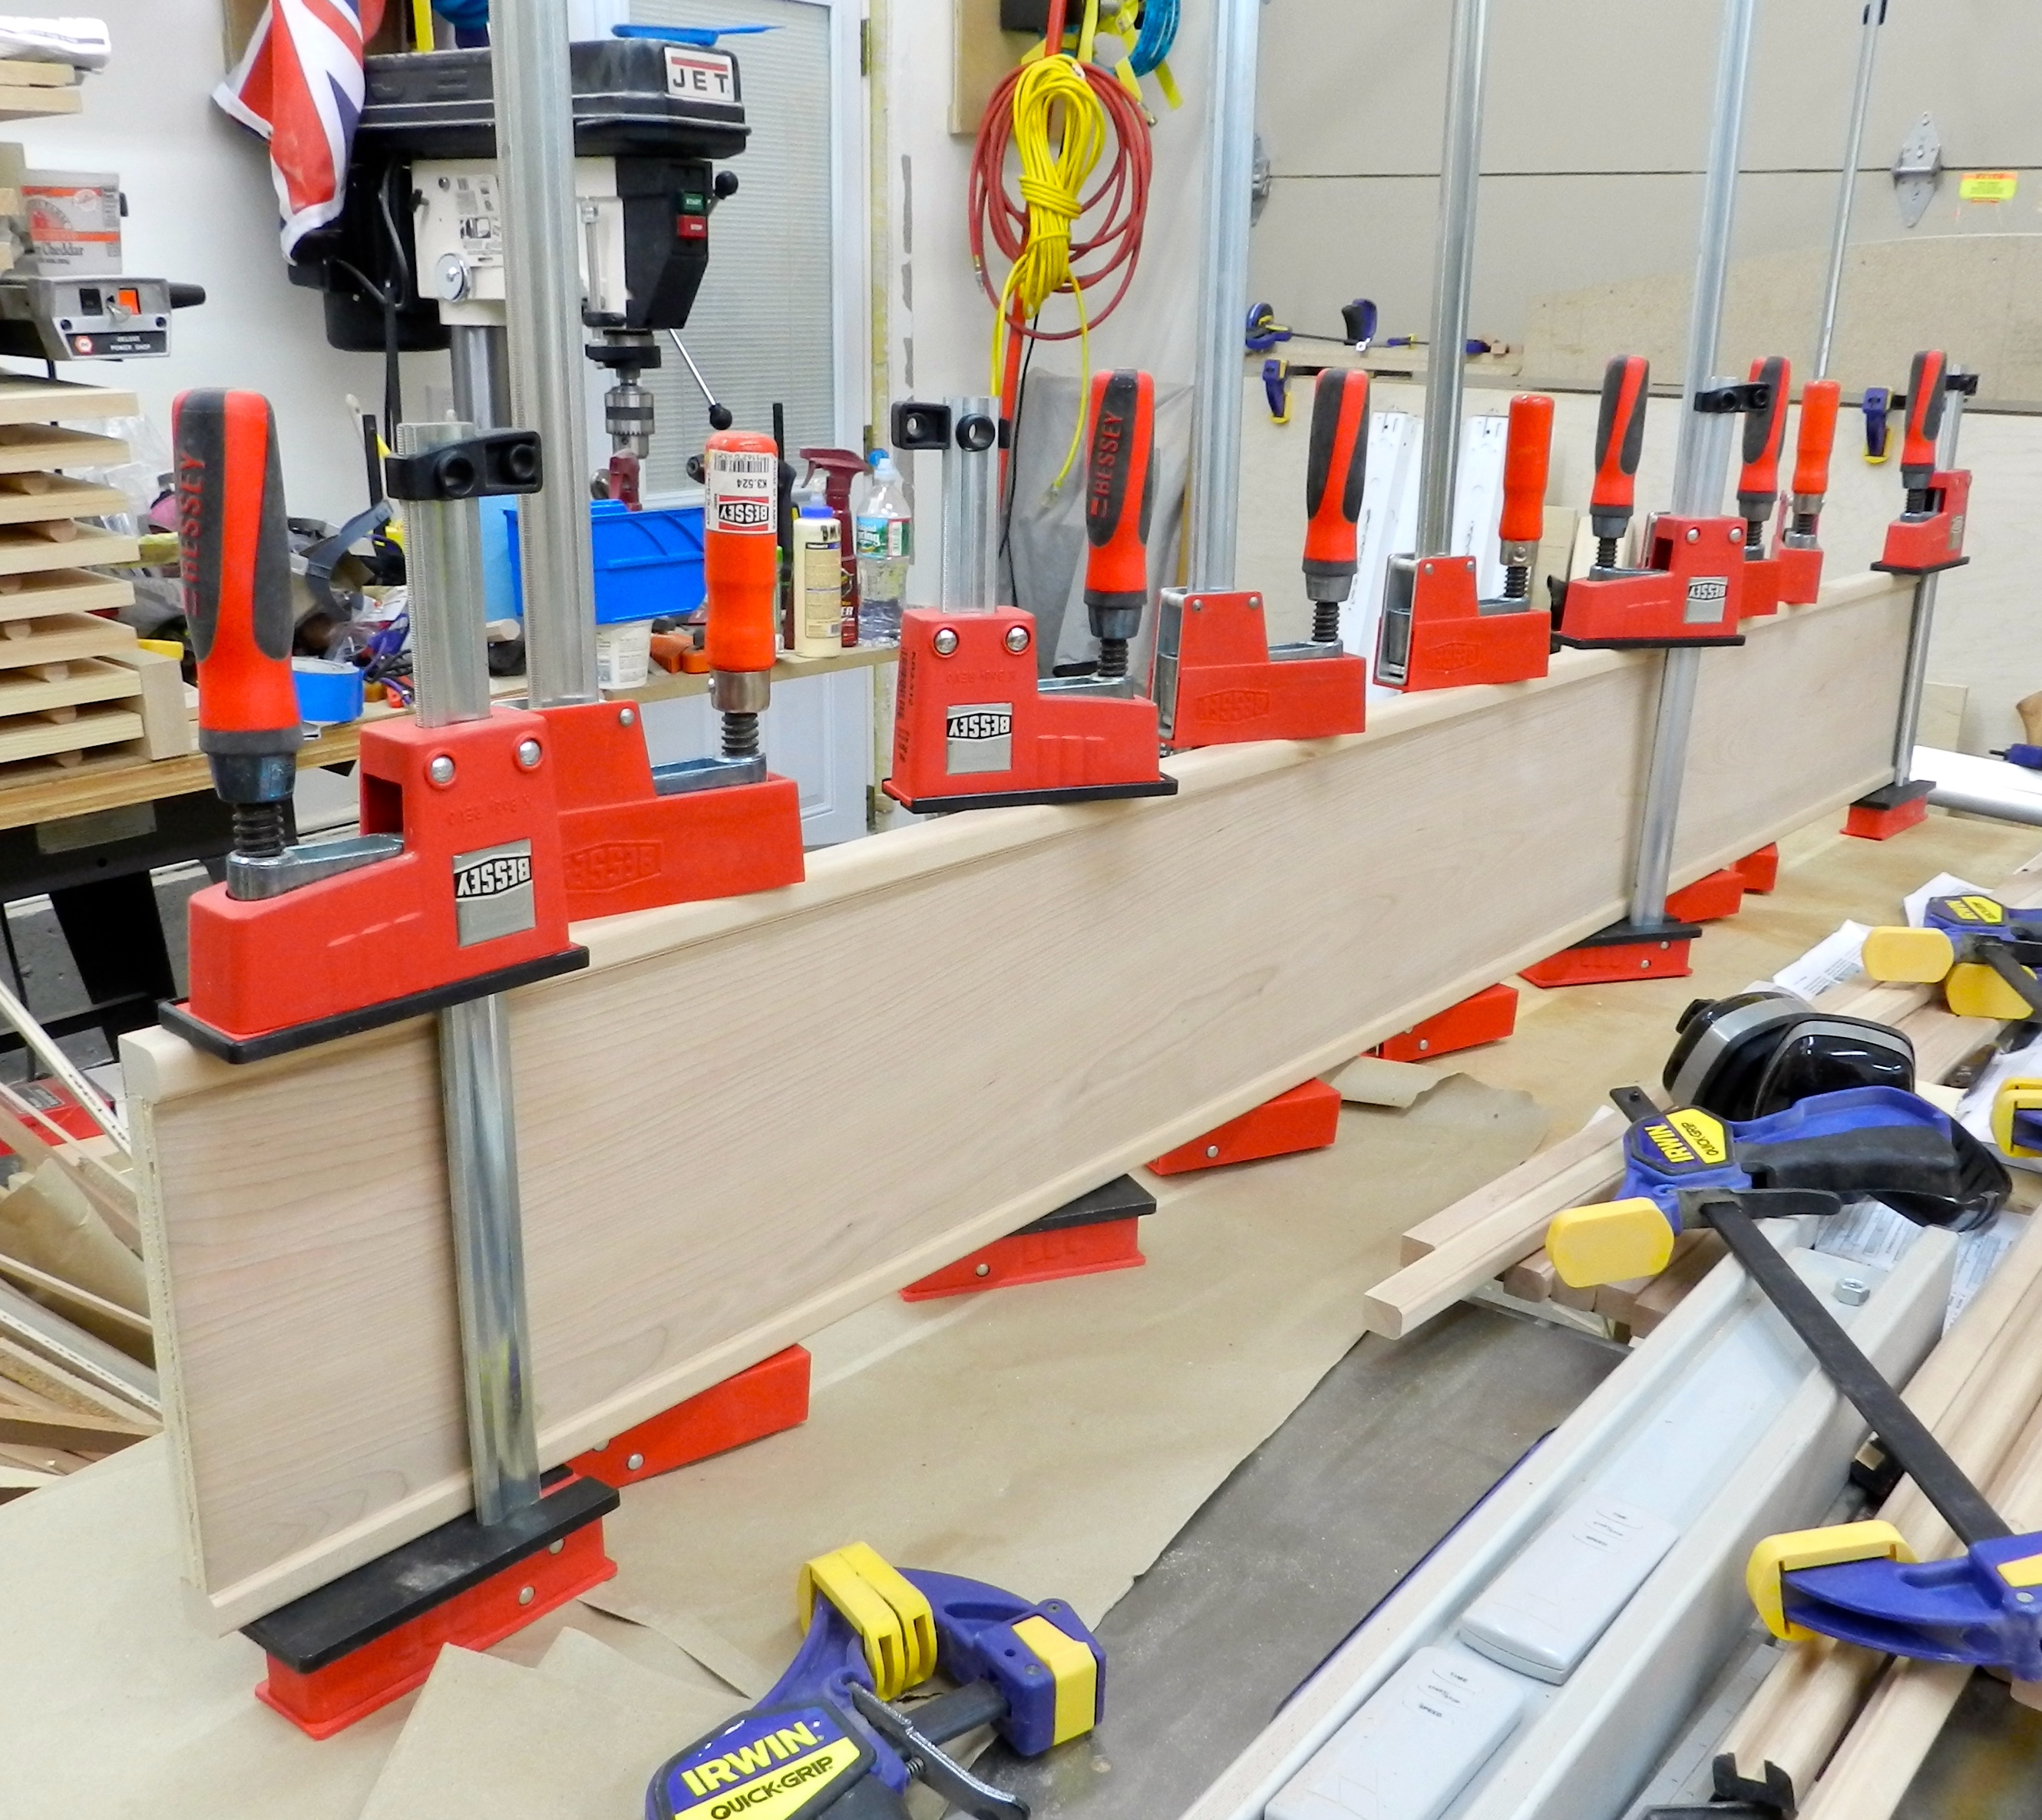
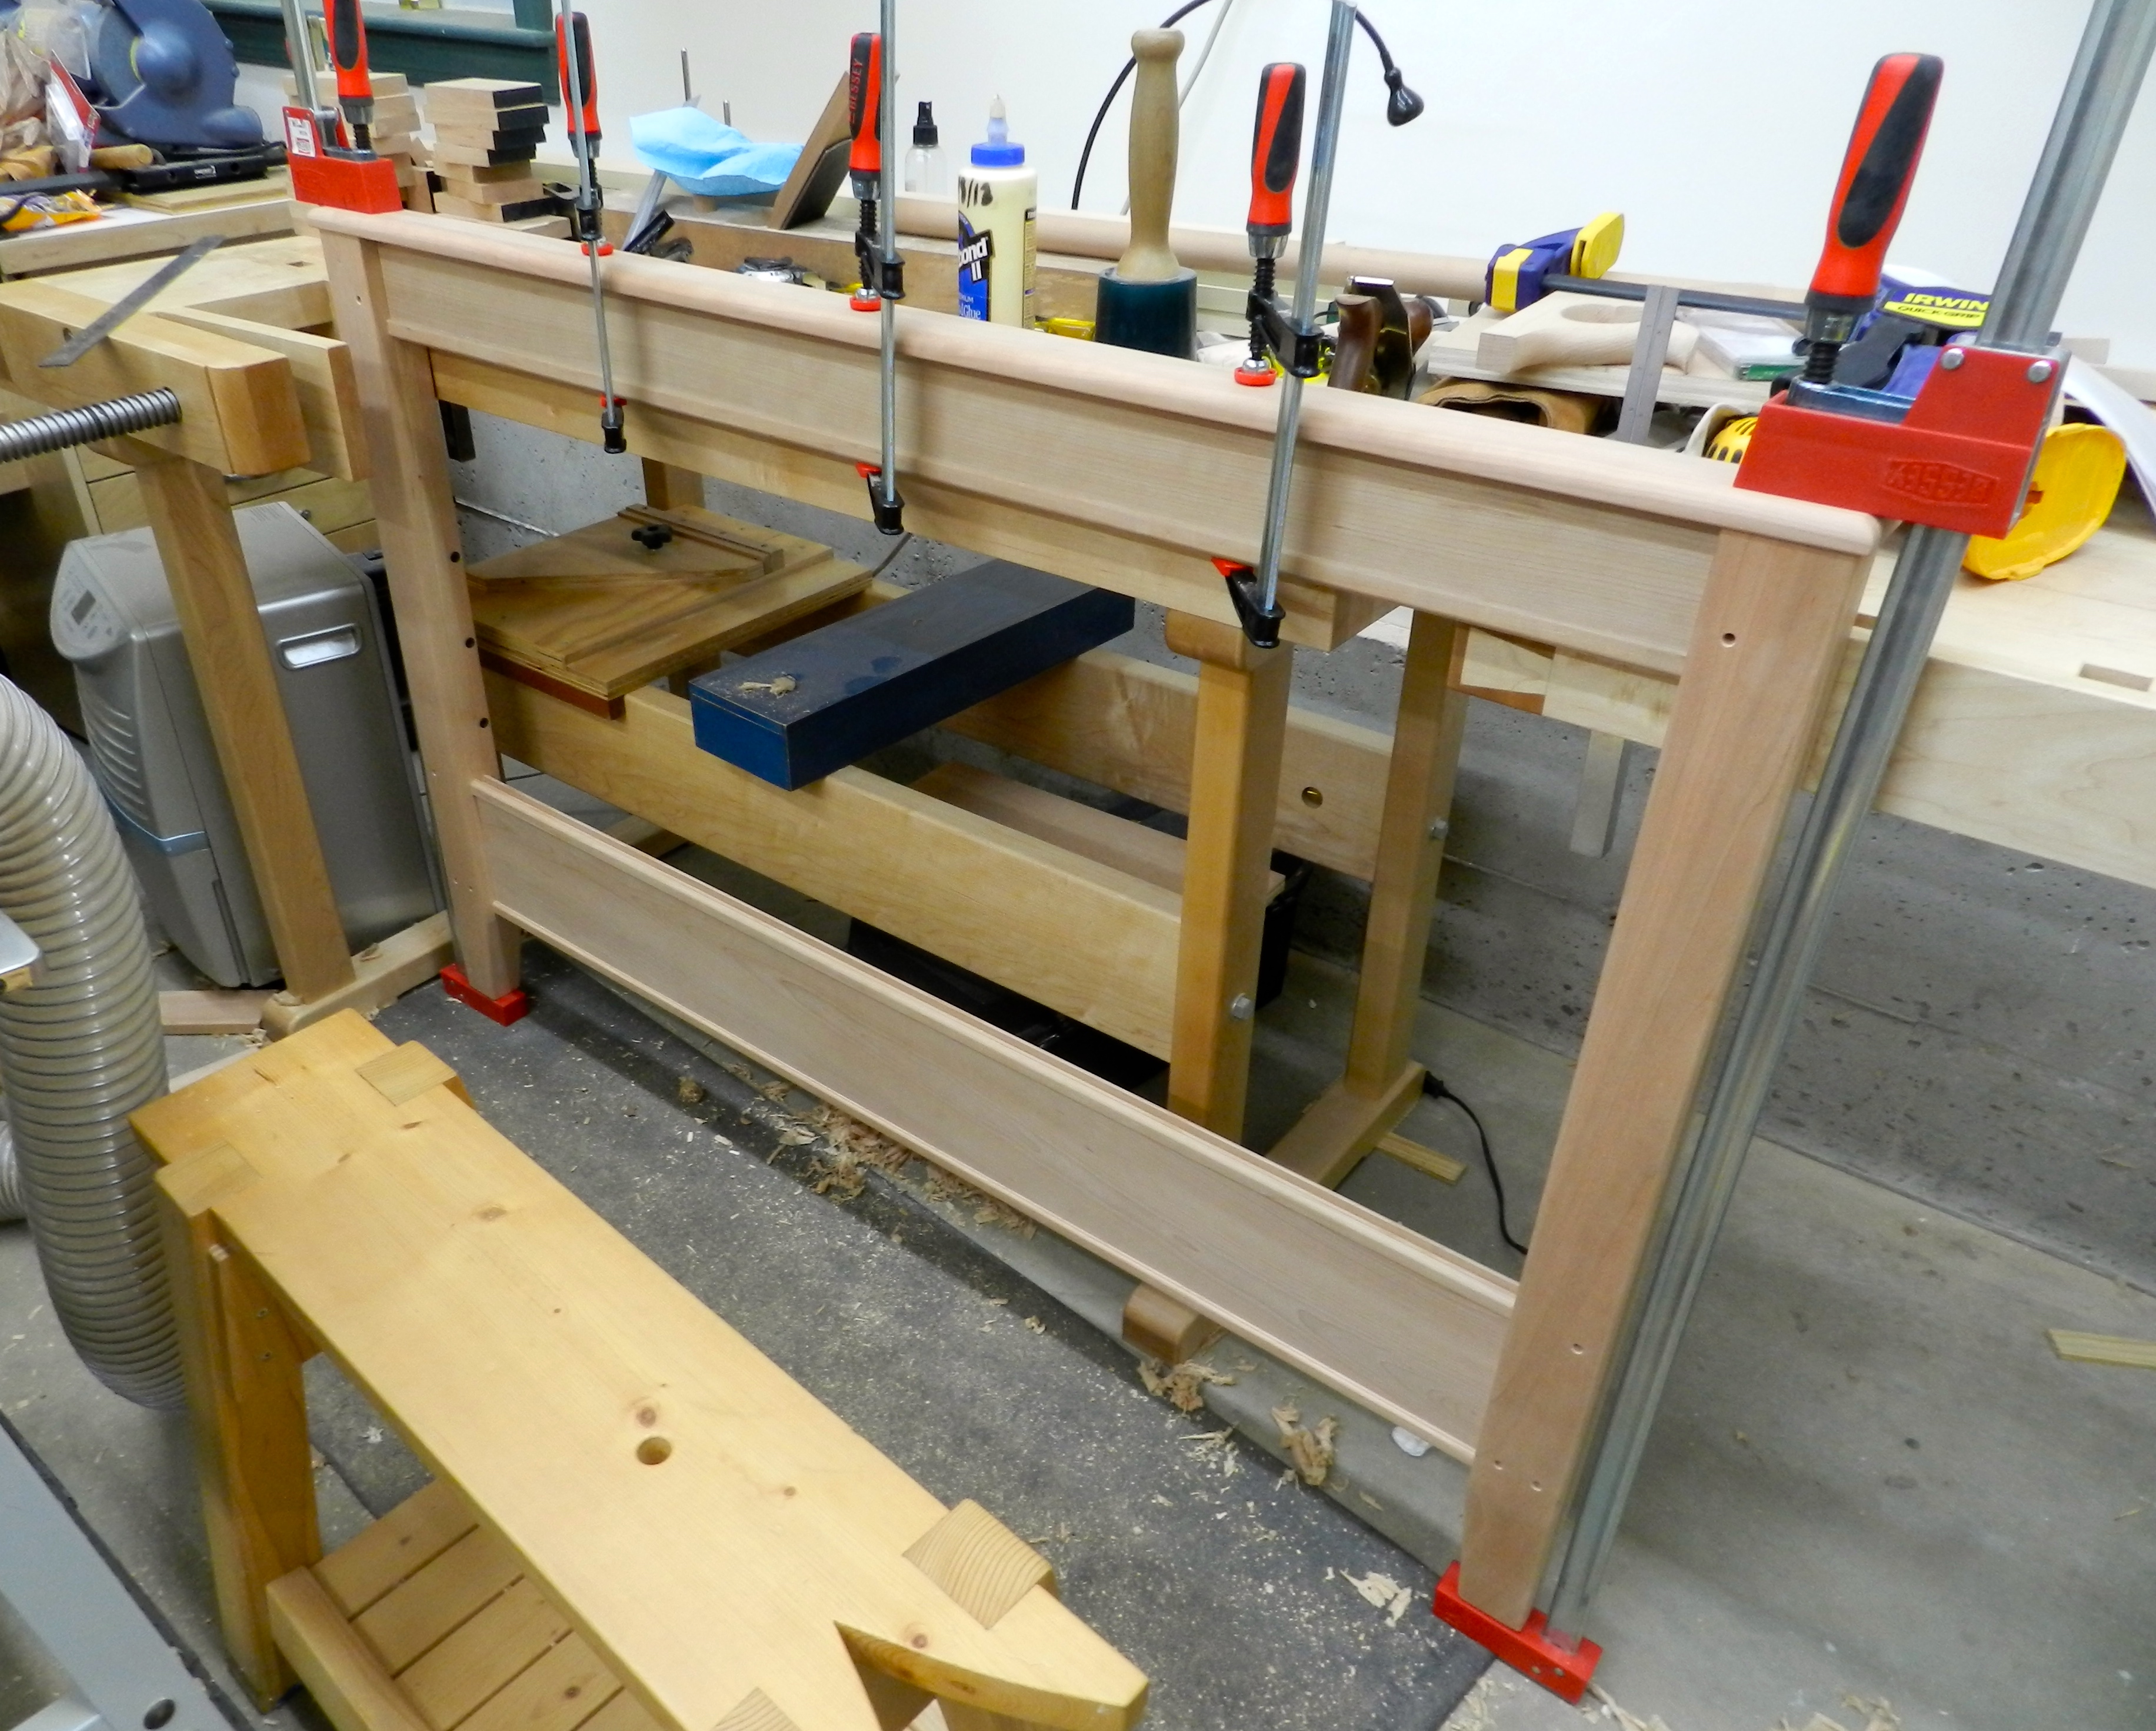
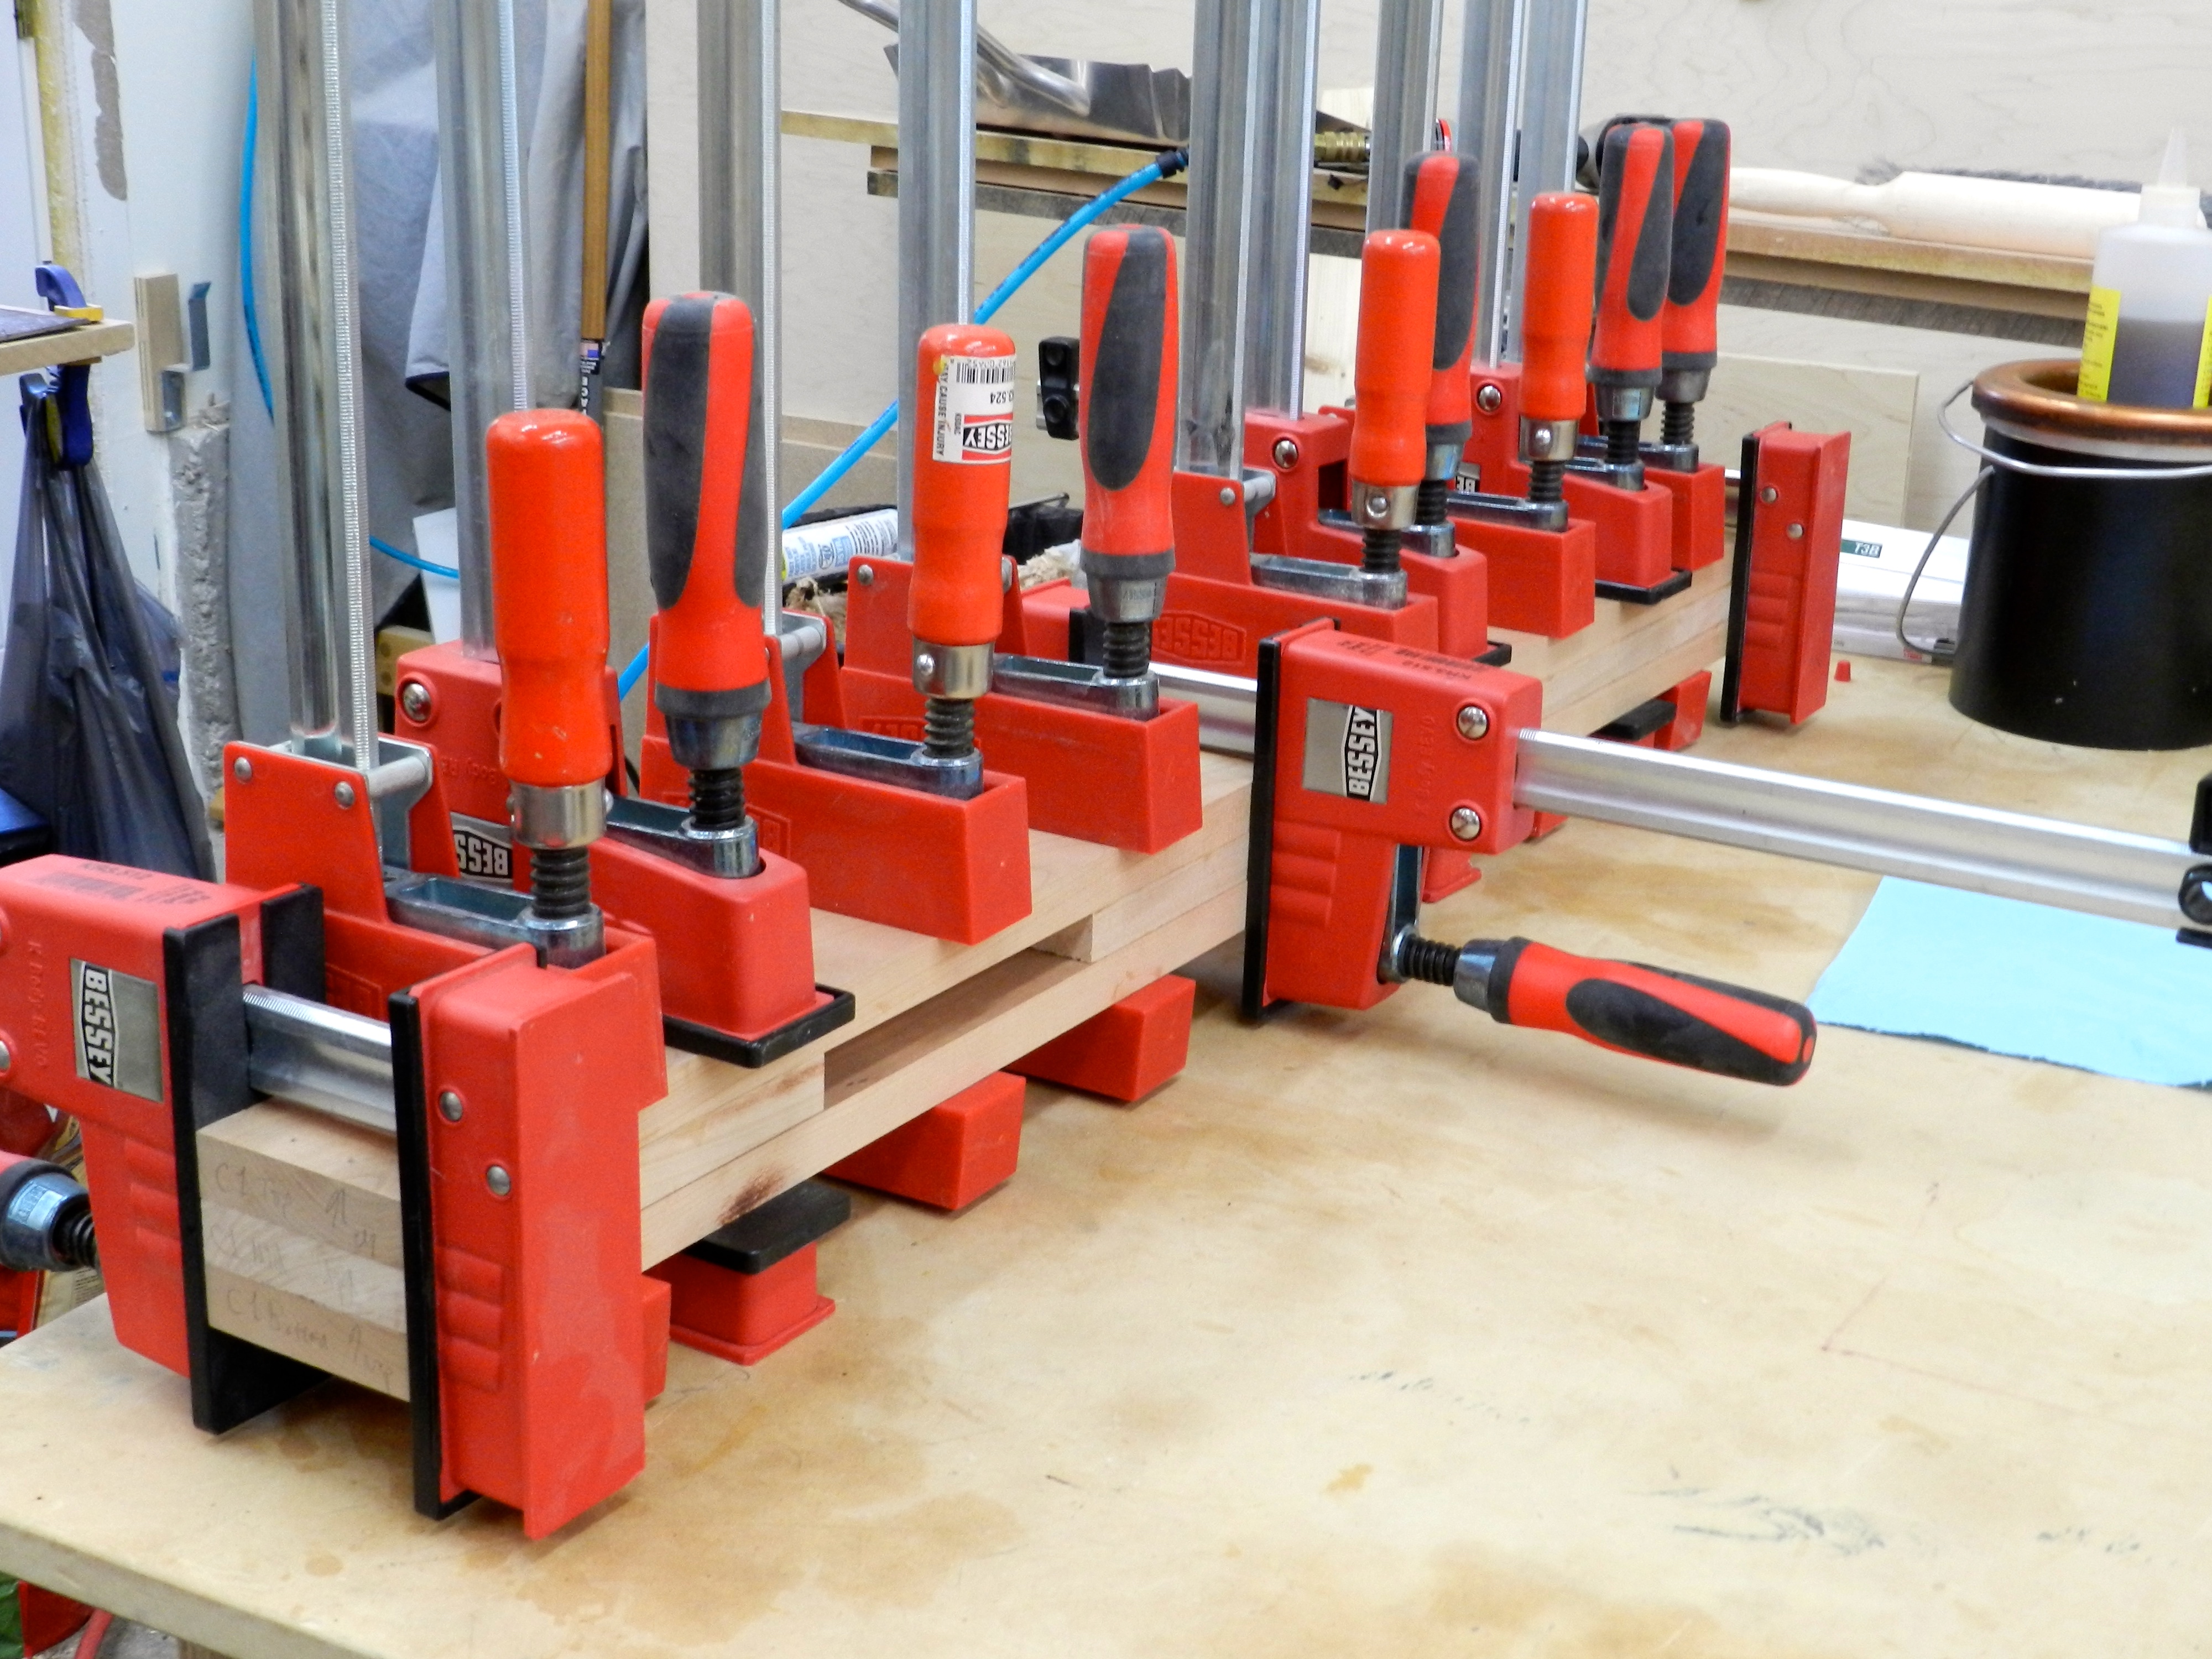
Clamping each section using extended bar clamps
Next up was gluing up all of the large sections of the bed — head-board, foot-boards, side panels etc. Given the width of this project I had to break out the Bessey K-Body rail extenders which allow me to bolt two K-Body clamps together to effectively make an even longer clamp. The connector section also works as an extra set of feet to keep the clamps level. I used hot hide glue again for its long open time and compatibility with finishes. Once in the clamps I checked everything for square, adjusted as needed and let the section dry overnight.
Attaching the cap.
Once the panel was dry it was time to glue on the top cap/hand rail. Next I cut the cove molding to size and glued it in place with the help of some dowel cut-offs.
Installing the slats:
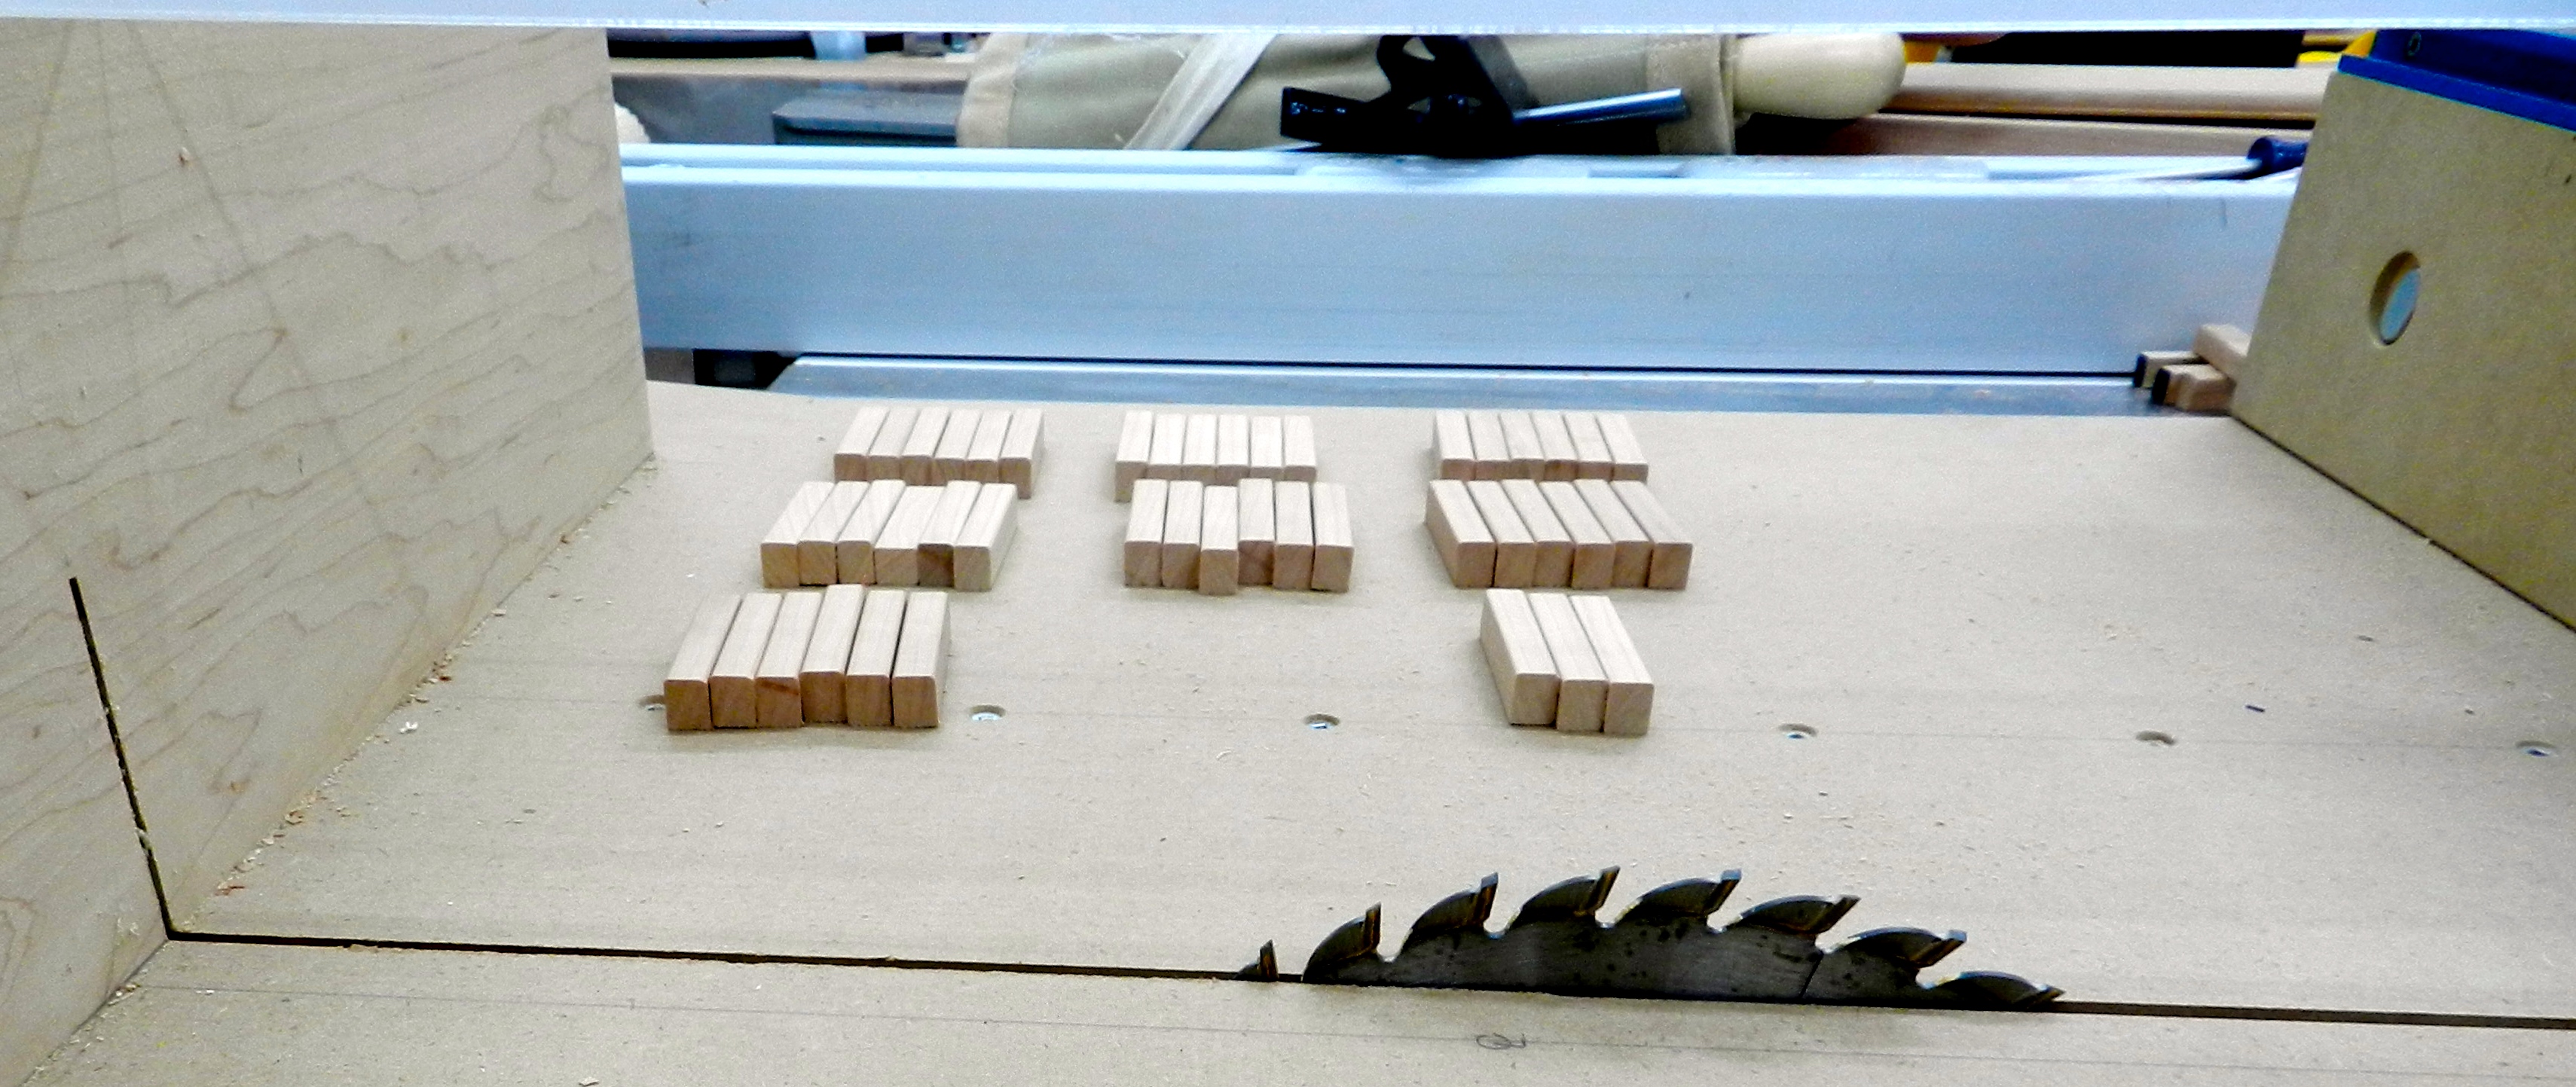
Cutting spacers on the cross-cut sled
I milled and test fit the slat spacers when I produced the molding above. I gently eased the corners with some sandpaper and cut them to length using my crosscut sled on the table saw and a stop block that was clamped in place against the rear fence of the sled. My OCD side also kept them in order so the grain matched across each panel.
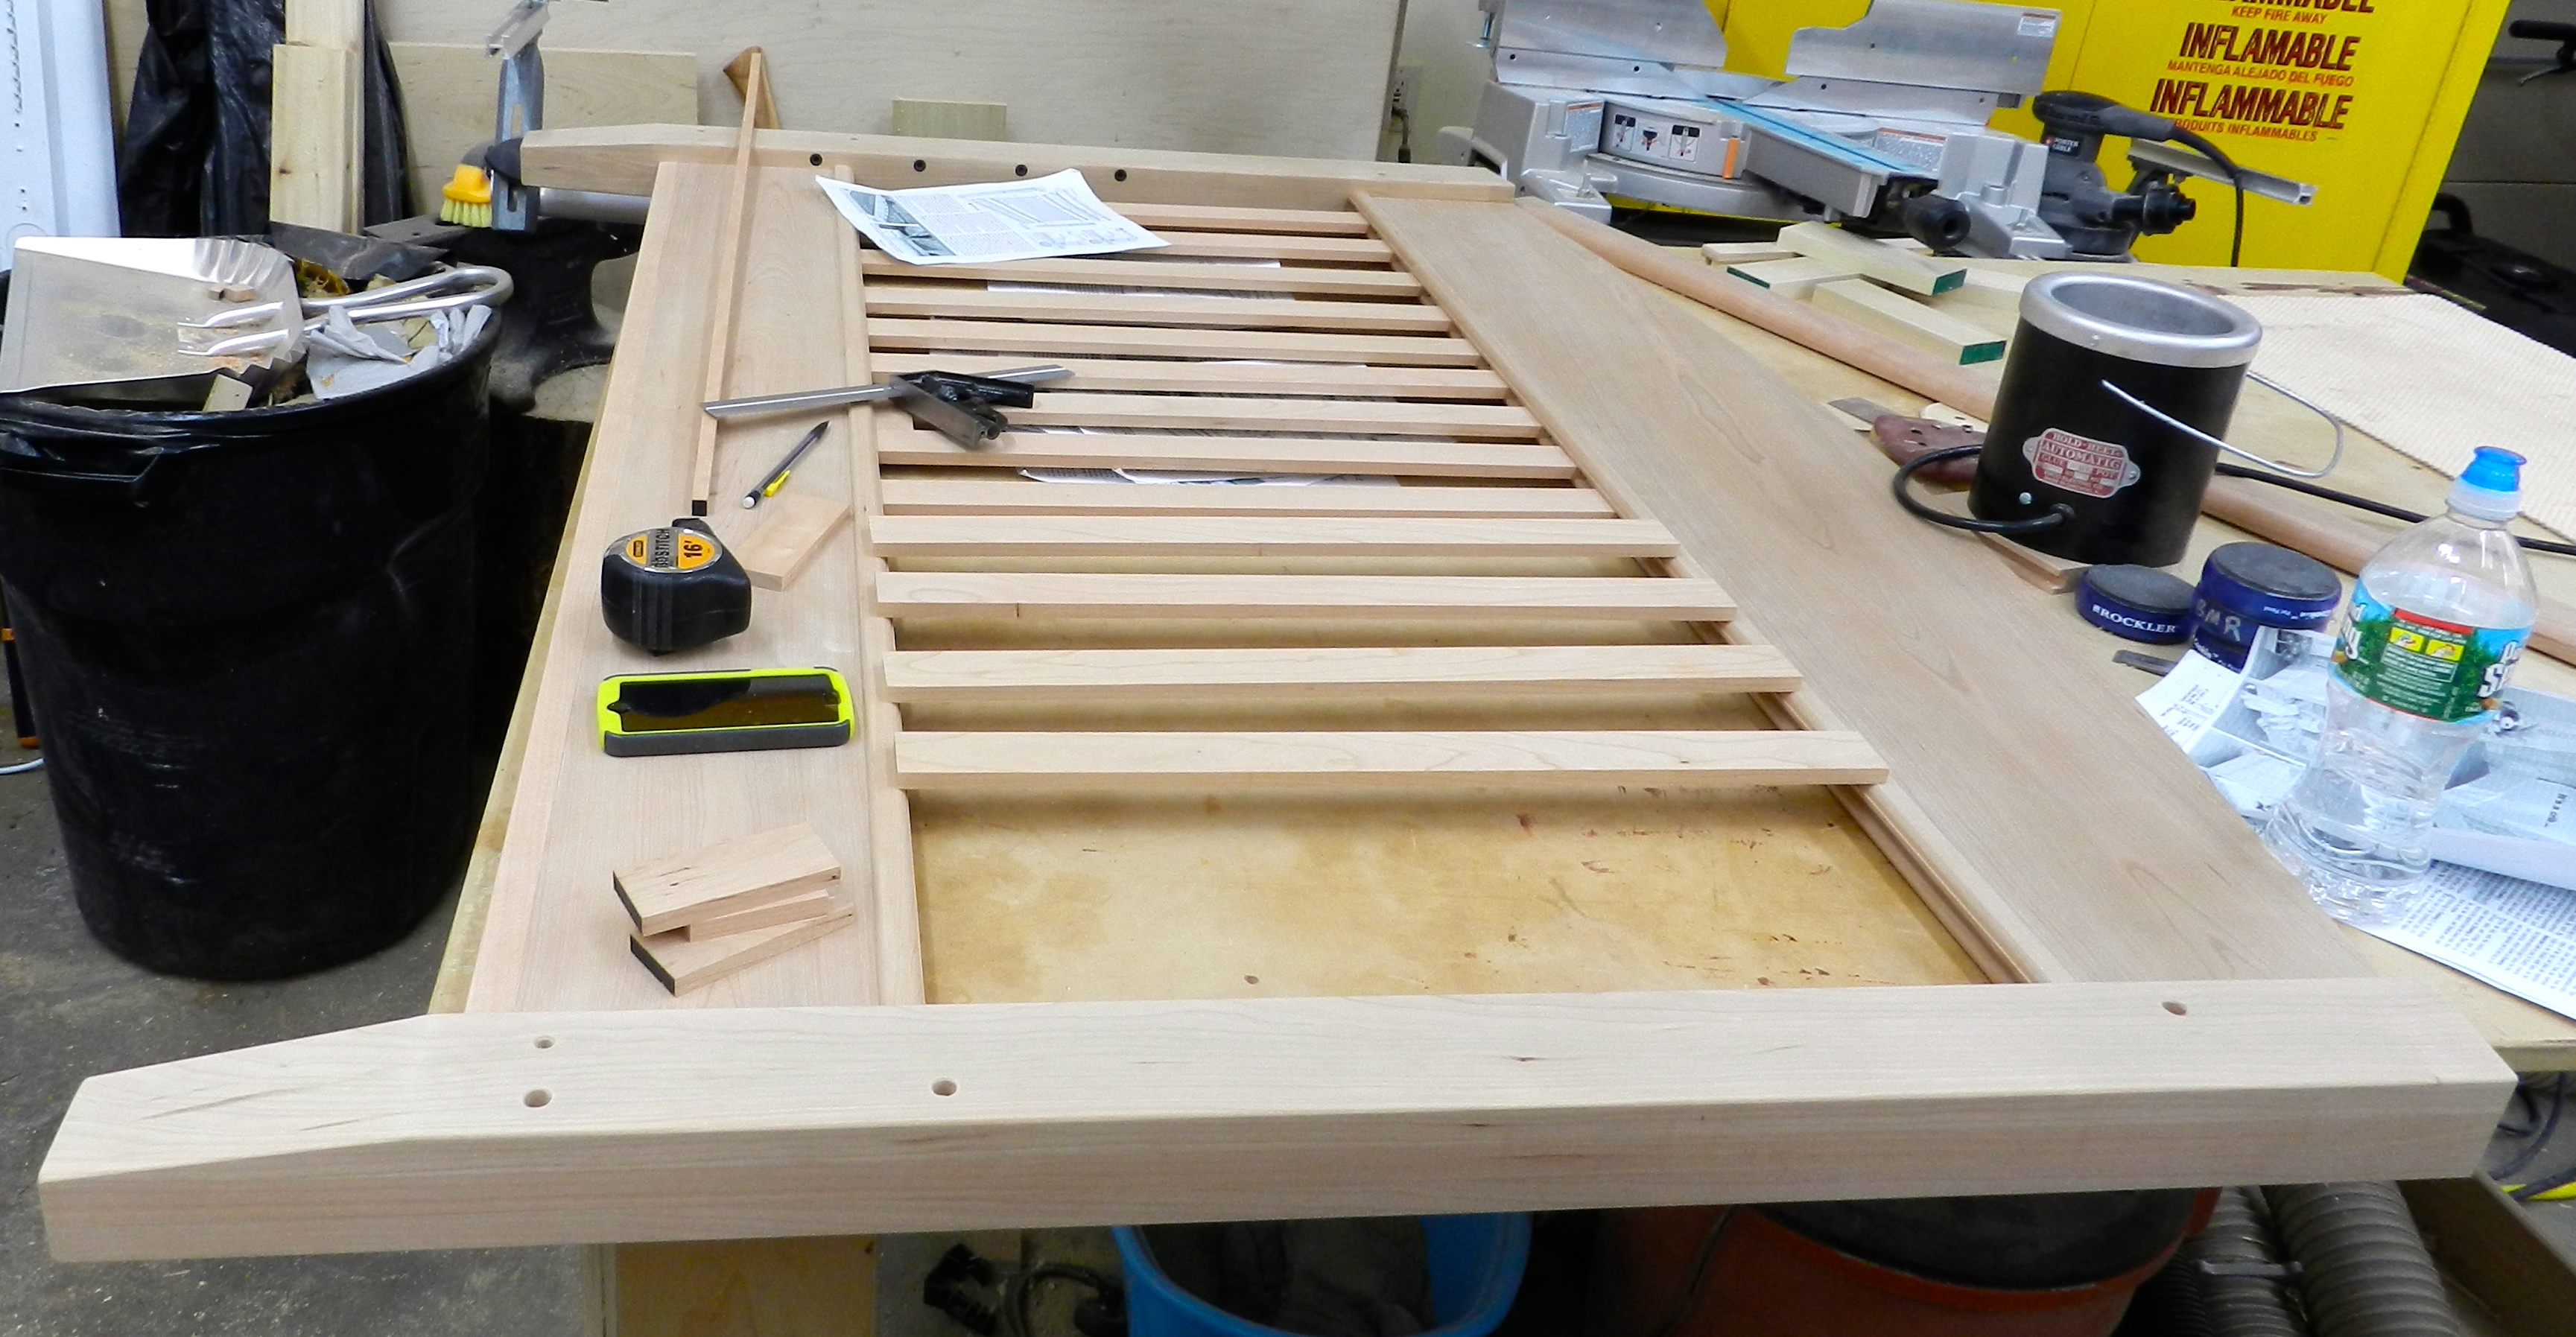
Installing the slats is a bit of challenge so I did a full dry fit/test run before doing it for real with glue. You start from the center slat which you mark with center lines on blue tape (that way you can remove the lines easily as they are only on the tape) on the slat and the panel and install at an angle to insert the slat and then straighten out when it is firmly in the top and bottom slot. I then install spacers to the left and right of the slat and repeat the process. When I get near the end of the assembly I install the last 3 slats at once (otherwise there would not enough room to angle them into place), move them to where they need to be and finish gluing in the spacer blocks.
Installing the slats
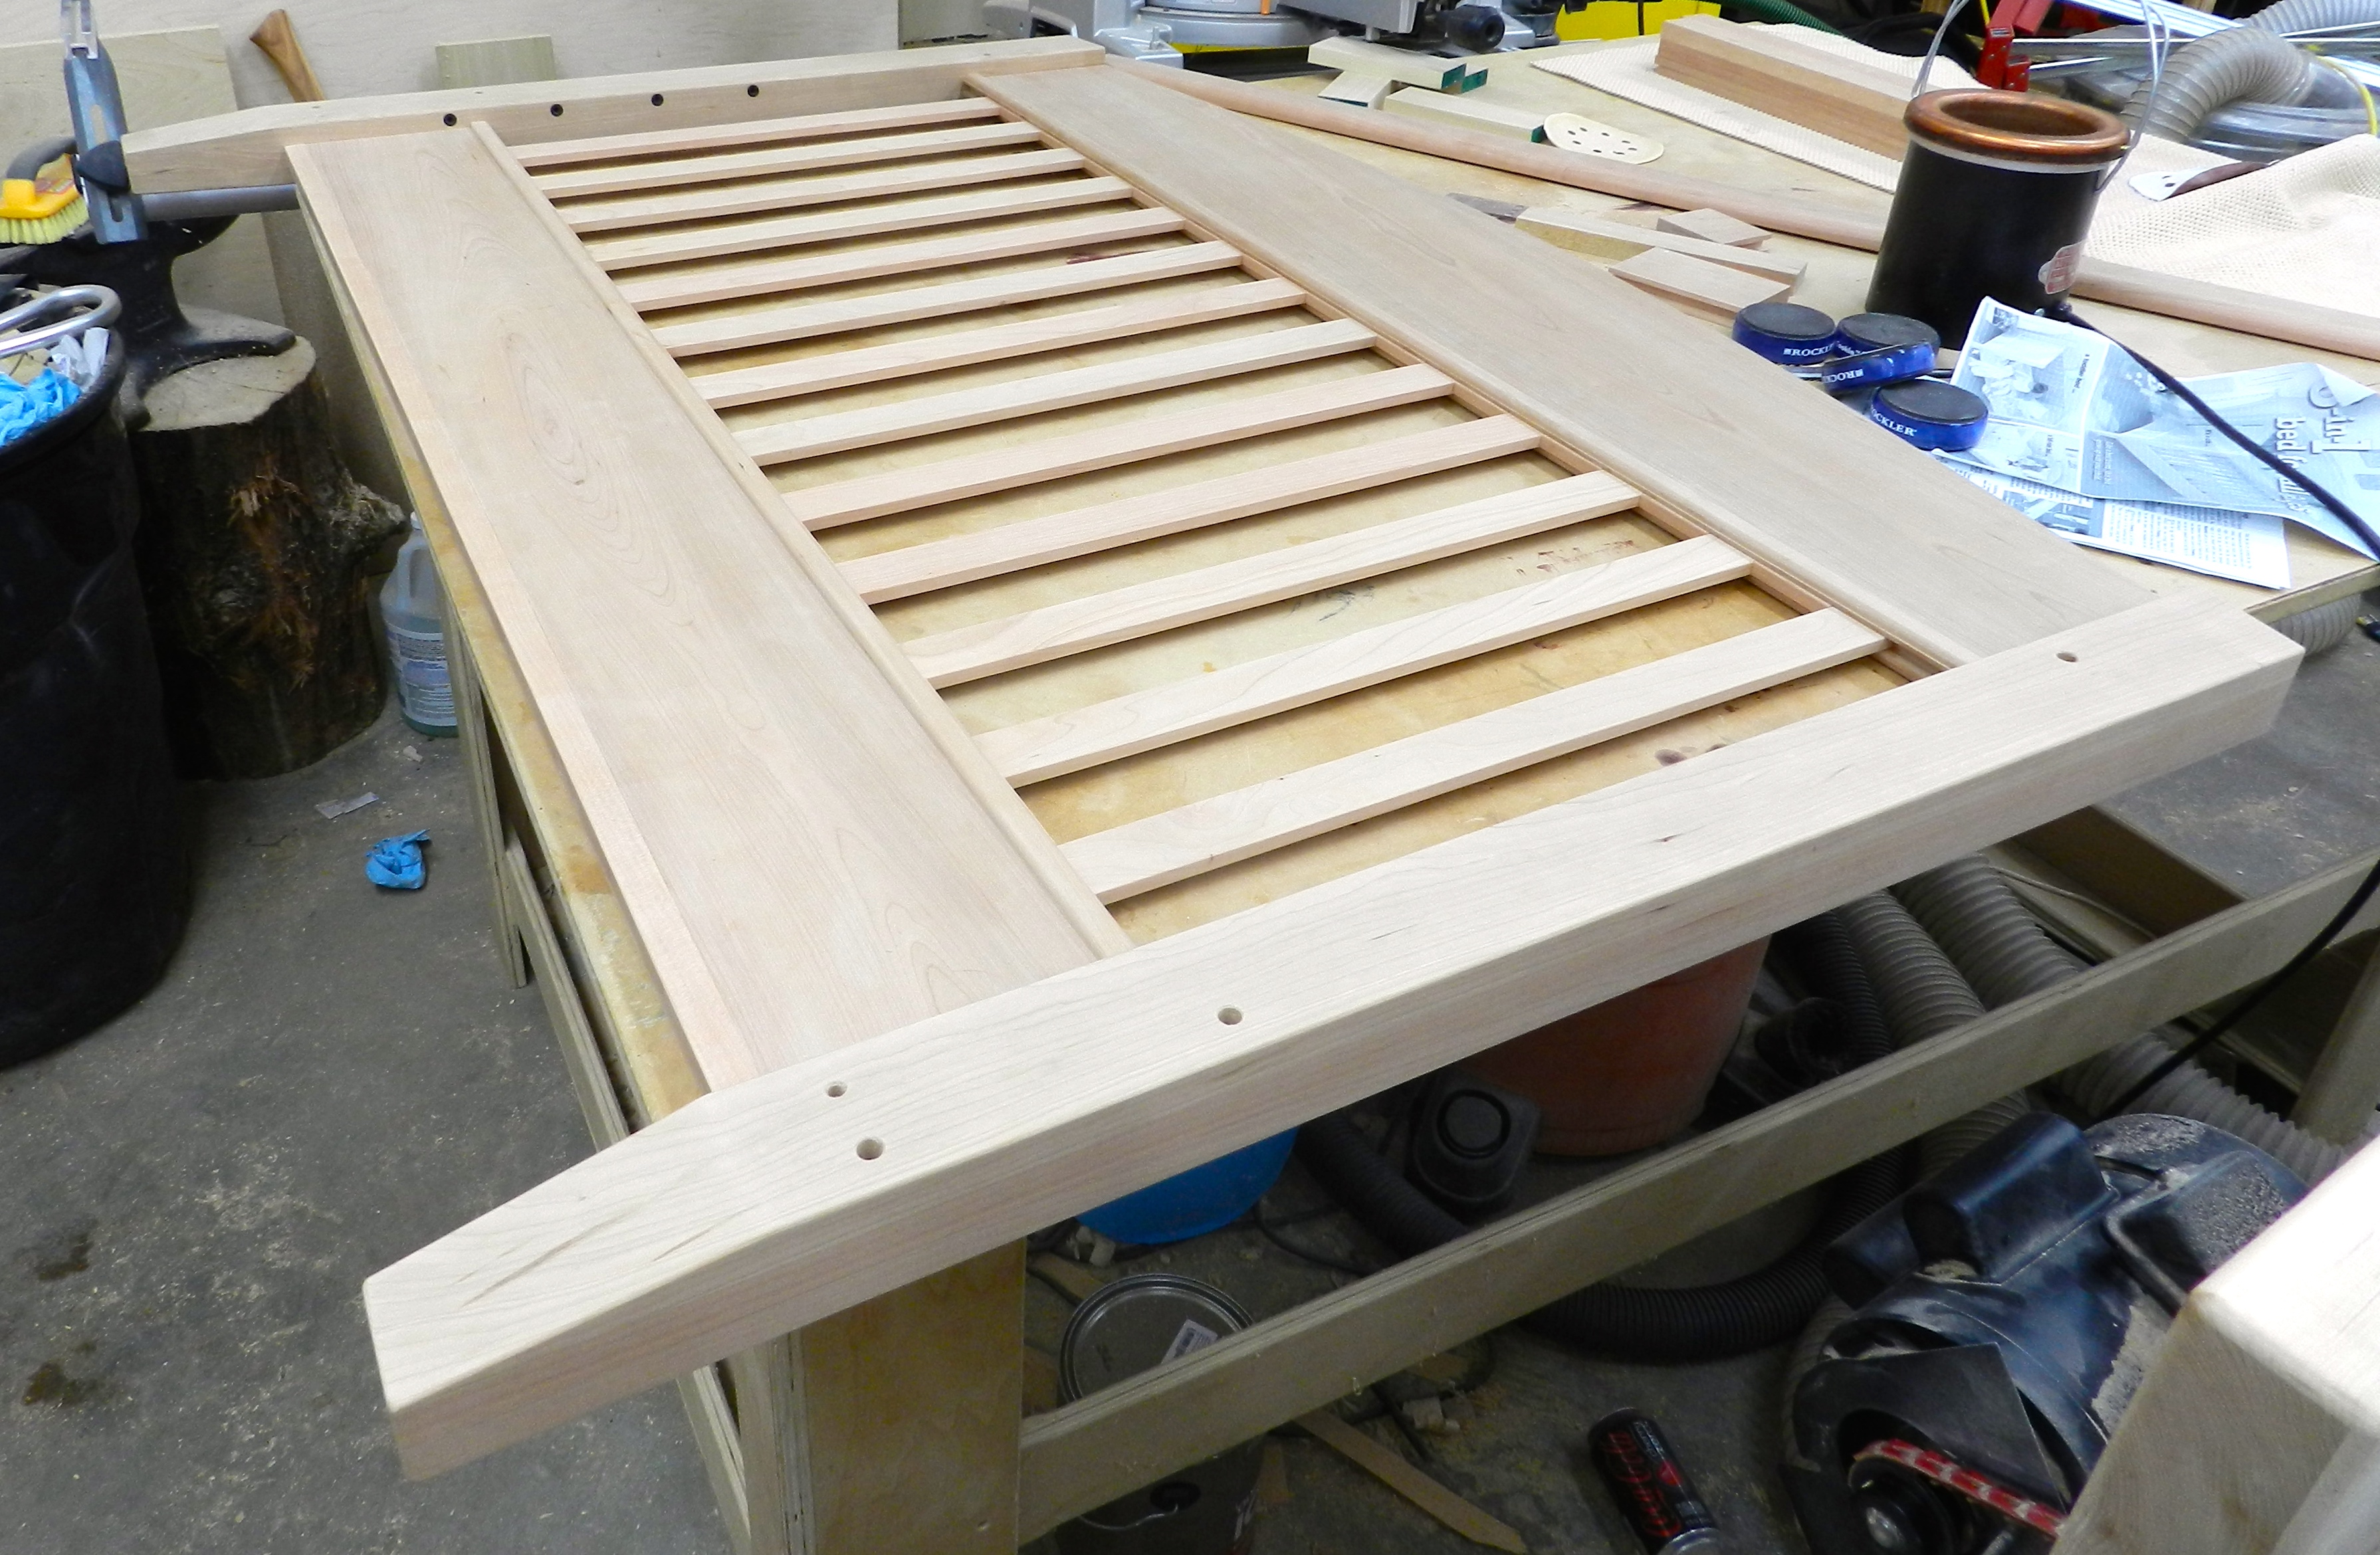
When laying out the slats in the dry run I also examined the individual pieces and laid them out so that the completed piece had even grain patterns and tones. I also made a few extra slats so I could swap in grain I liked etc. Some of those extra pieces were recycled into a baby blanket display rod here.
Slats installed
Once I completed all the assemblies, I test fit the bed in all three configurations. (You can see several photos of that process over on my public Facebook page here.)
Test fit
Now it was time to pick a finish and head out to the finishing booth. To cap off this series, I’ll be talking about choosing and using a finish.
If you’d like to read some other posts related to this project as they get posted please check out this link here.
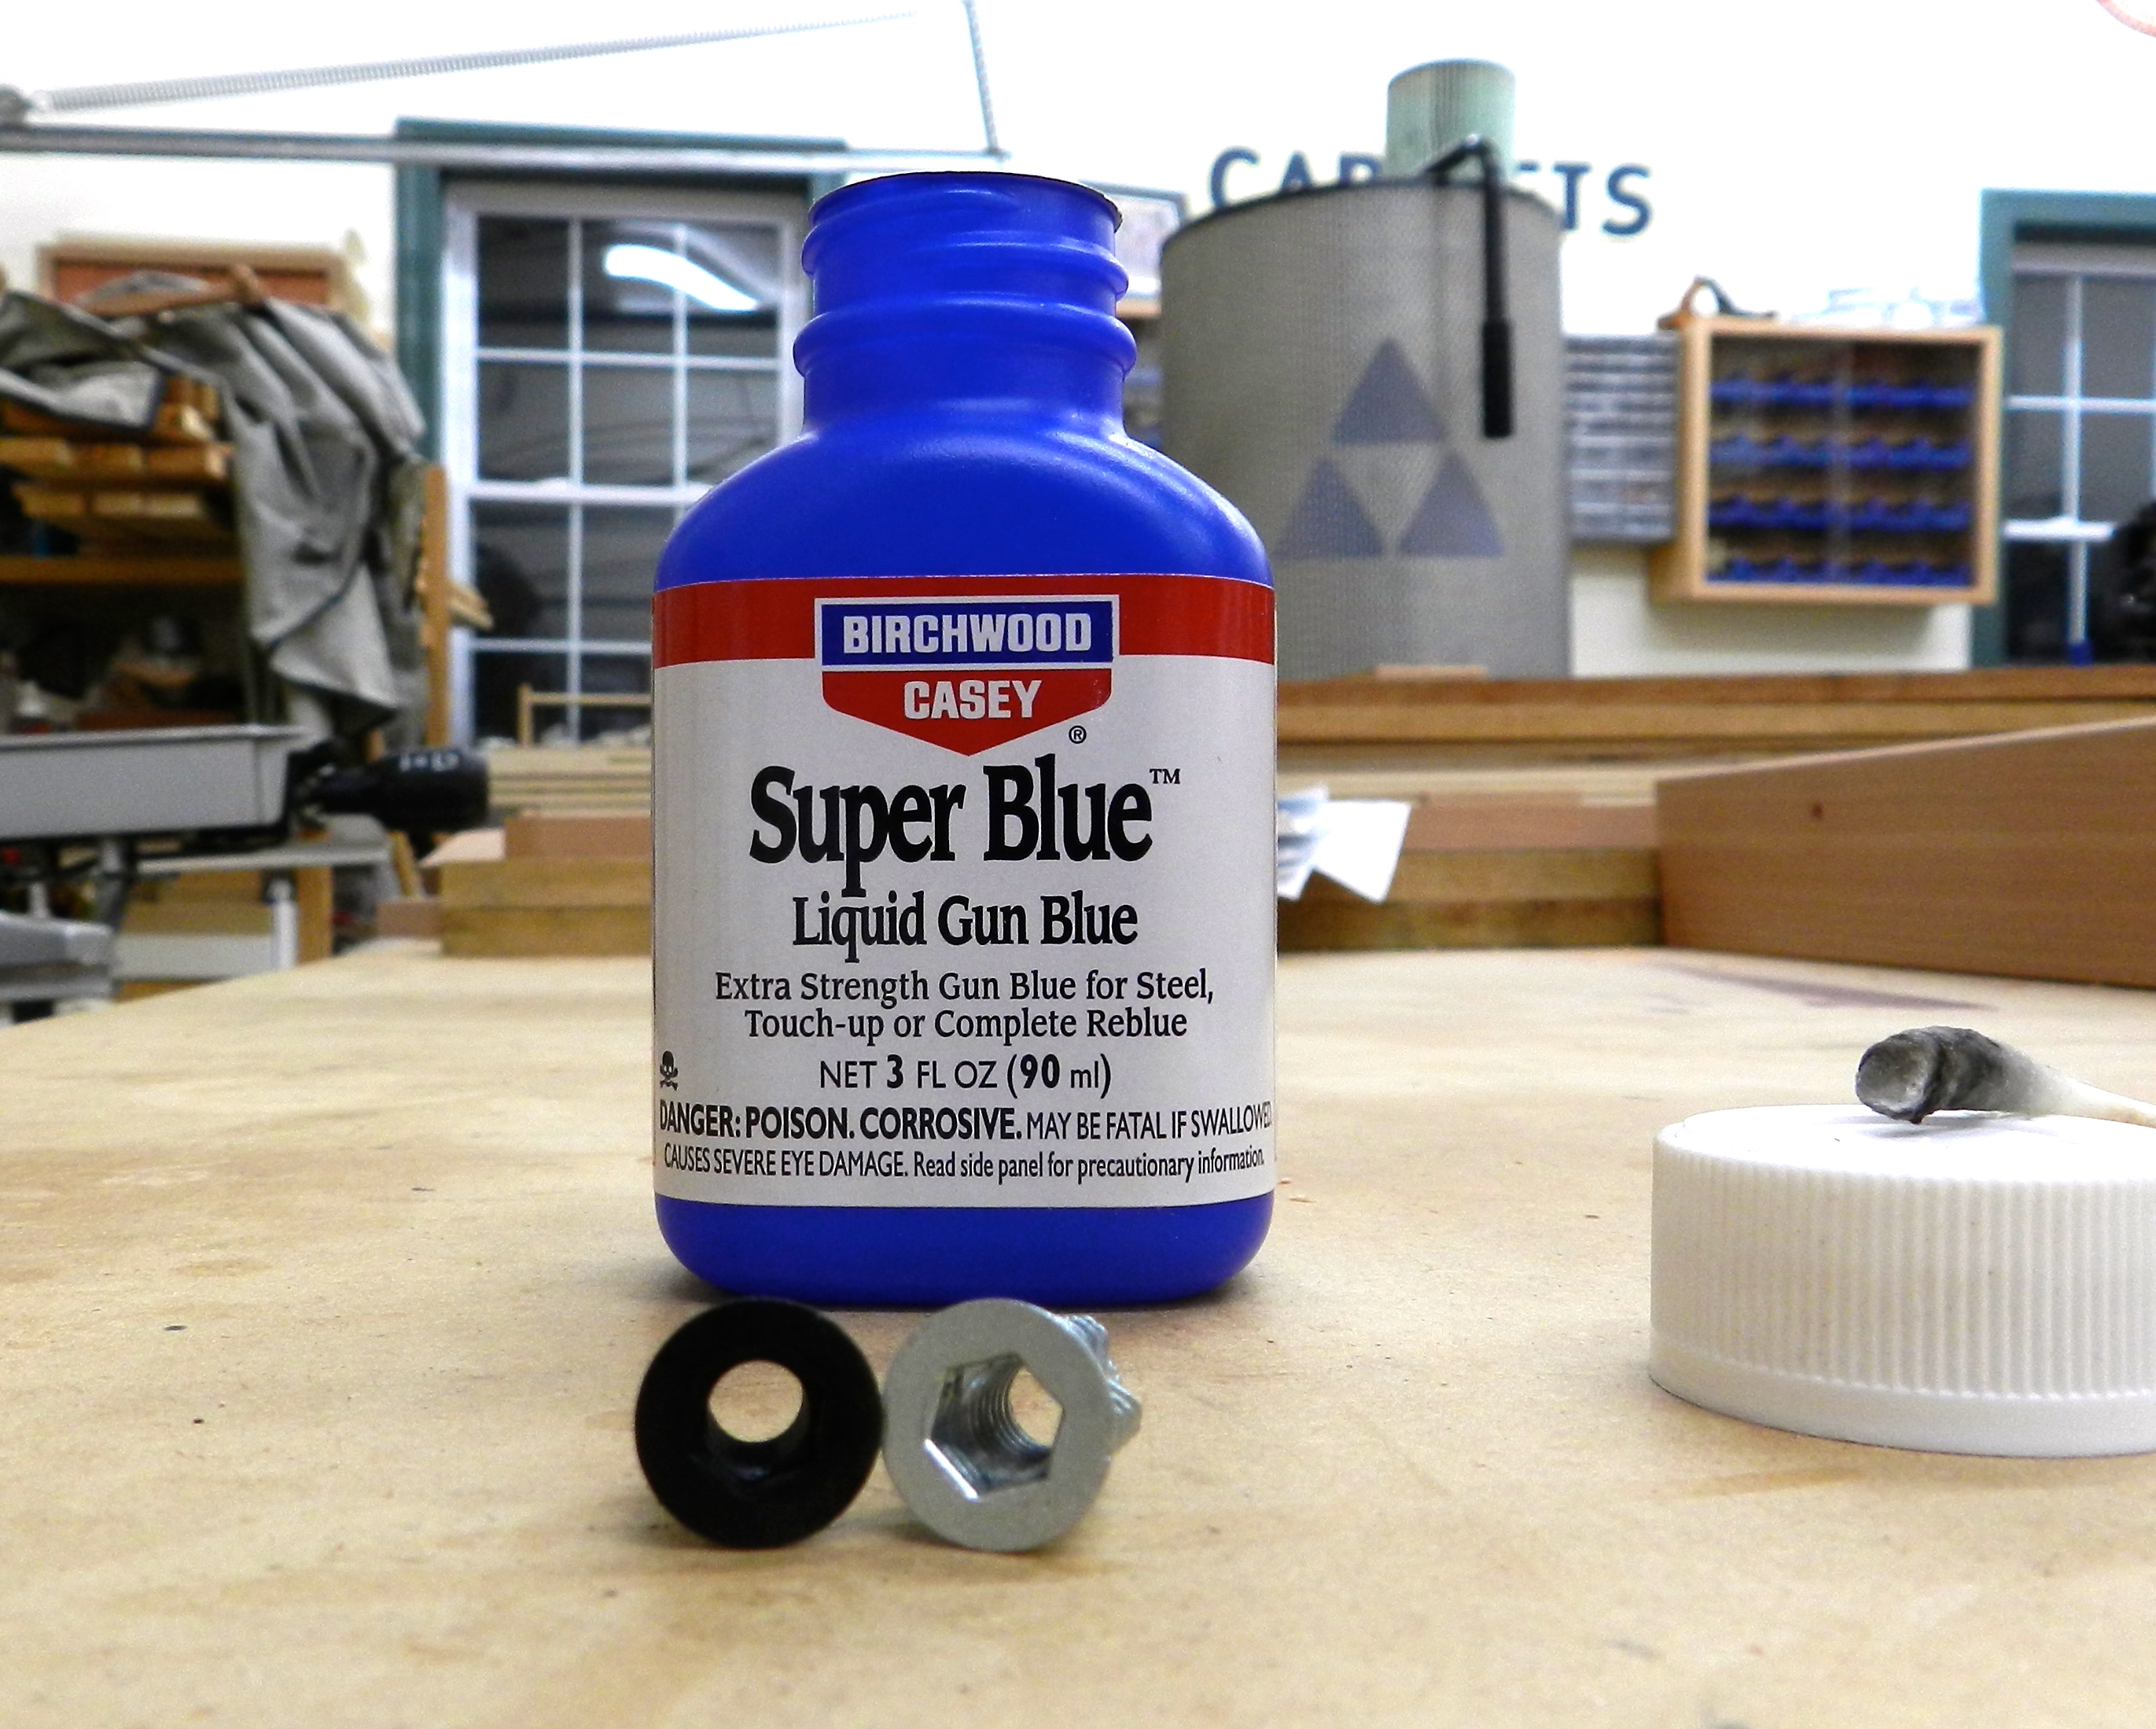
When we last left our woodworking hero he completed the legs and was heading into the home stretch — installing the hardware. But wait….some of these things are not like the others. The bed bolts in the hardware kit were ordered in a nice antique bronze finish. The bed frame has a nice enameled finish in a similar dark brown metallic color. The threaded inserts and bolts that hold up the bed frame were a bright silver zinc finish. I worried these shiny bits would stand out like a sore thumb.
Then I remembered a trick I learned from my friend Chris Schwarz that he used on his Anarchist’s Tool Chest. I soaked the zinced hardware in a bath of citric acid for a couple hours, then brushed them off with a brass bristle brush, rinsed them in water and dried them off. I then applied some ‘Super Blue Liquid Gun Blue’ to the hardware with a Q-tip and rinsed the hardware in water and dried it off to complete the process. The Super Blue creates a chemical reaction that creates a nice patina on metals. In this case it made a dark brownish color that gets the threaded inserts into a color spectrum very close to the rest of the hardware. (Check out the photo below to see the before and after). I’m very happy with how that color treatment went.
Modifying the hardware’s finish
Next up I had to drill a large number of stopped holes for the various bits of hardware this project included — threaded inserts, bolts and barrel nuts. To accomplish this I made use of some of my favorite methods for drilling a fixed depth hole. The quickest and dirtiest way to drill a hole to a consistent depth out in the field is with some blue tape wrapped around your drill bit. When the excess tape wipes away all your shavings you know you reached the depth you set out to drill.
Blue tape depth stop
Next up is using a fixed metal stop collar. This gives a more precise stop, but if you press too hard the collar can mar the surface of the wood, so I mainly use the collar with a dowel centering jig (As the collar stops when it hits the jig) or in places where the wood rubbed by the collar will not be seen.
Metal Collar Depth Stop
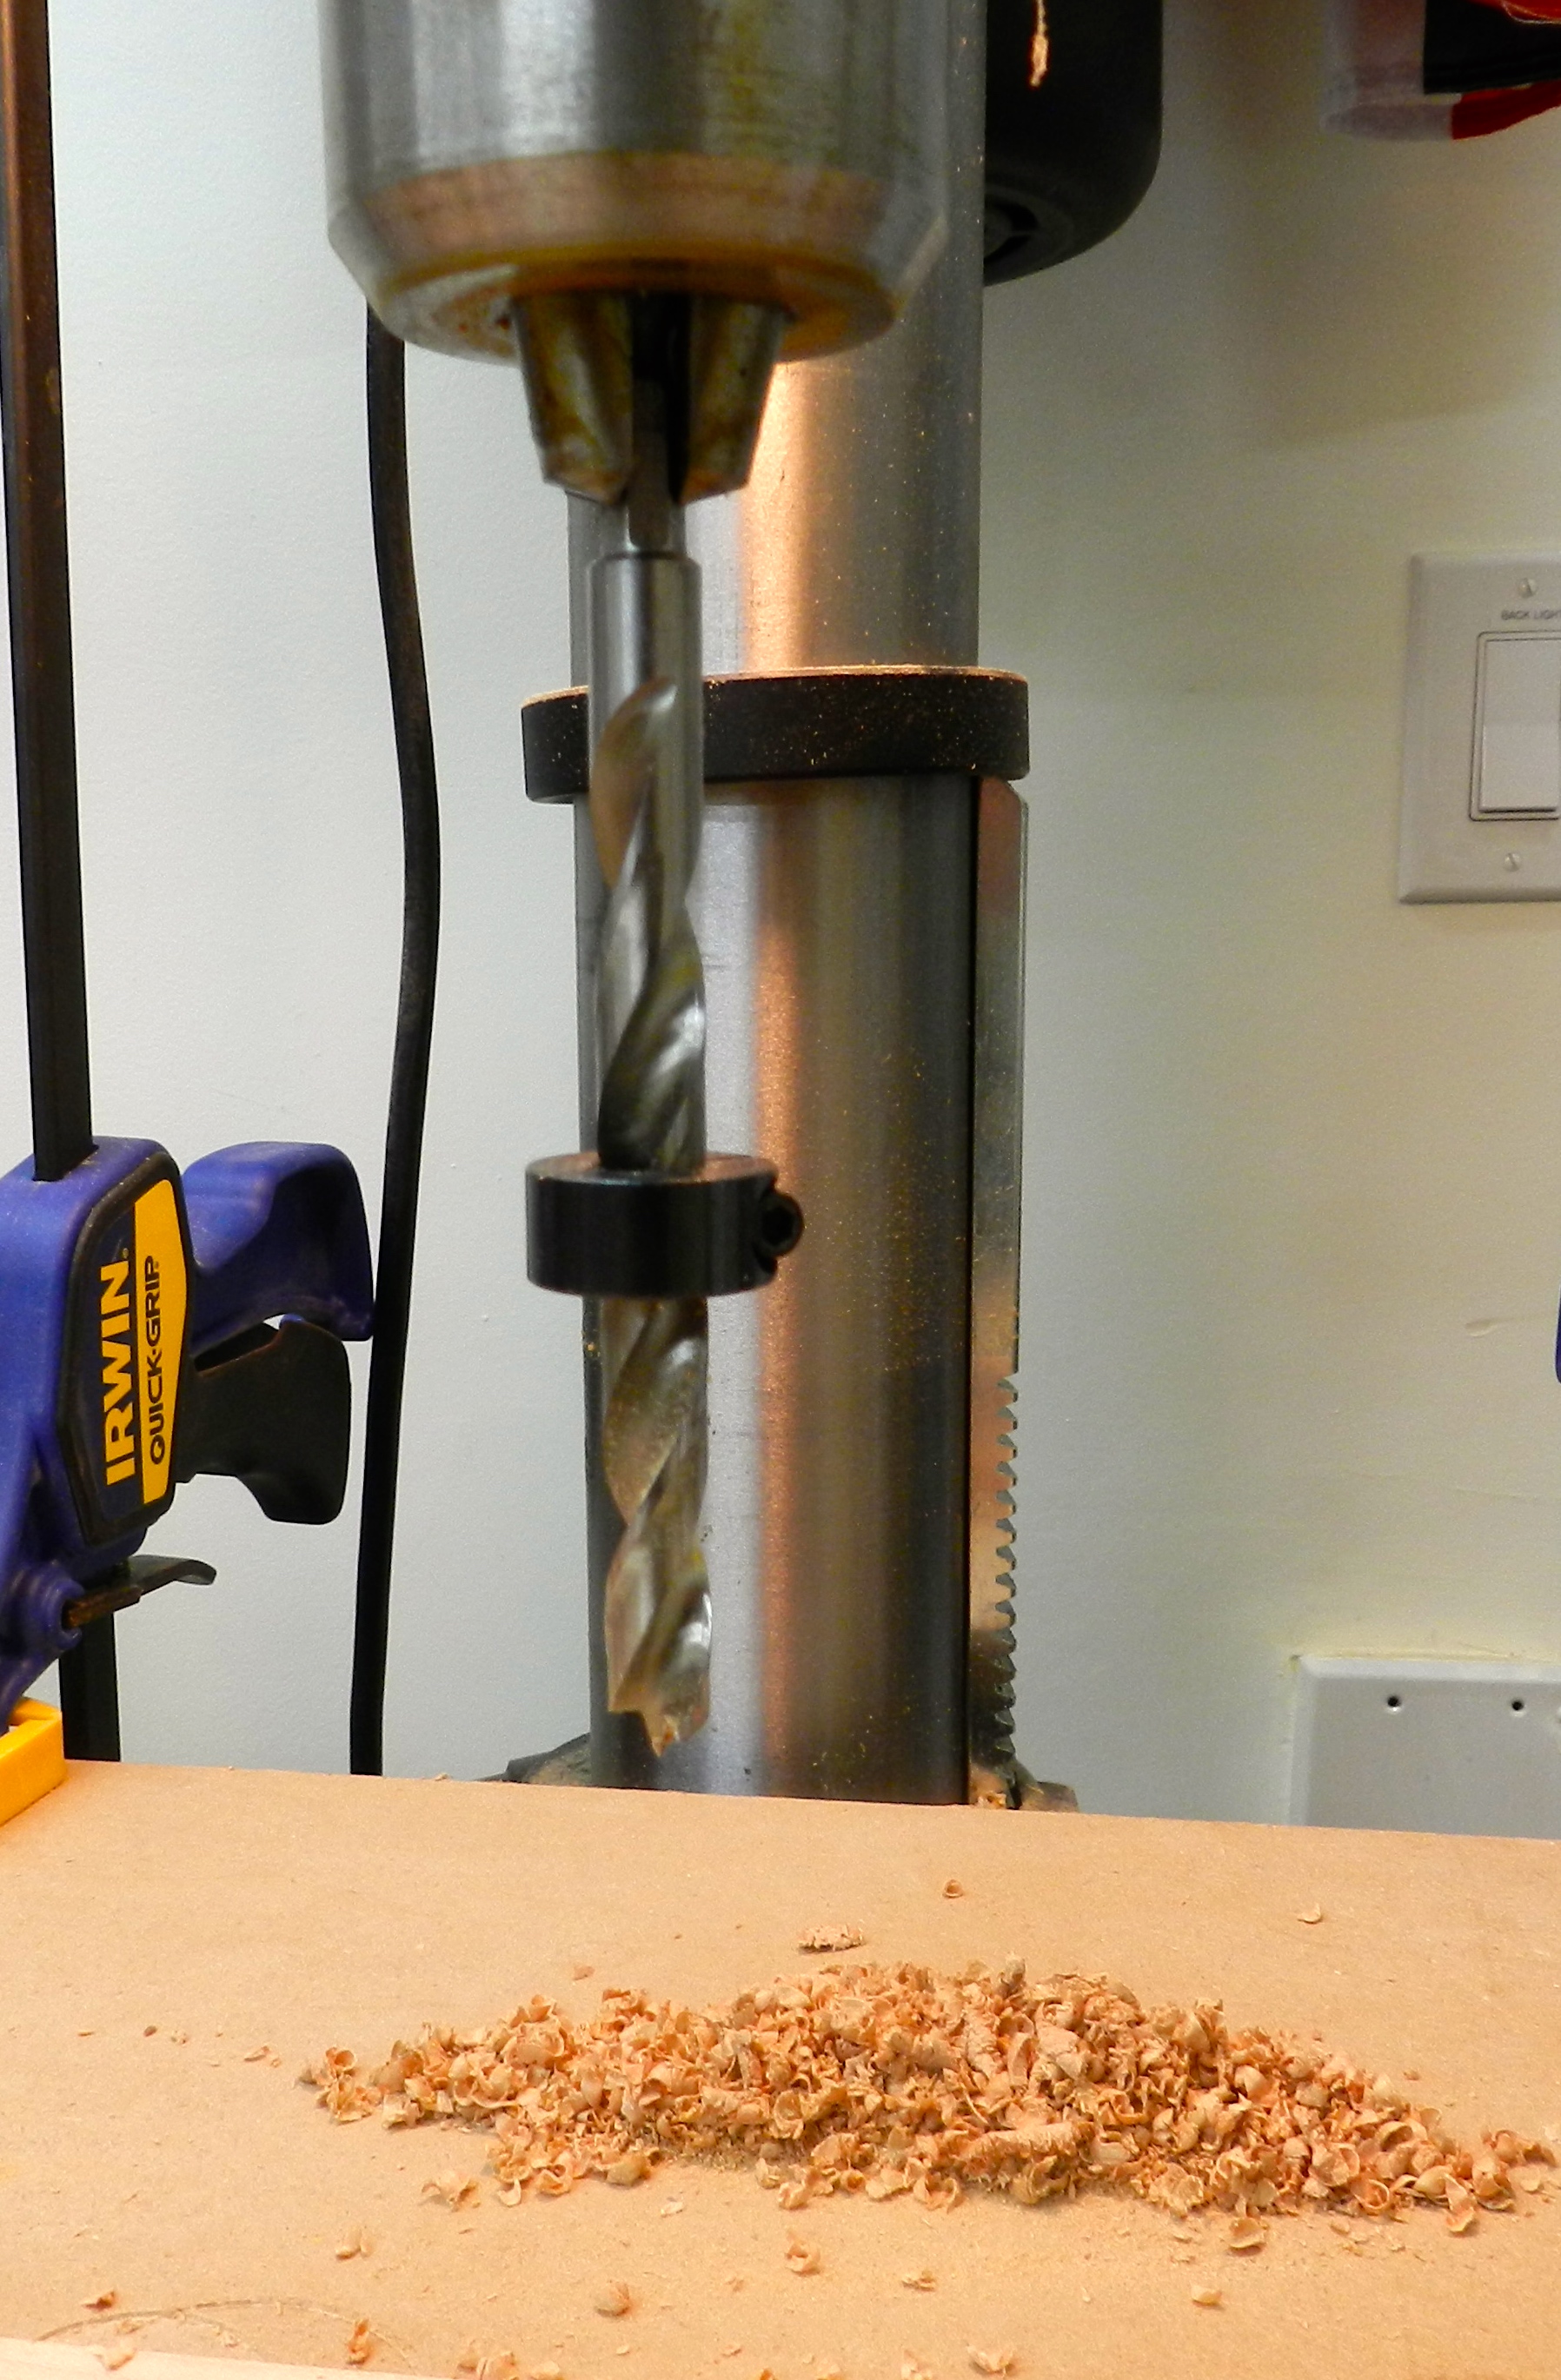
When I have the luxury of a drill press at hand I can make use of the built in quill depth stop (left side of drill press in photo below). When buying a drill press make sure you get a heavy duty depth stop and easy to use depth setting mechanism. Even with a nice stop I don’t trust the scale on it other than for macro level adjustments. For checking hold depth with a higher level of accuracy I use a depth gauge.
Drill press depth stop
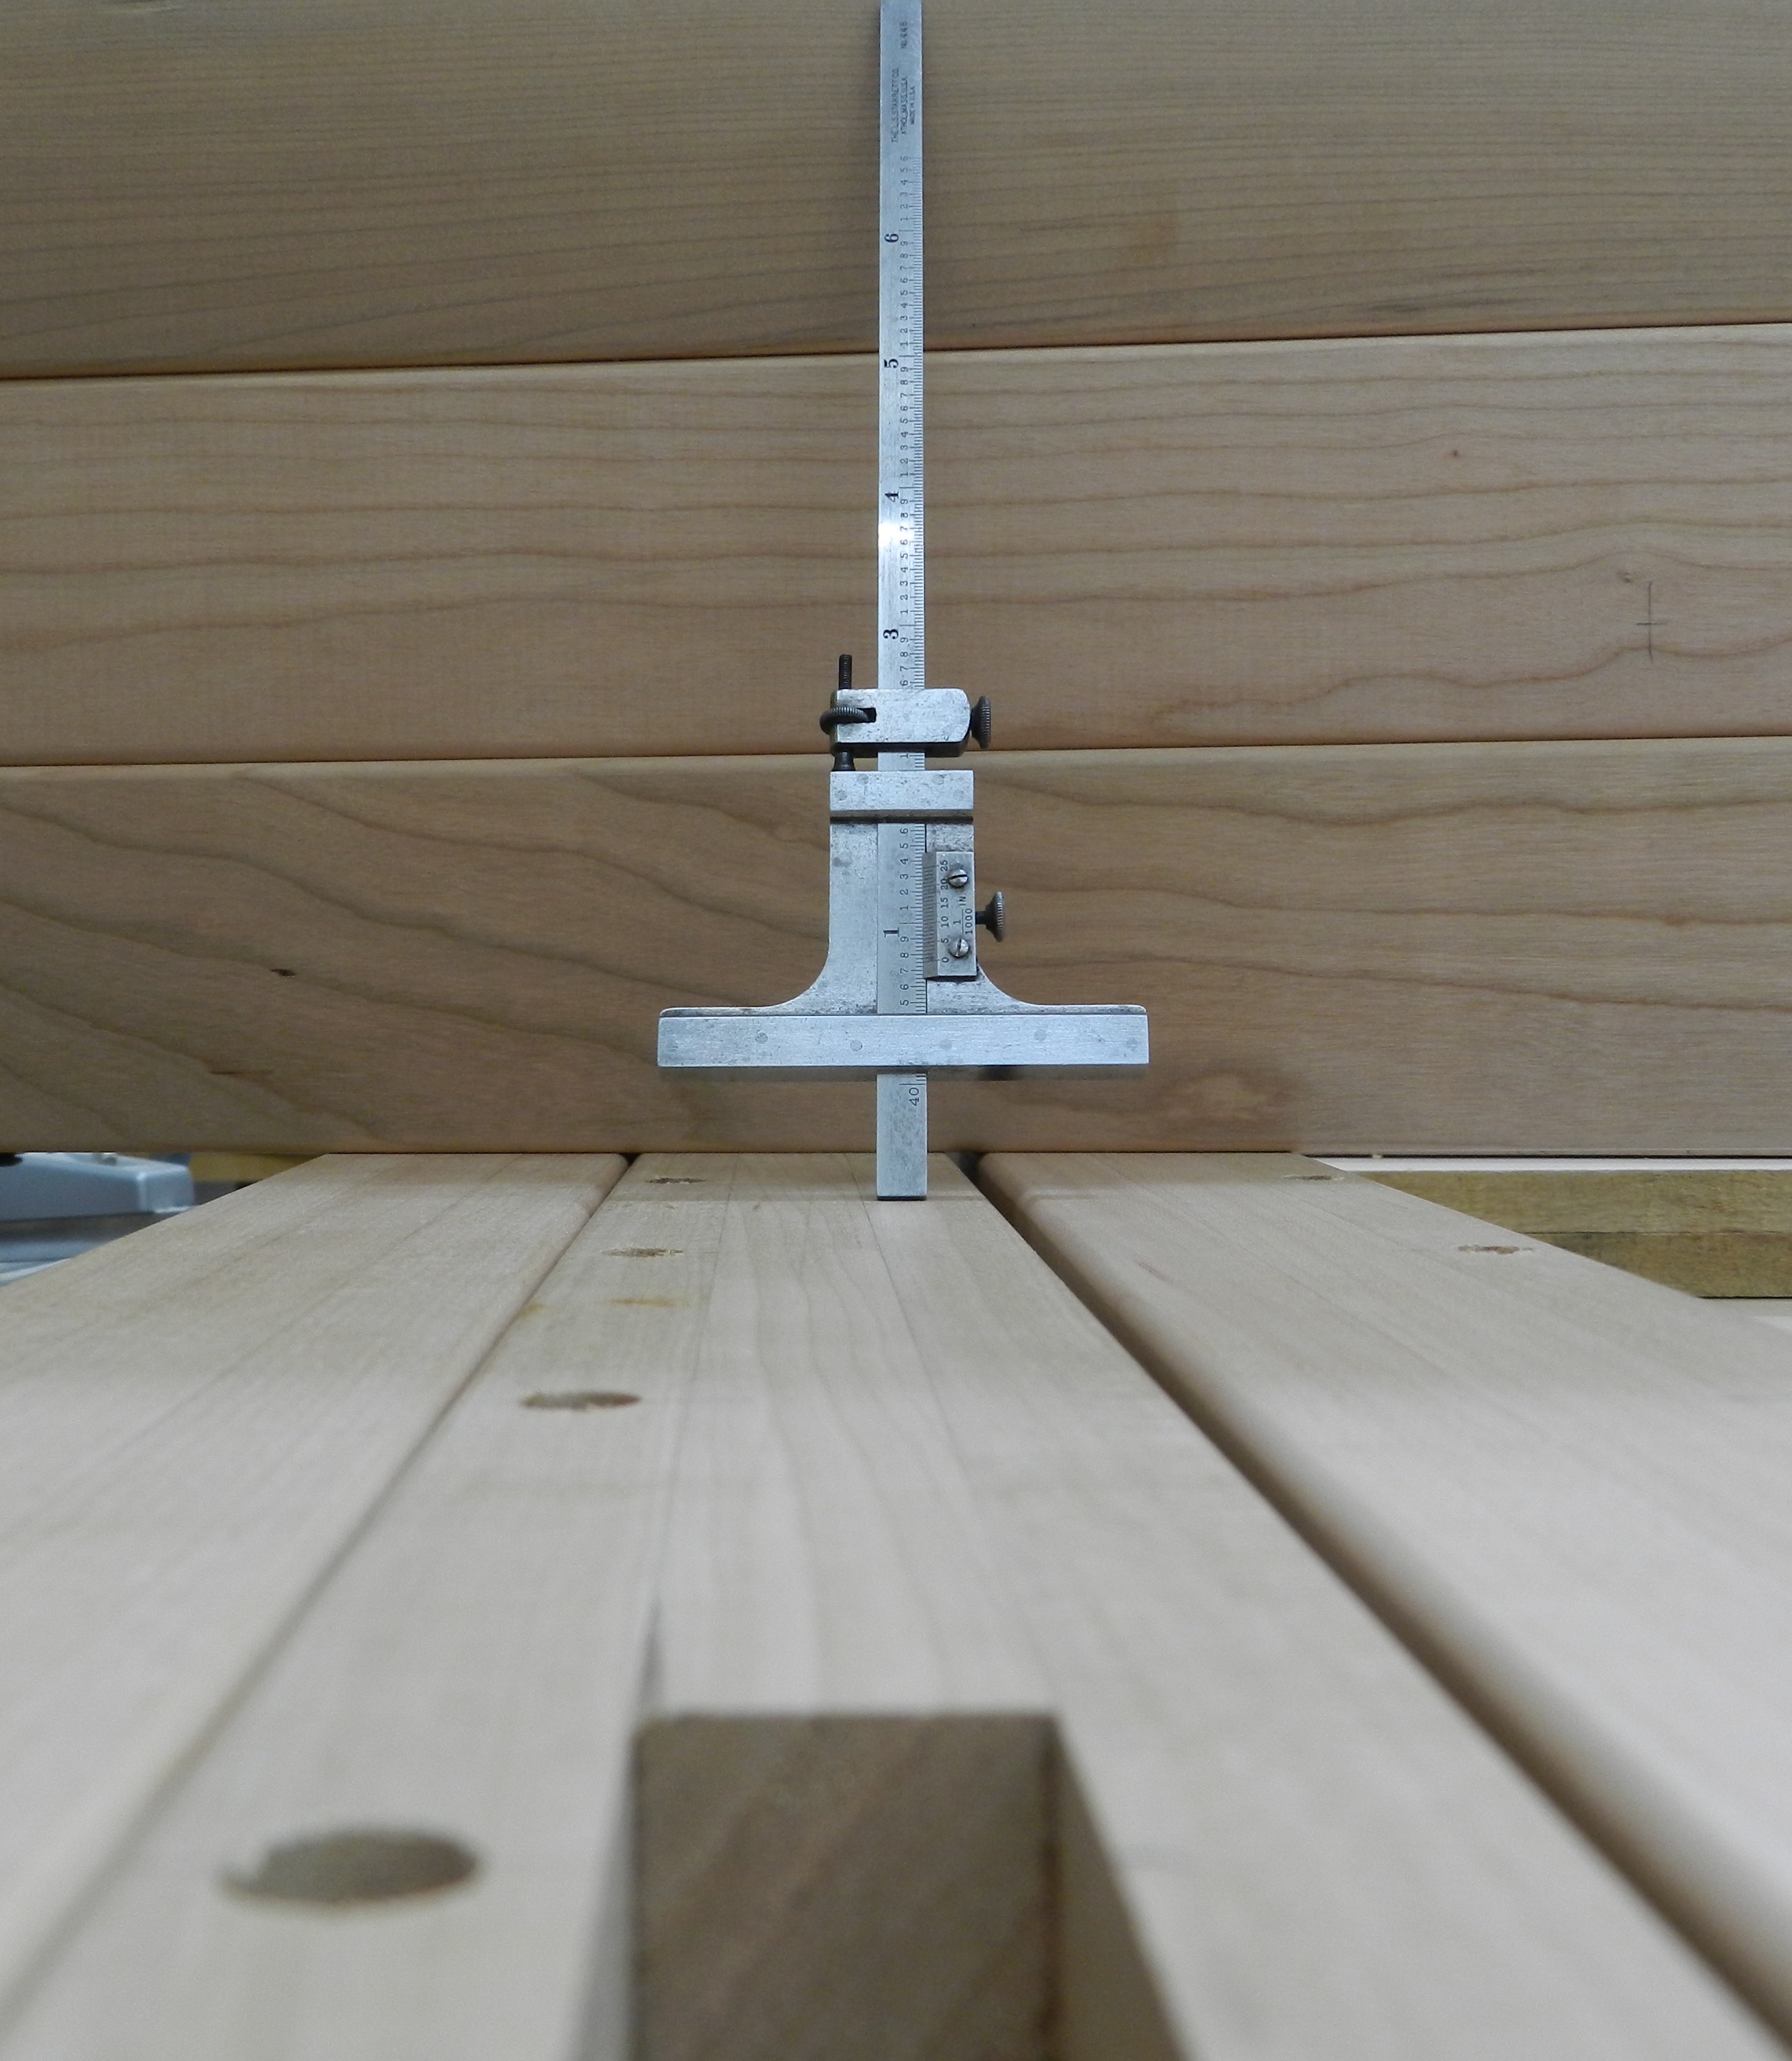
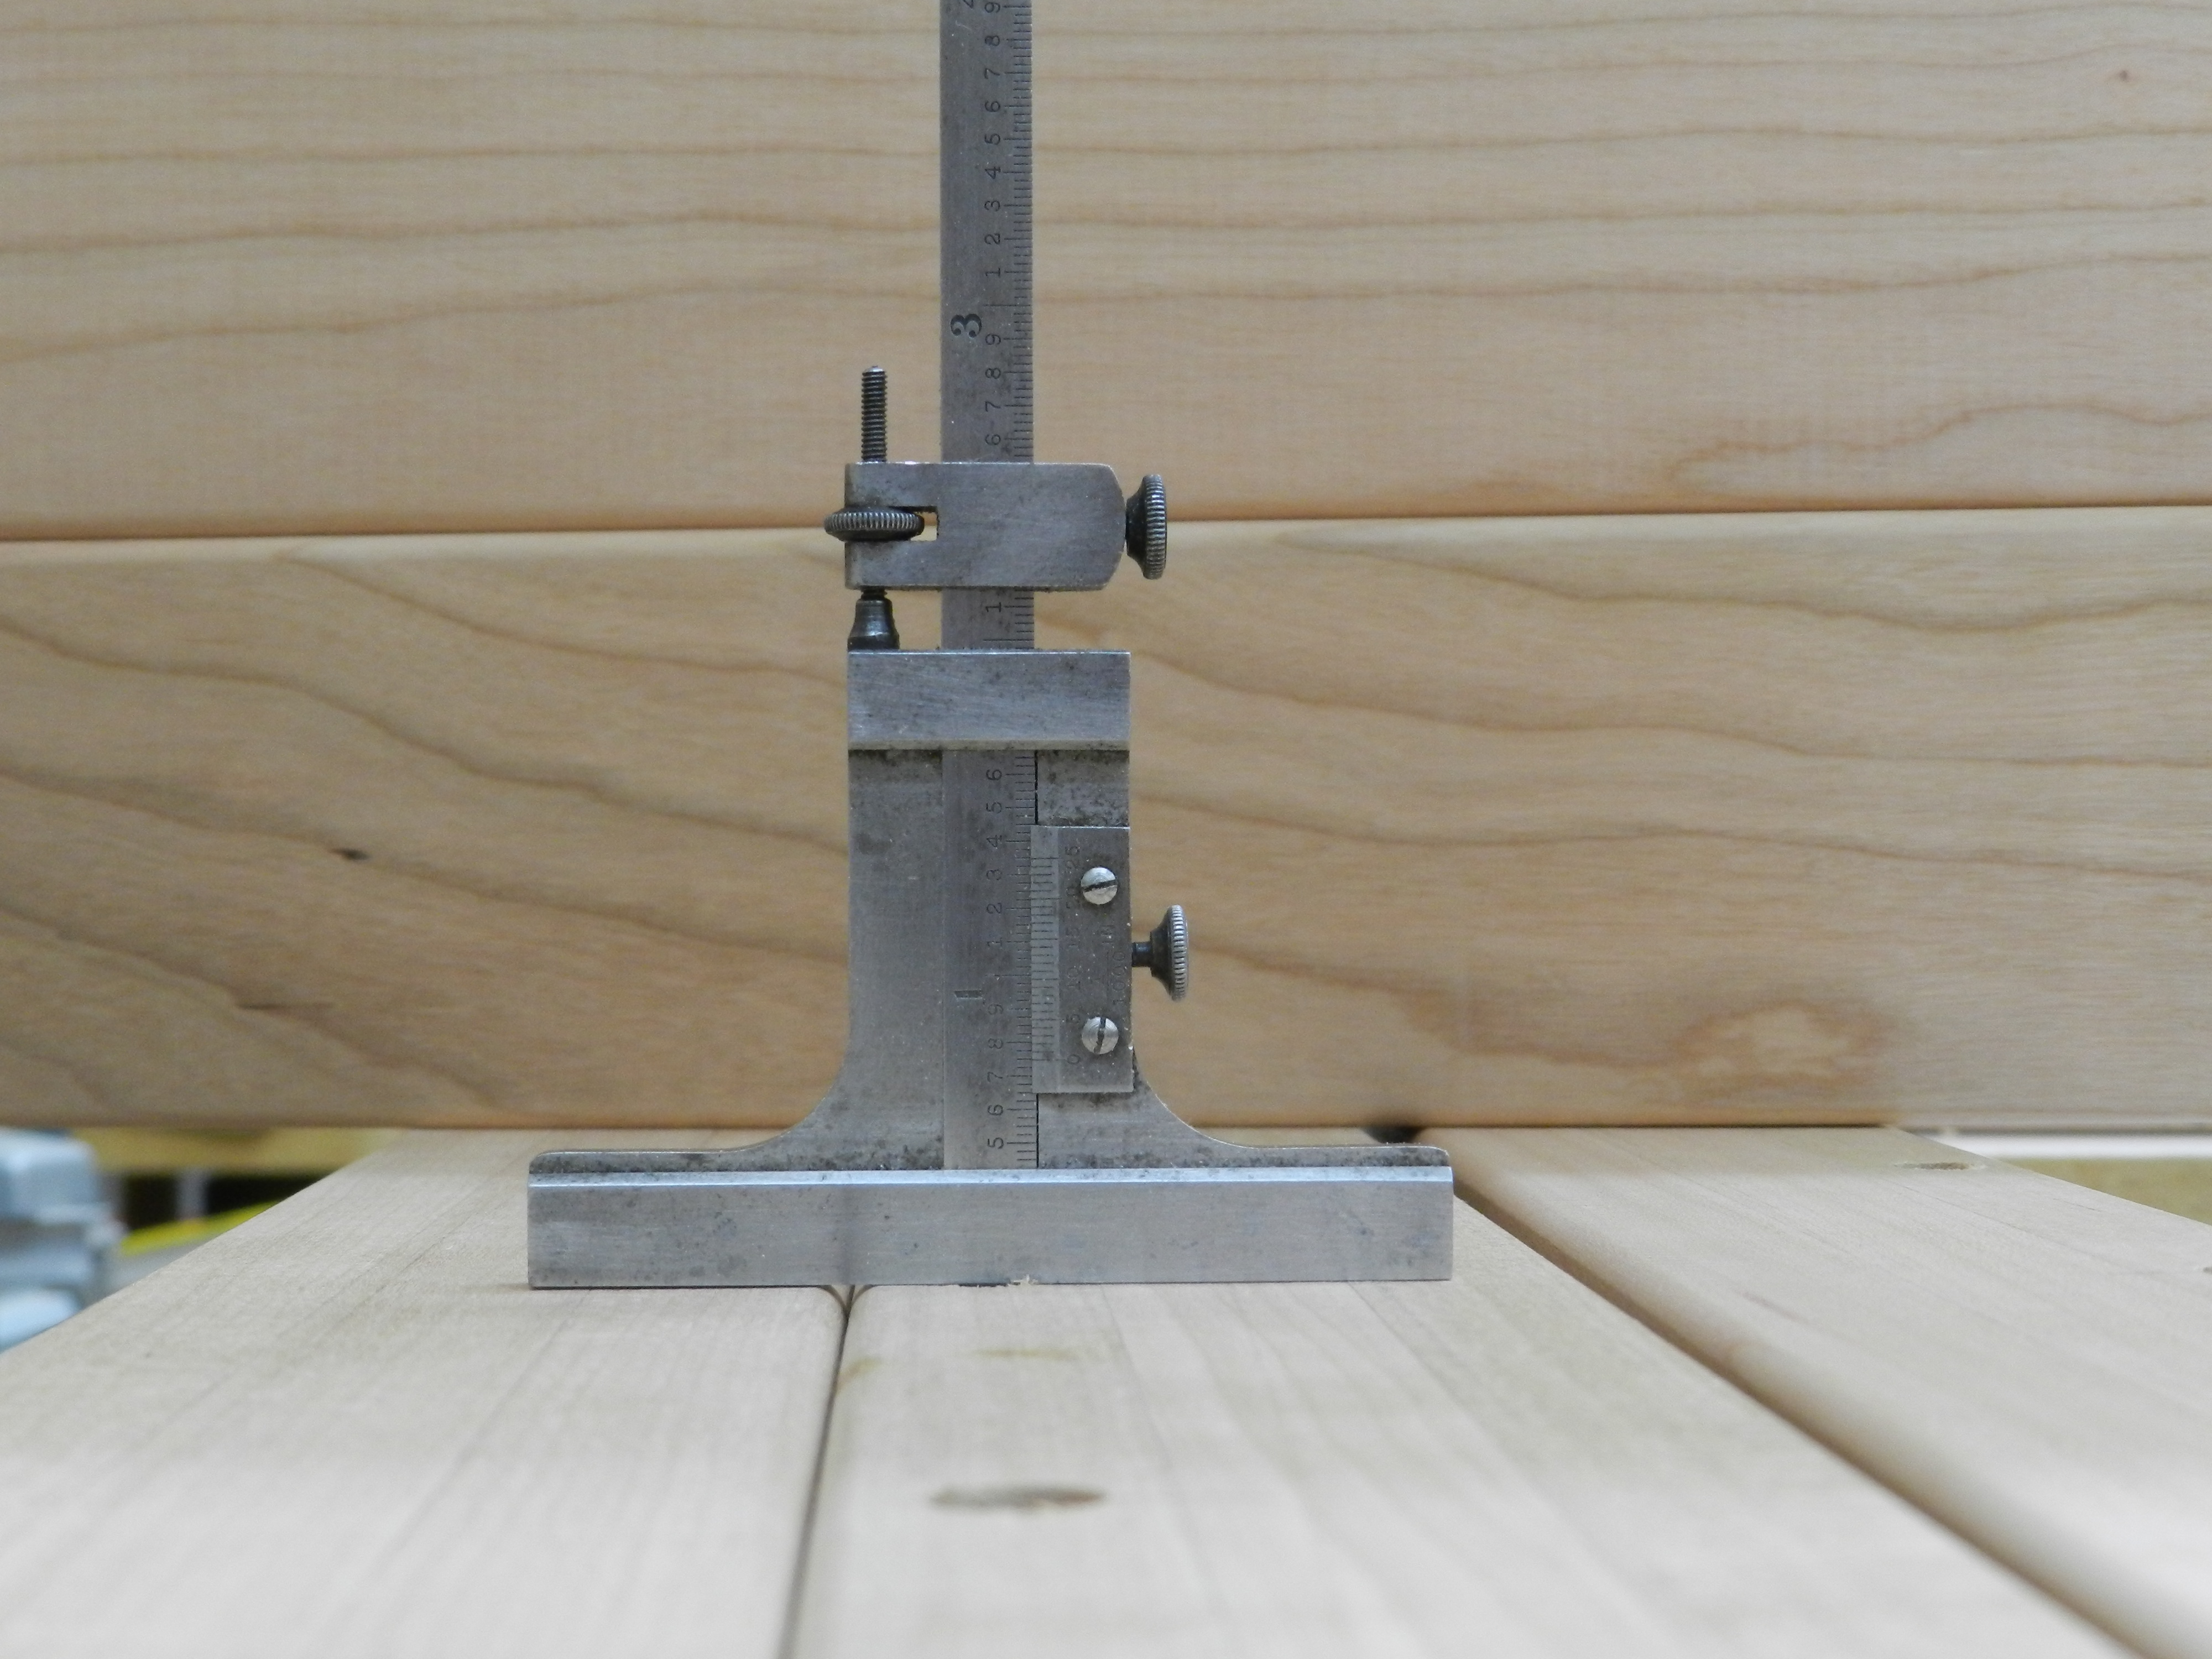
A depth gauge can be as simple as using your combo square with large holes, or a piece of dowel in smaller holes used to determine how deep the hole has been drilled. For real tiny holes or times I want a very high level of precision I use an old Starrett Machinist Depth Gauge I got at a tool show years ago. I like this gauge as it has its own macro and micro adjustment which is a very nice and completely overkill feature. 🙂
Old Starrett Depth Gauge with Micro-Adjustment
I set the gauge to the depth I want as shown above. I then place the gauge in the hole, as shown below, and tweak my drilling until I reach the depth I am going for. It’s a quick and easy process.
Depth Gauge In Use
With all the holes drilled I was able to install all of the threaded inserts into the posts. As the natural cherry ages it will become a golden brown color that will blend in with the brown colored hardware.
Completed Legs With Hardware Installed
I’m very happy with how the hardware came out, and as you can see in the photo below, even on this freshly completed piece the hardware, and the threaded inserts and bolts in particular blend in quite well.
Mattress frame installed
Next up in this series I’ll be talking about final assembly and finishing.
If you’d like to read some other posts related to this project as they get posted please check out this link here.
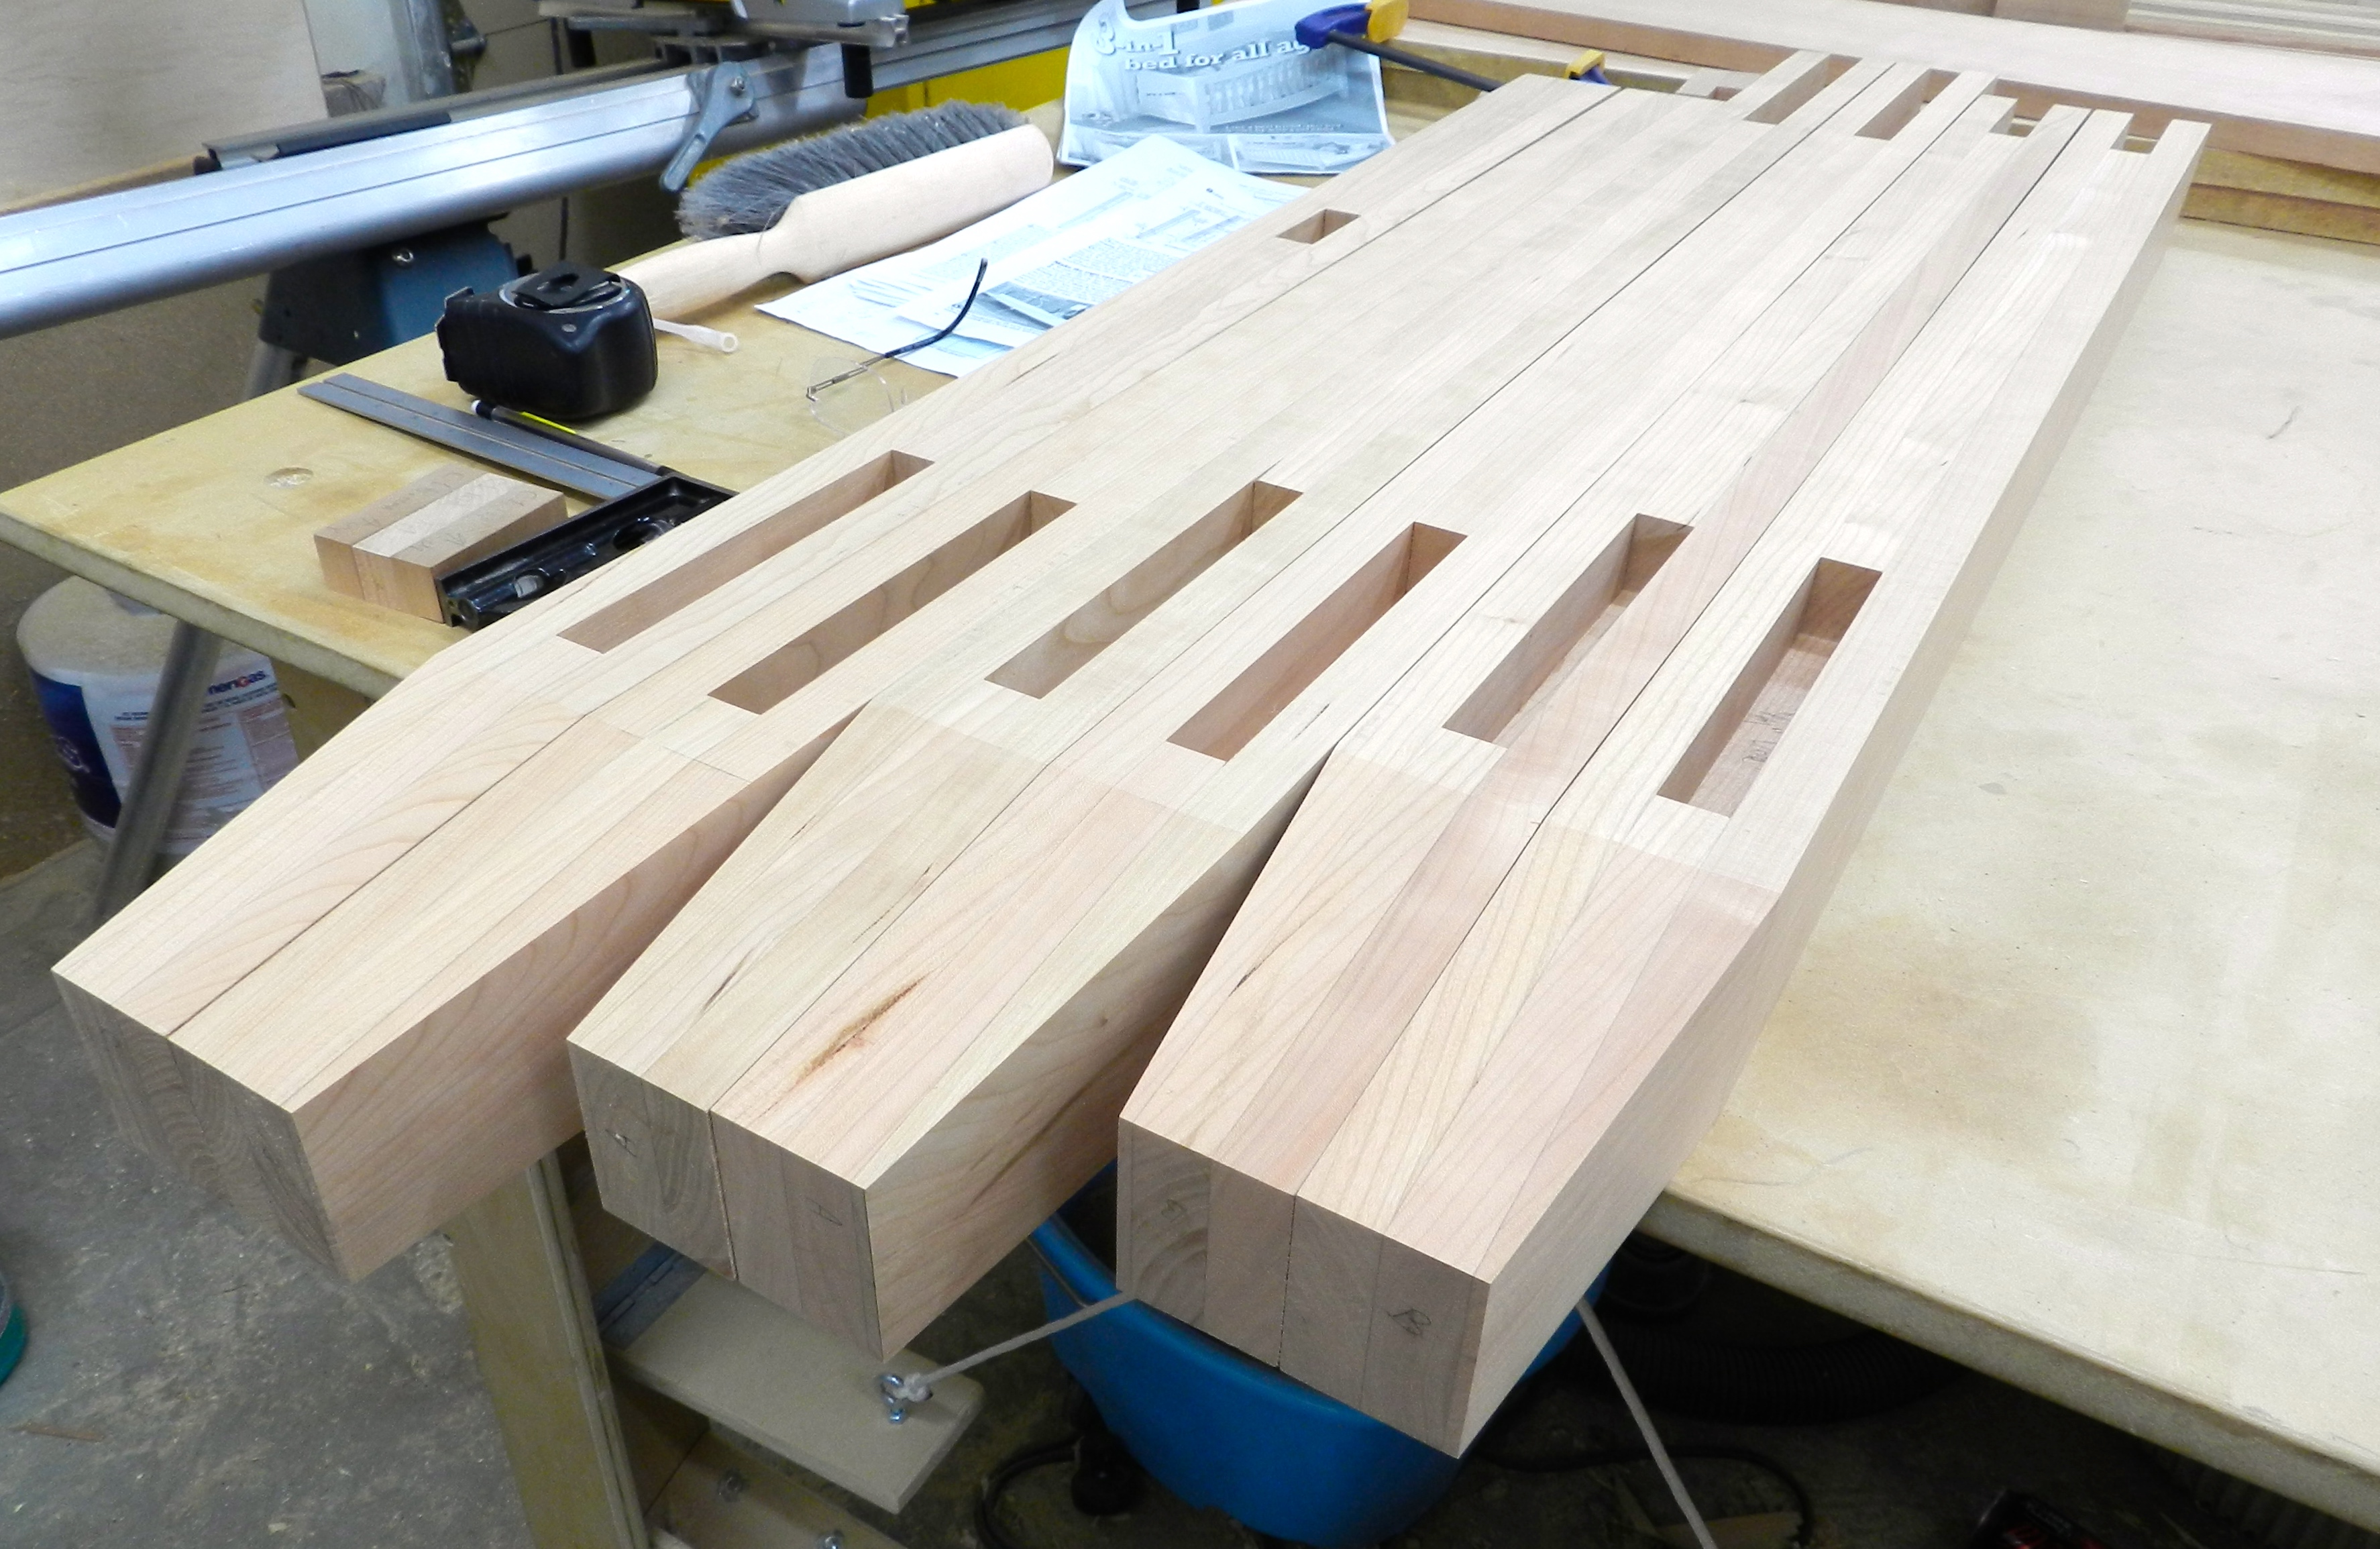
Today I’ll be talking about what it took to build the legs — 3 pairs — for Bradley’s crib and cover some of the more interesting techniques employed. This project was more of a ‘modern woodworking’ project compared to the period furniture and architectural details I am normally working on, but as I’ll show below there is a place for both styles of woodworking and they complement each other well.
Milling stock for 3 pairs of legs
Rather than having massive posts from a solid piece of cherry that needs to be mortised, this set of plans called for laminating up the stock from 4/4 pieces that were milled down to 3/4″ thick. For this project I tried to mill as many pieces as I could at a time, so for quite a while in the shop there were a lot of small piles of wood that would migrate around the shop as they were ripped, jointed and planed. I’m pretty sure my wife thought I was just moving the wood around like a child moving vegetables around on a plate to make it look like they are eating them. I’d mill things a bit heavy and let them sit stickered for a few days to acclimate further to the shop and mill to final size just before I’d use each piece.
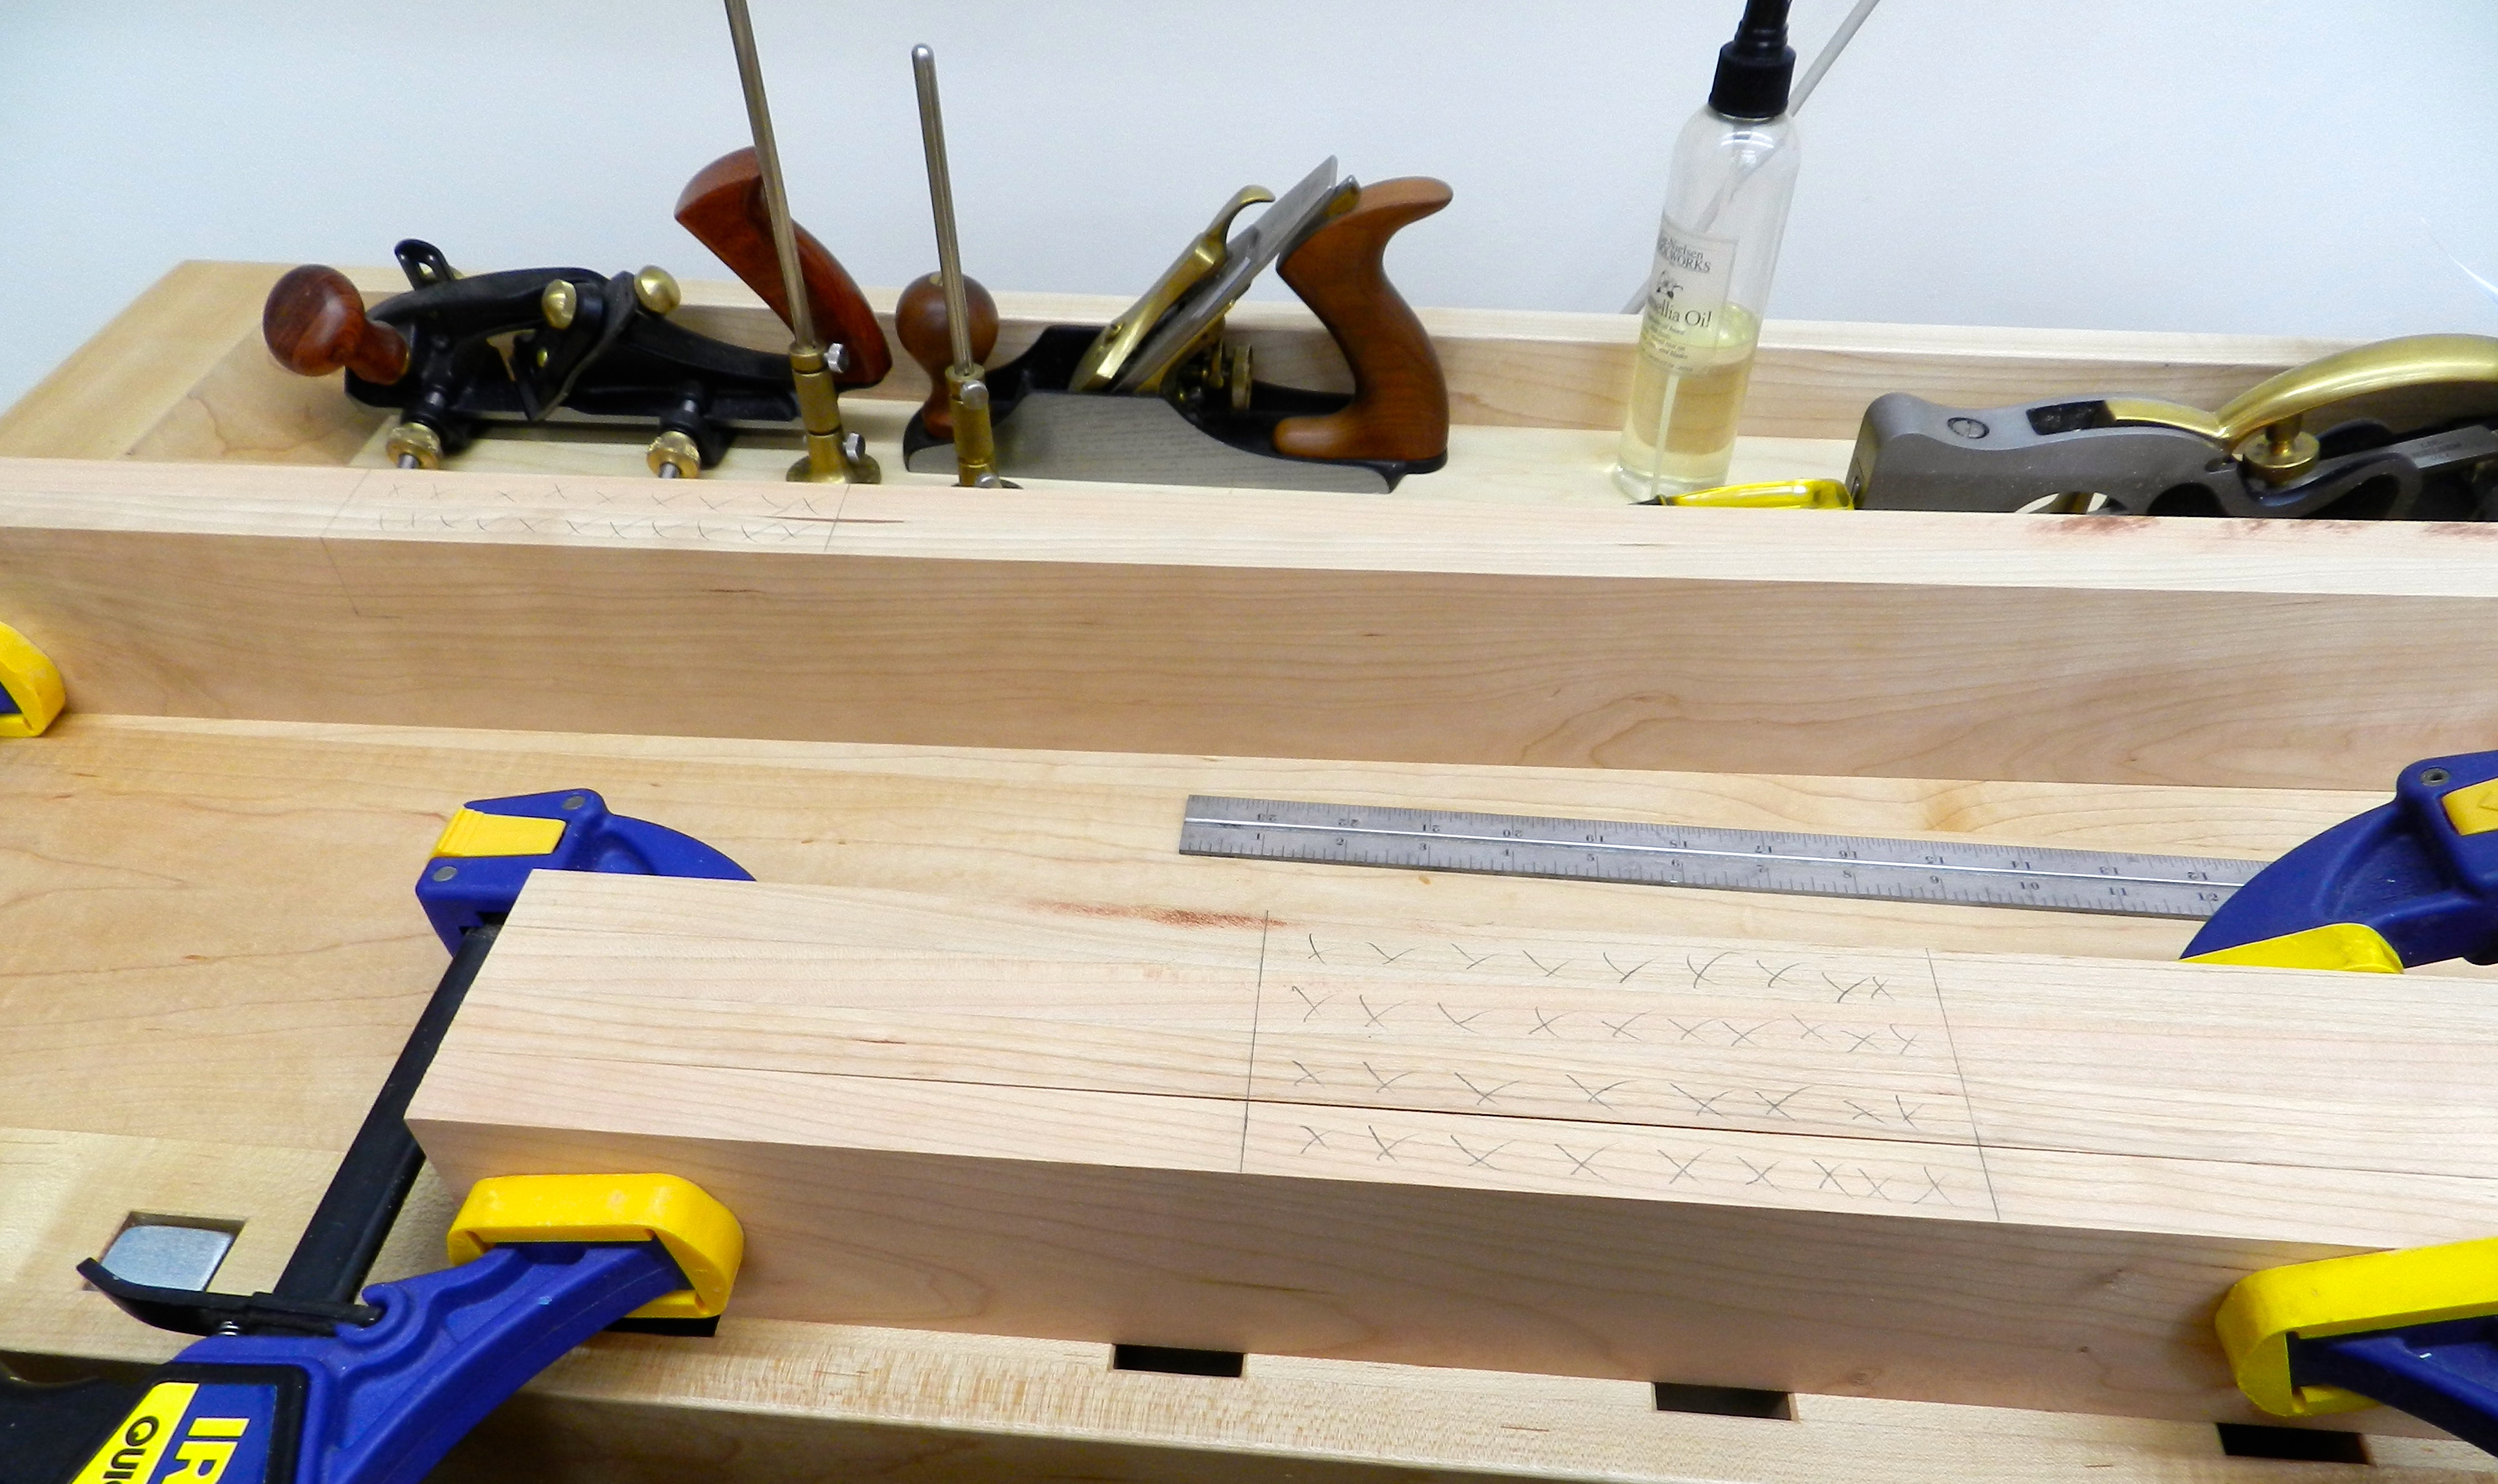
Laying out in bulk
By ganging blanks of the same type together I was able to mark them all at once saving layout time and helping to ensure they are all consistent.
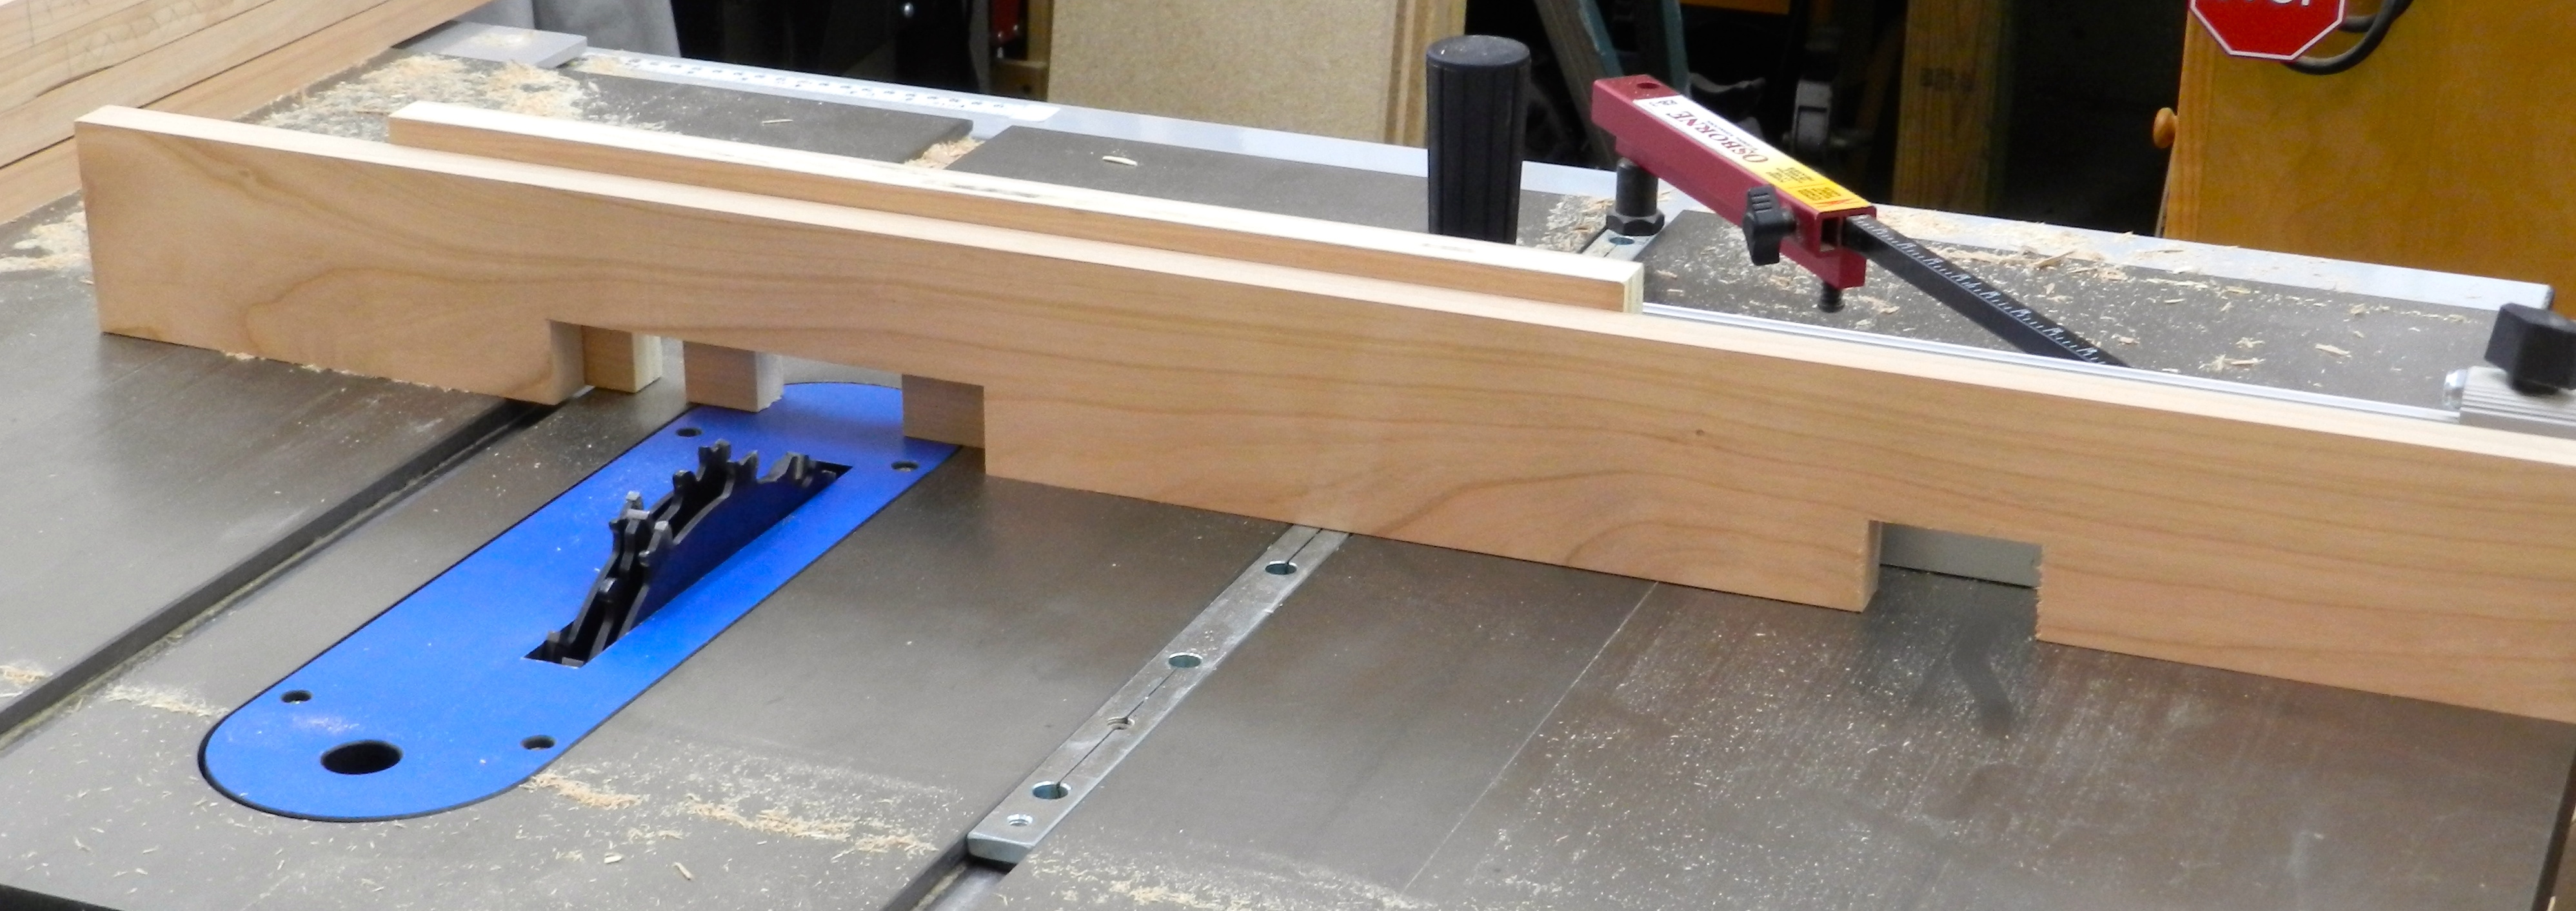
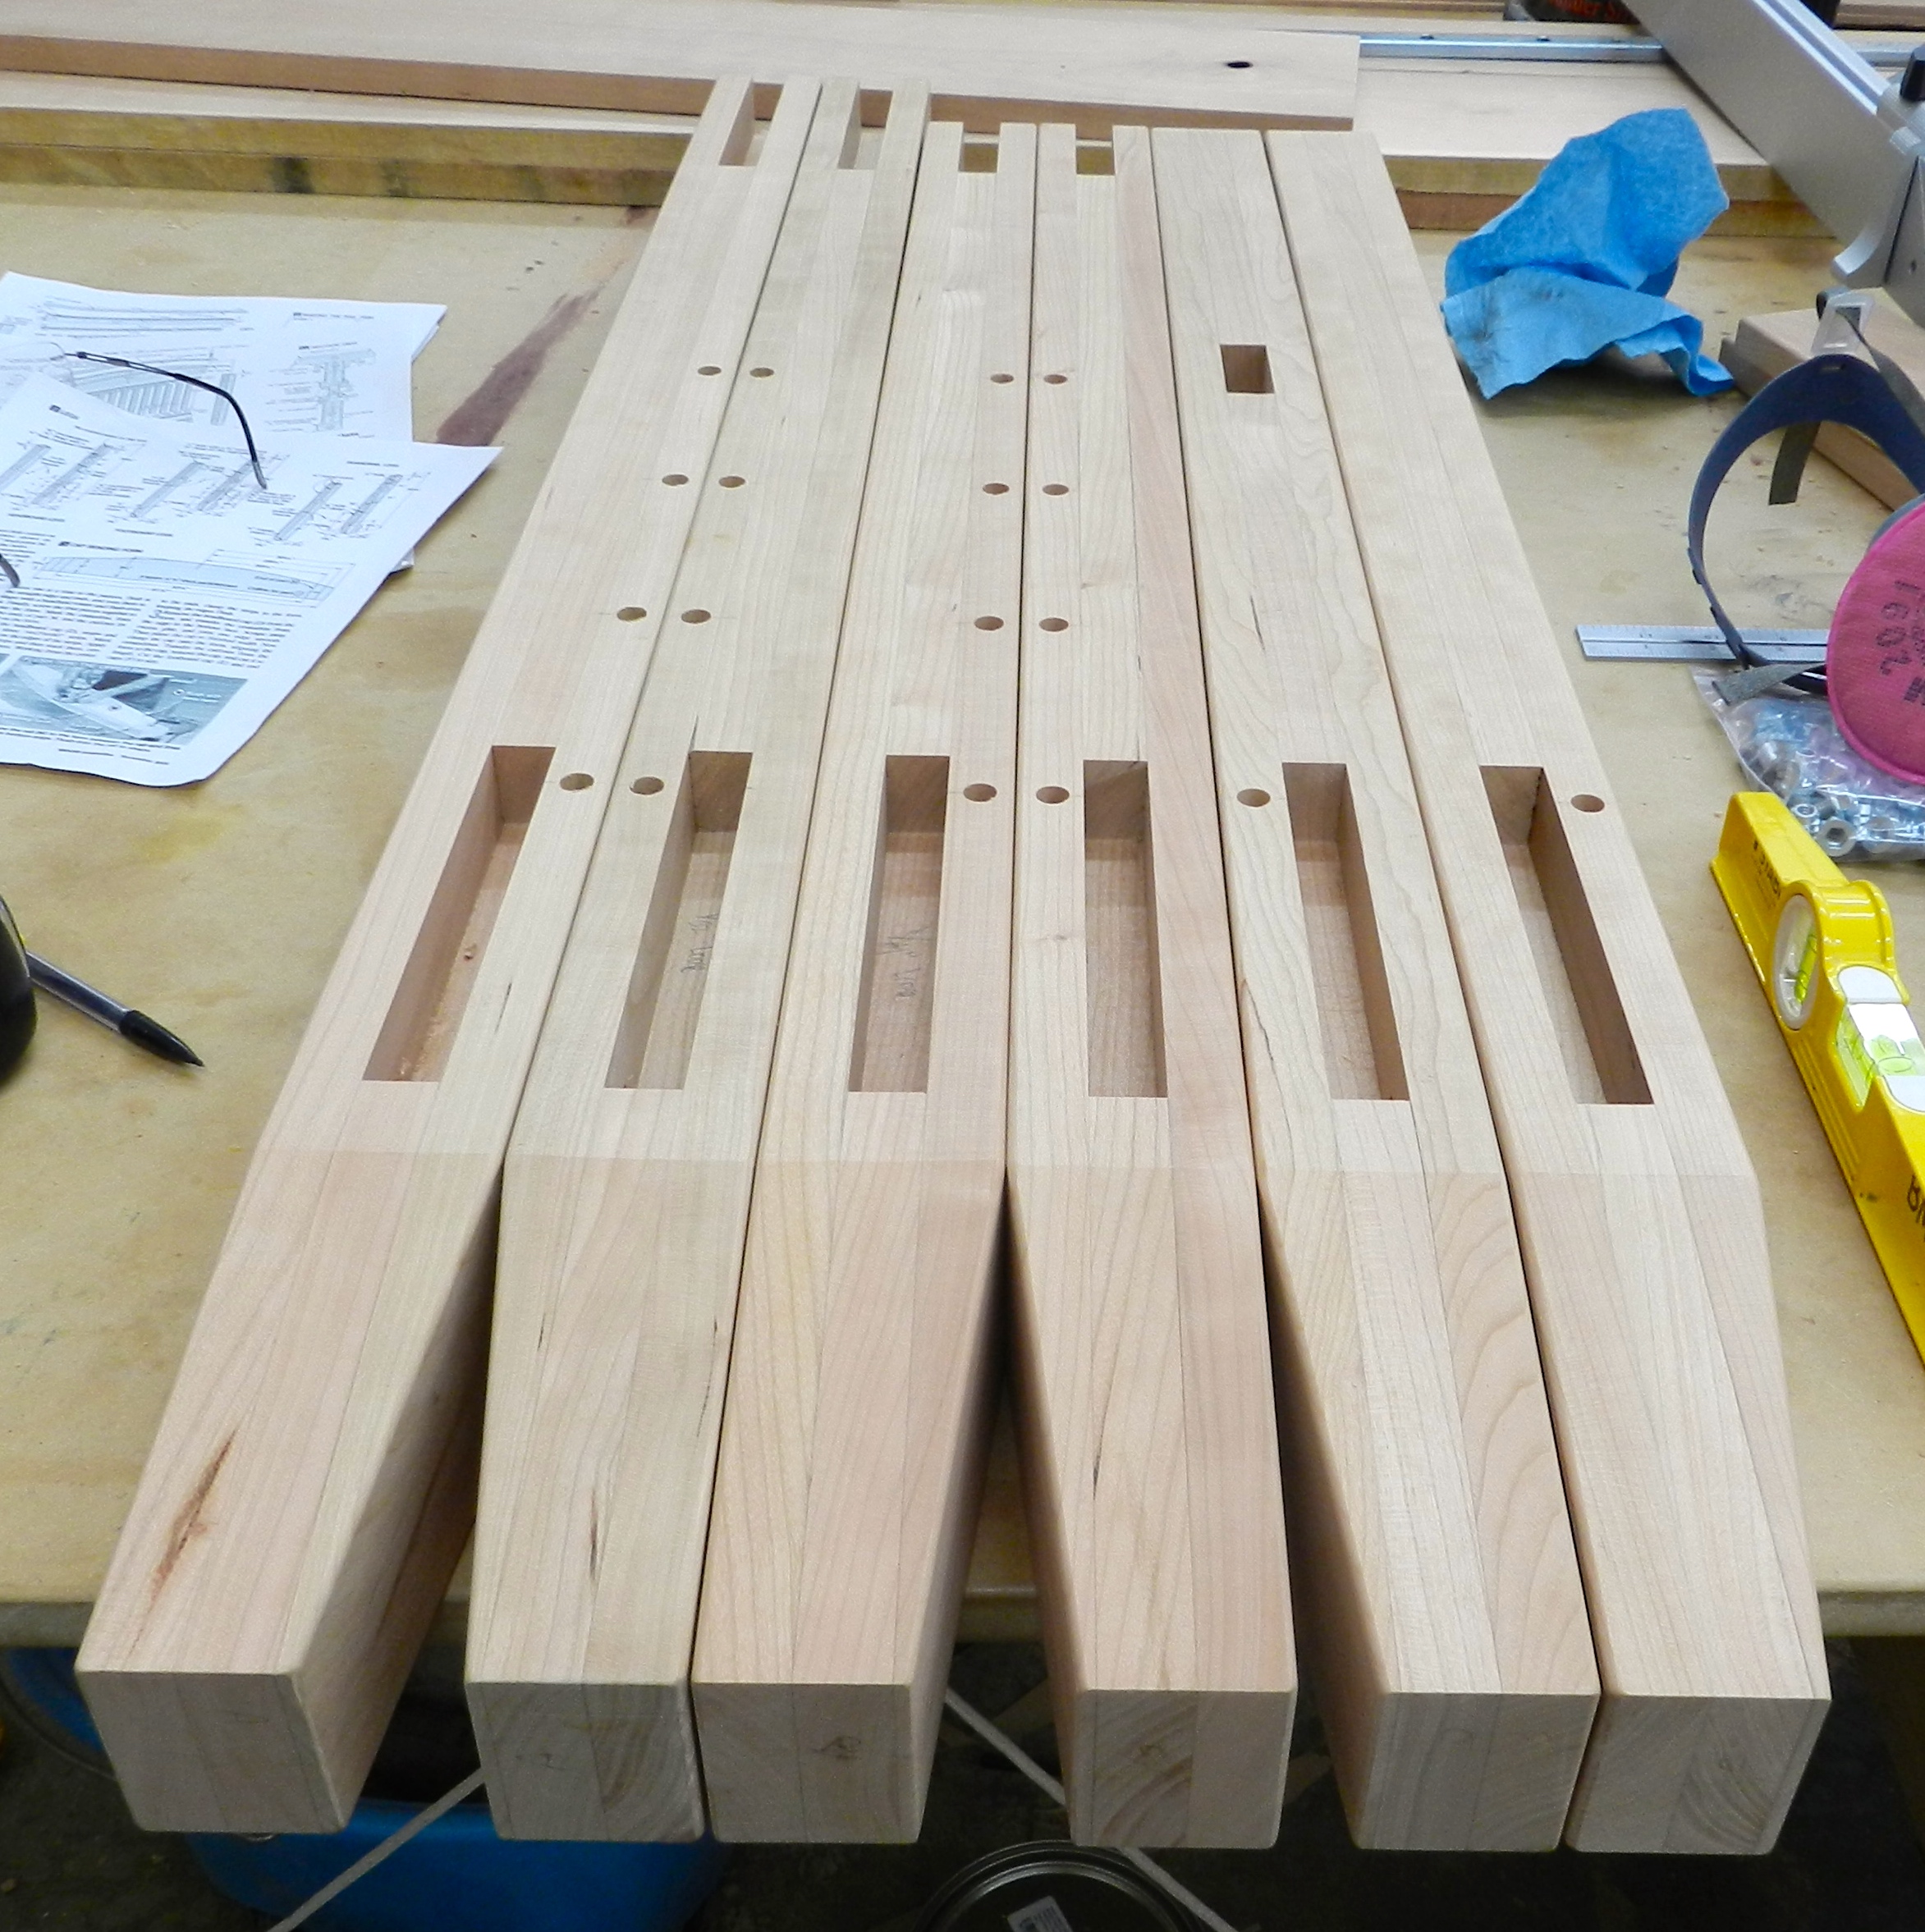
Used a dado set and miter gauge with sacrificial fence to cut dadoes
By using a dado head cutter in my table saw with a zero clearance insert and a heavy duty miter gauge with a sacrificial block to help limit tear-out I am able to quickly create what will become the mortises in the laminated post. This not only saves some time, but produces a nice clean mortise bottom. Make sure you make your mortises a tiny bit deeper to allow room for glue, any crumbs and a tiny bit of wood movement in the post. Given that the panel is cherry veneer plywood it will not move much.
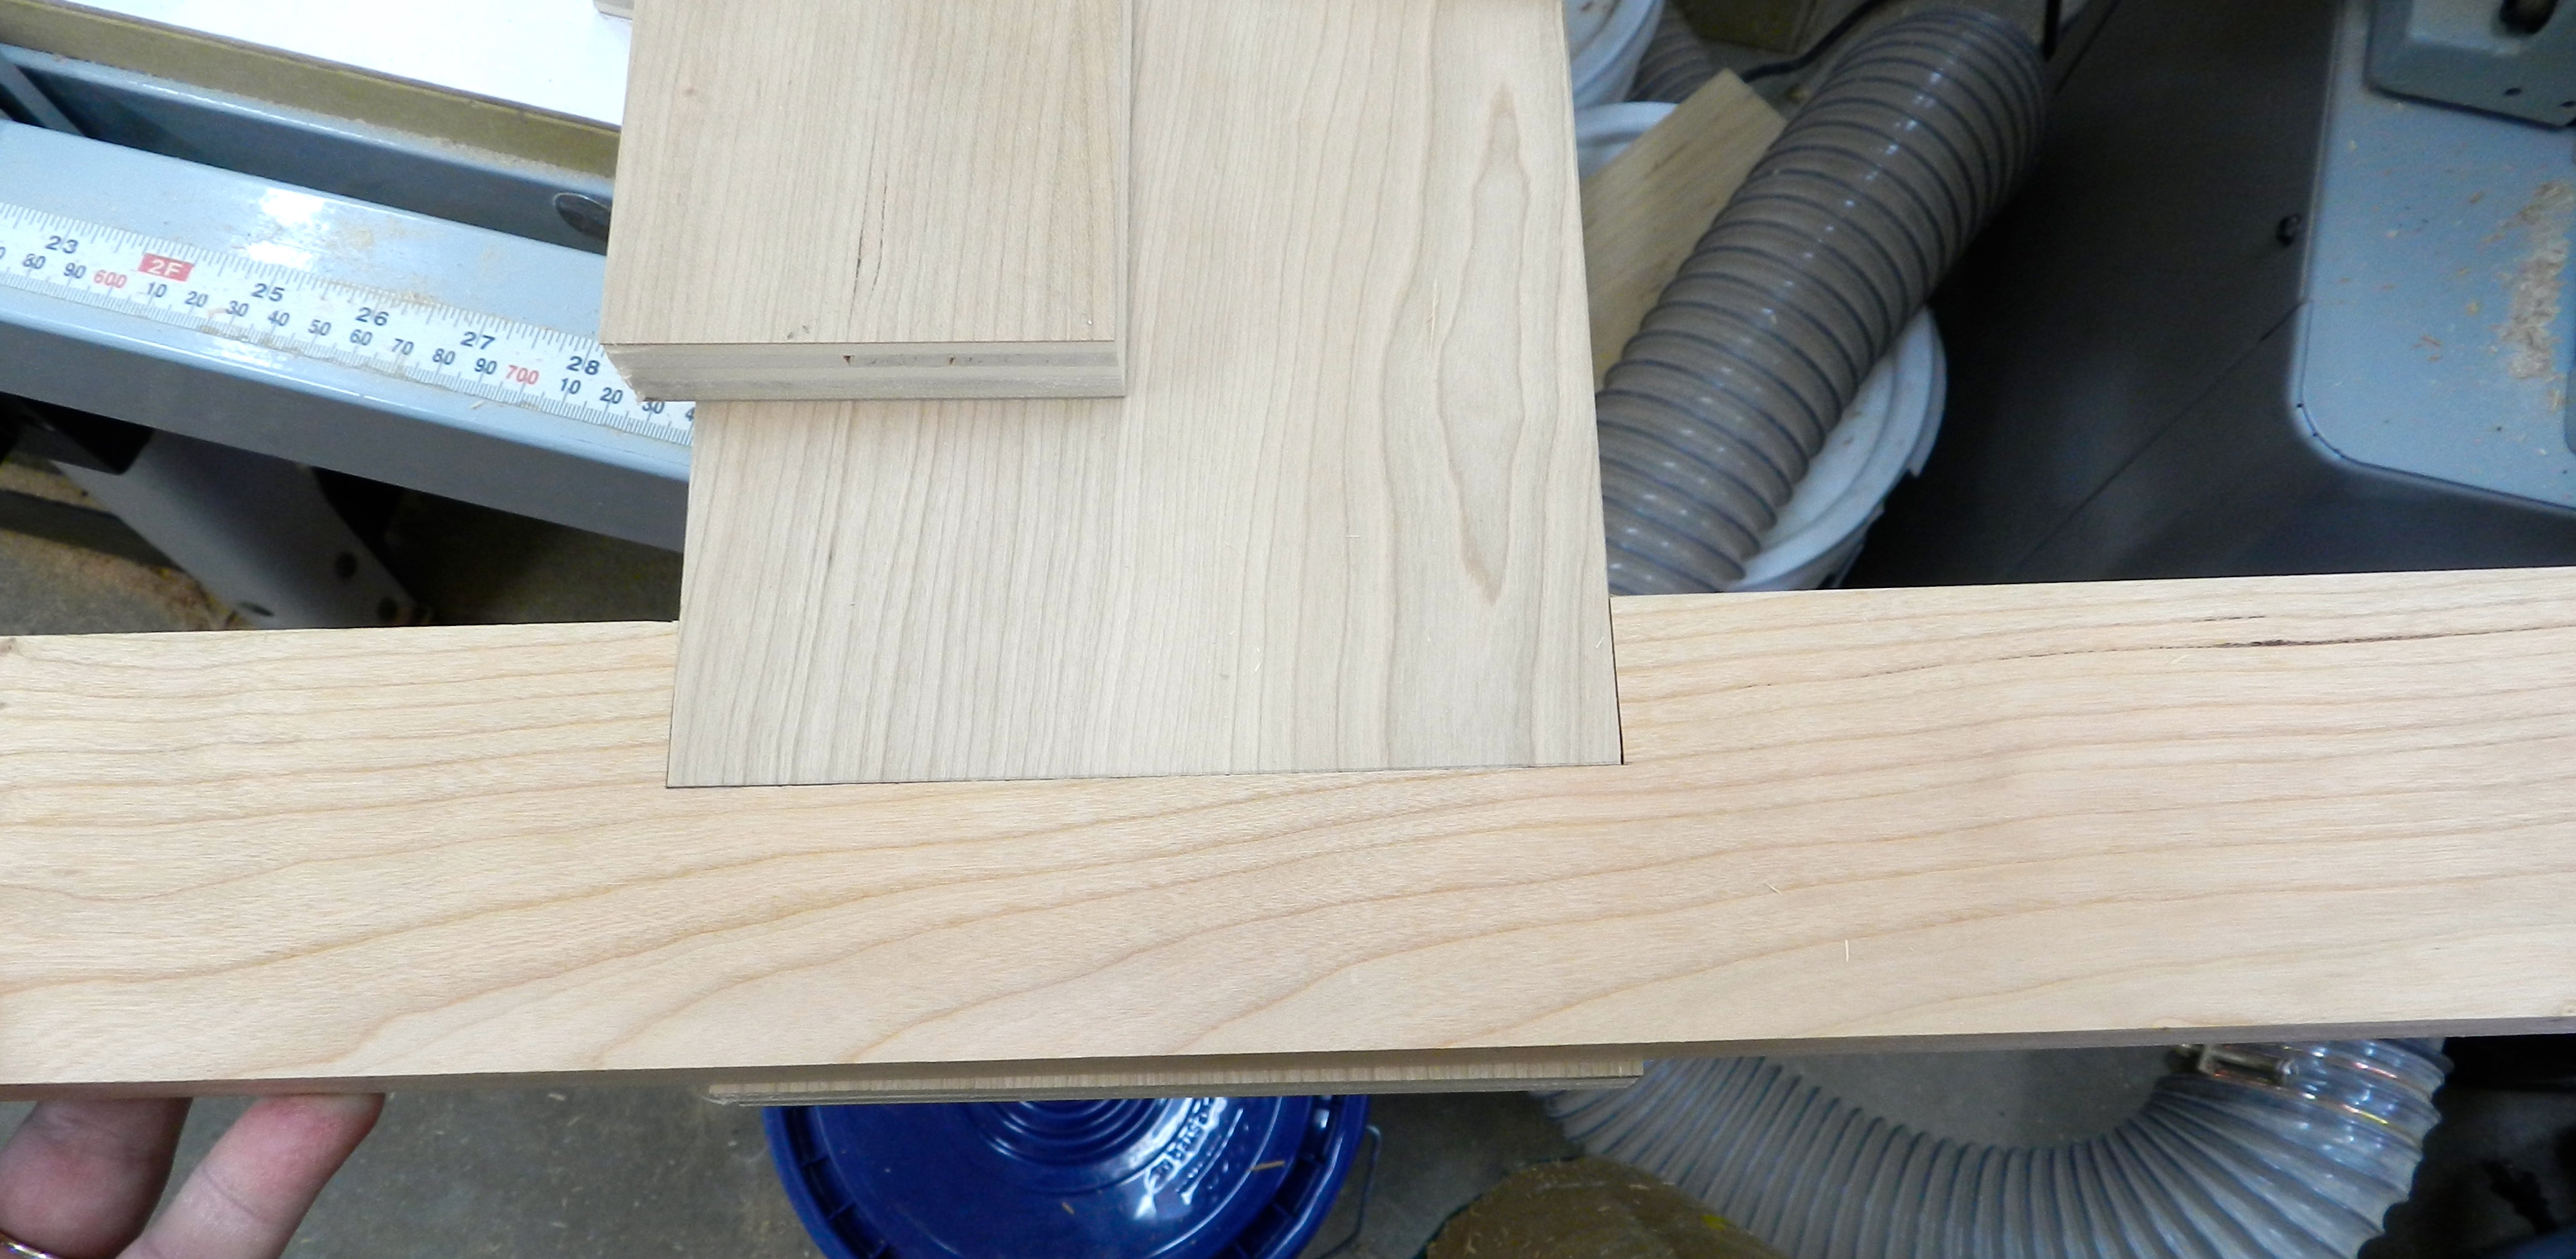
Making sure the rails have a nice tight fit
The goal is a nice square fit, and since the panels were already sized during the earlier ripping operations — see Part 1 — you could test fit them as you go.
Laminating the legs
With the mortises all cut, it was time to laminate up each leg. In picking the stock for the legs I was careful to choose the best grain orientations for the faces you’ll see. The pieces are all a little bit long and a little bit wide so the excess could be cut off after the glue dries. You want to be careful with your glue application, I applied warm hide glue to the both sides of the center piece of the lamination to make sure I didn’t get glue in any of the mortises. I also shot a couple of finish nails into the inch or so of waste on each end as that helps stop the pieces from sliding around when clamping up the lamination and it will be cut off later.
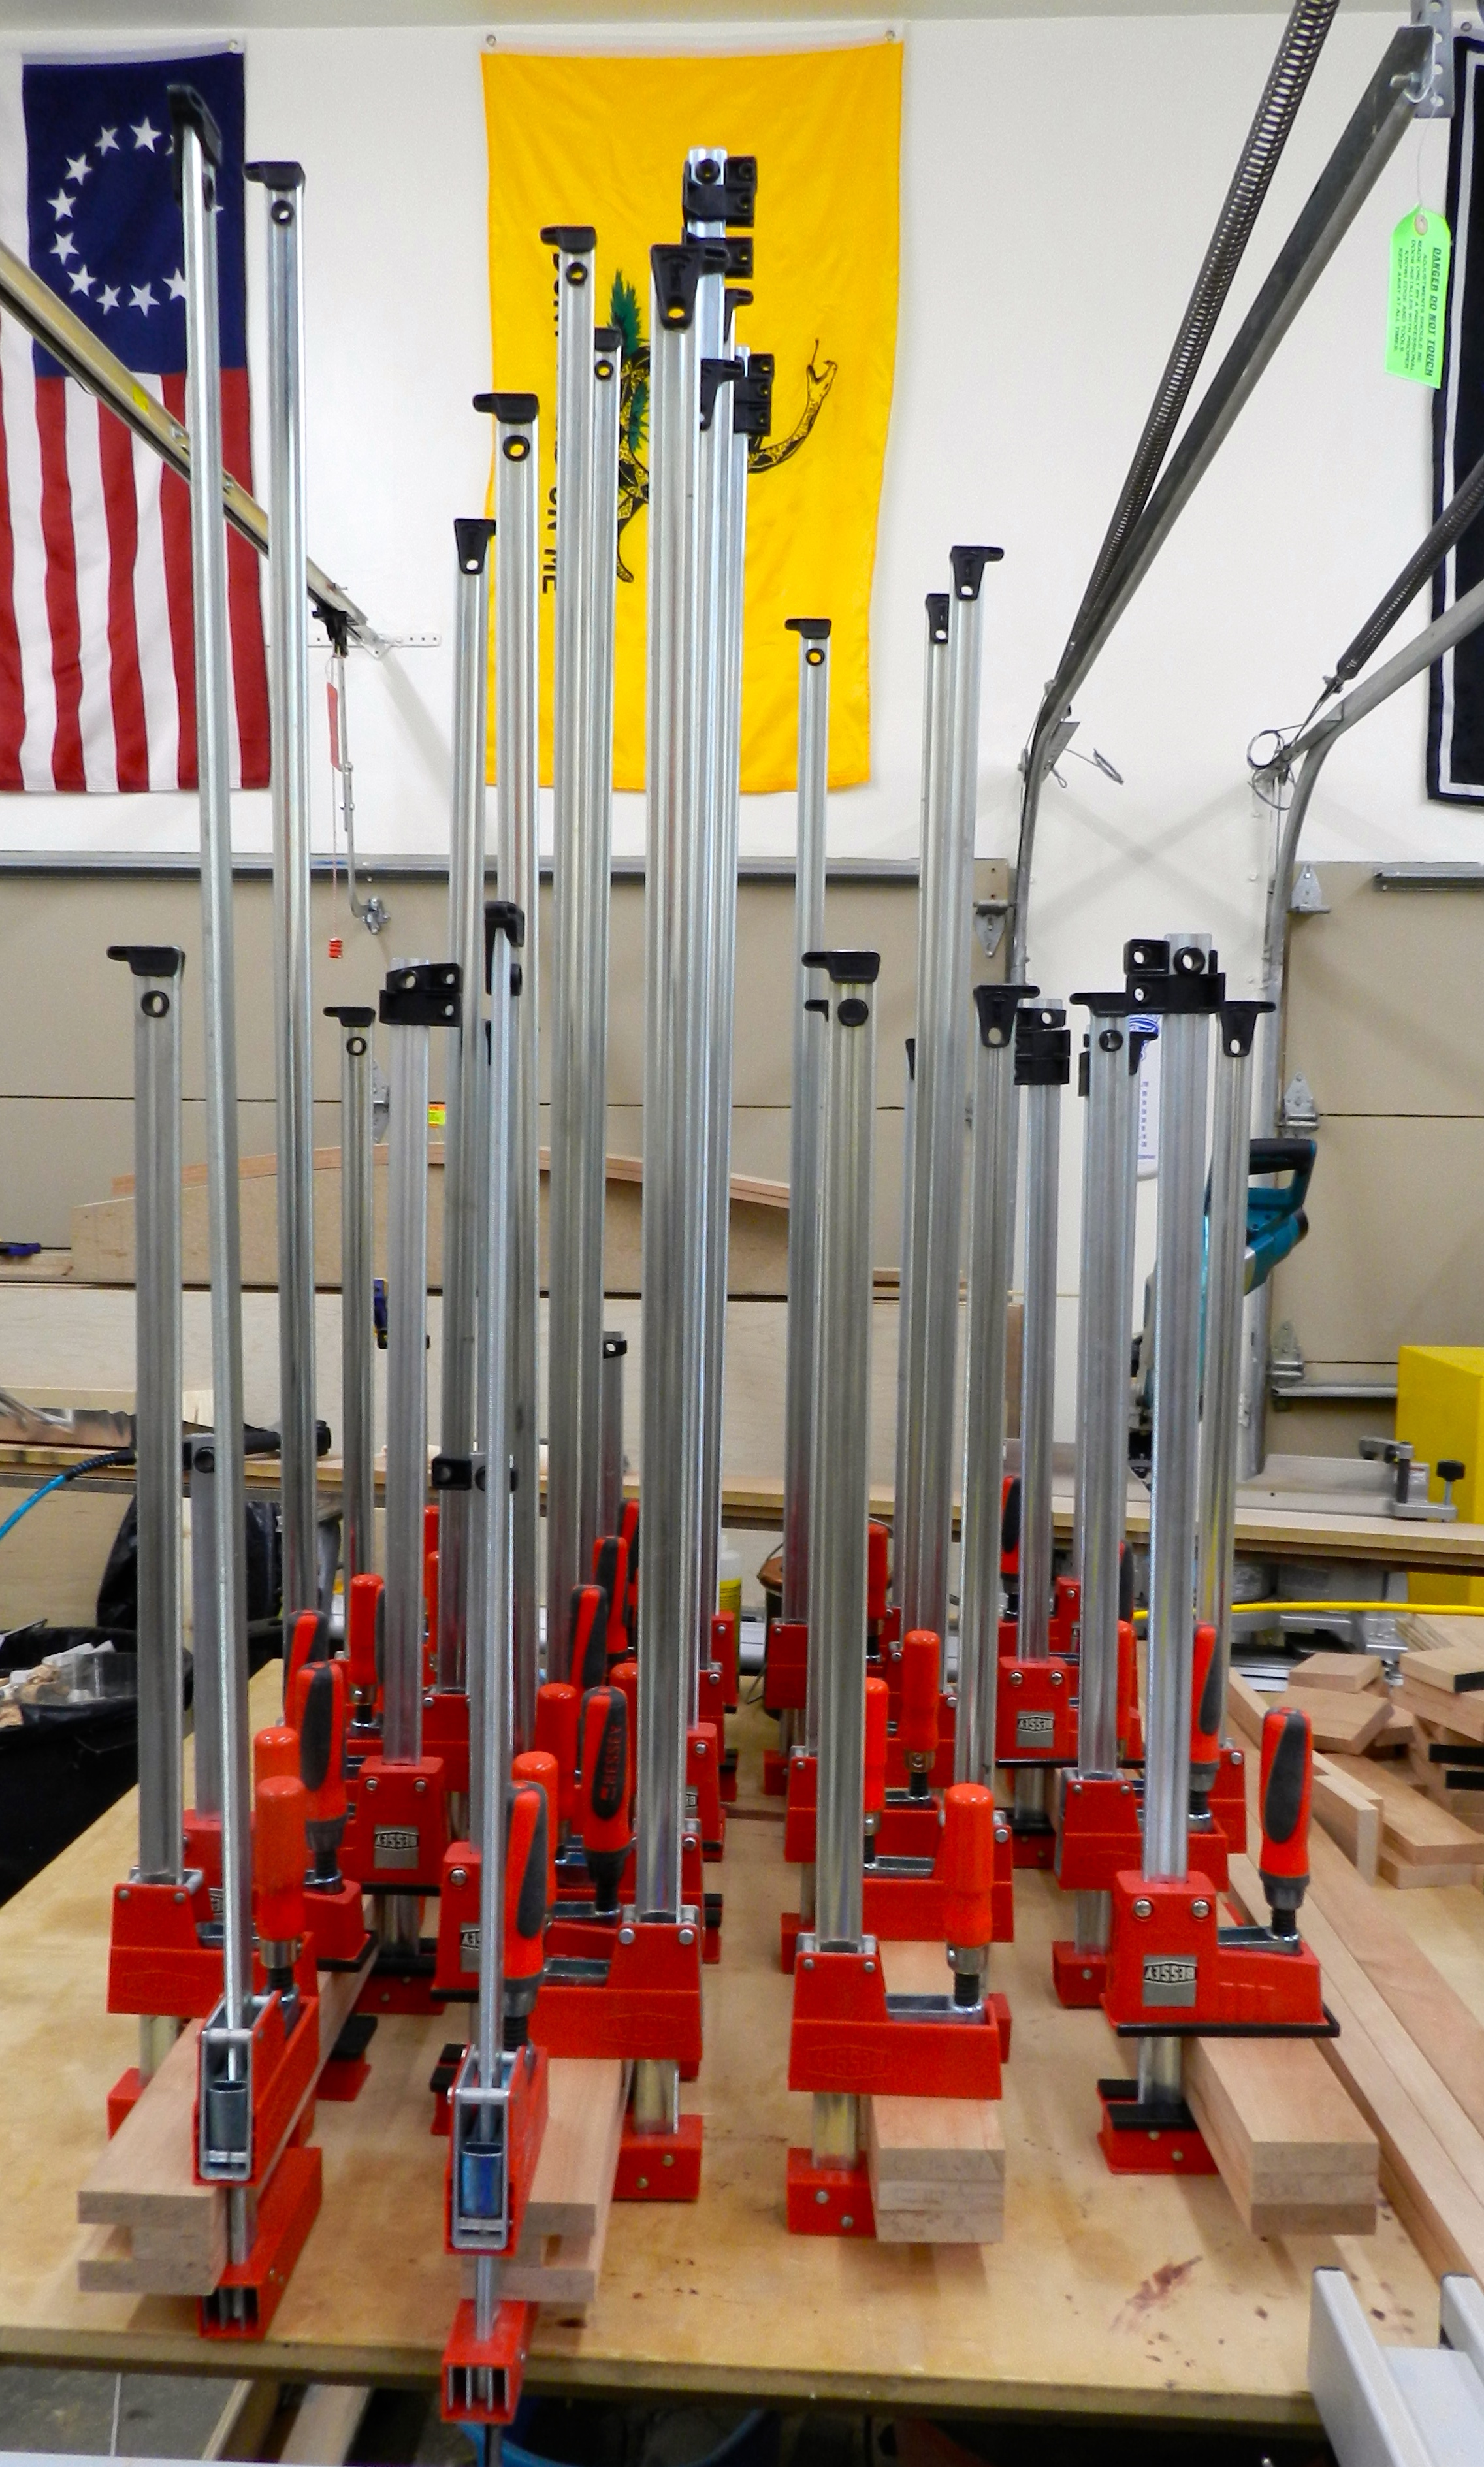
You can never have too many clamps…if I had more I would have had more baking at the same time
I glued up as many legs as my clamps would allow. You want to use nice strong clamps like the Bessy K Body clamps shown above to eliminate any voids in the laminated pieces. After the glue cured overnight I cut the legs to length — thus getting rid of the nails that helped keep things aligned. Next up I jointed and planed each leg to thickness and laid out the tapers on each leg — the two inner faces were tapered to give the legs a slightly lighter look.
Legs after tapering the bottoms
I tapered the legs on the band-saw and then cleaned up the mill marks with a hand plane. The plane made quick work of that task and yielded better results than a disc sander would be able to produce. Then using a palm router I rounded over all the appropriate edges using a 1/8″ round-over bit and cleaned up any mill marks from the router with 220 grit sand paper.
Completed Legs
Next up in this series I’ll be talking about modifying and installing the hardware, followed by final assembly and finishing.
If you’d like to read some other posts related to this project as they get posted please check out this link here.
The past few months out in the workshop I’ve been building a crib, and a toddler bed and a full size adult bed for our new baby — Bradley. The story of how I wound up building this crib is an interesting tale about baby furniture in America today…
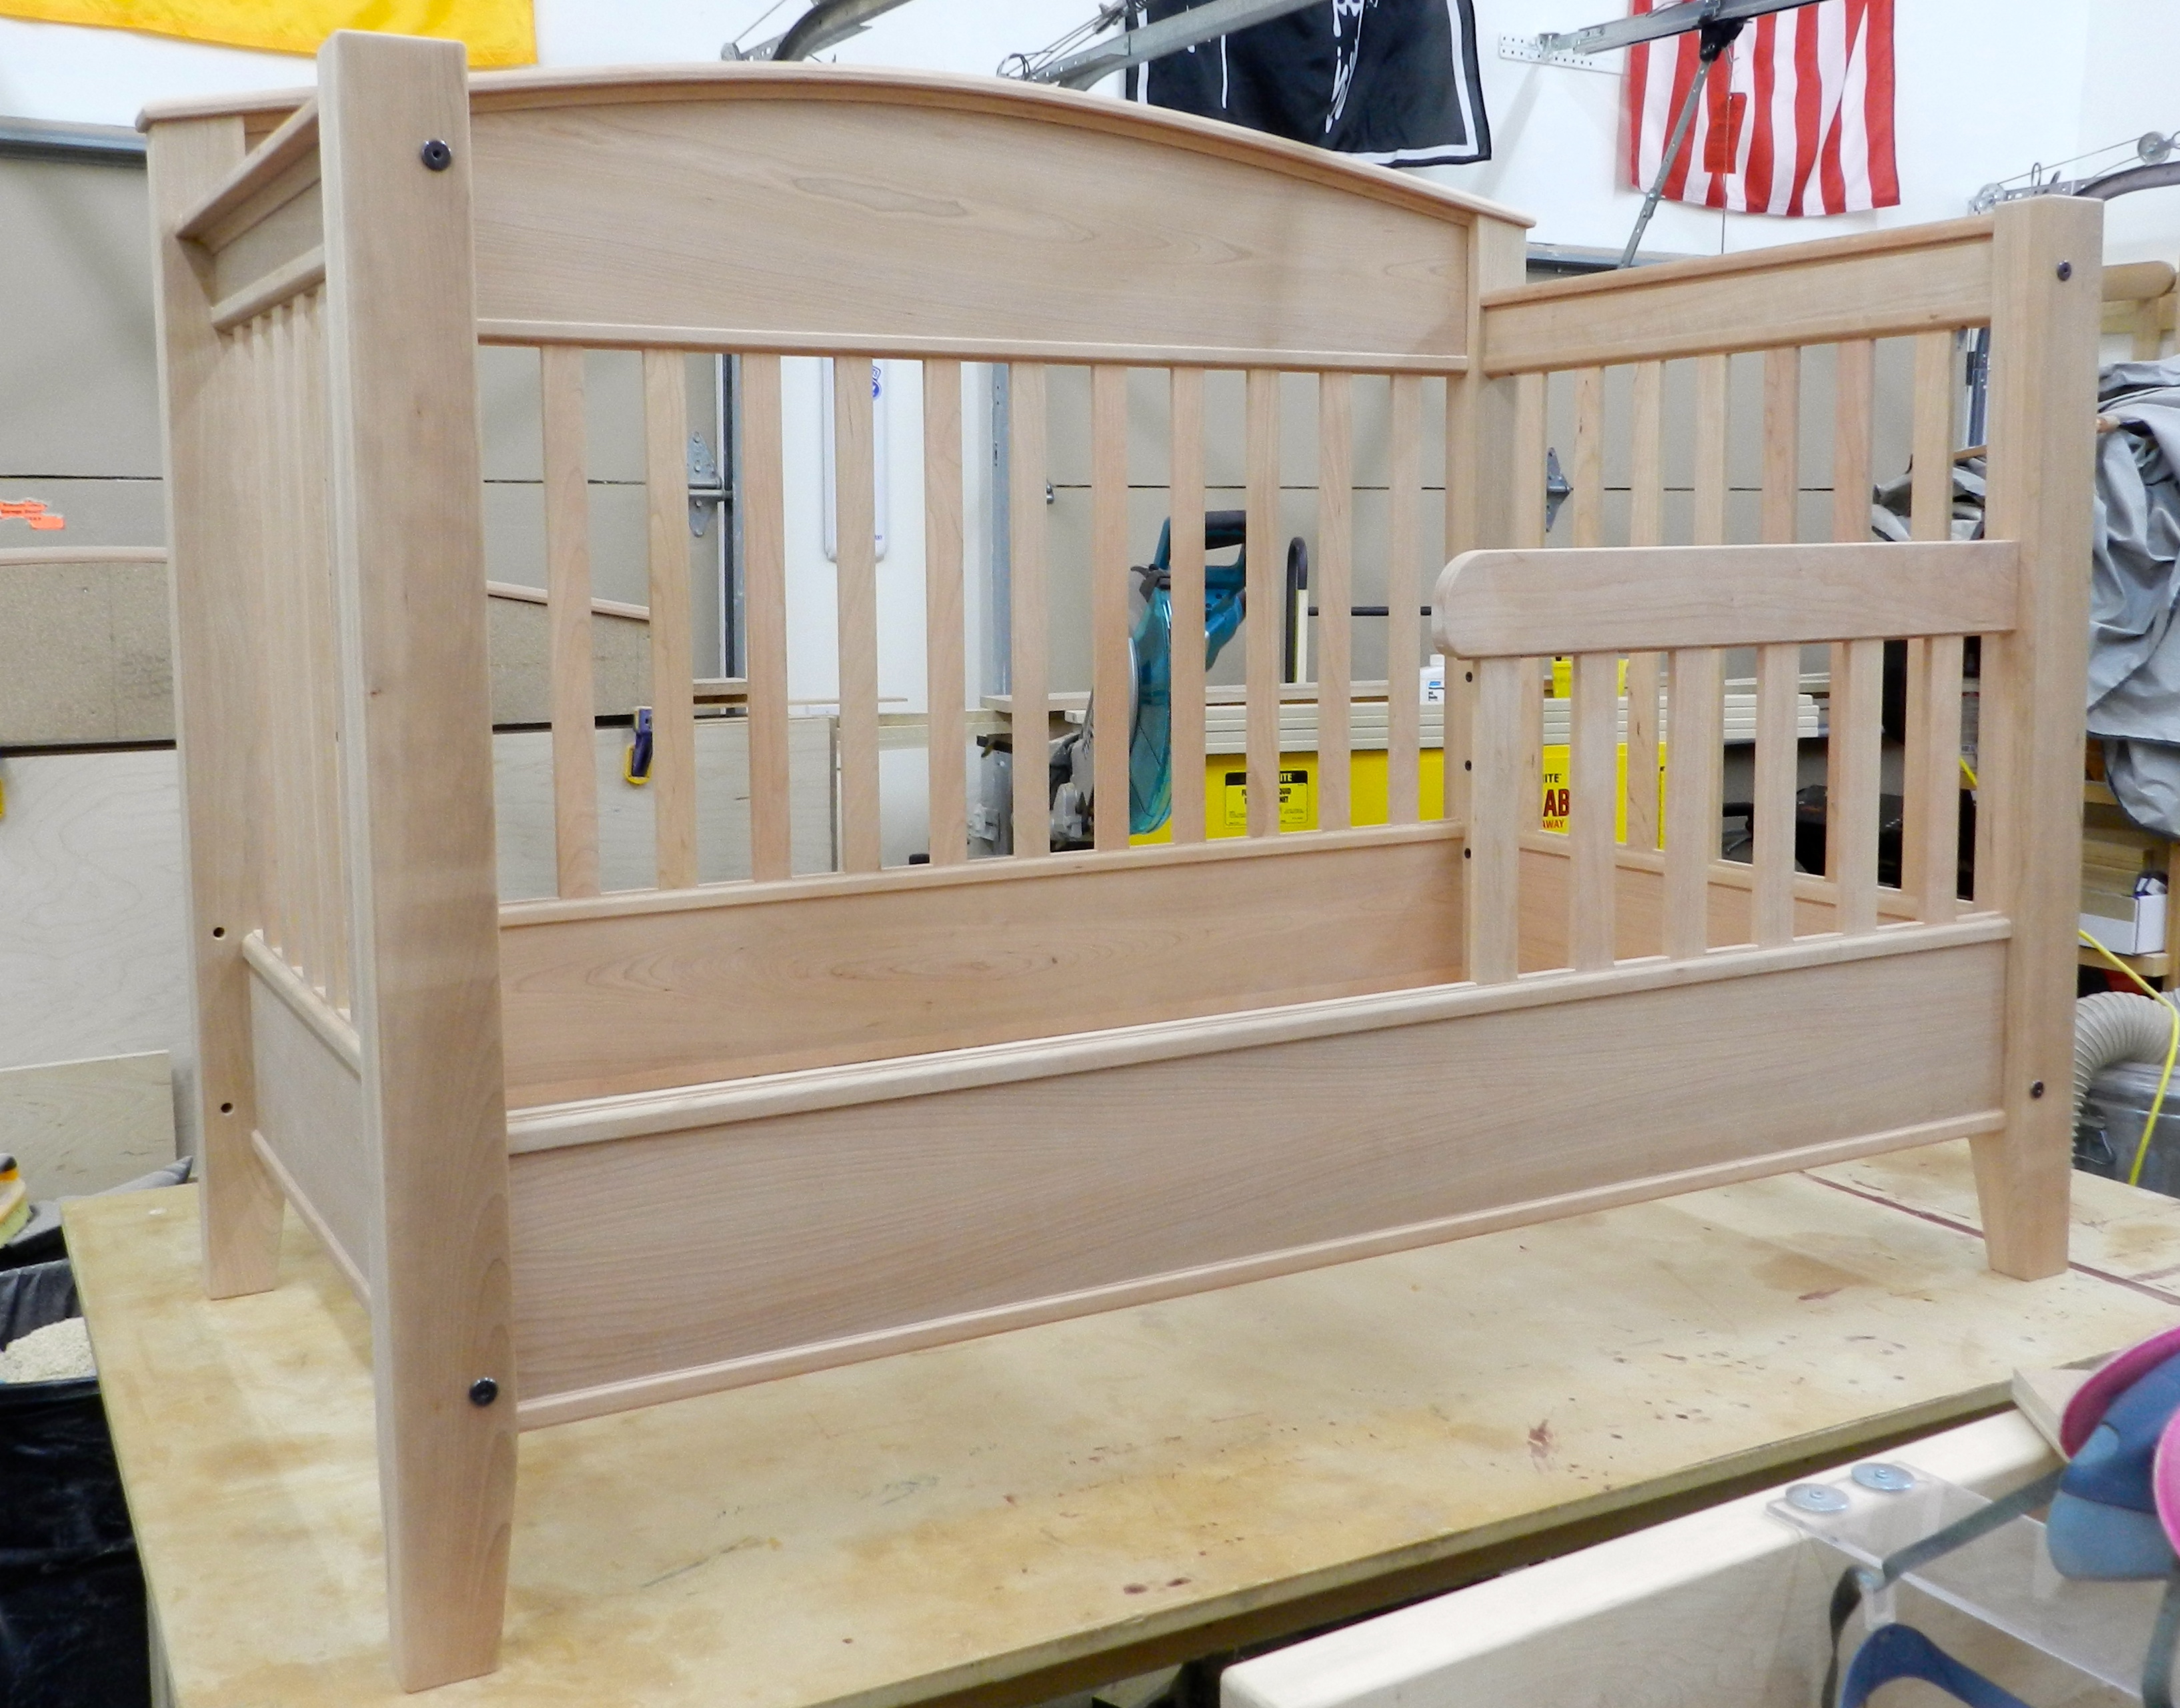
Completed Crib
With a baby in the house, we had a clear need for a crib. I wanted to build a crib, but with everything going on in our lives — our work, my teaching, writing, preparing the house for the baby etc my wife Alyssa and I were all set to buy a crib for the baby before he arrived. We went to all the usual baby stores — Baby’s R Us, Baby Depot, Buy Buy Baby, Target etc — all the cribs were poorly made imported junk that looked terrible on display and were more than I was willing to pay for such junk. Then we tried all the usual furniture stores in the area and while the price tags went up exponentially the quality was only marginally better and I could not find anything I was willing to buy at any price. Eventually we found a brand and product line we liked by ‘Young America’ — a company that specialized in higher end youth furniture, made in the USA from American Woods. With a 25+ year history in the marketplace and long running product lines you could keep adding pieces as your child grows — all things I liked. It was expensive, but I found a way to get it at a reasonable price via a buying club my parents were part of. We were all set to place our order and the week we finally went to enter the order the manufacturer said it was no longer accepting new orders. From searching online we found out that the parent company Stanley decided to shut down the factory (and with it eliminate about 400 jobs). If only I placed my order a week earlier…
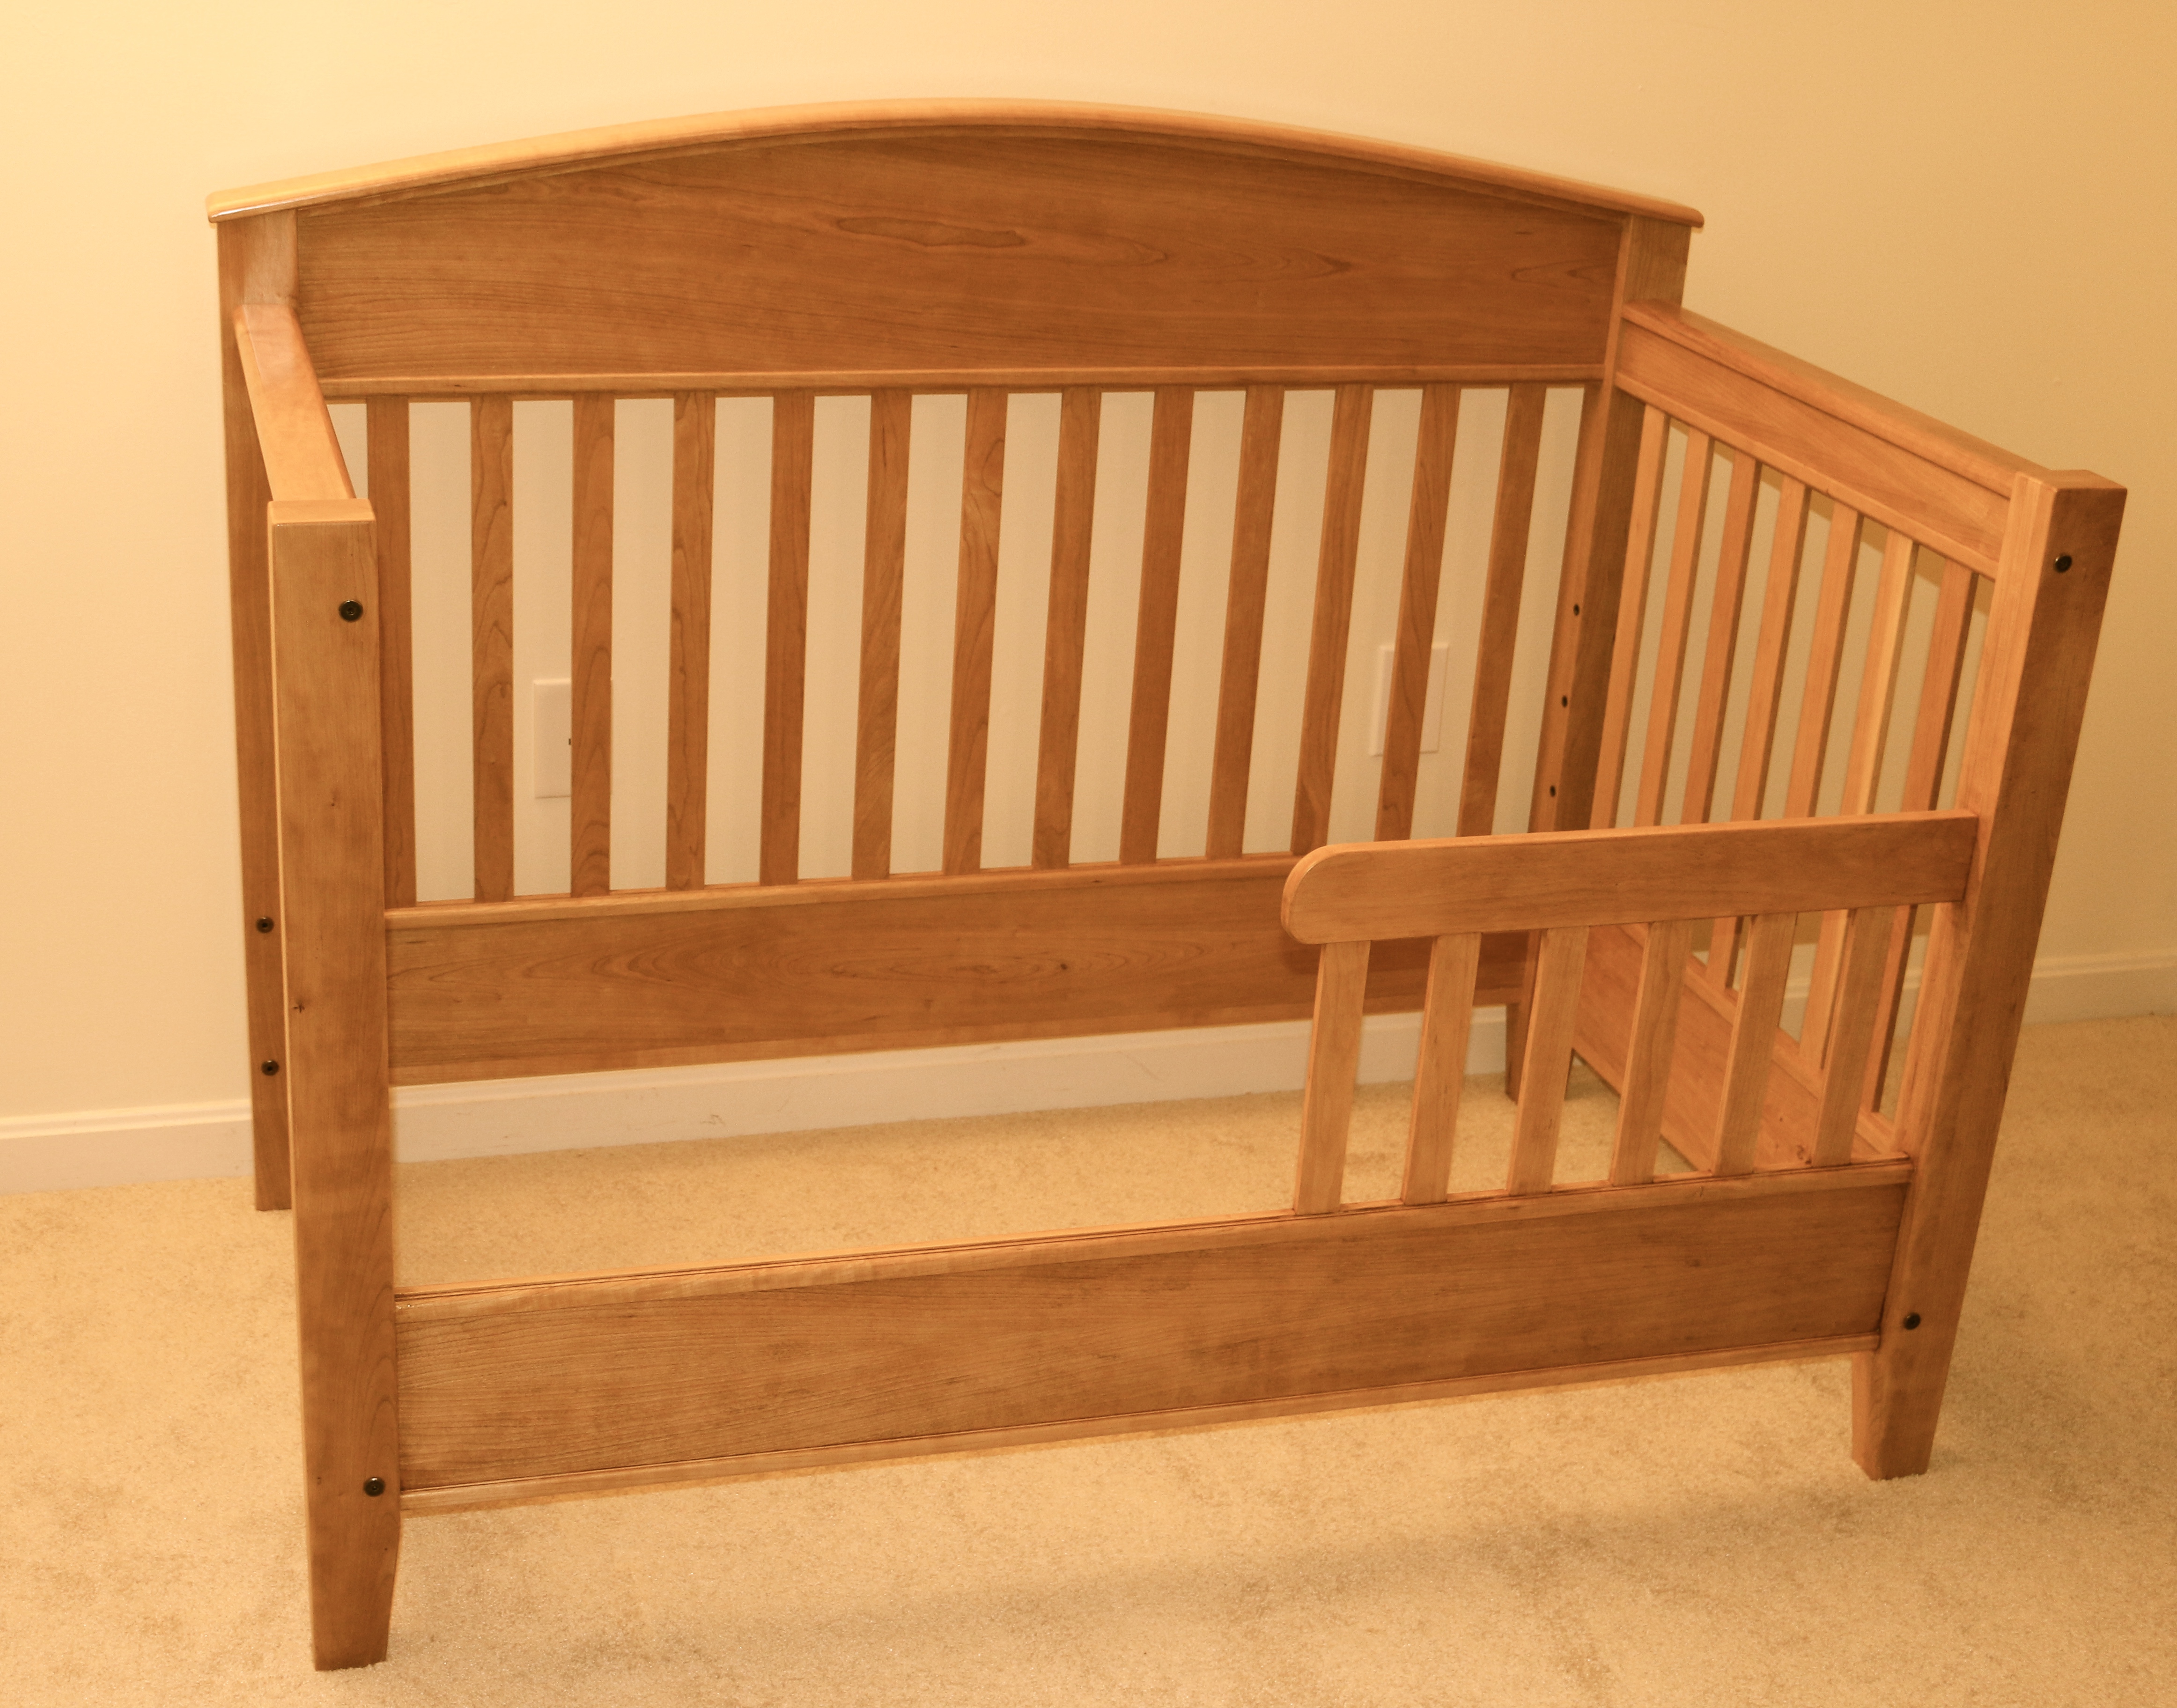
Toddler Bed
So it was back to the hunt. If I couldn’t find anything American, maybe a European brand? Some friends recommended Bellini — an Italian company with a good reputation that specializes in baby and youth furniture. They had some nice designs and pricing was a little higher than that of Young America — but from reading reviews and looking at the current product line I learned that recent years the furniture was no longer made in Italy, but made in Asia and had a decrease in fit and finish quality – yet the prices remained just as high as ever. If I am going to pay European prices I at least want it to be made in Europe. Quickly running out of time and patience I decided the only way I was going to get a crib that made me happy was to build it myself.
Adult Bed — Full Size Mattress
After a lot of searching I finally settled on a set of plans from Wood Magazine — the 3 in 1 bed which you can find here. The cheap Yankee in me liked the concept of these three in one cribs/beds and figured it would mean less furniture to store in the attic. It starts out as a crib, then converts into a toddler bed and finally converts to a full size adult bed by way of some nice hardware (decorative metal bolts and barrel nuts). The hardware — bolts and nice heavy metal bed frame are made in the USA and available from Products America here. The folks there are friendly and they produce hardware used by other baby furniture manufacturers.
Crib outfitted with mattress, sheets, skirt and of course stuff animals
I modified the design a bit by making the short side sections slatted — just like the front and back — being careful to adhere to government safety guidelines for cribs. I’m happy I did as I really prefer this look and the baby seems to like the extra light as well. I built the bed from Cherry instead of the maple you see in the article. I hand selected the cherry to have nice looking grain patterns and even tones. It took longer to build than I would have liked, as life, the birth and other obligations got in the way, but I am happy I finally finished this project and Bradley has a nice place to sleep. I am also happy with how rock solid this bed feels compared to the models we saw in the stores which felt flimsy in comparison.
A note for Bradley
On the bottom of the headboard is a small note — “For Bradley M. Rainford — Love Dad” for Bradley to find someday when he’s older.
Bradley enjoying his new crib
Now the trick will be getting the baby to sleep in it — it’s only been a day or two and he loves playing in the crib more than sleeping in it, but he’s used to sleeping in the master bedroom. Thankfully the bed will be there waiting for him to play, grow and eventually sleep.
In a couple of upcoming posts I’ll talk a bit about how I built this project and some other modifications I made (baby safe finish, hardware patina modification, jigs) and other interesting construction challenges. If you’d like to read some other posts related to this project as they get posted please check out this link here.
It’s that wonderful time of year — after Thanksgiving and before Christmas — where the Black-Friday and Cyber-Monday frenzy has died down and last minute shoppers are coming to the realization they’ll have to visit a brick and mortar store or start clicking on expedited shipping if they want their gifts to arrive in time for holidays. It’s also the time of year where bloggers offer their holiday gift guides, last minute project ideas and holiday drink recipes.
Fear not, I’m willing to attempt the holiday blogging trifecta with this post.
Sharpening a lead
Gift Idea for the Woodworker In Your Life — Learn the basics of Drafting by hand
Earlier this year I made a 2 hour video ‘webinar’ for Popular Woodworking titled “Hand Drafting Skill Builder” wherein I talked about the basic tools and techniques required to draft by hand. I started with a terminology and supply overview, then walked through several samples and discussed appropriate practice exercises.
From the course description:
With the basic drafting skills covered in this course you can quickly and efficiently communicate ideas and generate working plans.With a solid set of plans in hand, your woodworking in the shop will benefit from all the design details you worked out on the drawing board, where changes are easier to make. Your wood rack and your wallet will also benefit from the decreased waste.
Course Highlights:
What constitutes a basic drafting tool kit
How to layout a good working drawing with standard elevations, scales etc.
How to properly draw lines and make use of line weights
How to dimension a drawing
Basic lettering
Correcting mistakes
Where to find more information
The recorded version of this course is now available online and you can learn more about the course and see a sample video here on ShopWoodworking.com
Drafting Scales
The above content is also available as part of a 9 piece bundle called ‘9 Key Tools For Better Furniture Design’ which includes a lot of other great resources for anyone interested in stepping up their furniture design skills and sells for half off of what the 9 items would cost individually. This bundle can be found online here.
Both of the above are digital download content so there is no waiting or shipping necessary.
Last Minute Holiday Project Idea — Cutting Boards
I bet you have a lot of scrap around your workshop — most woodworkers are also wood hoarders. A cutting board is a great way to use up some of that scrap stock that has been haunting your woodpile for way too long. It’s also a great way to make room for the next project.
Holiday Drink — Gløgg
This classic warm Scandinavian holiday drink is great at a party and everyone seems to have their own recipe for it. Here’s a good starting recipe.
With the holidays quickly approaching it’s time to don the holiday sweater, have a warm drink and a snack and start drafting the next project.
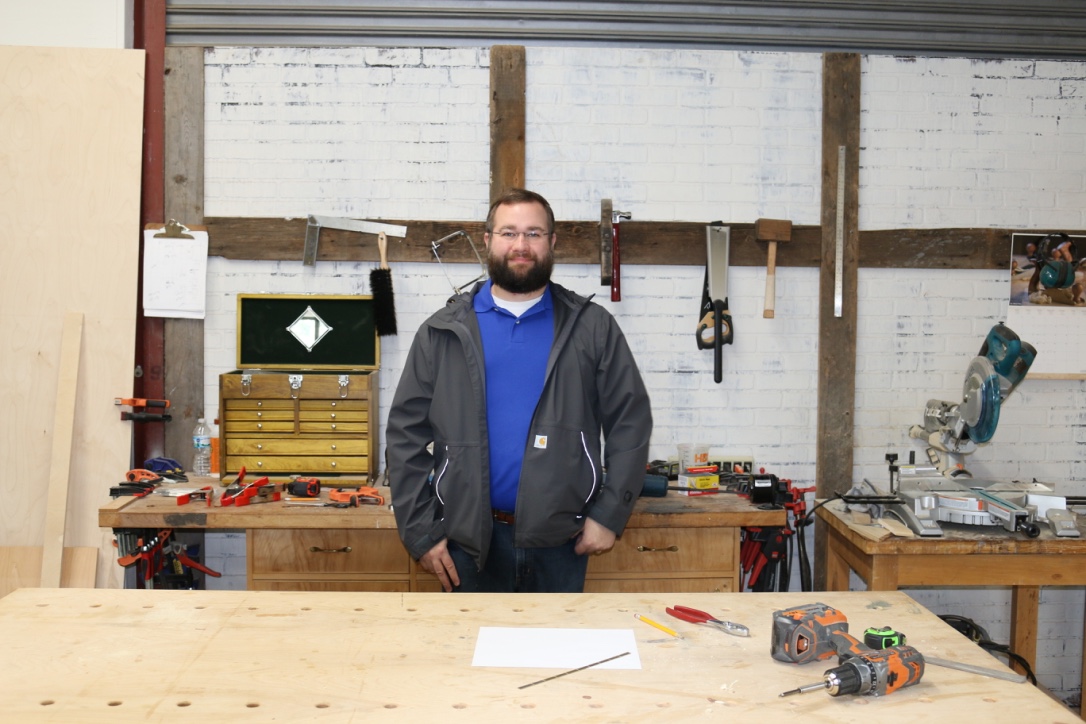
Throughout history many craftsmen (and craftswomen) have worn aprons as they ply their trade. A good workshop apron will help to keep some dust and dirt off of your clothes, keep your pencil(s), block plane and other essentials close at hand. It’s also an item you will spend a LOT of time wearing, so you better get something you like and make sure if fits comfortably.
Real Men Wear Aprons
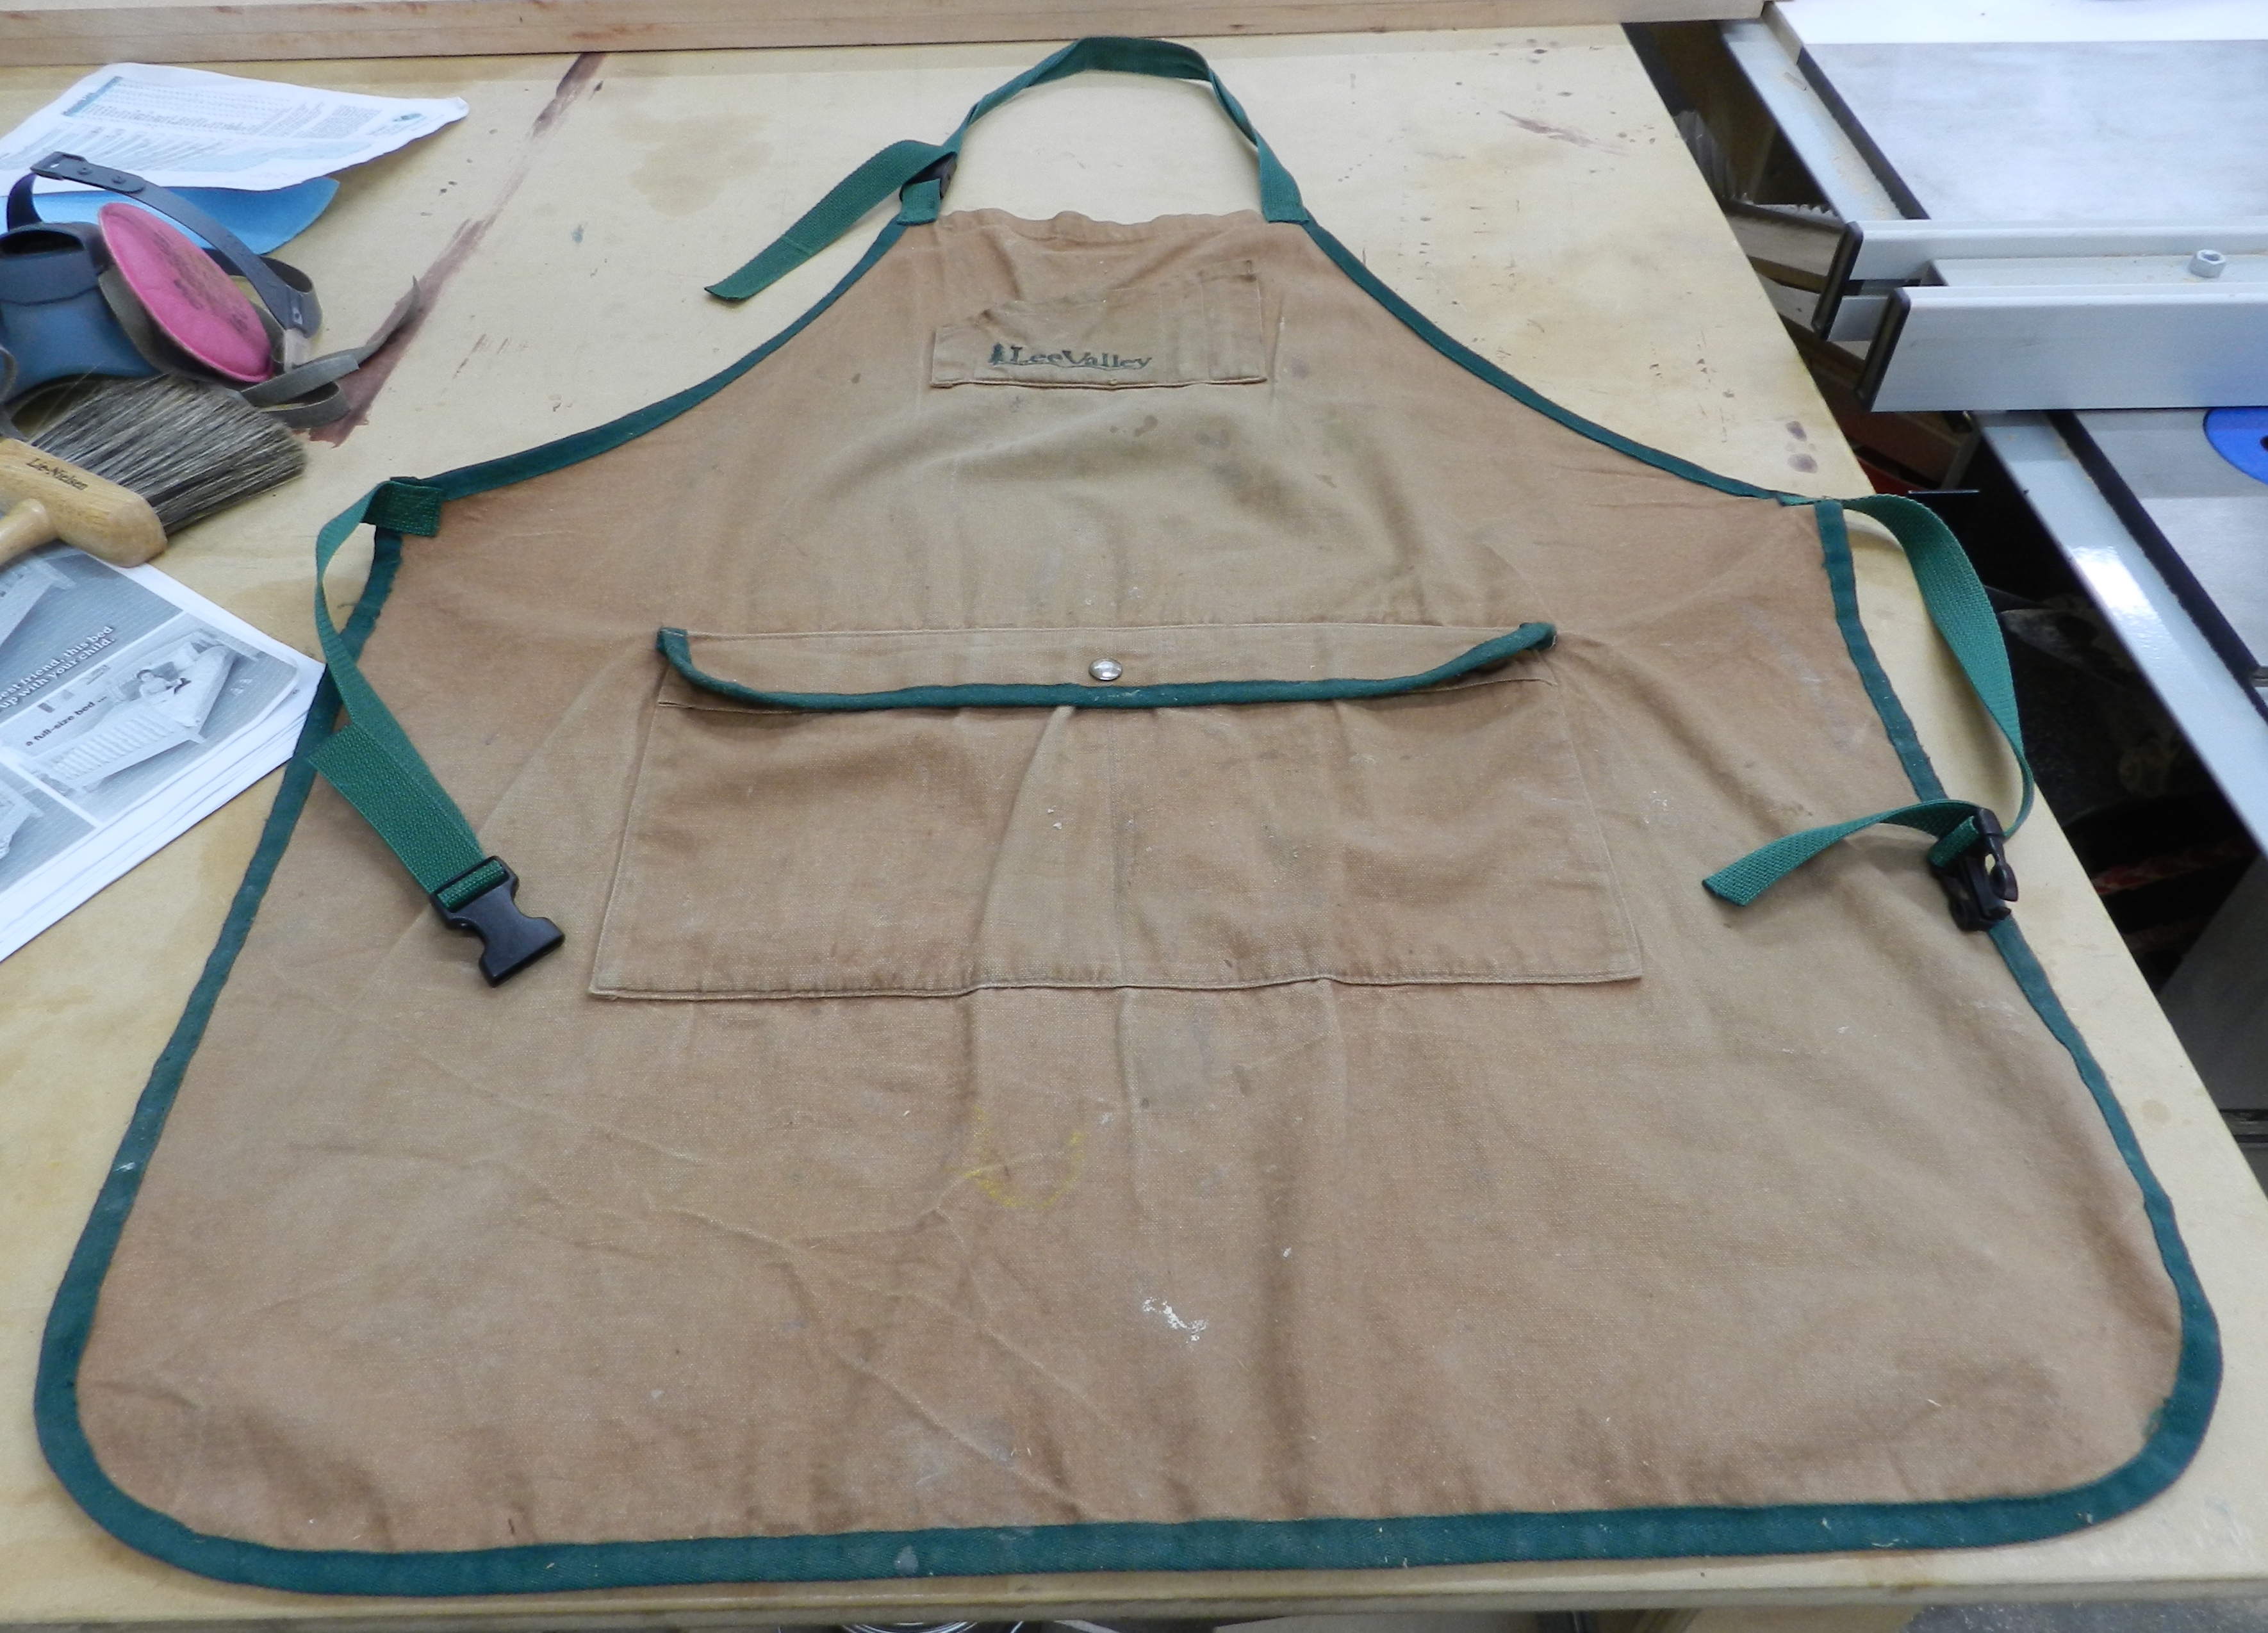
For the past ten years or so my main apron has been the standard canvas apron from Lee Valley (seen below). Made in Canada this apron met all the basic criteria — covered by torso, had a pocket with a cover, has a pocket for my pencils etc. Over the years the pencil pocket has worn out at the top edges, saw dust finds its way into the pockets (and I empty it every so often), it has survived many a washing though the chest is becoming a bit on the thin side. All in all I have been very happy with this apron.
My trusty old Lee Valley Apron
Since that time I also bought a Rockler apron that goes over the shoulder instead of around your neck, and a nice festool apron that wears a bit more like a vest. The Rockler apron was a pain to get on sometimes (the shoulder straps often got messed up, though I liked the idea of not having weight around my neck) and the Festool apron while nice didn’t cover as much and so I hardly ever wore these aprons and preferred to keep adding miles to the old Lee Valley apron. (Plus it was a Christmas present from my Dad).
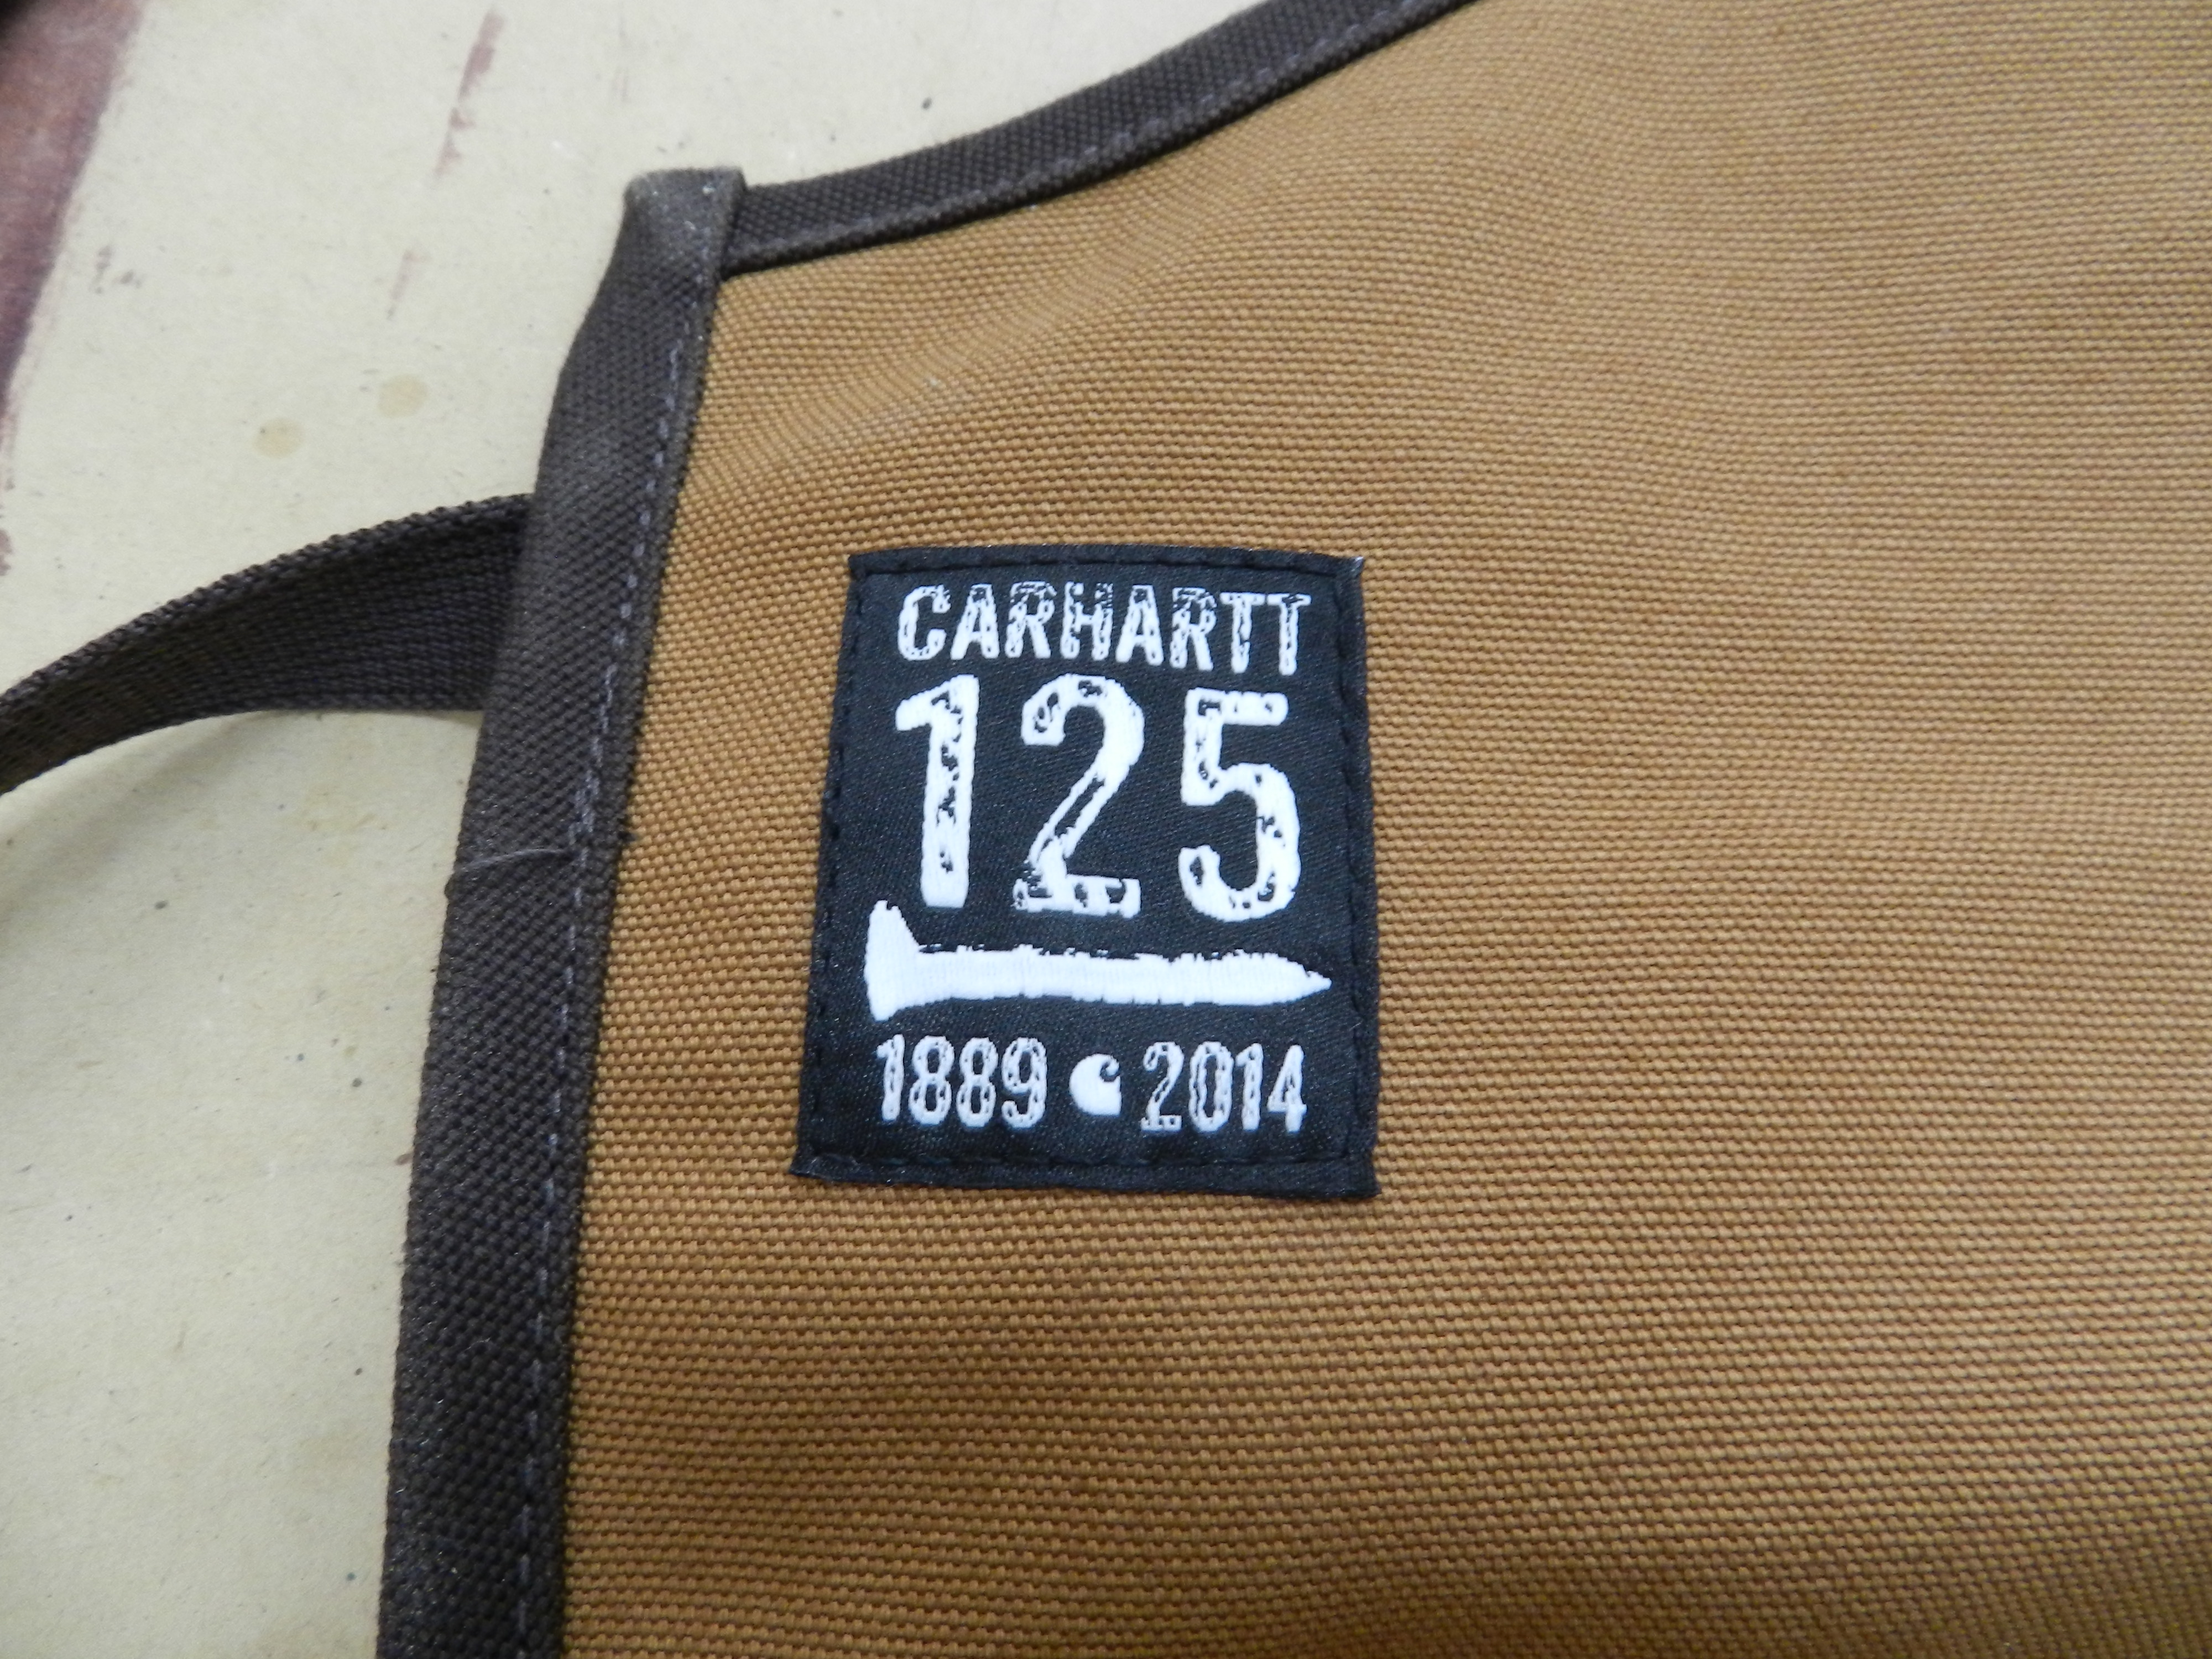
Carhartt Shop Apron
I wear a lot of Carhartt gear — I find it is made better and lasts a lot longer than other brands I’ve had in the past. (I’m looking at you Lee Carpenter Jeans that wore out way too fast…). Where I live we have one of the few Carhartt owned retail stores which caries most of the lines Carhartt makes and sells. While much of the stuff they make is made overseas — they do still make a line of Made In the USA garments and accessories and whenever possible I try to buy from this line.
According to Carhartt’s web page, less than 2% of all the clothing sold in America is actually made in America — that is a very scary number. The only way more clothing is going to be made in the USA is customers seek out and buy more of the clothing made in this country. (I also like American Apparel and Red Wing who also still make clothing products in the USA) You can learn more about Carhartt’s Made in the USA line here along with an interesting video talking about how and why they still make some products in the USA.
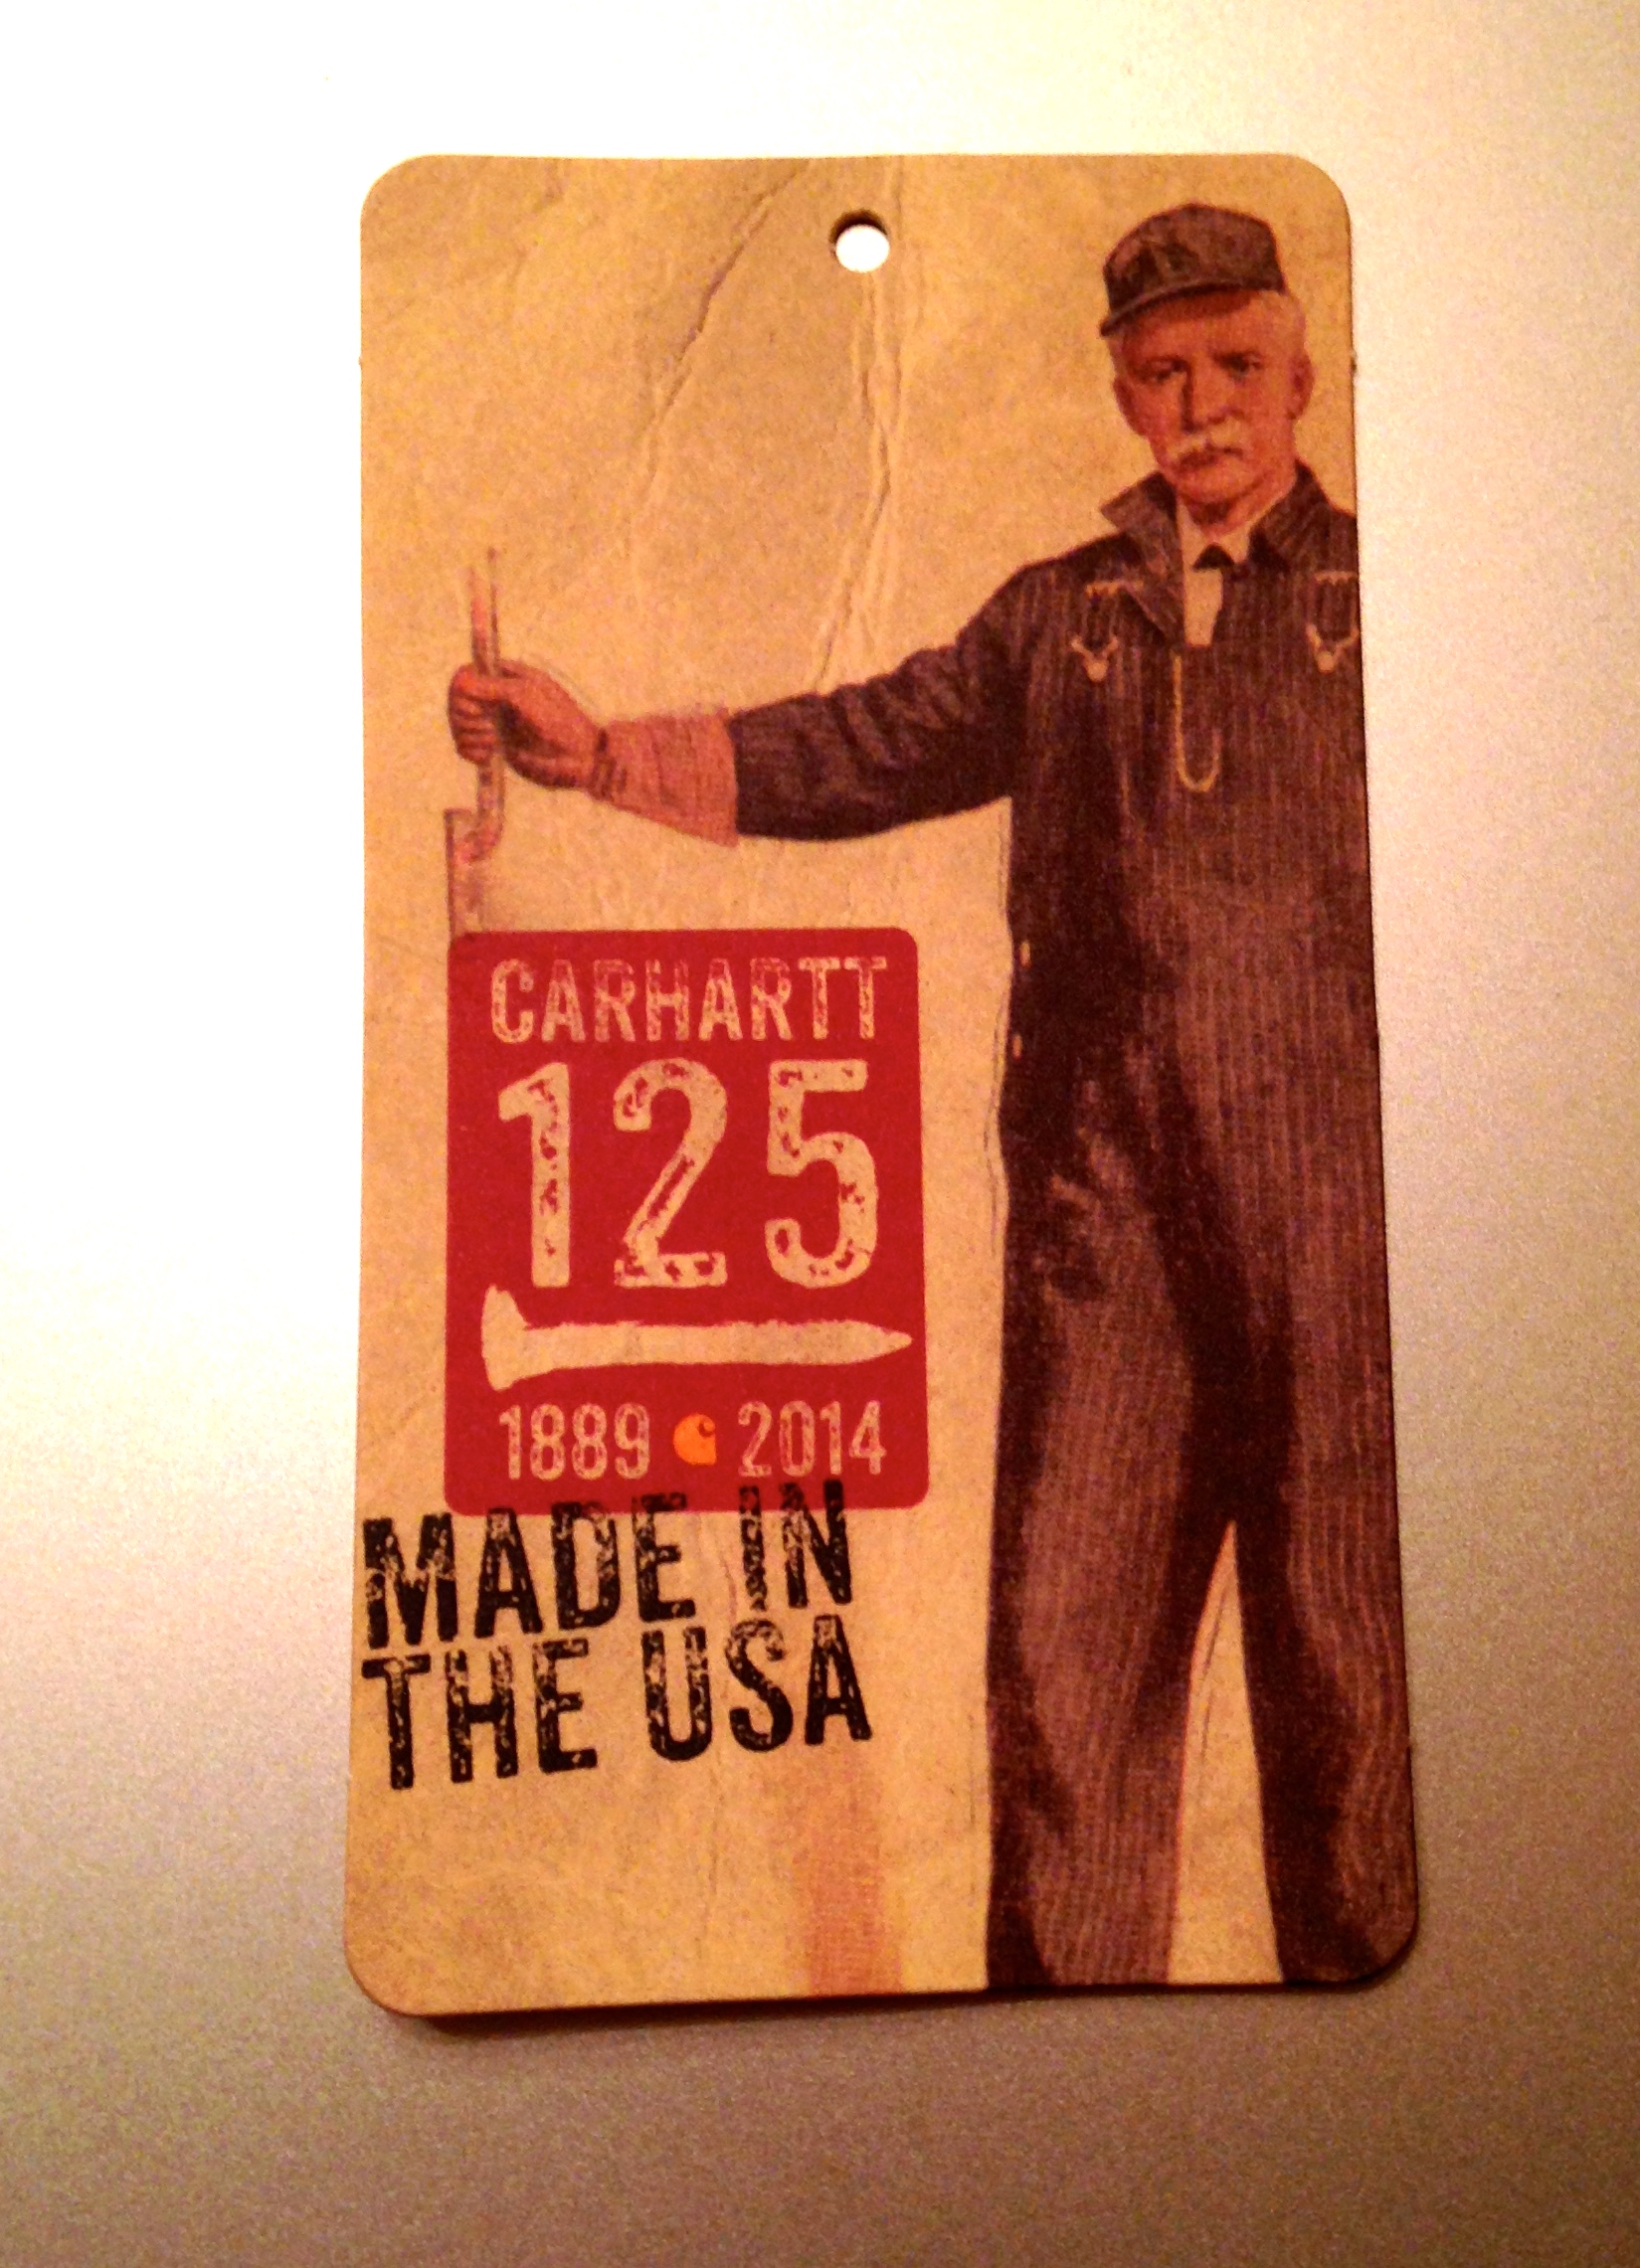
During my most recent visit I saw they had a table full of Carhartt 125th Anniversary gear and accessories including the workshop apron above.
Carhartt Made in the USA Line
Also from the tag above that came with the apron some portion of the sale will help support Carhartt’s $25,000 donation to SkillsUSA which helps train students for careers in technical, skilled and service occupations while fostering “total quality at work — high ethical standards, superior work skills, lifelong education, and pride in the dignity of work” and promoting community service.
125th Anniversary Made In The USA Line
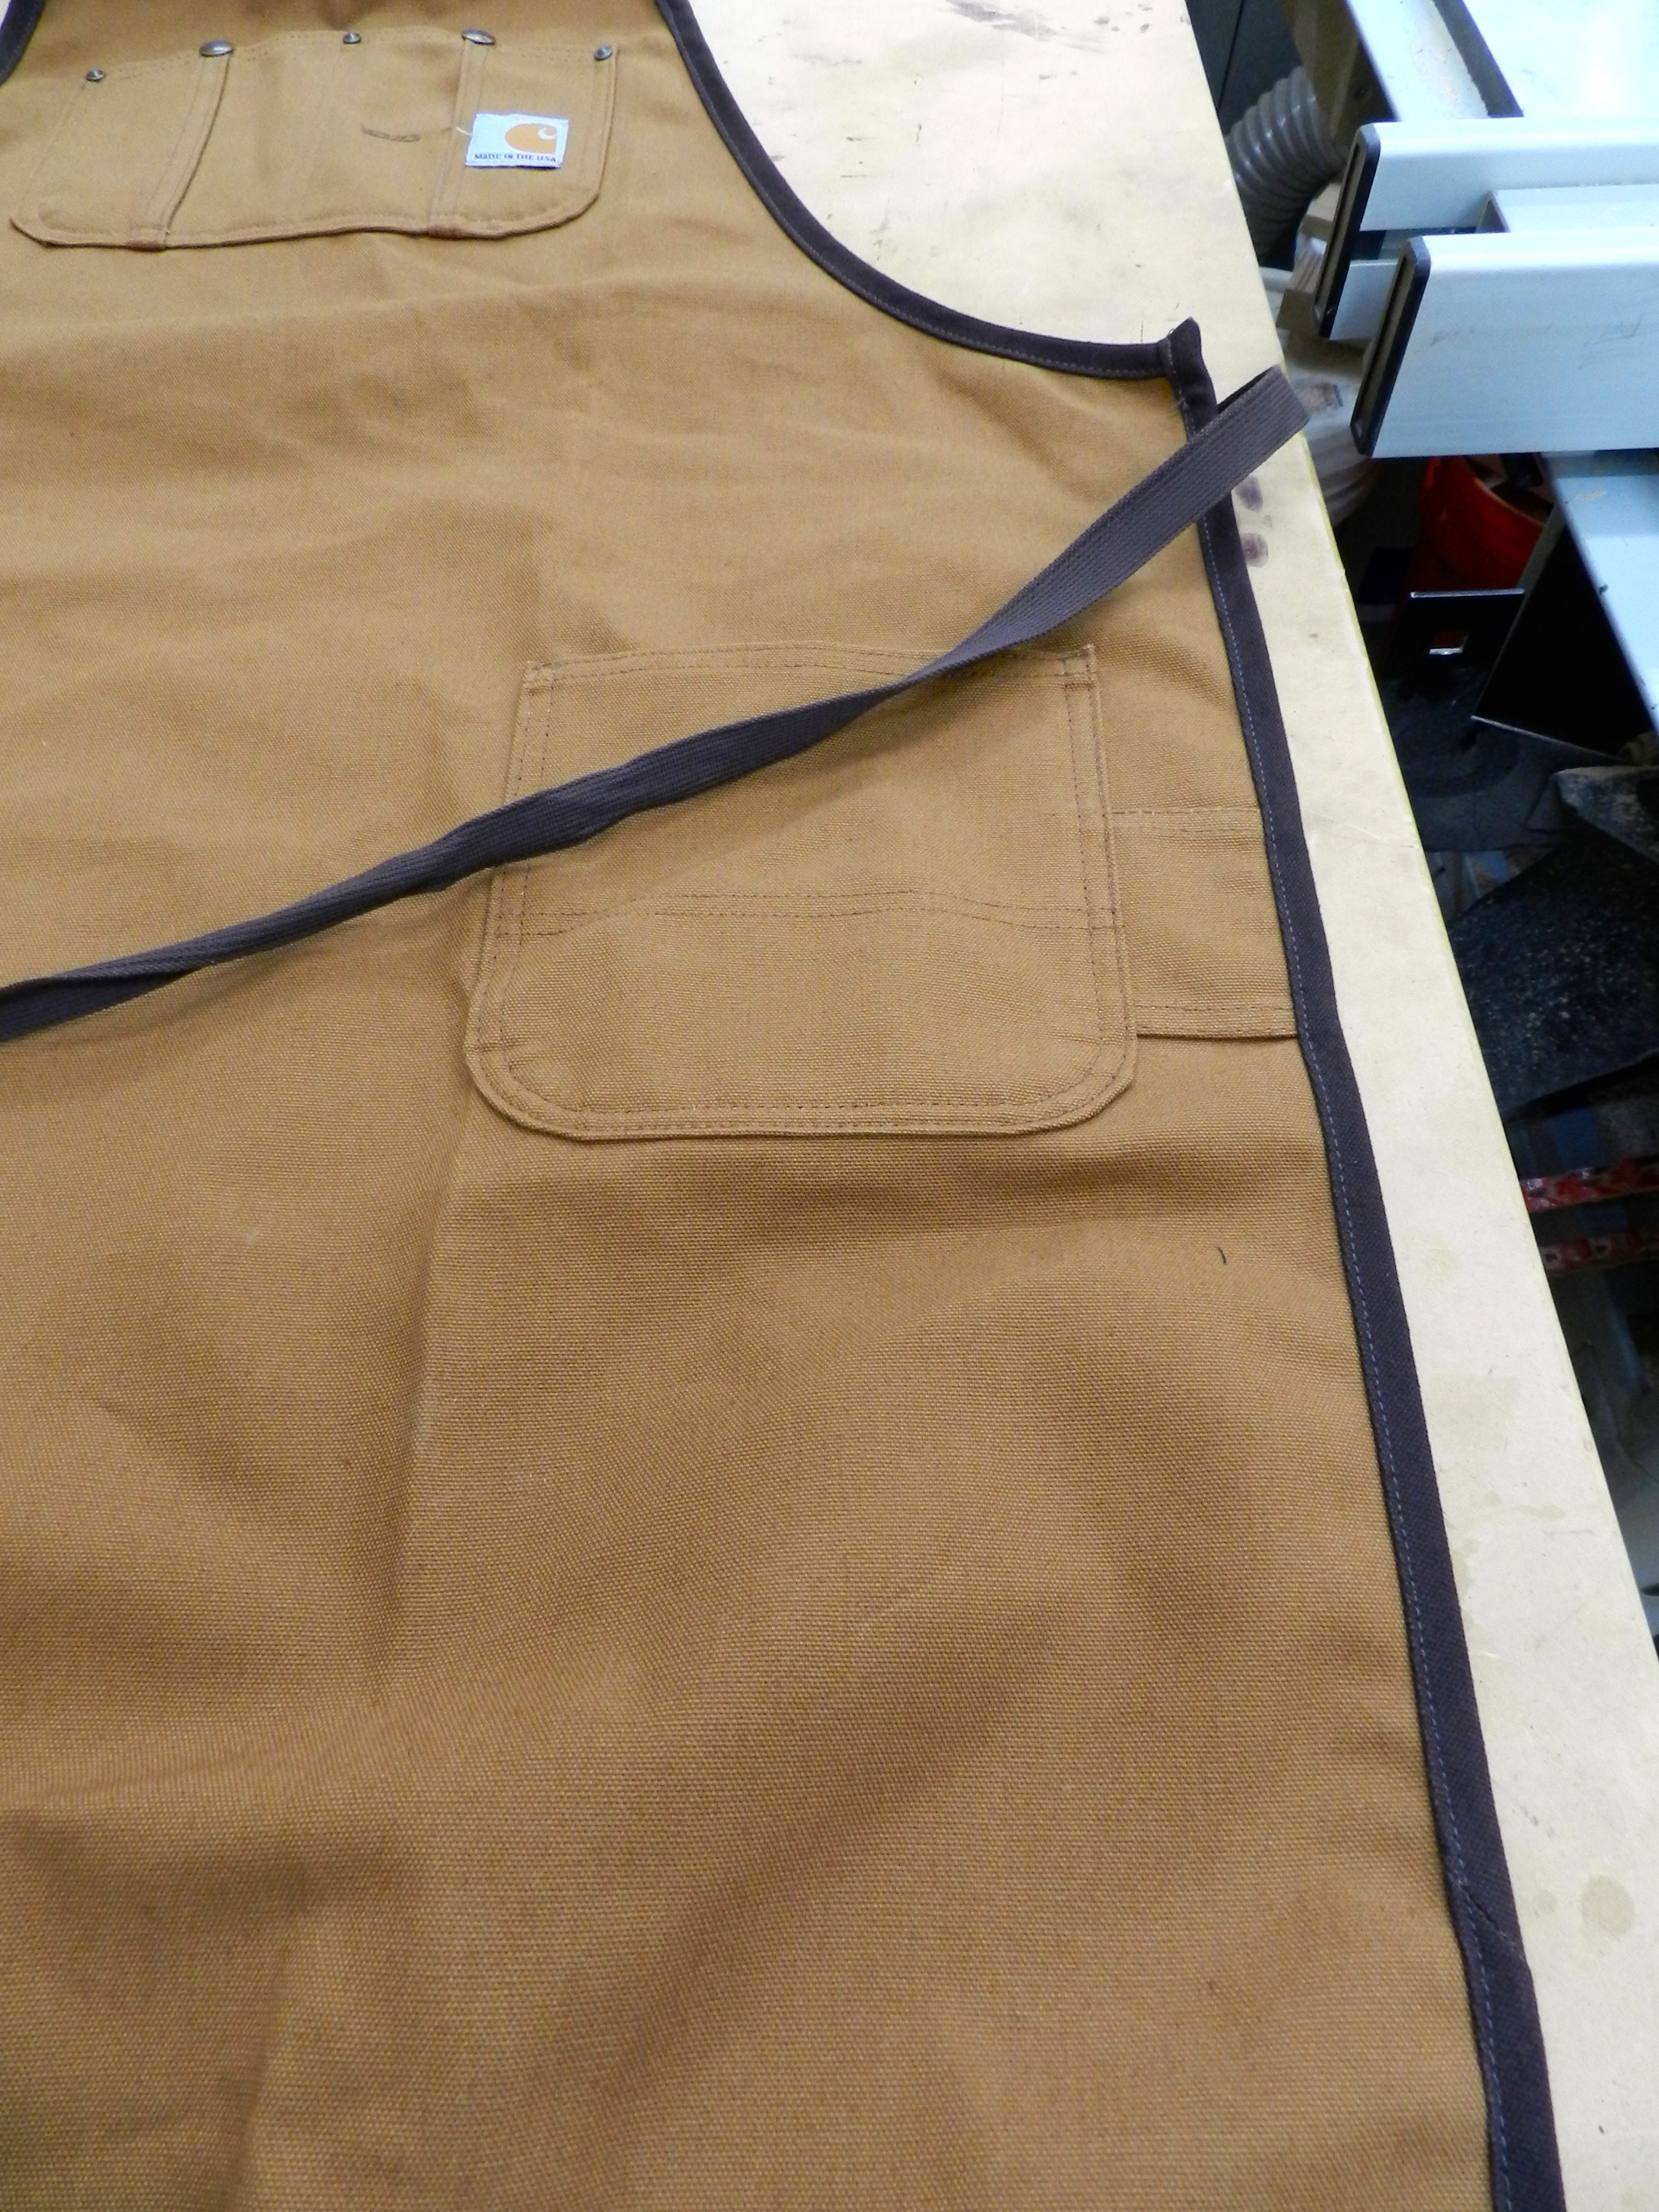
So far I am very happy with this new apron. (It was $34.99 — about the same price as my old Lee Valley apron which goes for $38 today) It is well made from Carhartt’s famous heavy duck canvas with rivet reinforced pockets. The fabric is noticeably thicker than my old apron and much longer though it does not seem to get in the way of my movements.
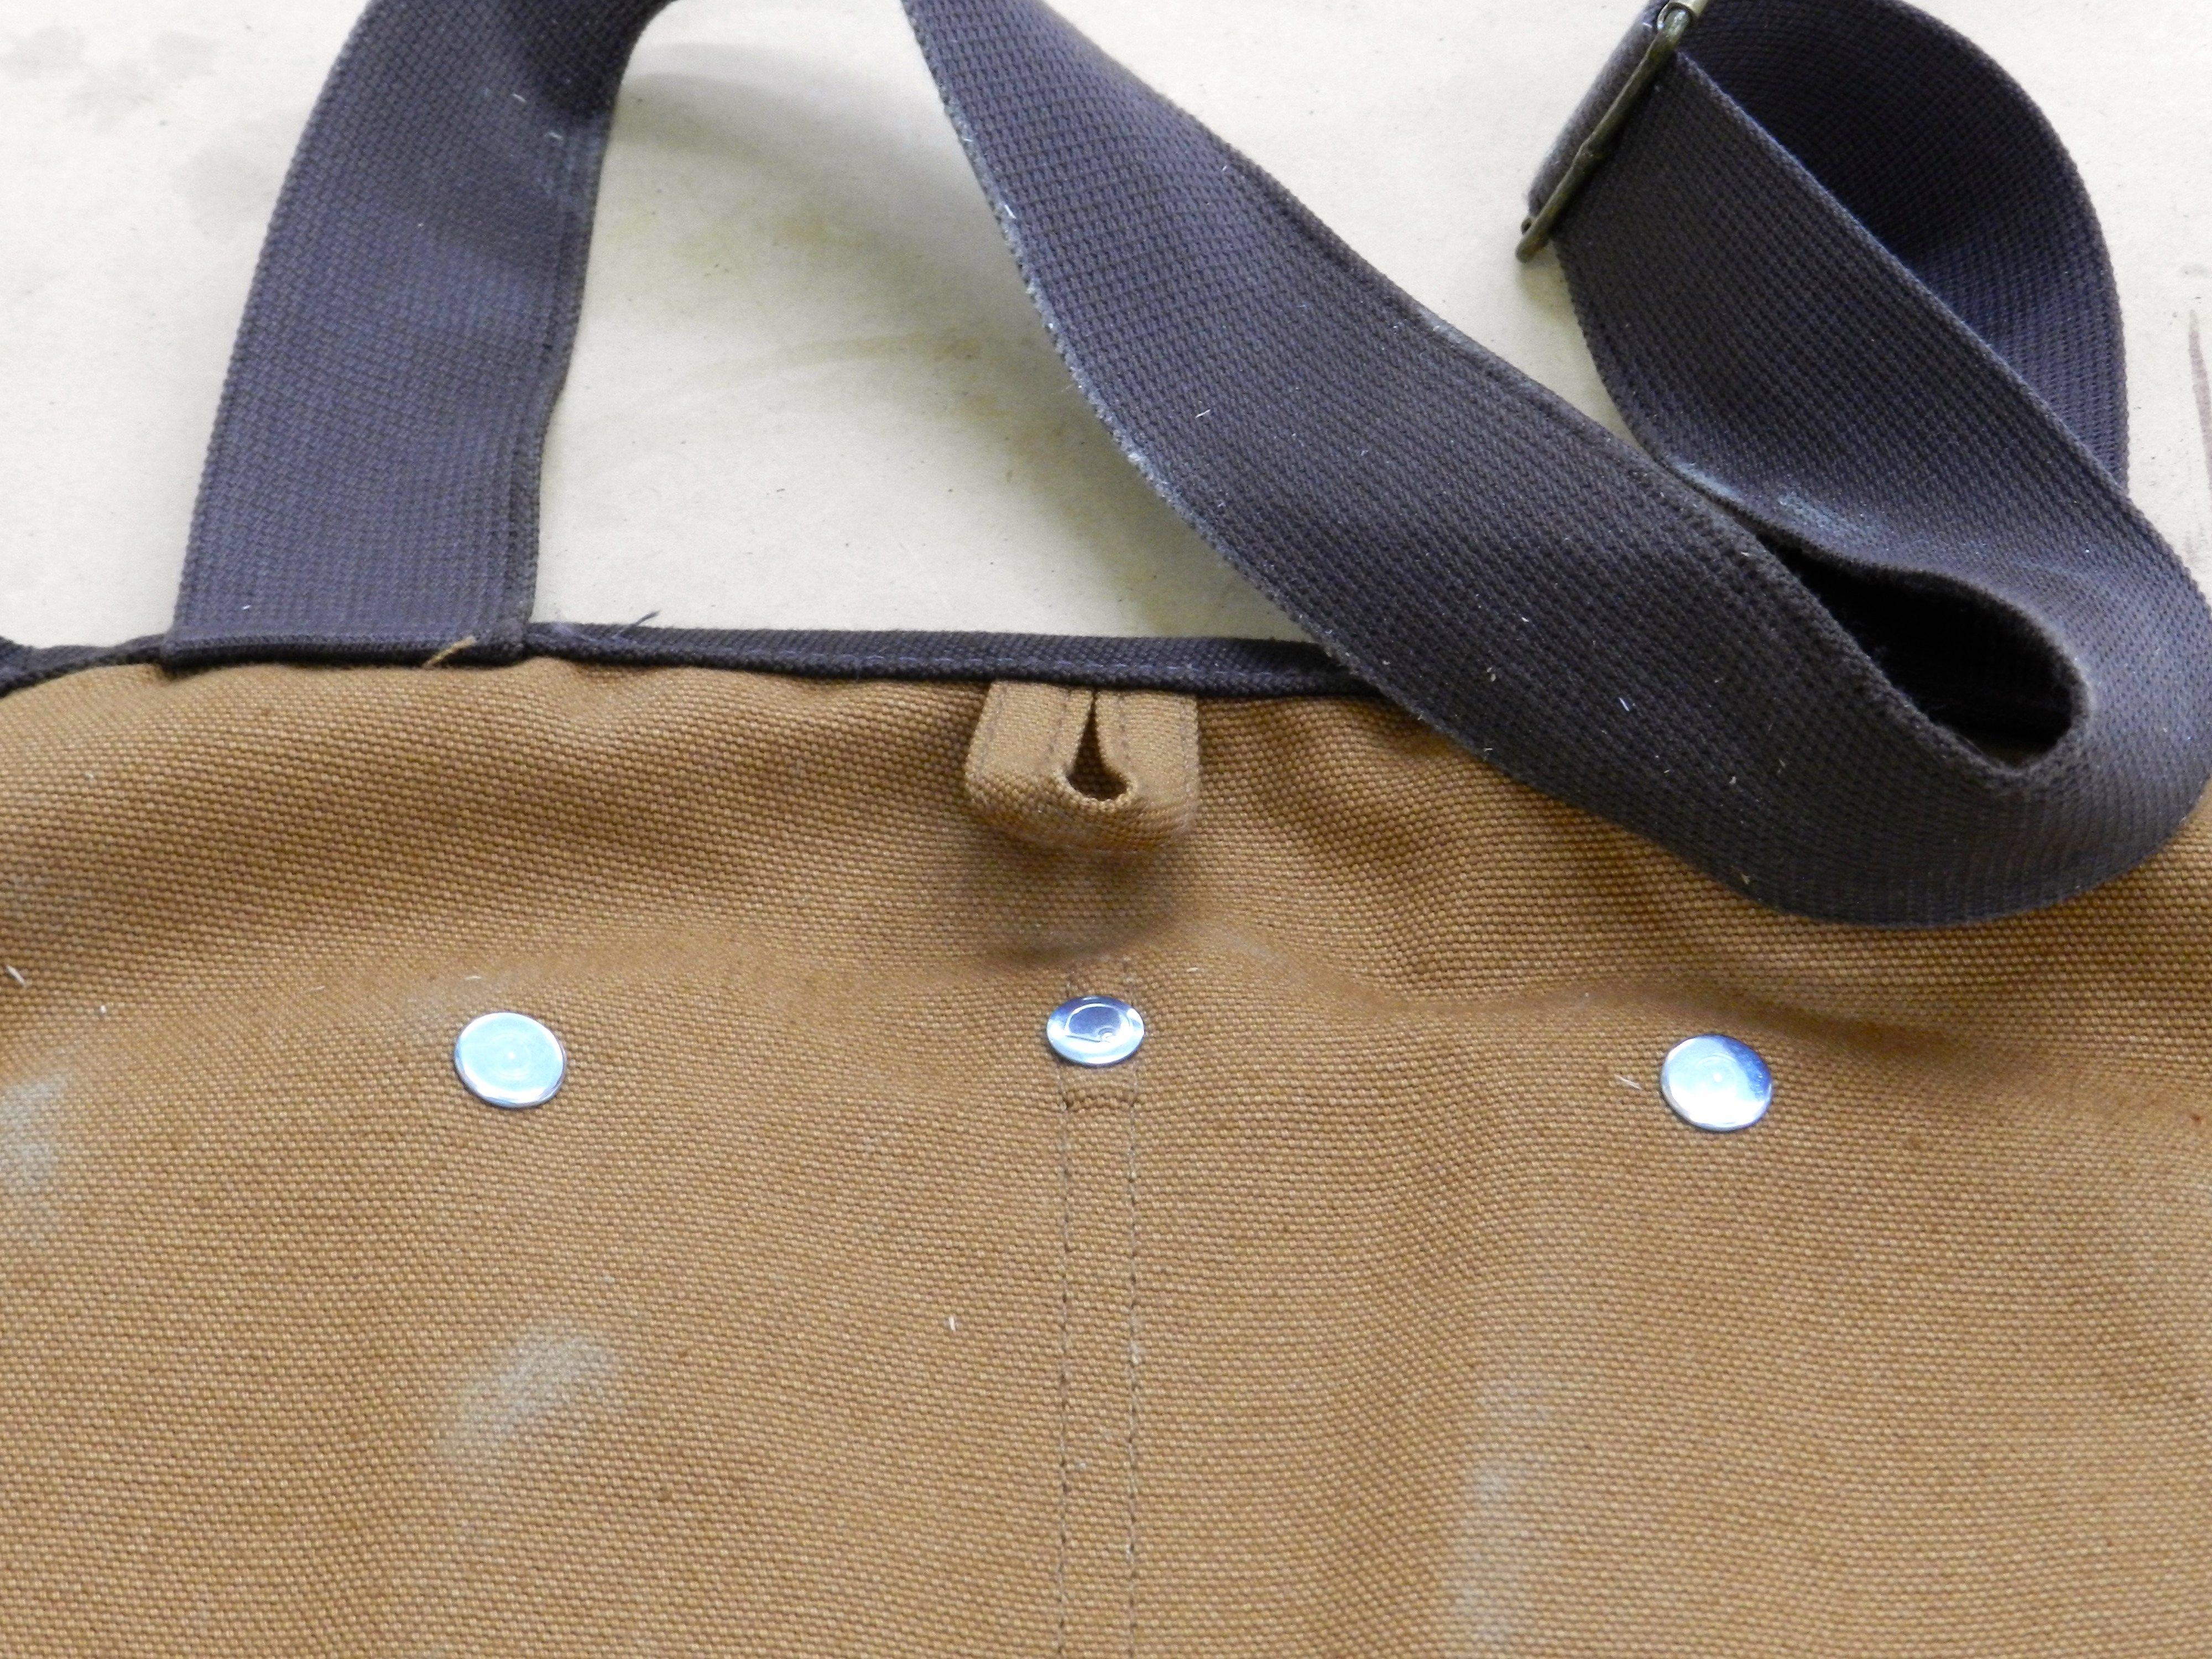
Riveted Top Pocket With Buttons
A nice wide (and soft) adjustable strap that goes around your neck along with a loop for hanging it up
Hook for hanging
Reinforced pockets (double layer of fabric) to help keep sharp objects from poking through the bottom.
Reinforced Pocket Bottoms
A pocket much like that on my carpenter jeans — great for cell phone, utility knife or similar.
Carpenter’s Pocket — Like on my jeans
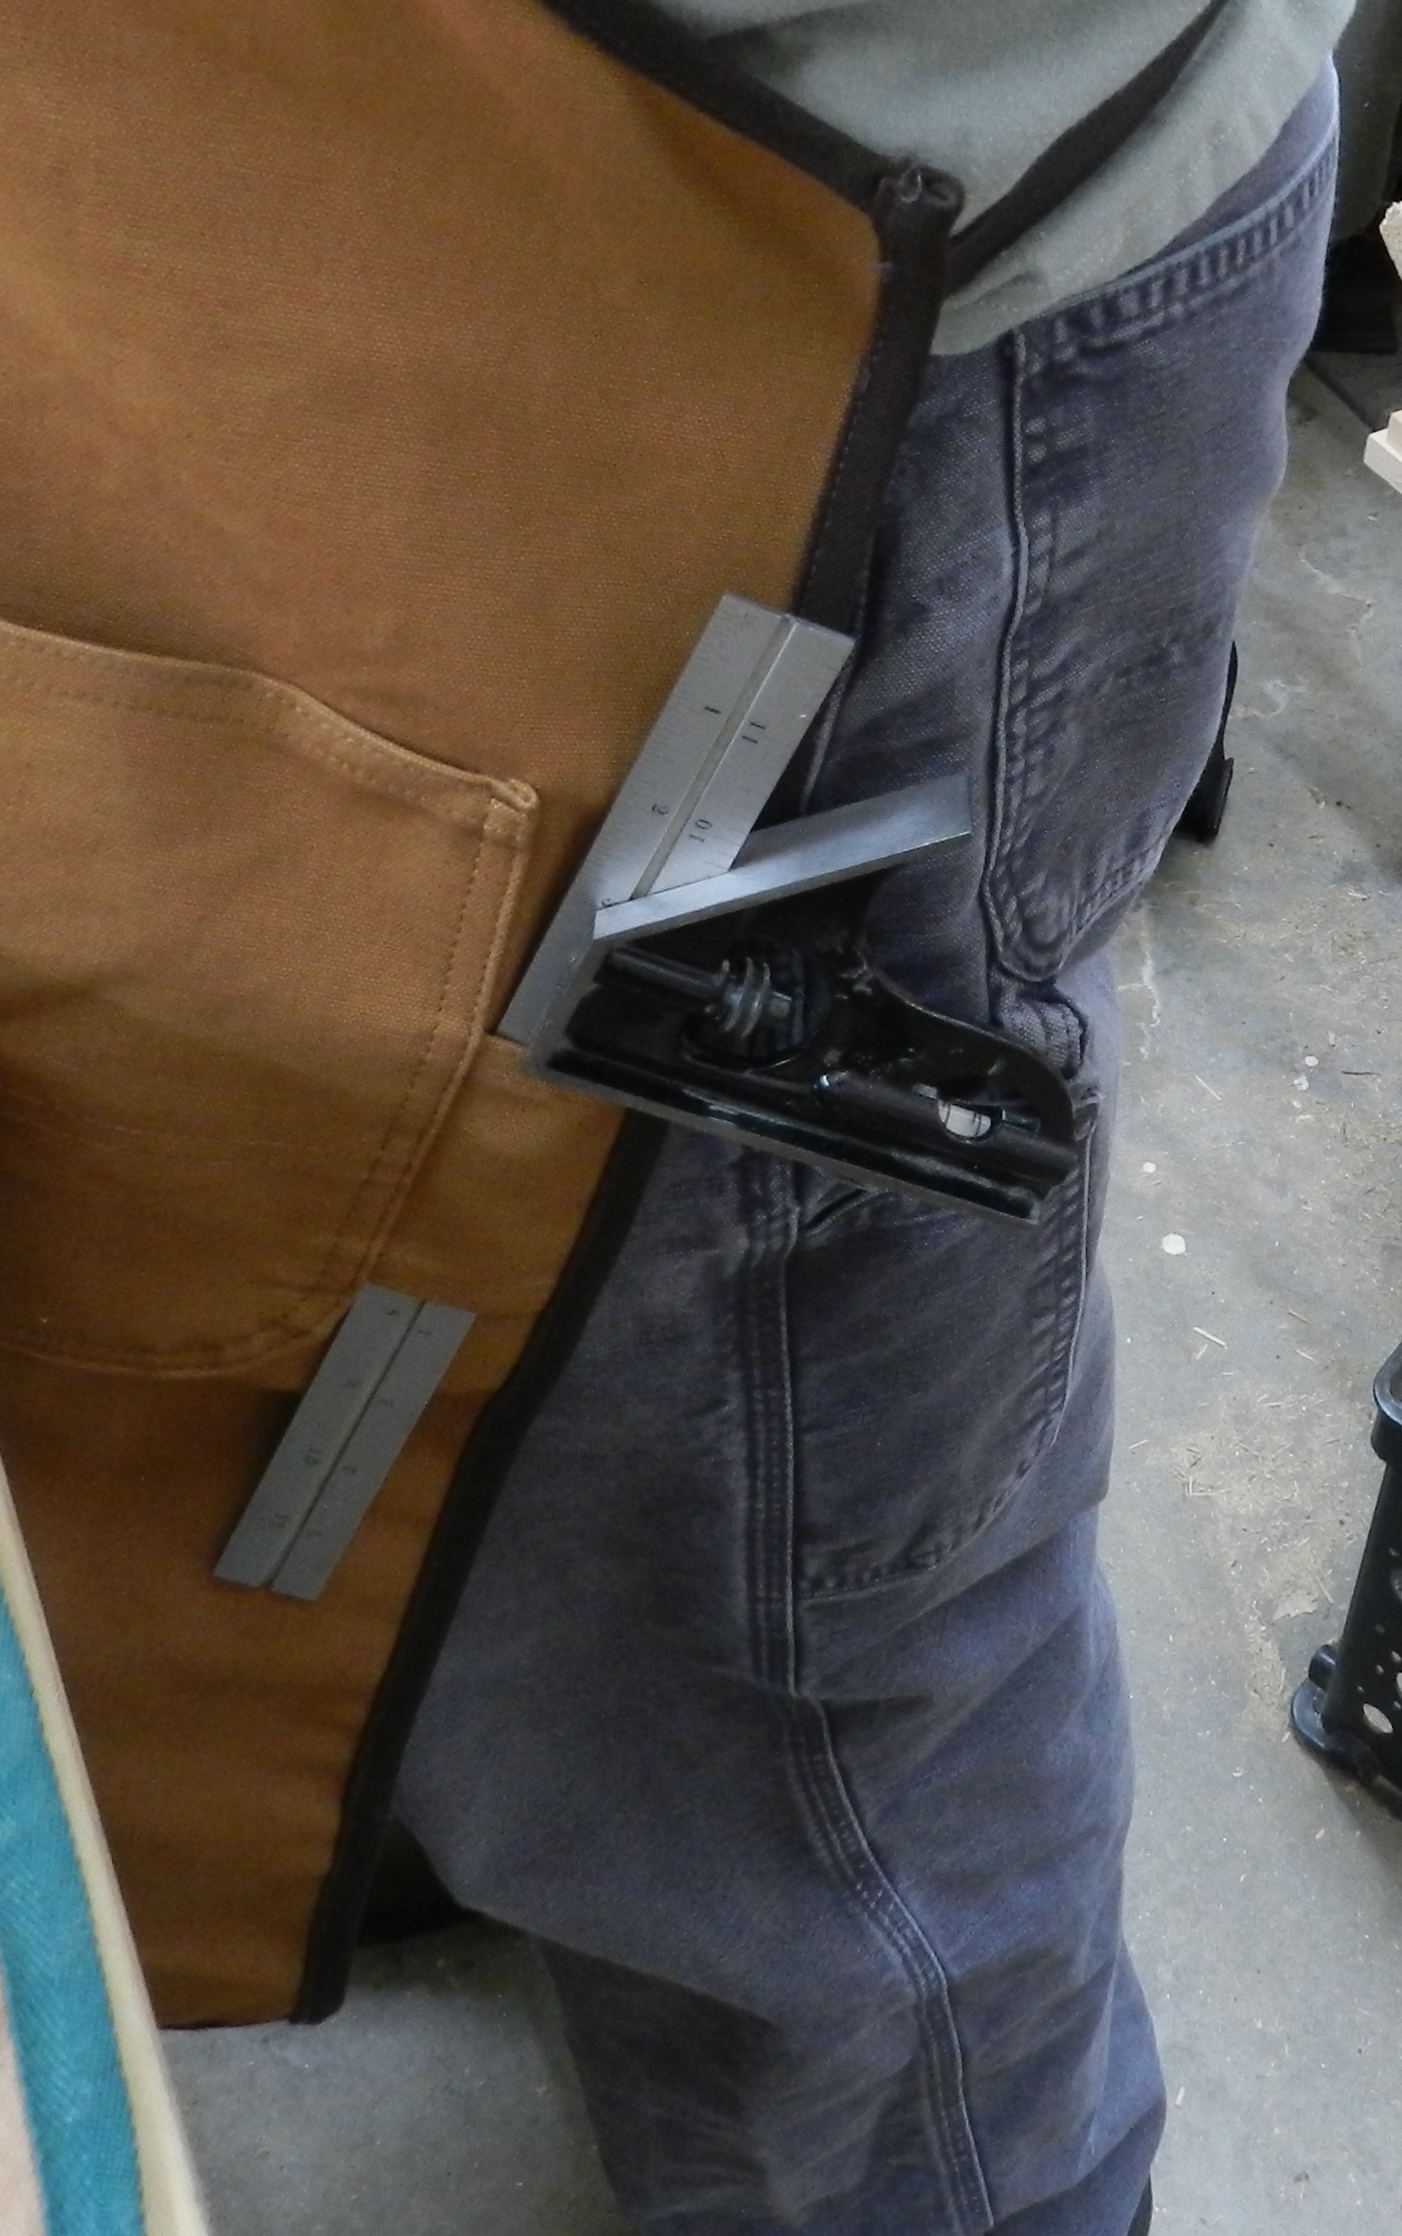
Along with my favorite feature — a loop for holding my combination square.
Apron pocket for holding a combo square
The apron ties in the back much as you see on other traditional aprons. I may get a set of plastic side release buckles as that was what I was used to, or maybe an Apron Hook but so far tying the apron behind my back has not been bad.
If you are in the market for a reasonably priced, Made In The USA workshop apron I would suggest checking this apron out before they stop making it — seems like it will be a limited run item.
Take care,
-Bill
P.S. They also seem to make a line of tool rolls and tool pouches out of the same materials. If you’d like to learn about making some of your own tools rolls and similar items for the shop check out these earlier posts.
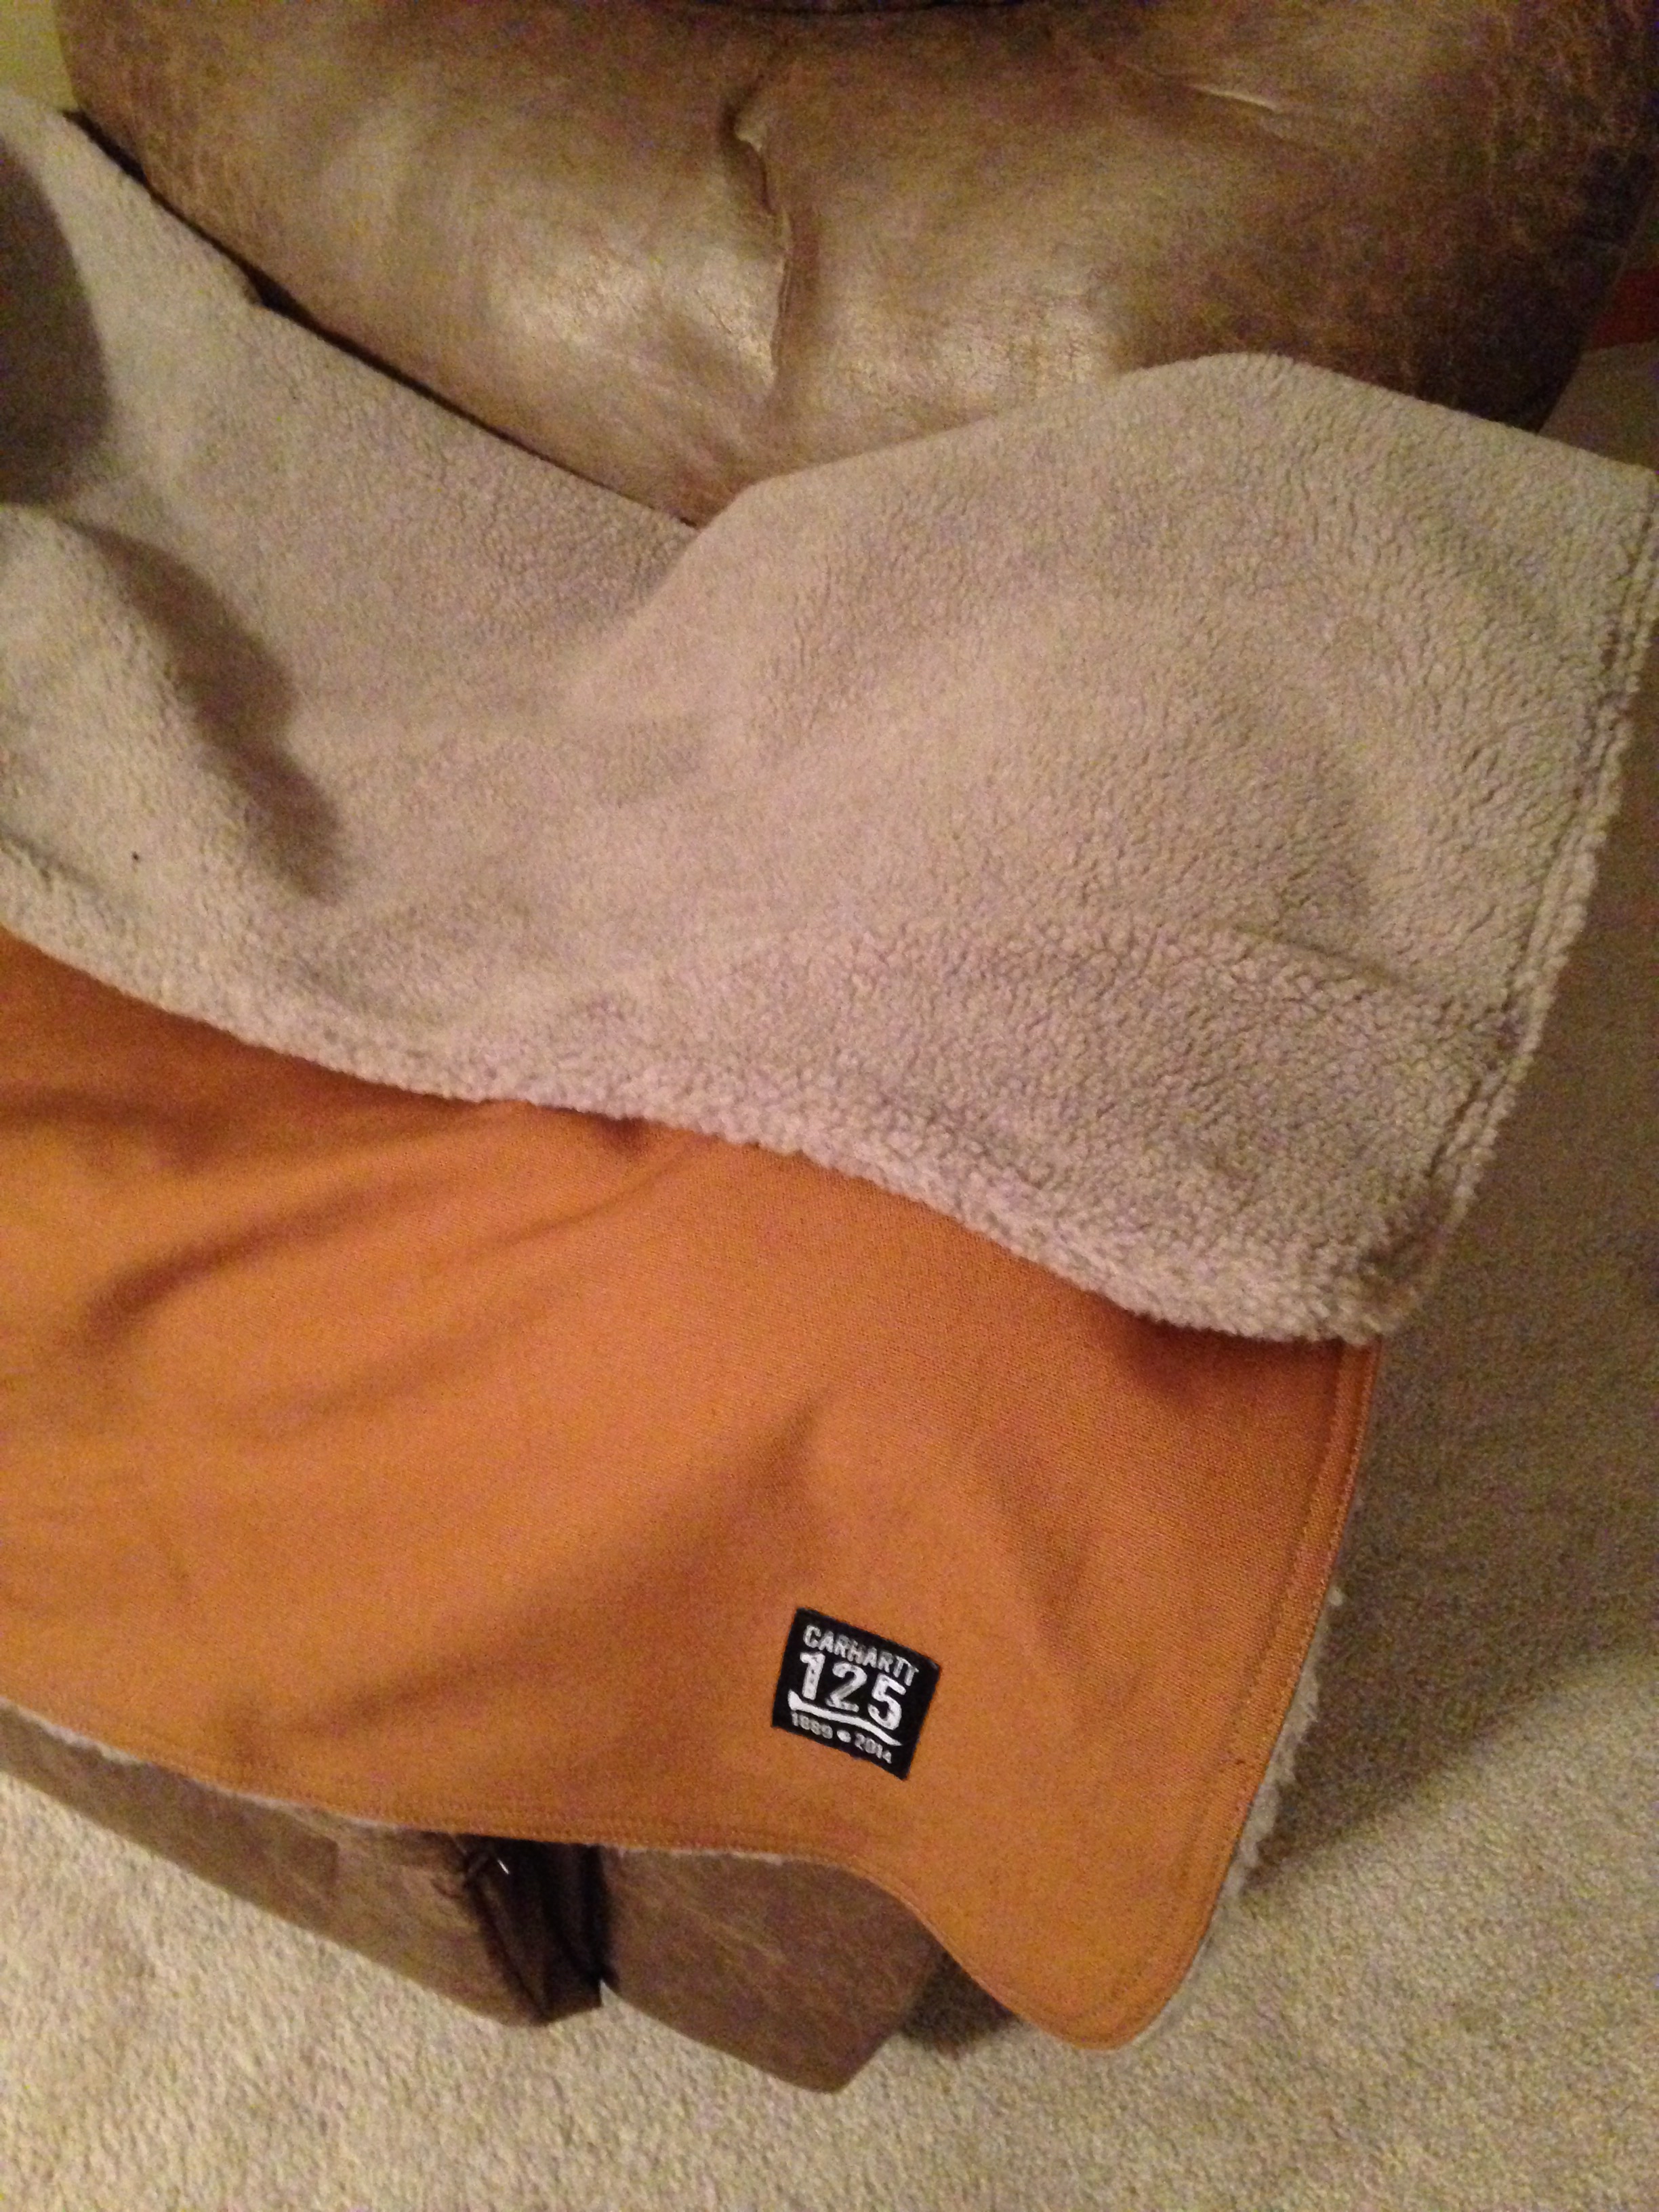
P.P.S. Not related to woodworking at all, but Carhartt also made a nice Made in the USA duck canvas blanket that is sherpa lined and is my new favorite couch accessory.
Carhartt Made in the USA Blanket
A Joiner's Guide To Traditional Woodworking and Preservation