I haven’t seen a lot of left-handed, or ‘sinister‘ workbenches out in the wild. I suspect most are from the mid 20th century or later with the assumption that earlier southpaws were likely forced to work right-handed much as a lot of the left-handed folks in my family were forced to learn to write with their right hands in school. If my woodworking research friends have actual information to the contrary I am interested to learn more about left-handed woodworkers. Given that in earlier times craftsmen usually made their own benches it seems logical left handed benches would be easy enough to make unless the social stigma and/or dominance of right handed tools outweighed the convenience.
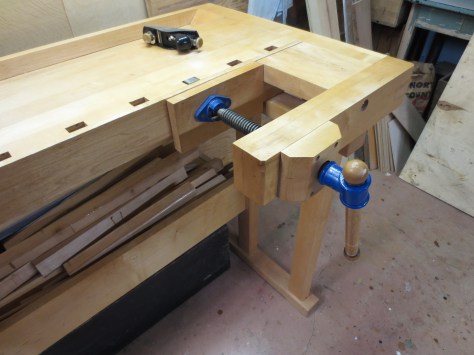
3/4 view of left handed Tage Frid workbench by Paul Van Pernis
My friend Paul Van Pernis, former president of the Early American Industries Association (EAIA) , recently reached out to me and shared that he built a pair of left-handed workbenches based off of Tage Frid’s original plans — one for himself and one for his youngest son.
Paul Van Pernis at the EAIA Annual Meeting 2015 holding my first son Bradley 🙂
Paul did an great job building his bench and it sounds like it has served him we’ll for 20+ years. It was great to see all the finger joints and other details much as what Frid had in his book and FWW article. The bench-top and vises look like they have all held up great.
Detail view of the shoulder vise
Paul’s original note about his workbench, how he acquired the materials and built them was too good not to share: (Shared with his permission):
The bench is still my primary bench. I use it all the time. Unfortunately I don’t have any pictures of my son and I together at the bench. It’s not like my wife to take a lot of pictures of me or my kids down in my basement workshop. The wood was milled at a local mill just 25 miles south of us in Mellen, Wisconsin called North Country Lumber. I knew the owner of the mill and his brother. I took care of their families when I was still practicing family medicine. I told the owner Bob Stilen that I was interested in building the benches and asked him if he could provide me with some 8/4 clear hard maple select or better. He was surprised that I knew a little about trees, sawmills, and furniture grade wood, but said he could get the wood. He called me about a month later and we agreed to meet at the saw mill the next Saturday when I wasn’t on call. The mill was closed, but both Bob and his brother were there when I got to the mill. After a cup of coffee and a lot of bad jokes and stories from a couple of real northern Wisconsin characters (think the movie, Grumpy Old Men) I got a private tour of the mill and the drying kilns. Then he showed me the wood he had selected for me. It was a gorgeous pile of absolutely clear northern Wisconsin hard maple all cut to 8/4 thickness, kiln dried and planed on two sides. The boards were all 8 feet long or better and many of them were 12 inches wide. It was drop dead gorgeous wood! I was thrilled and had a smile from ear to ear. I asked how much I owed them for the wood and both of them said to me, “Take it it’s yours. You’ve taken such good care of our families and especially our mom (she was elderly and one of my residents in the local nursing home), this is our gift to you.”
It was a wonderful gift and very typical of the good people who work hard and live well in the woods of northern Wisconsin. Bob Stilen started the saw mill on his own and had grown it into a significant business that employed about 80 people and was supplying hardwood to several furniture manufacturers throughout the U.S. They practiced great forest management (select cutting only) and gave good jobs and good salaries to their employees. Both Bob and his brother have passed away, but the sawmill is still in business. A lot of the teenagers in Mellen get their first summer job piling lumber and stickering it came off the saw.
I brought the wood home and have great memories of the time my youngest son and I had making those benches. My youngest son is now a Prebyterian minister in Howard Lake, Minnesota and still likes working with his hands. He and his wife are the ones I built the bed frame for that you saw in the picture I sent. My other memory of building those two work benches was that I burned out the ¾ horse motor on my old 1978 Sears table saw trying to rip that 8/4 hard maple. I replaced it with a 3 horse Baldor electric motor and switched from 110 to 220 and after that I had no problems. I retired that table saw about 18 months ago (it went to the son of a friend a local farmer from whom we buy 1/3 of a pig each fall) and invested in a Sawstop table saw which I really love.
My guess is that we built those workbenches in about 1990 or 1991, so they’re at least 26 years old. As benches do, they’ve acquired a few scratches, gouges, and dings, but they are both still doing well. After working with the benches there are really not any significant things I’d change about them. So, that’s the story.
Warm Regards,
Paul
Here are a few more photos of the bench from Paul:
Left-handed Tage Frid workbench by Paul Van Pernis
3/4 view of workbench
Left-handed original plans Tage Frid workbench by Paul Van Pernis
Shoulder vise close up
Detail view of the shoulder vise
Detail view of the tail vise
Left-handed Tage Frid workbench by Paul Van Pernis (Alternate view)
If you built your own Tage Frid inspired bench, either from Frid’s book and/or article or my recent revisit in the February 2017 issue of Popular Woodworking, I’d love to hear your story as well.
P.S. Check out Paul’s excellent series of blog posts on various planes from the Stanley Model shop over on the EAIA blog here.
P.P.S. I’m the webmaster for the EAIA website as well so if anyone has a relevant story they’d like to share with the EAIA, please feel free to contact me.
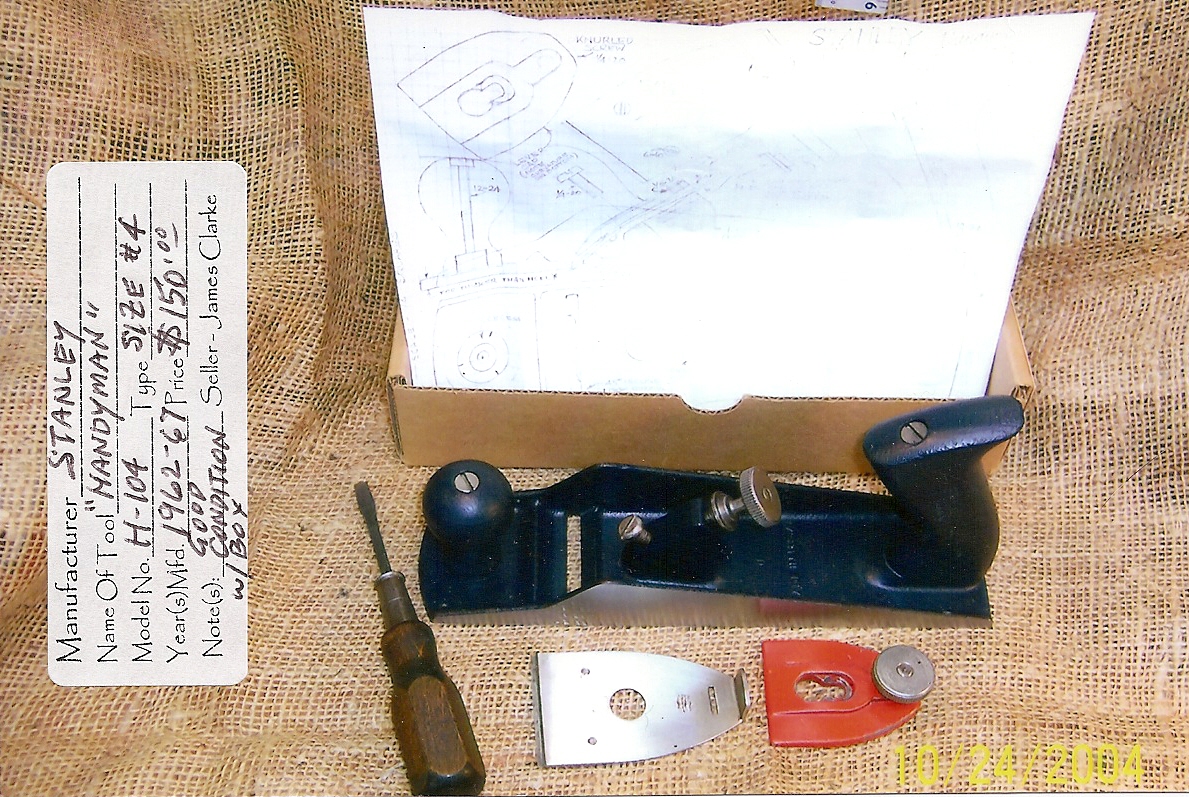
Some tools have an interesting story to tell. The little known Stanley H104 is one of those tools. Below is another guest post by my good friend James A. Clarke who shared with me a detailed write-up on this 1960s Stanley bench plane with disposable cutters that worked much the way a Gillette shaving razor cartridge works today. The content below is mildly edited from Jim’s original text to better suit delivery via a blog post, but I tried to capture the essence of his message and included some additional images. I hope that you will enjoy learning about the Stanley H104 plane — “The Little Plane That Could!”
The Stanley “Handyman” H-104 Plane by James A. Clarke
Introduction to “The Little Plane That Could!”
This post is about the Stanley Tool Company’s “Handyman” Bench Plane Model H-104 offered in 1962 as a low cost alternative to their many other higher priced offerings. The so-called “do-it-yourself” movement was well underway following WWII through the 50’s and early 60’s, but by this time demand for higher priced planes was significantly reduced and thus gave rise to the need for manufacturers to appeal to budget-minded buyers with low-cost alternatives. It was also apparent that do-it-yourselfers and the “handyman” didn’t require the top-end line of tools for household tasks.
Stanley H104 Dis-assembled (Photo by James A. Clarke 2004)
At this point it needs to be mentioned that Clarence Blanchard in his excellent publication “Fine Tool Journal”, Vol 53, No.2 Fall ’03, had a rather thorough coverage of this plane from the standpoint of how Stanley progressed the development from inception to production based on an actual production folder containing drawings and correspondence between various departments withing Stanley. This is recommended reading and can be found here: Stanley H104 Bench Plane Article by Clarence Blanchard.
Of interest, it seems that the plan began as a Model No. 140, but then was changed to the Model No. H104. (It is believed that it started out as a higher-end offering!) What is clear, however, is that the H104 had a relatively short lifespan (4-5 years) when Stanley discontinued it on June 13, 1967 due to poor sales. (< 20,000 were likely ever made). This plane is ‘collectible’ and the most sought after Stanley “Handyman” low cost plane due to its low production numbers and unique features.
H-104 Features:
Polished side-rails, painted (blue) based, knob and tote, red lever cap
About the same size as the standard Stanley No. 4 with cast-in non-movable frog
Distinctive low side rails (lower cost!)
Body 10″ long, 2 1/2″ wide, with 2″ cutter
Low cost alternative to Sears 4 sided throw-away cutter line of planes
Lever (Screw) cap — knurled 1/4-20 screw to tighten
Depth of cut adjustment with shouldered/knurled 1/4-20 screw (this was a poor choice as it had too much slack)
Tote & Front Knob Screws #12-24 threads
Author’s appraisal — this is a very nice low-cost plane for casual (“Handyman”) service. The disposable blades can be sharpened or replaced as intended.
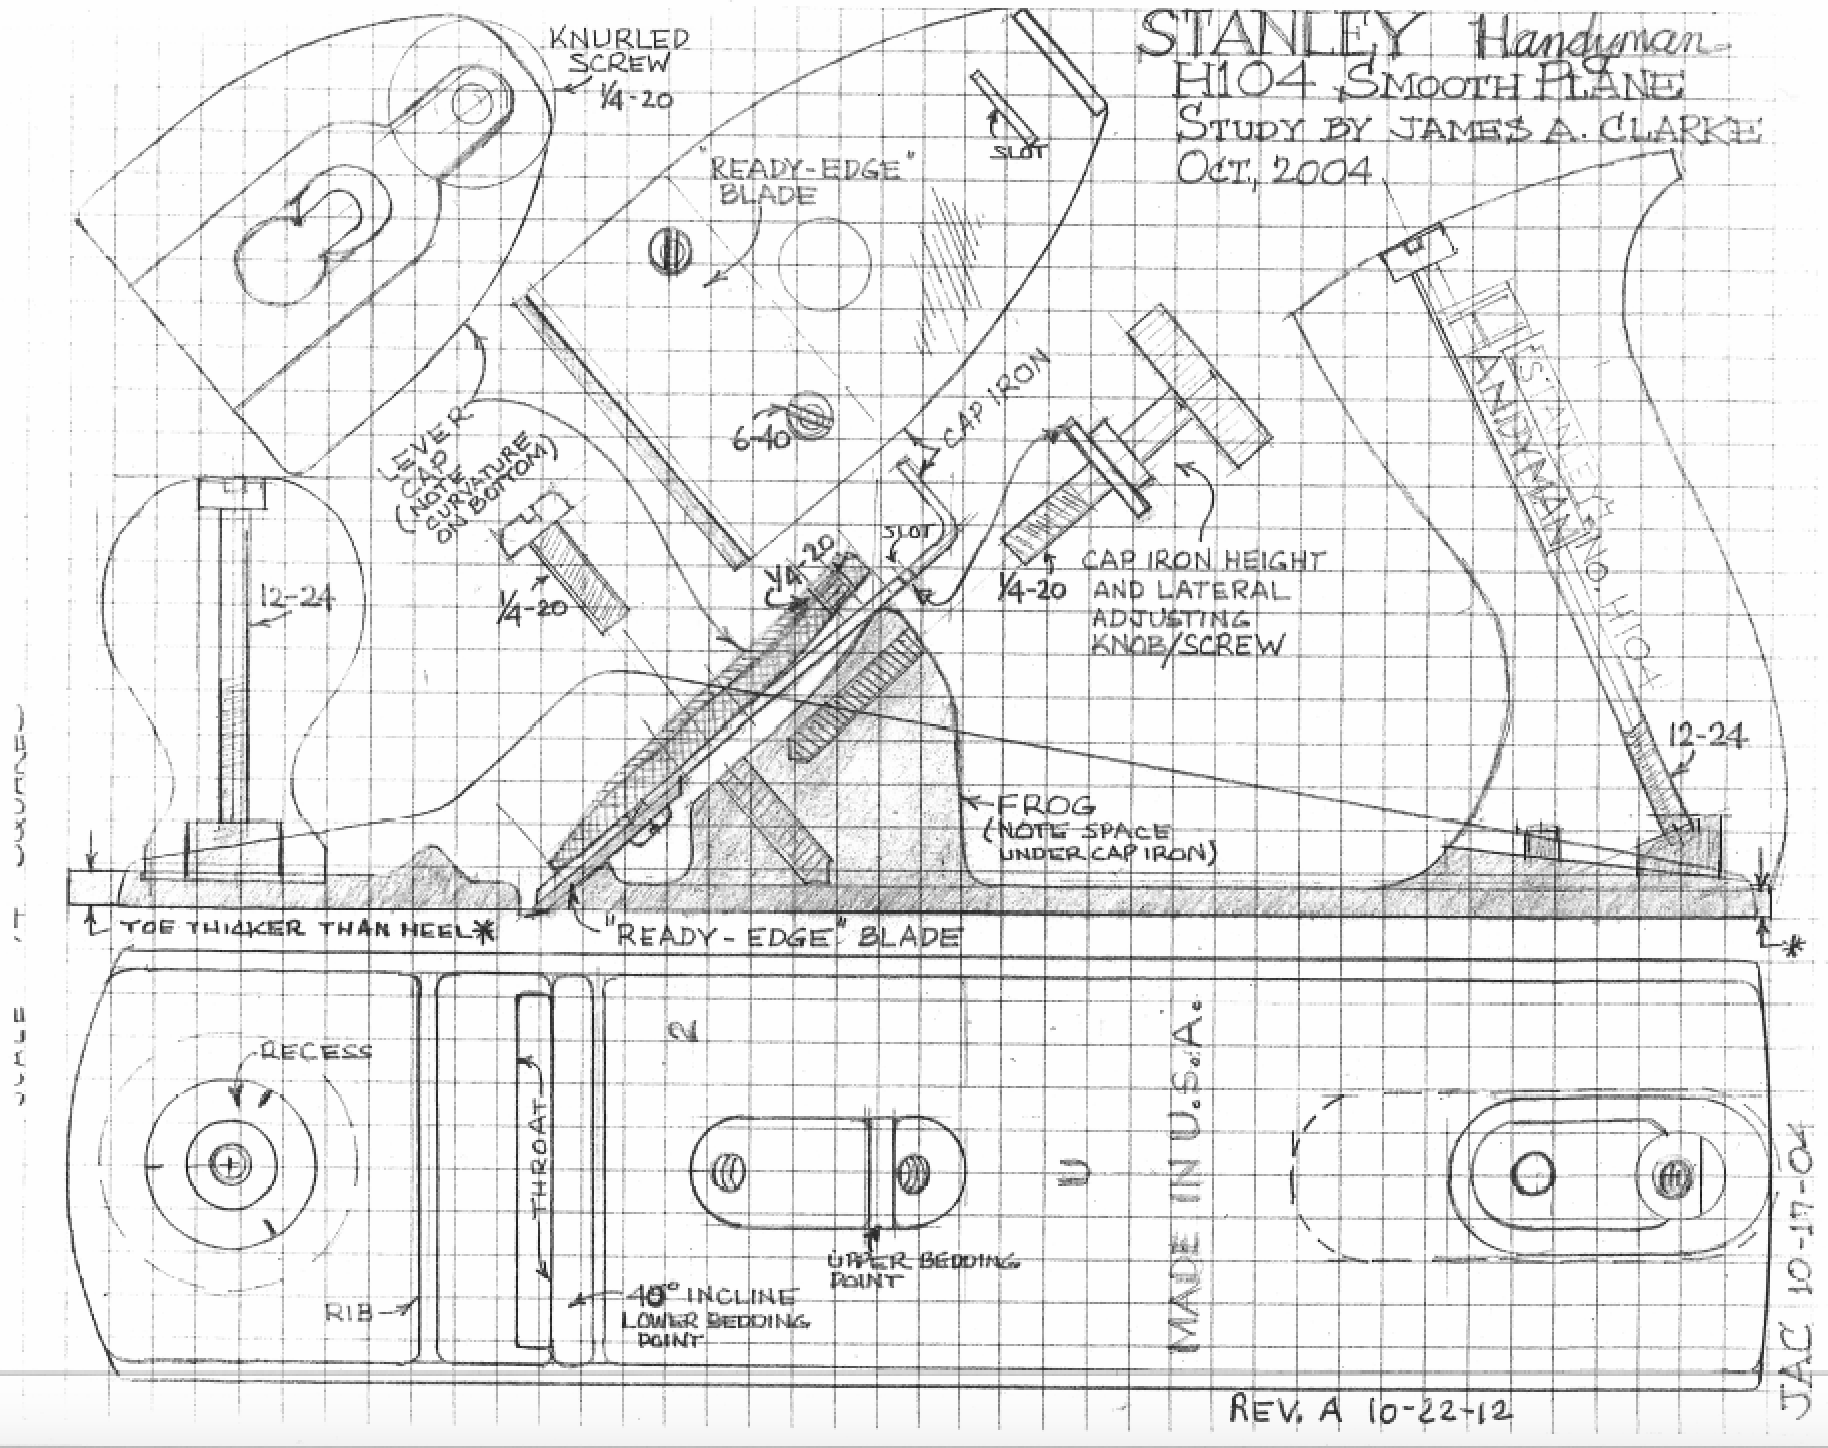
Figure 1: Stanley H104 as drawn by James A. Clarke
Description:
This description is accompanied by the hand drawn sketch above labeled as ‘Figure 1: Stanley H104’
To make these planes easier to use and maintain, Stanley revived the disposable blade concept, at a reasonable price and called it the “Handyman ‘Ready-Edge’ Bench Plane.” How many were actually made is unknown (From Blanchard — Less than 20,000) since not everyone was of the “disposable” cutter ilk, although it did have its merits and thus more than likely had a serious following. The real appeal of this little brother to the “standard” line (maybe not so little at 10″ long) is the various design solutions used for cutter height and lateral adjustments — the nicely executing castings and machined parts. For a so-called low-cost tool, this was a keeper! The H104 is about the same size as the other No. 4 planes in Stanley’s many-fold lines, although slightly longer but much lighter in weight at 2 1/2 pounds versus 3 3/4+/-.
The Frog
The H104 doesn’t have the traditional frog arrangement as used widely on Stanley and competitive bench planes. The fixed frog (making it a bit more like a block plane) is narrow, slanted (40 degree) “tower” cast as part of the base with two (1/4-20) tapped holes to accept the lever cap, the cap iron knurled blade adjustment knob. In this configuration there are three 1/4-20 screws:
Pan head screw to hold the lever cap in place
Special shouldered/knurled screw for adjustment of the cap iron/blade assembly
Knurled screw to tighten the lever cap against the cap iron/blade and thus against the frog at its top
This simple design was also effective. One of the quarrels I have with this configuration is the use of 1/4-20 threads which are not normally closely machined resulting in considerable slack (“backlash”) which is not appropriate for this type of application wherein adjustments are made frequently. (Especially when Stanley used a finer #12-24 thread for the tote and front knob screws where it doesn’t matter!)
The Blade/Cutter Cap Iron Assembly
Chatter must have been an issue with this plane as the uppermost tip (an area of about 1/8″ x 1/2″) of the slanted “tower” frog is the only part of the frog that comes into contact with the cap iron/blade assembly. This arrangement is only slightly stiffened by the attachment of the “Ready-Edge” blade to the cap iron that doubles as lateral adjuster and facilitates setting the depth of cut. It should also be noted that the cap iron is about the size of a credit card and only about twice as thick which is not a lot considering the minimal support provided for it.
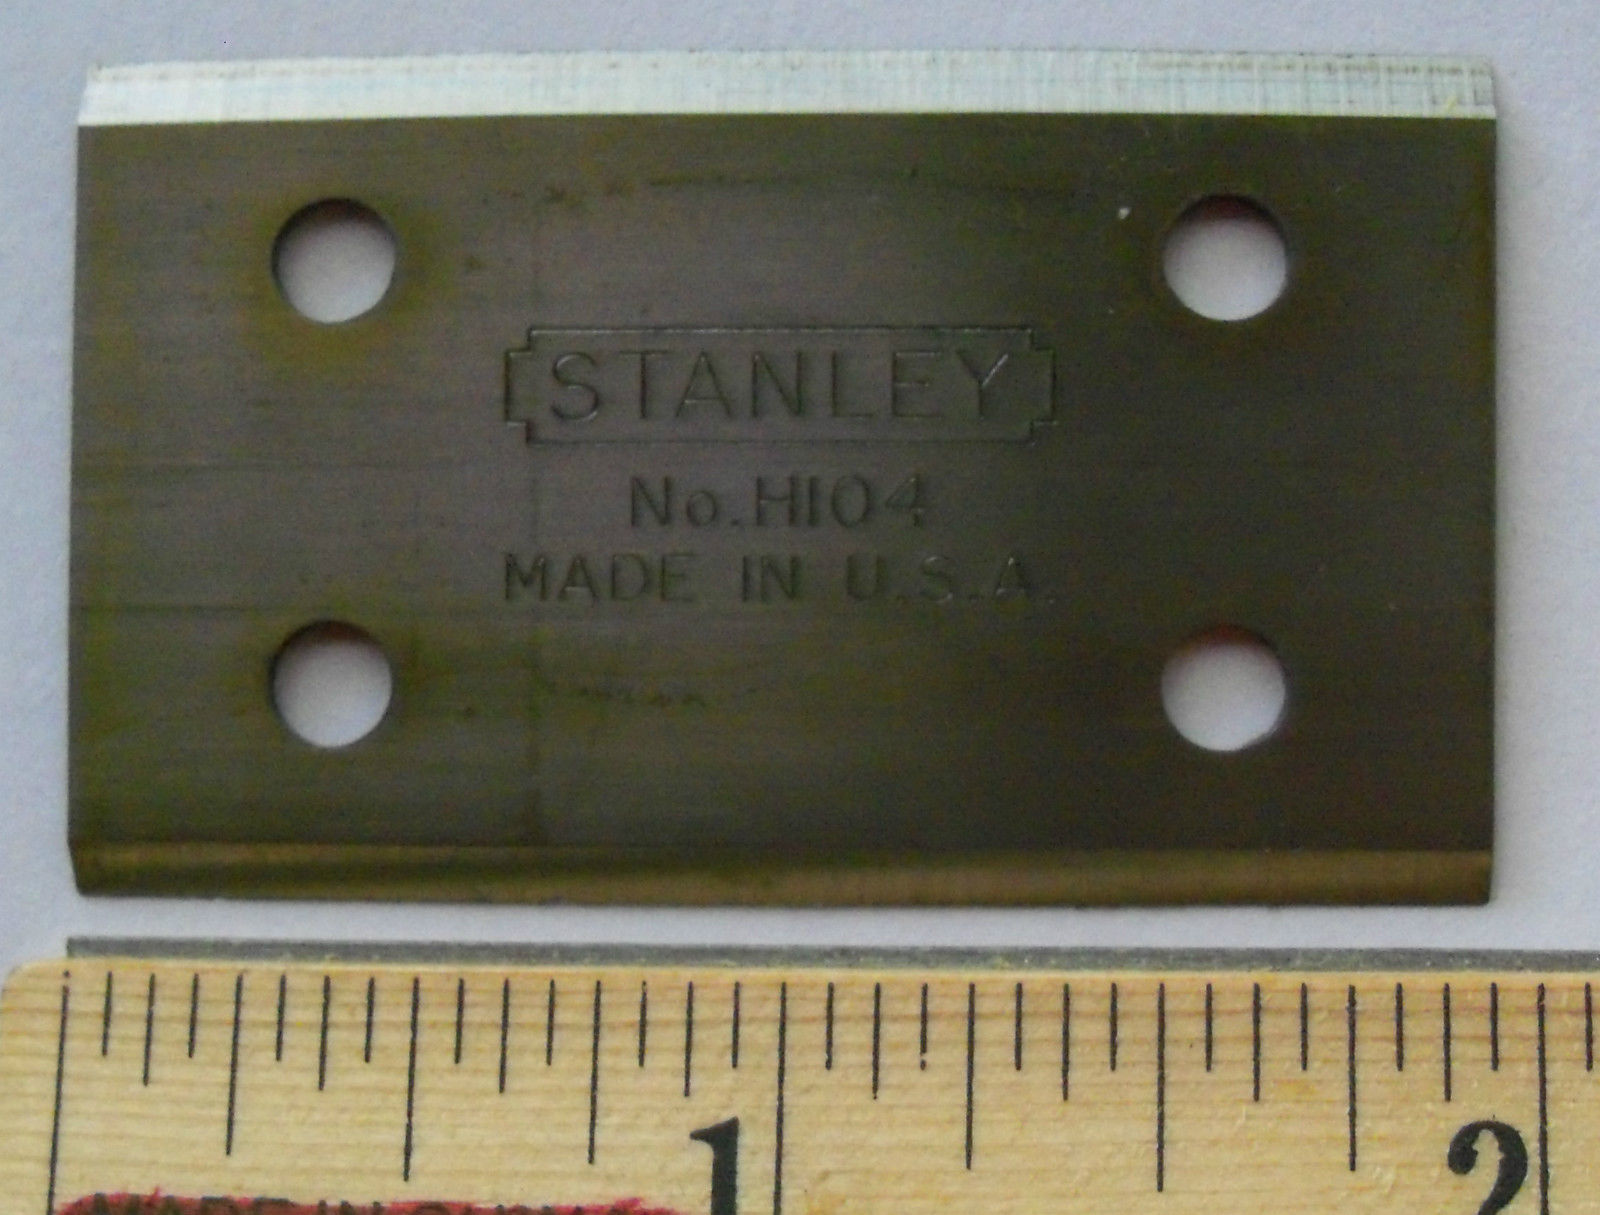
The disposable “standard” 25 degree bevel-angled “Ready-Edge” blade has two sharpened edges allowing it to be rotated and re-installed into position via two small (#6-40) pan head screws. This arrangement provides a narrow semi-adjustable cutting edge (reveal) between the cutter edge and the chip breaker (~1/32″-1/16″) and thus satisfactory for fine, medium or coarse shavings. When new the plane came with an extra blade in the box and additional blades could be purchased — similar to a shaving razor. A limited amount of sharpening was possible although apparently not expected by the “Handyman” population.
Lateral adjustment was a simple to the point solution (compared to what was used on Bailey, Traut and Shade designs) utilizing a slot in the cap iron engaged by a shouldered machine screw.
An interesting refinement is the key-hole slot in the lever cap — this shouldered/countersunk recess traps the head of the pan head screws to prevent creep/movement of the lever cap when the cutter depth adjustment is being made. Stanley originally used a ‘key-hole’ design on their top of the line bench plane offerings, but then “patented” a new kidney shaped design around 1933 intended to eliminate creep. While none of these designs effectively eliminated creep the H104 design was pretty much fool-proof — when the lever cap was locked into place it could not move.
The Knob and Tote
The hardwood front knob and rear tote were painted dark blue to blend in with the painted base (not the usual Japanning) with “STANLEY HANDYMAN H104” embossed/stenciled in red or white on the tote and “MADE IN USA” in the bottom casting. The rear tote is somewhat awkward to the feel and definitely not of the caliber of top of the line Stanleys.
Another interesting refinement can be found under the the front knob — three little spurs cast in at 120 degrees apart around the perimeter of the indented knob seat — presumably to prevent the knob from rotating. This was an unusual detail usually reserved for higher end planes and backs up Blanchard’s allusion to this plane possibly being developed as a higher end plane and then being downgraded to the Handyman line.
Stanley H104 (Photo by James A. Clarke 2004)
The Casting
The bottom casting is an excellent example of integral-base-casting and Frog “pillar” or “tower”with a raised boss around the tote and lateral brace ribs near the mouth that extend from side to side. The base side wall profile has a more modernistic look with rounded corners unlike the traditional curves you see on other planes. (This was likely a cost saving measure). The toe of the casting has the usual shallow curvature, but the heel has a blunted, almost squared off edge. Behind the frog a letter ‘U’ is cast and a ‘2’ is cast near the throat — presumably foundry casting numbers. The H104, although shorter, in profile looks vaguely like the Stanley No. 62 low angle plane, except for the side wall treatment and different bed angle — 40 vs 12 degrees.
H104 In Use
After sharpening and honing the blade at 25 degrees with a micro bevel at 30 degrees we were ready to make a few trial shavings. The plane was applied to pieces of 3/4″ x 6″ x 12″ of Pine, Butternut, Hard Maple, Soft Maple, White Oak, Red Oak, Ash and Cherry with honing taking place frequently but not for each wood sample. Skewing the plane was always necessary! Planing was done on two faces — the two long grain edges and finally the two end-grain edges. Planing effort was handicapped without the ability to vary the mouth opening — it is fixed, thus fine shavings were difficult to achieve. A variable mouth opening and more mass would be a significant improvements.
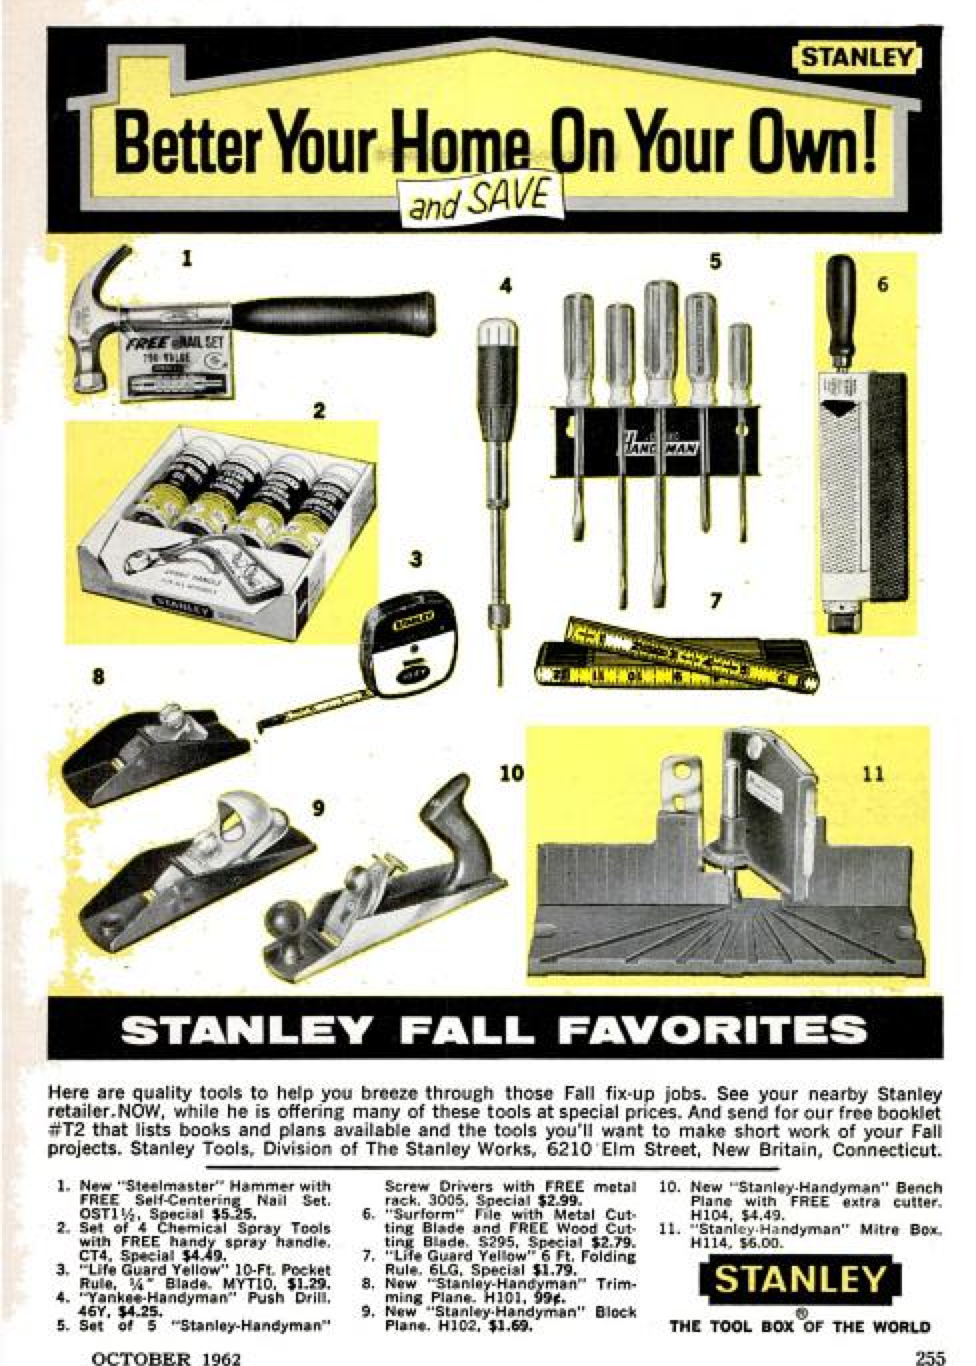
Stanley H104 in Ad From October 1962 (Seen in common publications such as Popular Mechanics)
The Verdict
The plane performed as expected — adequate but not exceptional. It would be satisfactory for “Handyman” tasks (via sharpening or extra blades) but unacceptable for serious woodworking/cabinetmaking. The plane cannot compare to a finely tuned vintage Stanley Bailey or modern premium plane (Lie-Nielsen, Veritas, Clifton etc)
Conclusions
Taking into account all of the opposing forces in play as this plane was developed it seems like a great deal of engineering design and manufacturing-engineering went into this presumably low end, and unfortunately low volume plane. It seems that parallel developments inside of Stanley and economic forces from outside forced them to release this plane into the “Handyman” line even if it was originally intended to be a higher end offering. Nonetheless this plane inherited some subtle levels of engineering excellence that often go overlooked when compared to its higher end brethren.
It’s unfortunate that the times (economic and technological change — moving to power equipment) lead to an early demise for this tool — in another time it may have seen a lot more use and wider adoption.
Approximate value — $75-$150 (Higher if in excellent condition and with box).
Acknowledgements from James A. Clarke:
I would like to thank fellow member of the WNYATCA Club (Wester New York Antique Tool Collector’s Association) Tim Rhubart for bringing this little ‘gem’ to the light of day. If it wasn’t for that, this author might never have known or become interested in the H104 since it’s not on everyone’s radar as a need to have collectible. Tim agreed to sell it to me for a reasonable price, and with some preliminary observations it appeared to have a story that needed to be told, and thus here in this post.
This writeup is dedicated to Tim, my “favorite tool dealer” and friend for bringing it to my attention and the “giants” of research — Roger K. Smith, Alvin Sellens, John Walter, Clarence Blanchard, Patrick Leach, Bob Kaune, David Heckel and several others — although they are not all necessarily students of the “Handyman” line, their methods and approach to research on the study of planes has greatly influenced this author’s modest efforts.
Acknowledgements from Bill Rainford:
A big thank you to my friend James A. Clarke for sharing this material with me and allowing me to share it with everyone online via the post. Also a big thank you to Clarence Blanchard for giving me permission to share a copy of his article on the Stanley No. 140/H104 Bench Plane from “Fine Tool Journal”, Vol 53, No.2 Fall ’03 here.
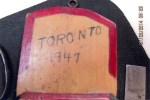
When investigating history there is often no better source than a first hand account. In this post I’d like to share with you a first hand account from my friend James A. Clarke of what it was like to participate in a manual training based program back in 1947. (If you are new to the blog or would like a refresher on Sloyd please check out some of my posts on this topic here) All of my experiences have been fairly recent and/or from research into a lot of Salomon and Larsson’s writings and from old North Bennet Street School newsletters so to meet someone with first hand experience from when the original movement was going strong is quite the treat.
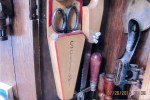
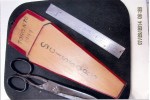
Manual Training Scissors Holder
Here are Jim’s recollections of the manual training and one of the projects that survives:
“Sloyd — Manual Training (Woodworking)
J. Clarke’s Recollection of Early Woodworking Training While in Public School Grades
As a small boy in Toronto, while attending Bowmore Road Public School (from Kindergarten thru 8th grade), between about 1941-1949 I also attended Manual Training Classes held at Norway Public School a few miles (walking distance) from home. How often this was, I’m not sure (can’t remember) — maybe about once per week in the 7th or 8th grades?? One thing for sure it was in 1947, at least, because there is an item still in our possession (a wall hung scissors holder) dated that year, made by J. Clarke. I do remember, however, the teacher being very disgruntled, and disappointed in me because I elected to draw and paint the chamfers (bevels) on the item, rather than use the chisel and plane, because it was easier! (I was always looking for the easy way out!)
Whether or not this was a “Sloyd” program is not clear, but certainly was a “Manual Training” program of the Toronto School System. ” — by James A. Clarke, July 2014, Age 79
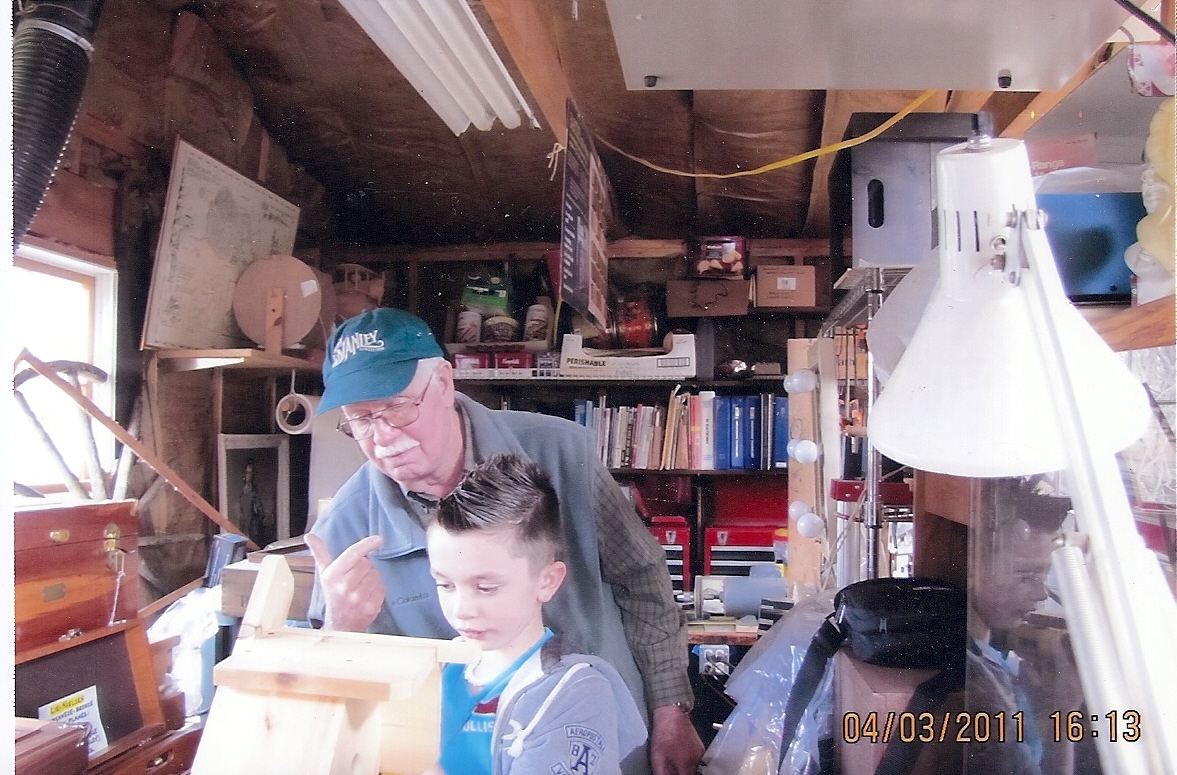
James A. Clarke sharing his love for woodworking with the next generation.
In most Sloyd and similar Manual Training programs the teachers were encouraged to modify the set of models they used to suit the personality needs of the class and tastes of the local culture. I don’t know if the project below was from a book or developed by the instructor, but it certainly is in line with the other models I’ve studied in the extant publications on this topic. (I scanned through what I had but didn’t find this exact project — if any of my bibliophile friends find the project, please share it here as that would also be interesting to check out)
Jim shared with me the following photos of the wall hung Scissors holder he made back in 1947:
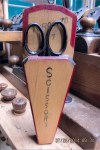
Scissors Holder in its natural habitat
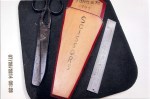
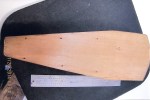
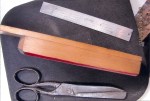
View with scale
Back view
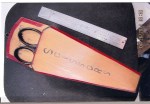
Manual Training Scissors Holder
Side View
Top View
Dated Toronto 1947
Another view
(The photos above were taken by James A. Clarke, scanned from hard copy by Bill Rainford both in 2014)
It looks like it was a well designed project and has survived the test of time. If you’d like to build your own version of this project — either for yourself or with any children or grand-children who are on their to becoming Sloyders — Jim has also drafted up a very nice and very detailed set of plans which you can download here:
If you wind up making your own version of this Scissors holder, please drop me a line or leave a comment as I’m sure others would be interested to see it as well.
Take care,
-Bill
P.S. Thank you again to James A. Clarke for sharing this material with us. Jim lives in Hilton NY with his wife Margaret. Jim is an avid tool collector and generous with his time and knowledge. I have his phone and email address but I am hesitant to put that on the open internet, so if you’d like to contact him directly please send me an email or leave a comment and I can provide that info in a less public way. (I don’t want him to wind up with lots of spam etc)
A Joiner's Guide To Traditional Woodworking and Preservation