Category Archives: Machinery

Flip the Switch

It’s never a good day when a power tool gives up its magic blue smoke. When I was making a recent run of saw horses my jointer’s switch decided it had enough.

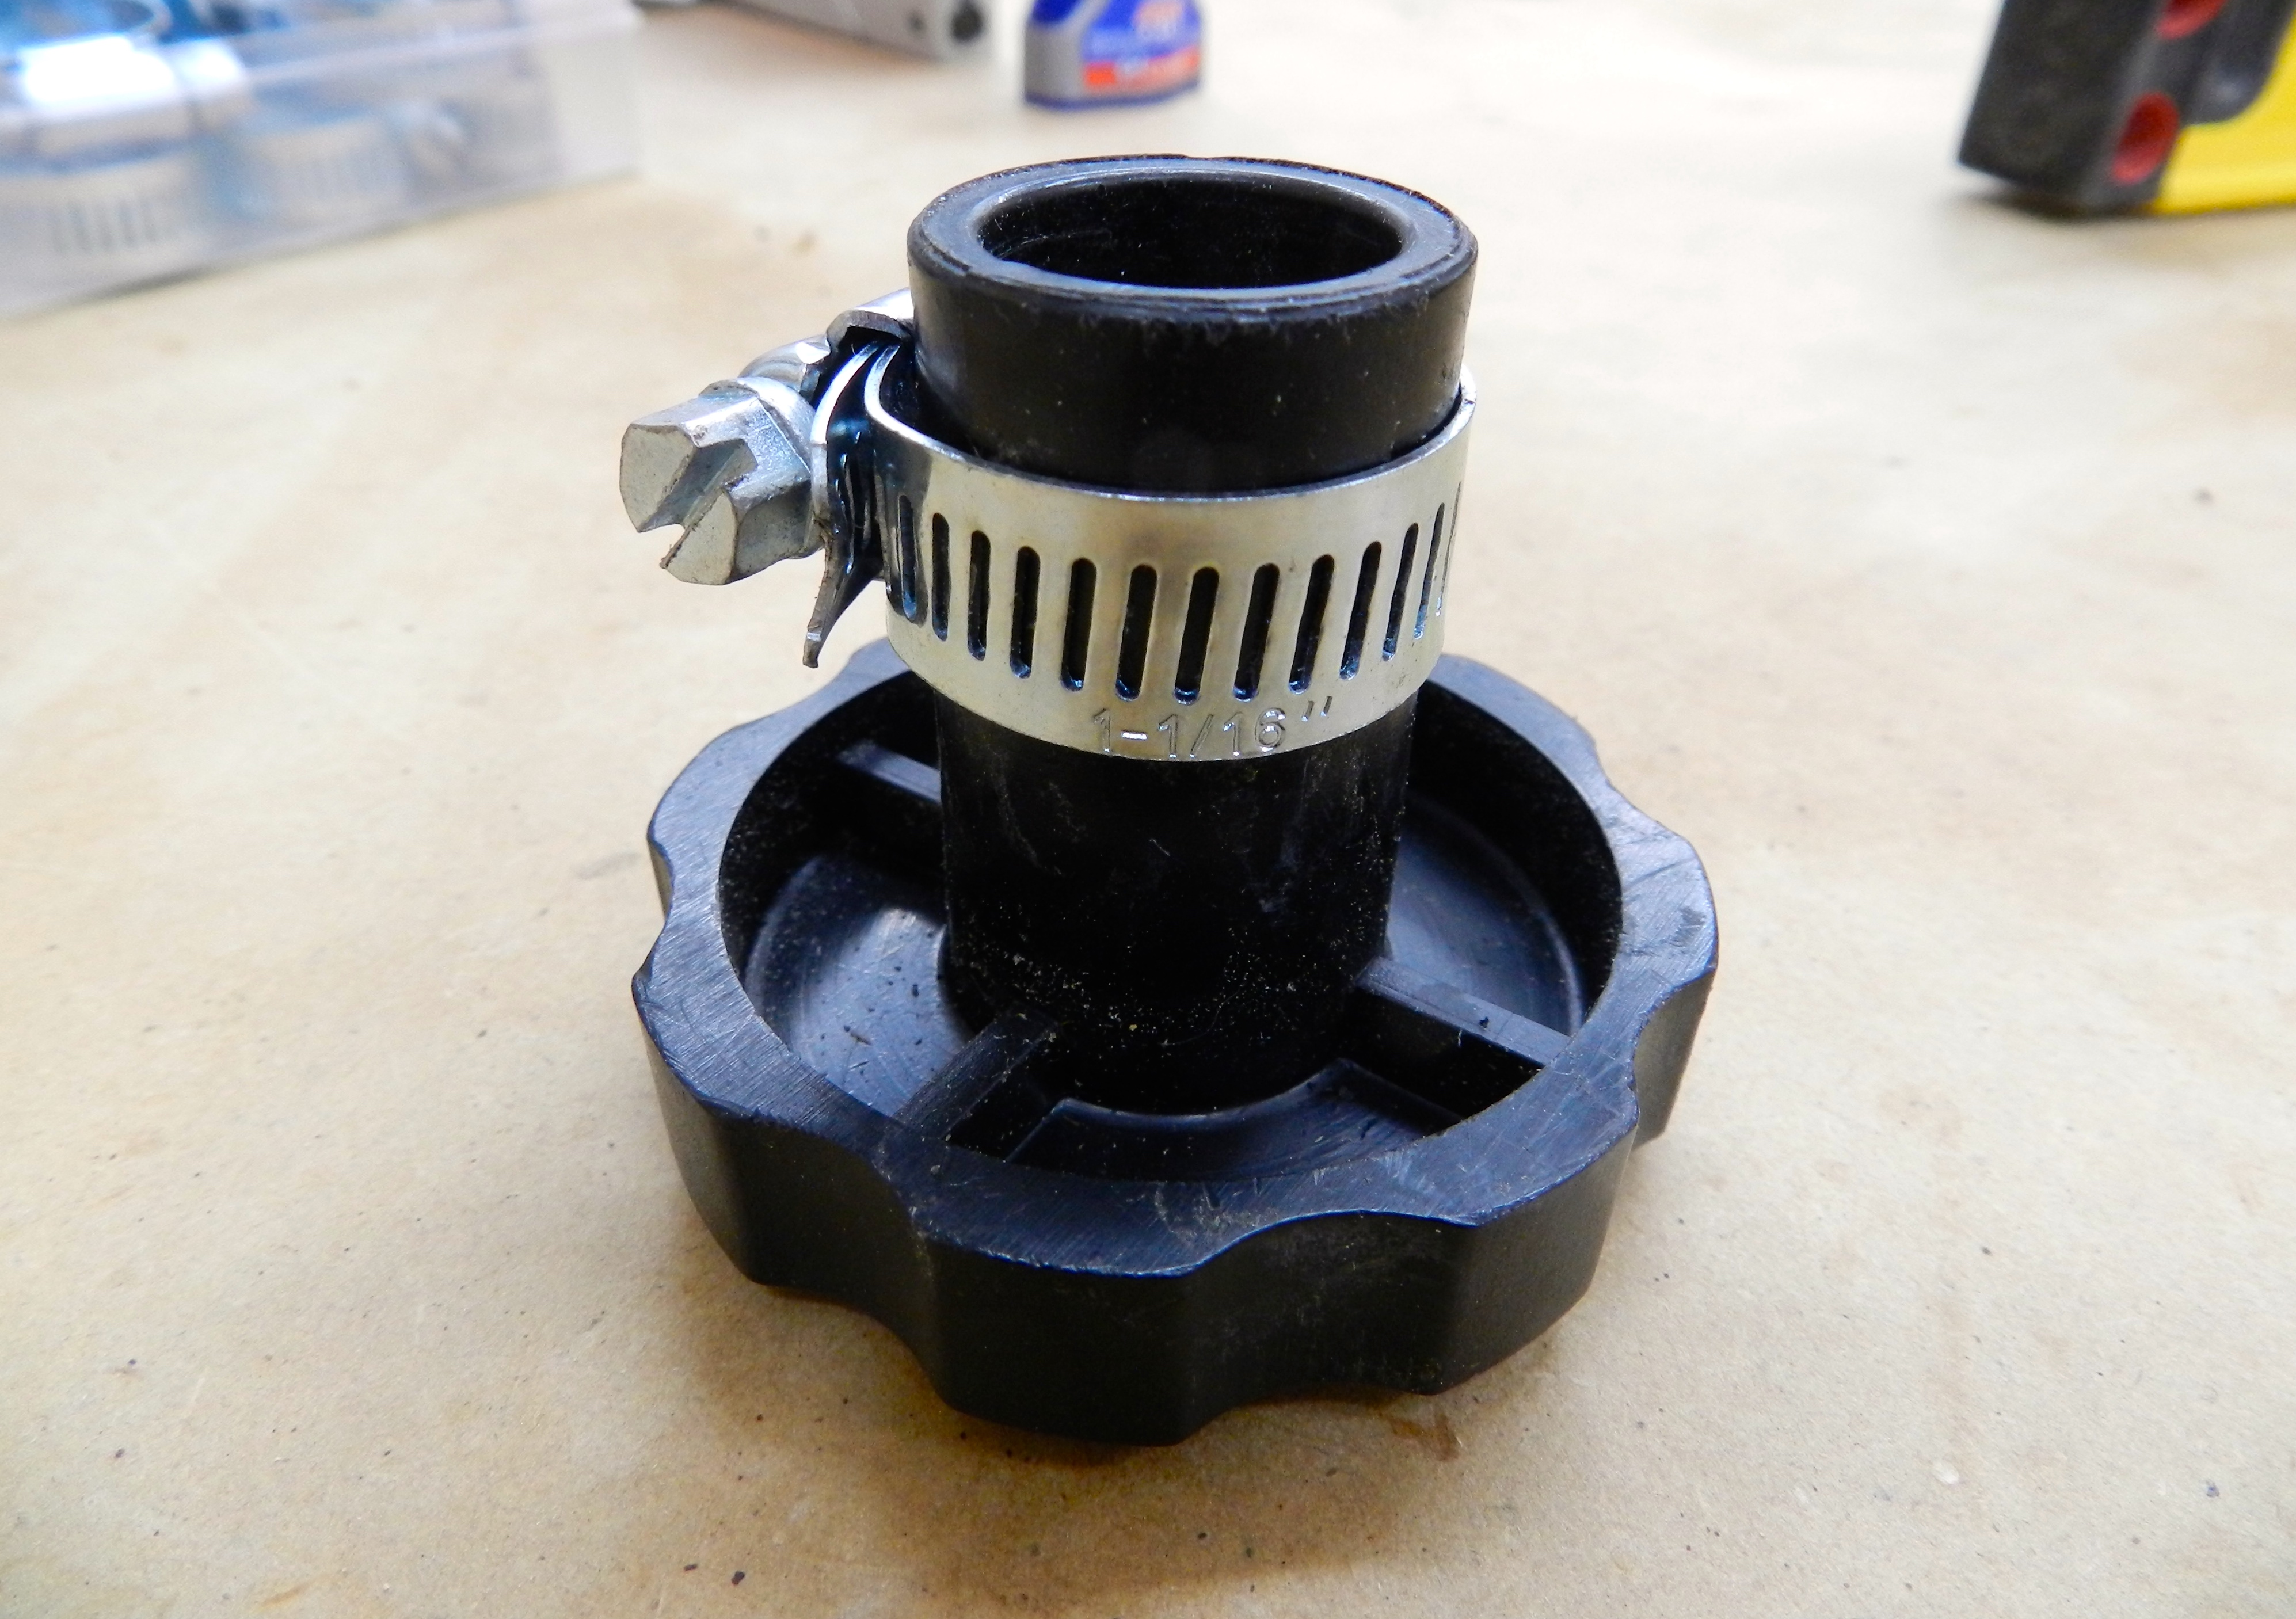
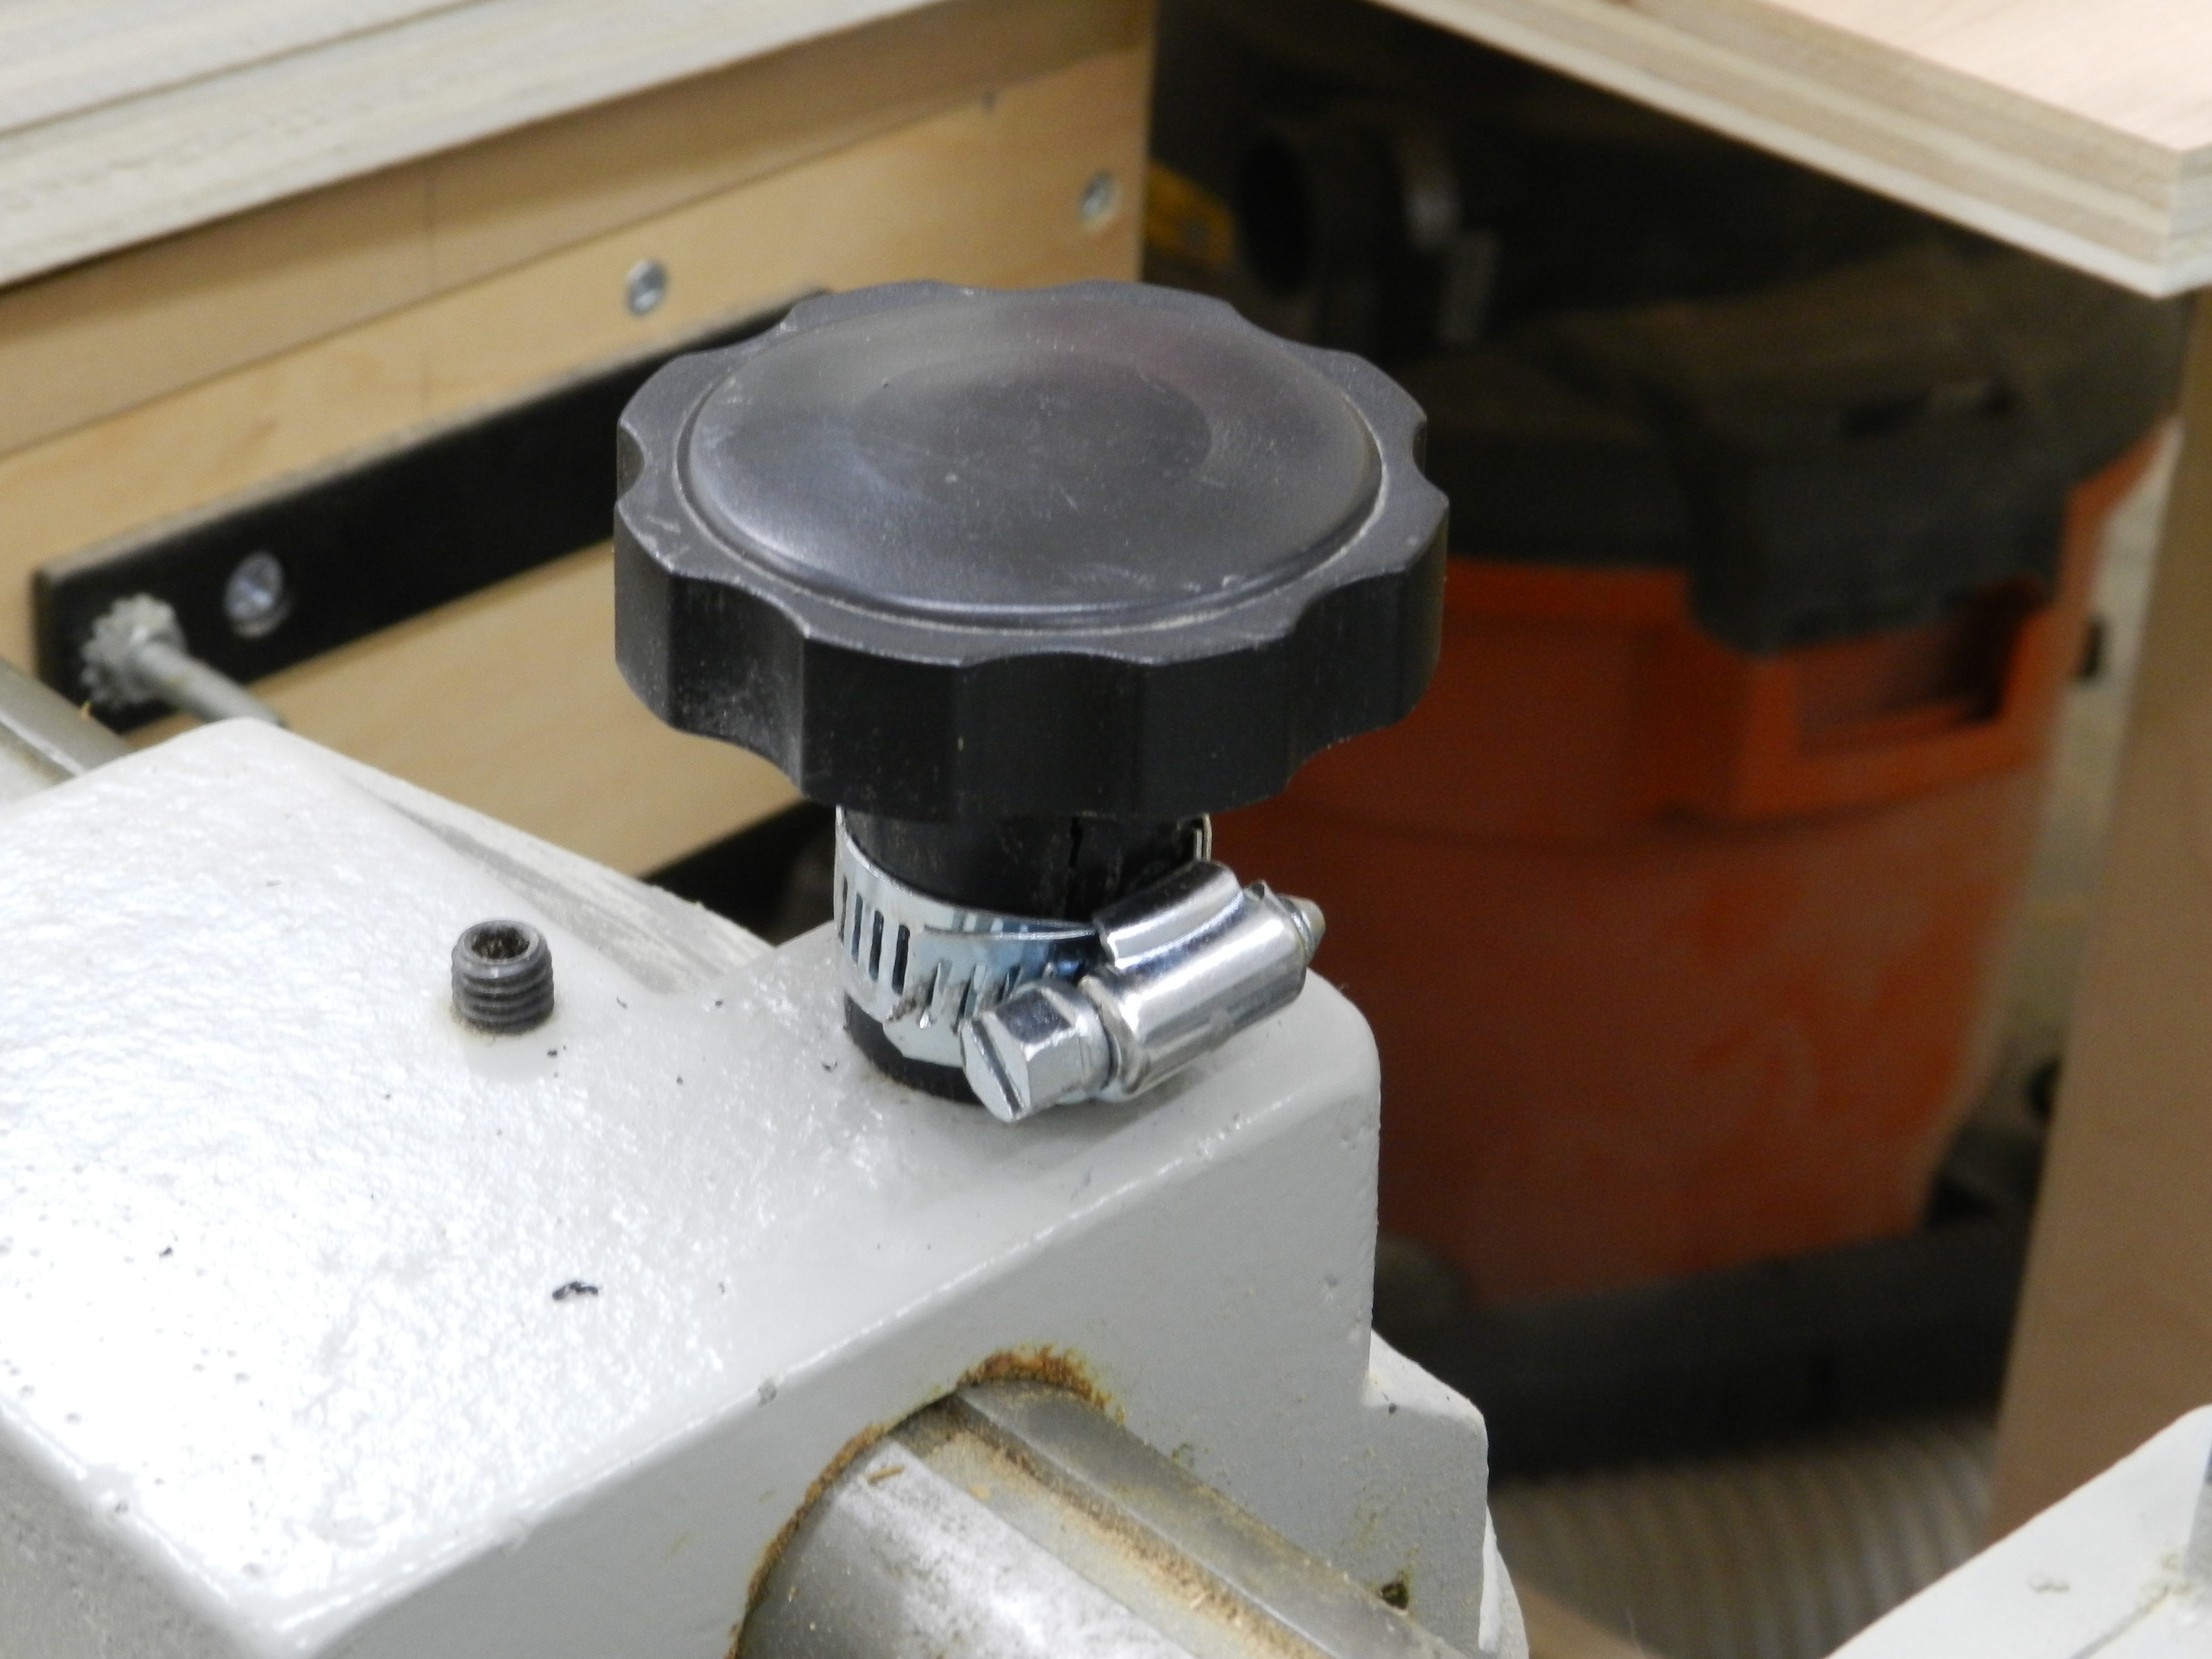
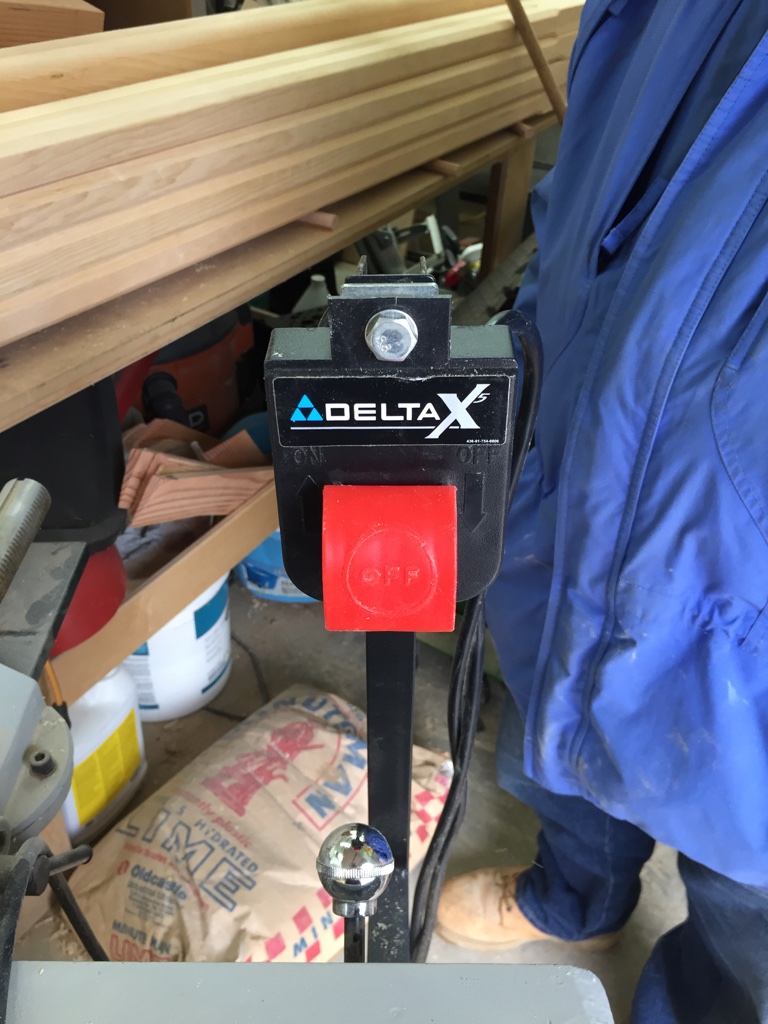
It’s a Delta X5 ‘Professional’ 6″ jointer with the 42″ beds. It’s the same one that had the large fence advancement knob break a while back requiring a modern make-do sort of fix.  For what was supposed to be a top of the line ‘professional’ machine for its size I’m disappointed with how many issues it has had related to the manufacturer cutting corners. I used to be a big fan of Delta but in recent years and especially with it being sold off from Pentair and later Black and Decker and the turmoil with it being owned by an overseas company that only seems to own some of the old Delta product lines I’ve been disappointed with the quality and longevity of these machines compared to the old iron 20th century versions of the same model tools.

Fried lead
Fried lead

I knew this switch was going to be trouble the minute I saw it in person as I have a Delta 36-980 Table saw of the same vintage and both purchased new in the late 2000s — that had the switch die — at least in that case of fused into the ‘On’ position so I was able to add a Rockler Router Table Switch  with a nice big crash pad on it and have a safe and reliable way to turn the machine on and off.

For either machine they want $50-65+ for a replacement switch assembly that likely would not last any longer and has an incredibly cheap feel to it. I didn’t want to hack the cable and try and hardwire in a similar Rockler switch on the jointer as the flimsy arm to hold the switch would require even more modifications.

Notice the now much shorter contact

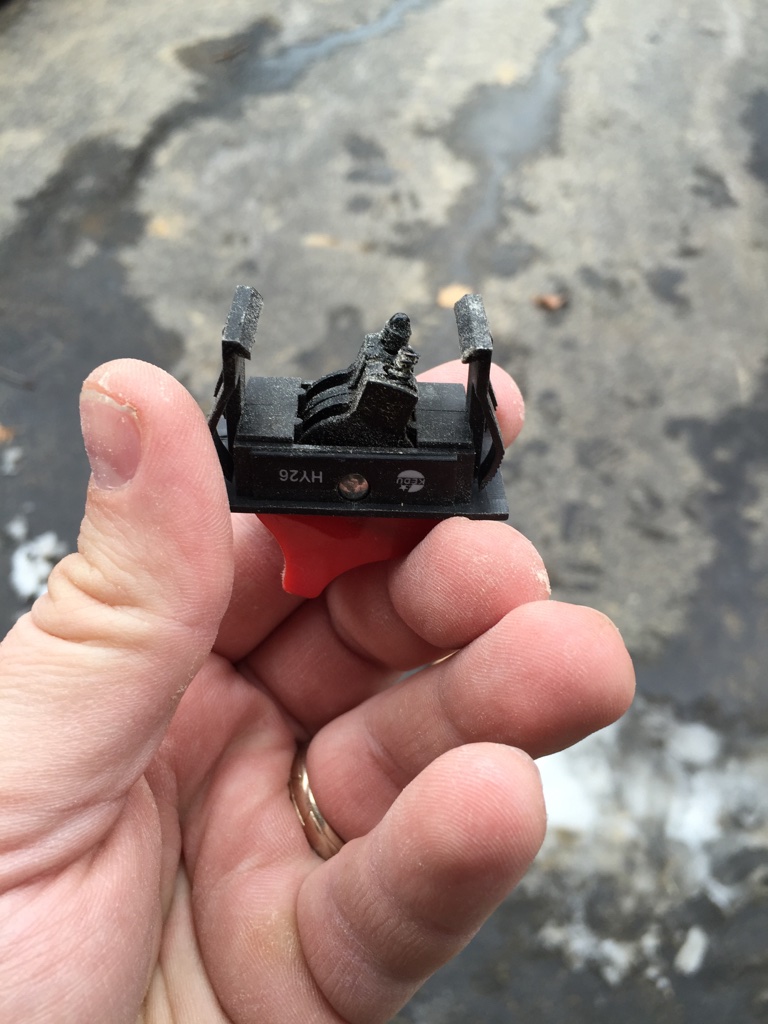
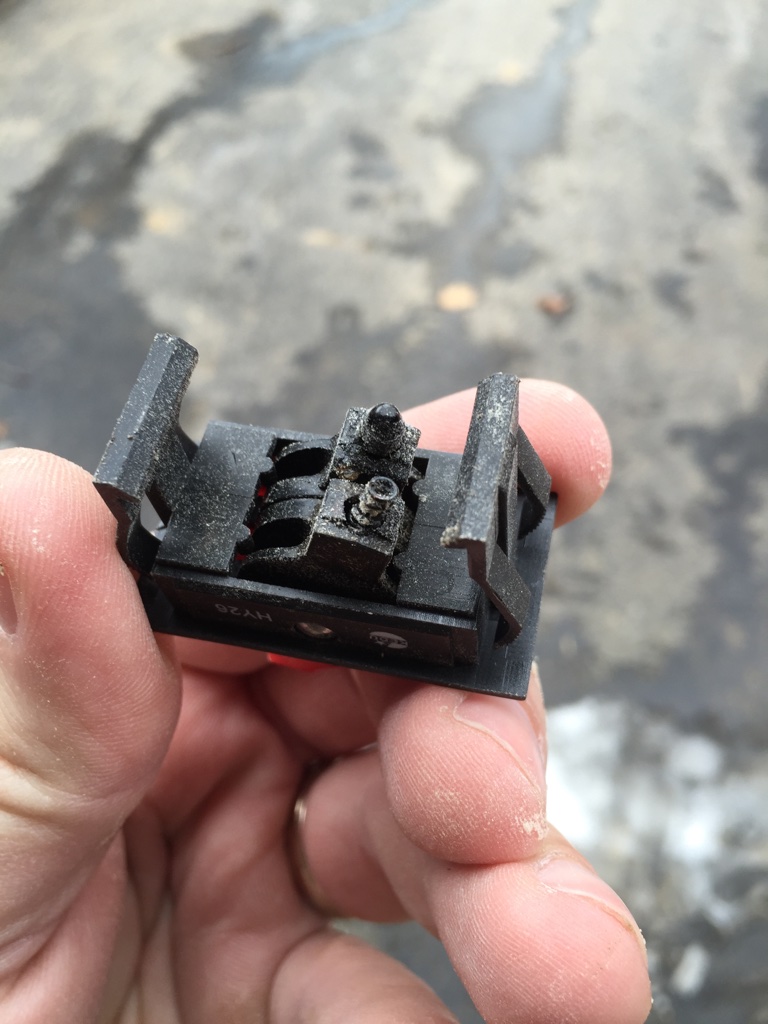
When the switch decided to die it seems to have arced and burned up the contact inside the switch (As seen above and below)

Carbon on the contact (sawdust from leaving the broken part sitting around the shop for a while)

Rather than throwing more good money after bad I figured with some research I could find another switch to insert into the housing that would have the same load ratings and have a much lower price and it took a while to find one I thought would work, but eventually I found the switch below:

Replacement Switch
Replacement Switch

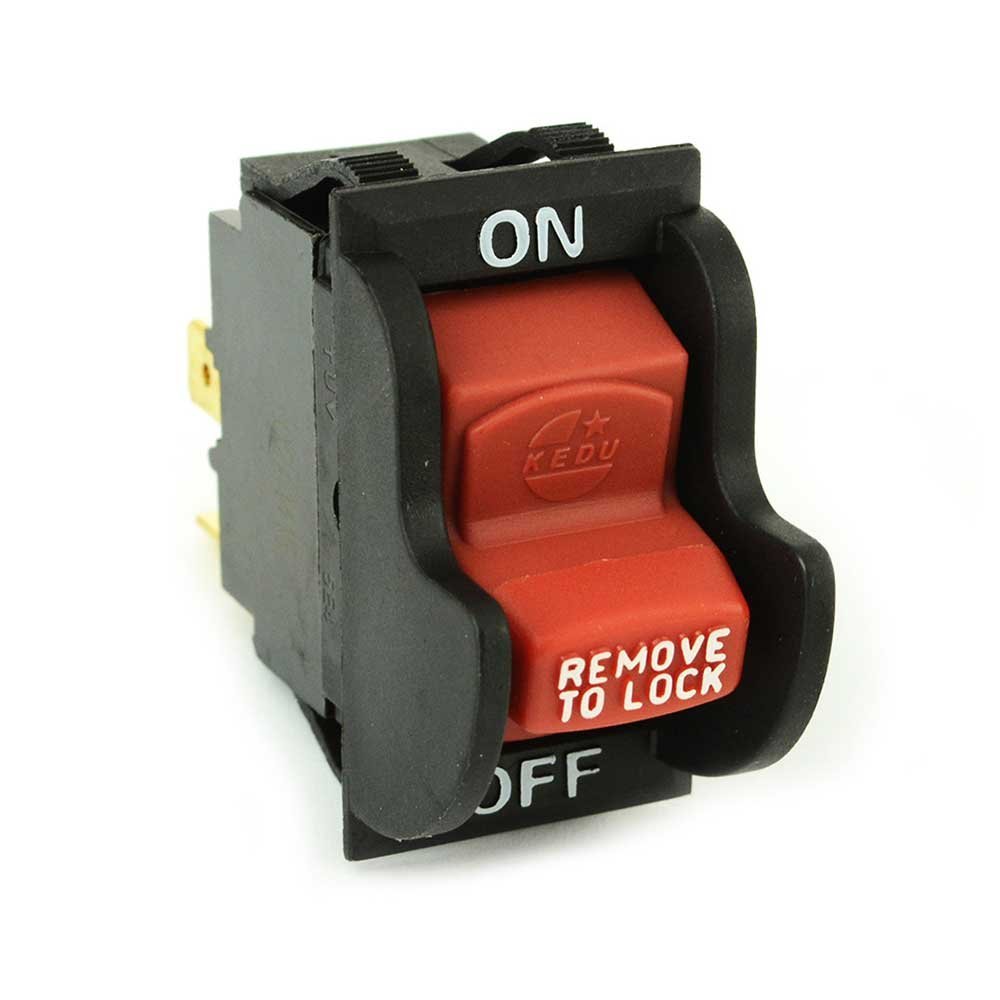
At the time I bought it, they cost me about $10 each and I bought one for my jointer and one for the table saw. You can find this toggle switch here on Amazon.com

Take a photo of your wiring ahead of time

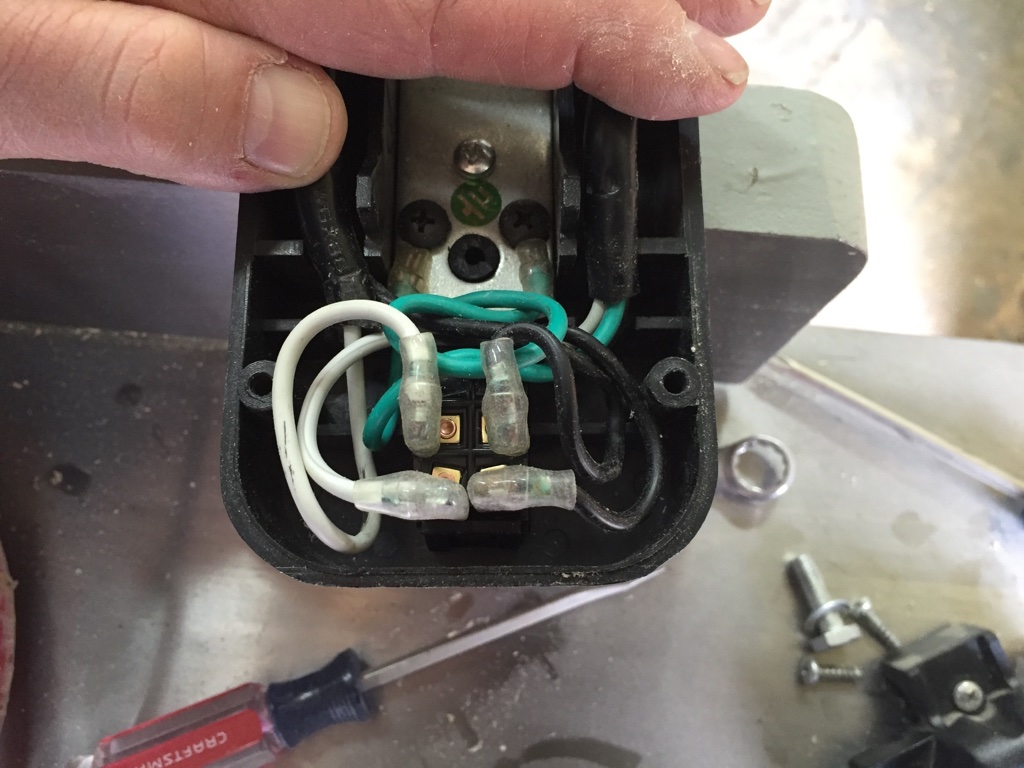
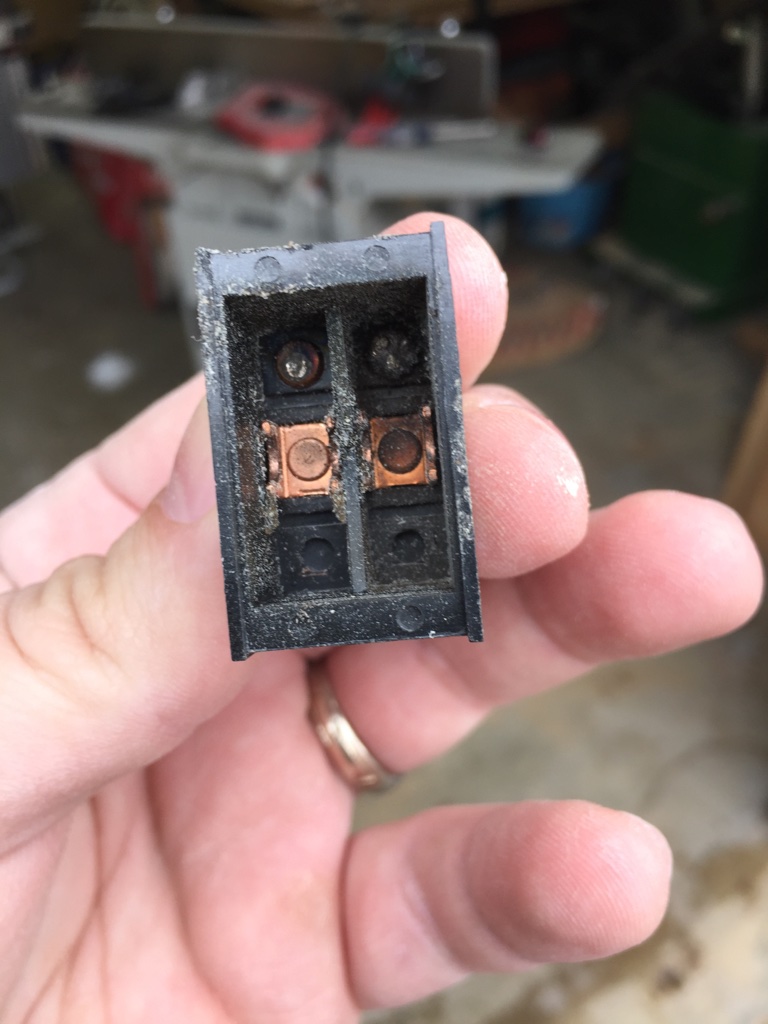
I opened up the housing, took a picture of the wiring via my phone so I could wire it back up correctly, unplugged the leads and compressed the snap fittings so I could pry the old switch out. The new switch popped in and the contacts fit fine. I neatened up the wires, gave the circuit a quick test and closed up the housing and put it back on the machine.

Delta X5 Jointer Switch Assembly

The replacement switch also has that built in child safety switch/pin that can be removed and seems to work fine with that large over button as seen above.

With a little bit of research I’m happy I was able to save a few bucks and get this machine back into service. Hopefully this new switch from another manufacturer will last longer.

Take care,
-Bill

P.S. I know I have been slow about posting lately, but we just had our second baby and things have been very busy. I’ve been amassing more content from time out in the shop so for the next month or two likely posts will be coming out at a slower pace but I’m working to get through the back log.

Stumped?

Woodworkers often pride themselves on their knowledge of trees and wood. Most folks simply go to the lumber yard or big box store to pick up wood that has been processed by others. Some have felled their own trees and dried their own wood. But for many once the body of the tree hits the ground they are left with a large unsightly stump.

What do you do with your larger stumps?

Small stumps can be dug out by hand. Larger stumps can be left to rot (or accelerated via chemicals or bacteria), burned out in a controlled burn, ground down below the surface with a large stump grinder, blown out with explosives or dug out by hand or machine.

Digging around the root ball

I needed to clear some of my yard for an upcoming barn build and after trying to get out some larger stumps by hand last year I decided the best avenue for me would be to enlist the help of a tractor with a backhoe.  If you don’t have a tractor you may have a neighbor, local machine rental store or landscaping company that can help you out.  I prefer this method of removing a stump by digging it out as I know when it’s completely out I won’t have sink holes or obstacles during future digging at this location.

How do I remove a large stump?

Testing to see if the root ball is free

I start by digging around the base of the stump to see where the major roots are. If they are too big for the back-hoe to directly rip through I will move further out away from the stump until I can rip them out with the bucket. I’ll work my way around the root ball until I can knock it over with the backhoe.

Root ball
Root ball

If the stump is still too big/heavy I’ll spray down the stump with water to remove dirt, grit and weight. (Thank you Dad for that idea as it saved the day on some of the real big stumps that maxed out what the tractor could lift and pull).  If the watering doesn’t work you can let it dry out a bit and cut the freed stump into more manageable pieces. (Make sure to take all necessary safety precautions when attempting that)

Water your stump...
Water your stump…

Next up, I got out my hefty 3/8″ thick logging chain and secured it to the stump. The trick for me was to get it around the roots in such a way that pulling up makes the stump tumble end over end and thus make its way out of the hole with minimal friction. If I tried to just drag it up on its own the friction makes it almost impossible to get out.

Pulling the stump with a logging chain

Each time a stump clears the pit it’s a mini celebration as even with a big machine stump removal can be a lot of work.

What do you do with the stump once you have it out of the ground?

Some town transfer stations will accept them and grind them up. Some folks will let them dry out and cut them up to burn as part of a bonfire. A last resort is hiring someone to come take them away — this option still a lot cheaper than paying for digging it out and grinding estimates were coming in at $100/stump so things can add up fast. I don’t recommend re-burying them elsewhere as they take a LONG time to rot on their own and buried stumps often lead to sink holes.

I know I flew through the above steps in this post, so if you’d like to see a video of some of these techniques in action in the removal of another stump, please check out my new YouTube video which you can watch by clicking the link here or by clicking on the image of the tractor below.

Tractor with back-hoe ready to go.

Now it’s time to be back out into the yard — there are still a LOT of sizable stumps left to clear out….

Take care,
-Bill

Modern Make-Dos

A ‘make-do’ is a term often used to describe damaged items that are repaired to remain functional — usually due to a combination of what was available, economics and a sense of thrift. Some of the repairs were rather modest, some were ingenious. An archetypical example of a ‘make-do’ is a piece of mochaware or similar pottery with a tin handle grafted on. Nowadays some folks collect make-dos for their quirkiness, functionality and price relative to other antiques which I think is fitting.

Earlier generations seemed to have a better sense of worth — if you invested all that time and money into the item, why not try to get as much use out of it as you can? I wish more folks today had that sentiment — it would help us get away from our disposable society.

Several years ago I bought a Delta X5 ‘Professional’ 6″ jointer. It’s a nice machine with an extra long bed for a machine of its size and generally well built. One big shortcoming on this machine is the large knob used to advance or retract the fence.

Delta X5 'Professional' 6" Jointer
Delta X5 ‘Professional’ 6″ Jointer

Within a few months of owning the machine this knob developed a crack. Apparently the knob was formed over a pinion gear that engages a rack connected to the fence.

Broken Knob
Broken Knob

When the knob slips you cannot advance the fence. At first I made do with the tape solution — ‘It’s only temporary unless it works‘.  I lived with this headache for several years, running out the machine’s 5 year warranty in the meantime as I knew a replacement knob meant pulling that pinion and getting a knob that would likely fail the exact same way.

Knob removed
Knob removed

While at NBSS I saw several of this same model jointer come and go as donations — units from the 1980s-present and all seemed to have the same affliction — broken or missing knobs. The really old iron stationary tools (including old Delta/Rockwells) we had, had knobs with metal handles that served their purpose for generations.

Band clamp variety pack

I figured there must be a better way to fix this knob and make-do. So I picked up a variety package of band clamps and test fitted them to the knob. The 1-1/16″ size fit perfectly. I applied some CA glue to the knob, attached it to the jointer and cinched down the clamp.

Band Clamp Test Fit
Band Clamp Test Fit

It’s not pretty, but it’s a a great make-do solution — I finally have a working fence adjustment knob again and it cost me less than a buck.

Working fix
Working fix

I wonder if my make-do will become a collector’s item for some future generation of tool collector.

Take care,
-Bill

P.S. Why did I finally fix this knob after all these years? Yesterday the spring pin on the tilt wheel of my table saw was sheared off. Not from cranking overly hard on it, I assume due to metal fatigue. Apparently spring pins are not as common as they used to be as Delta no longer stocks the part, and other online tool parts suppliers and my local Home Depot, Lowes and True Value all did not have any in the correct size.

Spring or Roll Pins Variety Set

When I was ready to give up and search more online sources like Grainger or auto part stores I found that Harbor Freight was selling a set of 315 spring pins for $7, so I bit the bullet, went over there and bought the spring pin kit and a band clamp kit which was on sale for $5.99. While I would have liked to have purchased American made hardware for both of these projects I could not find anything else locally stocked that would fit the bill, so for about $13 these machines are up and running again and I have a drawer full of spares for the future. The old spring pin was driven out by using a roll pin punch and a hammer and the new pin was inserted by compressing the pin with some vise-grips and some light hammer taps to insert it. Both machines are back up and running and the shop is humming again.

Table saw tilt adjustment knob

If you have similar make-do tips, please feel free to share them in the comments section below.