

I don’t like to sand. It is my least favorite part of woodworking. I use sharp hand tools and scrapers to cut down on how much sanding I need to do, but like death and taxes, for the woodworker sanding is a necessary part of the woodworking lifecycle. This summer I saved up some of what I made from teaching and bought a nice HVLP system. (FujiSpray Mini-Mite 4 with Gravity Fed Gun — more on that in a future post). With a nice HVLP I figured I could cut down on the amount of time I spend sanding a finish as each finish coat will generally go on faster and flatter with the spray gun. I figured I could just setup some cardboard or spray outside, but the New England winter set in and I had a LOT of finishing I need to take care of this season and too much stuff in the shop that I don’t want to get any overspray on so I decided I needed to build a proper spray booth in the basement that would not break the bank and could easily be taken down when I need the space back.

When looking online for some inspiration the main things I found were — tiny kits for model makers, spray corrals or zip fit walls or full blown industrial car painting booths — none of which really met my needs. I eventually found a company called ‘Formufit’ that sells a kit of specialty PVC connectors that would allow you to build a 7’x7’x7 PVC cube with a hinged door. It looked like a good design to start off with. I also wanted to add filtered air to help deal with overspray.
For Christmas this year I bought all the supplies I needed to build a nice home spray booth — thank you to my wife Alyssa for letting me buy them — and I’ll walk you through the process here.

The PVC fittings kit cost me $65.00 with shipping and you can find the Formufit Spray Booth Kit here. Below is a rough list of materials I put into this project. I had the tape, 2x4s, pine and screws on hand but added them since not everyone may have that on hand.
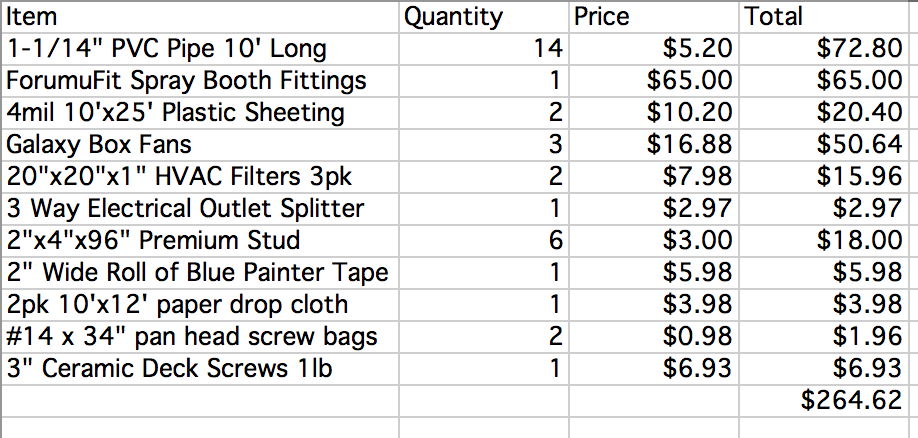
The total I arrived at was $264.62 which is a reasonable price considering how big this booth is and what it can do. I put together a nice time lapse video you can video by clicking here or via the image below.
I’m quite happy with how the booth turned out and bet it will see a lot of use this winter.
If you attempt build your own here are some additional details which may help you along the way:
- Covering the floor — for $4 I bought a two pack of disposable painter drop cloths. The upper is paper that can absorb drips and below it is plastic to stop bigger spills. It was good for the price, but if you are not careful can easily be ripped so I found myself taping up some holes I made. Next time out I might get something heavier duty.
- Lighting — add some extra lighting above the booth so you can see what you are spraying. In my basement I added three 48″ 2 bulb flourescent fixtures with daylight color temp bulbs I had on hand and they did a great job illuminating the booth.
- Finding box fans in New England in the dead of winter is not easy. The only place I could find any was ironically at Walmart via the webpage pick up in store option. I bought 3 ‘Galaxy’ 20″ box fans which use 0.8amps and amazingly are made in the USA. They cost me $16.88 each. Even with the filters in place they are pretty quiet and move a good amount of air.
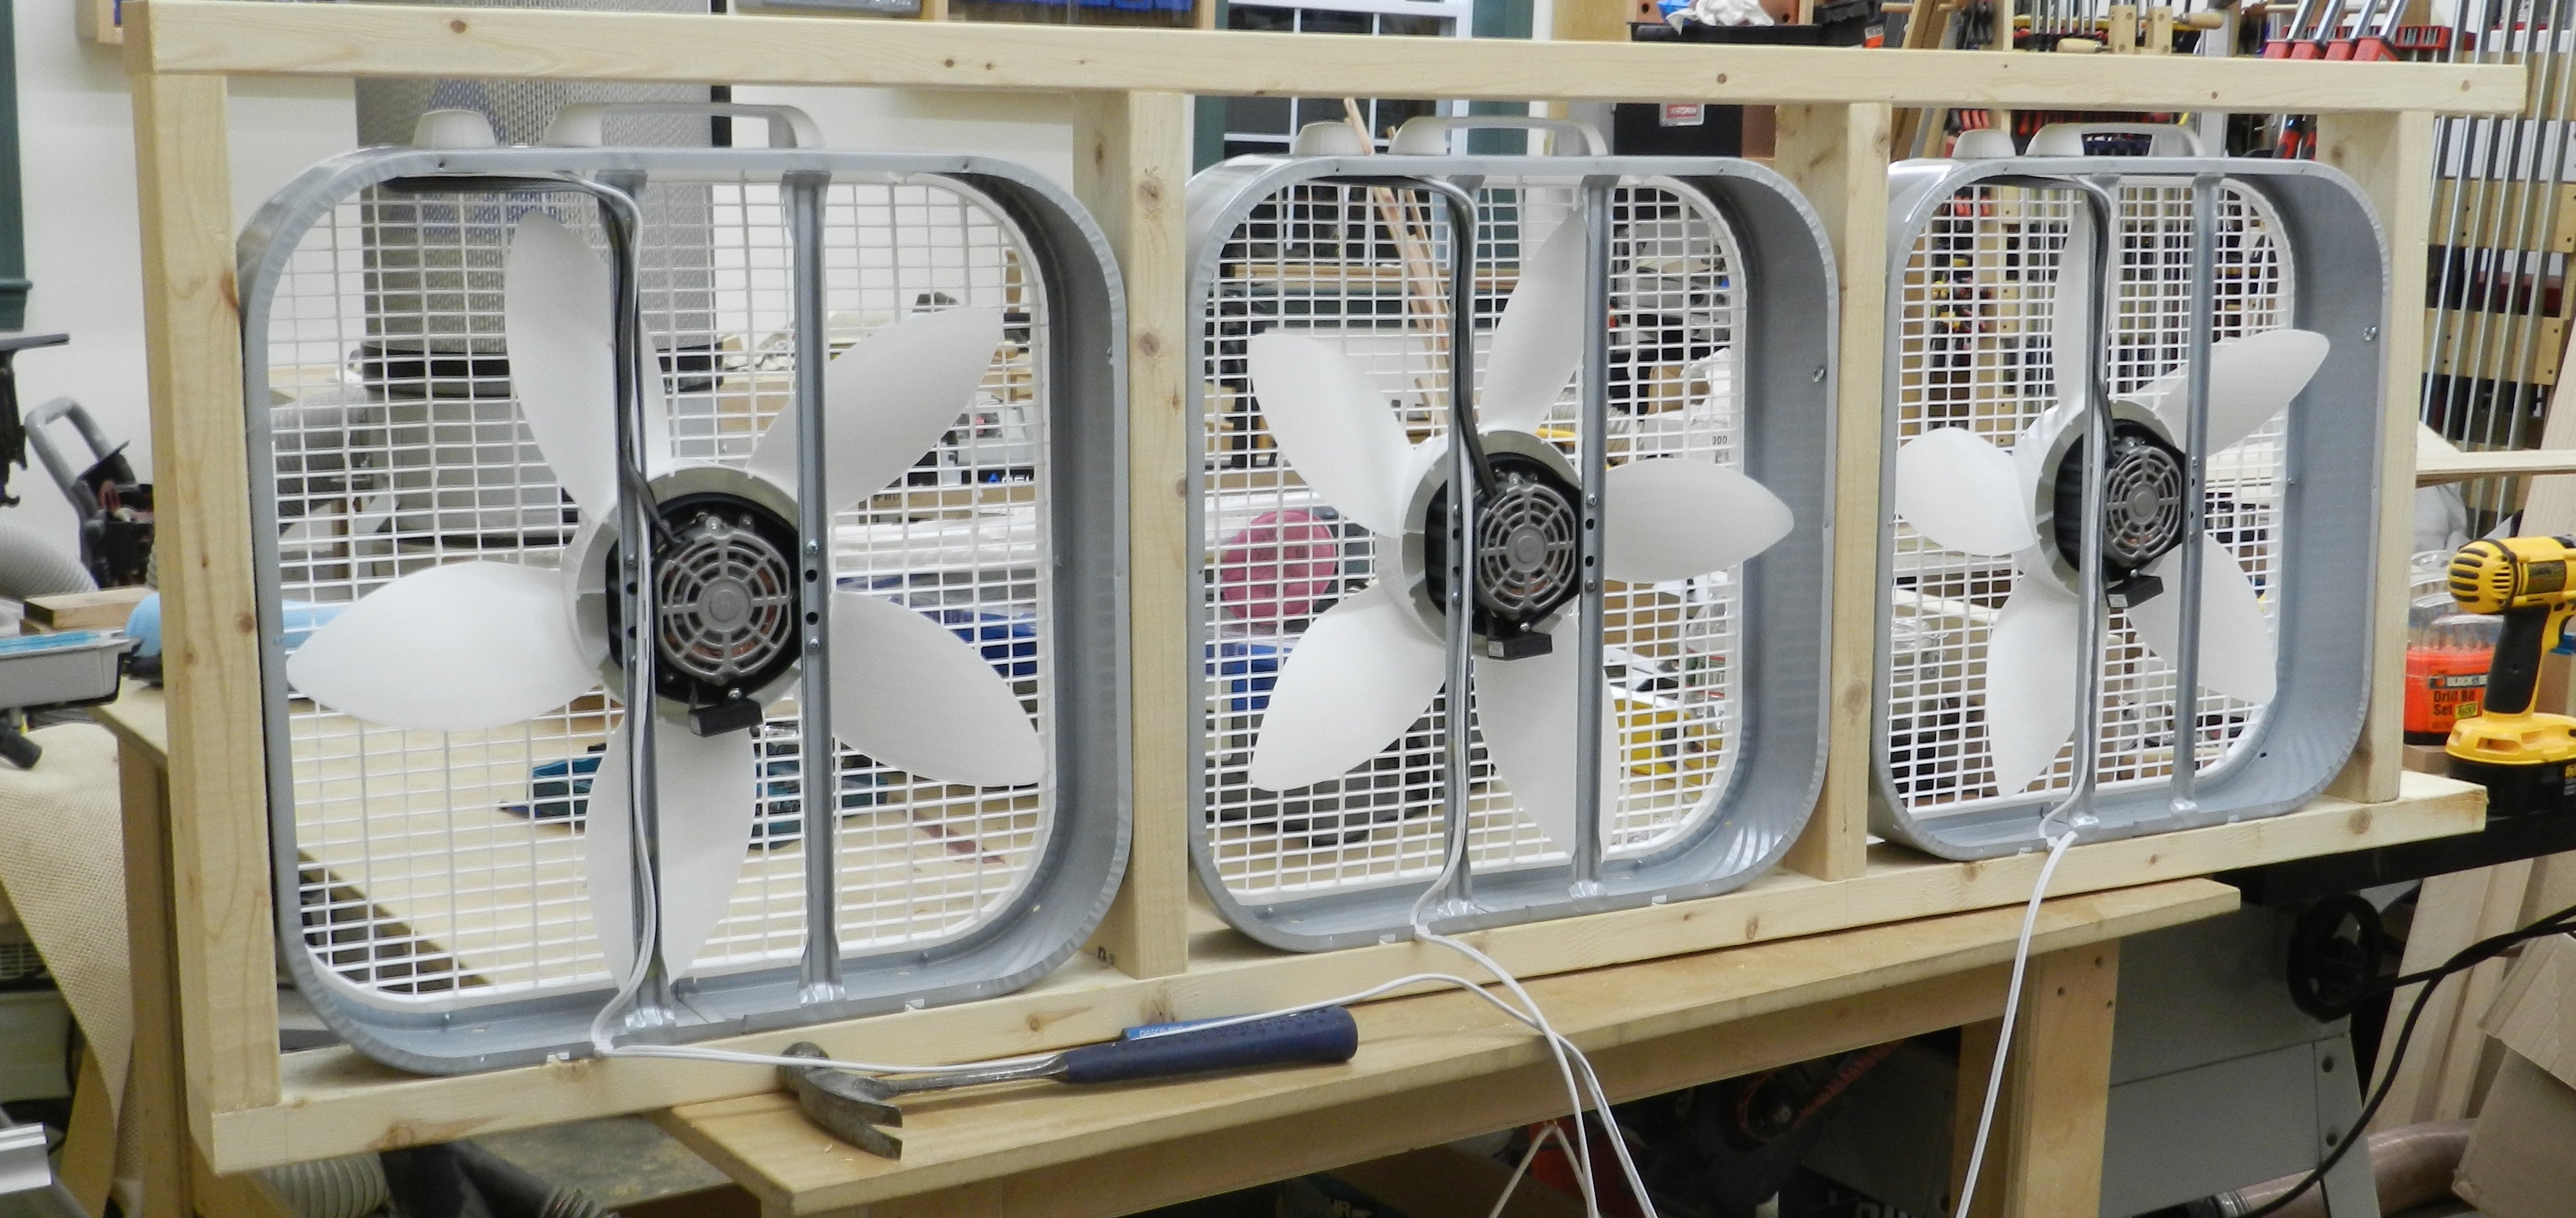
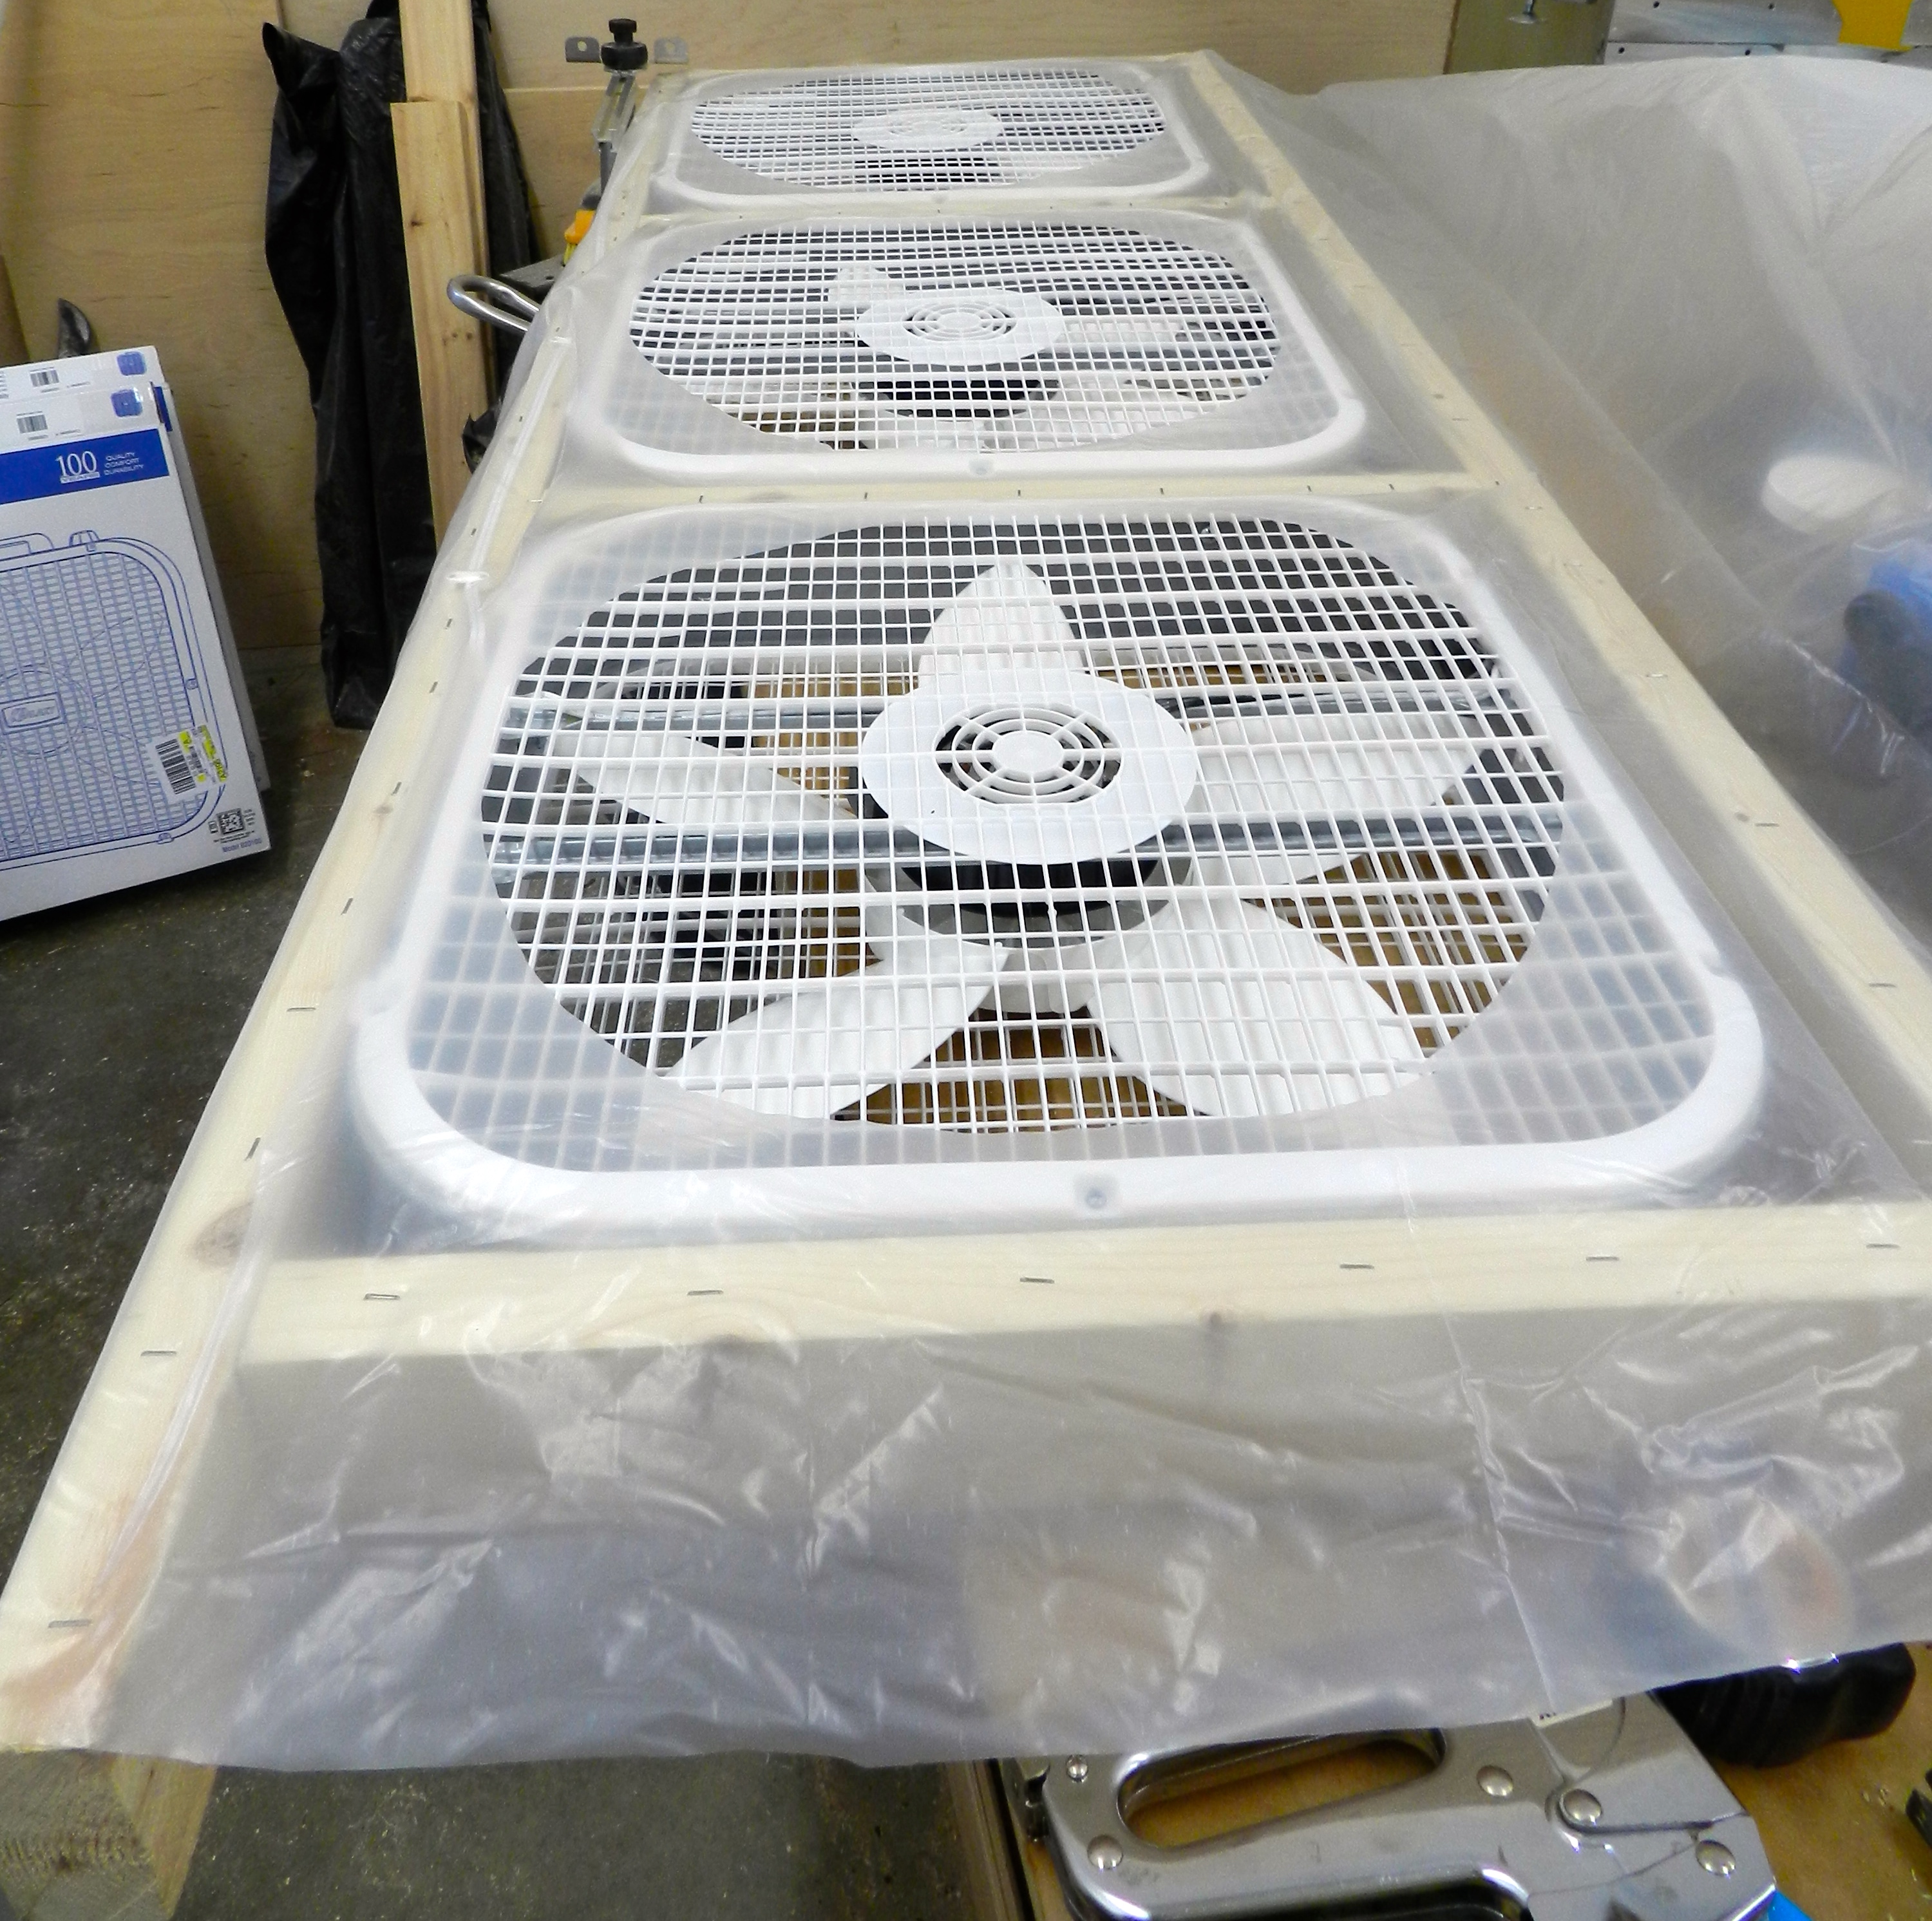
- I built a frame out of 2x4s to house the box fans and allow me to stand them vertically. The 2xs are attached with 3″ ceramic deck screws. The box fans are attached to the frame via #14 x 3/4″ pan head screws. I used holes already in the bottom of the fans to attach one side.

Fan Housing On the other sides I used a starter punch to make a dent and then drilled through the sheet metal into the frame. That method worked great. When making the frame make sure you leave enough space for your hand to get to the control knob on the fan. The bottom is left long to function as feet and keep the bottom fan above the bottom PVC of the booth. I also zip tied the wires together and used a 3 way splitter to connect them. This way I can control the fans via a single extension cord. I also screwed on some wood scrap legs/supports to keep the fan enclosure standing upright on its own.

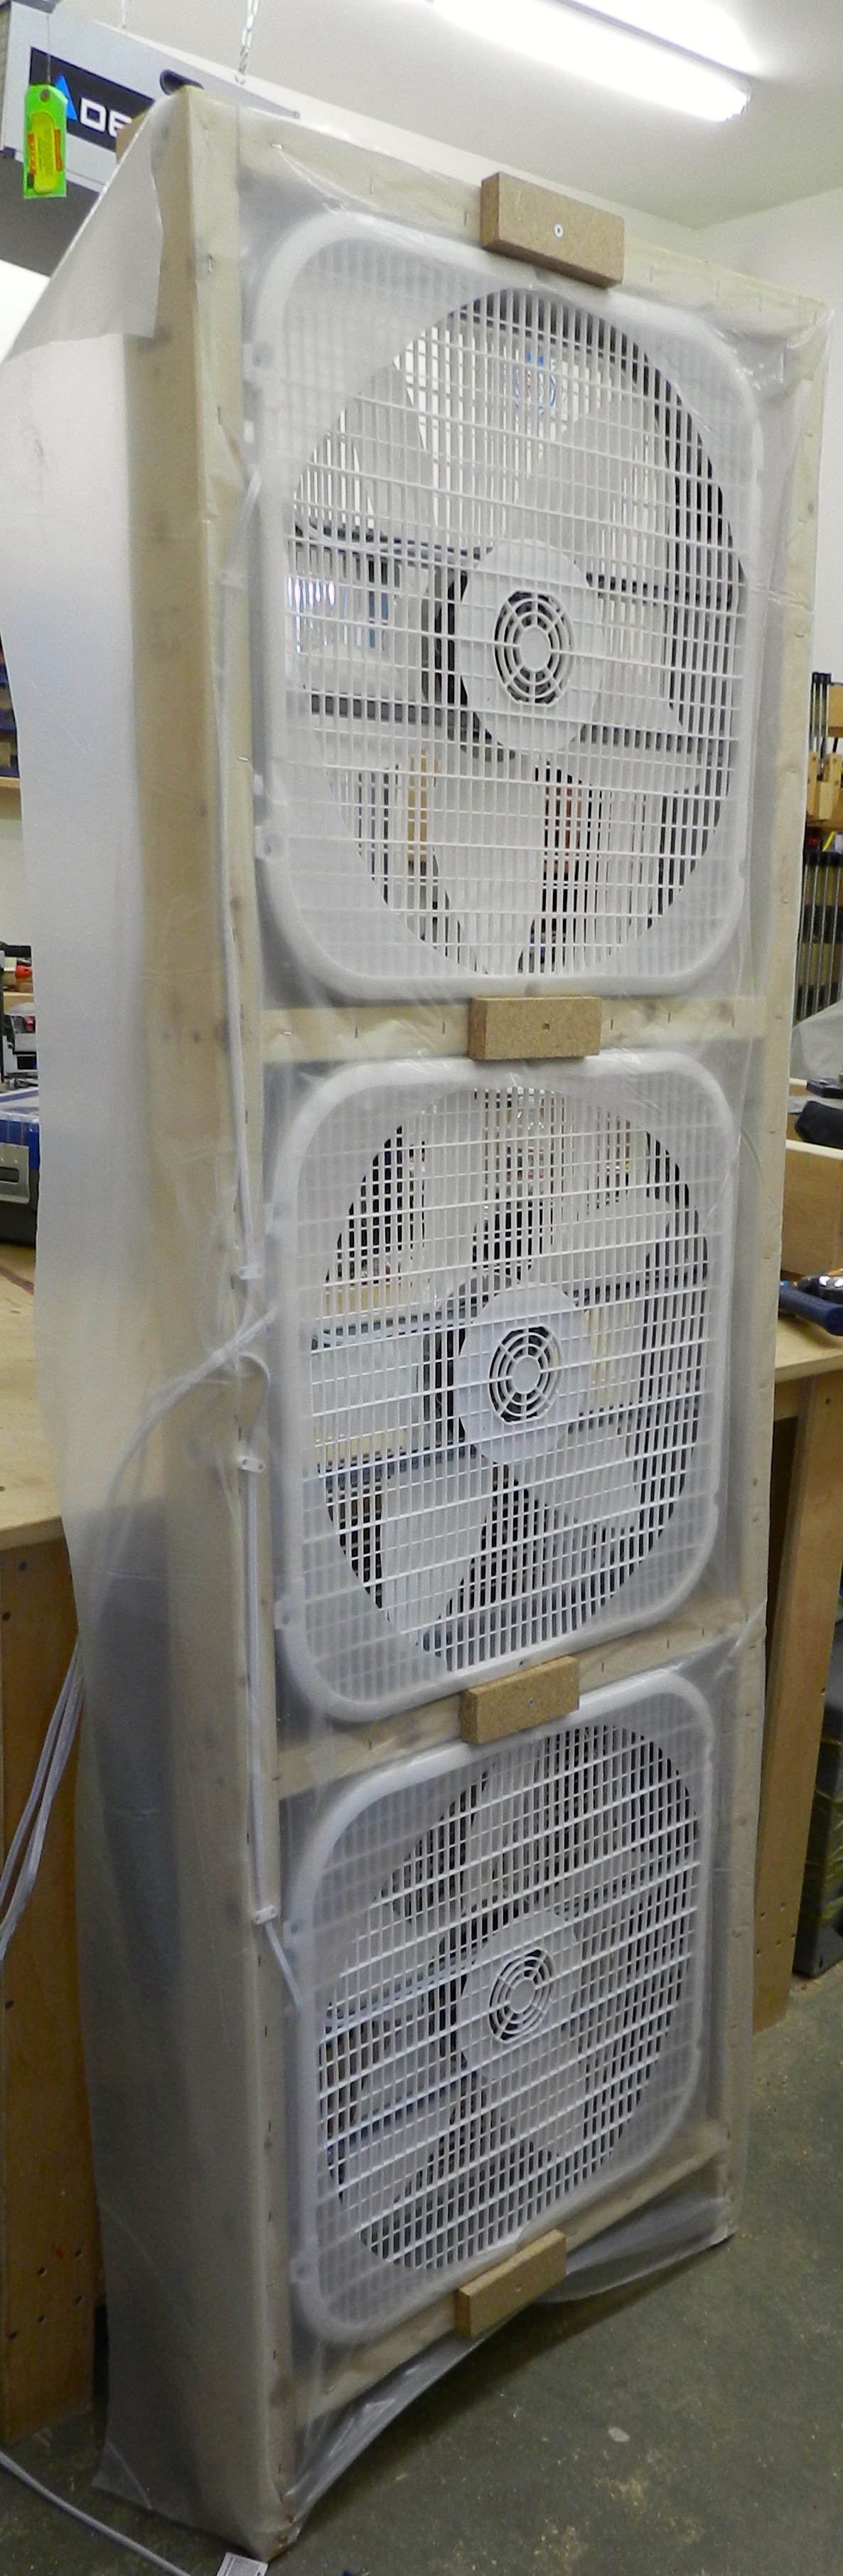
Fan Housing - Plastic Sheeting — get the thickest stuff you budget will allow. I bought 10’x25′ rolls of 4mil plastic which you can find in the roofing section of a large building supply store. I put one roll over the top and left and right side of the booth. From the second roll I cut out 9′ sections to make a front and back. I used the remainder of the roll to cover the fan frame and allowing overlap. Once stapled to the fan frame I cut out circles to direct the air flow and seal the booth. I used medium sized spring clamps to hold the plastic onto the spray booth frame.
- 1-1/4″ PVC was a little harder to find at the store, but once you had it in hand it cuts easily on a chop saw with a carbide blade. Cutting the pieces to length was easy via the plans that came with the kit. I could measure and cut one piece then use that as a template with a sharpie to transfer it to the others and cut off the sharpie line each time. Use a rubber mallet or arm strength to seat all the pipe pieces in the fitting. The only joints that were glued were the small pieces holding the hinges together. Everything else can be broken down or altered to fit your space.
- Filters — buy the cheapest filters you can find that looks like they’d actually do some filtering. Some were so cheap and thin you could see them. I bought two 3 packs of 3M filtrete filters that cost $7.99 for each pack and have some wire to help stiffen the filter as well. On the fan housing I tacked on some wood blocks that allow me to tape the filters in place. When the fans are on they hold themselves on so the tape really just keeps them from falling when the fans are off.

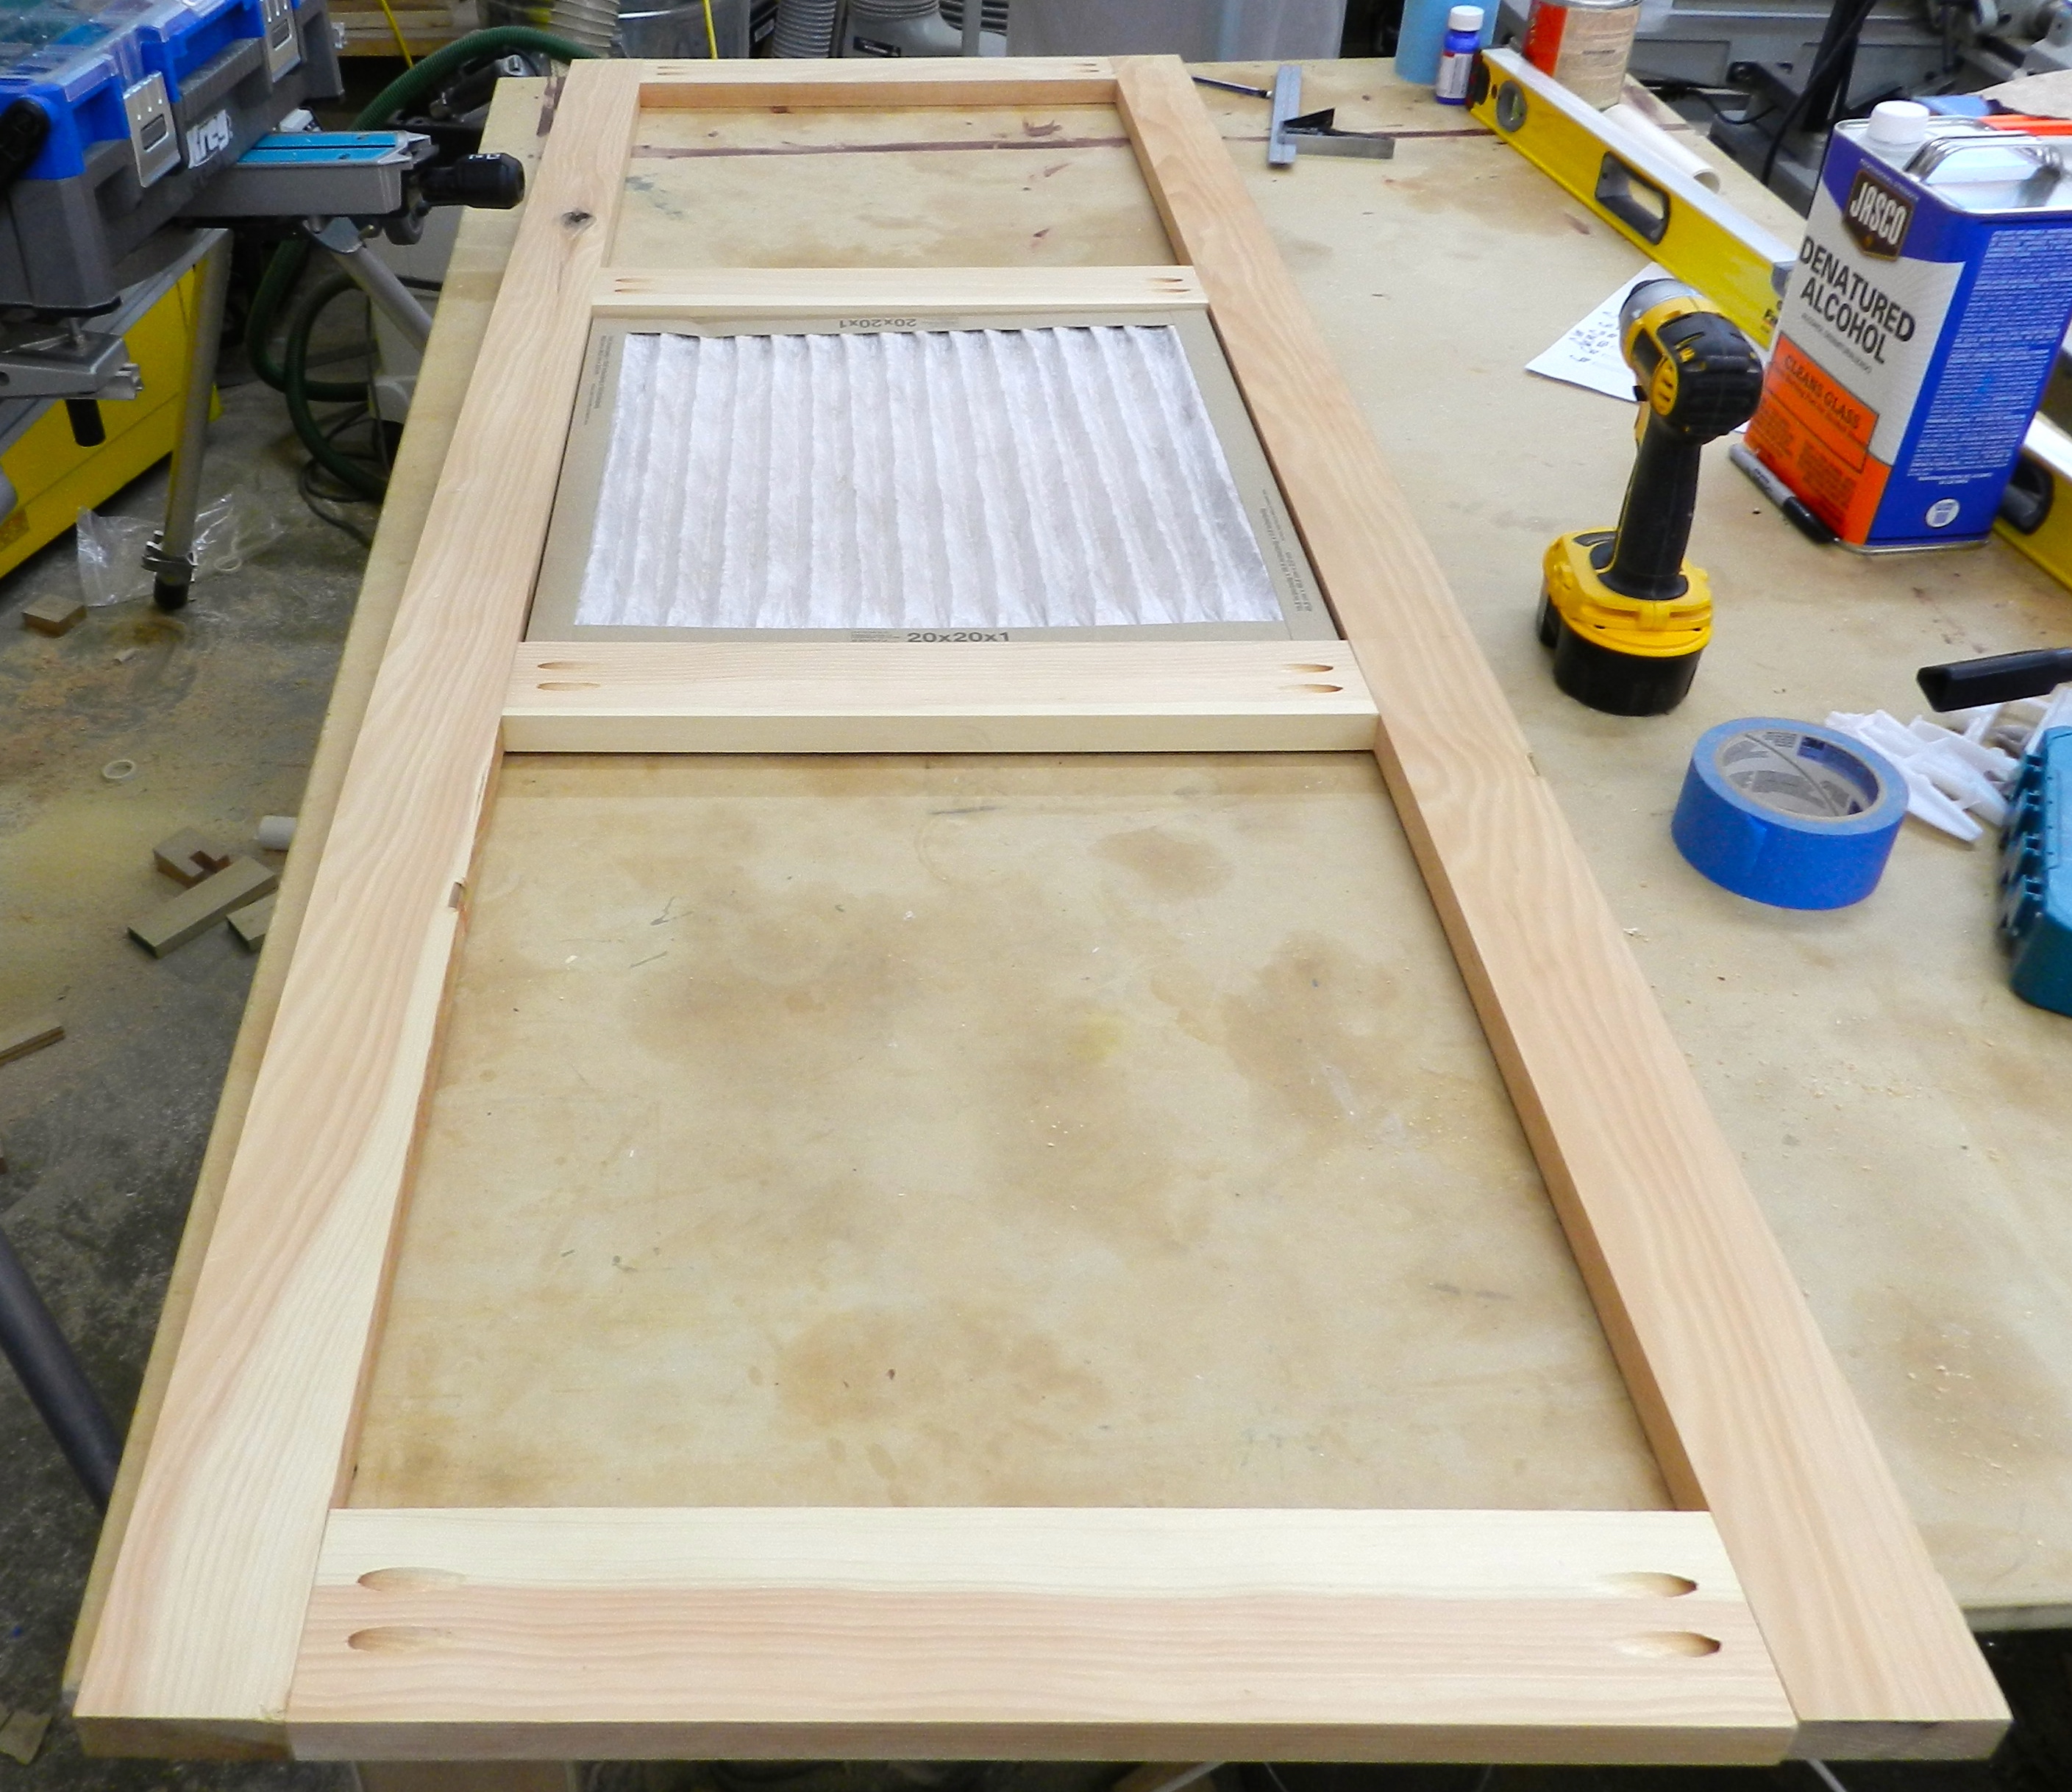
Fans ready for testing. (Filter holding blocks in place) For the intake air frame I just pocket screwed together some scrap pine I had in the shop being careful to tightly fit the opening to the size of the filters. I then tape the filters in place from the outside. This frame was hung from that PVC frame via a small bit of chain and some ‘S’ hooks.
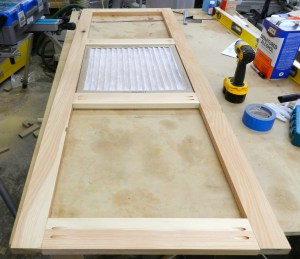
Frame for intake air filters - For the door make sure to use some double sided tape (or looped tape in my case) to keep the plastic on the door frame and make sure there is overlap so you can have some level of seal when the fans are on.
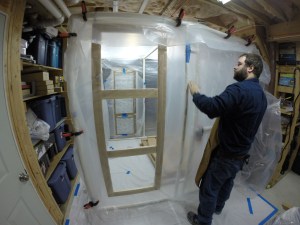
- Integrating the filter and fan frames. I put the wall sheeting in place, then places the fan frame where I wanted it. I then cut in like how you’d cut house wrap for a window and then stapled the plastic onto the wood frame thus making a good overlapping seal. The intake filter frame was hung up first, then overlaid with plastic and cut in, in a similar manner. With the door closed there is a pretty good amount of suction — you’ll see the plastic on the walls and ceiling suck in a bit, but that is good news and shows the power of the fans. (The clamps on the frame will keep the plastic from coming down on your head or your work.)
This was a fun project to build and I look forward to finally getting some more practice in with the spray gun.
Take care,
-Bill
IMPORTANT NOTE:
See safety disclaimer for the website here. The fans used here are not rated for flammable materials. I am only using this booth to spray water based finishes and a ways from the filters. If you plan to spray flammable materials you should do so outside or with a setup that includes a spark proof fan. Information provided on this blog is without warranty, so please use common sense when trying anything like this at home. If anything feels dangerous, do not do it. Also make sure to wear proper eye, ear and lung protection when working with finishes.

Great job Bill. Looks like you have created an easy to understand (and afford) temporary spray booth for those who wish to spray finish their projects. The time lapse video made most everything quite clear. One question is do you vent the fan to the outside?
Hi John,
Thank you for the note. 🙂
In this case I only vent out into the basement a I am only spraying low or no VOC water based materials and wearing a half mask respirator with P100 filters and a charcoal cartridge. If I were spraying flammable liquids I would move the setup outside and use a spark-proof fan with adequate ducting to fresh air.
Take care,
-Bill
Great Idea! About how long does this take to set up and tear down? I live in West Texas where it is very sandy and windy. This would be a perfect addition to my shop.
Thank you. Not including the time it took to build the fan and filter enclosures the first time, everything can be setup or torn down in less than an hour. After you take it apart it breaks down into a small space.
Take care,
-Bill
Looking to build this as a permanent fixture in our shop. Can you advise ref the fans; were these all linked electrically or did you run them individually. Ie 3 plugs each side. Thanks
Each box fan I set the speed I want via the knob and then connected all three plugs via a 3 way receptacle at the end of a 12 gauge extension cord — so when I plug it in all three come on at the same time and speed. Please make sure to review the ‘IMPORTANT NOTE’ section at the bottom of the post as those cheap box fans are not rated for flammable materials etc.
If you plan to spray with flammable materials you’ll want to invest in a proper exhaust rated Tubeaxial Fan (many of which are belt driven)
Also make sure to properly maintain, clean or replace the filters regularly.
I notice you have two fan frames at either end. Do both of these have fans in? Or 6 in total?
I’m trying to figure out if the fan section by the door is effectively sucking out of the room into the filters? Is that correct? Thanks
Next to the door is a hanging wooden frame that holds 3 filters, no fans. There are only 3 fans and they are the freestanding bank of fans on the solid wall (no door side) of the booth. When powered on you can see the suction and the plastic walls suck in a bit. It worked great.
Ok great. Thanks. So the fans are effectively sucking the air out of to the filters on the non door side. What’s the purpose of the filters without the fans? Thanks for your help
The fans on the non door side suck out air through the filters in an attempt to keep the fans clean, and stop overspray from getting on everything that is outside of the booth. (Note the disclaimer at the bottom of the post and only spray water based finishes as cheap box fans are not explosion/fire proof. If you need to spray flammable materials you should invest in proper belt driven fans for such an application) The filters on the door side allow for make up air and makes sure it passes through the filter so I am not pulling in dust/dirt that could get on whatever I am trying to spray.
Excellent. Thanks for clarifying!