

Shellac is one of my favorite finishes and sanding sealer. It’s goes on well, dries quickly and is compatible with many other finish types. Many folks new to woodworking seem to be afraid of it for whatever reasons — bad experiences using stale shellac from a can, association with antique or high end furniture, fear of a water ring or simply not knowing much about it the finish, where to get it or how to use it. I’m hoping to clear the air a bit and encourage more folks to try out this versatile finish.
The most common way most folks have accessed shellac is via a can of Zinsser ‘Bulls-Eye’ shellac which is available from most big box and hardware stores. There is nothing wrong with this product when it is fresh, but it does have a shelf life, so make sure to read the date on the package and get the most recent jar you can find — after 1-2 years on the shelf the canned shellac seems to deteriorate, and even faster once you open the can. You can dilute the canned finish by adding more denatured alcohol to it, thus making it into a lower cut and thus a thinner/lighter finish.
I prefer to mix my own shellac from flakes which is a straightforward process and ensures I always have fresh shellac on hand and of the ‘cut’ I want. (More on shellac ‘cuts’ in a bit..) When kept in a cool dry place shellac flakes will last for years. Once mixed shellac generally will stay fresh for 6-12 months in a tightly sealed container.
Where do you get shellac flakes?
Thankfully we are living in a modern hand tool renaissance wherein it seems more and more cottage industries keep popping up with high quality tools and supplies. In recent years I’ve purchased de-waxed shellac flakes from Hock Tools, ToolsForWorkingWood.com, Liberon, Rockler, Woodcraft and Shellac.net . Sometimes there are seasonal shortages as shellac is a natural product that mostly comes from India and similar parts of the world and in recent years the price of good quality flakes has risen as the result of decreased output due to environmental factors. I most often use blonde or super blonde shellac on lighter woods and as a sanding sealer as it imparts very little color to the wood. I used darker shellacs like amber and garnet on cherry and walnut and similar woods where I want to warm up the color of the wood.
How do I mix up shellac?
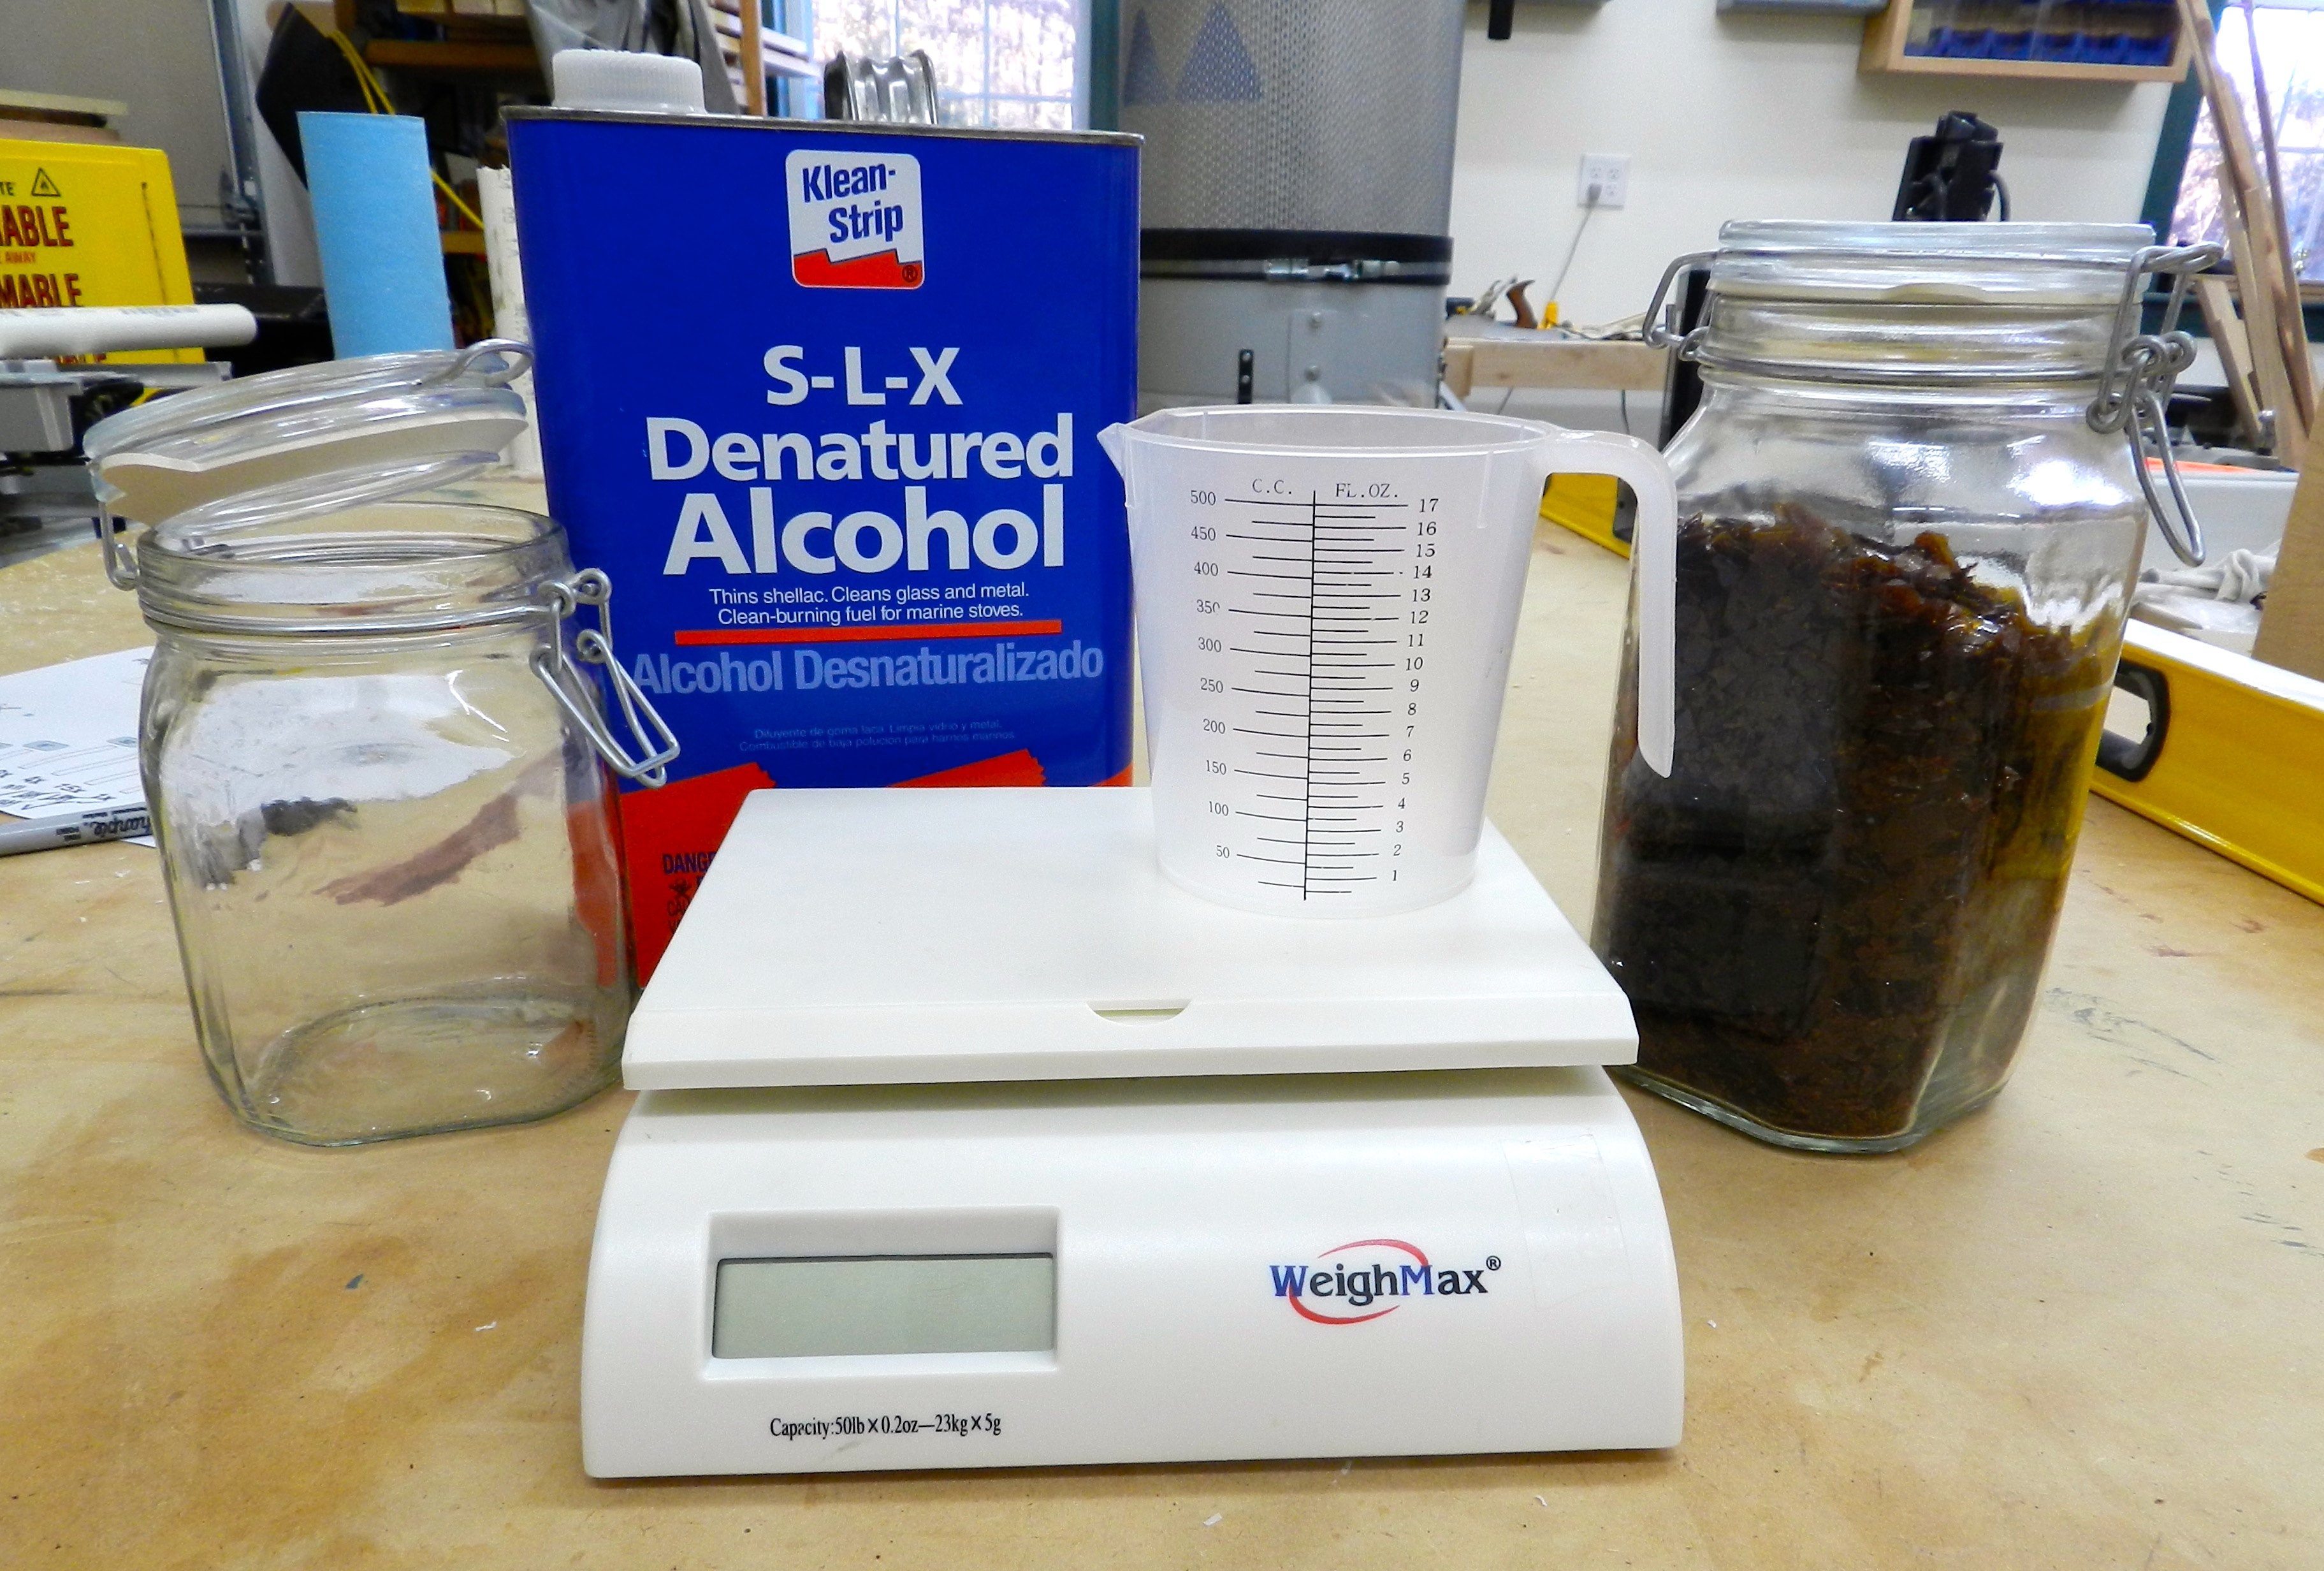
With some fresh shellac flakes in hand I will measure out by weight the amount of shellac I want to make. For this example I want to make a pint of 2lb cut of garnet shellac. In order to do this I first needed to weigh out 4oz of shellac. (Remember to zero out your scale taking into account the weight of your empty measuring cup)
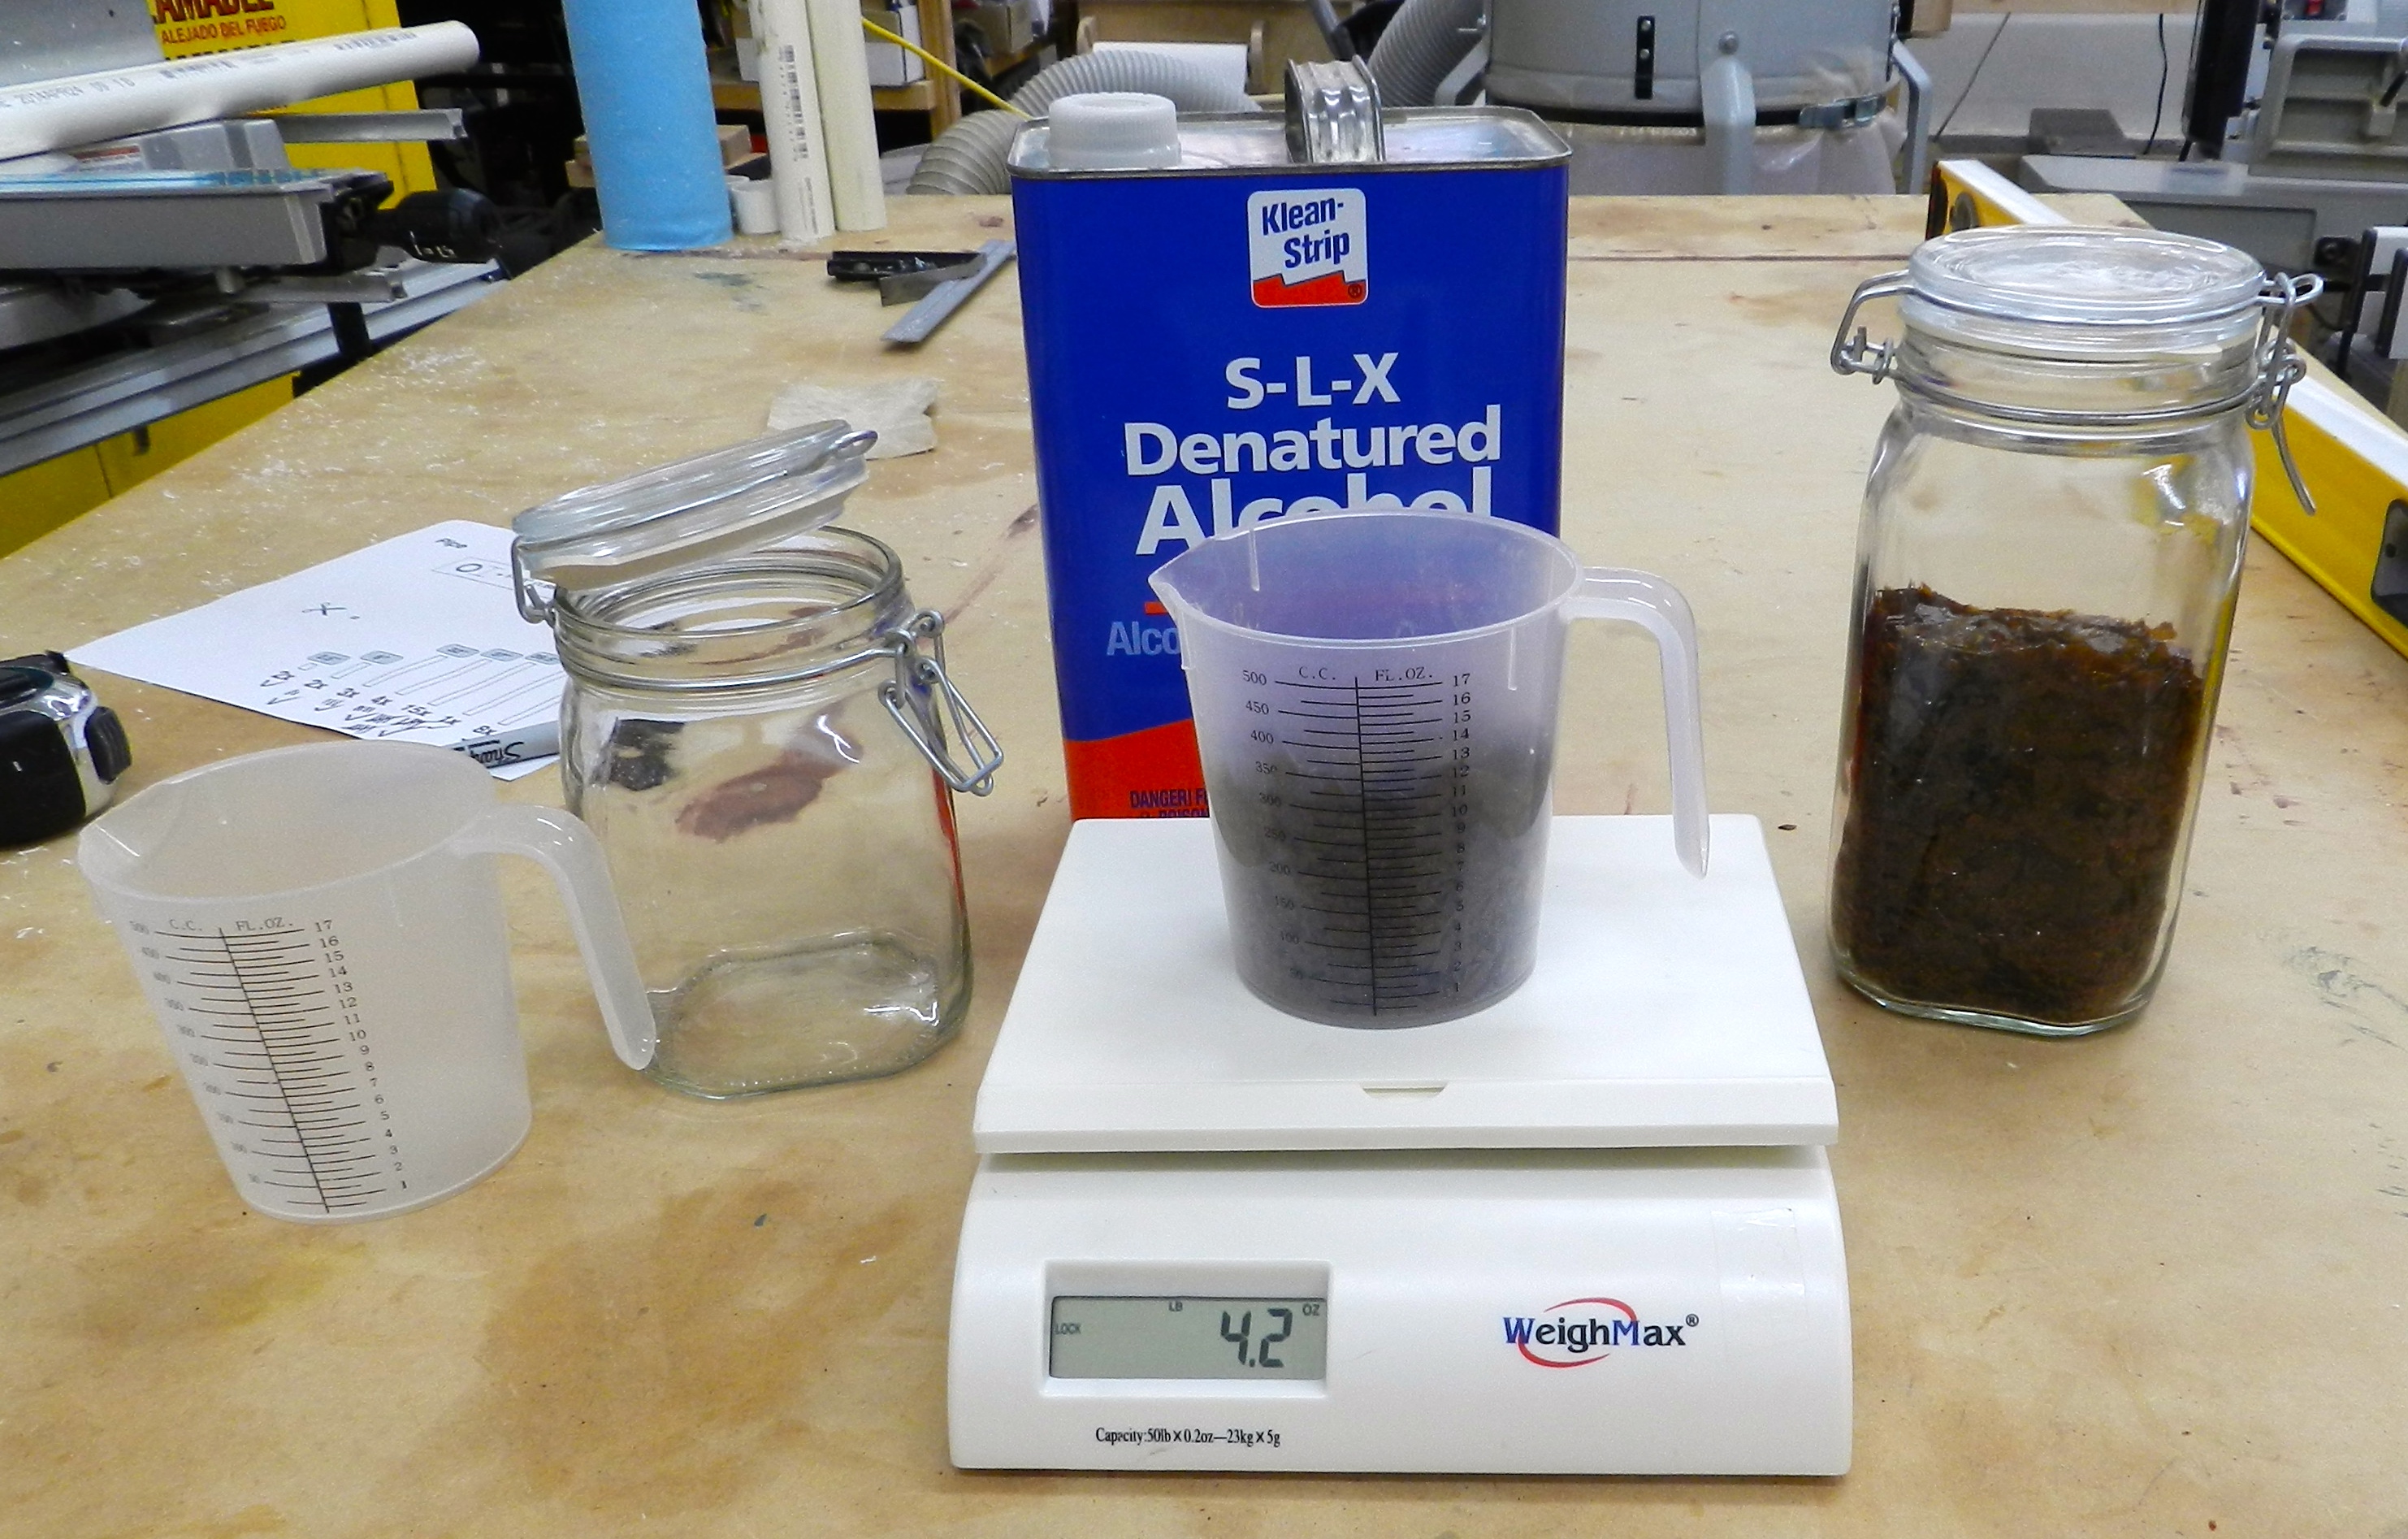
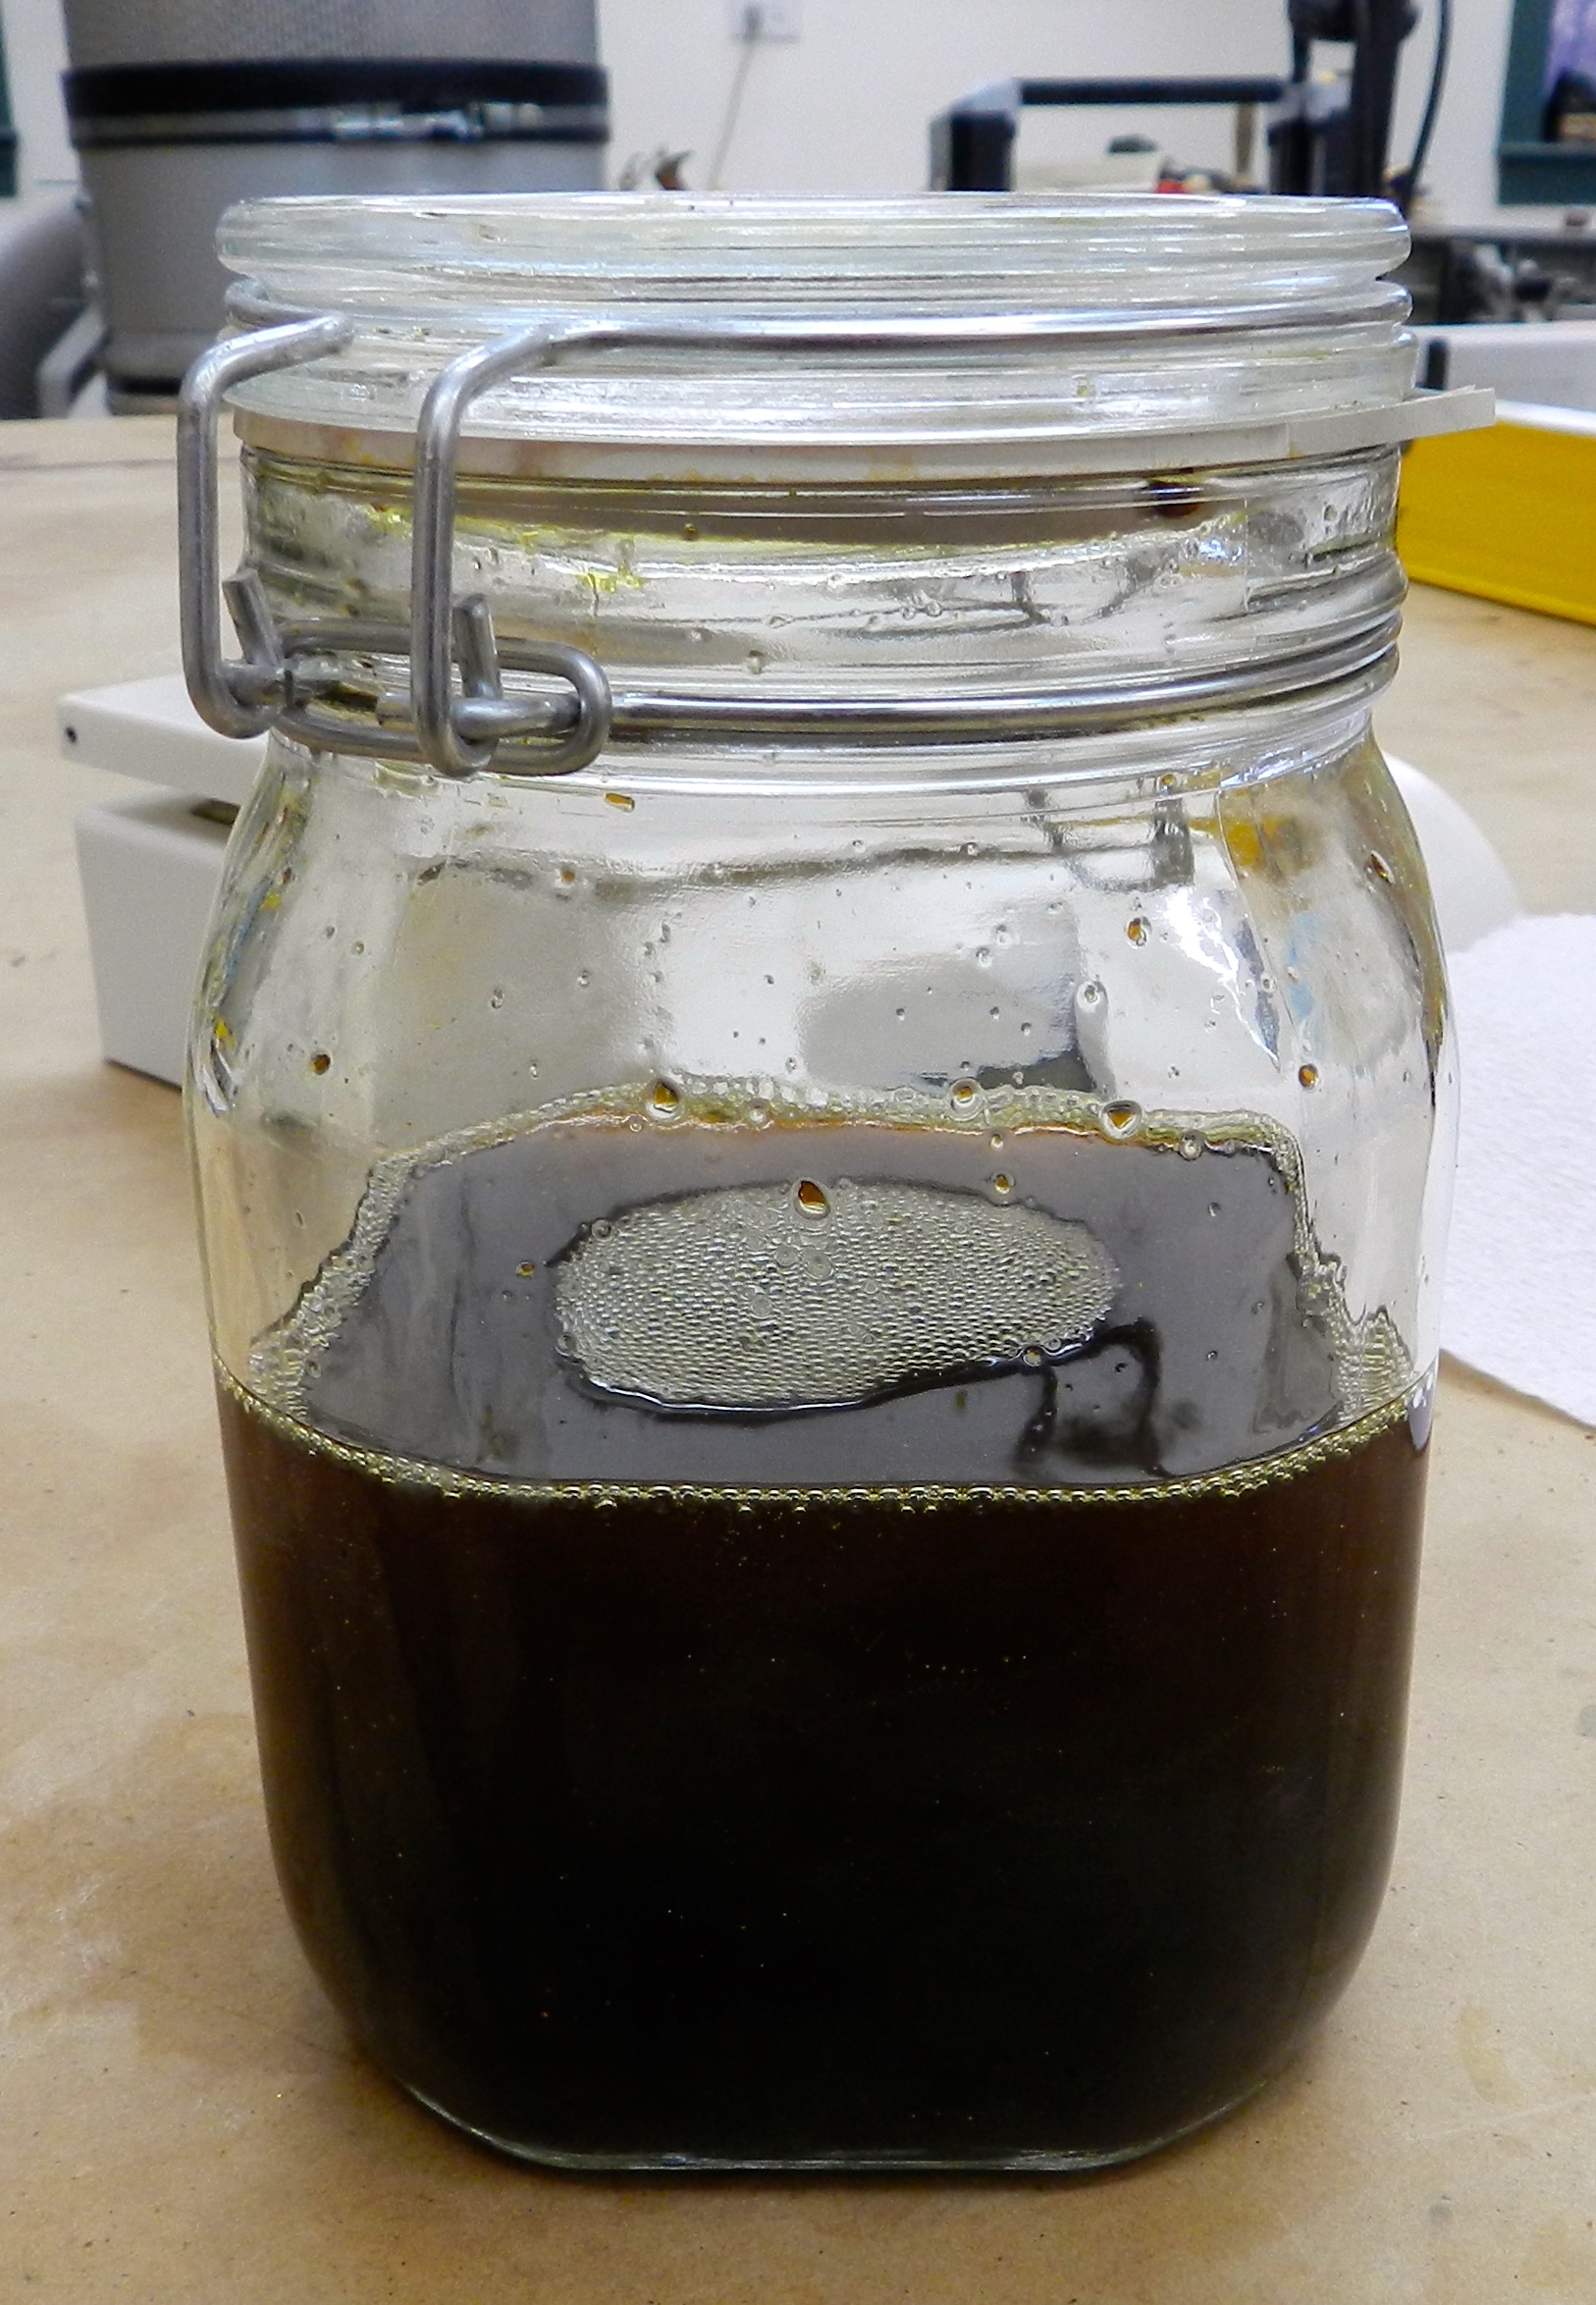
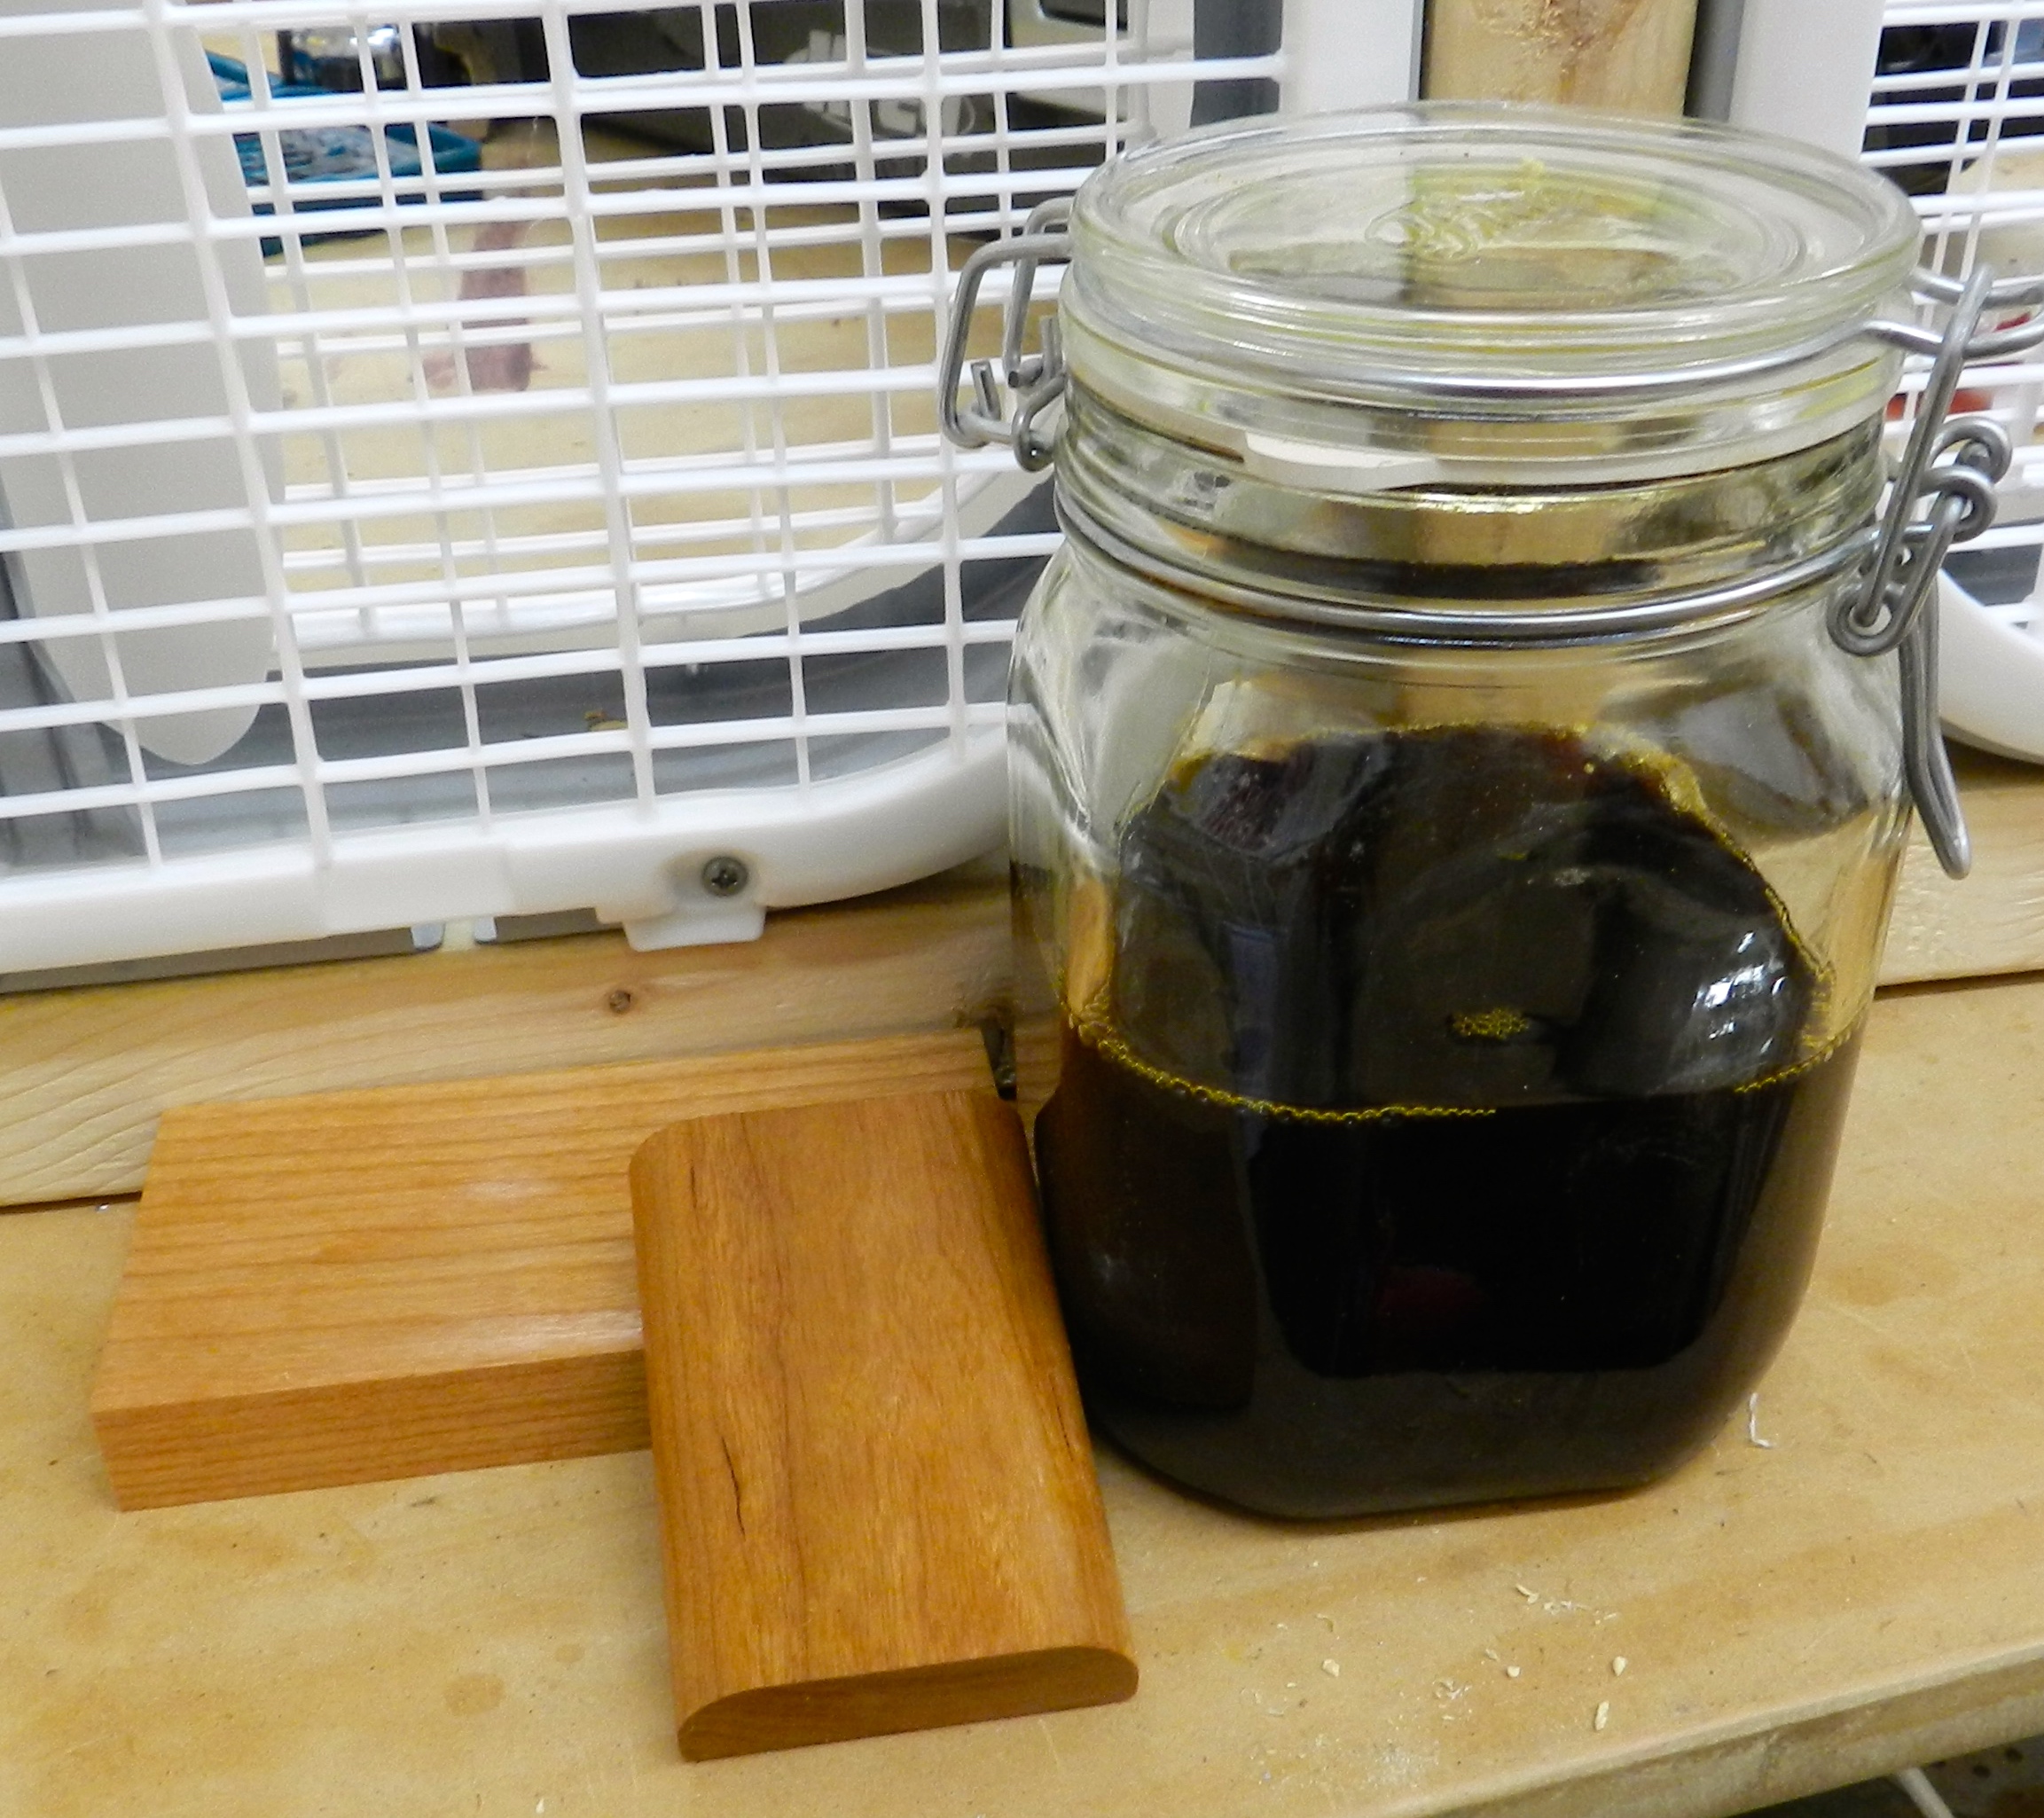
Next up I measure out 16oz of denatured alcohol by volume and put it in a re-sealable jar. I like to use glass jars with a rubber seal around them, often made by Fido and similar companies. I usually can get them in good sizes for very reasonable prices at places like ‘The Christmas Tree Shop’ and other discount retailers. The clear glass allows me to see how far along the flakes are in terms of dissolving and how much I have left at a given time.
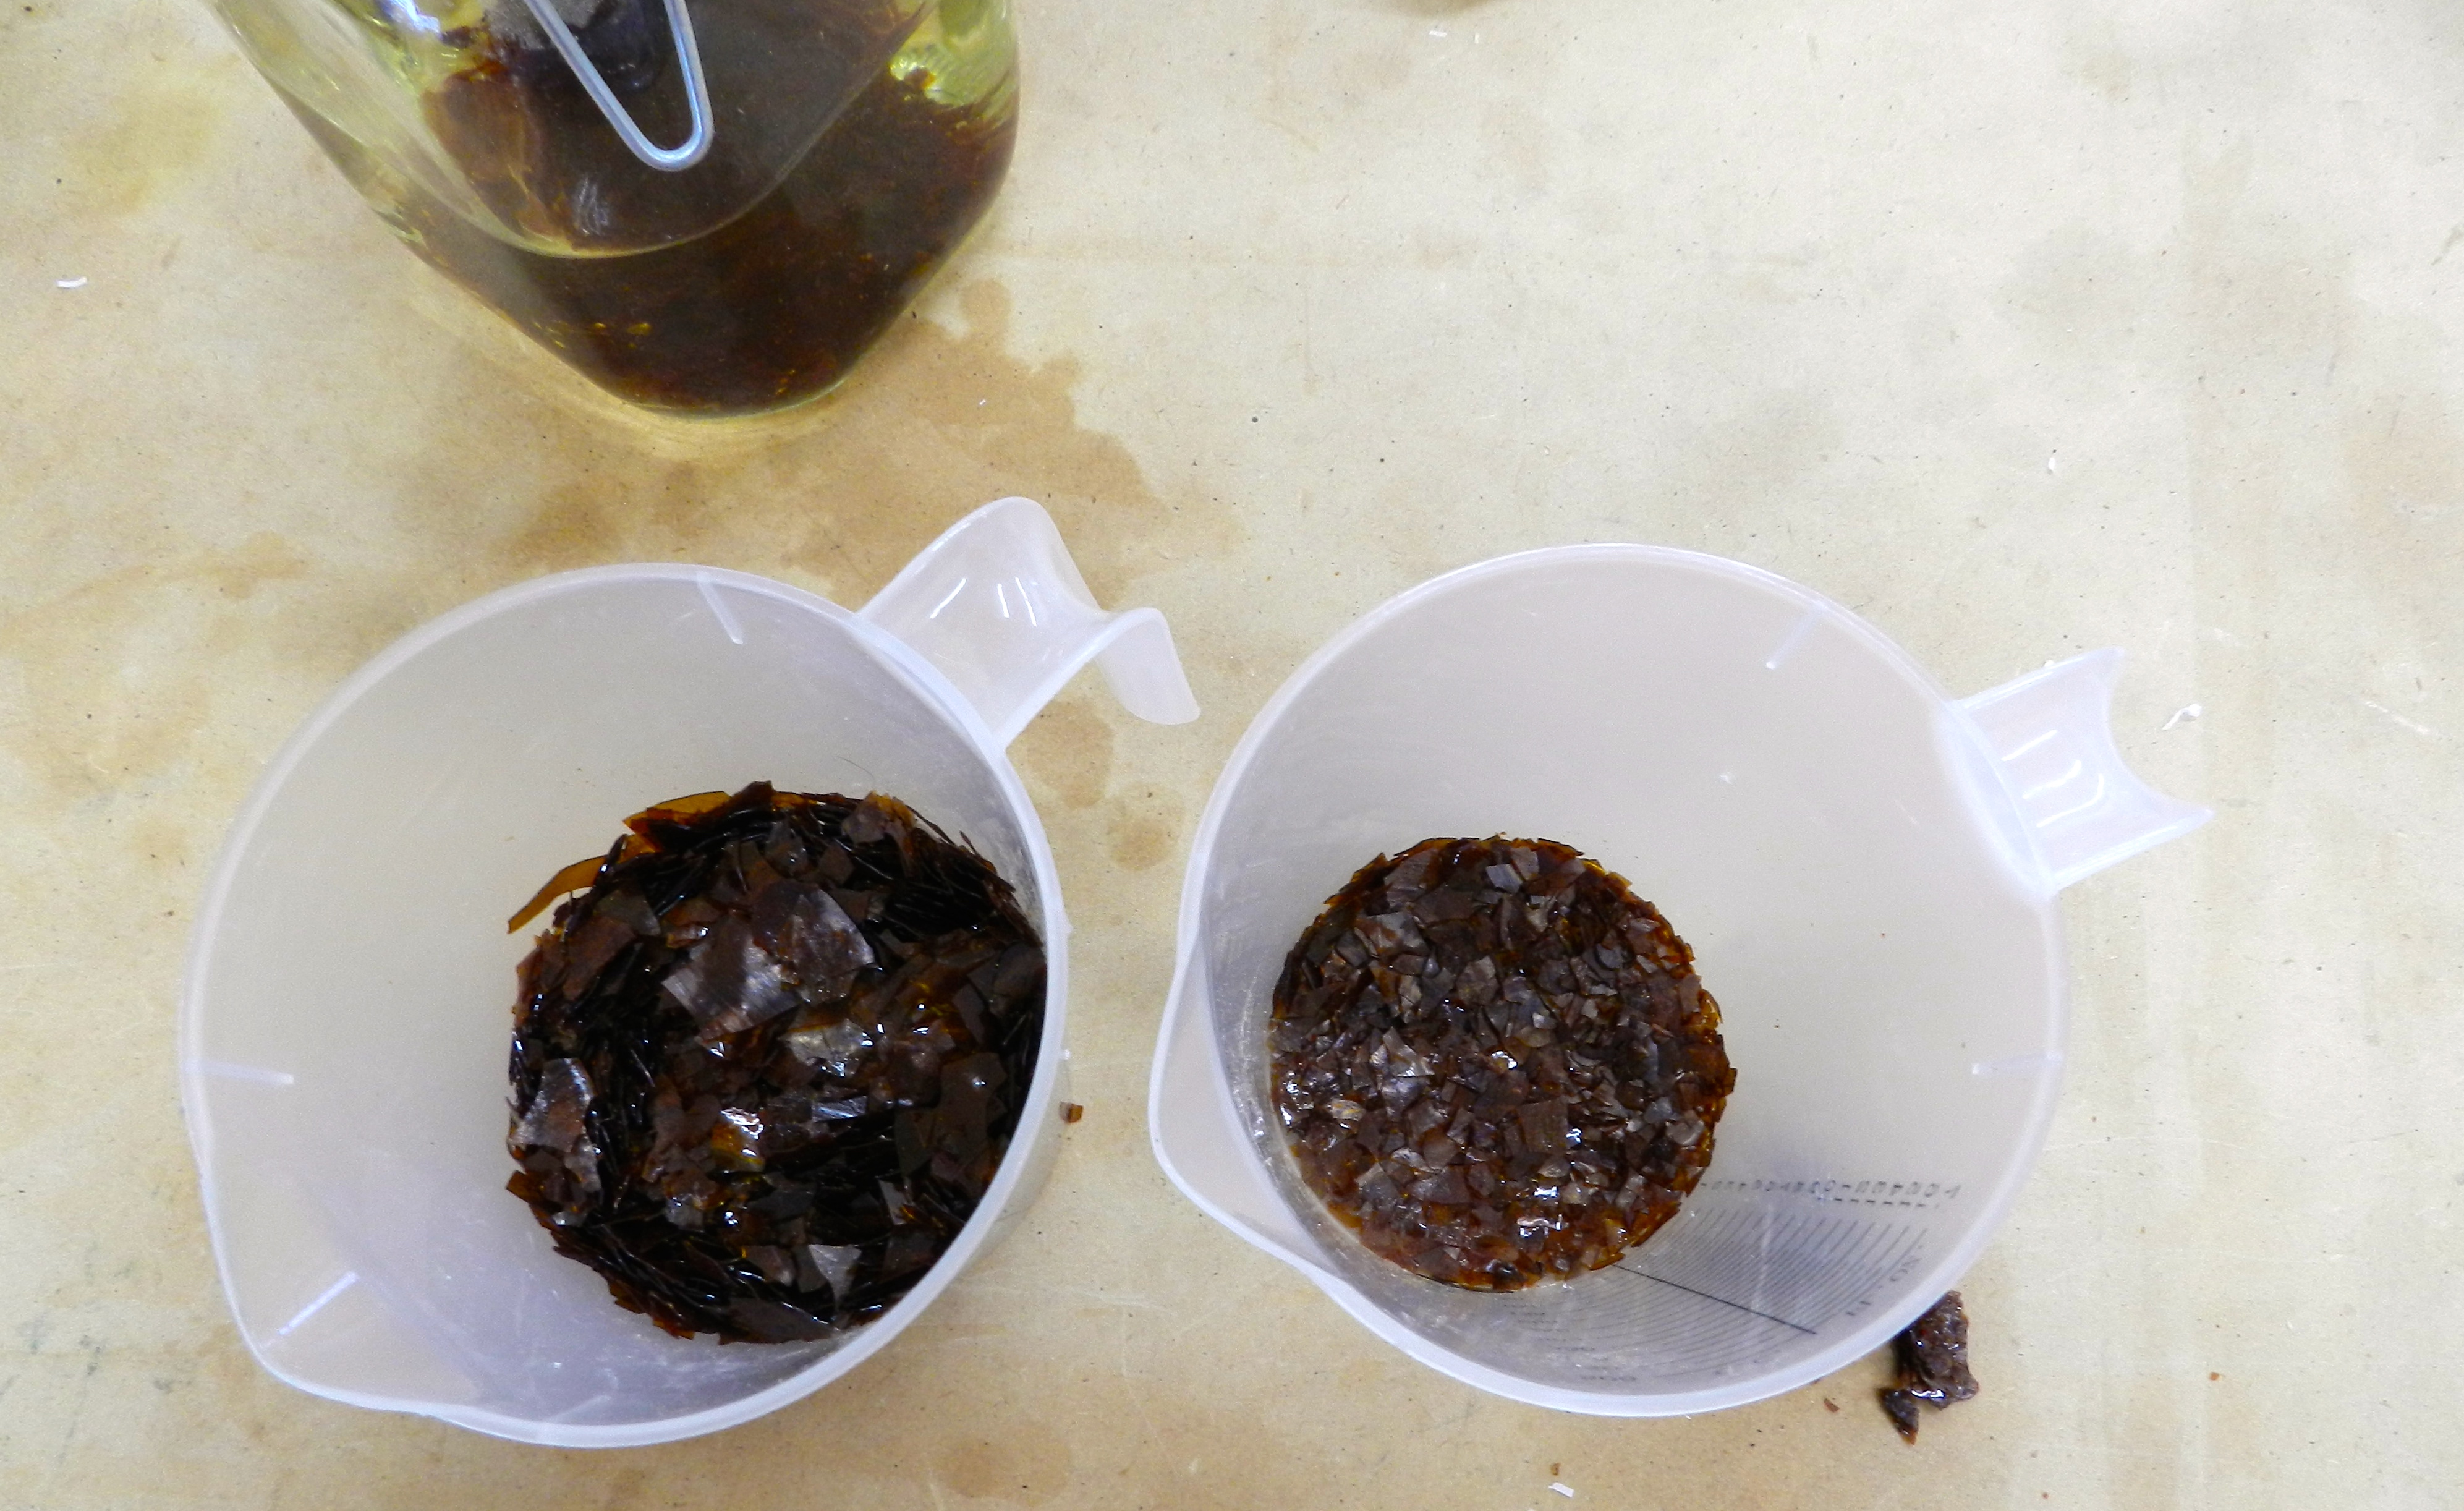
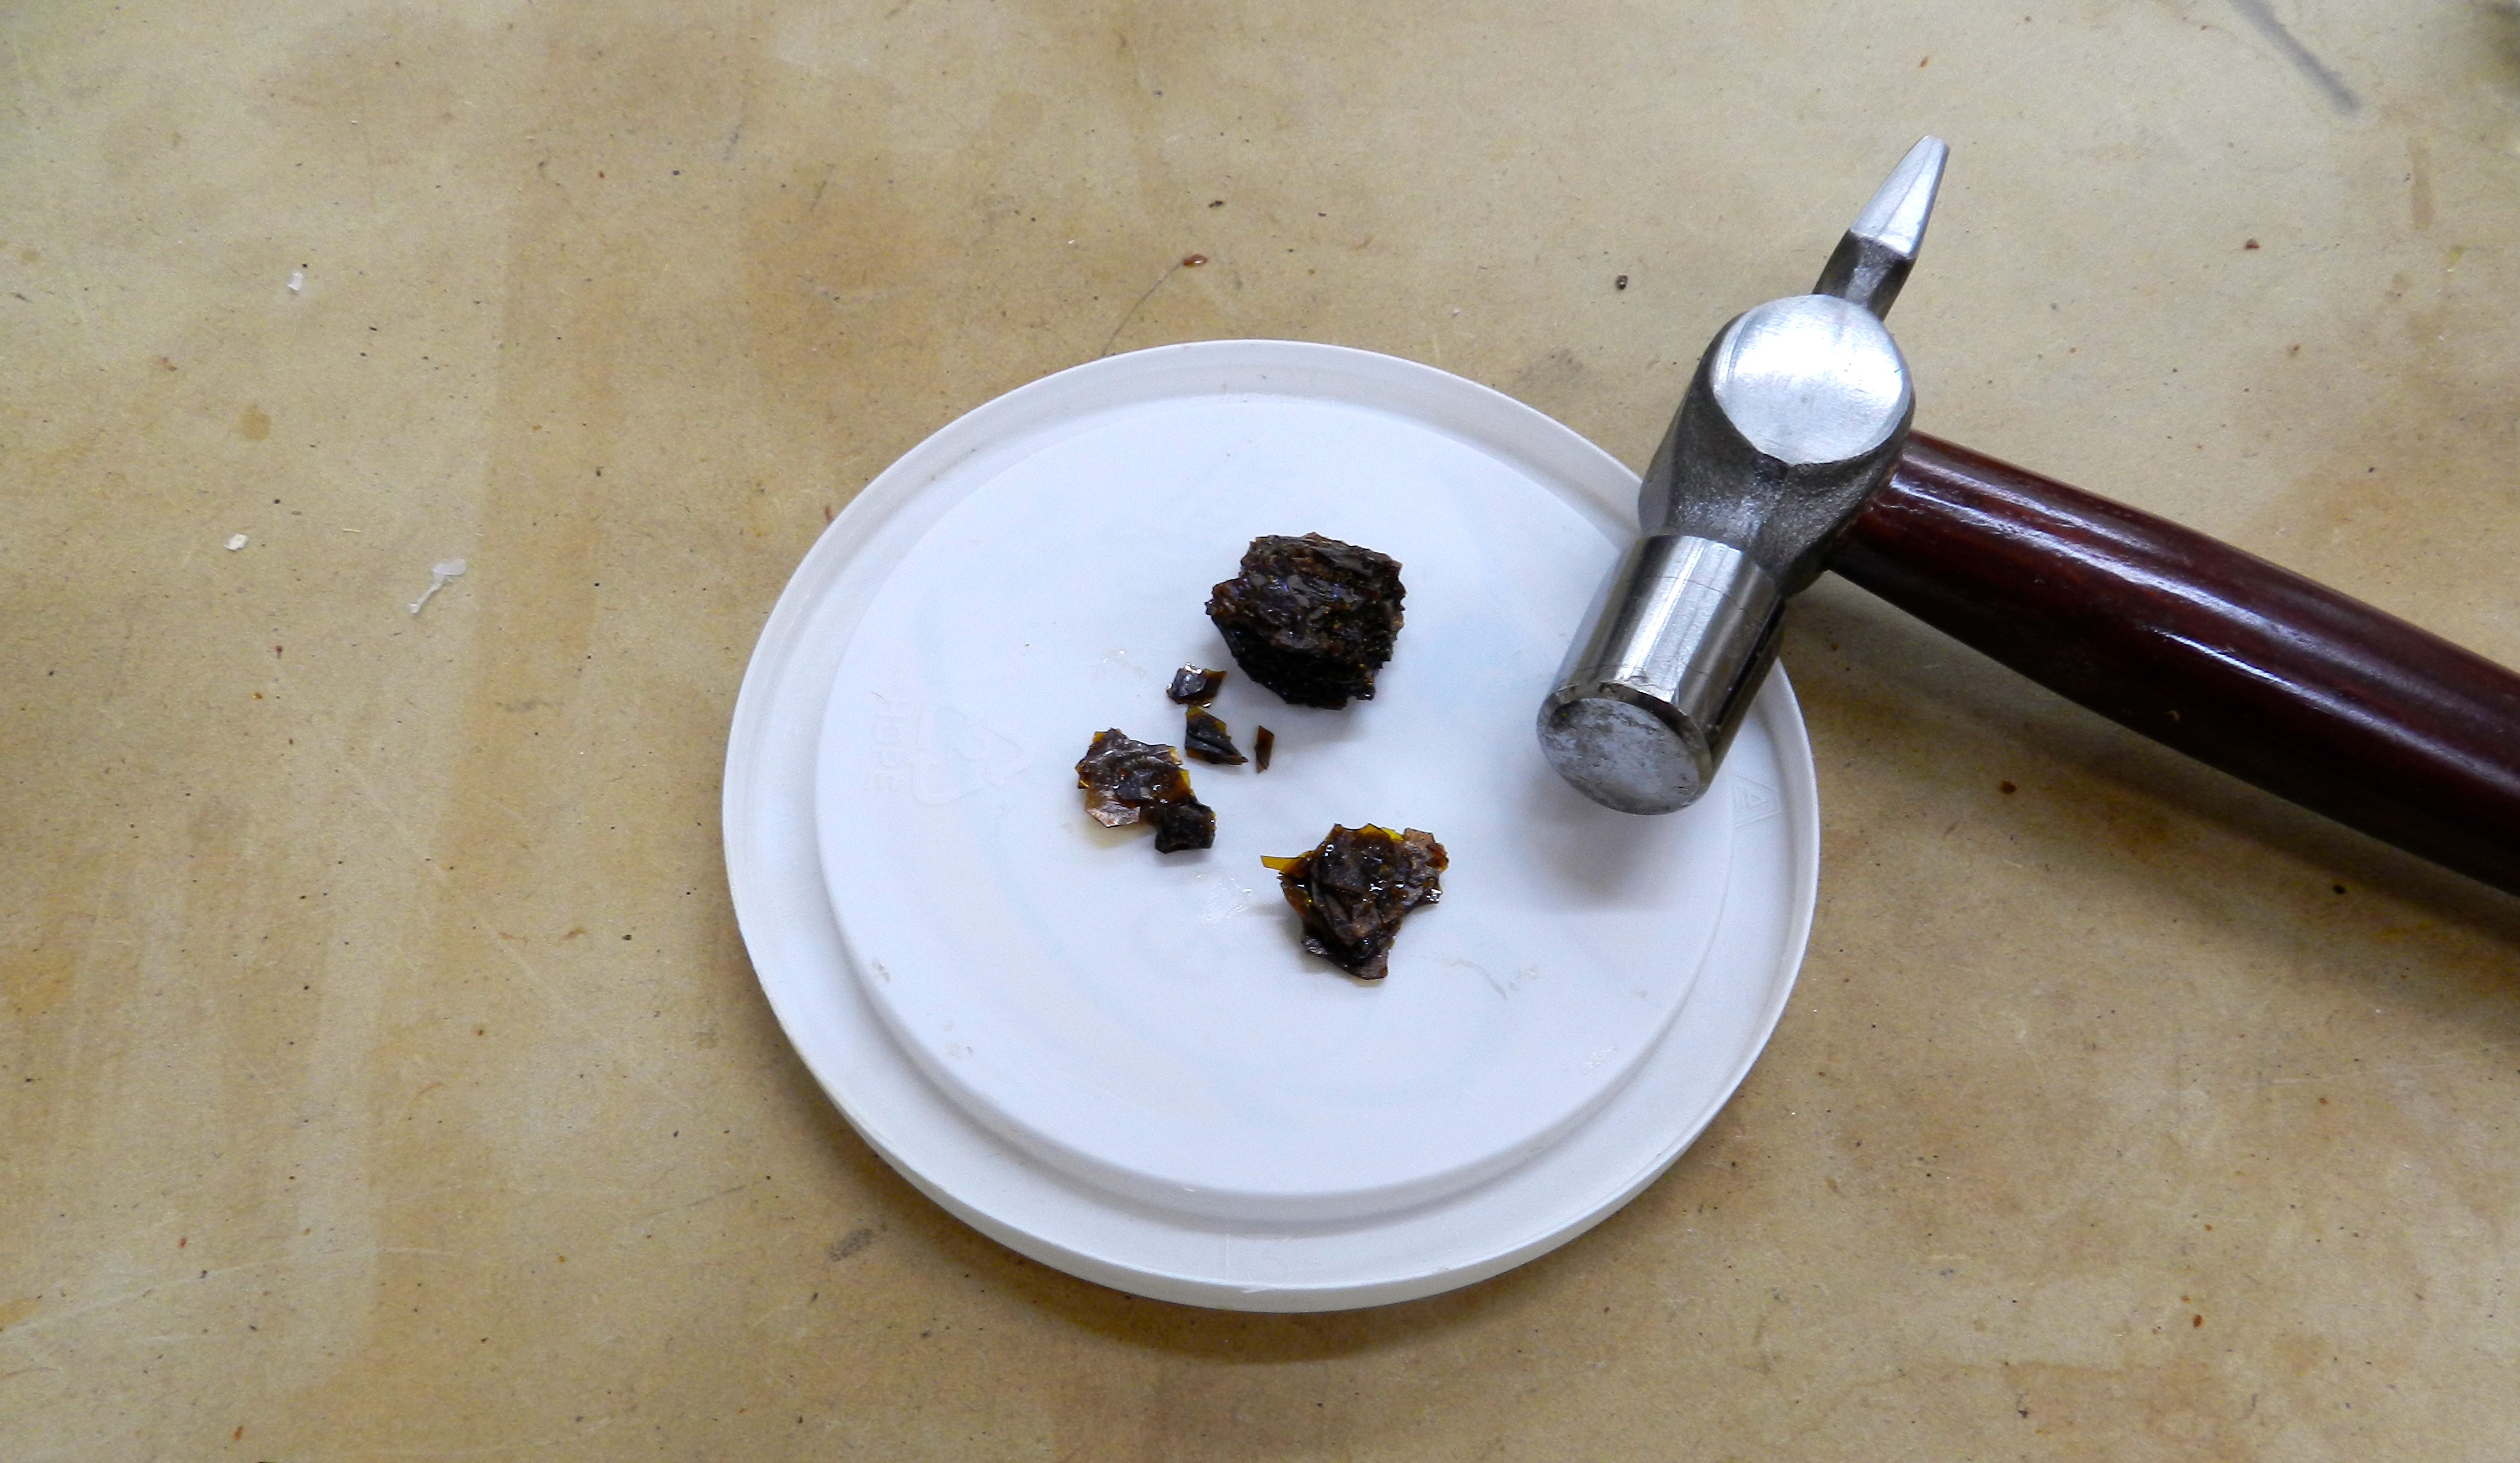
Before adding the flakes to the alcohol I like to grind them up as much as possible being sure to remove any large lumps. By breaking up the flakes I am increasing the surface area of the flakes thereby helping the shellac to dissolve faster and not leave as many or any clumps in the jar. In the photo below on the left you can see the flakes as they came from the supplier. On the right are the same flakes after I broke them up. Breaking of the flakes is a quick and easy process. I put the flakes in a strong container where the neck narrows a bit and I crush them using the bottom of my hammer handle. (Wood handle and clean) As I crush a bit of what I measured out I put it into the alcohol to start dissolving.
For the bigger lumps I use the head of the hammer to break them up, again trying to do this in or on a container that will not allow the pieces to fly all over the shop.
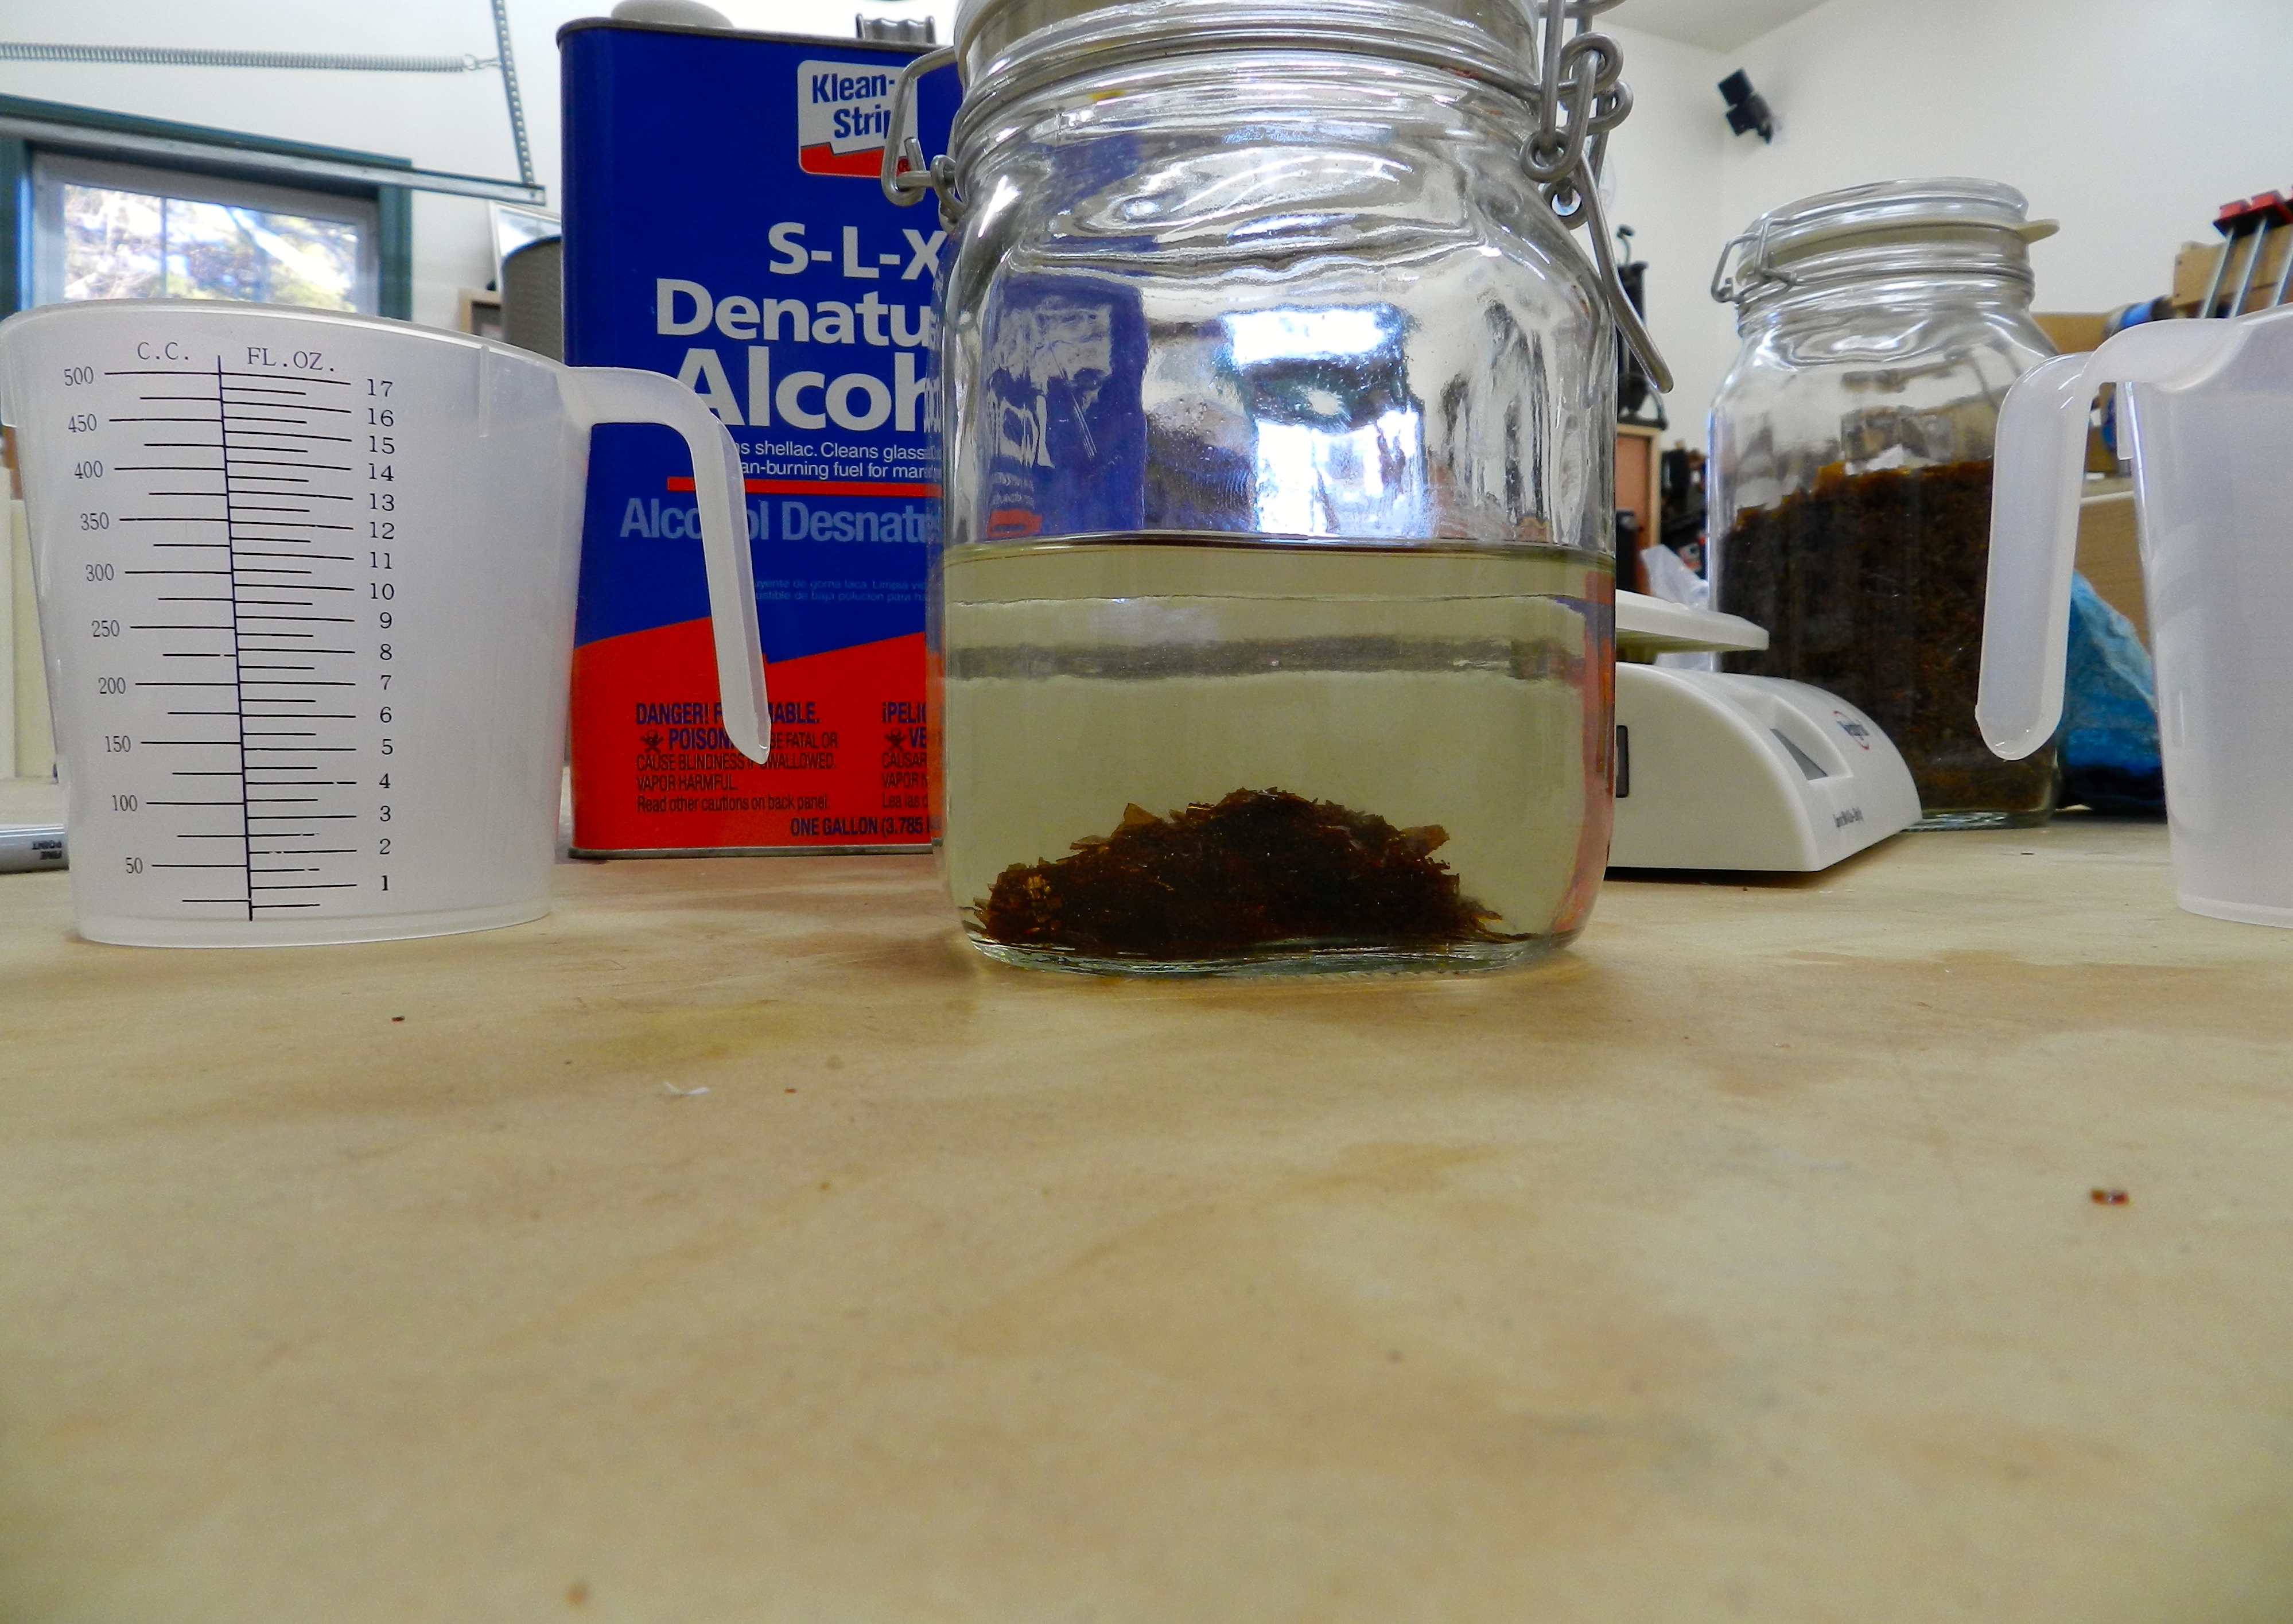
Once I have all the ground up shellac in the alcohol I swirl it around in the jar and then let it sit someplace in the shop near where I am working. Every so often I give it a quick shake until all the flakes are dissolved. Usually takes about a day and the finer you grind the flakes the better it dissolves.
Once you have your batch of shellac ready to go I usually decant the volume I want to use into a smaller container and filter it during that operation. The smaller paper filters can be found at better finishing supply houses (used a lot with auto finishing) or medical suppliers. I first heard about them at medical suppliers when I had a kidney stone and learned more that I ever wanted to about filtration.
When applying shellac by hand I normally make a rectangular rag from old (clean) white undershirts folding the rag to be the size and thickness I want and dip it into the shellac and apply via motions that are similar to using a paint brush. You want to avoid leaving streaks and making sure to take strokes that go from end to end on the piece. You’ll also want to sand between coats with 200+ grit sandpaper, 000 or 0000 steel wool or my new favorite — synthetic steel wool like Mirka Mirlon.
What ‘cut’ is right for me?
A ‘cut‘ or ‘pound cut‘ is the term used to describe the number of pounds of shellac dissolved into a gallon of alcohol. If you want a specific pound cut but don’t need a gallon you simply maintain the same ratio of flakes to alcohol. The table below will show you the most common cuts:
| Alcohol (Vol.) | 1 pound cut | 2 pound cut | 3 pound cut |
| 1 Gallon (128 fluid oz) | 1Lb. (16oz.) flakes | 2Lb. (16oz.) flakes | 3Lb. (16oz.) flakes |
| 1/2 Gallon (64 fluid oz) | 1/2Lb. (8oz.) flakes | 1Lb. (16oz.) flakes | 1.5Lb. (24oz.) flakes |
| 1 Quart (32 fluid oz) | 1/4Lb. (4oz.) flakes | 1/2Lb. (8oz.) flakes | 3/4Lb. (12oz.) flakes |
| 1 Pint (16 fluid oz) | 1/8Lb. (2oz.) flakes | 1/4Lb. (4oz.) flakes | 1/2Lb. (8oz.) flakes |
| 1 Cup (8 fluid oz) | 1/16Lb. (1oz.) flakes | 1/8Lb. (2oz.) flakes | 1/4Lb. (4oz.) flakes |
I normally start off with a 2lb cut and thin it if I need a lighter cut.
Shellac.net has a nice description of some basic uses for common ‘cut’s of shellac:
In general a “2 Pound Cut” is a good place to start. Several thinner coats are often easier to apply and finish than few heaver coats. work methods, tools, weather, and environment will dictate your ‘pound cut’ preference. A 3 pound cut is generally reserved for priming or sealing of stains, and sap, or knots prior to painting, especially on softer woods. Always use a Dewaxed Shellac as a primer under paint or as a seal-coat under clear finishes.
And ‘Natural Handyman’ has a nice description of the most common uses of shellac here and the relevant snippet for common cut usage would be:
1-lb. – Pre-stain sealing, French Polish finishing
2-lb. – Pre-finish sealing; general wood finishing
3-lb. – Floor finishing; sealing knots & sap streaks
4-lb. – Sealing tough knots & sap streaks, stains
I hope the above has de-mystified some aspects of mixing and working with shellac and I hope that you will incorporate it into some of your own projects.
Time for me to get back out into the shop.
Take care,
-Bill

Bill,
I’ve been fighting with shellac for a while. Ultimately I get a great finish, but only after sanding out all drag marks and drips. Recently I added a little turpentine and it seems to go on smoother. Have you done this? I’m a little concerned that it will ruin my finish.
Hi Jason,
What pound cut are you using? And are you using Shellac as just a sealer or as a final finish? I’ve heard of people adding a tiny bit of turpentine to shellac to extend the dry time, but have not personally done that. If you are getting drag marks then you may want to look at how you are applying it and how heavy the cut. When applying shellac by hand I like to use a folded up bit of lint free cotton cloth (like an old + clean rag made from a white undershirt or similar) to apply the shellac. I use this folded rag to brush it on in quick clean strokes trying to go from one end of the piece to the other — this leaves me with little if any sort of brush mark and I can actively manage the wet line between strokes. One of my favorite reasons for using shellac is how fast each coat dries, so other can be quickly applied over the course of a day. (Usually with a quick sanding via 0000 steel wool or synthetic or 220+ grit sandpaper between coats) You may want to dilute your shellac with alcohol and apply more thinner coats as that will yield better results. Later coats can help blend any lines in the shellac itself as it reactivates a bit with the fresh alcohol (similar to french polishing)
I hope this helps.
Take care,
-Bill
Great info, I’m starting to wade deeper into finishes so this was helpful. What projects would you not use shellac?
Thank you for the comment. I use shellac at the least as a sanding sealer on just about any project I have with a clear finish. Projects where I would not want to use shellac as a final finish would be places exposed to higher heat or water or alcohol as they can affect the finish. So if I were making say a dining room table or a baby’s crib I likely would use a high end UV stabilized polycrylic or similar finish. For an exterior project I’d use a marine spar varnish. Also for salad bowls and cutting boards I tend to use only a a natural oil finish. I hope this helps.
Take care,
-Bill
Great post! I just tried out some of that in the can shellac for the first time a week back. I have been meaning to order some flakes from Tools For Working Wood but have not got around to it. Now I have such a great reference I’ll have to get some on order. Thanks!
That is great to hear. 🙂
Remember that more thin coats will serve you better than fewer heavy coats and make sure to gently sand between coats — 0000 Steel Wool or synthetic steel wool or 220+ grit sandpaper. I think you’ll be pleased with the results.
Take care,
-Bill
Thank you for the very useful information. I am sure it will be used by many more thhan you see answering here.
Again Thank you.
Larry
Hi Larry,
You’re quite welcome.
Thank you for the kind note, I appreciate it.
If you like what you see on my blog, please consider following the blog so you don’t miss out on any of the new posts. On the right hand side of the page you’ll see widgets/buttons that allow you to follow the blog by email, Facebook or WordPress account.
Have a great weekend.
Take care,
-Bill