

“Sloyd is tool work so arranged and employed as to stimulate and promote vigorous, intelligent self-activity for a purpose which the worker recognizes as good” — Gustaf Larsson, Principal of the Boston Sloyd School (1906)
To explore the world of Sloyd training is to roll up your sleeves and get some time at the workbench building your skills. A core component of Sloyd based training is building a series of models which increase in scope and skills required to execute them. Let’s explore one of those skill building exercises from the series of models described in Gustaf Larsson’s 1906 book “Elementary Sloyd and Whittling: With Drawings and Working Directions”.
We’ll take a look at the ‘Match Striker’:
A Match Striker?!
Yep, a key tenet of these models is for the students to make something they can use in their day to day life. Living with items you make yourself will help further refine your ability to judge the quality and completeness of your own work. But why would a child want this? 1906 was a different time — maybe after a long day of 4th grade schooling the students liked to go home for a quick smoke? Probably not. Most likely this item was affixed near a fireplace or stove and provided a nice place to strike a match from — rather than directly on the mantel etc.
While the models were designed to be generally completed in order, the sloyd teacher was encouraged to experiment a bit and design models that would appeal to the actual students in the class. While it is possible that someone could build all the models from a Sloyd book or program and still not be much of a woodworker, the physical and life lessons learned were always considered to be more important than the accuracy of the model though clean and quality work was certainly the goal to strive for. Even if woodworking was not the students’ eventual vocation, it certainly helped them to judge the quality of and respect the work that went into this kind of work.
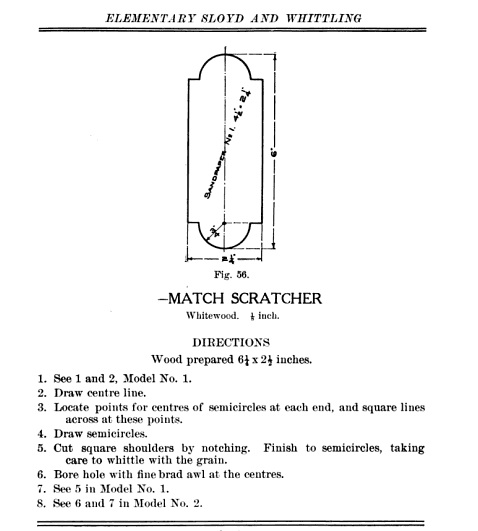
Above is the description of the exercise we’ll work through today…
I started off by sharpening my Sloyd knife (The Hyde Sloyd Knife is actually still made in the USA but takes a bit of sharpening to be useful) and practice a bit on some eastern white pine scrap. Tip: When whittling you want to use the full length of the blade taking a shearing cut and generally cut away from yourself.
After some practice it was time to move on to the real stock. In this case the only thing I had handy that was 1/8″ thick was some walnut I bought years ago and never found a good use for — unfortunately walnut is not great for whittling — so I’d recommend Whitewood, Eastern White Pine or Basswood as better choices for the new woodworker.
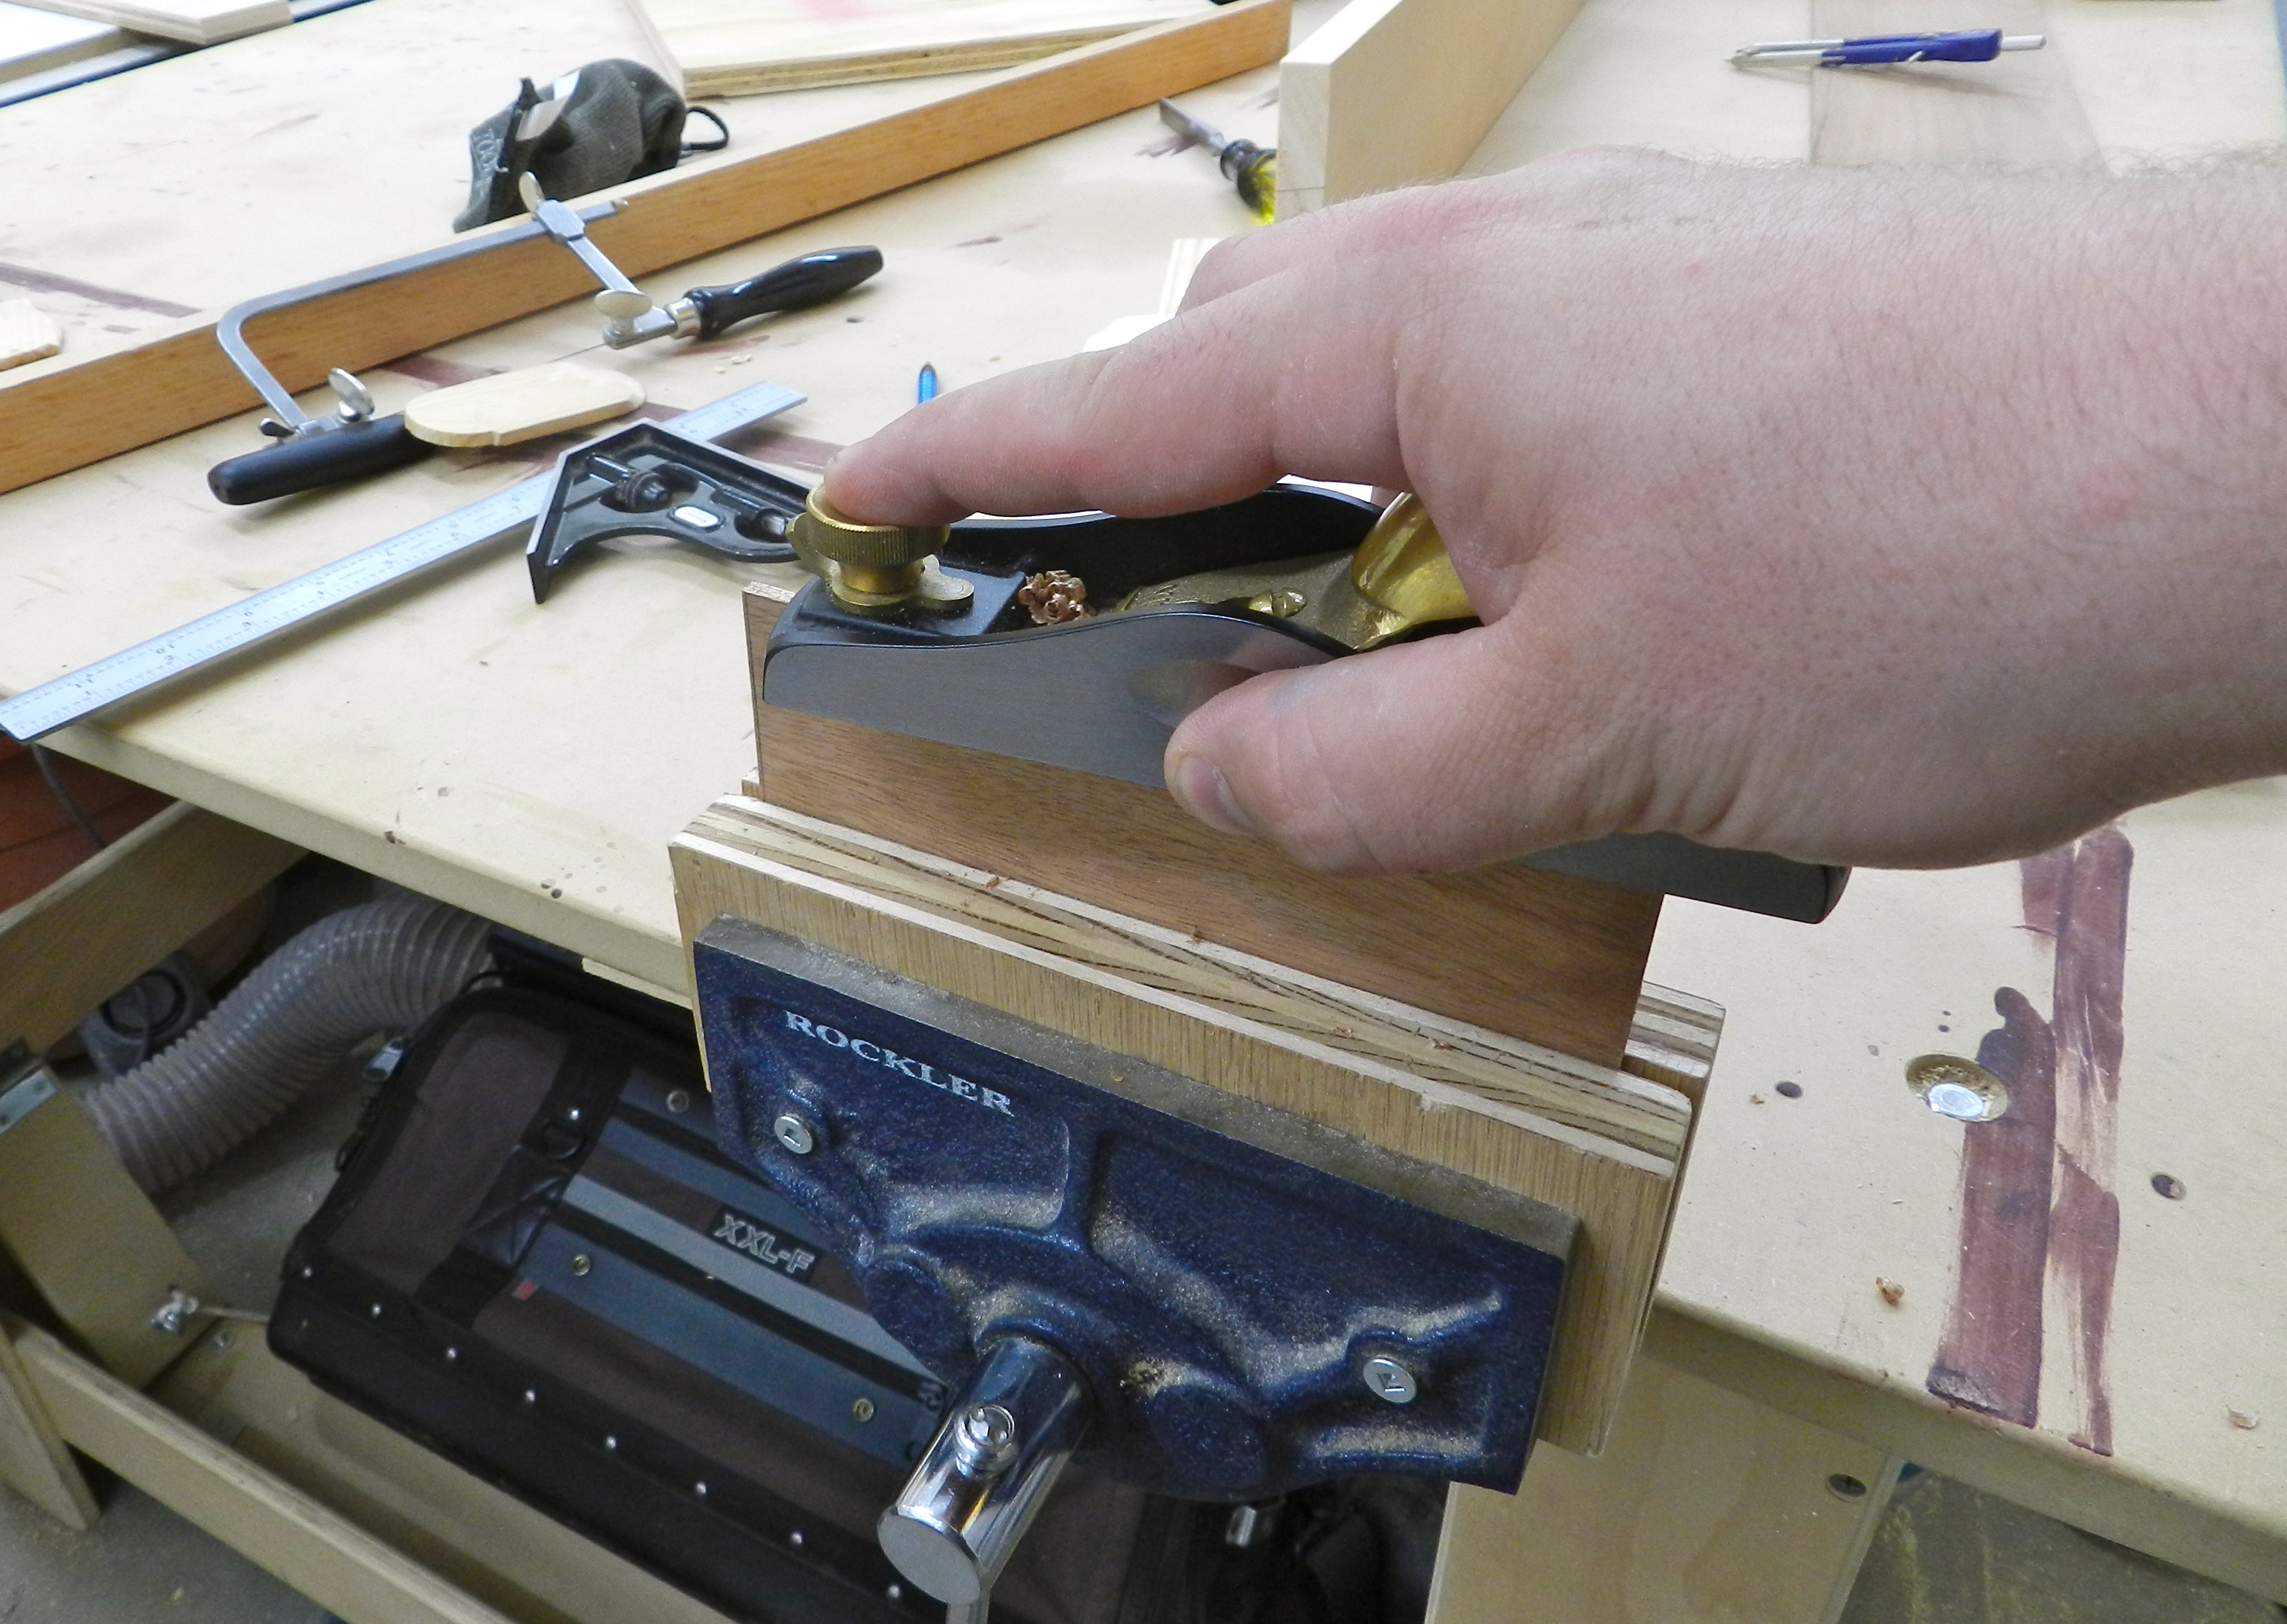
Crosscut the blank to length, then rip it to rough width. With a block plane, trim the piece to width.
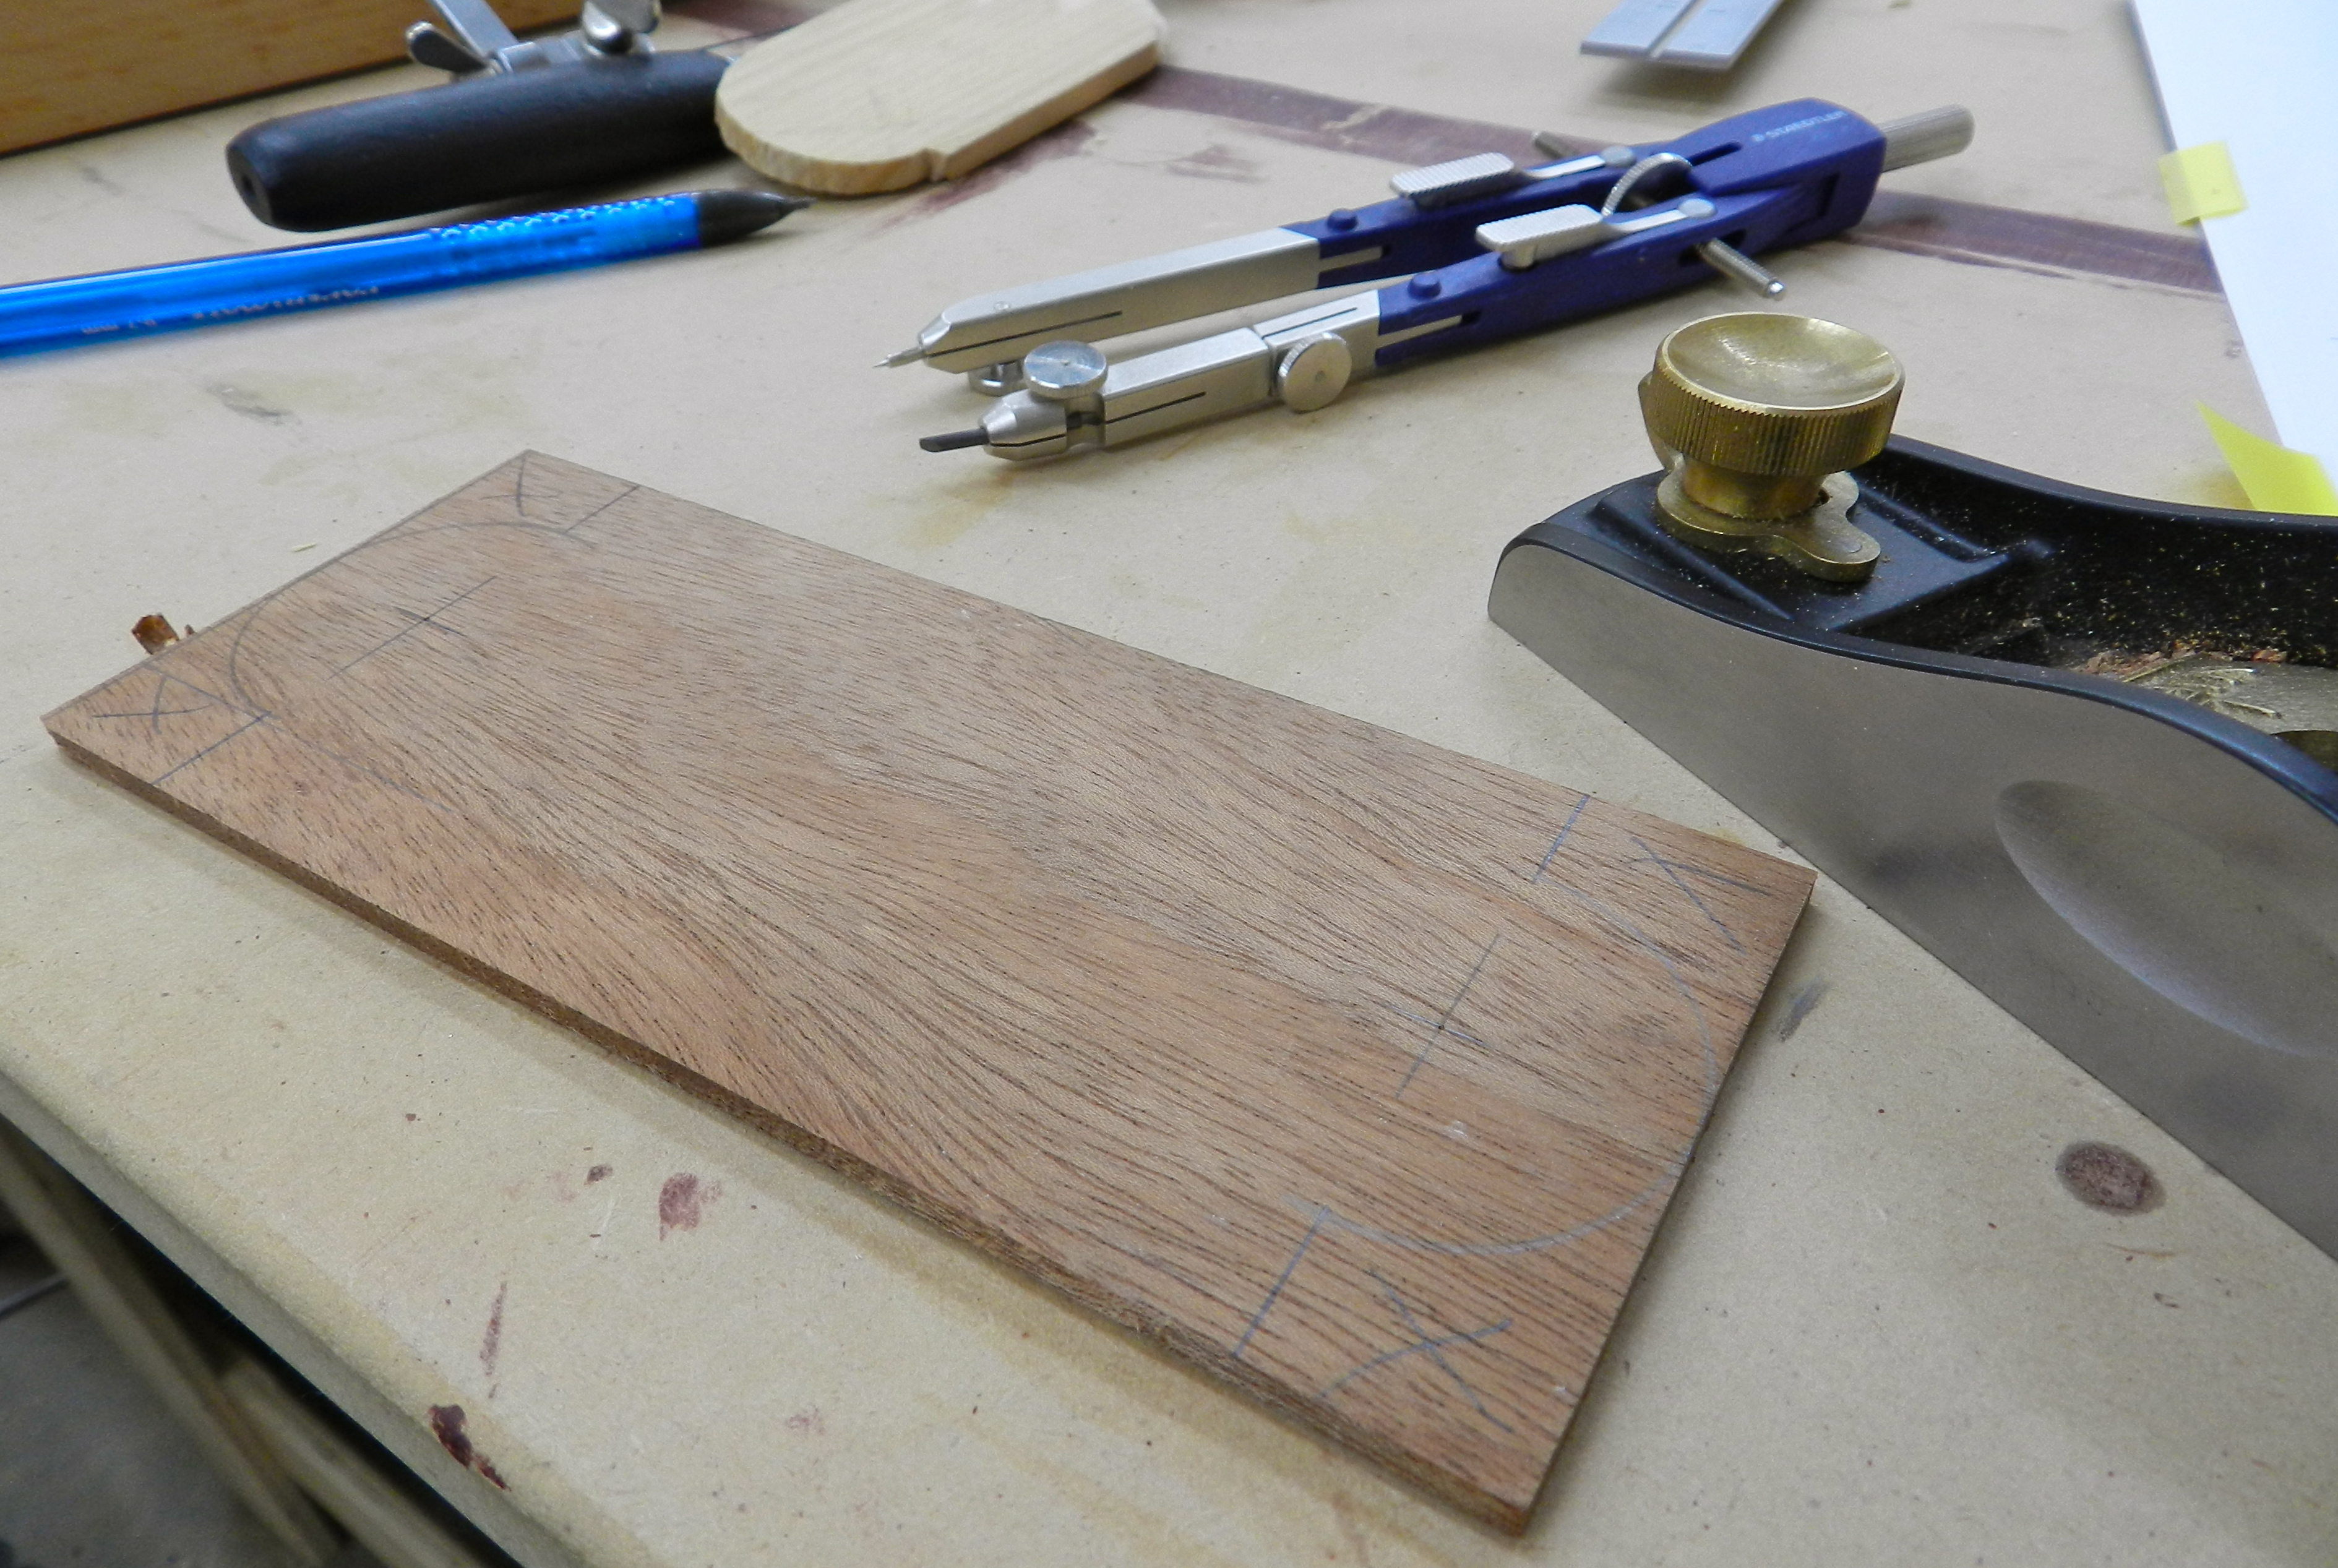
Next up is laying out the design using a compass and a square as called out in the plans.

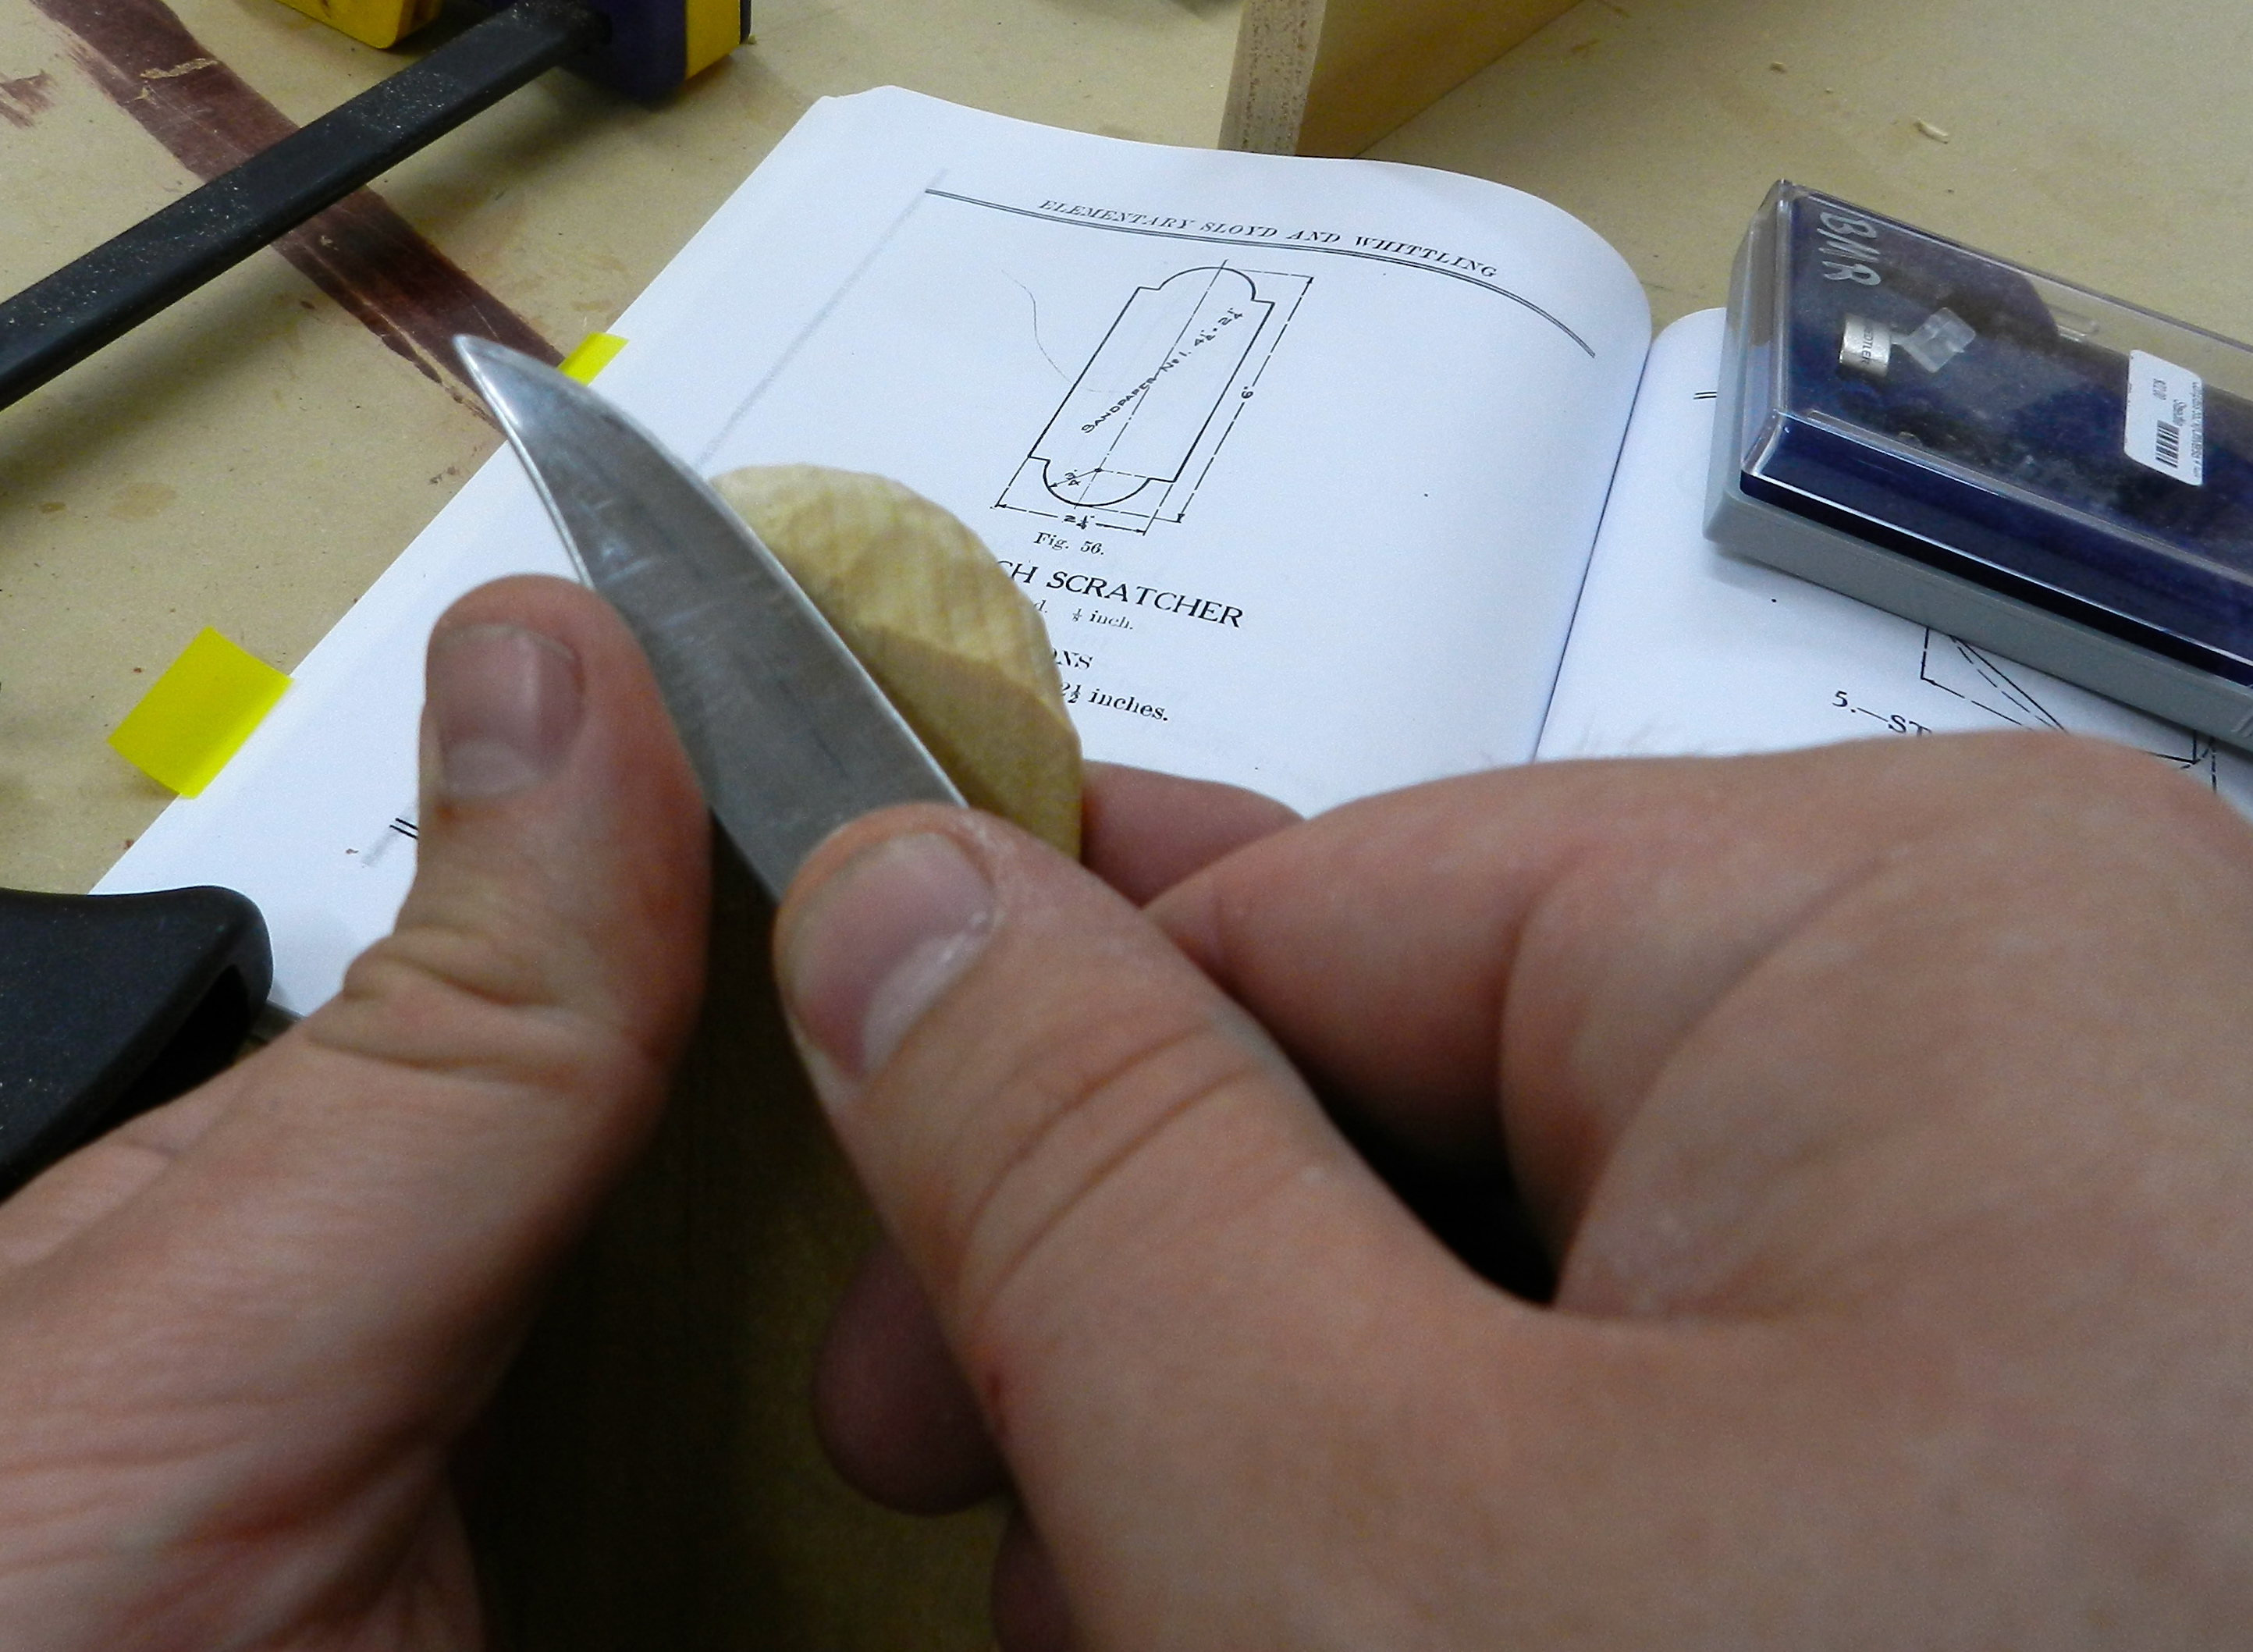
To cut the semi-circle you can use the sloyd knife to do all the work while holding the piece in your hands and whittling. If whittling is not your thing you can rough out the curve using a jeweler’s saw or fine coping saw and then clean up the edge using the sloyd knife.
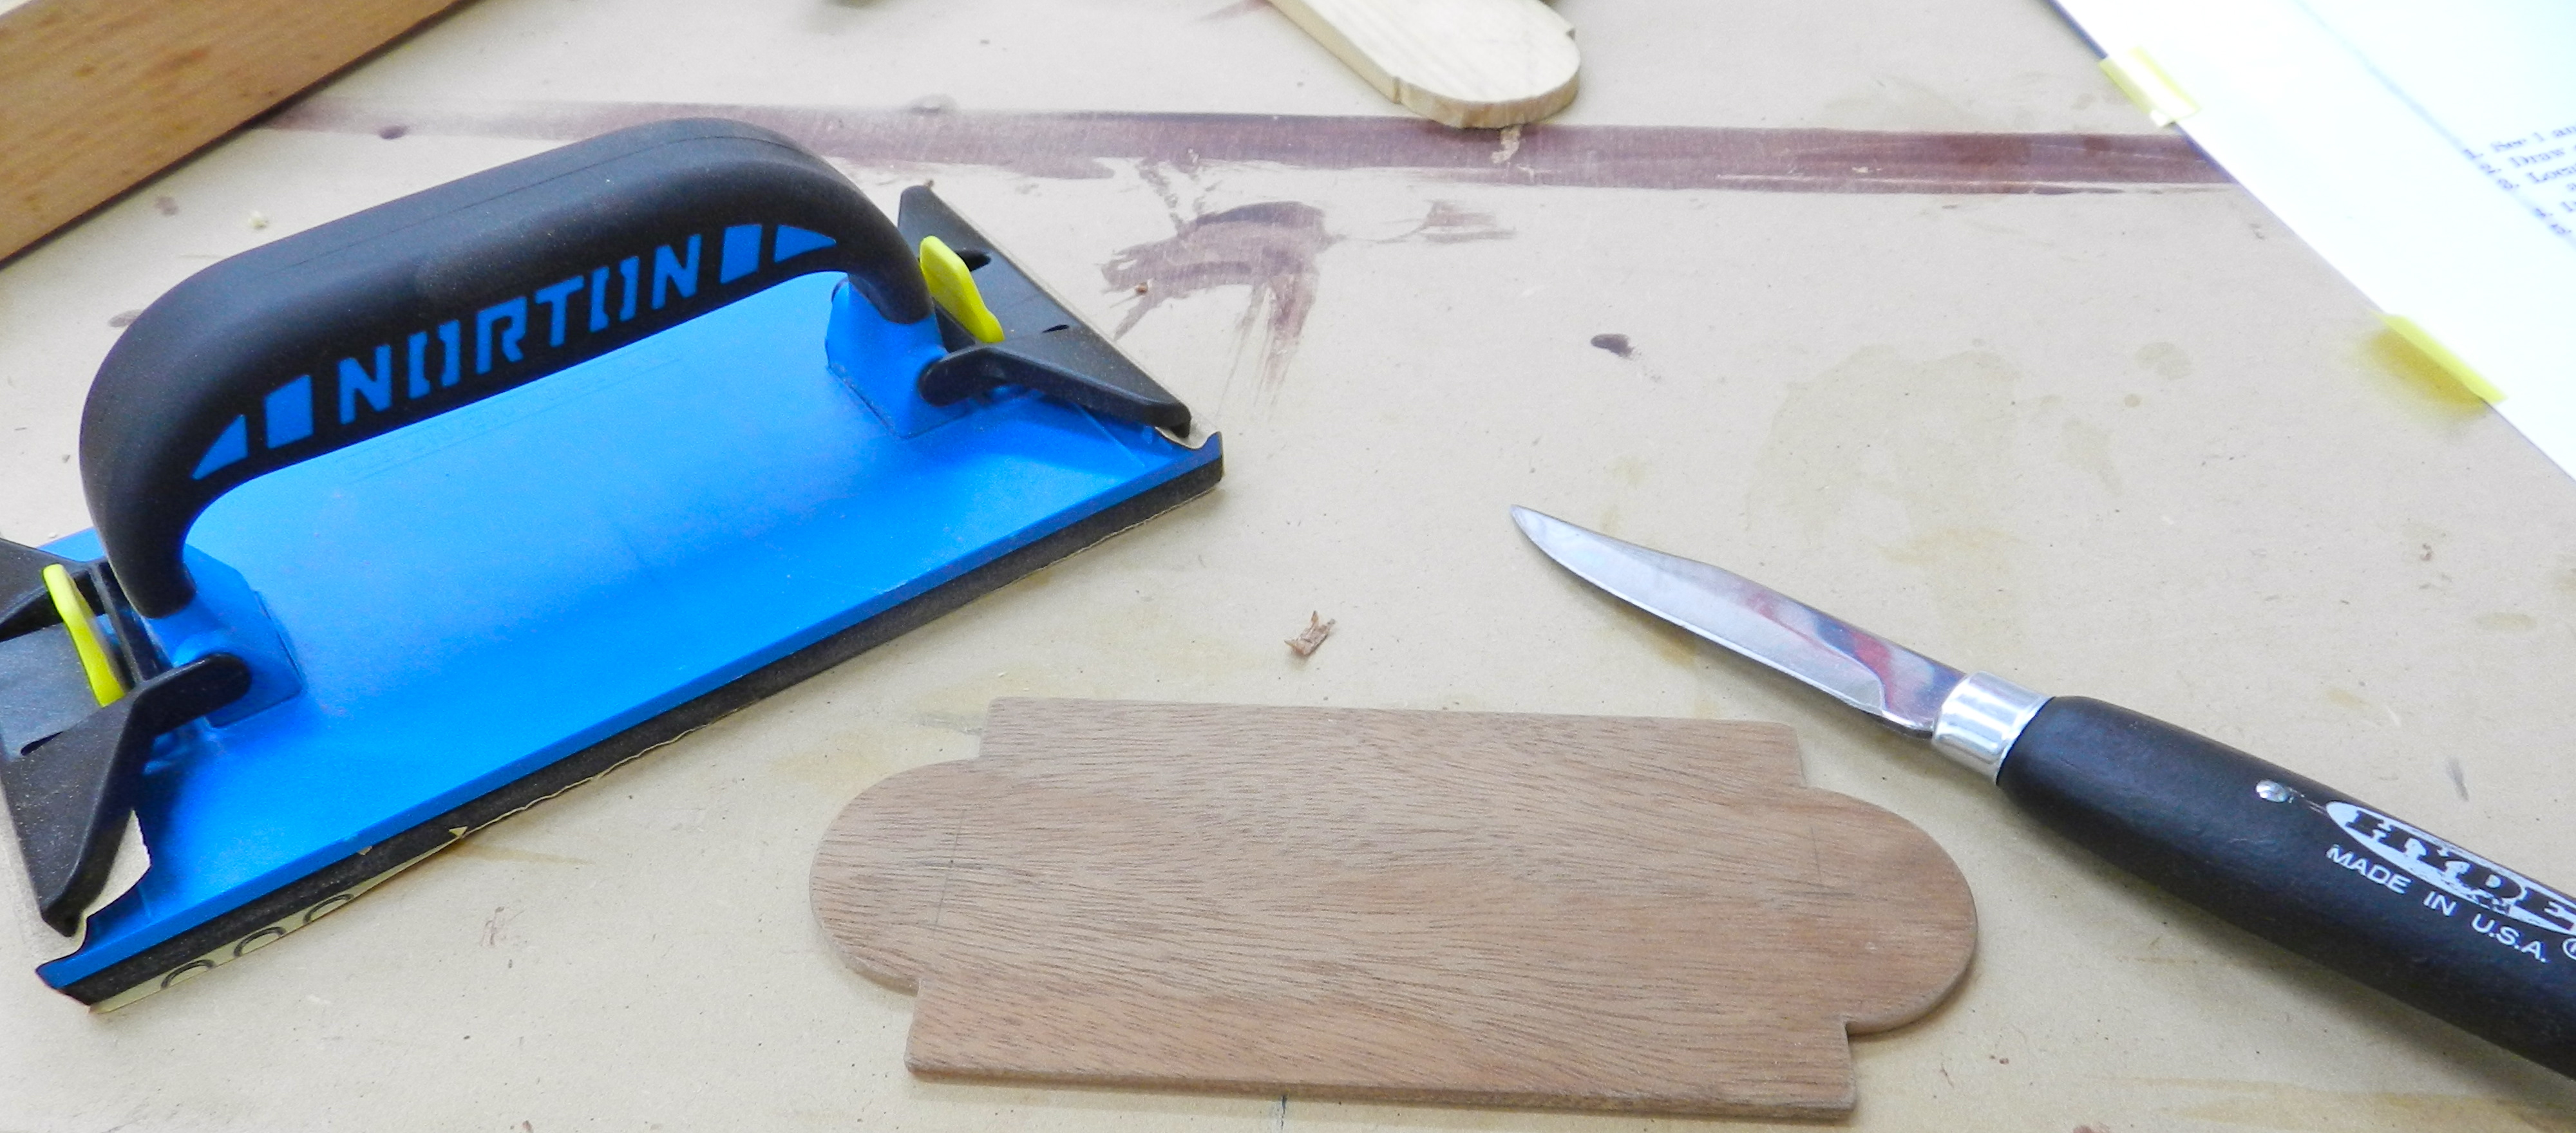
Once you are happy with the general shape you’ll want to take a sanding block and fine sandpaper to break the edges.
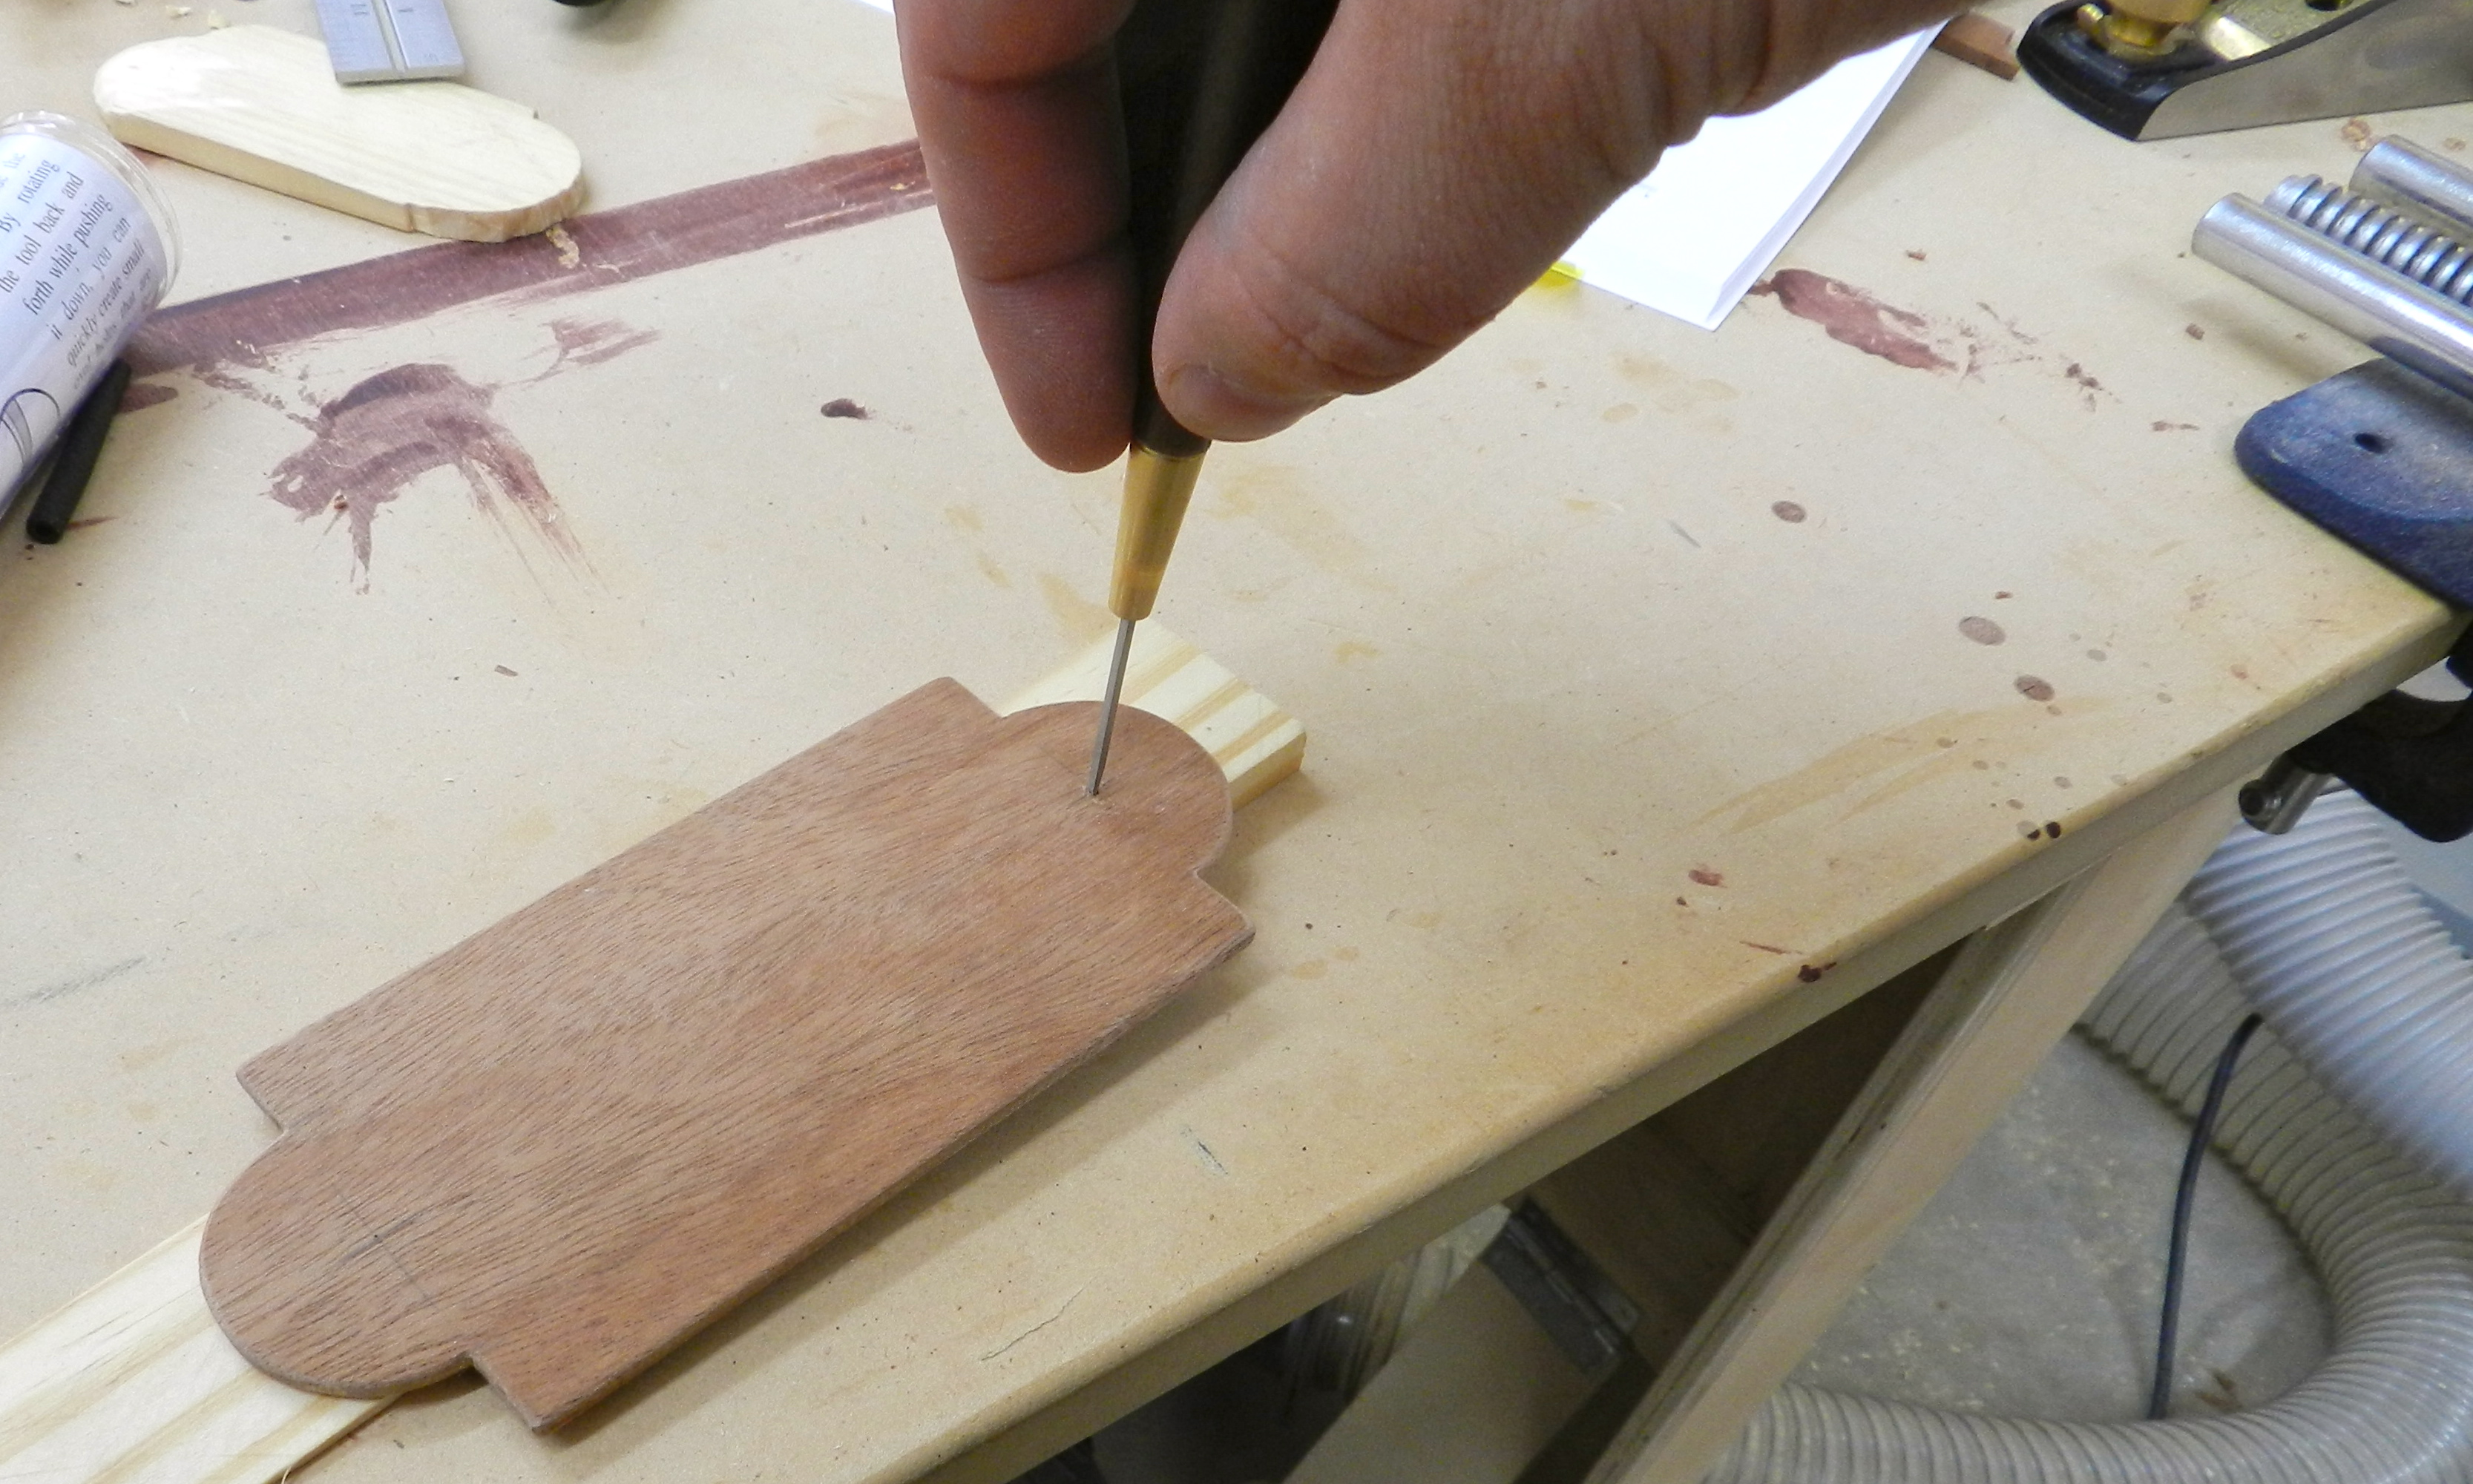
At the center of the semi-circles you’ll want to make a hole using a brad awl. In this case I am used a chisel edge brad awl. It drills a tiny hole by simply applying downward pressure and rotating your wrist back and forth until you get to through the piece or do the depth you want. (Note: I am used a shim to protect the bench surface) These holes are used to mount the striker to the wall or some similar surface.
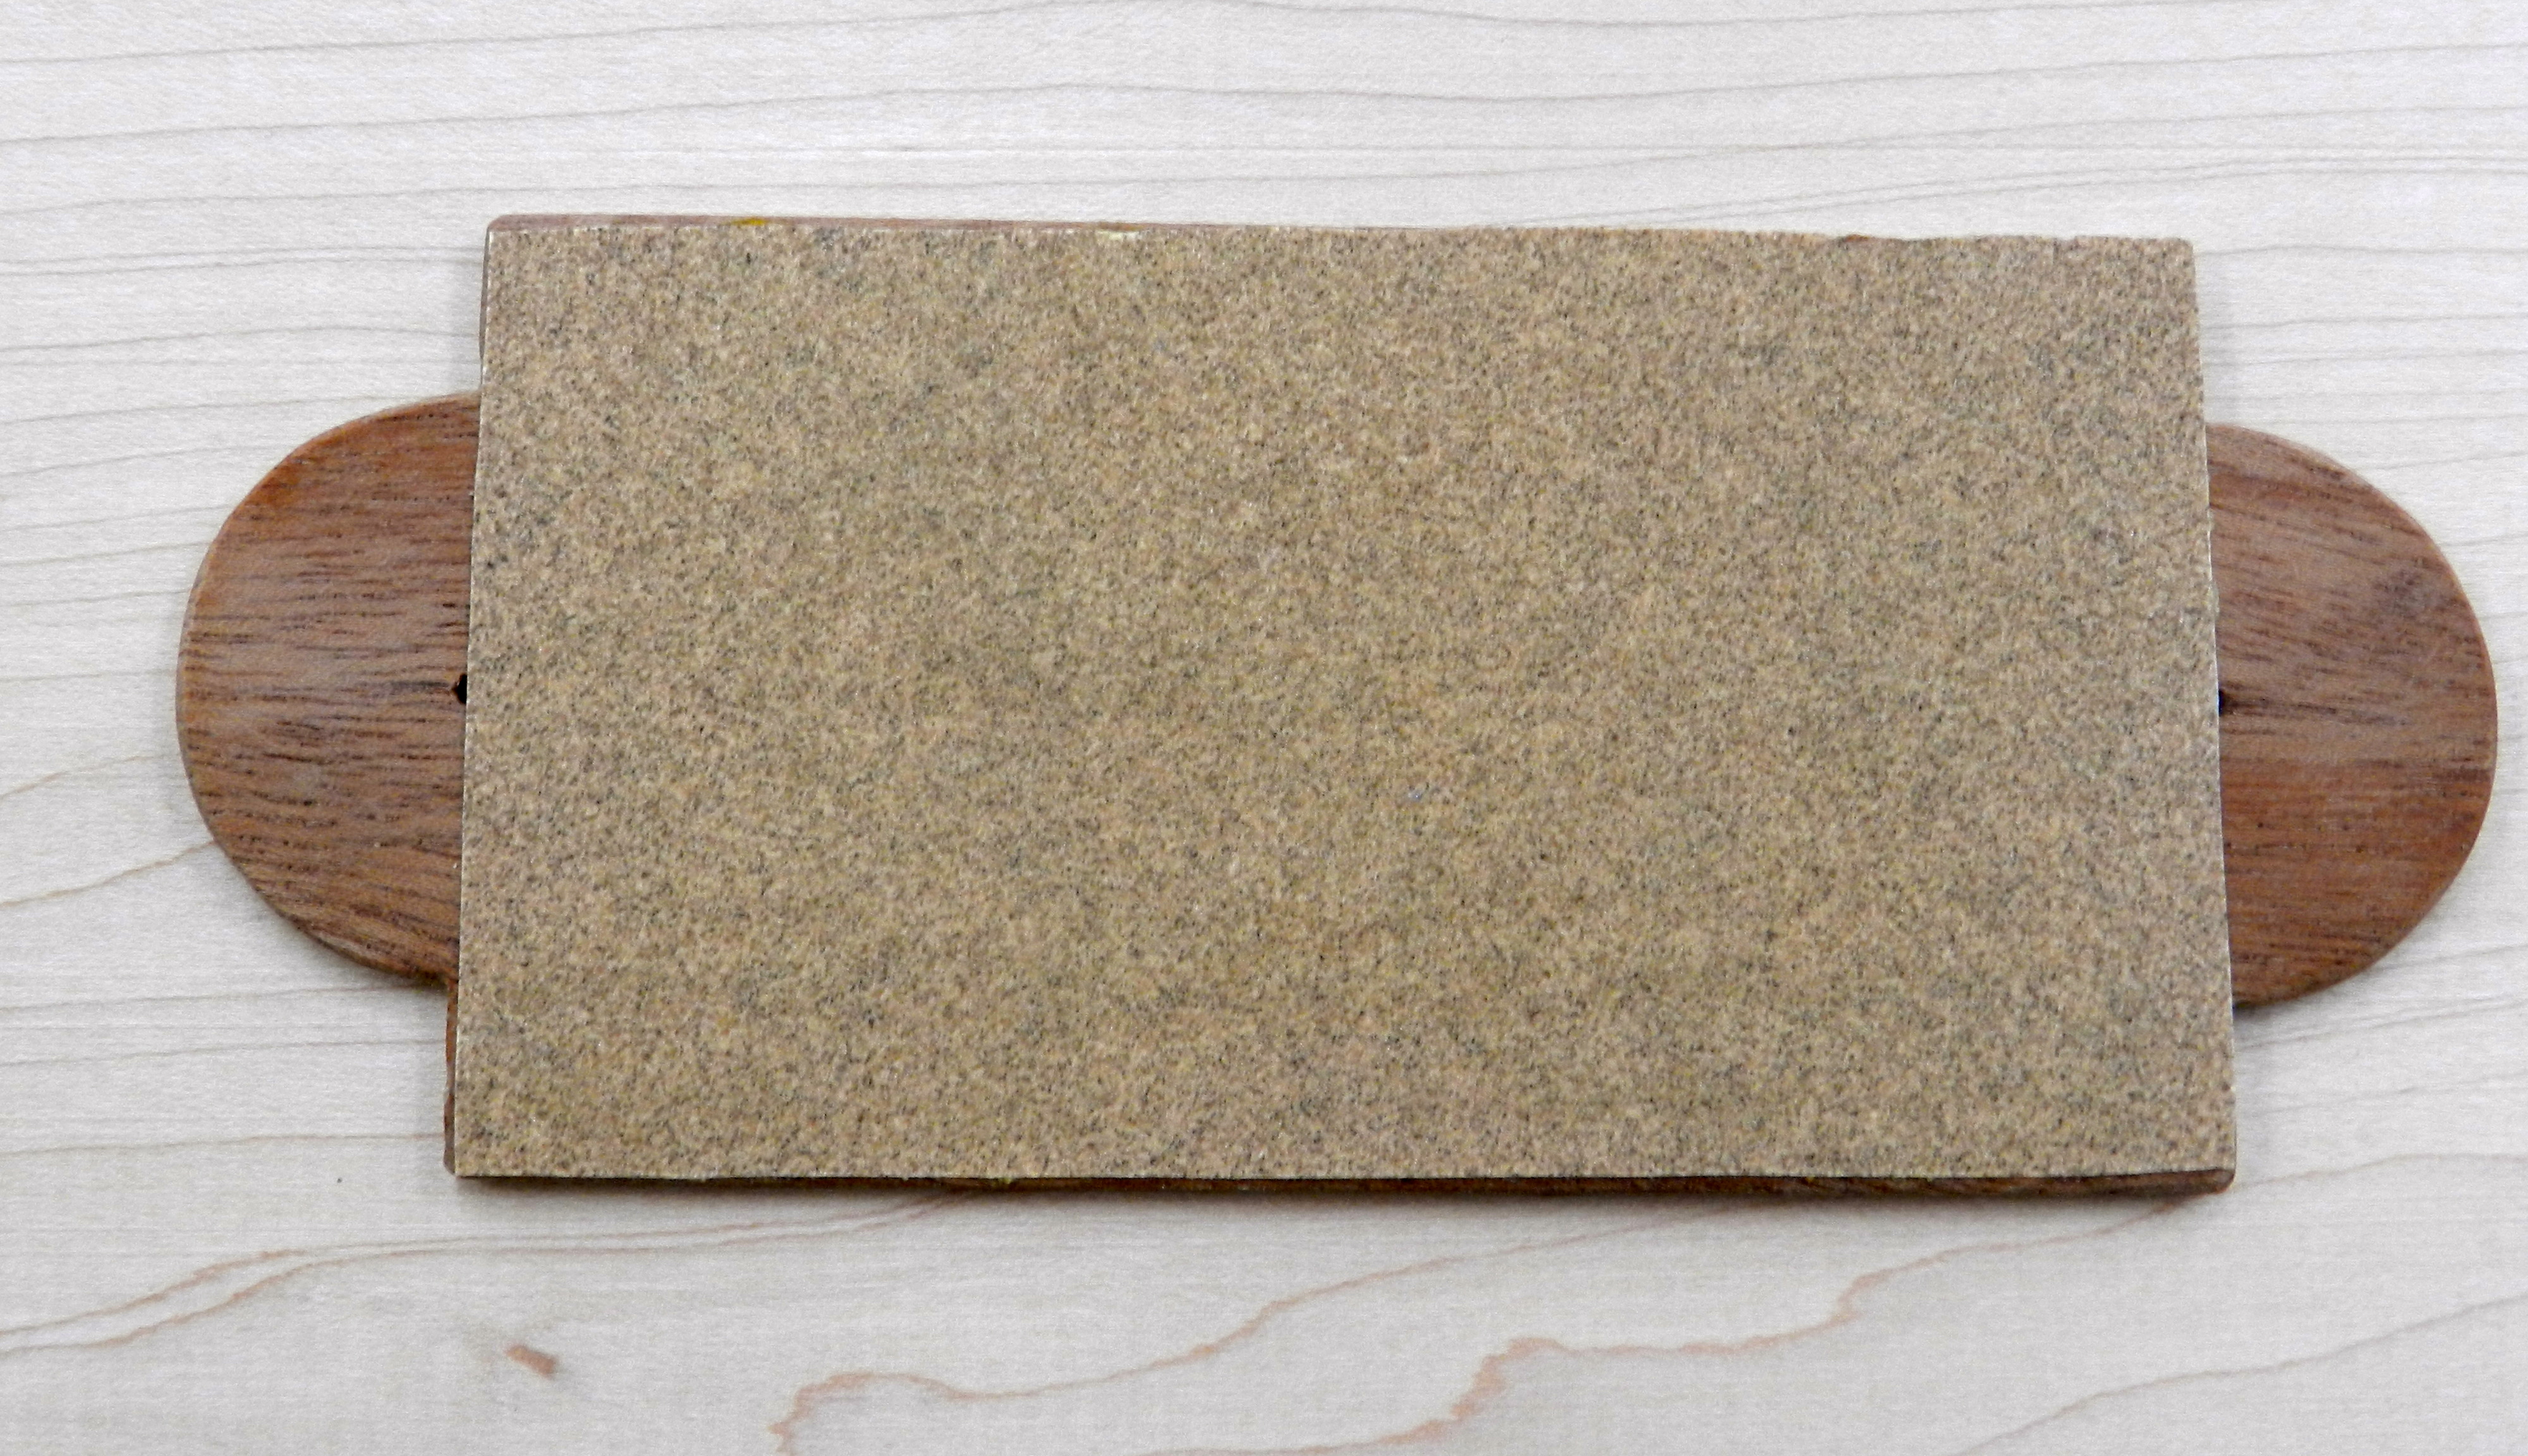
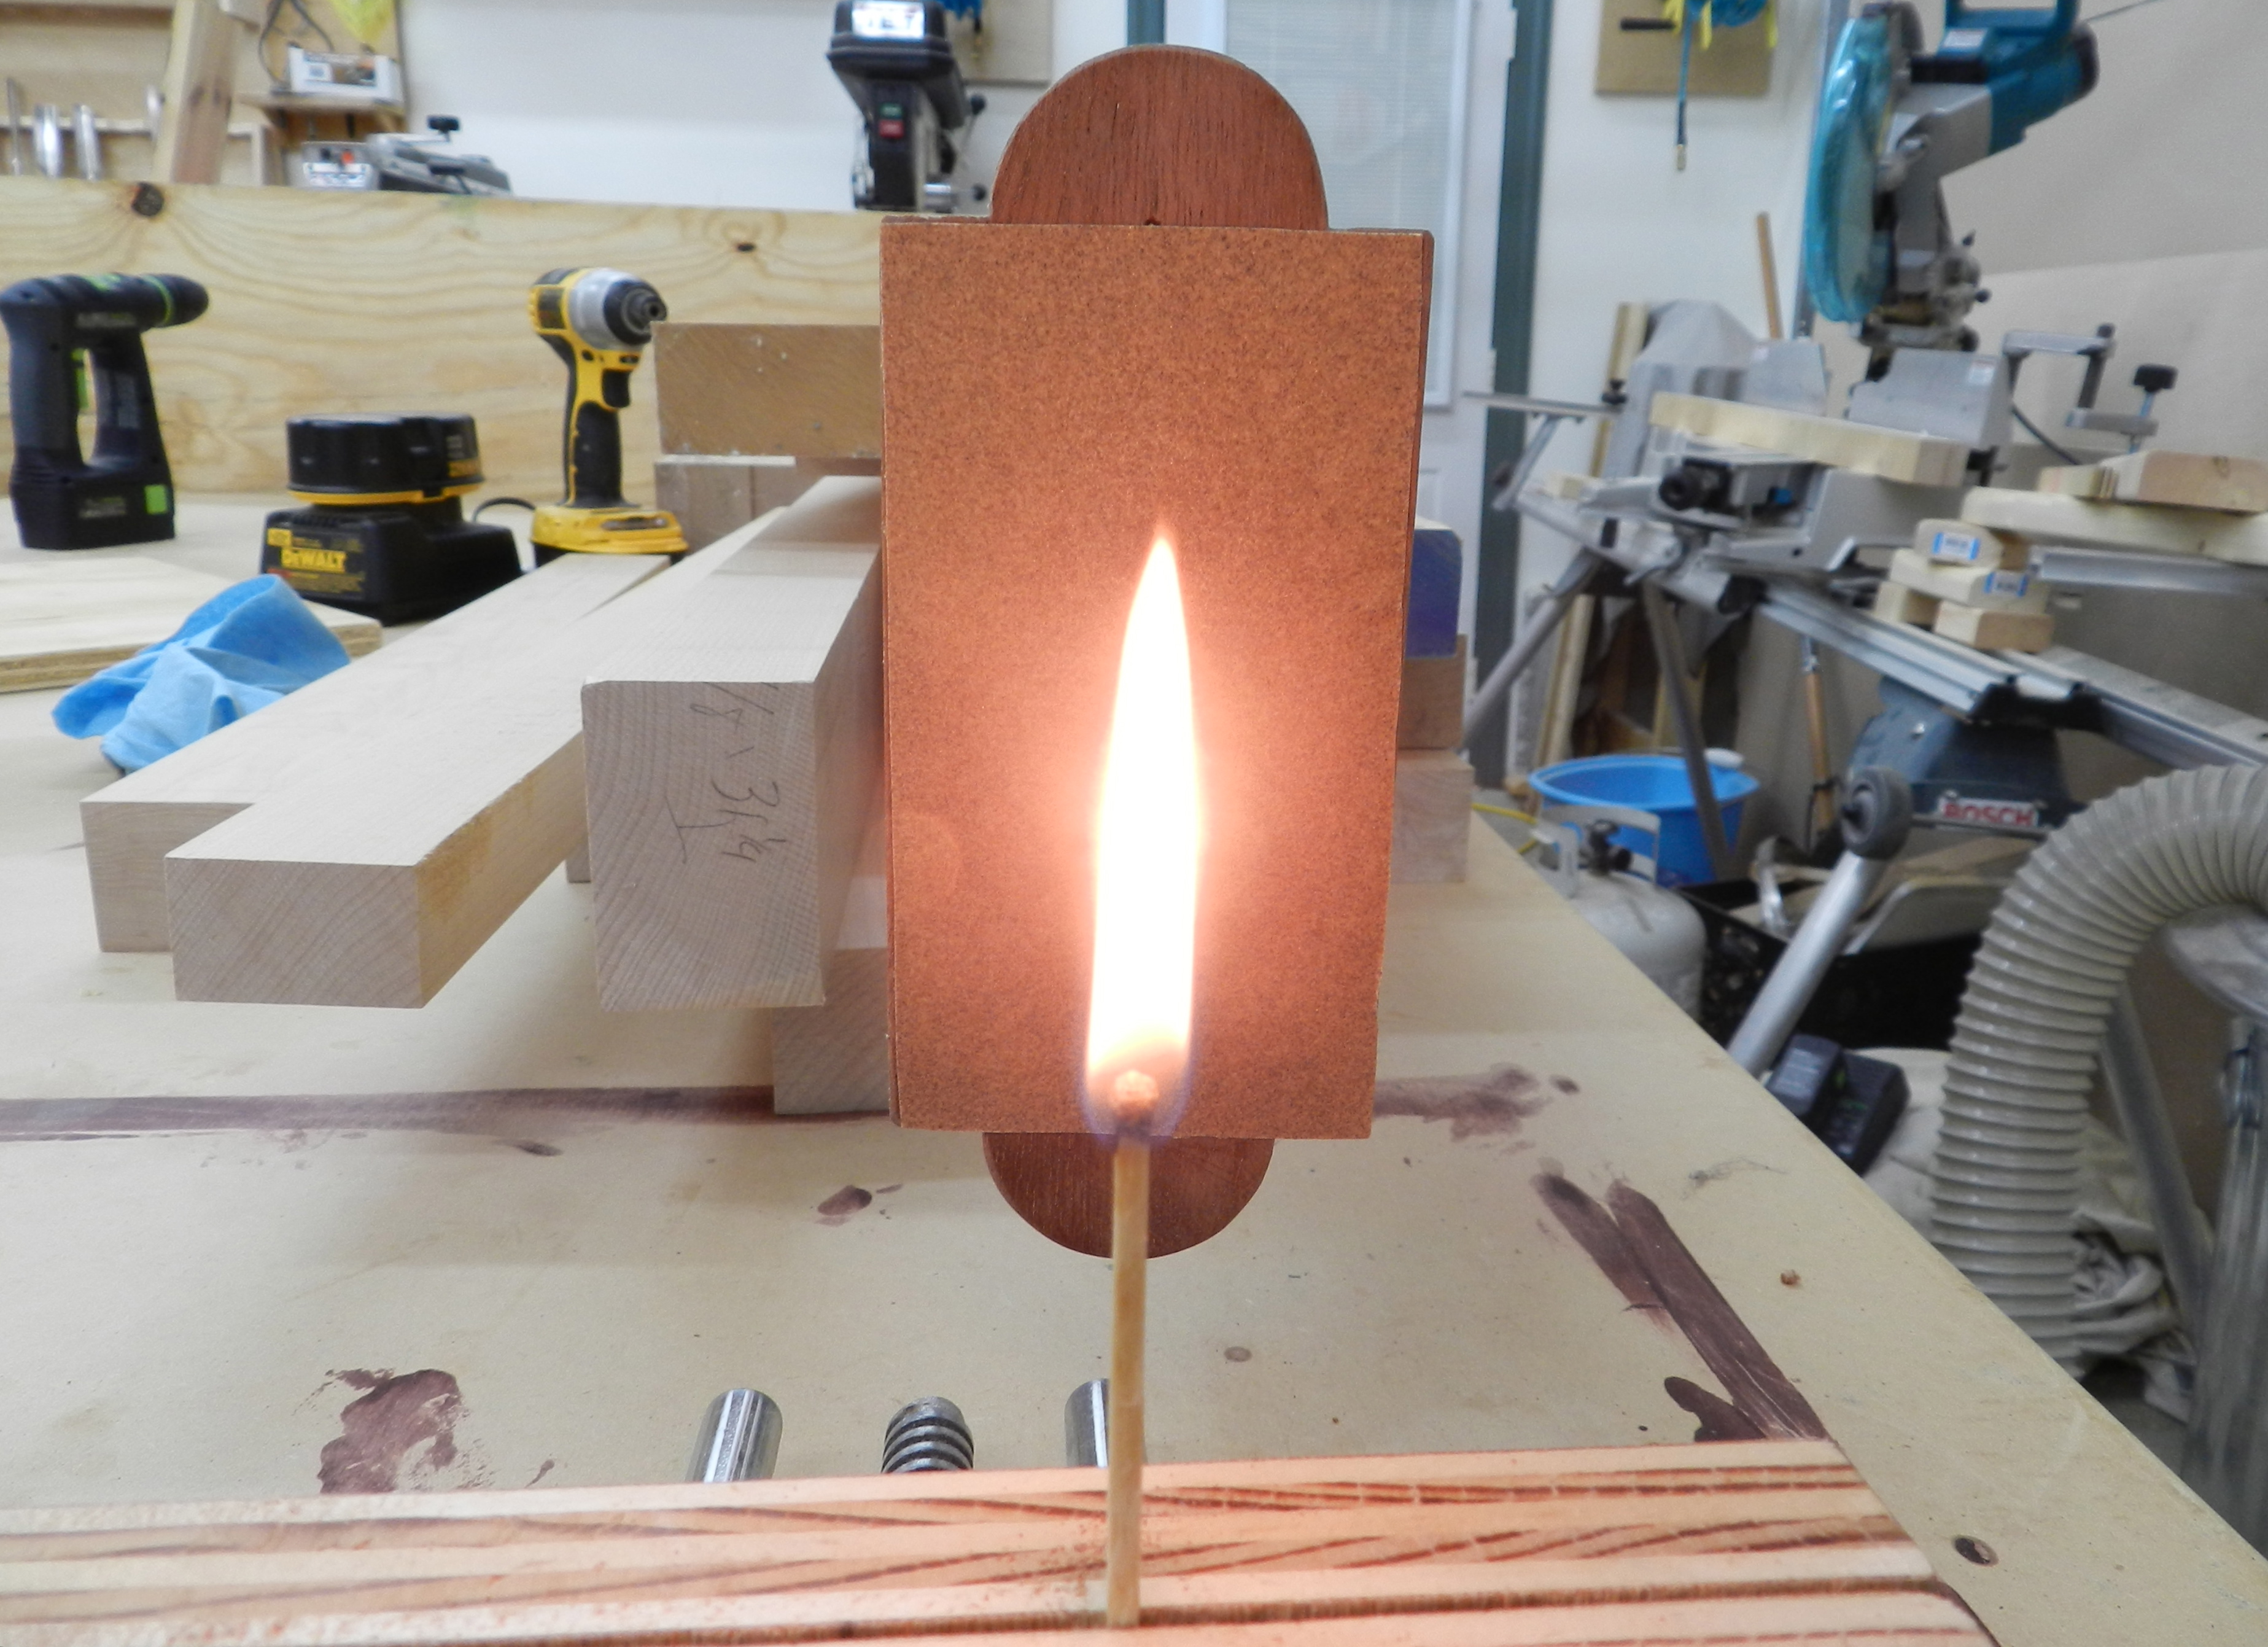
To complete the project, apply a coat of wax and glue a piece of ‘No. 1’ Fine Sandpaper to the surface. After the glue dries this match scratcher is ready to be used. Time to break out the matches and celebrate….

Turns out that most modern wood kitchen matches will NOT light on sandpaper or similar surfaces. So you need to either buy some ‘strike anywhere’ matches or find another use for this model. Don’t worry, if you flip back a few pages in the Larsson’s book you’ll see the the first model was a ‘pencil sharpener’ which is effectively a square strip of wood with the same sandpaper glued to it — and you’d rub a traditional wood pencil on this to sharpen/adjust the point. So now I have a very fancy yet simple pencil sharpener which will live out in the shop.
Wow, that was a lot of work for a modest item — yep, but the item was not the point — it’s a side effect of the intellectual and physical exercise. I am now able to whittle a nice curve and learned a new way to sharpen a pencil on the job site if I need something more refined than a crude chisel tip on a carpenter’s pencil made with a utility knife.
If you’d like to learn a bit more about Sloyd, please check out some of my other posts here and you can read Gustaf Larsson’s “Elementary Sloyd and Whittling: With Drawings and Working Directions” here. If you try out a sloyd model based exercise on your own, please share your experiences here.
Happy Sloyding!

Another great post about Sloyd! It is interesting to see someone go through a whole Sloyd-model project from start to finish. I was also very interested in your comments about how sloyd teachers were encouraged to experiment to find models that fit their own students. Something I found when I first discovered the sloyd system was that the models were quite well suited for their time (late 1800s – early 1900s) but many of them were not really appropriate for today, as they would have no real meaning. The project you did here is a great example of that – although your re-purposing it into a pencil sharpener is a good idea. I recall using something very similar in my high school drafting class to sharpen our pencils to a very fine point for detailed drawing! I look forward to future posts of a similar nature!
Thank you, I’m happy to hear that you and others are enjoying this topic. I agree with you about some of the models being a product of their times. At the end of several books on Sloyd you’ll see other spontaneous projects students came up with. Some of them were surprisingly intricate and even timeless — and some I had to search for online to figure out what they were or how they were used. A funny one of Larsson’s project was the ‘Swing Board’ — effectively a board with 2 notches in it. I couldn’t figure out what it was used for nor find anything online that matched the description and then then it hit me — it’s the board used as a seat with a rope swing. It’s interesting how the things we take for granted come and go over time. I have a few more Sloyd related posts in the queue so I will work on getting those posted in the coming weeks.
Take care,
-Bill
Swing Board, yep my grandmother had one we used to swing on when we went to visit