Workbench side clamps are not something I think anyone would generally use on a daily basis, but when the job calls for the sort of clamping they provide, they do a great job. I think one of the reasons they were not used often is the time it takes to affix them to the workbench — usually requires the use of nuts and wrenches.
How can I improve the likelihood I will use my new side clamps?
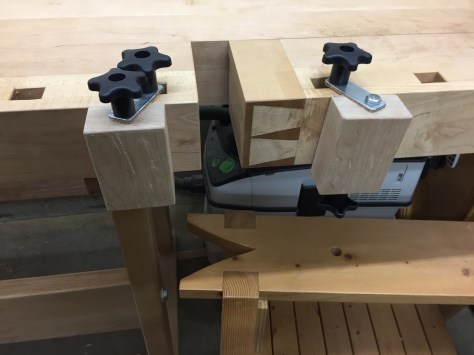
The 3/8″ 5 star knobs I ordered from Rockler for my side clamps arrived yesterday and I gave them a shot.
Side clamps with 5 star knobs
On the left you can see both knobs on the same side of the clamping block and on the right you can see one knob on the top and one knob on the bottom. Either configuration works well. With a 5 star knob you can easily loosen both knobs and remove one knob to move the block around.
The verdict?
The above tweak is not an earth shattering change but it does remove the need for a wrench and make it a little more likely I’ll break out the side clamps with the need comes up.
Take care,
-Bill
@TheRainford
P.S. If you’d like to read up on how to build your own pair of side clamps you can read my earlier post on that topic here.
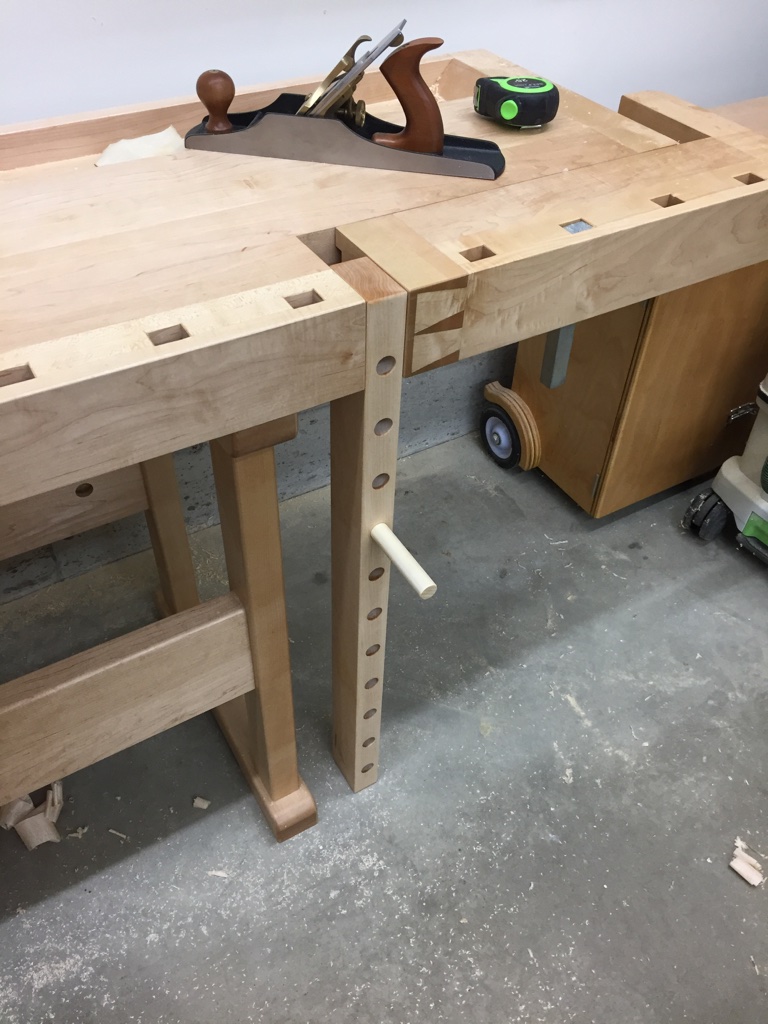
In building my workbench I also built a simple traditional deadman to help support long boards at the bench.
Workbench Deadman
This simple to build workbench accessory is as a great addition to any bench with a tail vise.
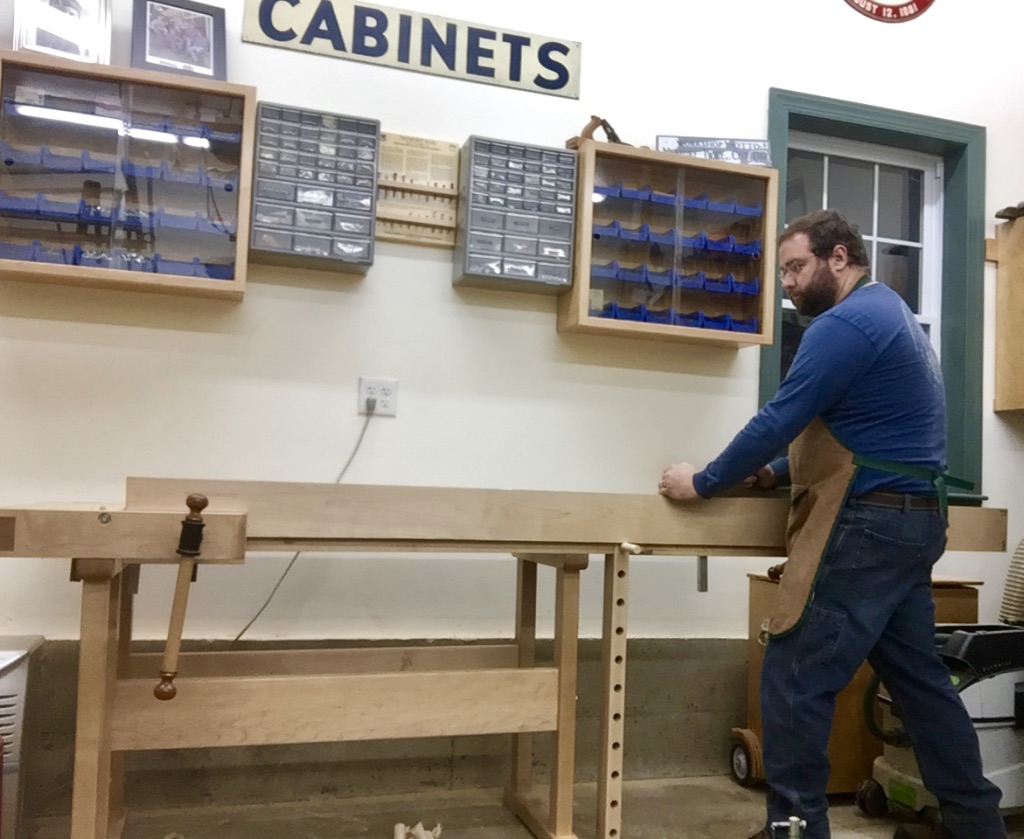
Bill demonstrating the use of his deadman
If you’d like to learn more about this bench and how to build one for yourself, please check out my blog post on this topic over on the Popular Woodworking site here.
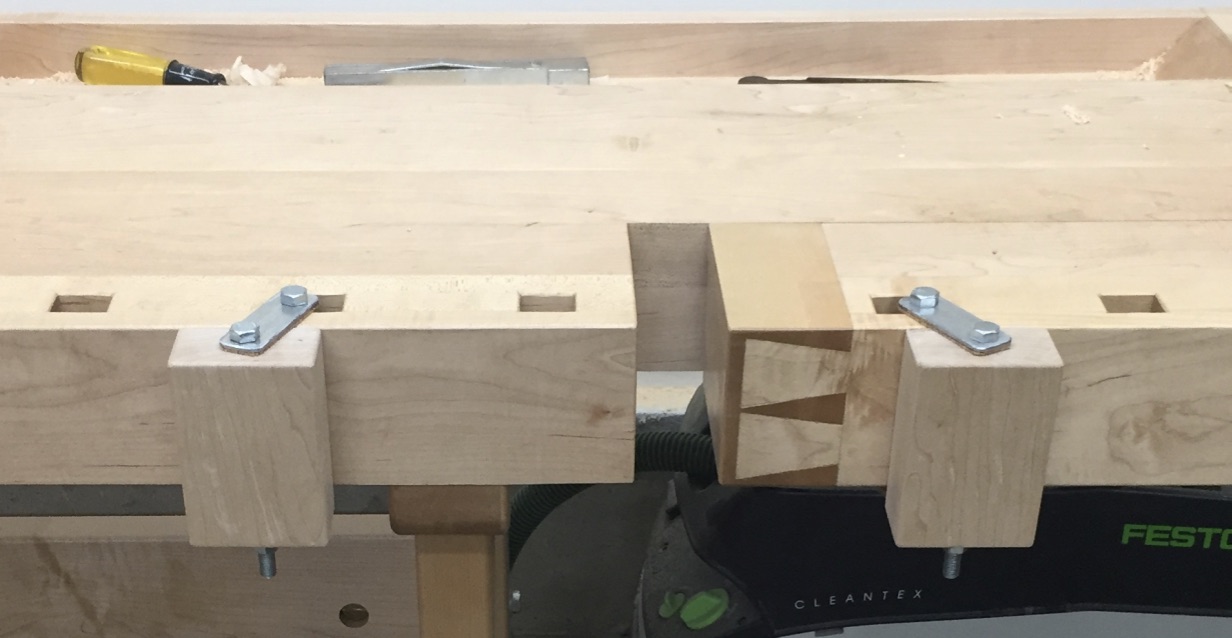
Have you used your side clamps lately? Wait, what are side clamps?
Close up of the side clamps
Side clamps are a pair of adjustable wooden blocks that mount on the outside of a traditional continental workbench with one block mounted to the tail vise and one mounted to the fixed portion of the bench top. In this experiment the blocks are mounted to the bench via 3/8″ diameter, 6″ long threaded bolts and some shop made metal plates.
Background:
When building my Tage Frid inspired Scandinavian workbench I spent a lot of time looking at examples of Frid’s benches — some early extant examples in person, his Fine Woodworking article on his bench (FWW Issue #4, October 1975), the chapter in Tage Frid Teaches Woodworking Volume 3 and various online searches.
In the FWW issue #4 diagrams and text there was a very brief mention of a set of ‘side clamps’. I couldn’t find any photos of these clamps online and they didn’t seem to make it into the book version of the bench. I was curious if they were cut to save space or if in fact they didn’t turn out to be useful.
I decided to build my own version of these clamps based on that lone diagram and experiment with them.
Building a pair of side clamps:
Using some scrap hard maple left over from the workbench I made two 1.75″ thick, 3″ wide and 4.5″ long blocks. I planed them and rounded over the edges with a 1/8″ radius router bit.
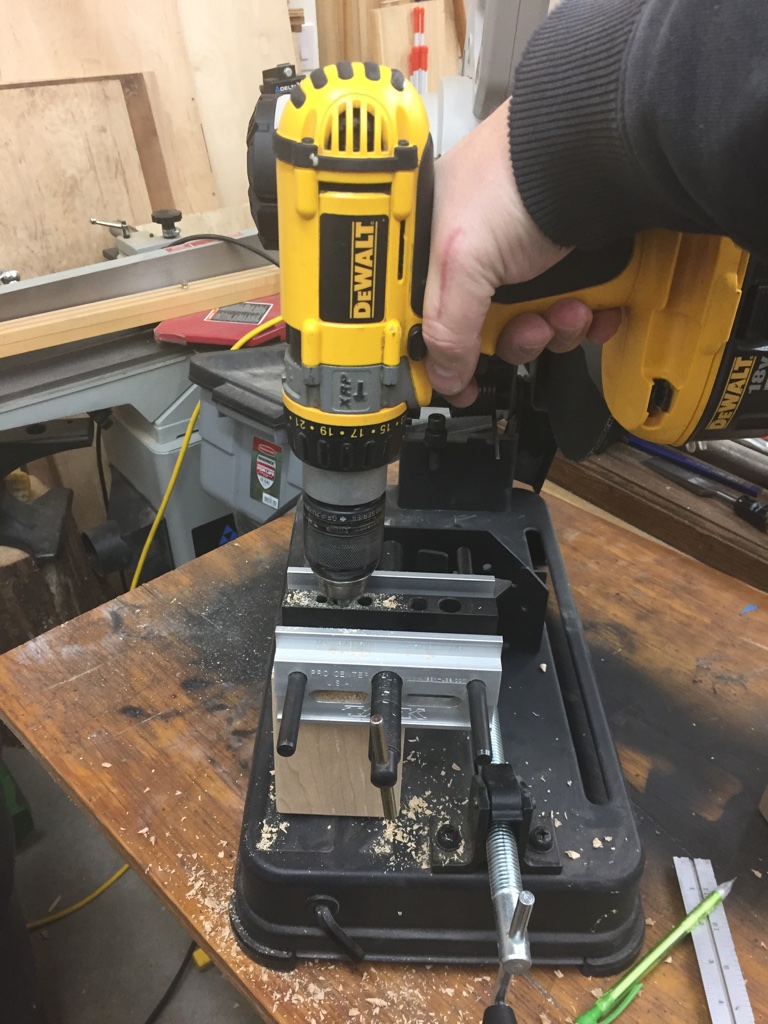
Use a self centering doweling jig to start the 3/8″ holes
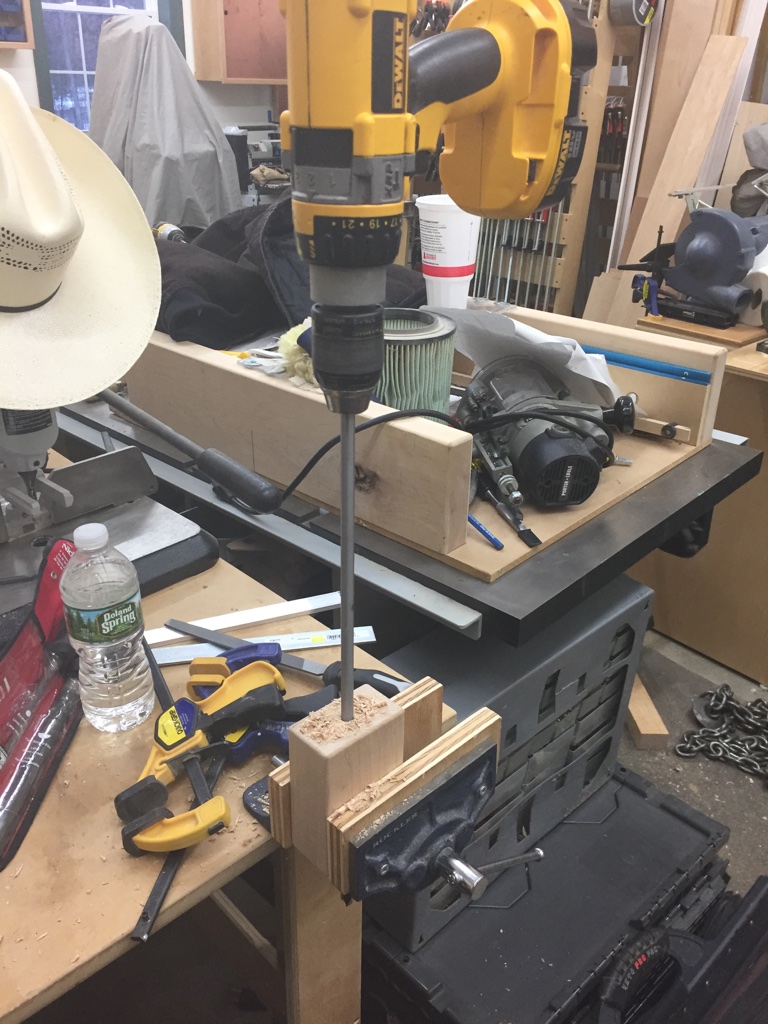
Next up was drilling a 3/8″ diameter hole through the center of the block, the long way. I started off the drilling by using a self-centering doweling jig (see photo above), and went as far as the bit would let me drill into the block. Then using that first hole as a guide I used a longer electrician’s style 3/8″ drill bit to drill the rest of they way through the block. (see photo below)
Use a long electrician’s style 3/8″ drill bit to finish the centered hole.
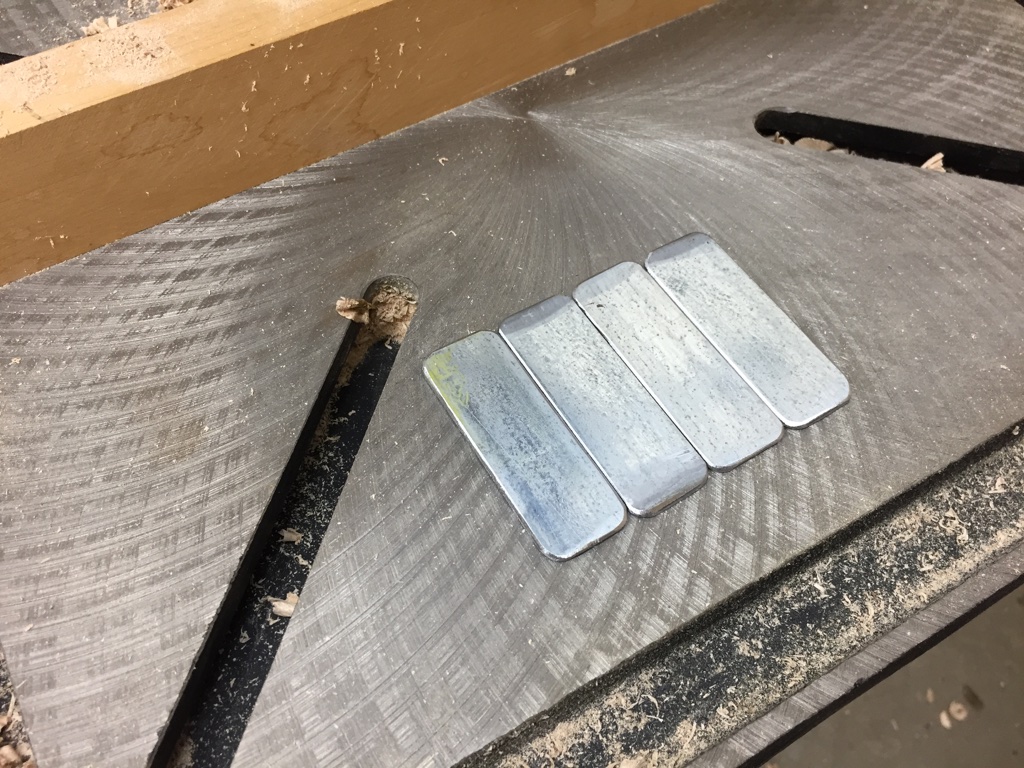
With the woodworking complete, it was time do to some metal working to make a series of small plates that are used to affix the clamp blocks to the dog holes in the bench by way of the 3/8″ bolts. I bought some 1/8″ thick x 1″ wide zinc’ed steel bar at my local hardware store and cut them to 2-7/8″ long. (Note this is 1/2″ shorter than what Frid called for as I as felt 3-3/8″ would have too much slop/space. I also could not find 1/4″ thick bar stock, but think 1/8″ thick is still plenty strong for anything I plan to do with these clamps. Make sure to leave at least 1/4″ of metal on all side around the holes). I cut the pieces to length using an abrasive cut off chop saw, but a hack saw could also get the job done.
Zinc’ed steel bar, cut to size, corners ground round and edge burs removed
I took the metal blanks over to the slow speed grinder and rounded over the corners and chamfered the edges a bit to remove any burs.
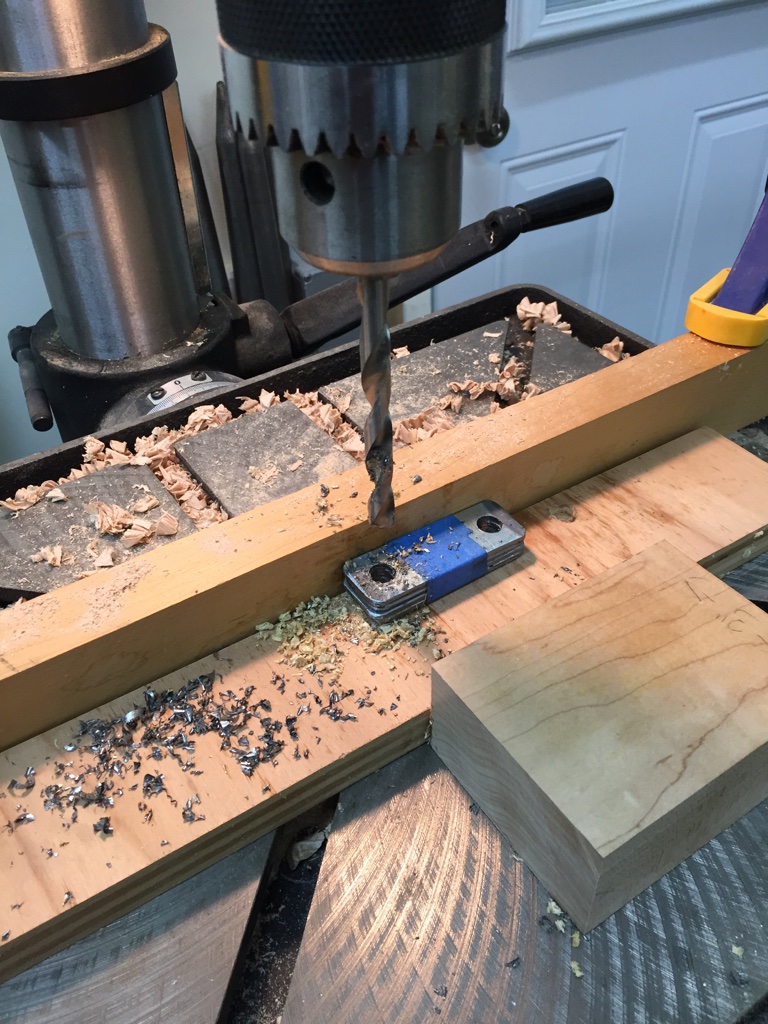
Drilling all four blanks at once.
Next up I stacked/ganged up all 4 pieces and drilled 3/8″ diameter holes at the drill press. The pieces were held together with some strong tape and held in place against my makeshift fence via the scrap block in the foreground of the above picture. Make sure to use some cutting oil and make sure you don’t overheat the metal nor your drill bit. Also use some scrap underneath the blanks to protect your drill press table.
Using a file to clean up and remaining burs and fine tune the work you did on the grinder
With the holes drilled out I took the metal blanks over to a vise wherein I made sure the bolts fit through the holes, cleaning things up with a rat-tail (round) file. I then used a flat mill file to clean up any roughness on the outside edges left from the work at the grinder.
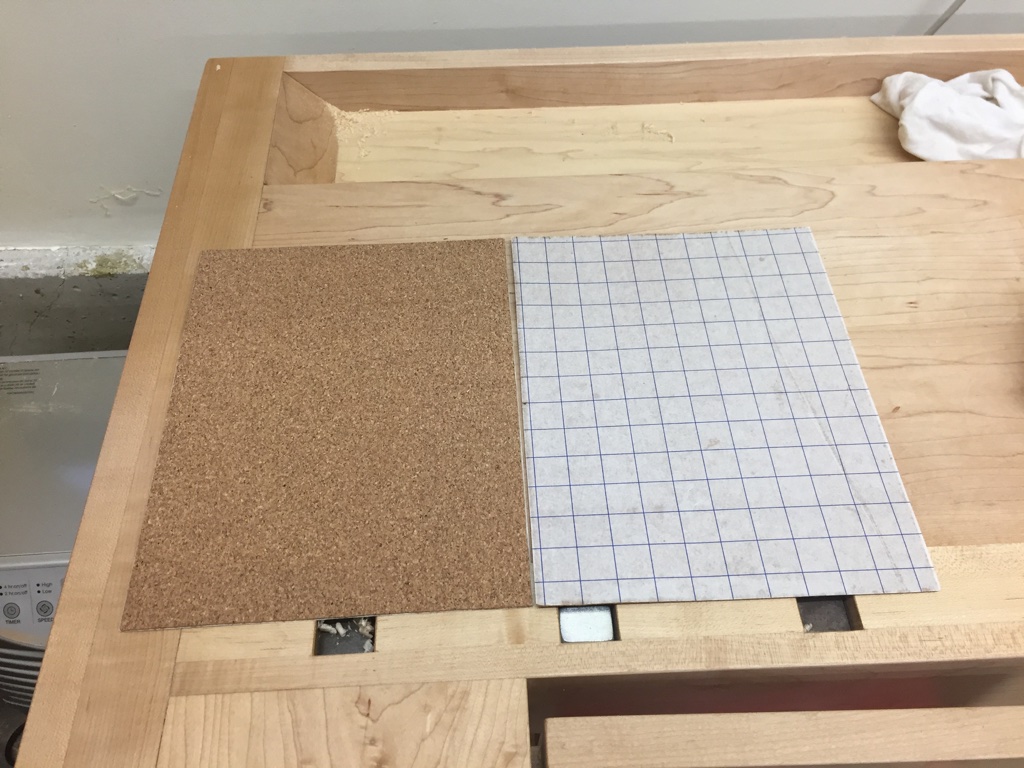
Given my background as an engineer, and touch of OCD I decided to add some self adhesive cork to the sides of these metal plates that might come in contact with my bench top
Self-adhesive cork sheets
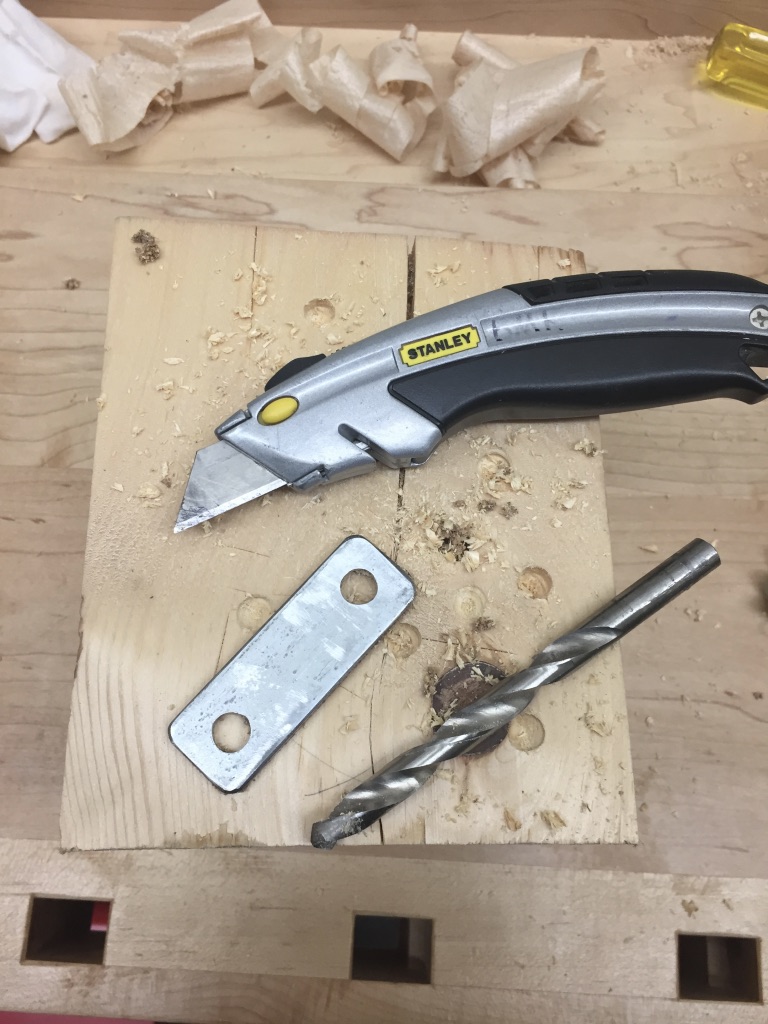
I cut the cork to rough size, affixed it to the plate and used a utility knife to cut off any excess around the edge and a 3/8″ drill bit to remove any waste inside the drilled out holes.
Use a utility knife to clean up the cork around the edges of the plate and the 3/8′ drill bit to clean up and cork in the holes
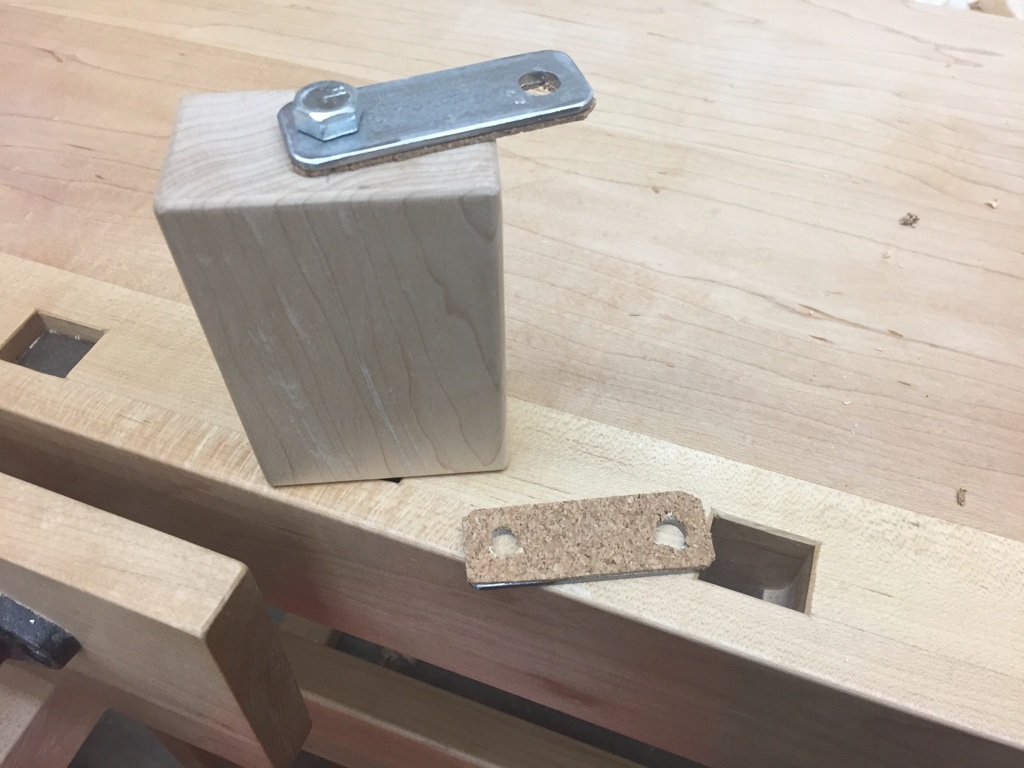
With the metalworking completed, it was time to install the nuts and bolts and try out the clamping blocks. One bolt goes through the top plate, the wood block, the bottom plate and is secured with a nut or five star knob. (I ordered some knobs from Rockler but at the time of this writing they’d didn’t arrive yet, once they come I’ll add some post script to show the clamps with easier to use knobs in place.) The other bolt goes through the top plate, the dog hole, the bottom plate and is secured with another nut.
Assembling a side clamp
Given the use of square dog holes on this bench, and the fact that that blocks are 1/2″ longer than the bench is thick, this allows the side clamps to pivot a few degrees in either direction. This gives you the ability to securely clamp some tapered or irregularly shaped pieces.
The blocks can be moved to different dog holes as needed or removed from the bench altogether. In testing these clamps on a few different items and shapes I found the blocks were surprisingly easy to use and held oversized items with ease.
Large objects are easily held between these side clamps
The Verdict: (So far…)
It was a fun project to build and experiment with. These clamps are useful for specialized clamping needs, such as large items, re-working the edges of a drawer box, planing dovetails flush, and similar operations.
Do I think they will get used every day? No. Do I think they can do a few jobs that would be tougher to do on the bench-top secured via bench dog, hold fast, face or shoulder vise? Yes.
For the small amount of wood, metal and time it took to make these side clamps I think they were a nice addition to my workbench.
If you build some side clamps for your workbench, please share what you thought of them in the comments below.
Take care,
-Bill Rainford
@TheRainford
P.S. If you’d liked to learn about the workbench featured in this post, please check out my related article in the February 2017 issue of Popular Woodworking Magazine which can be found here.
I have some big news to share with everyone today, I’m proud to say that I am the process of writing a book for the Lost Art Press tentatively titled “Go, Go, Go: The Life, Influence and Woodworking of Tage Frid”
You can read more about my background and the premise of the book in this post I made on the Lost Art Press Blog here. It’s an exciting opportunity and look forward to sharing my passion for Frid’s work and Danish Modern furniture design.
Related to the above book I’ve also written an article for Popular Woodworking Magazine on my Tage Frid inspired workbench which will be the cover story for the February 2017 issue which is coming out later this month. Once it is published I’ll be sure to share more related links and details.
UPDATE: The February 2017 issue of Popular Woodworking is now out and you can read more about it or purchase it here on PopularWoodworking.com
–Bill Rainford
@TheRainford
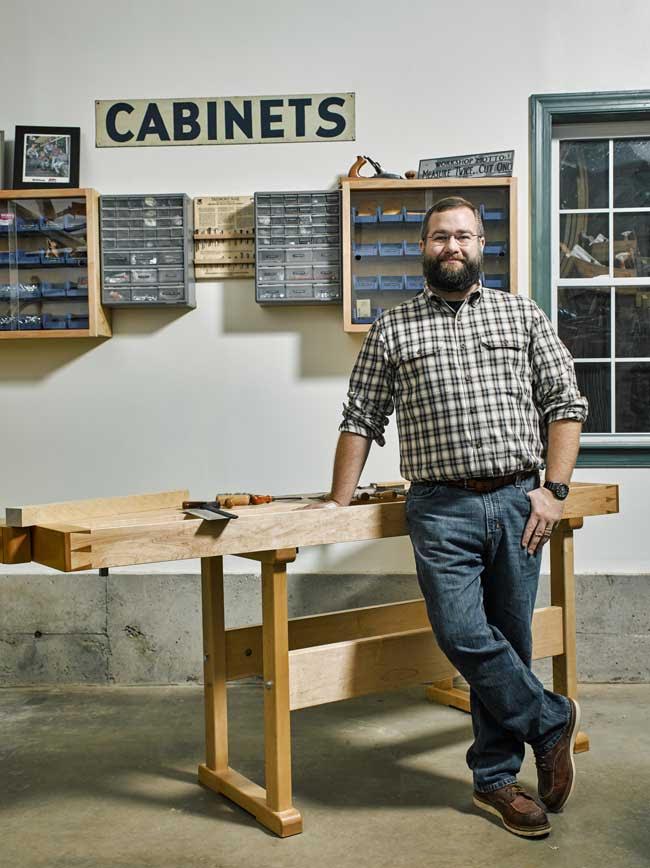
P.S. A big thank you to Doug Levy for allowing me to share two of the excellent photos he took for the upcoming article. You can check out Doug’s photography work here. He also has a great series on New England Craftsmen here.
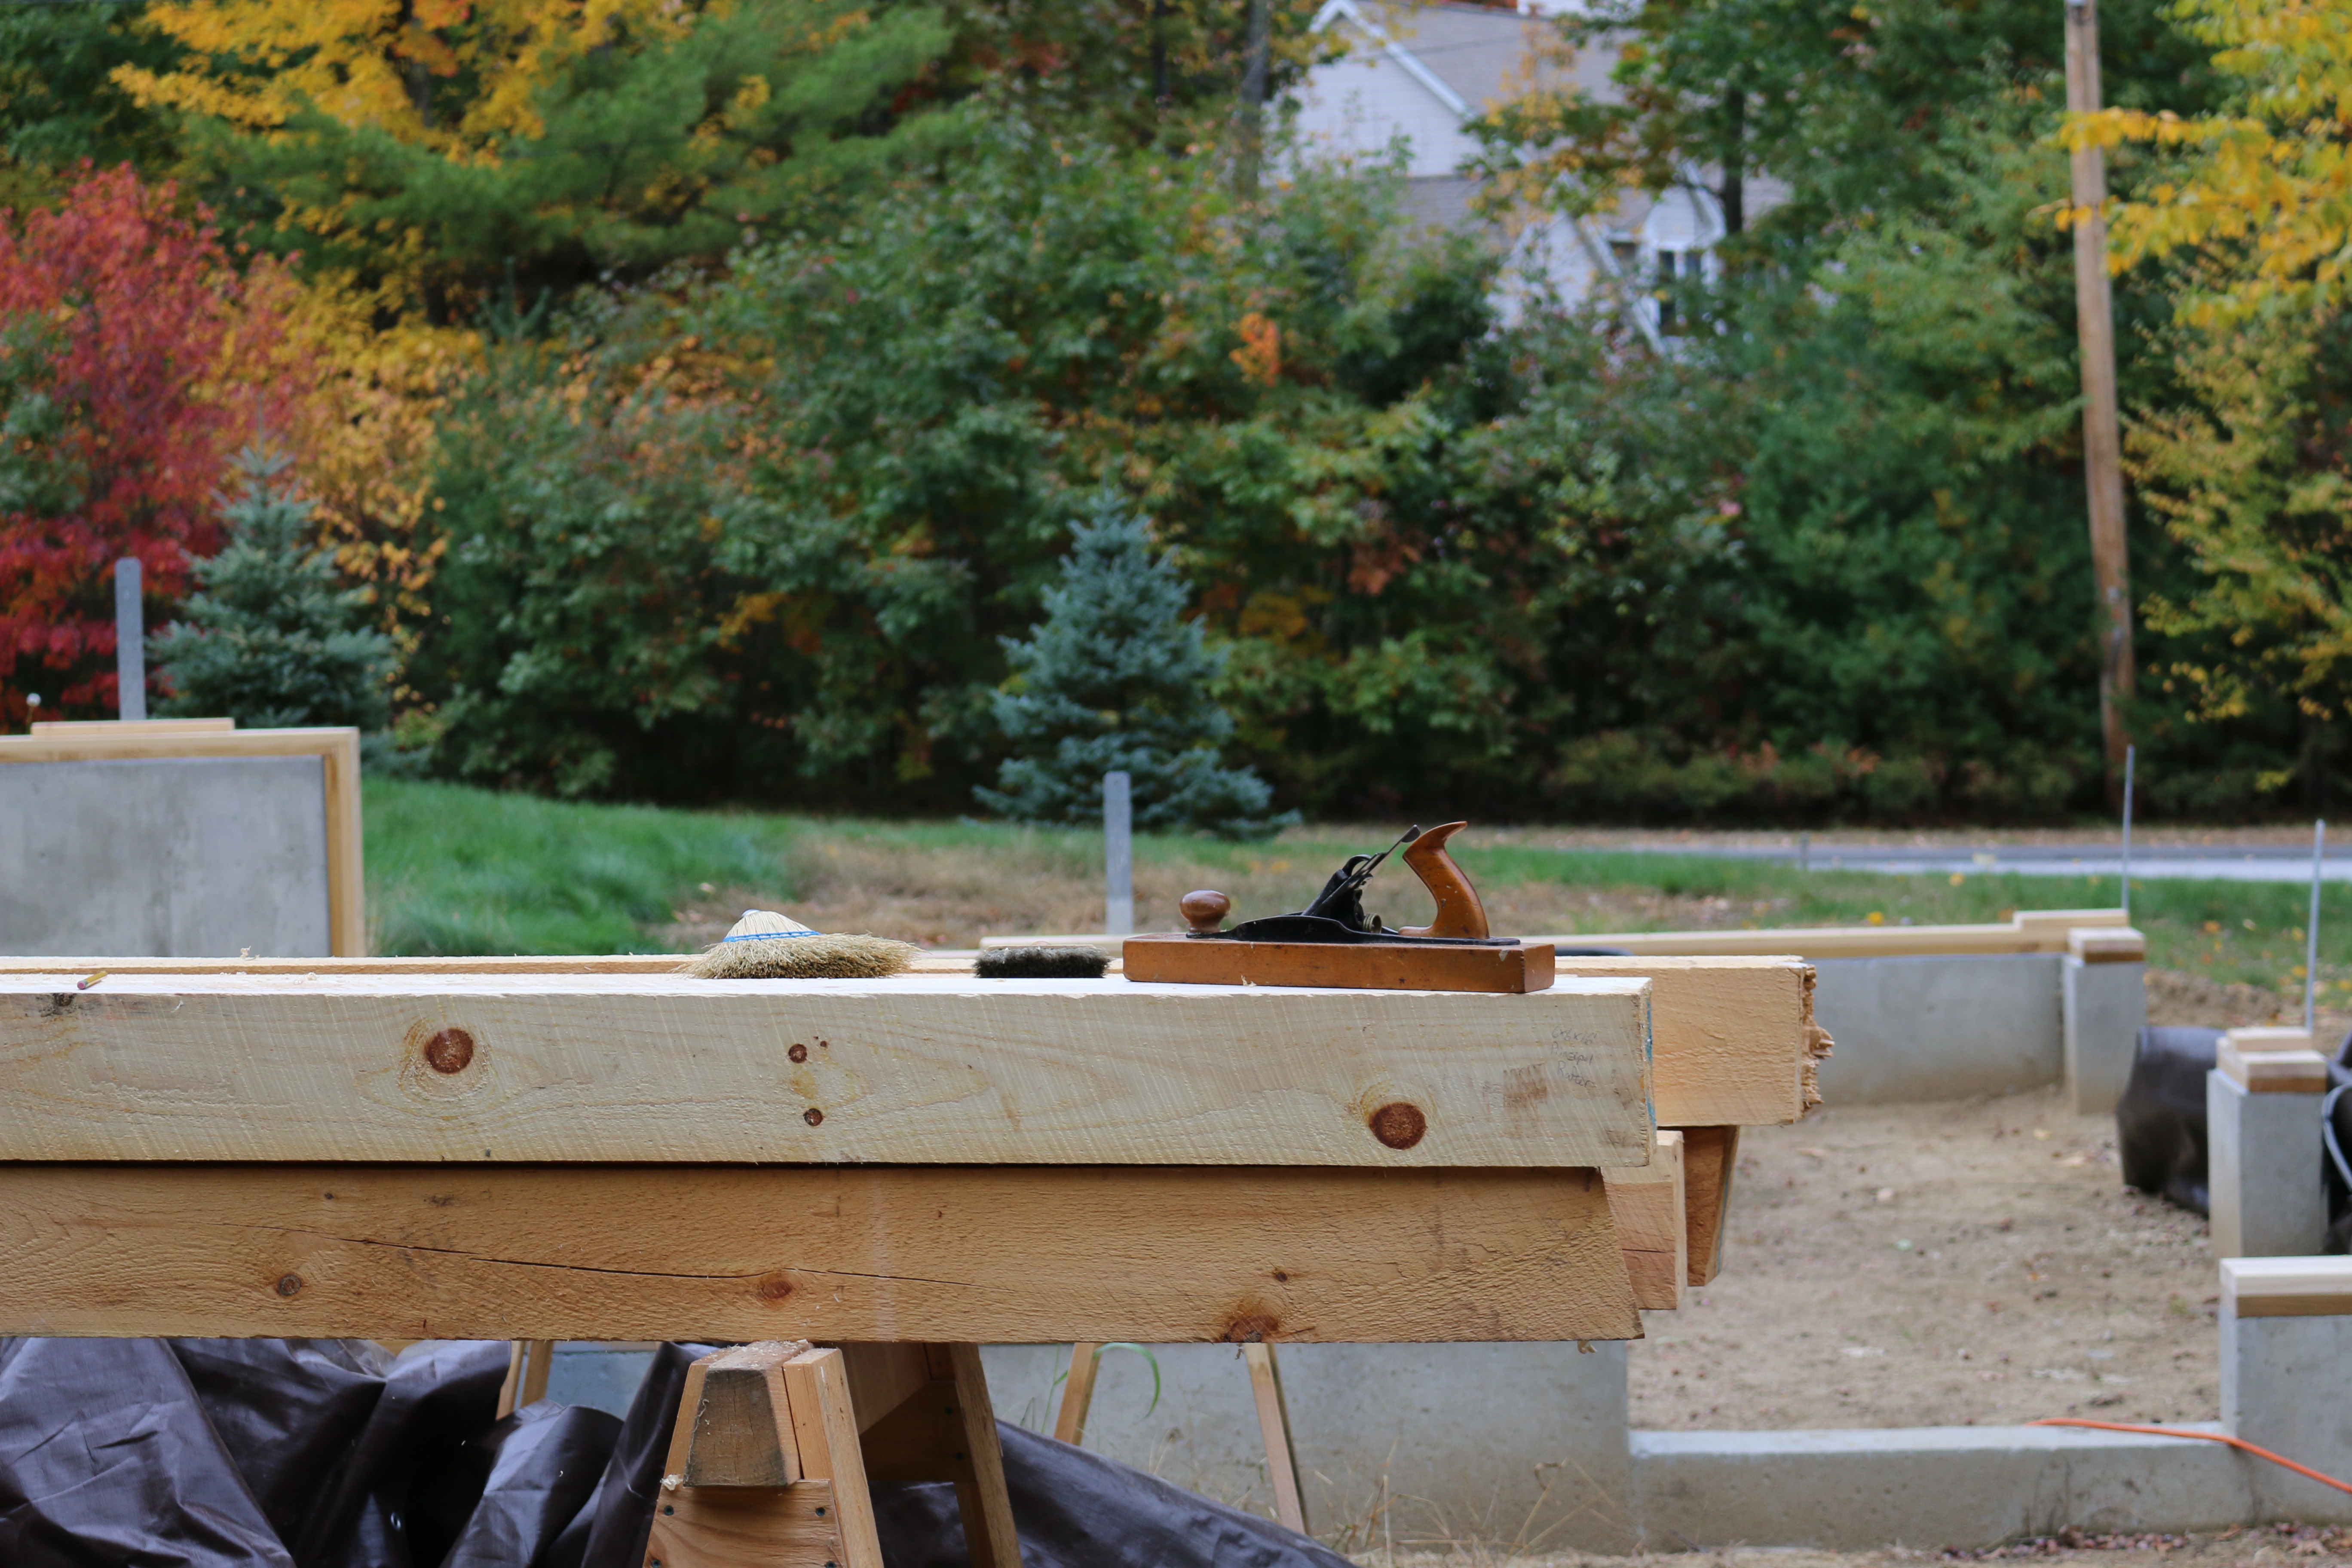
An early lesson in carpentry or woodworking in general is to take all of your measurements from a single reference face — this way you don’t get a bunch of accumulated errors that will throw everything off. It makes sense, but what do you do when measuring long distances? or uneven surfaces?
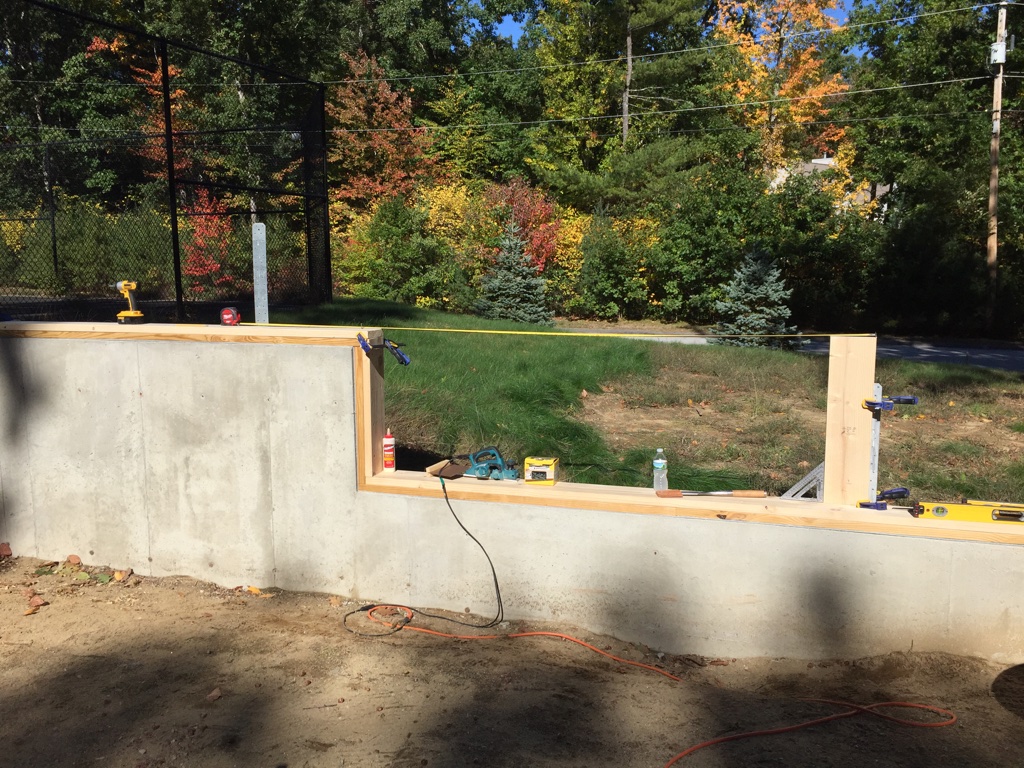
Let’s take a look at this 30 foot long foundation wall I am working on:
A view of the tiered foundation
In order to lay out the mortises in the sills for the posts I needed to make sure they are in the correct location which was a bit of a challenge.
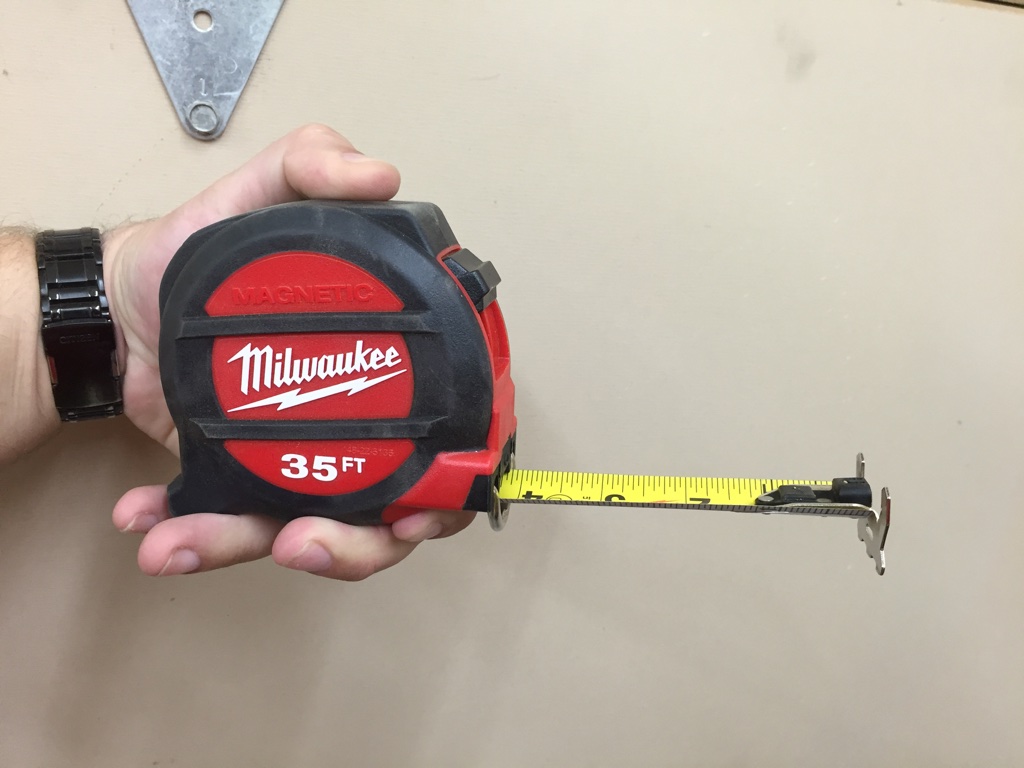
First off I had to go out and get a 35′ long tape measure. I bought a Milwaukee 35′ Magnetic Tape Measure from Home Depot.
35 Foot Milwaukee Magnetic Tape Measure
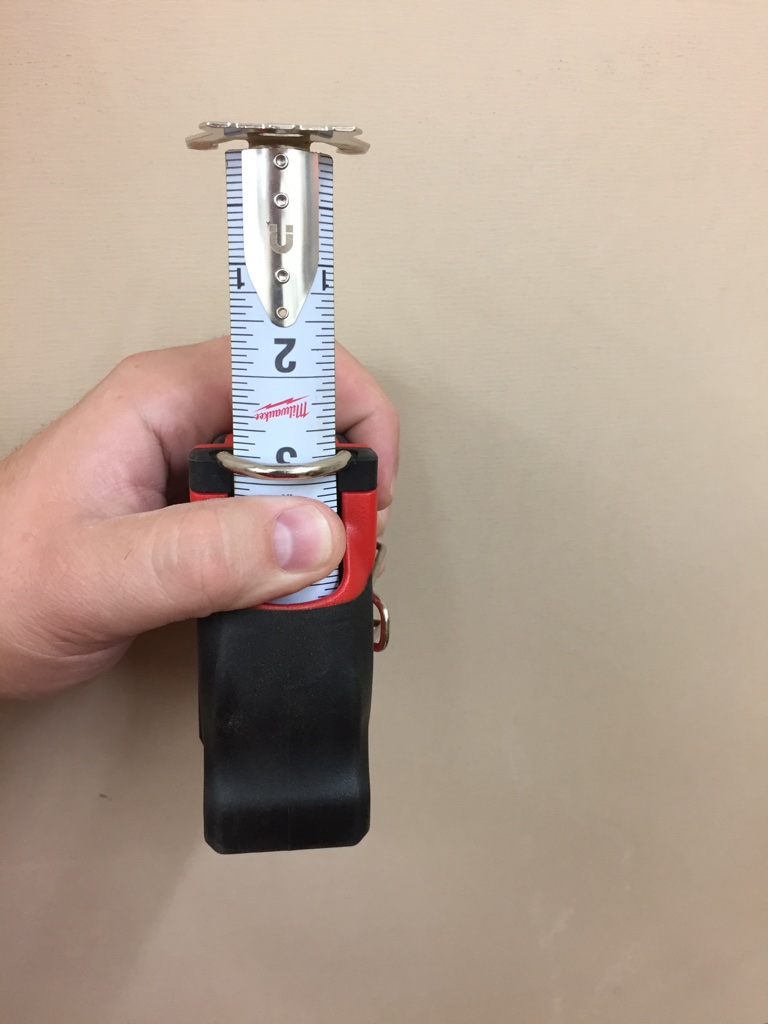
Beyond the length this model has a few nice features I really liked. First and foremost it has a finger protecting stop which is great for people like me that tend to use a thumb as the brake and occasionally get pinched by the end of the tape slamming back into the case. It also has an 8-9′ standoff (distance tape can hold itself out before it bends), a magnet in the end, large hooks and an architect scale (total inches rather than feet) on the bottom of the tape and a supposedly limited lifetime warranty.
Love that metal finger protector
I liked it so much I hope to get the 25′ model soon and will retire my Stanley and Stanley Bostitch tapes. You can find the 35′ model here. It’s a bit of a beast, so for everyday use I think the 25′ model will fit better in my tool belt.
In measuring the foundation I found out that its about 1/2″ shy of 30 feet. Other than that I’ve been very happy with how the foundation came out and across its width its consistently 24′ wide as expected.
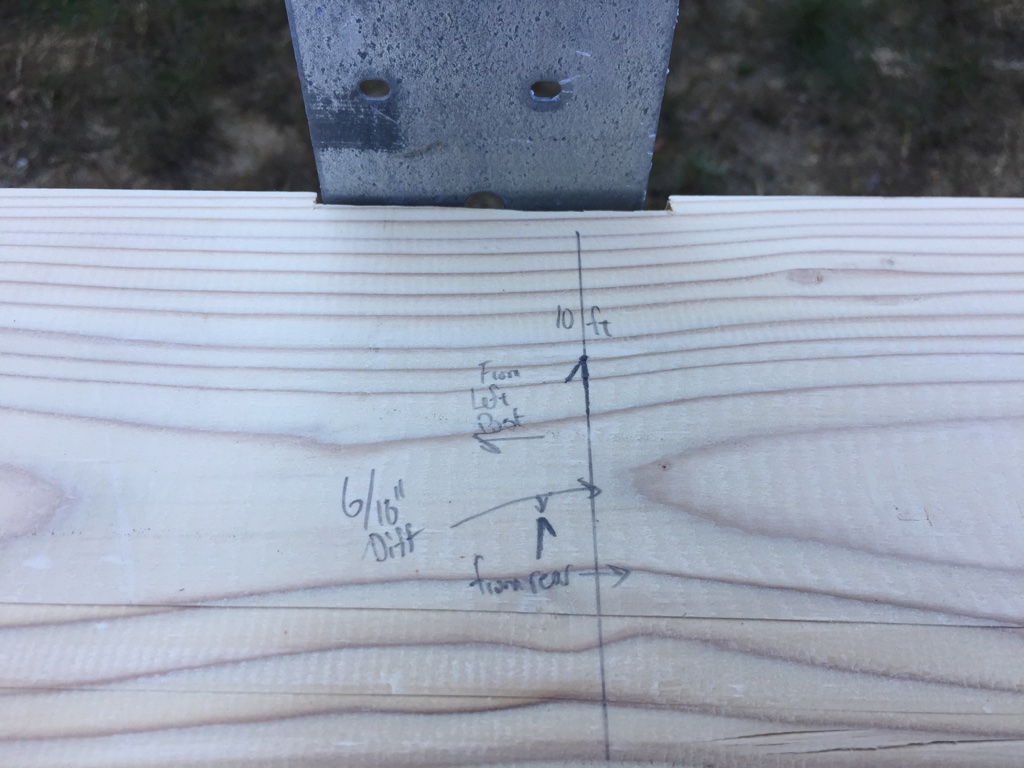
Laying out the first two sets of mortises from the front of the building was easy and straight forward. The 3rd set is where it got tough as I’d have to bridge the vertical step in the foundation. In order to make that jump I cut a piece of scrap 2×8 and using a level and a square set it exactly on top of the center line for the 2nd set of mortises and clamped it firmly to the cast in place straps.
Measuring and compensating for the different levels of the foundation
I could then pull the tape and lay out where that third set of mortises should be and also measure to the end of the building to confirm it matched what I got when just measuring the side of the foundation in a single pull. All the measurements lined up with what I expected, so that was good.
Figuring our the difference between measuring off the common reference face vs from each end of the foundation
It looks like when the straps were cast in place the concrete contractor measured from the back wall of the building rather than a single reference face and I could see the 1/2″ off they were due to the overall length of the building being off. Thankfully the posts are sufficiently large (6×6) that this won’t be a visible issue.
This all goes to show the value of taking your time and measuring as described above, for if I didn’t do this and laid out the top plates as if the building was an even 30′ long and if I laid out that 3rd set of posts 10′ off the back wall there would be some major problems during the barn raising.
Transitional planes are the pariahs of the woodworking world. The tool collectors don’t want them. Patrick Leach burns them in a funeral pyre. I’ve had a few over the years I got for a song and kept in the shop mostly for decoration.
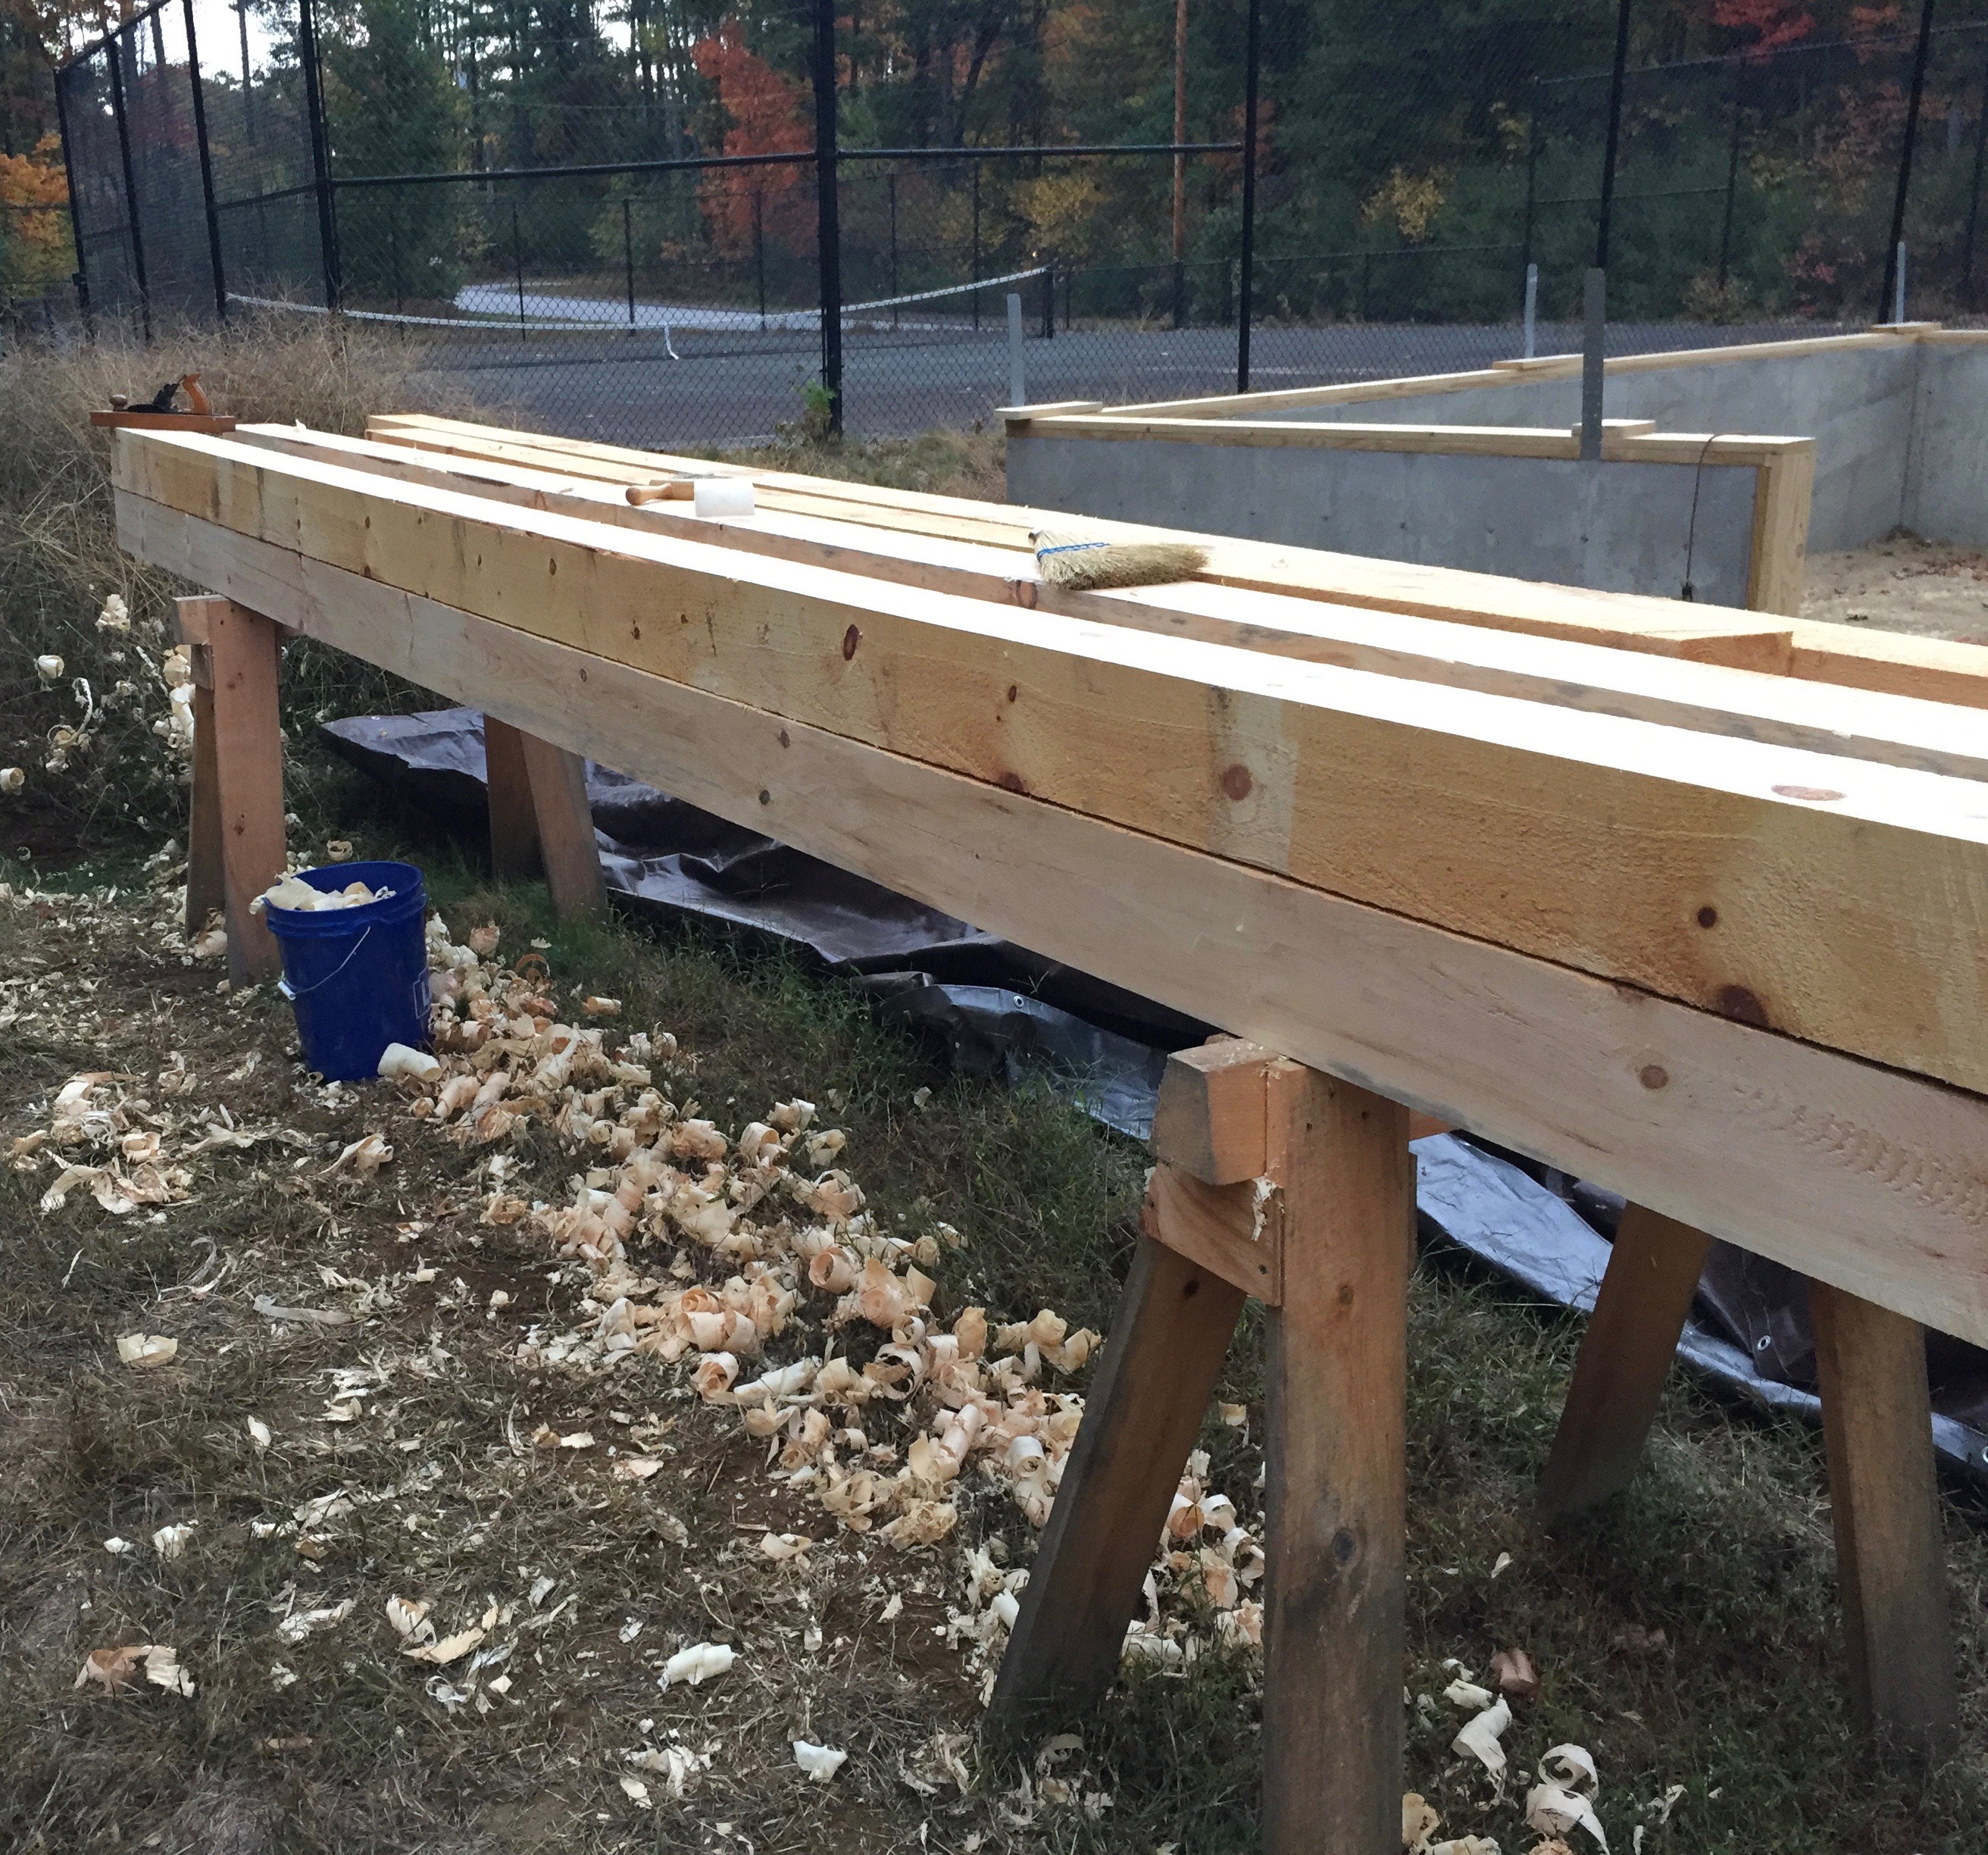
Cleaned up timber frame post
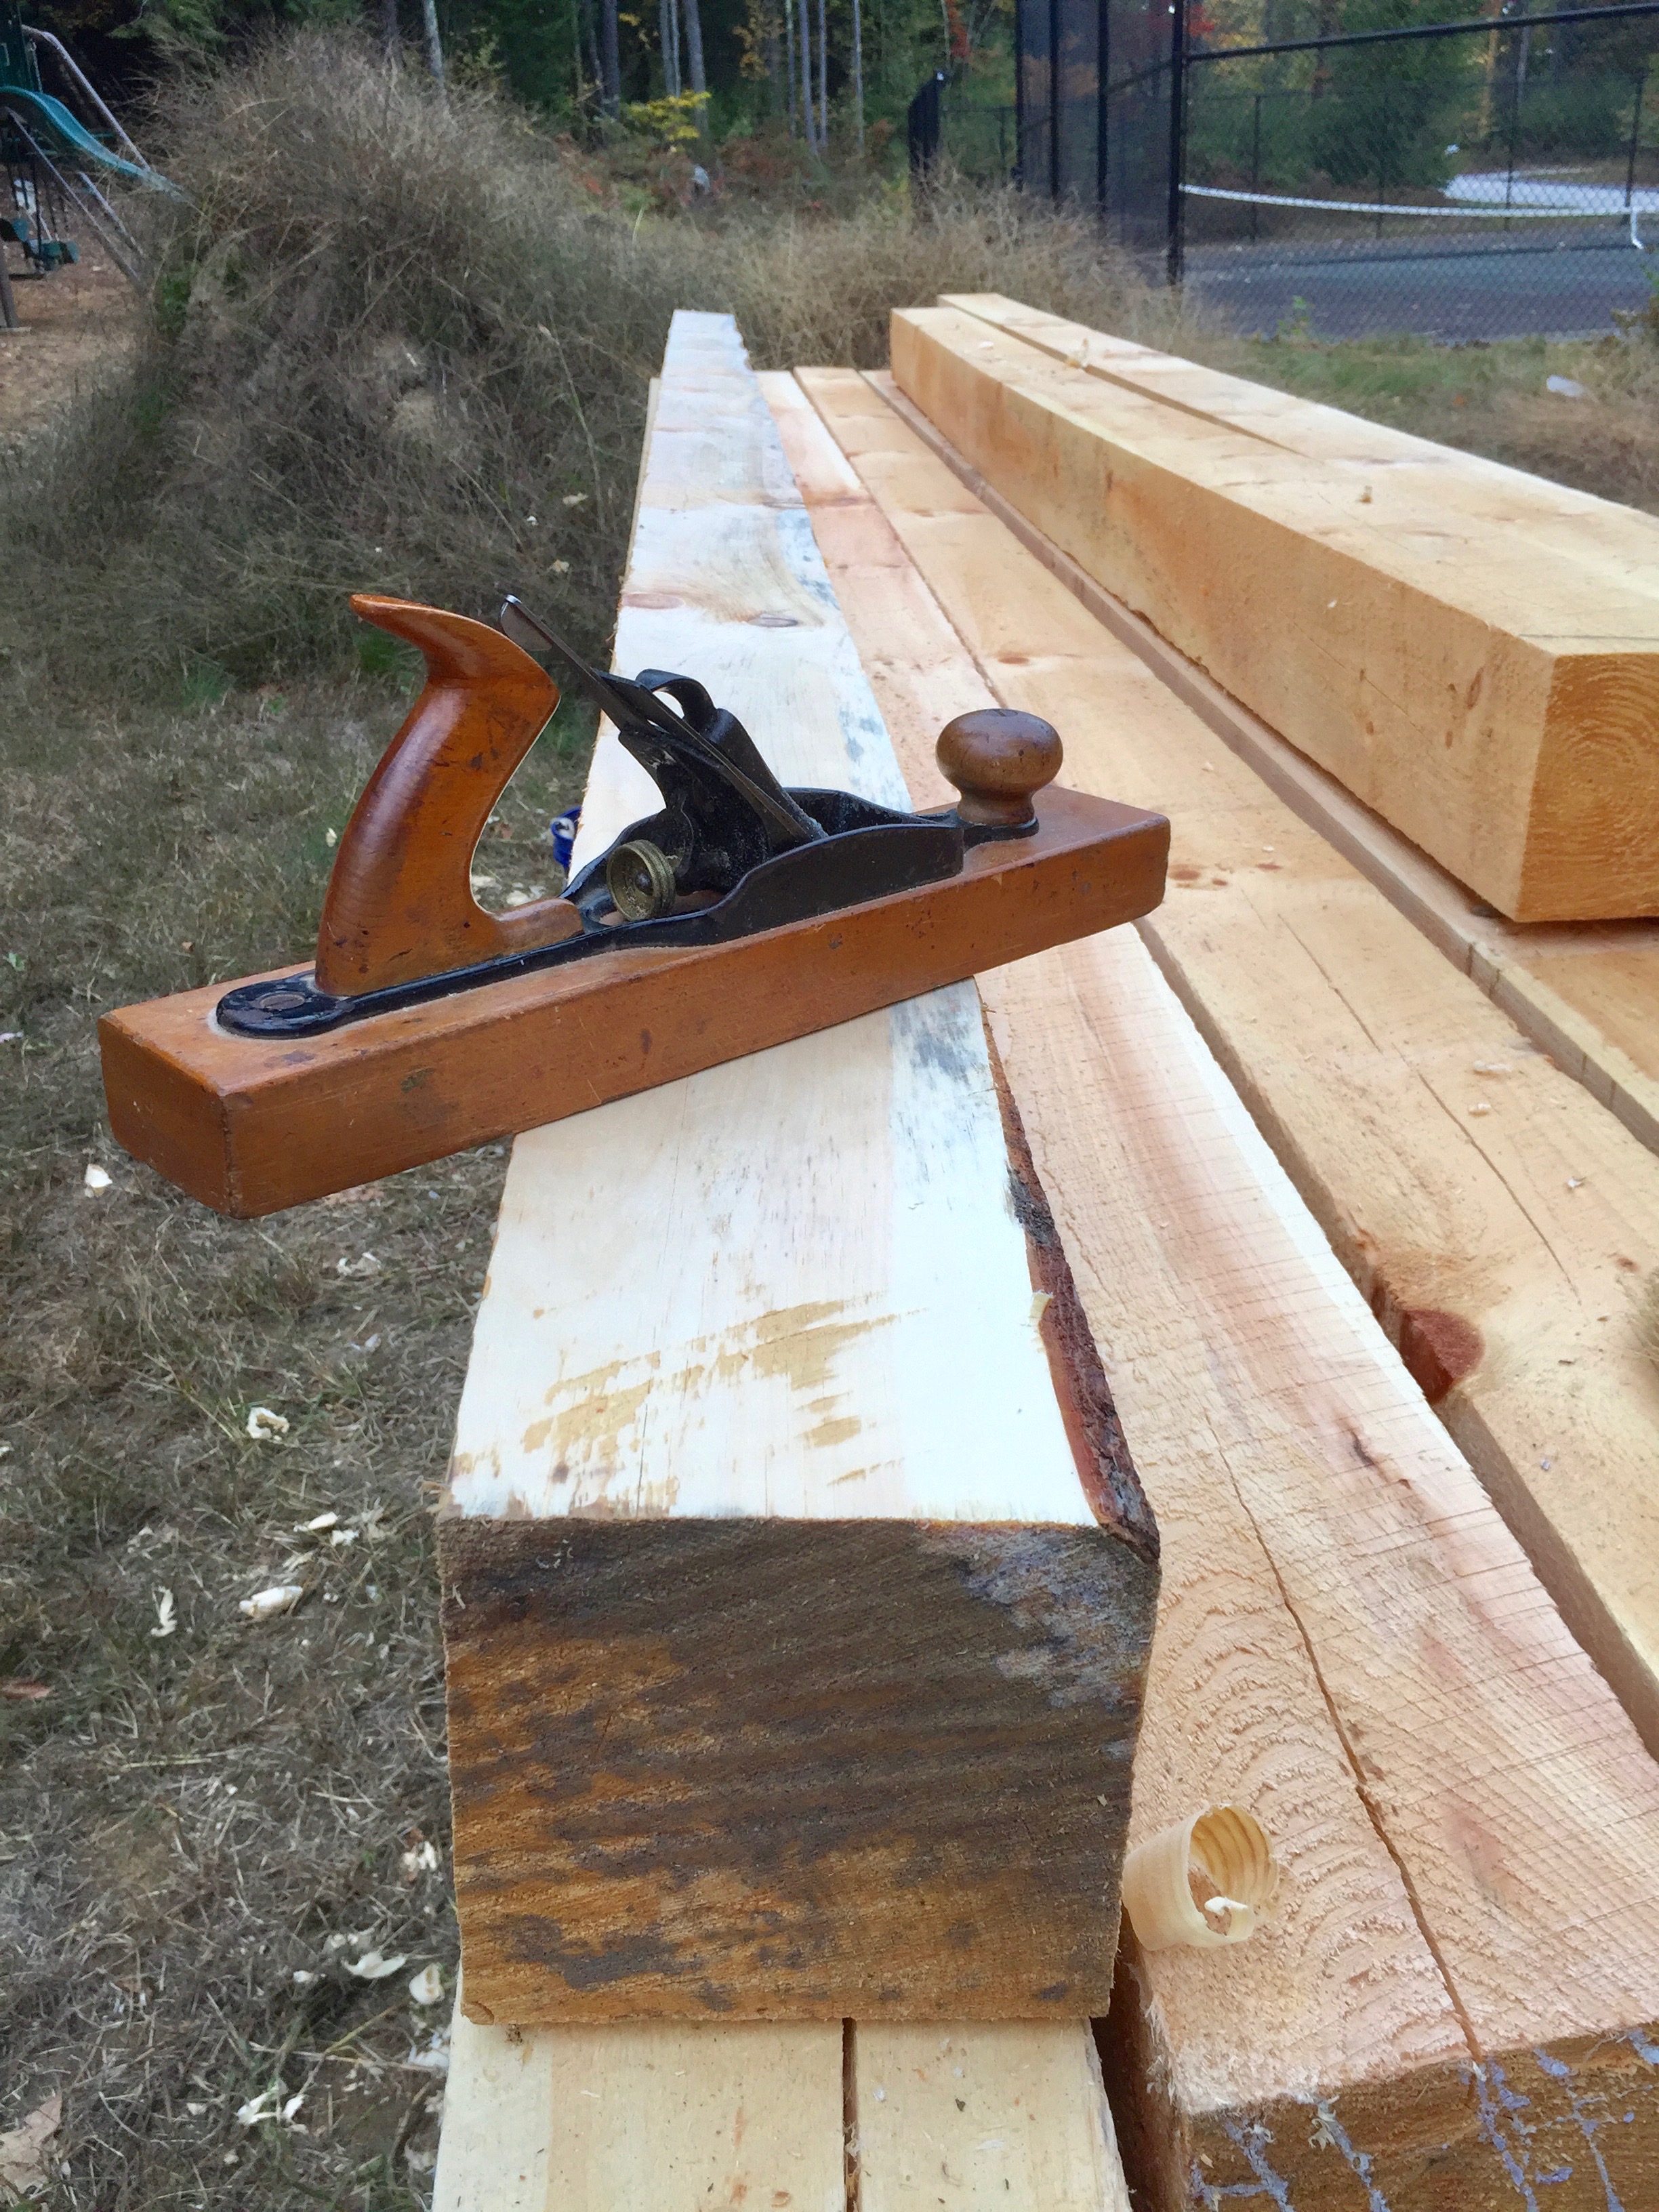
As I got more into timber framing and working with green timbers it dawned on me that these transitional planes — at least in the jack and jointer sizes might be useful for cleaning up timbers. The large wooden sole doesn’t rust the way a metal plane would when exposed to wet wood for long periods of time and you have a more or less modern Bailey style mechanism. The one annoying thing about the mechanism on a transitional plane is the blade advancement wheel spins the opposite way a metal plane works, but after a few minutes you get used to it.
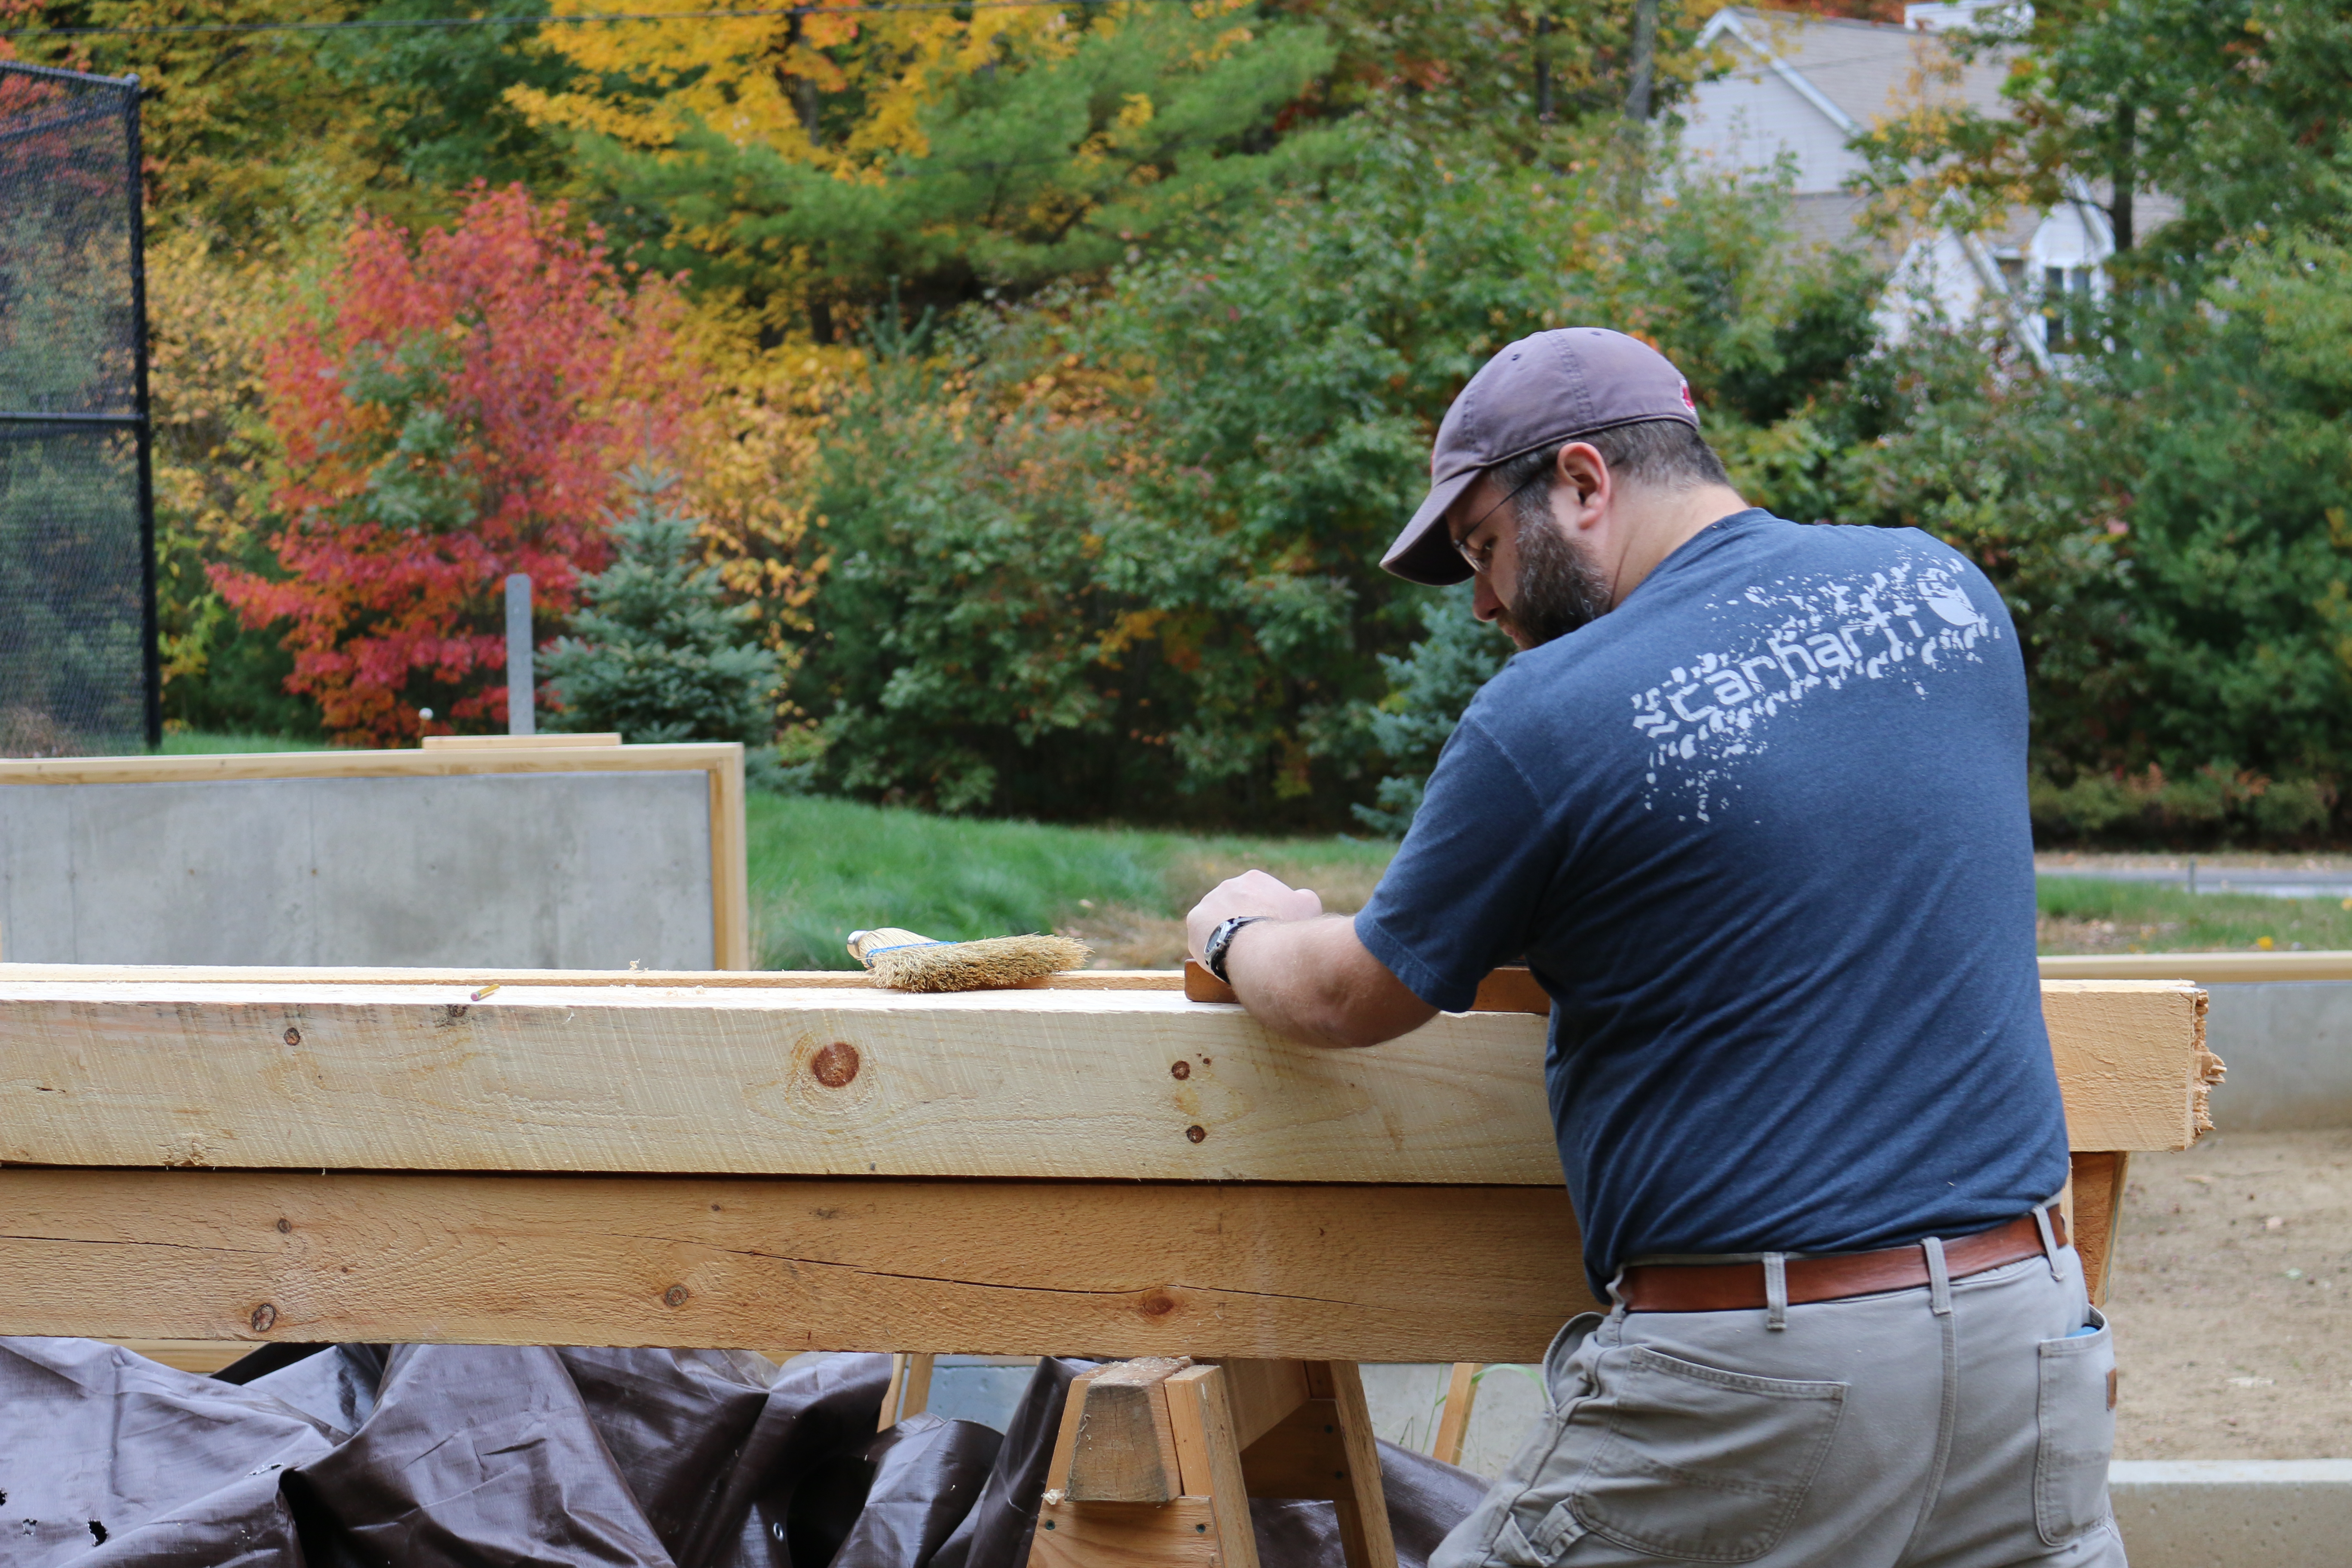
Bill using a traditional jack plane to clean up timber
For some timber frames I need to clean up and remove all the large circular saw or bandsaw marks. In a workshop or outbuilding being fresh from the mill is fine, but in a house all those rough surfaces can be a dust magnet or source of splinters.
With a nice camber it makes quick work of dressing a green eastern white pine timber
On my jack plane I’ve ground a camber appropriate to a jack plane and take a reasonably heavy shaving. The work goes fast and I admit its fun to make a 25′ foot long shaving on some of the largest timbers.
At first I felt bad about using a plane from the 1870s for this sort of work, but if properly maintained it will have a surprisingly long life and I’d rather see this plane get used as opposed to being in a pyre or on a shelf.
At the end of the day I make sure to remove the iron and wipe it down with oil so it does not rust and I’ll usually give the sole a little more wax.
Transitional Jack Plane in its new habitat
I can usually find these planes in surprisingly good shape for $10-35. If you’re willing to take one with more rust on the mechanism or a replacement sole you can likely get it for even less or even free from some dealers if you buy a few other items. The next time you are at a tool swap you may want to take a second look at a transitional plane and score yourself a good deal on a solid workhorse for your own timber framing or green woodworking projects.
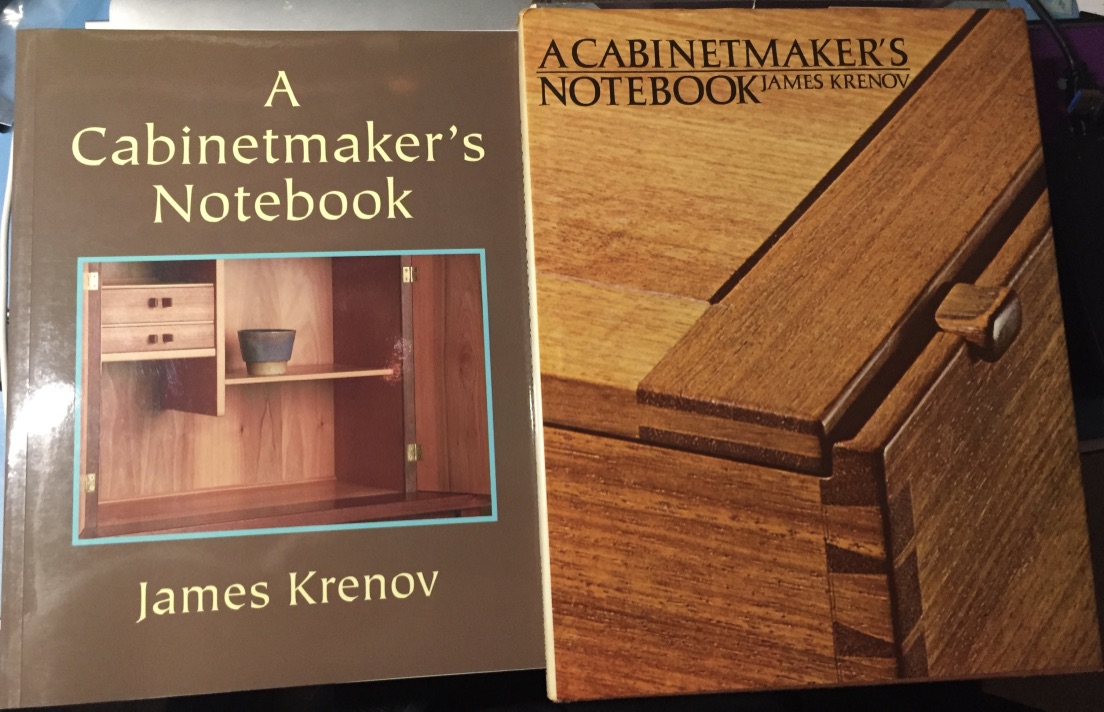
Reading A Cabinetmaker’s Notebook by James Krenov is often considered to be a woodworking rite of passage. And with any worthwhile ritual you don’t want to rush into it.
The Cabinetmaker’s Notebook by James Krenov
If you are just starting out in woodworking you’ll want to start with some solid introductory books (Tage Frid Teaches Woodworking, Made by Hand by Tom Fidgen, The Woodworker: The Charles H. Hayward Years, Understanding Wood by Bruce Hoadley etc. ), get your feet wet, mess up some pieces, experiment with hand and power tools.
Some of your projects will be triumphs, some of them will be failures and all of them will teach you some valuable lessons. After some time behind the bench you’ll more than likely hit a crisis of faith at some point. Are you bored with woodworking? Are you looking for a new design style? How do you rectify using power and hand tools or are you looking to be a hand tool purist? How well do you know the wood you are using? Does your work have any deeper meaning? How do I make a living at this? Will my work survive?
Everyone will have some questions along those lines at some point during their woodworking journey. That’s when it’s time to reach for A Cabinetmaker’s Notebook. This classic book from 1976 will not directly teach you woodworking skills like joinery or finishing techniques, but will provide you with some insights and inspiration that will often stay with you long after you read this book.
For folks that have read this blog for a while you’ve seen me go on about a desire to create items that last, getting away from our disposable culture and finding meaning in our work. Krenov was contemplating the same things back in the 1970s well before I was born, but the way he addresses it is often intoxicating and seeps into your subconscious.
“What I would like to do before it is too late is to get this [message] across to a few craftsmen-to-be who will work after me, and also to a public which will be there to receive them, because we are living in a time when, I believe, this is important, not only aesthetically, as oddities or rarities, but because …. much of our life is spent buying and discarding and buying again, things that are not good. Some of us long to have at least something, somewhere which will give us harmony and a sense of durability — I won’t say permanence, but durability — things that, through the years, become more and more beautiful, things we can leave to our children” — James Krenov, The Cabinetmaker’s Notebook, 1976
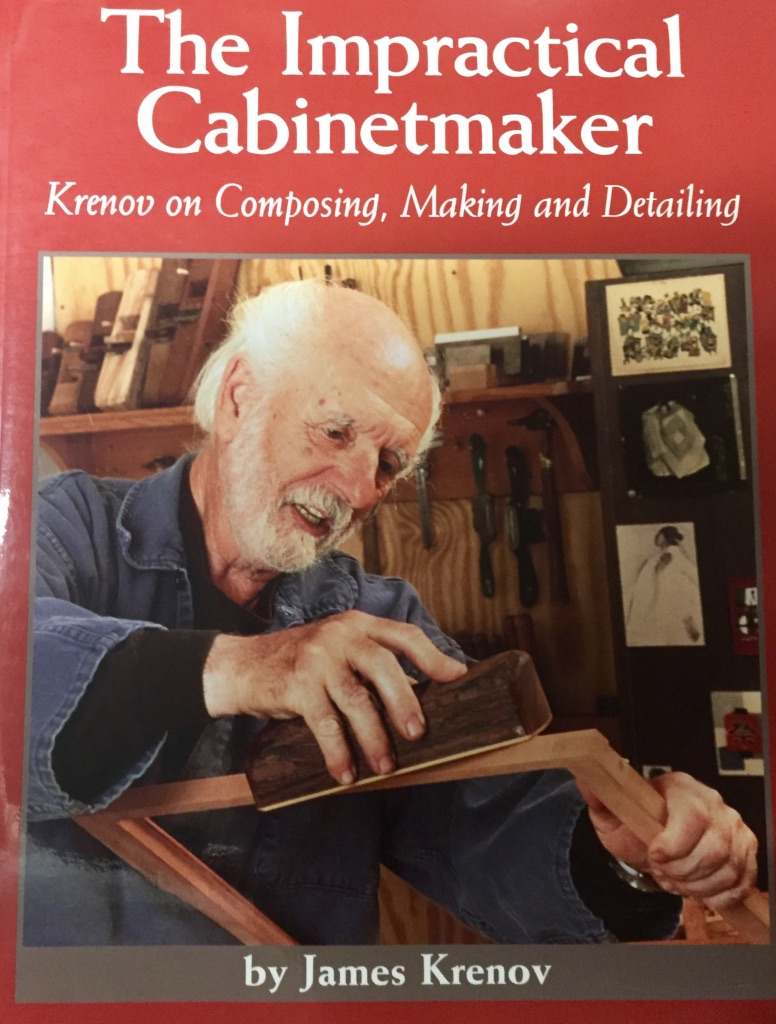
I first read the book about 10 years ago when I bought several of Krenovs books as softcover prints based on feedback from some other woodworkers. (With woodworking as my avocation I figured his book The Impractical Cabinetmaker would be right up my alley, but that is a post for another day).
The Impractical Cabinetmaker by James Krenov
At the time I first read them I wasn’t in the right frame of mind to fully appreciate it. Some insights on detailing and rewarding the curious stayed with me but I wasn’t a full cult member yet.
Back in September I picked up two early hardcover prints of Krenov books at the Nashua Tool show and decided to read this copy of A Cabinetmaker’s Notebook as I was doing some research on folks who taught at the School for American Craftsmen (SAC) and studying Danish and Scandinavian Designs. Over the past decade I also learned more about Krenov’s career, time at SAC, BU (heard funny but less than flattering stories about his time there at my Alma Mater), his time in Sweden, College of the Redwoods etc.
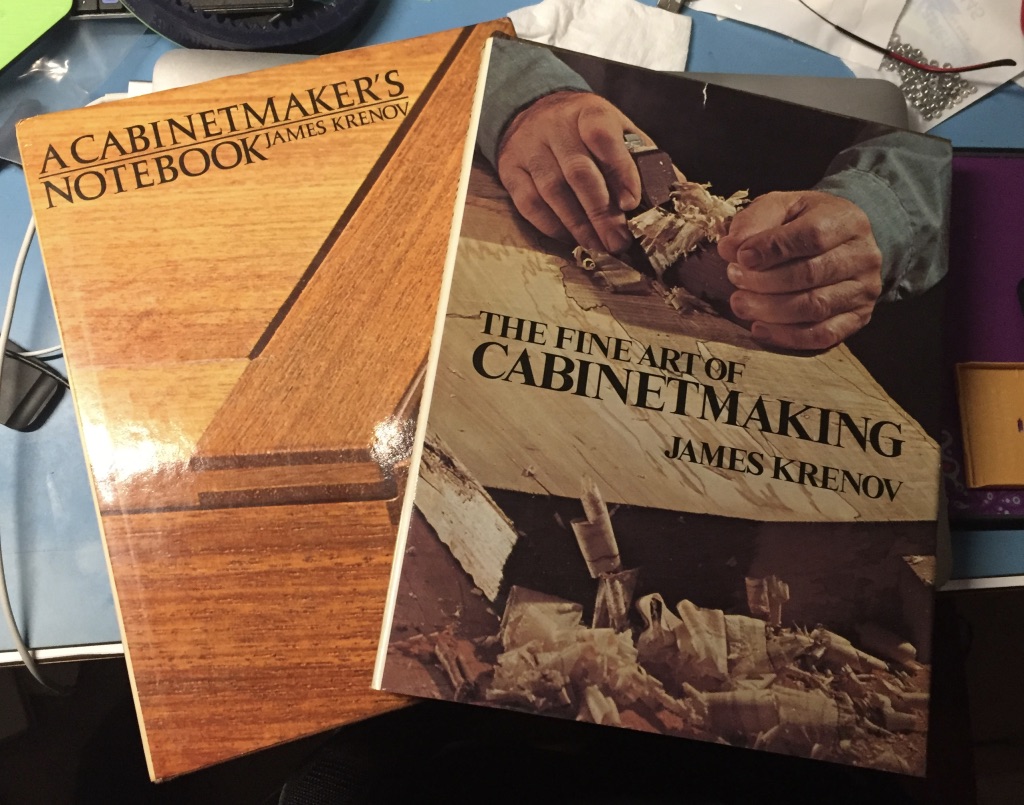
The Cabinetmaker’s Notebook and The Fine Art of Cabinetmaking by James Krenov
This time out the book really hit home for me. Krenov talks about what drives him as a craftsman and how he often agonizes over the best use of the wood. He’ll take some usage requirements from customers on commissioned work, but wants the freedom to let the wood talk to him and let the design flow. He works in little details to try and create pieces that are visually and tactilely interesting. By dabbling with asymmetry, curves, light/shadow, grain orientation and minimal finishes he’s able to produce interesting pieces that elicit emotions from the viewer. This process results in pieces that only get better with age and use.
The anecdotes in the book also add to the warmth — finding work early on, cats in the shop, revisiting your wood pile for inspiration, using the natural properties of wood and grain to help find the best use for that specific piece of wood to create something long lasting that will make yourself and anyone living with the piece happy.
So if you are in need of an inspirational recharge I recommend reading or re-reading A Cabinetmaker’s Notebook.
-Bill
P.S. I always say that woodworking is often the art of hiding your mistakes. (Sometimes by accentuating the defect with a bead or constructing things in such a way we try and cover up less desirable grain with other forms of joinery etc.) With all the time Krenov talked about fine details, it was interesting to me that the case piece on the cover of the original version of the book had an interesting minor mistake front and center for those who knew to look for it. If you look closely at the image below you’ll see he made 2 passes with a marking gauge at a slightly different setting. I know it is something I’ve done in the past.
Original cover from The Cabinetmaker’s Notebook
That may be why they changed the cover in later reprints, but much like a hidden or asymmetric pull or hidden cubby in a cabinet I think it was an interesting find and also shows that we are all human and even with a minor imperfection here and there we can still produce satisfying results.
You can listen to the interview here, along with several others from WIA including Caleb James and Tony Rousseau.
I had been friends with Dyami online for several years but this was the first time I got to meet him in person. He’s a real nice guy and also loves to share his passion for woodworking.
If you are not already subscribed to the MWA mailing list or podcast I highly encourage you to do so. It is an all volunteer organization that strives to help keep the craft of woodworking alive and growing.
Here’s a recap of Saturday and Sunday (days 2 &3) of Woodworking in America 2016. Saturday was a fun day of workshops and lectures. I watched a great talk by Caleb James on Danish Modern furniture. Chris Schwarz had a talk about Chairmanning and a talk about his Roman Workbenches. Roy Underhill demonstrated how to make a classic coffin. Mary May demonstrated how to carve volutes, C-Scrolls and other similarly projects. I also had some fun guarding Chris’ low Roman workbench as I helped Roy get it out to his van.
I got to see some more old friends, meet some new ones and meet several friends I knew from being online, but not in person. I got to meet Mike Flaim and had a brief interview with Dyami Plotke of MWA.
In the evening we had an event where we went Rhinegeist Brewery for some very good beer and BBQ followed by a tour of some of the massive underground brewing and beer storage tunnels that are under much of Cincinnati.
Click on any of the images below to click through the images as a slideshow. (if you are viewing this post in an email browser, please click on the post title above to view the post on the website itself)
Another great view of the Cincinnati waterfront.
Caleb James’ excellent presentation on Danish Modern furniture.
Caleb’s traveling tool chest with a large collection of the planes he’s made.
Great Hans Wegner quote
Caleb James
Nicely proportioned stool
A table from Caleb’s presentation we all hope to see in an article at some point.
George Walker
George Walker’s talk on Designing With Curves
George Walker with his string 2.0
George Walker demonstrating some great, and traditional ways of working with curves
Mary May’s class on carving volutes, C-scrolls and similar things
Sample of a violin scroll
Carving a volute
Mary May Carving a C-Scroll
Mike Siemsens’s Anarchist Tool Chest
Zach Dillinger with his very nice reproduction ottoman.
Zach Dillinger taking questions as the end of one of his workshops.
Quick selfie with my hero, Roy Underhill. It’s always great to see him and he’s very nice to all of us fans.
You know Roy Underhill’s presentation killed — there were a LOT of coffins all over the room.
Chris Schwarz’ talk on Roman Workbenches
Chris demonstrating how versatile the low bench is for preparing stock.
Taller Roman Workbench with Chris hand rasped nuts.
Chris Schwarz’ talk on making a straightforward chair (showing how you don’t need to invest in a lot of fancy chairmanning tools to make a comfortable and nice looking chair)
Chris cutting wedges for his chair leg tenons.
Vampire vise made by my friend Peter Ross for Chris Schwarz’ tall Roman workbench
Double wedged tenons in the Roman Workbenches to close up any gaps.
The nicest bus stop bench in Covington, KY. Guarding Chris’ low Roman workbench as Roy went to get his van.
Selfie while laying on a Roman bench in the middle of a city sidewalk.
Couldn’t help but think of the beginning of the Woodwright’s Shop as Roy walked to the parking garage that looks almost a bit like the streets of Durham, NC 😉
Rhinegeist Brewery in Cincinnati
Enjoying my time at Rhinegeist Brewery with Zach, Jake and others. They even had a beer called ‘Steve’
It was OctoberFest weekend in Cincinnati — the largest outside of Germany. Made my German ancestors happy to try all the brews and see all the folks in Lederhosen and Dirndls.
Folks jousting American Gladiator style in full on lederhosen.
One of our tour guides of the many underground brewery buildings in Cincinnati
Cincinnati Connector Street Cars
Great old sign dating back to the first days of electric in the city (At least according to our guide who was quite a character)
Pig sticker fence. I also really like how the guy restoring this row house painted the CDX on the door to look like a door and even layered it on the windows and painted them to look a bit like sash. Nice touch.
About to enter a spooky underground brewing cave that has even been in some recent movies.
Gives and idea of how big some of these brewers were back in the day, under a large hill in the city.
There might even be a ghost in this photo….
Inside of the hotel lobby. A very big open space
Testing out my new Timbuk2 camera backpack. Worked out great on this trip
A paddlewheel sightseeing boat out on the river.
If you’d like to see my photo recap of the first day of WIA 2016, please check out this earlier post here.
I had a great time at the event and hope to see many of you there next year.
Here’s a recap of my first day at Woodworking In America 2016 — held at the Northern Kentucky Convention in Covington Kentucky which is part of the greater Cincinnati Ohio area.
Greetings from Popular Woodworking in America 2016
This was my first time attending this conference and other than a nightmare of a time getting there by plane from NH (Thursday night flight cancelled, the second set of flights Friday at the crack of dawn, missing the connection due to ground staff incompetence and fighting to get on another flight later in the day) and missing the 2/3 of the day’s lectures I still had a very nice first day watching Freddy Roman’s presentation, exploring the brew and browse event, meeting a ton of friends old and new and meeting several online friends in person. I also had a great dinner with a great bunch of folks — Zach Dillinger, Mary May, George Walker and many others.
Click on any of the images below to click through the images as a slideshow. (if you are viewing this post in an email browser, please click on the post title above to view the post on the website itself)
Greetings from Popular Woodworking in America 2016
John A. Roebling Suspension Bridge
Street leading to the Northern Kentucky Convention Center, home to WIA 2016
Freddy Roman giving a talk on sand shading and inlay.
Some of Freddy’s banding stock samples.
Freddy Roman demonstrating some fine detail work.
Sand shaded blanks
Very neat sample board of some incredibly tiny and intricate banding Freddy acquired and has worked from.
Carving close up on big screen
David Thiel of popular woodworking tweaking his camera. I always think photographs of other photographers are fun.
My friend Zach Dillinger at the Mortise and Tenon booth
The new Crucible Tools — hold fast and dividers. Very nice looking.
Paper sector by George Walker and Jim Tolpin
Brendan Bernhardt Gaffney and George walker looking at Brendan’s new sector prototype.
Prototype Sector by Brendan. Definitely going to get one soon.
Joshua Klein and his most excellent Mortise and Tenon Magazine booth
Tico Vogt Toolworks
The large Lee Valley/Veritas booth. Always fun to try out their latest and greatest tools
SAPFM booth with the hand tool olympics. I’m proud to say I did will with my cutting events.
Lie Nielsen Toolworks with Mr. Lie Nielsen himself.
Deneb Puchalski of Lie Nielsen Toolworks giving a demo. Deneb is a great guy and I’ve been buying tools from LN for many years and he’s been my main point of contact for most of it.
Knew concepts marquetry saw
Some of the very nice work by Texas Heritage Woodworks
Jason Thigpen of Texas Heritage Woodworks making a great face.
Some of the very nice work by Texas Heritage Woodworks
Plate 11 Workbench Company
Plate 11 Workbench Company with leg vise and real nice planing stop
Plate 11 Workbench Company planing stop
A nice rocking chair by ne of the exhibitors. Wish I could recall his name, but he was offering online courses, one of which was on making this chair.
The Superior Works 🙂
Up next is a post about the second two days of the conference. I had a great time and hope I can attend it again in 2017.
Take care,
-Bill
@TheRainford
A Joiner's Guide To Traditional Woodworking and Preservation