The best $1 you can spend on your workbench

I recently finished off my never-ending project — building a proper workbench. I snapped some photos figuring it will never look this pristine again. Time to press the bench into service…

Things started off great, but I wanted to set my jack plane to take a heavy cut and see how just how aggressive I could get before the bench started to move. I’m 6′-1.5″ tall and 240lbs, so if I really get going I’ve moved many a sizable bench over the years. At 7′ long and made of solid maple the bench has a good amount of mass. The problem I have is a very smooth concrete floor which provides little traction for wood.

With a concrete slab I won’t be bolting the bench to the floor so I needed an alternative. I ran through several alternatives in my head but couldn’t come up with a good solution that didn’t jack up the bench. As I sat on my sawbench looking around the shop I recalled a blog post by Chris Schwarz from earlier in the year wherein he put some sandpaper on a shim and have very good results. (You can see Chris’ post here). Sandpaper didn’t get much traction on the concrete floor, but it triggered a different thought. Years ago Rockler marketed a ‘routing mat’ which was effectively an expensive roll of rubber drawer liner. The cheap Yankee in me promptly went out and bought a roll of drawer liner for a couple of dollars and he has served me well for a decade or so now.  I went to my router station, grabbed the mat and cut out four squares roughly the size of the foot pads on my bench. I put them under the bench and repeated my experiment…

Rubber mat can help your bench stay put

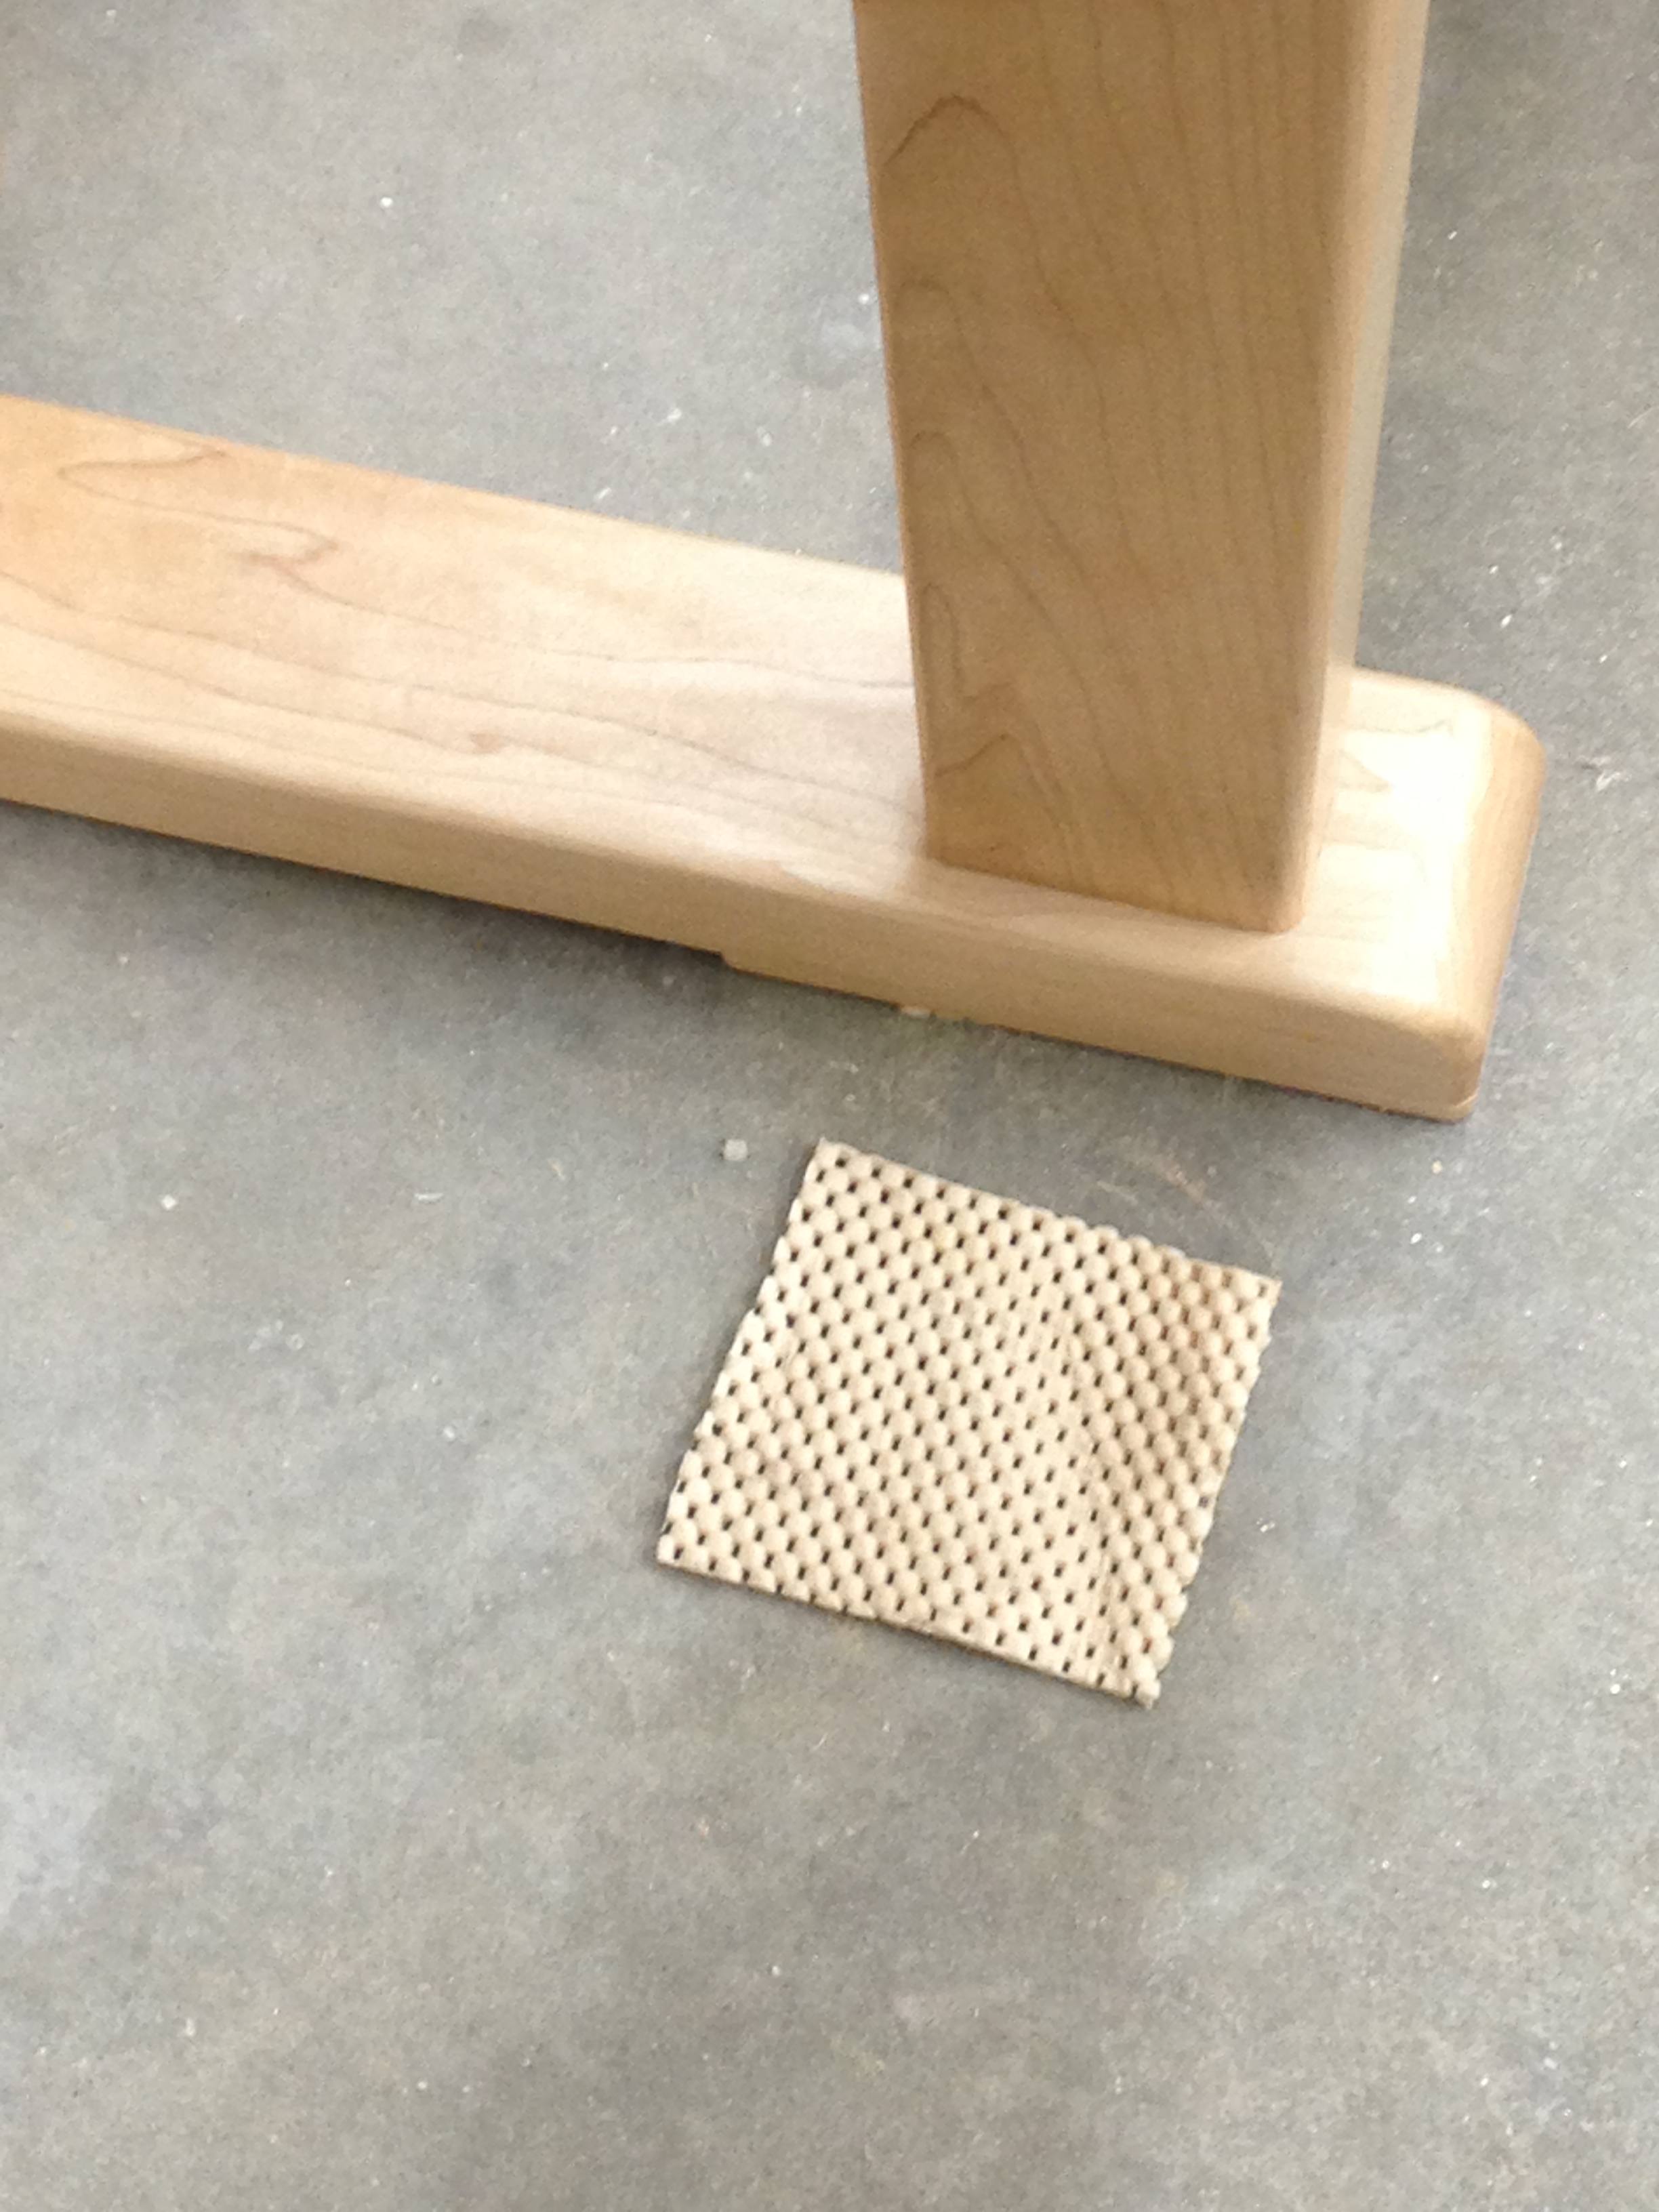
To my surprise it worked great. The weight of the bench compressed the pad so much the bench height is negligibly higher off the ground. I was able to aggressively plane some hard maple scraps left over from the bench and it was solid and stationary. I’m sure someone who really wanted to move it enough could find a way, but the increase in traction was impressive. If you’re also living with a concrete floor in the shop you’ll want to give this a try — it’s about the best $1 bench upgrade you can make.

Take care,
-Bill

P.S. I’ll make some posts about building the bench, but right now I have a some competing priorities taking my much of my time. We have a baby on the way in August, I need to build a crib, and I’m teaching for much of the rest of the summer. I’ll be posting as I get some free time here and there but it may be in spurts.

P.P.S. In digging up the the blog post above from Chris I learned that I am not the first to do this sort of thing with various forms of rubber padding — nonetheless the simplicity and the results were still worth sharing.

1805 Taylor Old Up and Down Sawmill

One of the hidden gems of Derry NH is the 200+ year old Taylor Sawmill. It’s one of the last surviving and working up and down sawmills in the region and likely the country.

Taylor Sawmill, Derry, NH

Powered by a large water wheel, this mill still operates for demonstrations and the occasional bit of restoration work.  It’s amazing to see and hear this mill in action. There is a distinctive noise as the saw makes each powerful stroke like clockwork, and it’s almost scary as you can feel some of the vibration through the floor and feel the air move as this massive timber frame saw blade oscillates up and down.

The mill is powered by a large water wheel which is fed by an adjacent pond.

The blade itself is held in tension by a massive timber frame. You can think of it as a giant frame saw. The blades could be changed based on the type of materials being sawn and desired finish quality results. In the video below you’ll see the mill operating at one of its slowest speeds. Each blade was set and sharpened by hand. As the saw cut the timber, the ratcheting mechanism (driven by the massive geared wheel in the bottom left of the photo below) advanced the entire timber into the blade via a moving carriage.

Up And Down Sawmill in Action

The mill itself sits on land in Derry NH purchased by Robert Taylor in 1799. The mill started operating in 1805 and had a fairly long service life. The mill site and 71 acres around it were purchased in 1939 by Ernest Ballard. By that time the original mill itself had been scrapped. Ballard eventually found a similar up and down sawmill in Sandown NH and moved it to the Taylor site. Ernest and his wife spent several years restoring and rebuilding that sawmill. He had to make the missing parts and track down a viable water wheel. Thankfully he persevered and was able to complete this project. In 1953 he donated the mill and 71 acres around it to the state of NH, thus creating Ballard State Forrest.

Back in 2010 I visited the mill with a class of North Bennet Street School students and took several photos and videos which I have edited together into a YouTube video that you can watch  here which includes the water wheel and saw cutting a timber.


It was an incredible sight to see, and a great place to have a picnic or do some kayaking. If you are in the area, please check it it out. You can learn more about this mill and plan your visit by visiting it’s official web page here and the Wikipedia entry here.

Take care,
-Bill

Getting the Most from your Combination Square

A combination square is such a ubiquitous tool that many woodworkers take it for granted and do not get the most from it.

Starrett Combination Squares and Accessories

I recently wrote an article on this topic for Fix.com and thought you might also be interested in reading it. In the article I talk about some of the more interesting uses and accessories that will help you get the most out of your combination square. You can check out the full article here.

Some of you might be asking — ‘What is Fix.com?’

The semi-official marketing answer is:
“We are Fix.com, a lifestyle blog devoted to bringing you expert content to make your life easier. We’’ll cover everything in and around your home, like landscaping, gardening, outdoor activities, home maintenance and repairs. From products to projects, we’ll be providing you with a daily fix of content from our experienced and knowledgeable team of writers.”

My less official answer is:
It’s a new blog site with a distinctive visual style that caters to folks who are passionate about woodworking, cars, exercise, fishing, gardening, grilling and motorsports. It will be interesting to see where this site goes as they produce more content and get a wider base of readers.  If you have a few minutes, it’s worth checking out.

Below is a sample of some of the visuals from this article:

My trusty Starrett Combo Square in the limelight

I’ve got some more articles in the works with Fix.com and you’ll be able to check out those posts as they get linked to my Fix.com author page here.

Take care,
-Bill

Making Brickbats and Fireplaces

Have you ever wanted to build your own fireplace and beehive oven? It’s not for everyone, but it is something I’ve wanted to tackle for a long time. I’ve talked to a few masons, read all the new and old masonry books I could find, but still didn’t feel comfortable building my own.  I could not find a good source that showed the end to end process. I also don’t want to end up burning my house down.

Completed Fireplace and Oven

To rectify this situation I figured I’d take a trip back in time. I just got back from spending a week at Historic Eastfield Village in Nassau NY (not far from Albany). If you’ve never been to Eastfield Village it’s a restored colonial village full of buildings and artifacts from the 18th and 19th century. What’s great about the village is that it is a hands on preservation laboratory where  you can stay for free in the tavern and live with all the antiques and artifacts that are normally behind glass in a museum setting. What’s the catch? Well you are living as they did in earlier times. There is no electricity or bathroom. You live by candlelight — make sure to bring white taper candles — and you can cook your meals in one of the many fireplaces and ovens. After a long day of working out in the village it was a lot of fun to have a meal in the tavern, have a drink and play some tavern games by candlelight. Some folks were carving wood, some we playing dominoes with Billy’s ‘Eastfield Rules’ and others were enjoying a good conversation with folks from another part of the country. Staying at Eastfield is always a memorable experience.

Tools Of The Masonry Trade

This 5 day class on building a traditional brick masonry fireplace and beehive oven was a special request from me and was filled with students and alumni from the North Bennet Street School’s Carpentry and Preservation Carpentry programs. We used all hand tools much as our forefathers would have used. Mortar mixed by hand with a hoe, bricks cut by hand with brick hammers — making some brickbats as we went, rubbing the face of a cut brick on a stone, setting and pointing with trowels and testing your work with levels. As I am predominantly a woodworker it was interesting to learn the skills required to tackle this project and as the week went on you could see the class pick up speed and some finesse. And I’m sure the next project we work on will be even better.

Group Shot of the Class

The class was taught by my friends Bill McMillen, his son John McMillen and Don Carpentier who is the founder of Eastfield Village — the village is set on his father’s ‘East Field’ and is Don’s long time home. Billy is also a master Tinsmith and preservationist having worked/taught/lead the preservation efforts at Old Richmond Town on Staten Island NY, taught at the Tinsmith Shop at Colonial Williamsburg and countless other venues. Don Carpentier moved and restored all the buildings in the village — an incredible undertaking and is also a well known historian and craftsmen having worked in wood, tinsmithing, blacksmithing and pottery. Don is also well known for his incredible Mochaware. John grew up around all this and is a skilled craftsman working in the NYC area.

If you’d like to see how we spent the week building these fireplaces, please check out the video below which walks you through the week at a high level (If you are reading my blog via email or some mobile phones you may have to click over to the actual post to watch the video):

You can also learn more about Eastfield Village’s current class schedule via their website here and the village in general via this nice video from Martha Stewart that you can watch here. If you can make the trip out to Eastfield Village for a class I highly encourage you to do so — it’s an experience you will never forget.

Take care,
-Bill