It’s that wonderful time of year — after Thanksgiving and before Christmas — where the Black-Friday and Cyber-Monday frenzy has died down and last minute shoppers are coming to the realization they’ll have to visit a brick and mortar store or start clicking on expedited shipping if they want their gifts to arrive in time for holidays. It’s also the time of year where bloggers offer their holiday gift guides, last minute project ideas and holiday drink recipes.
Fear not, I’m willing to attempt the holiday blogging trifecta with this post.
Sharpening a lead
Gift Idea for the Woodworker In Your Life — Learn the basics of Drafting by hand
Earlier this year I made a 2 hour video ‘webinar’ for Popular Woodworking titled “Hand Drafting Skill Builder” wherein I talked about the basic tools and techniques required to draft by hand. I started with a terminology and supply overview, then walked through several samples and discussed appropriate practice exercises.
From the course description:
With the basic drafting skills covered in this course you can quickly and efficiently communicate ideas and generate working plans.With a solid set of plans in hand, your woodworking in the shop will benefit from all the design details you worked out on the drawing board, where changes are easier to make. Your wood rack and your wallet will also benefit from the decreased waste.
Course Highlights:
What constitutes a basic drafting tool kit
How to layout a good working drawing with standard elevations, scales etc.
How to properly draw lines and make use of line weights
How to dimension a drawing
Basic lettering
Correcting mistakes
Where to find more information
The recorded version of this course is now available online and you can learn more about the course and see a sample video here on ShopWoodworking.com
Drafting Scales
The above content is also available as part of a 9 piece bundle called ‘9 Key Tools For Better Furniture Design’ which includes a lot of other great resources for anyone interested in stepping up their furniture design skills and sells for half off of what the 9 items would cost individually. This bundle can be found online here.
Both of the above are digital download content so there is no waiting or shipping necessary.
Last Minute Holiday Project Idea — Cutting Boards
I bet you have a lot of scrap around your workshop — most woodworkers are also wood hoarders. A cutting board is a great way to use up some of that scrap stock that has been haunting your woodpile for way too long. It’s also a great way to make room for the next project.
Holiday Drink — Gløgg
This classic warm Scandinavian holiday drink is great at a party and everyone seems to have their own recipe for it. Here’s a good starting recipe.
With the holidays quickly approaching it’s time to don the holiday sweater, have a warm drink and a snack and start drafting the next project.
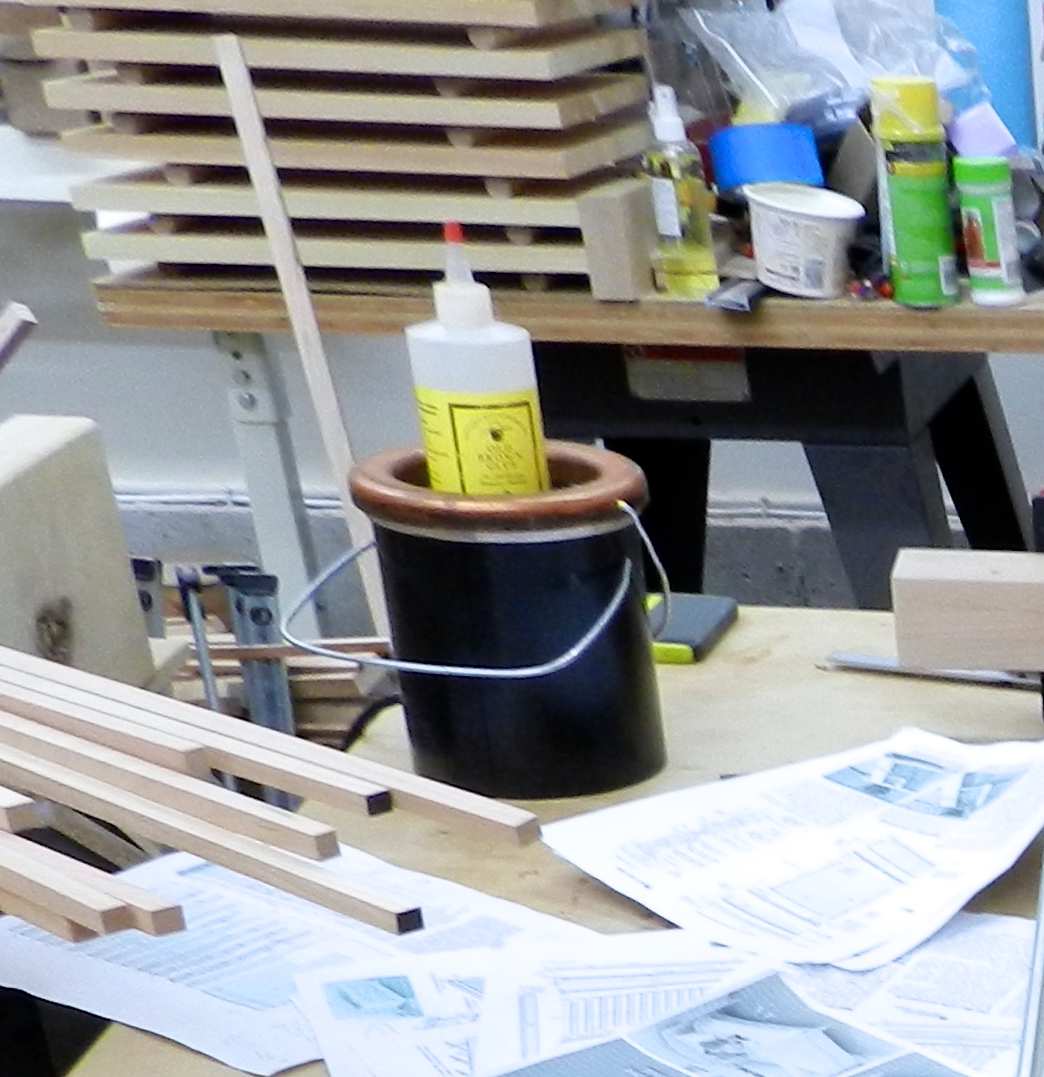
When I am out in the workshop and I need to glue something up quickly using hide glue or need only a small amount of hide glue where it is not worth the time and trouble to mix up some traditional hide glue from the pellets, I place a bottle of Old Brown Glue (OBG) in my electric glue pot and let it warm up in the water. (When not in use that bottle lives in the workshop refrigerator to extend it’s life).
Old Brown Glue in my electric glue pot
Once heated up the glue flows a lot better. The one thing I don’t like about the OBG bottle after heating is that it has a tendency to flow quickly and can quickly release way too much glue onto a given surface. Also after pouring out some glue, when you return the bottle to an upright position the air in the bottle has a tendency to shoot a blob of molten glue which can land on your project, your face, your cat, your wife — basically anywhere except the glue joint.
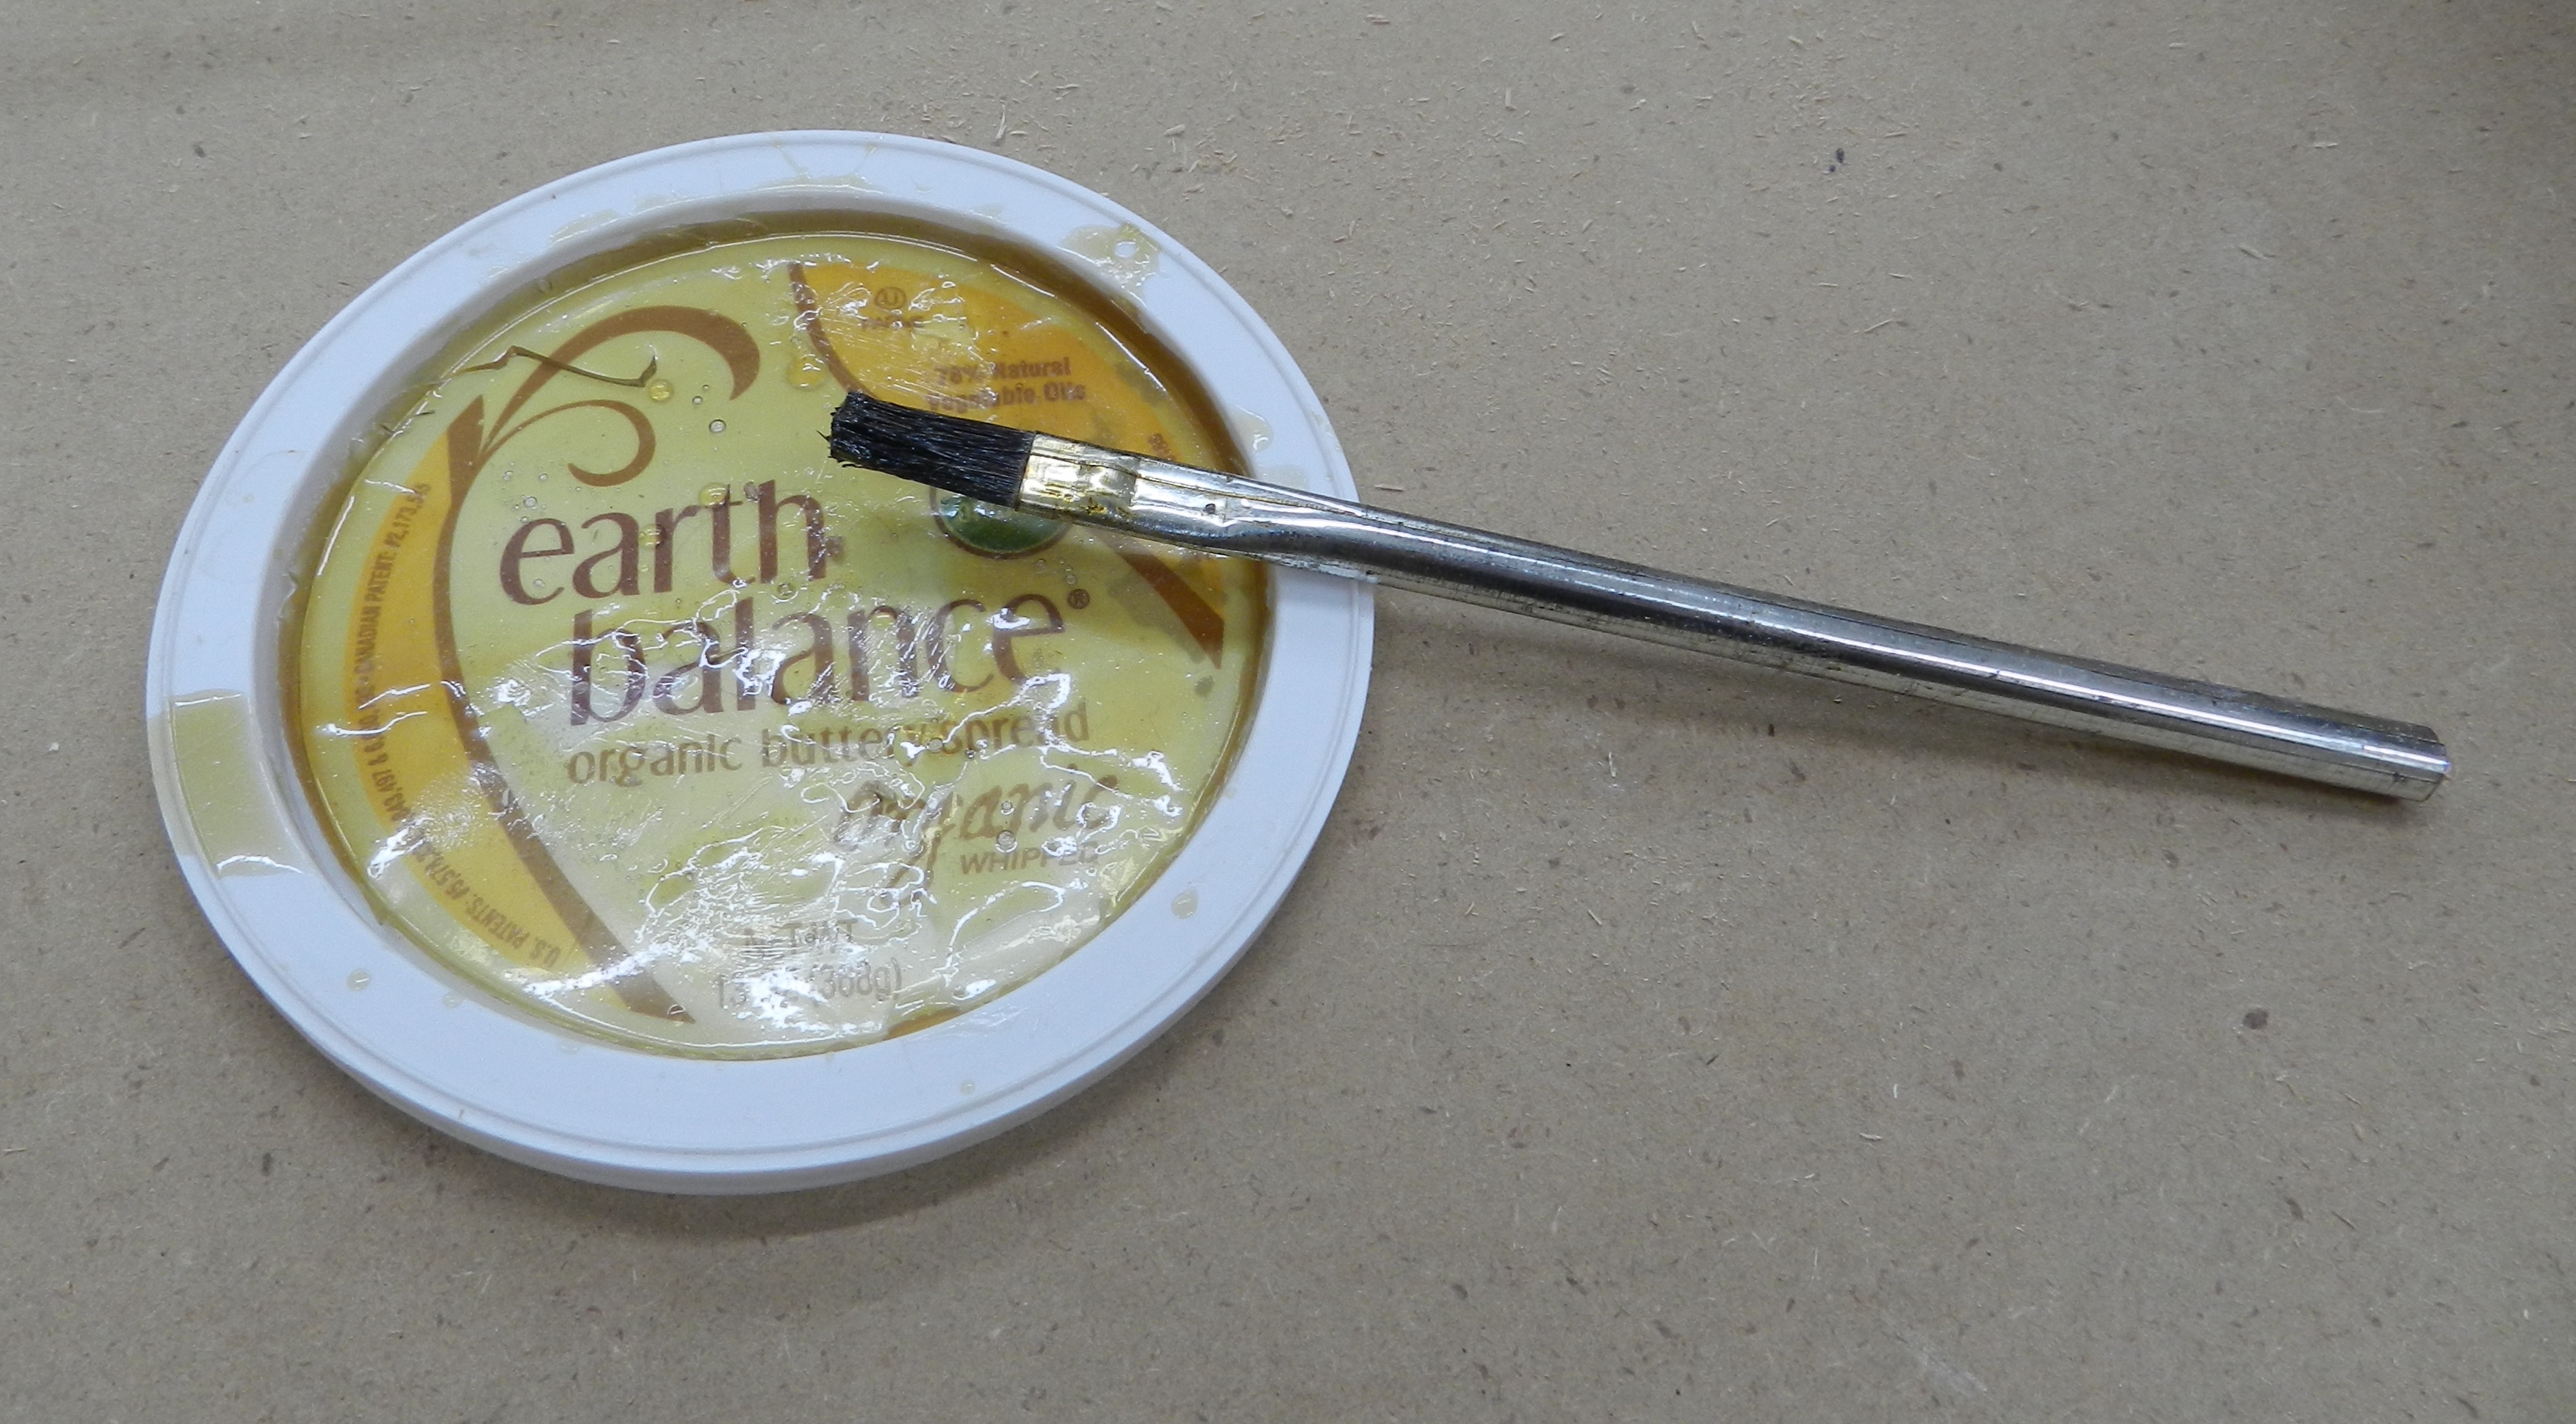
Hot hide glue ready to be used
To combat this I normally pour some glue out onto the TOP of the lid of a plastic container. Usually Earth Balance Organic Buttery Spread (which is a surprisingly good butter substitute) or the lid to a container of Breakstone’s Sour Cream work well as they both have a depression in the center that keeps the glue on the lid. You want a lid that is made of a flexible plastic and one that has a logo that will not come off. If the glue gets cold I can add some more warm glue and reinvigorate some of the glue that gelled on the lid but eventually the lid can get covered with glue that has cooled down.
The dried glue is easily removed from the lid
At the end of the day whatever is left on the lid will sit until it hardens. In a day or so I can bend the plastic lid and peel off the glue as a big disc. If the glue is still fairly fresh you can reheat it in a glue pot and use it again or if it is old or contaminated by dust or other foreign materials you can toss it and start over.
I’ve been a big fan of hide glue in recent years — for its reversibility, workability, compatibility with finishes and historical accuracy. If you’d like to learn more about hide glue and its many properties and uses check out the book “Hide Glue: Historical and Practical Applications” by my friend Stephen A. Shepherd via his blog here.
Take care,
-Bill
P.S. The woodworking community was sad to learn that Stephen A. Shepherd recently had a serious stroke. He is in our thoughts and prayers and we all wish him a speedy and full recovery.
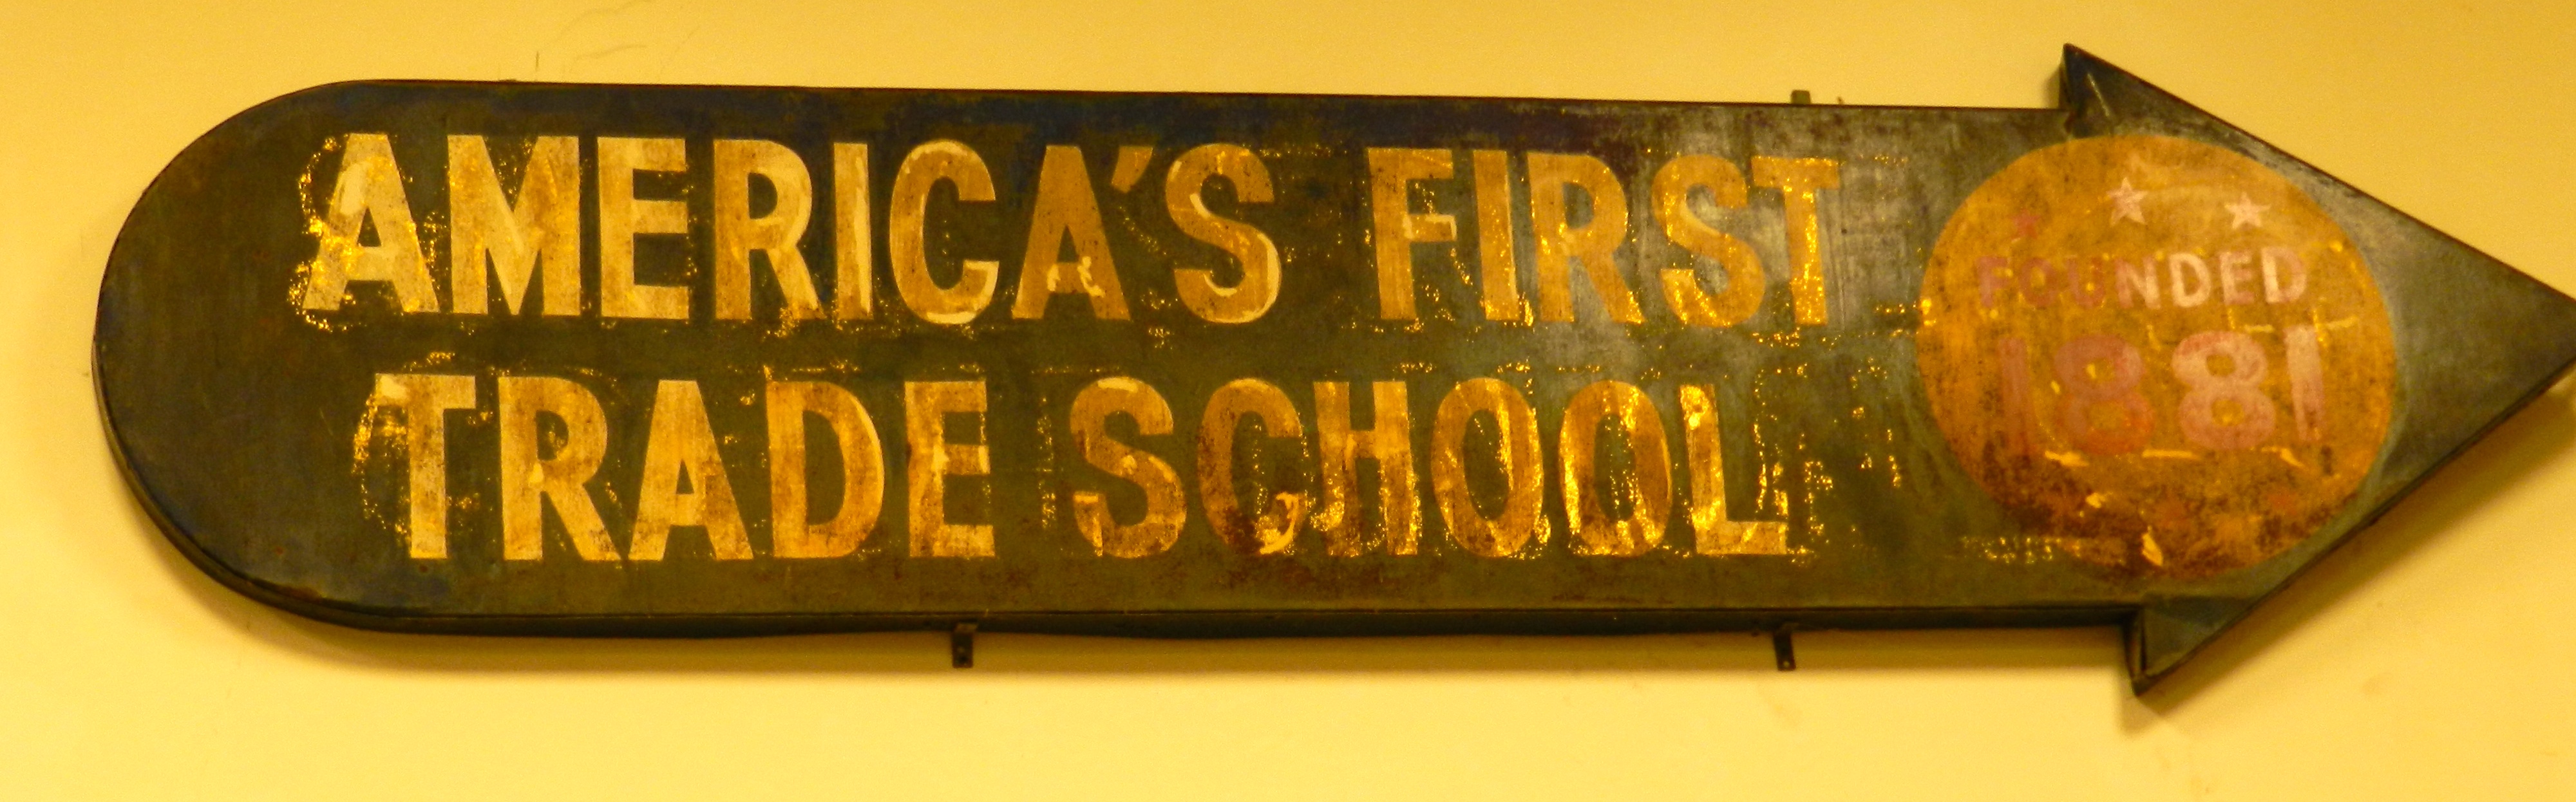
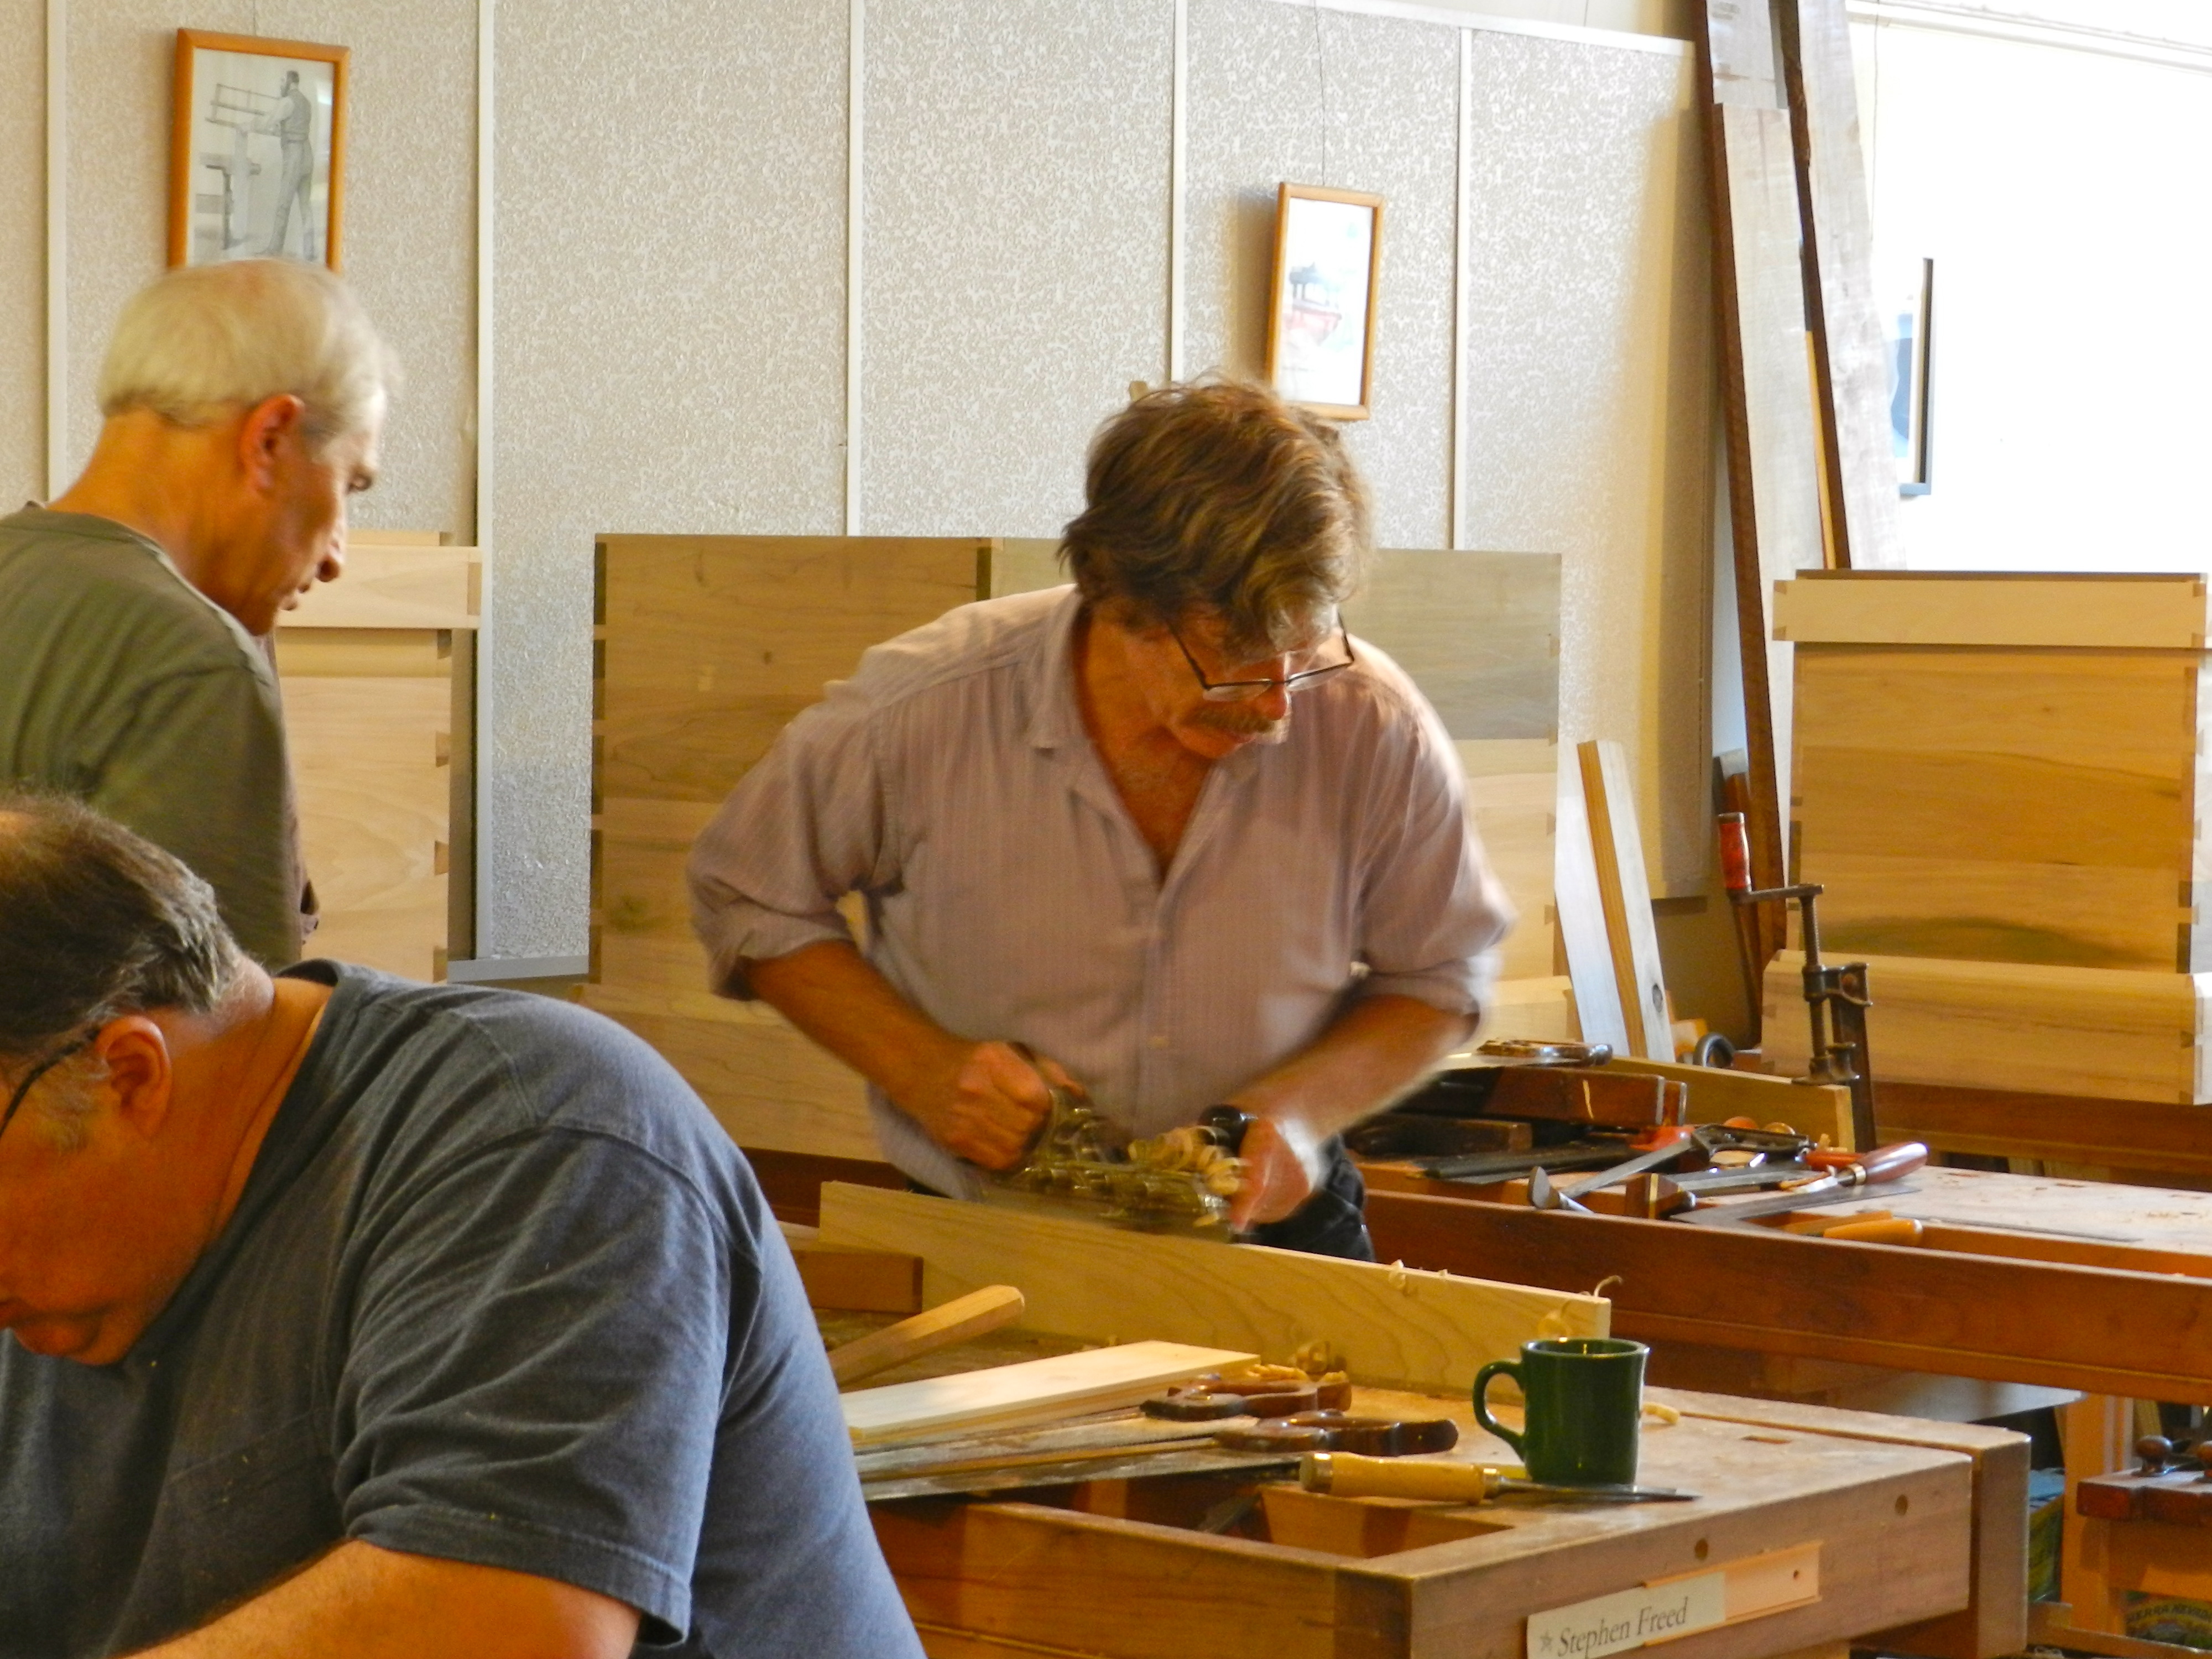
One of the lessons I learned while I was a student at the North Bennet Street School was an appreciation for quality hand tools and the superior work they can help produce. A hand tool that works well and feels good in the hand can be a joy to use — and all the better if that fine tool is also easy on the eyes.
NBSS America’s First Trade School
Many hand tools on the market today mimic or improve upon the designs of earlier tools. I love my Lie-Nielsen planes and chisels which take advantage of newer materials and manufacturing techniques and produce traditional tools that look great and work even better. A few makers have been a bit bolder with their designs and use of manufacturing technology — some of the new Veritas planes like the side rabbet or custom planes, Knew concepts coping saw and Woodpecker’s line of one time tools among others.
When I think about tools that are pushing the envelope in terms of design, use, manufacturing quality, and aesthetic appeal, John Economaki’s work is at the top of my list. If you are not familiar with John or his work, he founded Bridge City Tool Works in 1983 and like a fine micro-brewer has been making small batch runs of incredible tools ever since. Given the small production runs these ultra premium tools have been a the higher end of the market and are popular with woodworkers and collectors. I’d love to buy every tool he makes if I had the budget to buy them all, but even one or two in your tool chest will be a delight to look at and use on a regular basis.
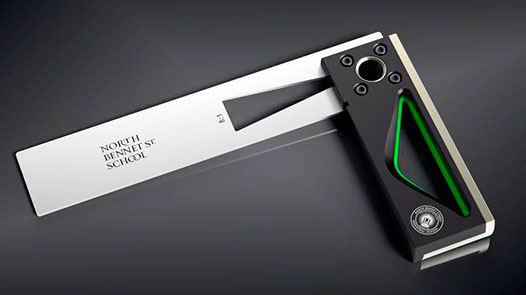
NBSS Edition Bridge City Try Square
Quality is Contagious: John Economaki and Bridge City Tool Works
If you live in the Pacific Northwest you can see some of John’s toolmaking prowess and furniture making skill at the “Quality is Contagious: John Economaki and Bridge City Tool Works” exhibit which is currently at the Bellevue Arts Museum in Bellevue Washington. The exhibit will run through February 1, 2015. (The exhibit was curated by Nicole Nathan in collaboration with Economaki and formerly seen at the Museum of Contemporary Craft in Portland, Oregon) and is a celebration of John’s work and dedication to quality.
If you are like me and live in the Northeast, do not despair — this exhibition will also be making its way to Boston in the new year. I am happy to report that the North Bennet Street School in Boston will be hosting this exhibition the late spring of 2015.
You can learn more about the exhibit at NBSS and tool here along with a personal appeal from NBSS President Miguel Gómez-Ibáñez here. Admission to the exhibit will be free and it will surely be a inspirational experience for both craftsmen and patrons of the arts.
Old North Bennet Street Industrial School Sign
“I am a huge fan of North Bennet Street School and can’t think of a more relevant venue on the East Coast for the exhibit – it is really quite an honor.” — John Economaki
Now here is the part where NBSS needs your help. Exhibitions are costly and, as a non-profit, the school has to raise $20,000 in funds to cover the installation, travel expenses and insurance. To help underwrite the costs, John Economaki designed a limited edition TS-1 Try Square (see photo above and below). The tool is 6.5” long, just under 4” in height and features a stainless steel blade with an 8:1 internal cutout for laying out dovetails. The innovative handle design interjects a fun combination of colors giving it a unique voice in the tool world. Individuals who contribute $250 or more, receive the NBSS square. For contributions of more than $400, supporters receive both the tool and a copy of the exhibit book.
Bridge City Exhibit Book and Try Square
If you’d like to help support this worthwhile exhibit you can make your donation here.
Donations over $75 are tax deductible and if you work for a larger corporation you may want to see if they have a donation matching program. At my current day job, and my last job as well, they will match any donations I made thus effectively doubling my contributions. I encourage you to do the same if possible. I’ve already made my donation and eagerly await my new tool and book. I also look forward to seeing you at the exhibition.
Throughout history many craftsmen (and craftswomen) have worn aprons as they ply their trade. A good workshop apron will help to keep some dust and dirt off of your clothes, keep your pencil(s), block plane and other essentials close at hand. It’s also an item you will spend a LOT of time wearing, so you better get something you like and make sure if fits comfortably.
Real Men Wear Aprons
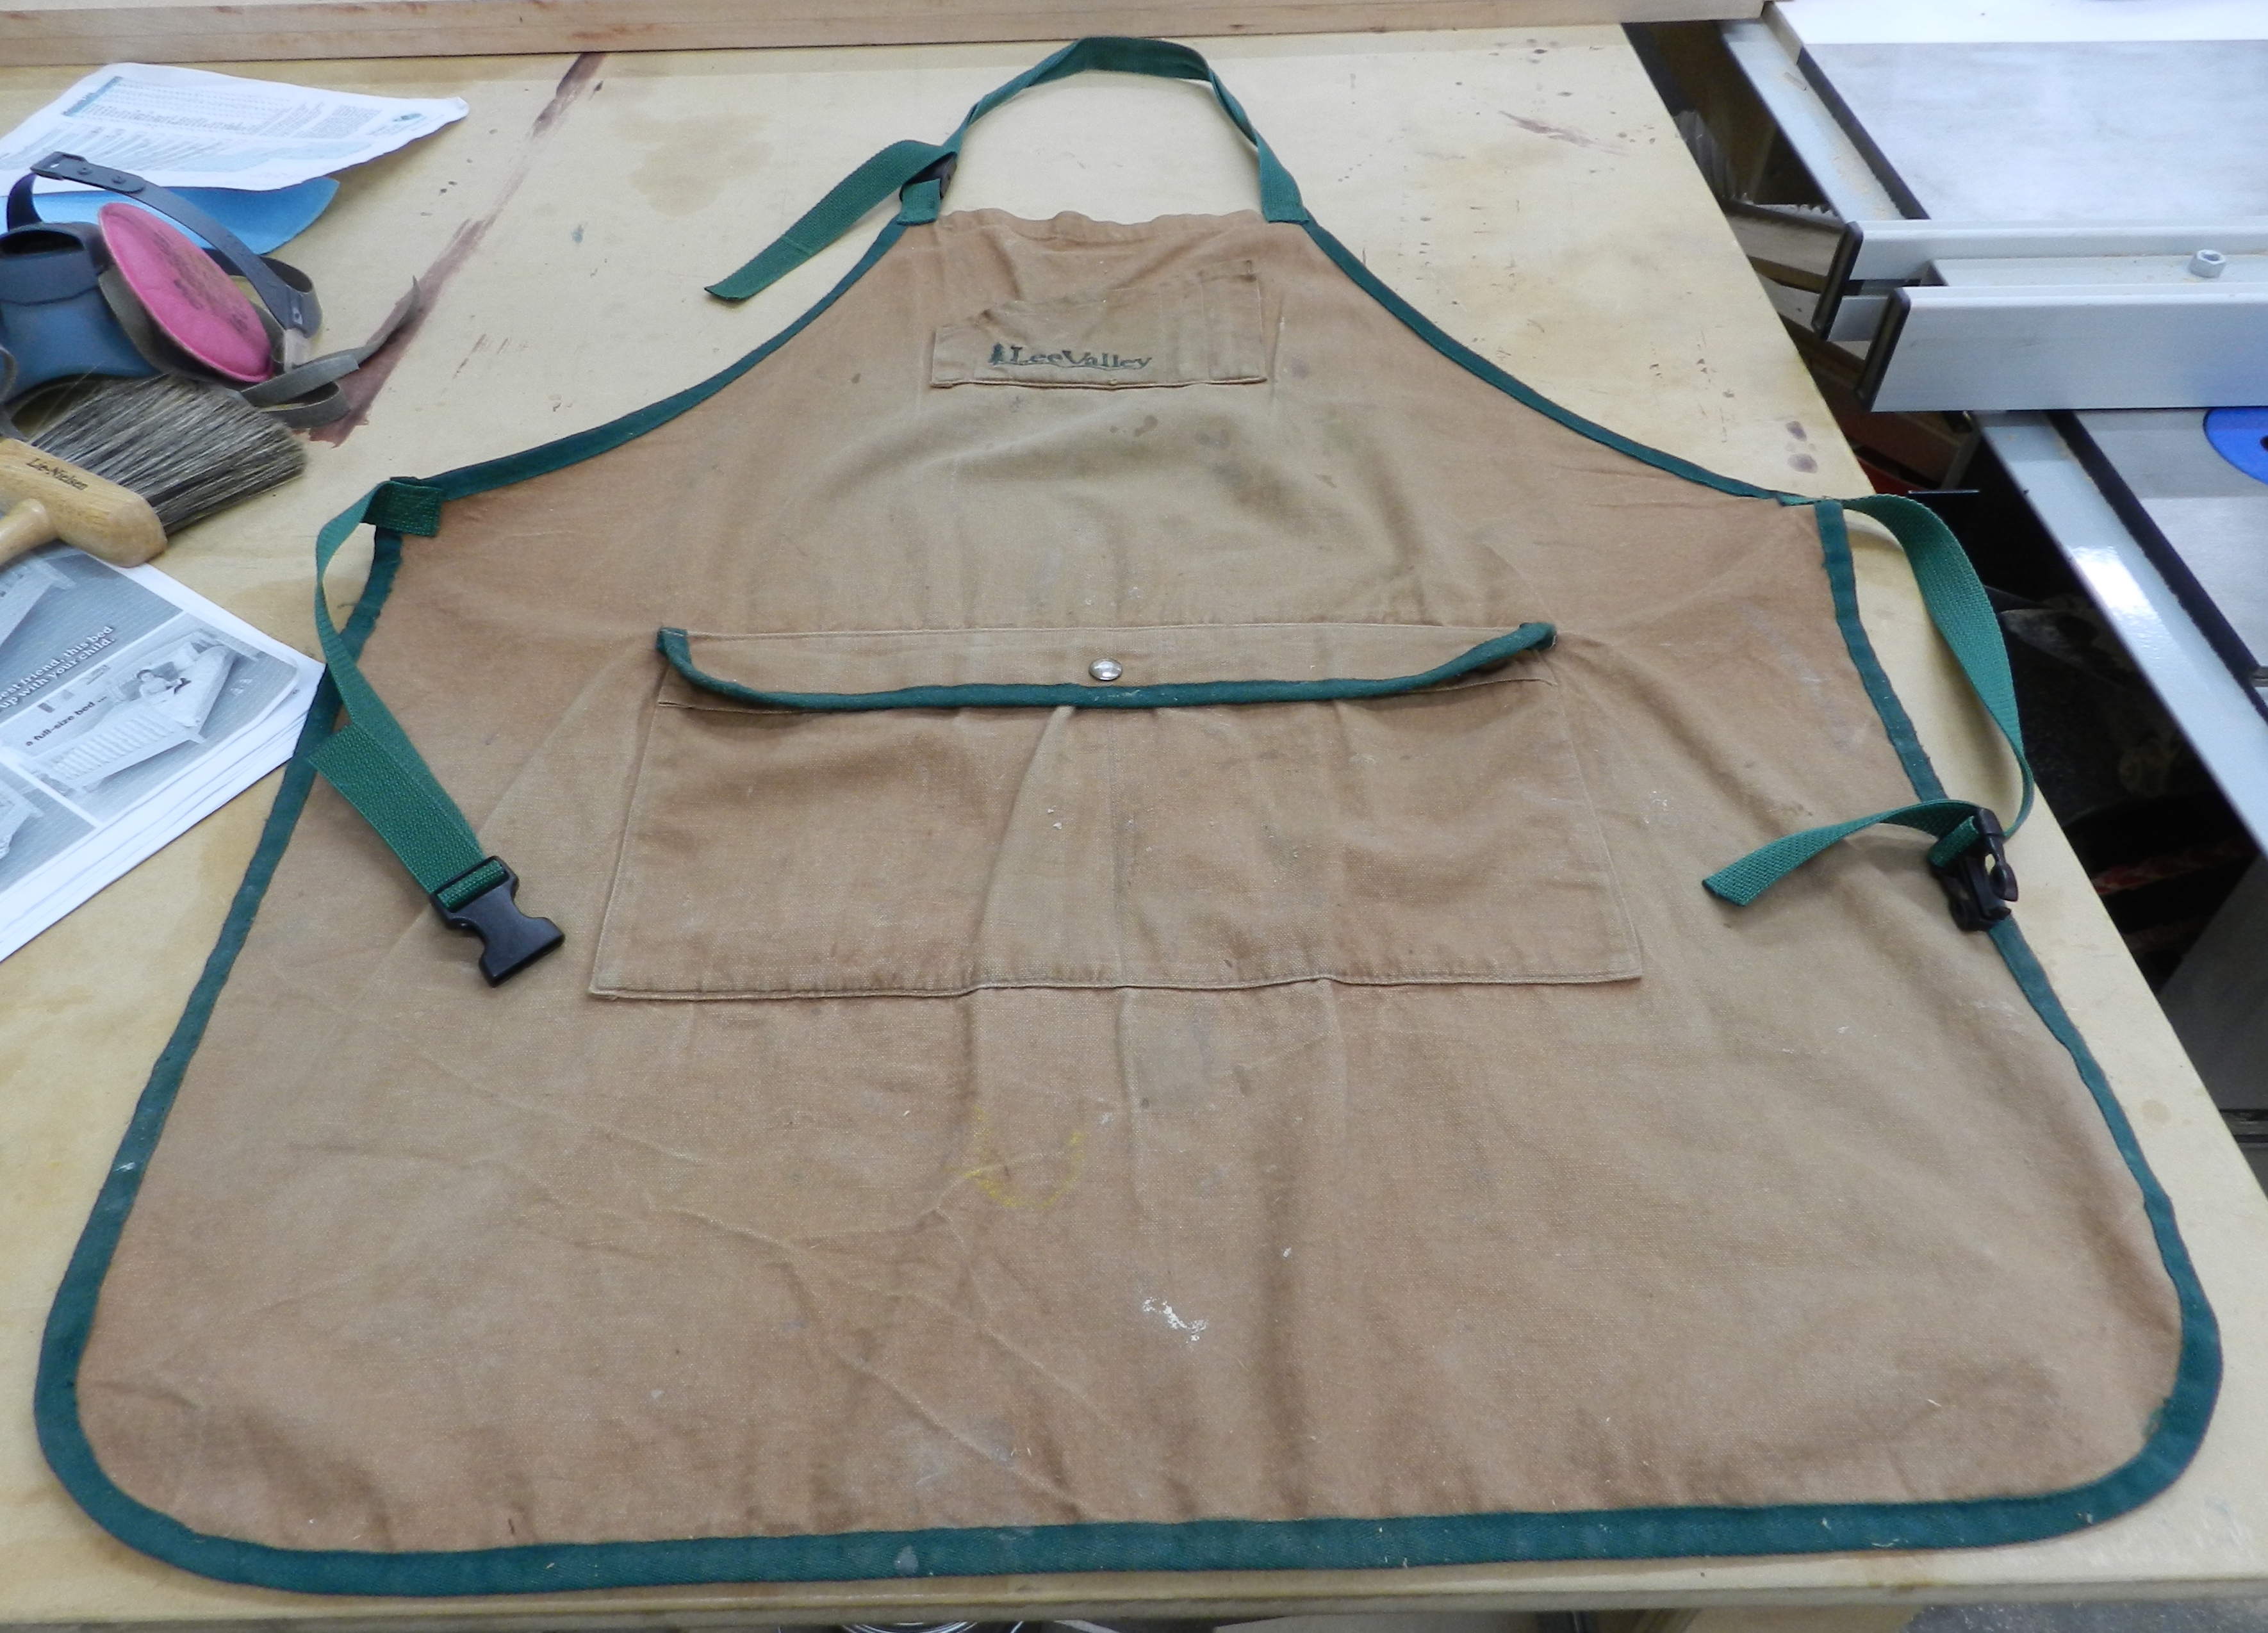
For the past ten years or so my main apron has been the standard canvas apron from Lee Valley (seen below). Made in Canada this apron met all the basic criteria — covered by torso, had a pocket with a cover, has a pocket for my pencils etc. Over the years the pencil pocket has worn out at the top edges, saw dust finds its way into the pockets (and I empty it every so often), it has survived many a washing though the chest is becoming a bit on the thin side. All in all I have been very happy with this apron.
My trusty old Lee Valley Apron
Since that time I also bought a Rockler apron that goes over the shoulder instead of around your neck, and a nice festool apron that wears a bit more like a vest. The Rockler apron was a pain to get on sometimes (the shoulder straps often got messed up, though I liked the idea of not having weight around my neck) and the Festool apron while nice didn’t cover as much and so I hardly ever wore these aprons and preferred to keep adding miles to the old Lee Valley apron. (Plus it was a Christmas present from my Dad).
Carhartt Shop Apron
I wear a lot of Carhartt gear — I find it is made better and lasts a lot longer than other brands I’ve had in the past. (I’m looking at you Lee Carpenter Jeans that wore out way too fast…). Where I live we have one of the few Carhartt owned retail stores which caries most of the lines Carhartt makes and sells. While much of the stuff they make is made overseas — they do still make a line of Made In the USA garments and accessories and whenever possible I try to buy from this line.
According to Carhartt’s web page, less than 2% of all the clothing sold in America is actually made in America — that is a very scary number. The only way more clothing is going to be made in the USA is customers seek out and buy more of the clothing made in this country. (I also like American Apparel and Red Wing who also still make clothing products in the USA) You can learn more about Carhartt’s Made in the USA line here along with an interesting video talking about how and why they still make some products in the USA.
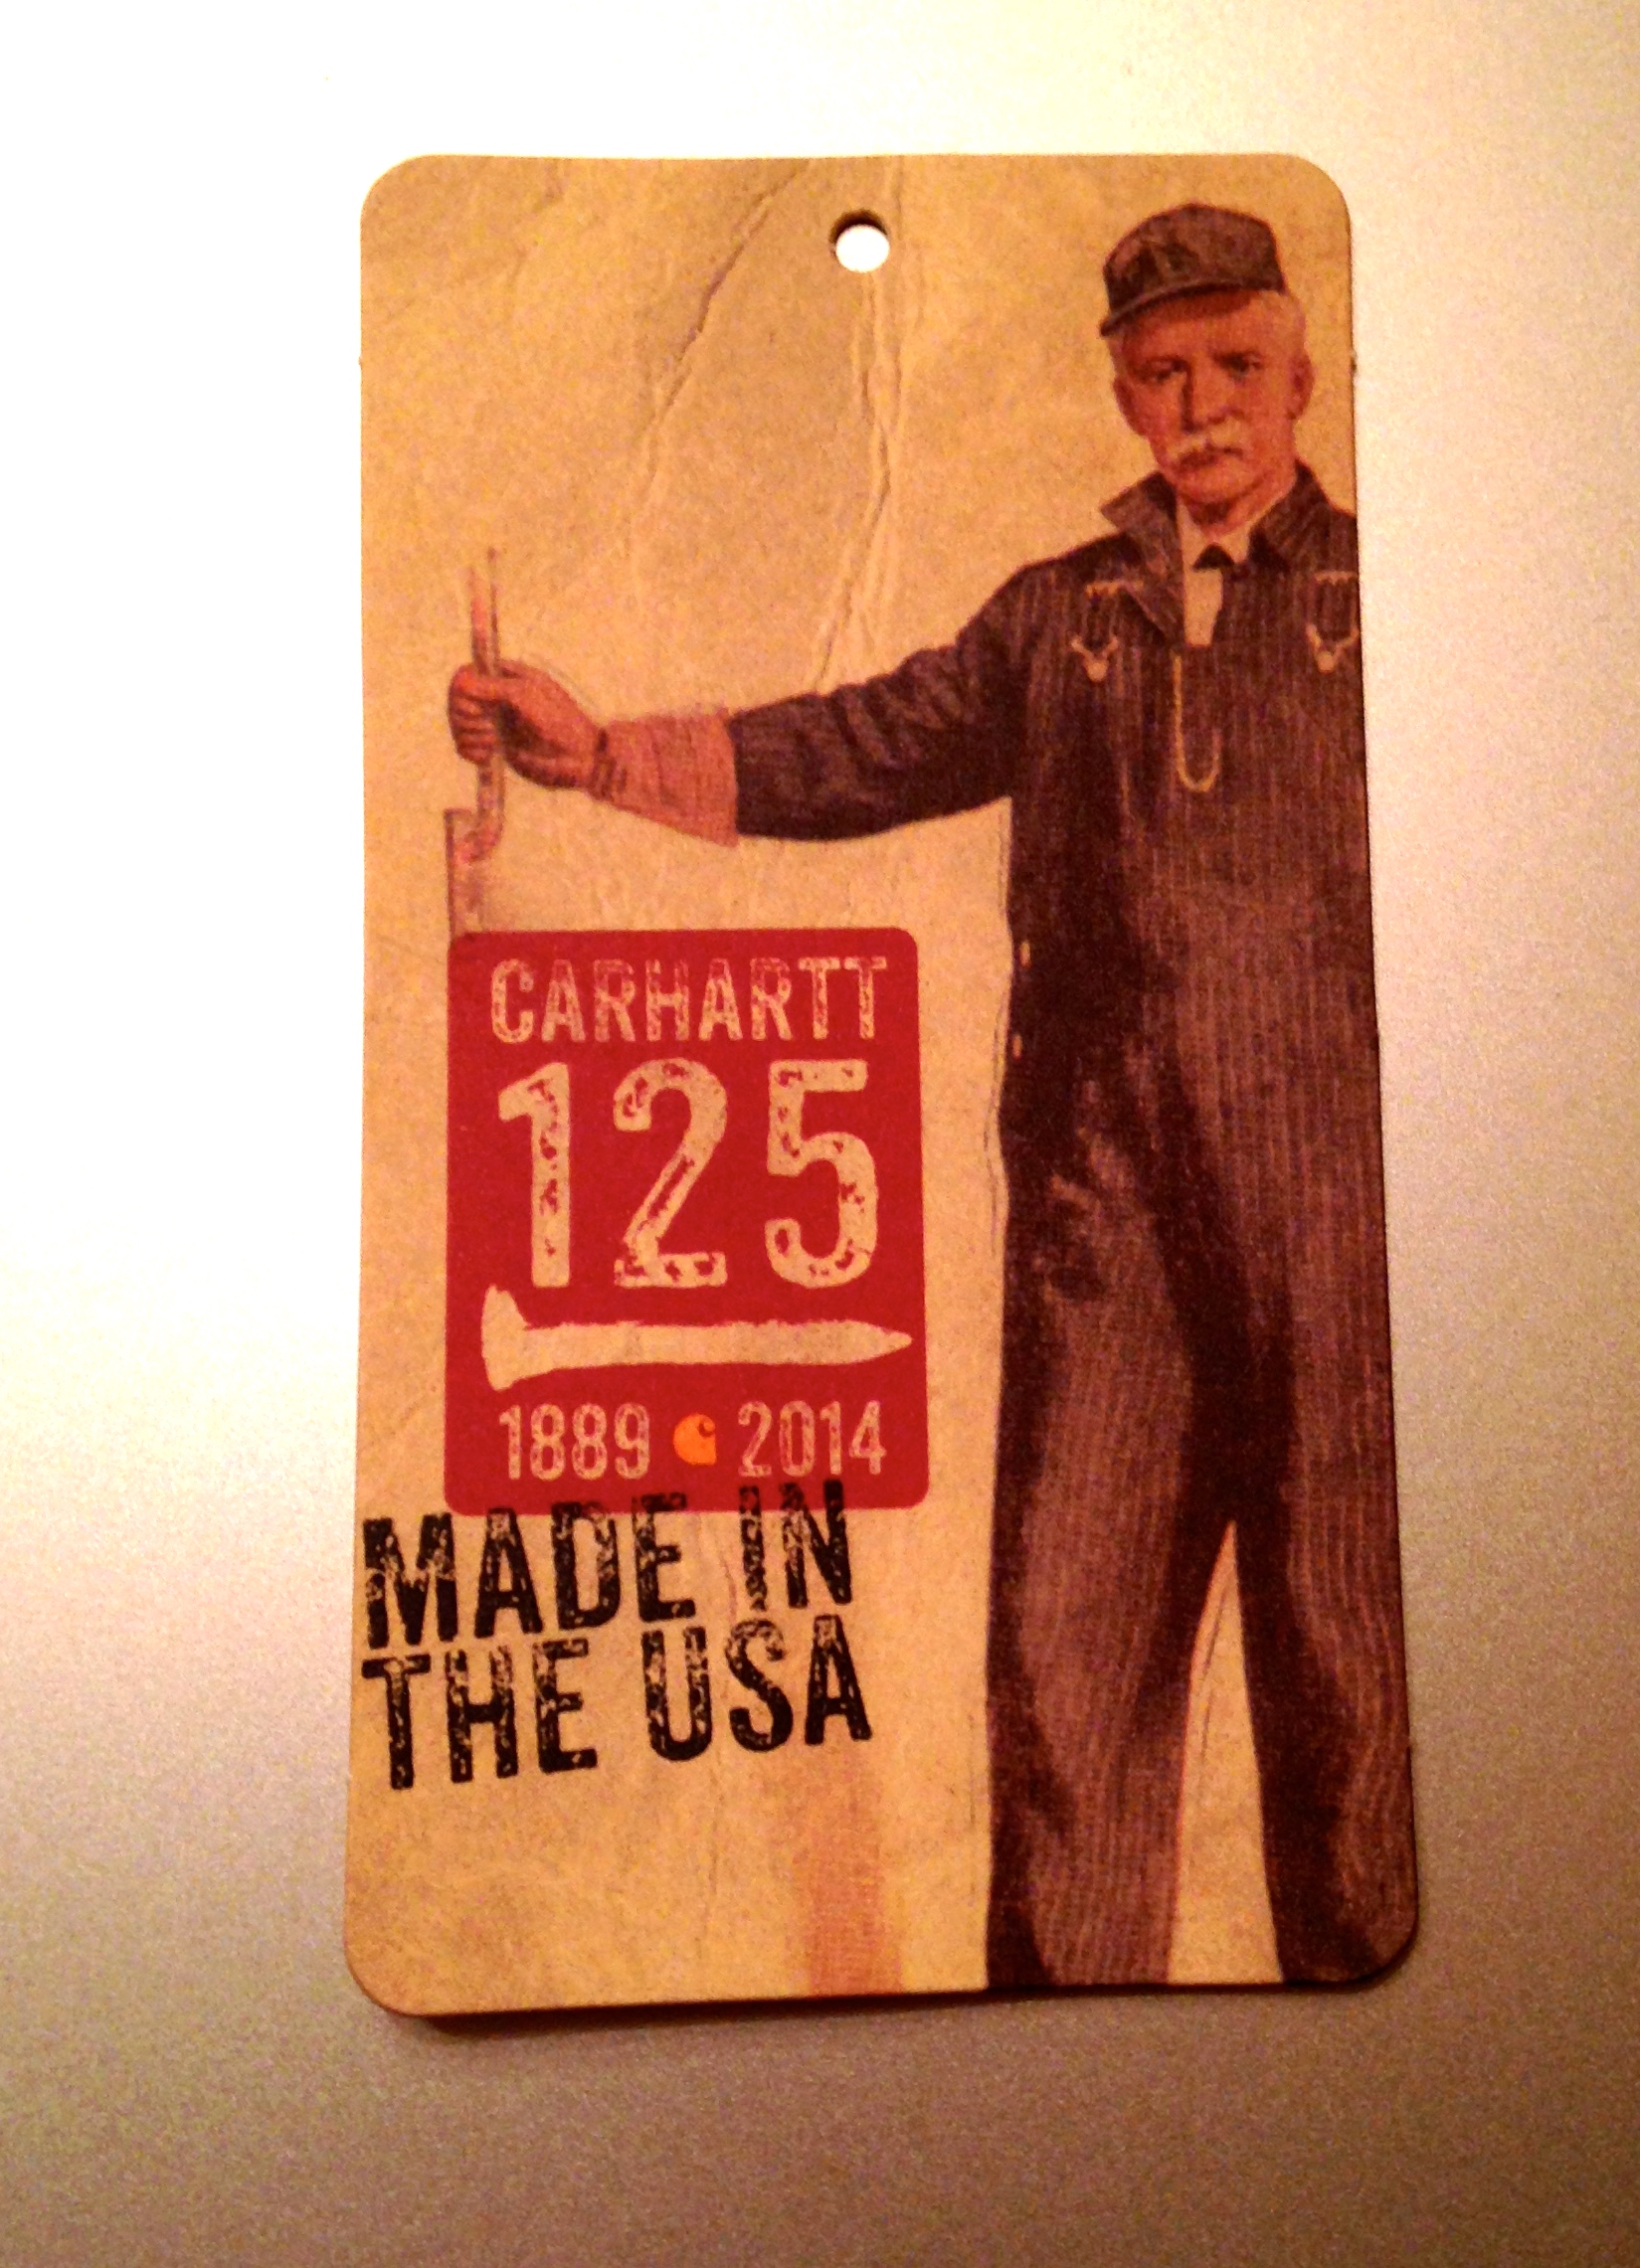
During my most recent visit I saw they had a table full of Carhartt 125th Anniversary gear and accessories including the workshop apron above.
Carhartt Made in the USA Line
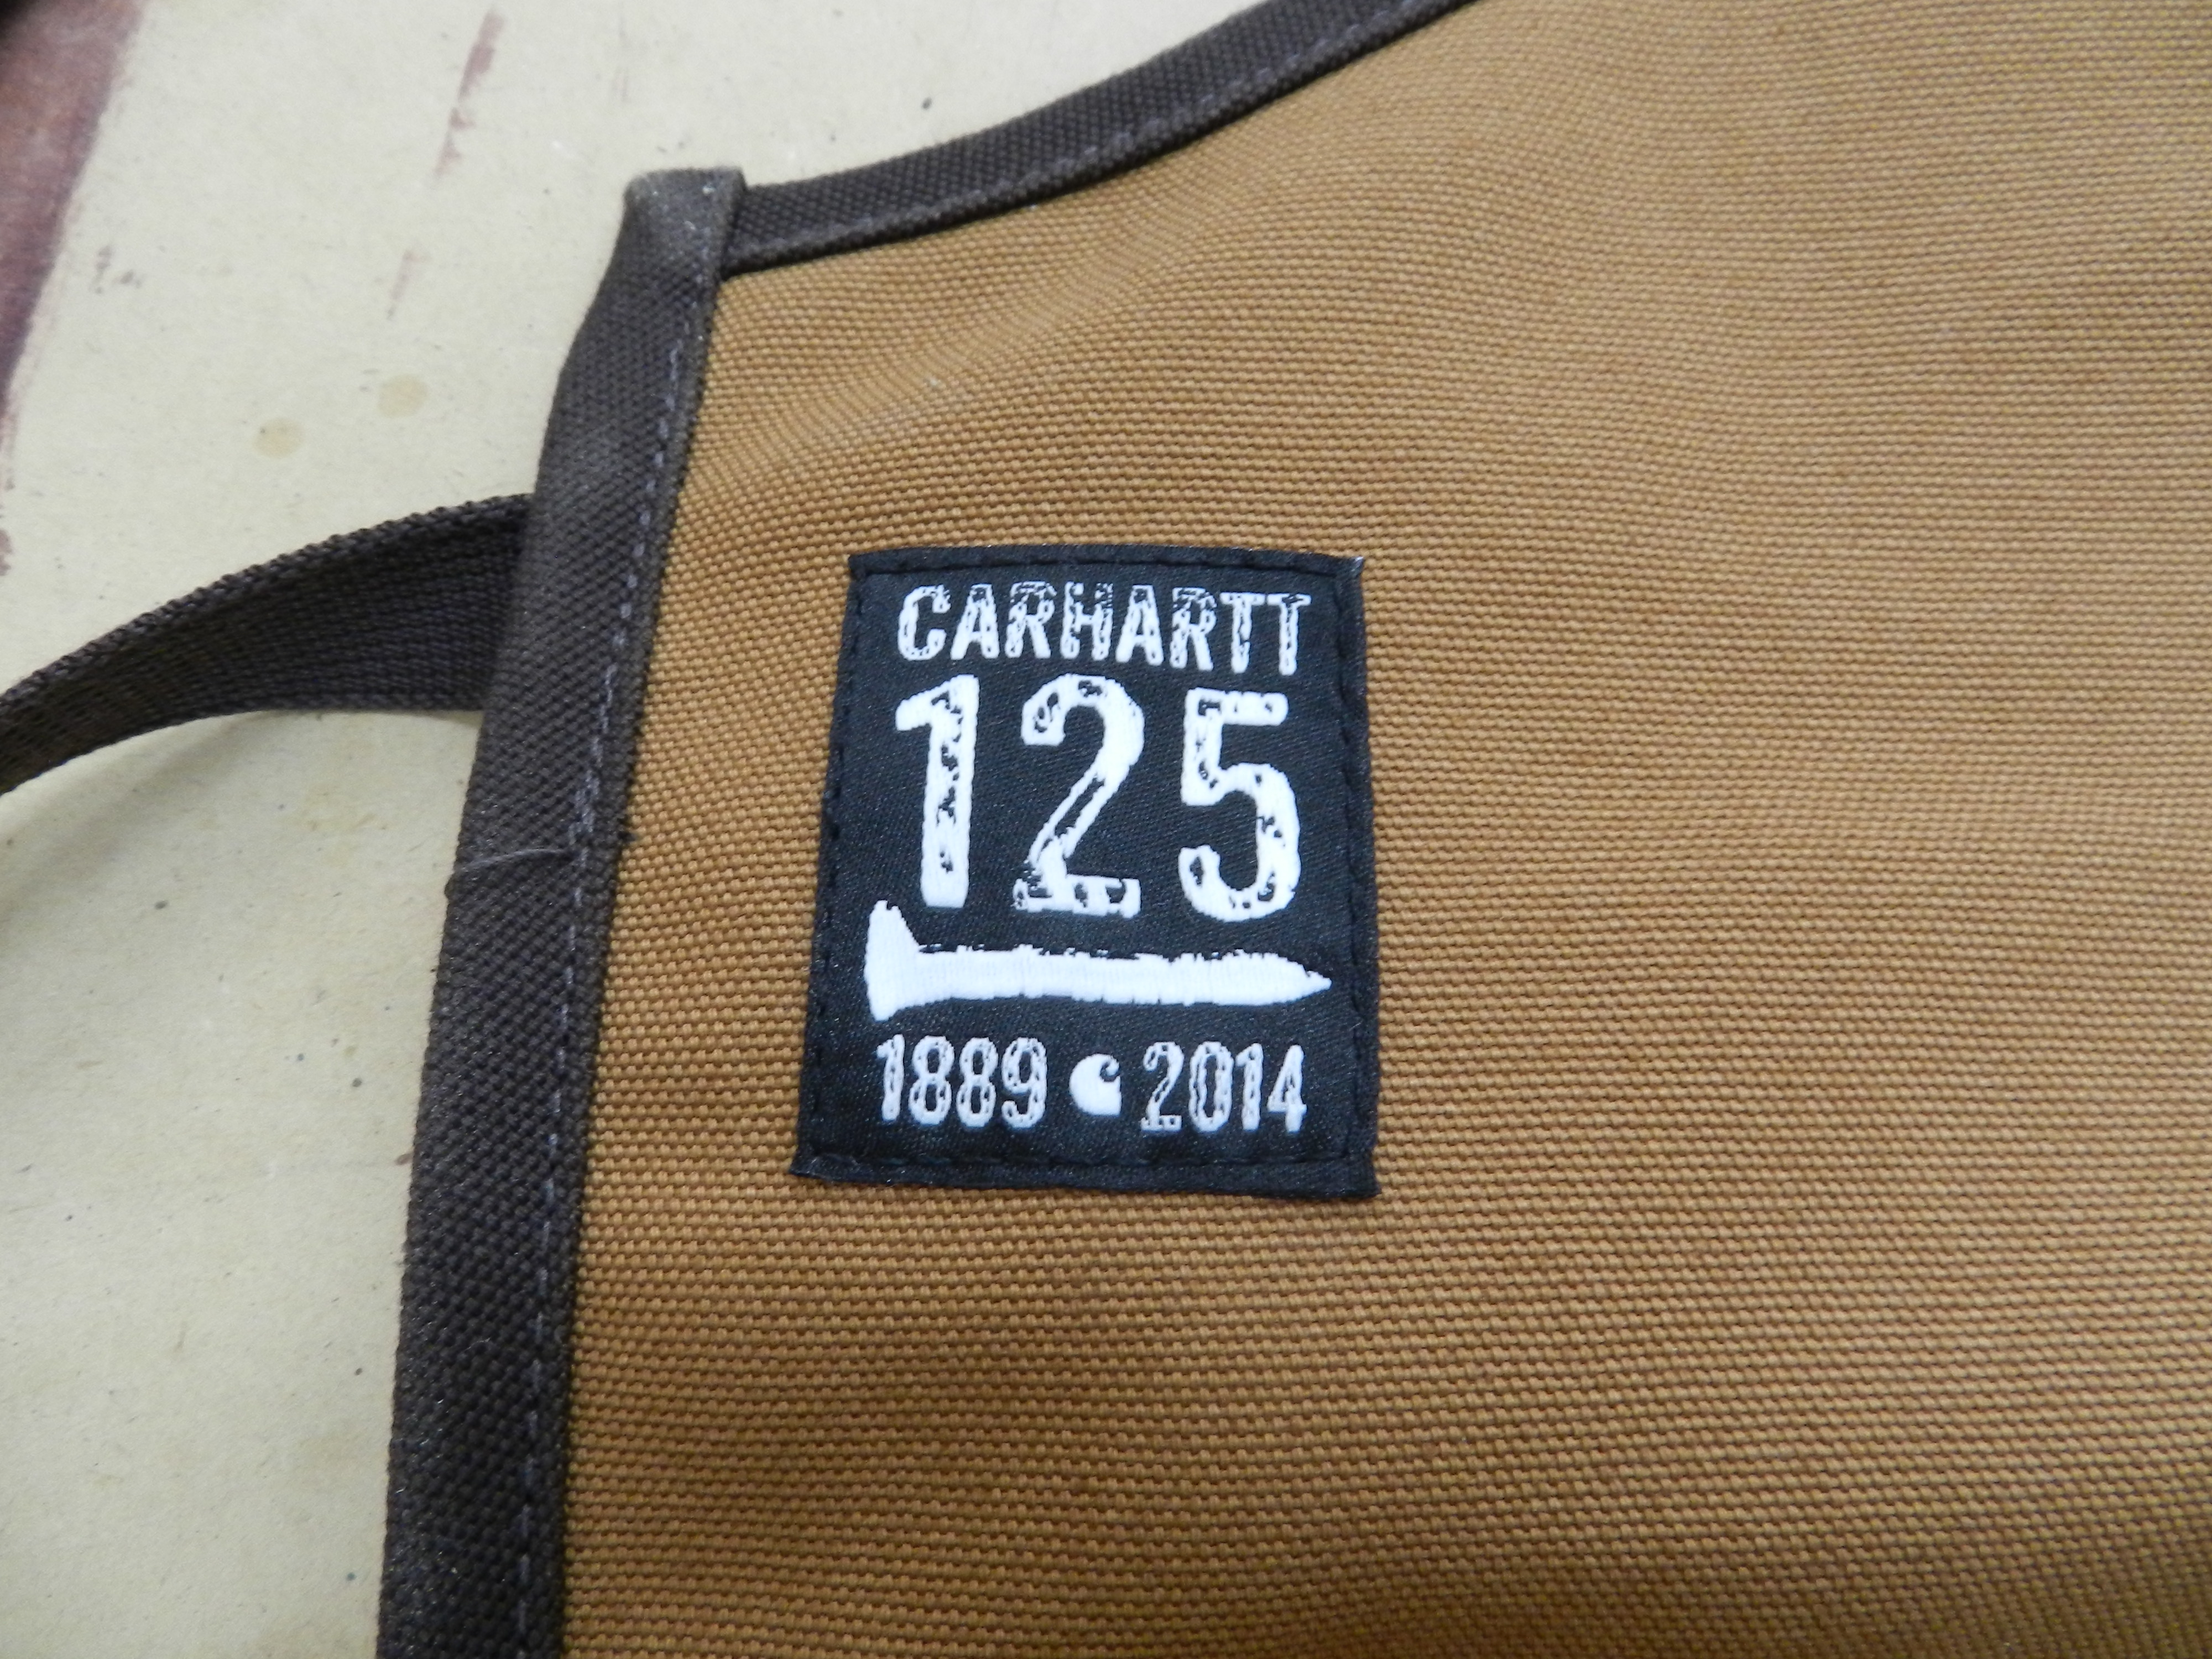
Also from the tag above that came with the apron some portion of the sale will help support Carhartt’s $25,000 donation to SkillsUSA which helps train students for careers in technical, skilled and service occupations while fostering “total quality at work — high ethical standards, superior work skills, lifelong education, and pride in the dignity of work” and promoting community service.
125th Anniversary Made In The USA Line
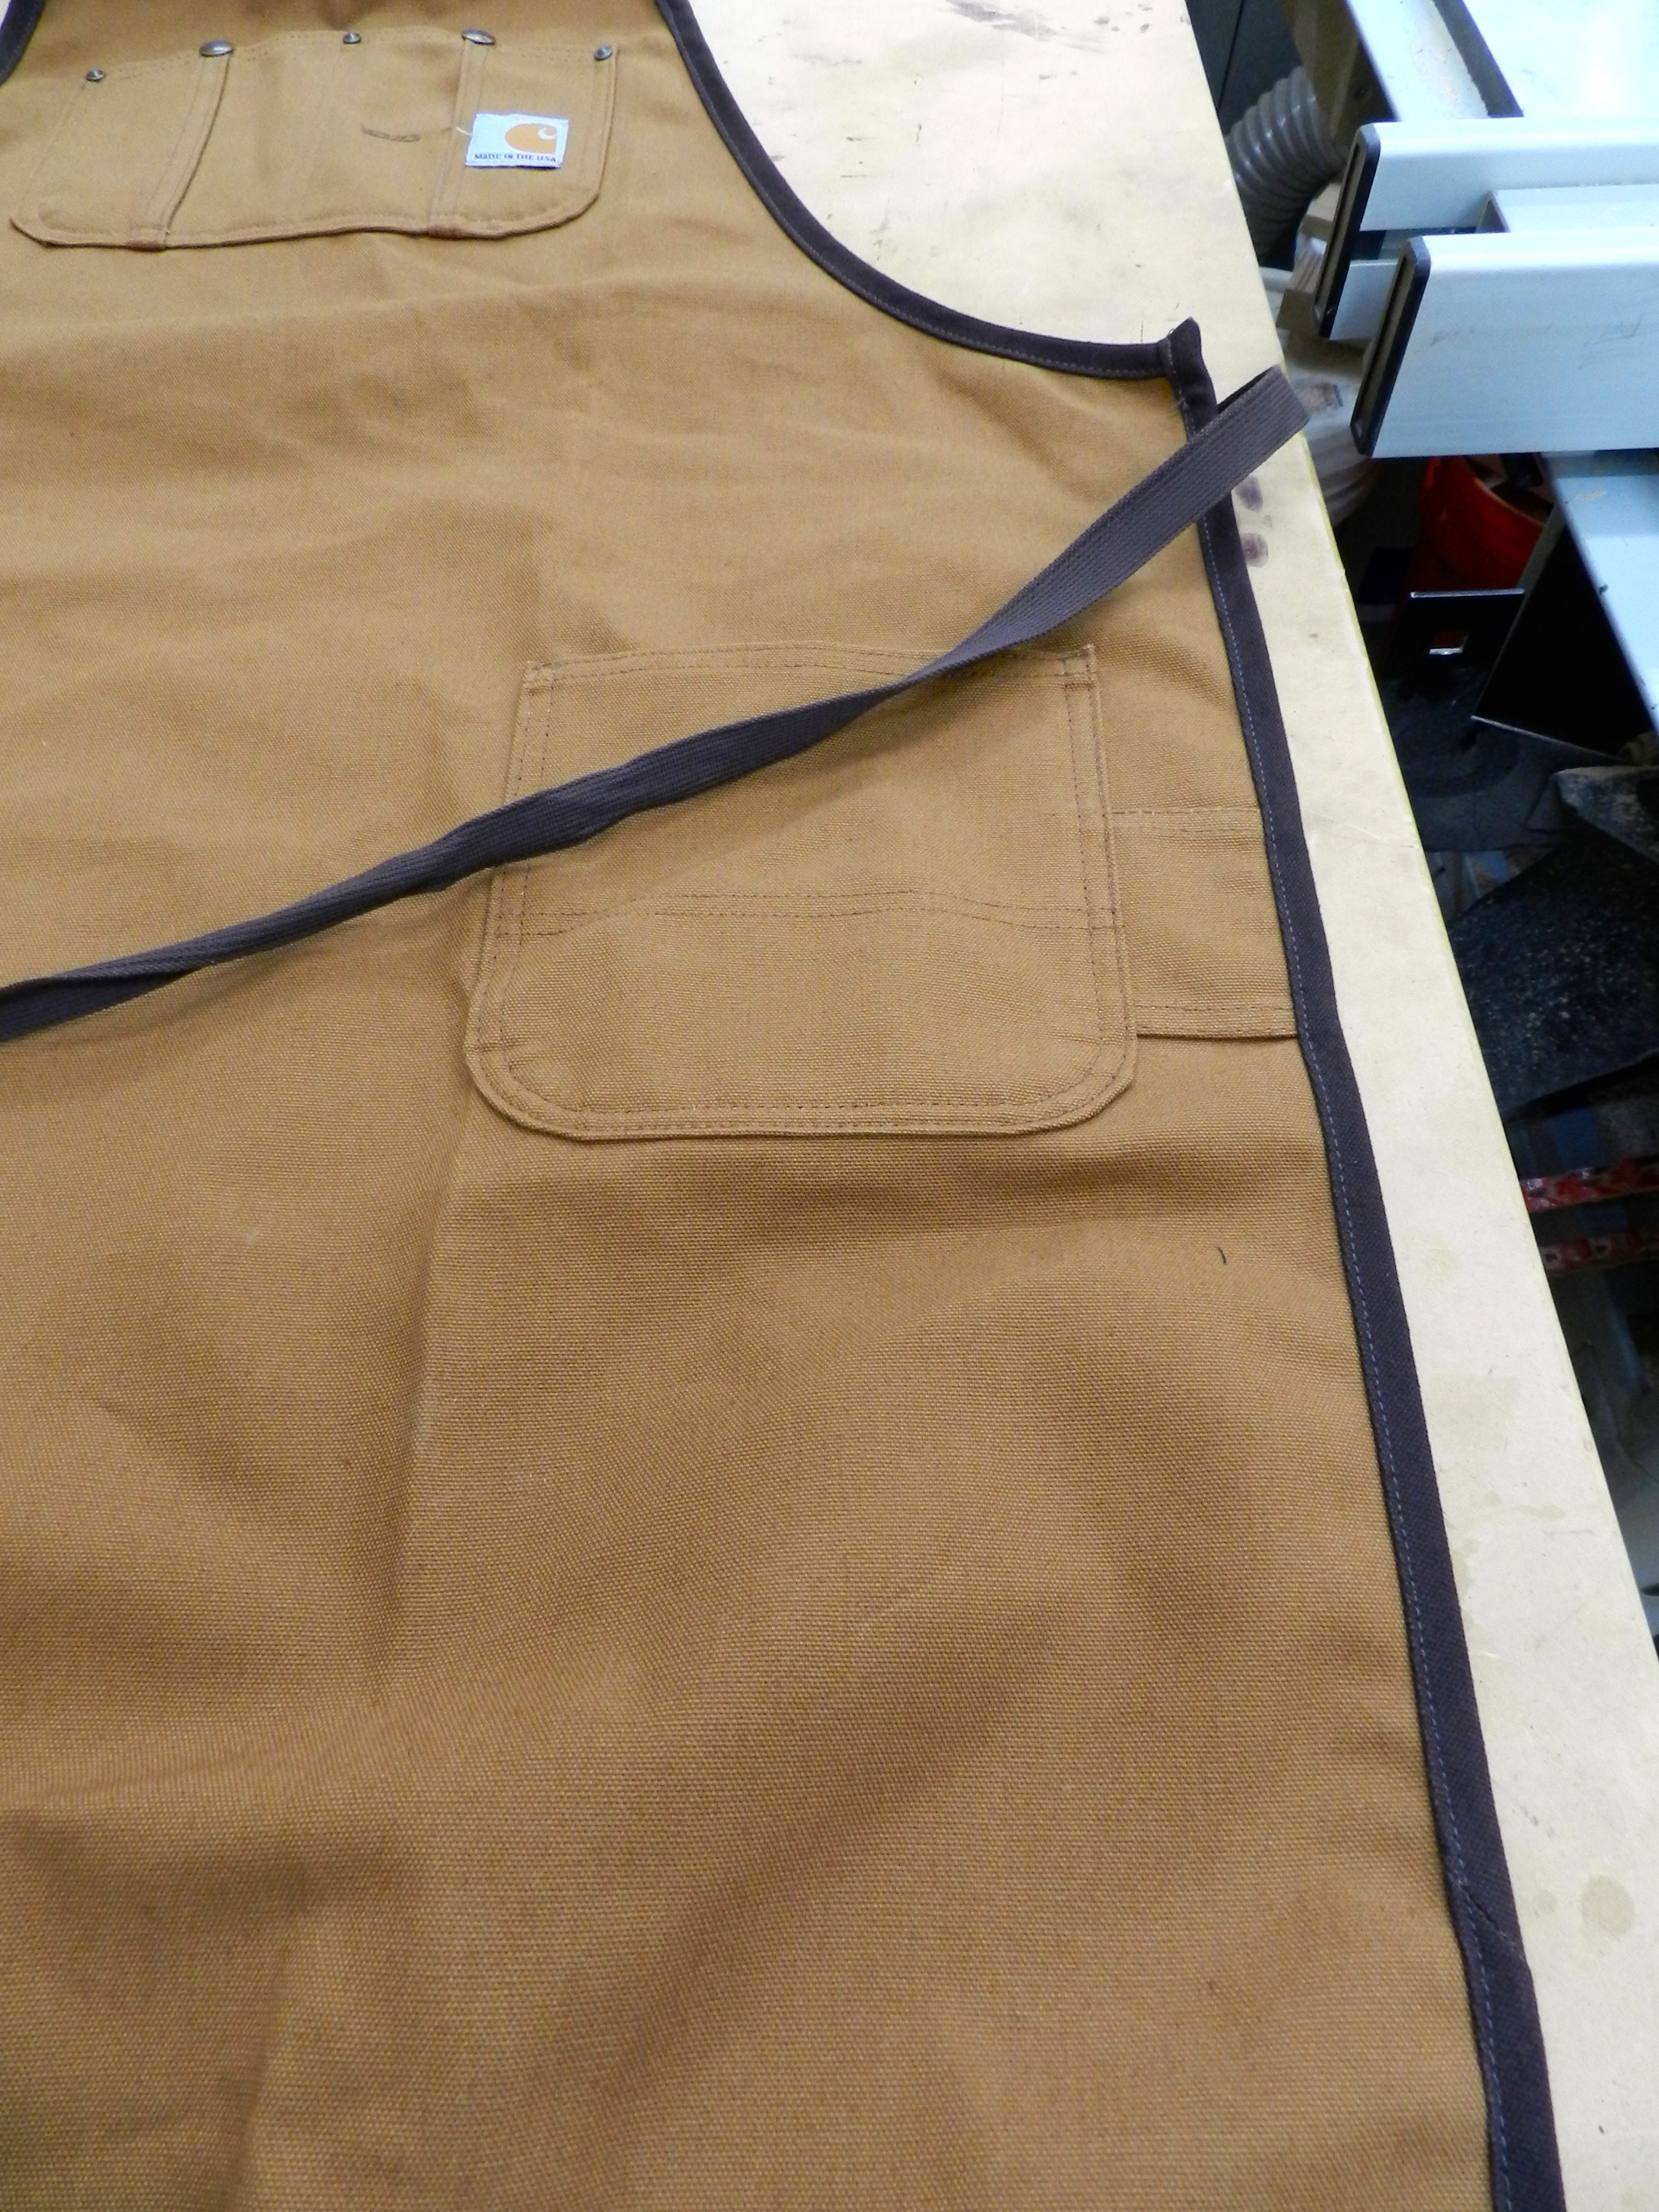
So far I am very happy with this new apron. (It was $34.99 — about the same price as my old Lee Valley apron which goes for $38 today) It is well made from Carhartt’s famous heavy duck canvas with rivet reinforced pockets. The fabric is noticeably thicker than my old apron and much longer though it does not seem to get in the way of my movements.
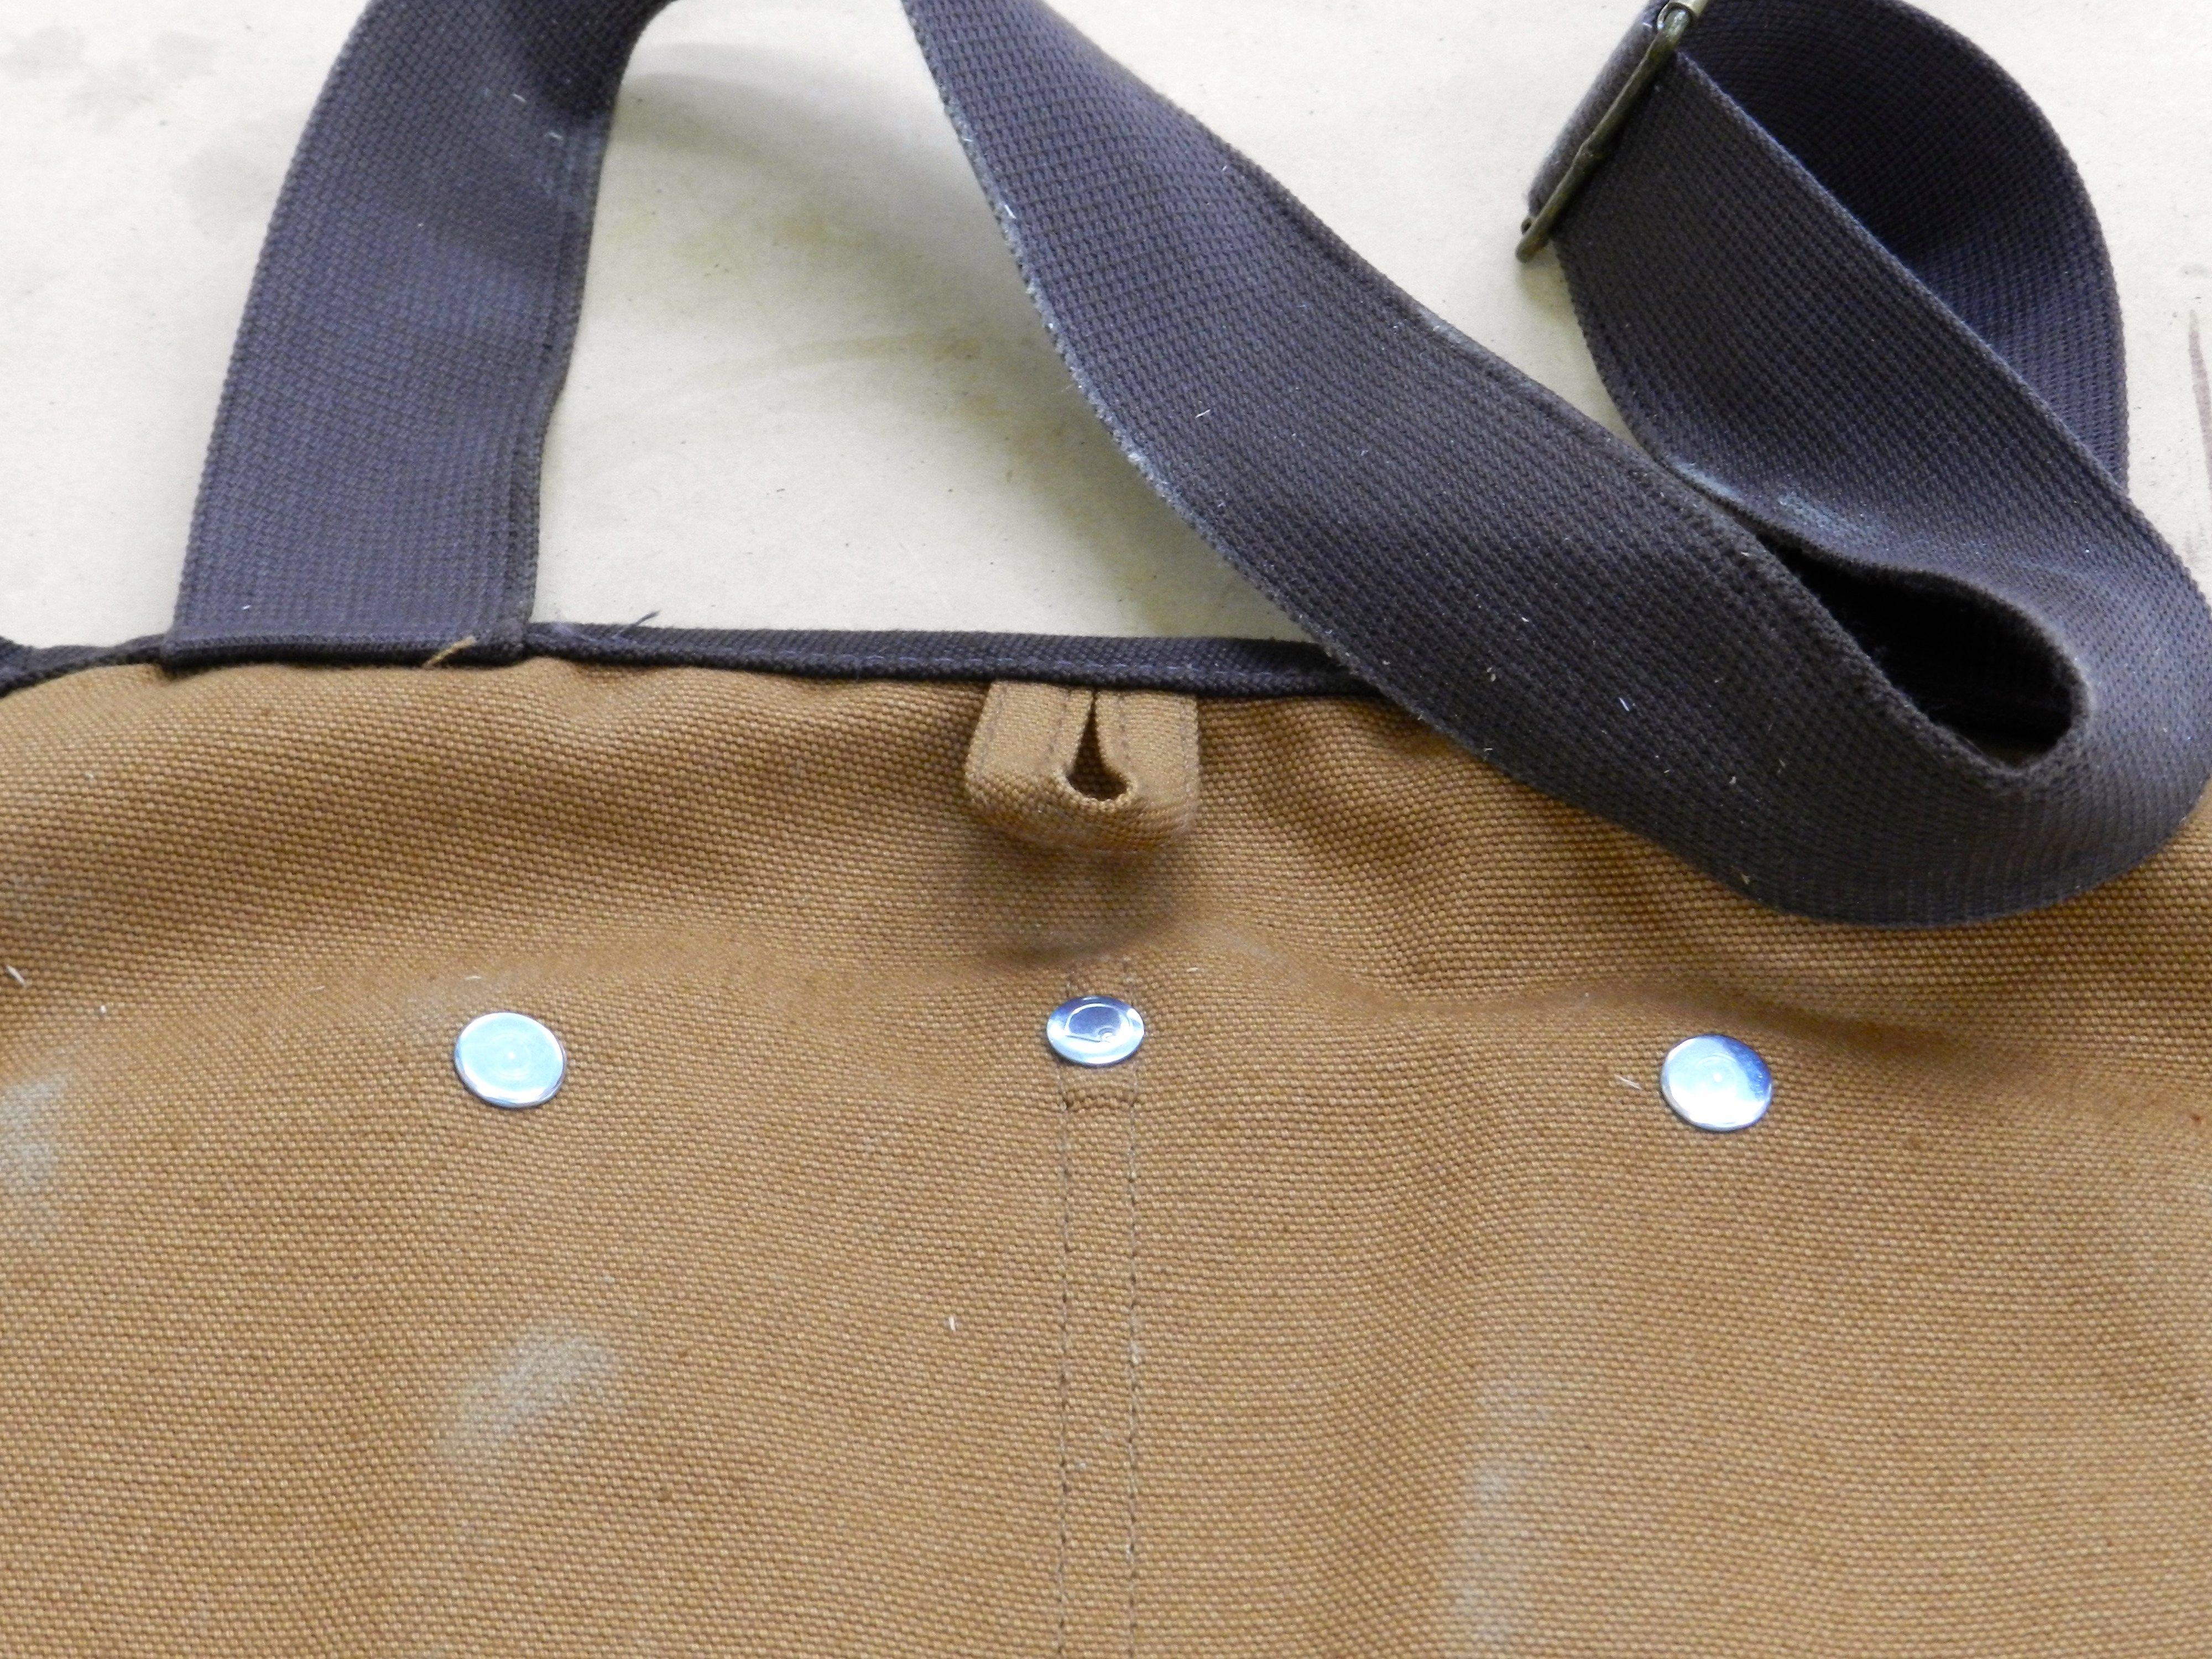
Riveted Top Pocket With Buttons
A nice wide (and soft) adjustable strap that goes around your neck along with a loop for hanging it up
Hook for hanging
Reinforced pockets (double layer of fabric) to help keep sharp objects from poking through the bottom.
Reinforced Pocket Bottoms
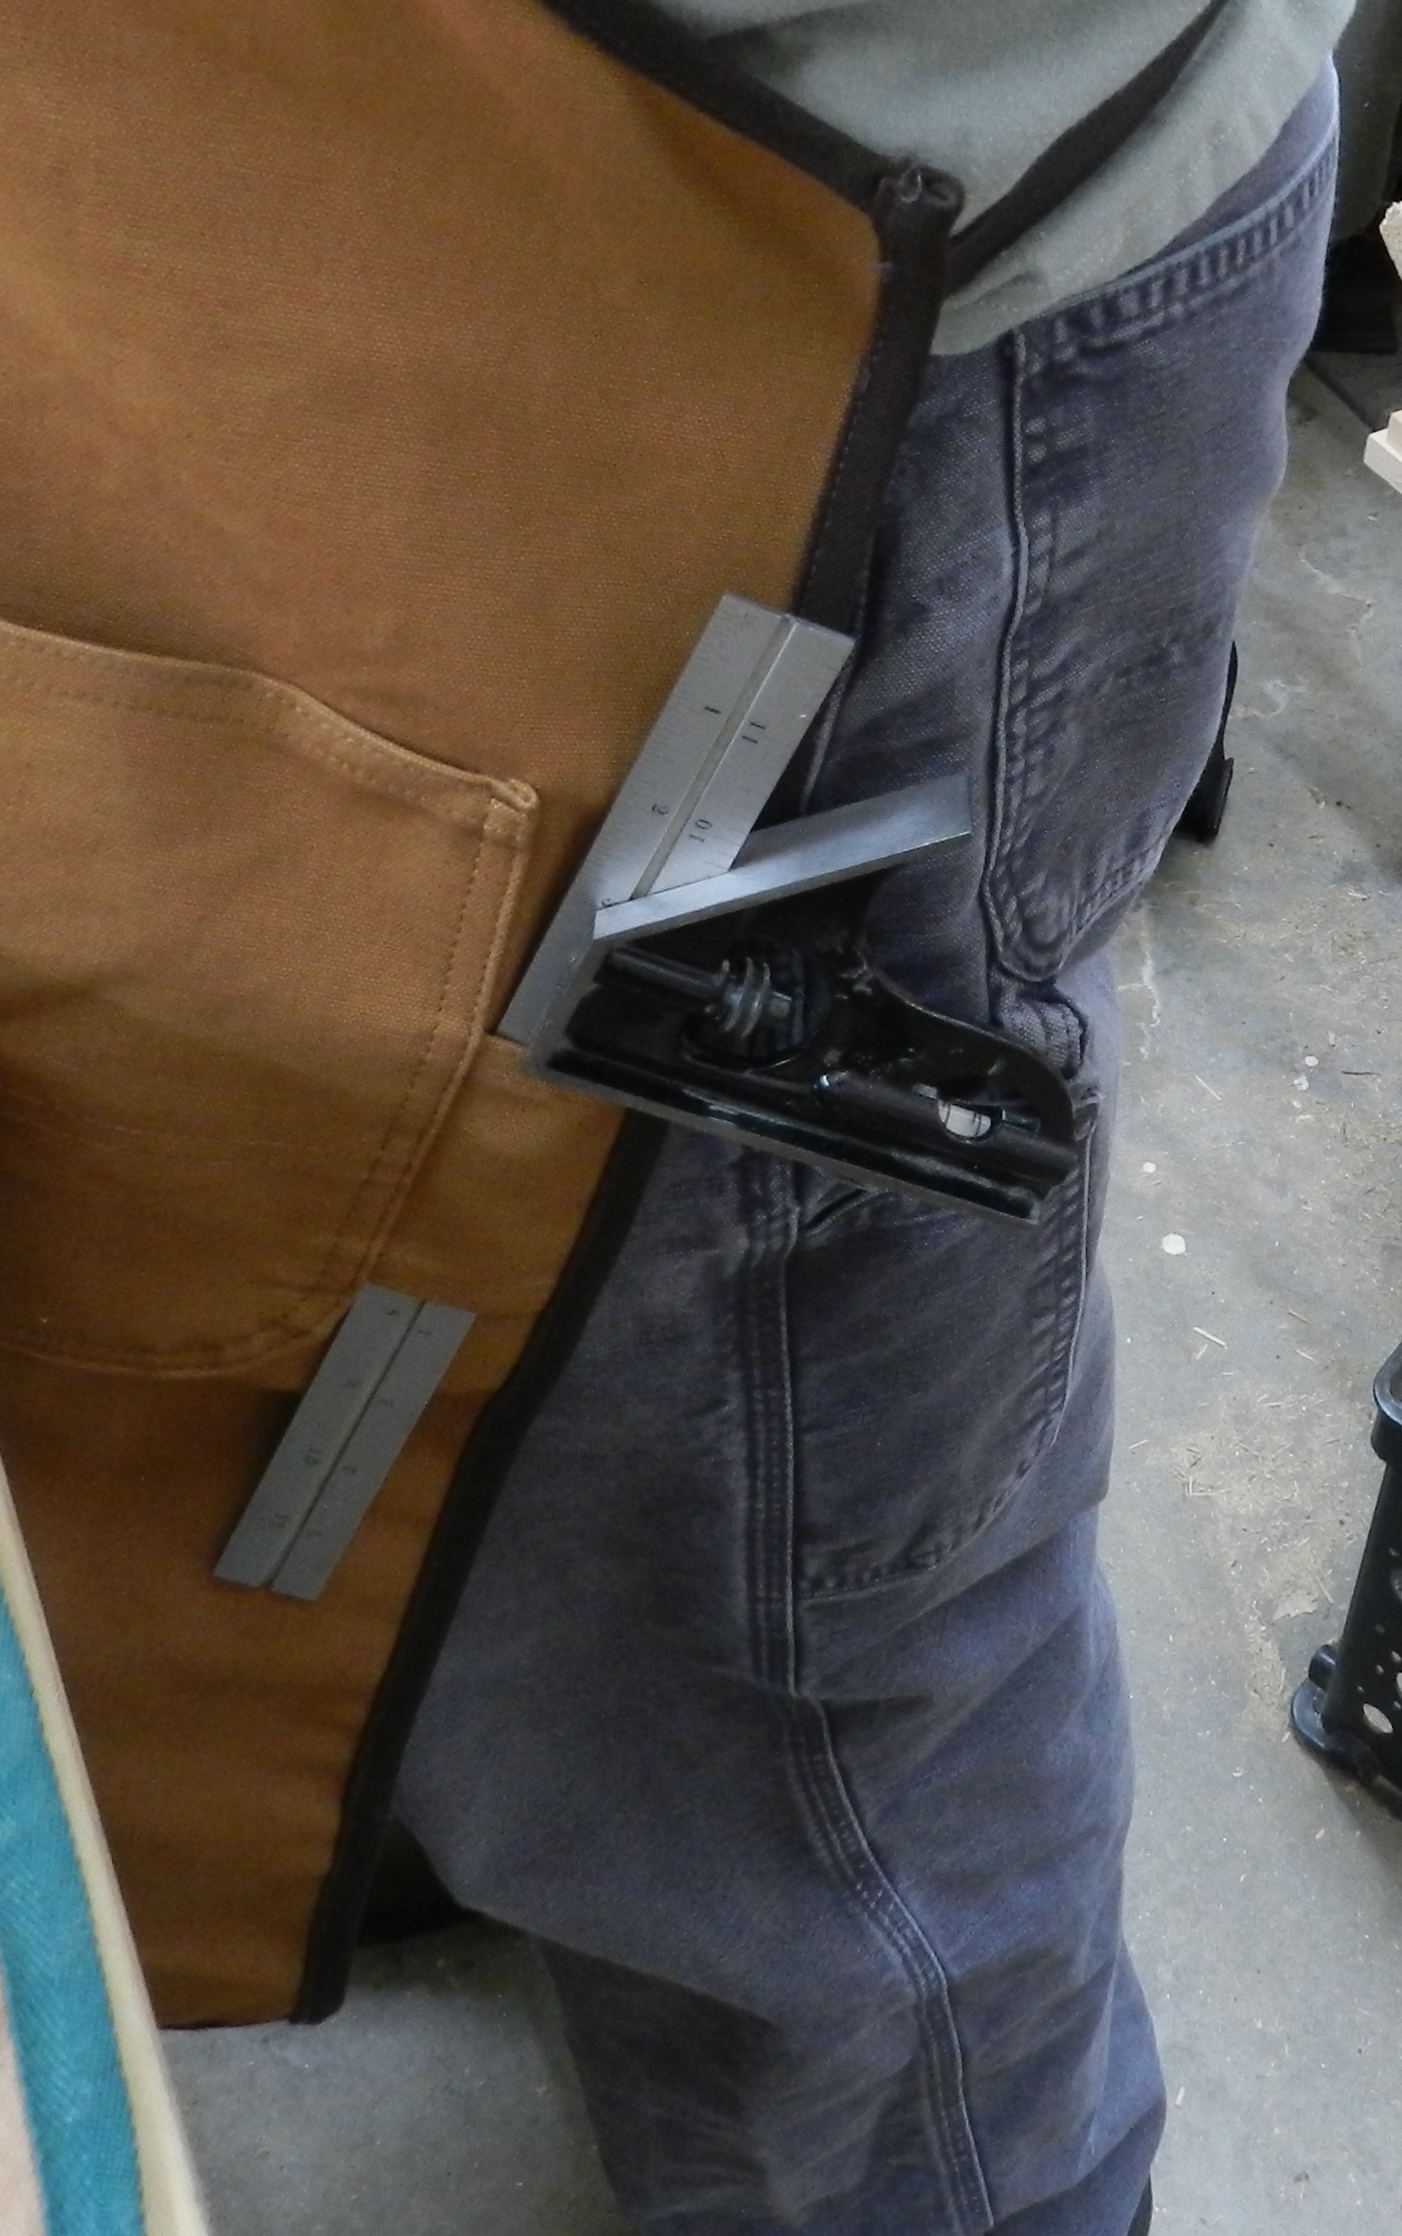
A pocket much like that on my carpenter jeans — great for cell phone, utility knife or similar.
Carpenter’s Pocket — Like on my jeans
Along with my favorite feature — a loop for holding my combination square.
Apron pocket for holding a combo square
The apron ties in the back much as you see on other traditional aprons. I may get a set of plastic side release buckles as that was what I was used to, or maybe an Apron Hook but so far tying the apron behind my back has not been bad.
If you are in the market for a reasonably priced, Made In The USA workshop apron I would suggest checking this apron out before they stop making it — seems like it will be a limited run item.
Take care,
-Bill
P.S. They also seem to make a line of tool rolls and tool pouches out of the same materials. If you’d like to learn about making some of your own tools rolls and similar items for the shop check out these earlier posts.
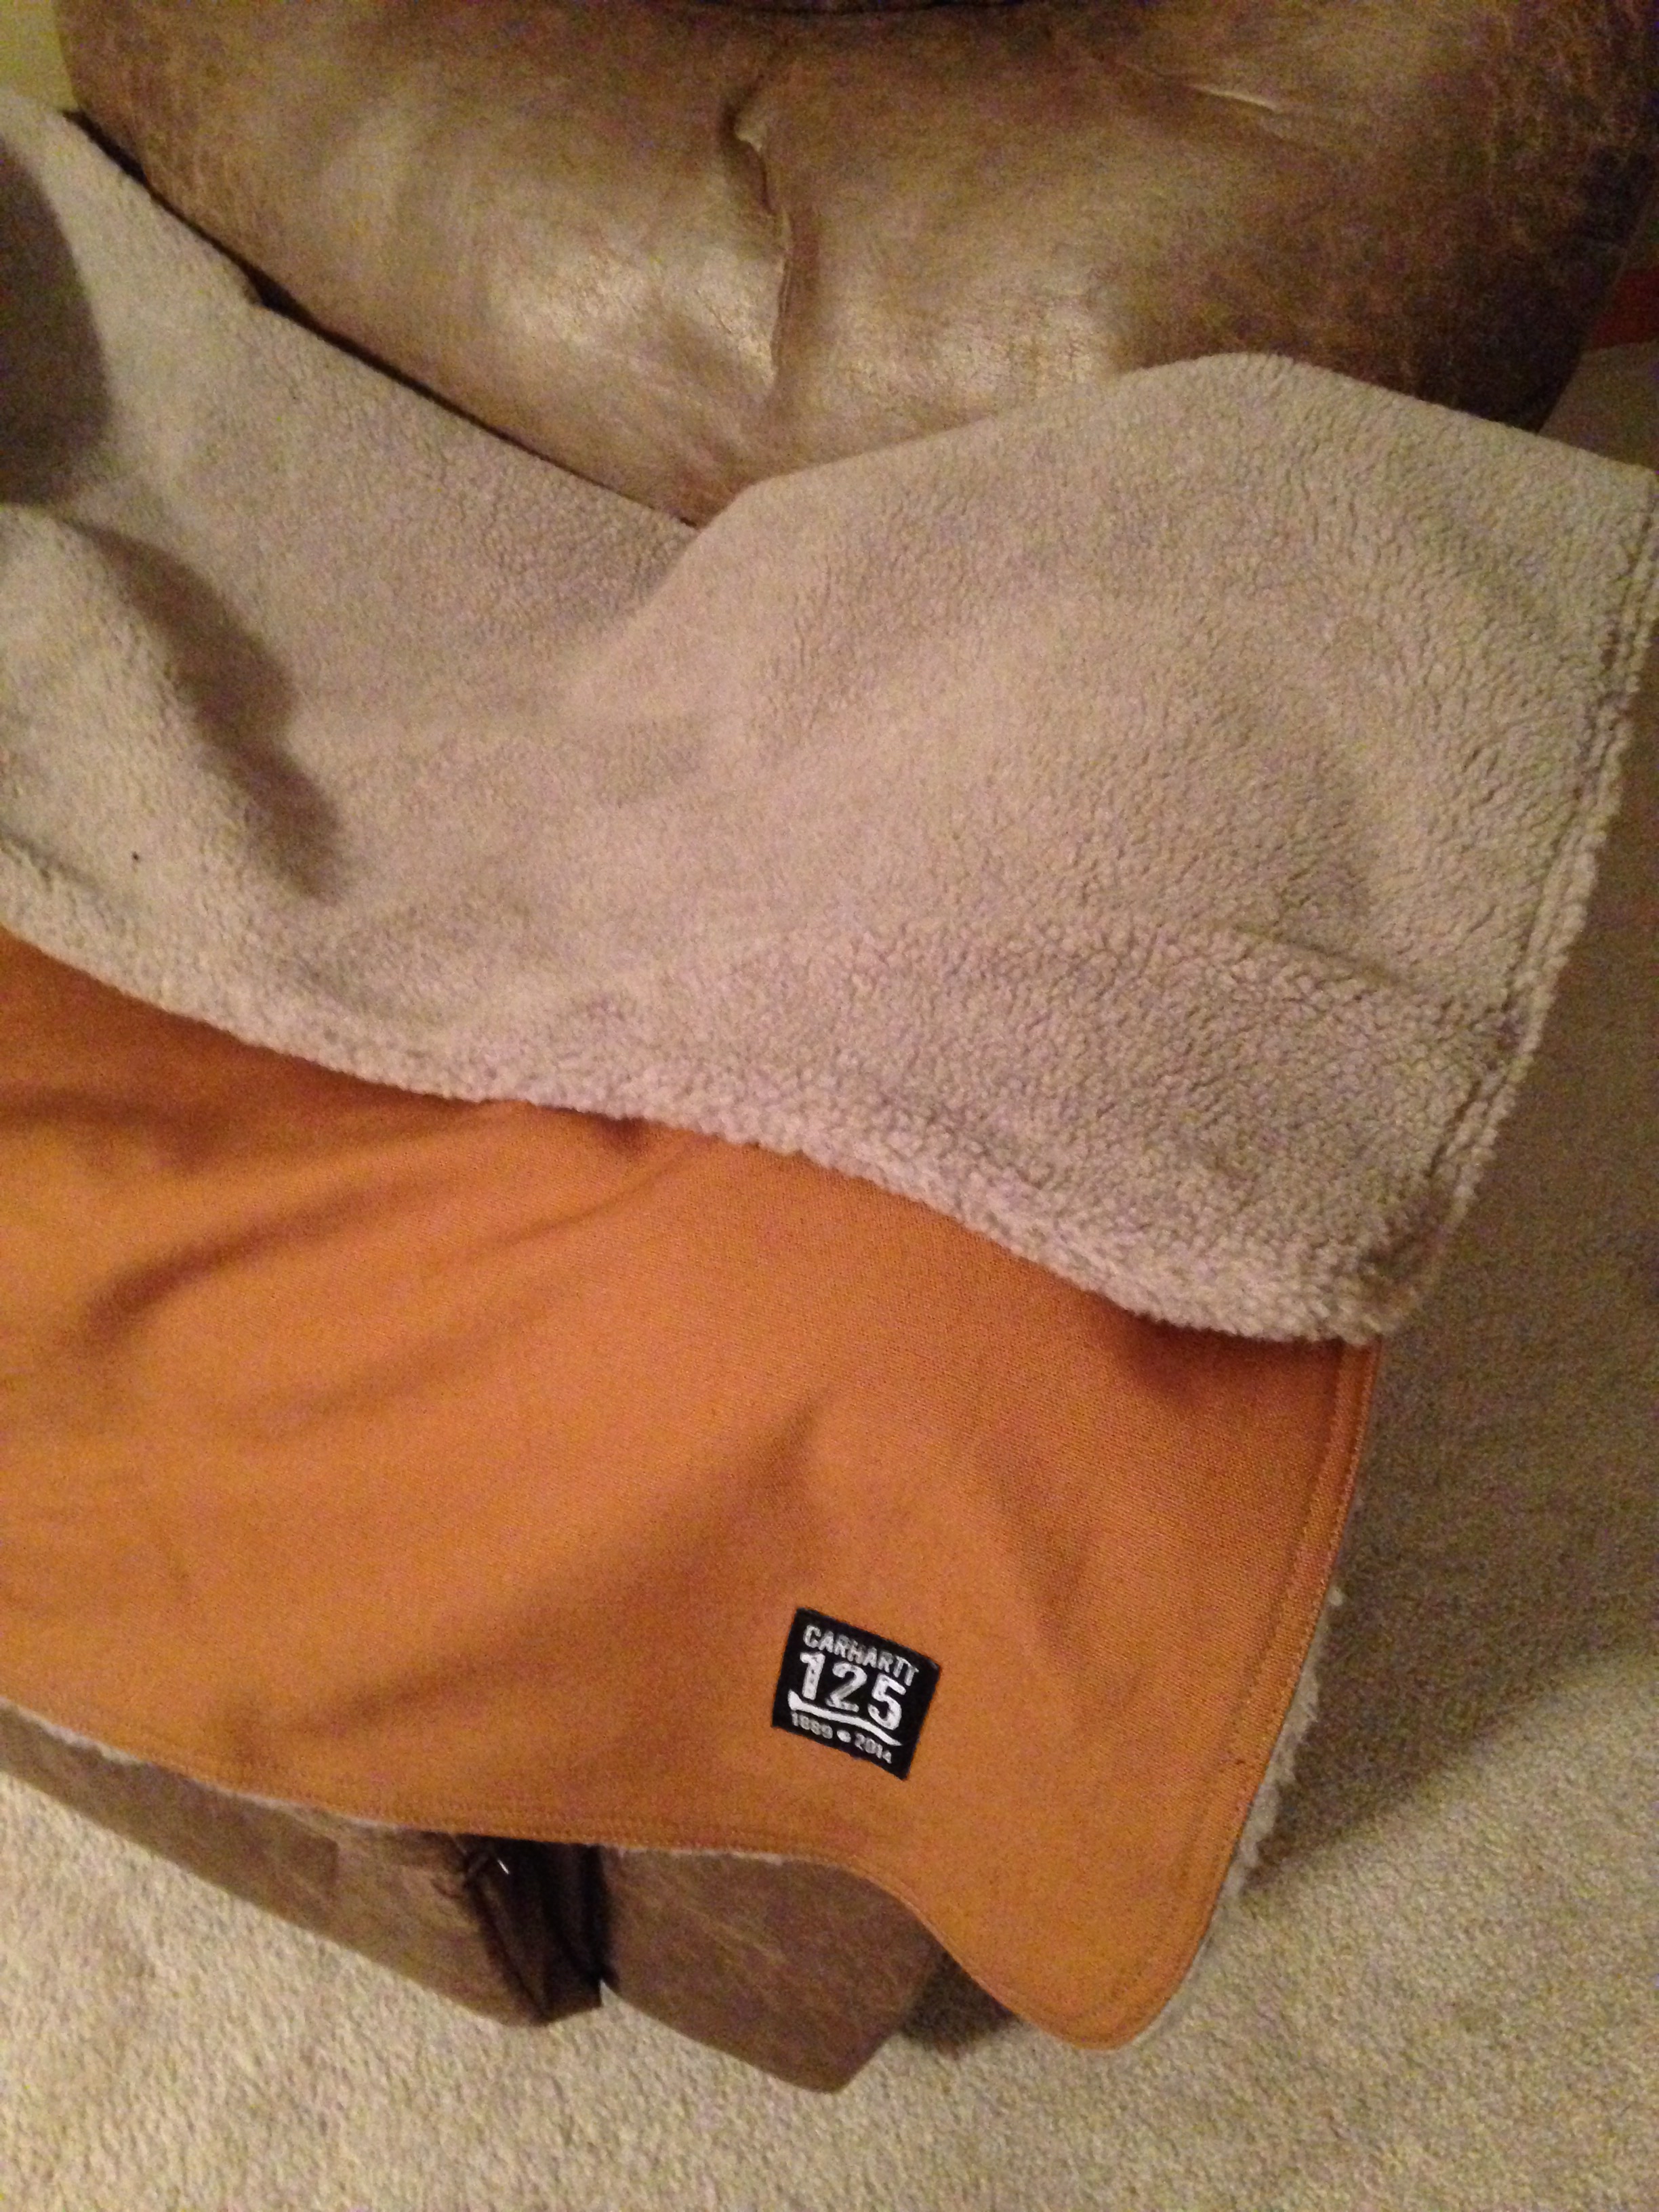
P.P.S. Not related to woodworking at all, but Carhartt also made a nice Made in the USA duck canvas blanket that is sherpa lined and is my new favorite couch accessory.
Woodworking books tend to be on the dry side — and a bit saw-dusty. Tired of reading about this year’s Ultimate Power Tool, the overly complex jig you can’t live without or yet another shaker nightstand I often find myself digging around in old woodworking books or reprints for inspiration and a glimpse into the past. I find it interesting to see what other generations found interesting and what they took for granted.
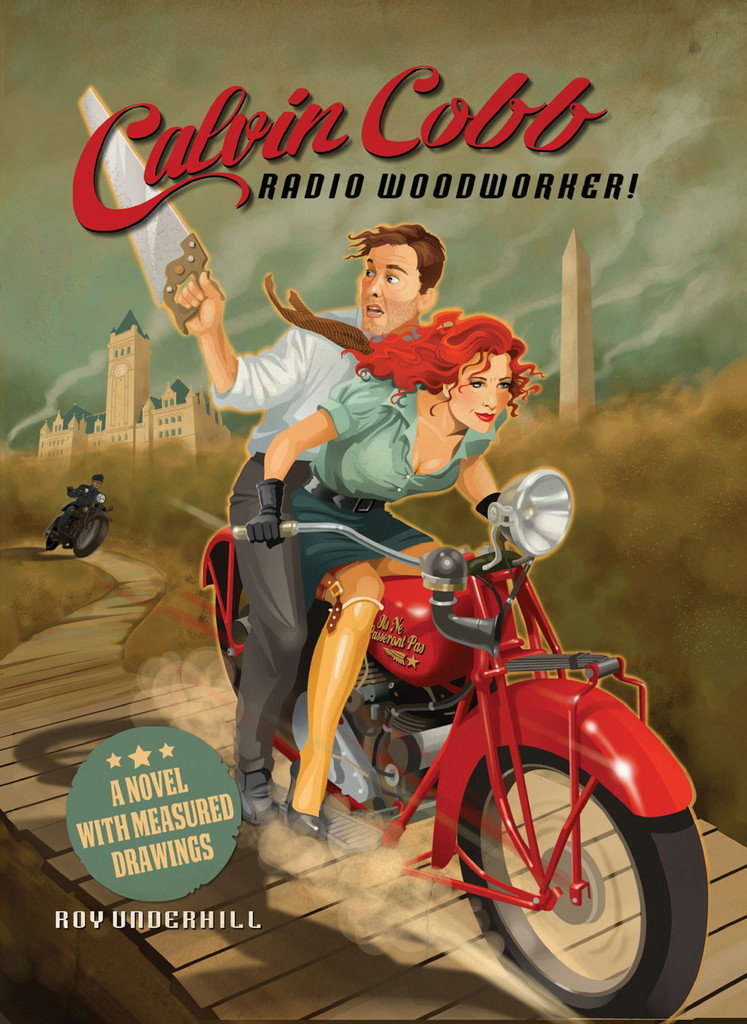
When I heard that Roy Underhill’s latest book — “Calvin Cobb: Radio Woodworker! A Novel With Measured Drawings” a period novel set in 1930s Washington D.C. and the surrounding area was available I quickly snagged a copy.
Calvin Cobb Radio Woodworker! by Roy Underhill
I have a tendency to buy books faster than I find the time to read them cover to cover, and I ordered the hard-copy (forthcoming) along with the digital edition figuring I might find some time to read it via my phone as I am tending to our newborn baby at odd hours. The book moved along at a frenetic pace and I got through it in a couple of evenings.
Before I go much further I do have to note the following — I grew up watching Roy Underhill and visiting historic sites up and down the east coast. I remember seeing Roy’s work at Colonial Williamsburg as a child. Over the years I got into modern woodworking (yes I watched a lot of This Old House and New Yankee Workshop with my Dad) and not satisfied with that went deep into traditional woodworking chasing ‘rabbets’. As an adult I rediscovered Roy and found a new appreciation for his work and his story-telling. If you watch an episode of the Woodwright’s Shop learning about the project or technique at hand is only part of the experience — Roy is also filling your head with history, funny anecdotes, philosophical questions and of course ‘subversive‘ woodworking concepts.
Washington Monument
We’re dumped out of a cab as we meet Calvin for the first time and follow him as he navigates the city, a section of strong personalities and some brushes with history. If you’re a fan of Roy’s storytelling style — a mixture of fact, humor, interesting and sometimes obscure details — I found myself Googling the occasional odd term like ‘ziggurat’ and ‘swagger stick’ and enjoyed learning about them — then I think you will also enjoy this book.
There is not much time to dawdle on the vivid details of Calvin’s world as he is surrounded by an energetic team of wounded female WWI vets with a penchant for computing, a mysterious woman who caught his attention, and the challenge of woodworking over the radio all while trying to hold down the government day job as the section chief of ‘Broadcast Research’. Let’s just say their agricultural muck-spreader gets a workout.
Old Post Office Building
Since I know Roy usually has a story to tell on a few levels I felt a bit like a detective with a hunch — knowing a bit about Roy’s work and having met him a couple of times I had a nagging feeling that some of the story followed aspect’s of Roy’s own life — stylized of course given this is a work of fiction. Some of the evocative imagery also reminded me of my own trips through the area. So I put on my deerstalker cap and made some notes about what seemed to click with me as I felt like I had crossed paths with the world of Calvin Cobb on several occasions.
I read that Roy had grown up in the D.C. area and after reading the book’s description of the Old Post Office Building I kept thinking — wow, I know I must have seen this building at some point, but now I really have to visit it the next time I am in D.C.. In the photo above from my last trip to the Capitol I did snap a picture that shows how prominent that clock tower still is today. (At the time of this writing that building is being re-developed as a Trump property, but the tower will re-open again to the public next year as a publicly owned section of the building run by the parks service)
The Capitol — AKA the Virginia House of Burgesses at Colonial Williamsburg
I also make an annual pilgrimage to Colonial Williamsburg and have visited the colonial Capitol building on many an occasion. It’s interesting to think of the restoration — which is historic in its own right given its age — as an active construction site. The carpenters in that building when Calvin visited acted much the same as guys I met while I was a preservation carpentry student. I still vividly recall Rich (the second year instructor) sending one of the students to another classroom to retrieve the ‘board-stretcher’ and on other occasions to pass the ‘screw hammer’ — so it seems that some things do not change with time.
Early Draft of Calvin Cobb hanging on a board at the Woodwright’s School
I also recall, from a blog post on Chris Schwarz’ blog that an early version of Roy’s manuscript for this book was hanging on the wall in his classroom so I went back to look at photos from when I was at the Woodwright’s School and sure enough it was there — I wish I knew to look for it at the time.
Roy Underhill planing a groove
And from that same visit I saw Roy with his trusty Stanley Multi-plane plowing a groove. Near the end of the book Calvin is thrust on stage and asked to wear a tool-belt which he sees as ridiculous in that context — which of course made me think of some of the occasional jabs Roy has made over the years at Norm who regularly wore a tool belt in the workshop though it seemed unnecessary and I thought it was a pretty funny reference. So why all the focus on Roy? I found it interesting that there seemed to be a lot of Roy in Calvin — maybe a revisionist/time traveling biography. Calvin struggles with his new-found stardom, pressures from the media superiors, communicating through media, meeting fans and trying to do what you love — all things that seem relevant to a certain TV Woodwright.
I can’t smile to save my life in a photo, yet when I met Roy a couple of years ago I was smiling ear to ear
While you won’t learn much actual woodworking from this book (though there are some PDF plans that come with the book and tie into some of Grandpa Sam’s Woodshop of the Air episodes; the Roy faithful may be familiar with them from his books and TV show), you will go on an enjoyable ride through the late 1930s D.C., learn a bit about some of the woodworking tools, general technological advances and social issues of the time (segregation/racism, anti-semitism, etc), and may find a new appreciation for Roy’s storytelling abilities and fact that the truth is about as crazy as the fiction given all the absurdity he’s encountered over the years to bring us woodworking over the air via TV and now the radio too. Let’s hope that Calvin Cobb gets picked up for a second season so we can see what else he has in store for Grandpa Sam’s Woodshop of the Air.
As Calvin would like to say at the end of a broadcast: “This is Calvin Cobb wishing that, as you slide down the bannister of life, all the splinters go in your direction!”
Take care,
-Bill
P.S. If you have other anecdotes about Roy or Calvin’s adventures, or if you build your own ‘Liberty Ladder’ please share them with us in the comments.
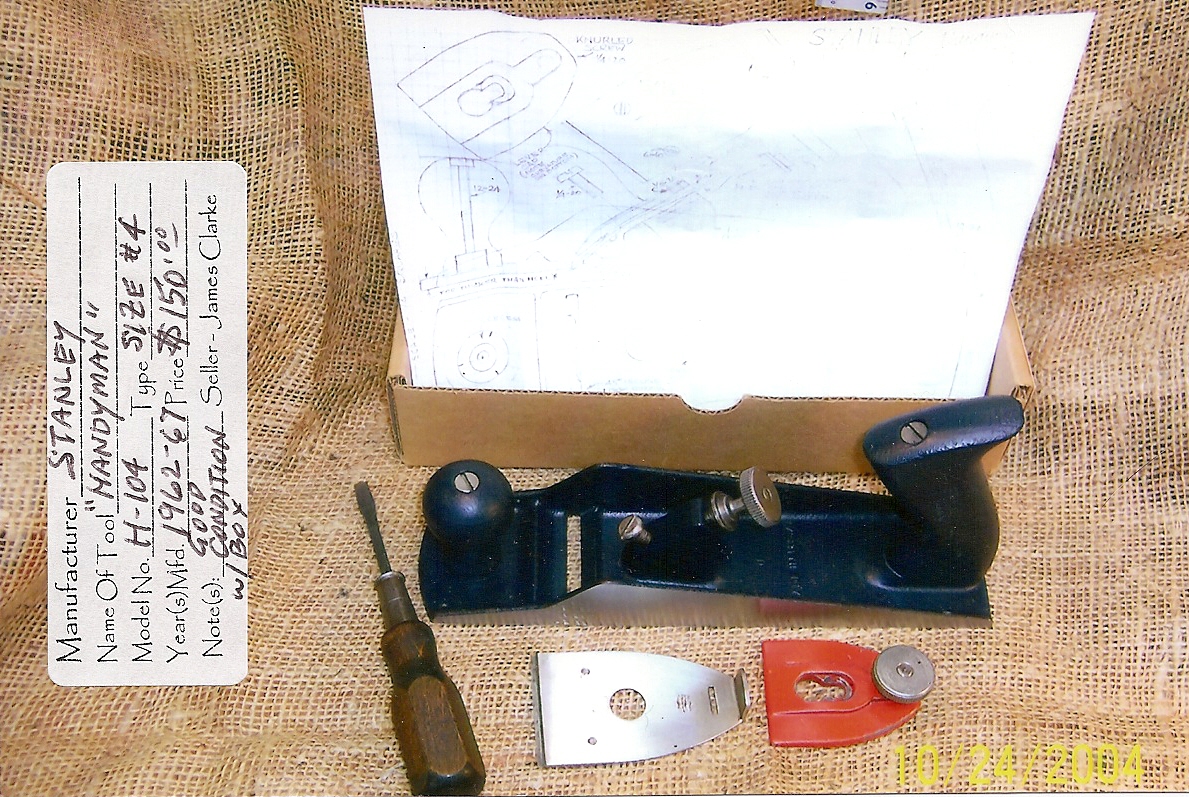
Some tools have an interesting story to tell. The little known Stanley H104 is one of those tools. Below is another guest post by my good friend James A. Clarke who shared with me a detailed write-up on this 1960s Stanley bench plane with disposable cutters that worked much the way a Gillette shaving razor cartridge works today. The content below is mildly edited from Jim’s original text to better suit delivery via a blog post, but I tried to capture the essence of his message and included some additional images. I hope that you will enjoy learning about the Stanley H104 plane — “The Little Plane That Could!”
The Stanley “Handyman” H-104 Plane by James A. Clarke
Introduction to “The Little Plane That Could!”
This post is about the Stanley Tool Company’s “Handyman” Bench Plane Model H-104 offered in 1962 as a low cost alternative to their many other higher priced offerings. The so-called “do-it-yourself” movement was well underway following WWII through the 50’s and early 60’s, but by this time demand for higher priced planes was significantly reduced and thus gave rise to the need for manufacturers to appeal to budget-minded buyers with low-cost alternatives. It was also apparent that do-it-yourselfers and the “handyman” didn’t require the top-end line of tools for household tasks.
Stanley H104 Dis-assembled (Photo by James A. Clarke 2004)
At this point it needs to be mentioned that Clarence Blanchard in his excellent publication “Fine Tool Journal”, Vol 53, No.2 Fall ’03, had a rather thorough coverage of this plane from the standpoint of how Stanley progressed the development from inception to production based on an actual production folder containing drawings and correspondence between various departments withing Stanley. This is recommended reading and can be found here: Stanley H104 Bench Plane Article by Clarence Blanchard.
Of interest, it seems that the plan began as a Model No. 140, but then was changed to the Model No. H104. (It is believed that it started out as a higher-end offering!) What is clear, however, is that the H104 had a relatively short lifespan (4-5 years) when Stanley discontinued it on June 13, 1967 due to poor sales. (< 20,000 were likely ever made). This plane is ‘collectible’ and the most sought after Stanley “Handyman” low cost plane due to its low production numbers and unique features.
H-104 Features:
Polished side-rails, painted (blue) based, knob and tote, red lever cap
About the same size as the standard Stanley No. 4 with cast-in non-movable frog
Distinctive low side rails (lower cost!)
Body 10″ long, 2 1/2″ wide, with 2″ cutter
Low cost alternative to Sears 4 sided throw-away cutter line of planes
Lever (Screw) cap — knurled 1/4-20 screw to tighten
Depth of cut adjustment with shouldered/knurled 1/4-20 screw (this was a poor choice as it had too much slack)
Tote & Front Knob Screws #12-24 threads
Author’s appraisal — this is a very nice low-cost plane for casual (“Handyman”) service. The disposable blades can be sharpened or replaced as intended.
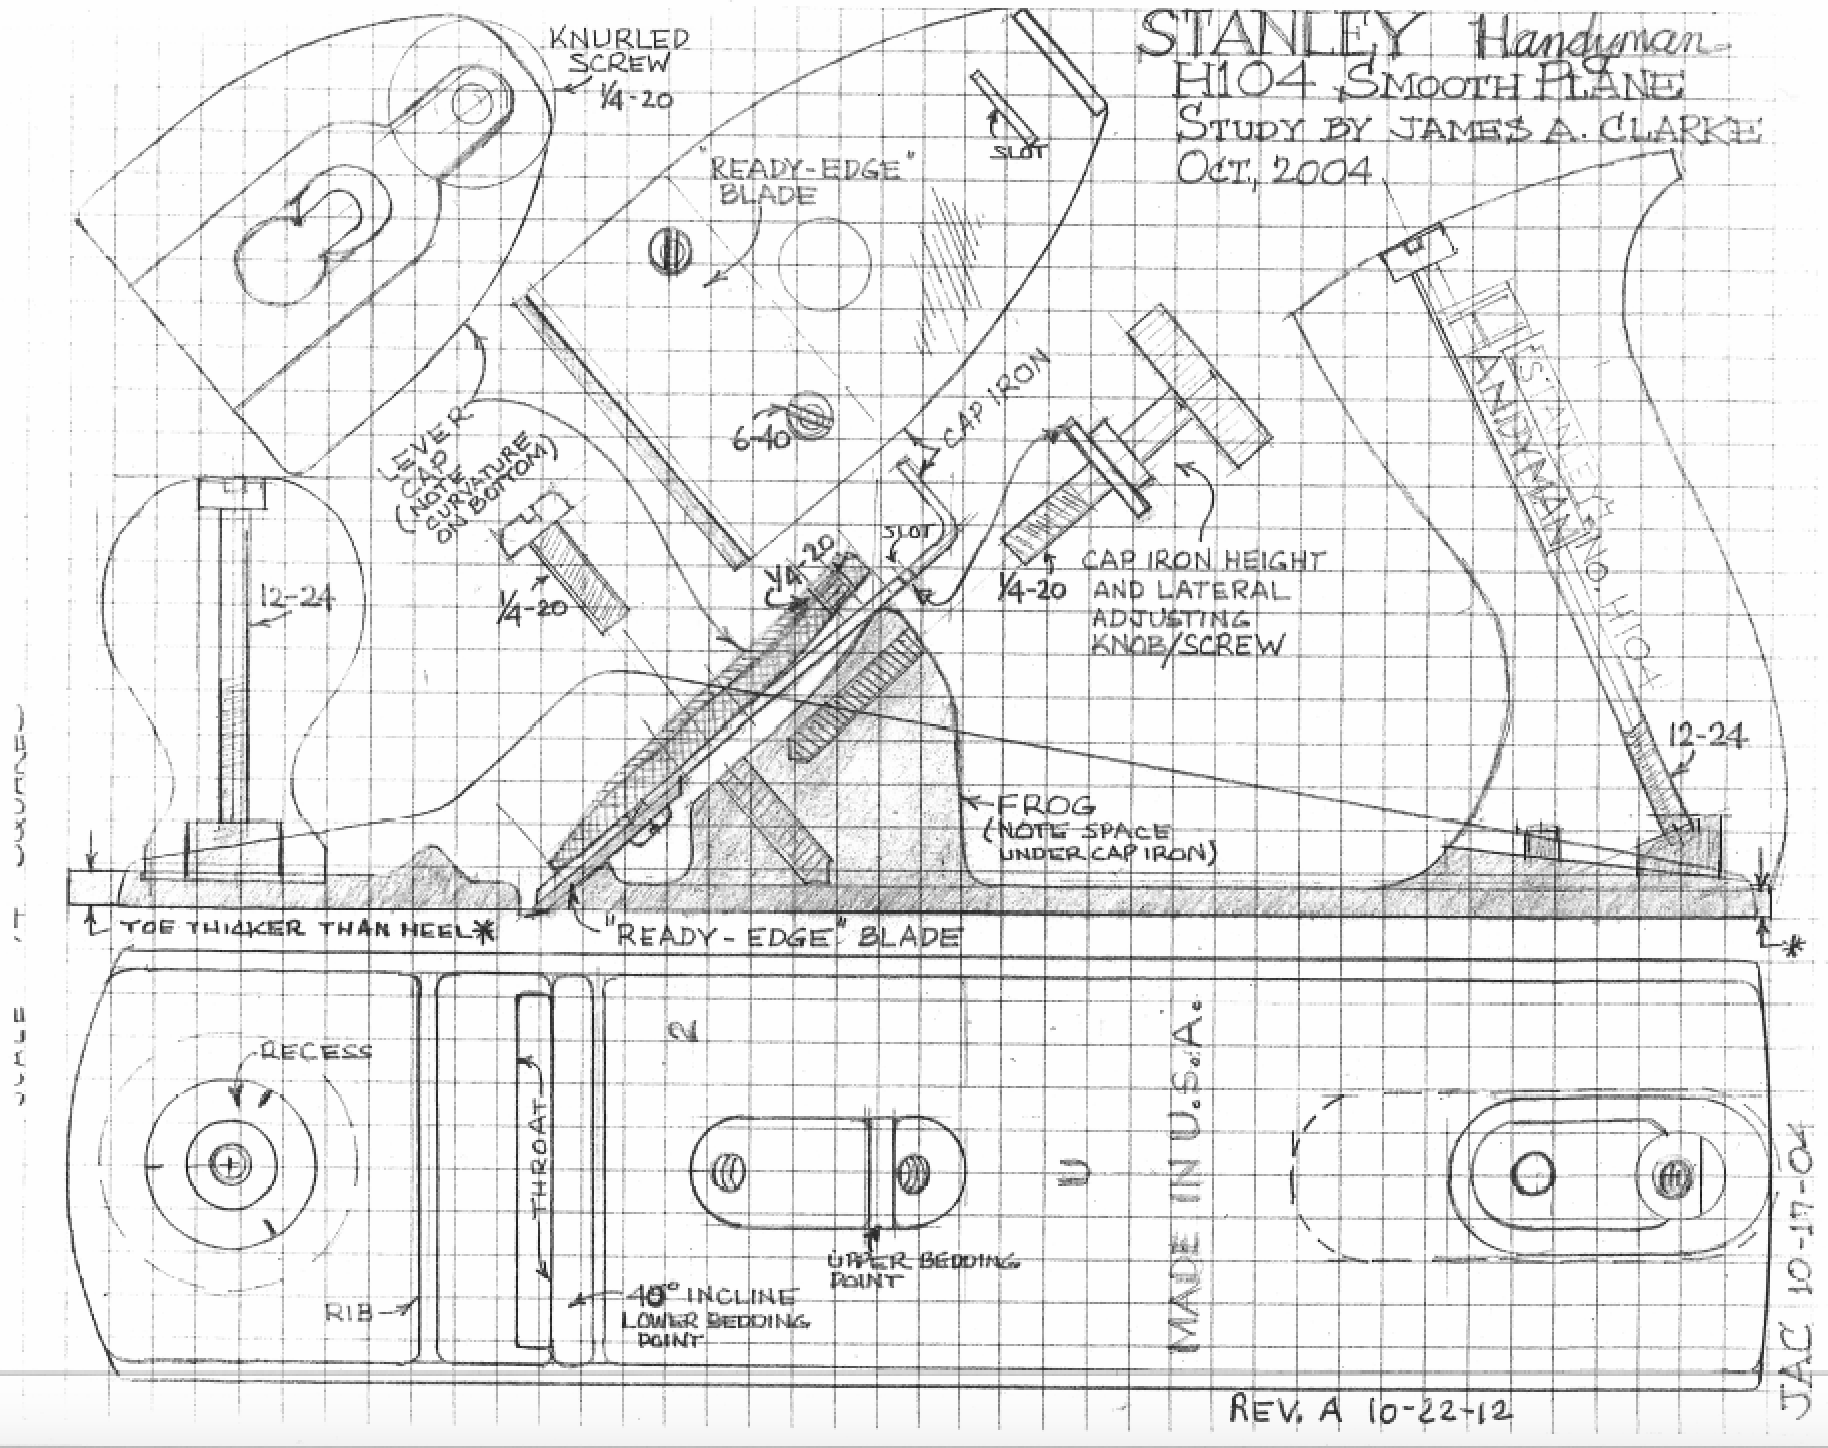
Figure 1: Stanley H104 as drawn by James A. Clarke
Description:
This description is accompanied by the hand drawn sketch above labeled as ‘Figure 1: Stanley H104’
To make these planes easier to use and maintain, Stanley revived the disposable blade concept, at a reasonable price and called it the “Handyman ‘Ready-Edge’ Bench Plane.” How many were actually made is unknown (From Blanchard — Less than 20,000) since not everyone was of the “disposable” cutter ilk, although it did have its merits and thus more than likely had a serious following. The real appeal of this little brother to the “standard” line (maybe not so little at 10″ long) is the various design solutions used for cutter height and lateral adjustments — the nicely executing castings and machined parts. For a so-called low-cost tool, this was a keeper! The H104 is about the same size as the other No. 4 planes in Stanley’s many-fold lines, although slightly longer but much lighter in weight at 2 1/2 pounds versus 3 3/4+/-.
The Frog
The H104 doesn’t have the traditional frog arrangement as used widely on Stanley and competitive bench planes. The fixed frog (making it a bit more like a block plane) is narrow, slanted (40 degree) “tower” cast as part of the base with two (1/4-20) tapped holes to accept the lever cap, the cap iron knurled blade adjustment knob. In this configuration there are three 1/4-20 screws:
Pan head screw to hold the lever cap in place
Special shouldered/knurled screw for adjustment of the cap iron/blade assembly
Knurled screw to tighten the lever cap against the cap iron/blade and thus against the frog at its top
This simple design was also effective. One of the quarrels I have with this configuration is the use of 1/4-20 threads which are not normally closely machined resulting in considerable slack (“backlash”) which is not appropriate for this type of application wherein adjustments are made frequently. (Especially when Stanley used a finer #12-24 thread for the tote and front knob screws where it doesn’t matter!)
The Blade/Cutter Cap Iron Assembly
Chatter must have been an issue with this plane as the uppermost tip (an area of about 1/8″ x 1/2″) of the slanted “tower” frog is the only part of the frog that comes into contact with the cap iron/blade assembly. This arrangement is only slightly stiffened by the attachment of the “Ready-Edge” blade to the cap iron that doubles as lateral adjuster and facilitates setting the depth of cut. It should also be noted that the cap iron is about the size of a credit card and only about twice as thick which is not a lot considering the minimal support provided for it.
The disposable “standard” 25 degree bevel-angled “Ready-Edge” blade has two sharpened edges allowing it to be rotated and re-installed into position via two small (#6-40) pan head screws. This arrangement provides a narrow semi-adjustable cutting edge (reveal) between the cutter edge and the chip breaker (~1/32″-1/16″) and thus satisfactory for fine, medium or coarse shavings. When new the plane came with an extra blade in the box and additional blades could be purchased — similar to a shaving razor. A limited amount of sharpening was possible although apparently not expected by the “Handyman” population.
Lateral adjustment was a simple to the point solution (compared to what was used on Bailey, Traut and Shade designs) utilizing a slot in the cap iron engaged by a shouldered machine screw.
An interesting refinement is the key-hole slot in the lever cap — this shouldered/countersunk recess traps the head of the pan head screws to prevent creep/movement of the lever cap when the cutter depth adjustment is being made. Stanley originally used a ‘key-hole’ design on their top of the line bench plane offerings, but then “patented” a new kidney shaped design around 1933 intended to eliminate creep. While none of these designs effectively eliminated creep the H104 design was pretty much fool-proof — when the lever cap was locked into place it could not move.
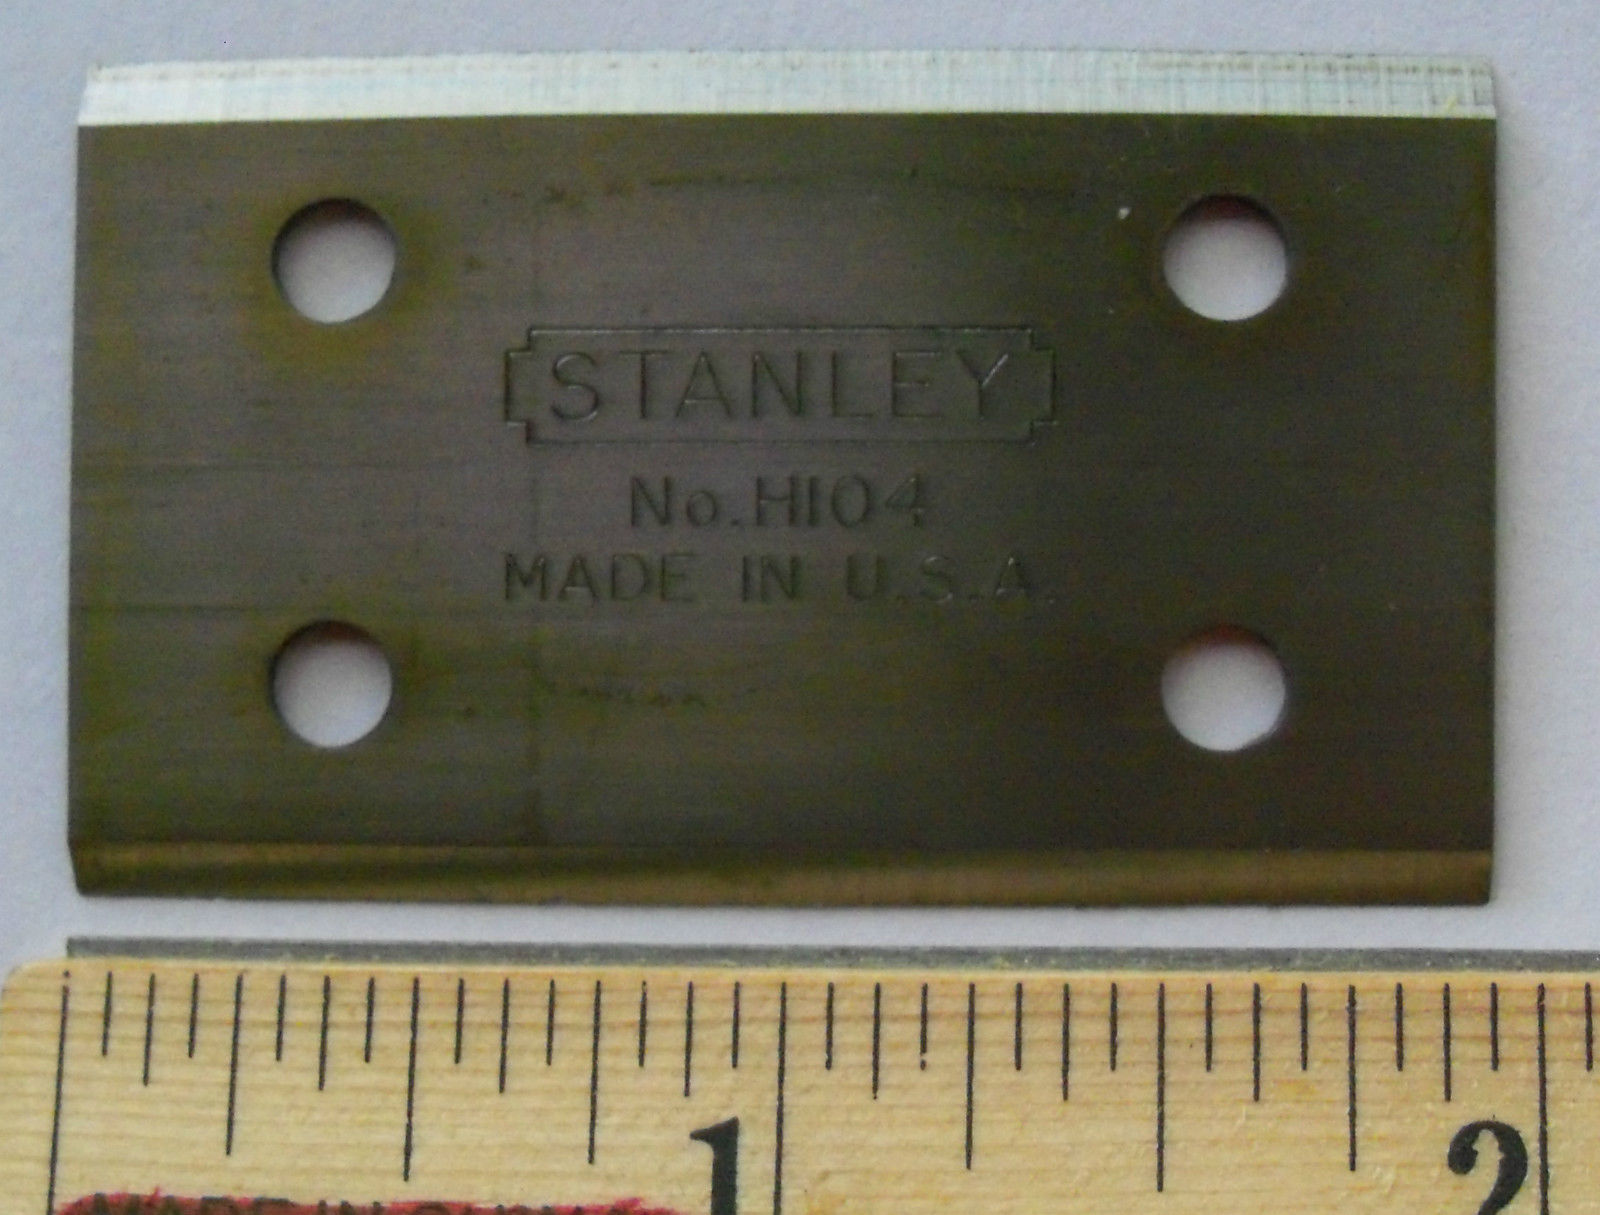
The Knob and Tote
The hardwood front knob and rear tote were painted dark blue to blend in with the painted base (not the usual Japanning) with “STANLEY HANDYMAN H104” embossed/stenciled in red or white on the tote and “MADE IN USA” in the bottom casting. The rear tote is somewhat awkward to the feel and definitely not of the caliber of top of the line Stanleys.
Another interesting refinement can be found under the the front knob — three little spurs cast in at 120 degrees apart around the perimeter of the indented knob seat — presumably to prevent the knob from rotating. This was an unusual detail usually reserved for higher end planes and backs up Blanchard’s allusion to this plane possibly being developed as a higher end plane and then being downgraded to the Handyman line.
Stanley H104 (Photo by James A. Clarke 2004)
The Casting
The bottom casting is an excellent example of integral-base-casting and Frog “pillar” or “tower”with a raised boss around the tote and lateral brace ribs near the mouth that extend from side to side. The base side wall profile has a more modernistic look with rounded corners unlike the traditional curves you see on other planes. (This was likely a cost saving measure). The toe of the casting has the usual shallow curvature, but the heel has a blunted, almost squared off edge. Behind the frog a letter ‘U’ is cast and a ‘2’ is cast near the throat — presumably foundry casting numbers. The H104, although shorter, in profile looks vaguely like the Stanley No. 62 low angle plane, except for the side wall treatment and different bed angle — 40 vs 12 degrees.
H104 In Use
After sharpening and honing the blade at 25 degrees with a micro bevel at 30 degrees we were ready to make a few trial shavings. The plane was applied to pieces of 3/4″ x 6″ x 12″ of Pine, Butternut, Hard Maple, Soft Maple, White Oak, Red Oak, Ash and Cherry with honing taking place frequently but not for each wood sample. Skewing the plane was always necessary! Planing was done on two faces — the two long grain edges and finally the two end-grain edges. Planing effort was handicapped without the ability to vary the mouth opening — it is fixed, thus fine shavings were difficult to achieve. A variable mouth opening and more mass would be a significant improvements.
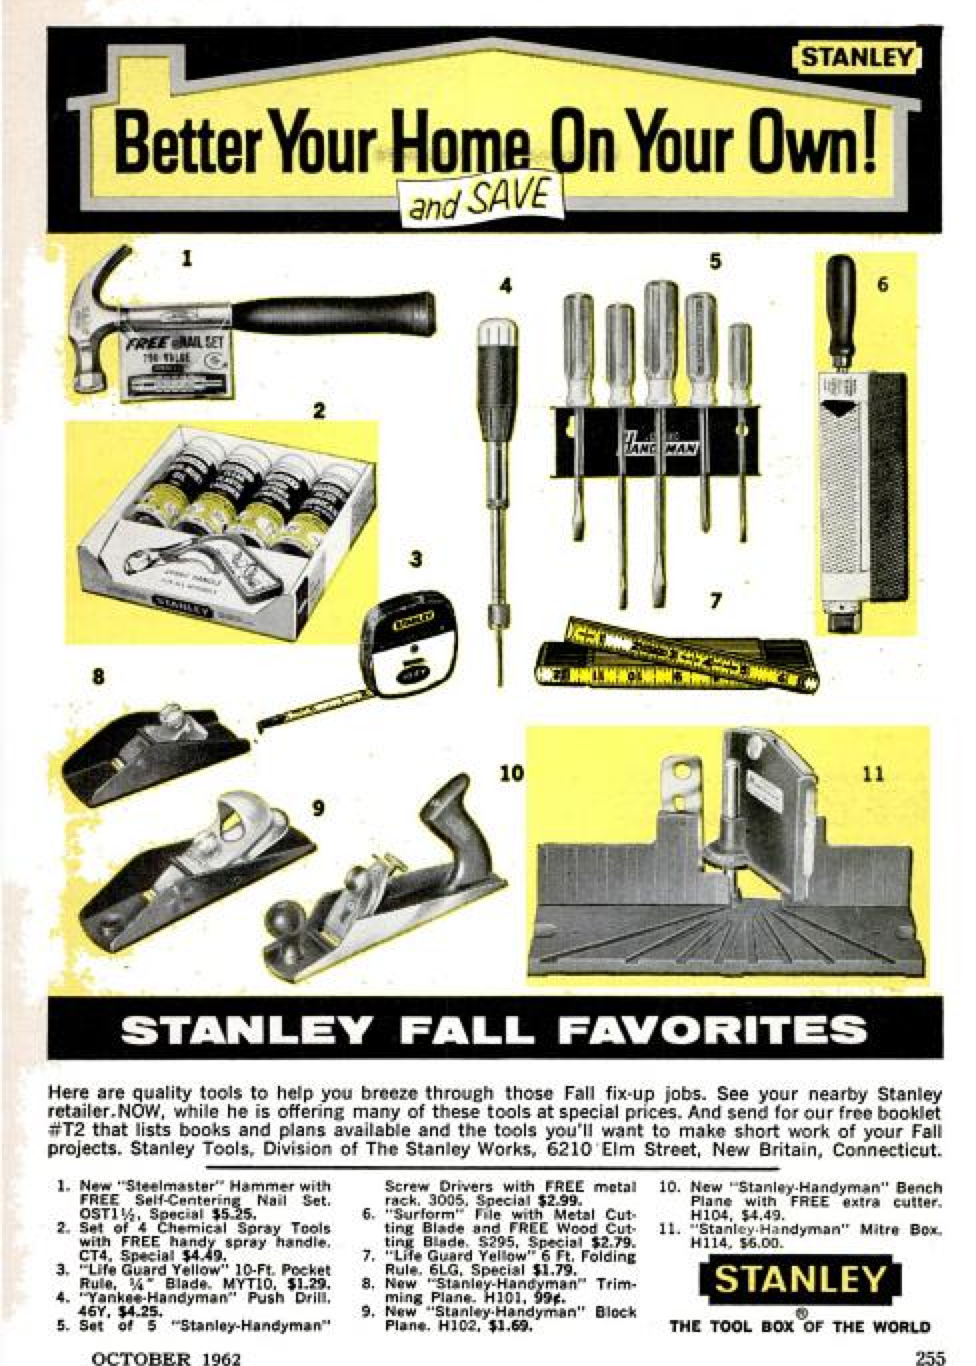
Stanley H104 in Ad From October 1962 (Seen in common publications such as Popular Mechanics)
The Verdict
The plane performed as expected — adequate but not exceptional. It would be satisfactory for “Handyman” tasks (via sharpening or extra blades) but unacceptable for serious woodworking/cabinetmaking. The plane cannot compare to a finely tuned vintage Stanley Bailey or modern premium plane (Lie-Nielsen, Veritas, Clifton etc)
Conclusions
Taking into account all of the opposing forces in play as this plane was developed it seems like a great deal of engineering design and manufacturing-engineering went into this presumably low end, and unfortunately low volume plane. It seems that parallel developments inside of Stanley and economic forces from outside forced them to release this plane into the “Handyman” line even if it was originally intended to be a higher end offering. Nonetheless this plane inherited some subtle levels of engineering excellence that often go overlooked when compared to its higher end brethren.
It’s unfortunate that the times (economic and technological change — moving to power equipment) lead to an early demise for this tool — in another time it may have seen a lot more use and wider adoption.
Approximate value — $75-$150 (Higher if in excellent condition and with box).
Acknowledgements from James A. Clarke:
I would like to thank fellow member of the WNYATCA Club (Wester New York Antique Tool Collector’s Association) Tim Rhubart for bringing this little ‘gem’ to the light of day. If it wasn’t for that, this author might never have known or become interested in the H104 since it’s not on everyone’s radar as a need to have collectible. Tim agreed to sell it to me for a reasonable price, and with some preliminary observations it appeared to have a story that needed to be told, and thus here in this post.
This writeup is dedicated to Tim, my “favorite tool dealer” and friend for bringing it to my attention and the “giants” of research — Roger K. Smith, Alvin Sellens, John Walter, Clarence Blanchard, Patrick Leach, Bob Kaune, David Heckel and several others — although they are not all necessarily students of the “Handyman” line, their methods and approach to research on the study of planes has greatly influenced this author’s modest efforts.
Acknowledgements from Bill Rainford:
A big thank you to my friend James A. Clarke for sharing this material with me and allowing me to share it with everyone online via the post. Also a big thank you to Clarence Blanchard for giving me permission to share a copy of his article on the Stanley No. 140/H104 Bench Plane from “Fine Tool Journal”, Vol 53, No.2 Fall ’03 here.
A ‘make-do’ is a term often used to describe damaged items that are repaired to remain functional — usually due to a combination of what was available, economics and a sense of thrift. Some of the repairs were rather modest, some were ingenious. An archetypical example of a ‘make-do’ is a piece of mochaware or similar pottery with a tin handle grafted on. Nowadays some folks collect make-dos for their quirkiness, functionality and price relative to other antiques which I think is fitting.
Earlier generations seemed to have a better sense of worth — if you invested all that time and money into the item, why not try to get as much use out of it as you can? I wish more folks today had that sentiment — it would help us get away from our disposable society.
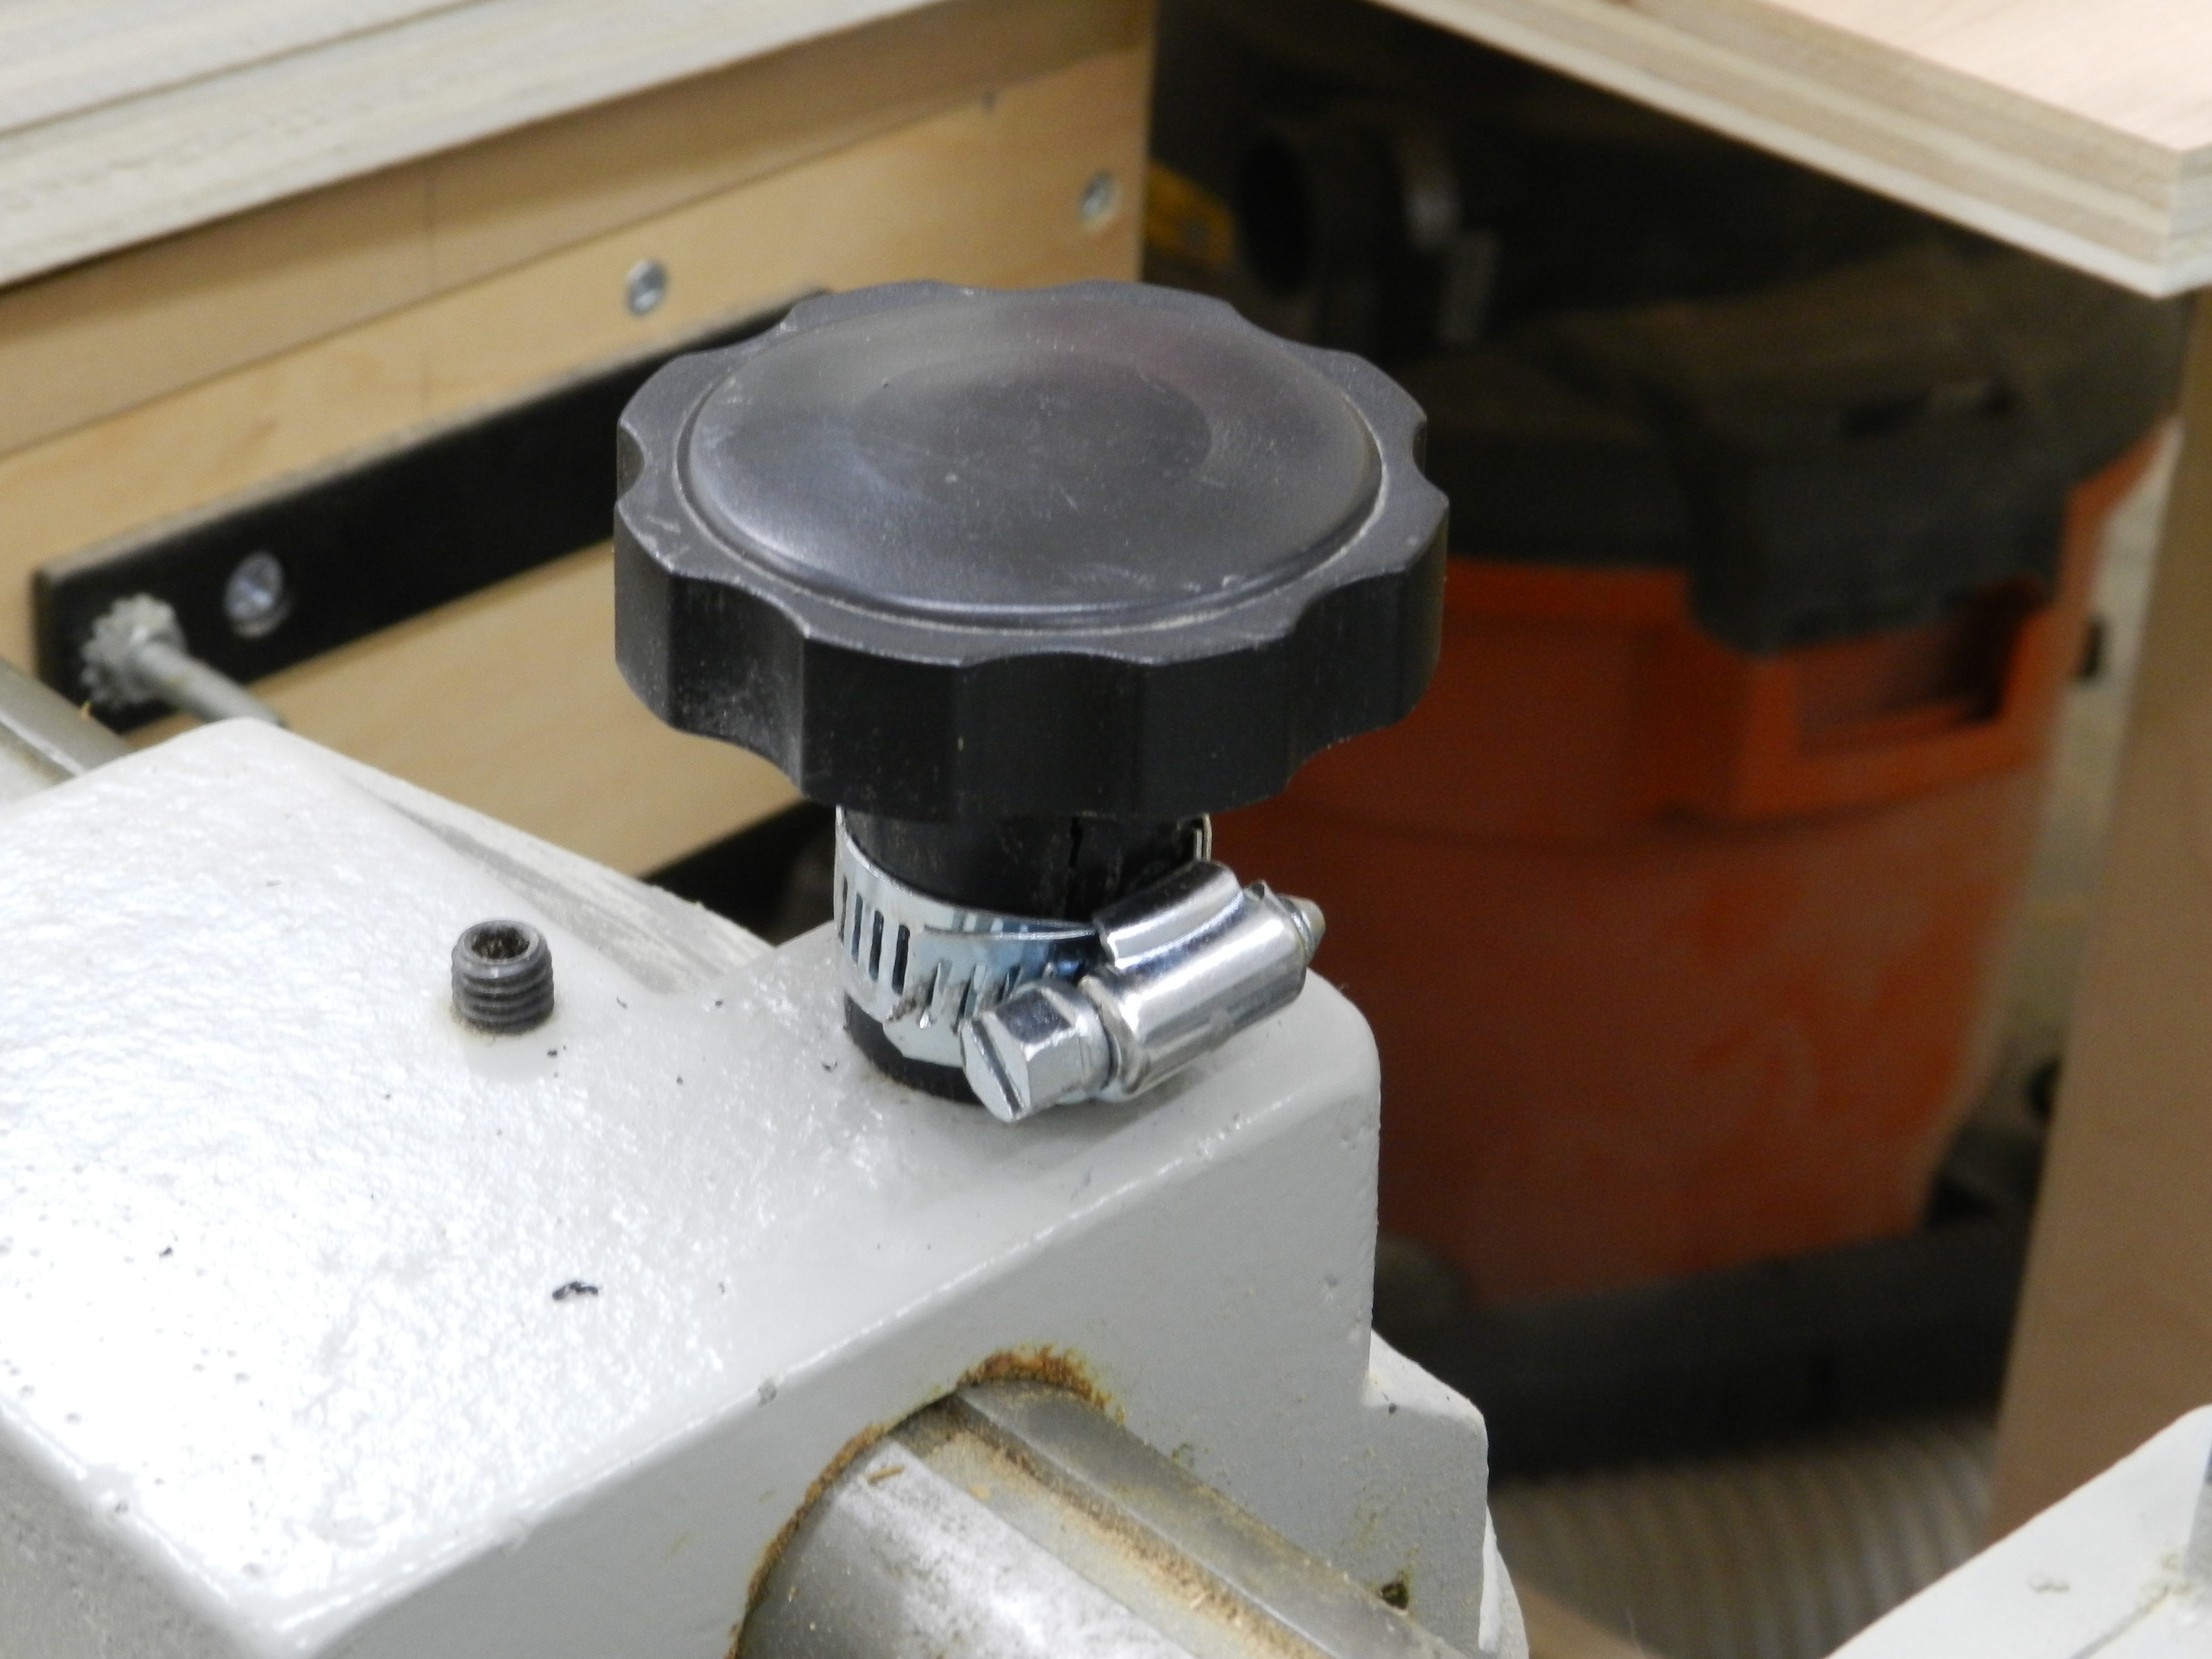
Several years ago I bought a Delta X5 ‘Professional’ 6″ jointer. It’s a nice machine with an extra long bed for a machine of its size and generally well built. One big shortcoming on this machine is the large knob used to advance or retract the fence.
Delta X5 ‘Professional’ 6″ Jointer
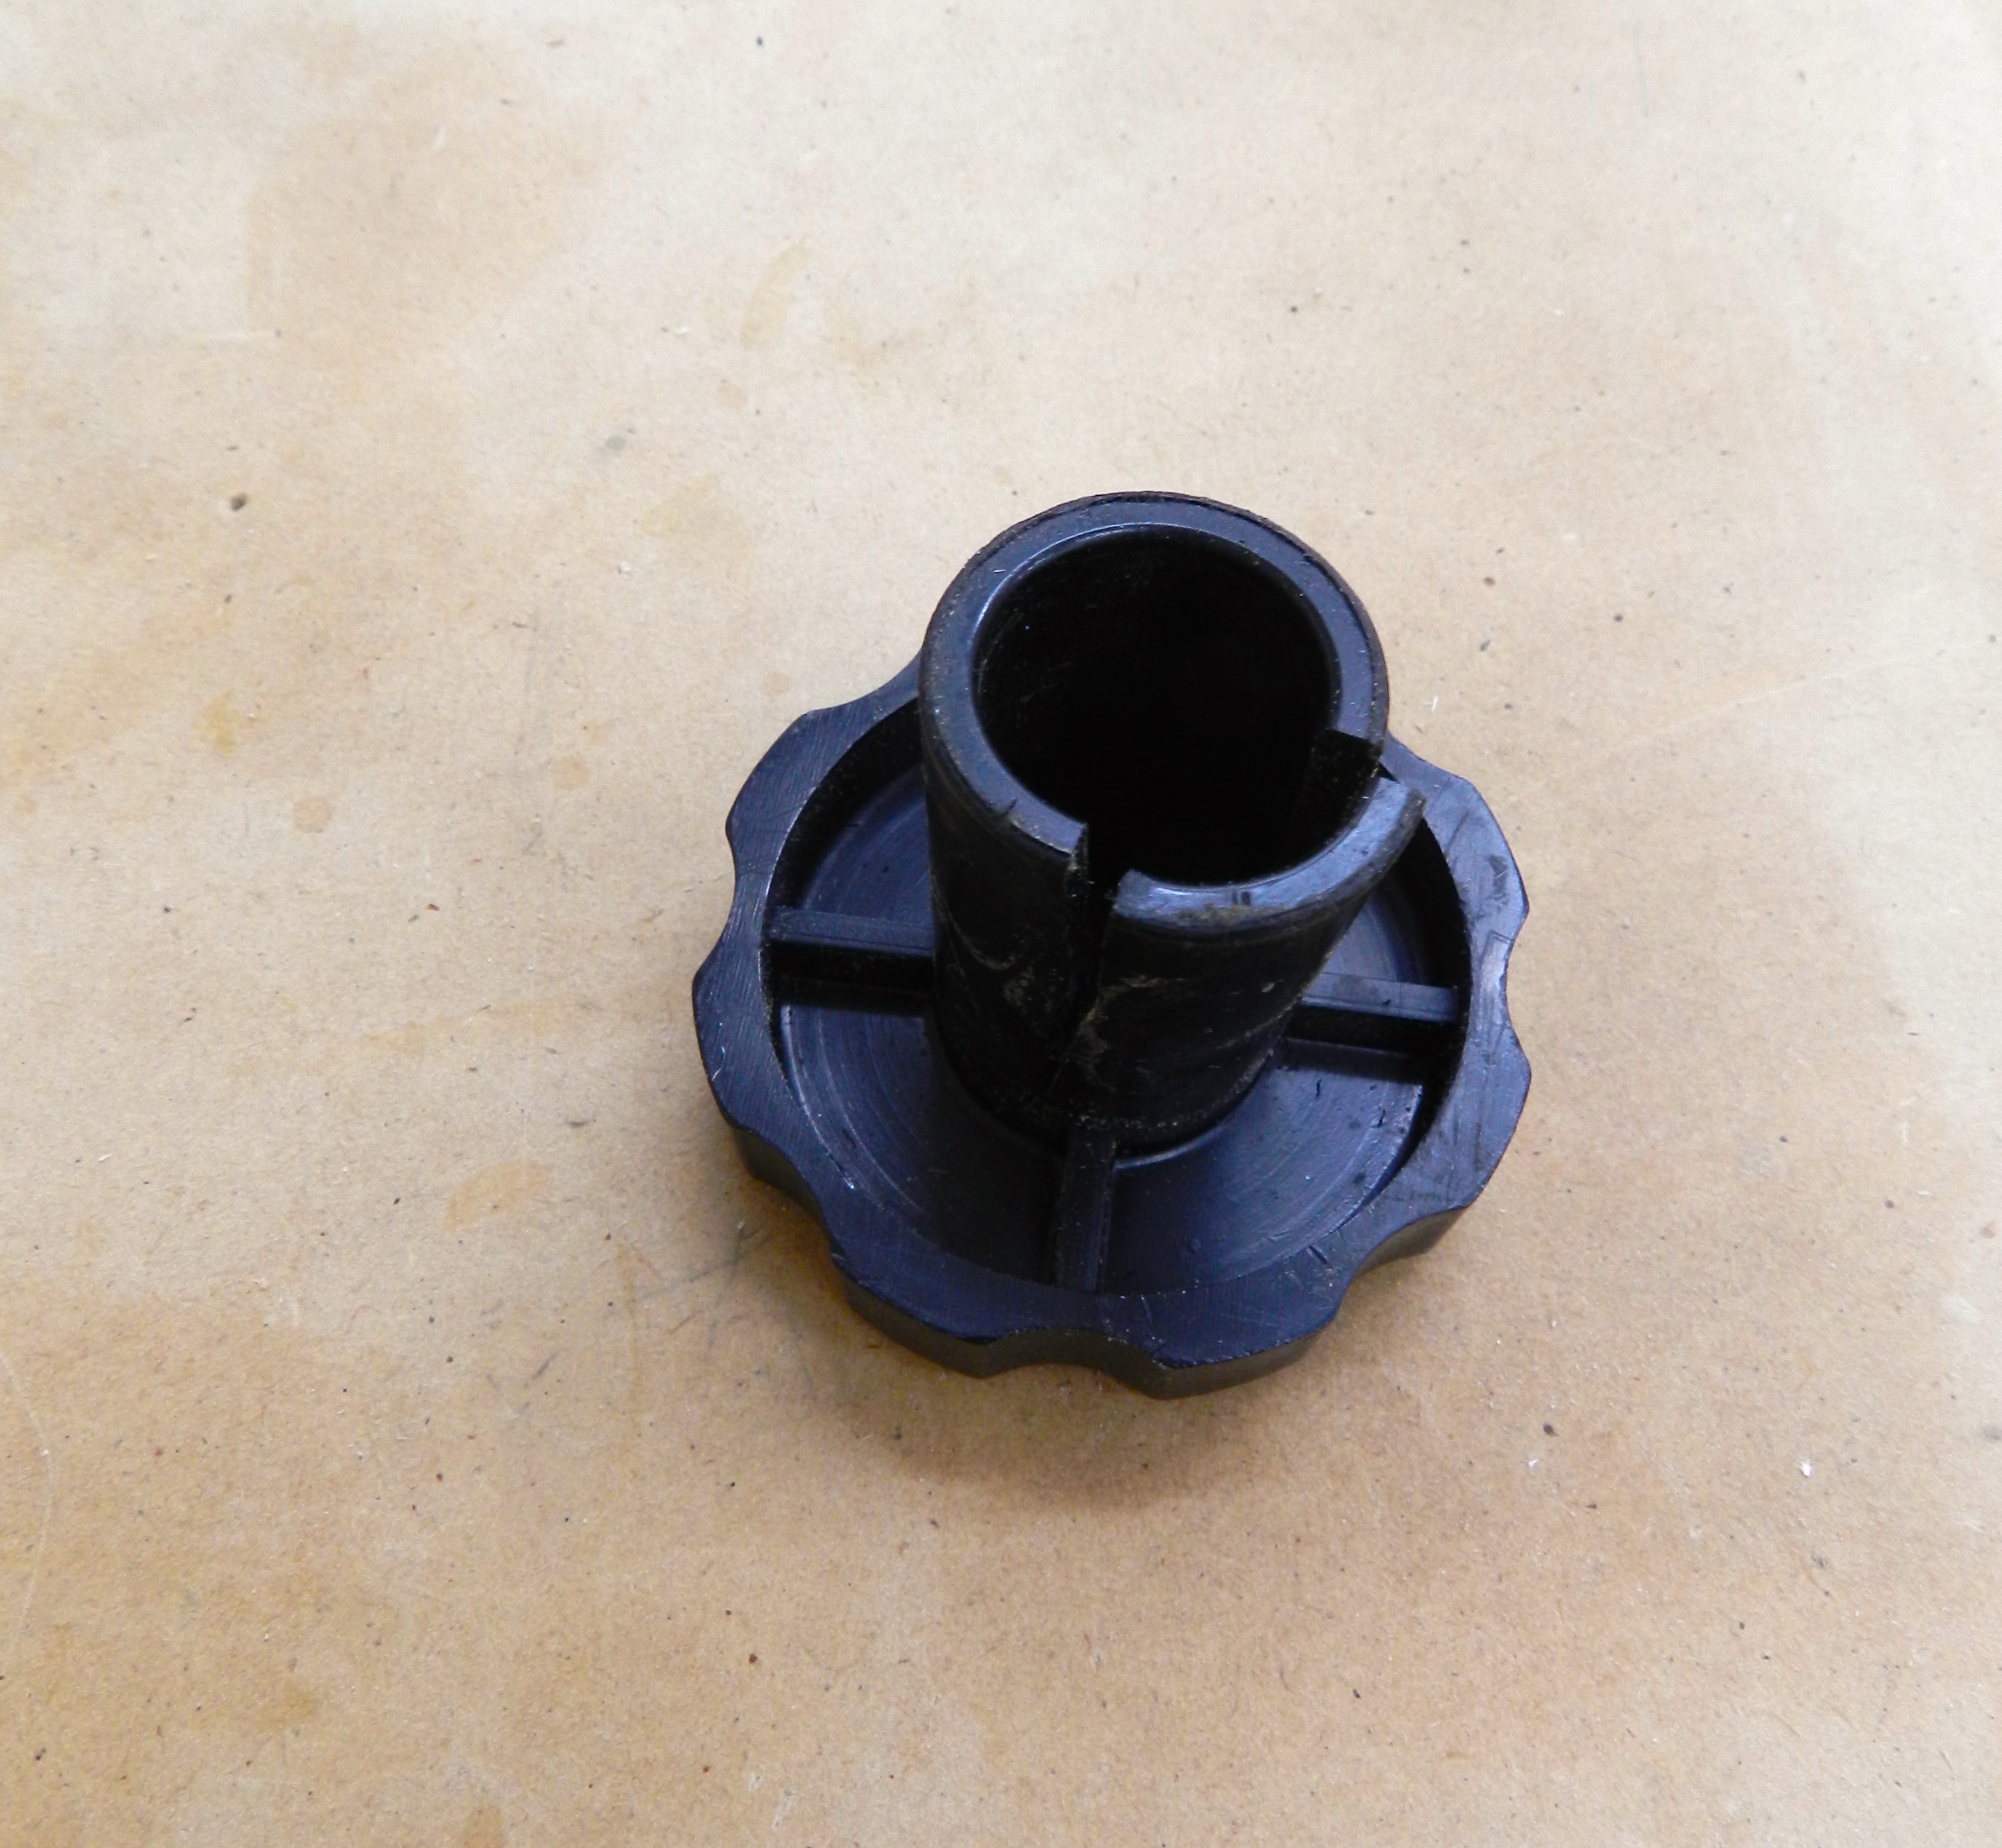
Within a few months of owning the machine this knob developed a crack. Apparently the knob was formed over a pinion gear that engages a rack connected to the fence.
Broken Knob
When the knob slips you cannot advance the fence. At first I made do with the tape solution — ‘It’s only temporary unless it works‘. I lived with this headache for several years, running out the machine’s 5 year warranty in the meantime as I knew a replacement knob meant pulling that pinion and getting a knob that would likely fail the exact same way.
Knob removed
While at NBSS I saw several of this same model jointer come and go as donations — units from the 1980s-present and all seemed to have the same affliction — broken or missing knobs. The really old iron stationary tools (including old Delta/Rockwells) we had, had knobs with metal handles that served their purpose for generations.
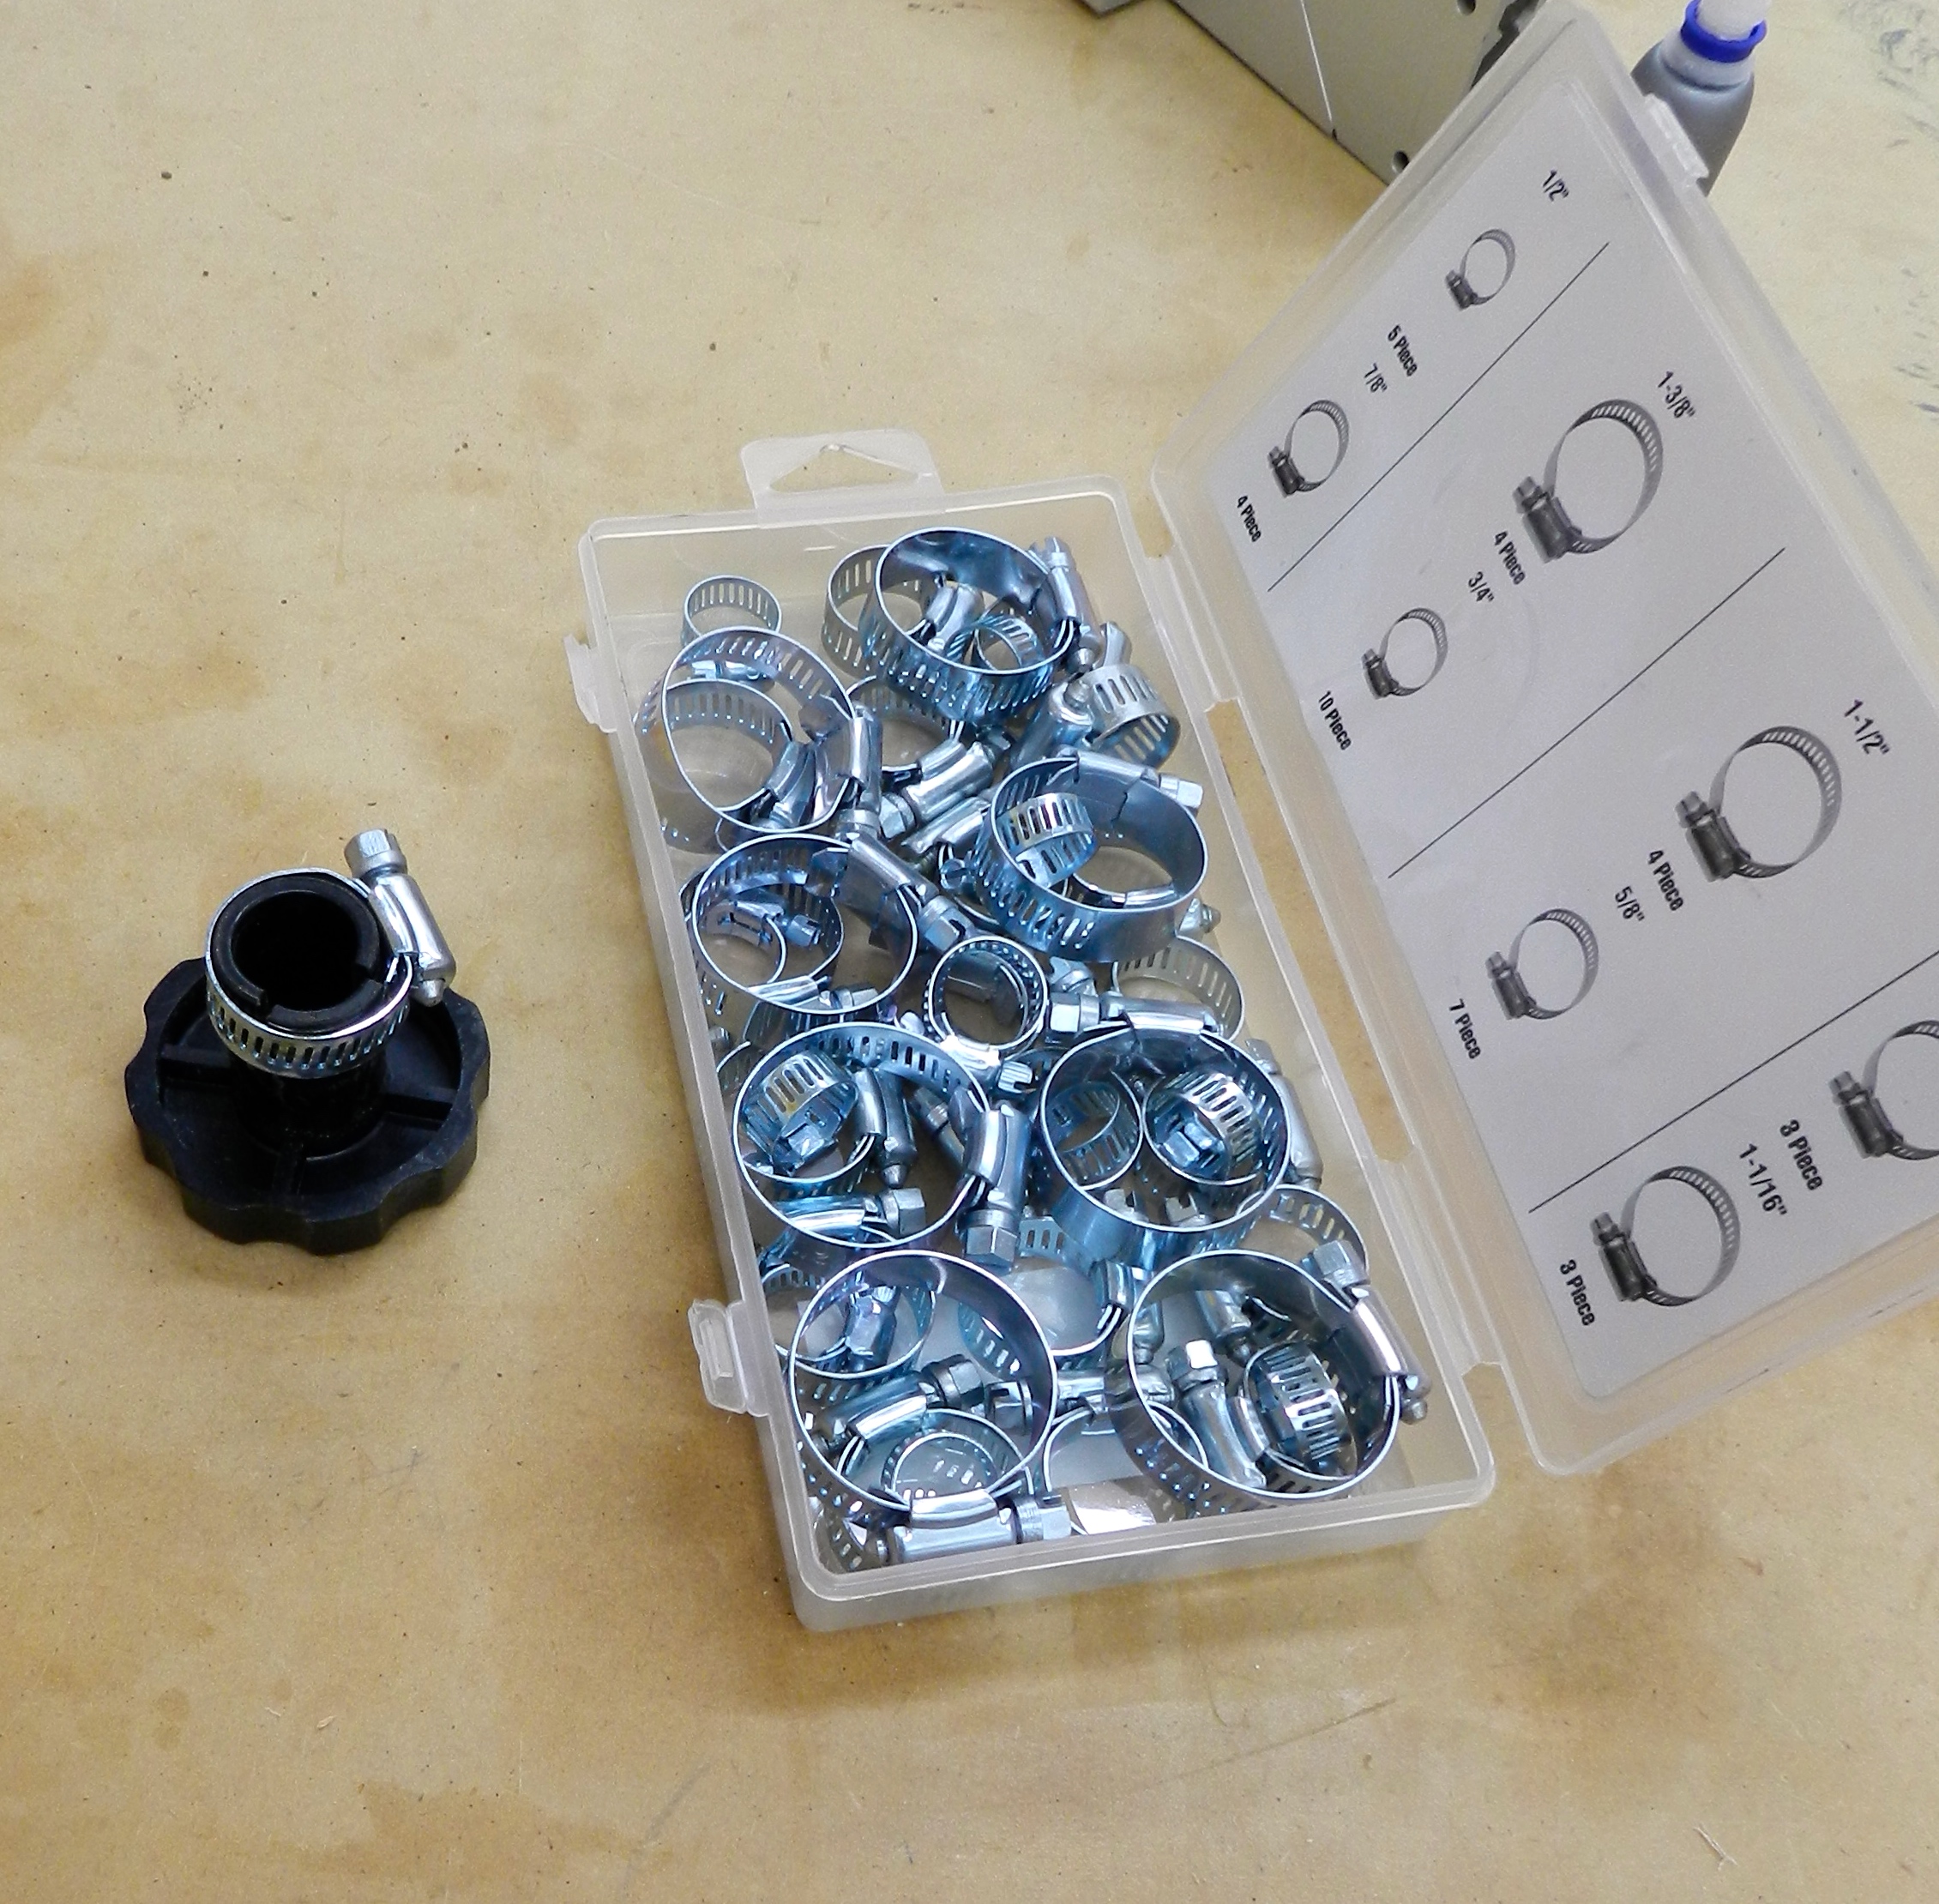
Band clamp variety pack
I figured there must be a better way to fix this knob and make-do. So I picked up a variety package of band clamps and test fitted them to the knob. The 1-1/16″ size fit perfectly. I applied some CA glue to the knob, attached it to the jointer and cinched down the clamp.
Band Clamp Test Fit
It’s not pretty, but it’s a a great make-do solution — I finally have a working fence adjustment knob again and it cost me less than a buck.
Working fix
I wonder if my make-do will become a collector’s item for some future generation of tool collector.
Take care,
-Bill
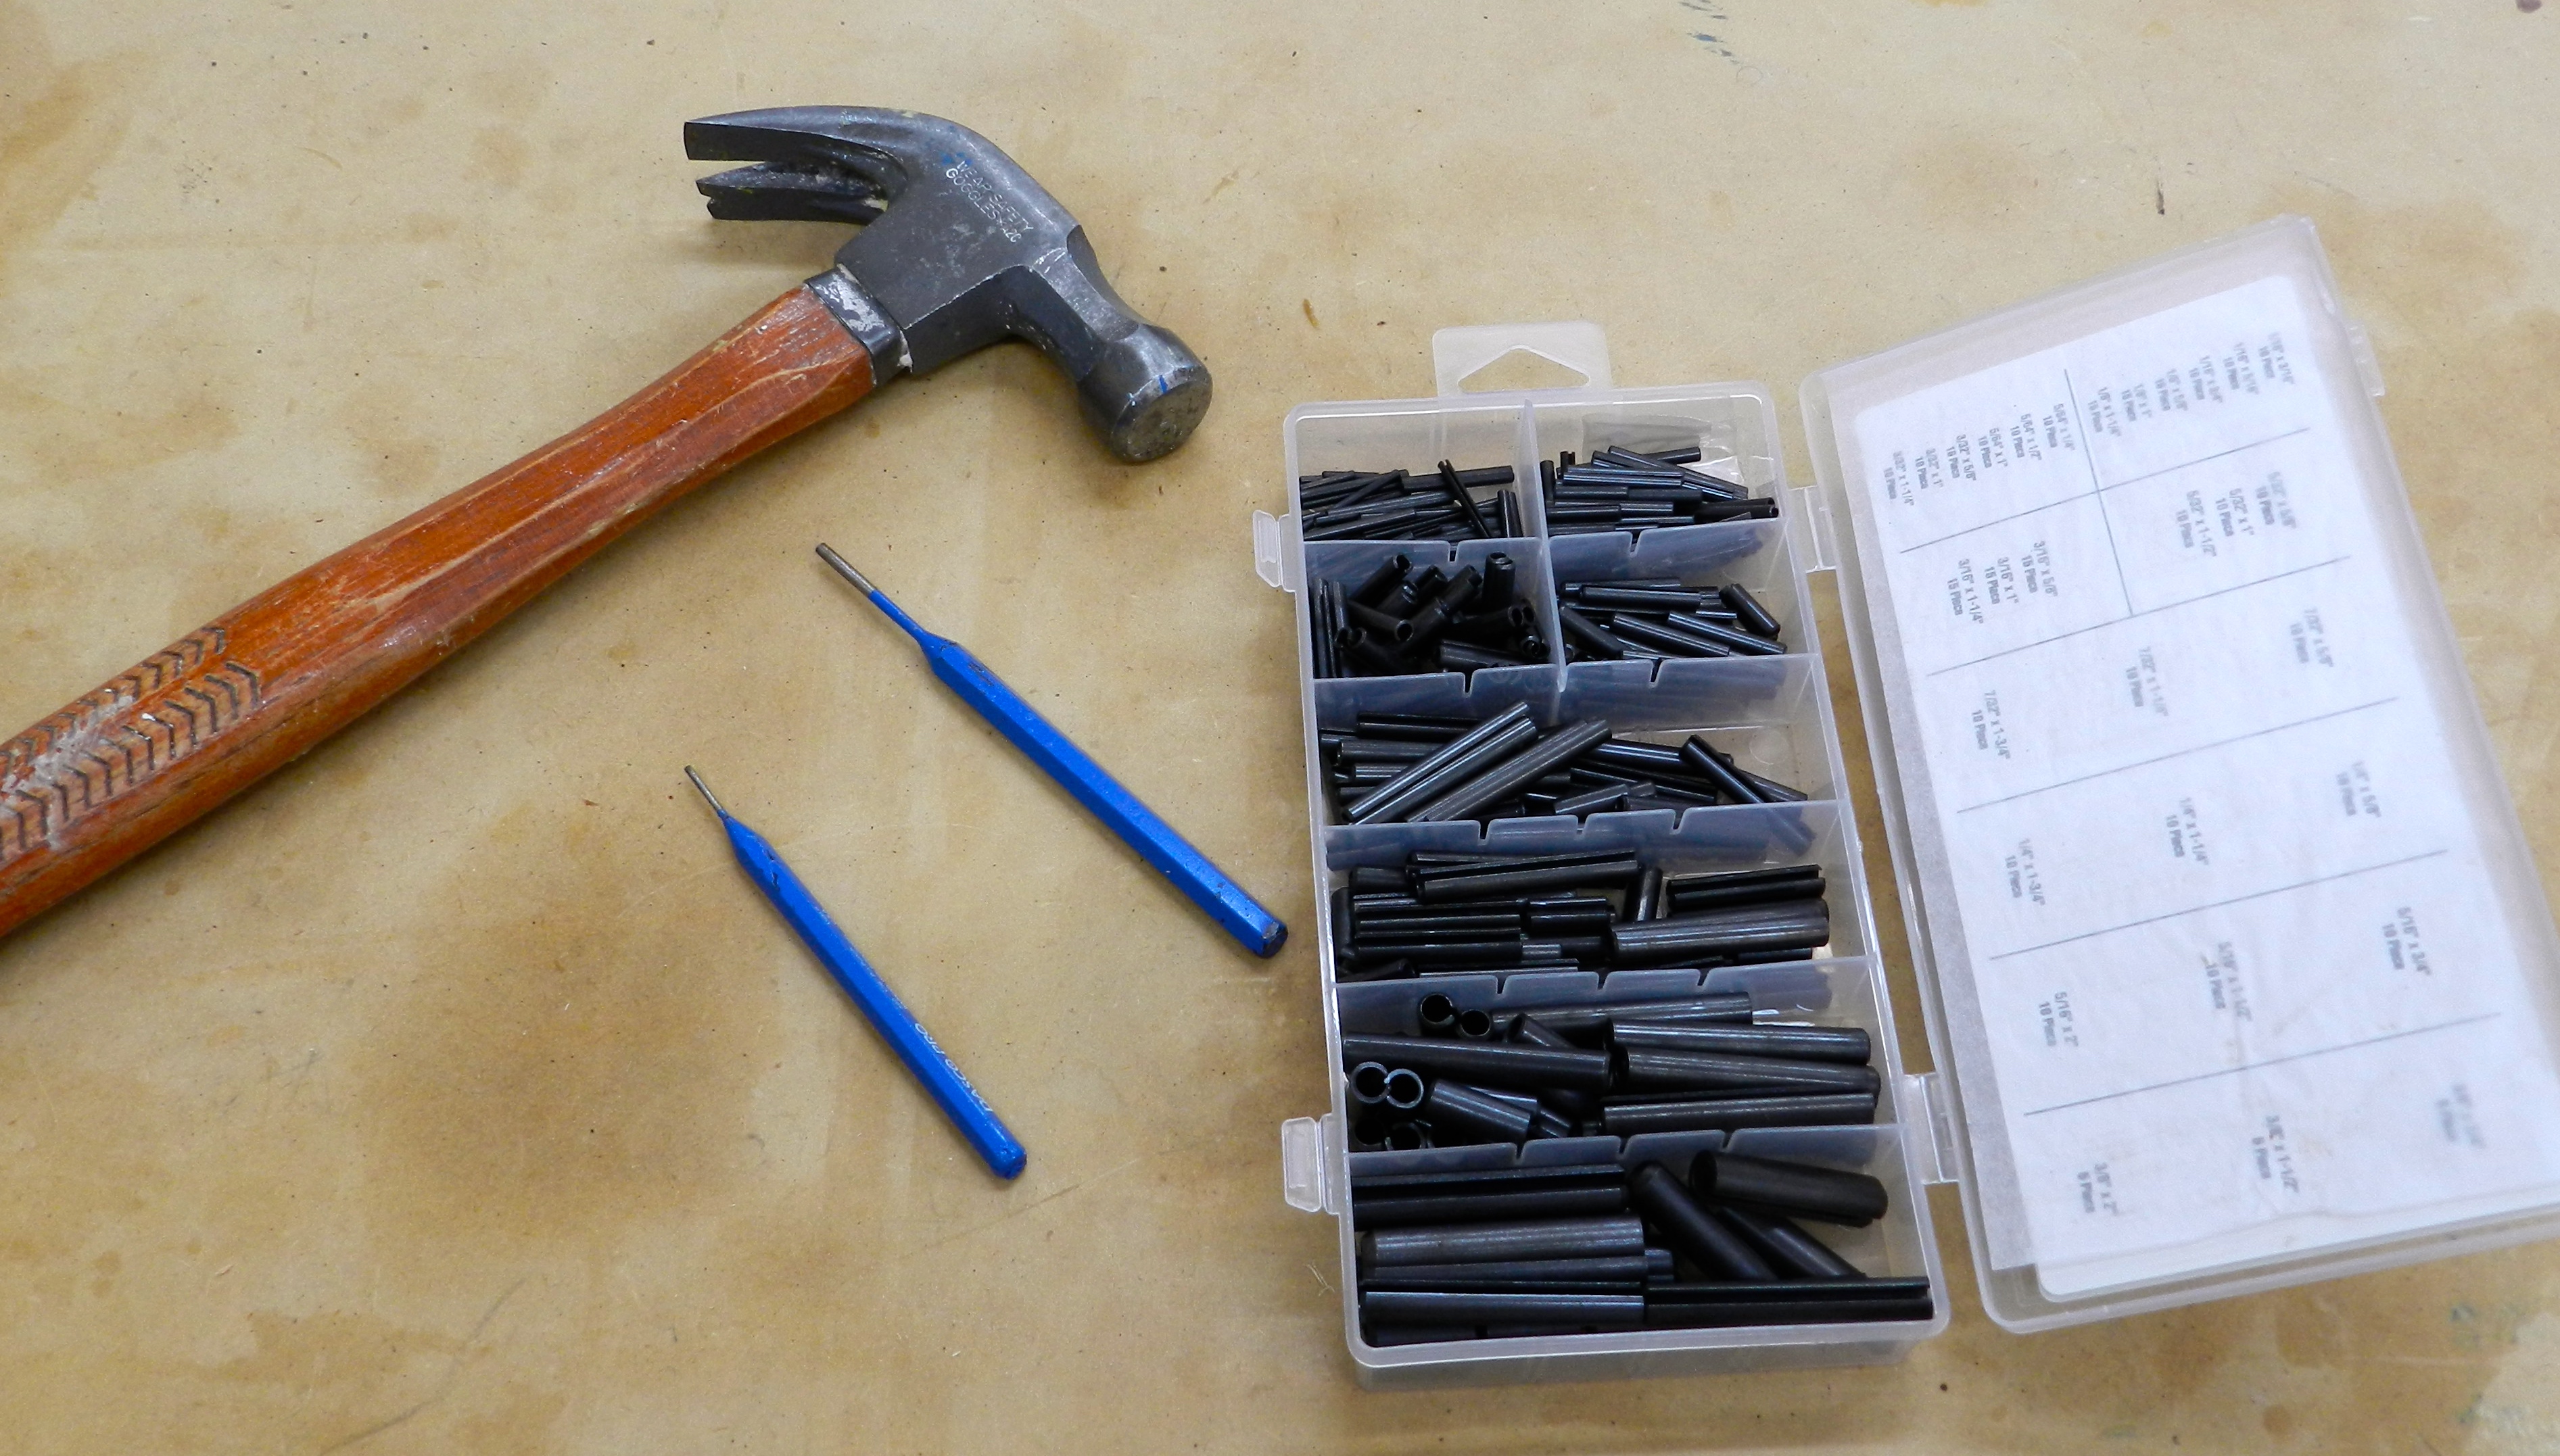
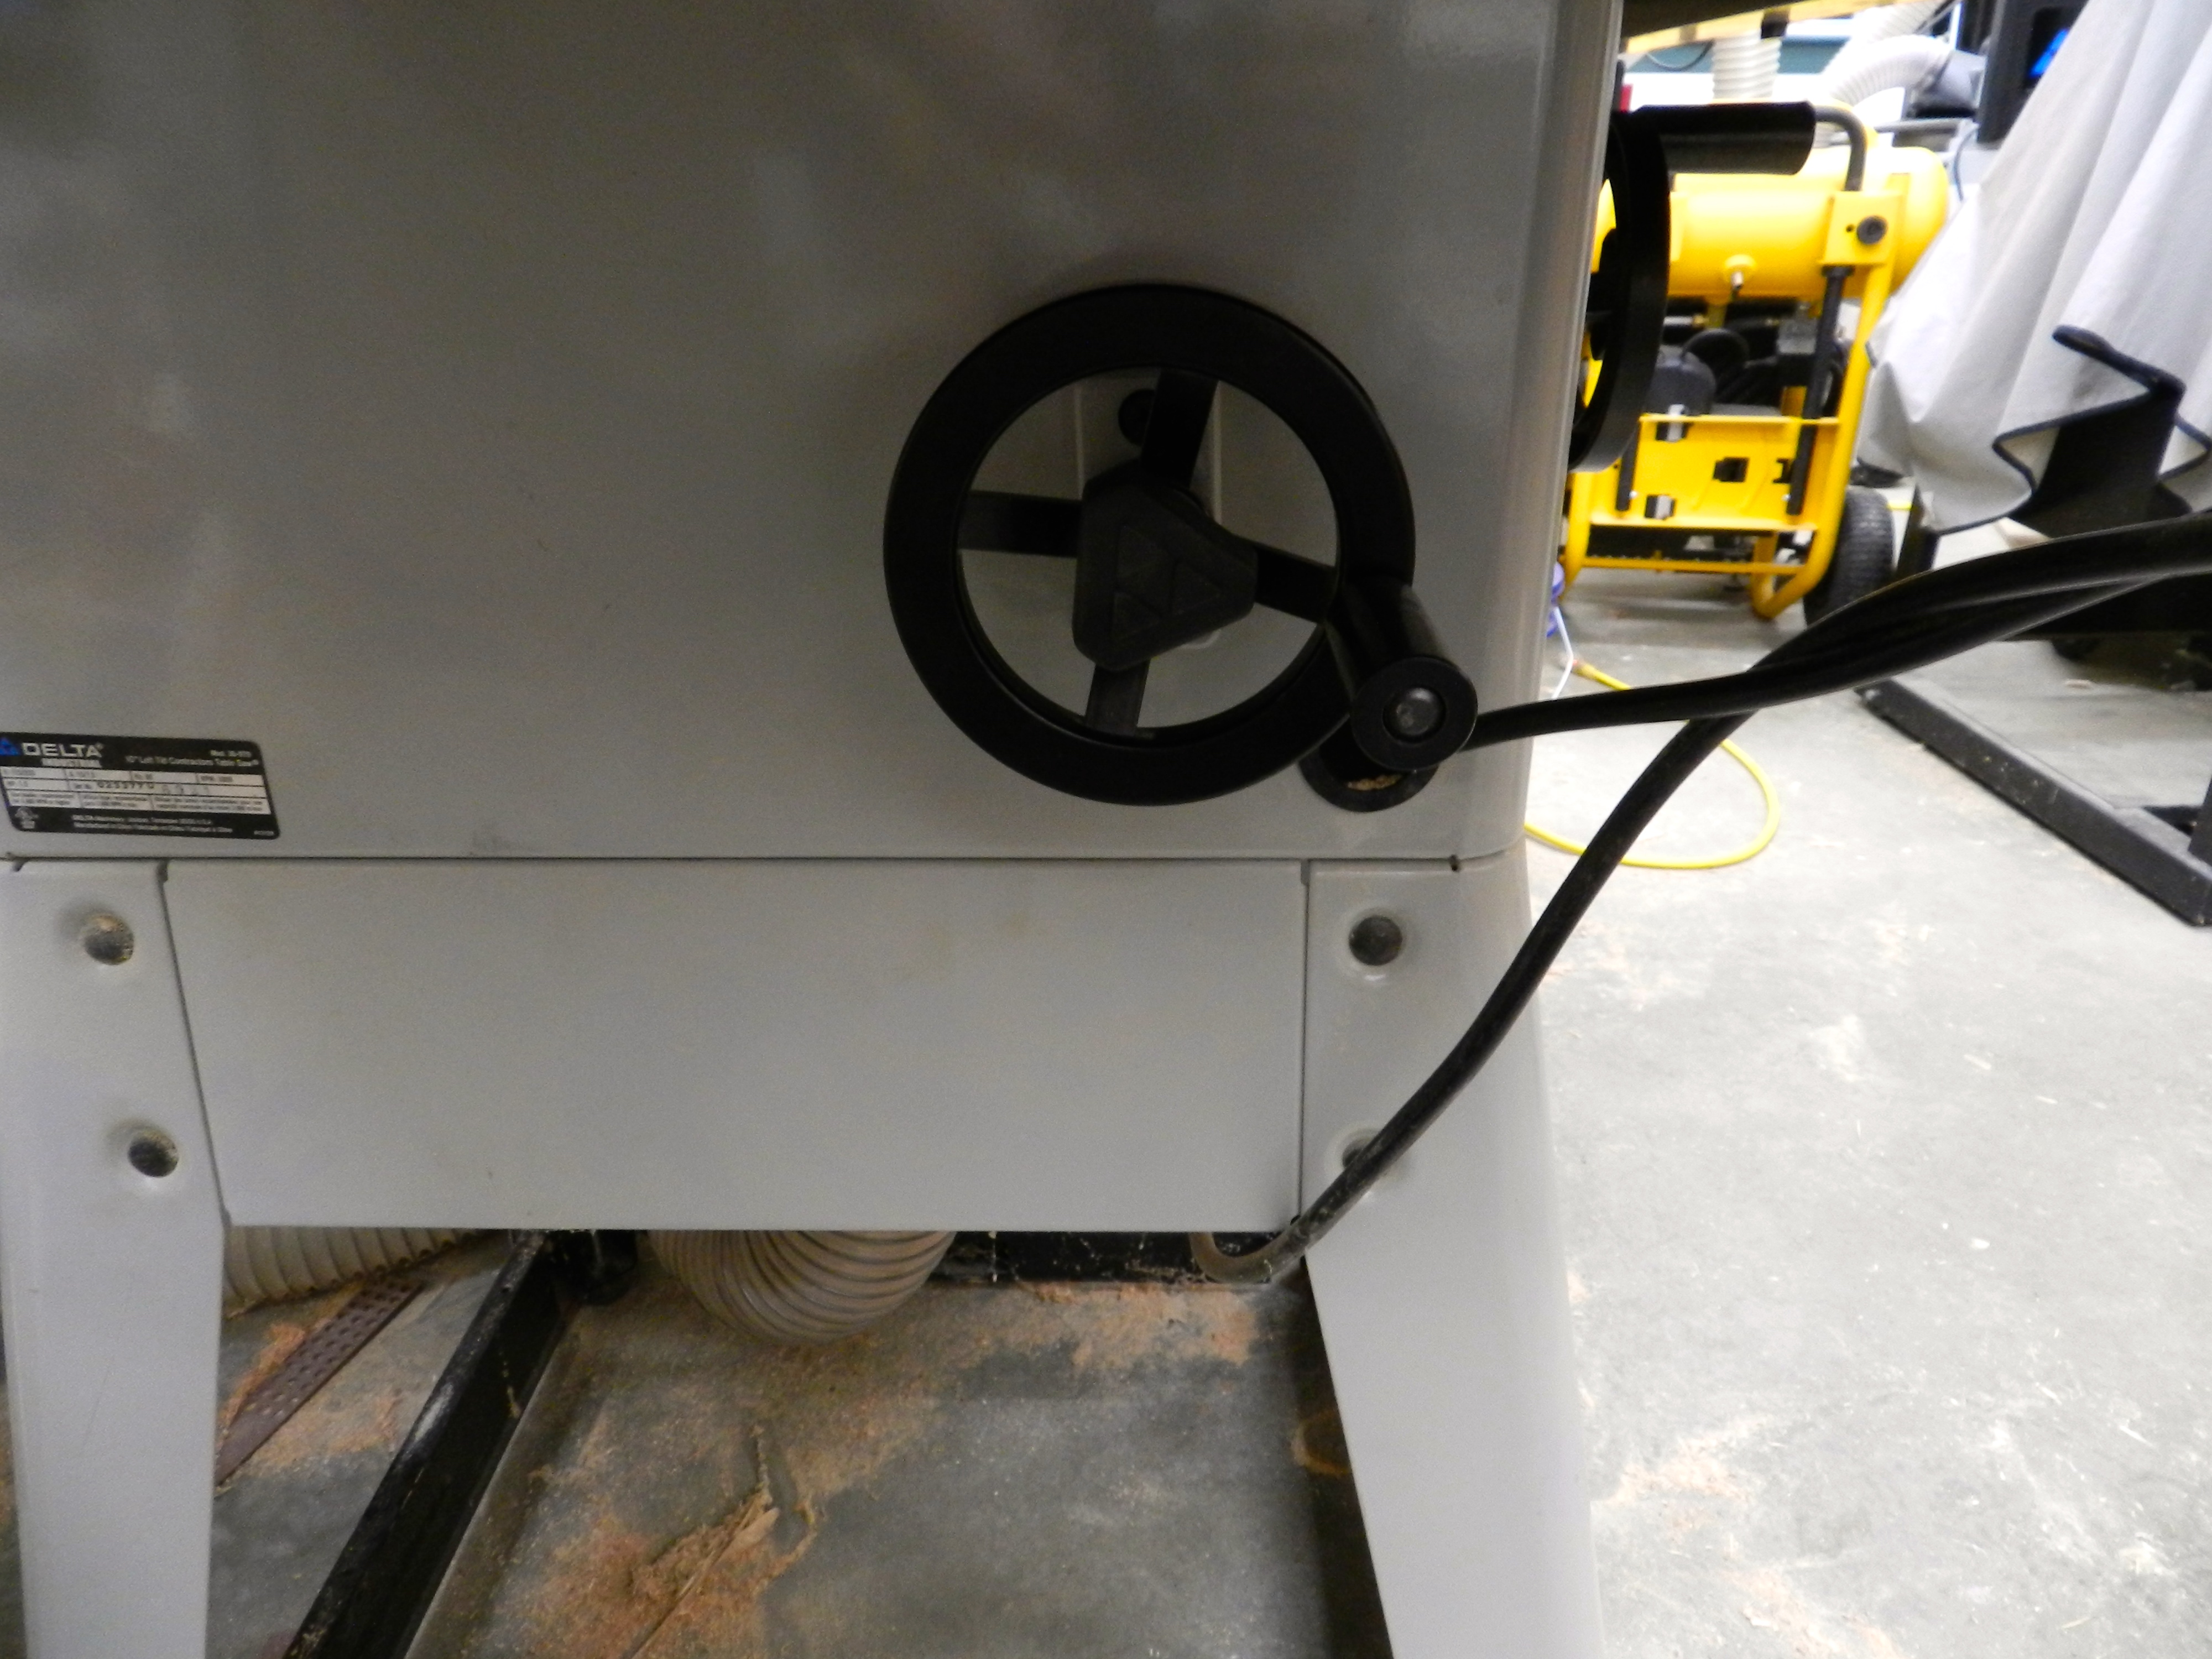
P.S. Why did I finally fix this knob after all these years? Yesterday the spring pin on the tilt wheel of my table saw was sheared off. Not from cranking overly hard on it, I assume due to metal fatigue. Apparently spring pins are not as common as they used to be as Delta no longer stocks the part, and other online tool parts suppliers and my local Home Depot, Lowes and True Value all did not have any in the correct size.
Spring or Roll Pins Variety Set
When I was ready to give up and search more online sources like Grainger or auto part stores I found that Harbor Freight was selling a set of 315 spring pins for $7, so I bit the bullet, went over there and bought the spring pin kit and a band clamp kit which was on sale for $5.99. While I would have liked to have purchased American made hardware for both of these projects I could not find anything else locally stocked that would fit the bill, so for about $13 these machines are up and running again and I have a drawer full of spares for the future. The old spring pin was driven out by using a roll pin punch and a hammer and the new pin was inserted by compressing the pin with some vise-grips and some light hammer taps to insert it. Both machines are back up and running and the shop is humming again.
Table saw tilt adjustment knob
If you have similar make-do tips, please feel free to share them in the comments section below.
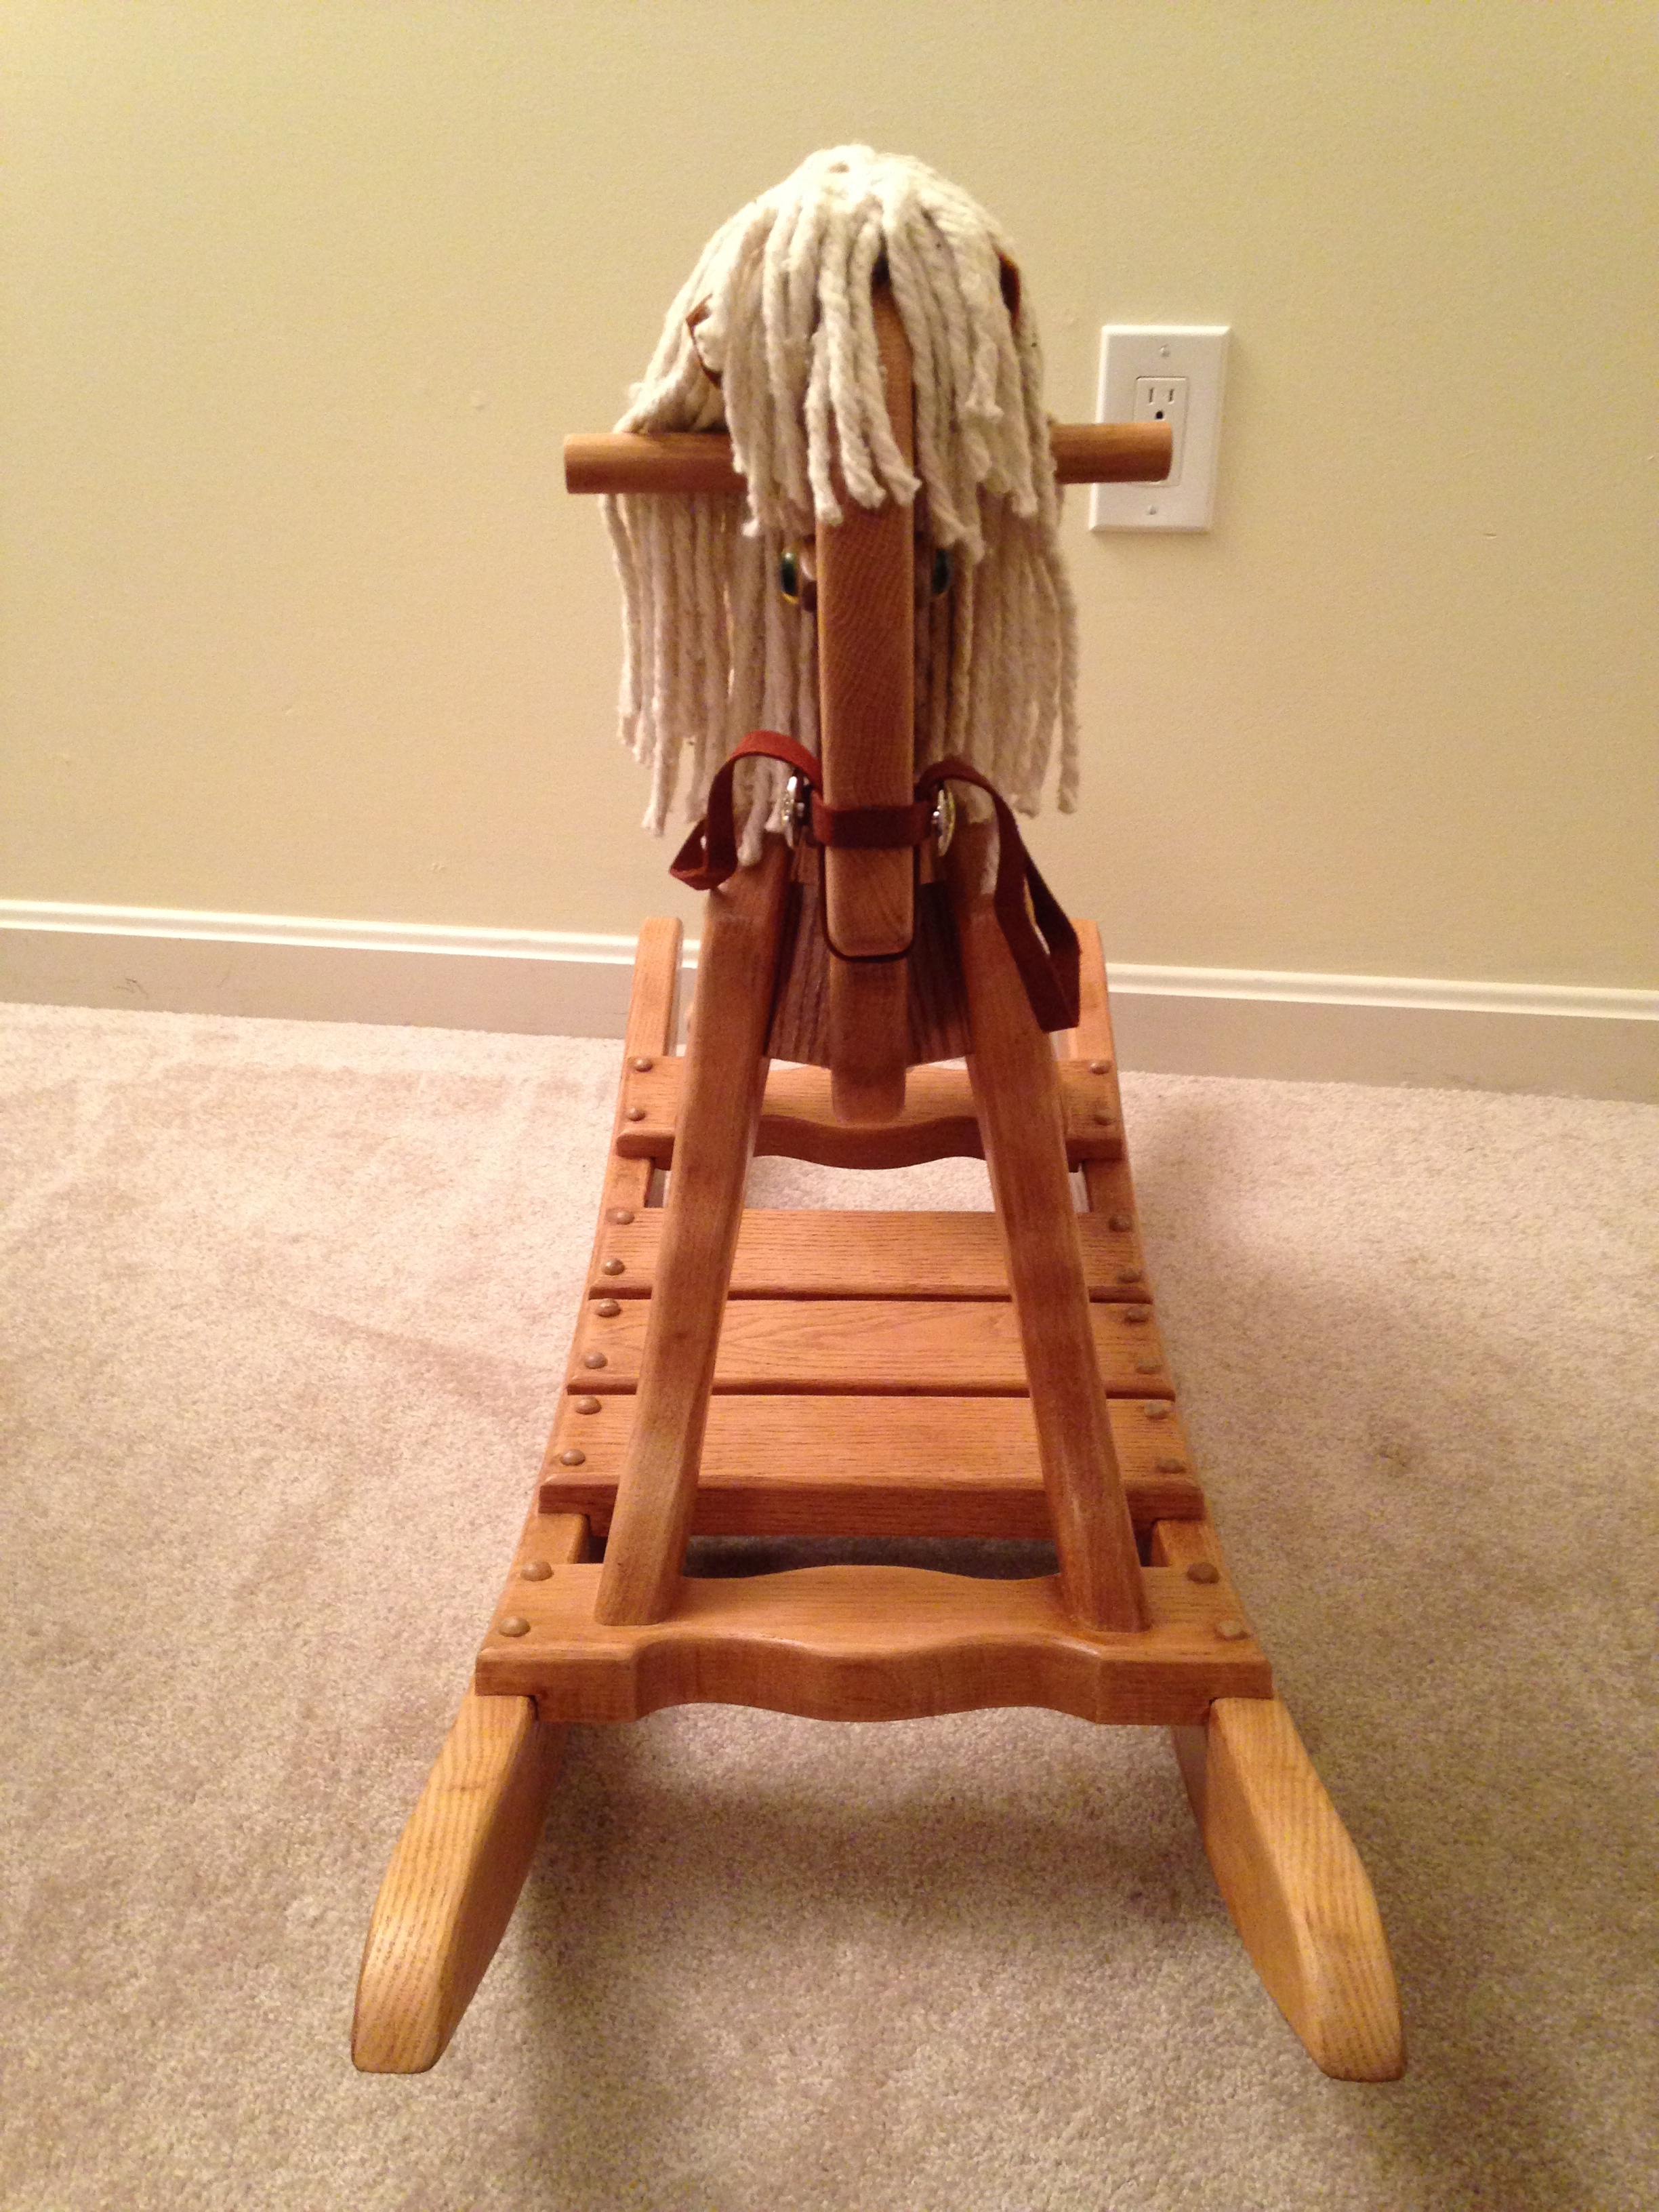
First off, I want to share some good news with everyone — in late August my wife Alyssa gave birth to our first child — a son named Bradley who came in at 10lbs 15oz and 23 inches long! We’re both proud parents and my wife and the baby are both doing well. With the new baby, work, and teaching this semester, I haven’t had as much time to blog as I would like. As things are calming down and and the cold weather sets in I’ll get some more time at the computer and will catch everyone up on what projects I’ve been working on. In the meantime I wanted to share with you one of the few family heirlooms I have — in this case my old rocking horse.
Oak Rocking Horse
I’m convinced that Woodworking skills and appreciation for woodwork are hereditary to some degree. When I was a child my Dad — William D. Rainford — made a very nice rocking horse for me. The horse was constructed from solid oak and was just about complete — the woodworking was done, the seat was on there, but the horse lacked his eyes, mane and tail. The horse worked great and as a child I fondly remember riding on it.
Front View of Oak Rocking Horse
With the impending birth of my son I bugged Dad to finish off the horse, teasing him that he had 33 years to finish it — that’s how old I am right now. I’m happy to report that my Dad came through and finished the horse off properly — he now has his eyes (which we are all still amazed that he had and was able to find after all of these years), a nice mane, leather ears and even a bridle.
Close Up Of Rocking Horse Head
I look forward to when Bradley is old enough to ride it. Right now it’s keeping watch over the other toys in Bradley’s room. Speaking of Bradley’s room and finishing off projects, I need to finish building the crib for Bradley before he outgrows his bassinet and starts giving me a hard time for not finishing off that project.
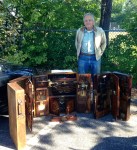
I’m generally not a morning person, but twice a year for the Live Free or Die Tool Show and Auction in Nashua, NH I seem to have no trouble getting up at 5am. The night before is more or less what Christmas Eve was like for me as a kid — not sleeping much and excited about what the next day will bring.
First aisle of tools on Thursday morning
At this point I don’t need much by way of tools, but you never know what you will find in Nashua and the show is literally on my way to work. So I have been going on Thursday and Friday mornings. Thursday to shop, Friday to see friends from NBSS and see if I missed anything.
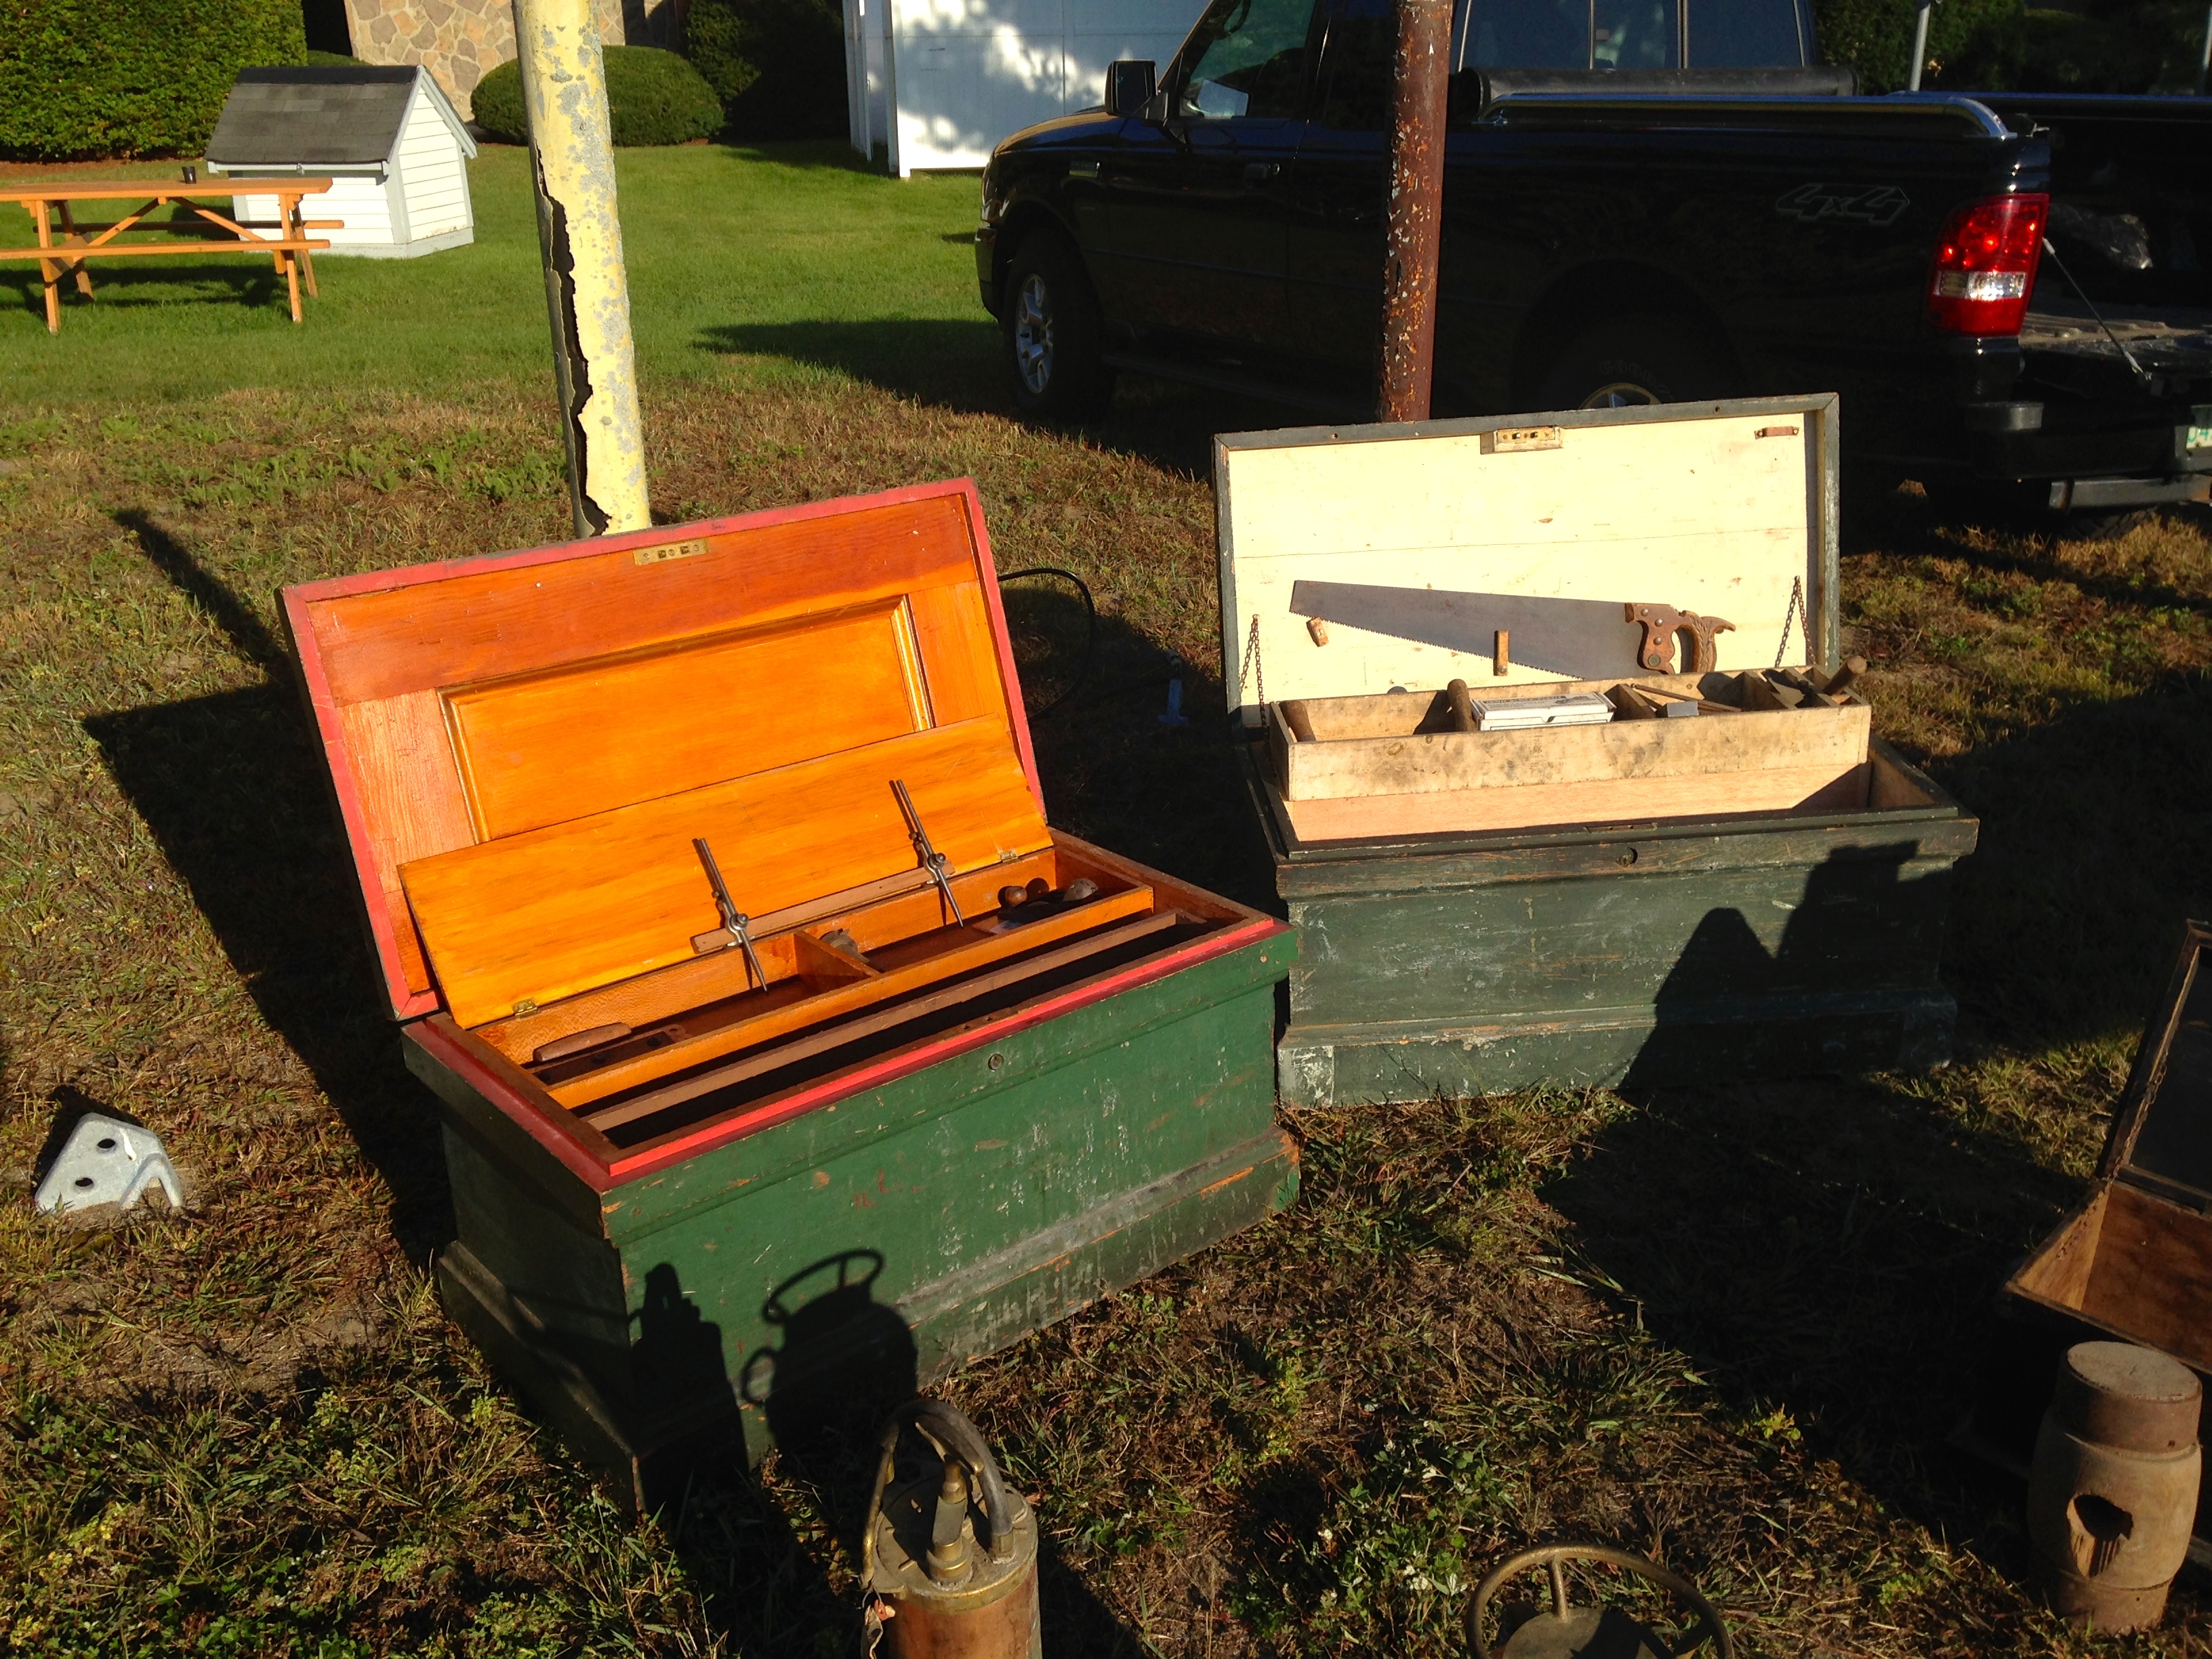
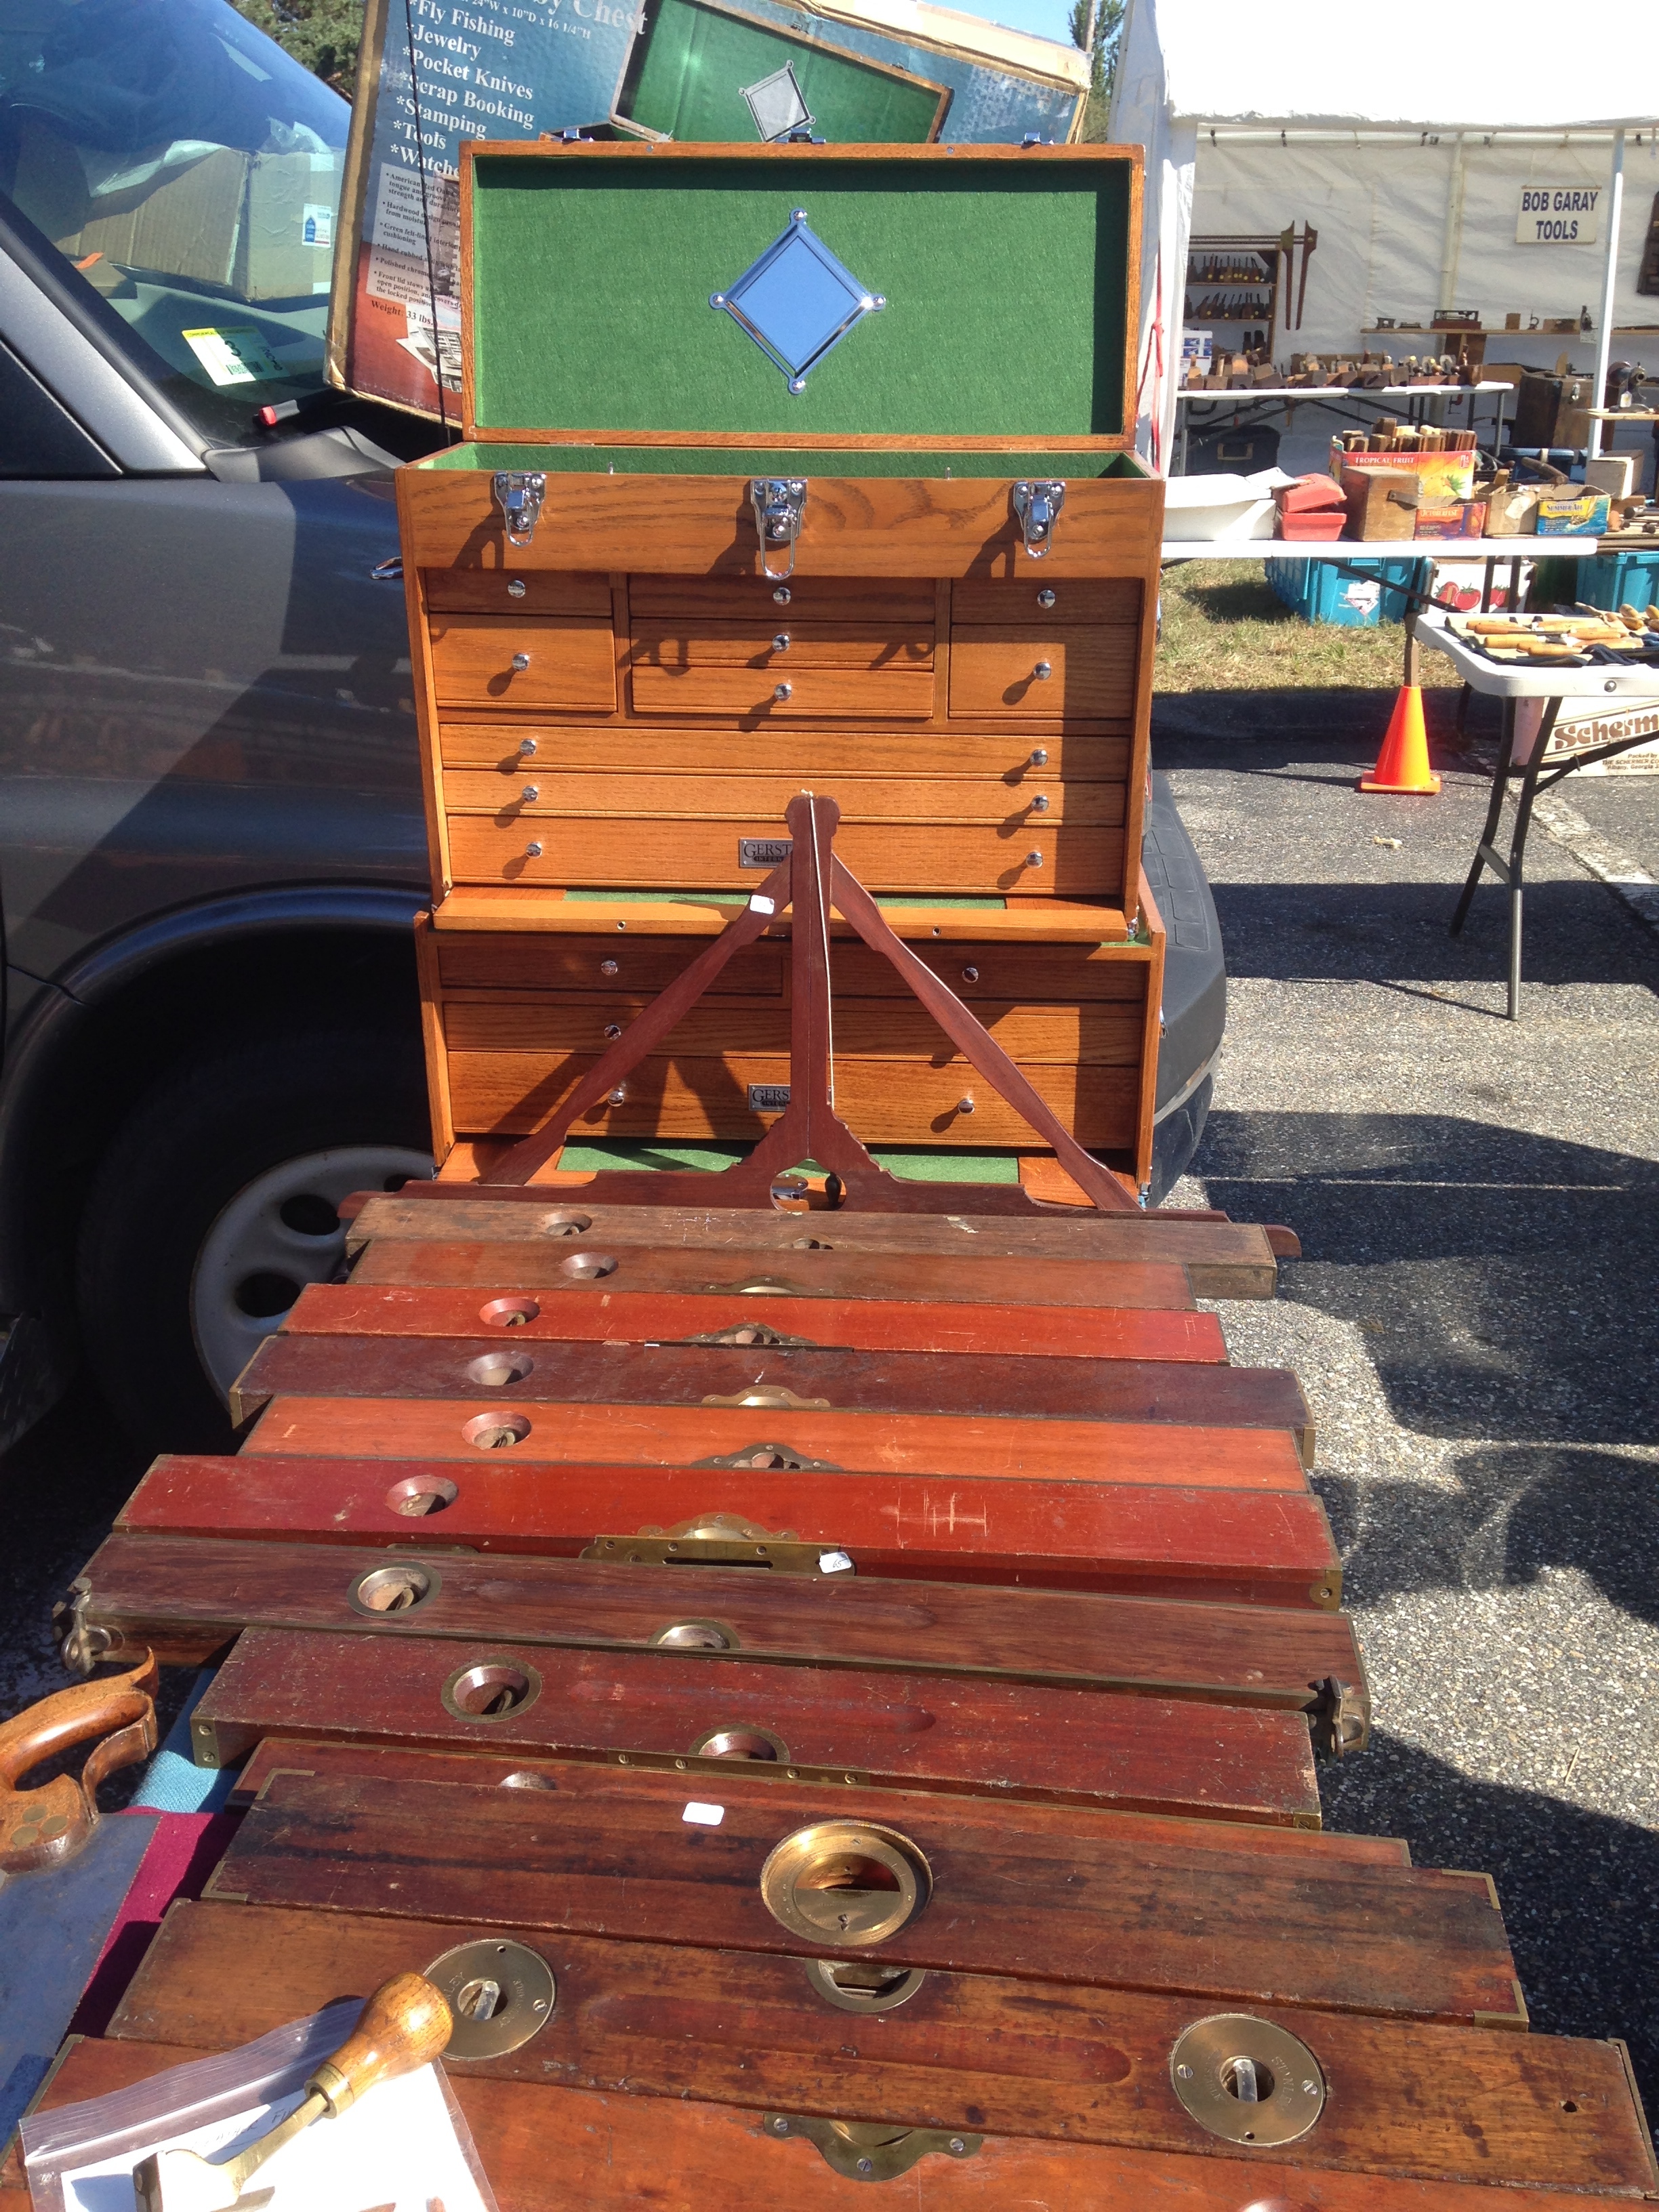
Tool chests for sale
I always enjoy snapping a few pictures of tool chests and tills. (Including the nice H.O. Studley inspired cabinets here).
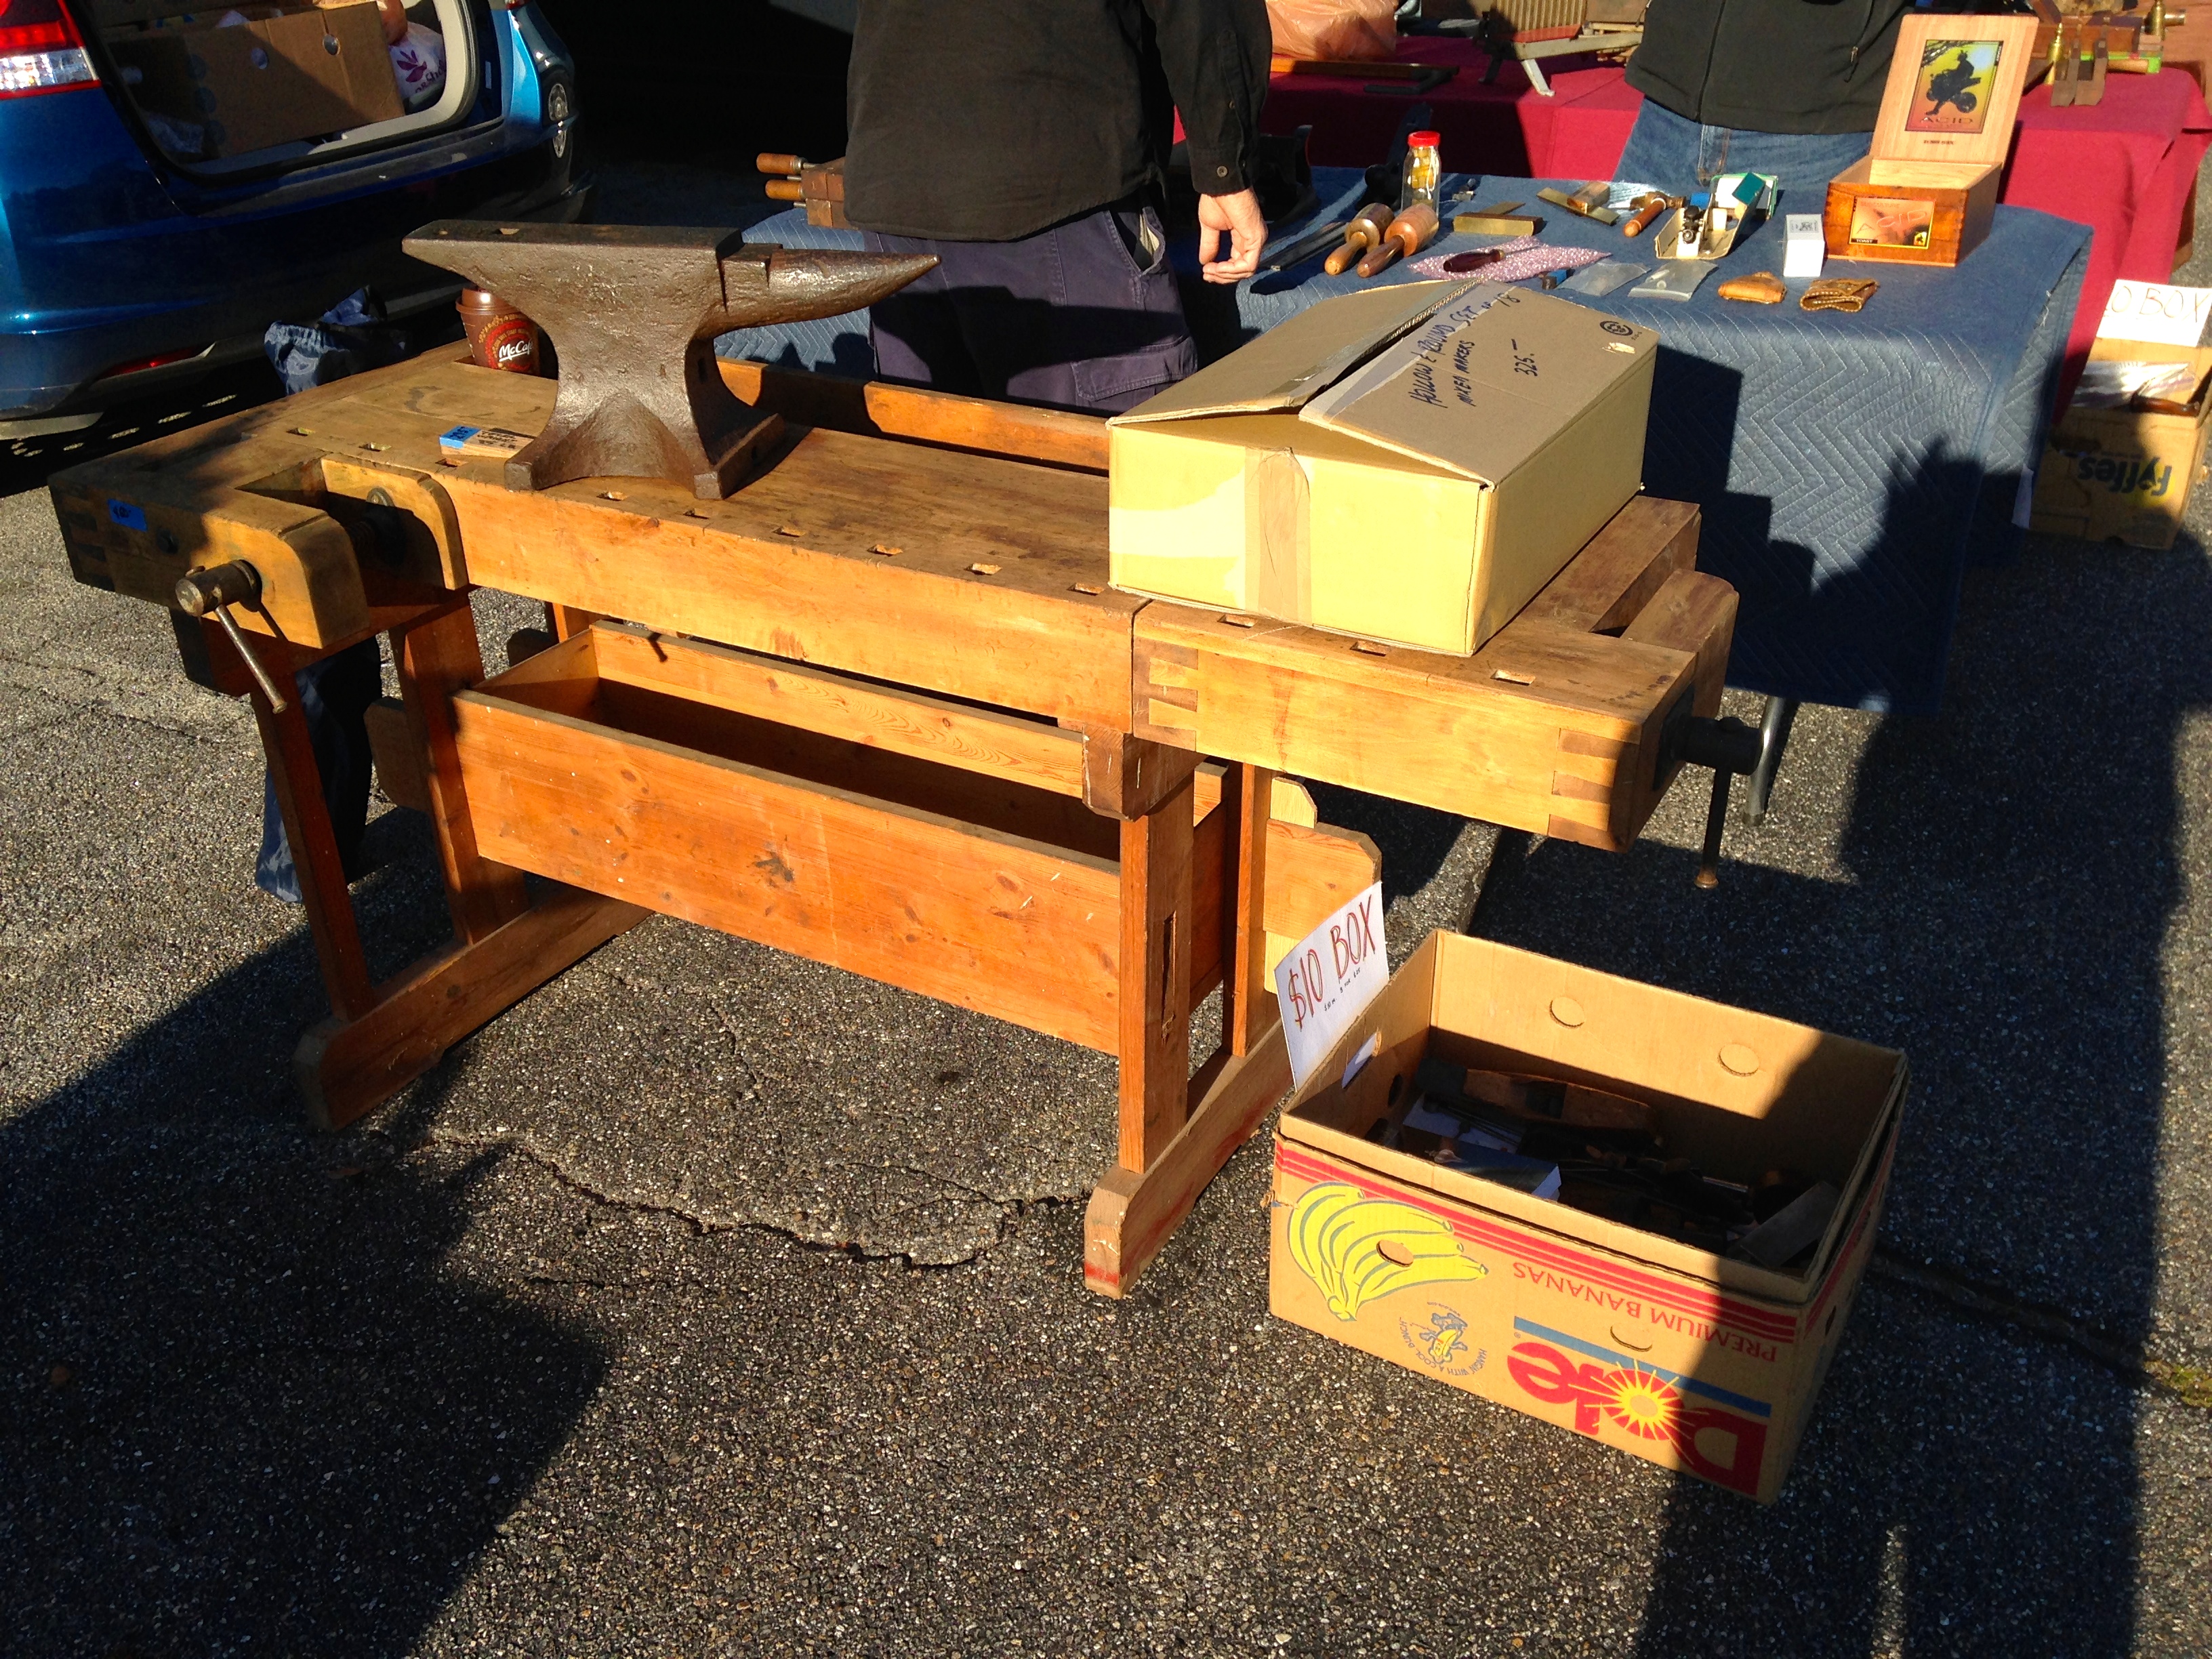
Student sized workbench
And examining the benches that make their way to the show.
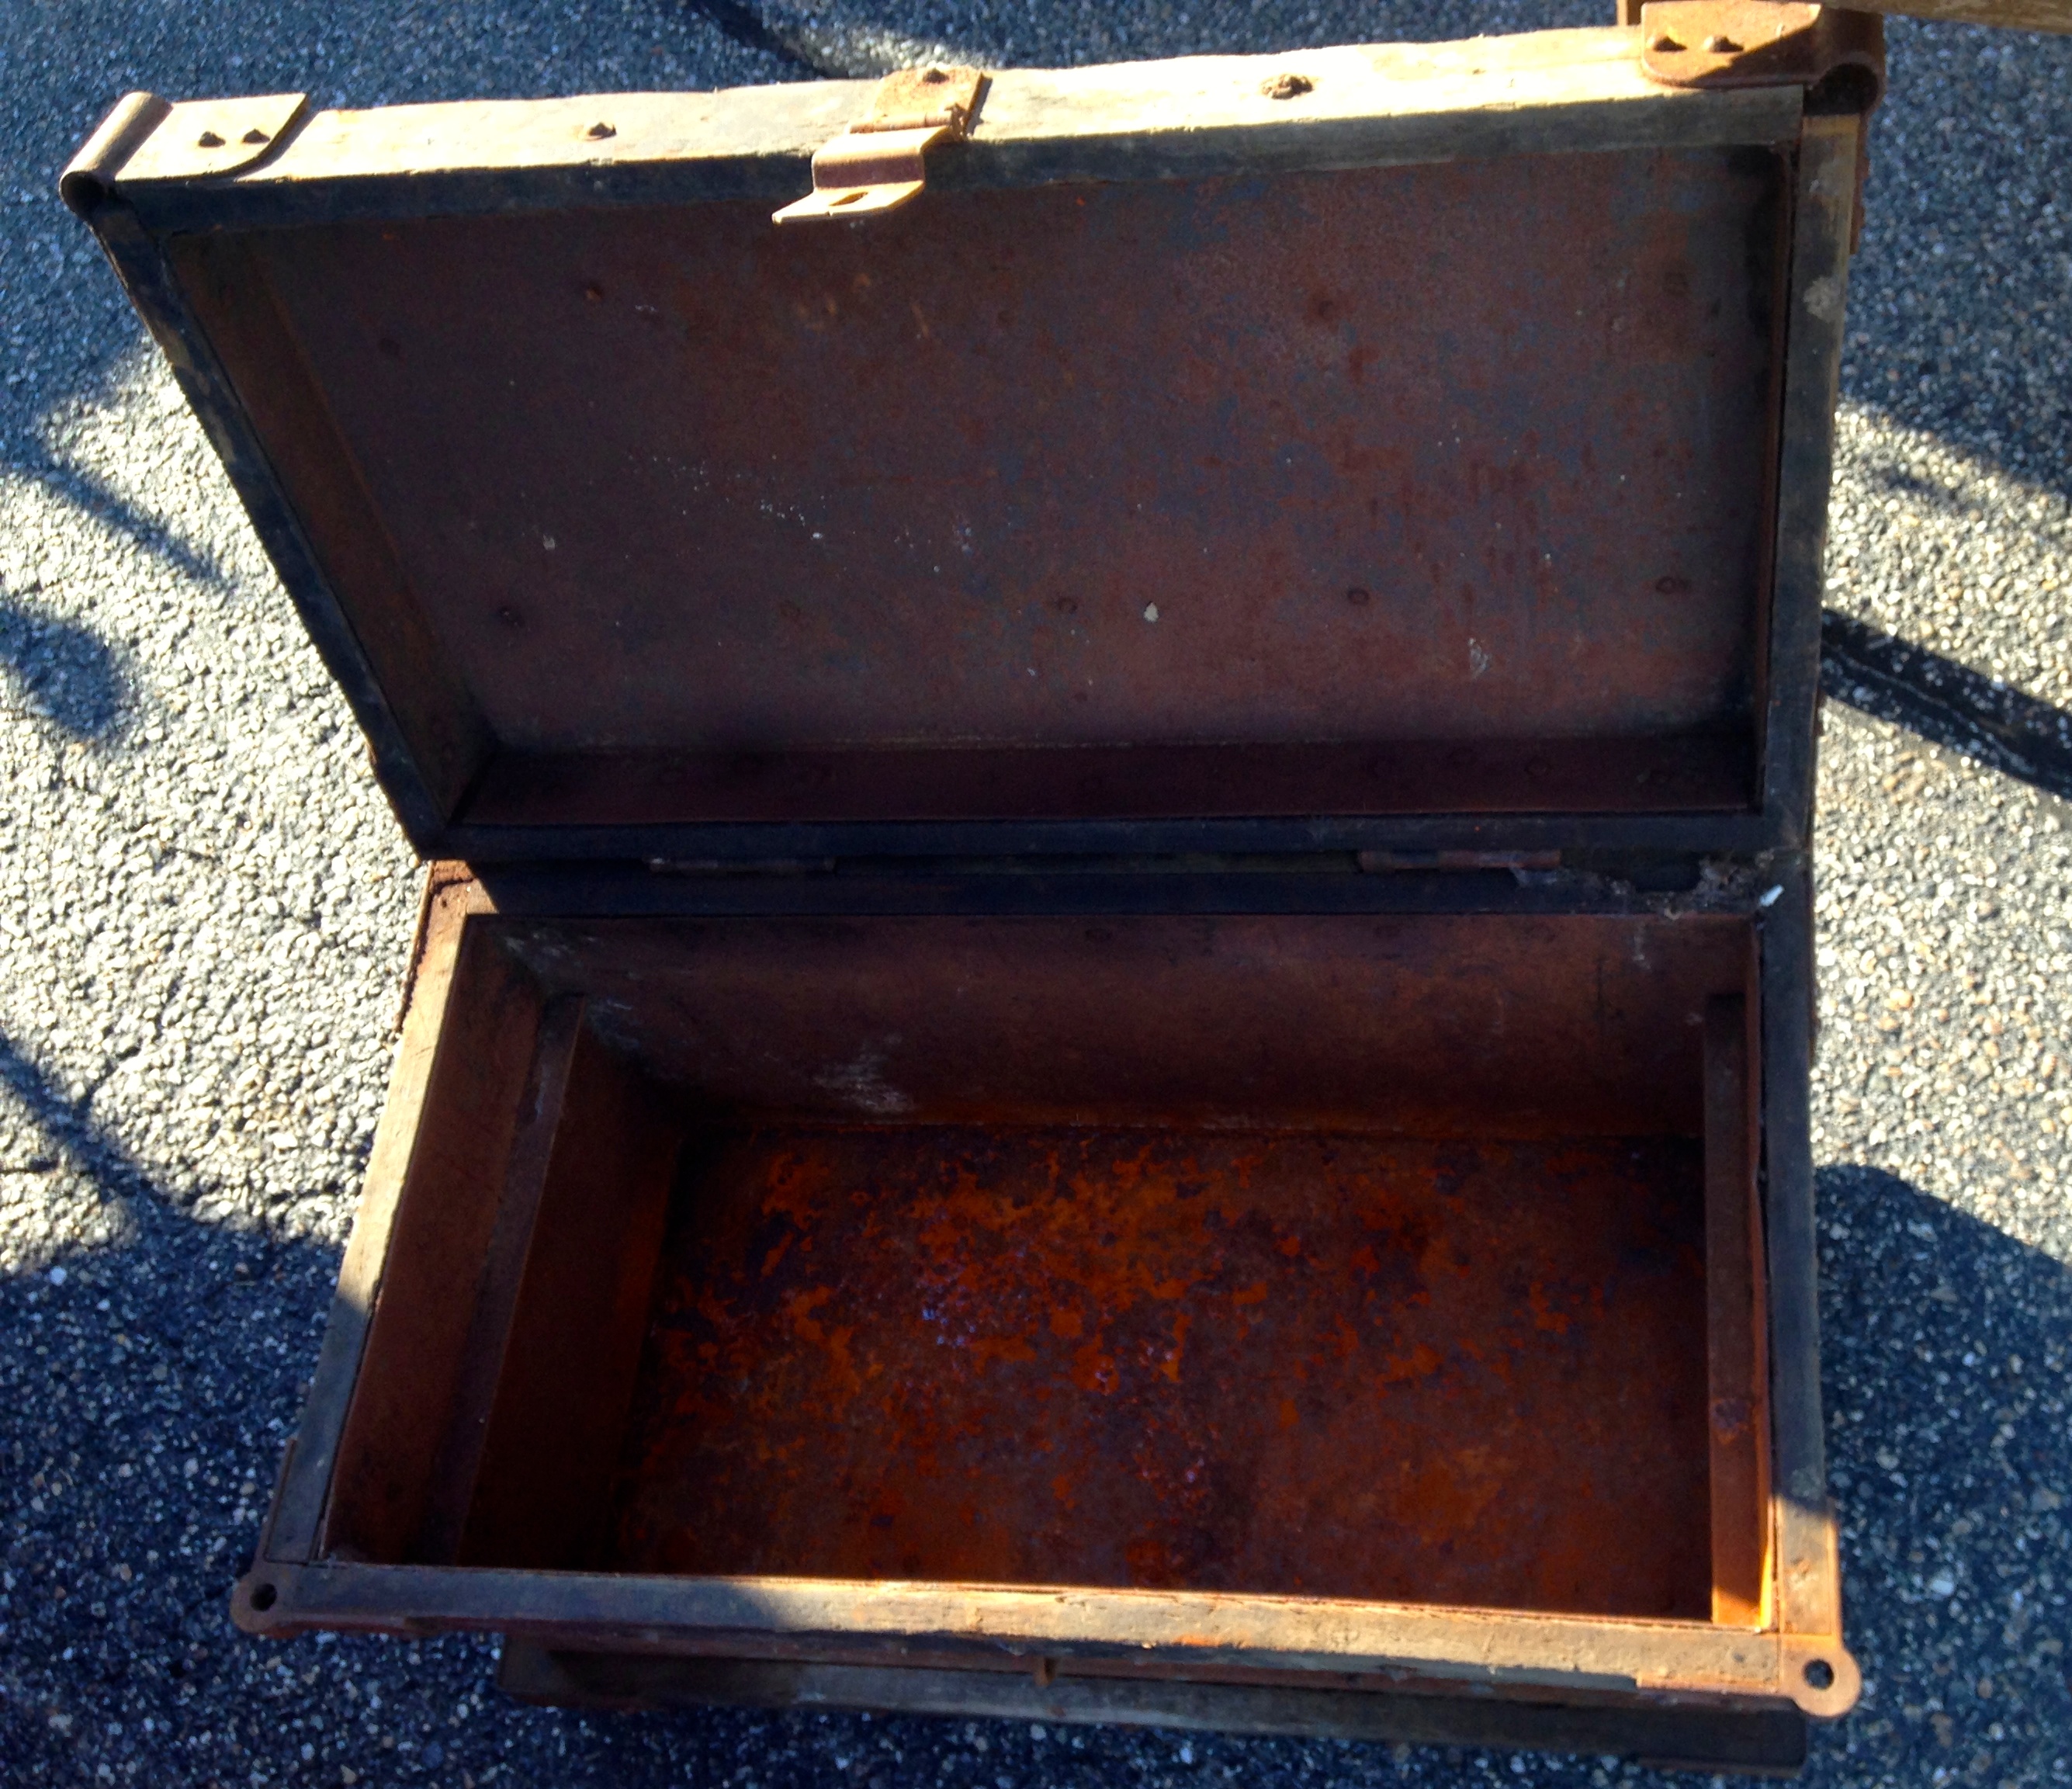
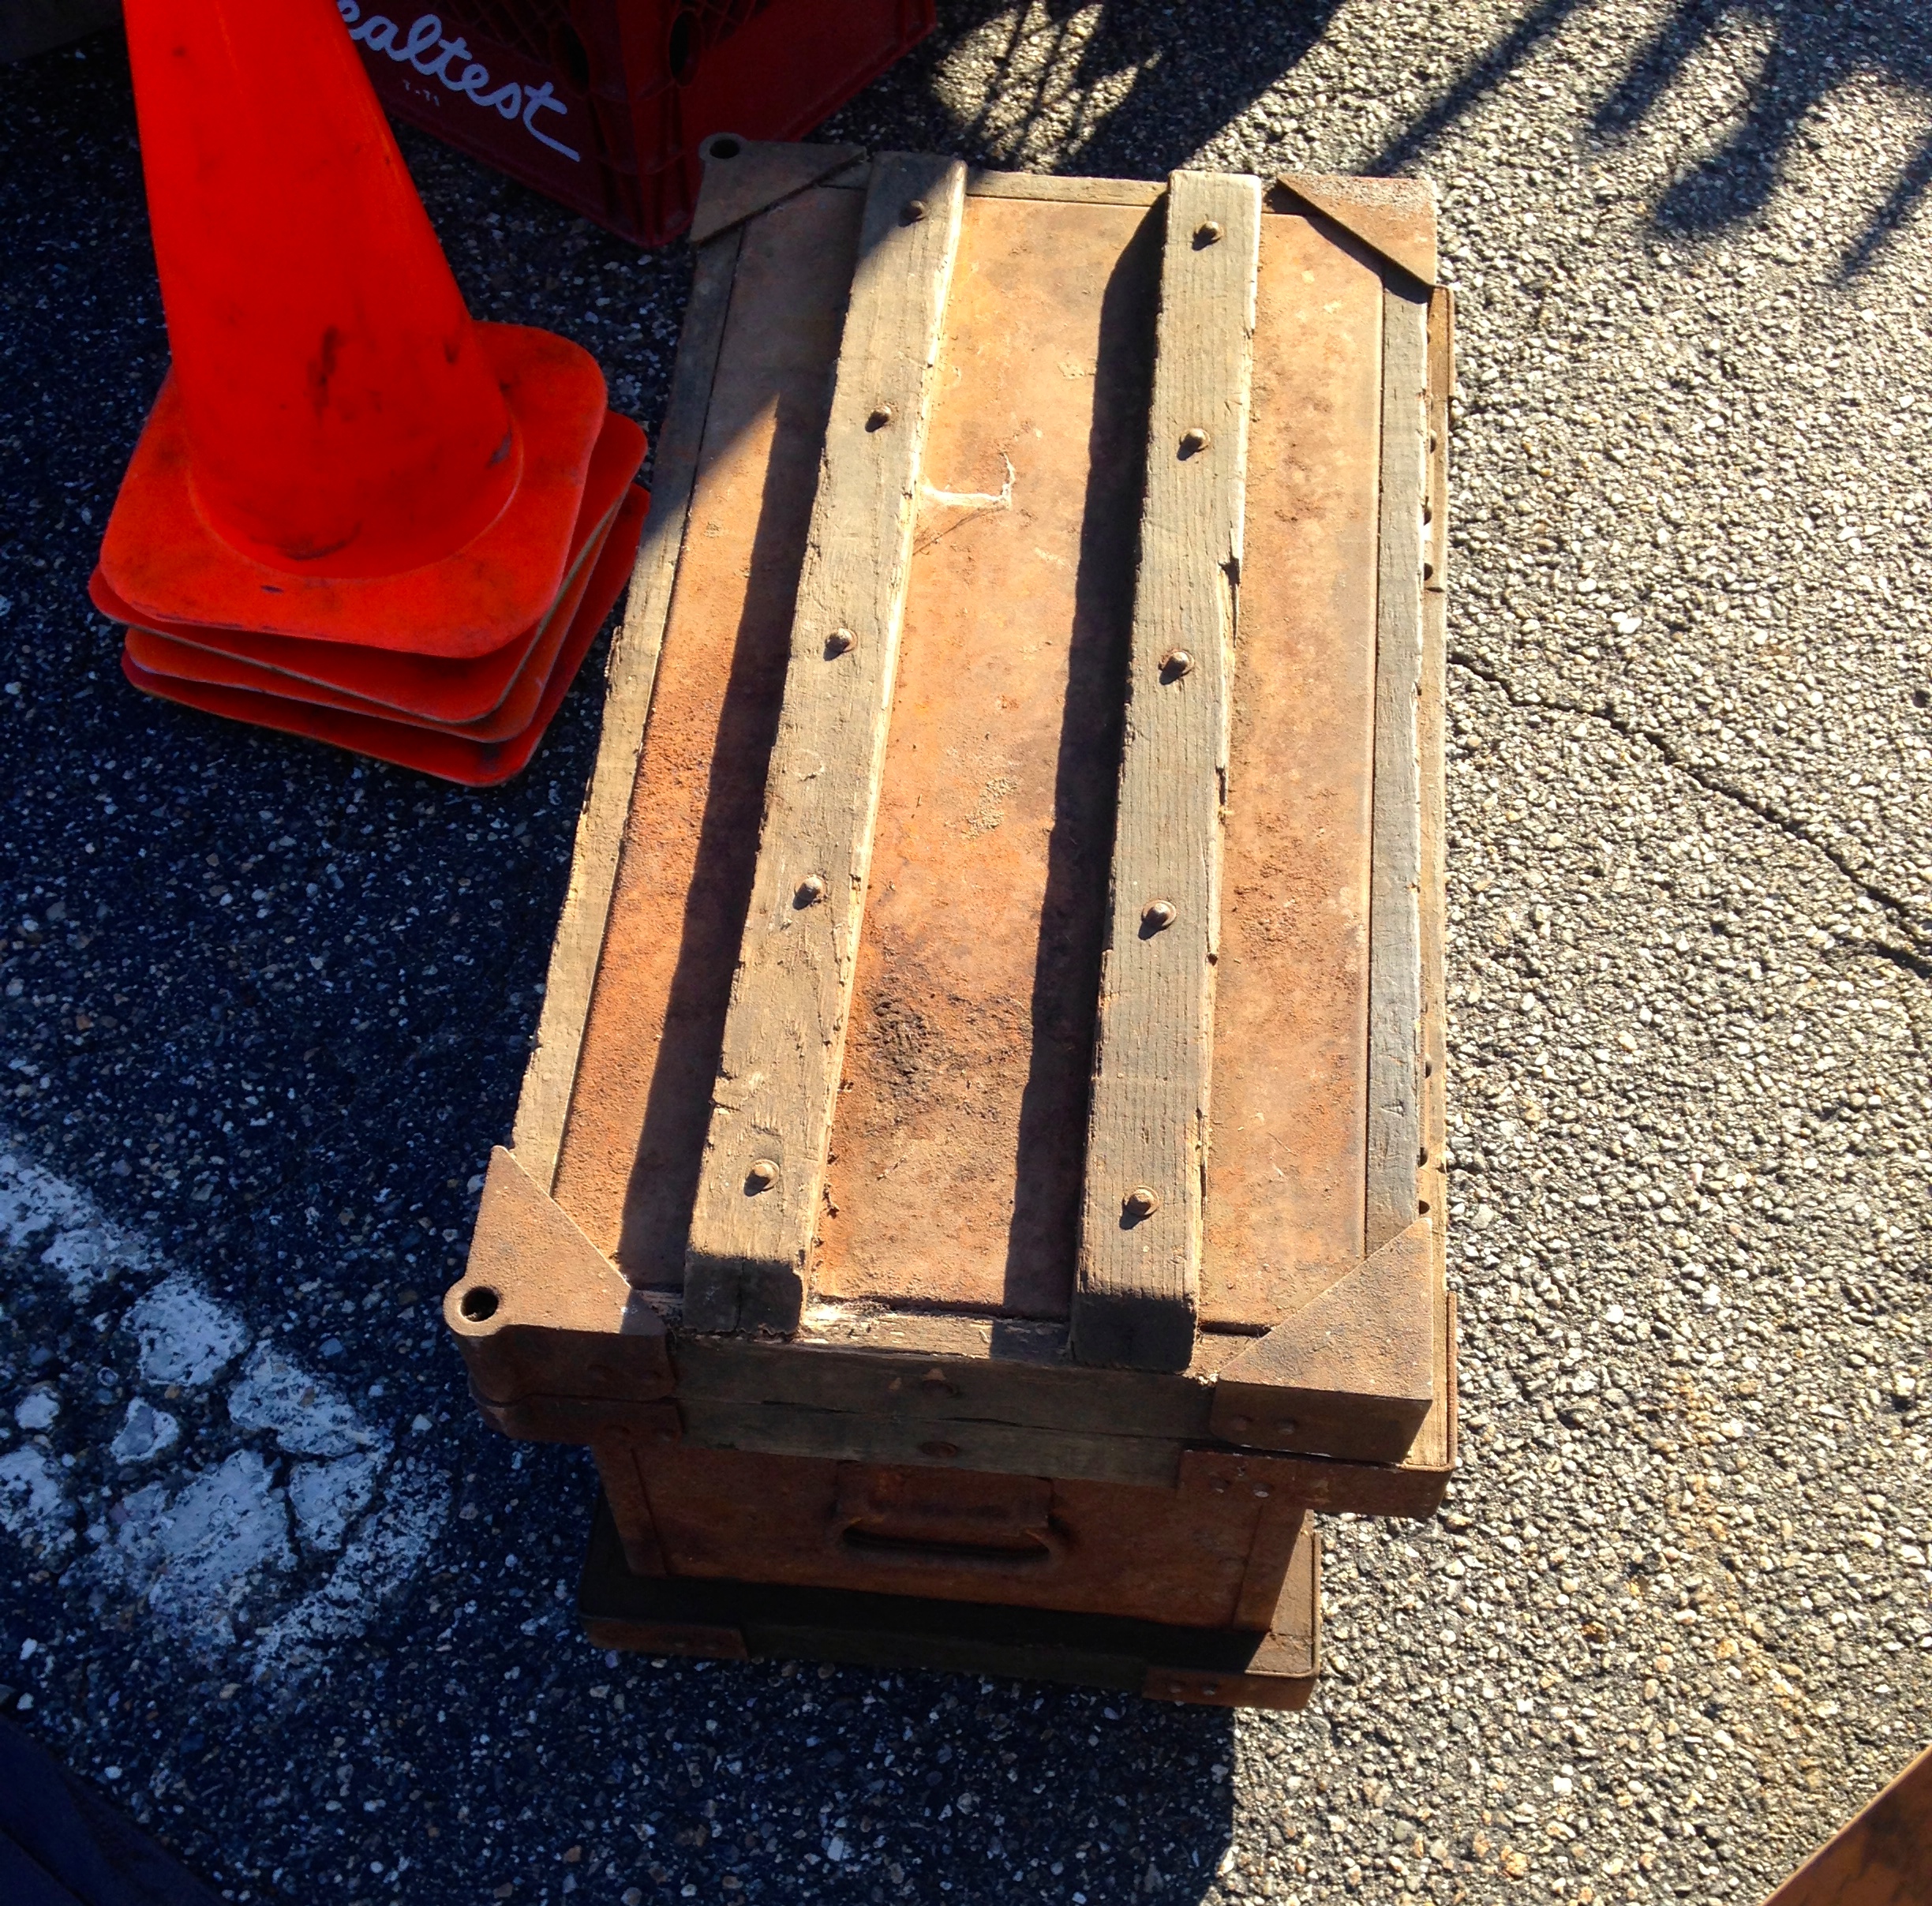
Metal lined chest
This very utilitarian chest was largely made of heavy metal sheets.
Outside of metal lined and reinforced chest
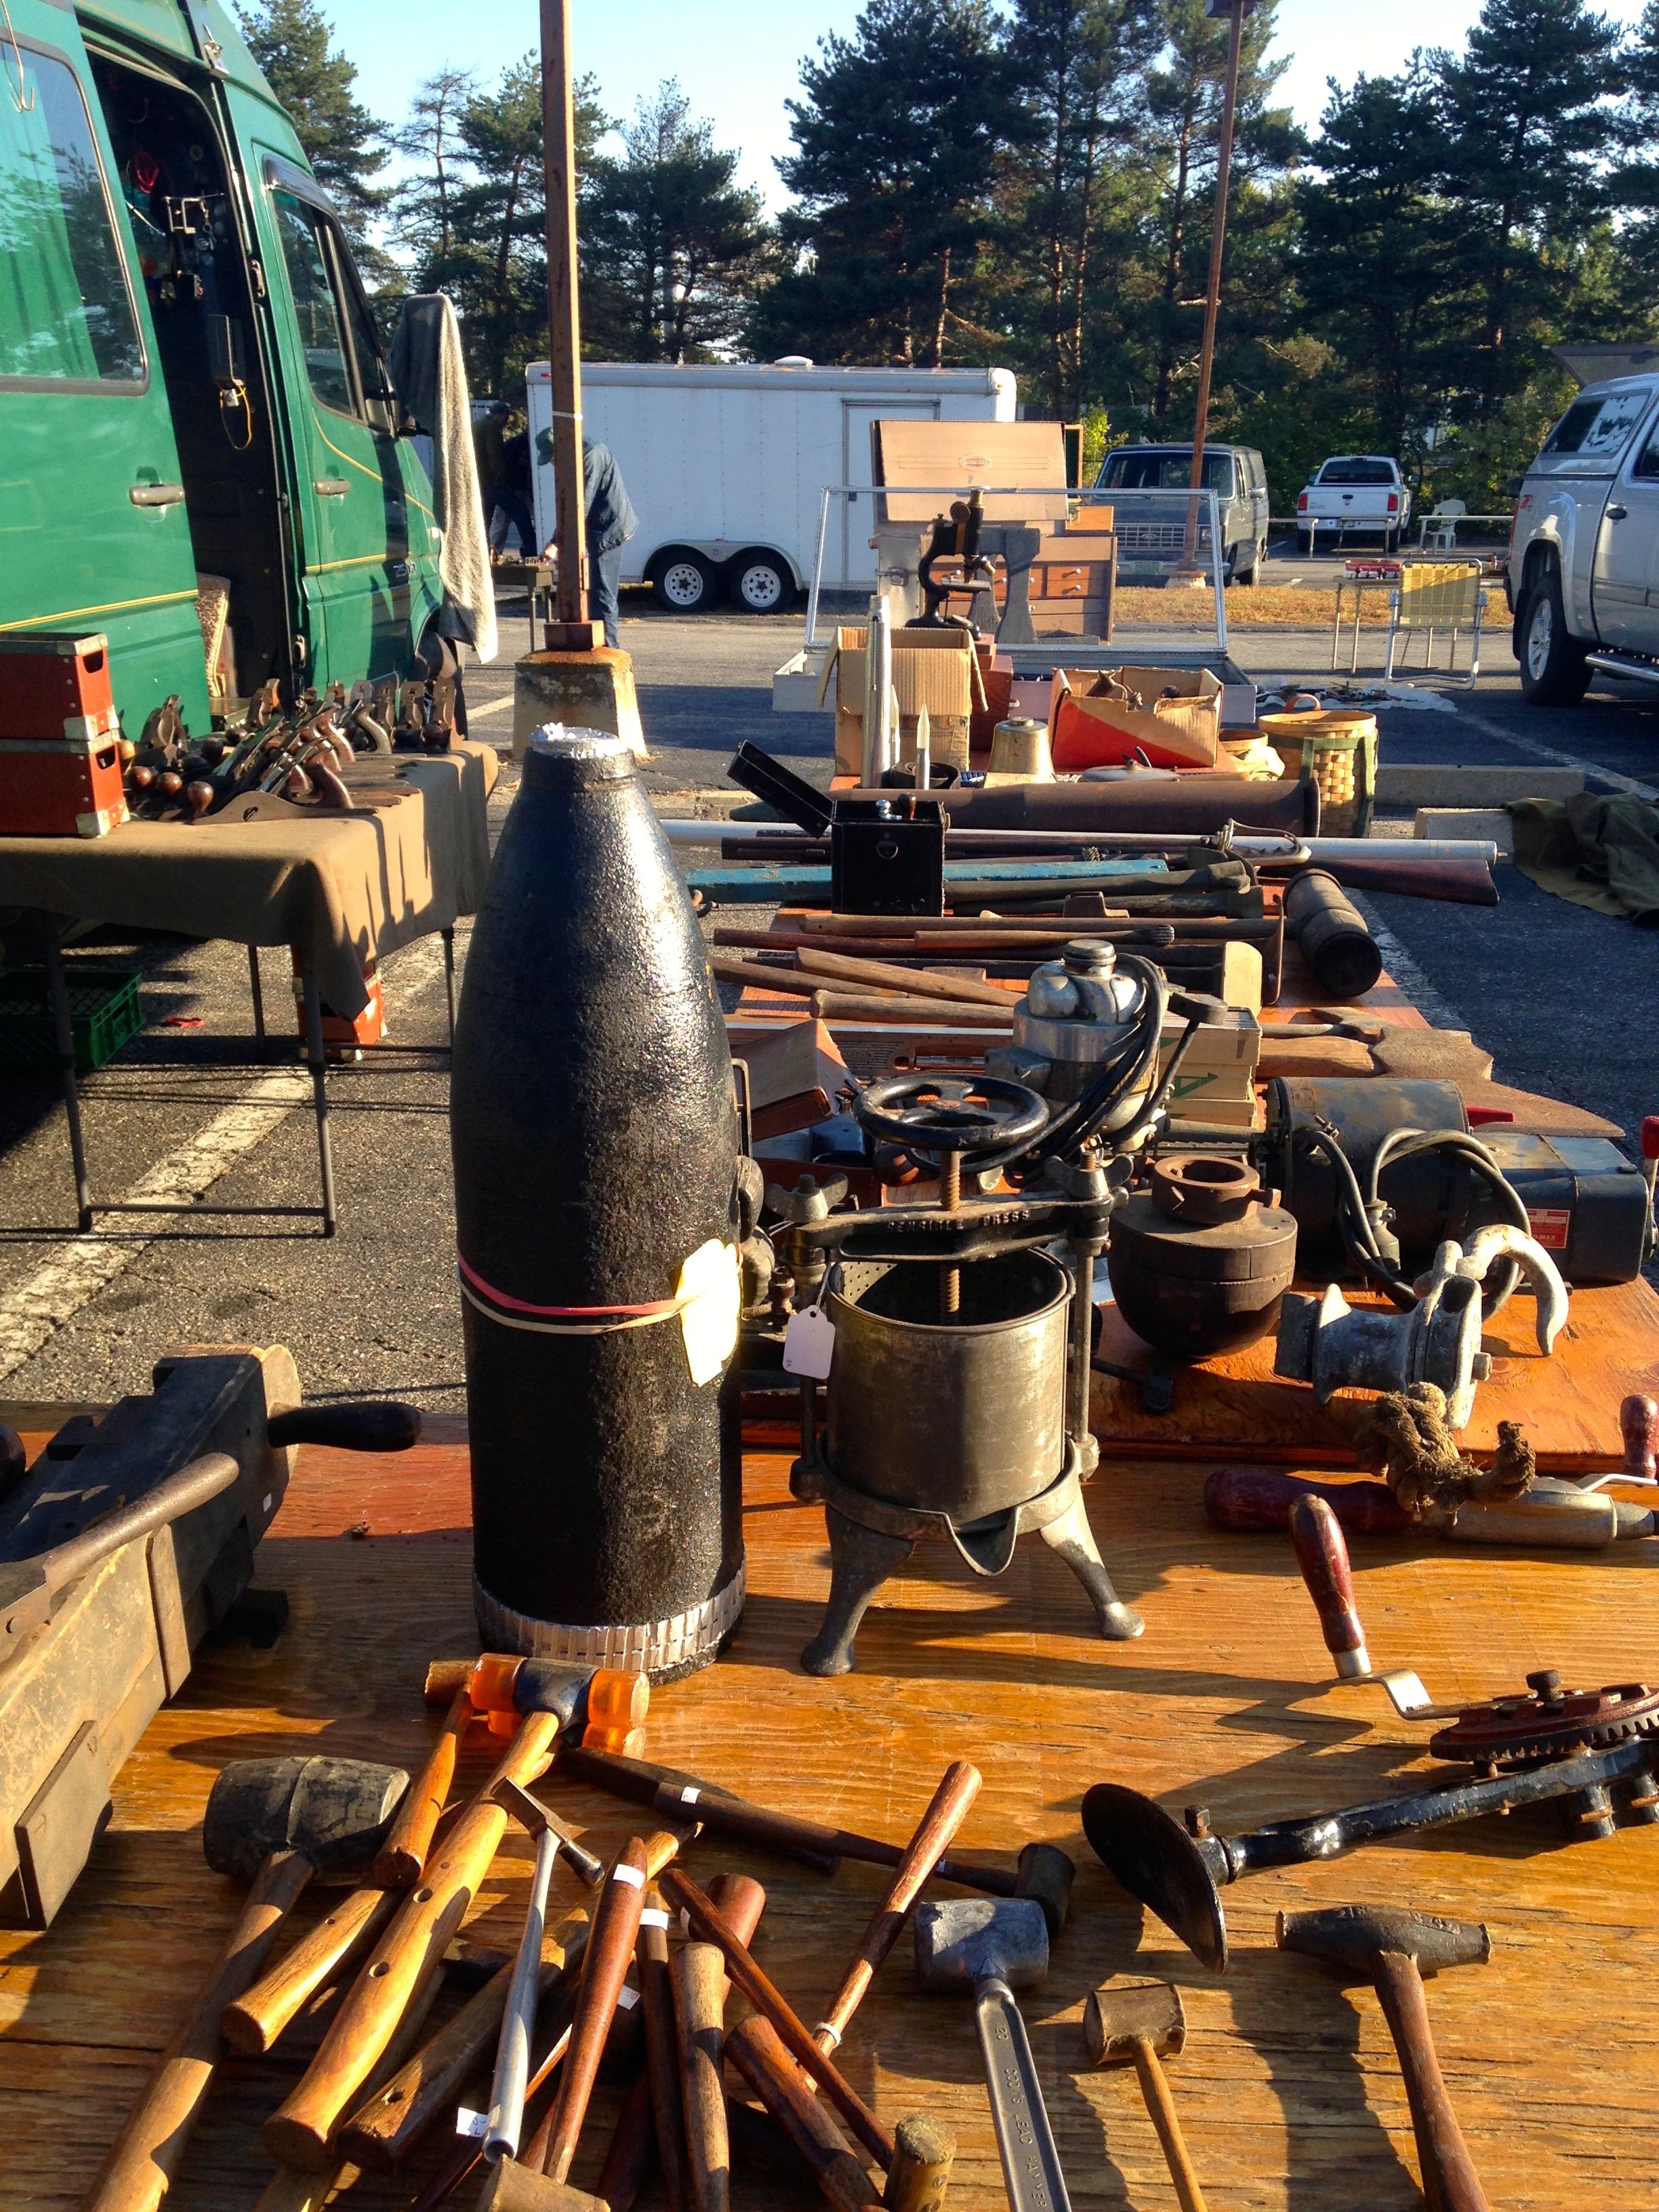
And for the tool collector who has everything, why not pick up some giant metal shell casing, or a paint mill. The latter I did kind of want…
Everything from massive shell casings to paint mills
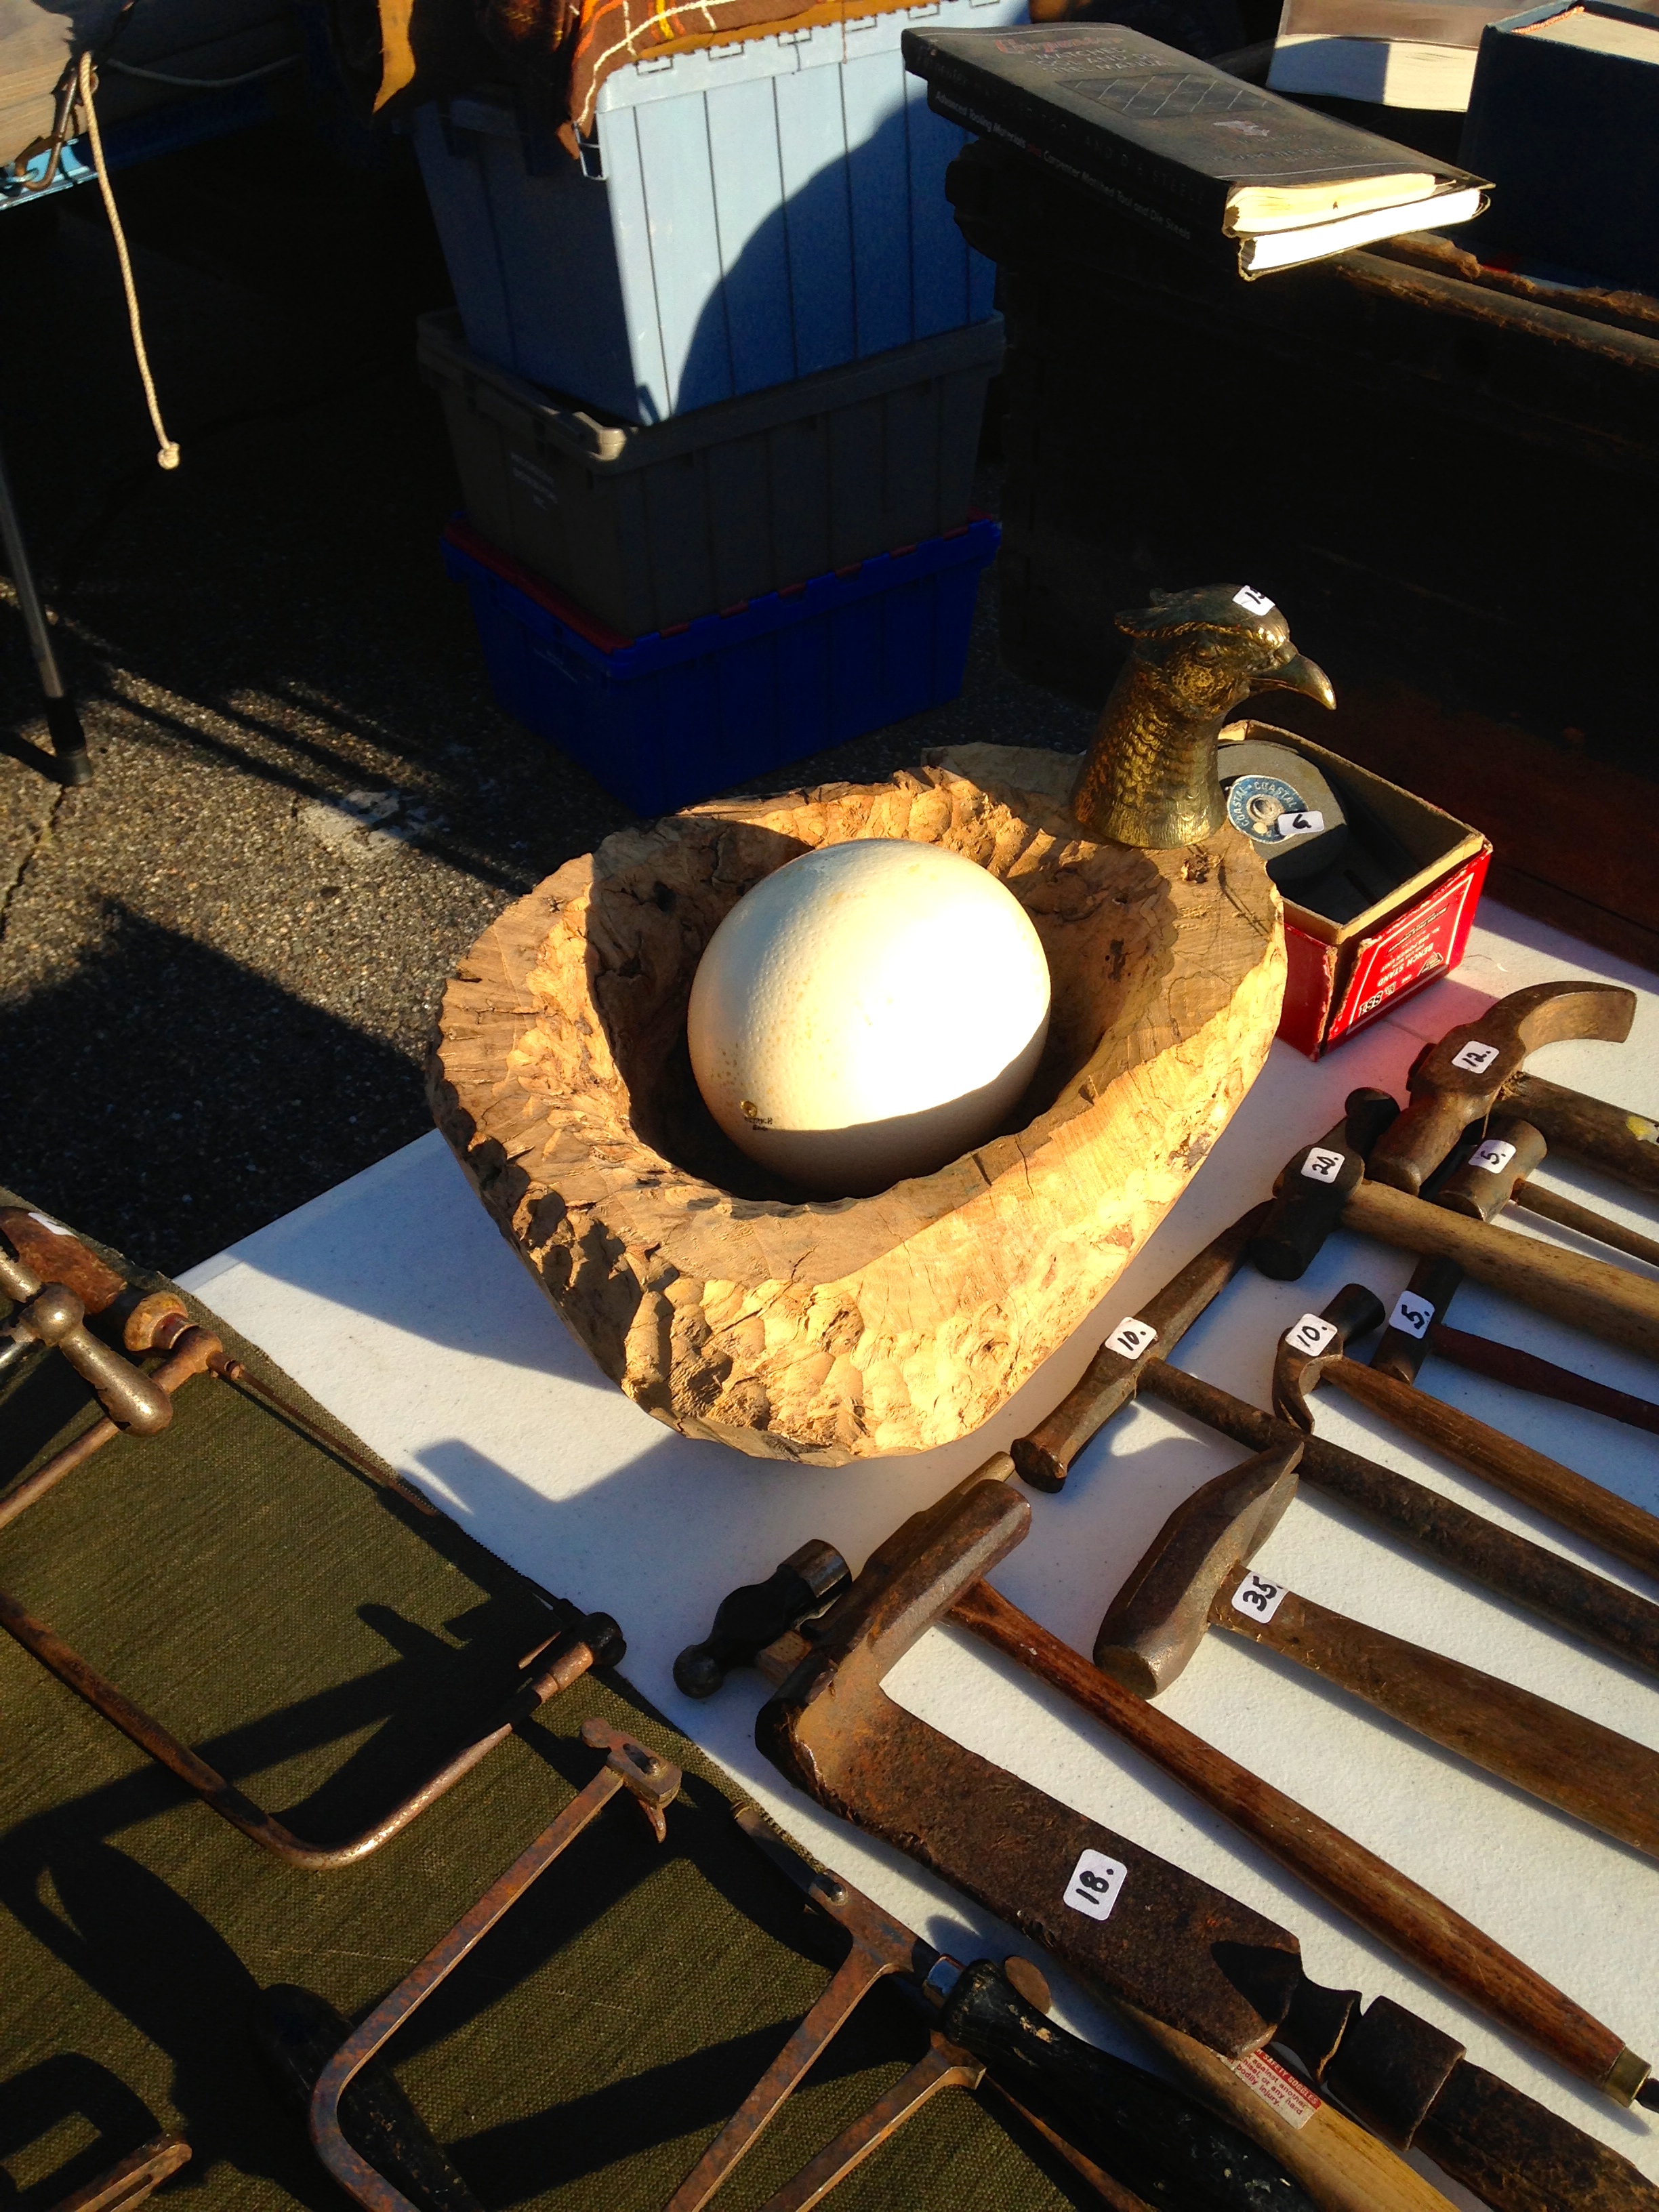
Or maybe a carved golden goose?
The golden goose?
Friday morning with the auction in full swing you’ll find and even wider array of vendors selling their wares.
Friday morning, even more vendors
Along with some of the lots that are coming out of the auction.
Tool chests and levels
This year wooden levels seemed to pop up a lot.
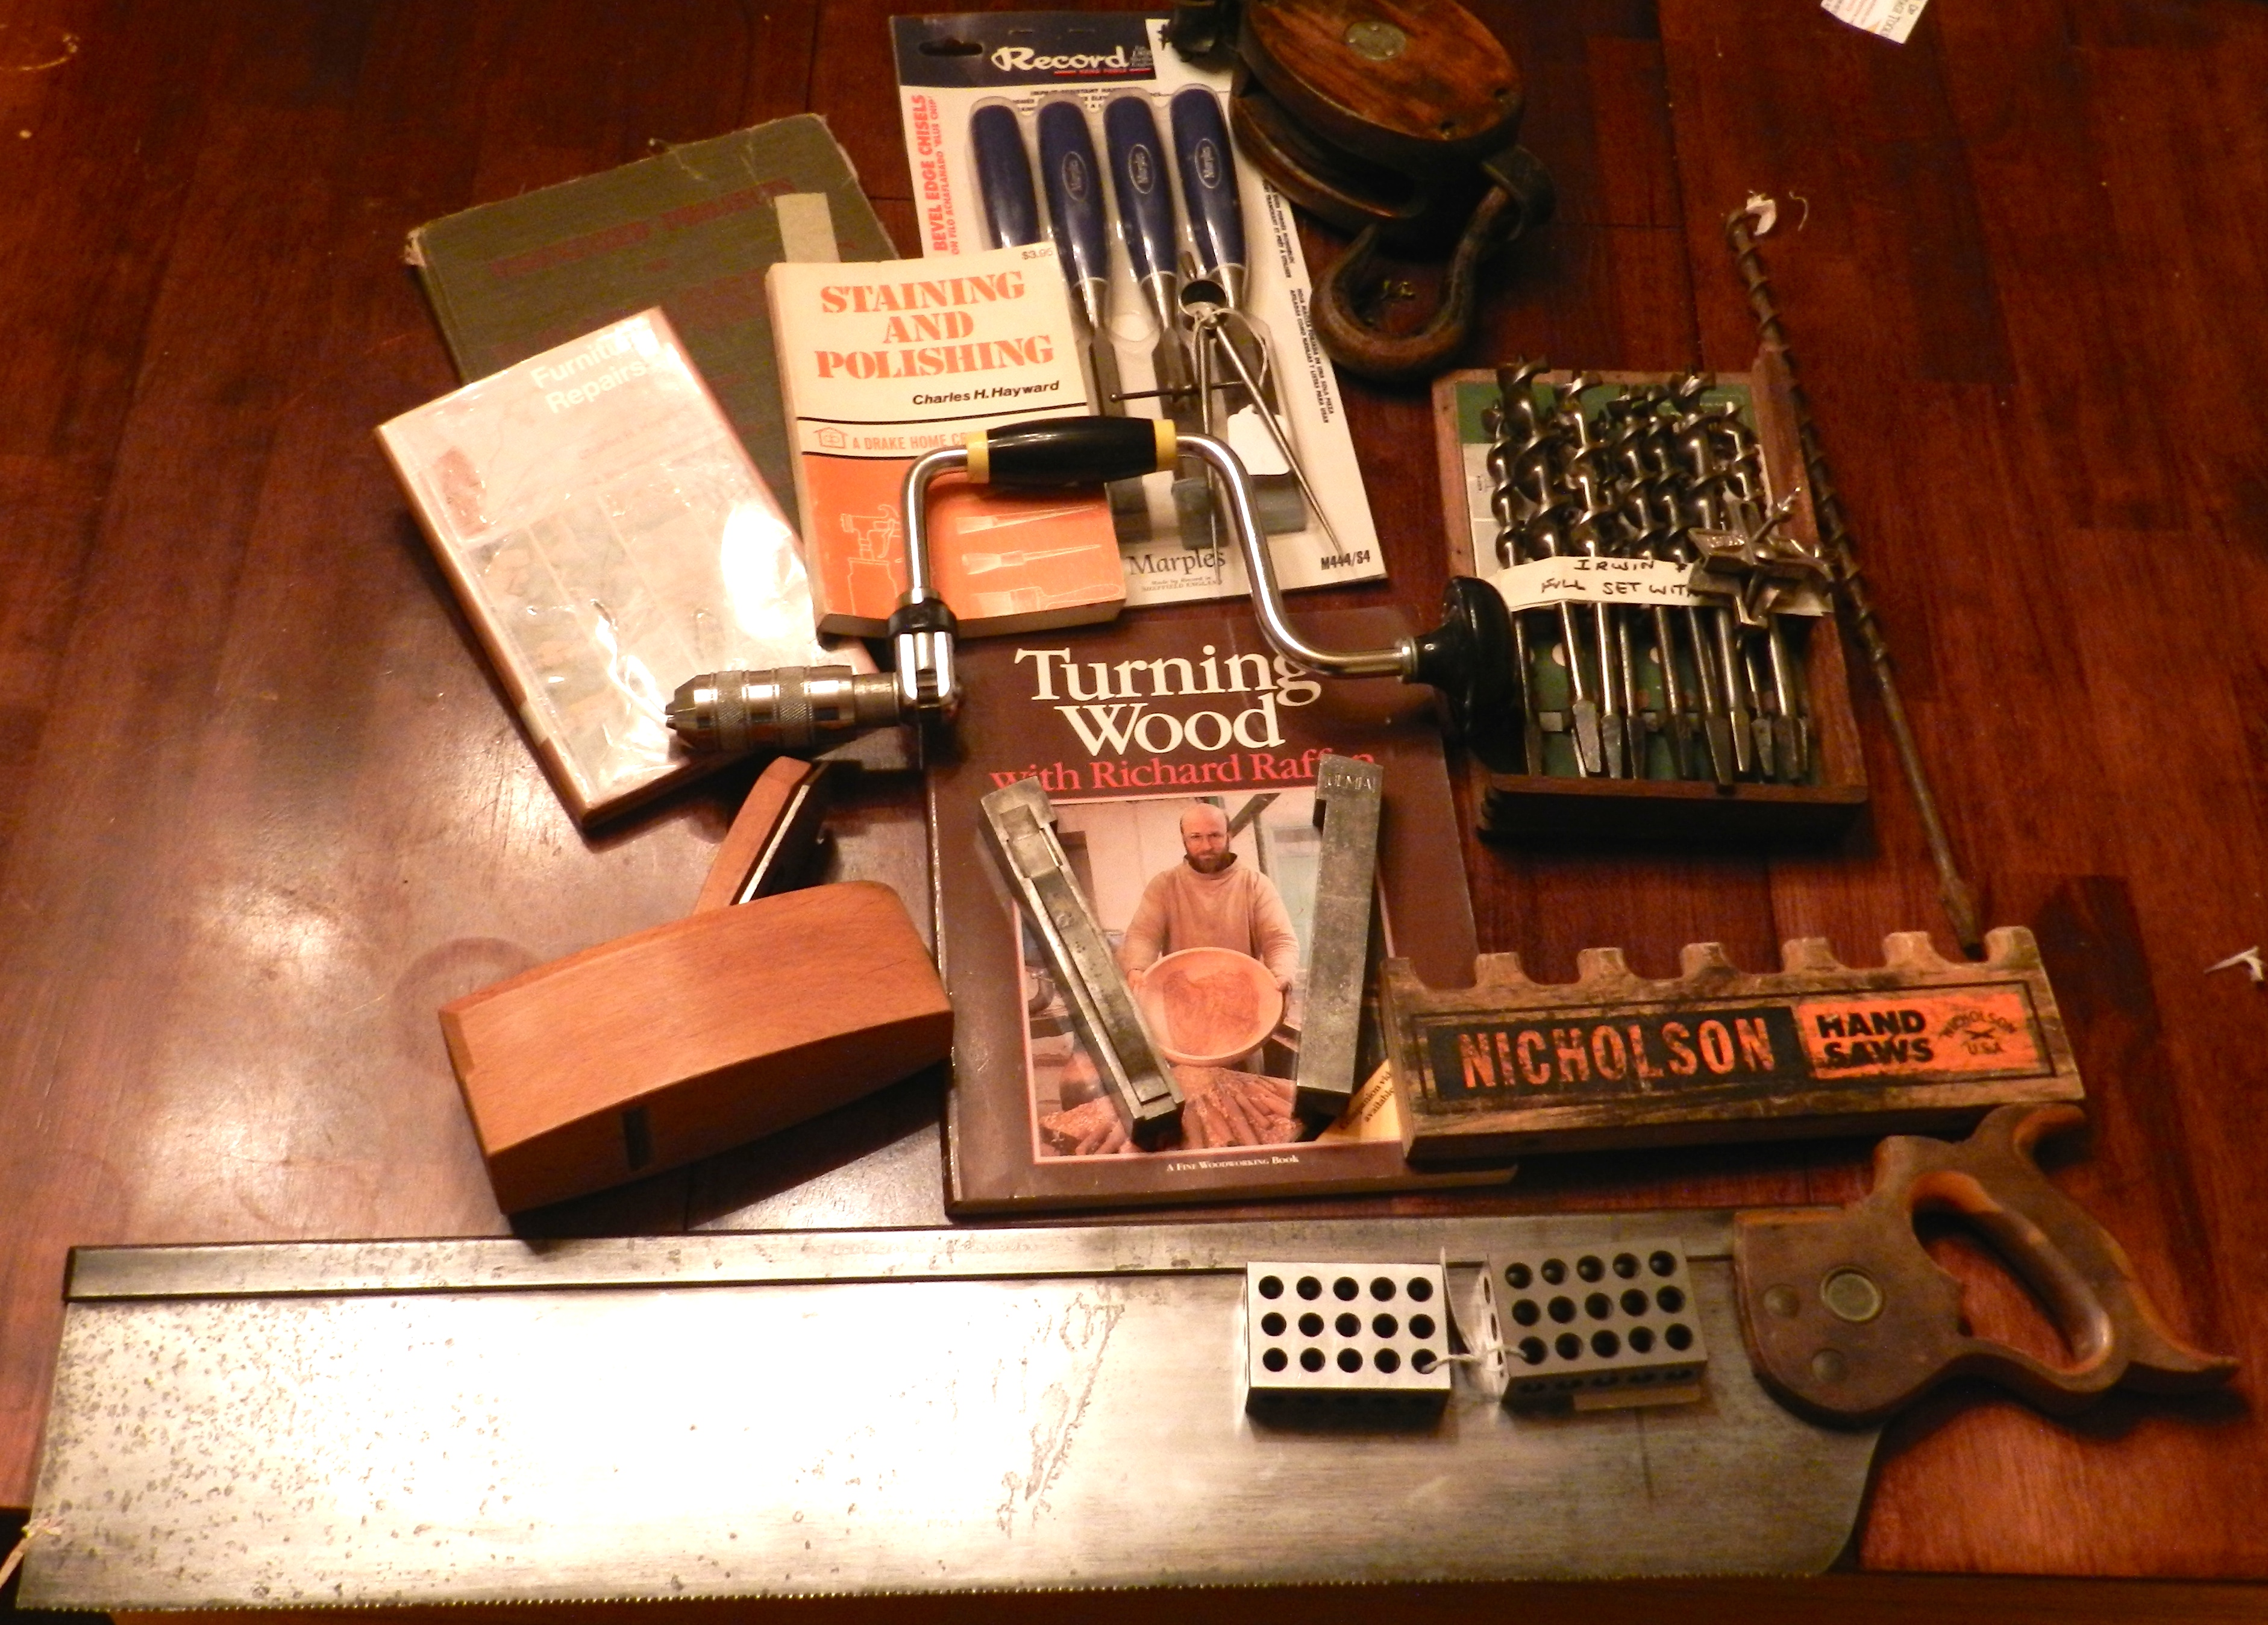
My finds
And of course, what did I come home with this year? I did pretty good this year, got some nice items and didn’t spend too much. I bought a nice full set of Irwin auger bits — we’ll see how they compare to the Russell Jennings pattern bits I bought last year. A nice in the package Marples blue chip chisel set (The ones that were still made in the UK by Record) — they’ll make a nice set of travel chisels and/or for the classroom. A few old books including Charles Hayward’s ‘Furniture Repair’, and ‘Staining and Polishing’, Wood Turning with Richard Raffan, and an interesting book from the 1940s with a Sloyd-ish feel called ‘Visualized Projects in Woodworking’ by J.I. Sowers. A nice Stanley English 4 ratcheting jaw bit brace. A nice big redirect block to use with my gin pole. A pair of machinists 1-2-3 blocks. A Nicholson Saw Display. Pair of Starrett Dividers. Pair of Ulmia Bench Dogs. A real nice E.C.E. Coffin/Smoothing plane. And a nice 5″ deep 28″ long Atkins mitre box saw to go with the Stanley mitre box I bought in April — at the time it came with a 6″ deep Disston saw that worked fine by was a bit too tall for my liking, so this was a better fit.
Time to get all this stuff out into the shop before my wife kills me and get back to work on finishing a crib I owe a certain newborn.
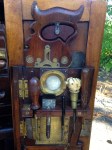
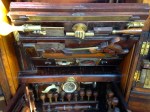
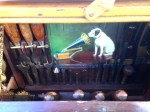
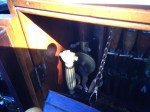
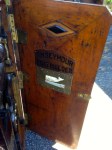
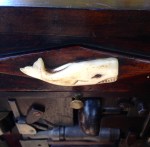
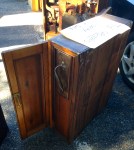
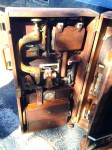
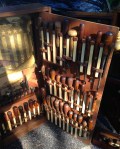
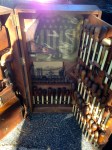
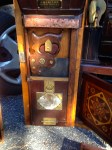
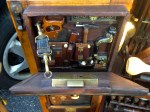
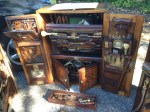
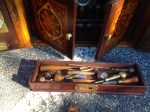
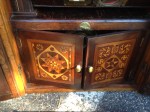
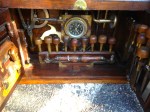
At the bi-annual Live Free or Die Tool Show and Auction in Nashua NH one of my favorite activities is look at all the unusual stuff folks have for sale. This year some of the most interesting items were not for sale. Behind a table of tools for sale and a framed photo of the Studley Tool Cabinet, Bill Garrett of Sparrowbush NY had a trio of tool cabinets each carefully fitted to hold a variety of unusual tools. From talking to Bill, he started with some regular tool cabinets and fitted them out to hold a variety of interesting tools from his collection. Clearly inspired by H.O. Studley’s work, Bill incorporated piano keys, tools racks, tills, unusual hardware and period details to fit in an impressive number of tools into a modest space. From carved ivory whales and fists, to highly detailed miniatures, to piano keys, small brass locks, an 1804 coin, period photos and advertisements the cabinets are a unique creation. I had a great time talking to Bill and poking around in all three cabinets. Please check out the photo gallery below and you might also find some inspiration for some hidden compartments in your own tool cabinet.
Take care,
-Bill
Bill Garrett with his tool cabinets
Interesting saw till
Great mixture of interesting tools and hardware
The RCA Dog likes to hear the sounds of woodworking tools
That fist is on the handle of an unusual saw
Tool Cabinets for Display, Not for Sale
R.M. Seymour Boatbuilder
Ivory Whale
Back of the right cabinet
Back of the center cabinet
Left cabinet left door
Left cabinet. Interesting crate hammers and small saws
Piano Keys and Chisels
Left Cabinet
Interior of the left cabinet
Another saw till
Very Detailed Miniatures
Middle cabinet
Till
Inlaid door
Behind the center cabinet doors
Bill Garrett and his tool cabinets
A Joiner's Guide To Traditional Woodworking and Preservation