Sloyd Workbench — Larsson Adjustable Workbench

Hello My Fellow Sloyders,

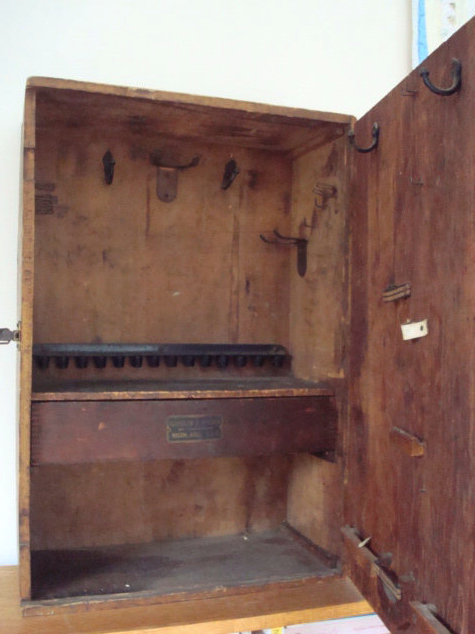
Recently we’ve talked a bit about the Sloyd Tool Cabinet and it’s contents — but with all these tools on hand and a book full of models to build, where do you actually build them?

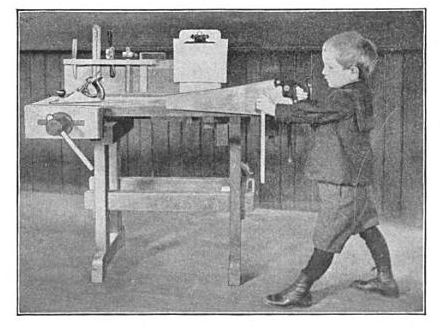
I’d like to introduce you to a slightly more famous cousin to the Sloyd Tool Cabinet — the ‘Larsson Improved Adjustable Workbench’ or more commonly known as a ‘Sloyd Bench’.

Larsson Adjustable Bench from November 1908 Sloyd Record

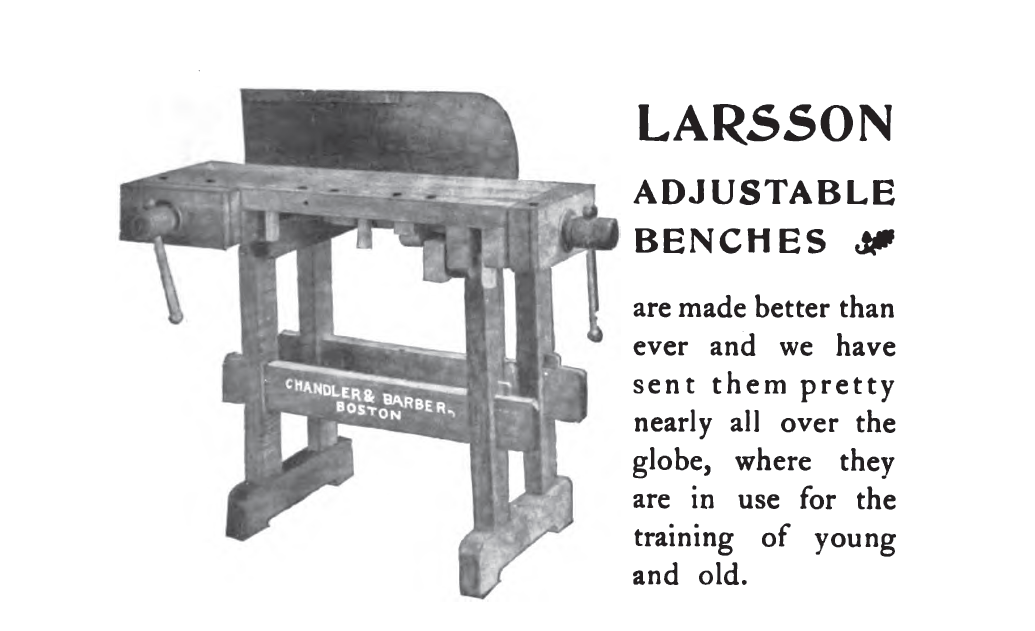
This workbench was designed by Gustaf Larsson the principal of the Boston Sloyd School in the late 19th and early 20th centuries and manufactured by Chandler and Barber to Larsson’s specifications.  The bench was the result of Larsson’s experiences at Naas, at the Boston Sloyd School and at  the North Bennet Street Industrial School. It draws upon design elements found in traditional continental European benches but was scaled to the needs of a classroom setting and had to accommodate both children and adults.

The Sloyd Record: Issue No.1 January 1904 -- Boston Sloyd School Alumni Newsletter
The Sloyd Record: Issue No.1 January 1904 — Boston Sloyd School Alumni Newsletter

How do we know so much about this bench?

In some ways it is fairly well documented in old tool catalogs, like those of Chandler and Barber — the premier supplier of ‘Sloyd System’ benches, tools and supplies and in other advertising. In addition, a fair number of these benches still survive which is a testament to how well they were built and how many of them were produced. While the North Bennet Street Industrial School catered to training immigrants and younger students in its earliest days, the Boston Sloyd School focused on teaching the teachers of Sloyd. Teachers would come to the school, learn how to teach Sloyd to students and then go back to their municipalities to teach Sloyd to the local population. So with diplomas in hand these new teachers often wanted to order the same or very similar setups to what they learned on. This was the genesis of many manual training programs in the United States.

Chandler and Barber Sloyd System Supplier Ad from January 1904 Sloyd Record

Above you can see one of the many ads Chandler and Barber took out in Sloyd related publications — in this case the ‘Sloyd Record’ which was the alumni newsletter of the Boston Sloyd School. Chandler and Barber seemed to be the most prolific dealer in this space, but just like today there was a lot of competition. You’ll see ads from Hammacher Schlemmer (they used to specialize mostly in tools and hardware back then), lumber dealers, publishers and other similar companies trying to get a piece of the apparently semi-lucrative Sloyd pie.

Buy the best -- buy a Larsson Bench from Chandler and Barber
Buy the best — buy a Larsson Bench from Chandler and Barber

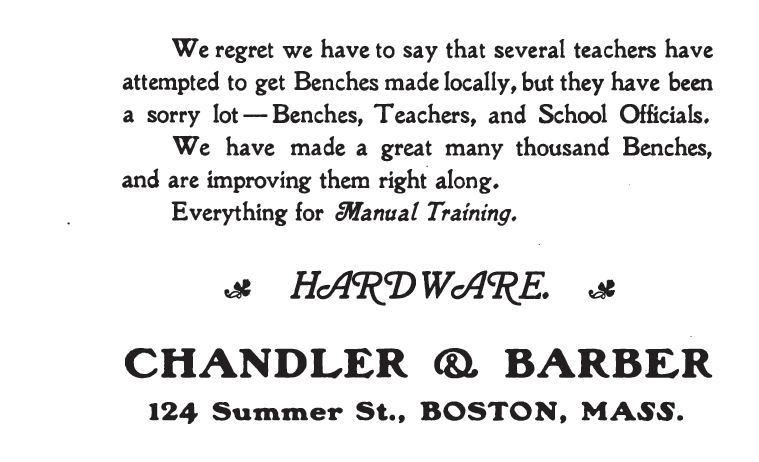
The competition got so fierce that some of the Chandler and Barber felt it was worth mentioning how others got burned trying to save a few dollars going with a competitor’s bench of inferior quality. Don’t be a part of that sorry lot…..

Larsson IMproved Adjustable Sloyd Bench as seen in 'A Textbook Of Working Models Of Sloyd' By Gustaf Larsson
Larsson Improved Adjustable Sloyd Bench as seen in ‘A Textbook Of Working Models Of Sloyd’ By Gustaf Larsson

What made this bench so special?

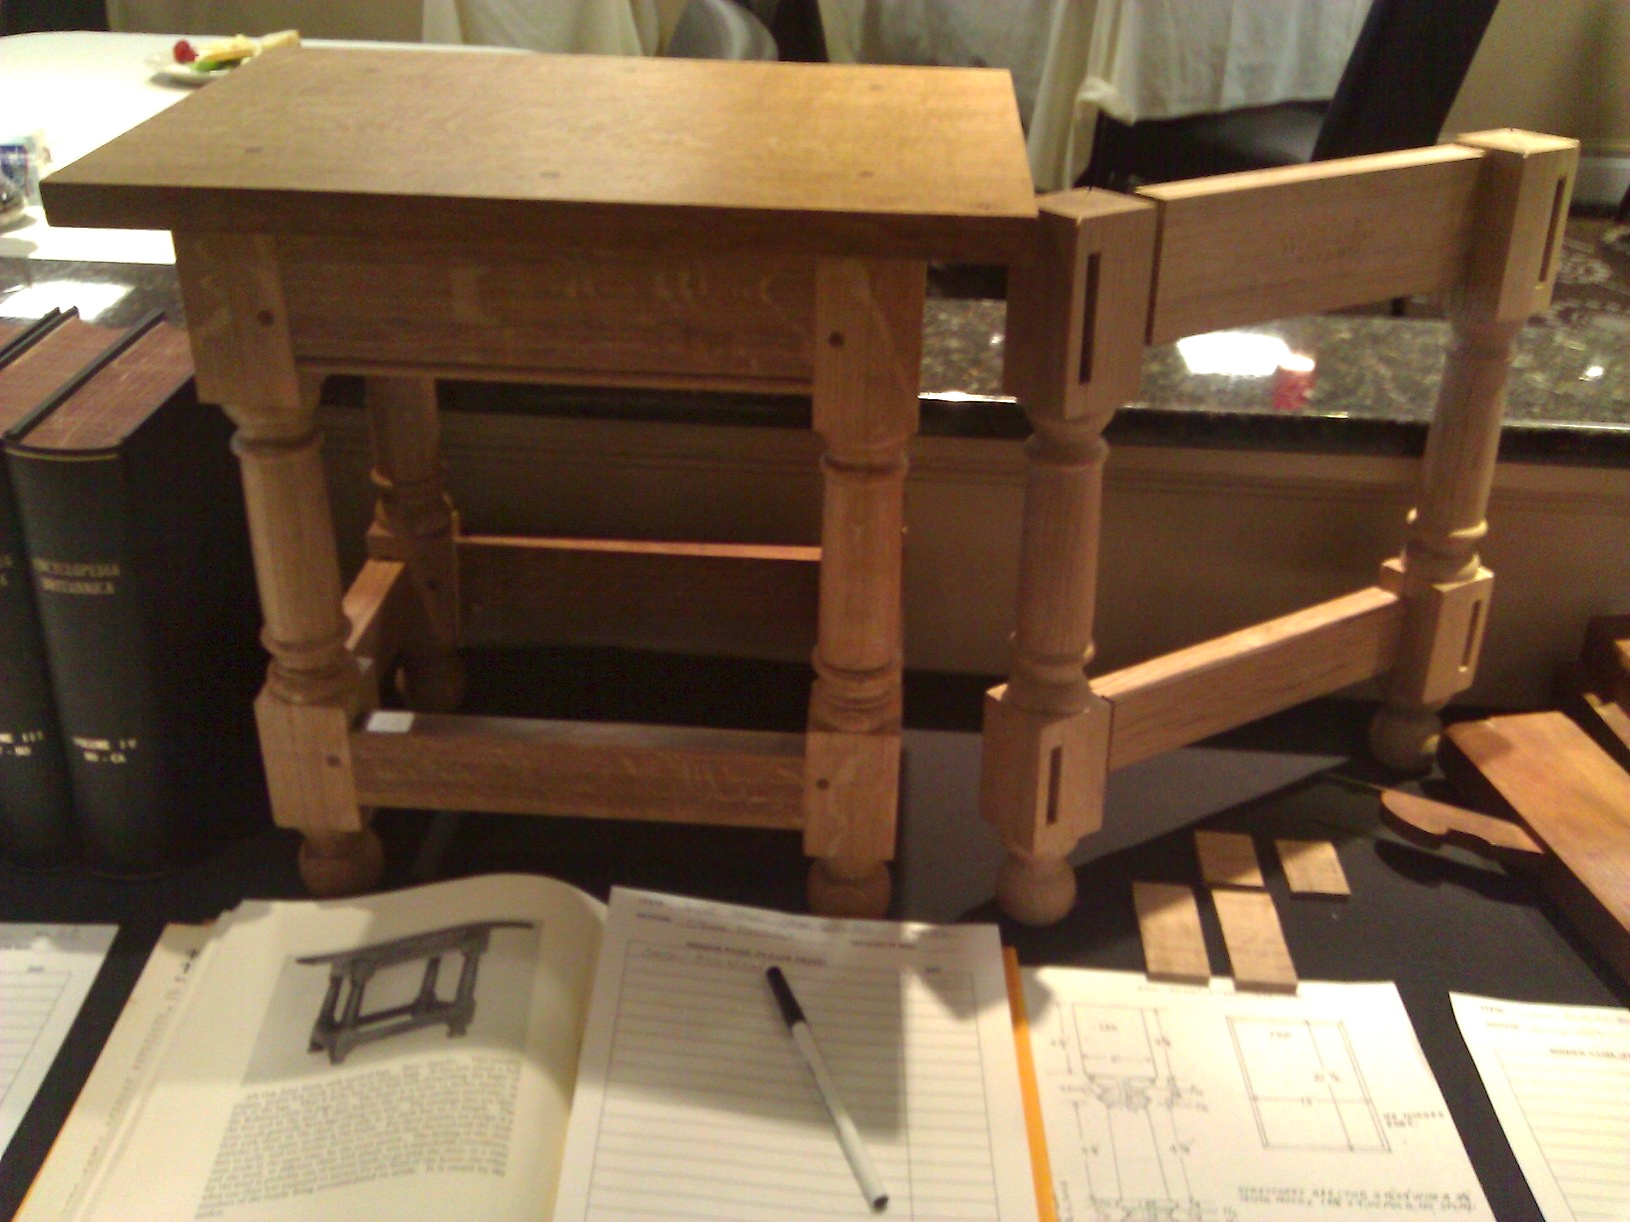
Beyond being the brand name bench associated with Sloyd pioneer Gustaf Larsson the bench did have some novel features. If you look carefully in the picture above you can see a set of hinges on the cross member of the base (near where you see the word Pat.Aplc..). Why would anyone want hinges on their bench? Essentially you could take the top of the bench off, flip up or down those blocks, re-install the bench top and be able to accommodate both children and adults in the same workspace. Over the years several models of bench were associated with Larsson’s name, including the popular No. 5 model shown here, another larger model designed for 2 students to share a workspace, and even a clamp on vise which could be used for light work when attached to a sturdy table.

Beyond being a reasonably stout bench, it could be ordered with wood or metal vise screws, a few variants of removable tool rack (which made it easy for instructors to see if all the tools were put back in their proper place and in good condition), vise and dog hole configurations and similar tweaks.

Larsson Improved Adjustable Bench as Seen on Craigslist (Thanks to Gary Roberts for the link)
Larsson Improved Adjustable Bench as Seen on Craigslist (Thanks to my friend Gary Roberts for the link)

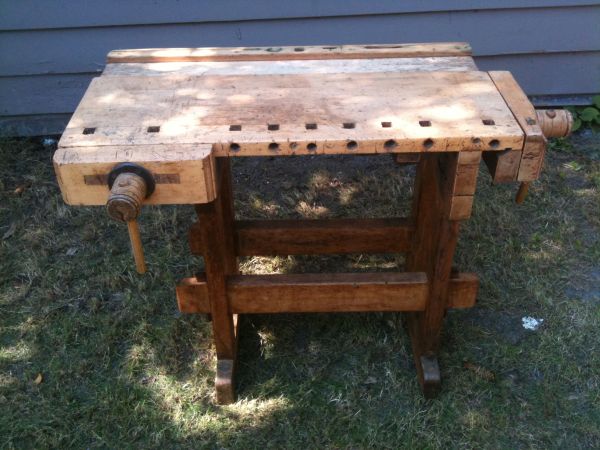
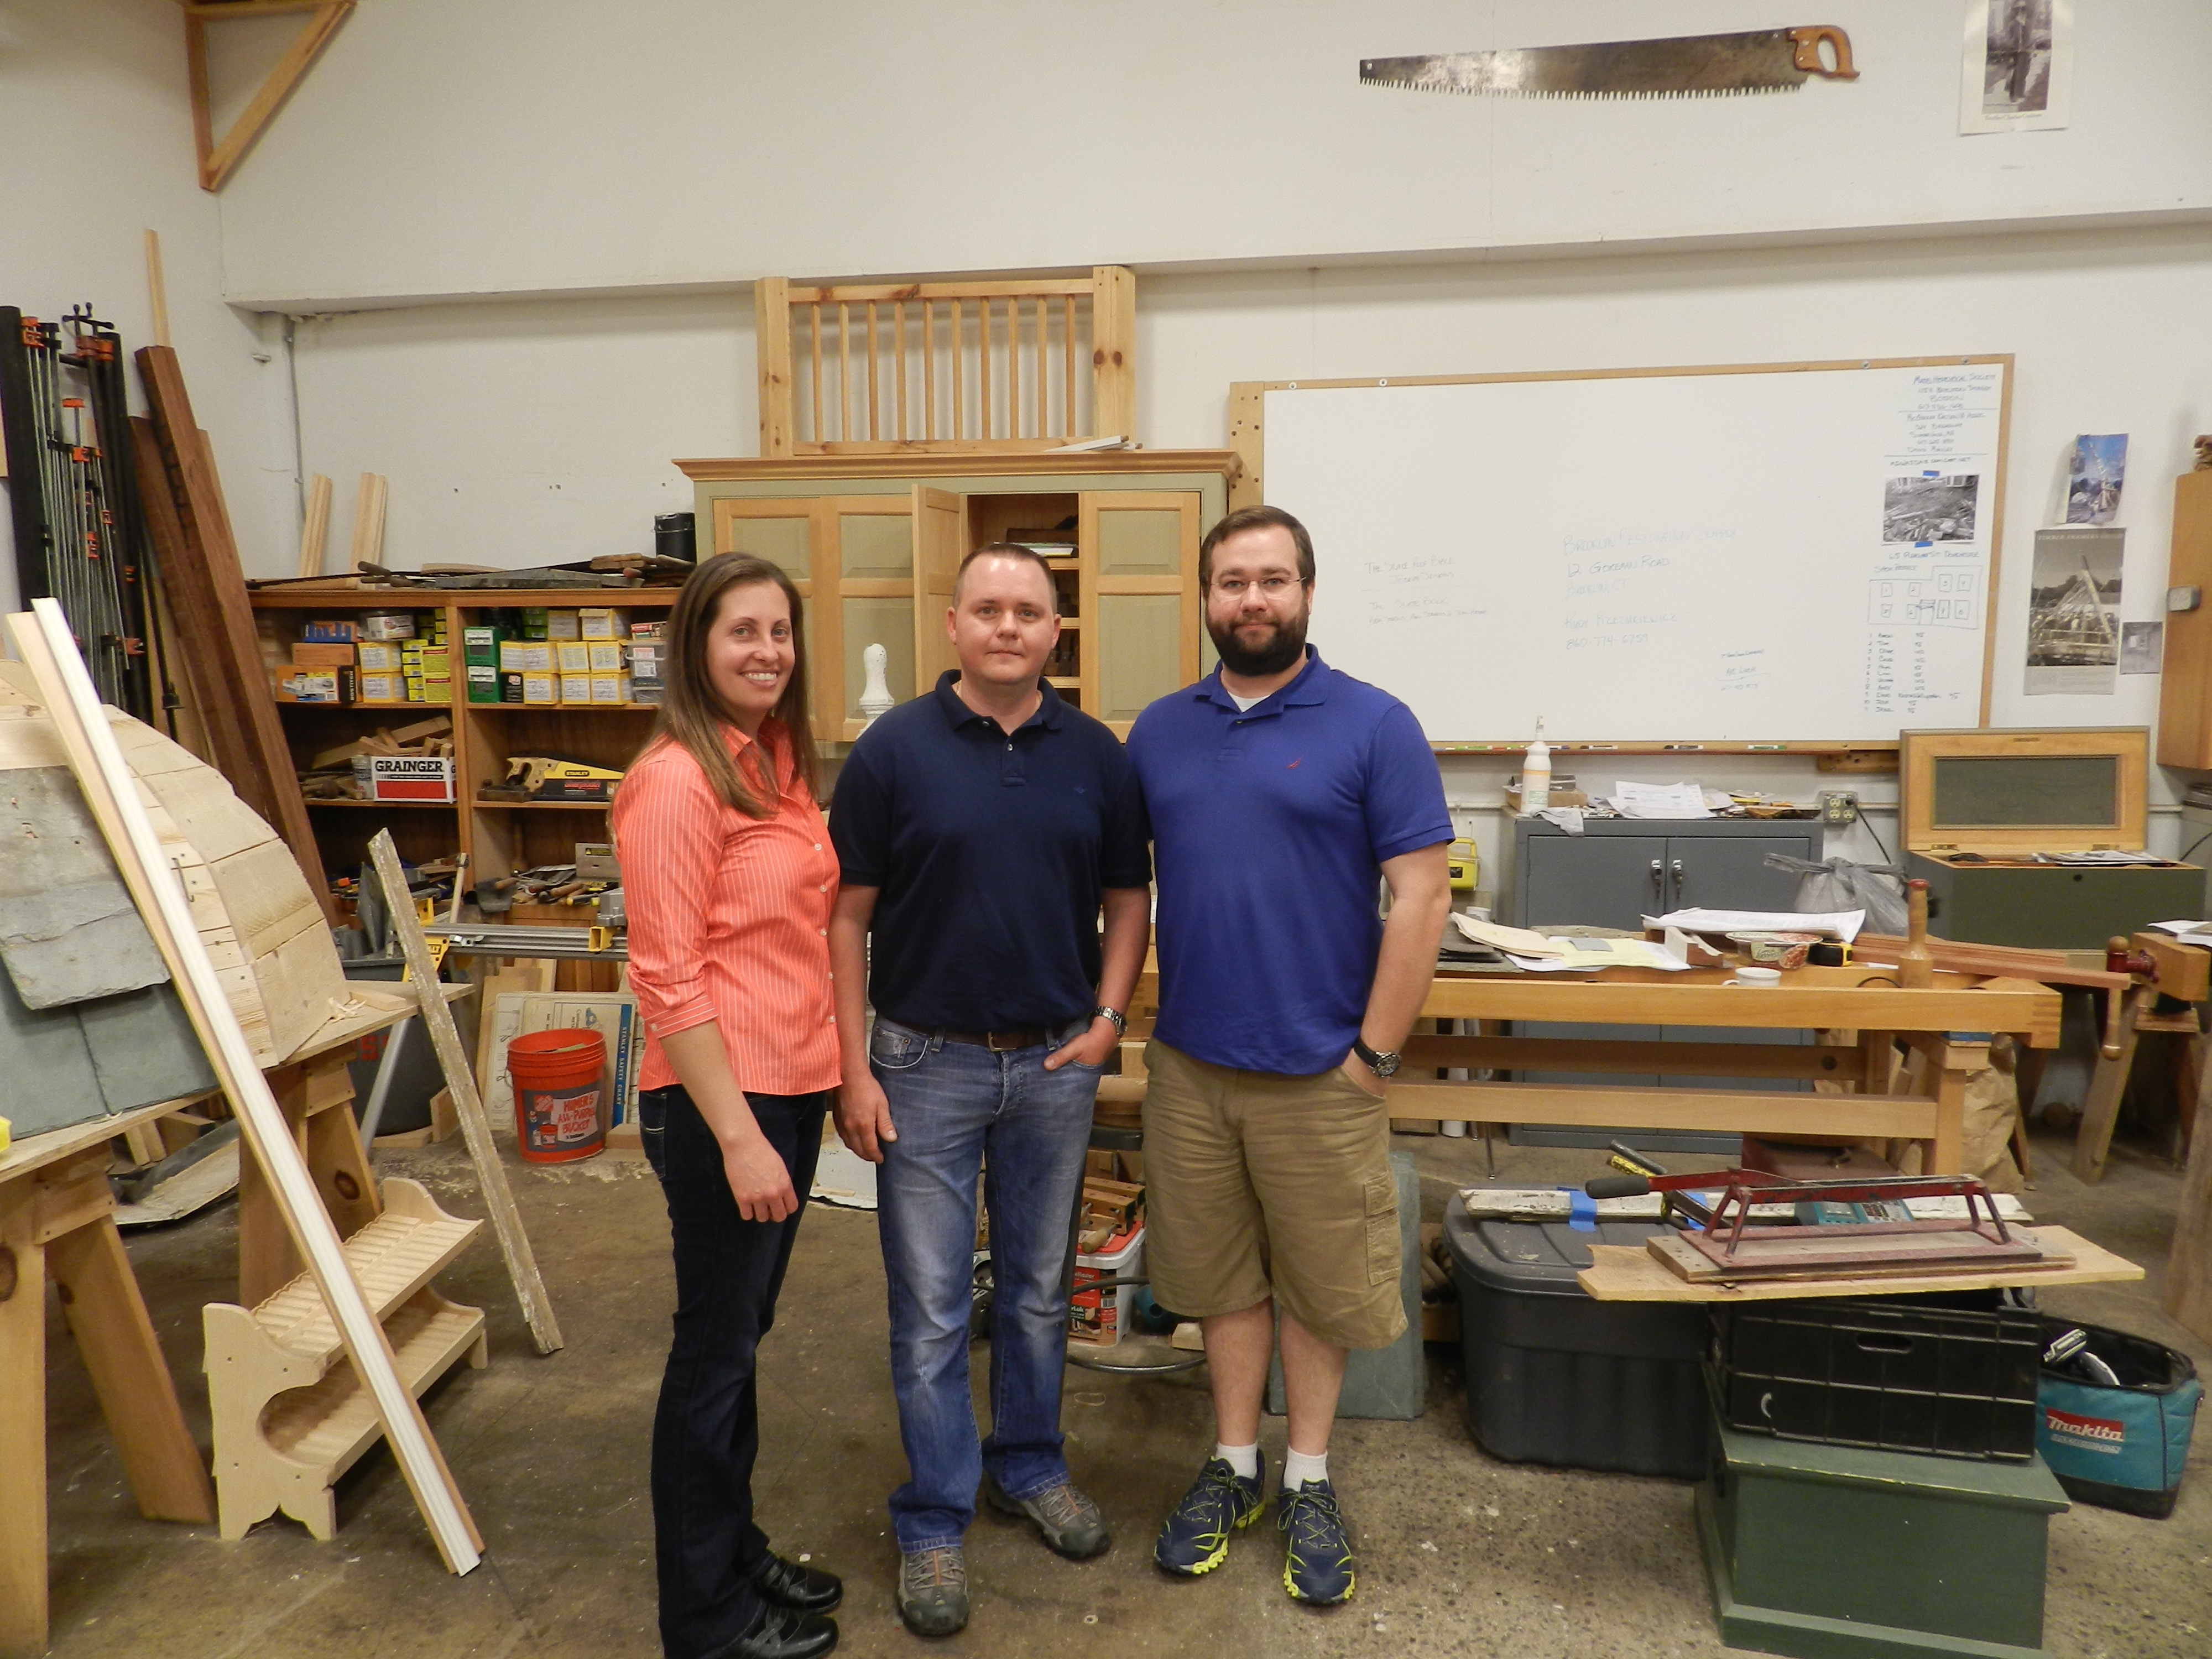
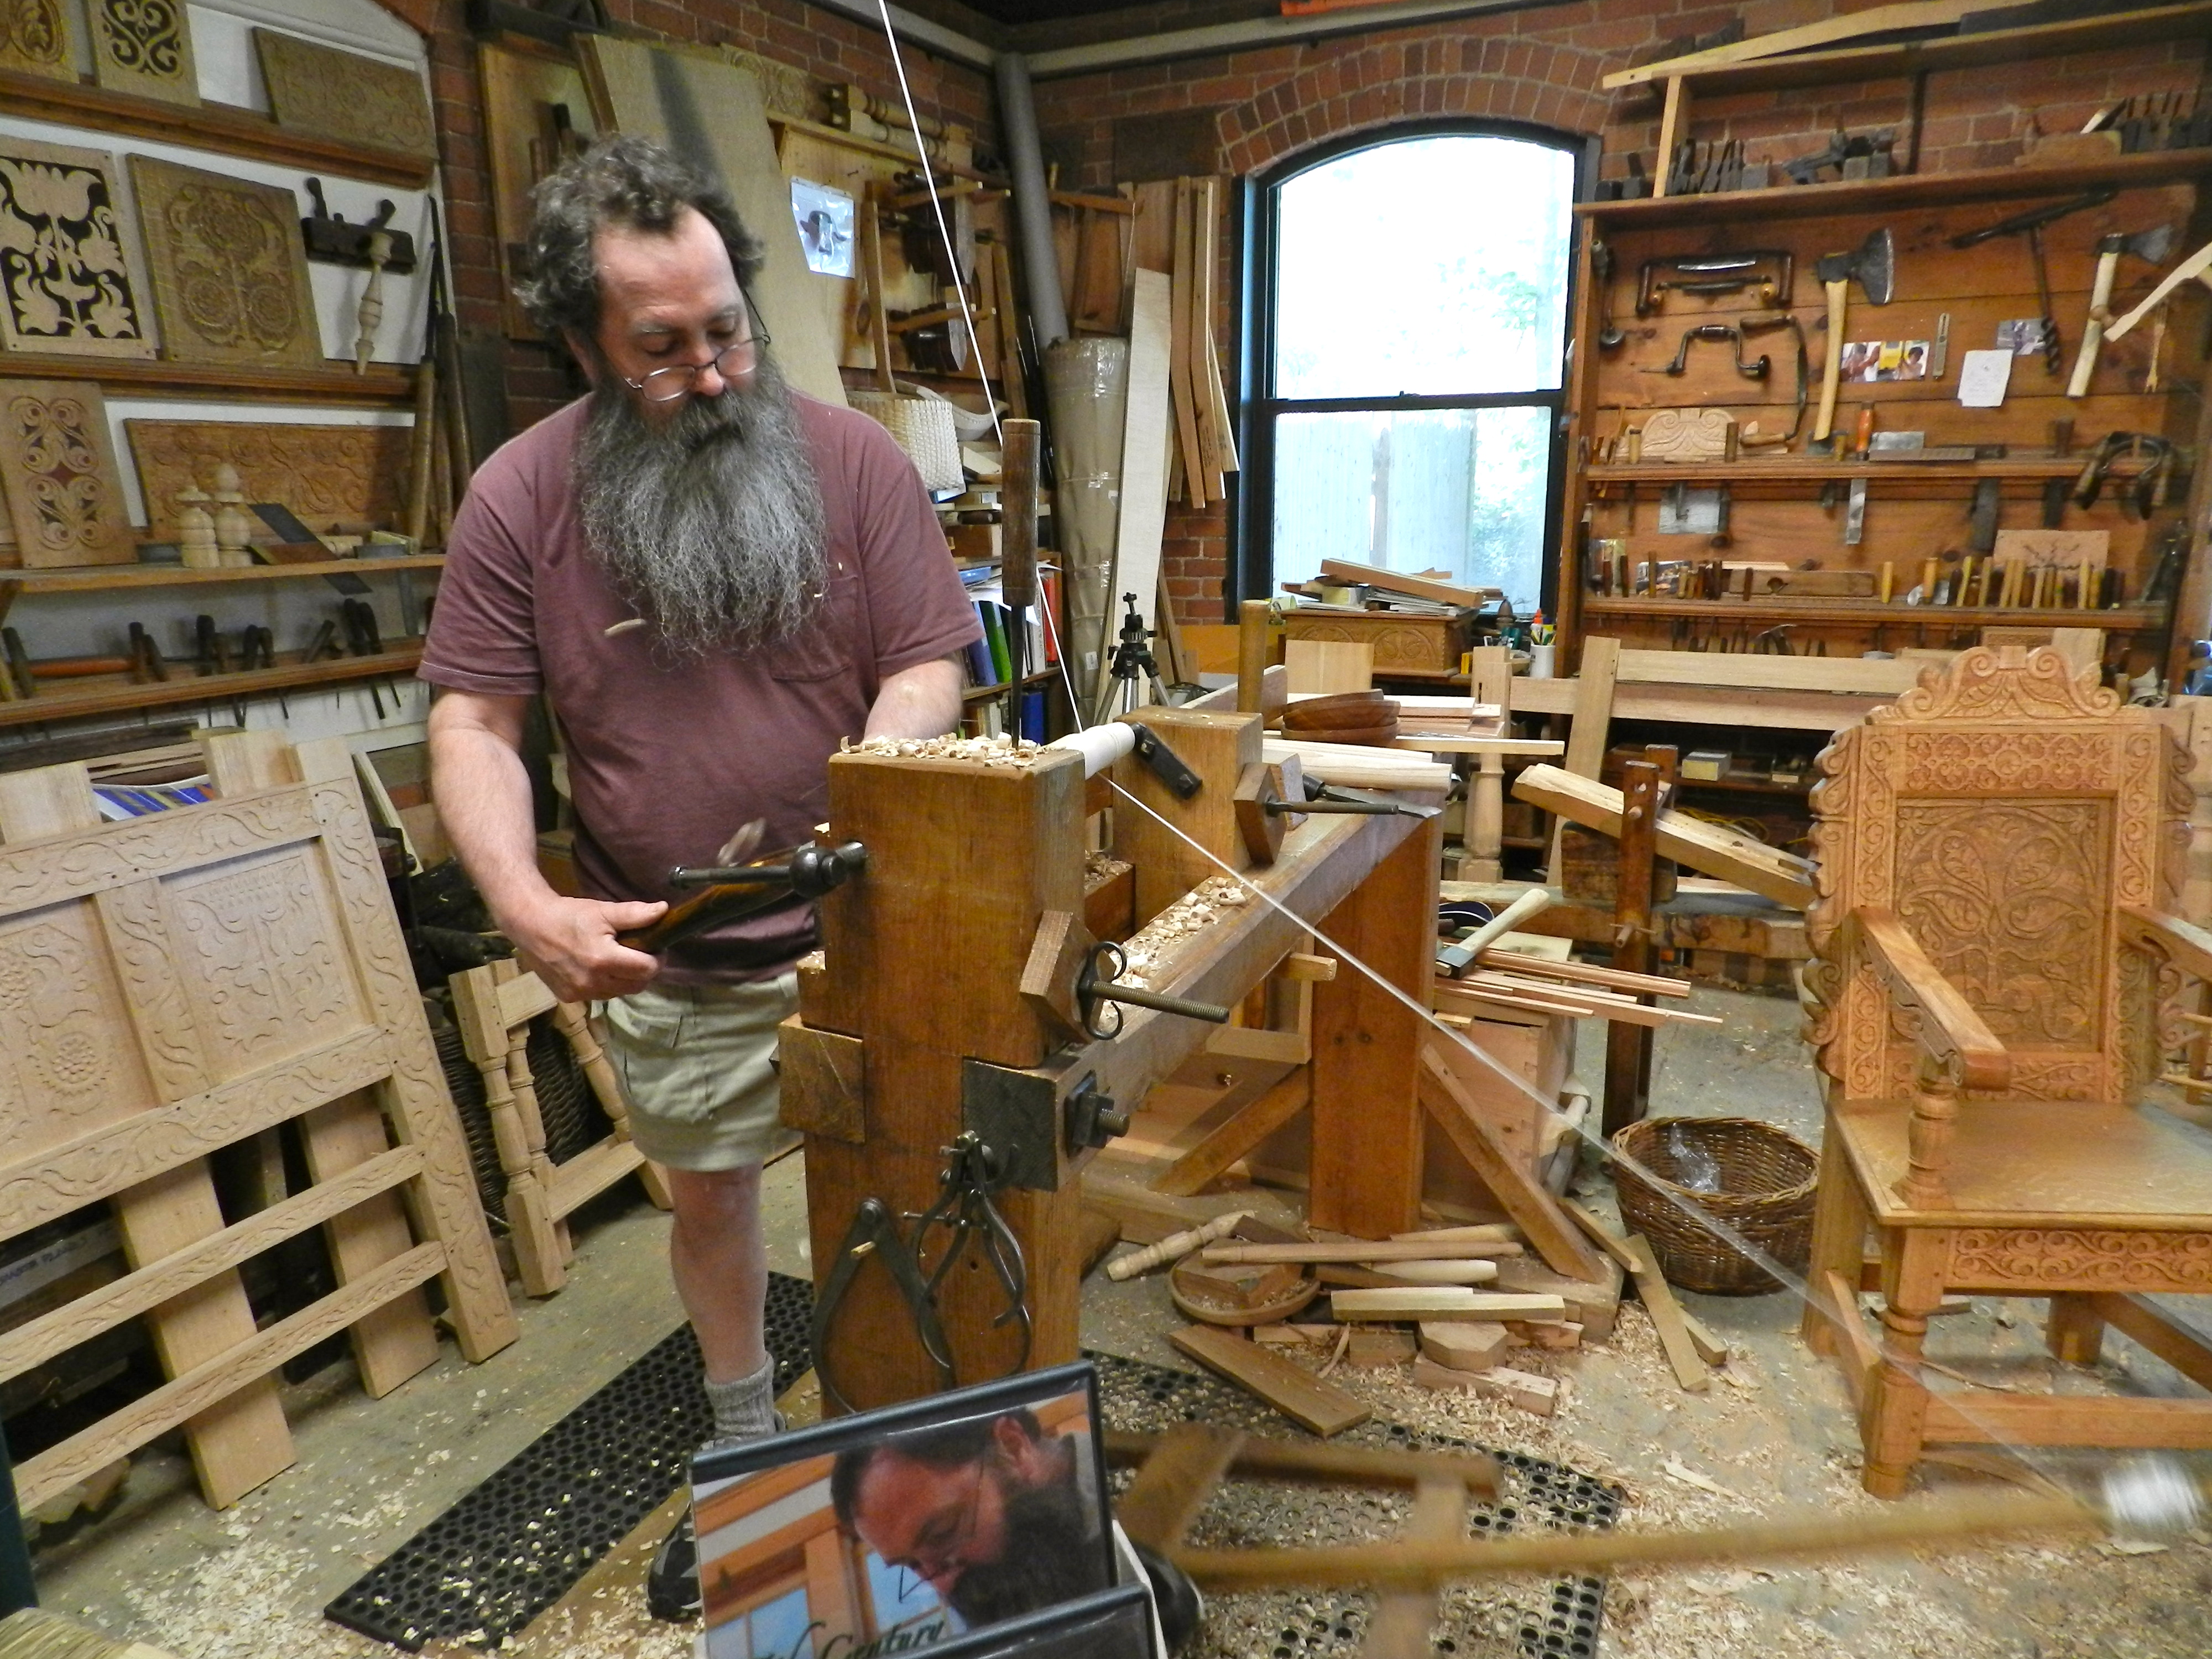
During my time at NBSS over the years I’ve had the chance to work at some of these benches a few of which seemed to survive in the darker corners of the workshop department. At the time I didn’t realize the history of what I working on — I thought it was just another old workbench which had seen better days and was propped up to accommodate taller students. At this sort of old bench I first learned to layout and cut a proper dovetail and it was well suited for the task and you could fit a fair number of them in a modest sized classroom. The benches were commonly bolted down into the floor which made up for the lack of mass when compared to a full sized bench. As a joiner these days I am used to working from a much larger bench as I work on a bigger scale, but if you are tight on space or find a good deal on a used model, it would be a great place to start on your path to more enjoyable woodworking.

In your travels, if you see any of these benches, tool cabinets or Chandler and Barber catalogs from the early 1900s, I’d be interested to see or hear about your findings here on the blog or via email.

Take care,
-Bill

As the Spurtle turns….

This past weekend I was busy in the shop working on a variety of projects. Sunday I spent most of my day doing some wood-turning at the lathe.

A favorite warm up project of mine is to make a traditional wooden spurtle.

Variety of Spurtles
Variety of Spurtles

What’s a spurtle?

A spurtle is a traditional Scottish kitchen tool that dates back to the middle ages. Traditionally made from maple this utensil is often used to stir soups, and beat the lumps out of porridge.  If you are not big on porridge, it also works well with a wok and will not damage your pots and pans.

Dan turning on the lathe

Over the weekend, my friend Dan Farnbach stopped by the shop for a quick lesson on the basics of spindle turning. He was a quick study and picked up a lot of the basics.

Roughing Gouge
Roughing Gouge

I learned about turning Spurtles from my friend and master wood turner Rich Friberg (NBSS PC2 Instructor). It’s a great way to make use of small pieces, produce something usable and explore design possibilities. For this piece I like how the small beads echo the light and dark similar to what you see in the curly figure itself.

Handle Detail
Handle Detail

A good spurtle is generally about a 10-12 inches long, held in the hand similar to a pencil or chop stick and stirs using a wrist action. I tend to like the designs that flair out a little bit at the bottom and are well balanced in the hand. Beyond that, the design possibilities are endless. The spurtle shown here is made from curly maple and finished with mineral oil. With use the finish can be renewed with more mineral oil or salad bowl oil.

Completed Spurtle
Completed Spurtle

If you make some spurtles of your own, make sure to share some pictures with us. If you get really good at making and using them you might want to enter the World Porridge Championships and compete for the Golden Spurtle.

Good luck and happy turning!

ADMINISTRATIVE NOTE:
Earlier this evening many of you may have received a partial post related to Sloyd showing a partial table — that was an accidental misfire wherein a draft got posted prematurely. But fear not, I do have some more Sloyd related posts coming up soon.

Striking Out With Sloyd

Sloyd is tool work so arranged and employed as to stimulate and promote vigorous, intelligent self-activity for a purpose which the worker recognizes as good” — Gustaf Larsson, Principal of the Boston Sloyd School (1906)

To explore the world of Sloyd training is to roll up your sleeves and get some time at the workbench building your skills. A core component of Sloyd based training is building a series of models which increase in scope and skills required to execute them. Let’s explore one of those skill building exercises from the series of models described in Gustaf Larsson’s 1906 book “Elementary Sloyd and Whittling: With Drawings and Working Directions”.

We’ll take a look at the ‘Match Striker’:

Match Scratcher in action....
Match Scratcher in action….

A Match Striker?!

Yep, a key tenet of these models is for the students to make something they can use in their day to day life. Living with items you make yourself will help further refine your ability to judge the quality and completeness of your own work. But why would a child want this? 1906 was a different time — maybe after a long day of 4th grade schooling the students liked to go home for a quick smoke? Probably not. Most likely this item was affixed near a fireplace or stove and provided a nice place to strike a match from — rather than directly on the mantel etc.

Sloyd Match Scratcher by Gustaf Larsson
Sloyd Match Scratcher Model Plans by Gustaf Larsson

While the models were designed to be generally completed in order, the sloyd teacher was encouraged to experiment a bit and design models that would appeal to the actual students in the class. While it is possible that someone could build all the models from a Sloyd book or program and still not be much of a woodworker, the physical and life lessons learned were always considered to be more important than the accuracy of the model though clean and quality work was certainly the goal to strive for. Even if woodworking was not the students’ eventual vocation, it certainly helped them to judge the quality of and respect the work that went into this kind of work.

Above is the description of the exercise we’ll work through today…

Practice whittling with some Eastern White Pine

I started off by sharpening my Sloyd knife (The Hyde Sloyd Knife is actually still made in the USA but takes a bit of sharpening to be useful) and practice a bit on some eastern white pine scrap. Tip: When whittling you want to use the full length of the blade taking a shearing cut and generally cut away from yourself.

Getting ready to lay out

After some practice it was time to move on to the real stock. In this case the only thing I had handy that was 1/8″ thick was some walnut I bought years ago and never found a good use for — unfortunately walnut is not great for whittling — so I’d recommend Whitewood, Eastern White Pine or Basswood as better choices for the new woodworker.

Planing the stock to width

Crosscut the blank to length, then rip it to rough width. With a block plane, trim the piece to width.

Lay out the design on the wood blank

Next up is laying out the design using a compass and a square as called out in the plans.

Cut out the semi-circle. Use a coping or jeweler's saw to hog out most and clean up with the Sloyd knife, or just use the knife to do all the work
Cut out the semi-circle. Use a coping or jeweler’s saw to hog out most and clean up with the Sloyd knife, or just use the knife to do all the work

To cut the semi-circle you can use the sloyd knife to do all the work while holding the piece in your hands and whittling. If whittling is not your thing you can rough out the curve using a jeweler’s saw or fine coping saw and then clean up the edge using the sloyd knife.

Clean up the curves with the Sloyd knife, then break the edges with the sanding block.

Once you are happy with the general shape you’ll want to take a sanding block and fine sandpaper to break the edges.

Drill mounting holes with a brad awl

At the center of the semi-circles you’ll want to make a hole using a brad awl. In this case I am used a chisel edge brad awl. It drills a tiny hole by simply applying downward pressure and rotating your wrist back and forth until you get to through the piece or do the depth you want. (Note: I am used a shim to protect the bench surface) These holes are used to mount the striker to the wall or some similar surface.

Completed match scratcher with 'No. 1' sandpaper (aka Fine Sandpaper)
Completed match scratcher with ‘No. 1’ sandpaper (aka Fine Sandpaper)

To complete the project, apply a coat of wax and glue a piece of ‘No. 1’ Fine Sandpaper to the surface. After the glue dries this match scratcher is ready to be used.  Time to break out the matches and celebrate….

Behind the scenes....
Behind the scenes….

Turns out that most modern wood kitchen matches will NOT light on sandpaper or similar surfaces. So you need to either buy some ‘strike anywhere’ matches or find another use for this model. Don’t worry, if you flip back a few pages in the Larsson’s book you’ll see the the first model was a ‘pencil sharpener’ which is effectively a square strip of wood with the same sandpaper glued to it — and you’d rub a traditional wood pencil on this to sharpen/adjust the point. So now I have a very fancy yet simple pencil sharpener which will live out in the shop.

Wow, that was a lot of work for a modest item — yep, but the item was not the point — it’s a side effect of the intellectual and physical exercise. I am now able to whittle a nice curve and learned a new way to sharpen a pencil on the job site if I need something more refined than a crude chisel tip on a carpenter’s pencil made with a utility knife.

If you’d like to learn a bit more about Sloyd, please check out some of my other posts here and you can read Gustaf Larsson’s “Elementary Sloyd and Whittling: With Drawings and Working Directions” here.  If you try out a sloyd model based exercise on your own, please share your experiences here.

Happy Sloyding!

Installing Doors and Windows as Performance Art

This past Saturday I taught a workshop on installing doors and windows at the North Bennet Street School’s Arlington location. While it is the last workshop that will be taught at that location before the big move this summer into the new facility back in the North End of Boston it did not feel as much like the end of an era — it felt like the beginning of something new. The Arlington location was where I learned as a student and where I first started teaching workshops at NBSS so while I am a little sad to see the old shop get packed up, I look forward to seeing where we can push going forward with new classes and new opportunities.

Door and Window Framing Mockup

In designing this class part of the challenge was to make accessible to a wide audience and also be reasonable with the materials. The format of this workshop was a full day of me demonstrating, lecturing a bit, answering questions and letting the class try some of the hands on operations.  By the time I got home I was on my feet for about 14 hours that day and felt like I completed a long piece of performance art.

Using shims to center and plumb up the door

We covered a lot of material given this was only a one day class:

  • basics of stick framing
  • how to install a new pre-hung door and adjust it
  • how to install a door knob and lockset
  • how to trim out the door
  • how to cut sheathing for a framed out window opening
  • installing and leveling a window
  • how to wrap and flash around a window
  • how to cut a stool and trim out a window
  • And MANY general questions along the way
Bill demonstrating how to adjust the door's opening
Bill demonstrating how to adjust the door’s opening

If there are carpentry, preservation carpentry, or general woodworking workshops you’d like to see offered at the school or in my own shop, please let me know as I’m always looking to teach something new and entertaining.

Traditional Sloyd Tool Cabinet

I recently had the opportunity to make a post to the Popular Woodworking online community which is edited by Dan Farnbach the PWM online editor.

Below is an extended version of that first post:

Bill Rainford -- Preservation Carpenter, Joiner, Instructor
Bill Rainford — Preservation Carpenter, Joiner, Instructor

Bill Rainford is a young and driven craftsman in whom I think you’ll find a lot in common. Voraciously self-taught at first, Bill went on to graduate from the Preservation Carpentry Program at one of New England’s premier craft schools. He now teaches workshops at that school (North Bennet Street) and serves as adjunct faculty at the Boston Architectural College, in addition to developing his own body of commissioned work, building his blog and holding down a day job in software. I want to welcome Bill to the community as an occasional guest writer. He’s going to bring us a little history and several techniques from his area of expertise, which he describes as traditional joinery –though Bill’s skills do not fit neatly in just one category.

We may also do a project plan over the course of the next few months. Please welcome Bill by reading this newsletter and then visiting his blog! Of particular interest is Bill’s recent collaboration with Roy Underhill – more on that at the bottom of this e-mail.

–Dan

What Sloyd Did For Me and My Woodworking Apprenticeship

Part of what made my training in preservation carpentry so rewarding was the way in which it was taught.  We followed a system of educational handwork derived from what was originally developed at Nääs in Sweden and known as the ‘Educational Sloyd System.’ Sloyd is the Swedish word for ‘craft’ and most commonly associated with skilled manual craft work. In the early years of the school in the late 19th century, there was a strong need in Boston and America as a whole to help new immigrants learn the skills needed to acclimate to this new country and develop skills to support oneself. This Sloyd System trained students by building a series of useful models/items each of which introduced basic tools and skills, built confidence to tackle more advanced work, and fostered the ability to evaluate your own work and push yourself to reach new levels of accomplishment.

Elementary Sloyd Training in traditional woodworking techniques
Elementary Sloyd Training based on traditional woodworking techniques

When Otto Aaron Salomon wrote ‘The Theory of Educational Sloyd‘ (page 7) he described the goals one should strove for in teaching and learning within this system.

The focus was not simply the ‘utilitarian aim’ :

  1. To directly give dexterity to the use of tools
  2. To execute exact work

There was also a larger, more ‘formative aim’ to the education:

  1. To instill a taste for, and love of, labour in general
  2. Inspire a respect for rough, honest, bodily labour
  3. Develop independence and self-reliance
  4. Train habits of order, exactness, cleanliness and neatness
  5. Train the eye and sense of form. To give a general dexterity of hand and to develop touch
  6. To accustom attention, industry, perseverance and patience
  7. To promote the development of physical powers

The goal of all this training was not just to help find a job, but to help round out the person. Students may never pick up a tool again, but they will forever have the knowledge of how to make and evaluate things with your hand and your eye and appreciate the labor of others – something I often feel is lacking in members of my generation.

Sloyd Knife grain direction exercise

Students in this sort of program would often start with a simple block of wood and a Sloyd knife and learn to make controlled cuts. From this modest exercise they will absorb 3 of the most important lessons a woodworker will ever learn:

  1. Cutting with the grain
  2. Cutting against the grain
  3. Splitting wood

From this most basic of exercises students are able to make usable objects like a pencil sharpener, letter opener, penholder etc. which they are able to keep, evaluate and use. As the training progresses the students will have more freedom to implement their own designs and apply the skills they have learned.

Fast Forward to Today

This sort of learning by doing, ability to be self critical, self-sufficient, and continually push oneself is still present at the school. In the current programs at NBSS students work under the supervision of a master craftsman who will start with the basics and guide students through their training. By the end of the 1, 2, or 3-year program, depending on major, students will demonstrate proficiency in many tasks, and while there is always more to learn they will be well situated to seek out and tackle the next big project.

After graduating from my training, I remained interested in Sloyd and did further research on the topic. I learned that many of the benches and hanging tool cabinets designed and produced for early Sloyd programs were based on the designs of Gustaf Larsson of The Boston Sloyd School and produced locally in Boston. Some of the benches are still in use by the school and you can find some second hand every now and then on eBay, but the hanging tool cabinet was news to me.

Sloyd Tool Cabinet Advertisement from the late 19th/early 20th century
Sloyd Tool Cabinet advertisement from the late 19th/early 20th century

Shortly after learning about the Larsson tool cabinet I made a serendipitous discovery at a local pawn shop in New Hampshire – I actually found one of these cabinets and in very good shape given its age. All the hardware was intact, and only the front door was rebuilt. It was clear that this cabinet was used for a very long time by someone who cared about it, as the replacement door inherited the hardware and layout of the original.

My antique Sloyd tool cabinet

I am working on a reproduction of this piece, and will be presenting parts of that project here and on the Popular Woodworking blog. Future posts will include a bit on how the cabinet was made, interesting details on the tools that once inhabited this cabinet, as well as notes and prices on modern equivalents. If there is interest I will also make some explorations into some of the Sloyd exercises which can help improve your own hand skills.

Roy Underhill is a fellow Sloyd enthusiast and has been inspirational to me in my research. I caught up with him this week and he offered even more wisdom on the topic, saying:

“Everyone human likes to move, so we came up with yoga, dance and sport to make movement more engaging and expanding. So too with woodworking and Sloyd. The exercises of Sloyd can bring every modern woodworker along a thoughtful path of liberating discipline, of progress and accomplishment — and reconnection with the good feelings of our ancient craft.”

Using your Sloyd Training

If you’d like to join me in re-connecting with the joy of our ancient craft of woodworking I will be taking some classes at Roy’s Underhill’s ‘The Woodwright’s School’ in Pittsboro NC this July 9-12. The first class is Making a Traditional Jointer plane with Bill Anderson and the second class is Making a Traditional Metal Namestamp with Peter Ross. Both of these classes are a great way to learn some basic Sloyd skills and experience the satisfaction of using a high quality tool you made yourself for years to come. If you’d like more information on one or both of these classes, please check out my post on this topic here. If you are interested in attending, please do not wait to sign up — there is a minimum number of students needed to sign up by mid-June in order for the classes to run.

-Bill

NBSS Distinguished Alumni Award Winner 2013: Brandon Gordon

An annual tradition at the North Bennet Street School on graduation day is recognizing a distinguished member of the alumni community. The students, staff and alumni community nominate candidates who are out in the field practicing their craft and embodying the best of what the school has to offer and this year we had another strong group of candidates which made the decision a tough one.

This year’s winner of the Distinguished Alumni Award (DAA) is Brandon Gordon (PC) of the National Park Service Historic Preservation Training Center (HPTC).

Left to right: Mrs. Gordon, Brandon Gordon, Bill Rainford

Brandon currently works as a project supervisor where he is responsible for for planning, evaluating, initiating, administering, performing and supervising work on the National Park Service’s (NPS) most complex and unique preservation projects.  He has used the knowledge and skills gained from NBSS to accomplish work on a variety of historic structures that cover a wide range of time periods and architectural styles.

In his own words:  “I continue to pass along these preservation and restoration techniques to advance the skills and methods of project teams.  My NBSS education has allowed me to direct highly skilled preservation trades people in the utilization of special tools and techniques necessary to carry out preservation projects. I also serve as a training instructor for lesser skilled employees by organizing and producing training programs for the NPS.  I have presented workshops on maintaining and repairing historic wood windows to NPS employees, U.S. Army Corps of Engineers, and at IPTW.”

Brandon speaking to the class

During Brandon’s visit we had our usual end of year BBQ and toured the Arlington facility. Later this summer the Carpentry and Preservation Carpentry departments will be moving to the new NBSS location on North Street in Boston where all the programs will again be under one roof — while nice to get all the programs back together again I also felt a bit sad that this was likely the last big hurrah at this location which was home to me when I was a student.

Handing out the perfect attendance awards

After a nice introduction from Rich Friberg, Brandon took the opportunity to talk with the students about what he did when he was at NBSS, some workshops he taught at NBSS, what he’s done since graduation, a bit of advice, and answering questions from the class.

Dave receiving his award

Next up, it was time to hand out the perfect attendance awards + scholarship which were started last year by Johnathan Ericson (PC ’11). Judging by the long list of winners it was nice to see the level of dedication exemplified by this class of students.

A funny moment during to the talk

During the Q & A session there were some good questions and amusing anecdotes that kept everyone entertained including what it’s like to work on the White House when the President is coming and going via the Marine One helicopter.

The O'Shaughnessy Method: Capturing some of Steve's funnier pearls of wisdom
The O’Shaughnessy Method: Capturing some of Steve’s funnier pearls of wisdom

And  no recap of the day would be complete without a mention of the last day of class surprise PC1 (2014 class) had for Steve O’Shaughnessy their instructor. They had custom shirts made which made which decry ‘The O’Shaughnessy Method’ which captures some of the more poignant, memorable or hilarious things Steve said to them during the year. (Click the picture above to view it larger and read it) If anyone has a copy of the original graphic, please send it my way.

The PC1 class sporting their new T-Shirts

It was a beautiful 90+ degree day at the school and great to finally meet Brandon in person. As the students move their tools out of the shop for the summer and get ready for their internships or new jobs I know they are going out into the world with a solid skill-set that will serve them well for years to come.

Congratulations to Brandon and the PC Class of 2013 — you have a bright future ahead of you!

EAIA 2013 Cape Cod — Day 3 Tool Swap, Tinsmithing, Tool Chests, Auction and Banquet

Day 3 was the last day of the EAIA 2103 Conference on Cape Cod. It was another busy day full of events. After breakfast we headed off to the Tool Show and Swap where folks setup tables full of tools for sale or trade or a booth with a display to show either a unique collection, research results or other things of interest to the group.

Tool show and swap
Tool show and swap

Seeing the prices folks wanted for some items, I’m not convinced they wanted to sell them — but I guess that is why most folks refer to themselves as collectors (or hoarders — as my wife often calls me) and not sellers.

It was great to finally meet Chris Schwarz in person as I've been a fan of his work and writing for a long time.
It was great to finally meet Chris Schwarz in person as I’ve been a fan of his work and writing for a long time.

A highlight of the event for me was finally getting to meet Chris Schwarz in person. I’ve conversed with him via email and similar means for several years, but it was nice to get to talk with him in person. I am a big fan of his work, research and writing.

Very nice display showing how wood and metal planes can be restored

This display was interesting in that it showed a split view of before and after restoration. Having brought many an old plane back to life, it was a nice presentation.

Bill McMillen giving his talk on Tinsmithing

Next up was master tinsmith Bill MicMillen — who you may have seen at other EAIA events, Eastfield Village or Colonial Williamsburg.

Bill McMillen's talk on 'The Tinsmith In America: The Trade, Materials, Tradesmen, The Tools and Products'
Bill McMillen’s talk on ‘The Tinsmith In America: The Trade, Materials, Tradesmen, The Tools and Products’

Bill gave a nice talk on the “Tinsmith In America: The Trade, Materials, Tradesmen, Tools & Products”. It was interesting to see how the trade came to America, changed and migrated over the years.

Soldering a tin cup
Soldering a tin cup

Bill went on to demonstrate how to make a tin cup walking us through the various forming and soldering stages.

Bill McMillen demonstrating how to tinsmith as he makes a cup

Bill demonstrated his considerable hand skill in making the cup by hand and also showed how some of the later forming machines changed the way common items were made.

Chris Schwarz giving a talk on 'Tool Chests Fancy & Simple'
Chris Schwarz giving a talk on ‘Tool Chests Fancy & Simple’

Chris Schwarz gave a talk called ‘Tool Chests Fancy and Simple’ where he explained a bit about the evolution and anatomy of tool chests — from the densely packed and high style H.O. Studley Toolchest, to fare more utilitarian models.

Chris Schwarz and his tool chests -- then and now. You can see how far his research, his work and his designs have come over the years.
Chris Schwarz and his tool chests — then and now. You can see how far his research, his work and his designs have come over the years.

It was also interesting to see some of Chris’ journey from earlier power tool oriented projects to later more traditional projects that focused on traditional joinery and hand tools.

Joint stool at the EAIA Silent Auction

In the evening we took part in the EAIA annual silent auction that benefits the EAIA endowment. There was a nice selection of traditional tools, books and items folks donated and/or made for the auction.

Beautiful chair in the silent auction that I believe had a relationship to (or at least a design derived from) the works of Wallace Nutting

Alyssa and I had a lot of fun in the auction and it took some bidding, but we got some of the items we set our sights on….

Turned kingwood pen
Turned kingwood pen

Alyssa had her heart set on this nice turned pen made from kingwood and is already putting it to good use.

Books and turned pen we won in the silent auction. The had I bought from the Lost Art Press

I won an old book from Winterthur Museum on the Dominy Clock shop which came from Long Island (a few towns out from where I grew up) and was a book I’ve been hunting around for for several years. I look forward to reading it soon and visiting WInterthur later this year as they have an exhibit on 400 years of Massachusetts furniture and has several reproductions made by friends from NBSS.

After teh banquet dinner Myles Standish came to regale us with stories of his life and to answer questions.
After the banquet dinner Myles Standish came to regale us with stories of his life and to answer questions.

After the auction we had the annual meeting and banquet. Following dinner, Myles Standish came to regale us with stories of his life and travels and answer any questions the audience had.

Beyond all the events I also got some shiny new toys:

Saws and Carriage Maker's Rule
Saws and Carriage Maker’s Rule

I got the carriage maker’s rule and old hand saws at the Great Planes auction and will put them to good use in the shop.

Lot's of new reading material
Lot’s of new reading material

At the tool swap I got some great books this year. I got a bunch of historic reprints from the Toolemera Press that I had been thinking about for a while. In an antique shop on the Cape I found a nice 1950s set of 4 Audel’s books on masonry. At Plimoth I got one of Peter Follansbee’s DVDs on carving (Which he was kind enough to autograph for me), a DVD version of making a chair from a tree, and a nice book on English Period House Fixtures and Fittings which looks like a nice reference book.

Lee Valley Saddle Square made for the 80th Anniversary of the EAIA -- I look forward to using it at the bench.
Lee Valley Saddle Square made for the 80th Anniversary of the EAIA — I look forward to using it at the bench.

I’ll end with the first thing I got on this trip — picked up during registration — which is a nice Lee Valley Saddle Square which was engraved to commemorate the 80th Anniversary of the EAIA. Similar to Lee Valley dovetail saddle squares I have I’m sure it will earn its place in my tool chest.

I had a great time on this trip and while it was hard to go to work on Monday, I was happy to think about the great time we had and look forward to next year’s event.

EAIA 2013 Cape Cod — Day 2 Heritage Museum, Sandwich Glass Museum and Tool Auction

Day 2 of the EAIA 2013 Cape Cod conference turned out to be as jam packed as the first day. The weather was perfect and we got to explore some new museums.  First stop was the ‘Heritage Museum and Gardens’ which I had never been to before.

The Heritage Museum's trough that leads seemingly uphill to a waterfall. Very Neat.
The Heritage Museum’s trough that leads seemingly uphill to a waterfall. Very Neat.

The entrance had this trough which looks like it just just out into space and almost looks like it is flowing uphill…

The beautiful gardens and waterfall at the Heritage Museum.

From the side you can see how it ends with a waterfall surrounded by one of the MANY beautiful gardens on site.

Circular Shaker barn -- a very good copy of the barn at Hancock. It was home to the automobile collection and related exhibits.
Circular Shaker barn — a very good copy of the barn at Hancock. It was home to the automobile collection and related exhibits.

There is also a very good replica of the Hancock Shaker Village round barn which is home to the automobile collection and related exhibits.

Motorama signage and the largest collection of Corvette Prototypes I've ever seen in one location
Motorama signage and the largest collection of Corvette Prototypes I’ve ever seen in one location

Inside the barn was an exhibition on automotive design, GM’s motorama exhibitions and the largest collection of Corvette prototypes I’ve ever seen under one roof.

Harley Earl's retirement gift from GM -- a 1963 Stingray Vette that matched his shark.
Harley Earl’s retirement gift from GM — a 1963 Stingray Vette that matched his shark.

Harley Earl’s 1963 Stingray Corvette convertible that was designed to be painted like the mako shark that hung on the wall of his office. After several attempts to match the color of the shark, the engineering staff stole the shark at night, painted it to match the car, and then said ‘Look the car matches the shark now’

Corvette CERV III Prototype from 1990 stuffed full of technology that was ahead of its time. Looks a lot like the much later 1997 C5 generation

This 1990 prototype corvette was one of the HEAVIEST corvettes ever made and was jam packed with so much new technology it was not feasible as a production vehicle. But its absolutely amazing to me how many of the design cues eventually made it into the car during the much later C5 generation.

Tour of the gun collection

Next up was a tour of all the long guns and interesting pistols the museum had in their archives.

Alyssa riding the carousel with me.

There was also a restored carousel that we all got to ride on. It was probably 10+ years since my wife and I last rode a carousel — but even as an adult it was still a lot of fun.

One of many interesting trade signs...
One of many interesting trade signs…

Near the carousel there was a section full of interesting weather vanes and trade signs.

Trade signs for a butcher shop were about as literal as you can get.

Next up was a visit to the Sandwich Glass Museum which recounts the history of the Sandwich Glass Works.

Working kiln inside of the Sandwich Glass Museum

Inside the visitor center is a nice new and working kiln.

Glass blowing demonstration

After a video history and lecture on the women of the Sandwich Glass Works we were treated to a glass blowing demonstration.

Re-heating the glass

In the evening we returned to the hotel for the Great Planes tool auction. In a room full of tool collectors and experts the prices for a lot of items seemed to go higher that I would have expected — or at least higher than I was willing to pay, but I got a couple of small items near the end after all the big spenders got a little tired out. I got a nice pair of old Disston hand saws and a 4′ carriage maker’s boxwood folding rule which I can put to good use.

Great Planes tool auction at night

It was another busy day down on the Cape. Up next, Day 3 Demonstrations, Lectures, Silent Auction and Banquet….

EAIA 2013 Cape Cod — Day 1 — Woodworking with Peter Follansbee

For me, one of the highlight’s of this years EAIA conference was a lecture from and later talking with Peter Follansbee of Plimoth Plantation.  I met Peter before as some of my classmates from NBSS have worked at the plantation, but on this visit, it was particularly interesting to learn more about what brought him to the plantation and how his work and research have changed over the years.

Peter Follansbee in his natural habitat -- the Joiner's shop
Peter Follansbee in his natural habitat — the Joiner’s shop

Peter answered many questions and demonstrated some carving at the bench. In person I find he often has funny anecdotes and snarky comments that are both cutting and entertaining.

Shavings from the early part of a day's work -- the way a shop should look.
Shavings from the early part of a day’s work — the way a shop should look.

I particularly liked the carved book stand (seen below) which could be adjusted for viewing angle, and had small dowels that can keep the book open.

Carved Book-stand by Peter Follansbee
Carved book stand by Peter Follansbee

He also demonstrated some light spindle turning at his pole lathe.

Peter turning at his pole lathe

In the shop, as always, were examples of the varied sorts of work he carries out. Seen below is a great looking carved English style chair, and behind is a greenwood chair similar to that which is seen in Jennie (John) Alexander Jr’s book on working with green wood which I heard was the inspiration for Peter’s recent book on making joint stool from a tree.

Beautiful carved chair. In the background a chair built to the specs from 'Make A Chair From A Tree : An Introduction To Working Green Wood' which was the inspiration for Peter's 'Make a joint stool from a tree' book.
Beautiful carved chair. In the background a chair built to the specs from ‘Make A Chair From A Tree : An Introduction To Working Green Wood’ which was the inspiration for Peter’s ‘Make a joint stool from a tree’ book.

Peter was gracious enough to sign my DVD of his carving, so that also made my day.

Peter splitting wood with a froe and answering questions from the audience

Surrounded by a throng of overly eager visitors, Peter took question and demonstrated the use of a froe for splitting wood.

Peter's version of the Anarchist's Tool Chest
Peter’s version of the Anarchist’s Tool Chest

Above you can see some joint stools from his book on that subject along with his own interpretation of the Anarchist’s tool chest based on the recent book by Chris Schwarz. It was neat to see how Peter used (presumably) blacksmith made hinges and painted the chest. (Along with a different panel configuration for the lid). You can learn more about it on Peter’s blog here.

A sample of the high style work Peter produces. Similar to a piece he has at the MFA next to a partial original. It's amazing to see how much brighter the colors were originally.
A sample of the high style work Peter produces. Similar to a piece he has at the MFA next to a partial original. It’s amazing to see how much brighter the colors were originally.

And finally, shown here is an example of some of the high style work Peter produces. When I give my class a tour of the MFA America’s wing each summer I am always happy to show them the original they have on display alongside the reproduction Peter produced for the museum to show how the piece likely looked when it was new. I always find it interesting to see how earlier generations enjoyed color, and changing styles much as folks do today.

It was another great visit to Peter’s shop, and I look forward to seeing what he’s been up to on my next visit to the plantation.

EAIA 2013 Cape Cod — Day 1

This past weekend Alyssa and I attended our first EAIA annual meeting which was held in Hyannis on Cape Cod. For those not familiar with the EAIA, it is the Early American Industries Association which is an organization that celebrates the trades, crafts, and tools that were a part of American history and have made an impact in all our lives.  We were members for a few years, but this was the first event we attended…and now we can’t wait for next year’s events! Below and in some upcoming posts I’ll try to recap some highlights from this years events which kept us busy.

Obligatory tourist picture of me in front of the sign where we are...
Obligatory tourist picture of me in front of the sign where we are…

You can learn more about the EAIA here

View of Plimoth Plantation from the Fort

We started out our day with the introductory/orientation film and then an interesting talk by Peter Follansbee who is an expert on 17th century woodworking and quite the interesting character. He talked about his own background, interesting changes at the plantation over the years and research into traditional woodworking of that era.

Beautifully stacked firewood getting ready for the long winter ahead

After that program we were free to explore the plantation and/or take part in some other behind the scenes tours.

Justin Keegan (NBSS CFM + Plimoth Interpretter) hewing a log
Justin Keegan (NBSS CFM + Plimoth Interpreter) hewing a log

My wife and I had been to Plimoth many times over the years, and some of my classmates from NBSS worked at the museum so I did not have high hopes for this part of the event, but I was happy to see some programs and behind the scenes events where I learned some interesting new information. We also got to have lunch ‘Like a Pilgrim’ eating some food prepared as it would have been back in the 17th century — so some traditional turkey, vegetables, desert, condiments, utensils (or lack thereof — I missed my spork), and table manners.

New building in the village

In the Plimoth Maritime Workshop we took part in a lecture on 17th century Shallop boats, how they were used in the colony and how the plantation recreated some of these vessels, issues that came up during construction and how they fared on the open sea.

Lecture about the 17th century Shallop (boat), its use in early Plimoth, and the recreation of some of these vessels

I love to see this sort of behind the scenes workshop — to see how they setup, how they work, what tools they use etc.

In the Plimouth Maritime Workshop -- I love to see the behind the scenes workshops at this sort of living history museum
In the Plimoth Maritime Workshop — I love to see the behind the scenes workshops at this sort of living history museum

The pungent smell of pine tar on the rigging from the Mayflower II which was in drydock was quite strong, but added to the ambiance — though folks with asthma did not agree with me on that.

Even if you were great with knots as a scout, I bet you'd have trouble with the massive rigging covered in pine tar that belong to the Mayflower II
Even if you were great with knots as a scout, I bet you’d have trouble with the massive rigging covered in pine tar that belong to the Mayflower II

We had great weather all weekend. We also took part in a private tour event where one of the curators explained how the plantation uses experimental archaeology and character interpretation to explore the mindset and problems of the time period and also to try and answer some of the questions we have about the times given the incomplete records that survive.  Who would have thought that thread + textiles specifically spun to recreate a 17th century coat would help improve sutures used in open heart surgery?

Annual session of 'Whatsit' where members try to guess what some particularly odd tools were used for
Why did these chickens cross the road? …. to get to Peter Follansbee’s talk of course.

The livestock on the plantation were quite used to humans and friendly; no animatronic squirrels like at Williamsburg (*wink* to my friends at CW with that old joke)

Peter Follansbee in his natural habitat -- the Joiner's shop
Peter Follansbee in his natural habitat — the Joiner’s shop

There were also numerous demonstrations from folks working in the historic trades — blacksmithing, woodworking, pottery, textiles, cooking etc.

Carved Book-stand by Peter Follansbee

If you’d like to learn more about Plimoth Plantation or plan a visit of your own, check out their website here.

Annual session of 'Whatsit' where members try to guess what some particularly odd tools were used for
Annual session of ‘Whatsit’ where members try to guess what some particularly odd tools were used for

After dinner and an ice cream social for first time attendees we took part in the annual ‘Whatsit’ session. Folks try and stump the other tool enthusiasts with their recent finds — or figure out what that oddball tool your late relative left you in his will was actually used for. Not surprisingly there is not as much demand for a brass button polisher or ox training yolk as you might think.

It was a beautiful day filled with back to back events. Stay tuned for a bit more on woodworking at the Plimoth Plantation and Day 2 and 3…