Tag Archives: Blacksmithing

Nashua Tool Show April 2016

Time for my semi-annual post about the Nashua ‘Live Free or Die’ Tool Show and Auction. Wait, didn’t that happen back in April? Yep. I’m really behind on my blogging as I have been busy working, writing, teaching and helping with our second baby. Having two kids under 2 years old is definitely exhausting.  So there will be a few posts here and there out of time as I work through my backlog.

Veteran Woodworkers Association -- Tool Testing and Sharpening Station
Veteran Woodworkers Association — Tool Testing and Sharpening Station

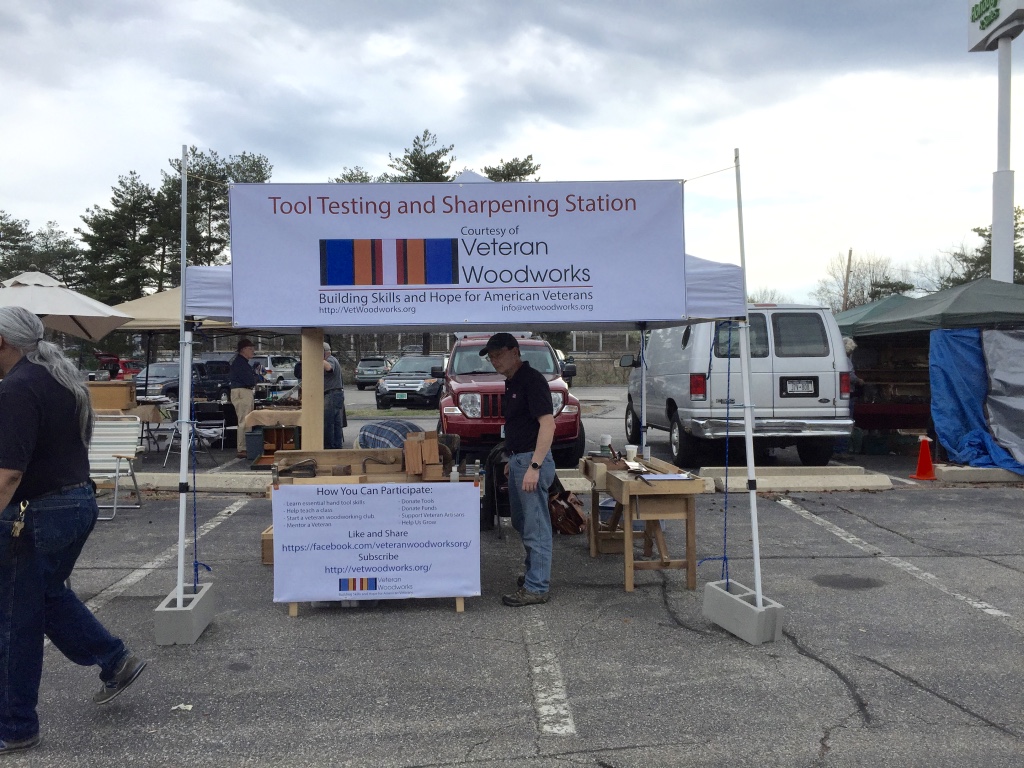
A new vendor/booth I had not seen before was the Tool Testing and Sharpening Station that was put on by the Veteran Woodworkers Association — a great place to sharpen and test out your new tool purchase.

April 2016 Nashua Tool Show and Sale

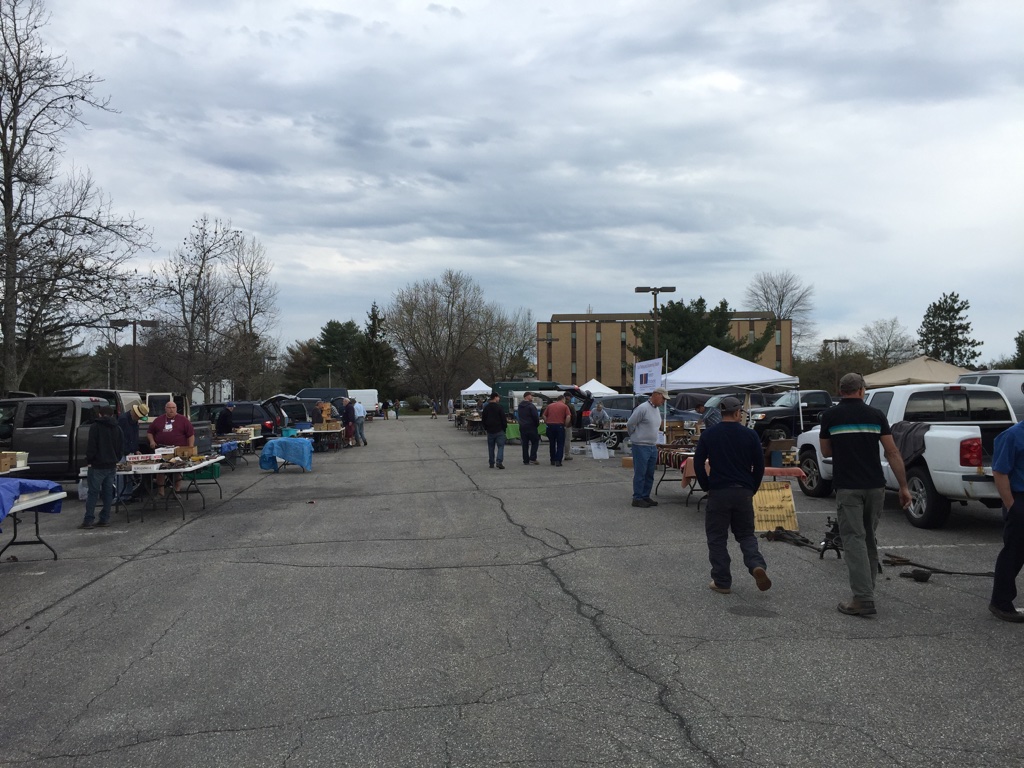
It was an overcast day with the threat of rain so I think turnout was a little lower than average and my new job is a lot further away from home so I didn’t get to spend as much time at the show as I normally do.

Vendor with an extensive collection of tools make from bones and ivory.

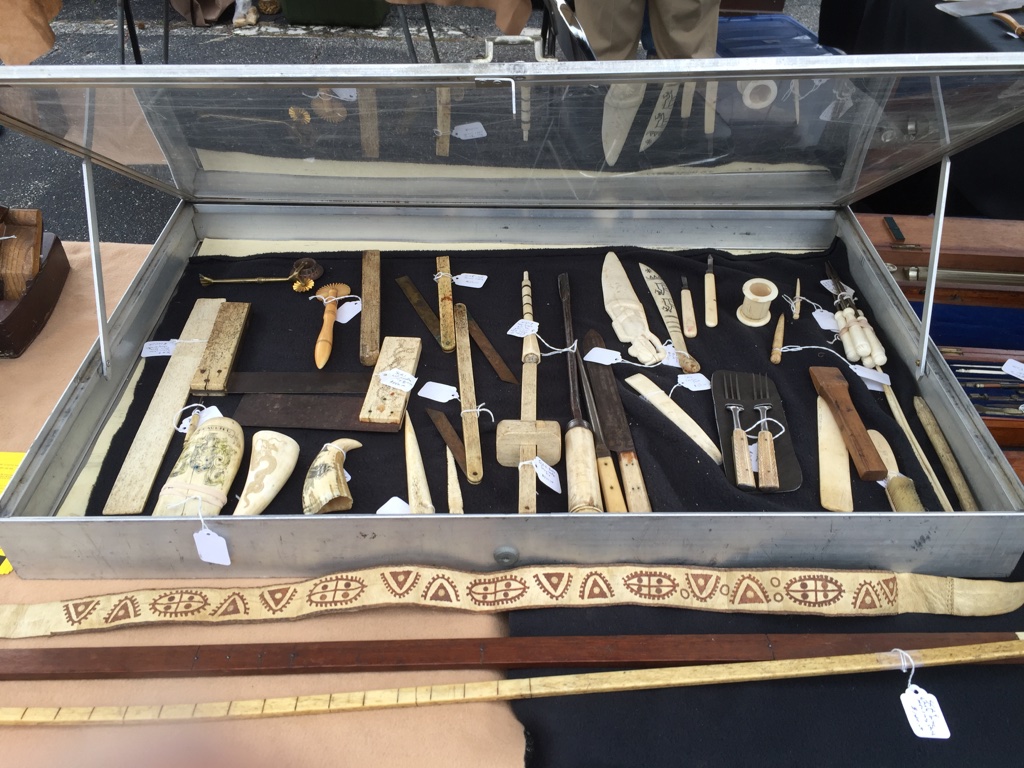
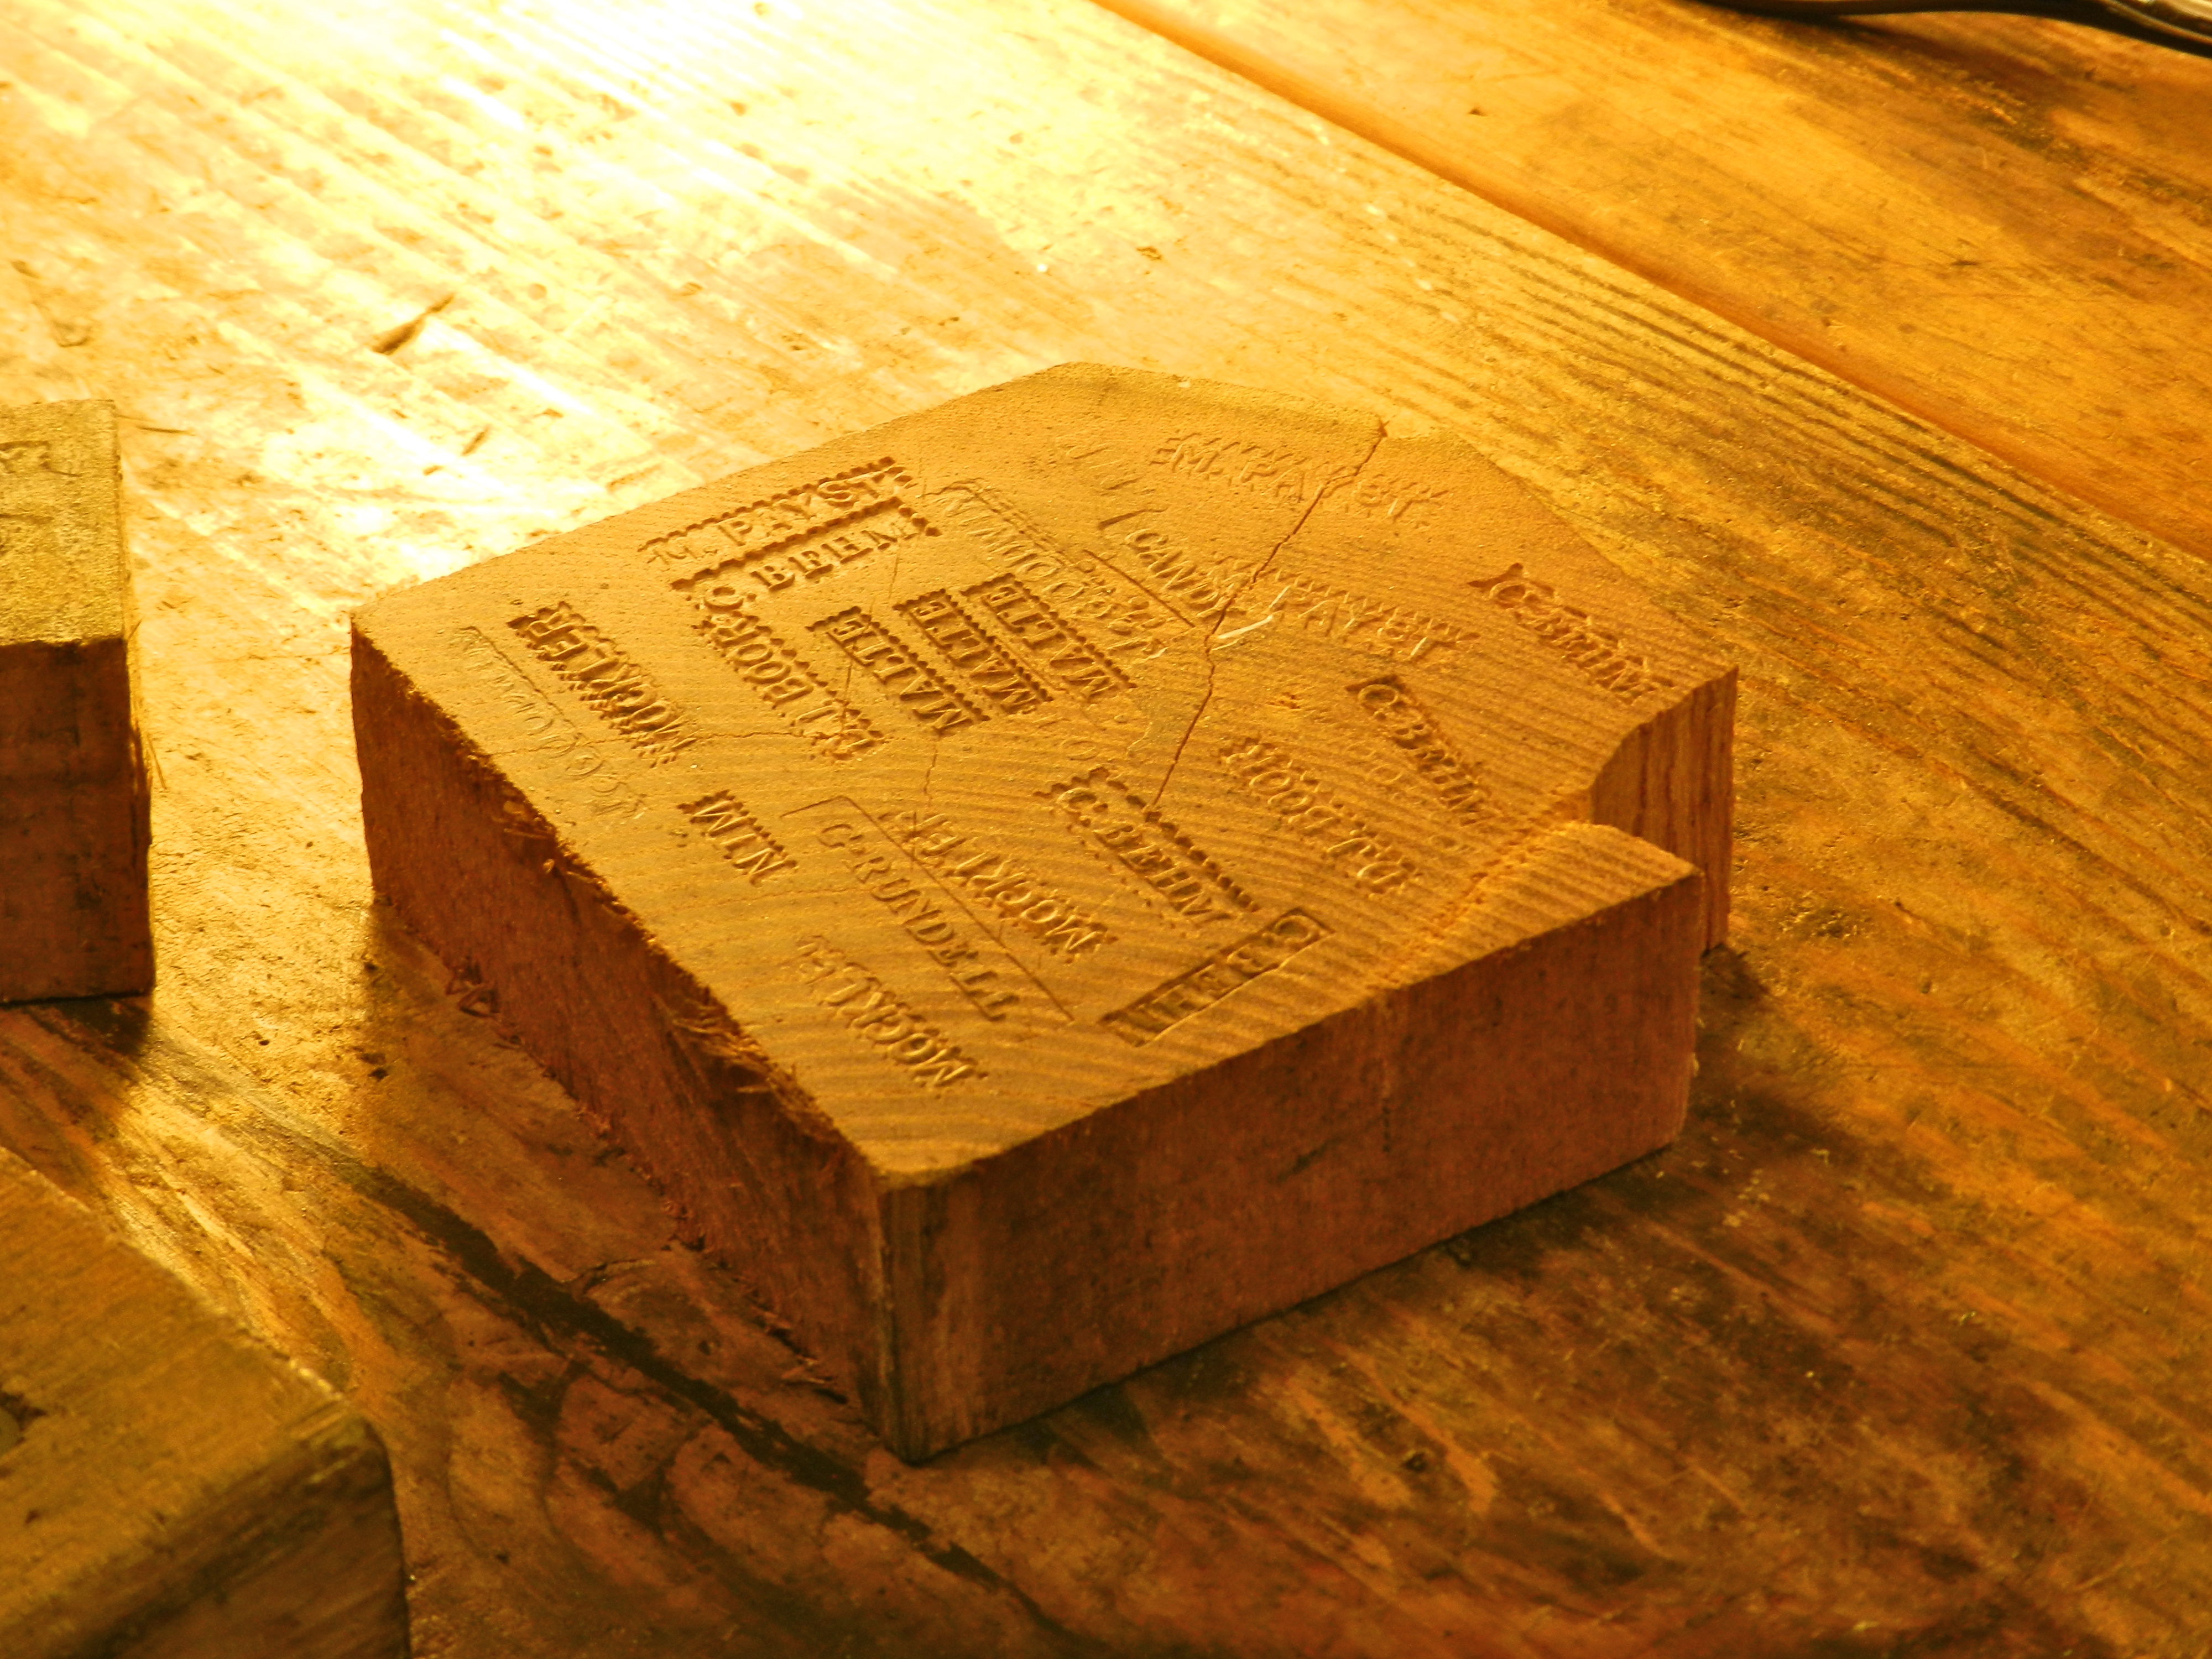
There was not a lot that jumped out at me this year, but one vendor had a pretty extensive collection of native and ancient tools. He also had a lot of tools made from ivory and bone.

More of the Vendor with an extensive collection of tools make from bones and ivory.

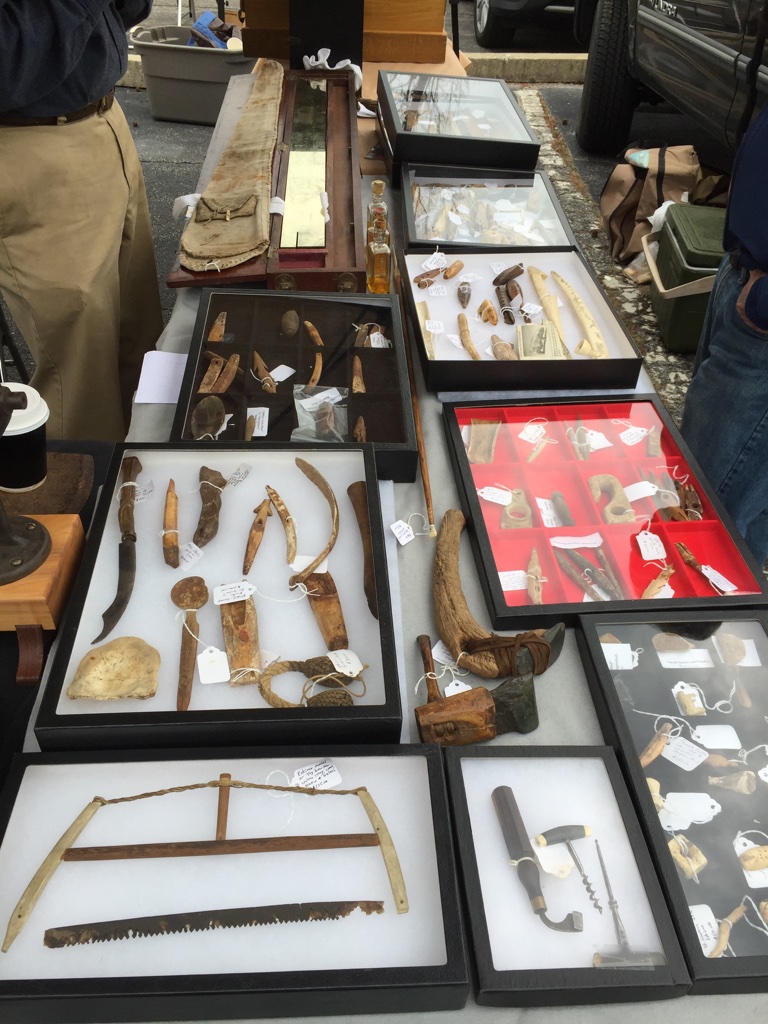
It was amazing to see some of the detail on these early tools.

Post Drill Side View

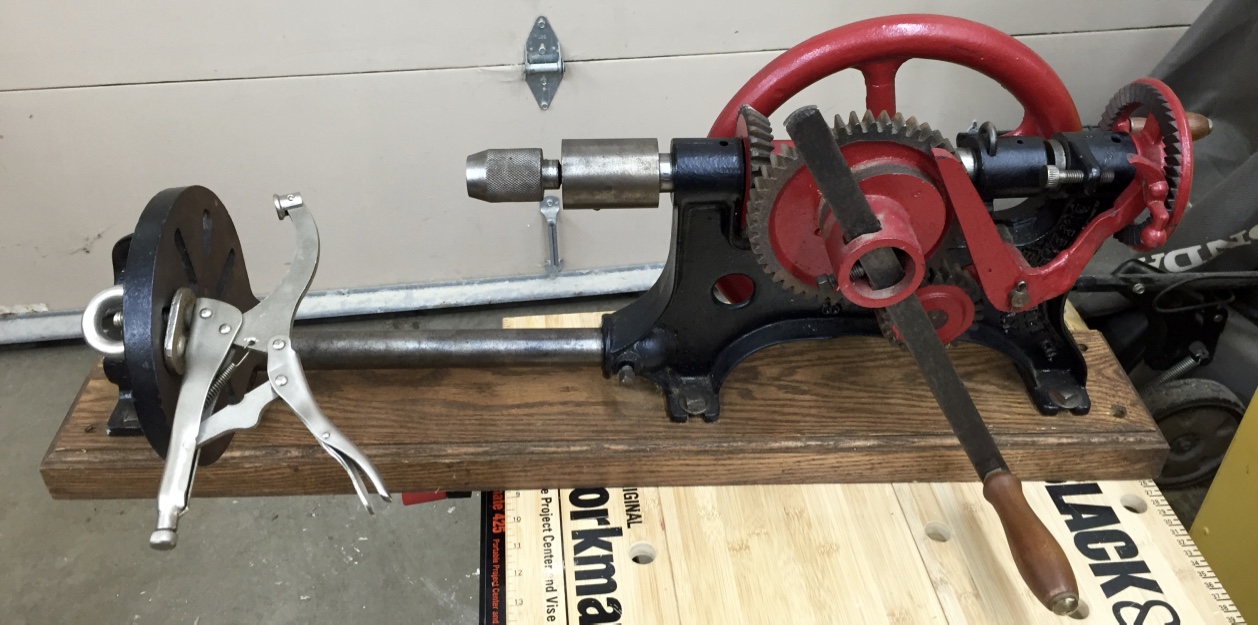
I almost made it out of the show without spending much at all but then two items caught my eye. The first was this nice Post Drill by Buffalo Forge. The drill looked complete, exceptionally clean (possibly restored but can’t tell for sure, so if it was restored it was a while ago). Even has a nice heavy vise grip style hold down — assuming that was a later addition, but works great and useful.  It looks like this was one of the later produced models by the Buffalo Forge.

Details of the Post Drill

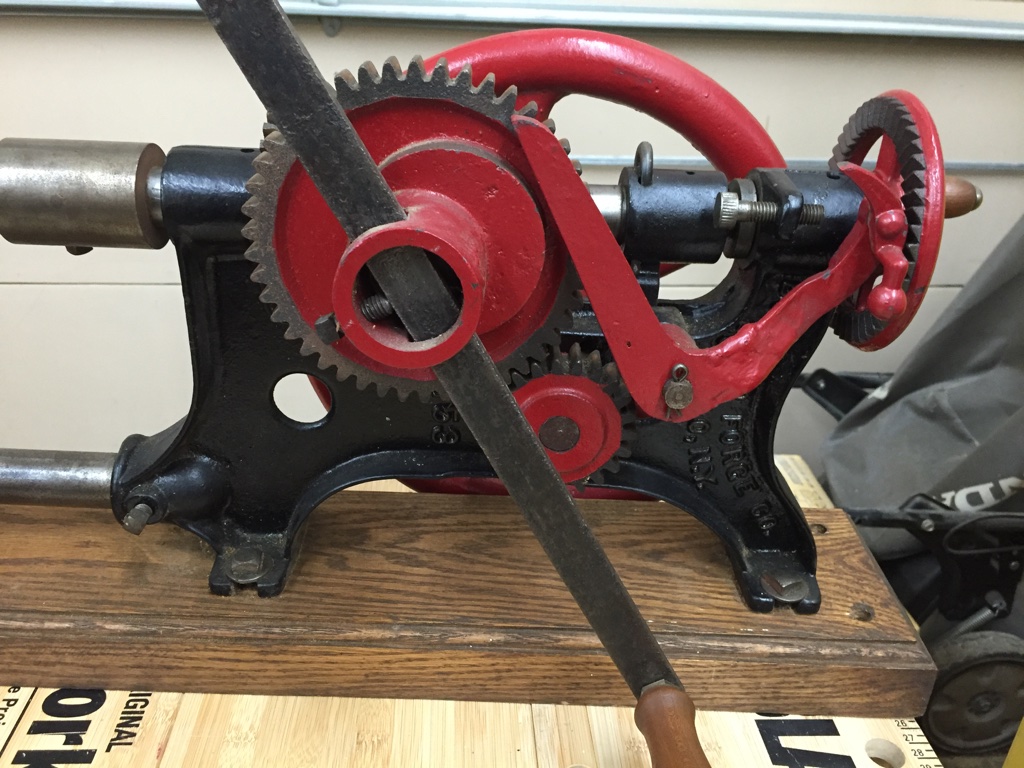
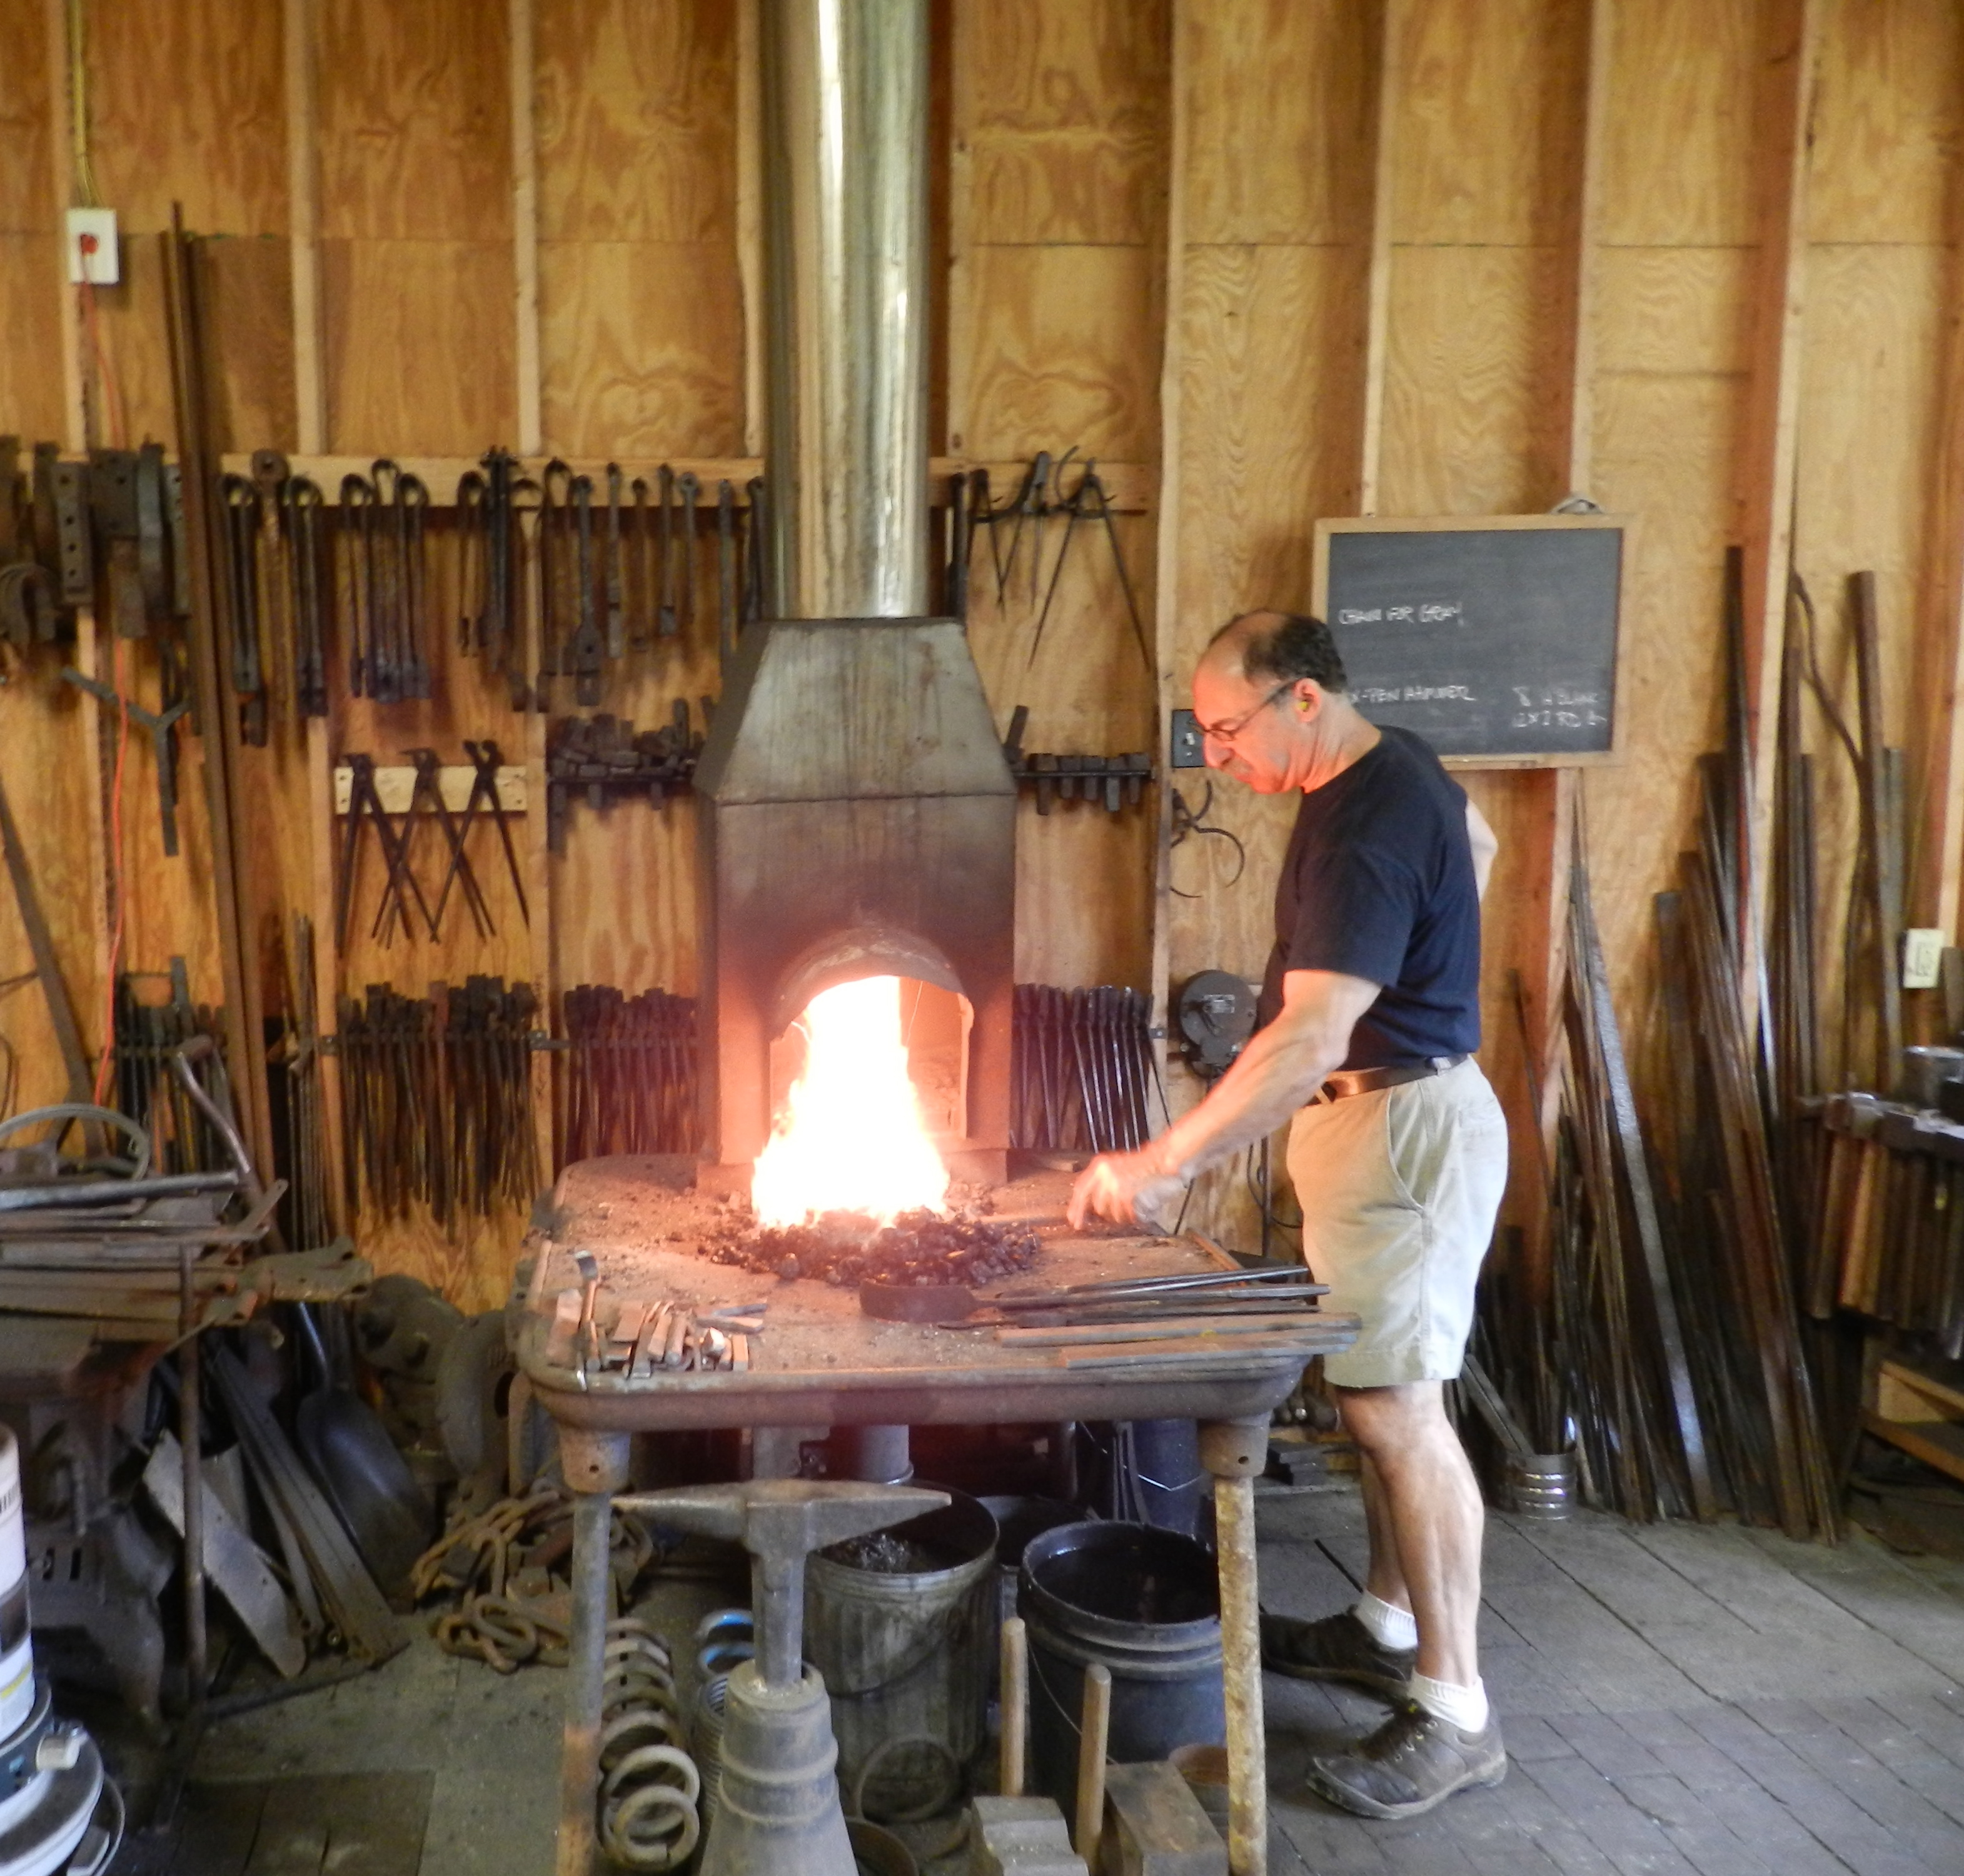
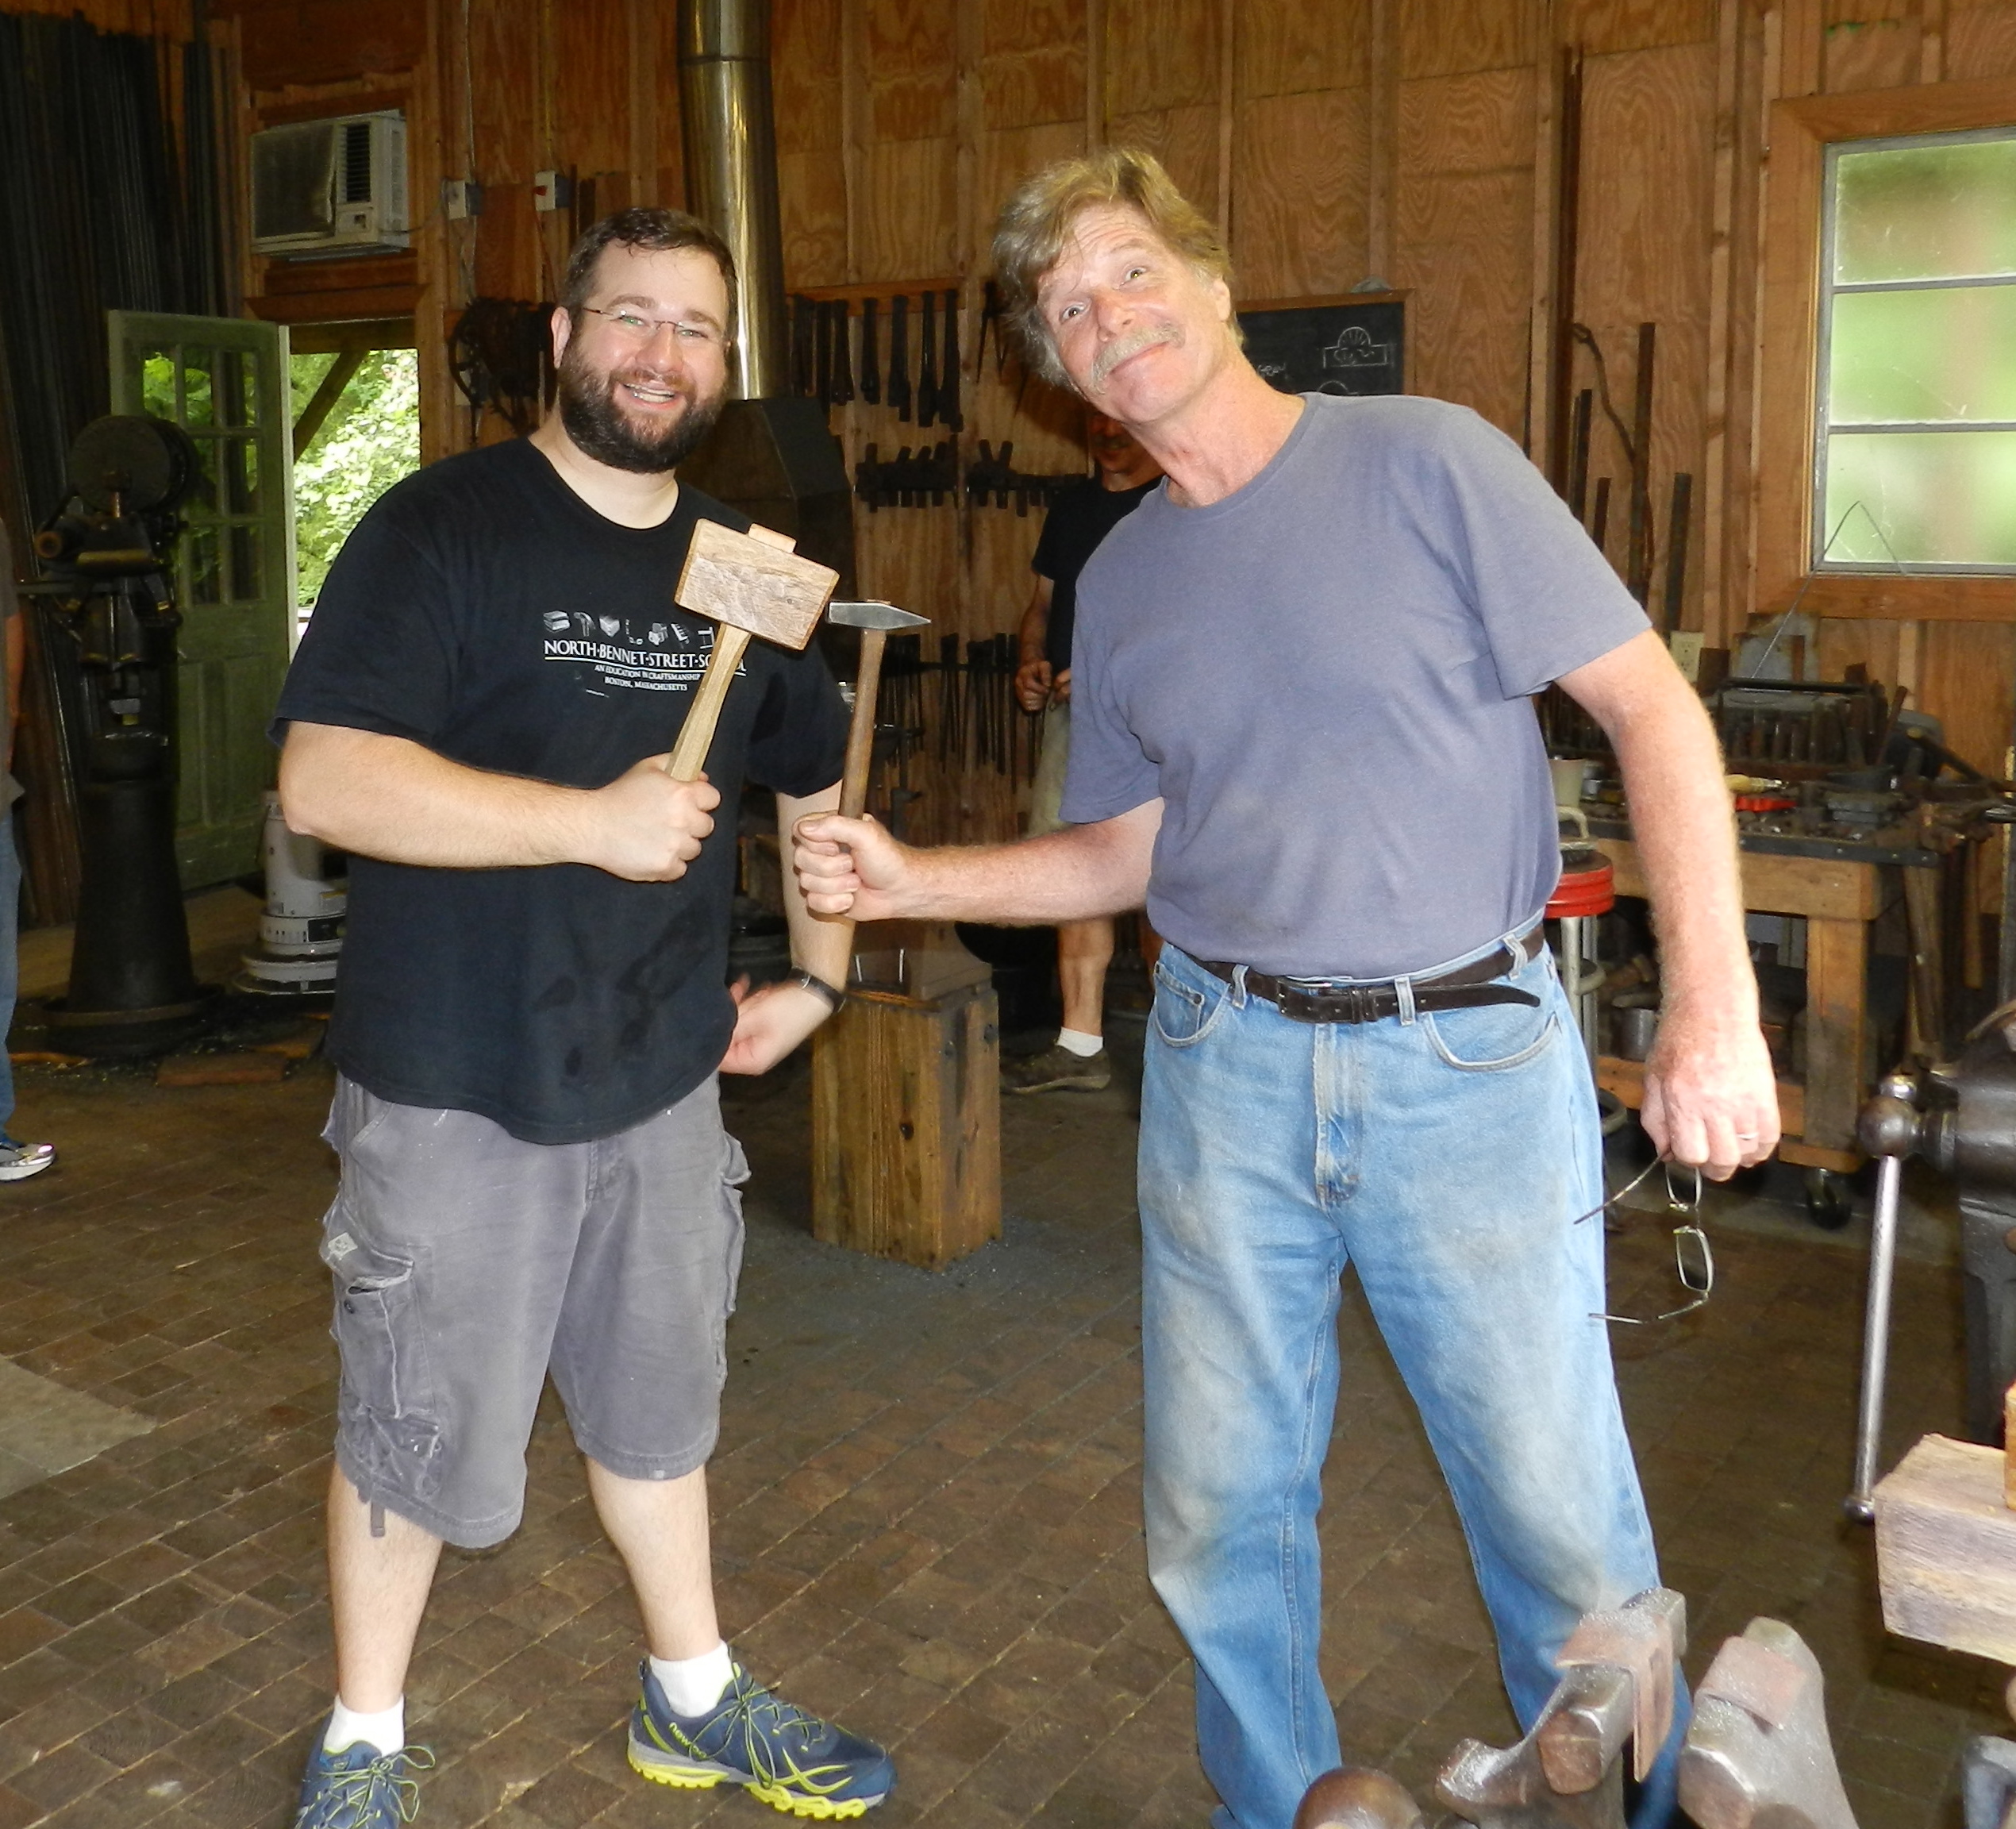
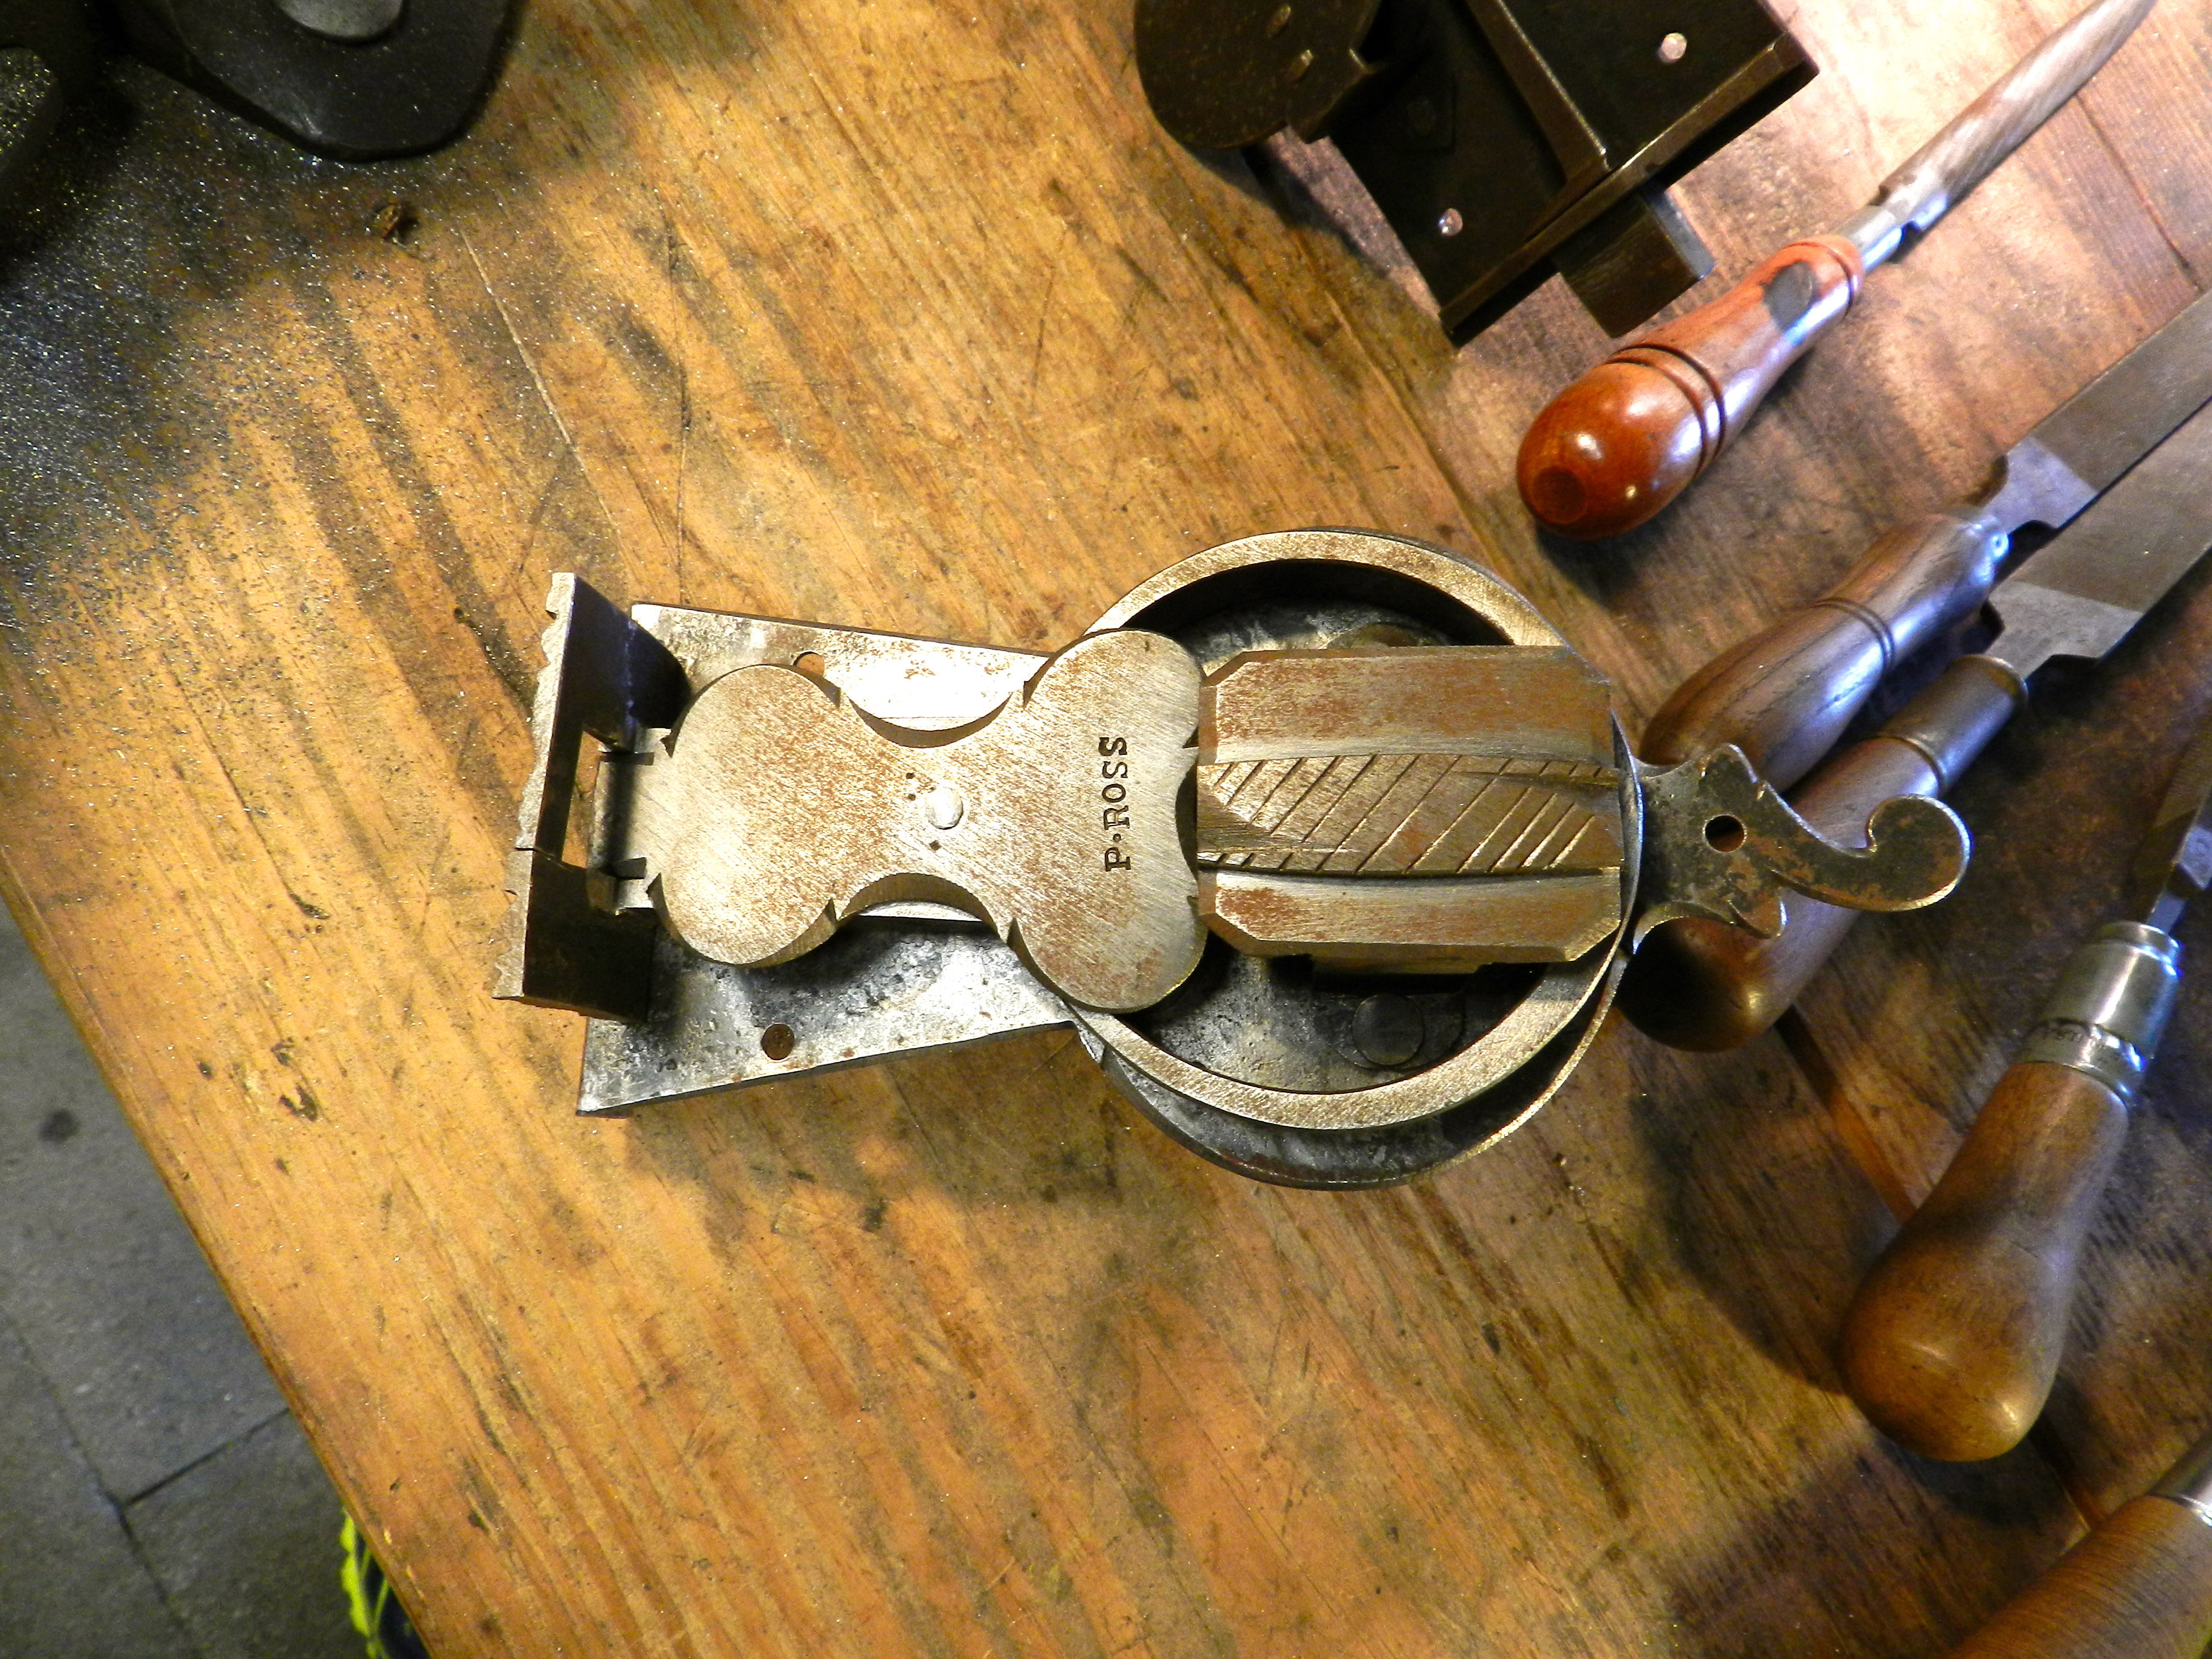
I’m in the process of building a timber frame barn and want to get a bit more into Blacksmithing (took some classes at Prospect Hill Forge and down in NC with Peter Ross) and would love to dabble in it a bit more. Once the barn is standing I know right where this drill will get mounted. The drill gets mounted on a heavy post, hence the name and is powered by hand crank. You can adjust the throw of the crank lever. You can also turn the mechanism using the heavy fly wheel on the left but in general that is more to help keep momentum going. This model also has a gearing mechanism on top that will advance the drill bit as you turn the drill and is useful when drilling metal.

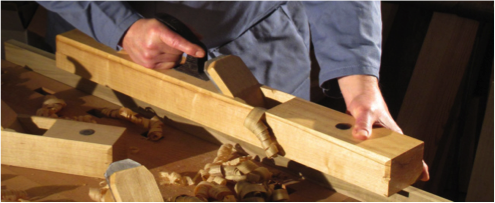
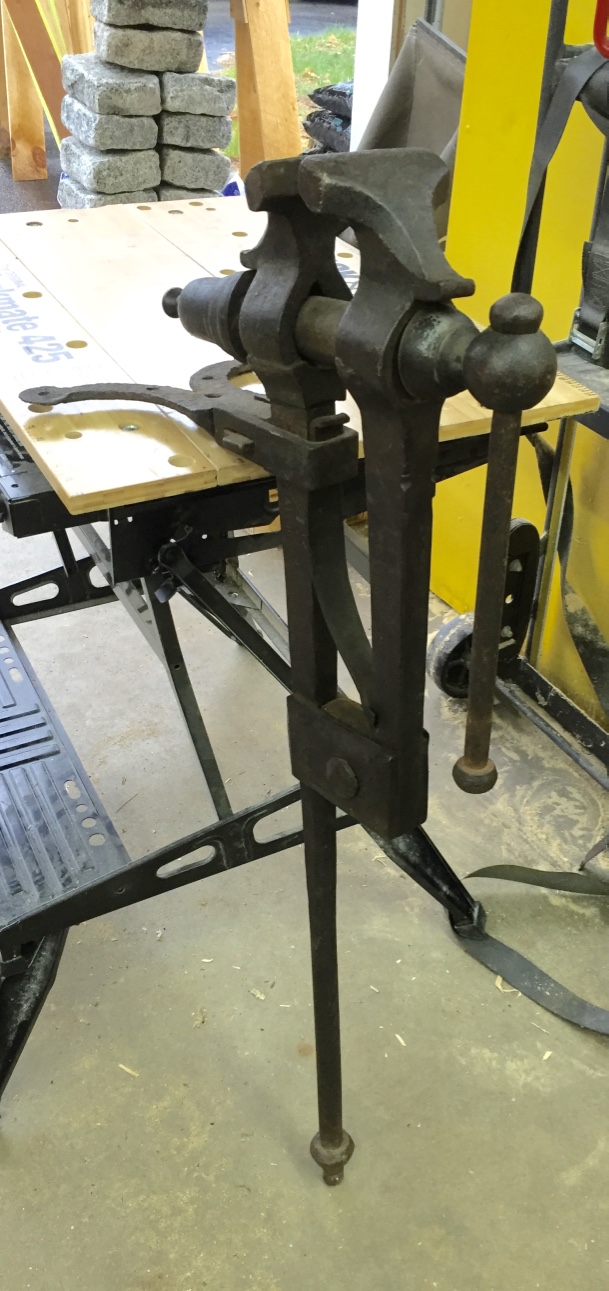
The same vendor also had a nice Leg Vise used for Blacksmithing that also caught my eye. The vendor was not at the booth and after waiting around for 15 or 20 minutes and going by some very VERY vague descriptions of what the seller looked like from neighboring booths, I posted my friend Ken (Thank you Ken 🙂 ) at the booth to keep an eye on my new treasures and went into the auction to search.

Nice complete Blacksmith Vise
Nice complete Blacksmith Leg Vise

As it turned out it was my friend Josh Clark of HyperKitten fame.

Top view of Blacksmith Leg Vise

It’s a nice big leg vise with some nice details, working spring, reasonably clean jaws and still a good amount of life left in the screw.

Side view with jaw open

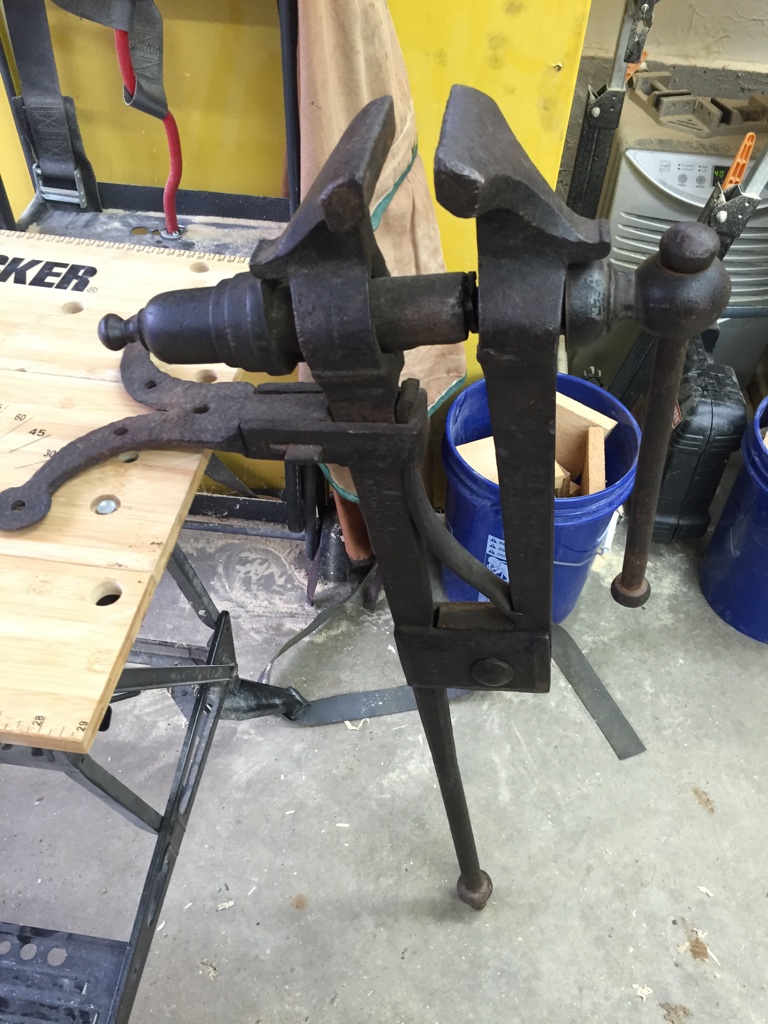
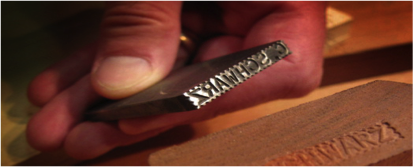
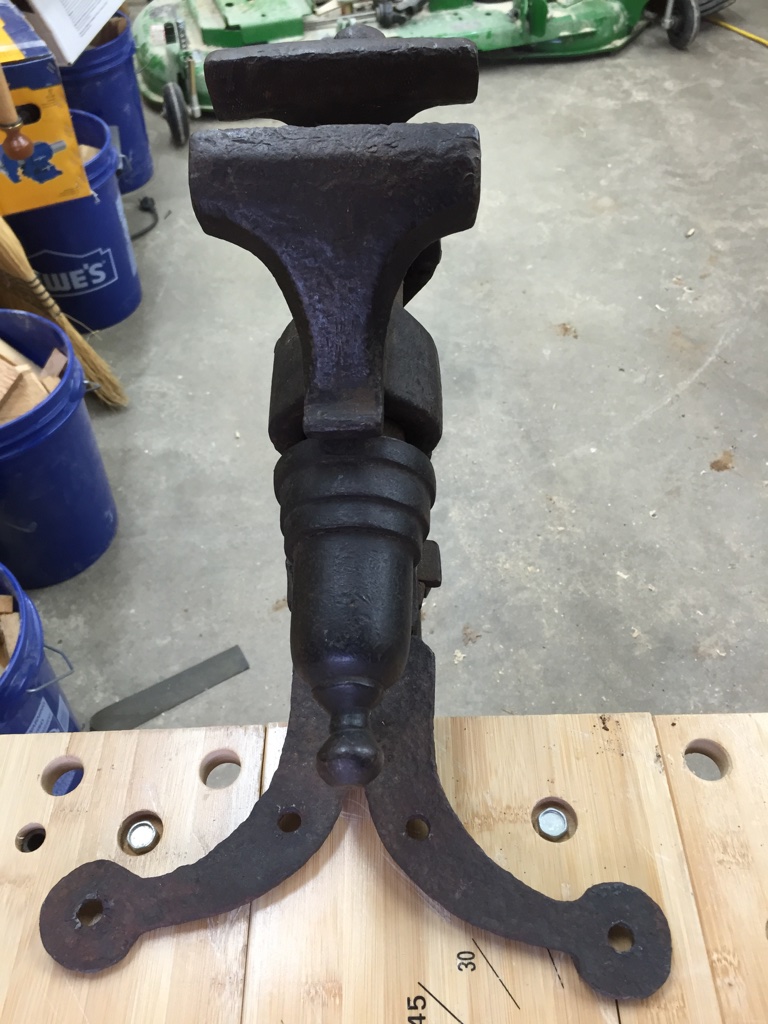
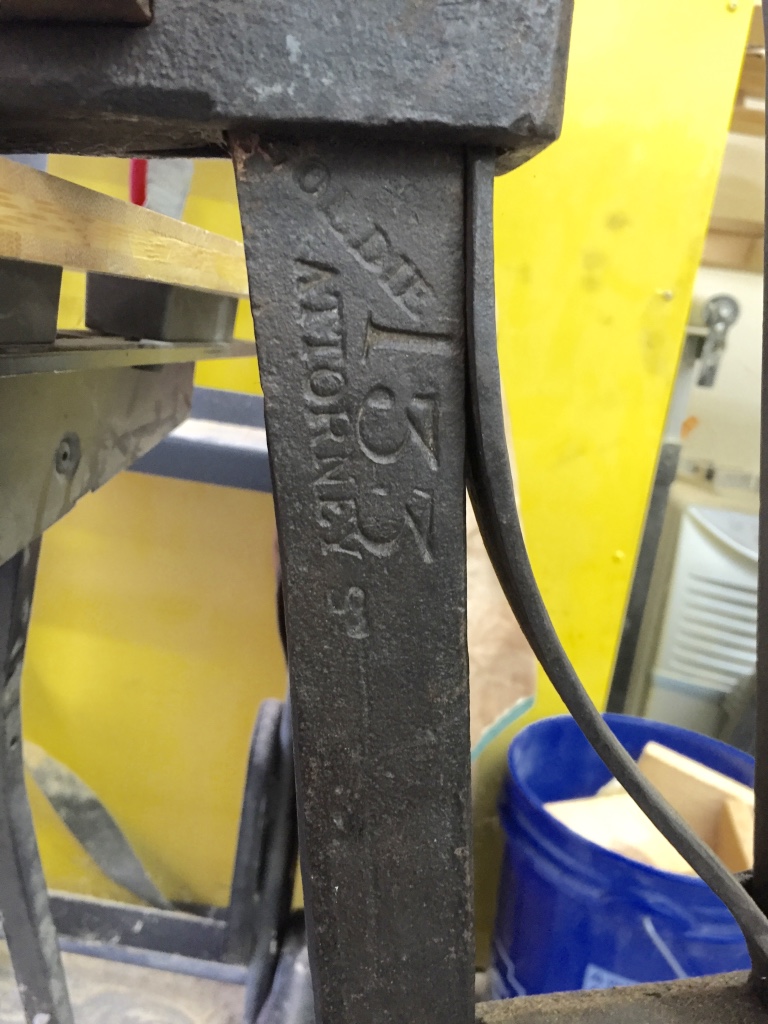
The vise had nice chamfered and some filed details and has a named stamp in it which reads “Goldie. 133 Attorney Street”.

Goldie, 133 Attorney Street NY

After doing some online research and in particular finding this post on a forum I was able to learn a little bit about this vise.

“From the above post by Frank Turley (Which had a lot of great pictures which have gone MIA, but matched my vise above) I

The raised letter markings are “GOLDIE” AND “133 ATTORNEY.” He googled and found that the maker was Joseph Goldie located at 133 Attorney Street, New York, NY. I found Goldie in my Directory of American Toolmakers as a maker of “anvils, rules, and vises,” 1842-1849. The son, Joseph Goldie, Jr., made “miniature vises and anvils,” probably for jewelers. The big vise has the wrap-around U-shackle with its split and splayed mounting bracket. It has chamfered legs and pivot beam. It has a nicely turned “bell shape” on the screw box, not too unlike the Peter Wright’s.

[Snip]

The tenoned vises were “composites.” The box was a forge welded tube with a coil of square-sectioned  stock brazed within for the internal threads. The stops, to keep it from turning. usually two, were brazed on.The external portion of the box was composed of perhaps 3 rings that were brazed together and then lathe turned. A careful cleaning will sometimes show lines of brass left from the original brazing. These old vises rarely exceeded a 4 1/2″ jaw width.

The tenon for the mount was often rectangular in section going through a hole in the fixed leg. This necessitated having a hole in the leaf spring. To tighten the assembly, the tenon had a carefully placed slot in it to receive a wedge.

The pivot beam usually had an unthreaded, headed bolt with slot to receive a wedge, not a nut and bolt. If there is a nut and bolt, it was probably added at a later date.

My pictured vise has a jaw width of 4 5/16″ and an overall length of 36″ — Frank Turley

All in all it was a good show, I saw a lot of old friends, picked up a couple of fun new tools for the shop and I look forward to the September show which is fast approaching.

Take care,
-Bill
@TheRainford

Making Your Mark — Name Stamps with Peter Ross

How do you mark your wooden tools ?

Carve your name into it? No.
Burn your name into it with a branding iron? Meh.
Sharpie? That’s so ’90s.
If you really want to be a traditional woodworker you’ll want to use a hand made metal name-stamp. I’ve seen some of these stamps over the years in tool sales, but never found my name or initials, so I figured it was time to take matters into my own hands. This past week I had the opportunity to take a workshop at the Woodwright’s School making a metal name-stamp. I had a great time during the class and will cover some of the highlights here:

Master Blacksmith Peter Ross at the forge

The class is held in the forge/workshop of Master Blacksmith Peter Ross who was the long time master of the blacksmith shop at Colonial Williamsburg. Pete is a friendly person and a great instructor.

In the afternoon Roy came by to visit. (Bill Rainford with Roy Underhill)

During the afternoon we were visited by Roy Underhill who came by to make sure we weren’t making counterfeit Nikes or anything illegal. 😉  It was great to chat with Roy for a few minutes and he’s every bit as nice in person as he is on TV.

My first stamp 'BMR' which will be used to mark some of my tools with my initials.
My first stamp ‘BMR’ which will be used to mark some of my tools with my initials.

Now on to business….for my first stamp I made one with my initials ‘BMR’ so that I can label some of my tools. By stamping some of my old wooden planes I’ll officially be part of the long line of owners who had them before me and those who will have them after me.

Testing my Initials stamp in some end grain

After forging the rough blank we learned to use the various types of files and letter stamps needed to make a nice stamp. Along the way we’d test the stamps in the end grain of some wood and in lead flashing.

Testing the stamps on some lead flashing

Why do you use end grain wood and lead flashing?!

The stamps work by crushing some fibers and leaving others proud, thus creating a 3D surface that can be read — much like you see in the maker’s marks on the toe of a molding plane. The lead does a great job showing you crisply where your stamp is pressing and where you may need to work on it some more.

Peter teaching the class how to file and use the leg vise

Peter demonstrated how to properly file and also how tough the surface of the stamps become once they were case hardened — the files were no match.

My second stamp -- 'RAINFORD' with a slight curve over the length of the stamp
My second stamp — ‘RAINFORD’ with a slight curve over the length of the stamp

Making a longer name stamp was even more challenging since the letters are all set free hand you could very easily mess it up with any given letter. If you do mess it up, file off the mistake and try again, and again as needed.

Testing my second stamp

For my second stamp I made my last name and curved it a bit to make a gentle arch. Around the edge of the stamp you could decorate it any way you wanted, the most common being a traditional sawtooth-like border.

Another test block showing some of the variation across the stamps

Most if not all folks in the class got a chance to make a couple of name stamps and practice their filing skills.

A beautiful lock that Pete made

Beyond the class itself we also got a chance to see some of the amazing work Peter does in his shop. From beautiful locks, to tools, to massive Roubo holdfasts it was neat to see the variety of black and whitesmithing tasks Peter carries out in his shop.

If you are interested in taking this workshop, please check out the Woodwright’s School website here. I had a great time and look forward to my next workshop at the Woodwright’s School.

The Road to Roy Underhill: Workshops With the Woodwright

Jointer Plane Making & Name Stamp Workshops

 At the Woodright’s School in Pittsboro NC


Are you interested in meeting and taking a woodworking class with Roy Underhill of the Woodwright’s Shop and Woodwright’s School? (Along with Peter Ross the former master of the Colonial Williamsburg Anderson Forge and Bill Anderson a master plane maker – both of which have been on Roy’s show)

I talked to Roy and the guys and they were willing to do a special run of the two workshops below on the following dates*: Arrive July 8th class 9-12th leave the 13th at Roy’s School in Pittsboro NC

* (Given the very long drive from NH down to NC I wanted to try and get a few days in a row down at Roy’s school to get the most I could out of the trip, and I am very appreciative they were willing to do so, but we need a few more people to sign up in order to run it) So if you are interested in one or both of these sessions I encourage you to sign up soon.


http://www.woodwrightschool.com/name-stamps-w-peter-ross/

1 Day class $145 + $40 materials

Peter Ross Name Stamp Workshop

http://www.woodwrightschool.com/making-bench-planes-wbill/

3 Day class $425 + $115 materials (beech + plane iron etc) to make a massive single iron jointer plane

Jointer Plane Workshop

Total: $725 Tuition and materials for 4 days + your own food and lodging. I will be driving down (11hour drive from NH) and if folks from NBSS or the general Boston area are interested in joining me I can carpool. Hotels in the area are $55-100/night.  Info from Roy on what it’s like to take a class at his school can be found here.

I also hear there is a good pizzeria behind the school that Roy has been known occasionally have a drink with the students after class and above the school is an old time used tool shop that has similar stuff to what we hunt for at the Nashua Tool show.

If folks are interested, we could also take an extra day to go see nearby Old Salem, which is home to the Museum of Southern Decorative Arts and a Moravian living history museum much like Colonial Williamsburg. http://www.oldsalem.org/ It’s kind of a crazy adventure, but I think it would be a memorable experience.

For more info, please contact me or sign up at Roy’s site:

You can reach Bill Rainford at: (My firstname ‘dot’ lastname at facebook.com) — or via my blog or my linkedin page

Woodwright’s School Registration Page

Getting Hooked on Blacksmithing

I recently had the opportunity to take one of the ‘Taste of Blacksmithing’ classes at the Prospect Hill Forge in Waltham MA as part of the NBSS group event there. It’s something I wanted to take for a long time and I am happy I finally got to take it. During the class we learned some basic techniques and principles of how to work metal, then Carl and Mike let us try it for ourselves. The project for the class was a drive hook — which is a hook you would drive into a timber framed post or similar and then use like any other hook. (see below)

Completed Drive Hook
Completed Drive Hook. First thing I ever forged -- I really like it. You would drive it into a post and use it like any other hook. Has nice twisting detail.

I’m looking forward to talking more classes there in the future.

You can find out more about the Prospect Hill Forge here. Carl and Mike were great instructors, and like me worked in Software/High Tech. 🙂

Here is a brief slide show from our class:

This slideshow requires JavaScript.