All posts by @TheRainford

Maker, Joiner, Traditional Woodworker, Instructor, Engineer, Open Source Software and Hardware, Preservation Carpentry, Custom Furniture, Custom Mill work, Instruction, Preservation Masonry. Yep, I like to make stuff.

Live Free or Die Tool Auction and Sale

The Live Free or Die Tool Auction (and the sale out in the lot out back), also known as the ‘Nashua Tool Show’ is one of the few times a year I am happy to get up at 5am. I rarely if ever go into the actual auction; I spend all my time and money out in the parking lot tracking down odd and old tools on my list and all the things I didn’t know I needed until I found them and realized how I could not live without them. 😉  It’s a great event twice a year and well worth the trip if you are into old hand tools.

Below is a highlight reel from this weekend’s show and sale:

Workbench
Workbench

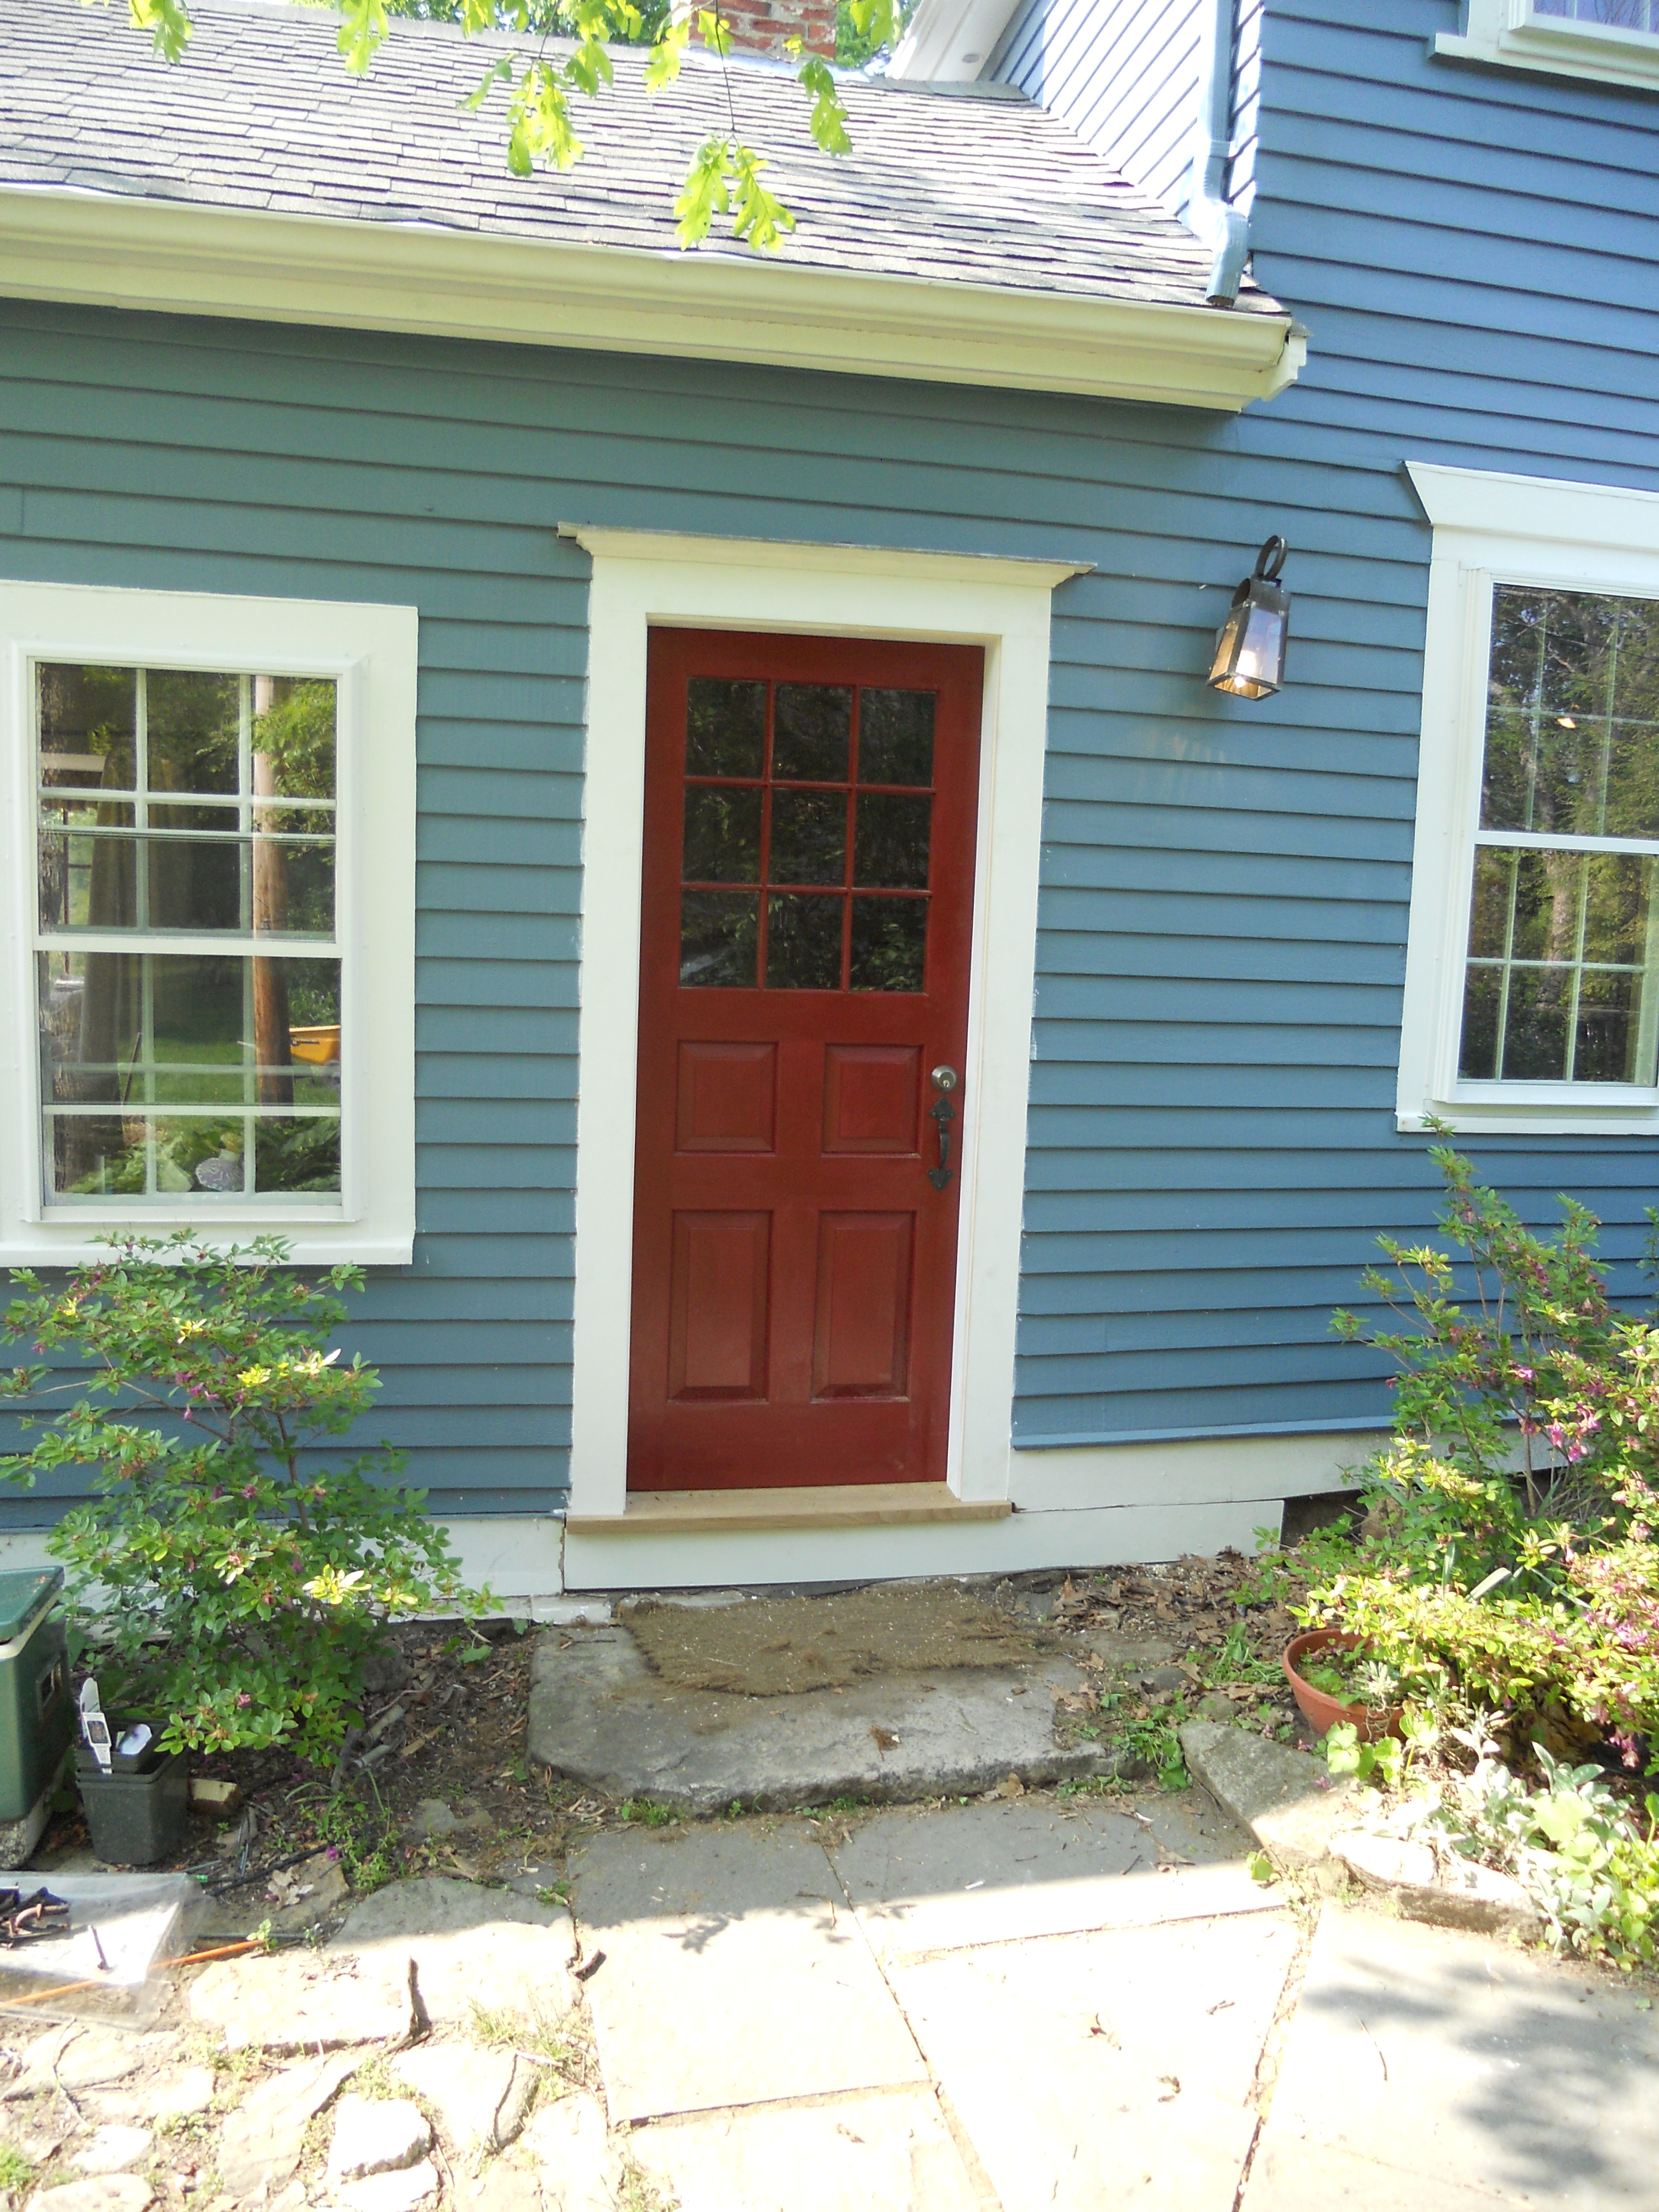
A stout, but short workbench.

Interesting tray
Interesting tray

An interesting tool tote/tray that holds the tools off the ground for easier access.

Shur Stop Glass Ball Fire Extinguishers

Neat antique fire extinguisher grenades by ‘Shur Stop’. I never saw a full technician’s case of them before along with several of the holders for them. If they were exposed to enough heat the hammer would spring like a mouse trap, smash the glass causing a violent chemical reaction that would remove oxygen from the area and hopefully put out the fire. We’ll often see these over old boilers or up in the attics of old homes.

Full Case of Shur Stop Glass Ball Fire Extinguishers

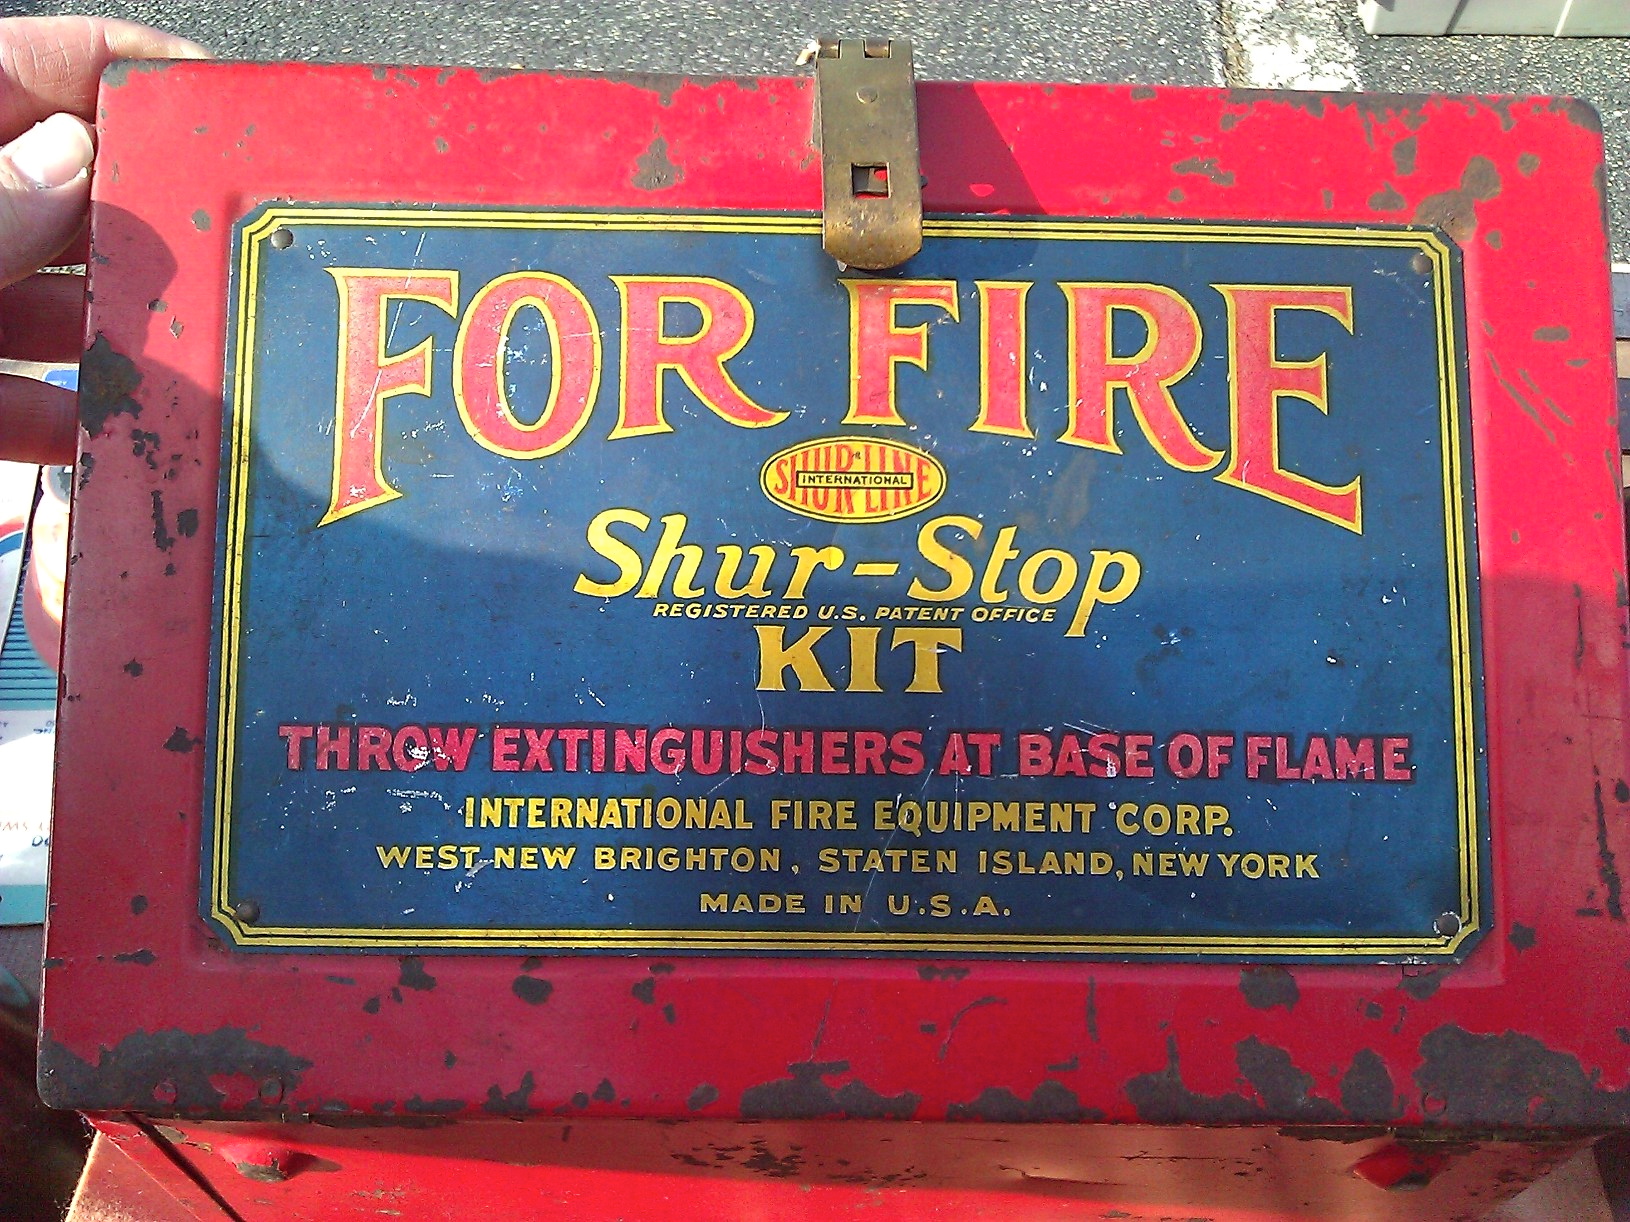
Apparently you could also throw them at the base of a flame — giving them the nickname: ‘Fire Extinguisher Grenade’

1897 Folding Sawing Machine

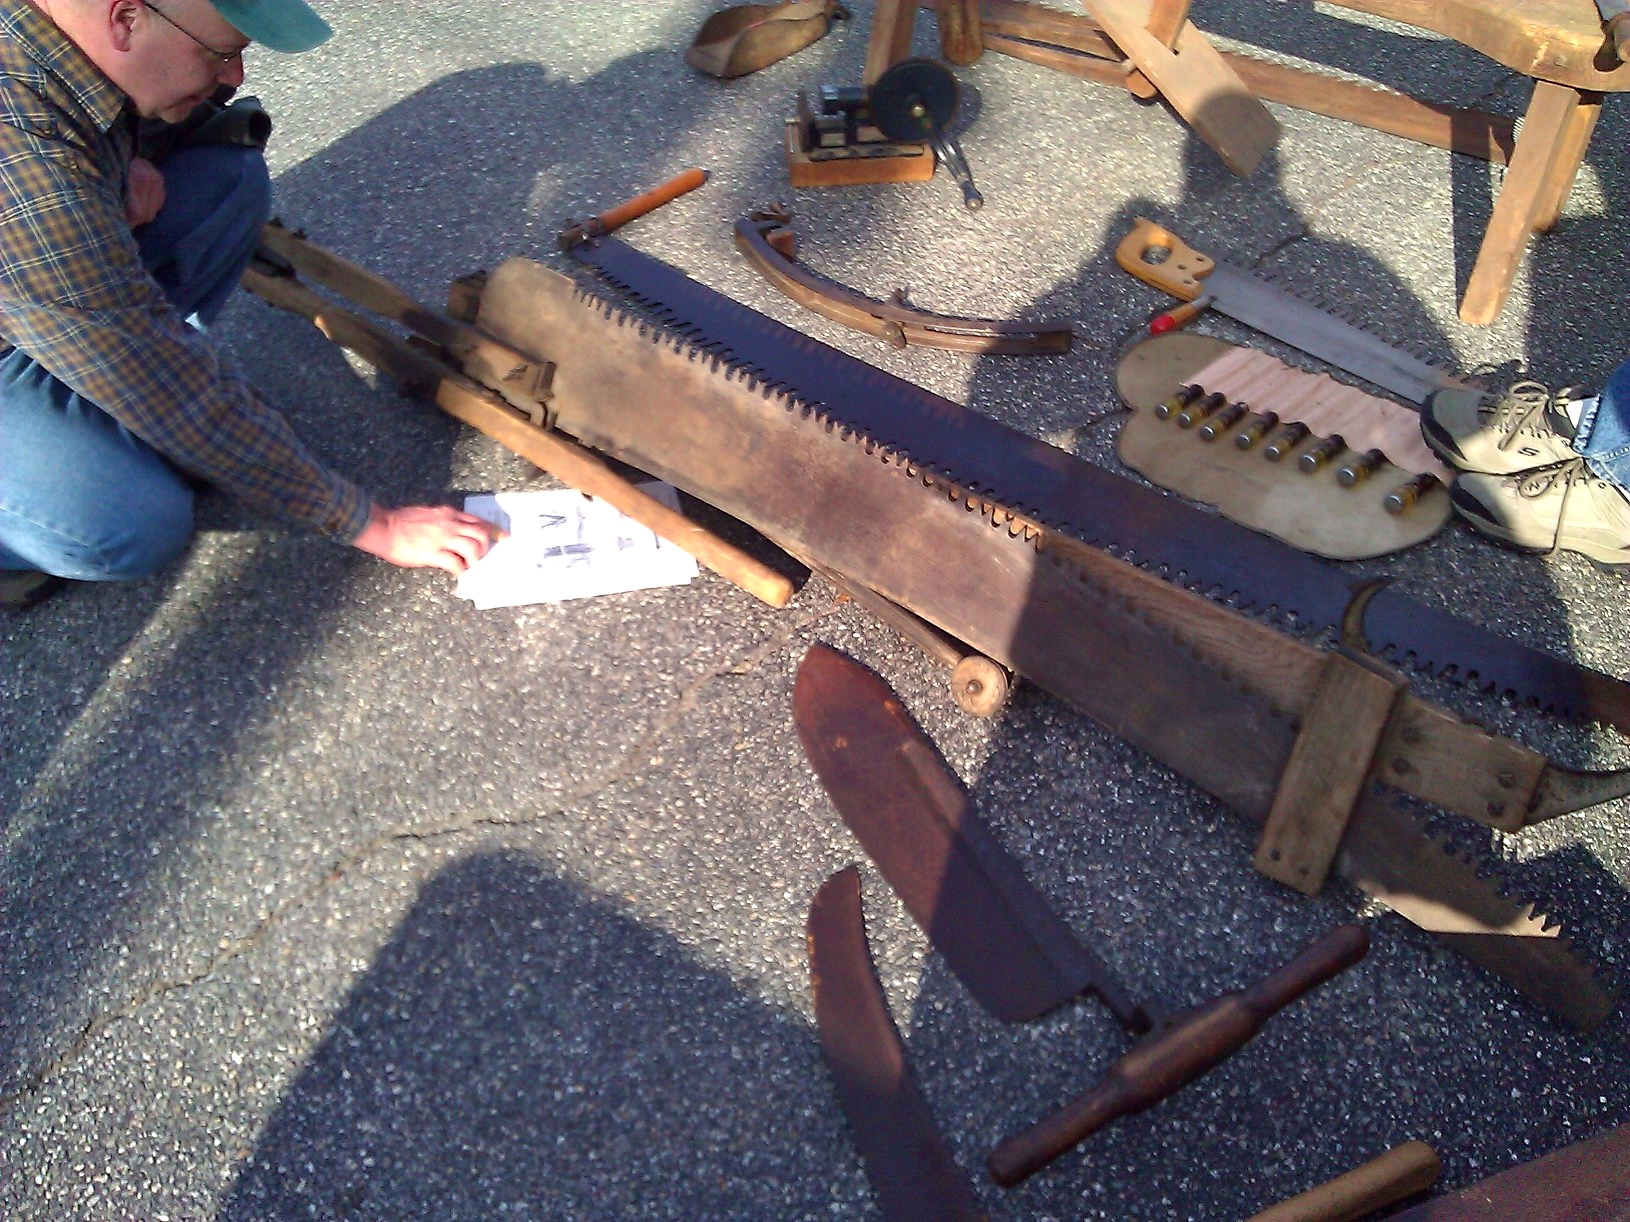
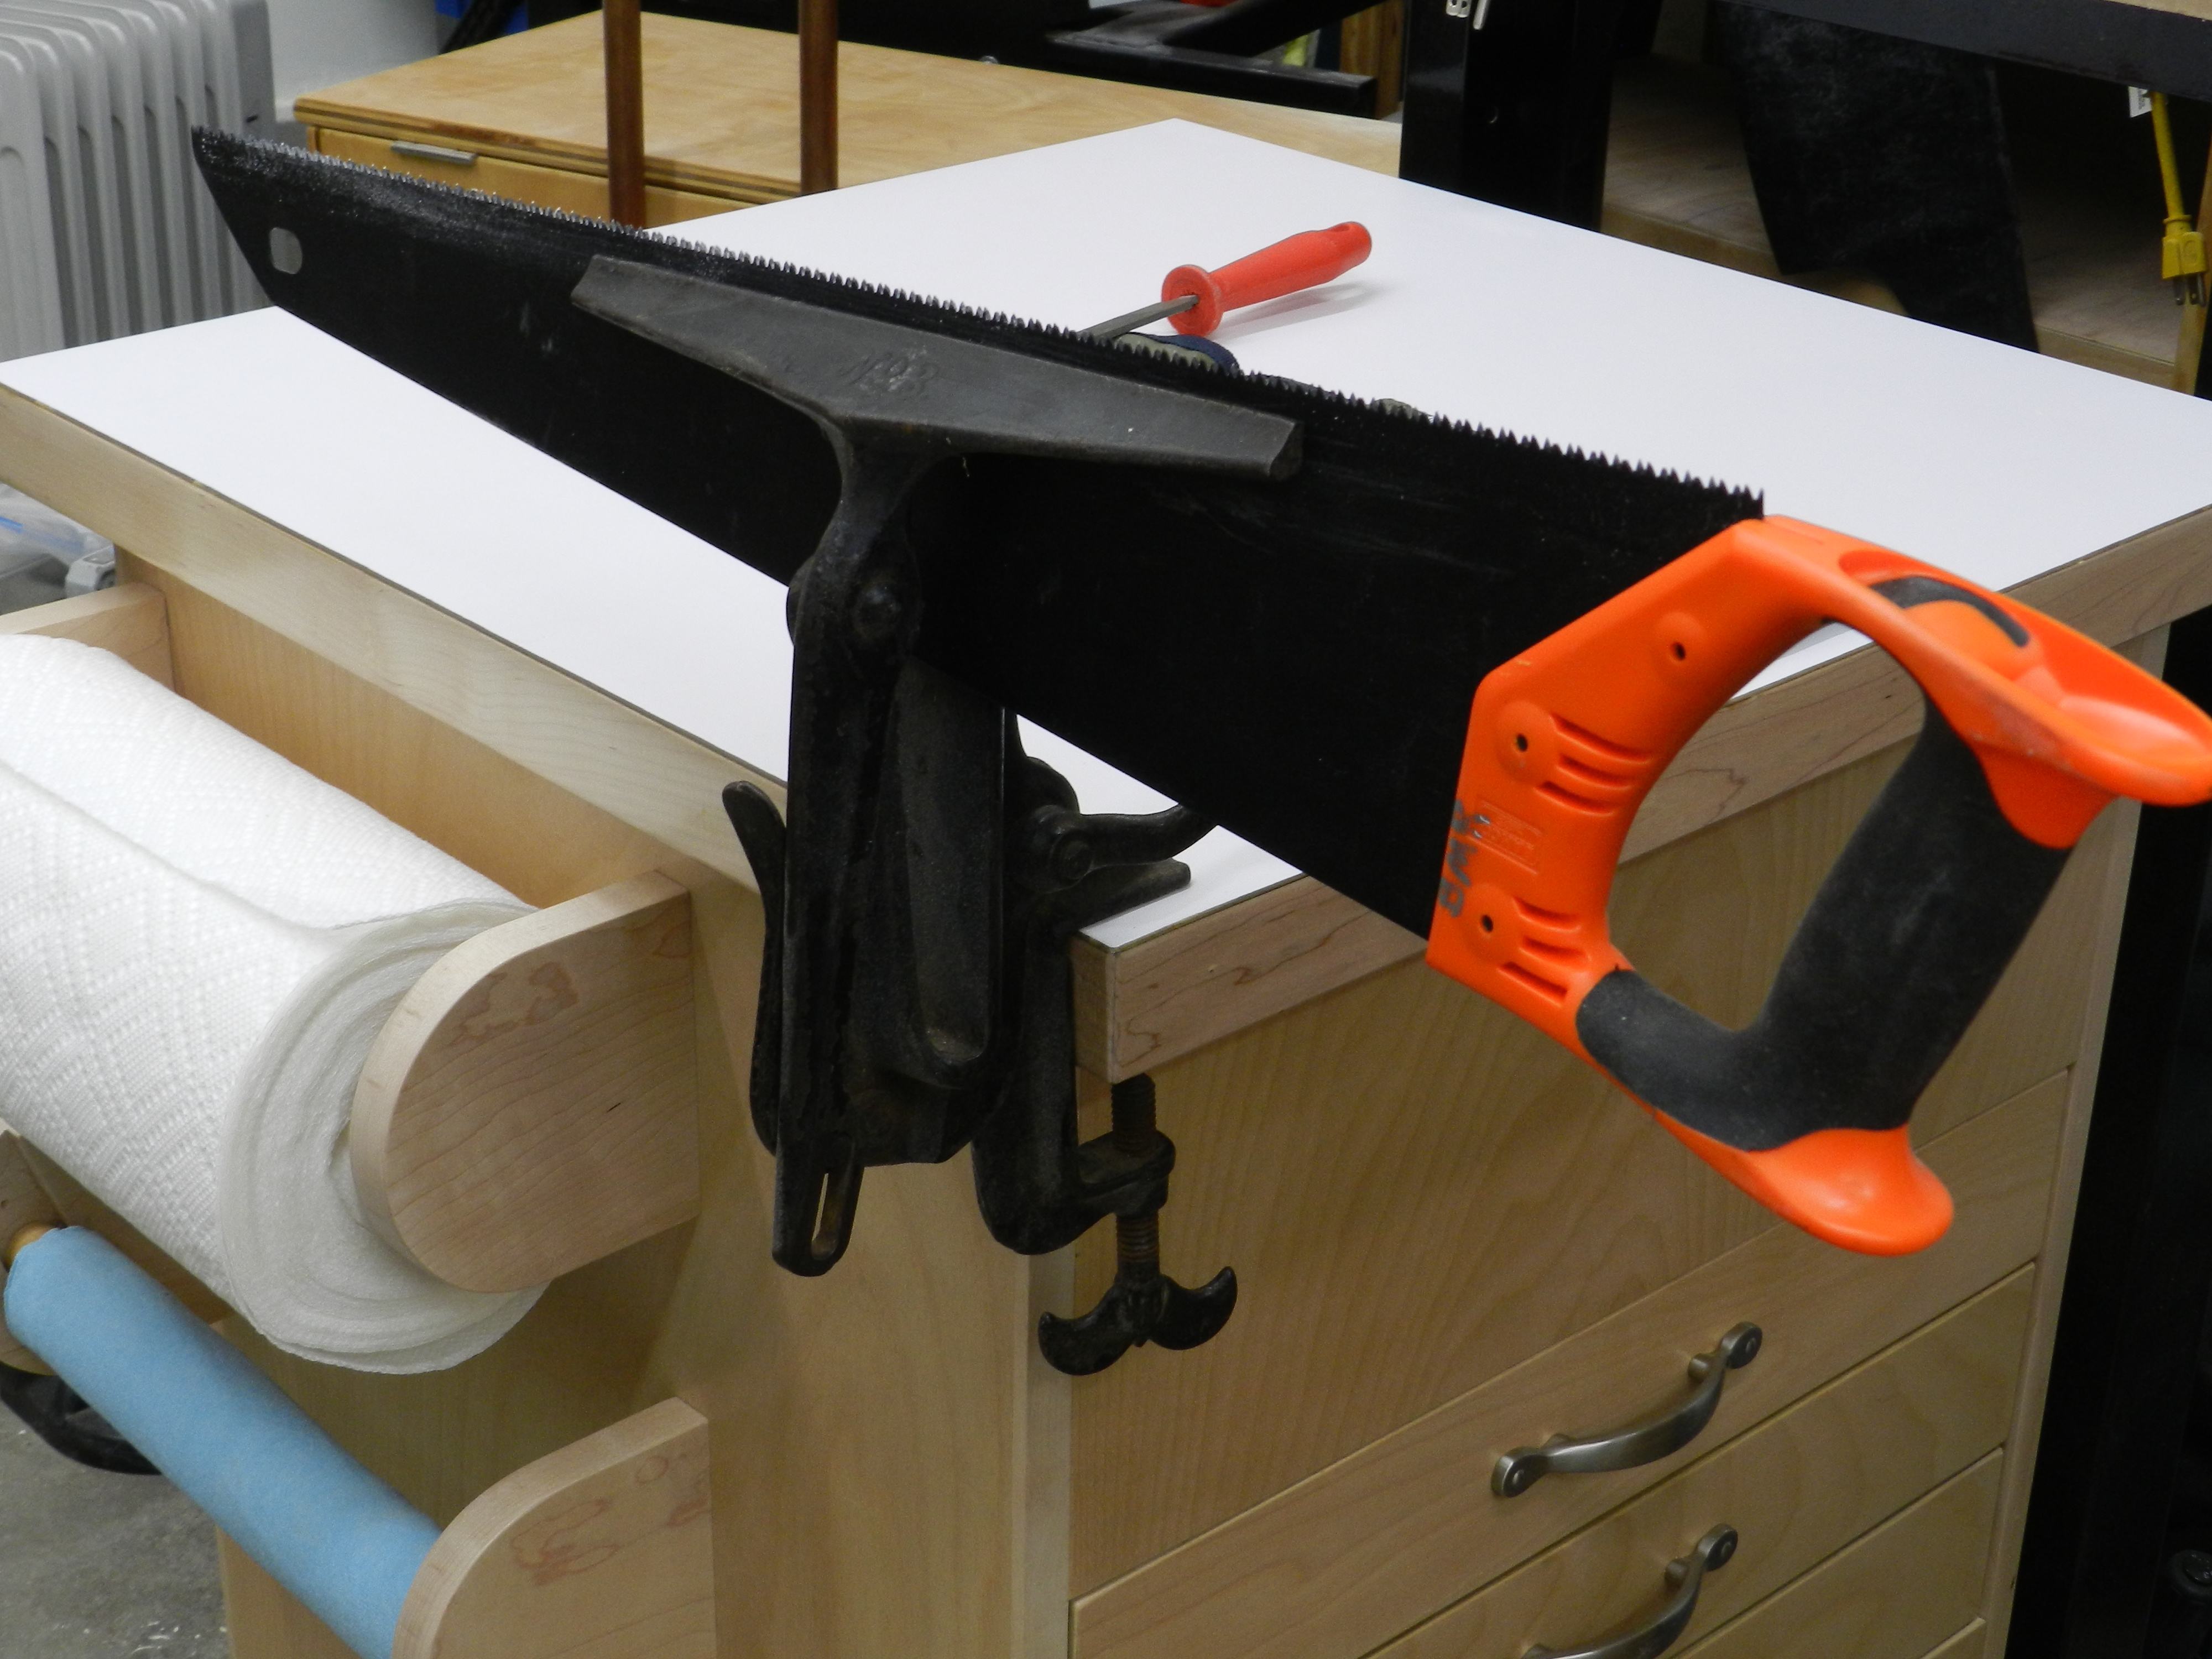
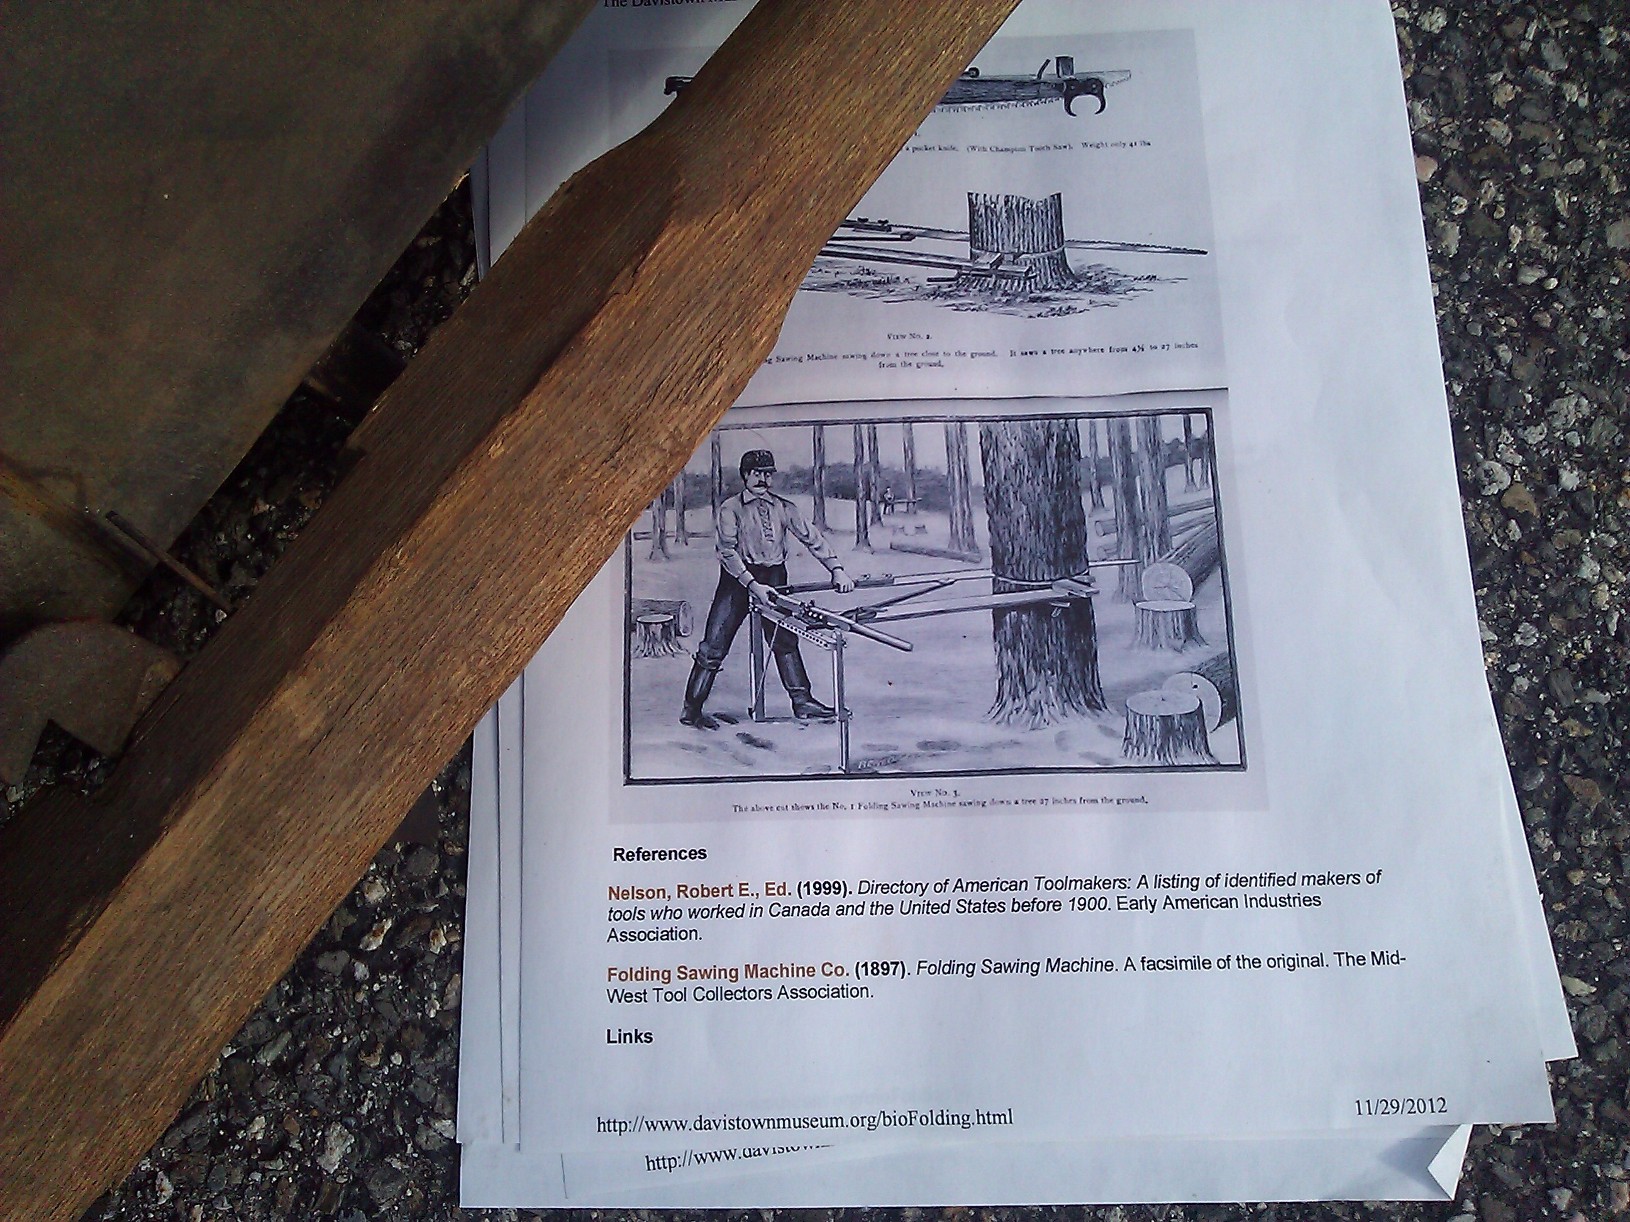
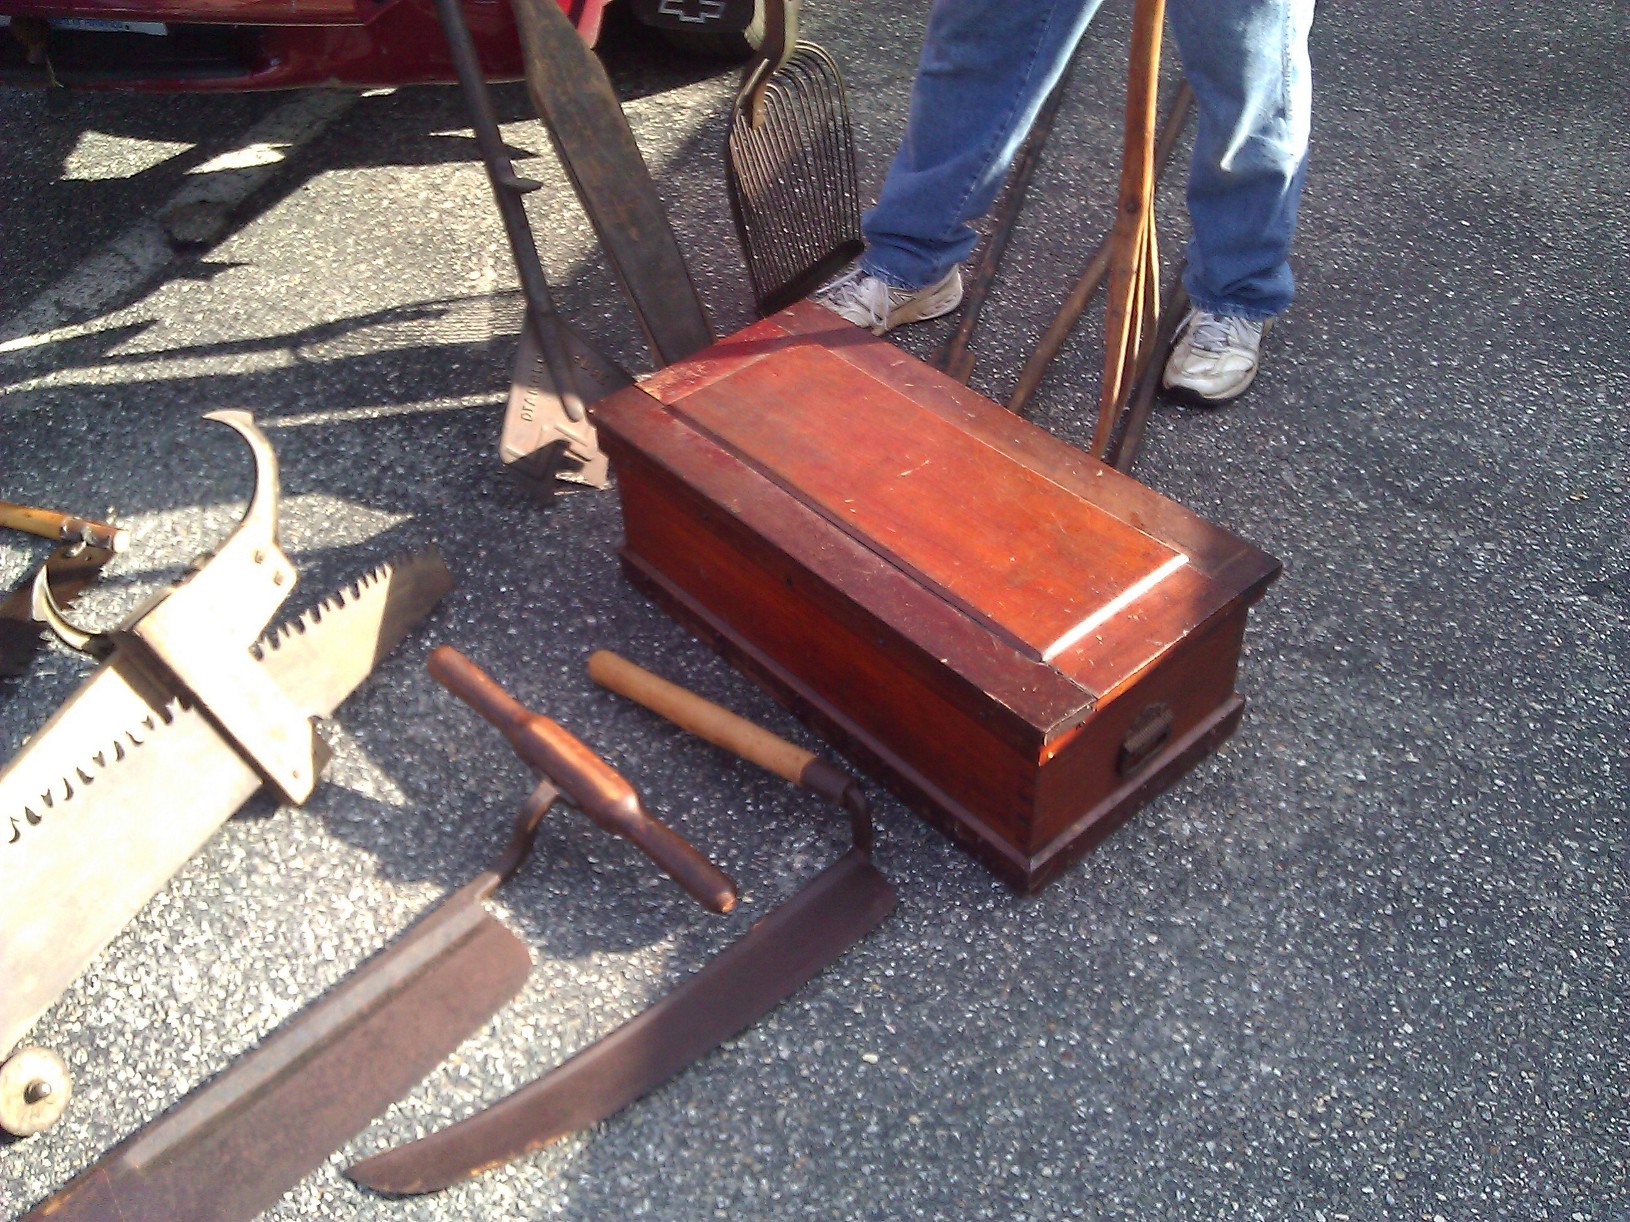
If you are living in the 1890s and want to use a 2 man saw to fell a large tree and don’t have any friends willing to help, you should check out this ‘Folding Sawing Machine’ from 1897.  It helps hold the saw perpendicular to the tree and allows you to use a lever to push and pull the saw.

1897 Folding Sawing Machine


Shave Horse aka Schnitzelbank

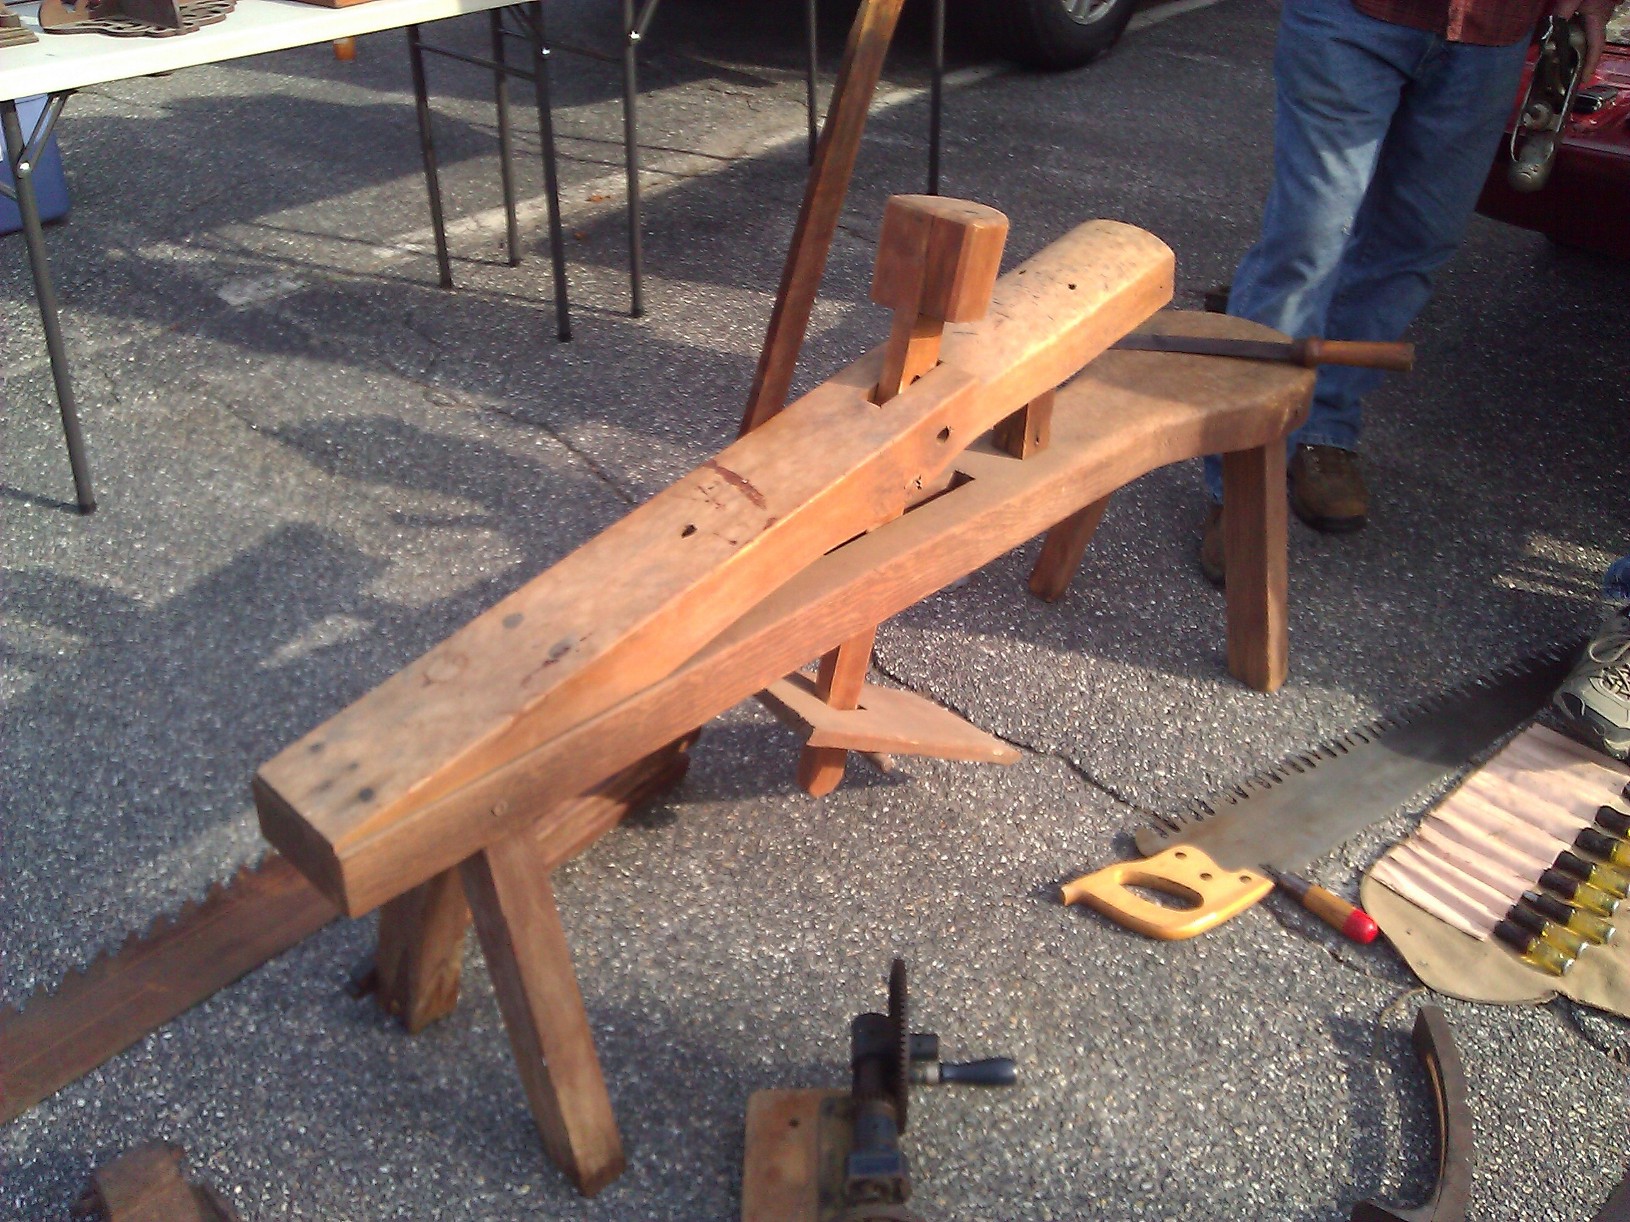
A nice oak shave horse or schnitzelbank It was made from heavy oak, pegged and secured with cut nails.

Small Traveling Tool Chest


Pair of tool chests
Pair of tool chests


Metal Tool Cabinet
Metal Tool Cabinet

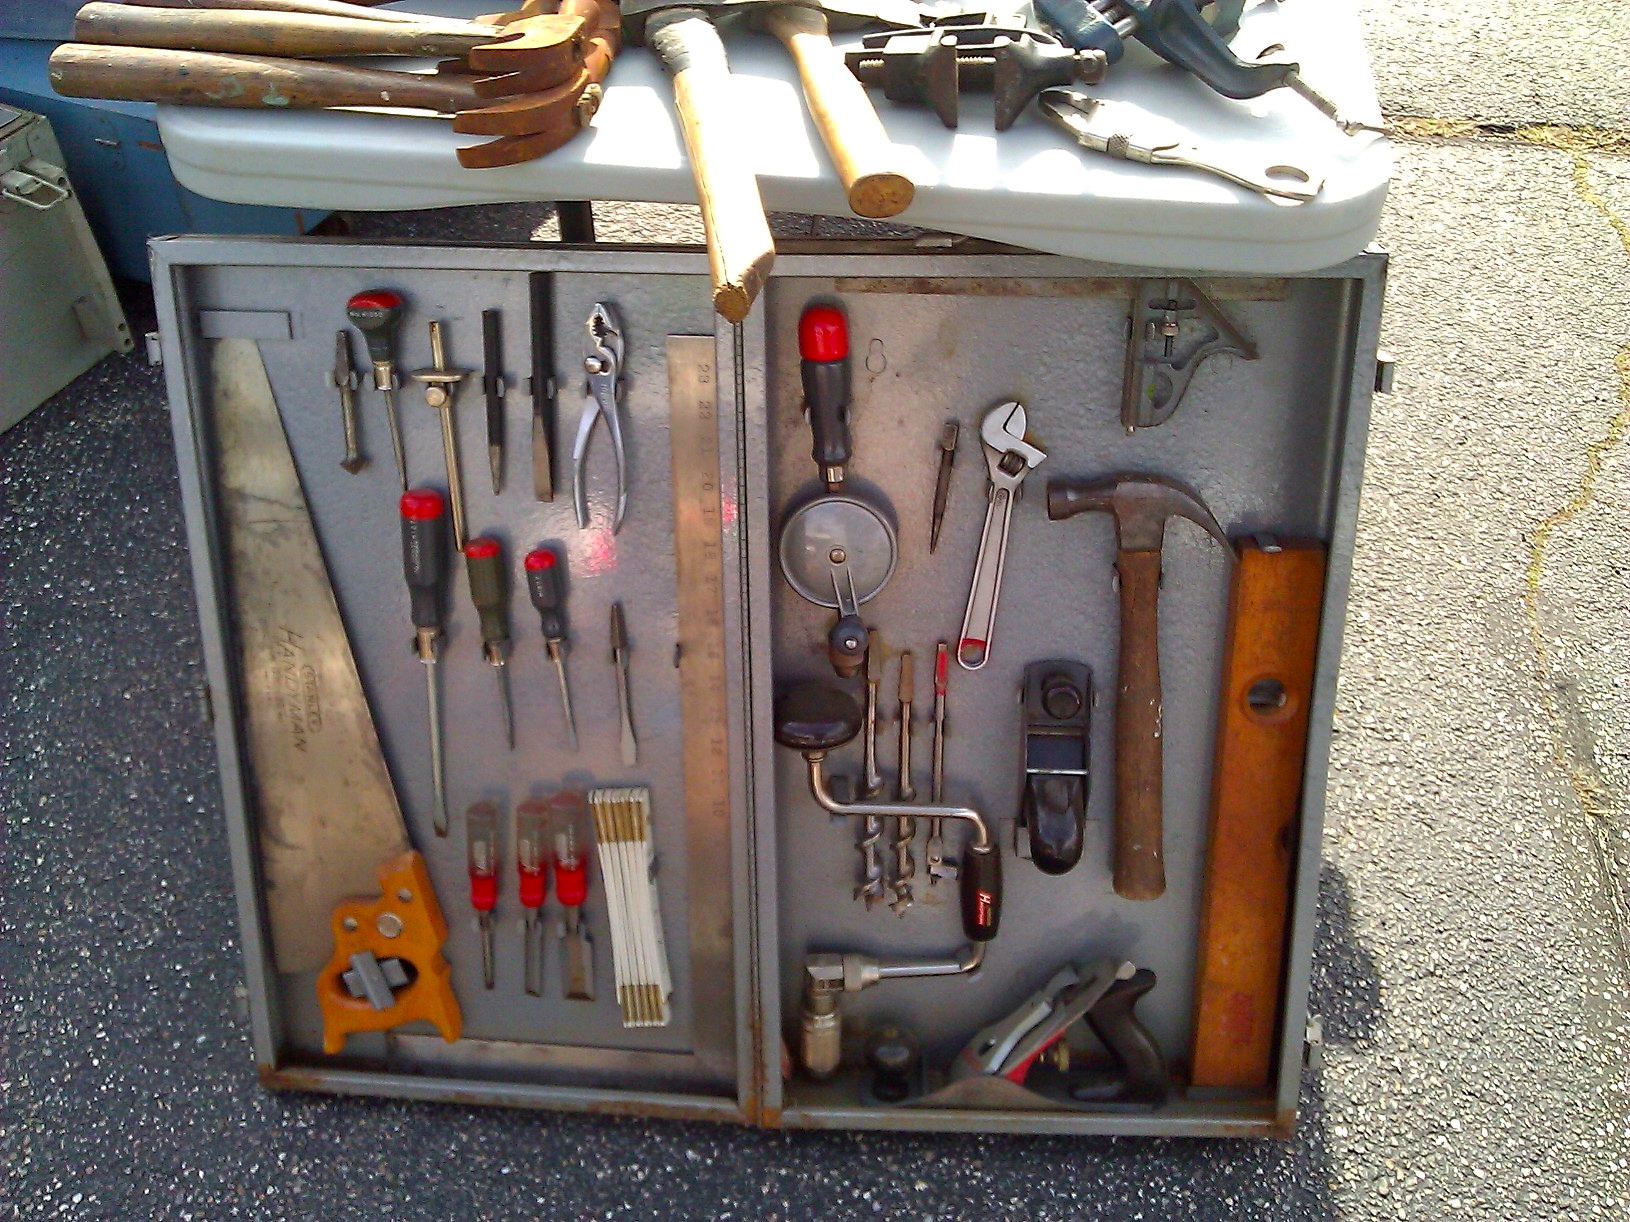
An interesting commercial tool cabinet made from metal with what looked like mediocre post WWII tools.

Machinist Tool Chest


Saw till on lid closed. Lid back on tool tray in chest -- Nantucket Tool Chest
Saw till on lid closed. Lid back on tool tray in chest — Nantucket Tool Chest

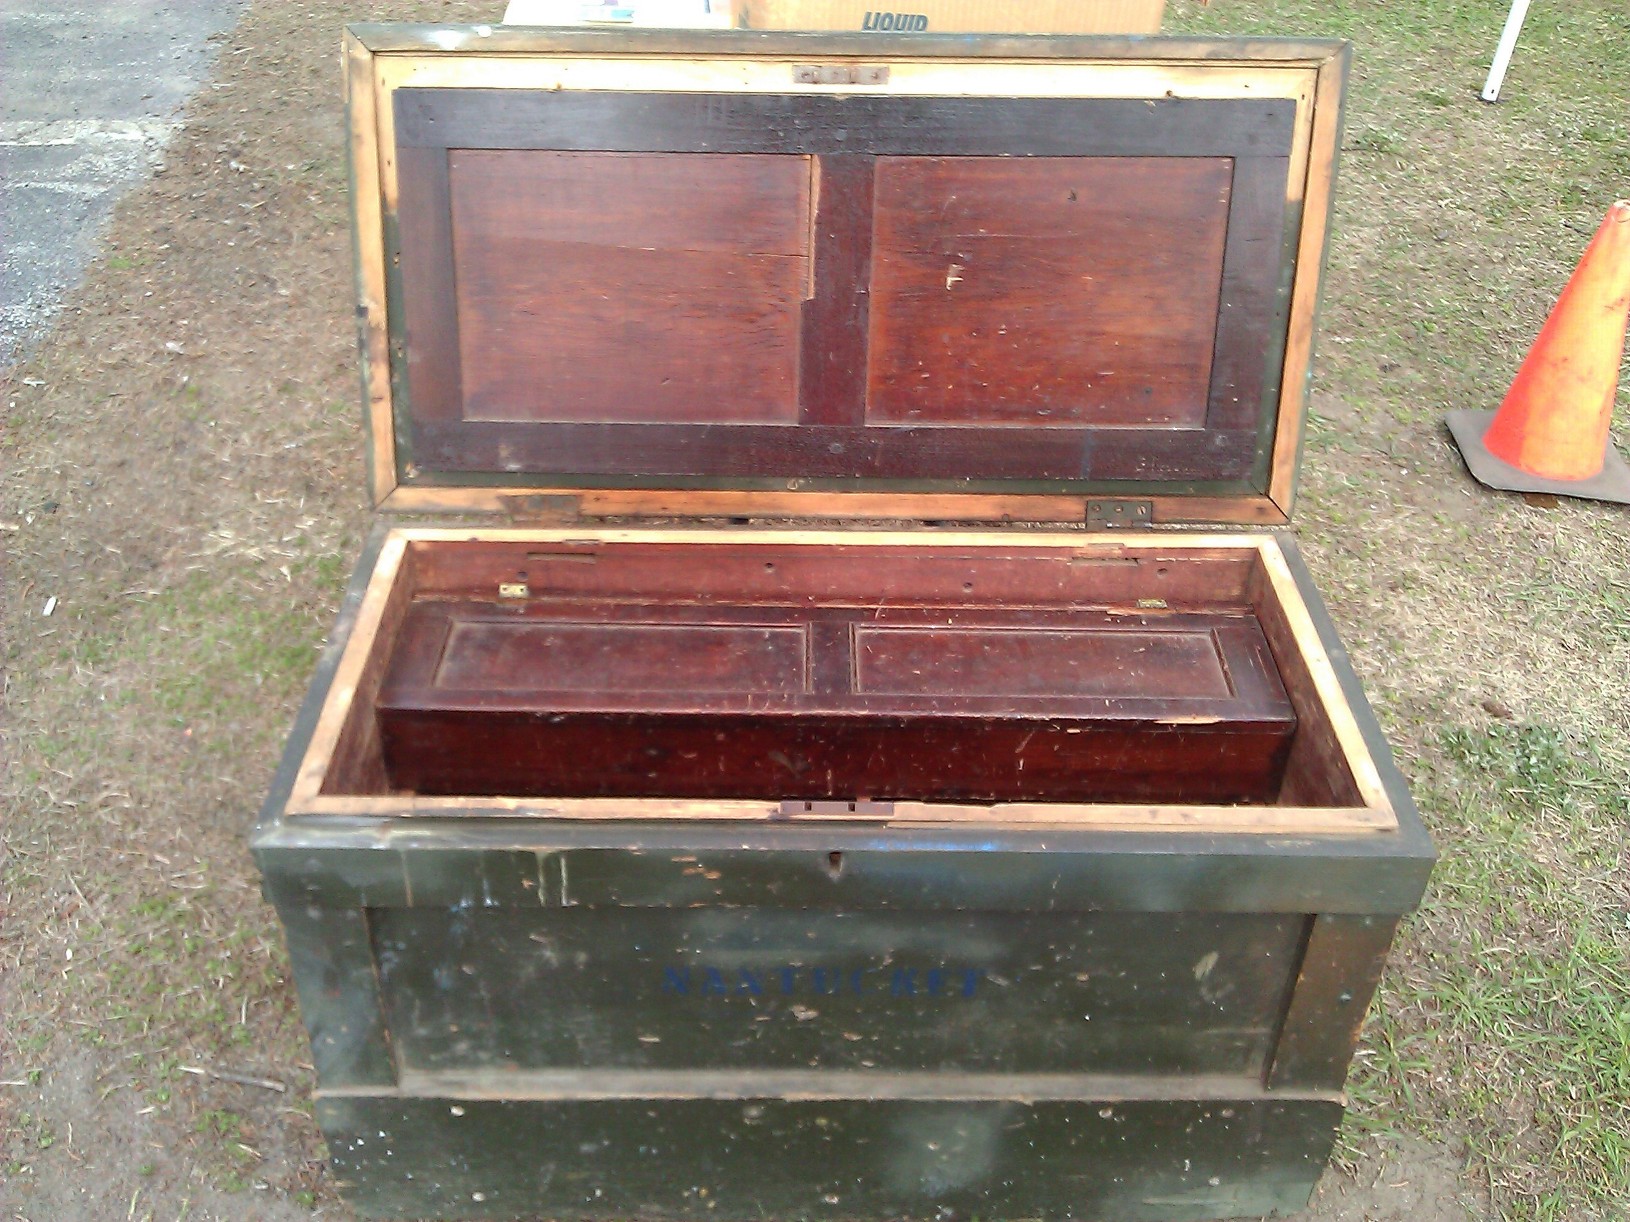
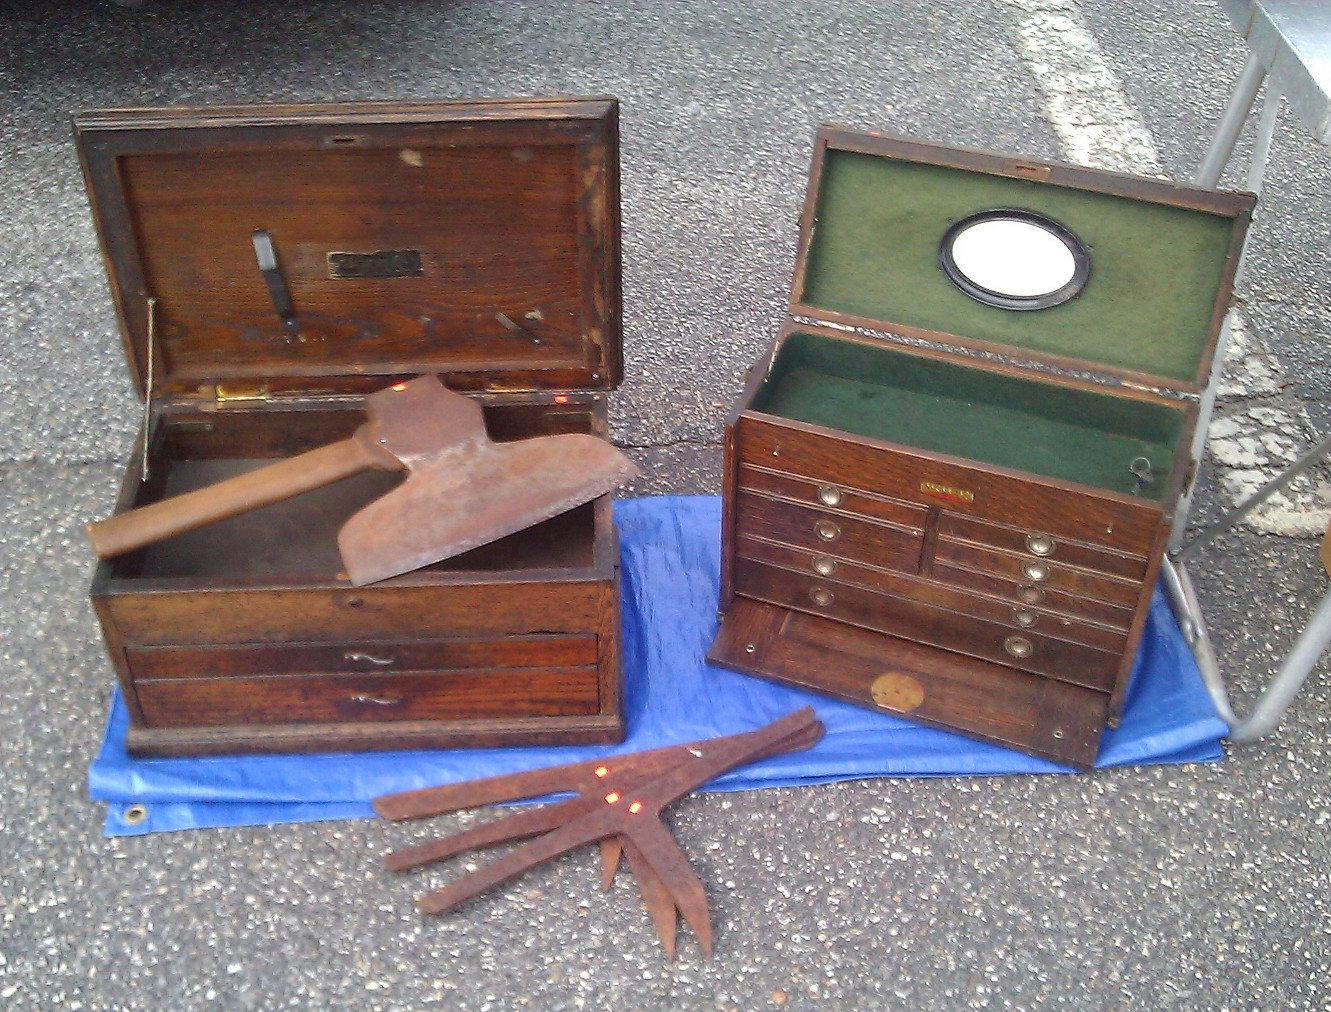
While no Anarchist’s tool chests were to be found this year, this solid old chest, presumably from Nantucket given the huge painted label on the front. It looks like it was based on traditional designs, made in the 20th century but built a bit more like a modern carpenter with very simple joinery compared to a traditional joiner who more likely would have used dovetails, mortise and tenon etc.

Sliding Tool Trays or Tills -- Nantucket Tool Chest
Sliding Tool Trays or Tills — Nantucket Tool Chest

The till lid screws were stripped and was removed for the above photo. There were 3 layers of tills and at least one division on the bottom to divide the bottom compartment of the chest.

Saw Till -- Nantucket Tool Chest
Saw Till — Nantucket Tool Chest

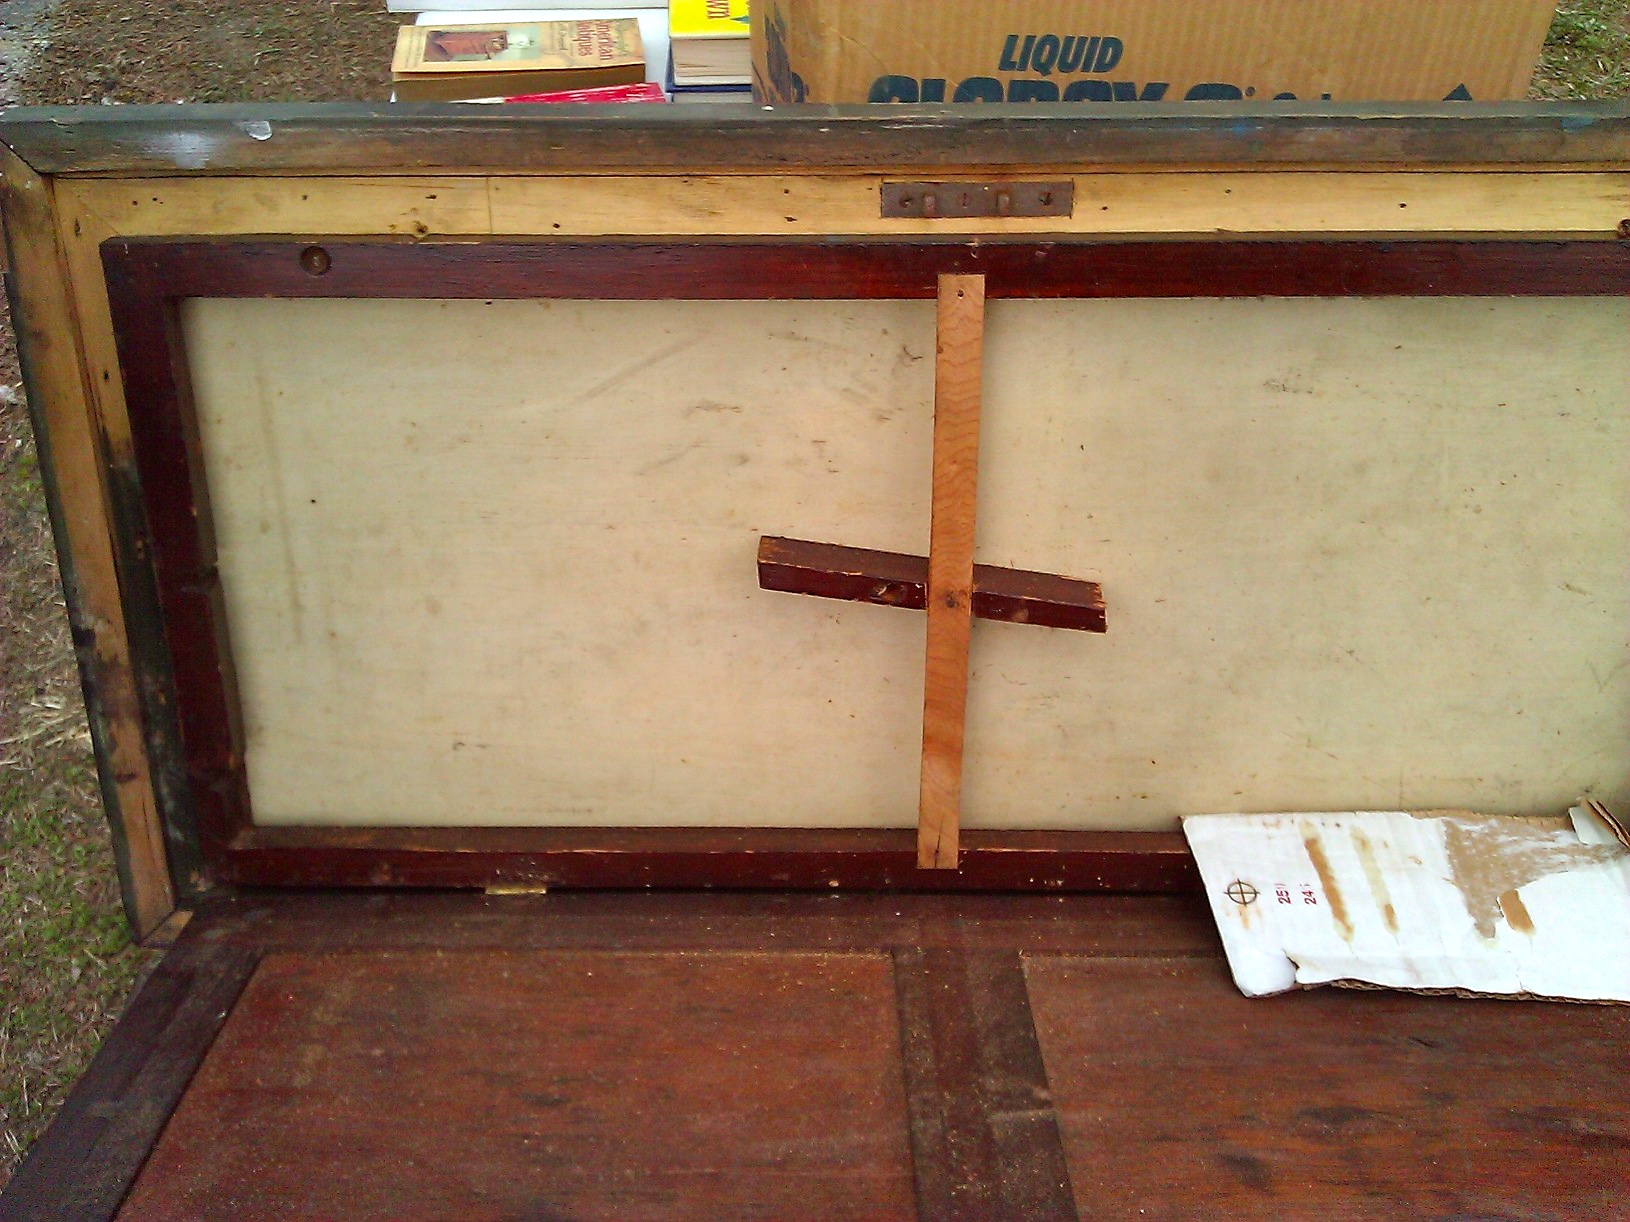
Saw till was protected by a frame and panel that attempted to dress up the chest. The corners of the chest were reinforced with extra wood and hid the joinery, but I suspect the overlapping boards mean that the corners were potentially all nailed together which means this chest was likely built quickly.

Nantucket Tool Chest

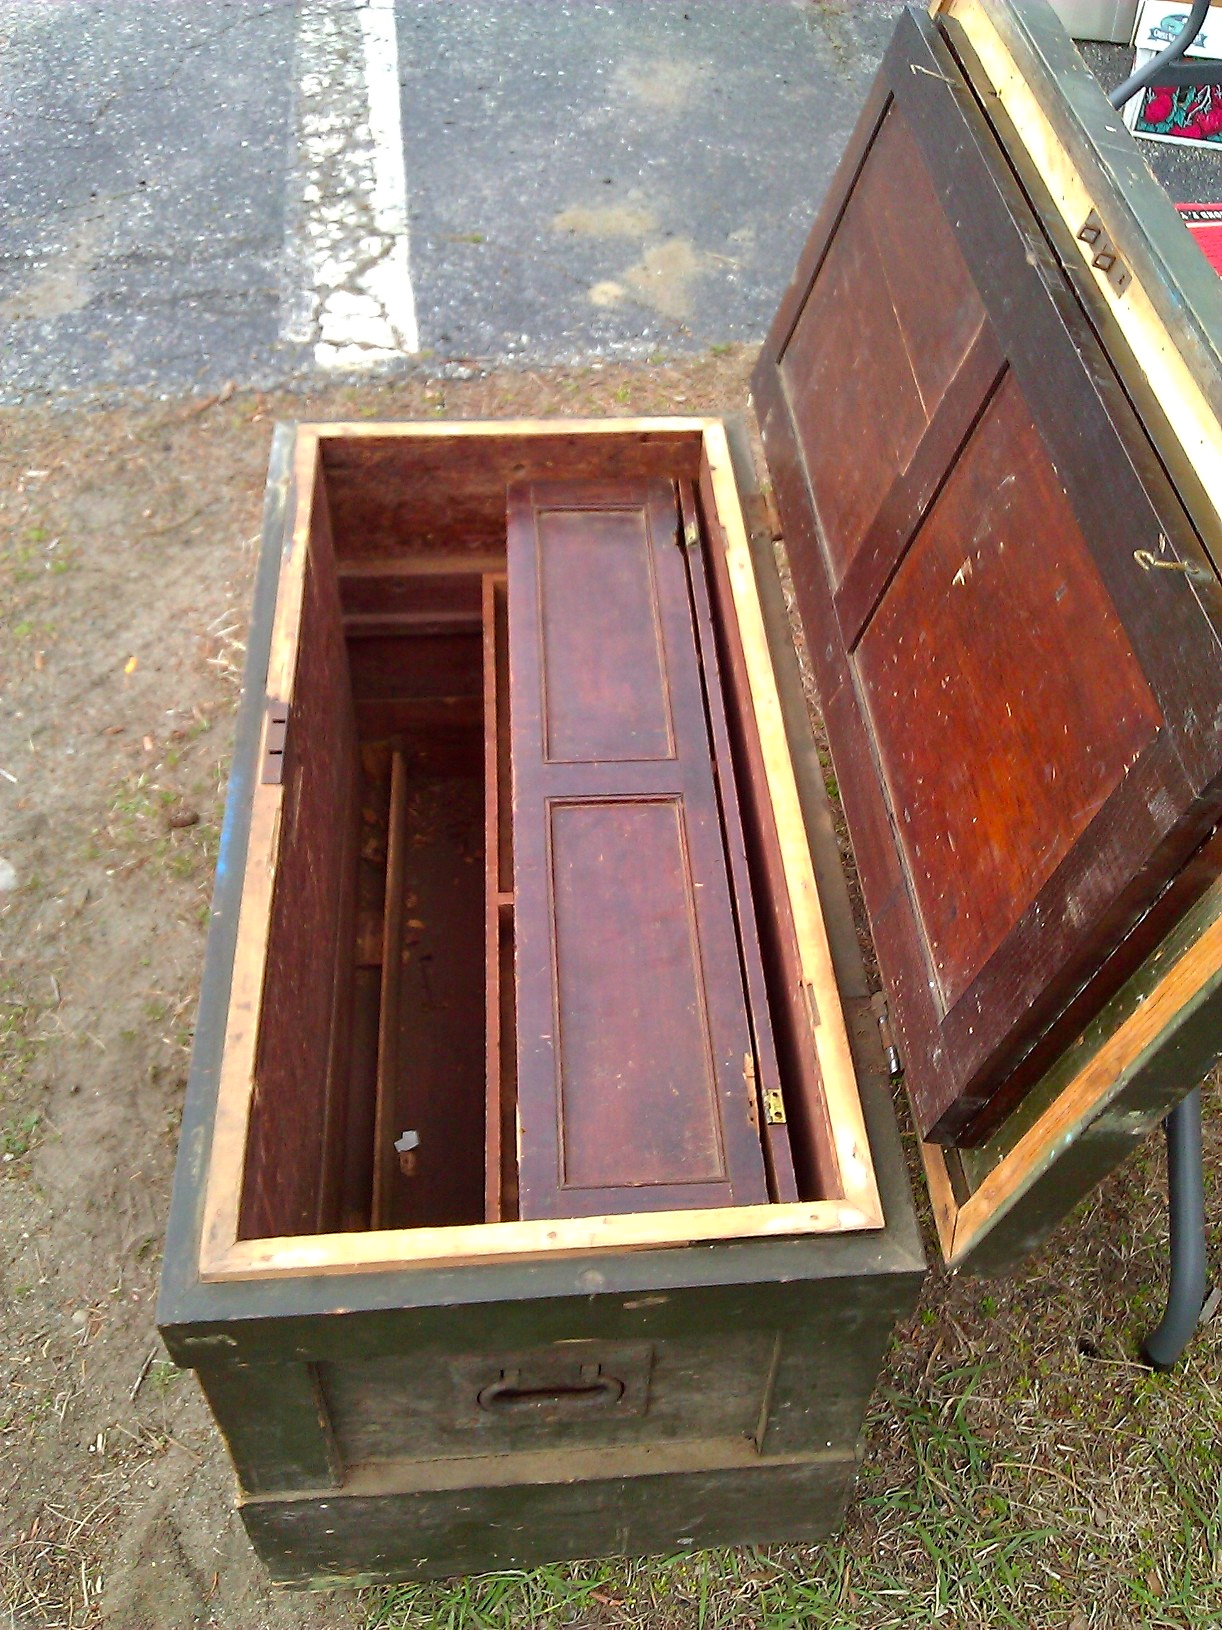
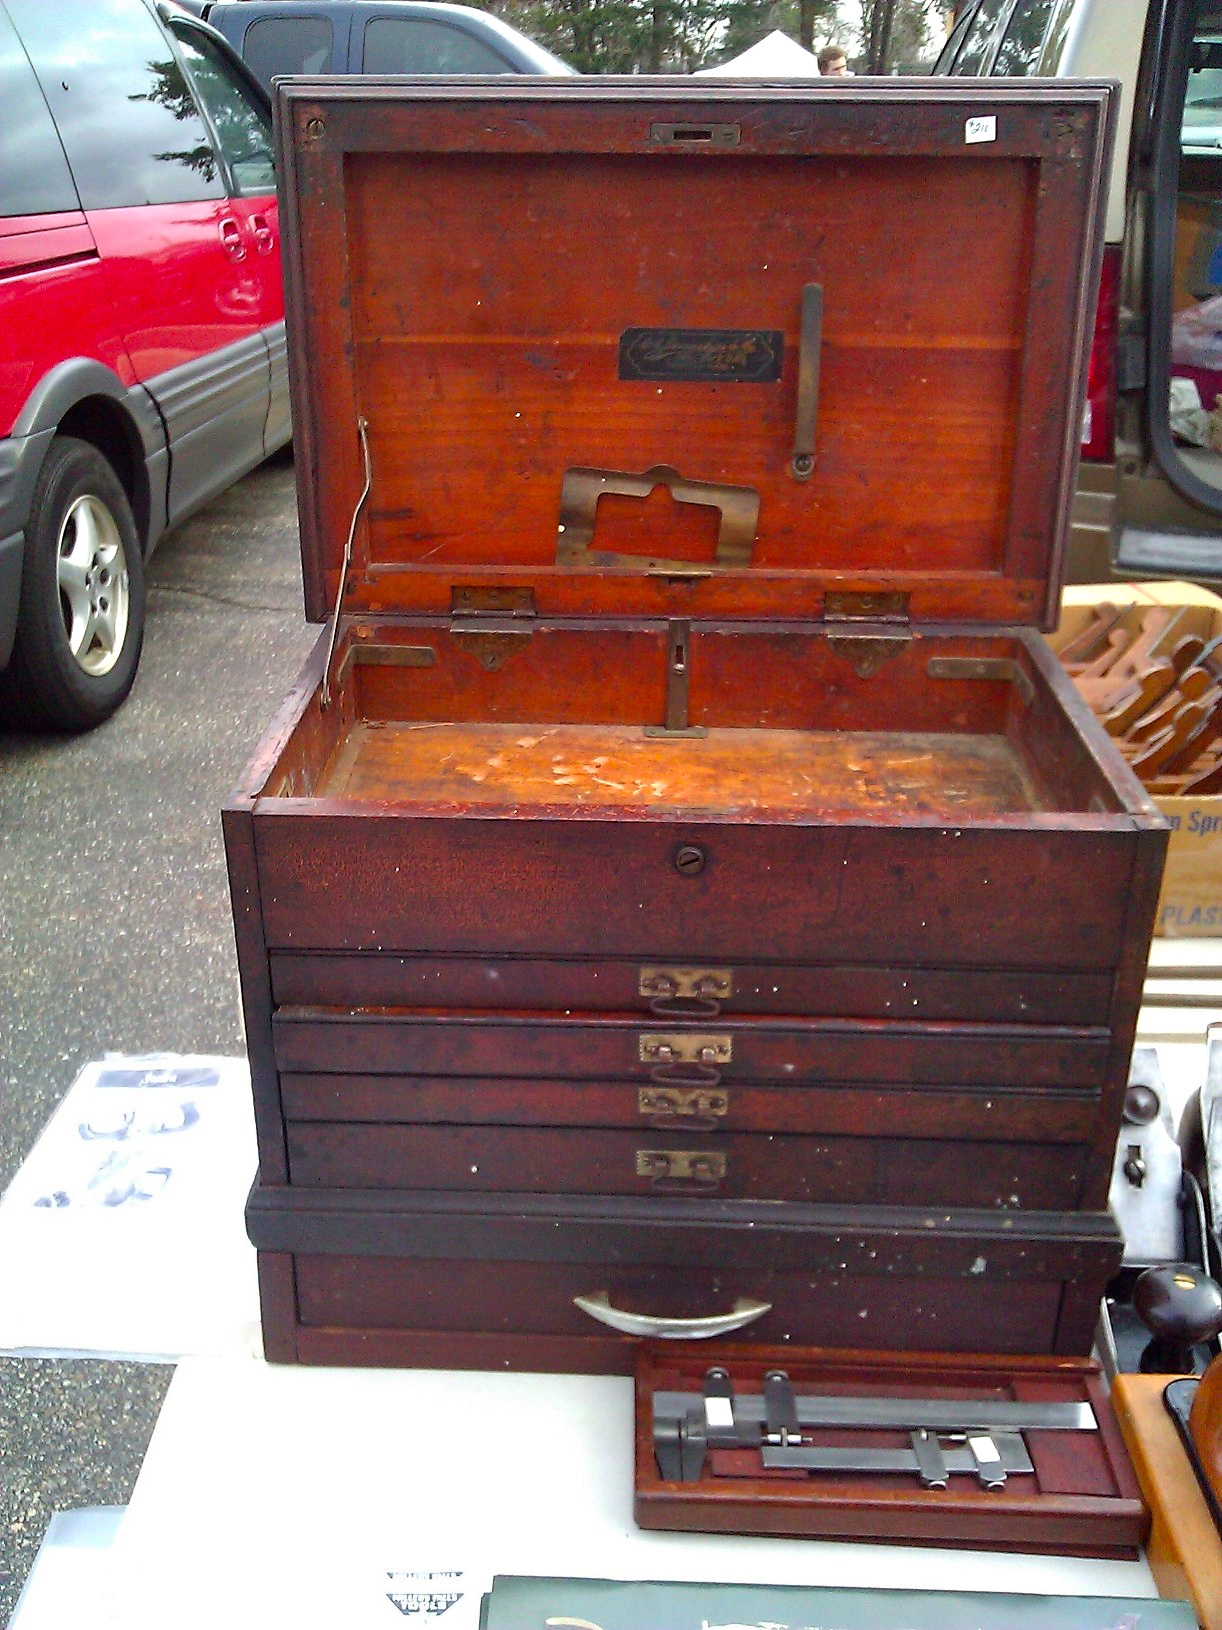
The chest lifts were heavy cast lifts that looked of modest quality. It was interesting to see how the dust rim was screwed on.


My new treasures from the show this year

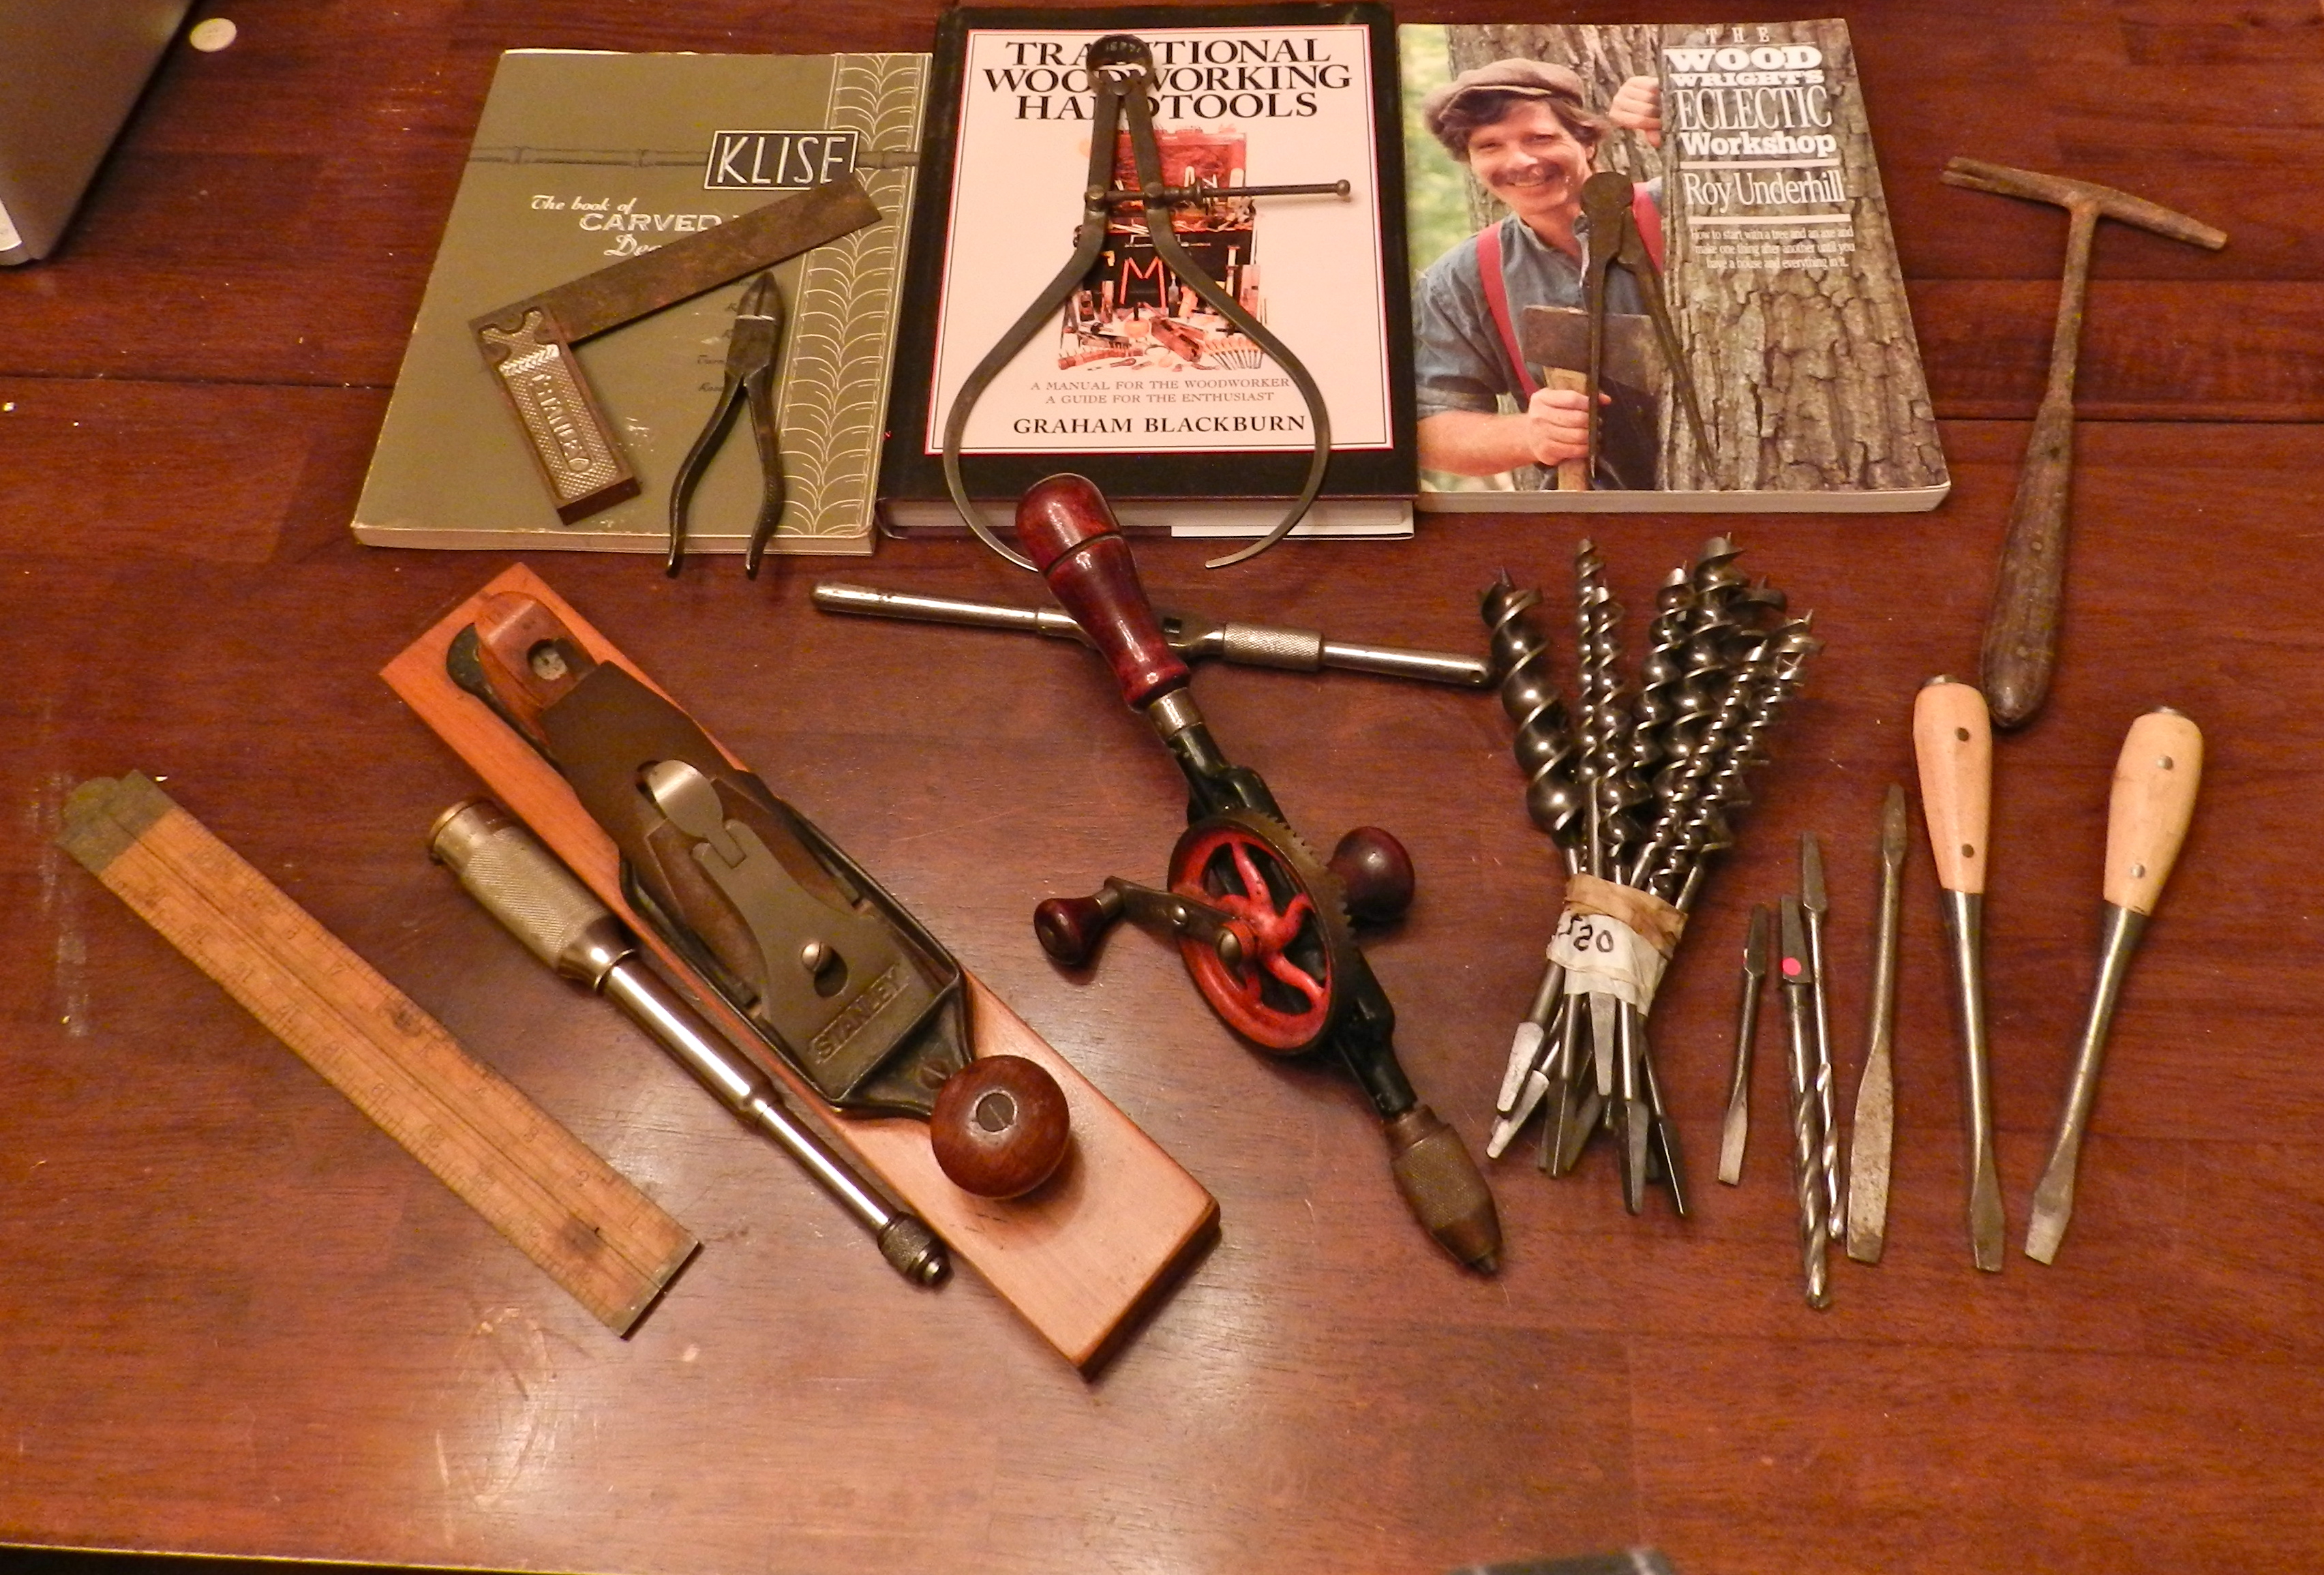
This year I did well. I found all the odd items on my list and only a couple of extras.  I picked up a great double gear Miller’s Falls egg beater drill — recommended by Tom Fidgen and love it so far. Also got a nice set of Russel Jennings Pattern Auger bits, a nice Miller’s Falls push drill (just a novelty I wanted to try), and a few books. For my Sloyd related projects I found a real nice transitional jack plane, 2 foot folding rule, bit brace drivers, stanley square etc. As always I had a great time and I’m already looking forward to the September show.

(You can check out what happened last September here.)


Measure Twice, Calculate Once

After drafting a new project or case piece but before you head to the lumber yard, you have to make a stock list. This inglorious bit of work is a necessary evil if you want to get all the necessary supplies on your first trip. The past few weeks I’ve been working on drafting up several upcoming projects and as I used this spreadsheet a few times and thought it was worth sharing with you.

Empty Stock List
Empty Stock List

Back when I was a student at the North Bennet Street School they had a nice little photocopy of a stock list that looked like it was originally made in Excel.  We’d enter all the details for our project and then calculate the board footage for our projects by hand with a calculator. This often tedious work was susceptible to the occasional human error so I’d usually wind up checking and rechecking my calculations as I went. After doing this a few times, the computer scientist in me thought ‘Wait a minute, I can code this up in Excel and let it do all the work for me’ — plus printing this spreadsheet for a customer or when dealing with a supplier looks better than a hand written version.

Stock List For Shutters
Example Stock List For Shutters

Highlights:

  • Keeps track of name of pieces, quantity
  • All values are in inches
  • Automatically calculates board footage
  • Adds common extra length (+1″), width (+1/2″) and thickness (+1/4″)
  • Totals up board footage
  • Adds extra at the end to take care of test cuts, small amount of scrap etc

This spreadsheet has worked well for me over the years and I hope you will benefit from using it as well. You can find a copy of it here (*.XLSX format):

Excel Stock List

New Workshops at NBSS Spring 2013

Just a quick note: I will be teaching some new workshops this spring at the North Bennet Street School’s Arlington, MA location.  My teaching schedule can be found here. I look forward to seeing some of you in class this spring or summer.

-Bill

Introduction to shutters @ The North Bennet Street School

Saturday, May 4 – Sunday May 5

8:30 AM – 4:30 PM Register

Instructor: Bill Rainford
$375

Shutters Workshop
Shutters Workshop

Learn about traditional wooden shutters in this two-day workshop. Using traditional joinery, students will build a sample shutter and learn the skills needed to layout and build shutters for your own home. Discussion includes interior and exterior uses, fielded panels and louvered styles Students should be able to plane and square up a board by hand and have some experience laying out and cutting traditional mortise and tenon joinery by hand. Some experience with tuned hand tools and power tools is required. PLEASE NOTE THIS CLASS WILL BE HELD IN ARLINGTON.

Traditional Shutters

Register

Hanging doors and windows: demo and discussion @ The North Bennet Street School

Saturday, June 8

8:30 AM – 4:30 PM Register

Instructor: Bill Rainford
$50

Completed door
Completed door

This one-day demonstration workshop includes installing a modern door, cutting to accommodate a door knob and lock set, mortising hinges, installing a modern window and related trim and flashing. We cover the proper tools for these projects and include ample time for questions throughout the day. PLEASE NOTE THIS CLASS WILL BE HELD IN ARLINGTON.

Register

Get to the point…

“Warning: Sharp chisels are dangerous and should be handled with care. Dull chisels are even more dangerous and should be sharpened.”

This timeless advice comes deep in the small print of the little card that comes with many Lie-Nielsen tools. Much like a shower or brushing your teeth, sharpening is a regular daily routine for most traditional woodworkers, and while it is amazing to see the lengths we go to be sharp, many of us often relegate this task to the end of the bench or tiny bits of counter space here and there.

Why all the fuss about about where to sharpen? How do I avoid this ‘dangerous’ situation?

For many years I was sharpening wherever I could find a bit of space yet knowing there was a better way to go about this. After moving last year I finally got around to re-arranging and re-imagining my workshop space and decided to do something about where I sharpen. Several years ago I went through a phase where I built a lot of New Yankee Workshop projects meant to organize the workshop and at that time I bought the supplies to build Norm’s Sharpening Station but never got around to building this one last project — I even had the top all laminated and ready to go since before the move. Now as I looked to make more room in my shop and move my 4’x8′ sheet goods cart out of the shop I needed to clear off that extra plywood and get some more storage space for all my sharpening paraphernalia.  Now that I’ve finished this project I don’t know how I lived without it for so long. I *finally* have all my sharpening gear in one place, I have a spot I can quickly sharpen at and get back to work. I also have waited way too long to finally have an actual paper towel holder in the shop — yes the simple pleasures in life — like not having sawdust all over a clean sheet from the roll that was bouncing around the shop.

The point? Keeping your tools sharp is a vital part of doing good work, so the investment in a dedicated sharpening space and a couple of weekends is a great way to keep your edges keen, your points sharp and your paper towels clean (especially if you don’t want to get caught stealing paper towels from the kitchen 😉 ).  Happy Sharpening….


The Softer Side Of Woodworking Anarchy

As a woodworker we often delve into specialties other related trades and crafts — blacksmithing, forestry, drafting etc, but not many talk about the woodworkers who sew….

Panel Saws On Saw Bench

You sew?! Yep, and the is the same look I get when I walk into a Jo-Ann fabric wearing Carhartt — I know exactly what I am looking for and where to find it.  I’m usually in there picking up supplies to make tool rolls, saw cases and similar projects.  In fact the only reason we have a sewing machine at home is because I picked one up to make tool related projects.

Panel Saw Cases
Panel Saw Cases

Do you do it to be cheap? Like most woodworker’s I’d make water from a powder if I could, but I don’t think its ever really been much about saving money — that sewing machine + supplies was reasonable, but certainly not cheap. I learned the basics of using a sewing machine in middle school Home Ec and figured it would be like riding a bike. When it came time to make a tool roll for my timber framing chisels or a saw case for my panel saws I could not find anything on the market that met my needs, was made in the US or was worth the price being asked of it. So out of necessity I decided if I wanted a nice saw case for my panel saws I better make one myself.

Closed Cases
Closed Cases

So I bought some heavy duck canvas, poly edging and metal snaps and started making some patterns. Shown in this post are the results of that effort. I made the first of these cases when I was a student at NBSS and they have served me well. I also lined them with material that will protect the tool metal and compared to its unprotected brethren who were only wearing a coat of oil the saws in their cases remained free of rust. My only complaint is that the cases are a bit of a saw dust and cat hair magnet, but so long as I put them back in my tool chest as I do with a plane sock they have been holding up well. Critical joints have been reinforced, the corners sealed (you can melt poly so it does not fray) and the closing strap secured with a metal snap. Just make sure you keep or replace that little plastic tooth protector or you run the risk of sawing your seams.  I’ve been very happy with the results and just picked up some material to make some more custom tool rolls for my auger bits and some other smaller tools, so stay tuned for more info on those projects.

Panel Saw
Panel Saw

If you want to take your subversive woodworking to the next level the next power tool you buy might be a sewing machine, or better yet track down an old treadle powered model. You might be surprised at the results.

If you’d like to learn more about subversive woodworking and anarchy check out these links:

http://video.pbs.org/video/2265289533/

http://www.woodworkersjournal.com/Ezine/Articles/Roy_Underhill_A_Quarter_Century_of_Subversive_Wood_6204.aspx

Have Files, Will Sharpen

The bench planes and chisels are not the only tools that need regular sharpening…your handsaws will also benefit from a little TLC.

Below is a nice vintage saw sharpening vice I picked up years ago from a cabinetmaker in Newton who was retiring and moving south. It was in very good shape and had some very graceful lines in the casting, but the little vise screw was designed to only close up to about 1″ so I could never use it on my 3/4″ thick assembly table unless I wanted to shim it up with an extra block of wood. It now found its home on the edge of my sharpening station where it’s generally out of the way when I am sharpening on the stones.

Saw in Saw Vise
Saw in Saw Vise  (No, that Bachco saw for timber framing is not the most traditional saw for sharpening, but every now and then a quick touch up helps extend its life)

When looking for a saw sharpening vise, make sure you pick one where the inner jaw faces are smooth, the center of the jaws are open in the center when not under pressure — this way it evenly applies pressure when holding your saws — and has a solid clamping action both on the saw and onto the bench. If you cannot find one of these old vices, you can make your own jaws from wood and use it in your bench vise or check out the modern version of this vice from Gramercy Tools.

Space at center of the jaws

Now that you have a place to hold your saw, it’s time to start sharpening. I used to have a random assortment of files I bought from various machinist’s chests, flea markets and used tool dealers over the years and I got by with that.  The problem with that random assortment was if you wanted something just a little bigger or smaller or finer or at a different profile it was a lot of hunting around, I may not have what I was looking for and I do not believe all of them were necessarily meant for hand saw sharpening. Then a few weeks ago I saw Lee Valley started offering a Grobet Swiss files with a labeled tool roll and decided to give it a try. I’ve had other Grobet Swiss files in the past (for carving and similar applications) and been very happy with the quality.

Lee Valley Saw File Set + Tool Roll

So far it’s been a great little set and earned a place in my tool chest. I sprang for the ‘needle file’ which is used with very fine and progressive pitch saws and has a dedicated pocket in this tool roll. Online there are plenty of great articles on how to sharpen a saw so I won’t go into detail about how to do that here, but I will make a few high level suggestions. If you sharpen regularly and with a consistent motion you’ll likely have good results. If you have to joint and reset a saw, track down an old Stanley or similar saw set tool. I found an old one in the original box for < $10 and it looked almost new — these tools often do not see a ton of use, but when needed they work much better than the very old bending wrench style saw set.

Good luck and happy filing!

Signing your name in wood…

It’s easy enough to sign your work with a Sharpie or branding iron…and I’ve done both many times in the past. But what if you are looking for something that will give your work that extra flourish? Or work on a massive scale like a timber framed barn? Or be a new sign for your shop? Often the best solution is to carve your own sign or inscription.

This past weekend I had the opportunity to take a two day workshop in letter carving with Janet Collins at the North Bennet Street School.  I had a great time. Below is a quick recap of how I spent my Superbowl Weekend.

Demonstrating how to make the first cuts

Janet is a graduate of the NBSS CFM program, instructor, former workshop director and accomplished artisan. She has a passion for woodworking and loves sharing the craft with others.

Laying out your letters

After sharpening your tools the first step is laying out your text first on paper or a computer.

Transferring your pattern

Transfer your pattern on to the workpiece.

Carving
Carving

Now for the fun part — carefully carving your letters into the piece. You want to take a light touch, always be aware of the grain direction and strive for an even depth of cut.

Carver's natural habitat
Carver’s natural habitat

Just as you can never have too many clamps, you can never really have too many carving chisels and gouges.

Completed name carving
My completed name carving

A raking light and solid platform to secure your work are requisites to success in this sort of work.

Gilding lesson
Gilding lesson

Beyond the carving exercises we were also treated to a nice demonstration on how to gild this sort of hand carved sign.

Janet Collins with completed sign

Pictured here is Janet with her carved and gilded number sign.

Chip carving samples

Beyond letter carving, these kinds of woodworking skills can be applied to may other forms of carving…

More chip carving
More chip carving

such as chip carving…

Chip and relief carving samples

relief carving…

Celtic knot and floral carving

organic designs, geometric designs, anything you can imagine. The above sample boards are just a few from the large bag of samples Janet brought to show the class.

Carved and Gilded sign at NBSS

Above is a hand carved and gilded sign honoring the founder of NBSS — Pauline Agassiz Shaw. If you study it carefully you can see how it was clearly laid out by hand and shows many of the tool marks and design cues you’d expect to see in hand work. Pictured below is a nice old sign in the Cabinet and Furniture Making department at NBSS which is a combination of painting and carved details — “All Kinds Of Woodwork Done Here” which is an apt description for what goes on in the upper bench room. I am also partial to the “Please don’t feed the woodworker” sign.

"Don't feed the woodworkers" and "All Kinds of Woodwork Done Here" signs by the entrance to Cabinet and Furniture Making department at NBSS.
“Don’t feed the woodworkers” and “All Kinds of Woodwork Done Here” signs by the entrance to Cabinet and Furniture Making department at NBSS.

After taking this course I have a new sign for my workshop, and a whole new appreciation for hand carved signs. Next time you are walking around your town take a moment to look at some of the carved signs and see if you can differentiate the ones that were carved by hand versus those which were made by machine. After looking at a few of them you’ll likely see that many of the signs with the best details were carved by hand.

I’m looking to make some signs for my barn and workshop and will be sure to post them here on the blog. In the meantime you can learn more about Janet Collins and her work via her website here and here. And if you are interested in taking workshops at NBSS you can find out more here.

Building Walls and Slinging Mud

This past weekend at the North Bennet Street School I taught a new 2 day workshop that I designed on framing, drywall, mud and texture work. It was an opportunity for students to learn the techniques necessary to properly install or repair drywall around their homes, improve their finishing and texture skills and ask questions.

Bill Teaching
Bill discussing technique

It was a lot of material to cover in 2 days, but the class was enthusiastic and put in the hard work necessary to get through all the major exercises.  Below is a highlight reel from the class:

Laying out the frames

Once each student finished his/her frame they were assembled into wall sections.

Assembling the frame sections

Each student had their own workspace to practice in.

Students cutting and hanging sheetrock
Cutting and hanging Sheetrock

Cutting, hanging, coursing, cleaning up edges etc.

Bill Demonstrating Technique
Bill demonstrating how to blend coats of mud

Hands on demonstrations of technique

Taping and initial mud work

Working around obstructions like outlet boxes, taping, and initial coat of mud.

Wet and Dry Sanding
Wet and Dry Sanding

Sanding the initial coat of mud and applying subsequent coats.

Applying Texture
Applying Texture

Patching, repairs and applying various finishing and texture techniques.

It was an informative and enjoyable experience and I look forward to teaching similar workshops in the future. If you have requests for other workshop topics you’d like to see covered, please let me know.

Don’t forget to pack your Molding Comb


As a preservation carpenter or cabinet maker a common task that comes up is replicating a molding you find out in the world. Unfortunately most historic sites, museums and stores will not let you pop off a piece of molding to directly trace its profile — no matter how politely you ask. That’s where the molding comb, a.k.a profile gauge, comes in handy. This seemingly simple tool works by pressing it up against the molding you want to capture, and pressing the little feelers against the pieces so they take on the shape of what it’s pressed against. This works much the same way as a common desktop toy from the 1980s with a ton of metal pins held in a grid that can capture whatever you press into it. Once you have the profile you can take the gauge and trace it onto paper thus transferring the profile.  This tool also works well for wood turners.

When it came time for me to try and find my own molding combs, I was surprised by how few are even on the market, let alone quality versions. As a kid I remember playing with some versions of this tool made from a series of metal pins, they were often very stiff to use and once a pin got bent, rusty or lost the tool usually became very hard to use. When looking for one of these tools you’ll want to seek out a model that has pins or blades that move smoothly but are kept under sufficient tension to retain the shape you are tracing. You also want to have the finest/thinnest blades you can find as the higher resolution will result in smoother curves. Some of the cheap import models yield results that look like an old 8-bit video game with jagged edges. 


The best ones I could find on the market today I bought from GarrettWade.com, and you will pay a premium to get a quality tool you may not use everyday, but I believe the much higher quality results are worth the extra expense in this case. Pictured above are all 3 sizes they offer, and coming from Europe they are in metric sizes roughly on the order of 6″, 12″ and 18″. What I like about them is the fairly fine granularity of the blades, the nice amount of tension on the blades which hold a profile well, and the way one side is triangular and one side is round making it easier to get into odd places. For exterior work the plastic surfaces will not rust which comes in handy when working out in the weather.

Getting a grip on a solid mallet

A good mallet of often overlooked. All too often we settle for a store bought carving mallet or crude instrument we fashioned in a hurry and then live with for years. Before the holidays I decided is was time to make a nice larger mallet for myself and one for a friend. I wanted a mallet that was a little larger and heavier than the average.

You can never have too many clamps, especially when clamping up a blank wherein you do not want to see any glue lines.
You can never have too many clamps, especially when clamping up a blank wherein you do not want to see any glue lines. Plus it takes on the look of some modern art work. 😉

I decided to make my new mallet out of cherry and hard maple as they are two of my favorite woods to work with, and I like they contrast they have with each other when finished. The hard maple (Same I used for my workbench) is hard, dense and wears well, and the cherry (From a curly cherry piece I had around the shop) has a nice even tone and finishes well.

Blanks ready to be turned

In making this sort of mallet, the stock preparation work is more important than the actual turning and finishing. That is why its critical to get the mating surfaces planed dead flat and take the time to clamp it up tightly (don’t starve the joint of glue) but make sure you do not have gaps or you will have unsightly glue lines and a potentially weaker mallet.

First Mallet Turned, Next to the blank

Why would someone spend so much time and effort to make a fancy mallet you are only going to beat the heck out of?

If you’ve ever turned a mallet from a single piece of wood and used it for a while you’re likely to see parts of it eventually come flying off — but only from two sides.  This leaves you with an unbalanced mallet which may not hit your chisel the way you want. Where quarter sawn grain is exposed the wood is mostly intact after years of use, but where long grain is exposed some hard hits can take advantage of the plane of weakness in the wood causing them to fly off. They break off much the way splitting a piece of wood with a froe separates the grain.

The good news is there is a way to avoid this…

Completed Mallet
Completed Mallet

By gluing up a mallet as you can see here the hard maple pieces are quarter sawn — so on all 4 sides of the finished mallet you have nice dense quarter sawn hardwood grain oriented in such a way that it should have a nice long service life even under harsh conditions — plus it’s pleasing to look at especially with contrasting woods.

End of mallet with finish applied

Won’t it break apart with seasonal movement or use? I used Tite-Bond II for the glue which has been proven to be stronger than wood when used in long grain to long grain bonds. The center or handle piece of wood should be a well seasoned hardwood ideally rift sawn and known to be stable. I’ve seen many of these mallets get heavy shop for years and hold up very well. A similar mallet is often a regular project the cabinet and furniture making program at NBSS.

Completed Mallet
Completed Mallet

You should take the time to fit the handle to your hand and make it as austere or ornate as you see fit. I particularly like how the laminated structure of the blank results in nice contrasting areas like you see on the bead in the above photo.  I do a lot of period work so I was thinking about the 18th century as I turned these mallets. Most of it is finished with the skew chisel and needed almost no sanding. The finish is tongue oil with a very light coat of wax only on the end grain and handle. I look forward to it providing years of solid service.