Most woodworking projects require some gluing-up. With the variety of glues on the market, how should you know which one is right for the job? The answer depends on what you are gluing up, and how the finished project will be used. Let’s take a look at some of the most popular types of glue.
The Wide Variety of Wood Glues Available
I recently wrote an article on this topic for Fix.com and thought you might also be interested in reading it. In the article I talk about:
Some of the more popular types of glue how to use them
Some of the less common wood glue variants and why you might want to use them
Simple tooling to help make sure your glue applications go well
Each summer I teach a semester long class in ‘Traditional Building’ at the Boston Architectural College in association with the North Bennet Street School as part of the BAC’s Historic Preservation Master’s Degree Program. It’s a low residency program wherein most of the semester is taught online via a series of video lectures and assignments through an online class portal called Moodle, but for an 8 day week the students all fly into Boston for a hands on Intensive session. I have the students from 8:30am-5pm, they get a break for dinner and they have another class in the evenings — it’s an incredibly busy week for all involved but a great way for working professionals to earn a solid degree. This year was no exception.
The Main Reading Room at the Boston Public Library
As part of a class in ‘Traditional Building’ I’m teaching these budding Historic Preservationists the basics of how to ‘read a house’. What does that really mean? It means they are getting an overview of the major building systems used in traditional buildings, how style elements evolved over time and how to look critically at these buildings and learn to read the tool marks and materials to help investigate and document the state of the structure. Effectively it is a crash course in becoming a ‘House Detective’. Certainly a semester is not enough to learn all the ins and outs of a traditional building, but the course helps students get a taste of this wide ranging field and exposes them to some of the tools, trades, experts and other resources that will help them in their careers.
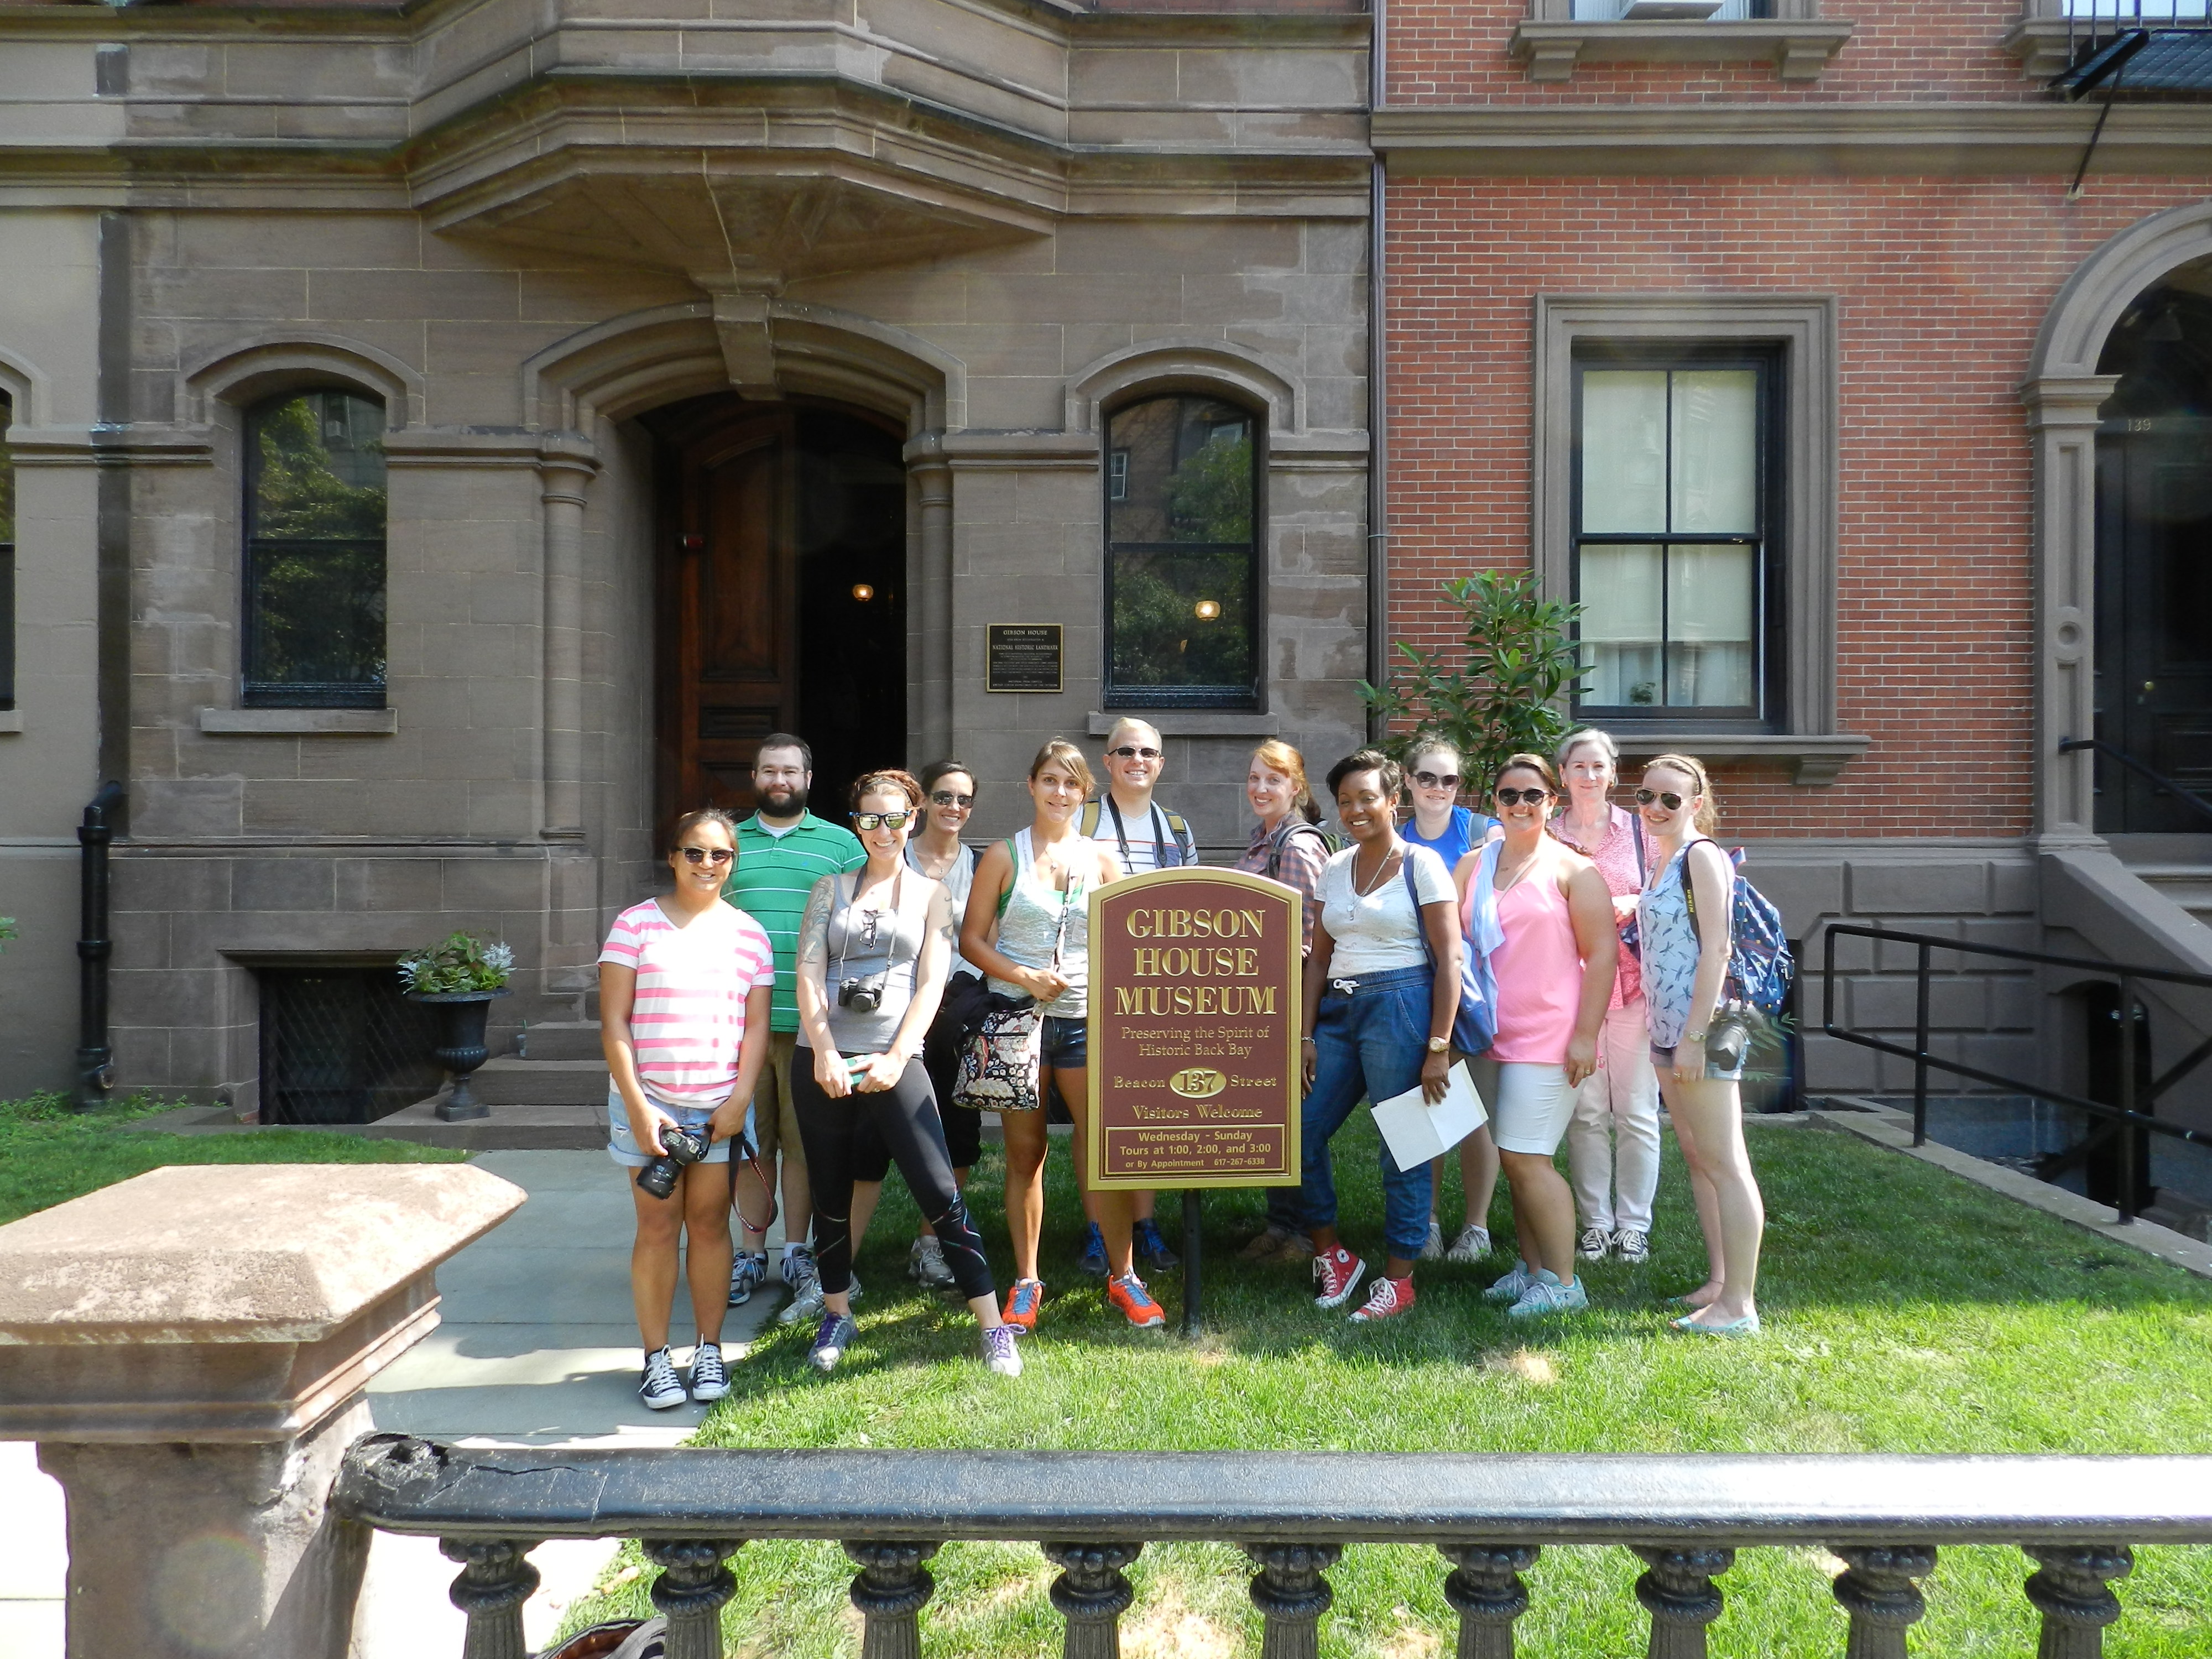
Group Picture in front of the Gibson House Museum
We spent a day touring some major architectural landmarks in downtown Boston — from the Paul Revere House, to the Pierce Hichborn House, to the Otis House, to the Gibson House, to the Boston Public Library and to Trinity Church.
Trinity Church — by H. H. Richardson
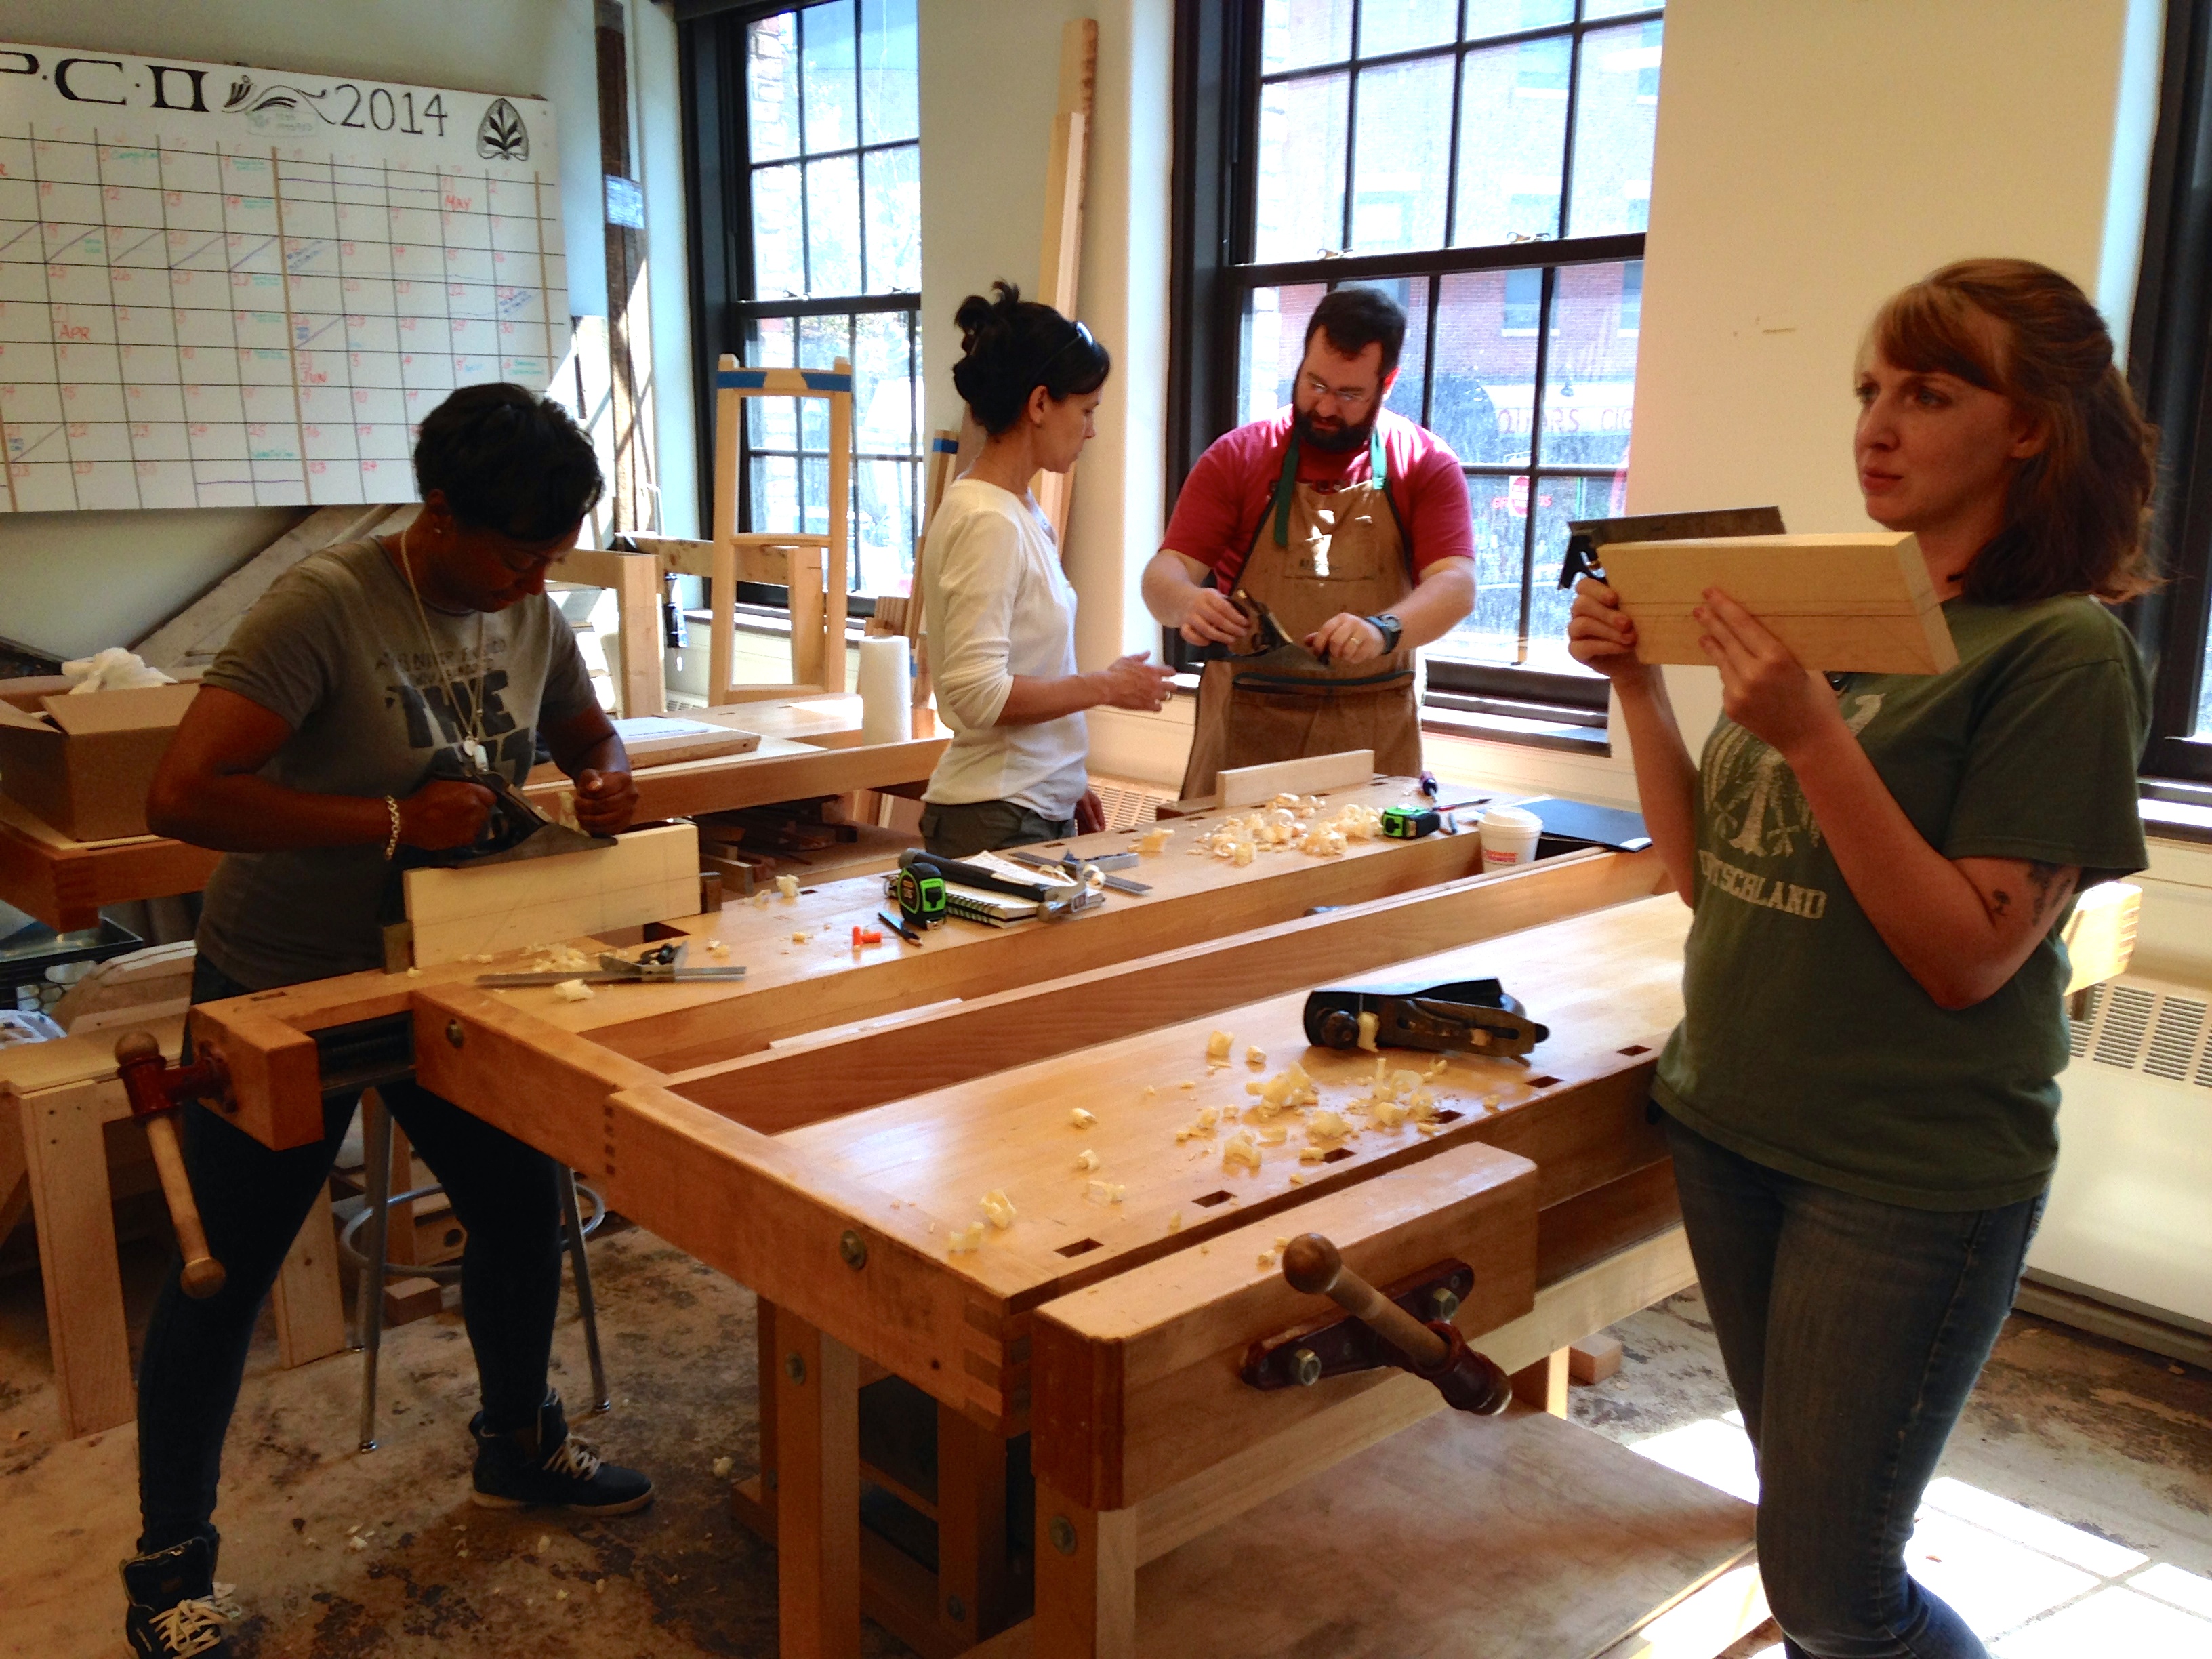
We also spent a day in the classroom workshop learning the basics of traditional woodworking. From planing to squaring up a board to building a small tool tote the students got a taste of what traditional bench work is like.
Bill Rainford Teaching Traditional Woodworking
Many students had never used a hand plane or driven a cut nail before so it was a lot of fun showing them the ropes.
Traditional bench work — squaring up a board etc. (Photo by Patti Vaughn 2014)
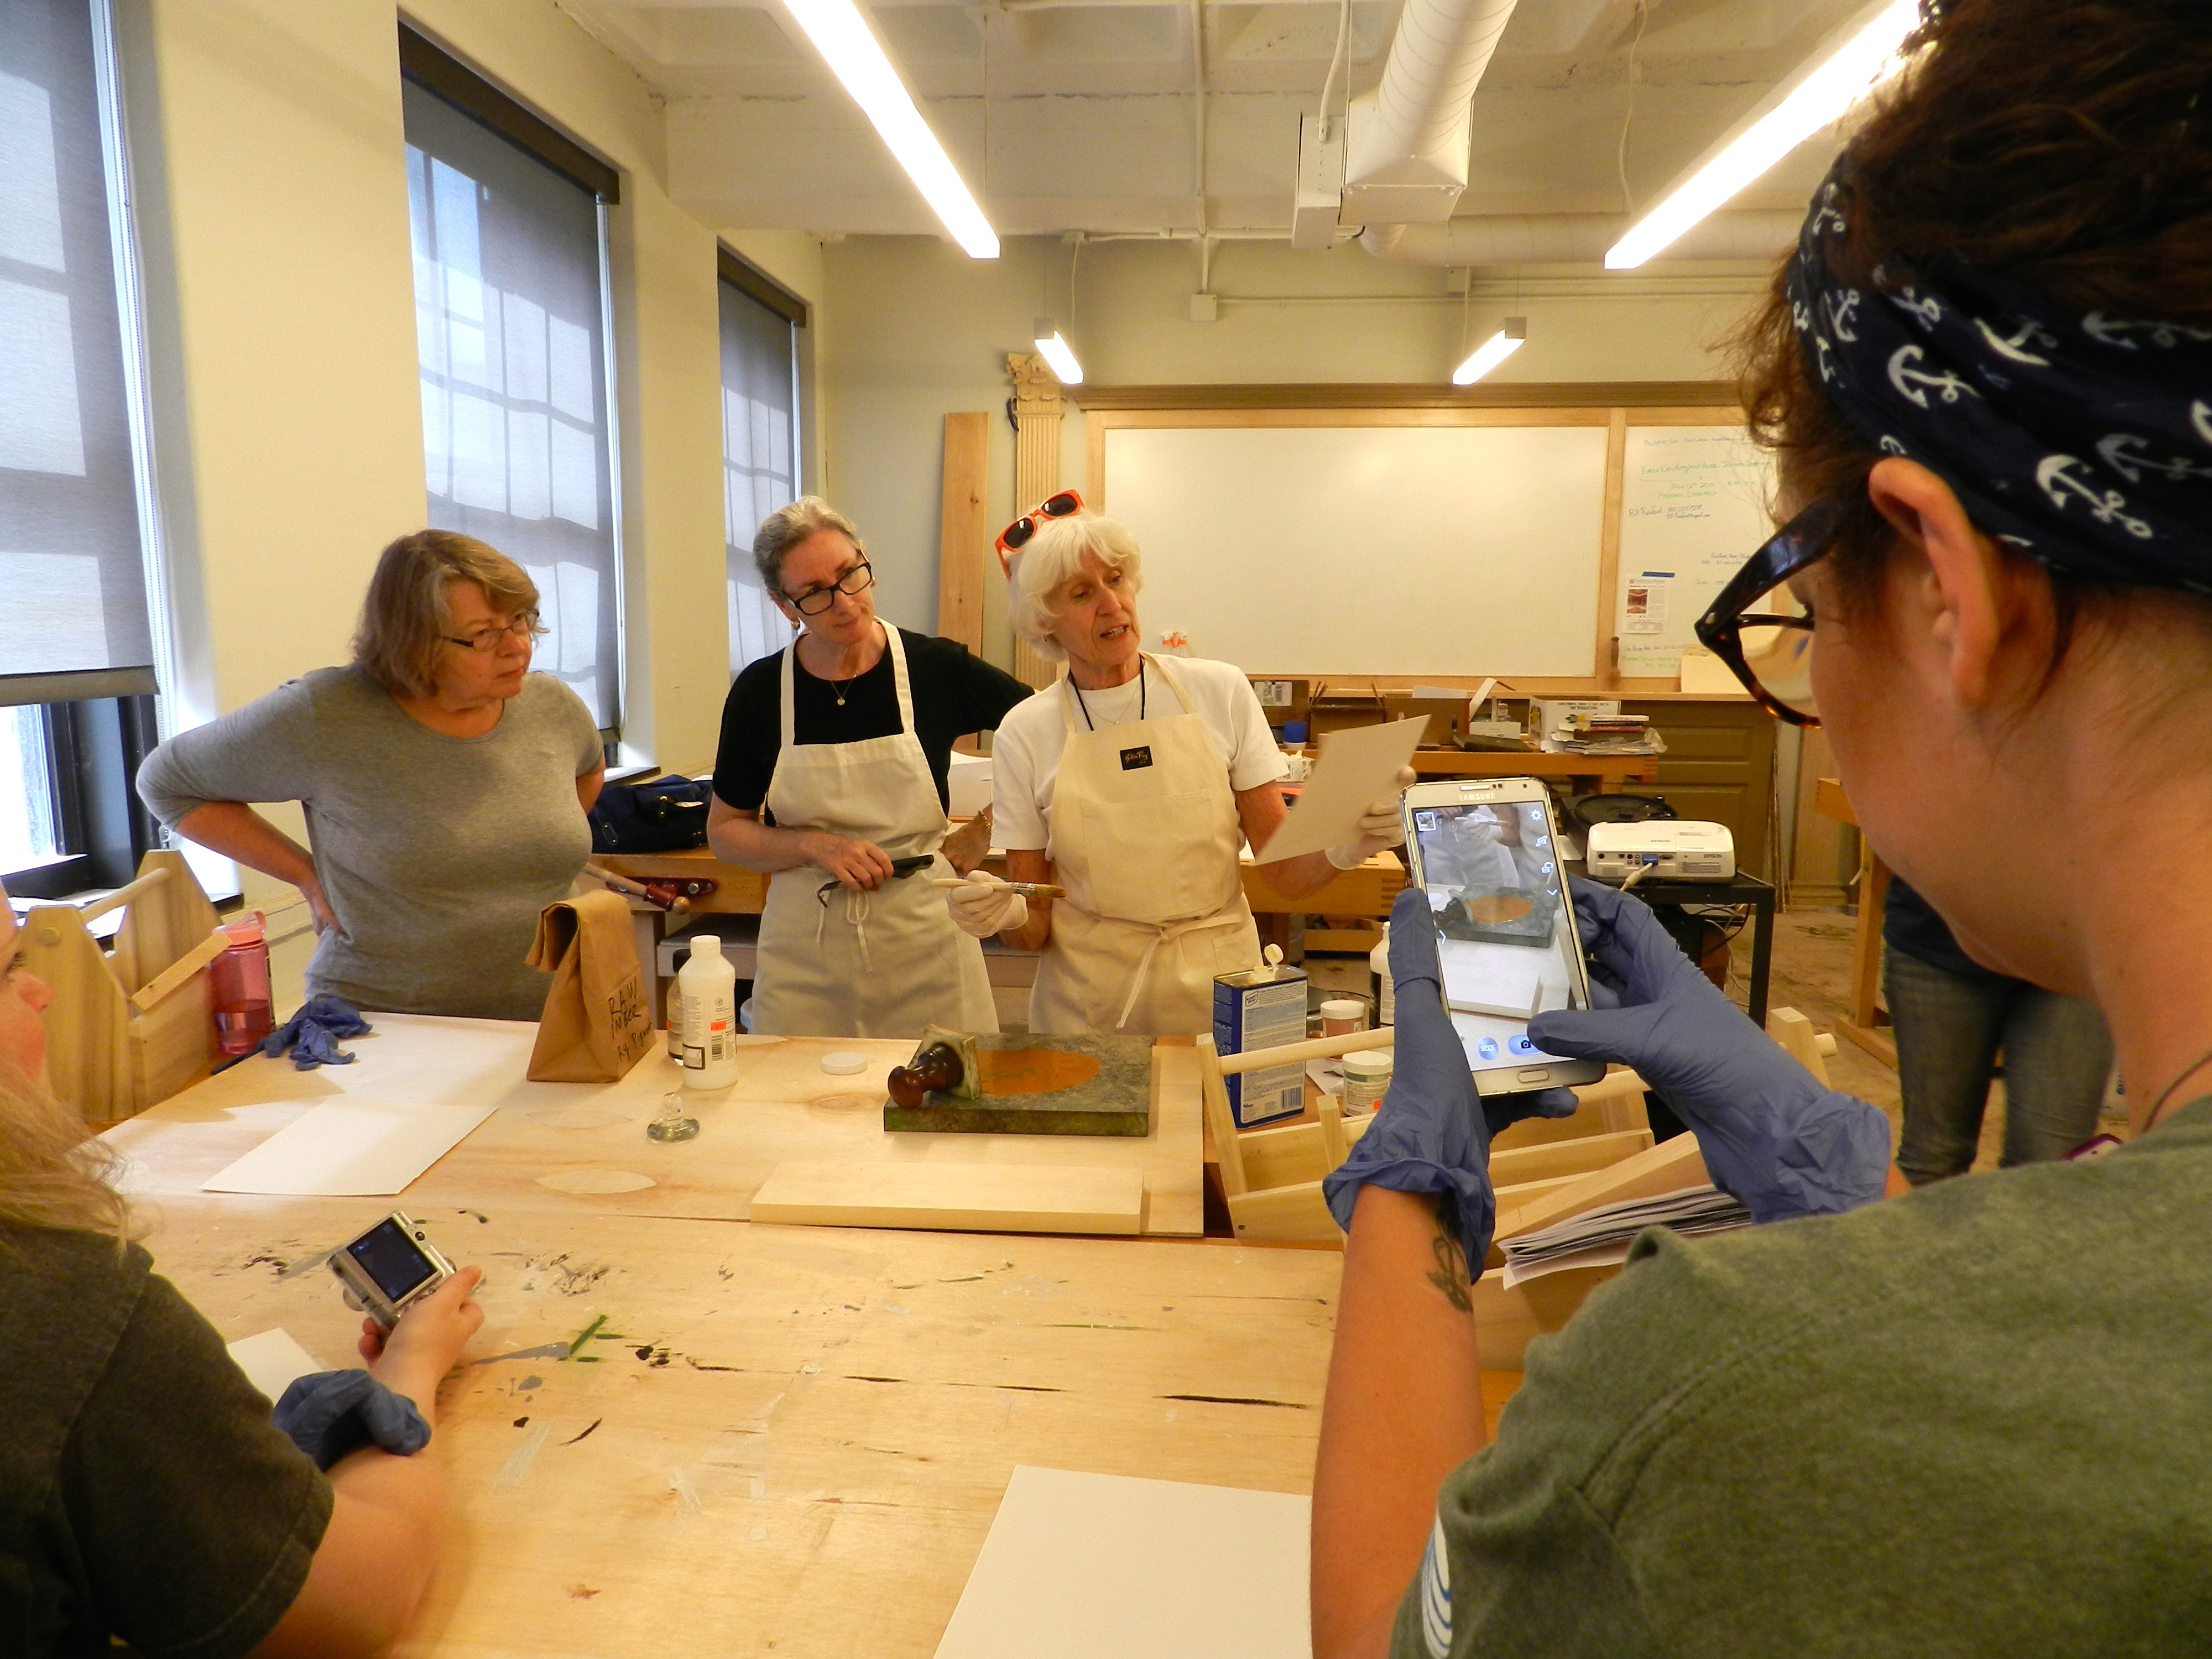
Another day during the week we spent with Sara Chase who is a well known Historic Paint Expert.
Sara Chase — Historic Paint Expert
Sara talked about the manufacture of early paints and led the class in mixing their own paints using mullers, oil and pigments.
Making traditional paints by hand with Sara Chase
Students then took some of the paint they made and applied it to the tool boxes they made the day before in the woodworking lessons.
Dierdre and Julie painting their tool totes
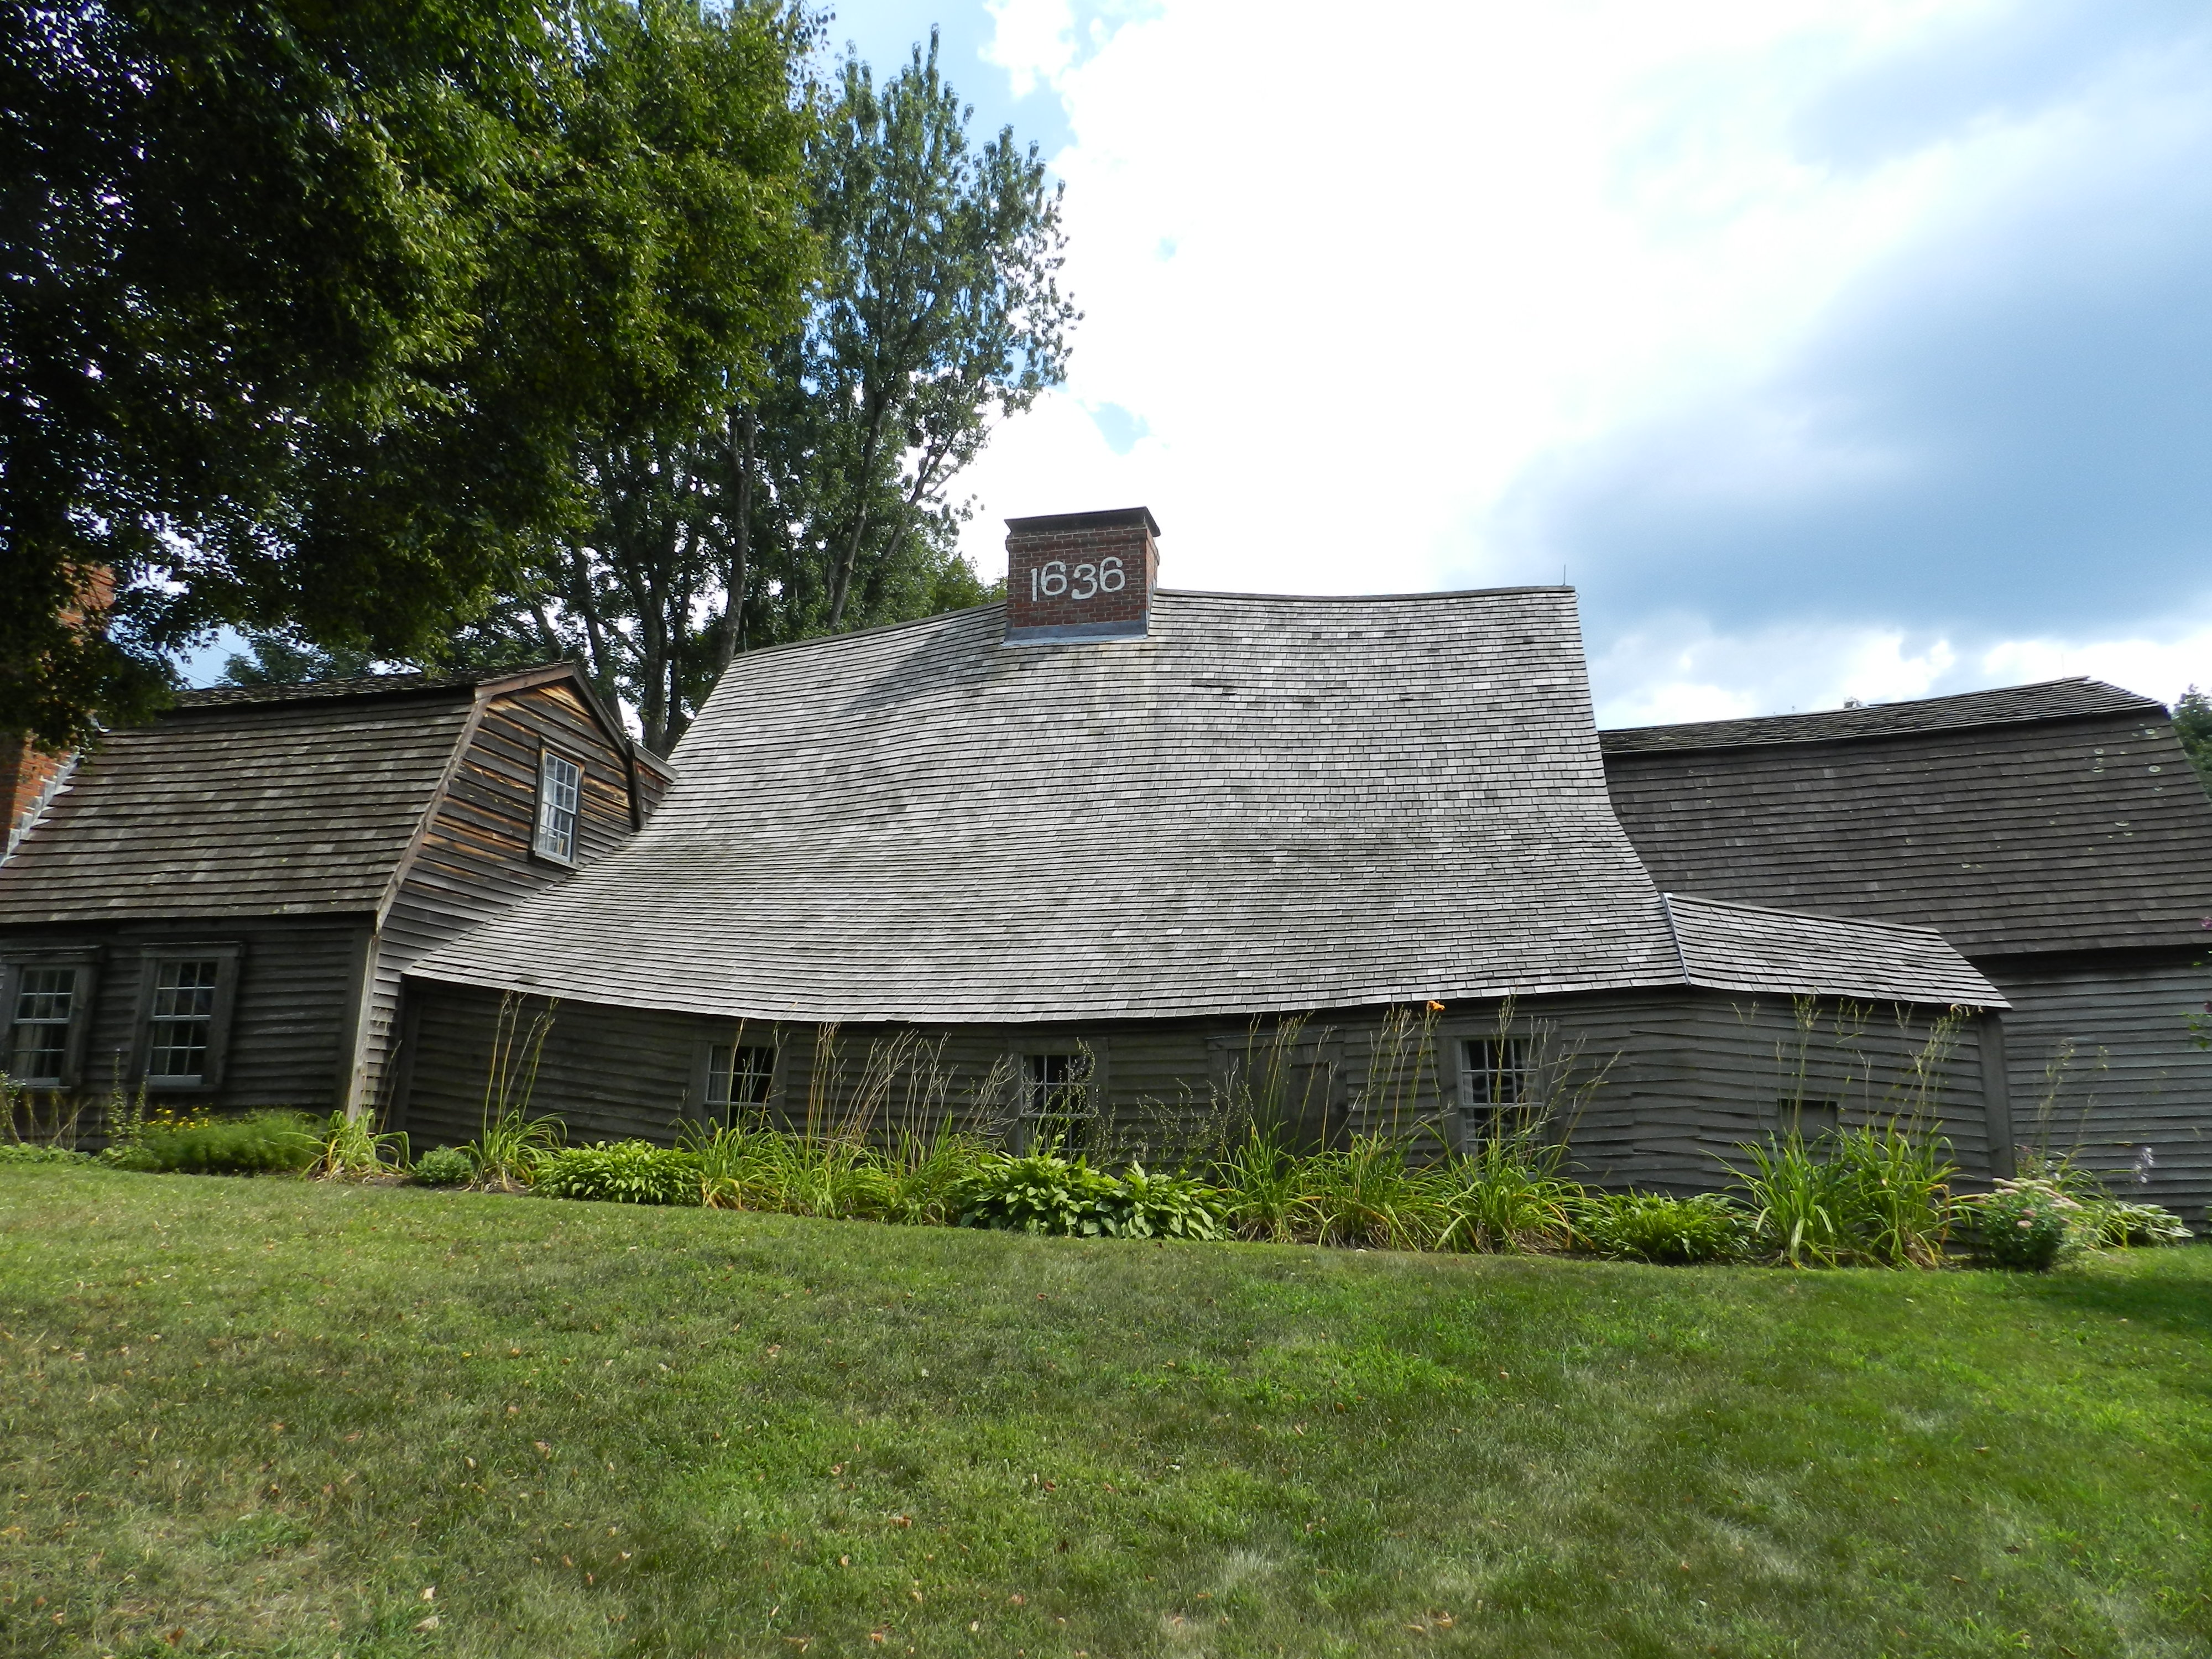
We took a field trip to the Fairbanks House in Dedham MA which is the oldest standing Timber Frame in North America.
The Fairbanks House — The Oldest Standing Timber Frame in North America
Erin Leatherbee is the curator at the Fairbanks House and also one of the first graduates of the BAC’s Historic Preservation MDS program.
Erin Leatherbee (Curator) and her intern Aubrey give us an overview and tour of the Fairbanks house
Erin and her intern Aubrey gave us an overview of the house and how it evolved over time and also gave us an in depth tour of the house itself.
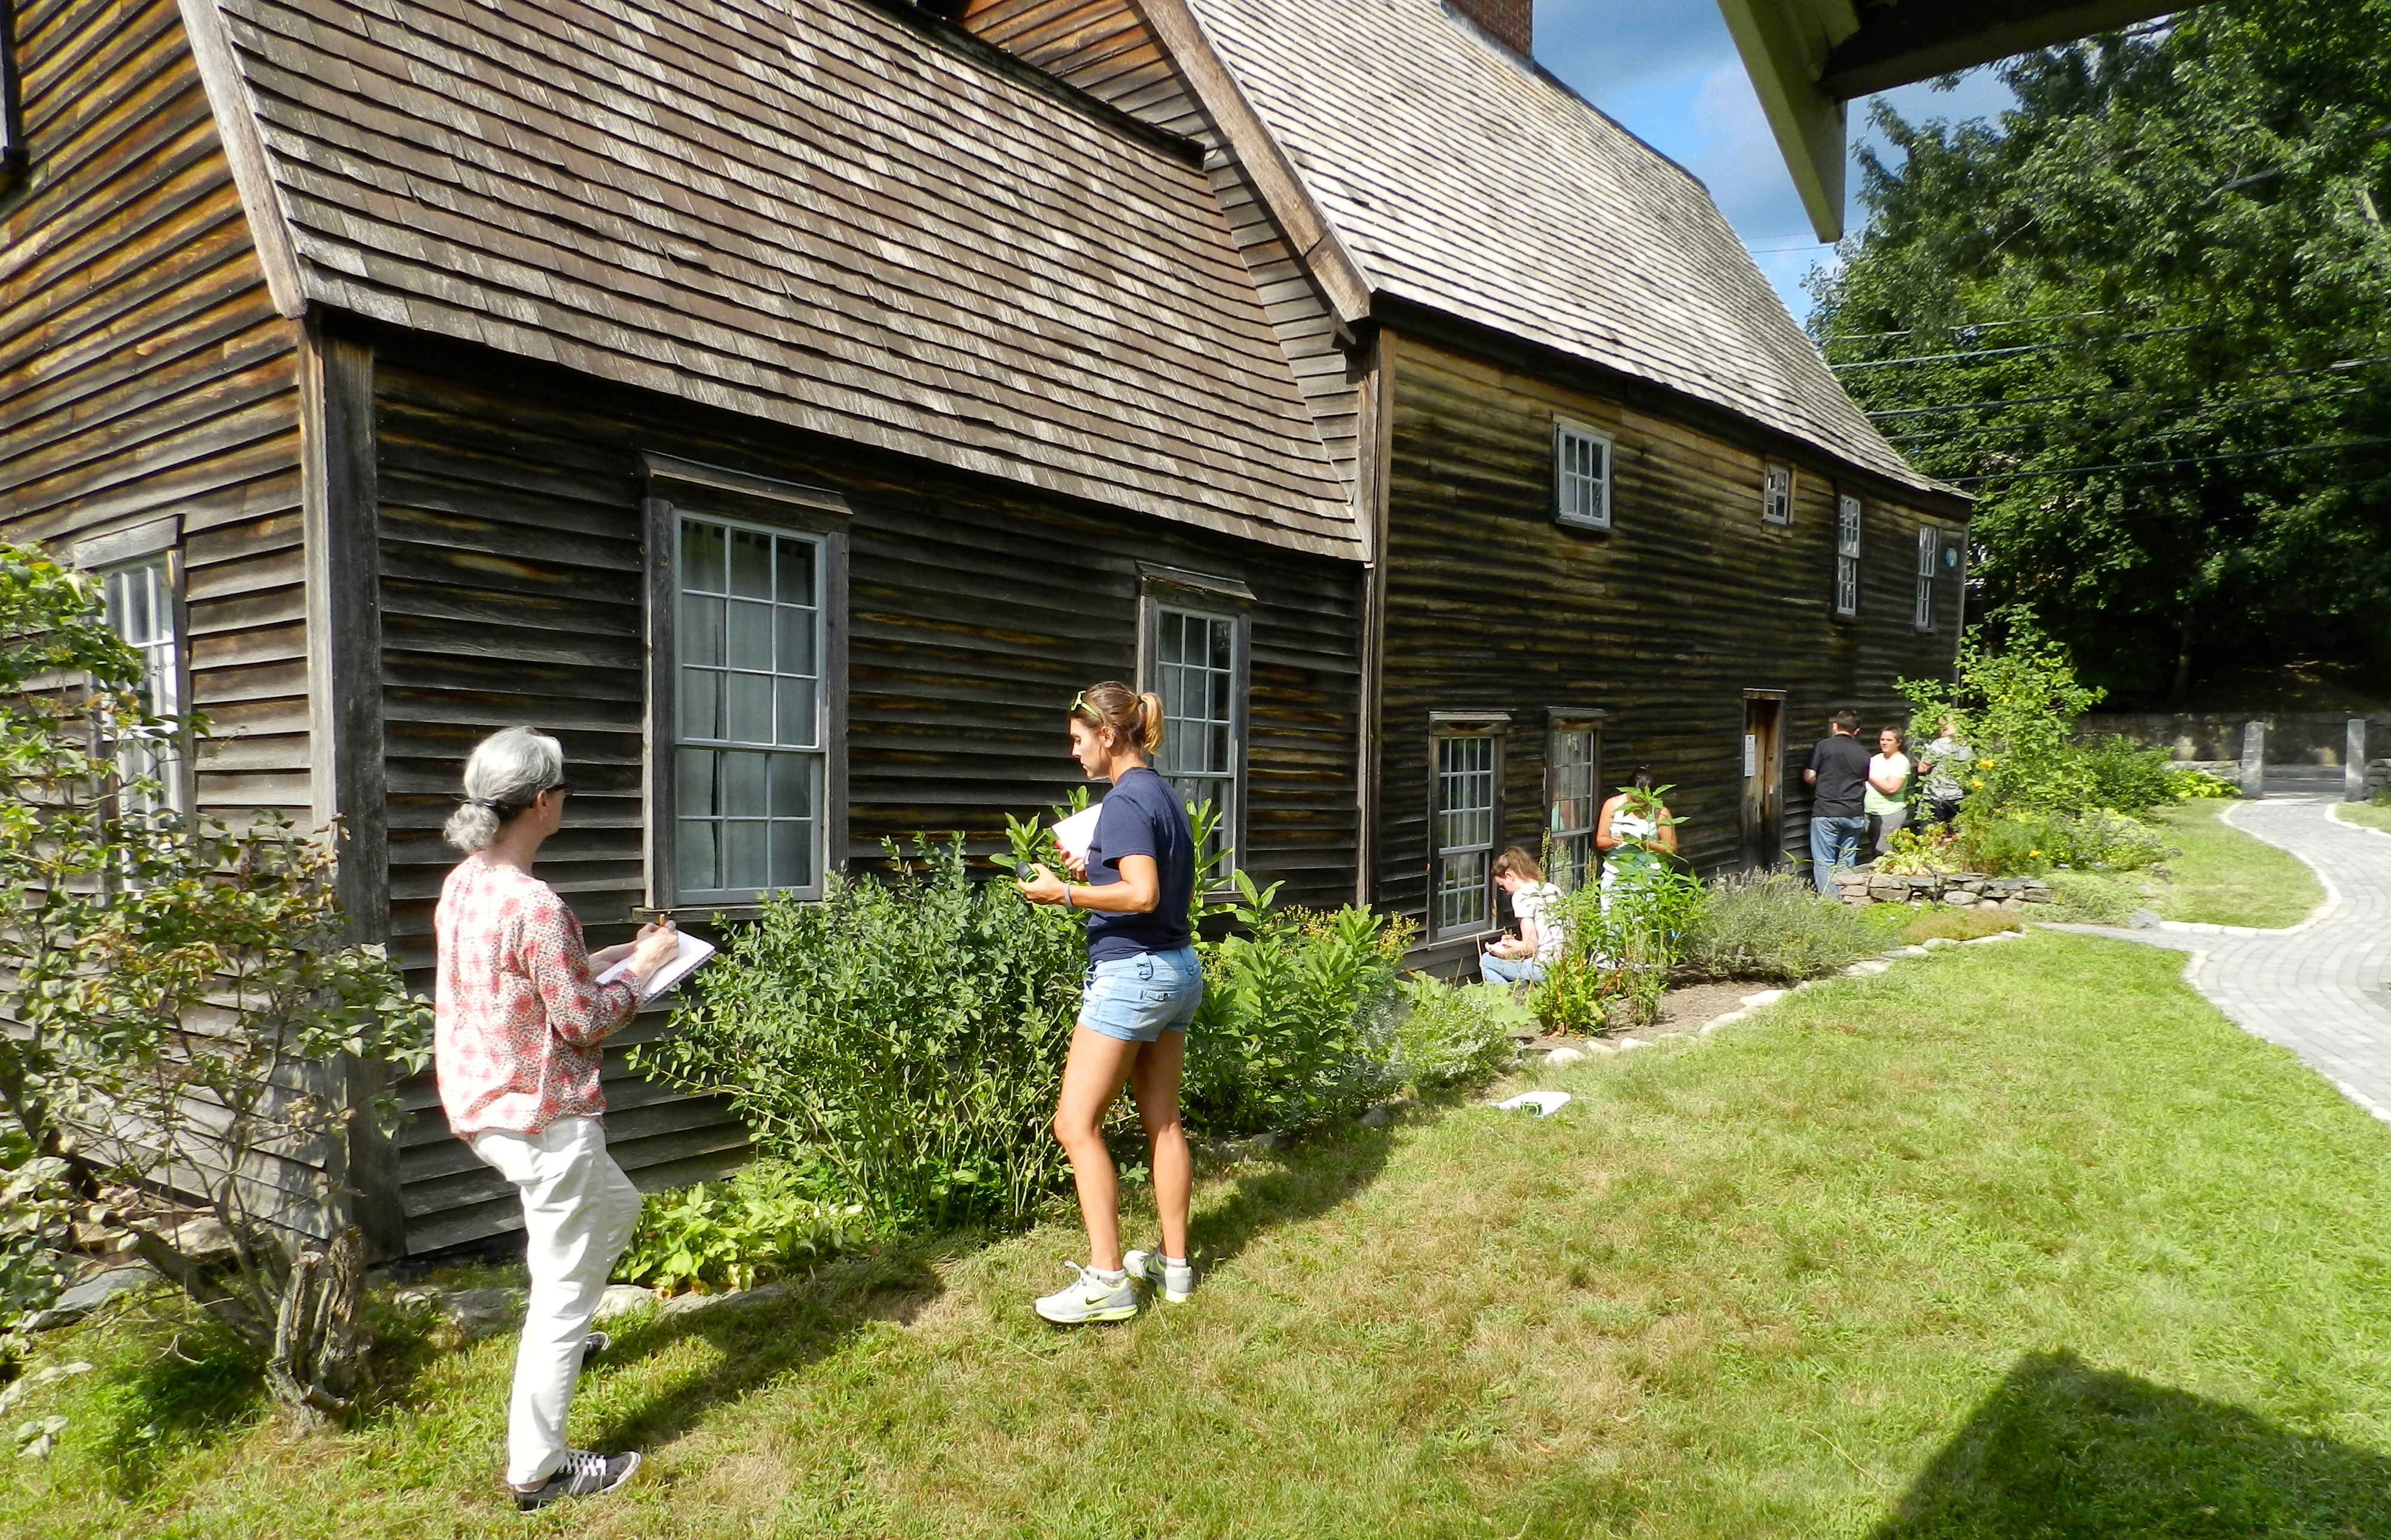
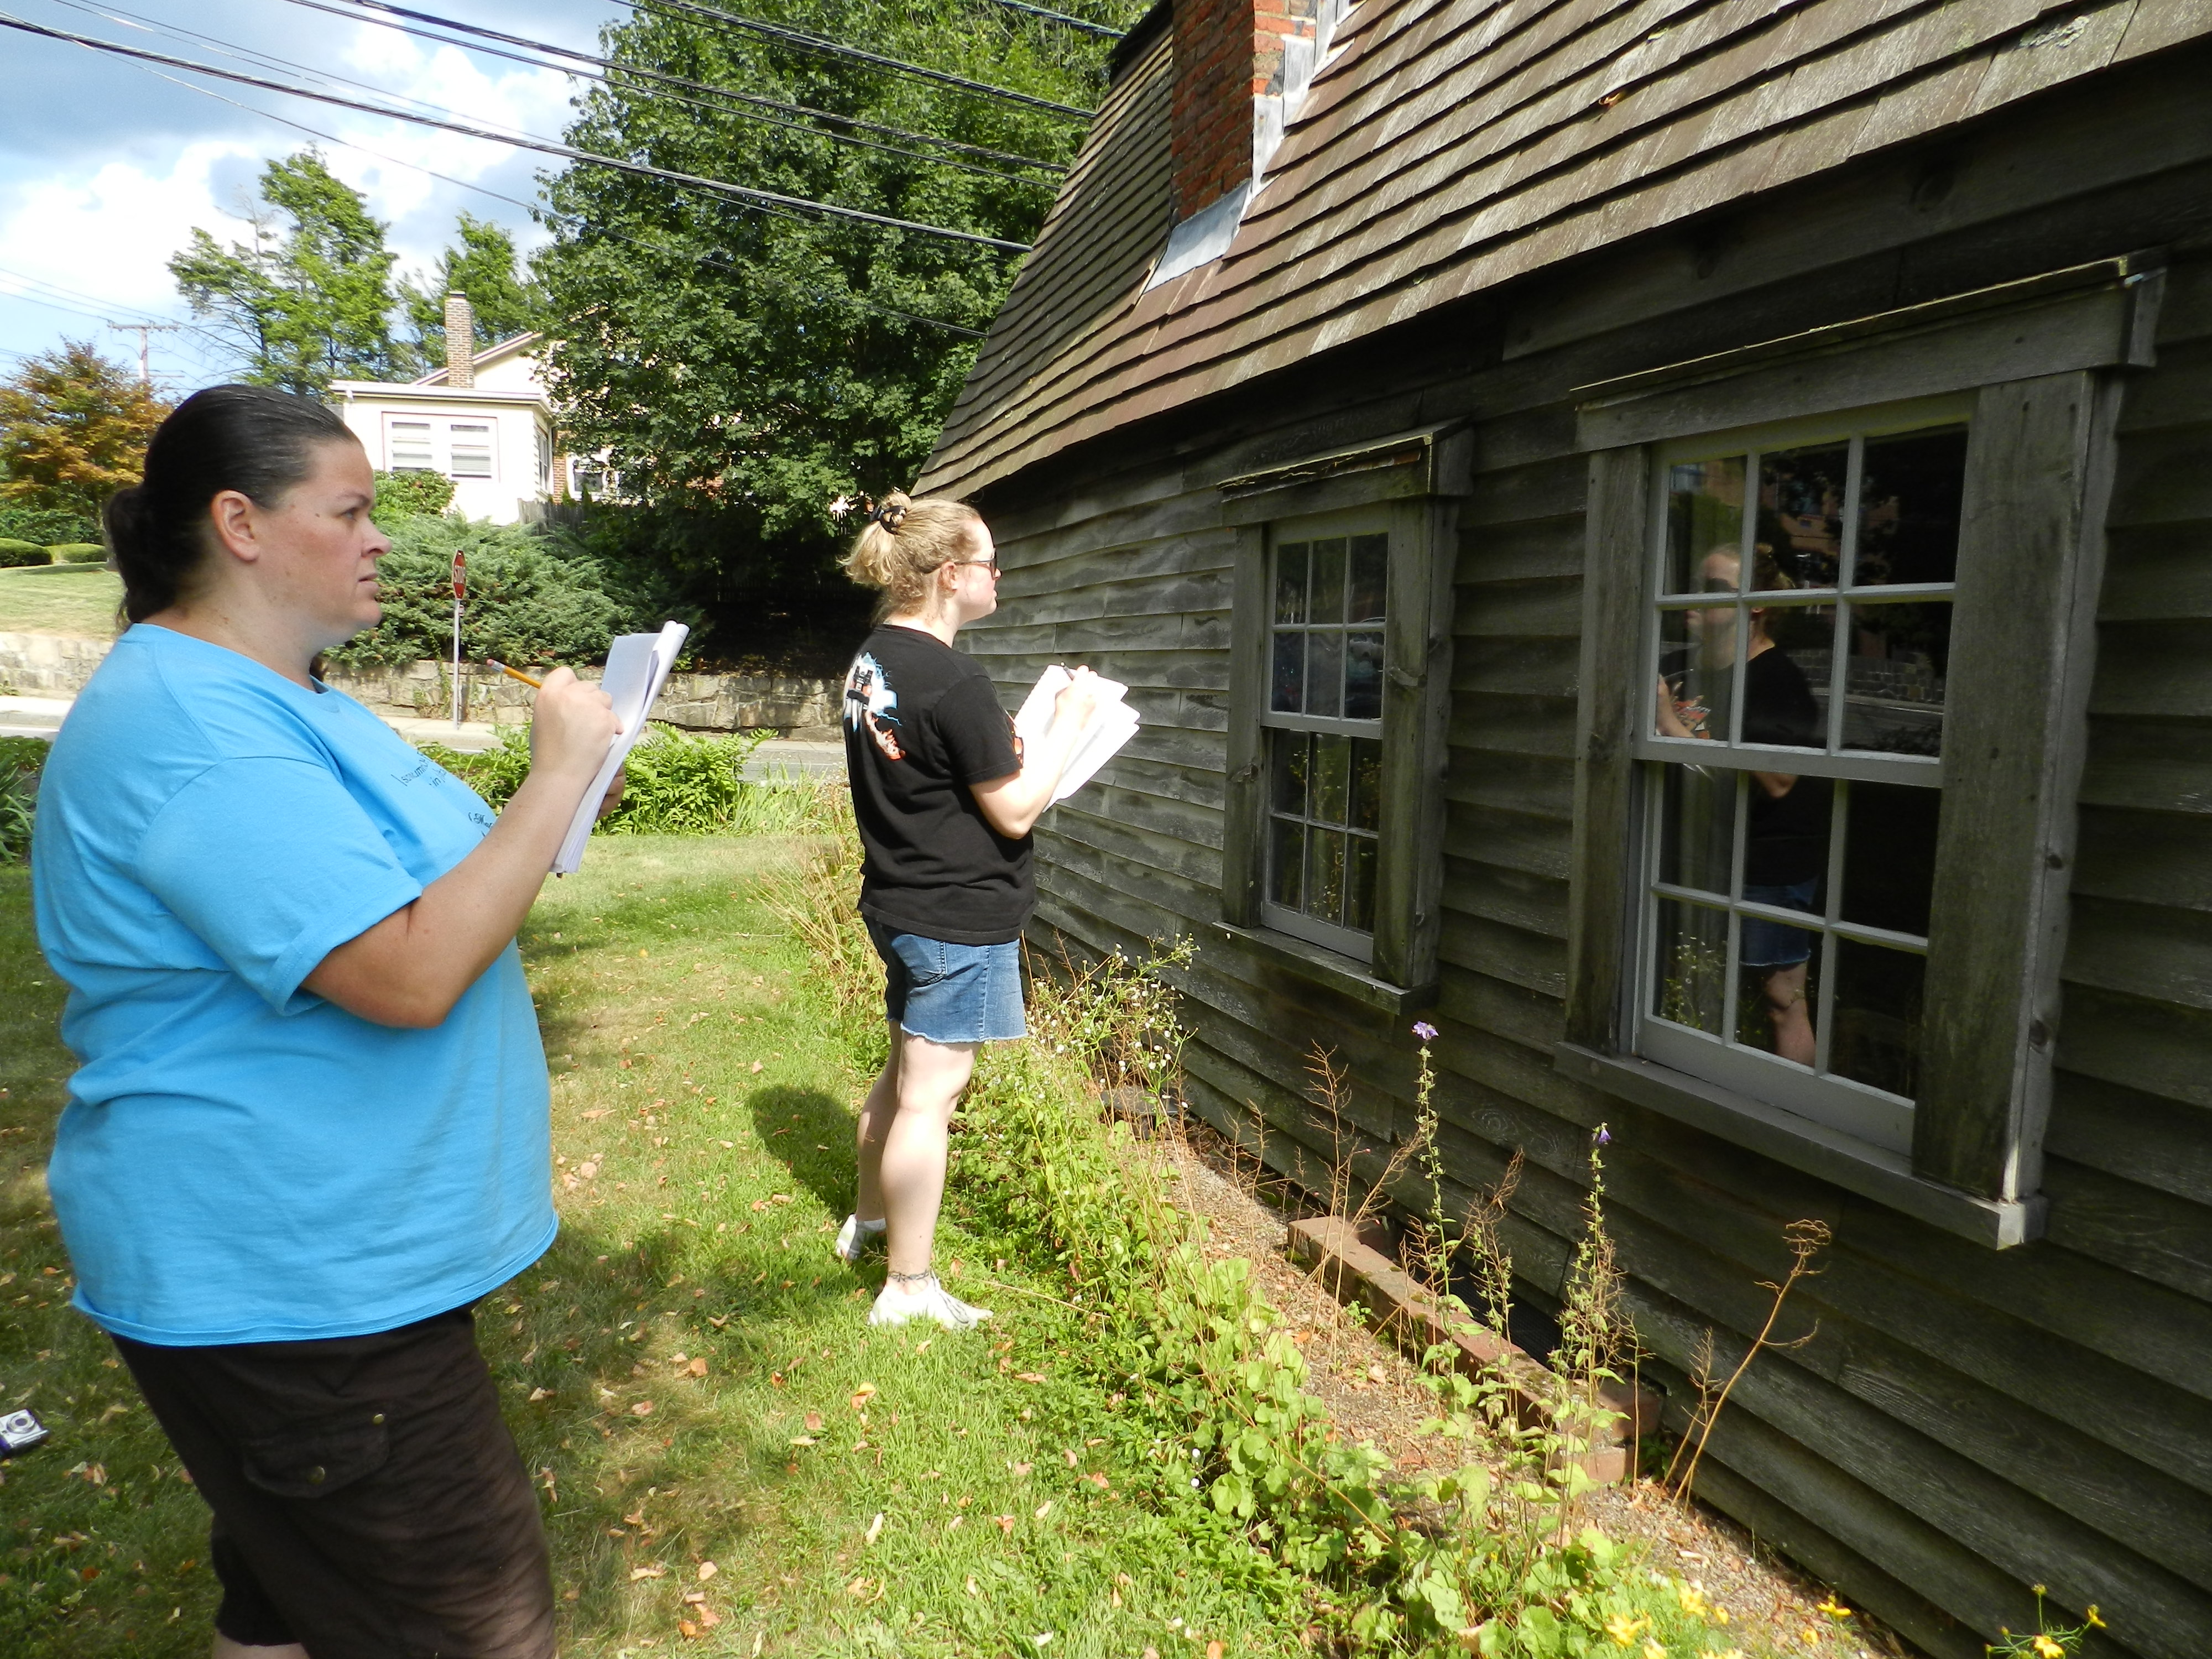
Field work at the Fairbanks House
While on site I had the class break out their notepads, tape measures and rulers for some field work.
Stephanie and Patti working on Window Condition Reports
Each student was assigned a window and wrote up a detailed window condition report.
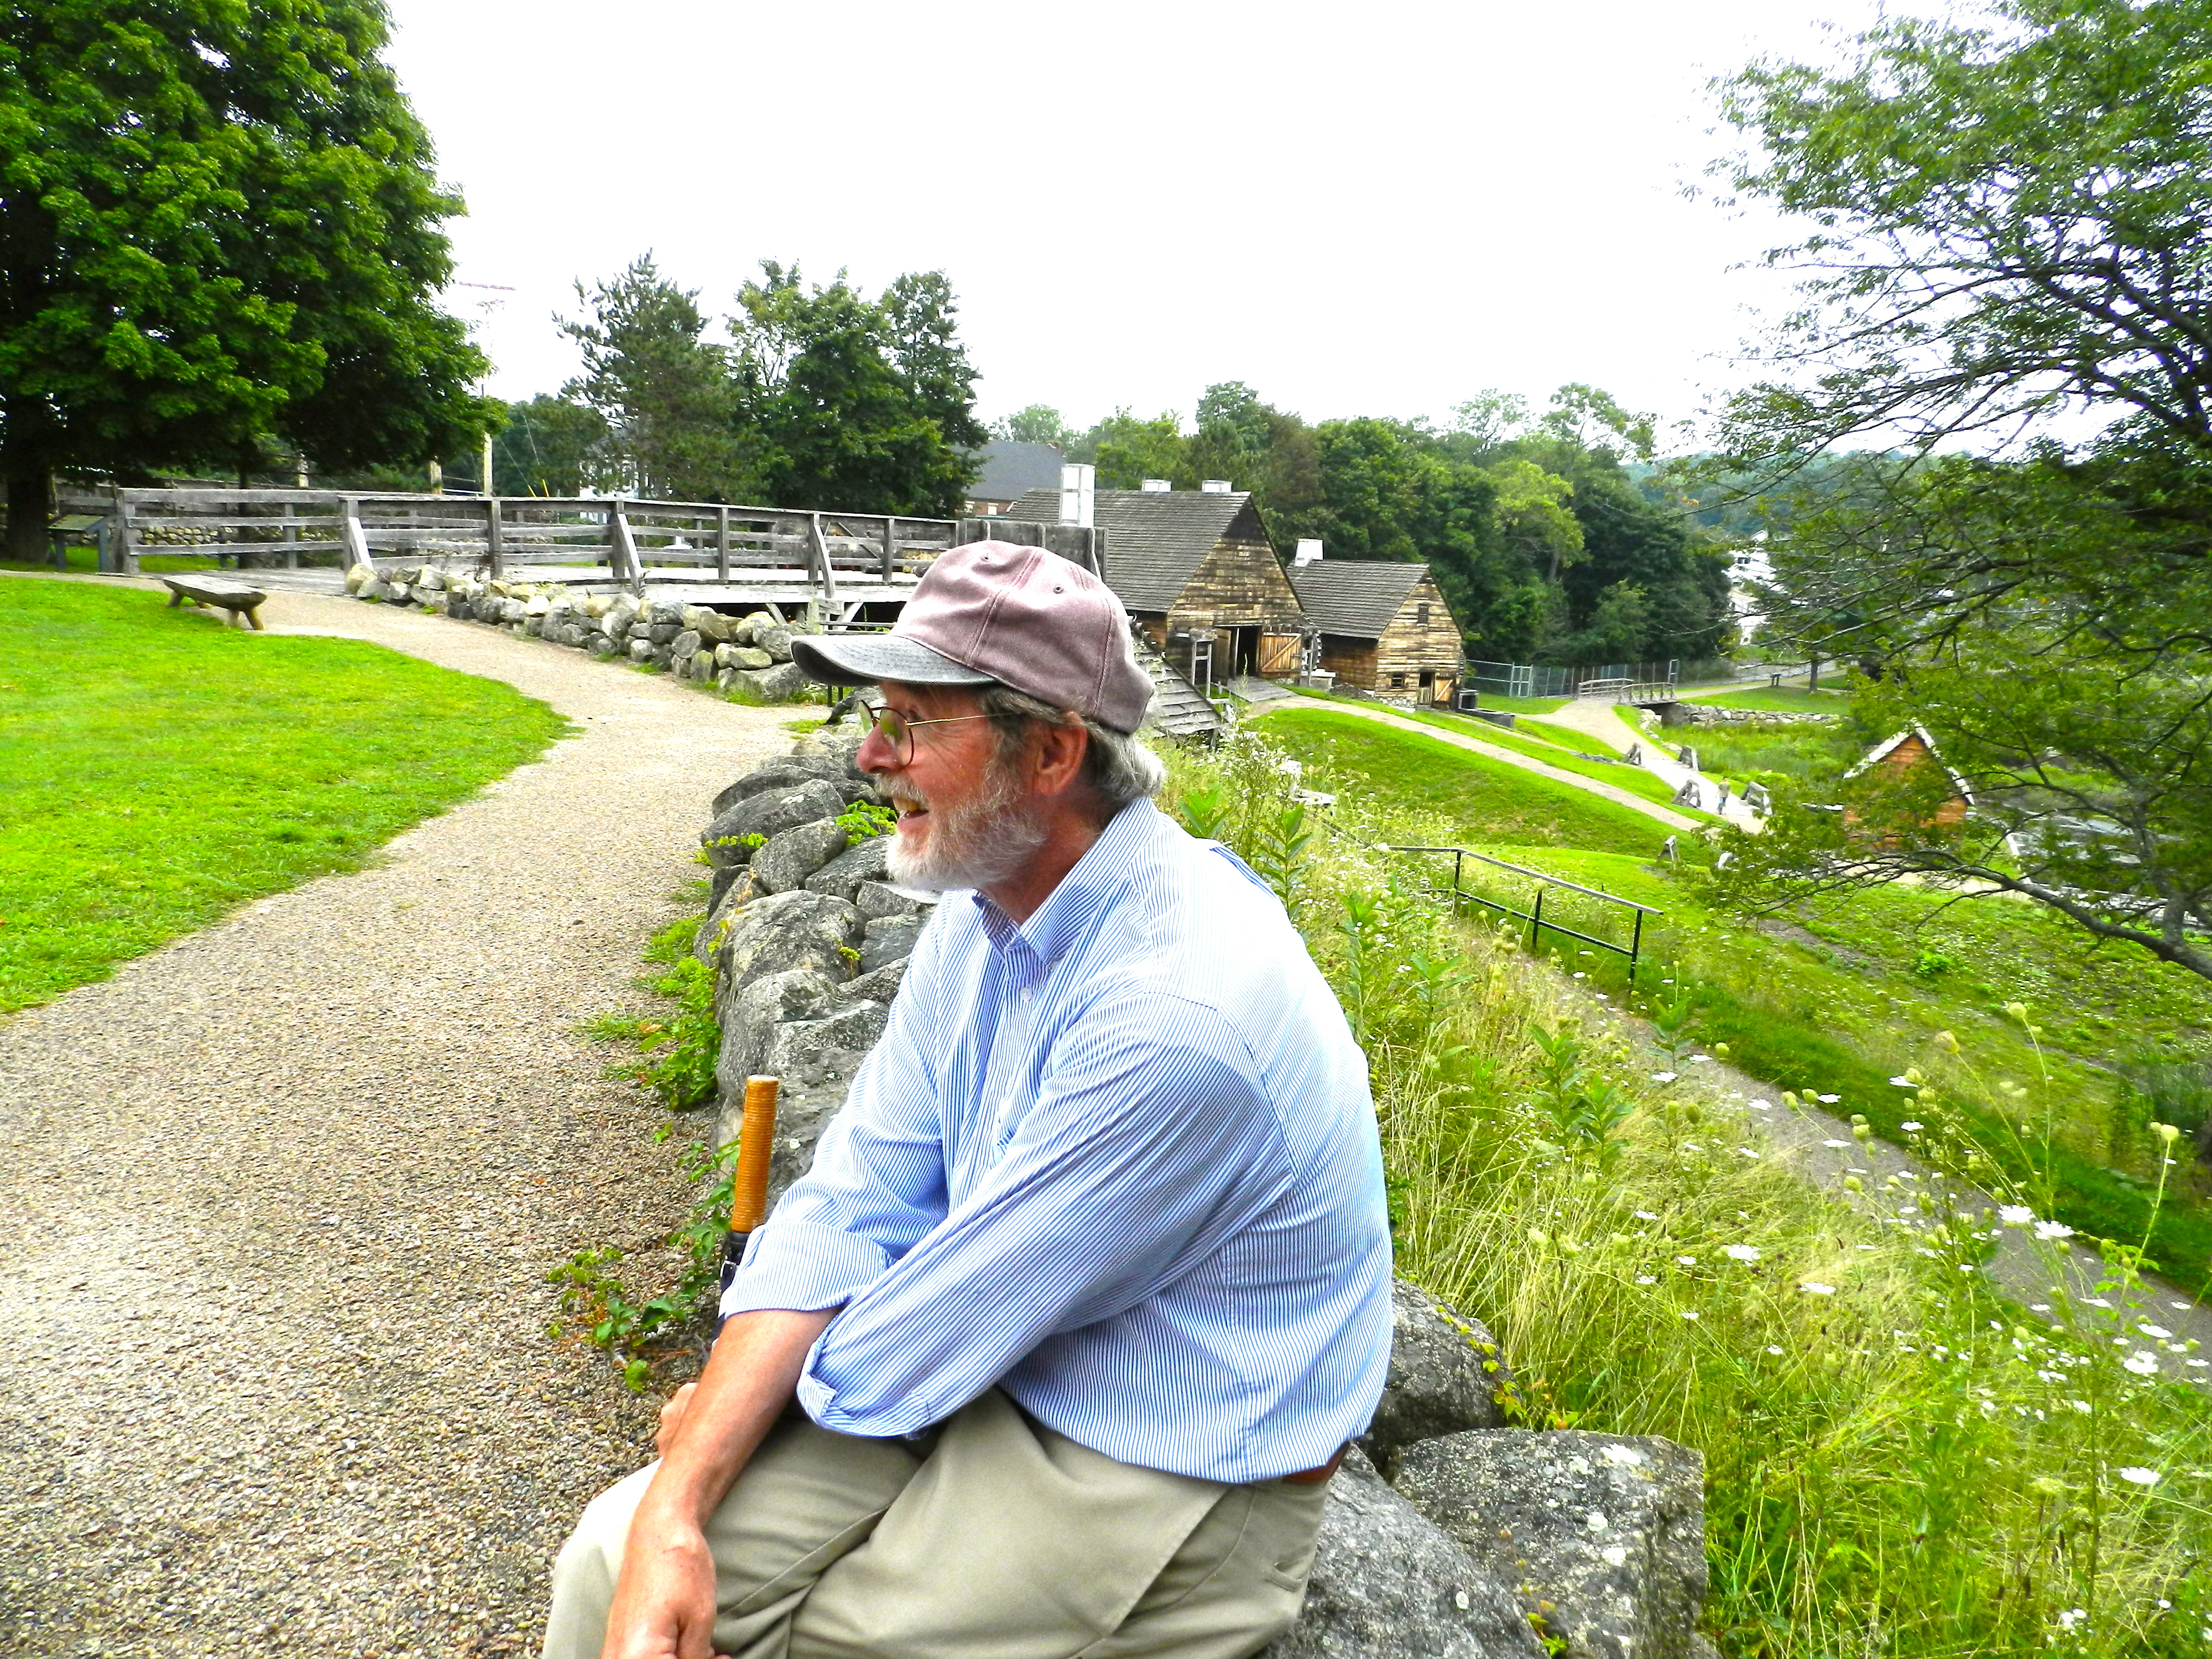
Robert Adam talking about historic hardware and fasteners at the Saugus Ironworks
During the week we also took a trip to the Saugus Ironworks National Park to tour the facility. It was a very rainy day but with umbrellas in hand we toured the facility and museum, saw the Ironworks in action and participated in a hands on lecture by Robert Adam (founder of the NBSS Preservation Carpentry Program and nationally known preservationist) where he show the evolution of home hardware over time — from wrought and cut nails, suffolk and norfolk latches, patent hinges and all manner of lock-sets. (With all the rain I have very few pictures from that day)
Bob Miller (TA for this class, NBSS CFM Graduate, Historian, and Tour Guide) in his element
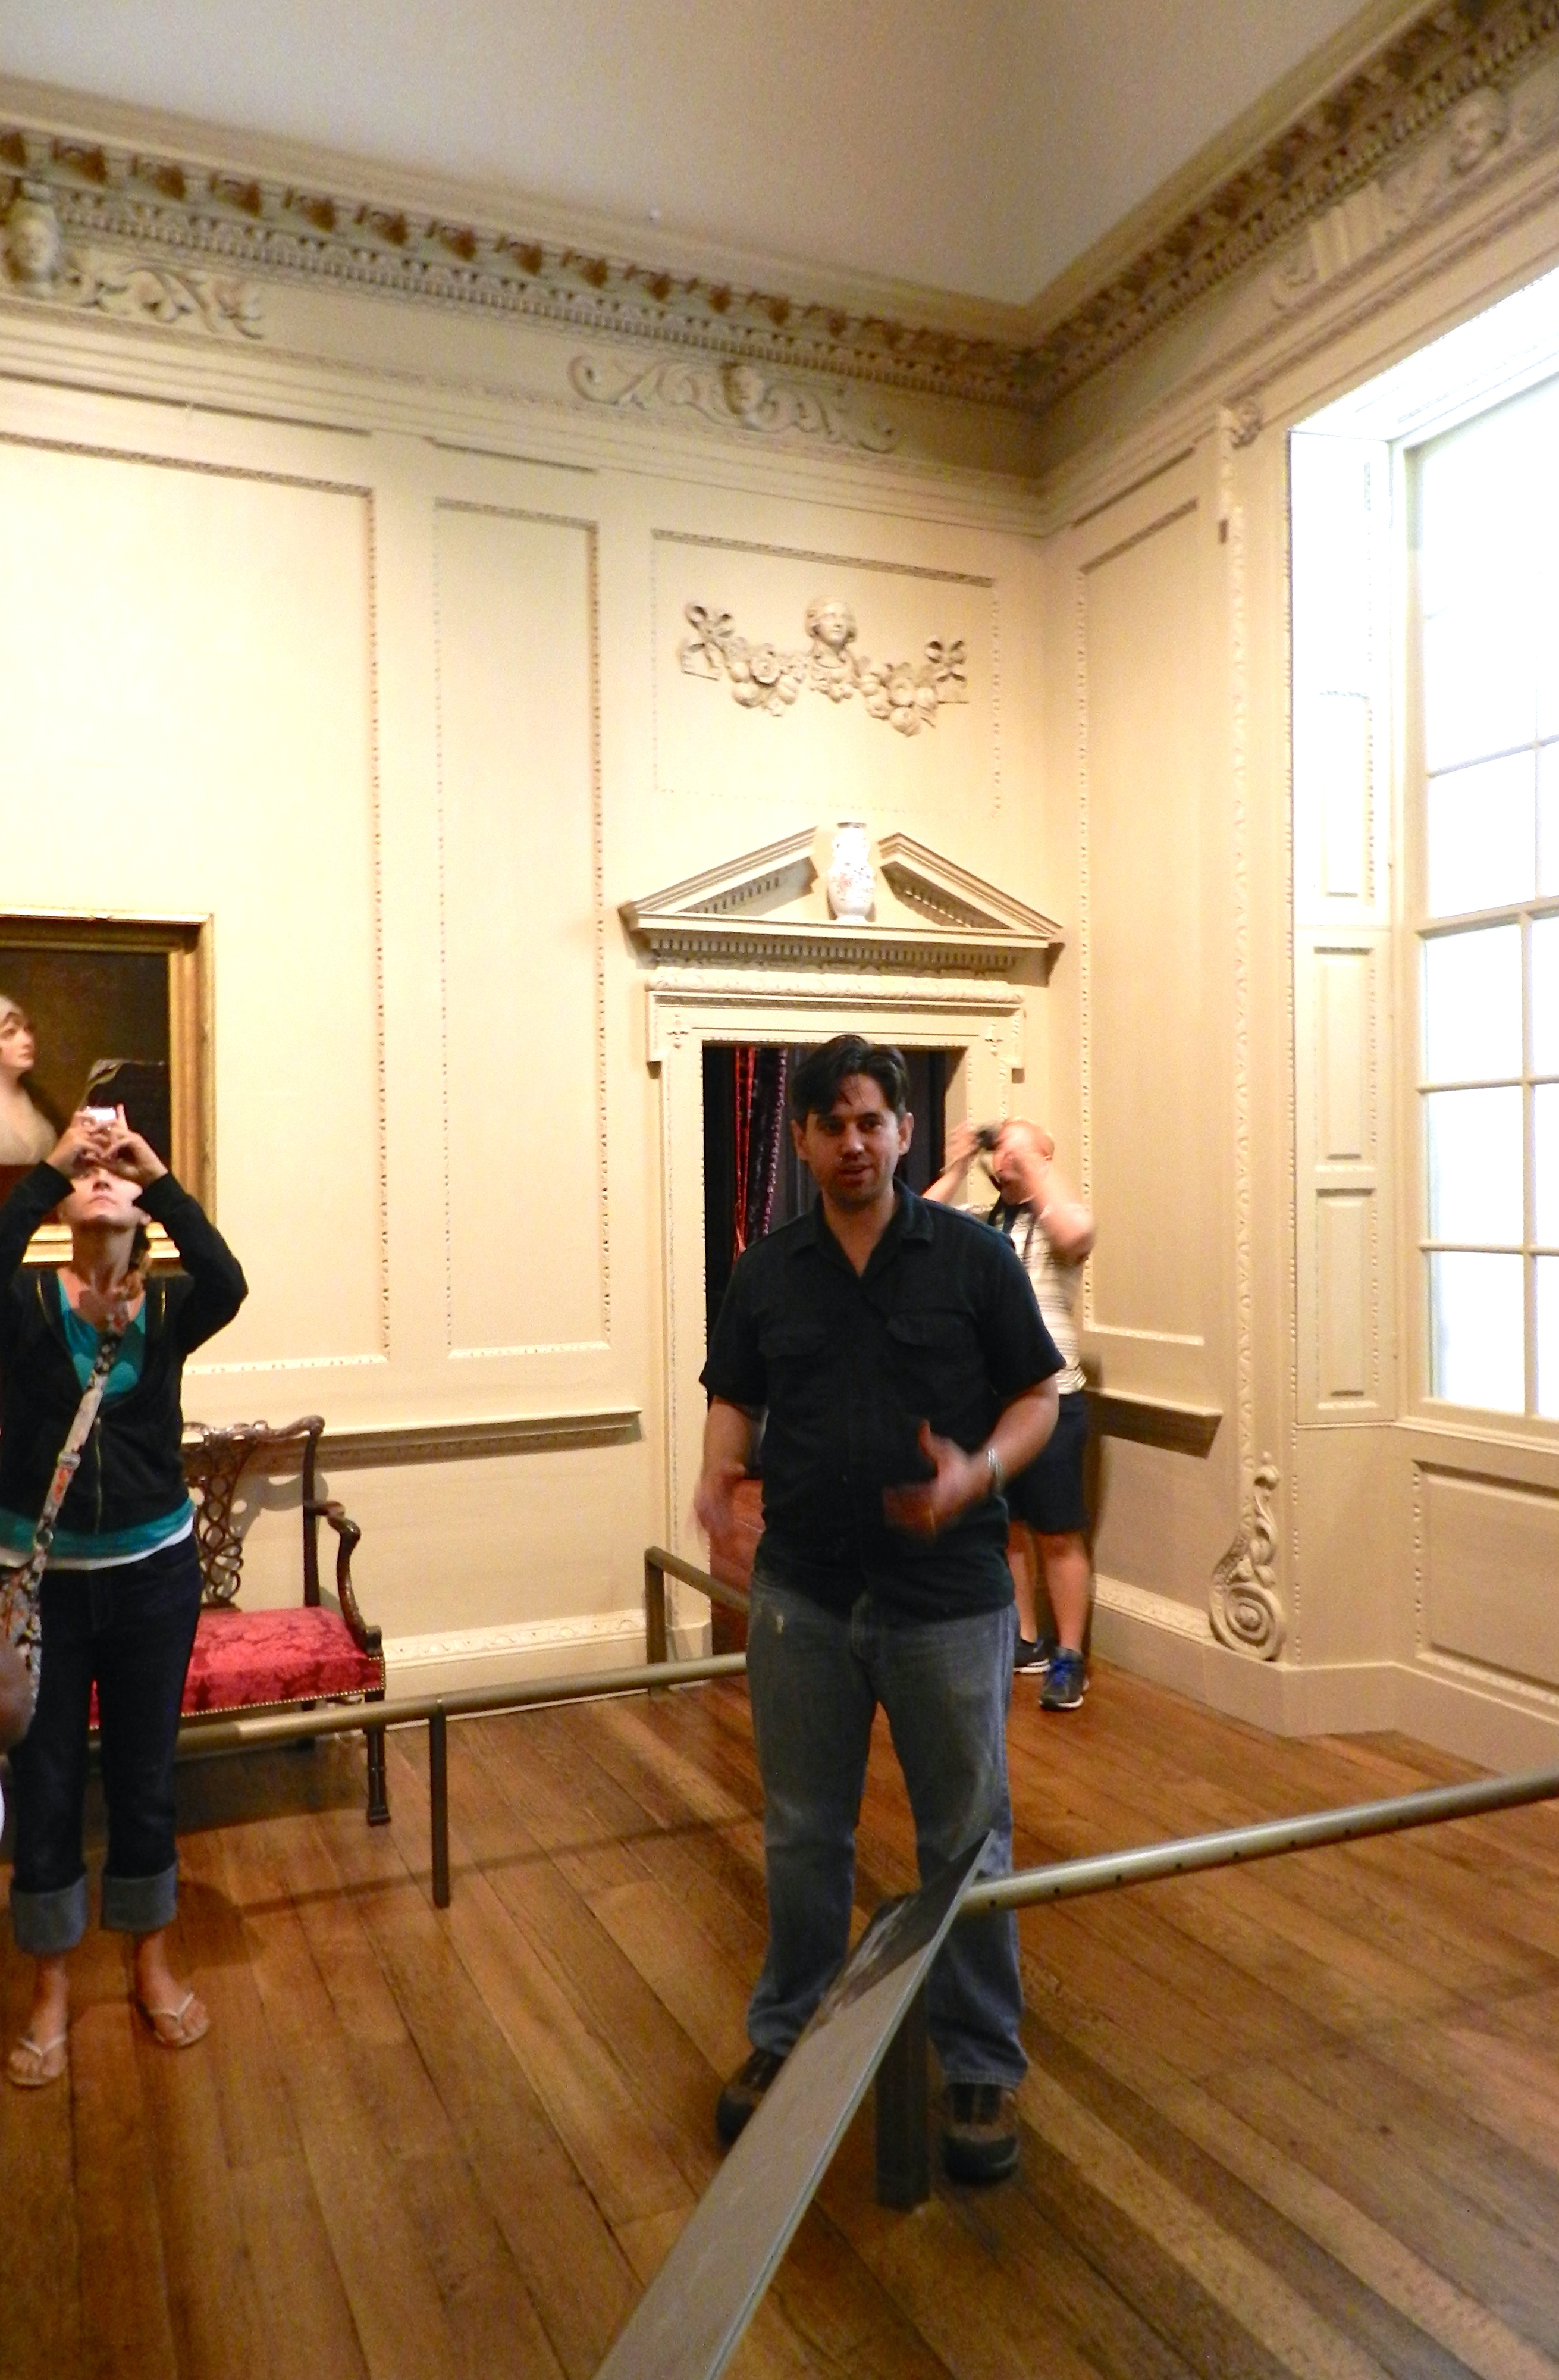
After the paint lecture we went over to the MFA to tour the Americas Wing. With a baby on the way and good chance I could be called away to the hospital at any time I am thankful to have had Bob Miller as my TA this year. Bob is a graduate of the NBSS Cabinet and Furniture Making Program, an historian, professional tour guide and the perfect fit to help keep the course moving through all the venues we had to cover this year.
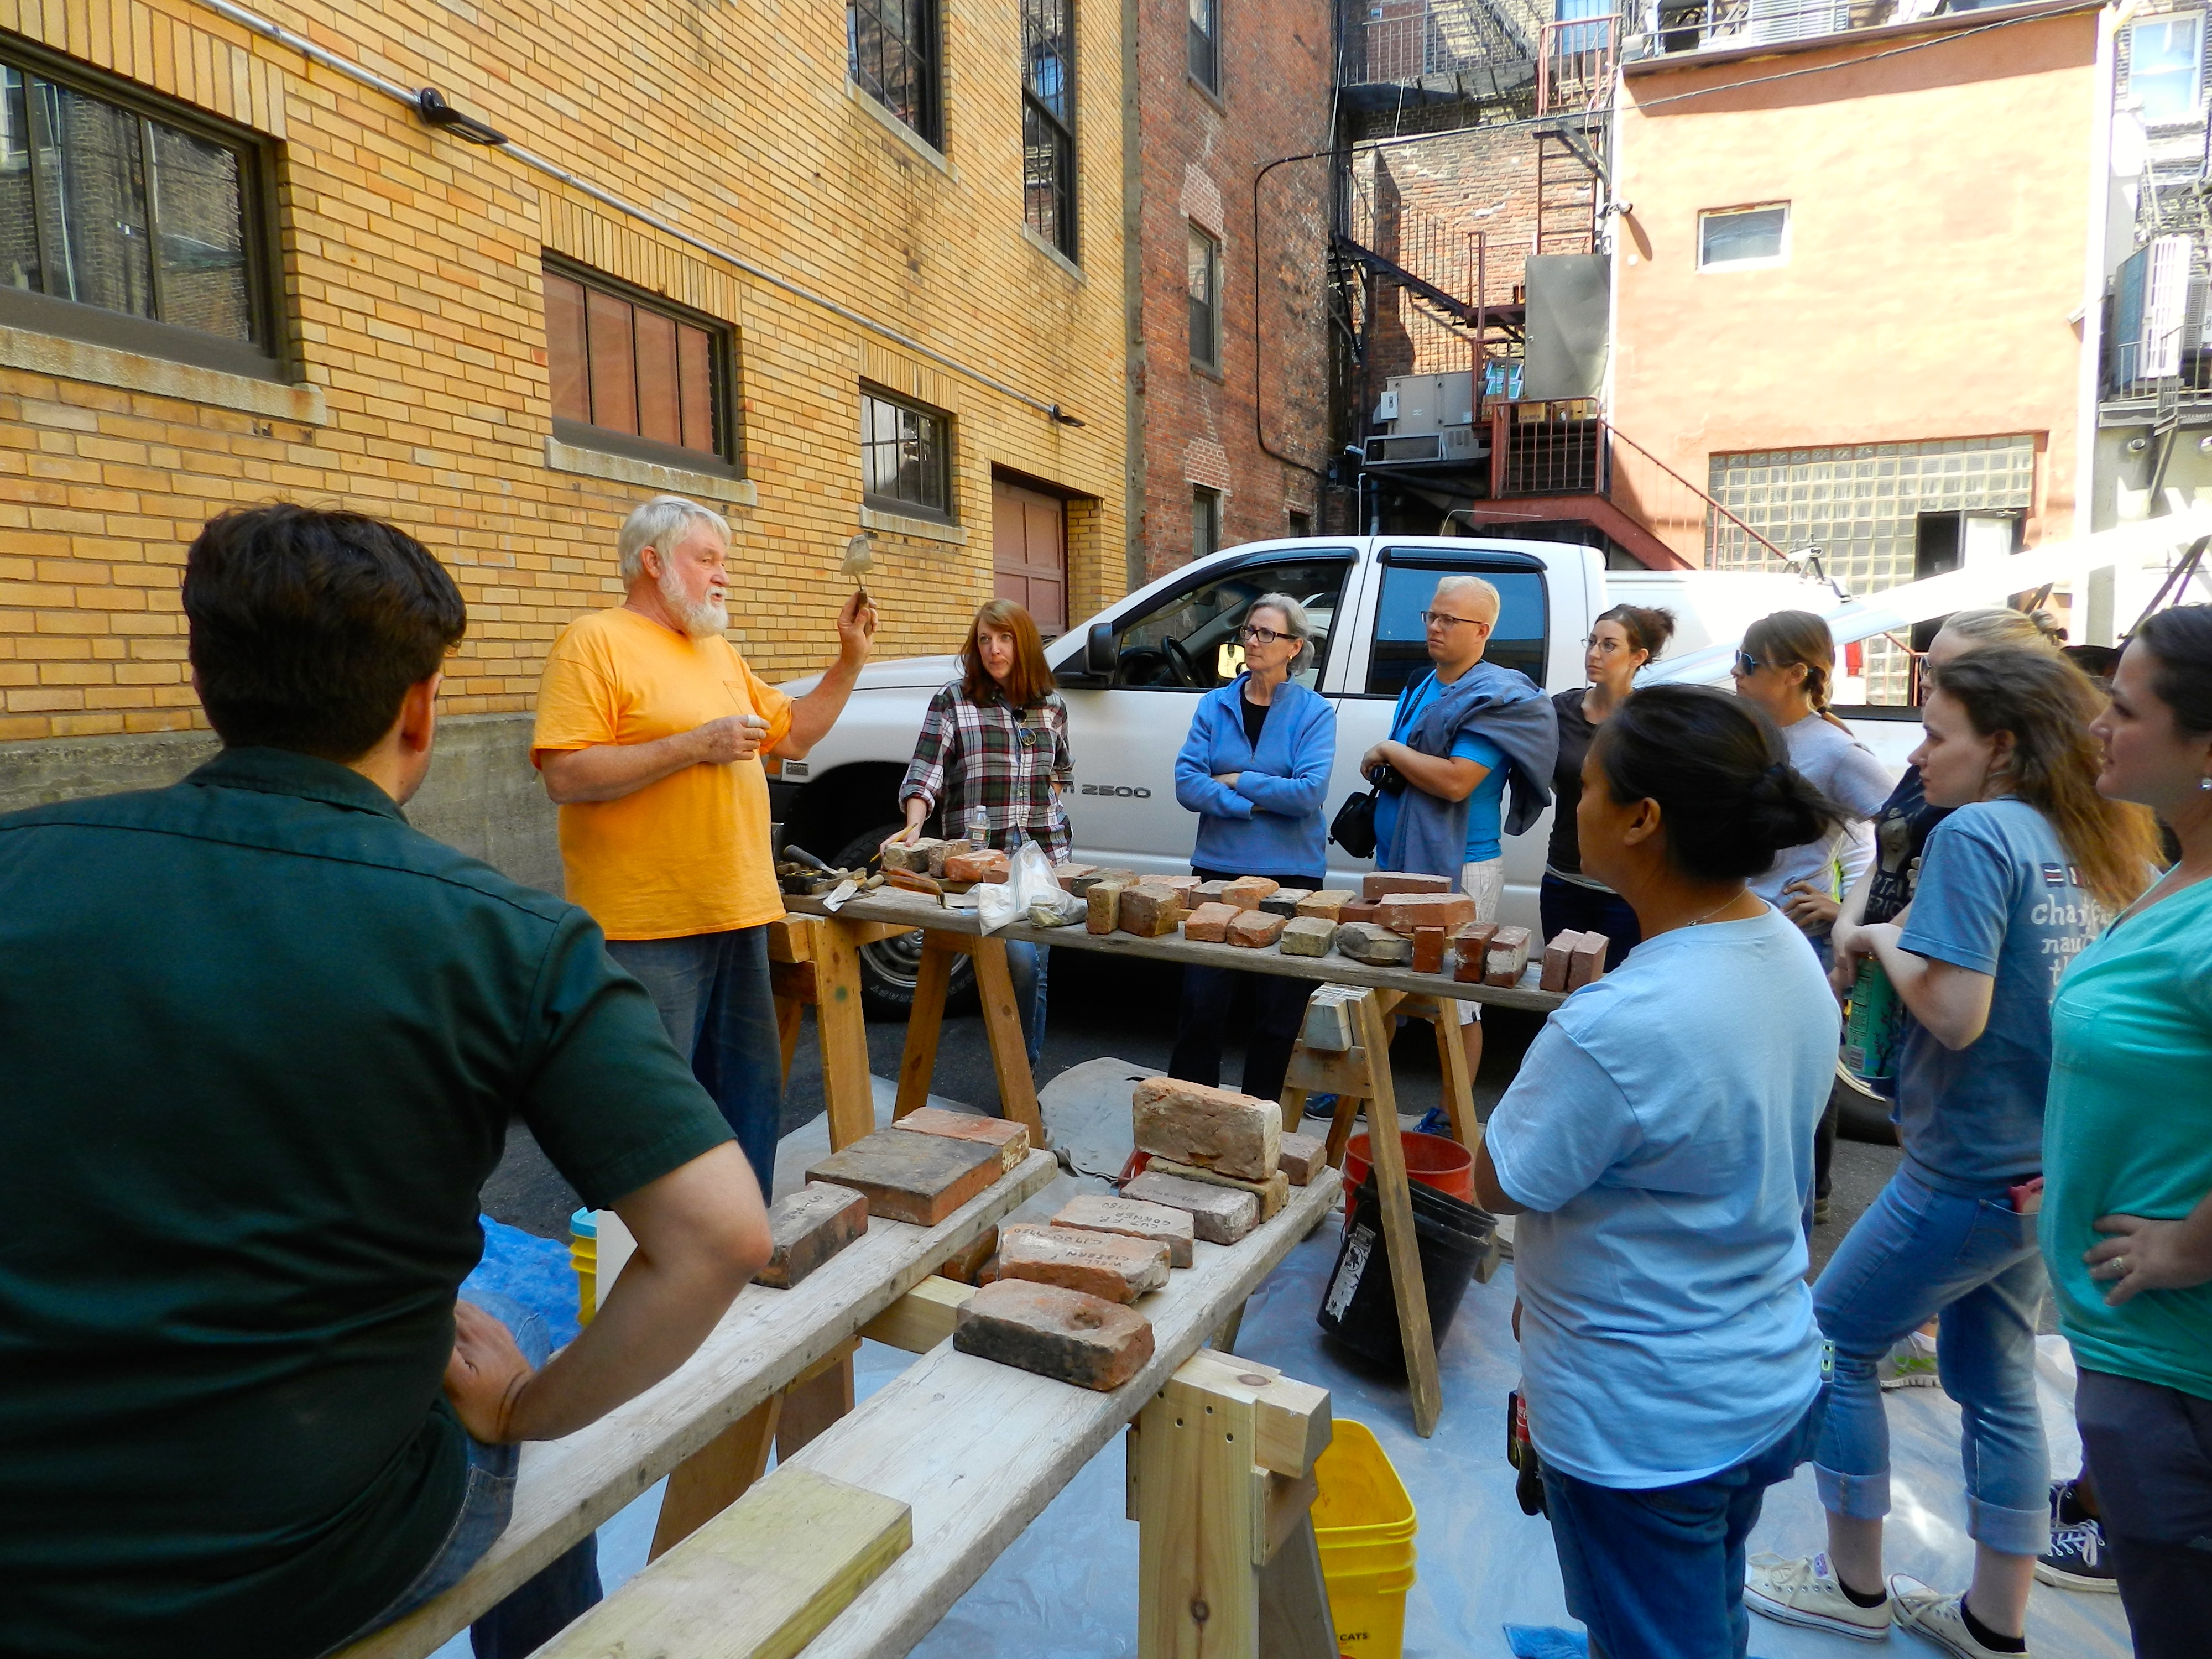
Preservation Masonry with Richard Irons
This year we also had Richard Irons a well known Preservation Mason come by to talk about masonry. The day was a mixture of time spent in the classroom and outdoors mixing mortar, setting some bricks, cutting blocks, re-pointing etc.
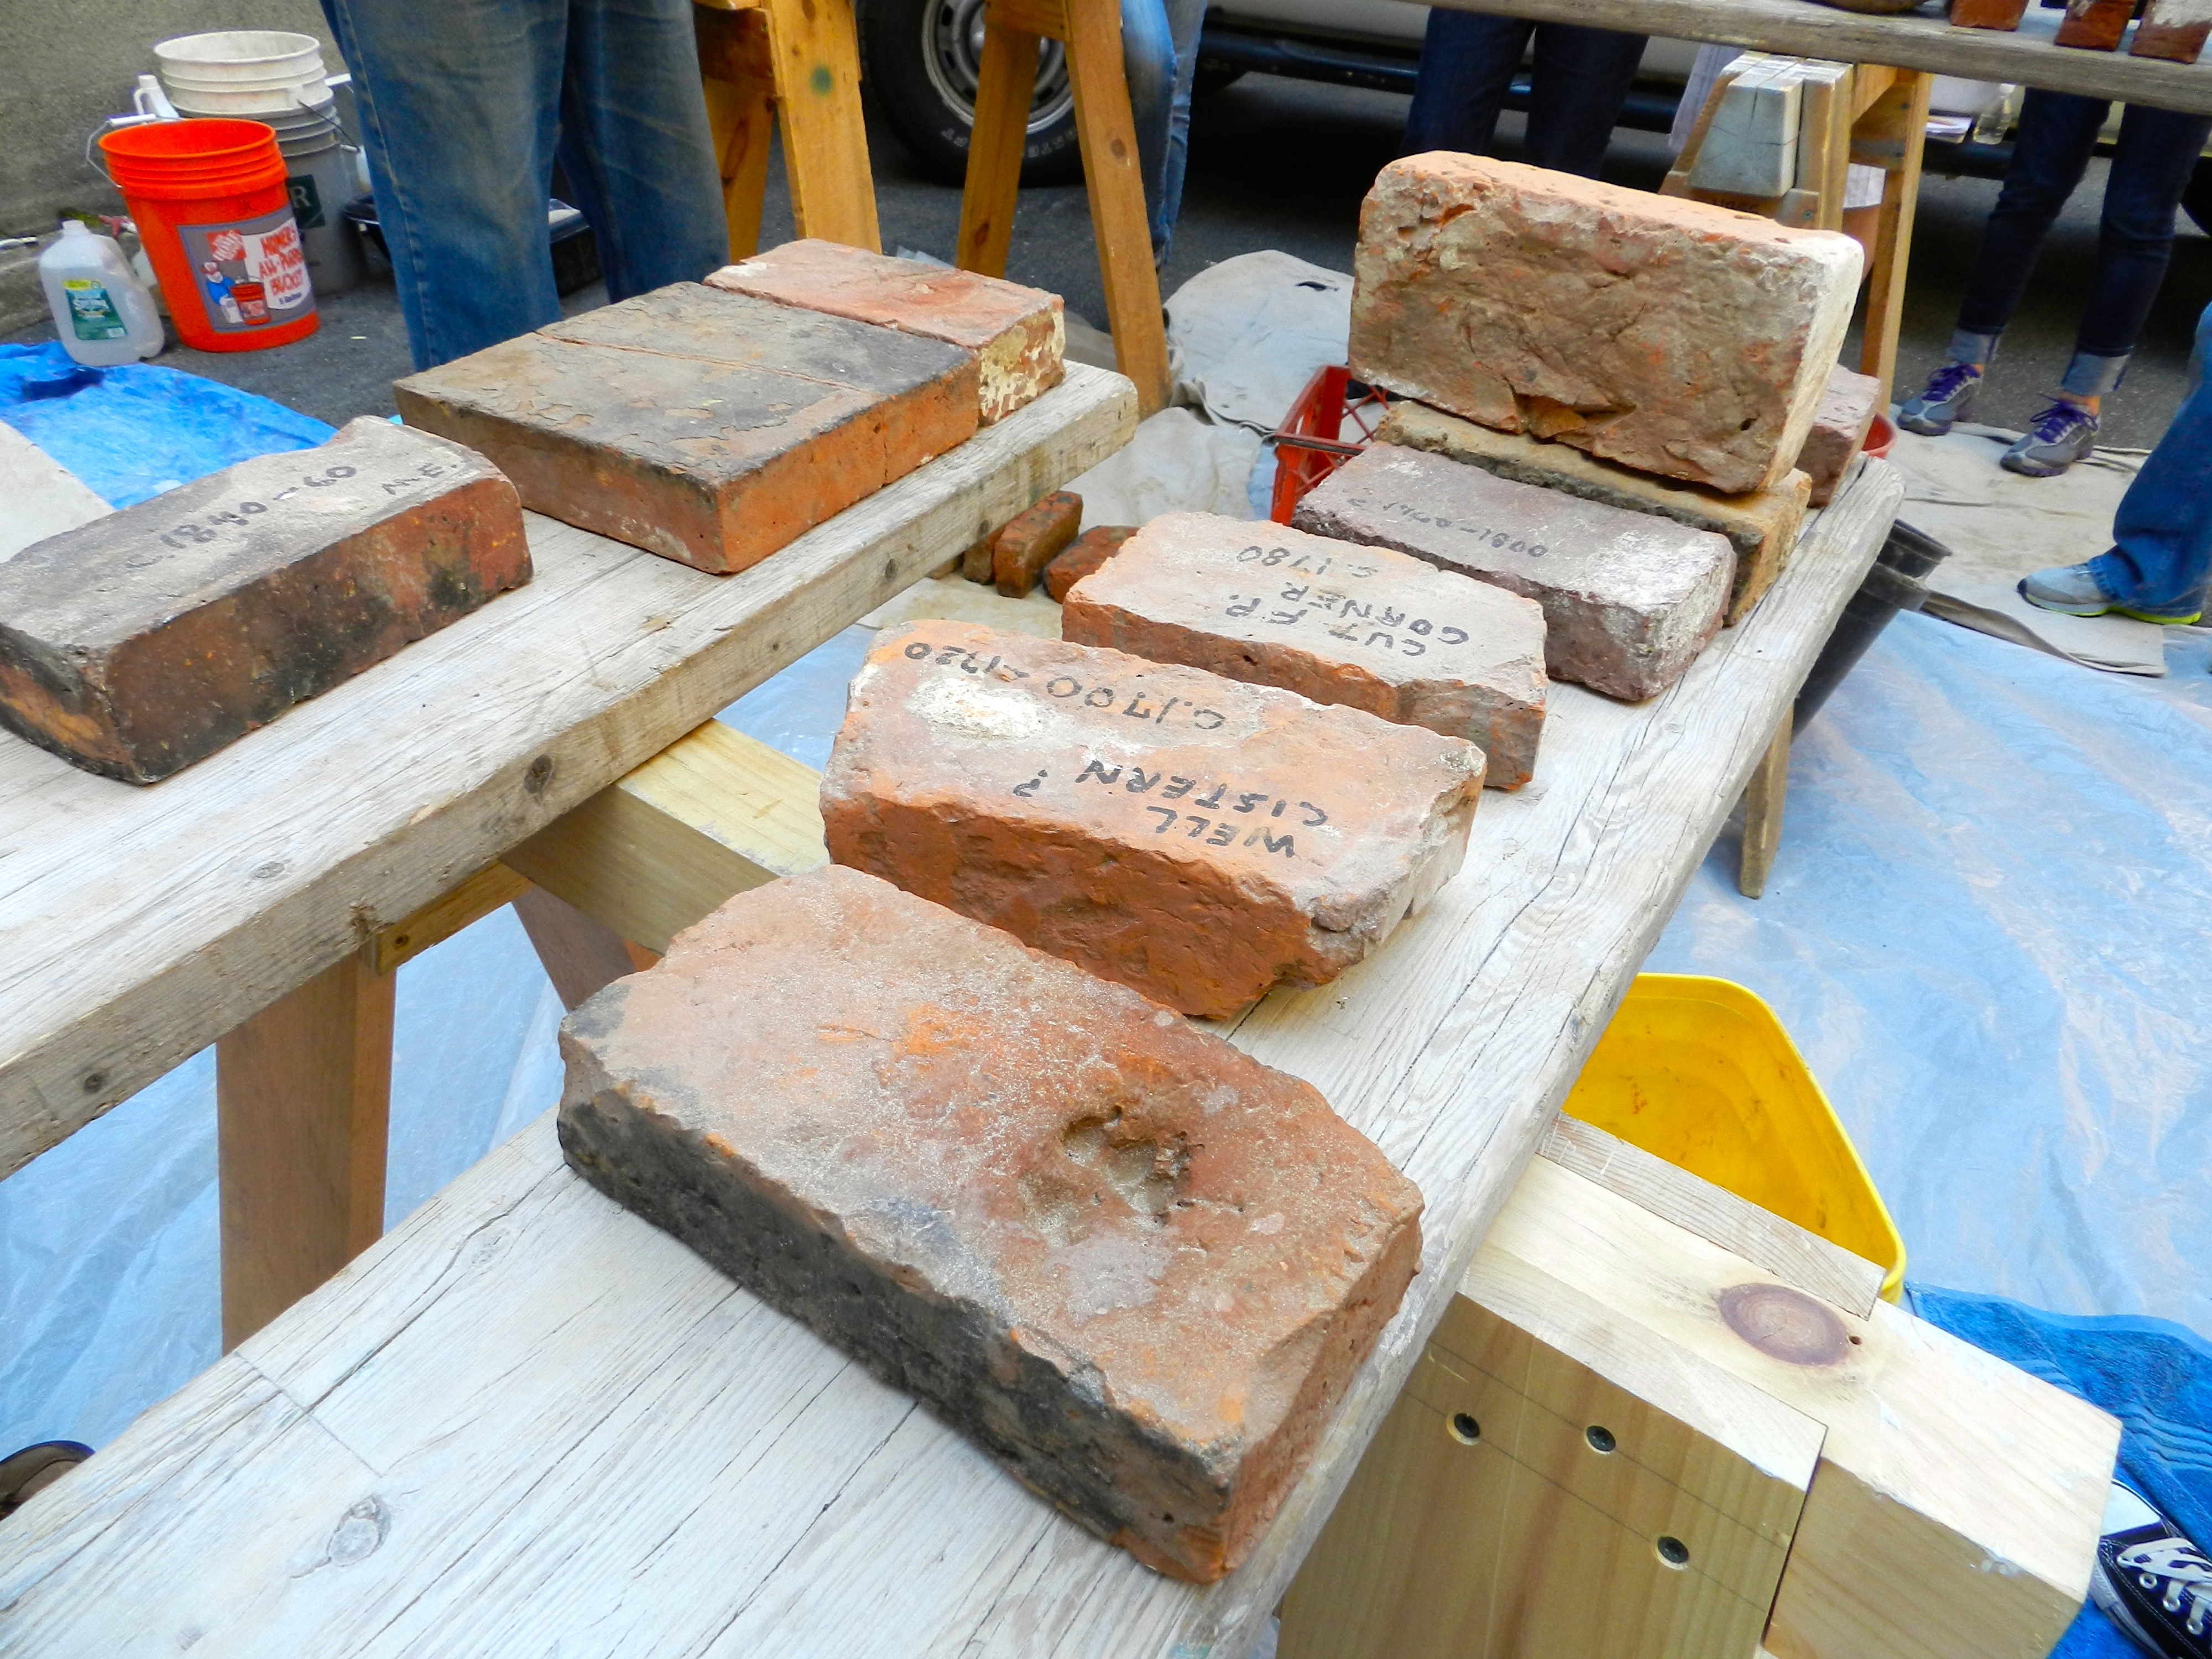
A sampling of historic bricks from Richard’s collection
Richard brought with him a nice sampling of some of the many historic bricks in his collection. It’s always interesting to see just how much the look, style and finish varied over time and location.
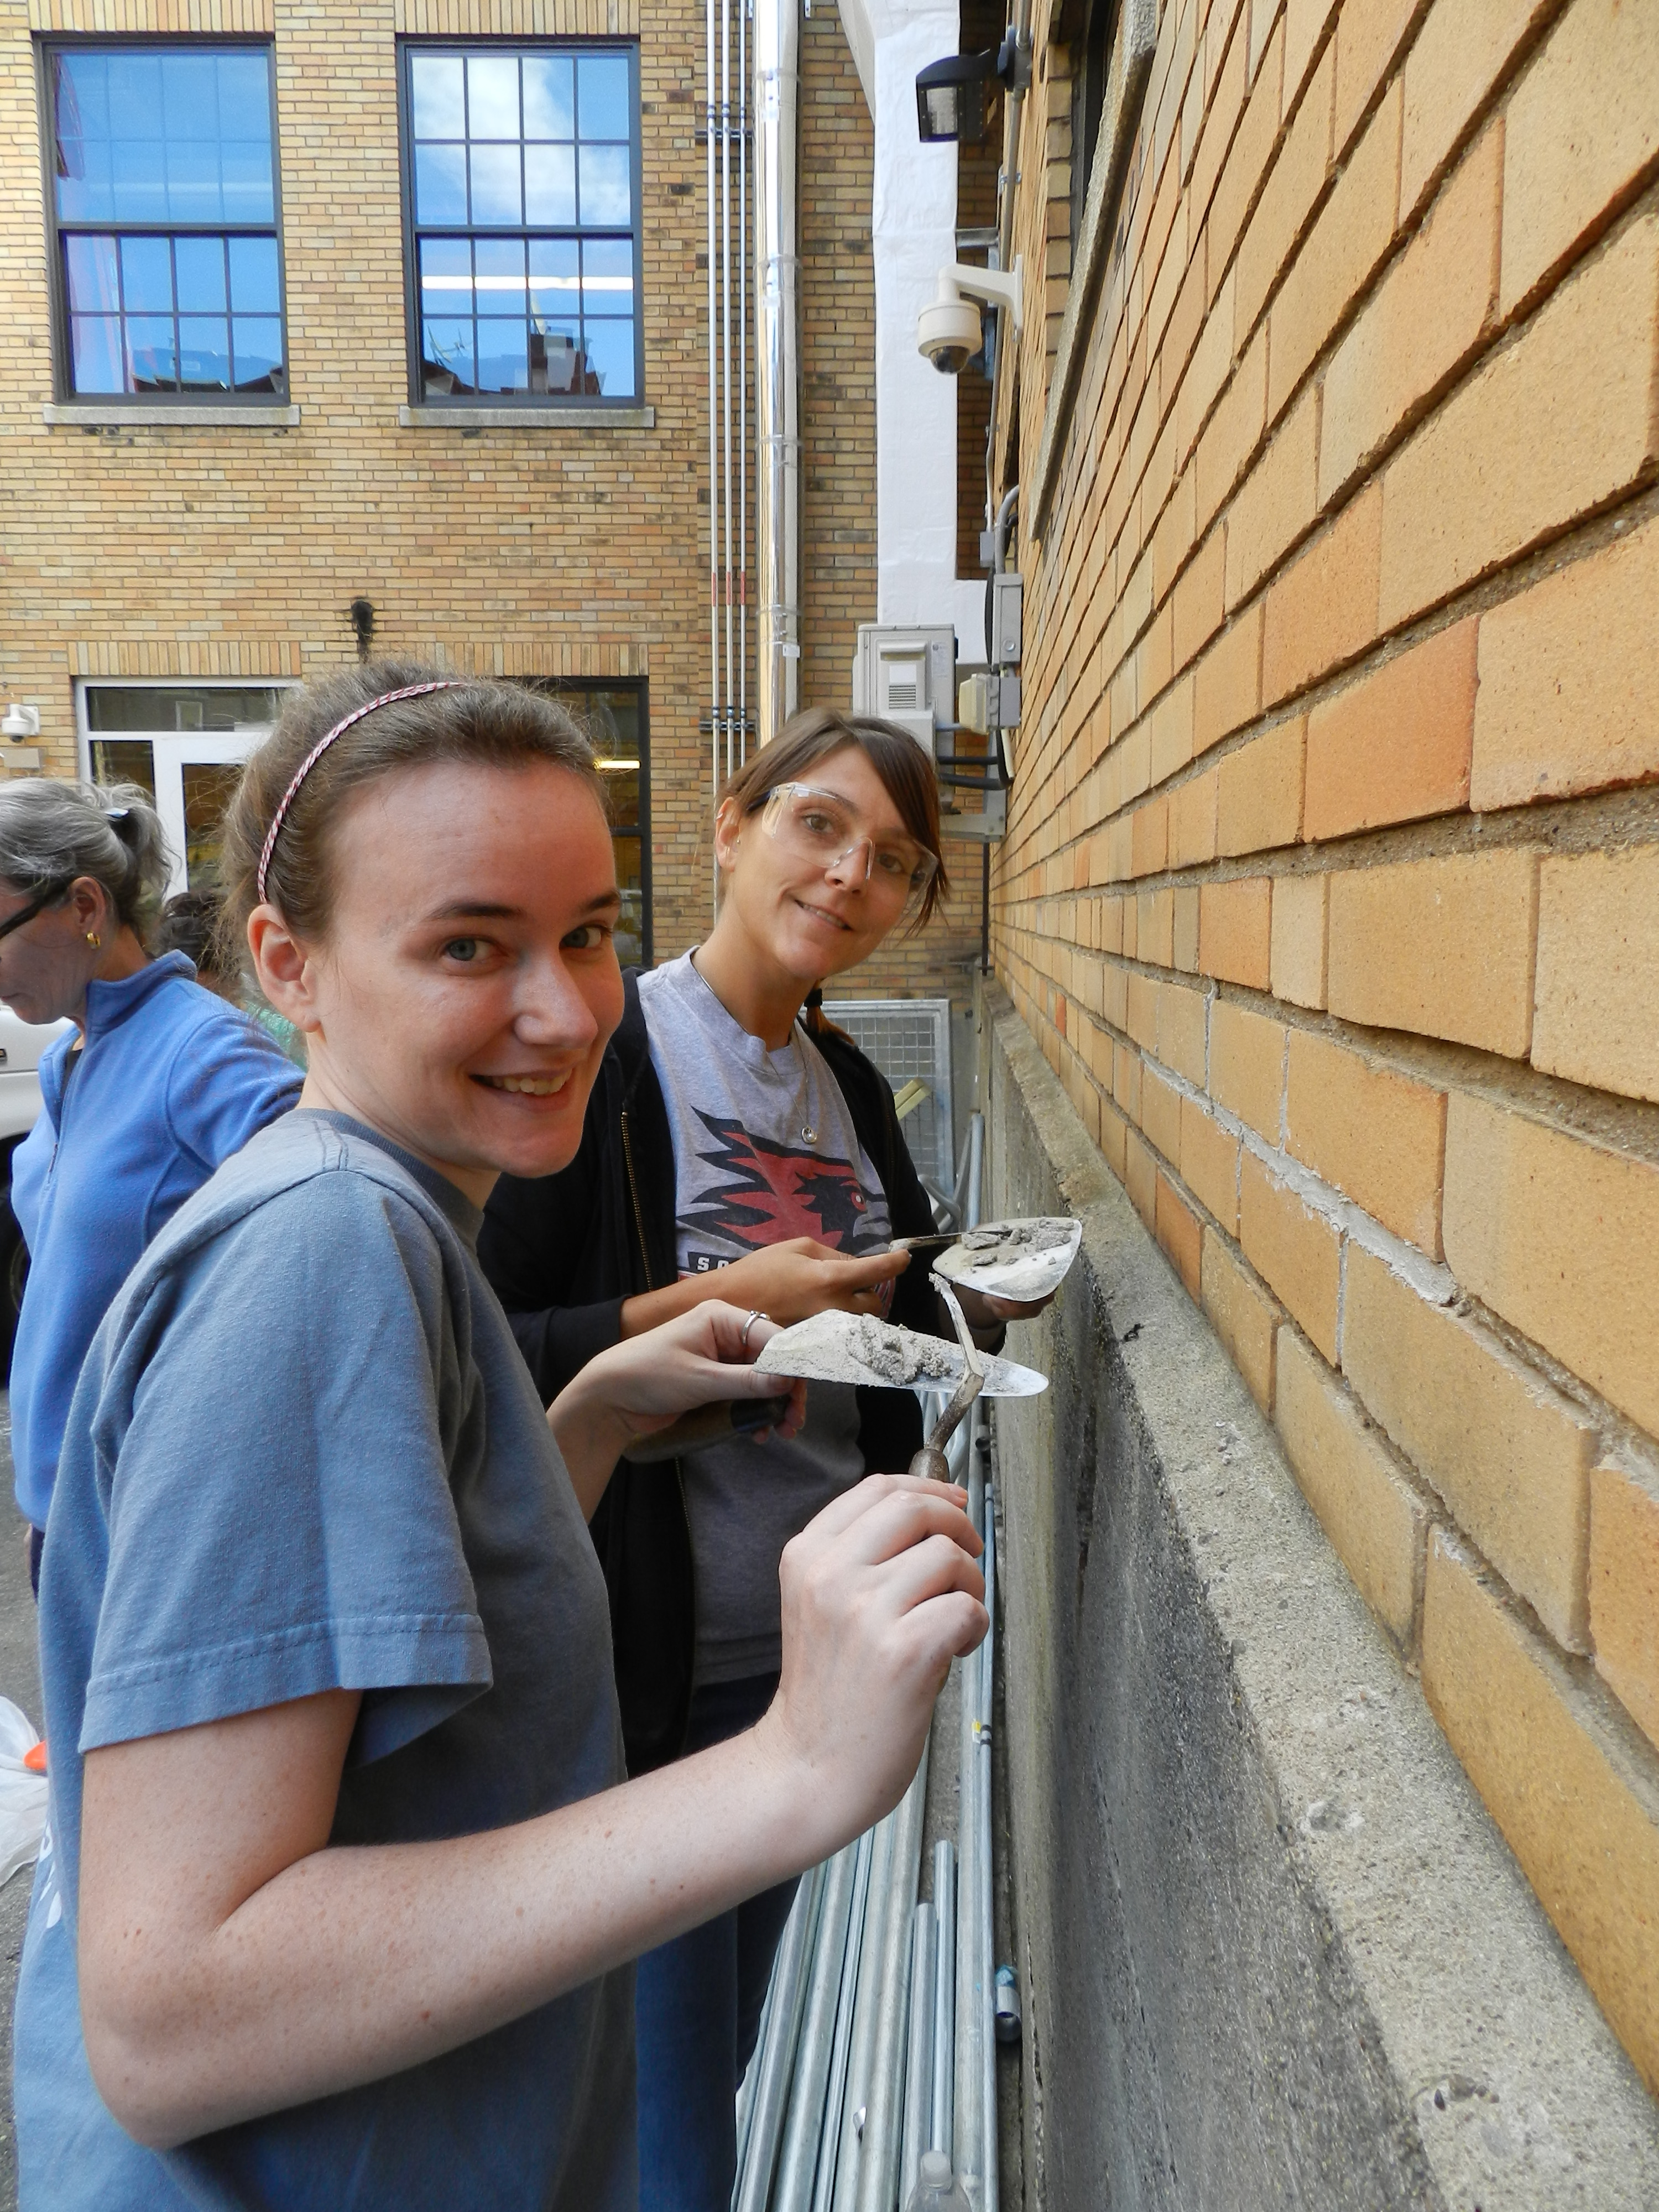
Felice and Jamie re-pointing the back of the school
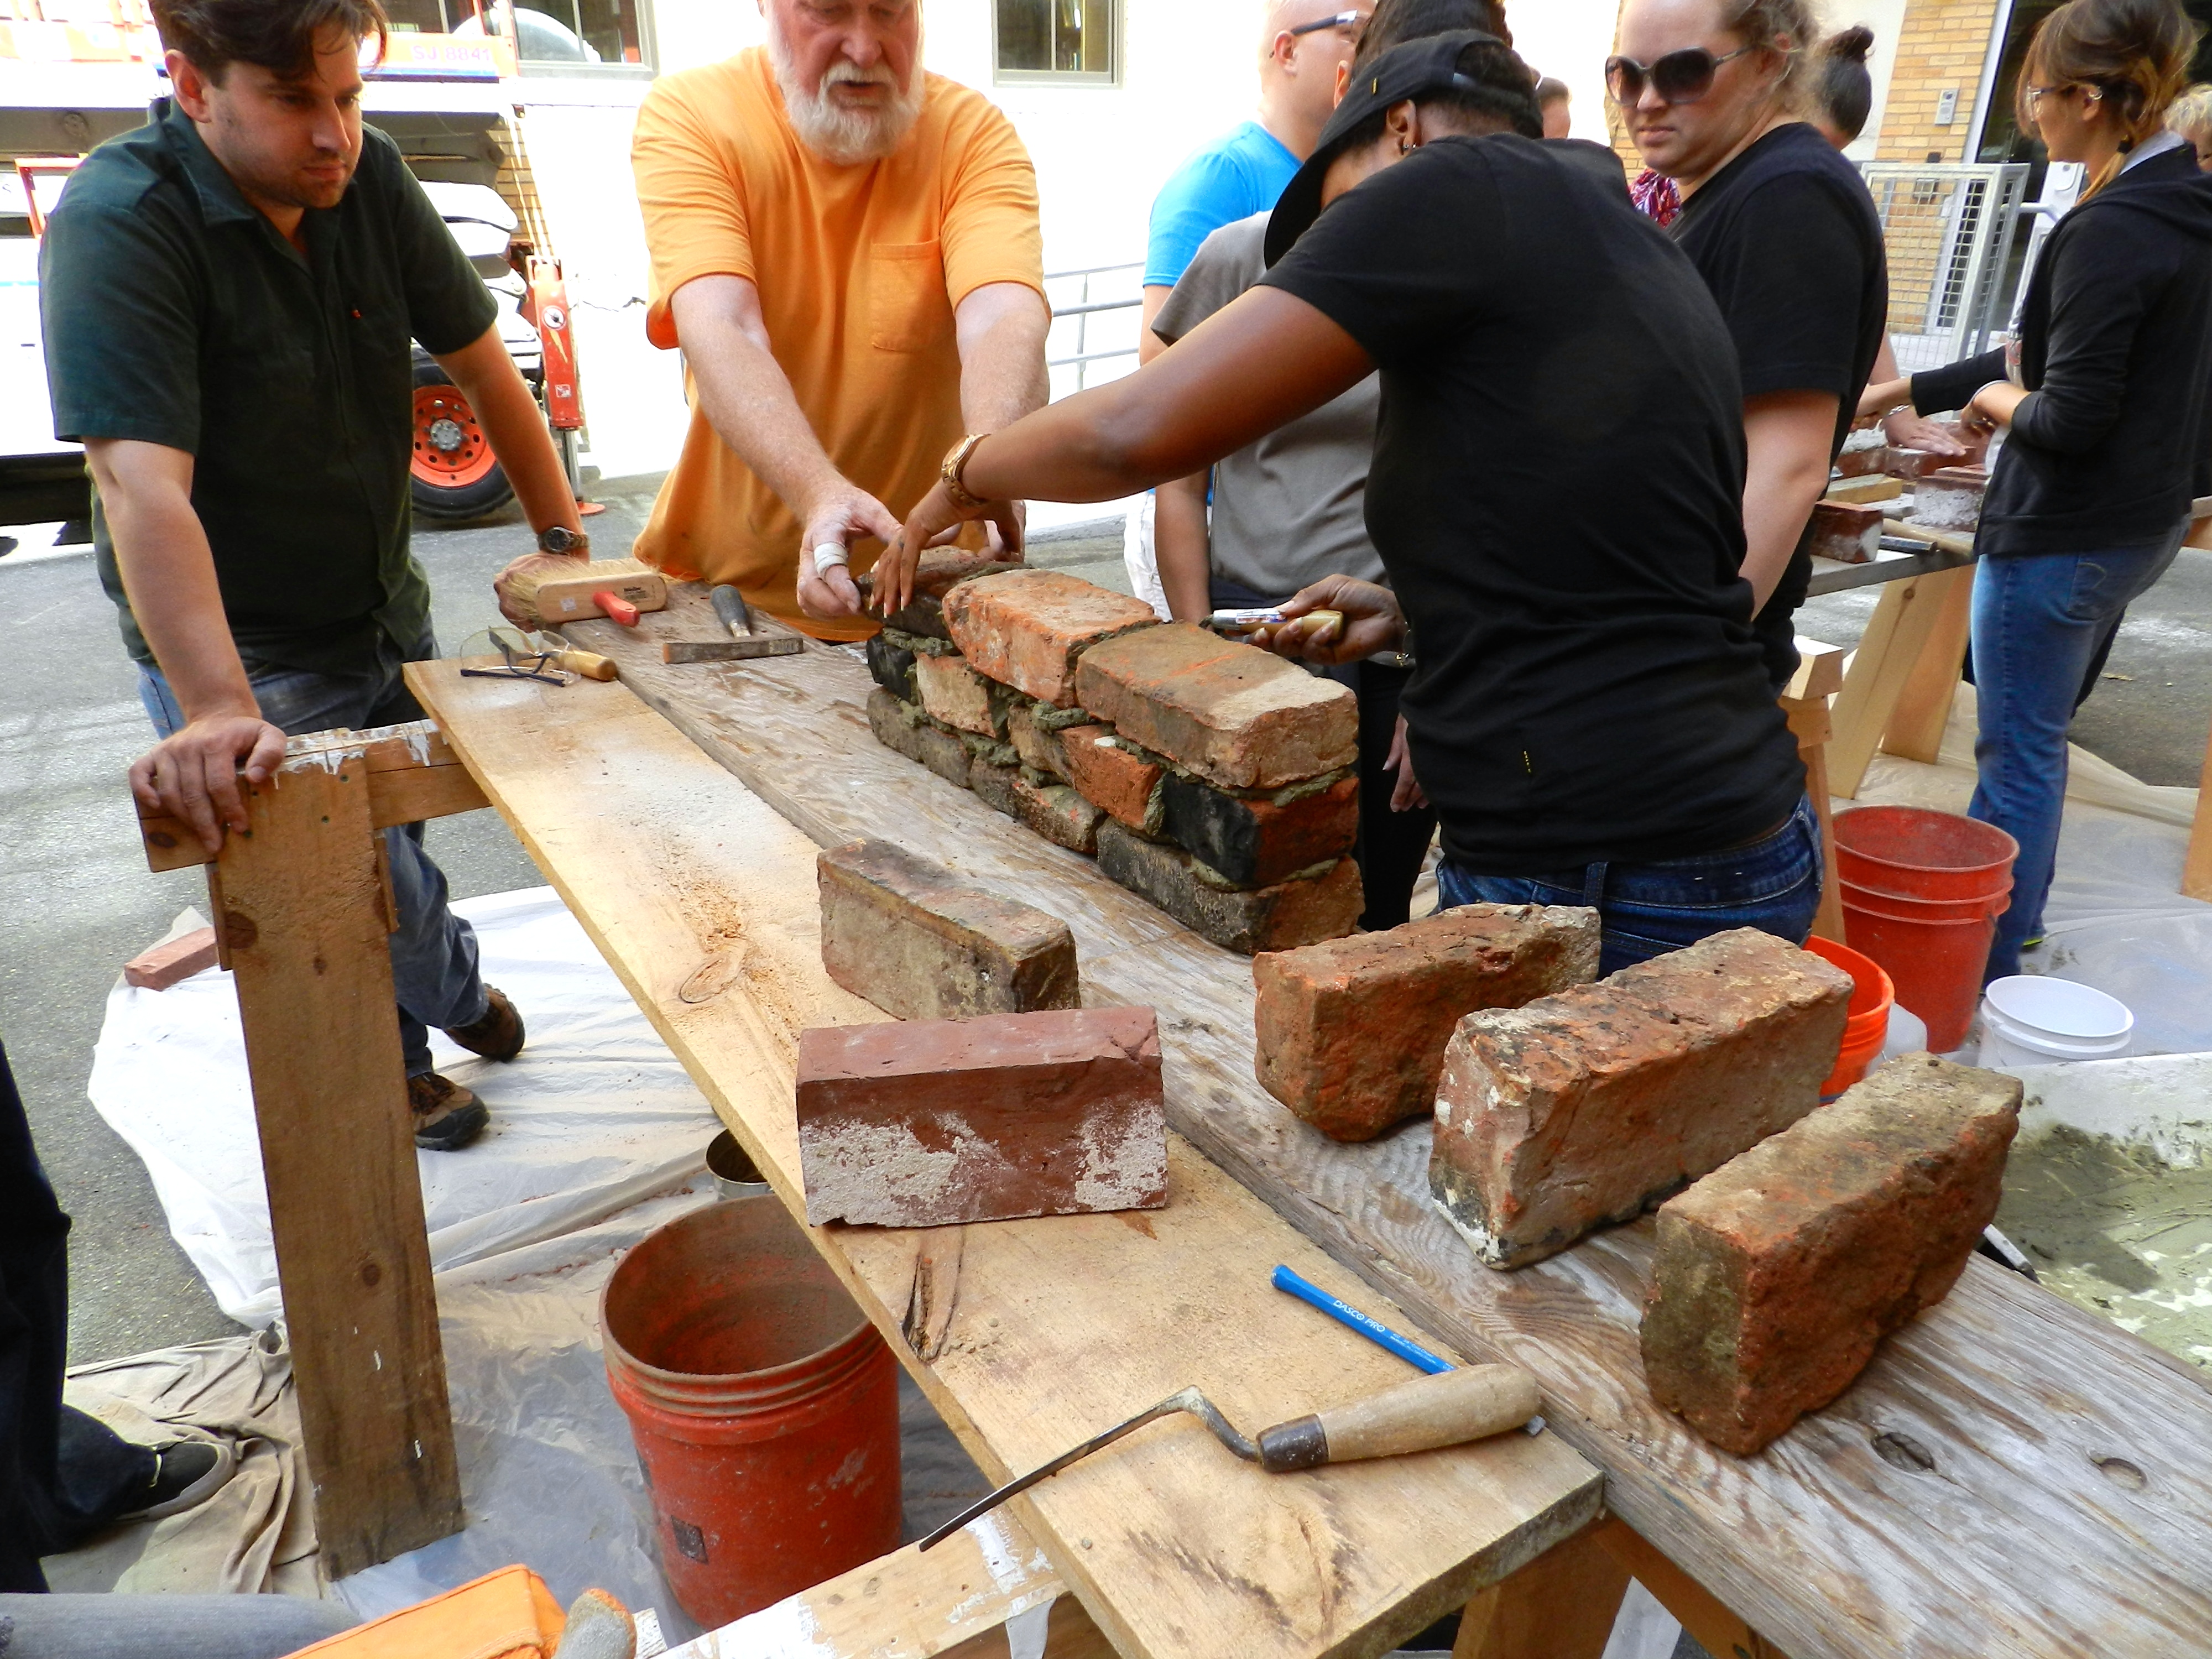
The students had the opportunity to re-point some mortar joints, lay up some bricks, cut blocks and get a taste for some traditional masonry work.
Dierdre building a brick wall
The last big day of the intensive week was spent timber framing with Brian Vogt who is a fellow graduate of the NBSS Preservation Carpentry Program and is the Carpentry instructor at the school.
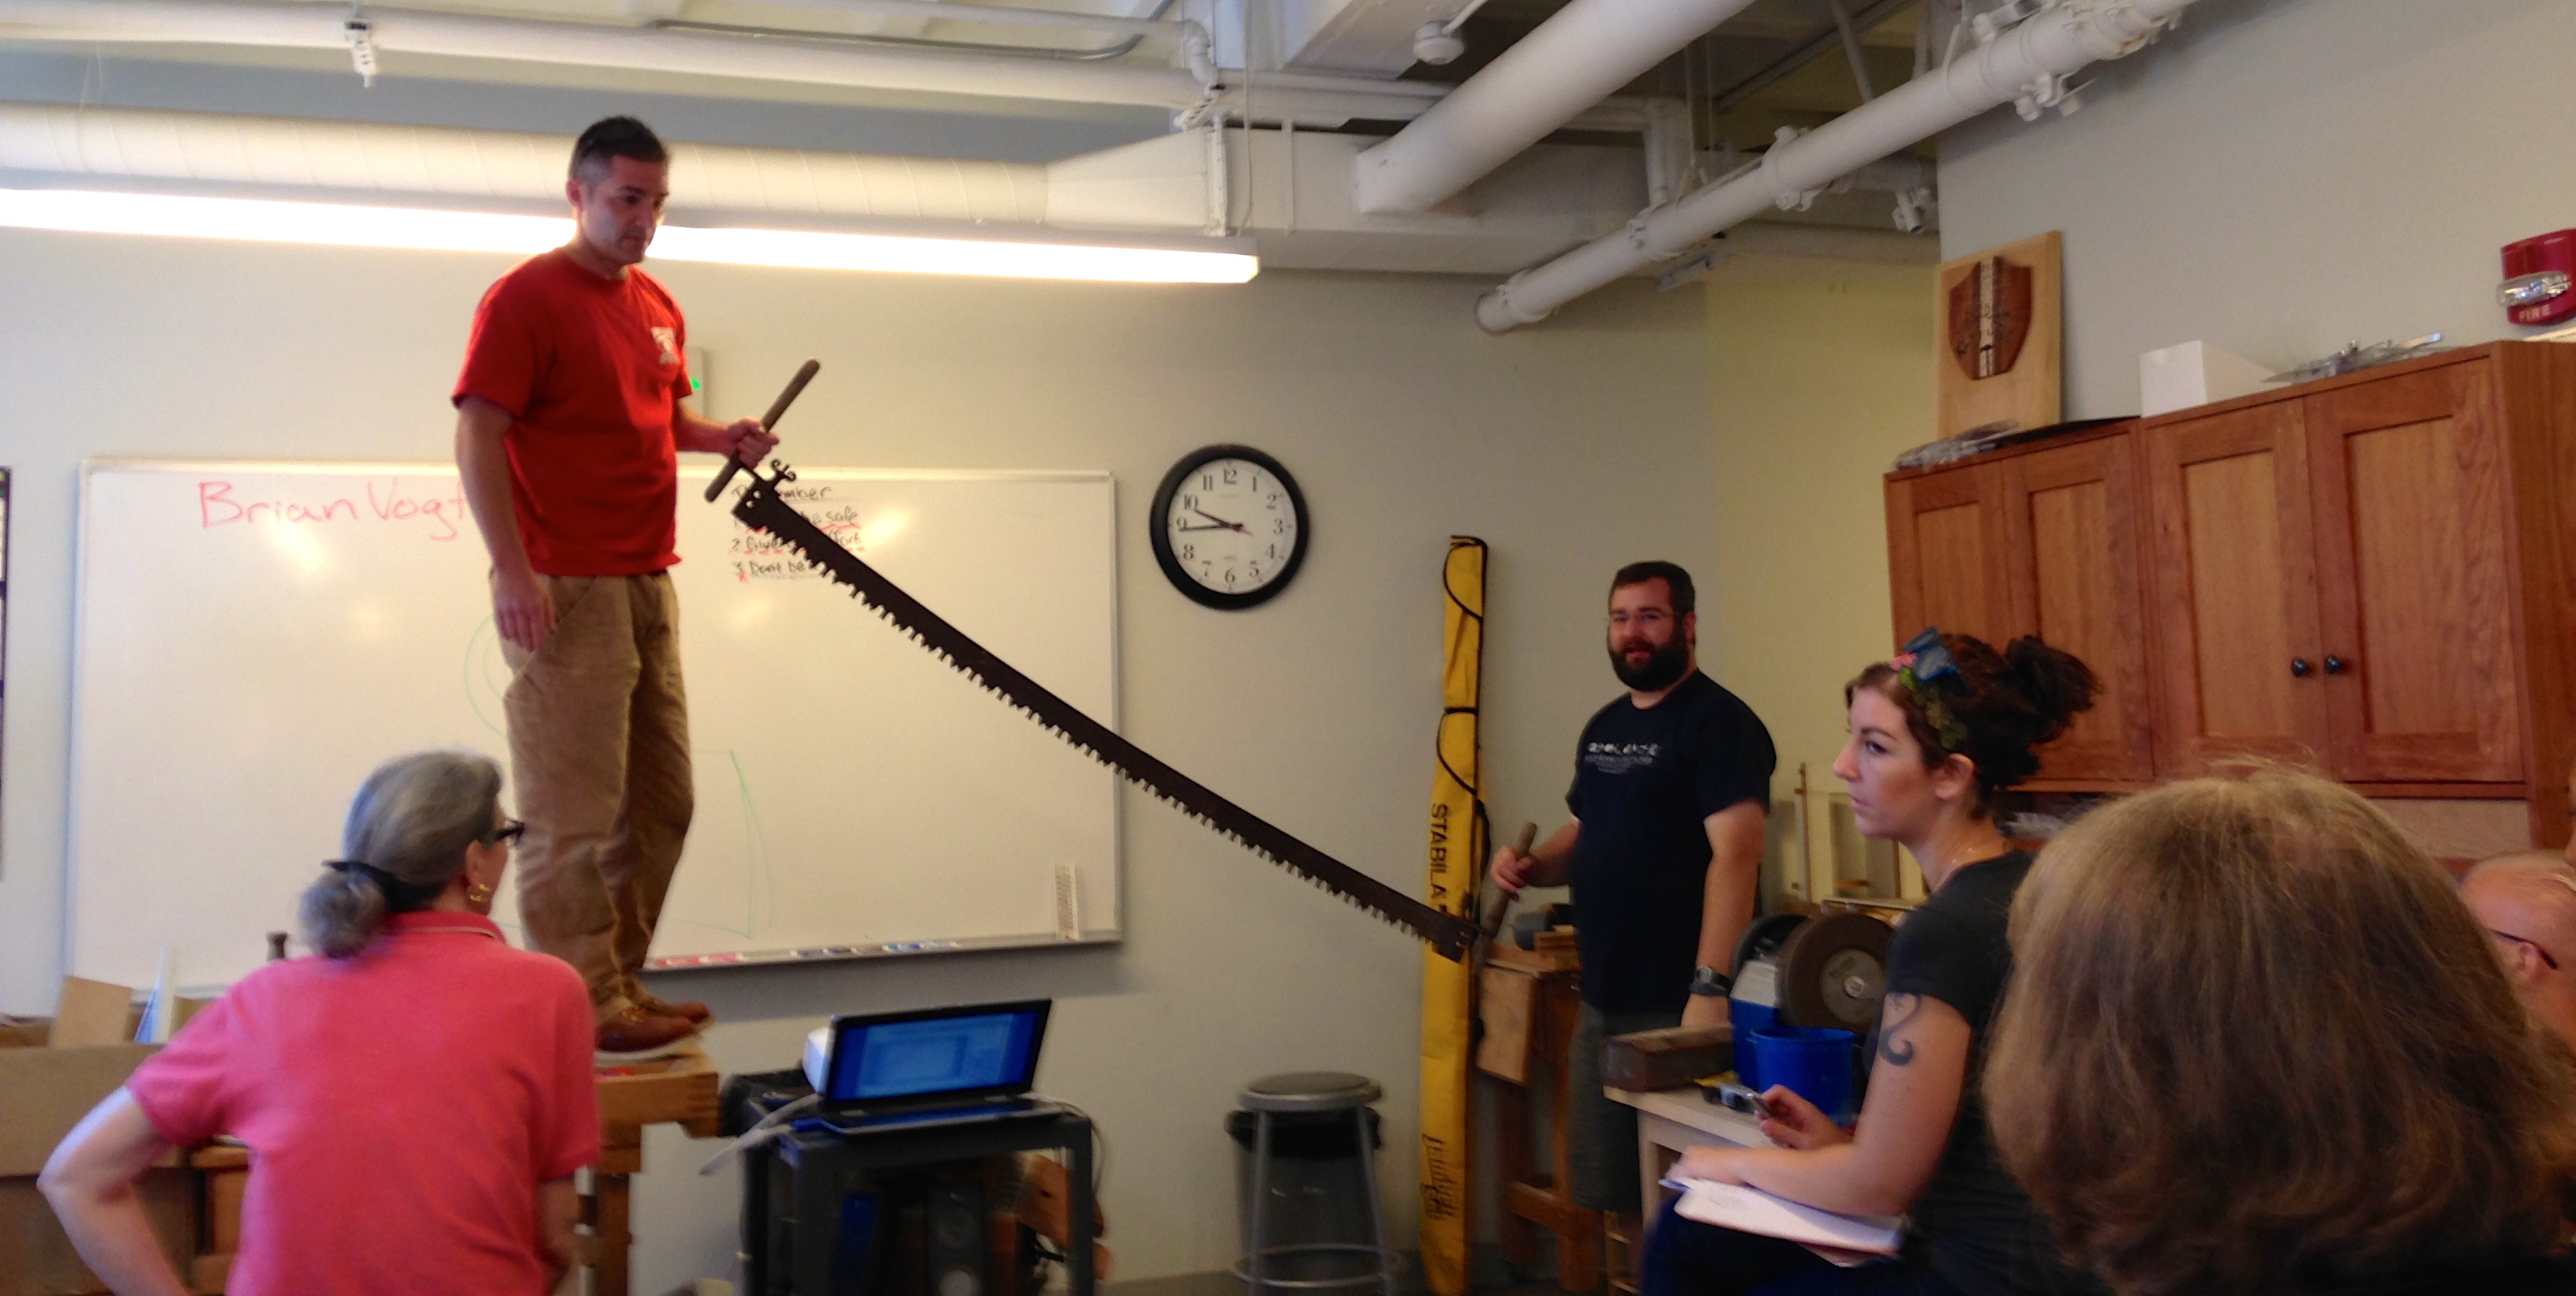
Brian Vogt (NBSS Carpentry Instructor) explaining the basics of Timber Framing
After an overview of the tools, techniques and joints used in timber framing it was time to go stand up a frame…
Brian Vogt and Bill Rainford talking about timber framing, 2 man saws etc (Photo by Patti Vaughn 2014)
Also unusual about this event was the fact that we stood up the frame in ‘connector’ at the school which is a new addition that connects two older buildings that make up the main NBSS campus.
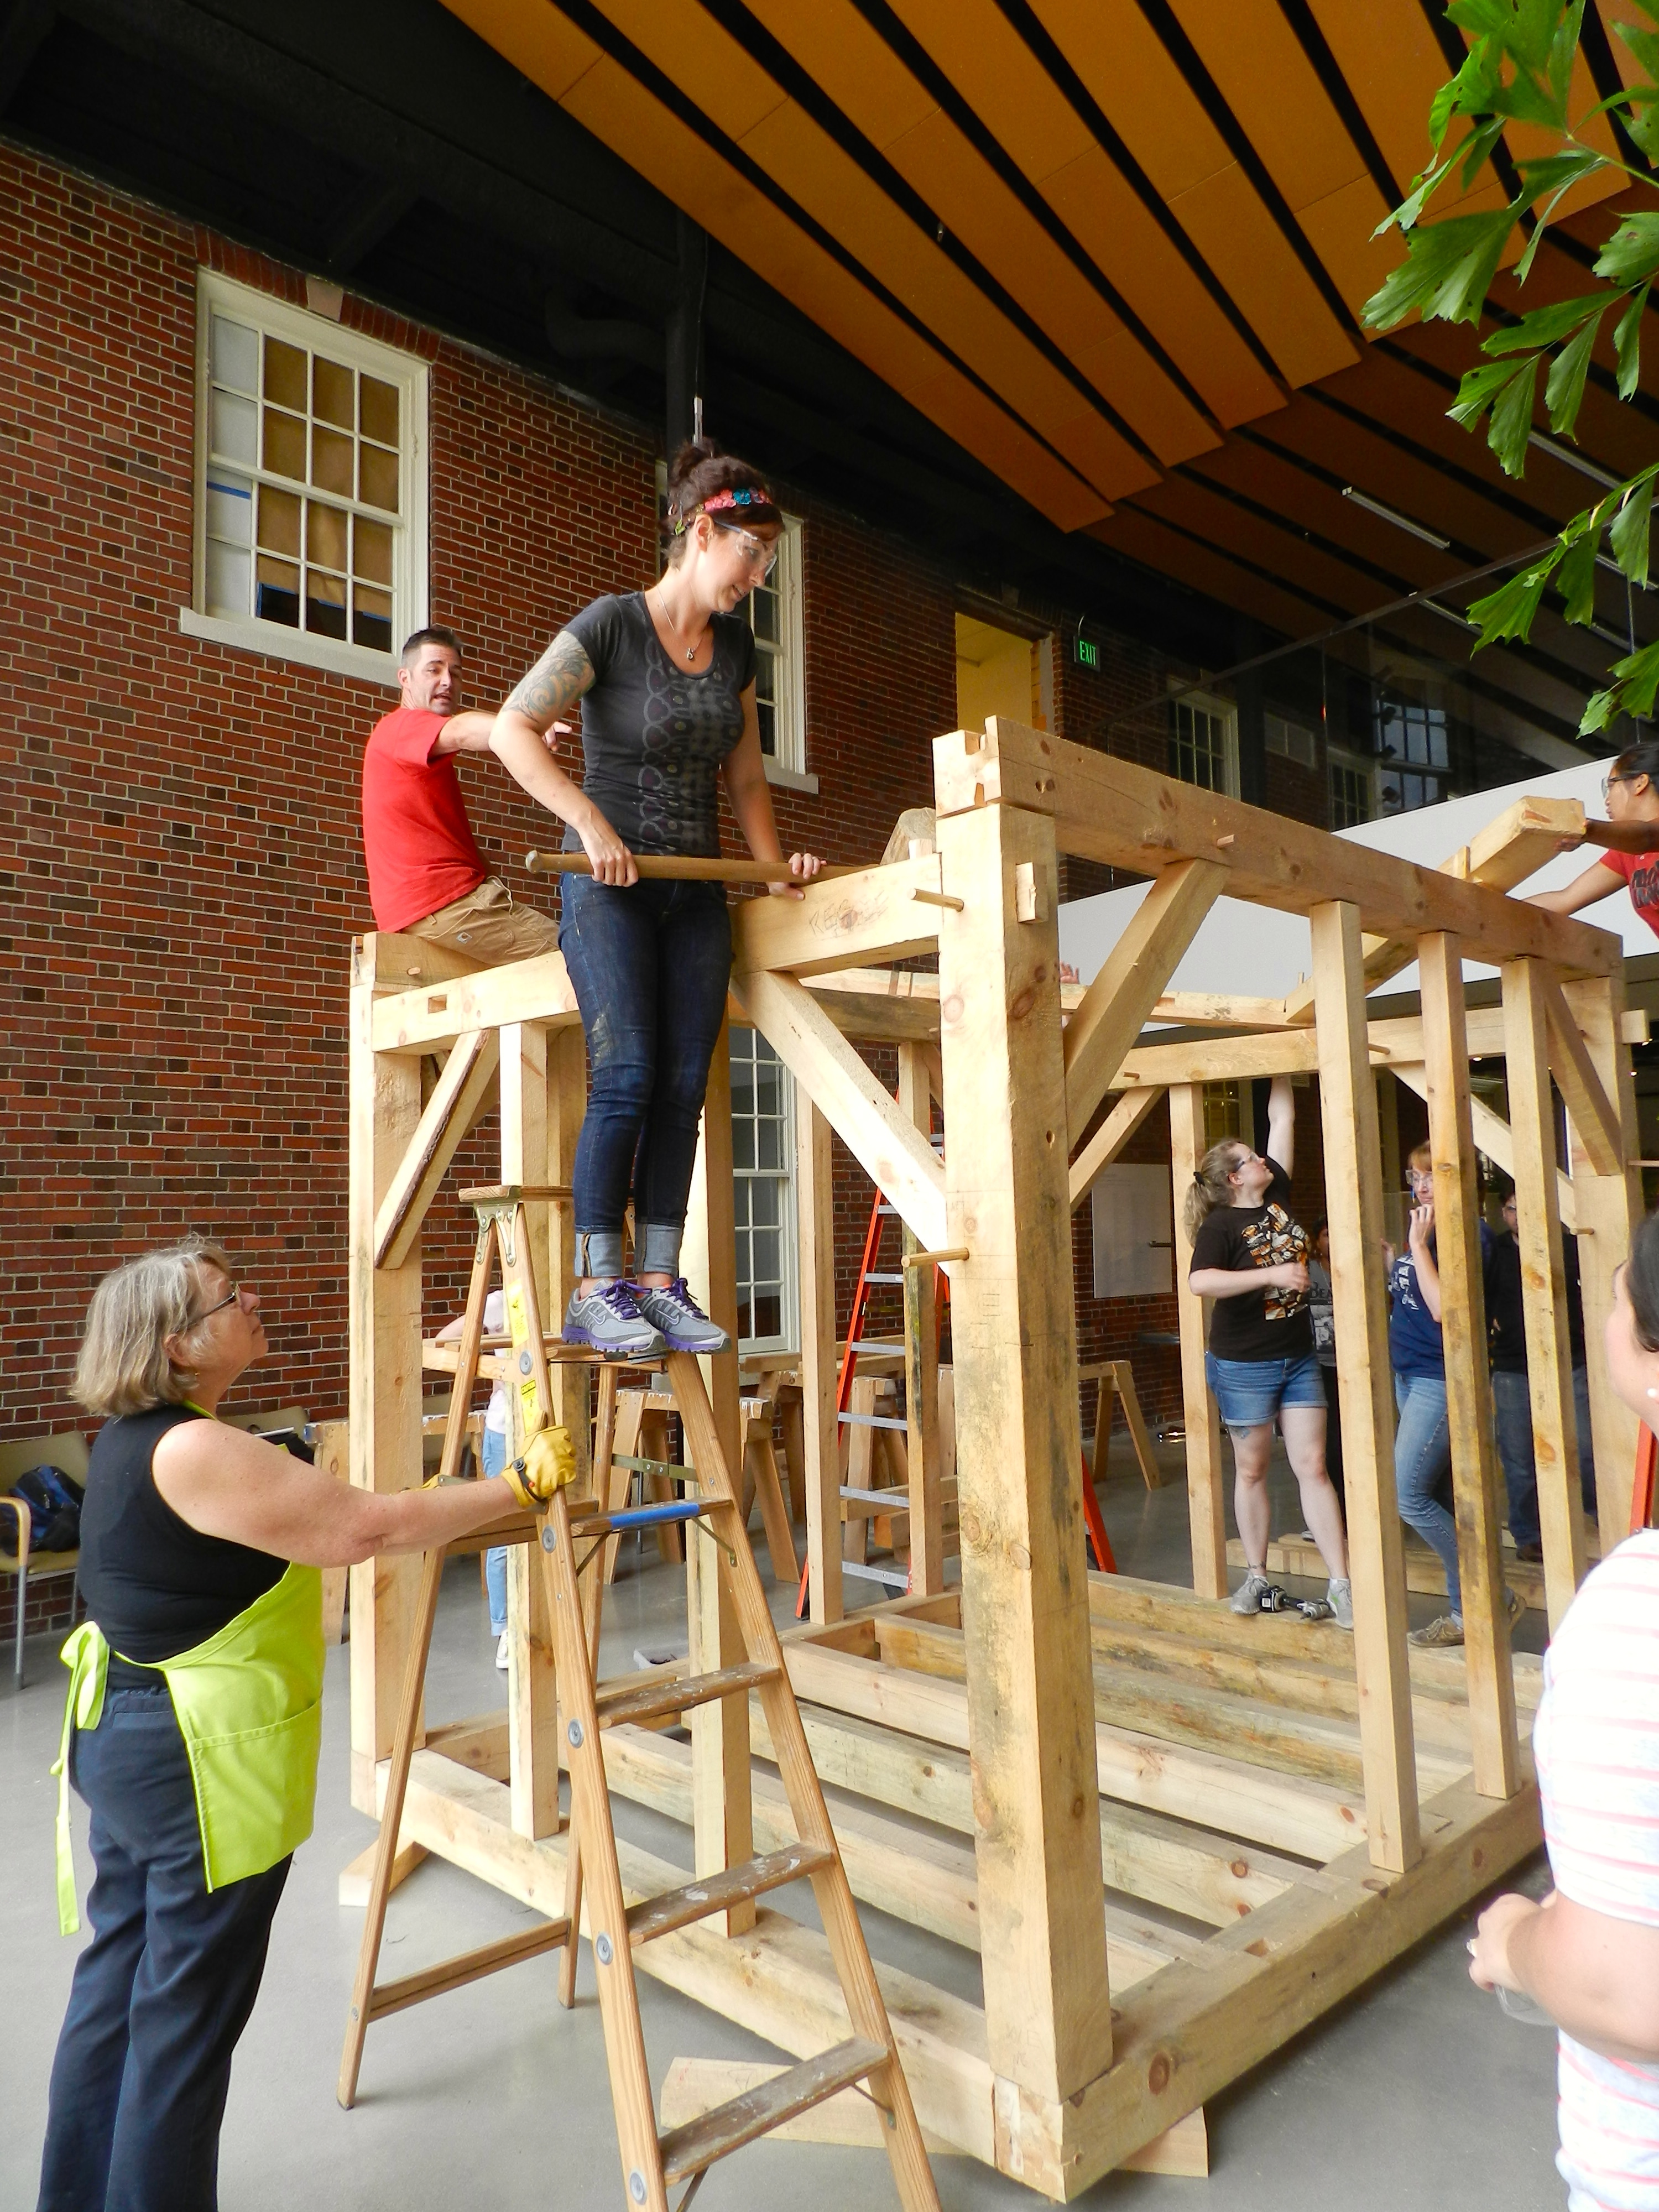
Jennifer using the ‘Commander’ and Susan steadying the ladder.
It takes a lot of teamwork and heavy lifting to have a safe frame raising and the class did a great job that day.
Another view of the indoor frame
With the frame standing it was time to get some quick group pictures and then start the process of disassembling it.
Group shot on the completed timber frame
I’m exhausted just looking back on all we did that week, but I’m glad we got through it and I am confident that this group will be another great set of ‘House Detectives’ that will be out in the field solving some of the mysteries contained in our historic homes and museums.
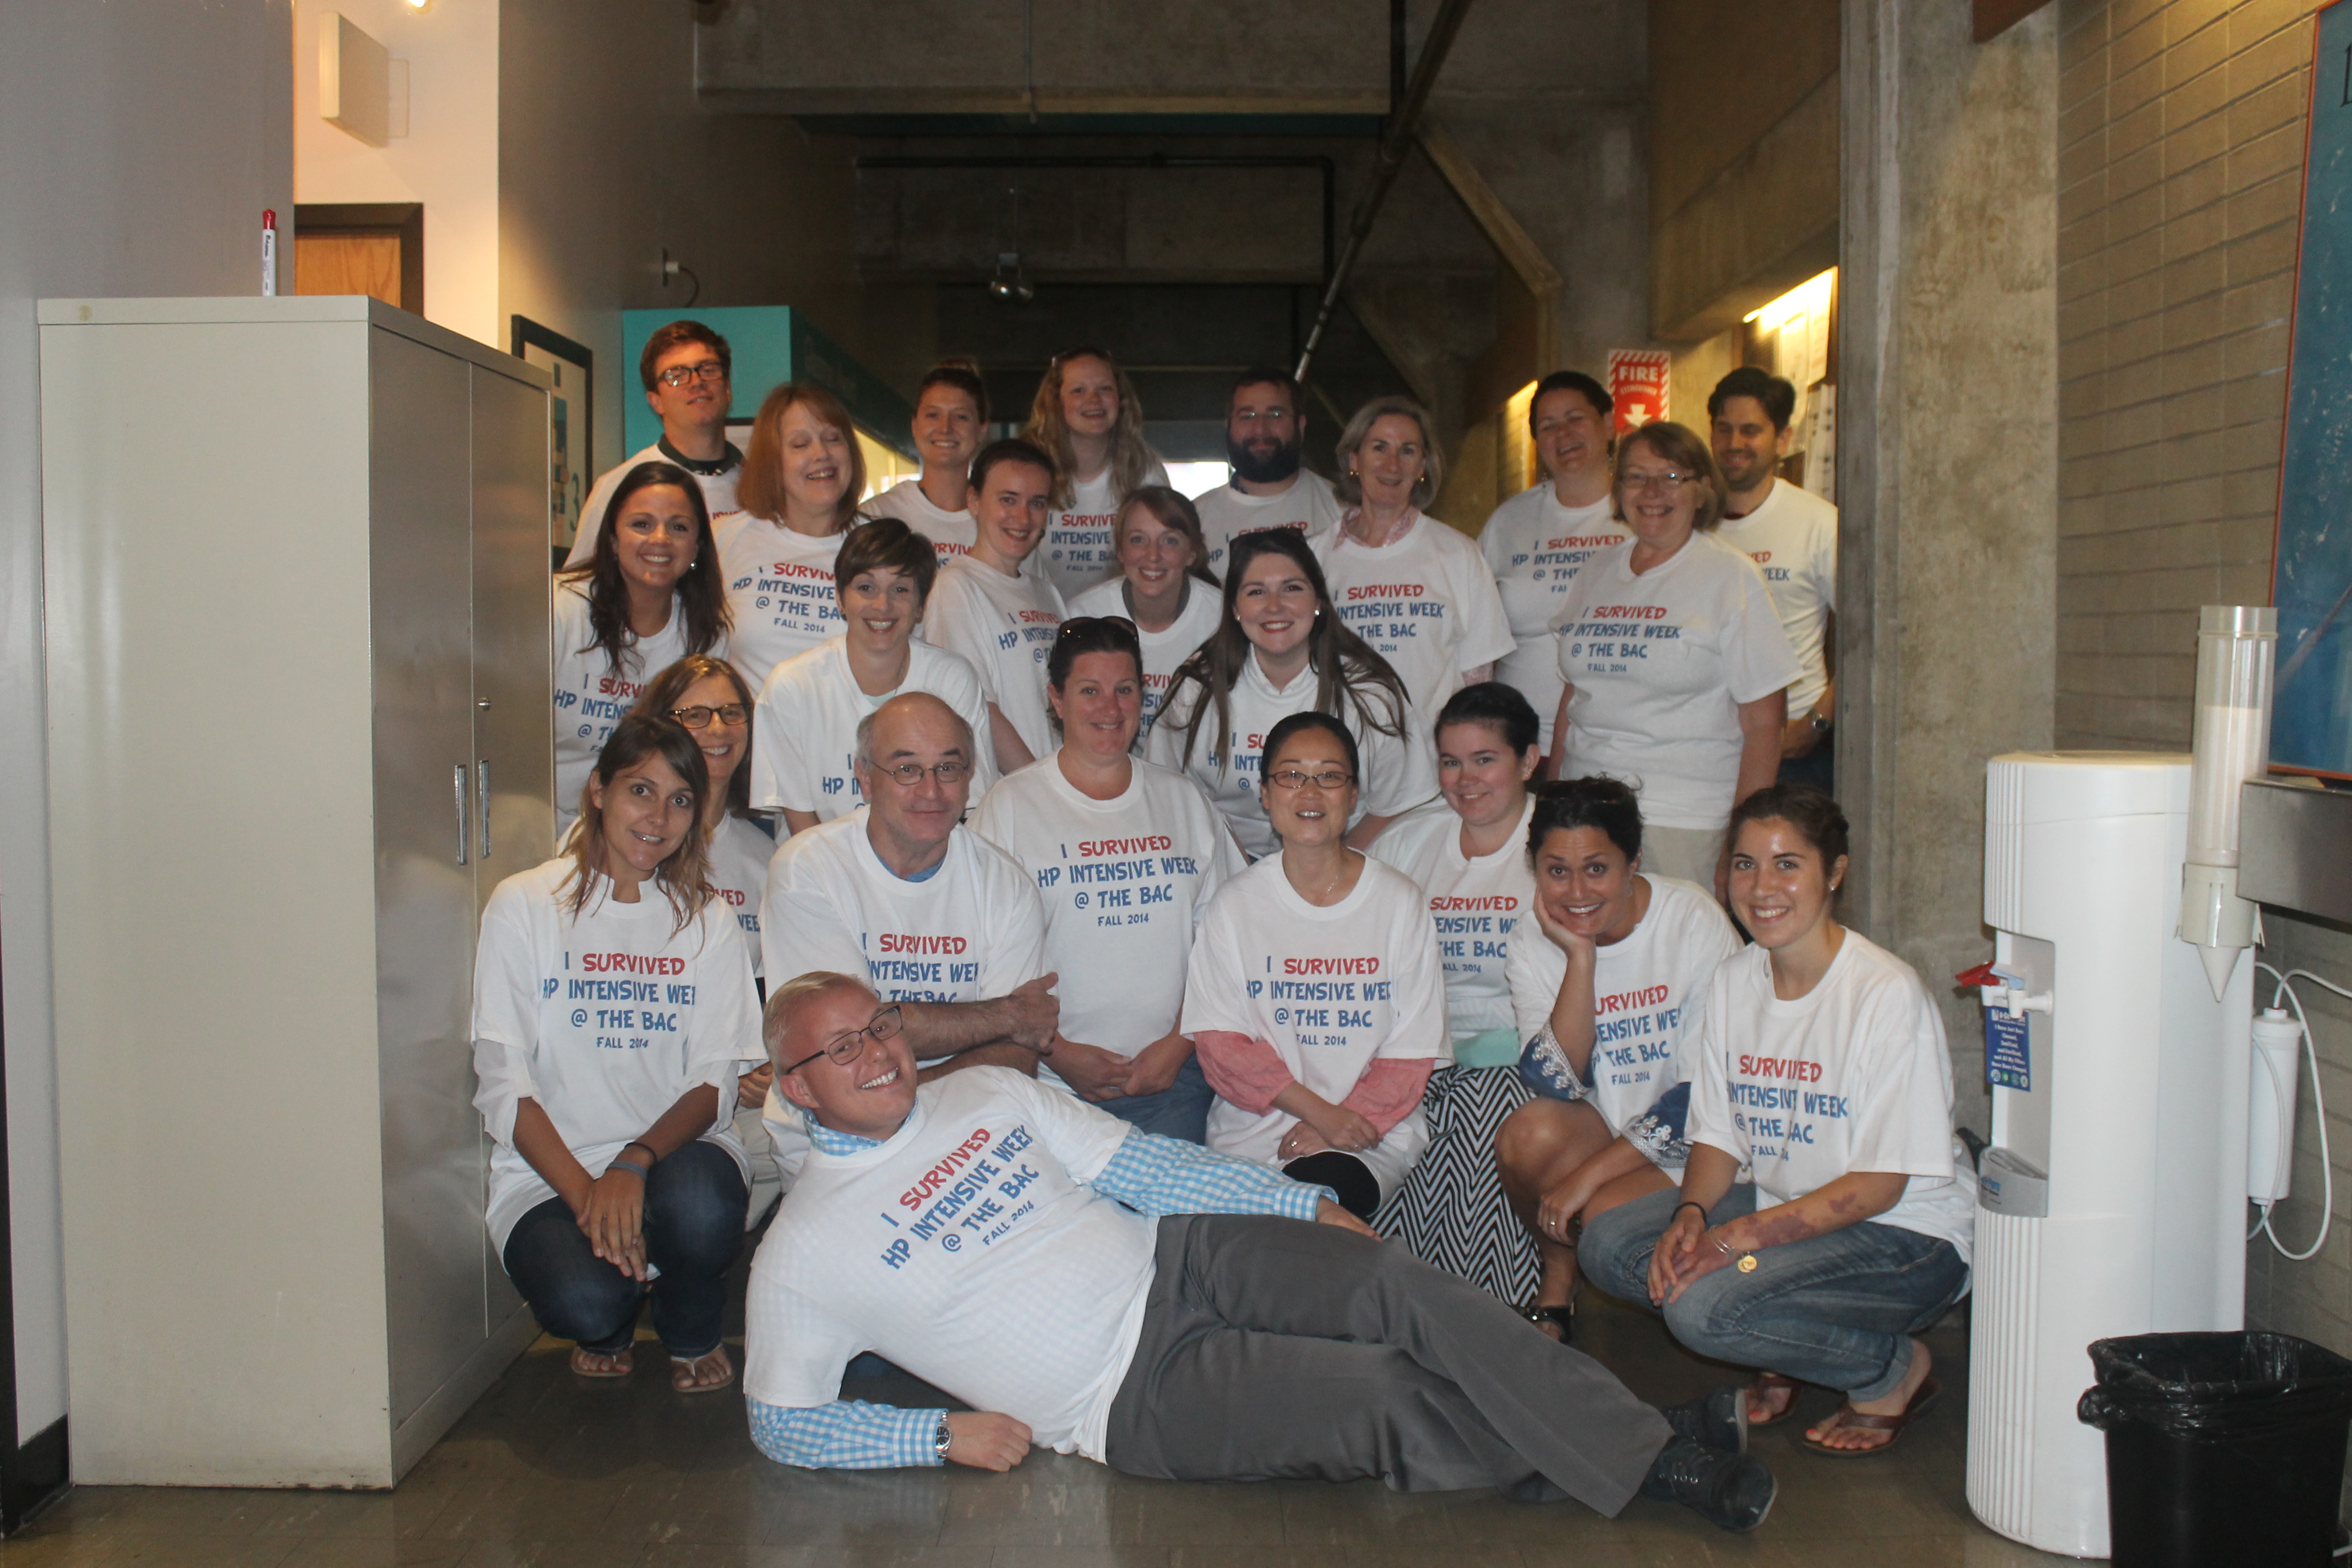
Group photo on the last day of the class
If you’d like to learn more about this course or the school, please check out these related posts from prior years.
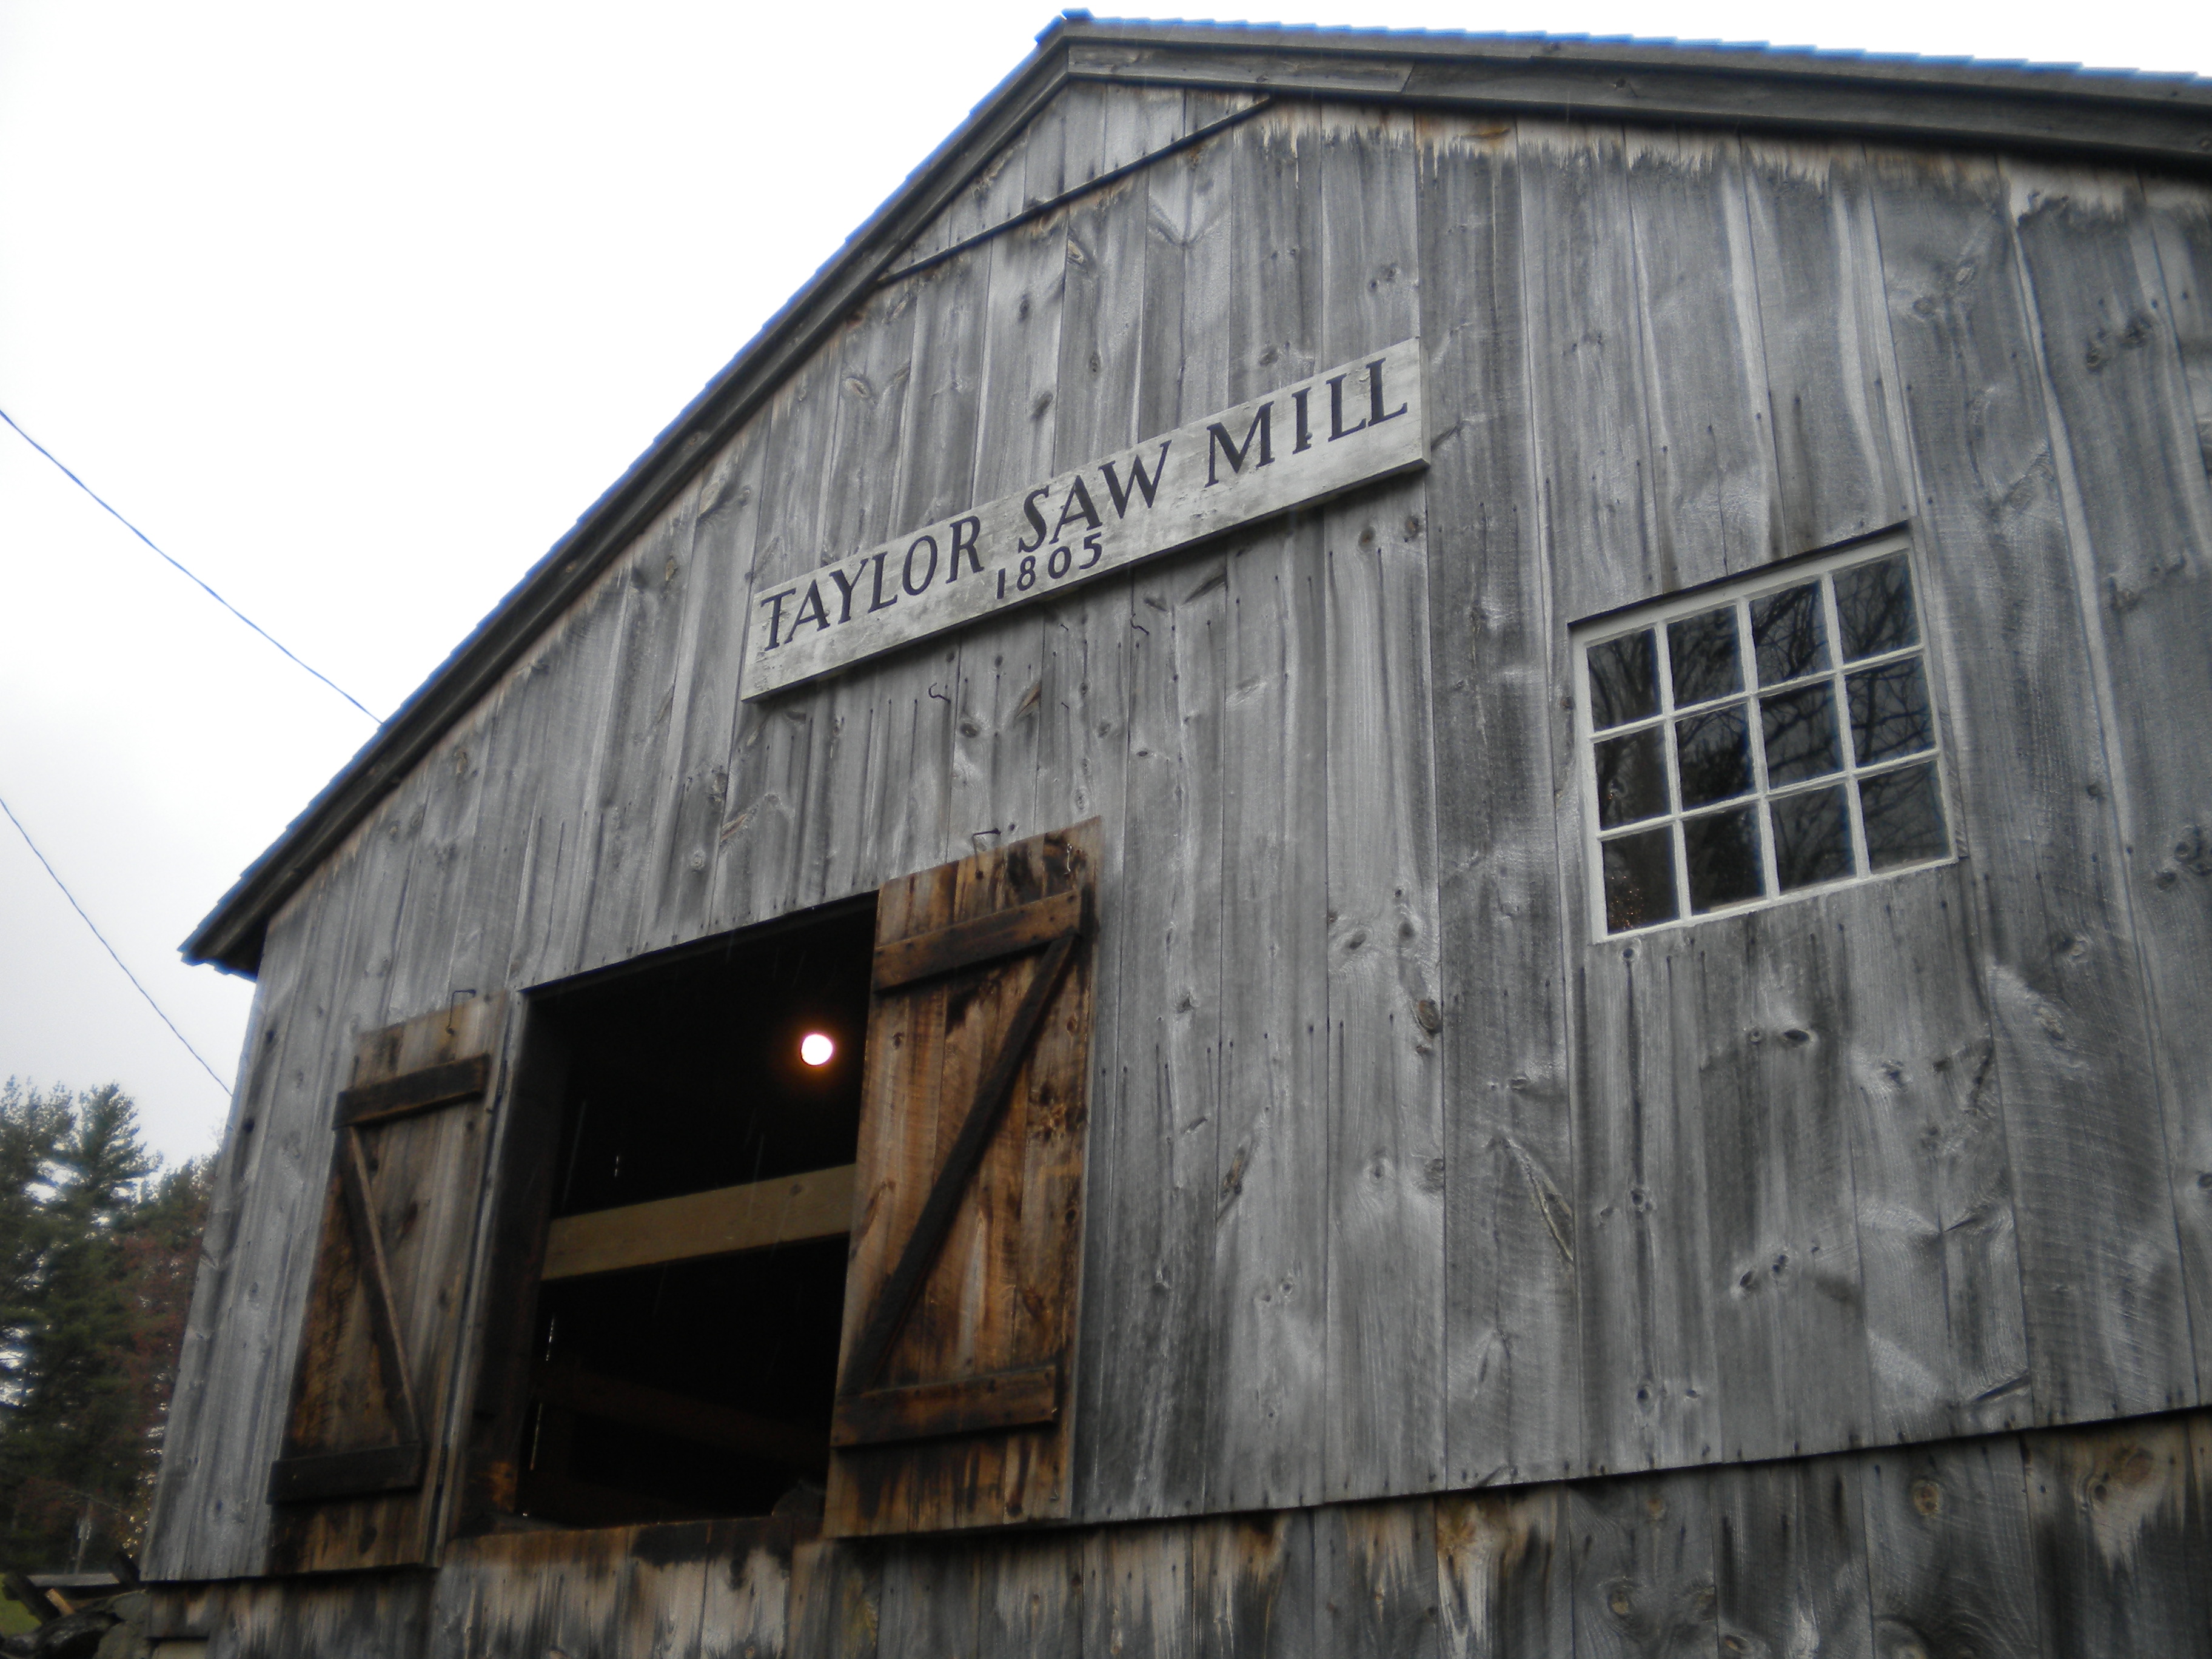
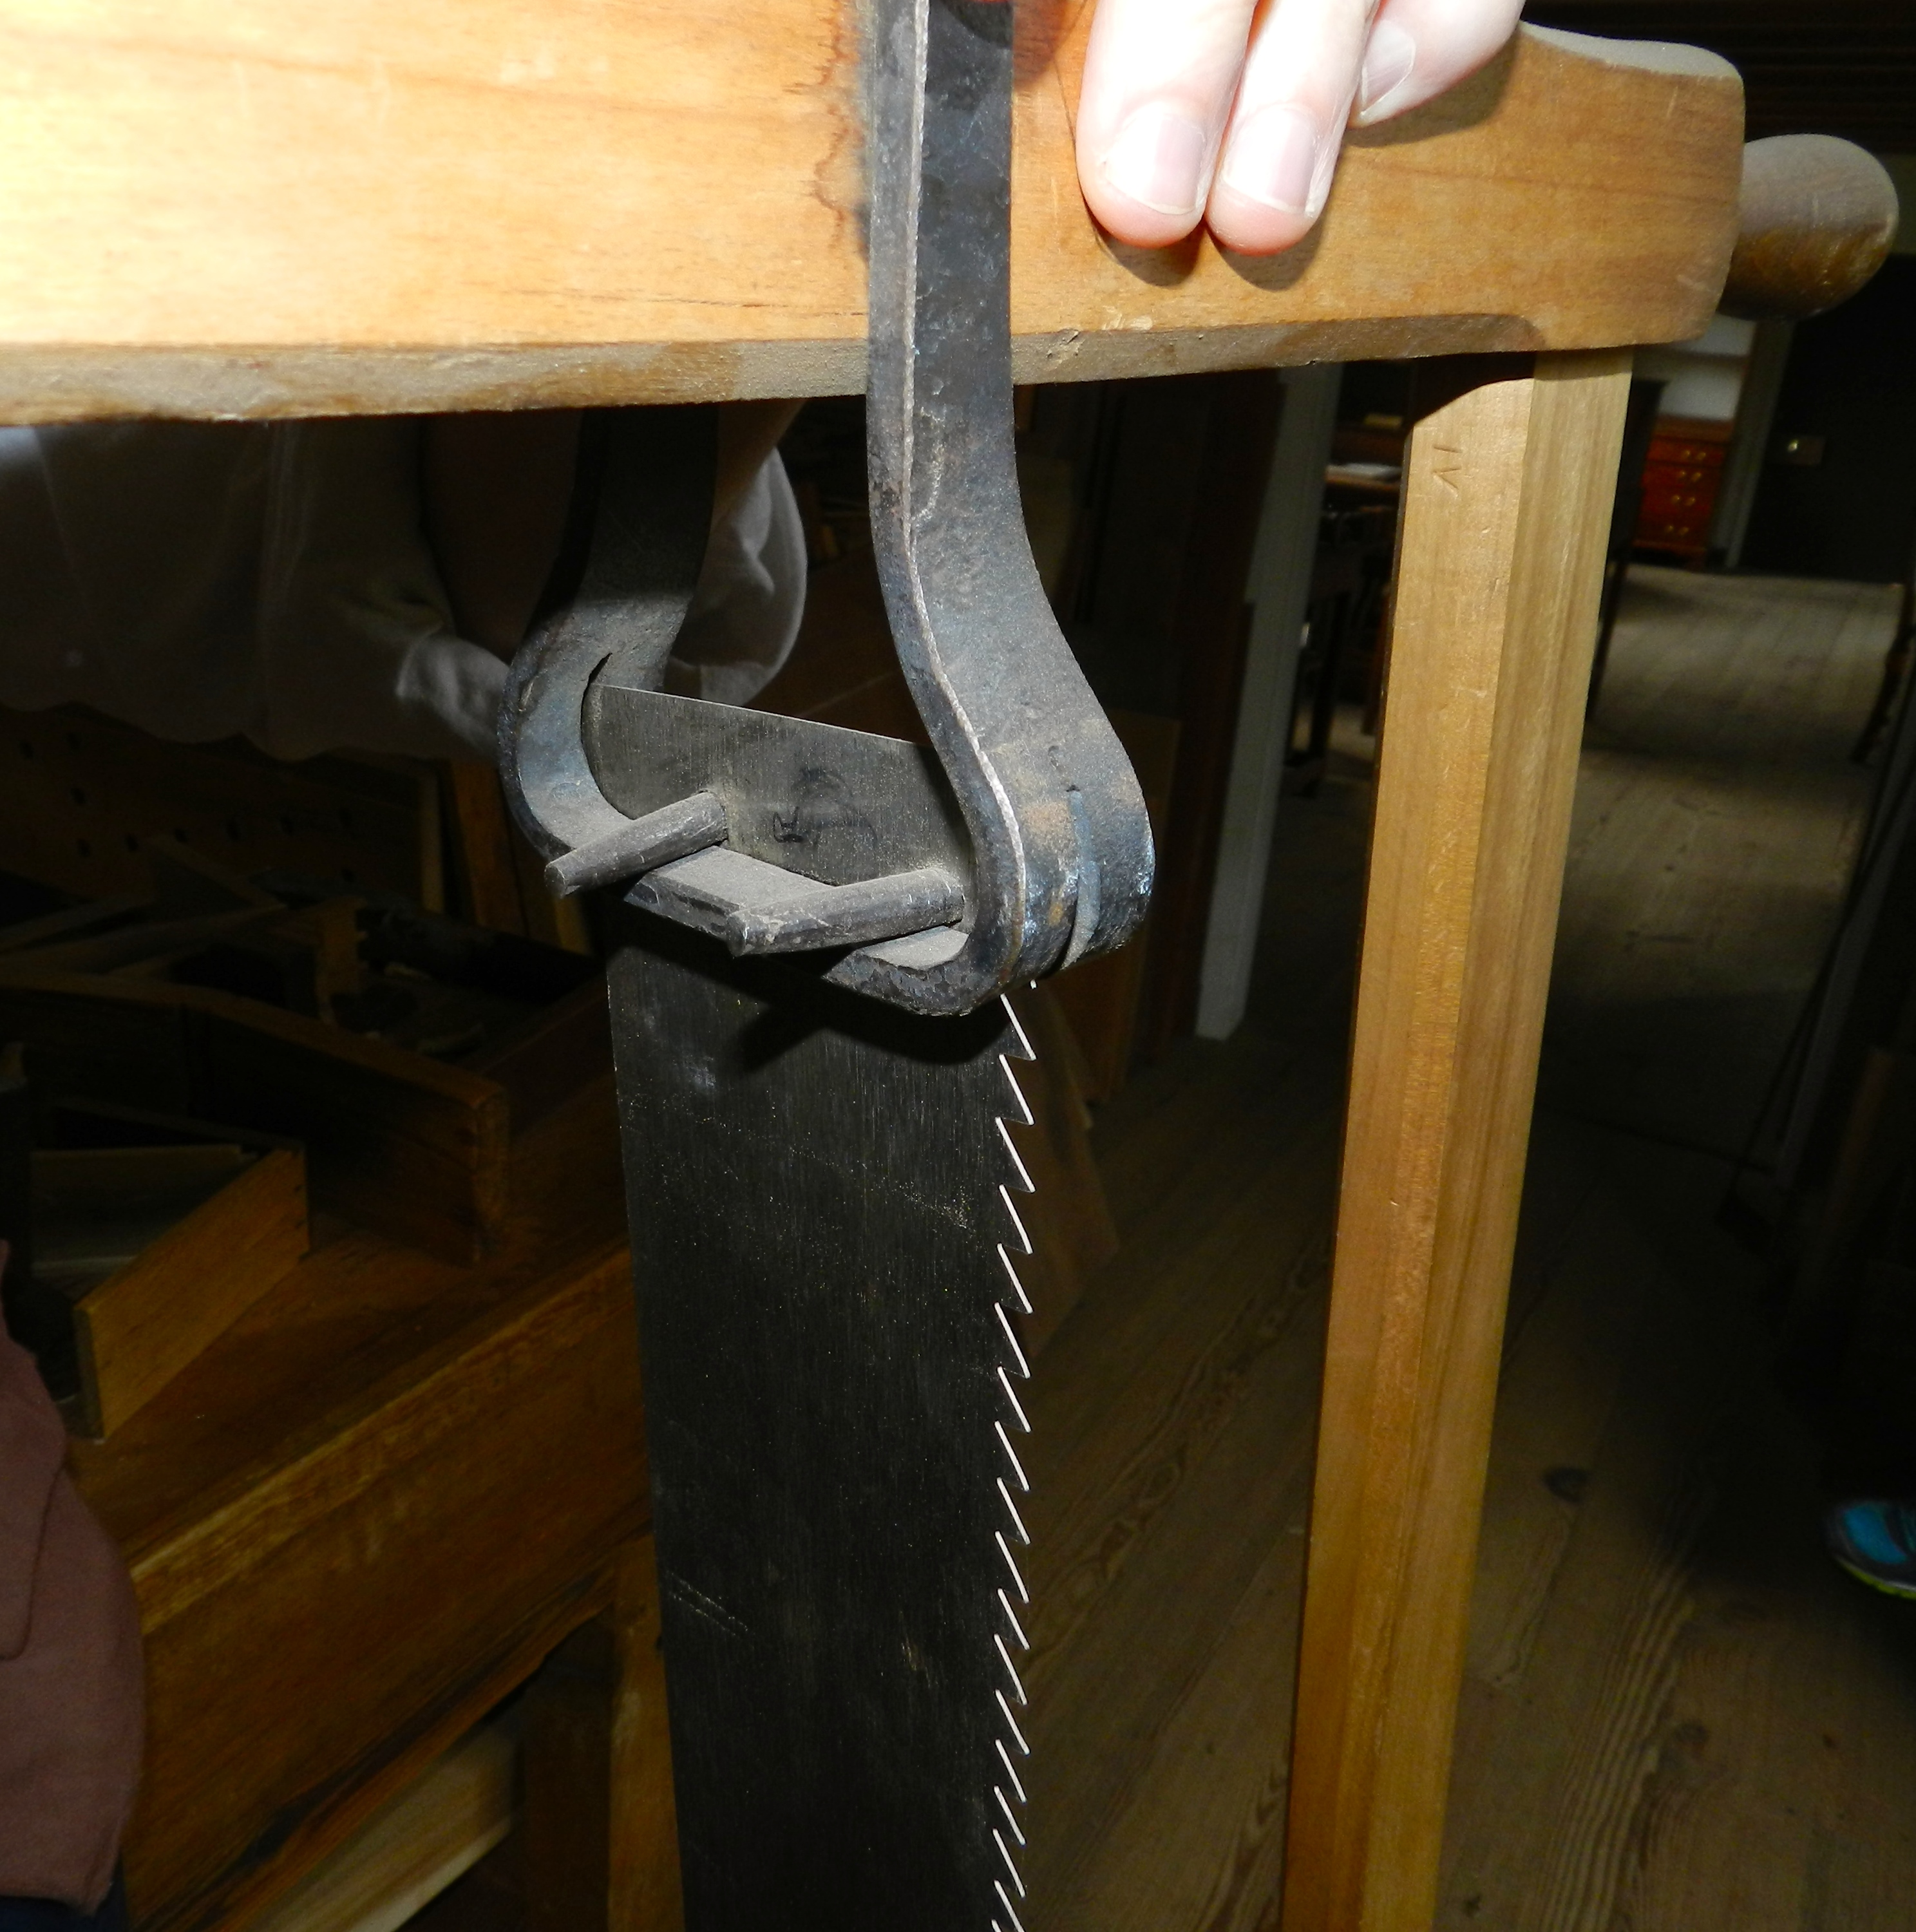
One of the hidden gems of Derry NH is the 200+ year old Taylor Sawmill. It’s one of the last surviving and working up and down sawmills in the region and likely the country.
Taylor Sawmill, Derry, NH
Powered by a large water wheel, this mill still operates for demonstrations and the occasional bit of restoration work. It’s amazing to see and hear this mill in action. There is a distinctive noise as the saw makes each powerful stroke like clockwork, and it’s almost scary as you can feel some of the vibration through the floor and feel the air move as this massive timber frame saw blade oscillates up and down.
The mill is powered by a large water wheel which is fed by an adjacent pond.
The blade itself is held in tension by a massive timber frame. You can think of it as a giant frame saw. The blades could be changed based on the type of materials being sawn and desired finish quality results. In the video below you’ll see the mill operating at one of its slowest speeds. Each blade was set and sharpened by hand. As the saw cut the timber, the ratcheting mechanism (driven by the massive geared wheel in the bottom left of the photo below) advanced the entire timber into the blade via a moving carriage.
Up And Down Sawmill in Action
The mill itself sits on land in Derry NH purchased by Robert Taylor in 1799. The mill started operating in 1805 and had a fairly long service life. The mill site and 71 acres around it were purchased in 1939 by Ernest Ballard. By that time the original mill itself had been scrapped. Ballard eventually found a similar up and down sawmill in Sandown NH and moved it to the Taylor site. Ernest and his wife spent several years restoring and rebuilding that sawmill. He had to make the missing parts and track down a viable water wheel. Thankfully he persevered and was able to complete this project. In 1953 he donated the mill and 71 acres around it to the state of NH, thus creating Ballard State Forrest.
Back in 2010 I visited the mill with a class of North Bennet Street School students and took several photos and videos which I have edited together into a YouTube video that you can watch here which includes the water wheel and saw cutting a timber.
It was an incredible sight to see, and a great place to have a picnic or do some kayaking. If you are in the area, please check it it out. You can learn more about this mill and plan your visit by visiting it’s official web page here and the Wikipedia entry here.
A combination square is such a ubiquitous tool that many woodworkers take it for granted and do not get the most from it.
Starrett Combination Squares and Accessories
I recently wrote an article on this topic for Fix.com and thought you might also be interested in reading it. In the article I talk about some of the more interesting uses and accessories that will help you get the most out of your combination square. You can check out the full article here.
Some of you might be asking — ‘What is Fix.com?’
The semi-official marketing answer is:
“We are Fix.com, a lifestyle blog devoted to bringing you expert content to make your life easier. We’ll cover everything in and around your home, like landscaping, gardening, outdoor activities, home maintenance and repairs. From products to projects, well be providing you with a daily fix of content from our experienced and knowledgeable team of writers.”
My less official answer is:
It’s a new blog site with a distinctive visual style that caters to folks who are passionate about woodworking, cars, exercise, fishing, gardening, grilling and motorsports. It will be interesting to see where this site goes as they produce more content and get a wider base of readers. If you have a few minutes, it’s worth checking out.
Below is a sample of some of the visuals from this article:
My trusty Starrett Combo Square in the limelight
I’ve got some more articles in the works with Fix.com and you’ll be able to check out those posts as they get linked to my Fix.com author page here.
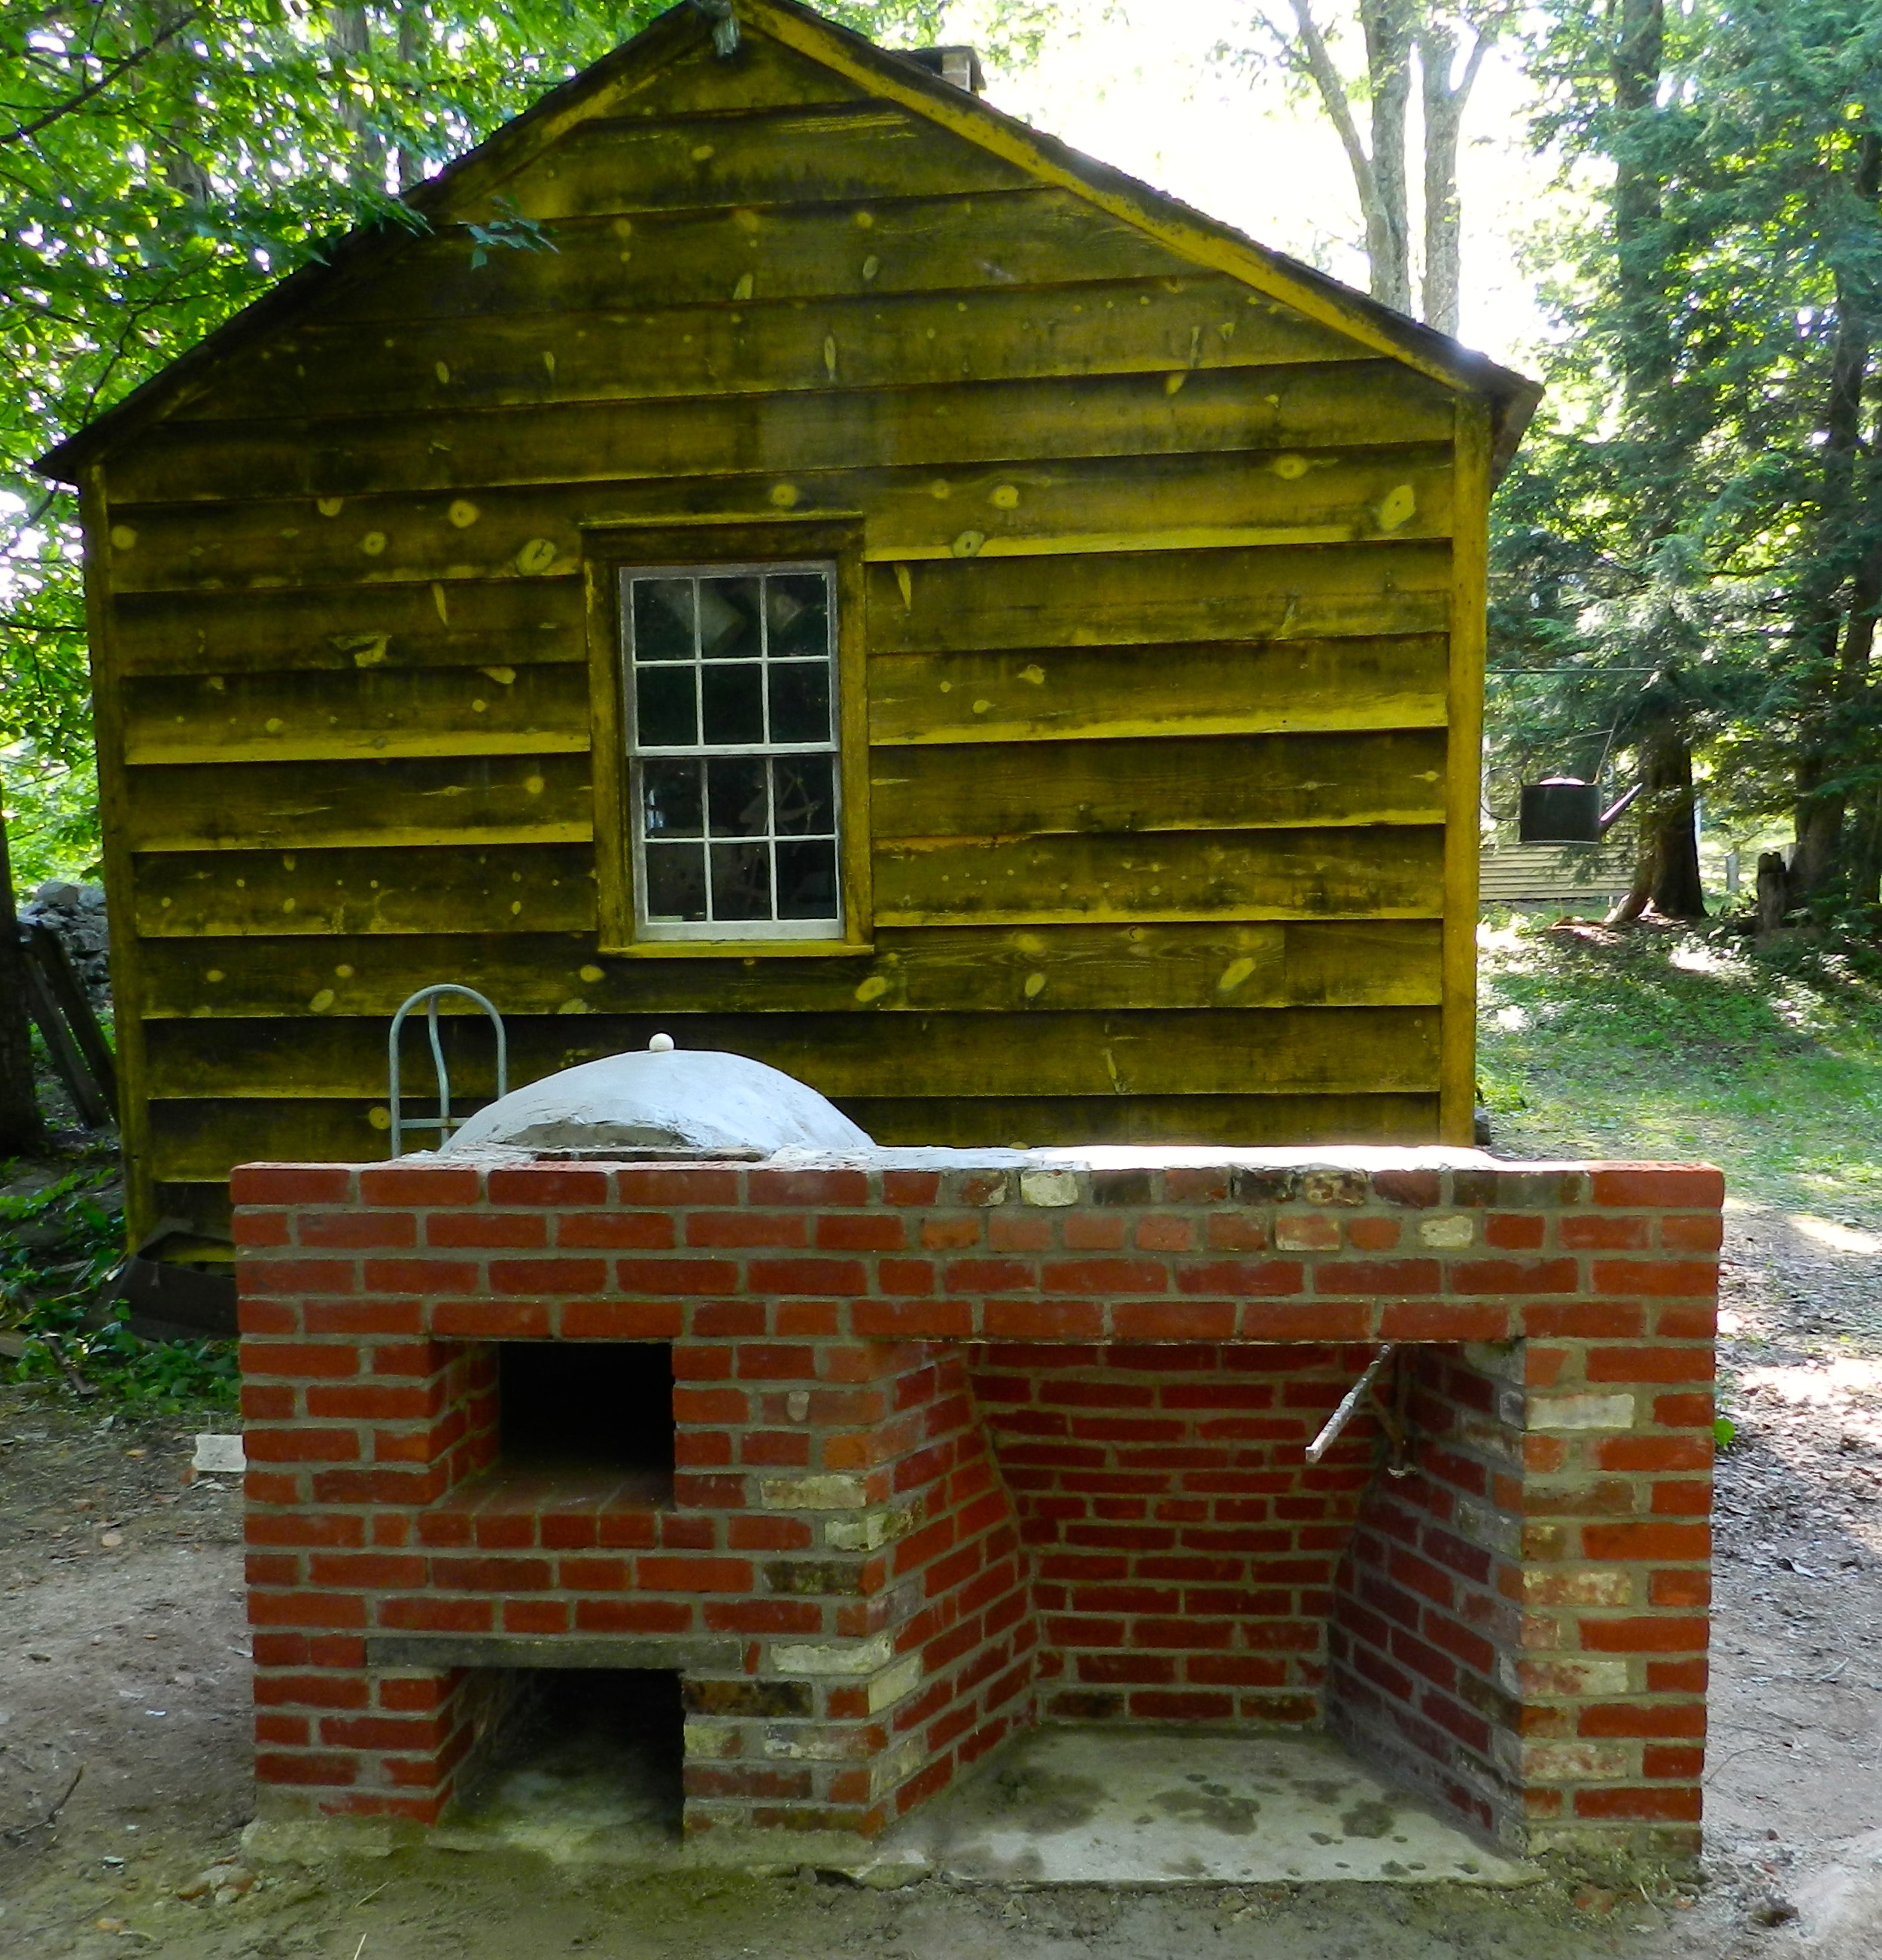
Have you ever wanted to build your own fireplace and beehive oven? It’s not for everyone, but it is something I’ve wanted to tackle for a long time. I’ve talked to a few masons, read all the new and old masonry books I could find, but still didn’t feel comfortable building my own. I could not find a good source that showed the end to end process. I also don’t want to end up burning my house down.
Completed Fireplace and Oven
To rectify this situation I figured I’d take a trip back in time. I just got back from spending a week at Historic Eastfield Village in Nassau NY (not far from Albany). If you’ve never been to Eastfield Village it’s a restored colonial village full of buildings and artifacts from the 18th and 19th century. What’s great about the village is that it is a hands on preservation laboratory where you can stay for free in the tavern and live with all the antiques and artifacts that are normally behind glass in a museum setting. What’s the catch? Well you are living as they did in earlier times. There is no electricity or bathroom. You live by candlelight — make sure to bring white taper candles — and you can cook your meals in one of the many fireplaces and ovens. After a long day of working out in the village it was a lot of fun to have a meal in the tavern, have a drink and play some tavern games by candlelight. Some folks were carving wood, some we playing dominoes with Billy’s ‘Eastfield Rules’ and others were enjoying a good conversation with folks from another part of the country. Staying at Eastfield is always a memorable experience.
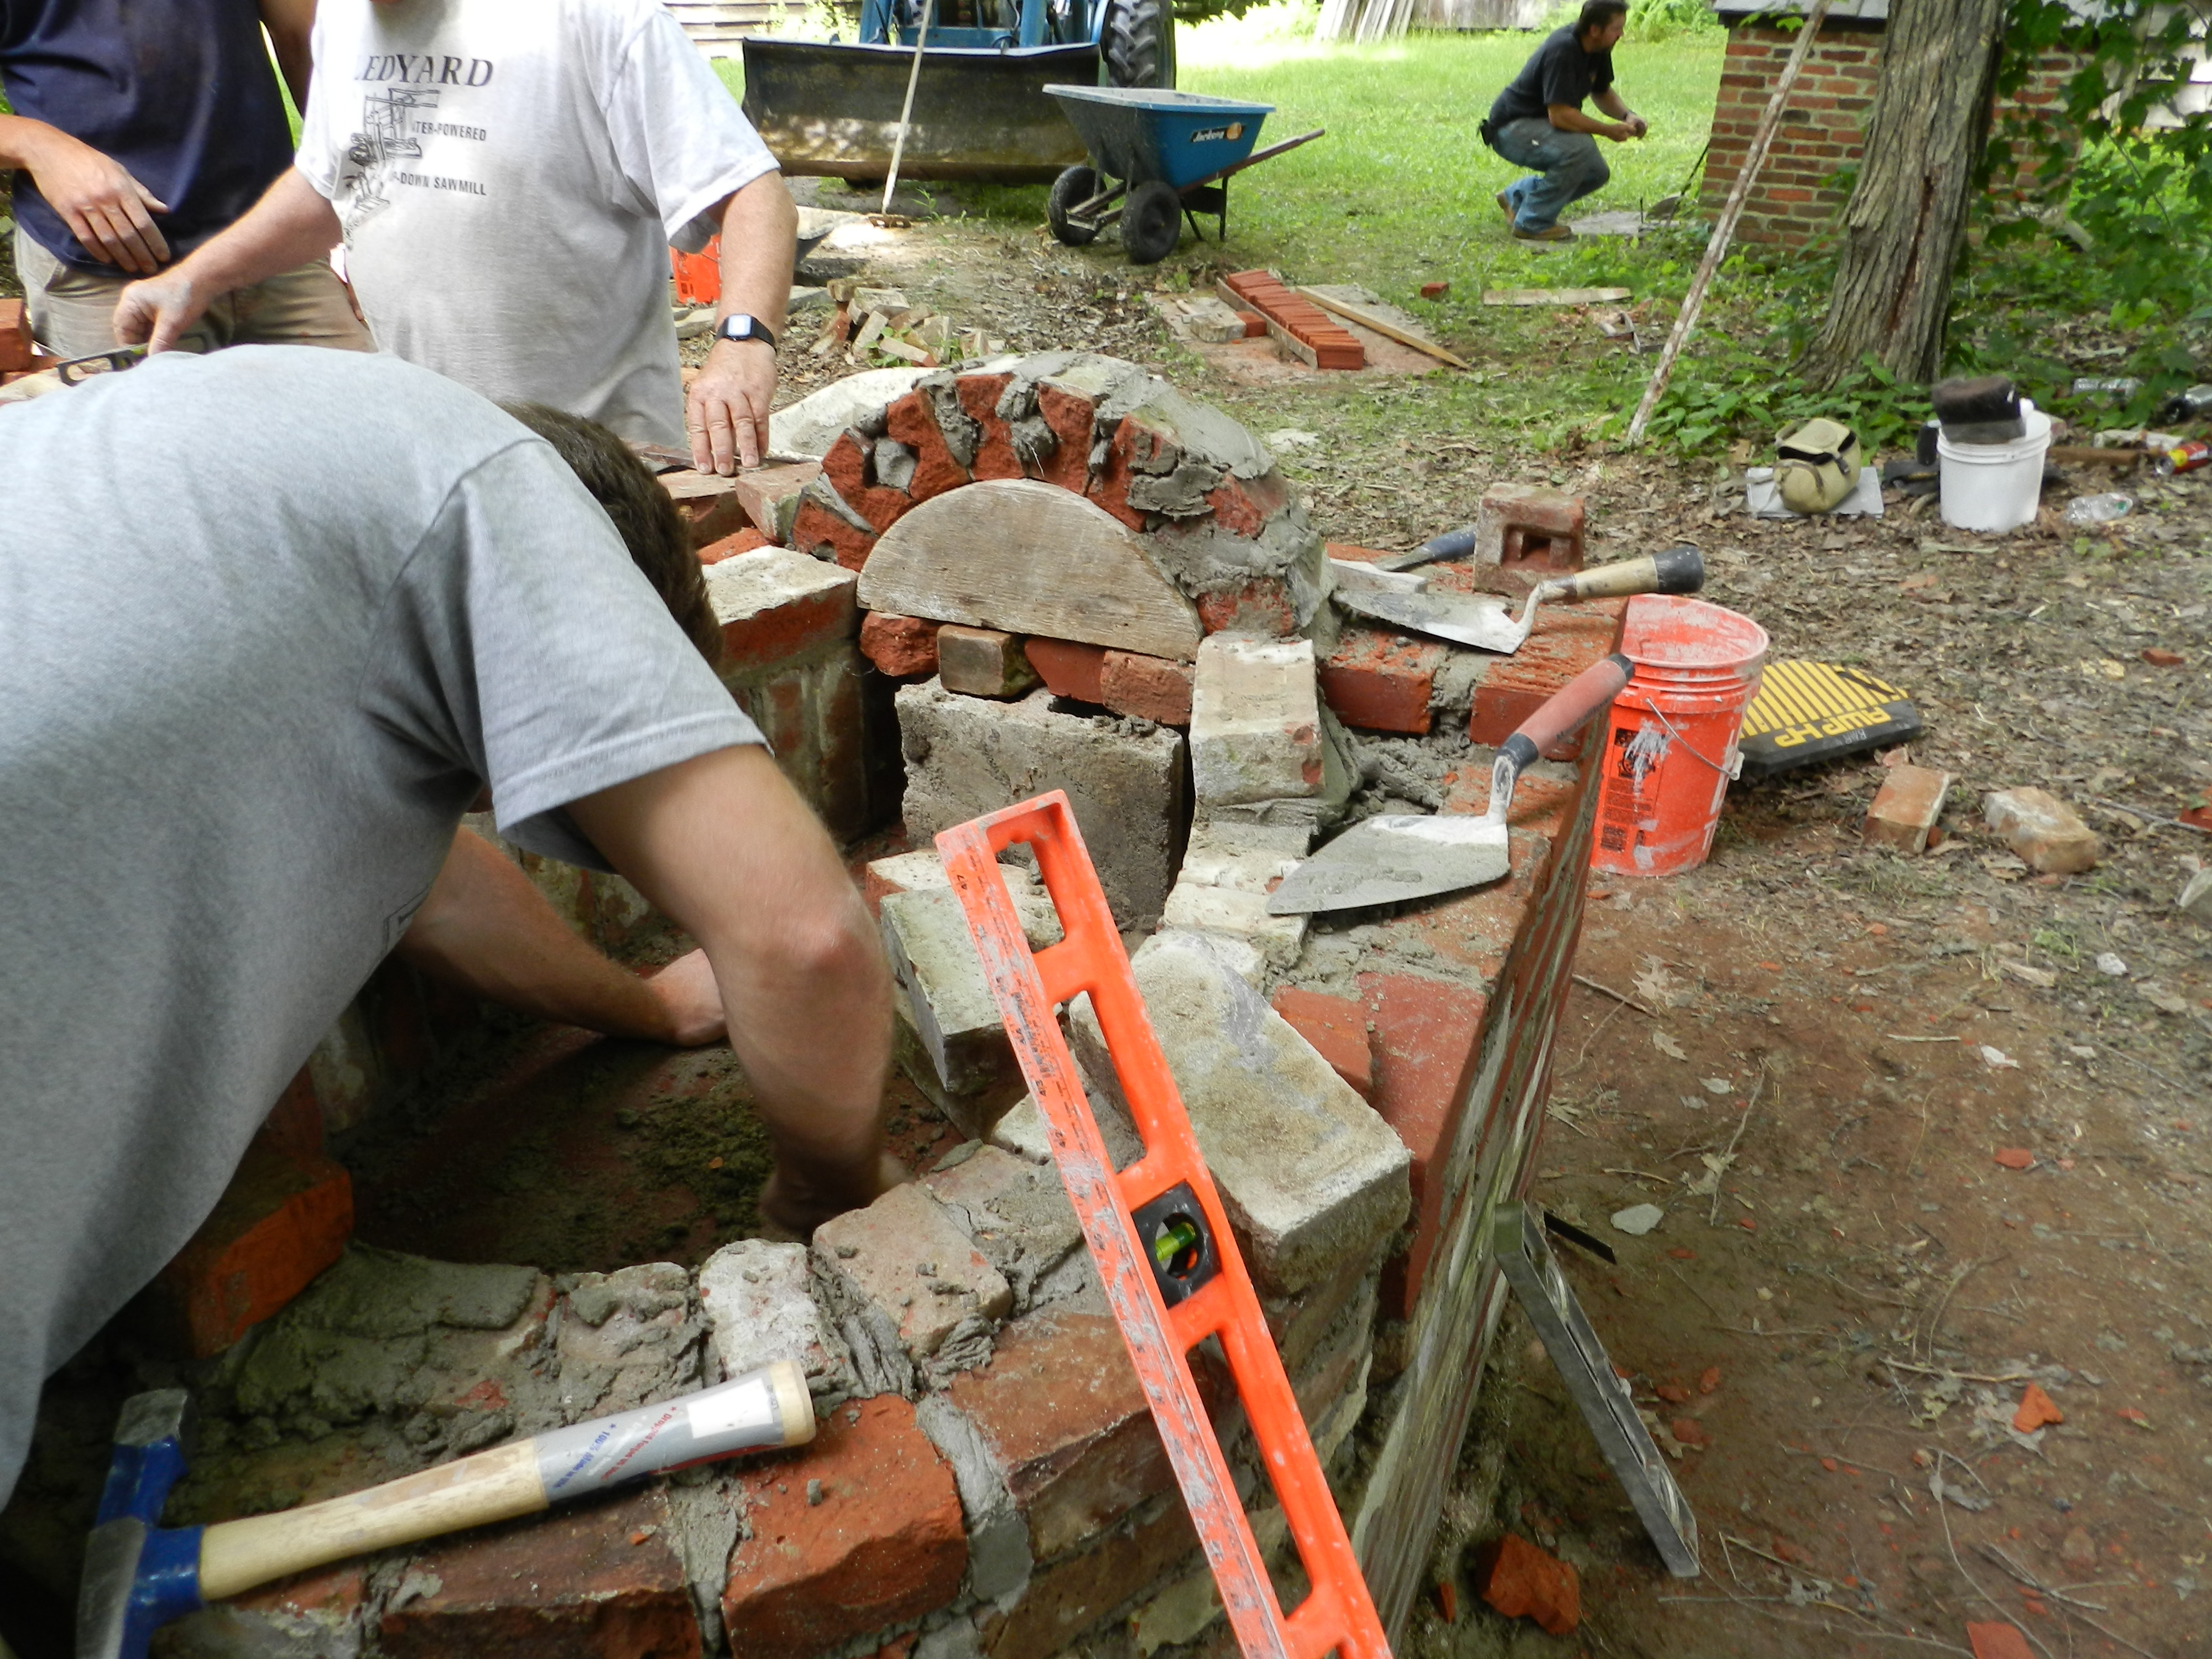
Tools Of The Masonry Trade
This 5 day class on building a traditional brick masonry fireplace and beehive oven was a special request from me and was filled with students and alumni from the North Bennet Street School’s Carpentry and Preservation Carpentry programs. We used all hand tools much as our forefathers would have used. Mortar mixed by hand with a hoe, bricks cut by hand with brick hammers — making some brickbats as we went, rubbing the face of a cut brick on a stone, setting and pointing with trowels and testing your work with levels. As I am predominantly a woodworker it was interesting to learn the skills required to tackle this project and as the week went on you could see the class pick up speed and some finesse. And I’m sure the next project we work on will be even better.
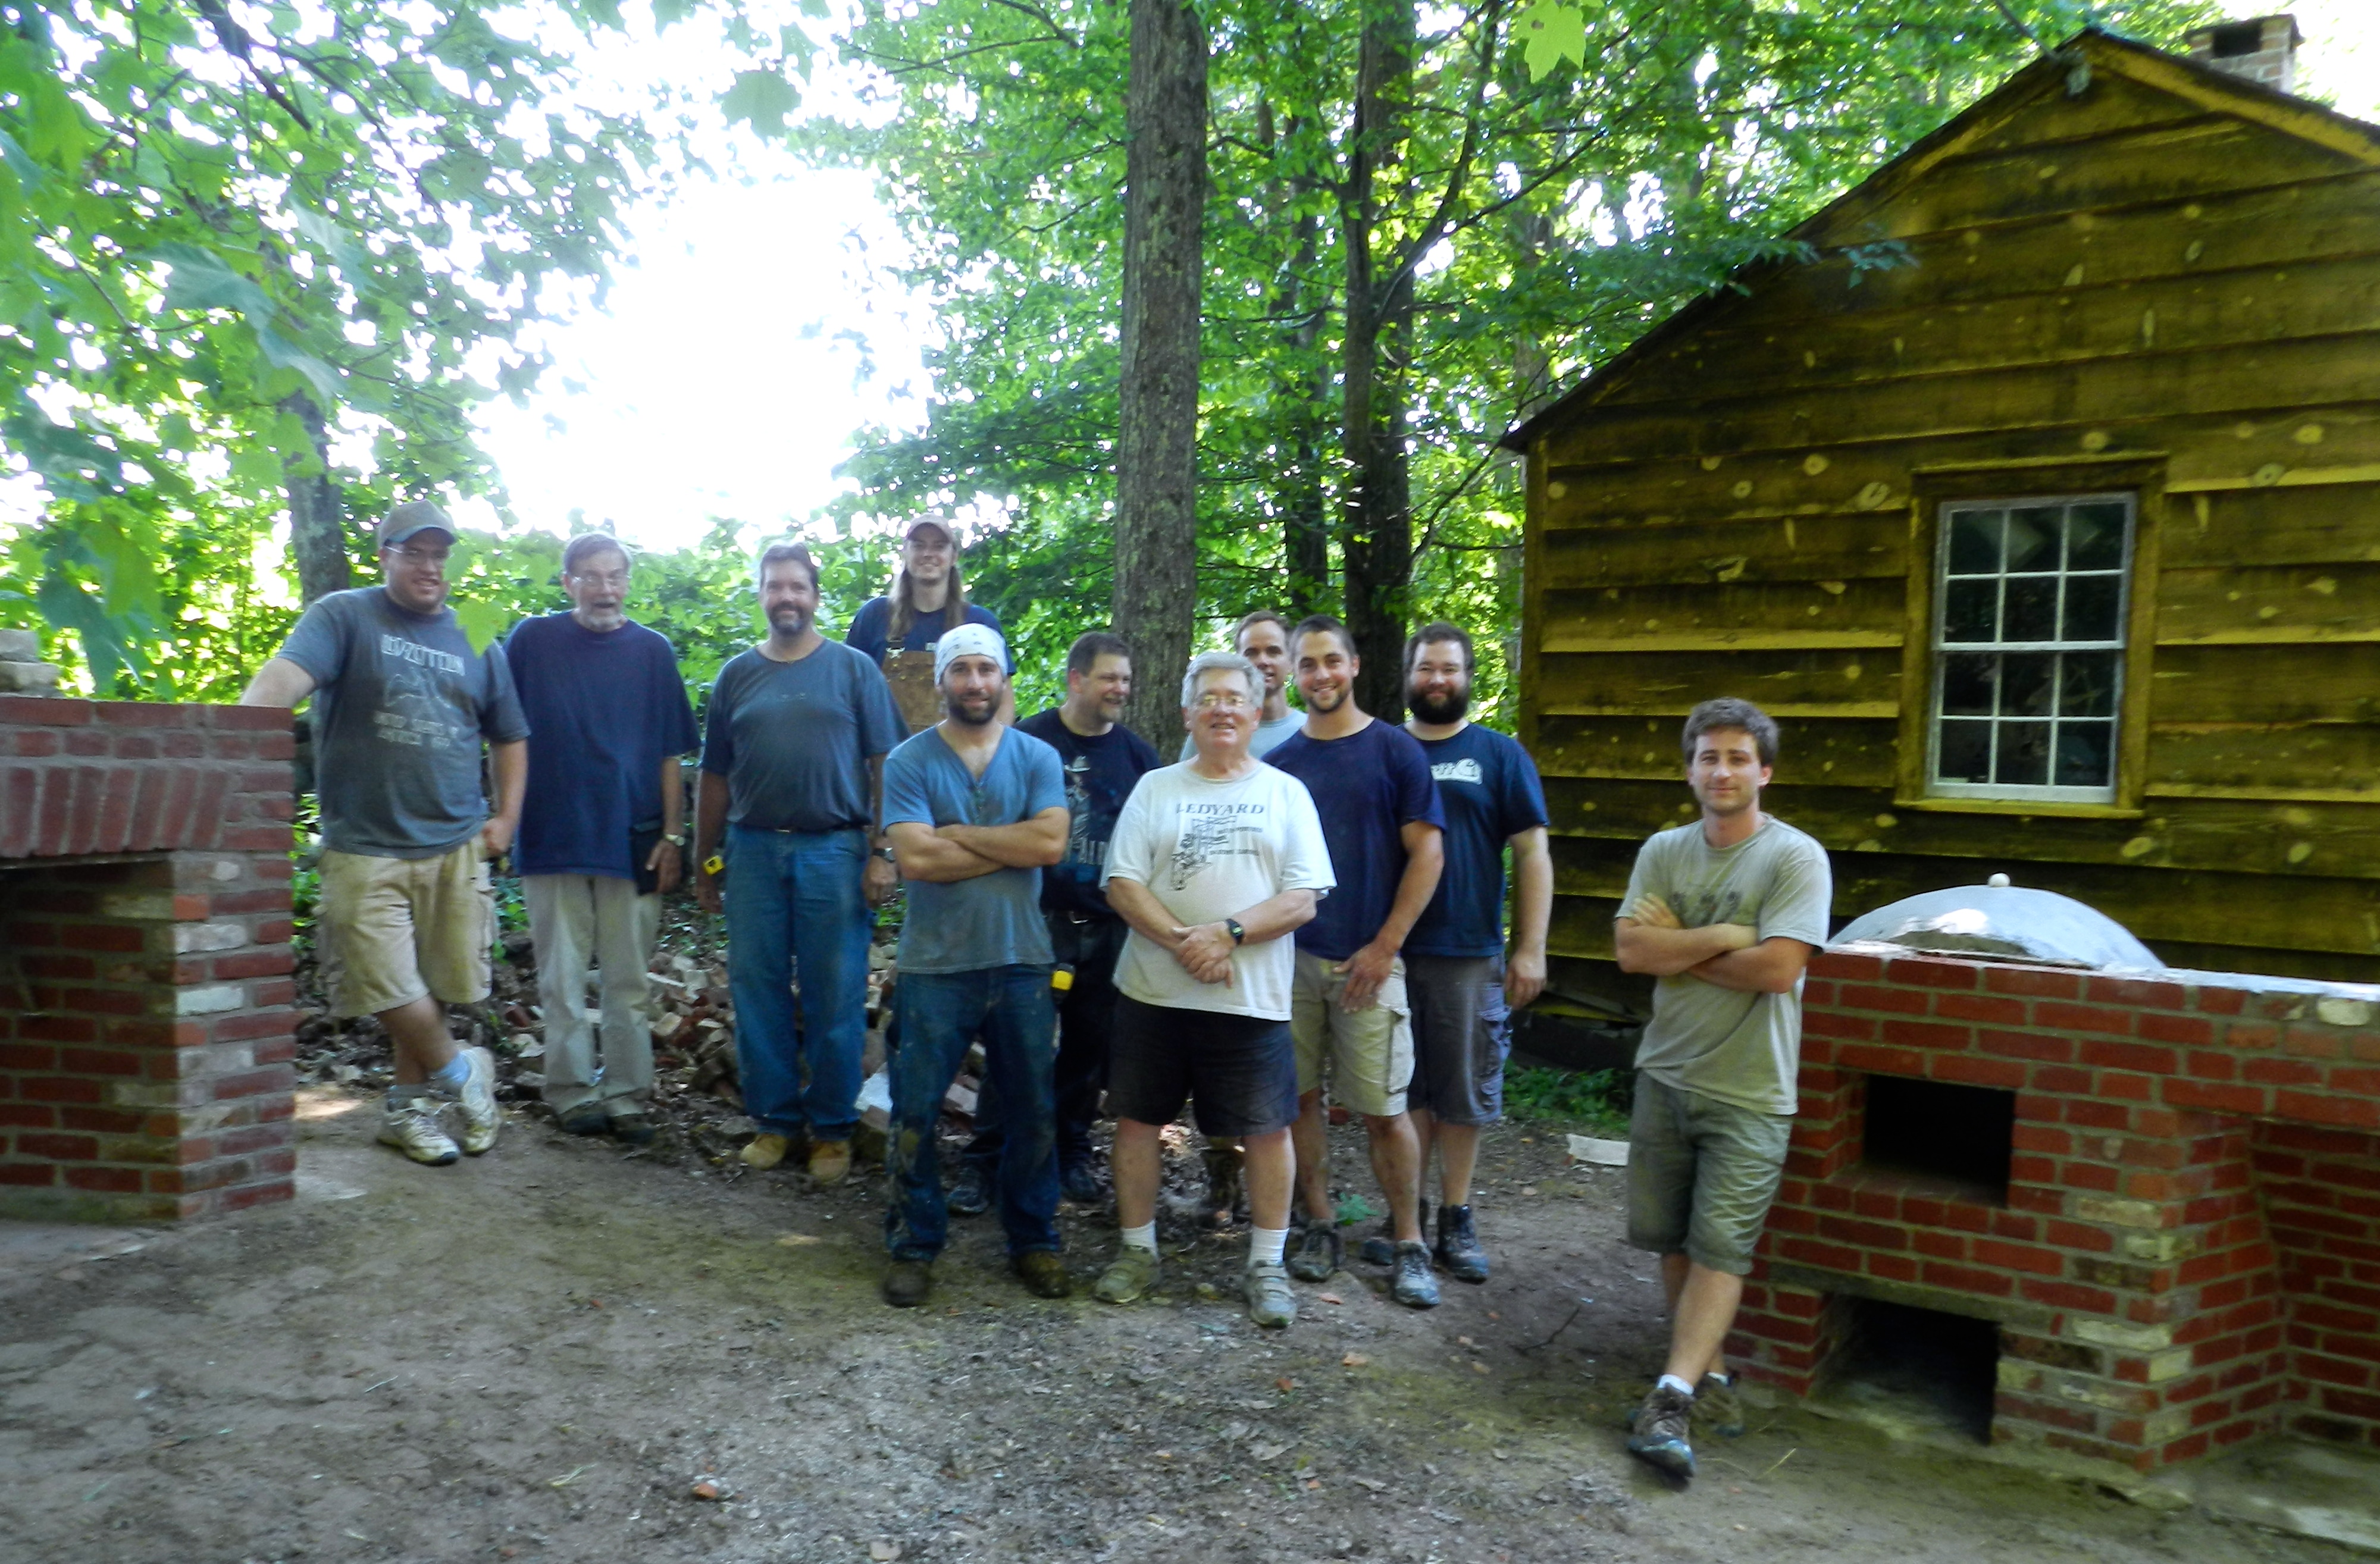
Group Shot of the Class
The class was taught by my friends Bill McMillen, his son John McMillen and Don Carpentier who is the founder of Eastfield Village — the village is set on his father’s ‘East Field’ and is Don’s long time home. Billy is also a master Tinsmith and preservationist having worked/taught/lead the preservation efforts at Old Richmond Town on Staten Island NY, taught at the Tinsmith Shop at Colonial Williamsburg and countless other venues. Don Carpentier moved and restored all the buildings in the village — an incredible undertaking and is also a well known historian and craftsmen having worked in wood, tinsmithing, blacksmithing and pottery. Don is also well known for his incredible Mochaware. John grew up around all this and is a skilled craftsman working in the NYC area.
If you’d like to see how we spent the week building these fireplaces, please check out the video below which walks you through the week at a high level (If you are reading my blog via email or some mobile phones you may have to click over to the actual post to watch the video):
You can also learn more about Eastfield Village’s current class schedule via their website here and the village in general via this nice video from Martha Stewart that you can watch here. If you can make the trip out to Eastfield Village for a class I highly encourage you to do so — it’s an experience you will never forget.
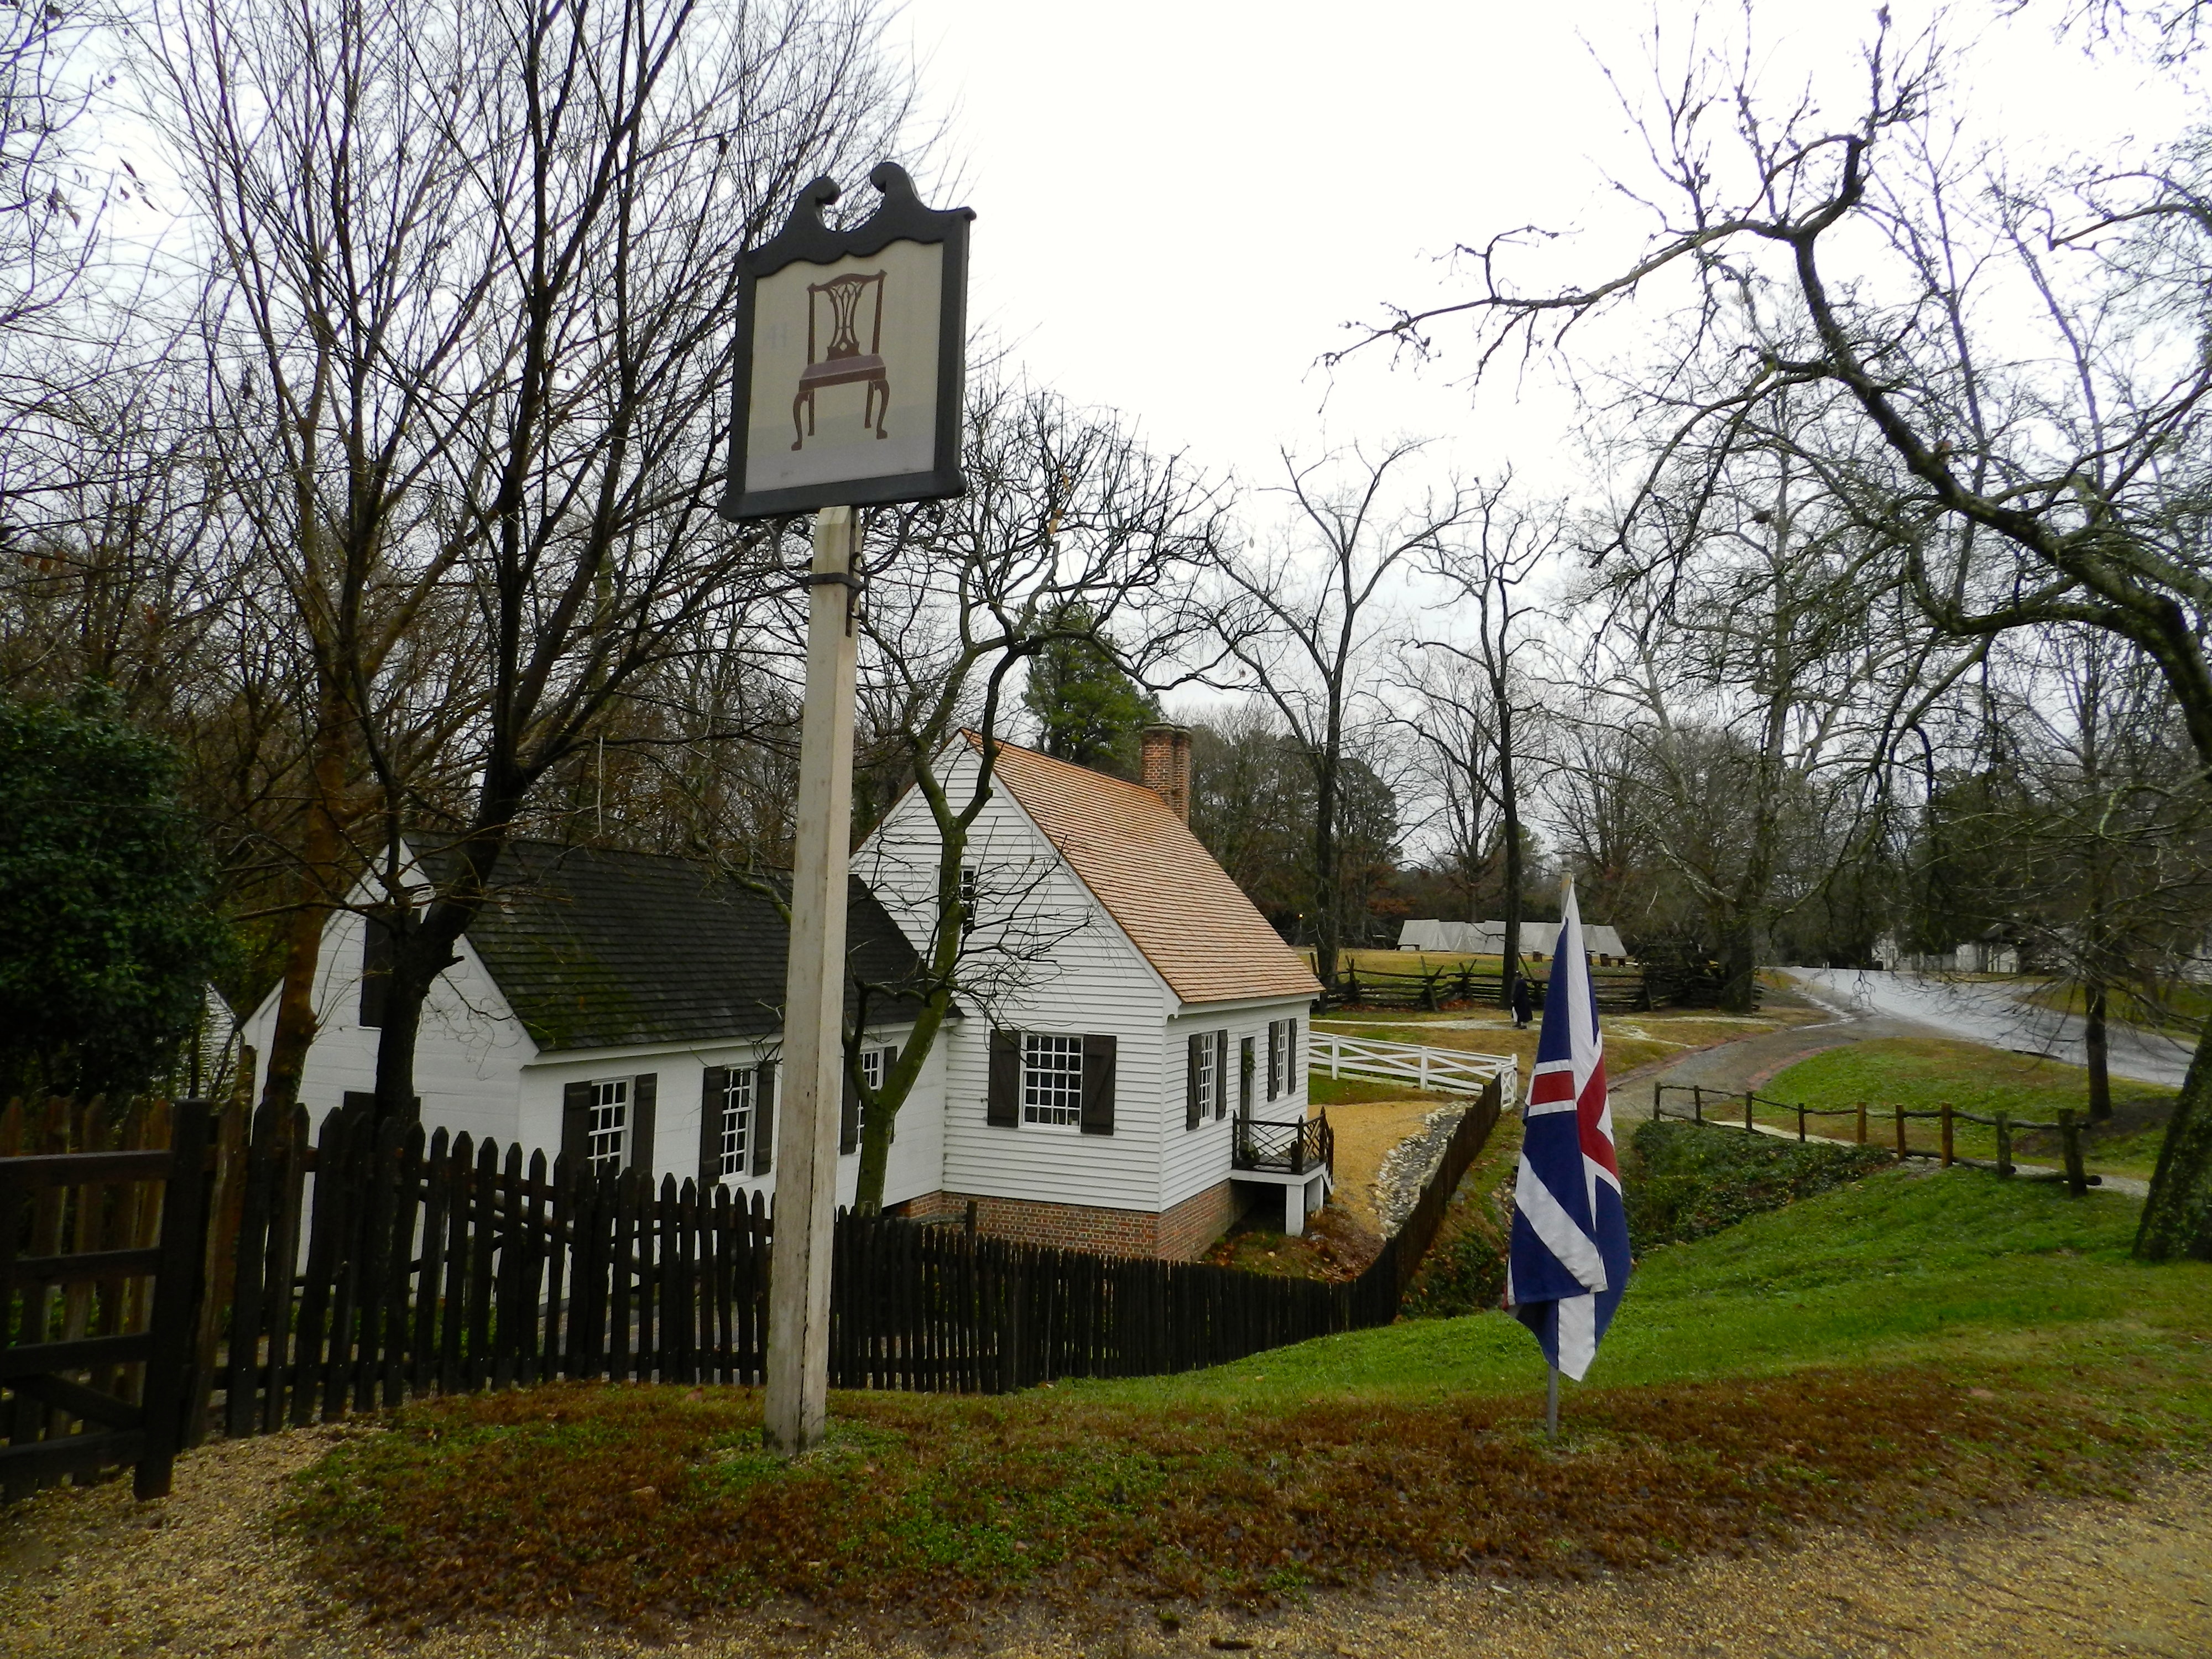
Back in December 2013, I topped off the Mr. Fusion, warmed up the Flux Capacitor and headed back to the 1780s for our annual pilgrimage to Colonial Williamsburg Virginia. During this visit I wanted to check out some of the frame saws my friends are using and what they thought about the saws ahead of building my own.
My first stop was that Anthony Hay Cabinetmaker’ Shop…
The Anthony Hay Cabinetmaker’s Shop at Colonial Williamsburg
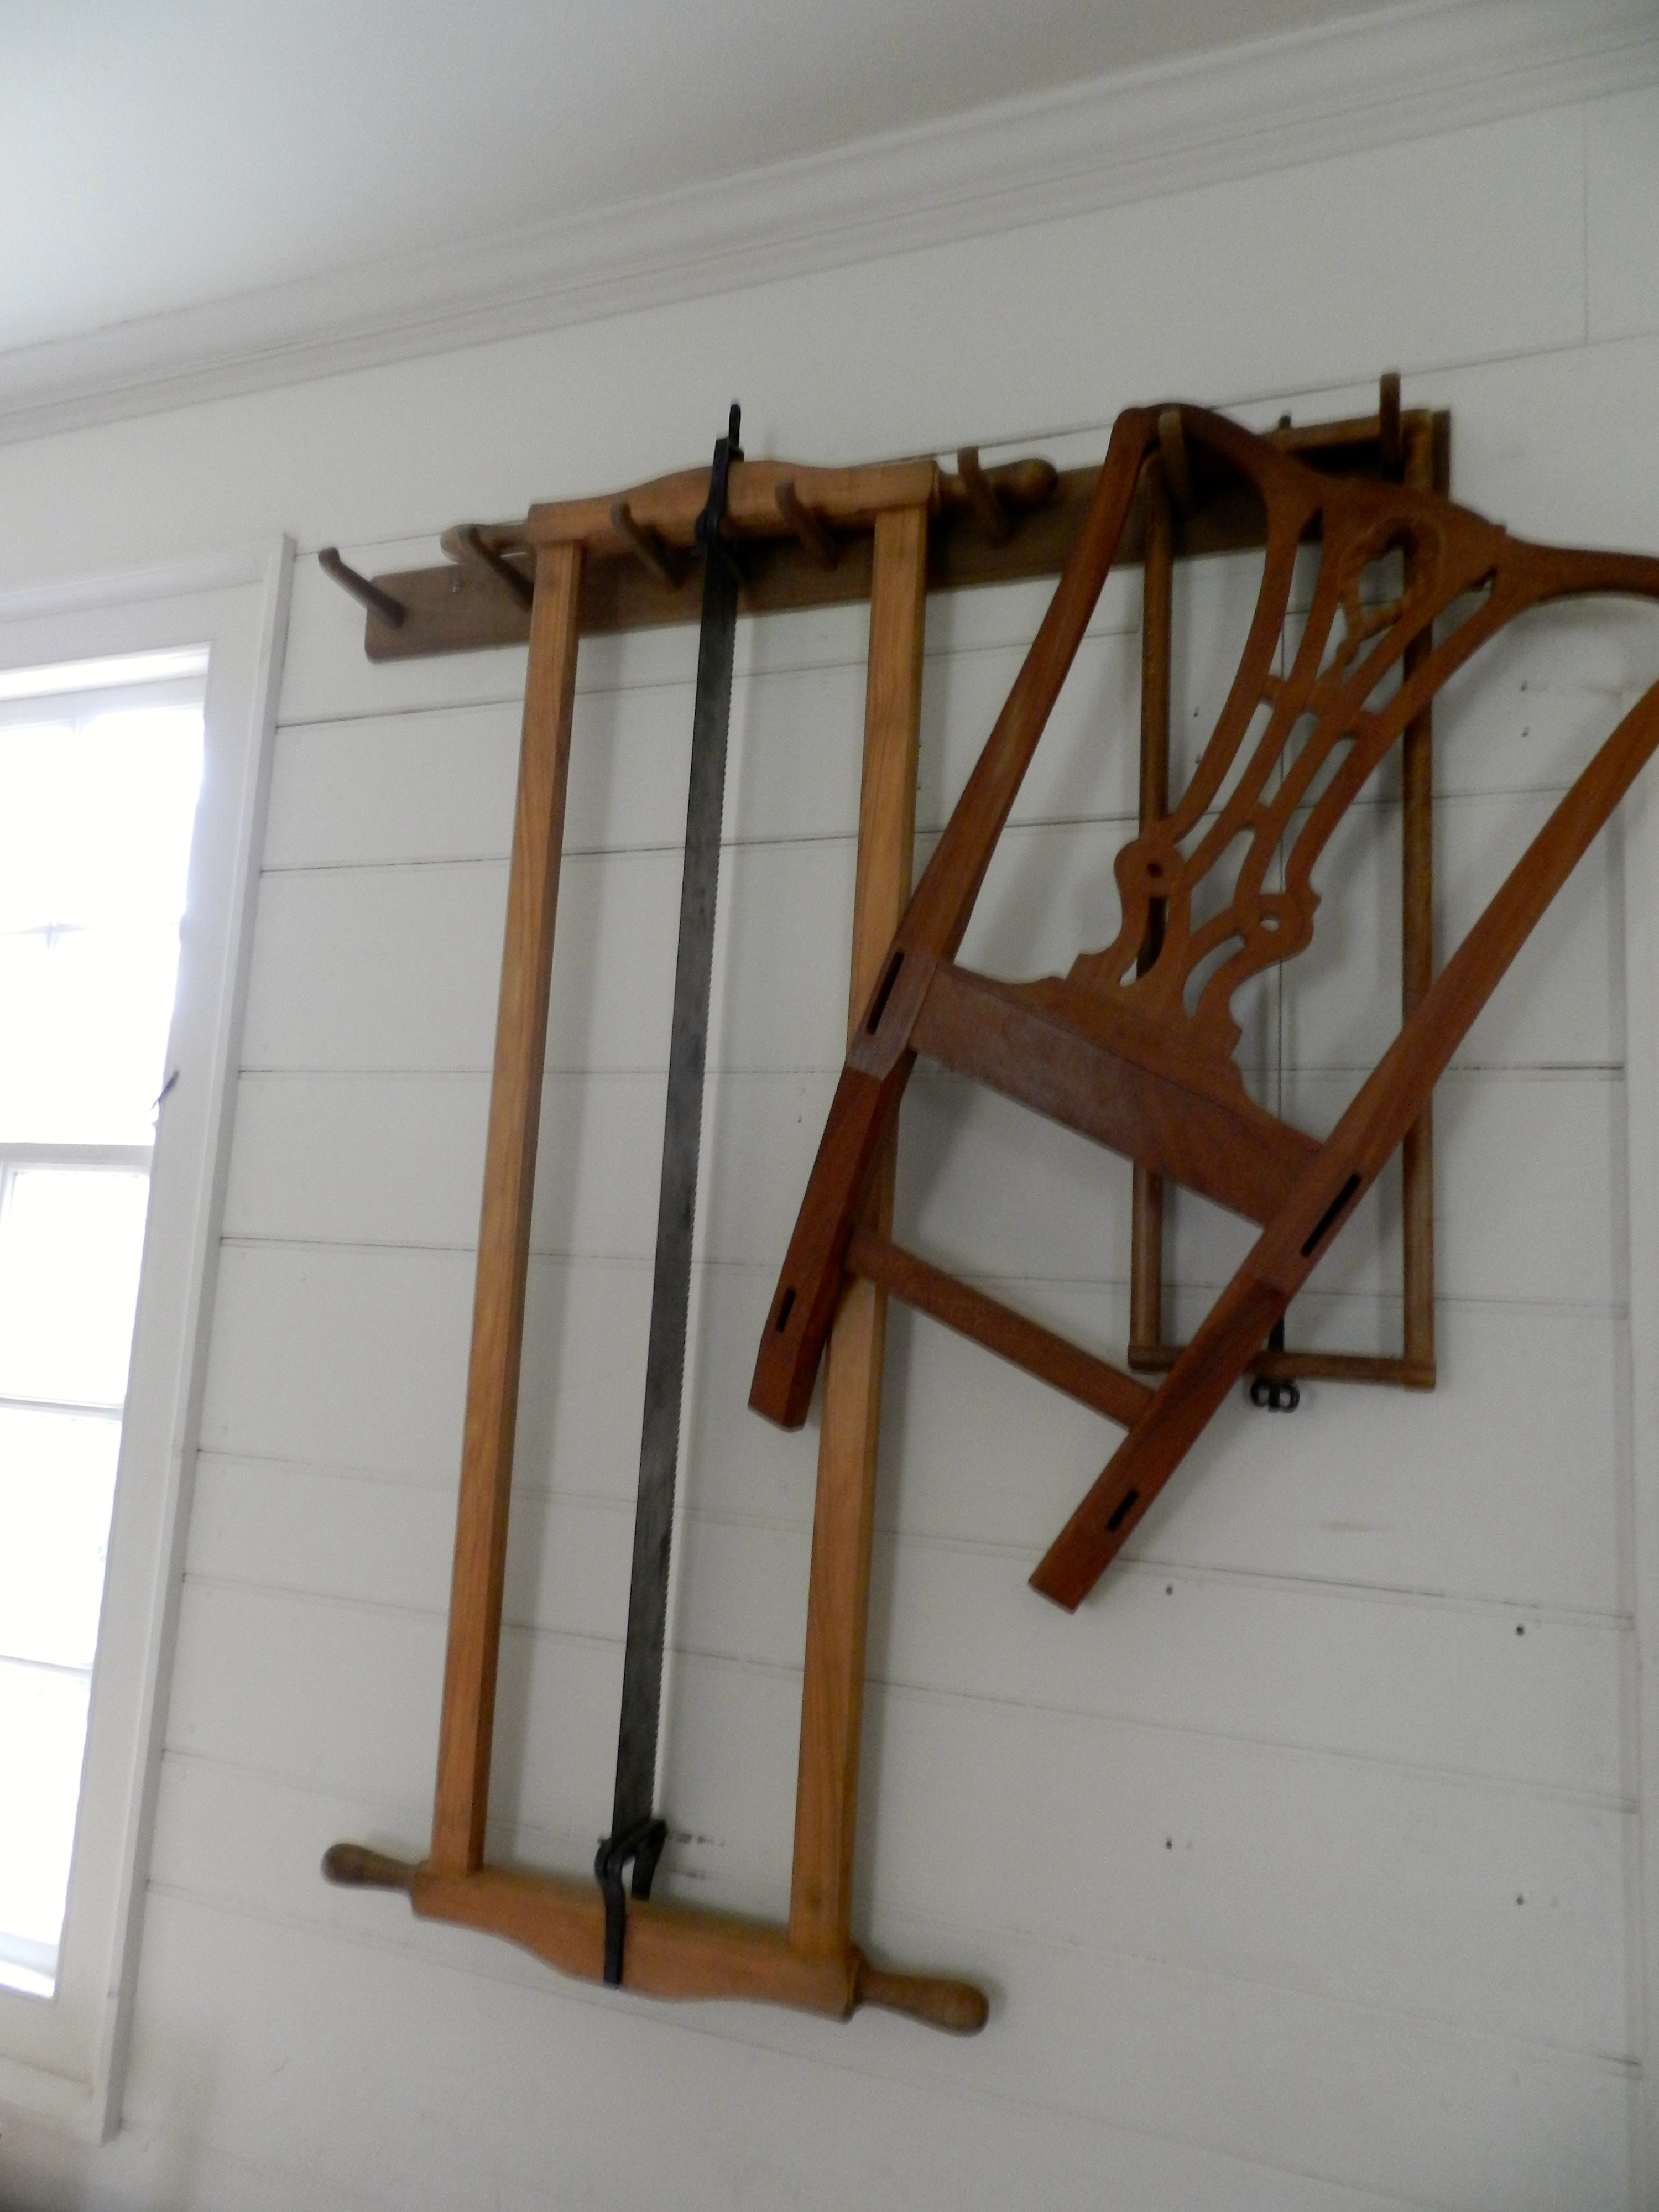
Hanging on the wall was a nice two man frame saw and a smaller veneer saw you may recall seeing in an episode of The Woodwright’s Shop. (Season 6, Episode 9 — Free Preview Here on YouTube )
Frame saws hanging on the wall of the Hay Shop
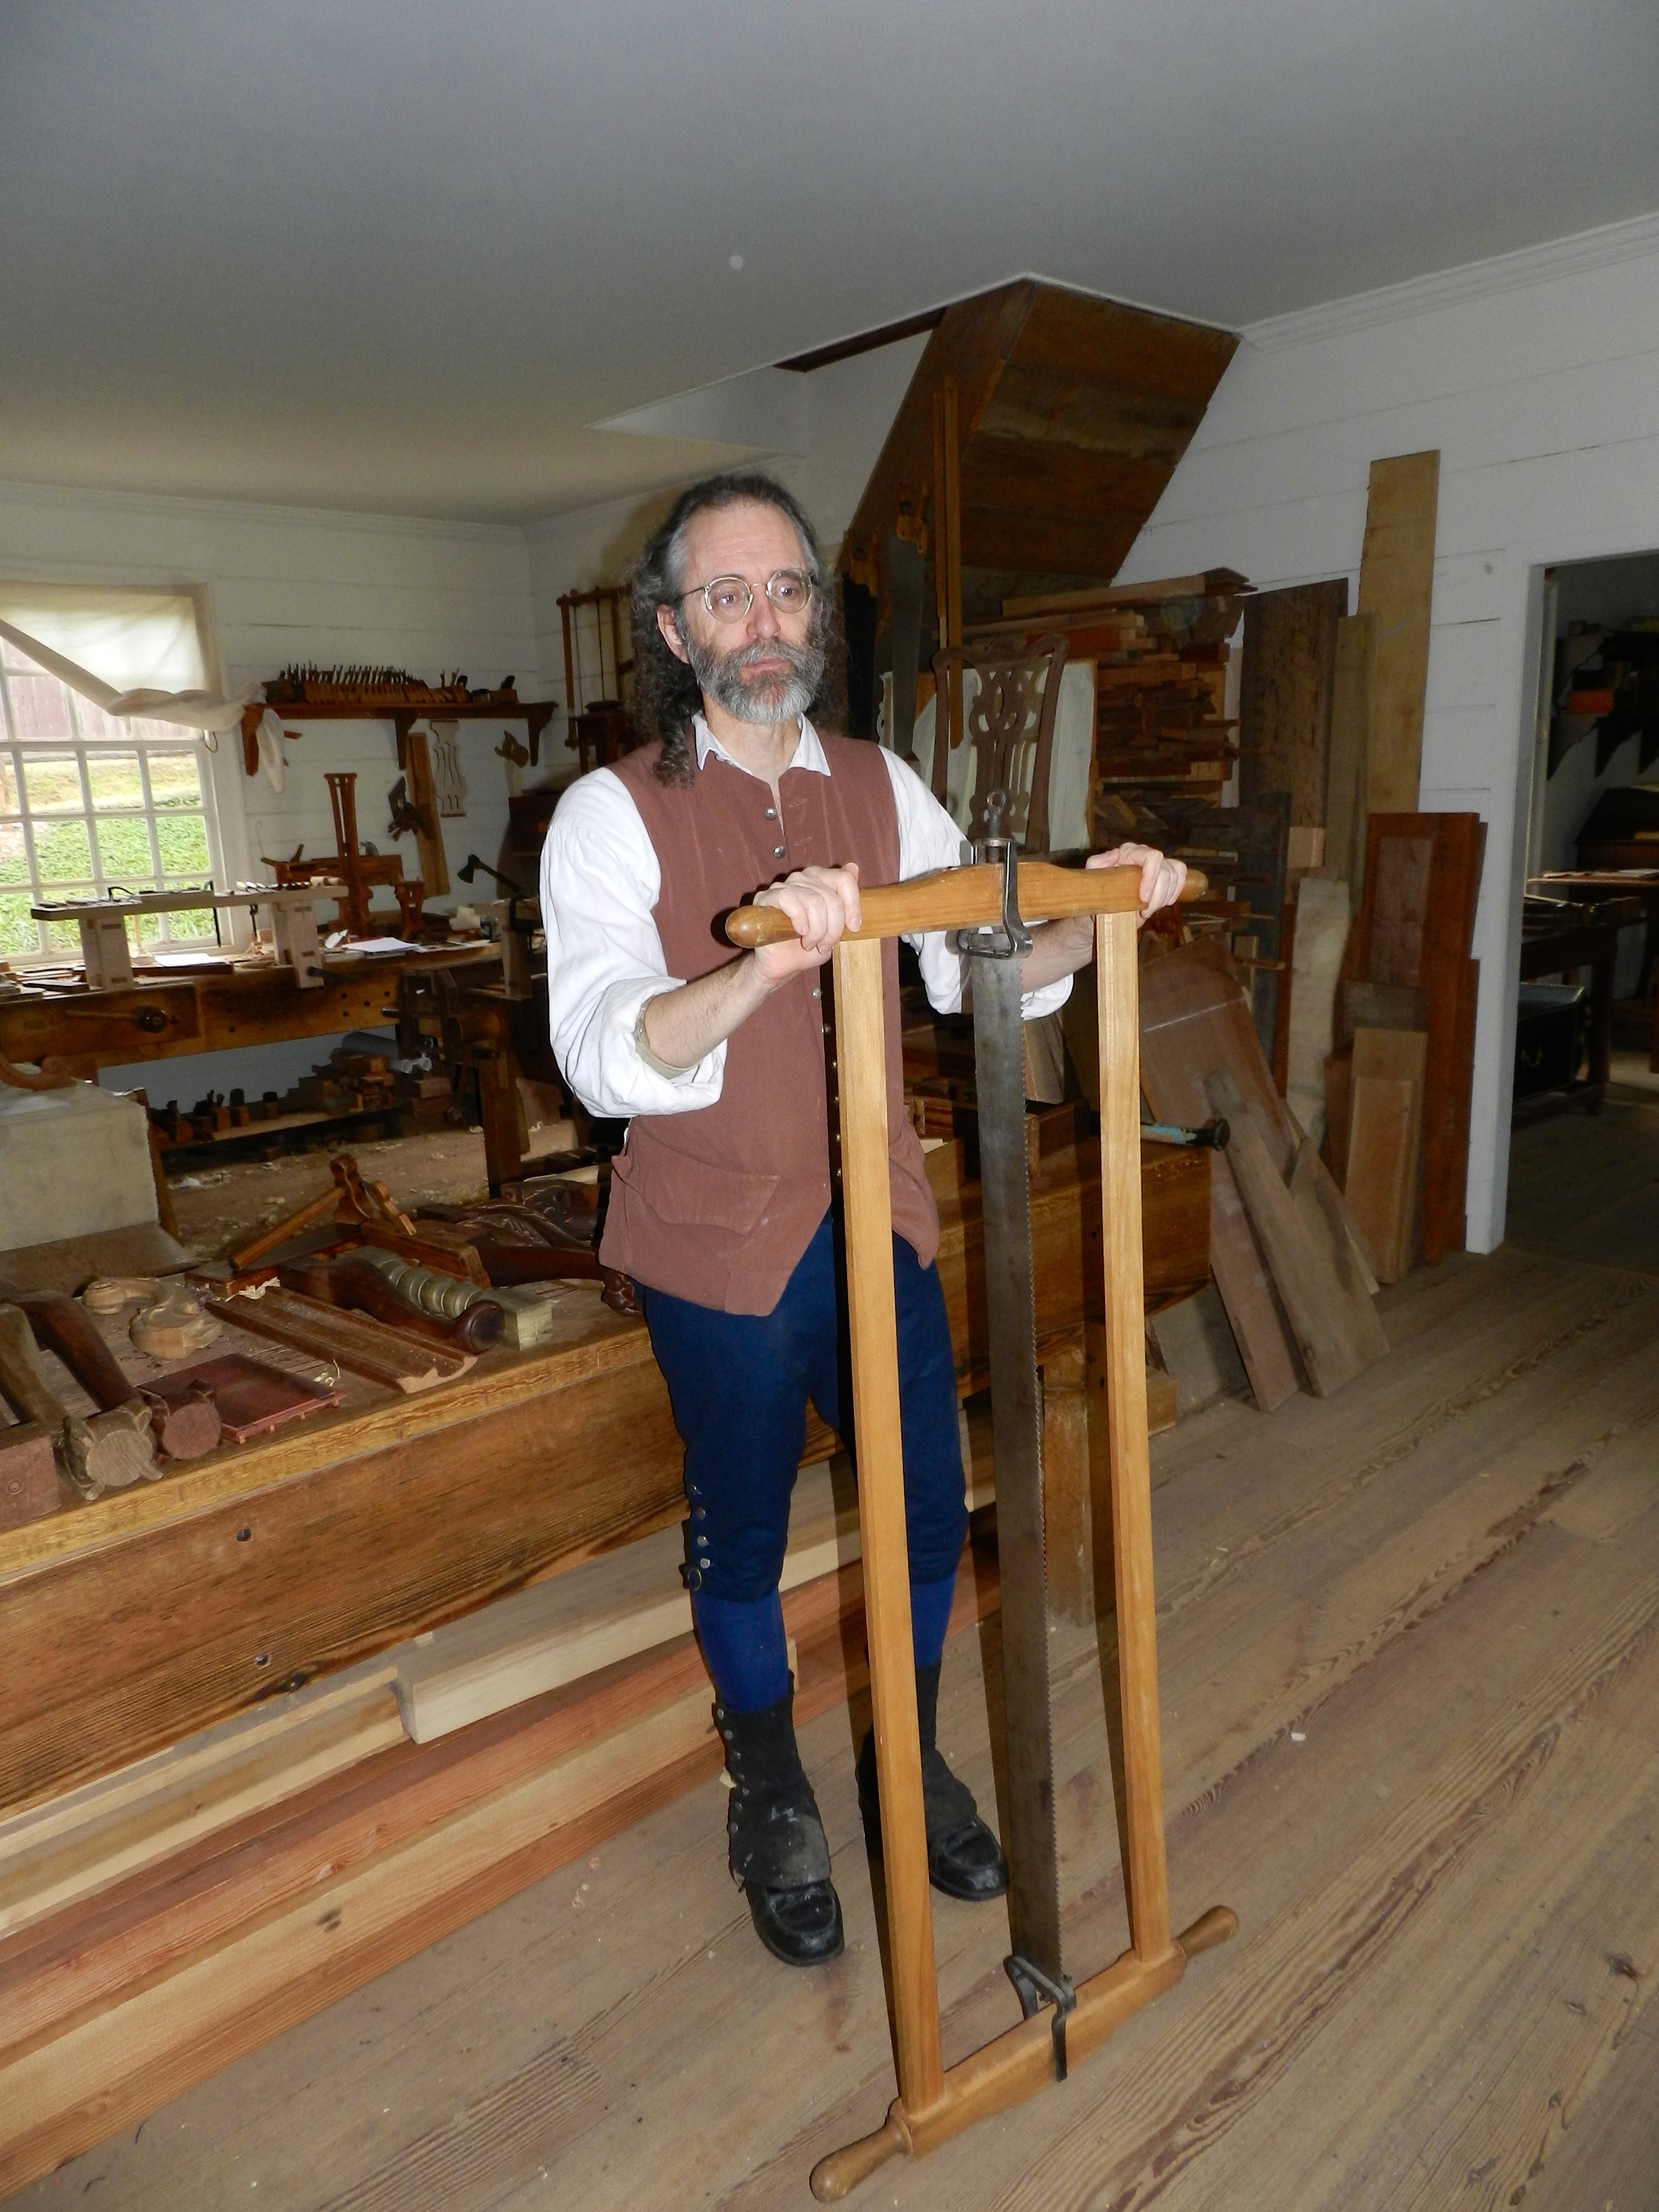
In talking to my friend Ed Wright, the master Harpsichord Maker in the Hay Shop, he showed me some of the finer details of the larger saw shown below.
Ed Wright with a frame saw in Anthony Hay Cabinetmaker’s Shop
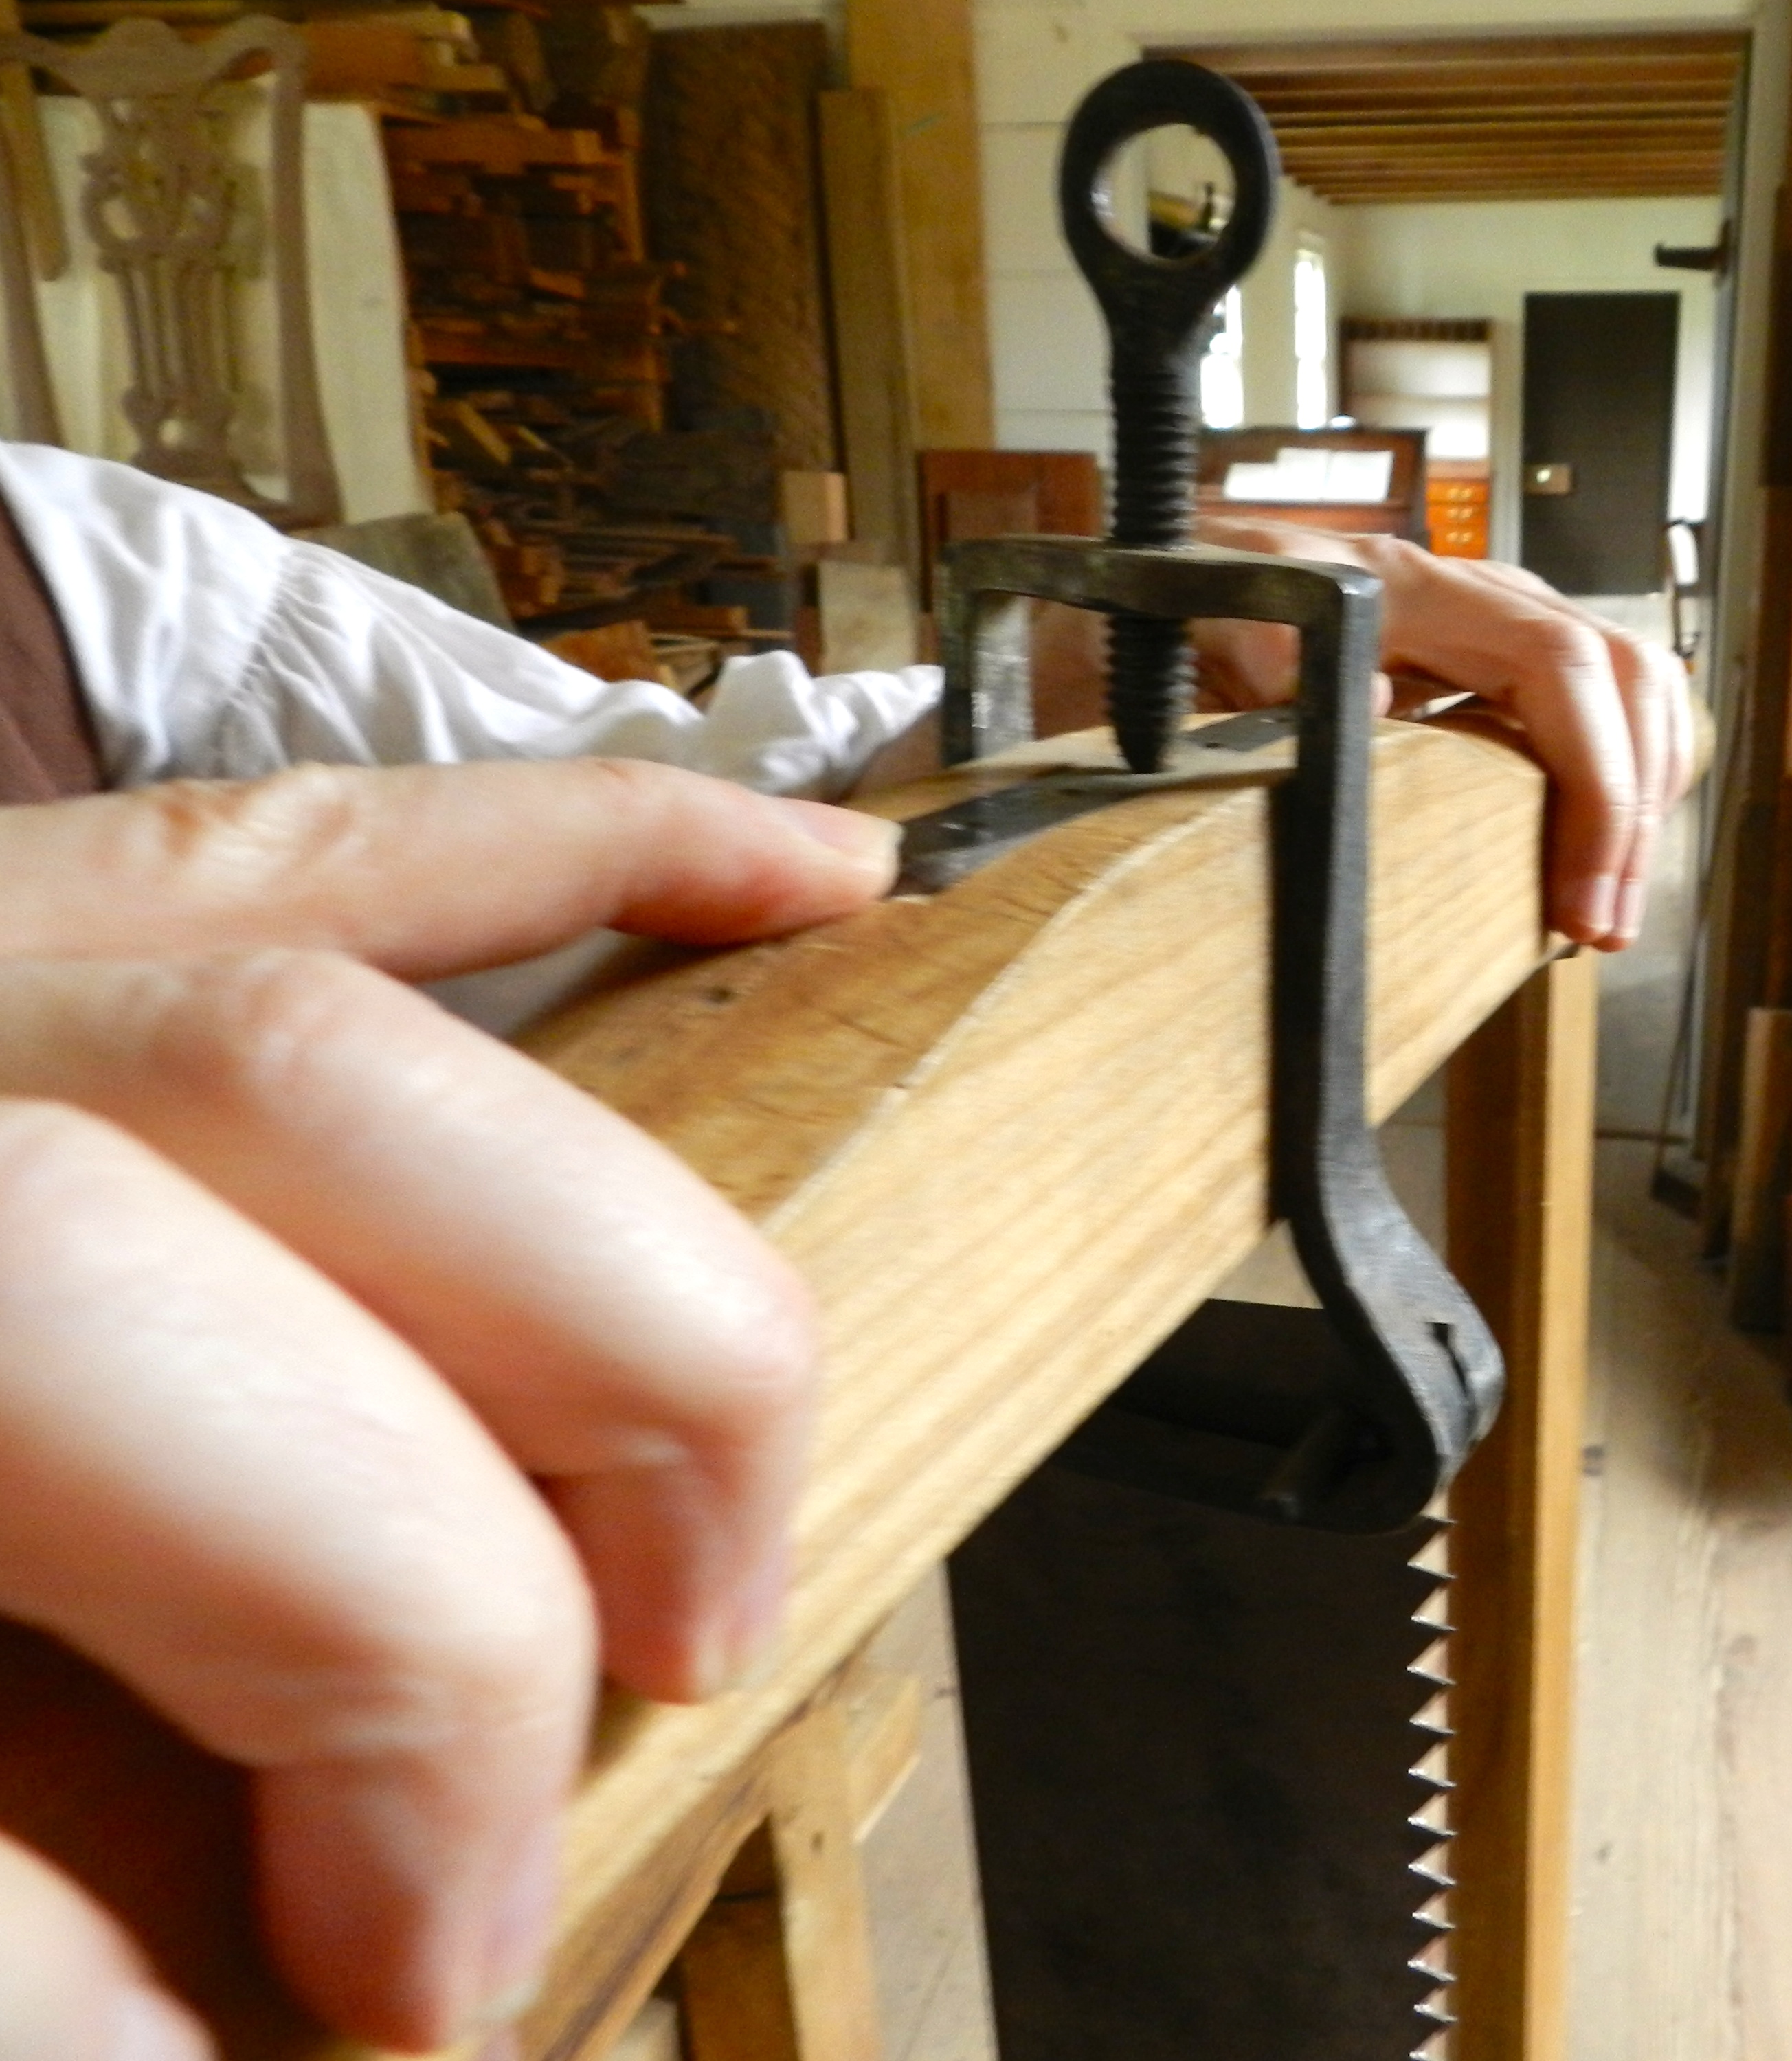
The saw’s size and details were derived from Roubo’s plates. The hardware was forged by Colonial Williamsburg’s Blacksmiths, not to be confused with Williamsburg Blacksmiths up in Williamsburg MA (I bought my hold fasts and log dogs from the former, and barn hardware from the latter and I am very happy with both). You can see the forged eye bolt below, passing through a threaded square section and pressing against a metal wear plate.
Close up detail of the tensioning mechanism of a frame saw
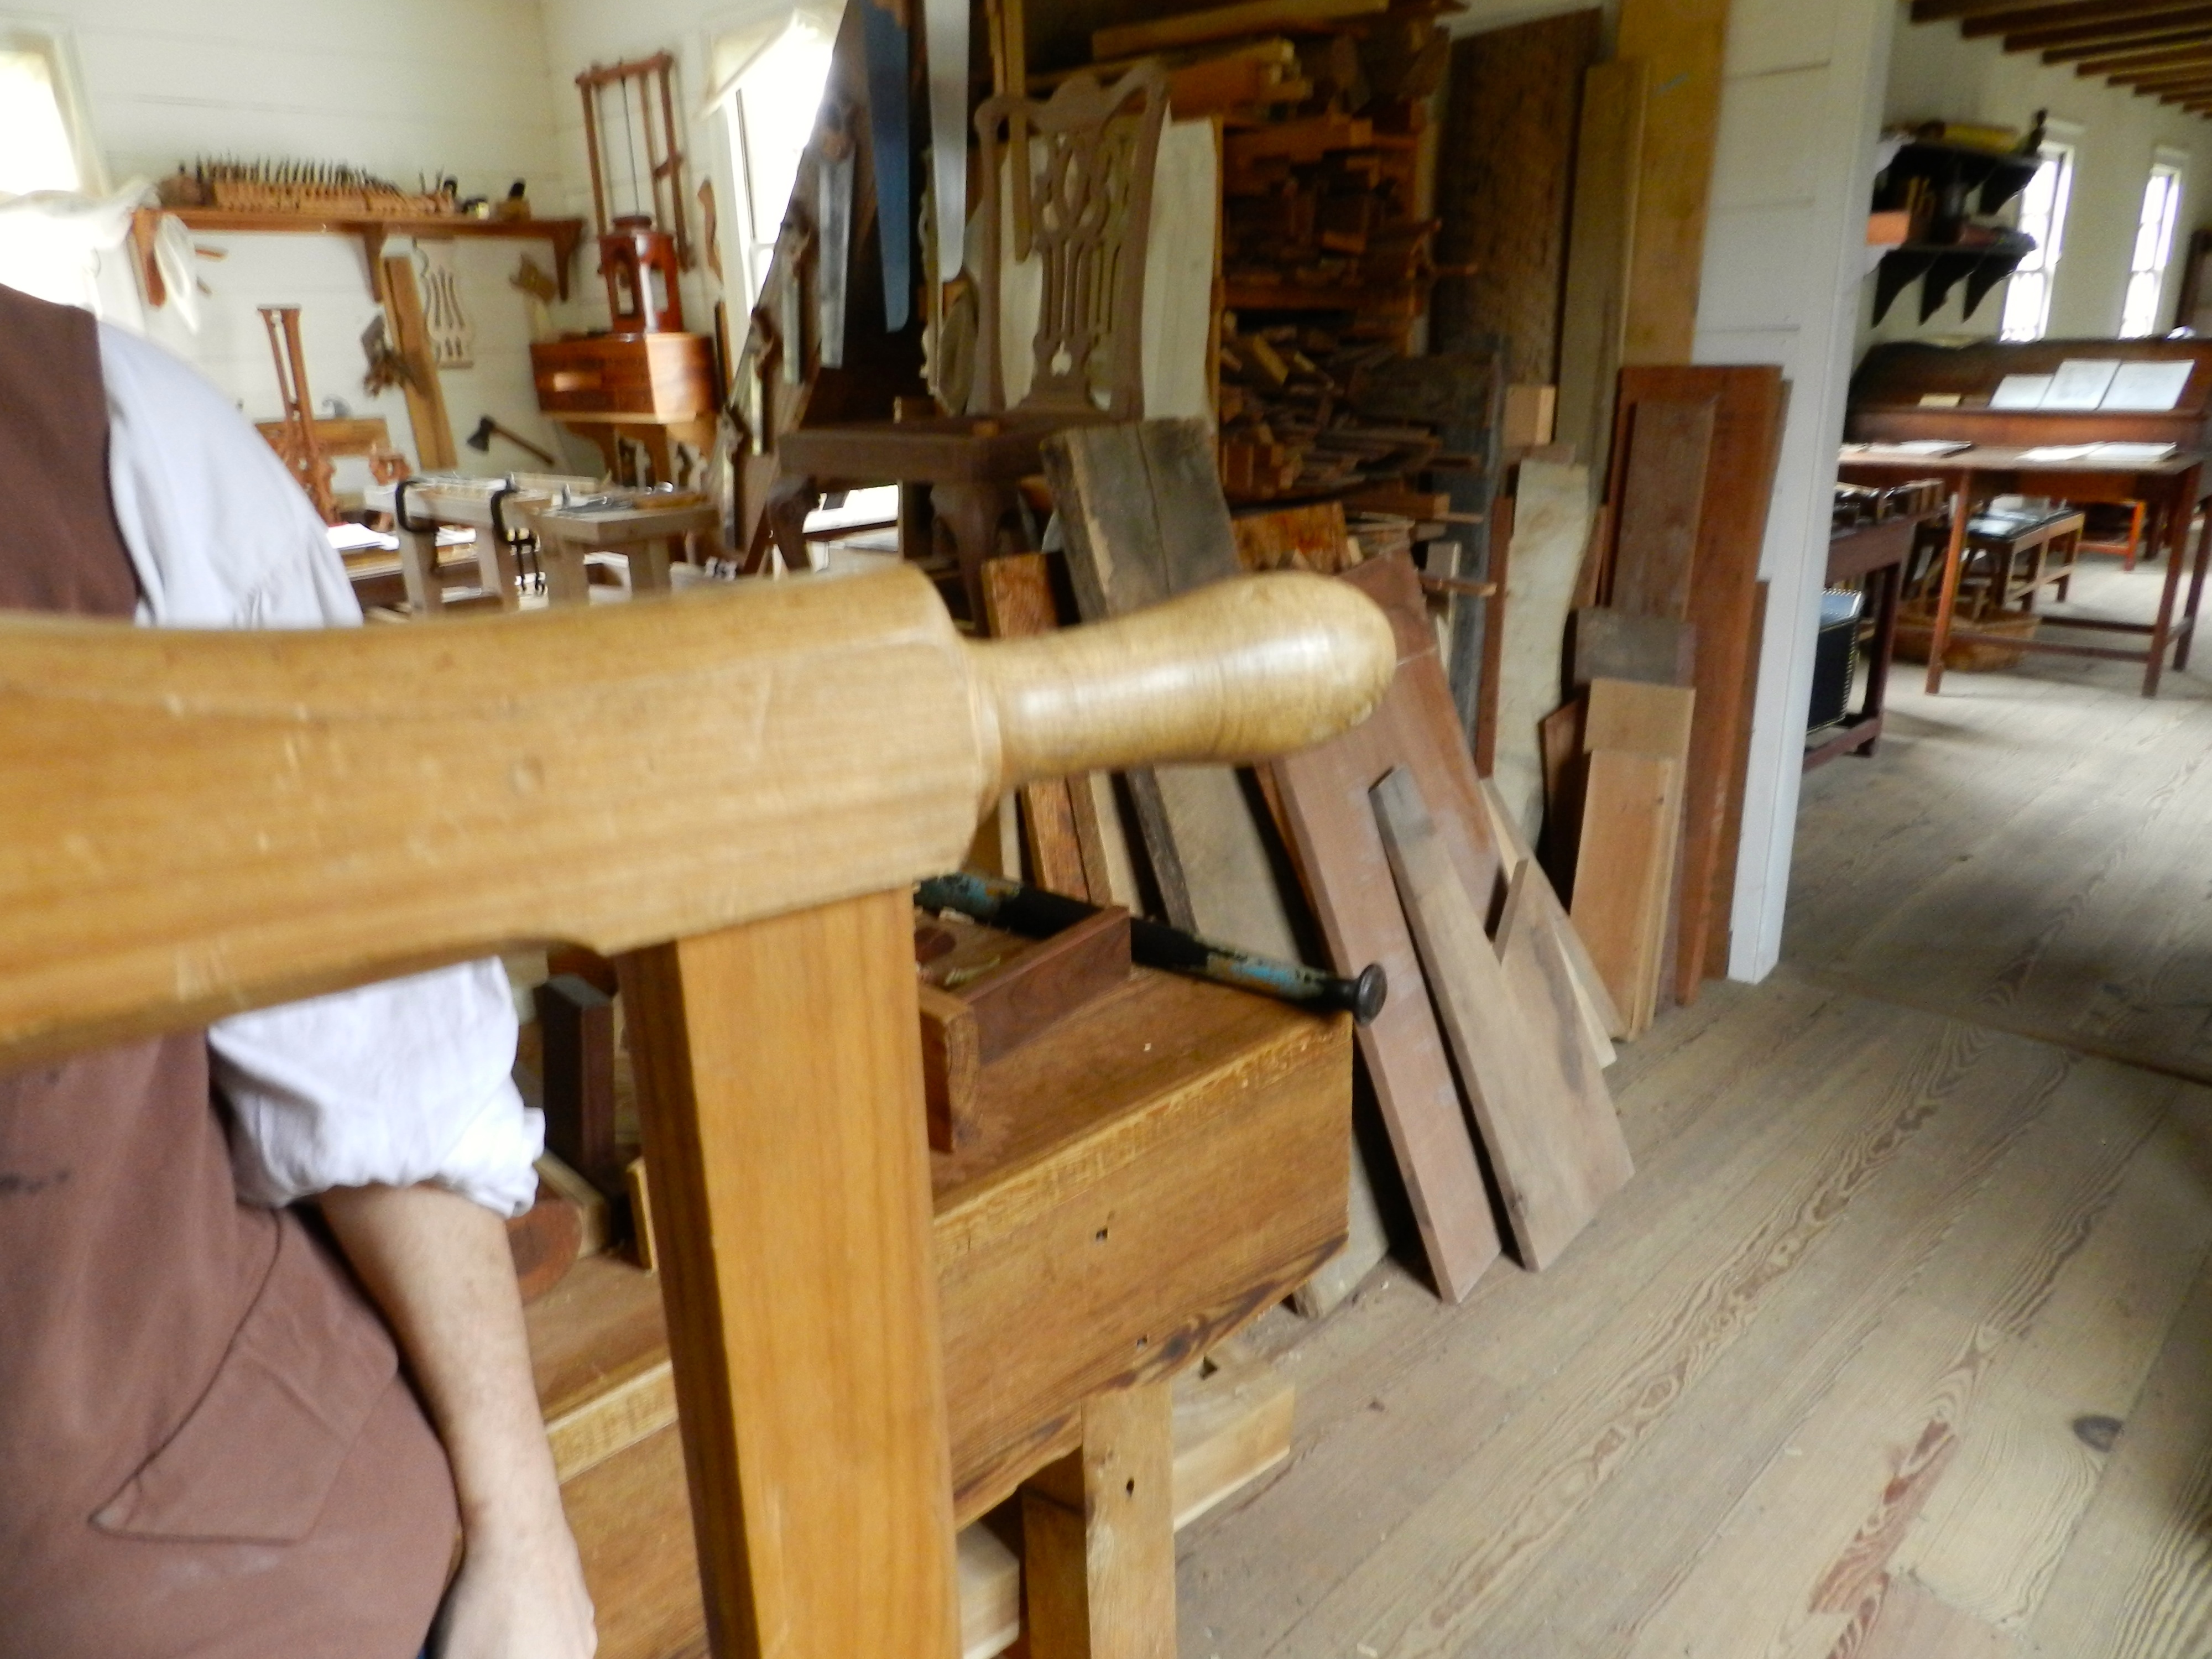
The saw deviates from the Roubo plate a bit with the offset turned handles shown below. (Check out Don’s post here — which includes a copy of the plate I am referring to and is related to the recent LAP reprint of Roubo on Marquetry which includes a nice translation of this plate and Don’s experiments with his own reproduction saw) Ed said that the turned handles worked well over the years even if they give the saw a slightly more modern (Say 19th century) appearance compared to the simple carved volutes in the Roubo print. If you were to use this saw all day long vigorously sawing fine veneers I could see wanting this sort of turned handle and it seems to be popular in other reproductions I’ve seen. While the carved volutes seem like they’d be tougher on the modern sawyers’ hands I suspect the likely simple volutes were contoured to fit in the sawyers hand and would have forced him to have a lighter grip on the saw which might have allowed him to react more directly to the wood and make fine adjustments as he goes. From examining Figure 10 of the Roubo print it looks to me like the sawyer on the right has a very light grip and is sighting down the saw to gently steer it on an appropriate course as the the left sawyer is sighting as well as pulling the saw through the cut. Don’s translation talks about the advantages of sawing on a slight incline and lifting the saw on the return stroke to clear sawdust and not bind the saw. Sawing with a second person can be like having a dance partner — if you are in sync and can communicate well verbally and non verbally you have a shot, if you are out of sync things can go south quick as the narrow blade is unforgiving and wants to follow the path of least resistance.
Close up detail of turned handles on the frame saw
The saw blade is held in place via pins that are held in tension, thus tensioning the blade. The blade shown here is quite wide, though not quite as wide as the ~4″ Roubo suggested. When using this type of saw you need to be careful not to over tension it as you can deform/stretch the holes in the blade. The impression I got was that this saw was a little slow cutting at times. A lot of folks online have experimented with saw tooth geometry and similar variations. Adam Cherubini had an interesting and somewhat controversial post regarding his experiences with frame saws which you can check out here. (Be sure to read the comments as several other folks who have been experimenting in this space weighed in).
Close up detail of the pins the secure the blade to the frame
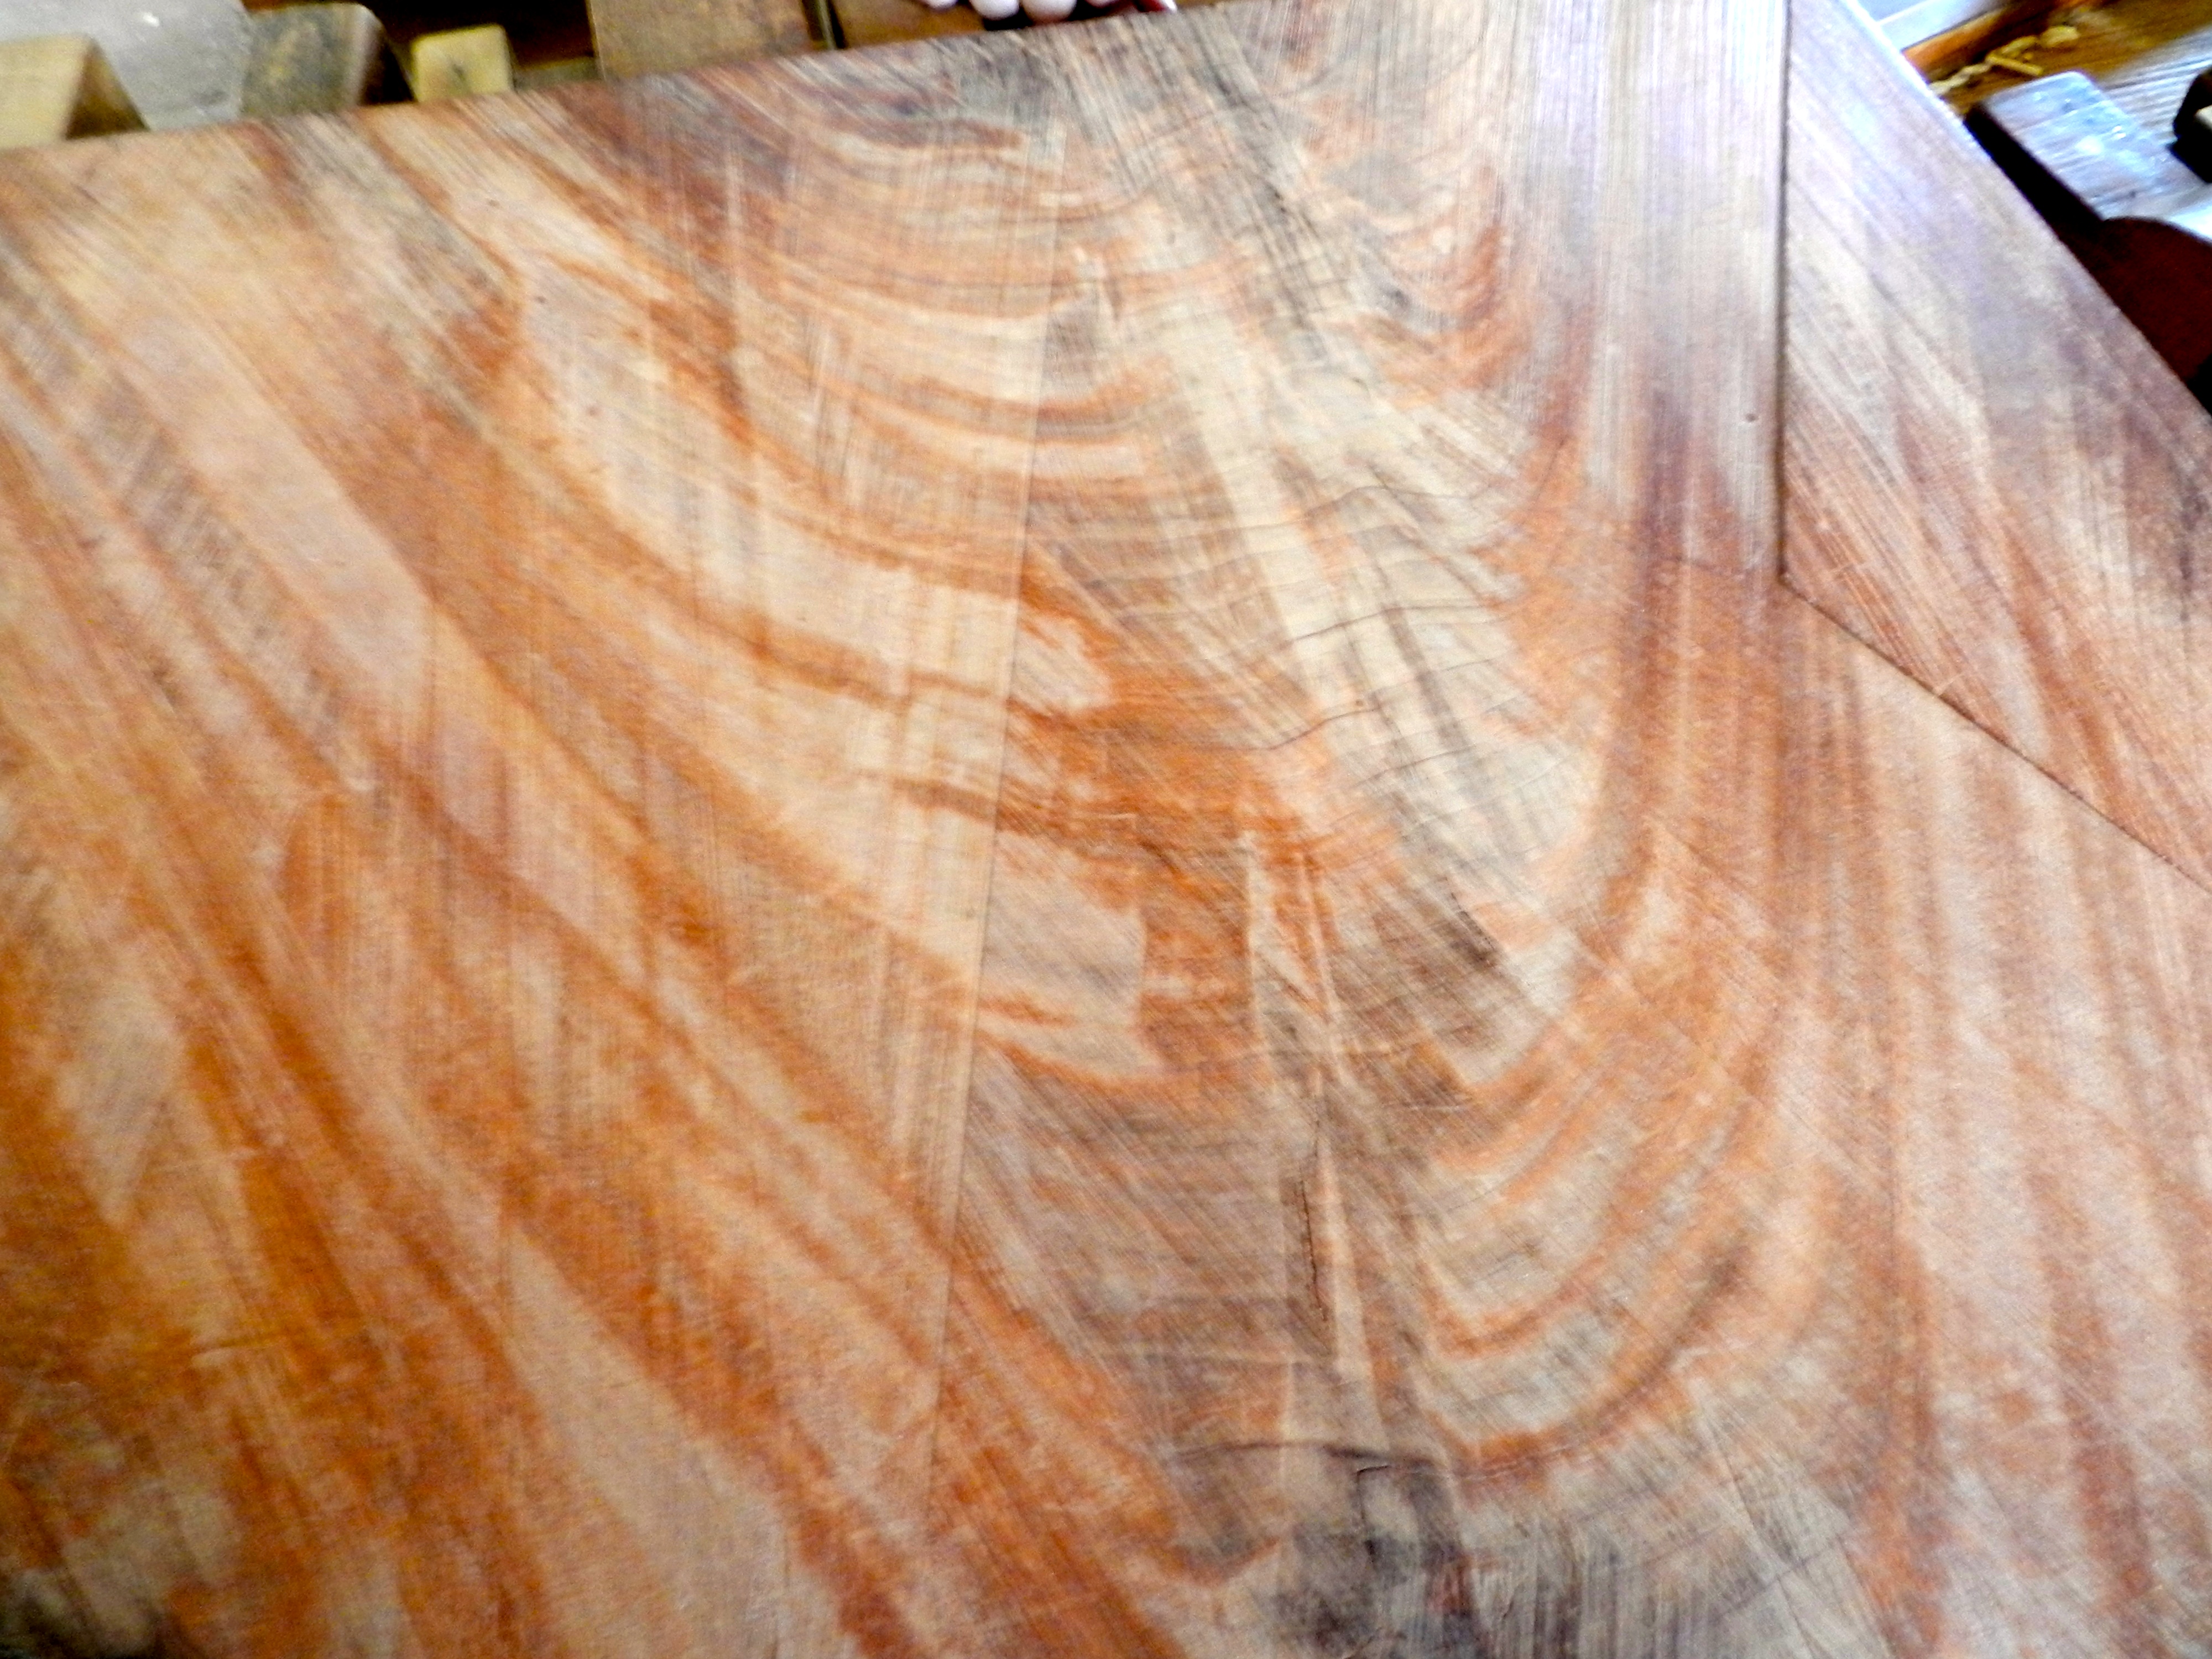
When using a frame saw to re-saw planks or make veneers you can see some of the telltale marks of the tool as it slices through the figured wood. (See below). In general the blade wants to follow the path of least resistance, so cutting in with another saw to start as Roubo describes or using a ‘kerfing plane’ as Tom Fidgen suggests are great ways to better your chance of success. If you’ve seen any of the many great projects to come out of the Hay Shop you’ll have no doubt Ed and the others in the shop have mastered many uses of the frame saw.
Panel that was cut with a frame saw — shows the telltale pattern of tool marks showing how the saw progressed through the wood
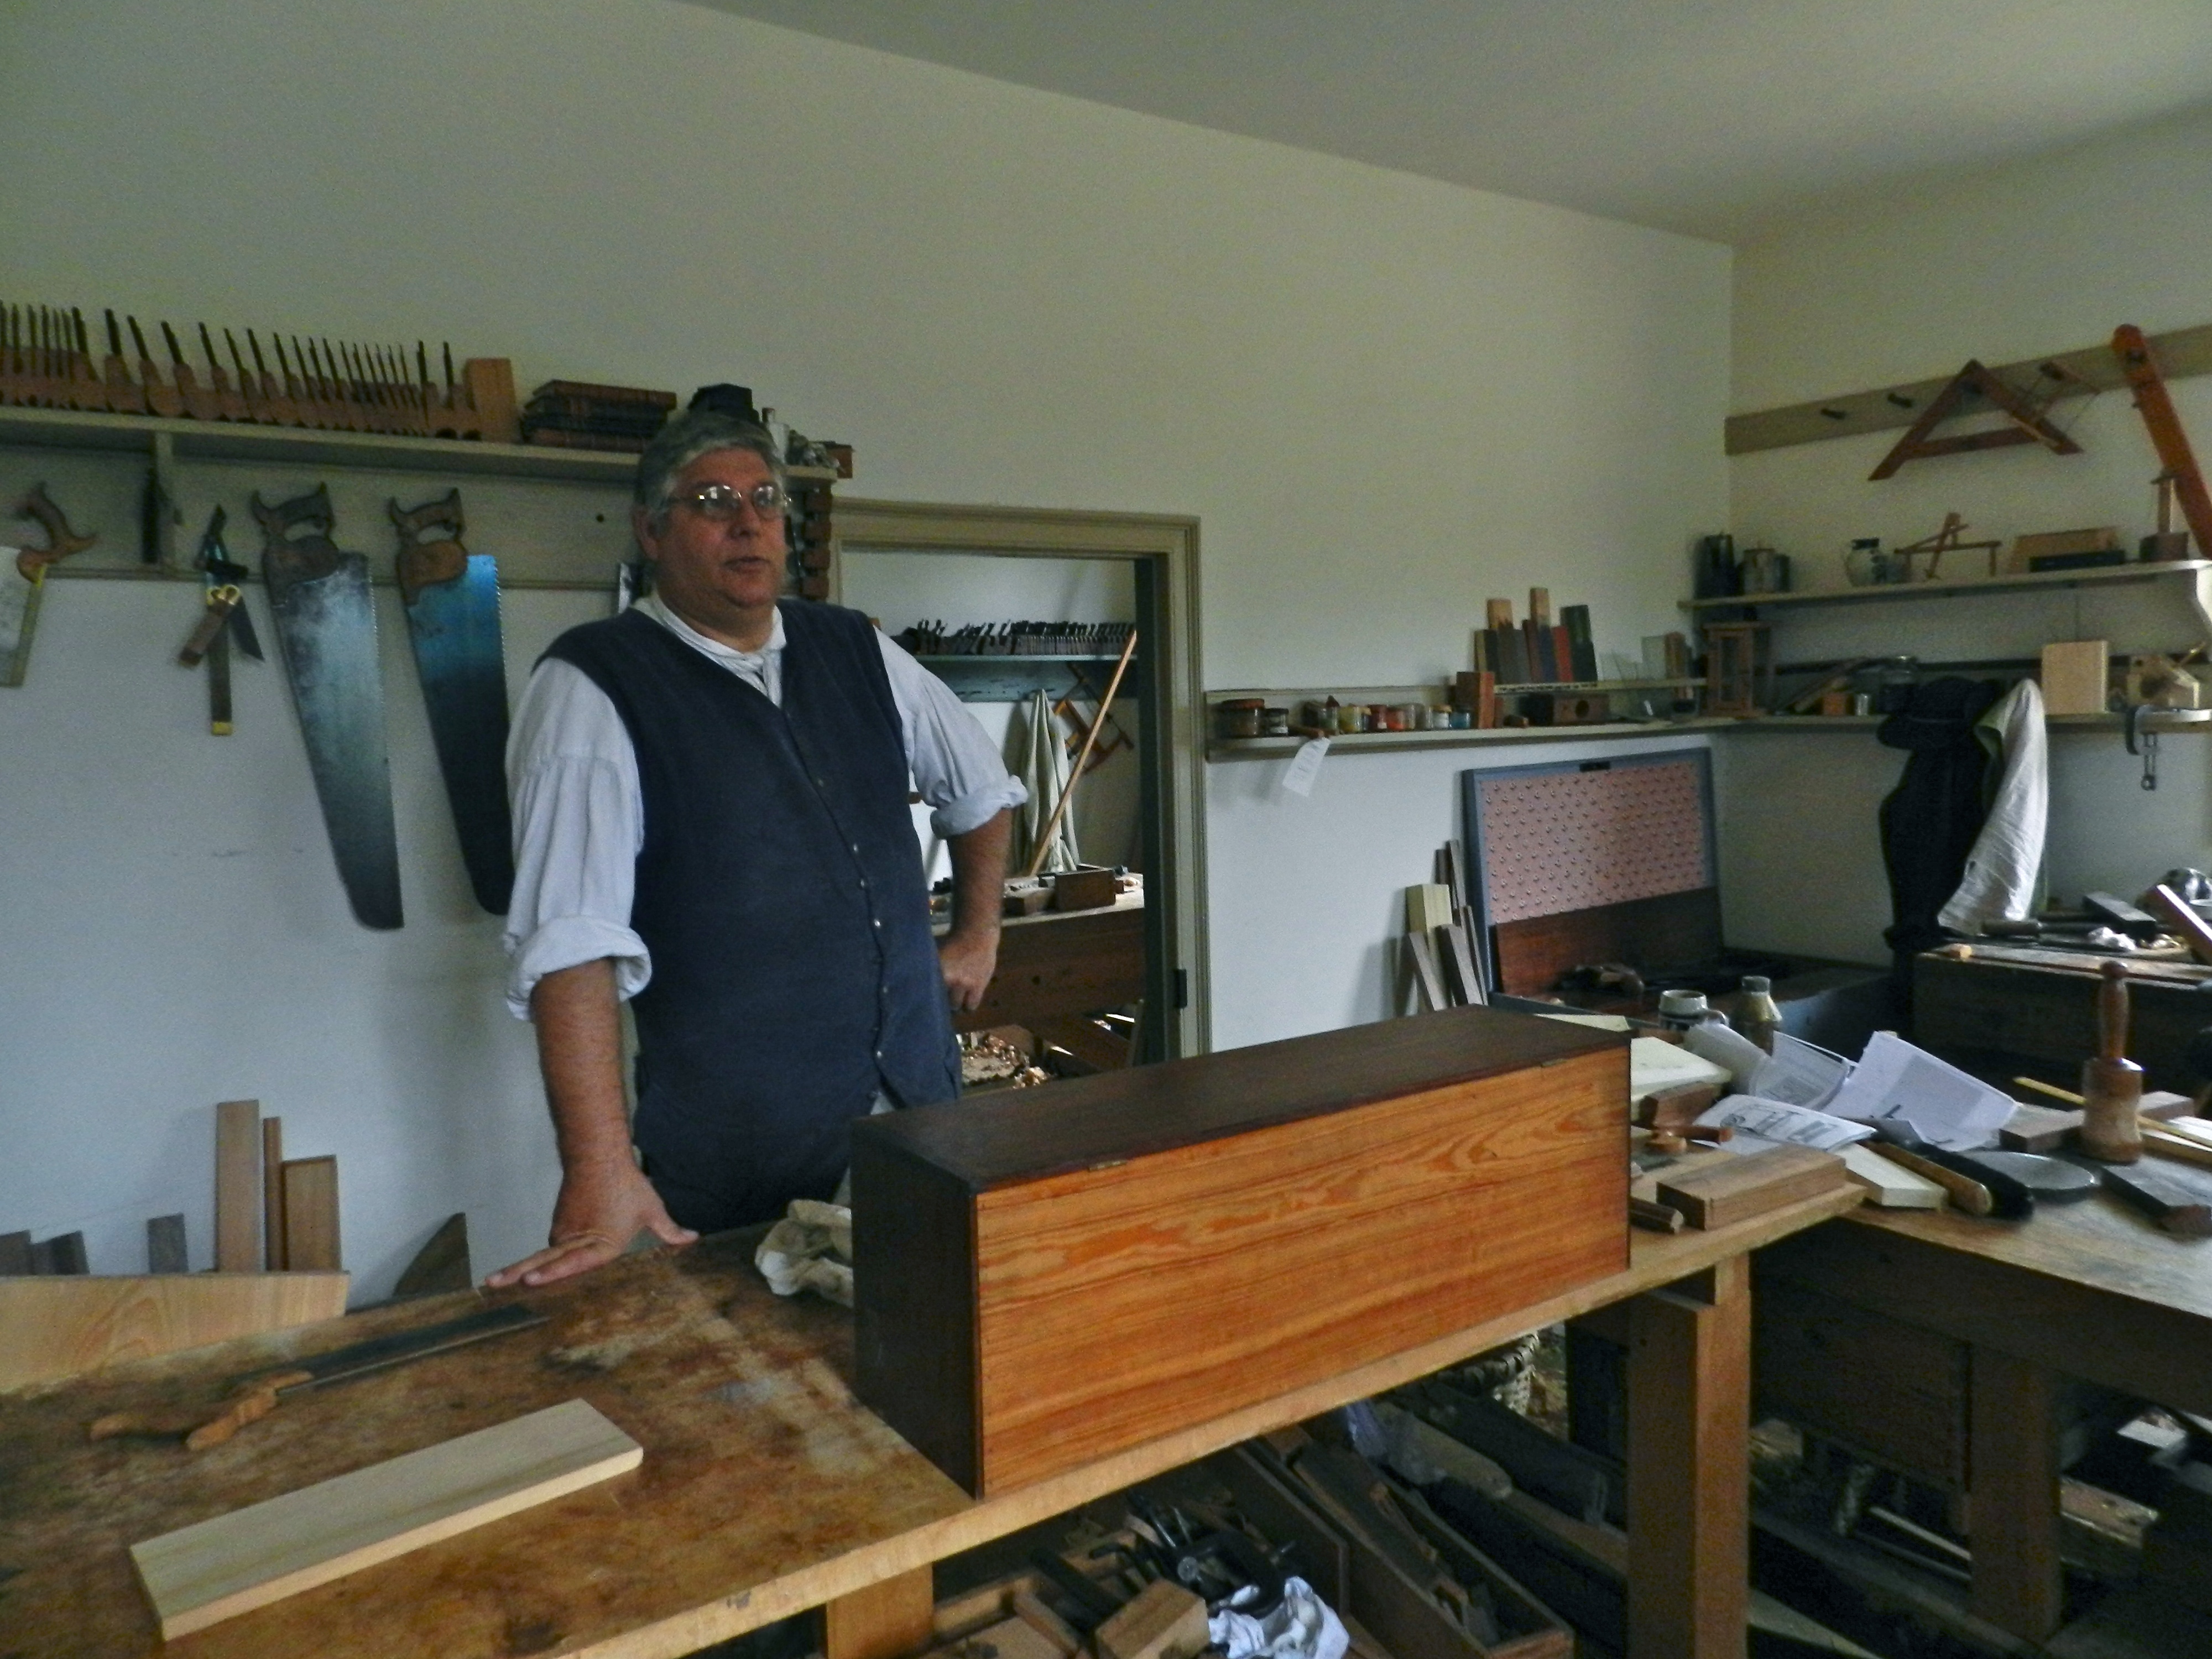
My next stop was to visit Master Carpenter Garland Wood in the Joiner’s shop. Every time I visit I want to pull up a bench and take up residence in the shop as another member of the crew. The benches, tools and projects all feel like home.
Garland Wood in the Joiner’s Shop
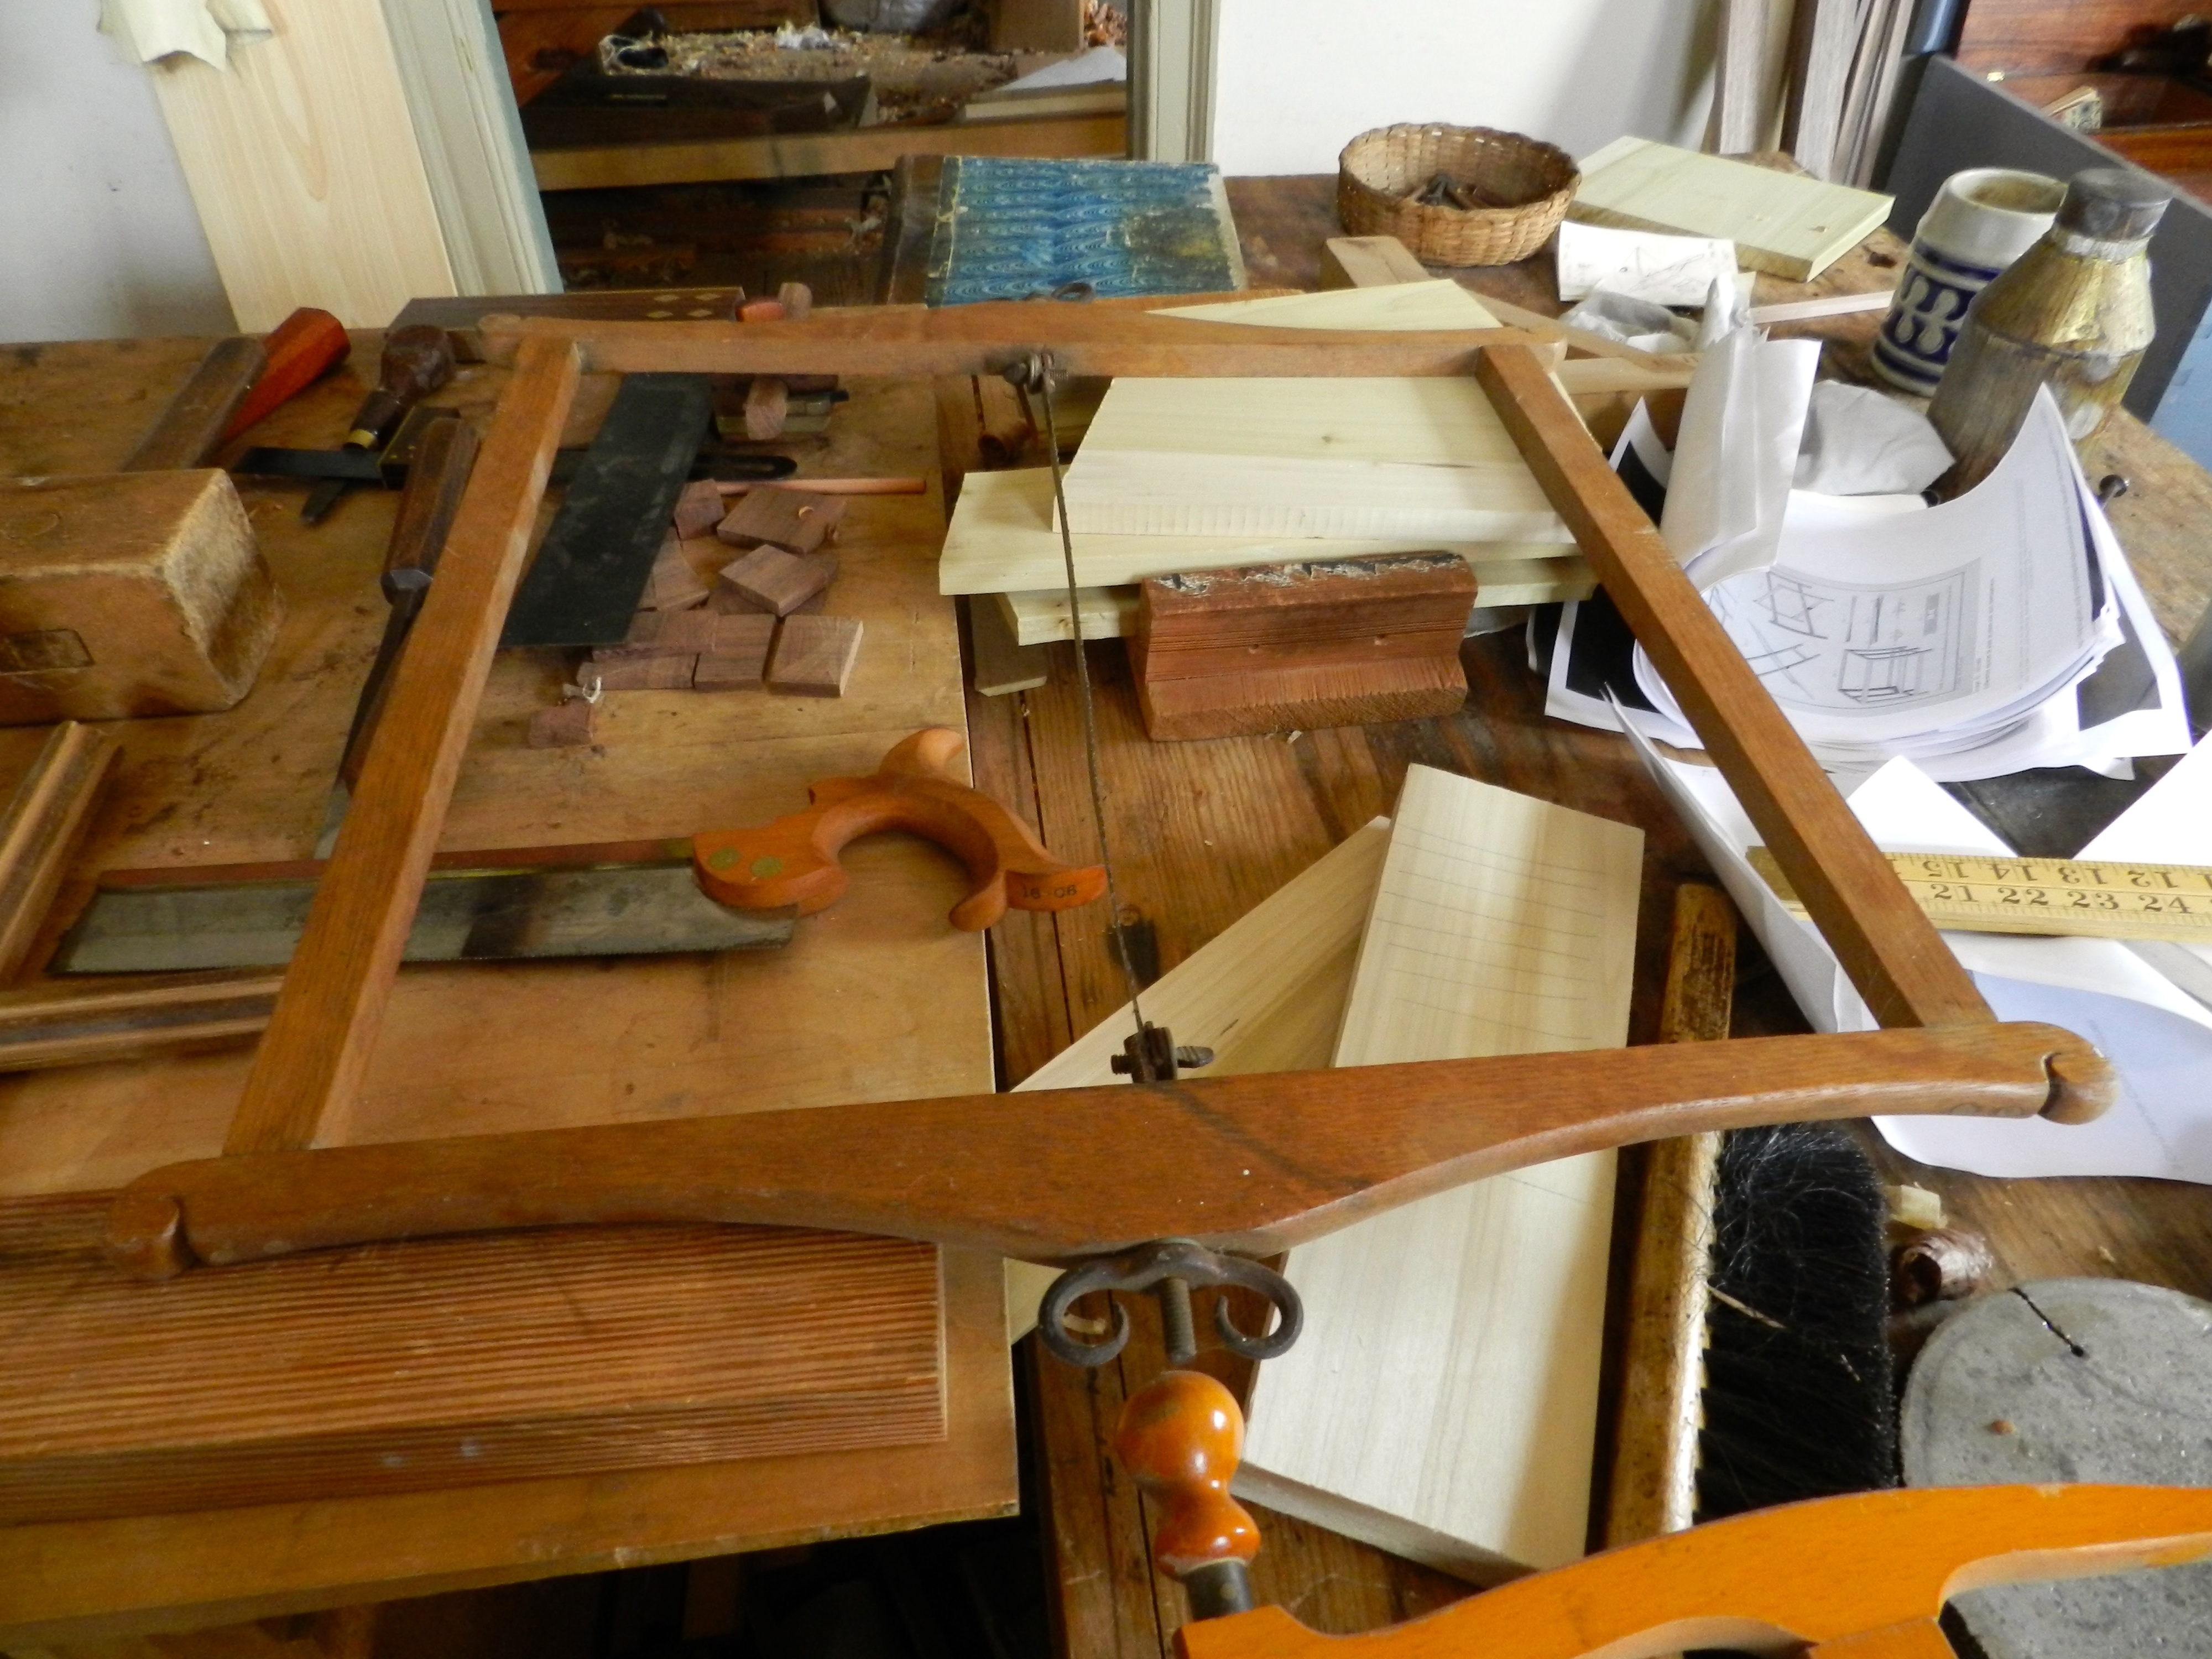
In the Joiner’s shop Garland showed me the frame saws he had on hand in the shop. Shown below is a nice felloe saw with its narrow blade used to cut curves. In the wheelwright’s shop you can see some larger versions of this style of saw. The example below has nice delicate lines, a simple volute detail, and nicely wrought wing nuts on both ends of the saw. In the foreground of the photo below you can see a tiny bit of a simple bow saw which we’ll talk about in a future post.
Small frame saw, a ‘felloe saw’ used for cutting curves and the like, in the Joiner’s Shop
There are very few places you can drop by and pick the brains of talented folks who share the same level of enthusiasm for traditional woodworking and sharing the craft with others — Colonial Williamsburg is one of those places. I’m thankful to Ed and Garland for their time and advice. I look forward to putting some of it to use in building my own frame saw.
Take care,
-Bill
P.S. I’m of the mindset that we still have more to learn about these saws and look forward to experimenting a bit with my own. I ordered the first production frame saw kit blade from Bad Axe Toolworks based on a saw from Tom Fidgen’s Unplugged Woodshop and will be posting about that in the future.
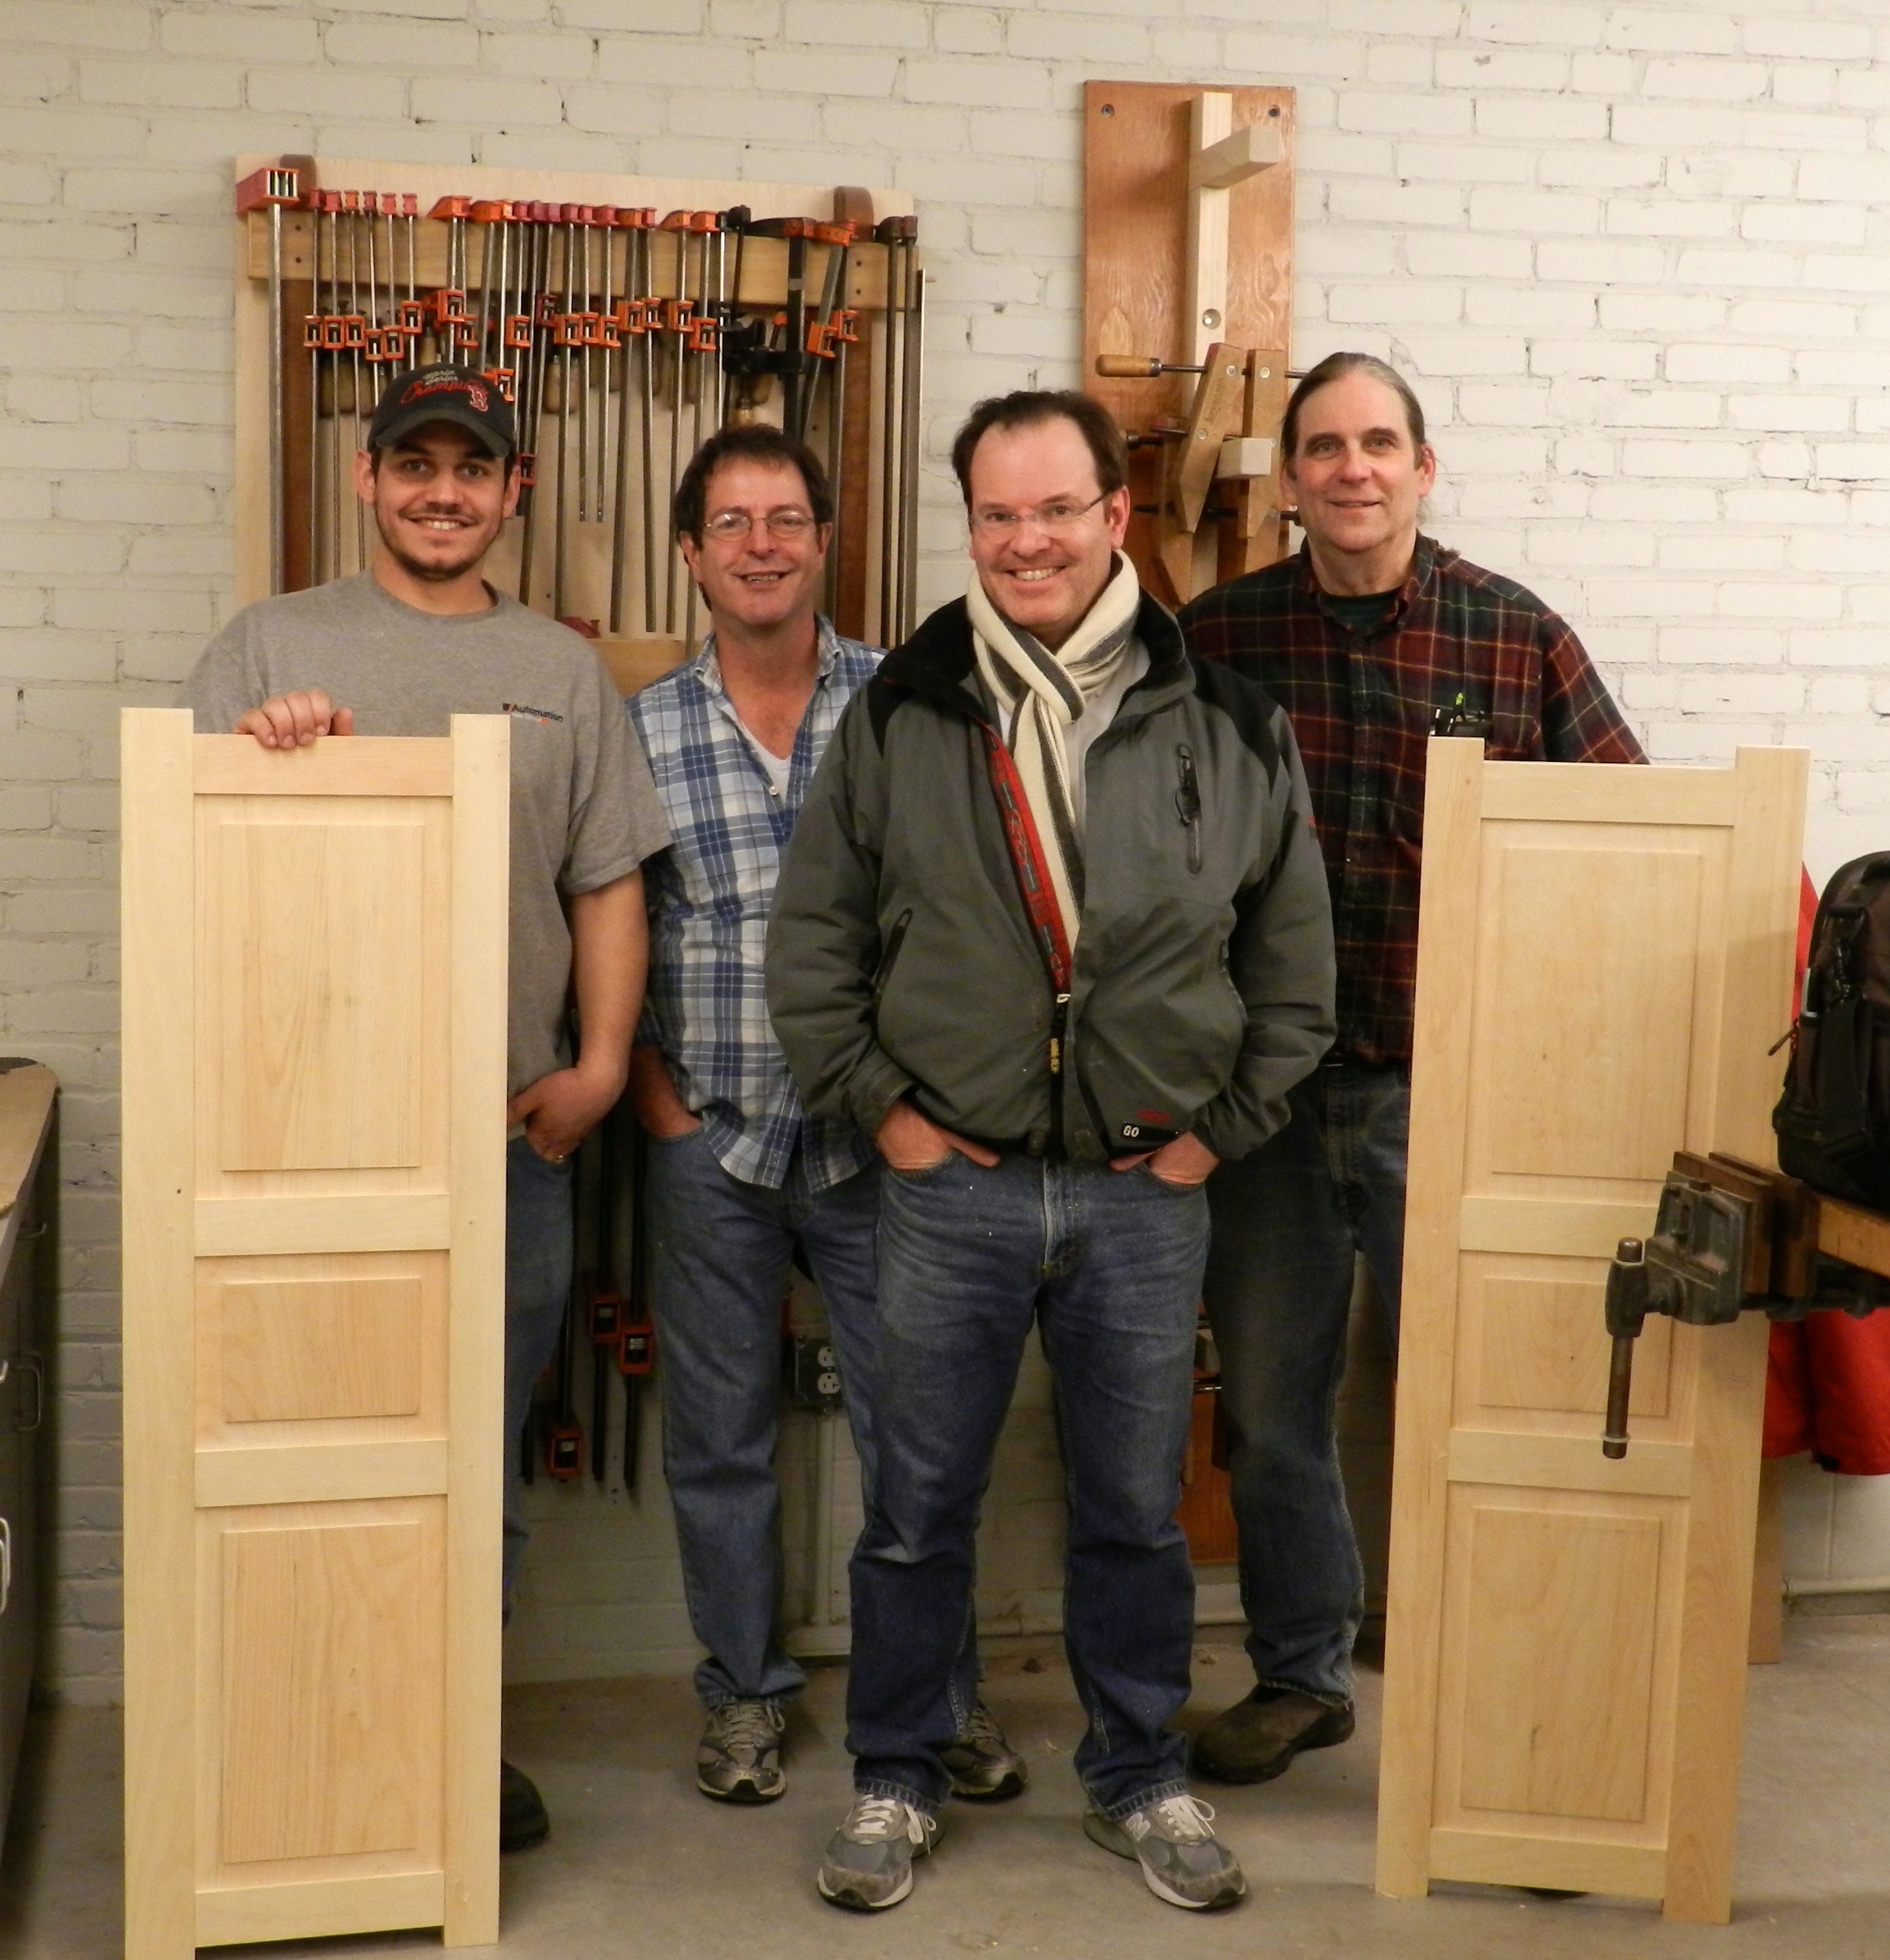
You don’t often see a good working pair of shutters on a newly constructed home. Most times you see a pre-fab set of vinyl shutters screwed on to the side of a house or no shutters at all. The vinyl shutters usually have no hardware and often are not properly sized for the windows they are adjacent to. I want to reverse that trend and make sure at least a few folks know how to make a traditional wooden shutter.
Shop plans for my Shutters Workshop
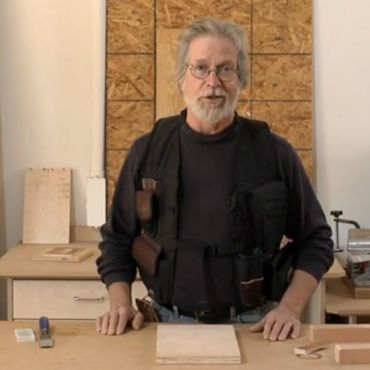
I designed and taught an Introduction to Shutters Workshop at the North Bennet Street School this past weekend which was a lot of fun. Beyond my usual hand drawn plans I also modeled this project in SketchUp. (You can read more about that effort here).
The class hard at work
In the class students learned how to make a shutter using traditional hand tools and via power equipment. They were able to weigh the pros and cons of each against their skill sets and use what was most appropriate to their project. (Some folks will be repairing a few shutters, others will be making enough for an entire home)
Making octagonal pins
After building the frames, cutting all the mortises and tenons, and fielding the panels, everyone learned about traditional draw-boring. By making and using tapered octagonal pins and driving them through the offset hole drilled into the tenon, the joint is drawn together. This joint uses no glue, is quite strong and can be serviced in the future if a rotten piece needs to be replaced.
John finishing up his shutter
We also discussed many design options, regional variations and examined several examples we had on hand. It was a busy two days, but I’m hopeful that we’ll see some proper new shutters start popping up in the area.
Group picture with some finished shutters
Take care,
-Bill
P.S. I have several more workshops coming up at NBSS over the next 3 months if you are interested in joining me — there are still a few seats available. Up next is Traditional Molding with wooden Molding Planes in April, Saw Horses and Saw Hurdles in May, and Making a Window Sash in June. You can learn more about each of them here.
Building customized storage solutions is one of the joys of being a woodworker. I never seem to have enough storage at home or in the shop. On days when I don’t have a lot of time in the shop, when I have some nice scraps I want to use or when I want a quick warm-up, I often find myself making boxes and other storage solutions for items I want to take care of. Below are three posts I recently made for Popular Woodworking on their ‘Woodworking Daily’ blog to explore some of my thoughts on this topic. I hope that they will inspire you to get out into the shop and make something today.
Aging 100 Years in a Day
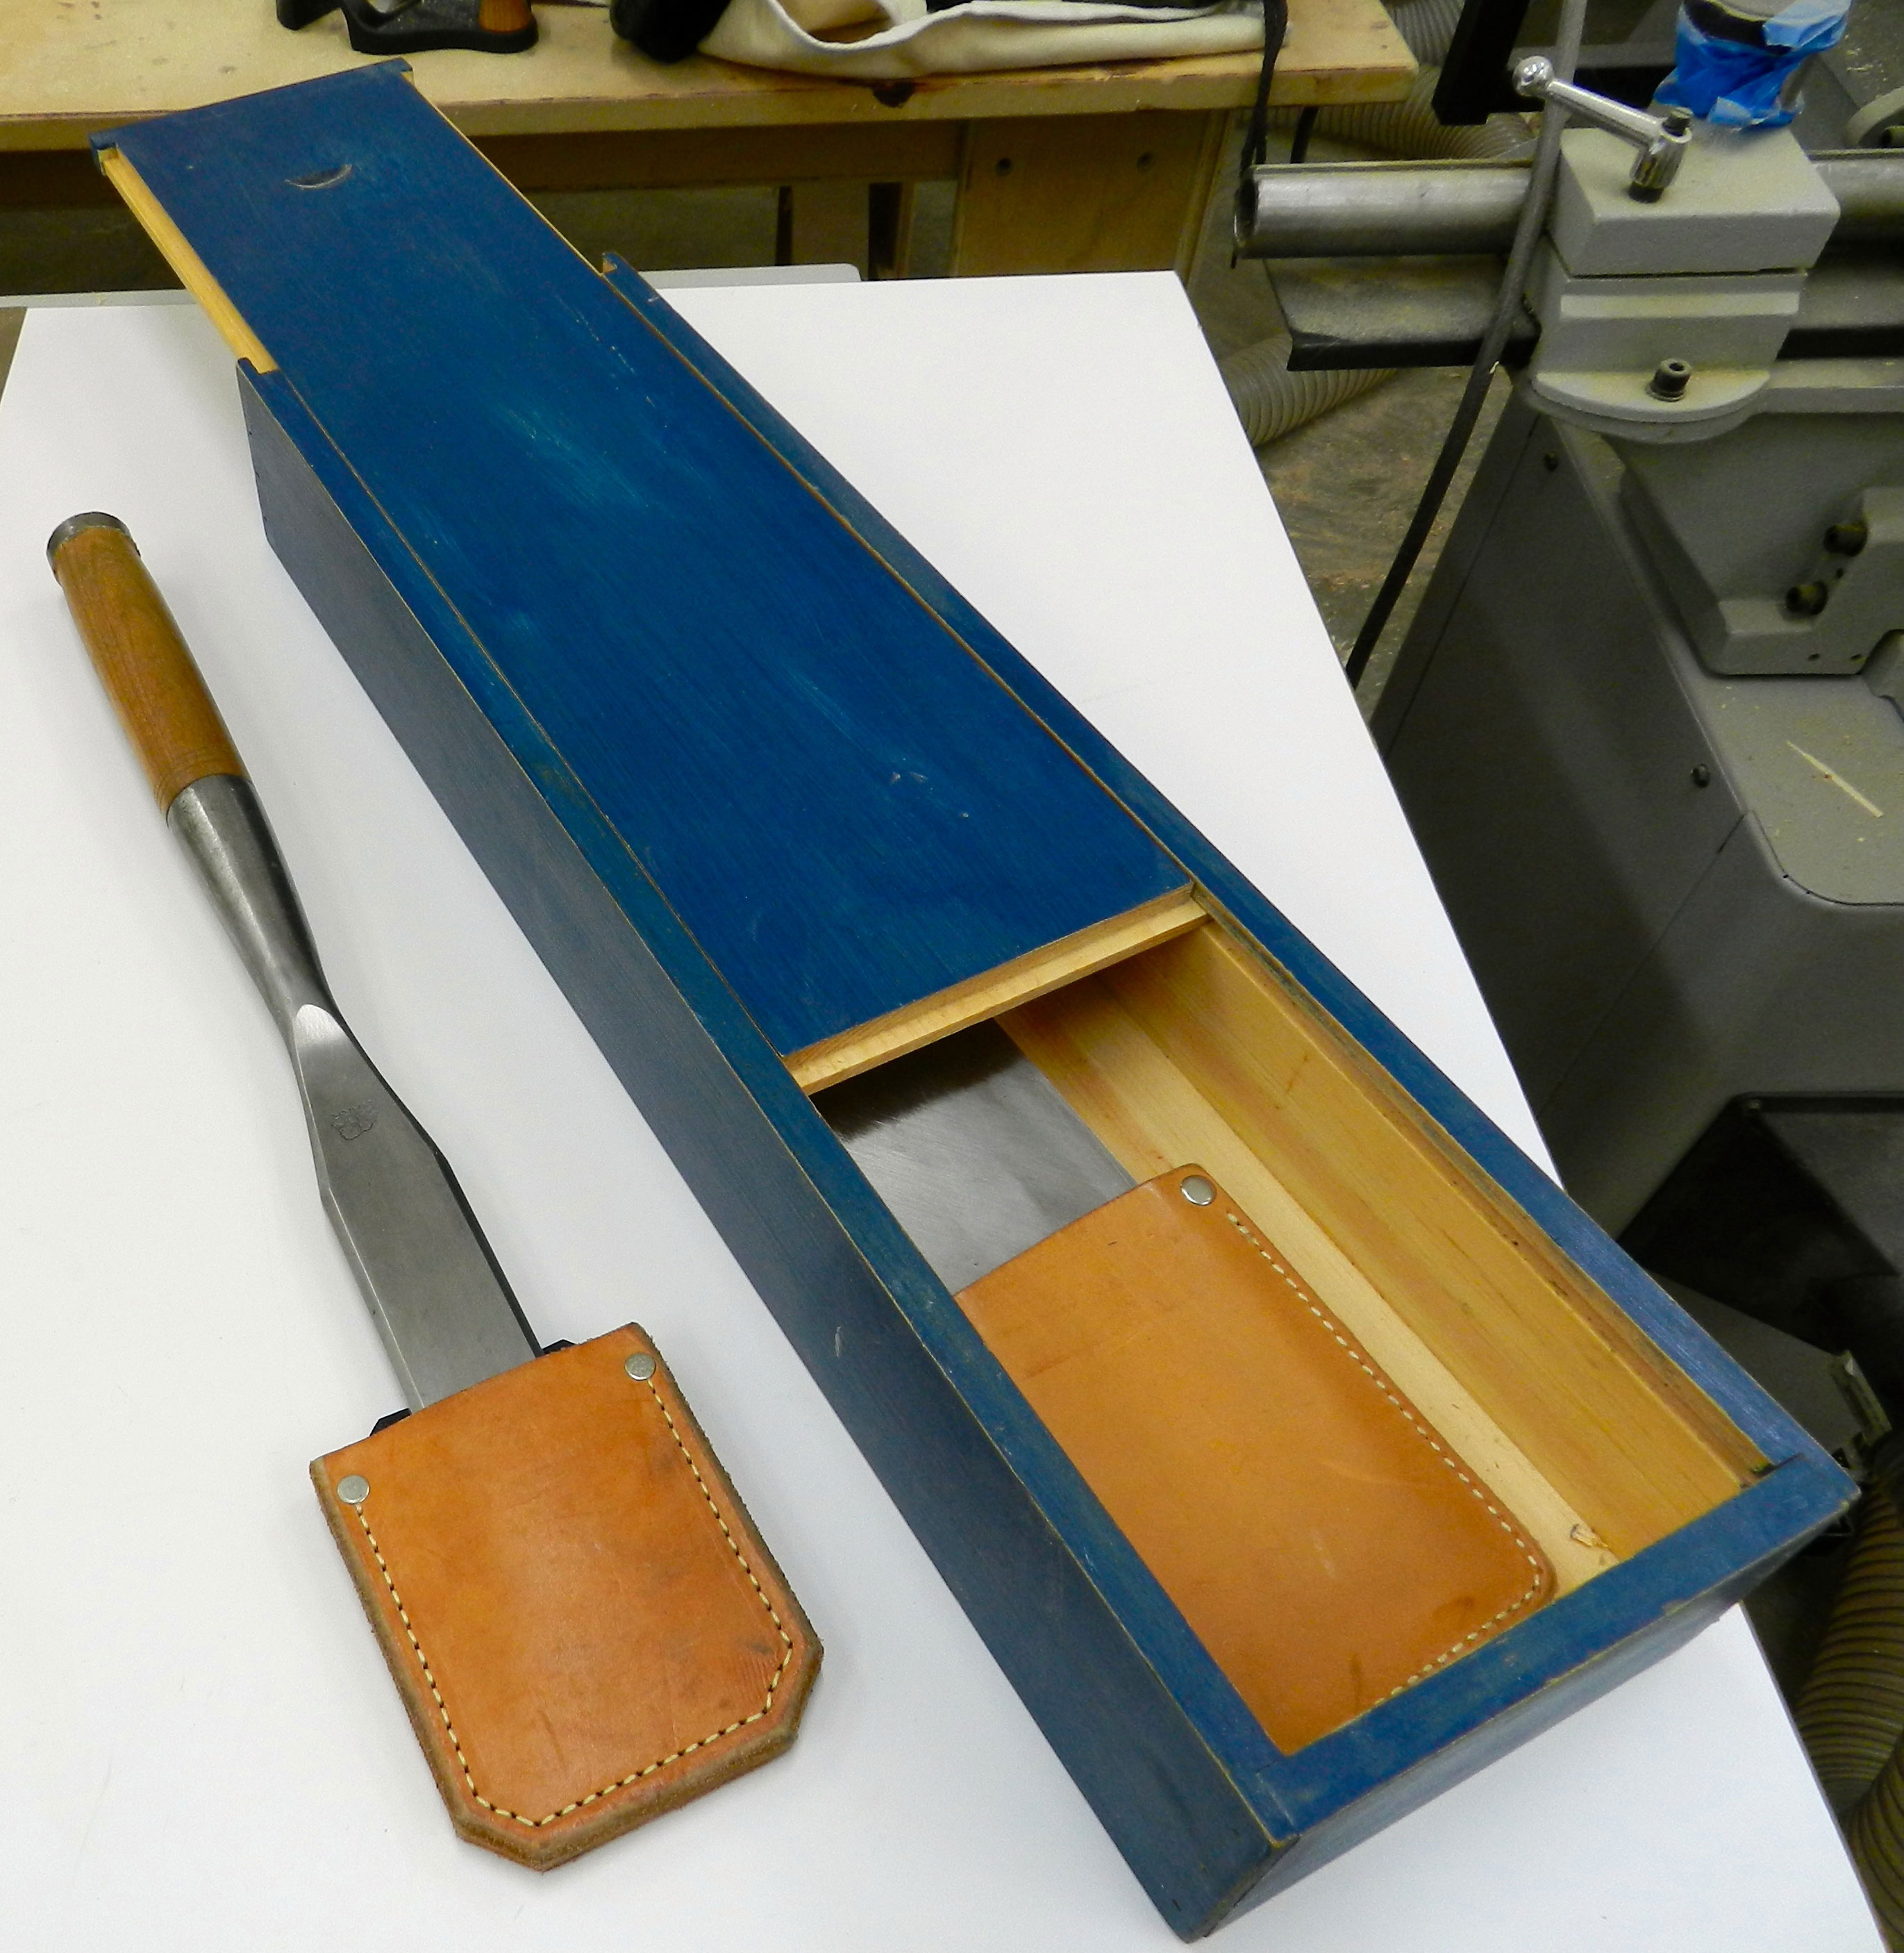
Sliding top timber framing chisel box
You can check out this post on making a sliding top timber framing chisel box from eastern white pine, simple rabbet joints and cut nails. It features a weathered finish made from milk paint and wax that will only look better with age and use. You can read the post here.
Working in the Round
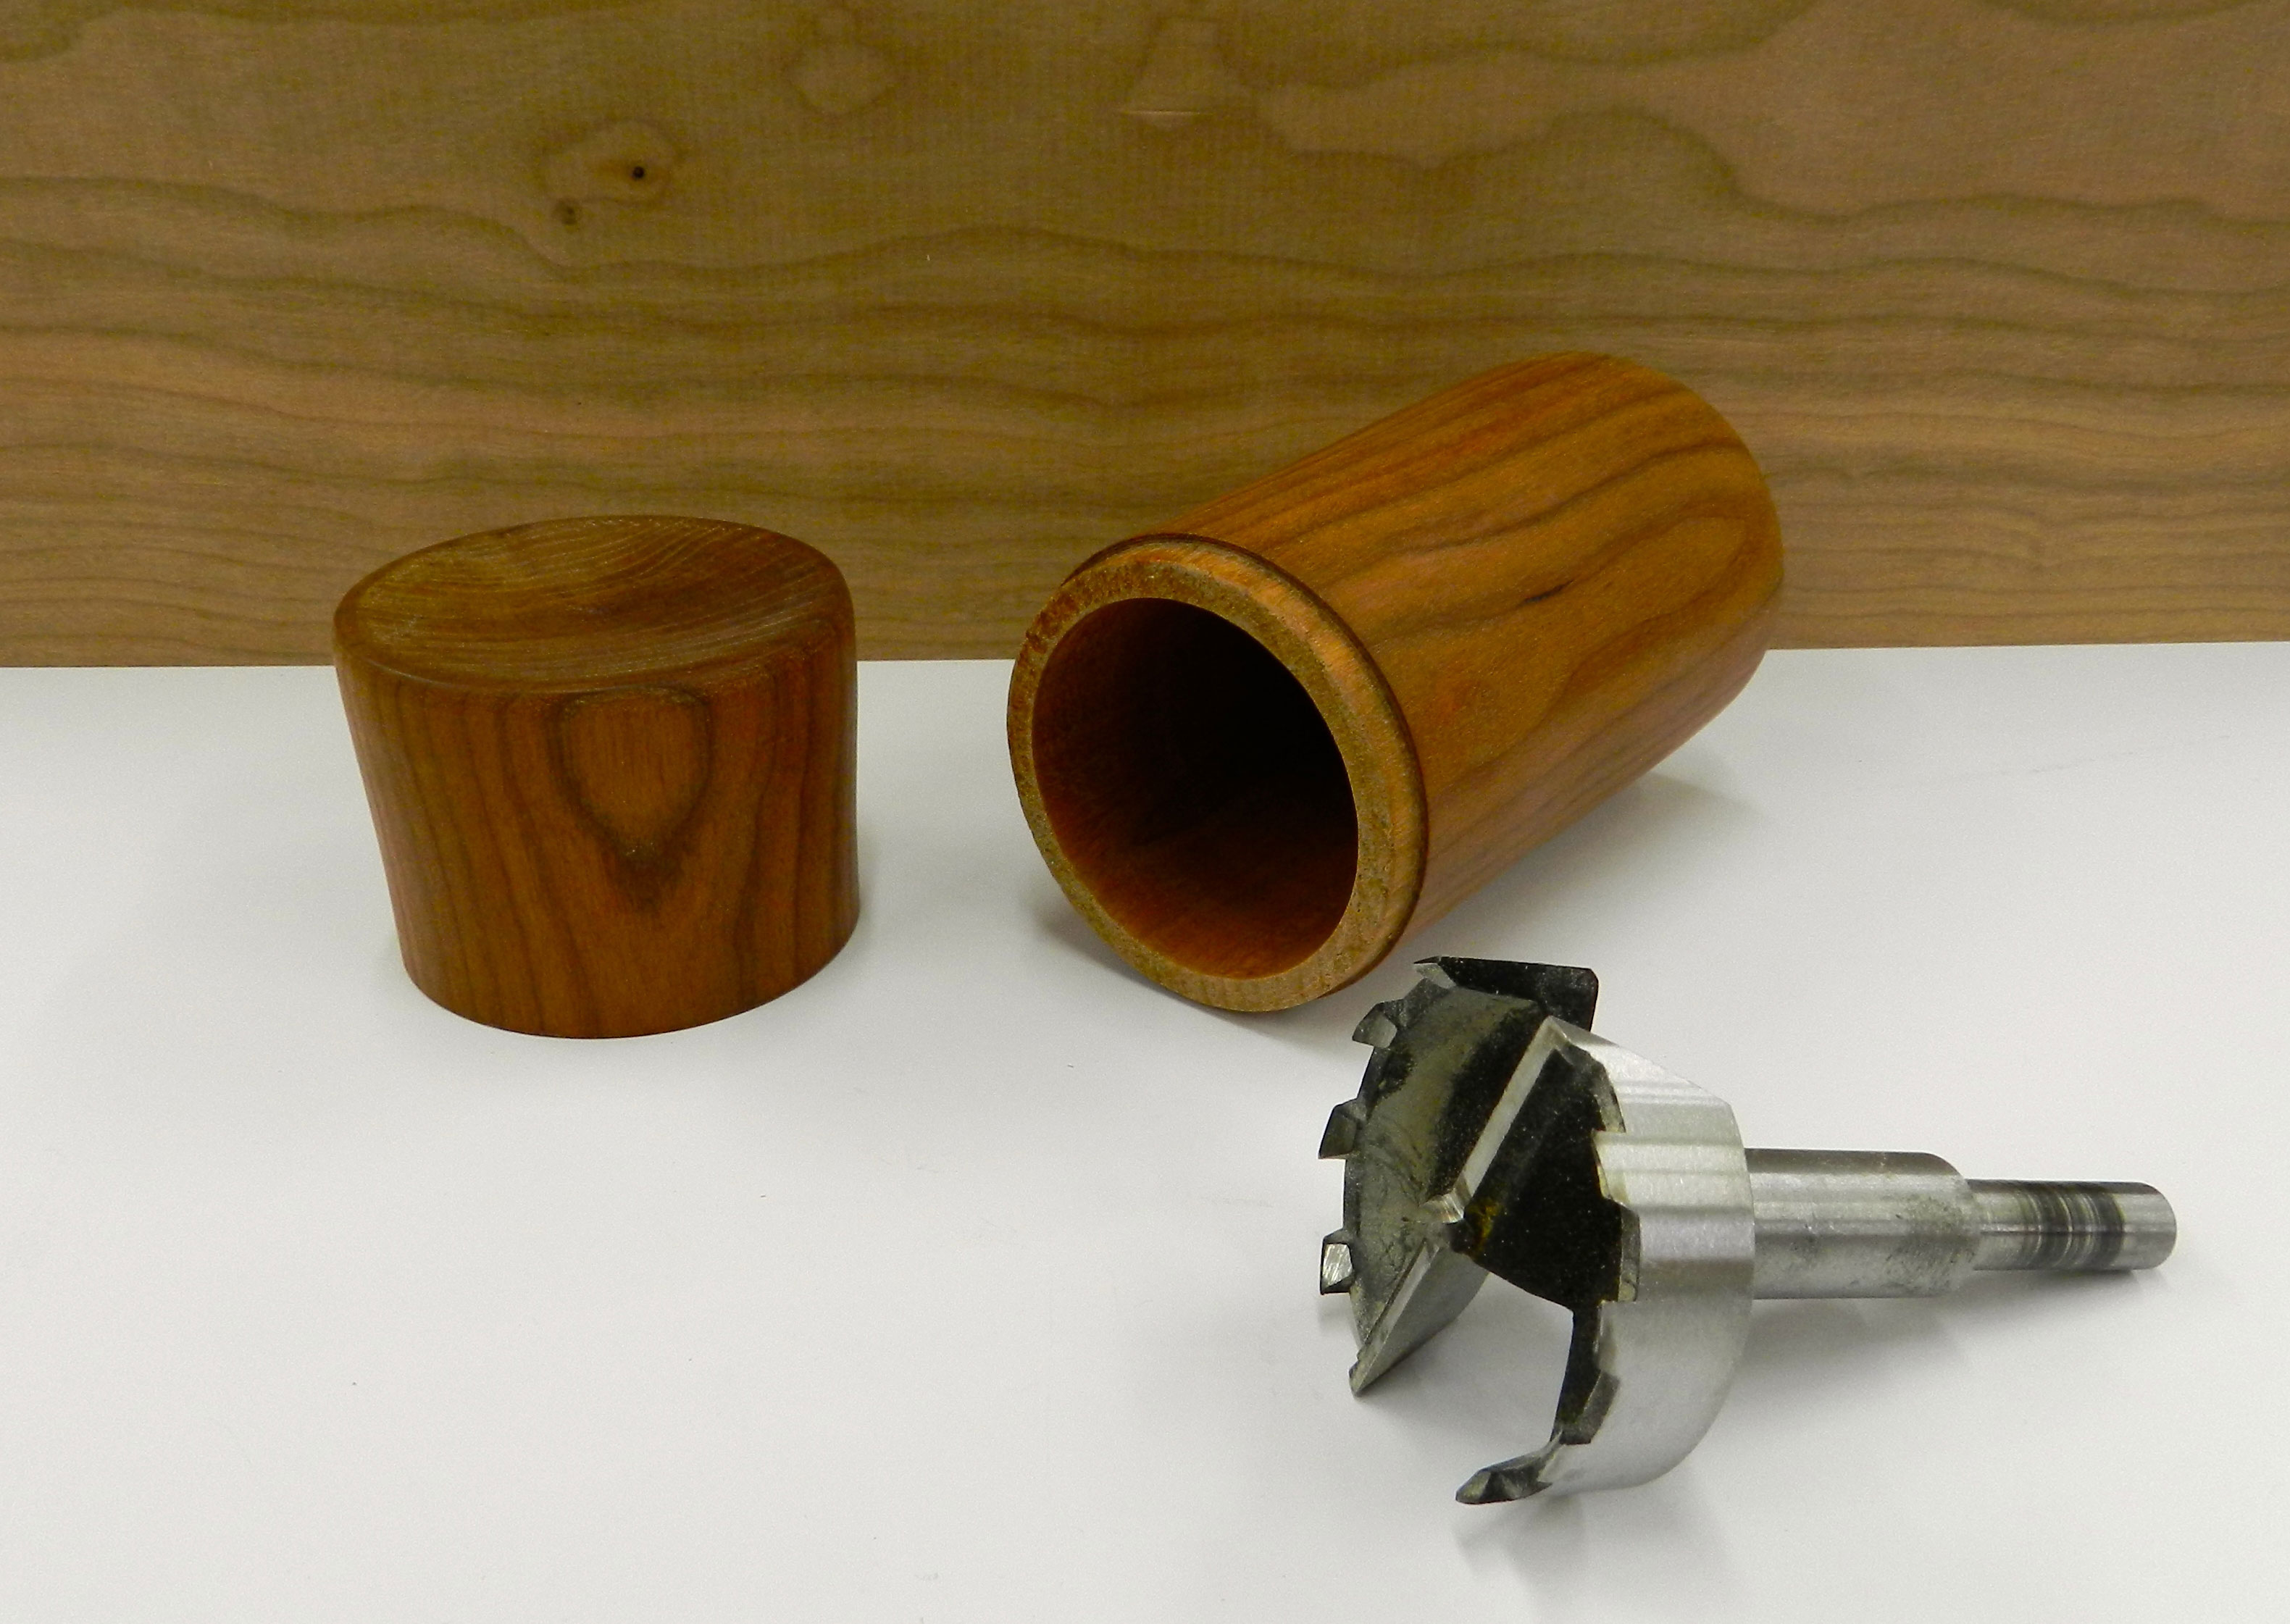
Turned Box
This turned cherry box is a great way to start turning round boxes. The hollowing is done via a large Forstner bit. You can learn more about how to do this here.
A Great Box to Have Dinner With
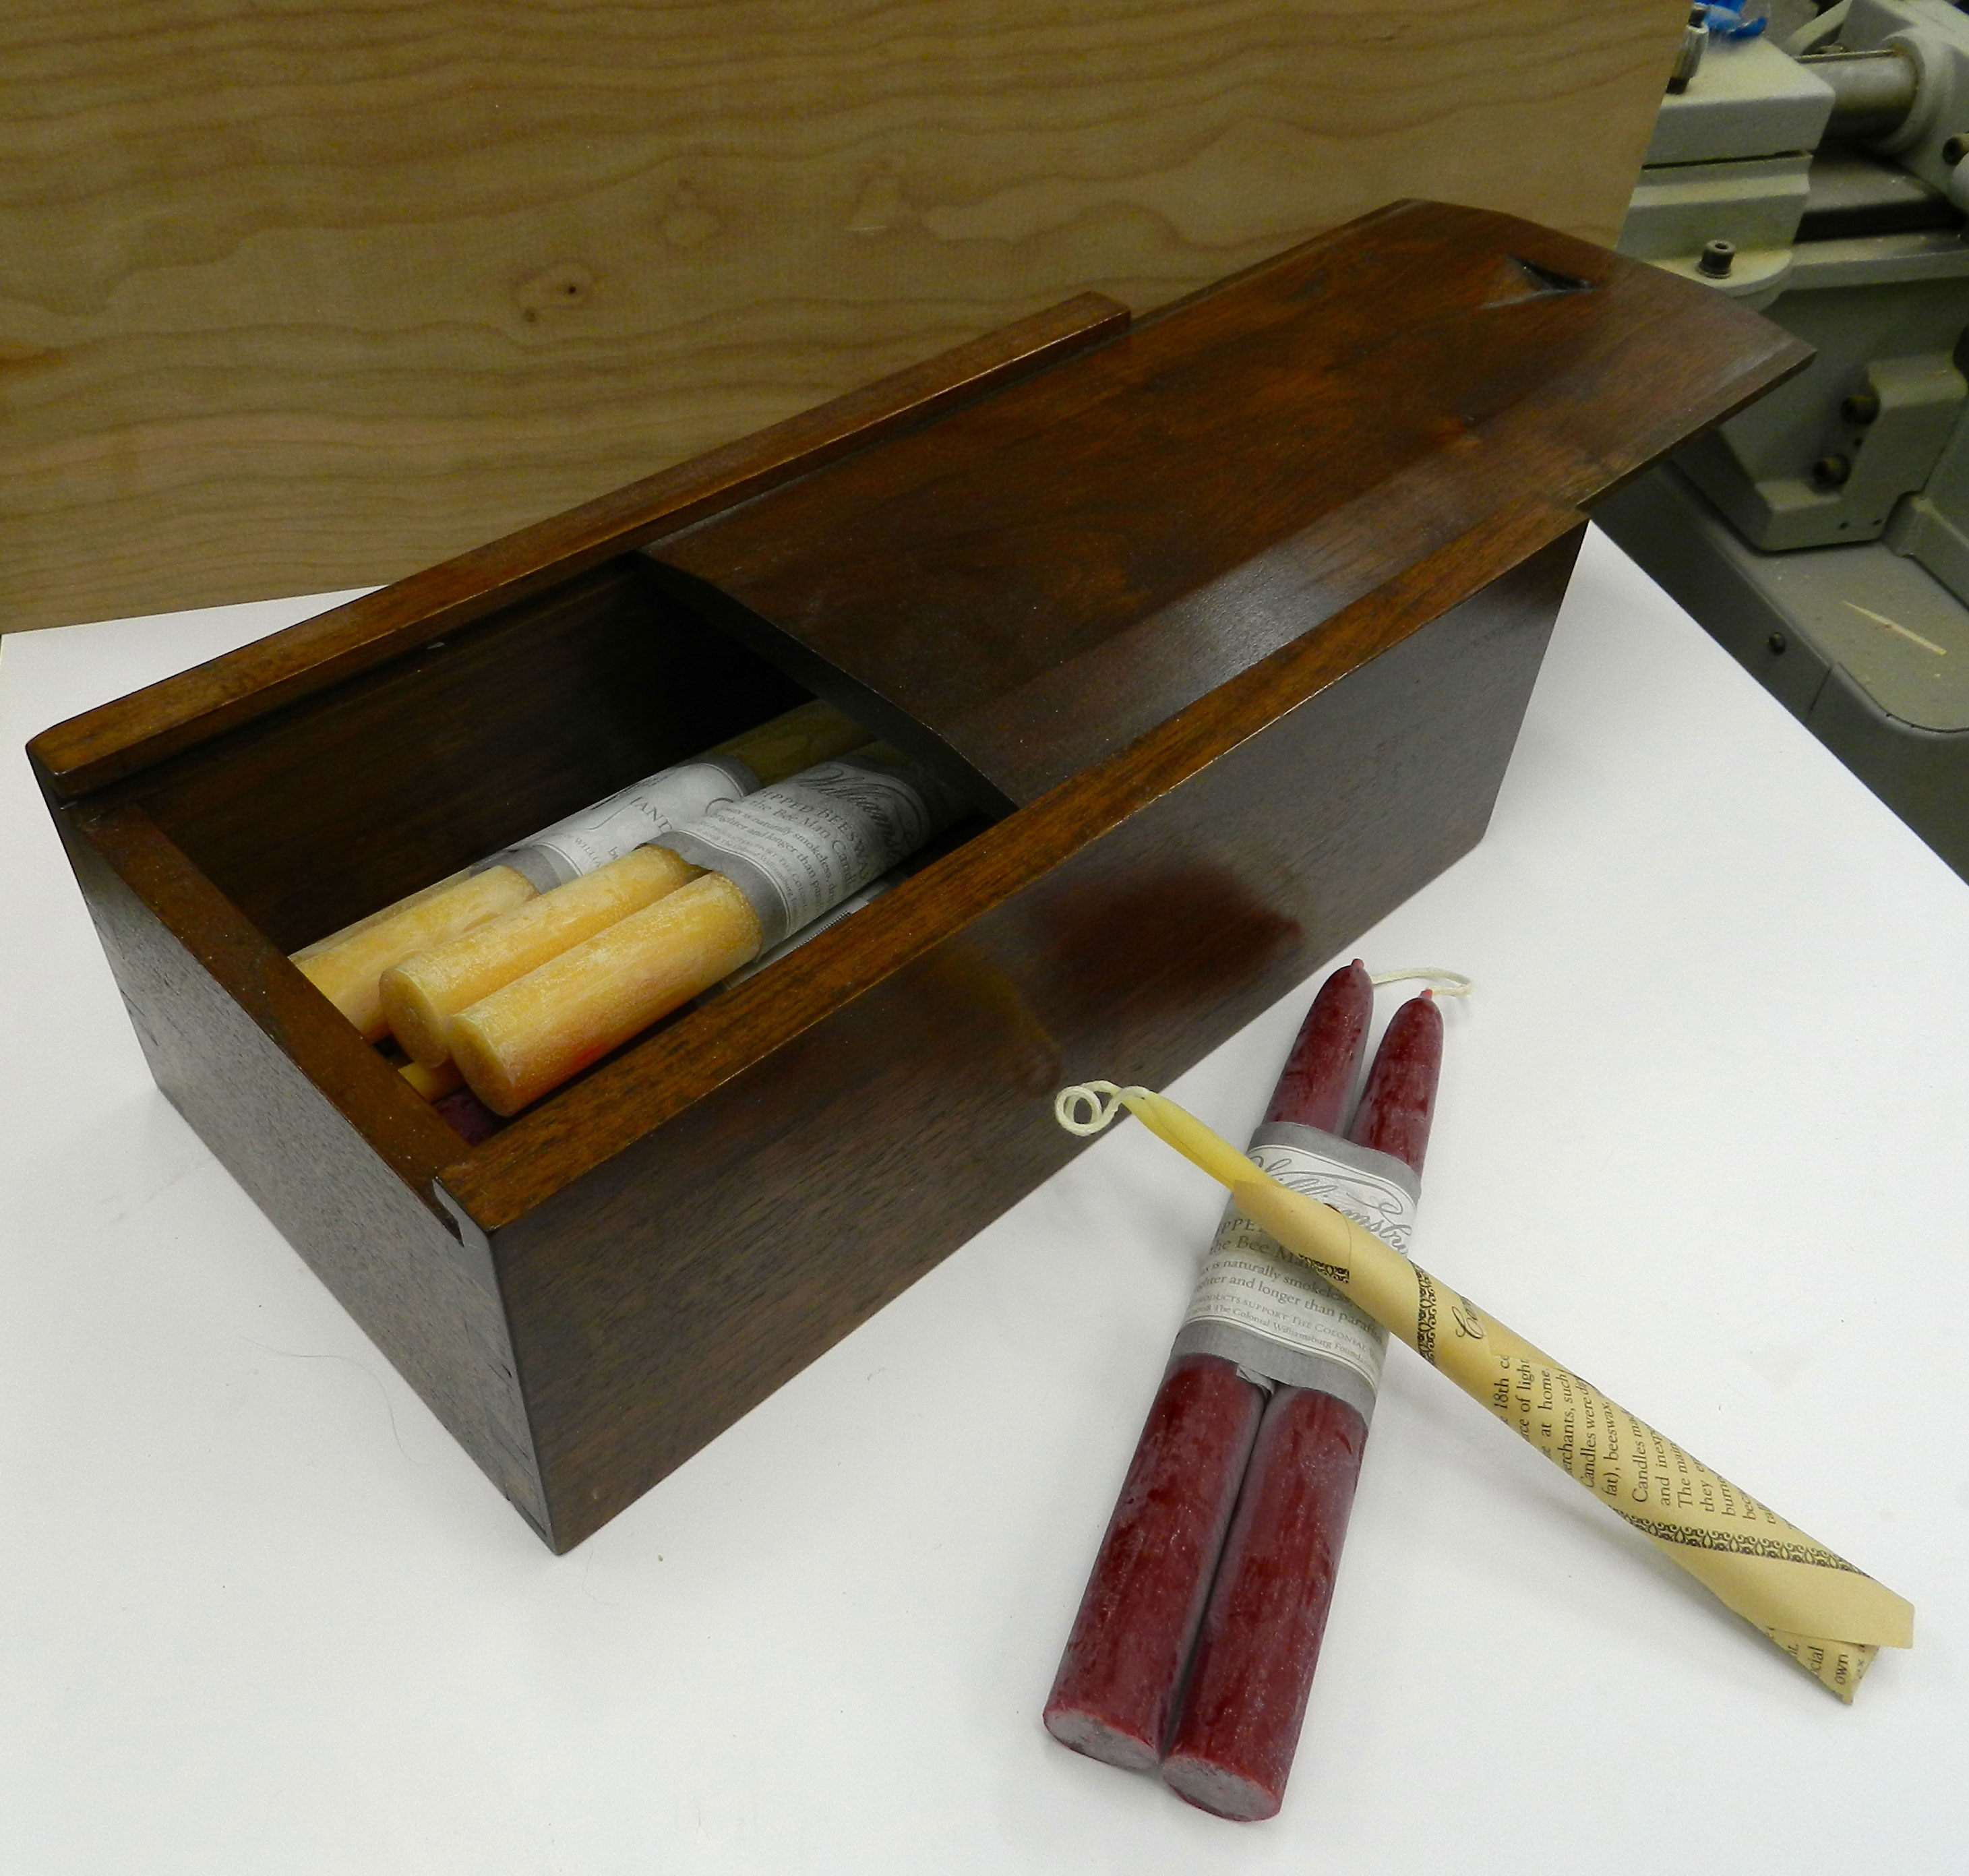
Dovetailed Candle Box
This walnut candle box was one of the first projects I built as a student at NBSS and we still use it today. I’ve seen similar boxes for sale at Colonial Williamsburg (Prentis Store) and various Shaker Villages, so even in our modern times there is apparently still some demand for candle boxes. Learn about some of the details you can apply to your own shop built version. You can read more about it here.
“An ounce of prevention is worth a pound of cure” — Benjamin Franklin
When it comes to design and drafting old Ben’s quote rings as today as it did in the 1700s. A good design and a clear set of plans can spare you from a lot of unnecessary frustration or wasted material. When I went to High School in the 1990’s I had the opportunity to take classes in traditional drafting on paper and using AutoCAD on old DOS based PCs that were old even at the time. The computer was viewed as the future, but the extra time for smaller projects and prices/availability of good software was a hindrance. For the sake of expediency and my wallet I generally broke out the drawing board when I needed to make a set of plans.
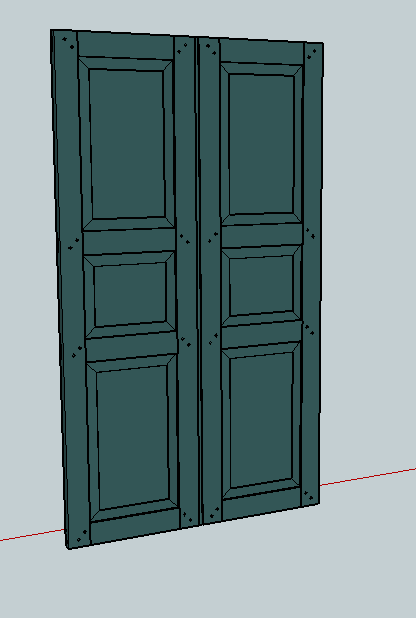
Workshop Shutters In Color + Perspective
Years later when I went to the North Bennet Street School they also espoused the use of traditional drafting with leads and full size drawings. No messing with expensive computers and ever-changing software. This works great for chairs and pieces with lots of complex curves. But for timber frames and buildings, often with many repeating elements a small change in the design could literally send you back to the drawing board for hours.
Workshop Shutters
I recently got a copy of SketchUp and around the holidays found a real good deal on Robert Lang’s SketchUp for Woodworkers Shop Class on Demand Videos and watched them around Christmas. SketchUp took a bit of getting used to compared to my old AutoCAD days, but after watching Bob’s videos, and with my background as a software engineer and traditional draftsman I got up to speed quickly. (You may have noticed a proliferation in some computer generated renderings in recent posts) Bob Lang’s videos start with simple projects and tools and increase in complexity. I recommend getting both videos as the second video (‘Advanced Techniques’) was the most interesting to me wherein he shows the user how to create dovetails, work in the round, layout the model for printing dimensioned renderings etc.
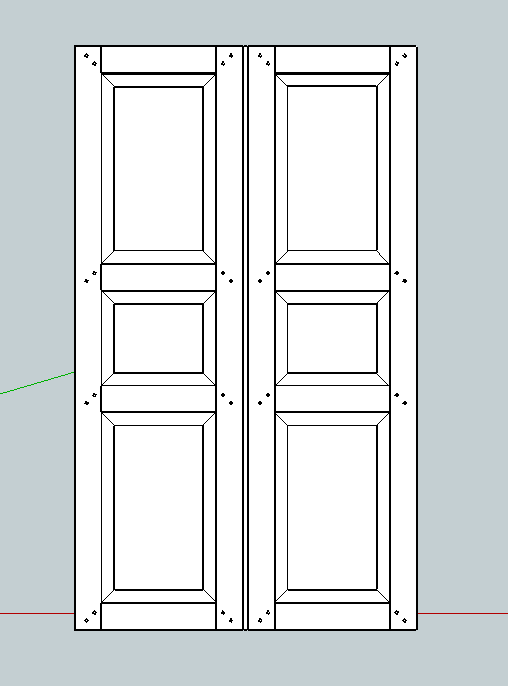
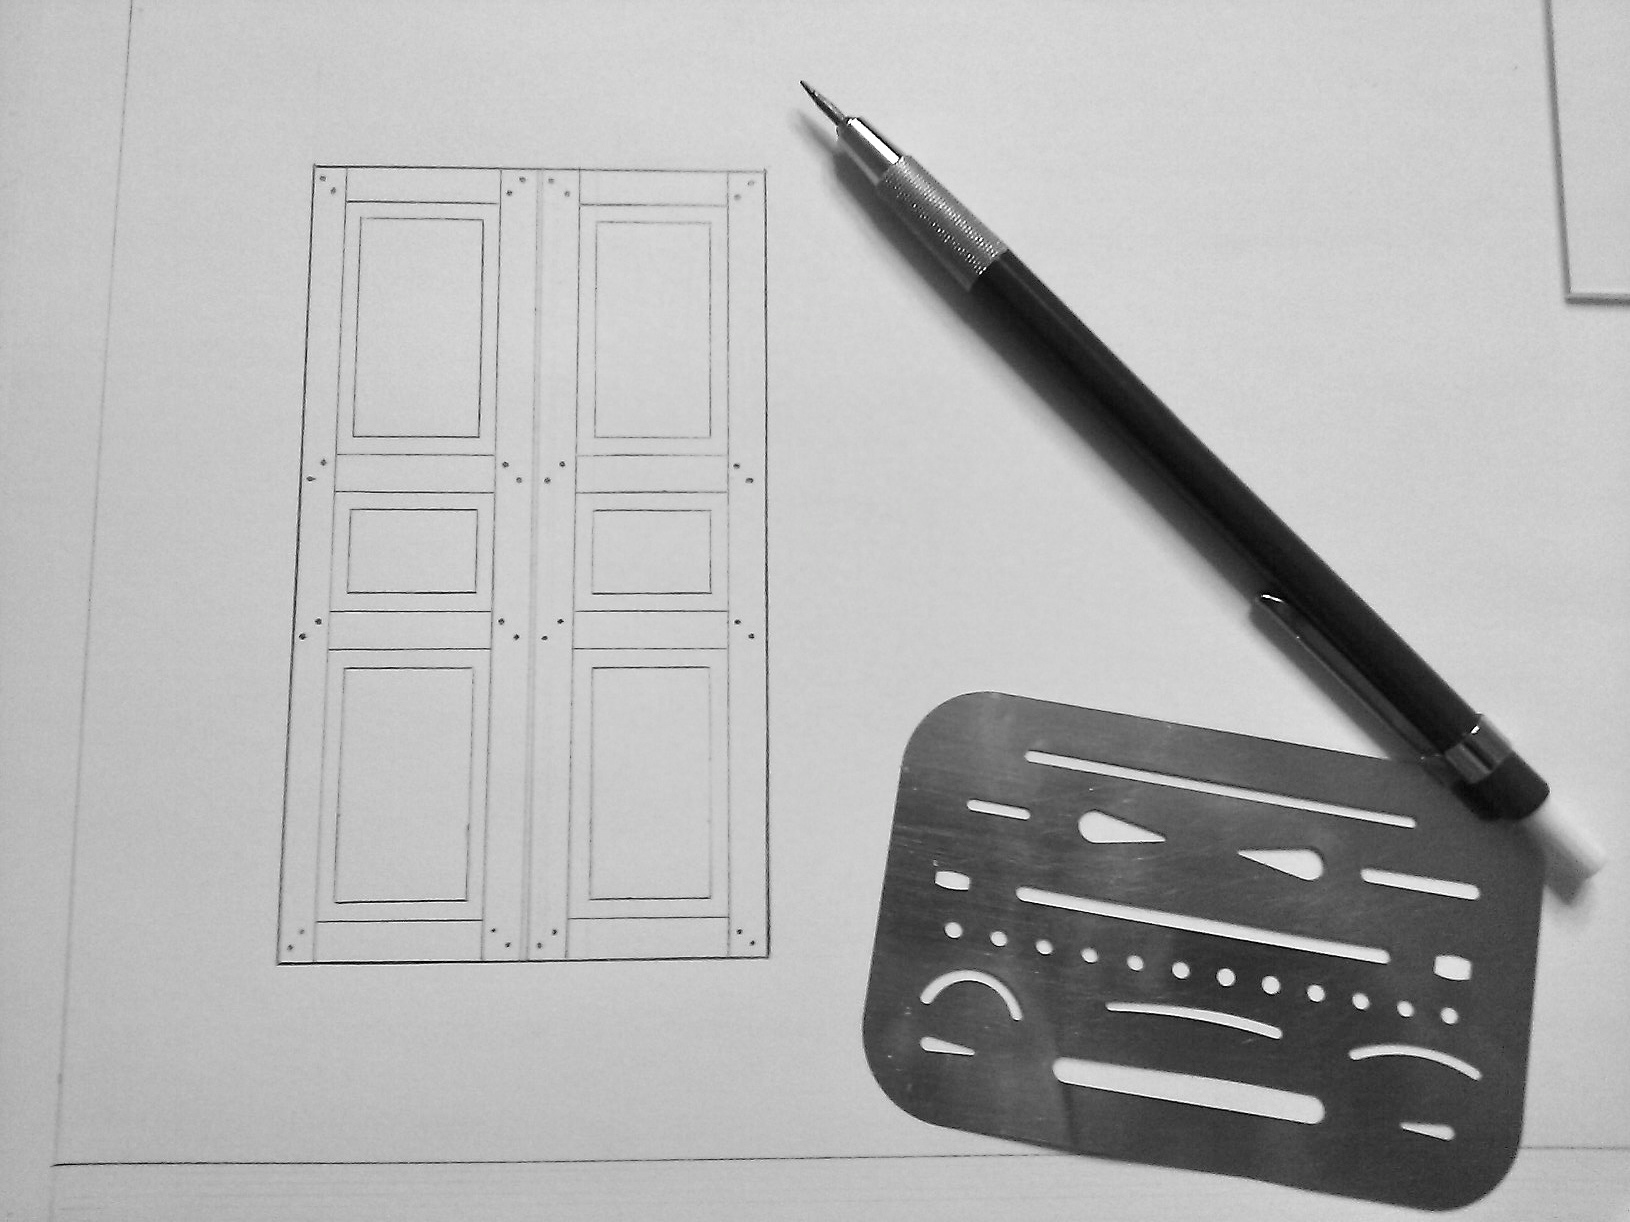
Hand Drawn Shutters
Save a Tree, Burn some Pixels
About a year ago I designed some traditional interior shutters for my workshop — I started out drafting them by hand. The plans sat on my TODO list for a few months and now with SketchUp in hand I decided to explore some other design possibilities with the raised panels.
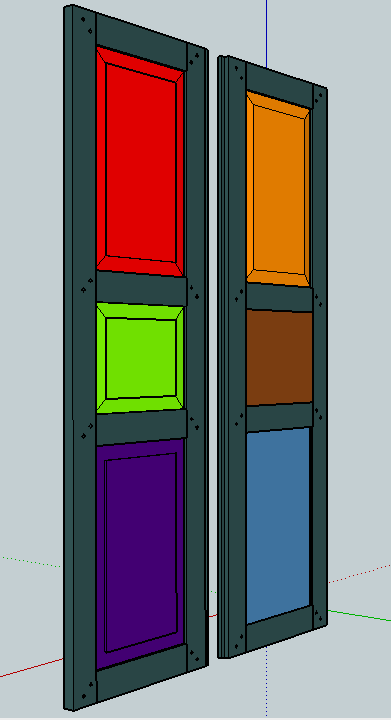
Various Panel Options
Design Options Explored (Colors added for easier reference here, I’m not planning to build any shutters for a circus):
Red — Raised, Sunk Fielded Panel
Orange — Raised and Fielded Panel
Green — Raised and Fielded Panel (rounded fielding)
Brown — Flat Panel
Purple — Raised Panel
Blue — Bead and Butt
Panel Details
In the end I settled on #1 above which was part of my original design, but this software saved me from having to experiment with a few test panels to see how things looked from different angles — a nice time and effort saver which offset the perceived longer time it took me to draft this project in SketchUp in the first place. Each project I get a little faster with SketchUp and I think part of why I feel like it takes longer is you generally need to complete your model in most if not all details as opposed to some shortcuts I can take when drafting by hand. (Though I think I am getting a bit OCD as I created all the mortises, draw bored pins etc in full 3D)
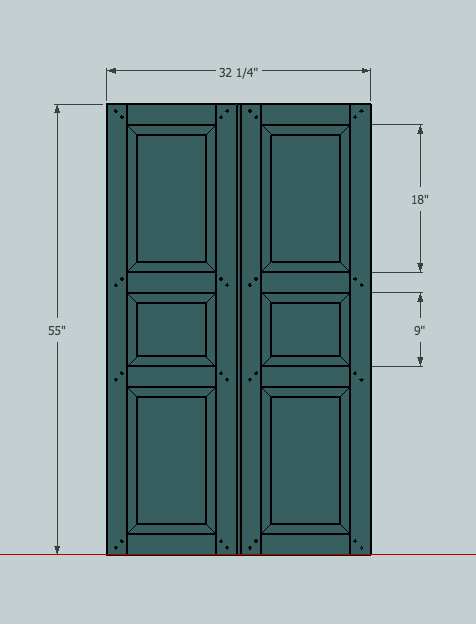
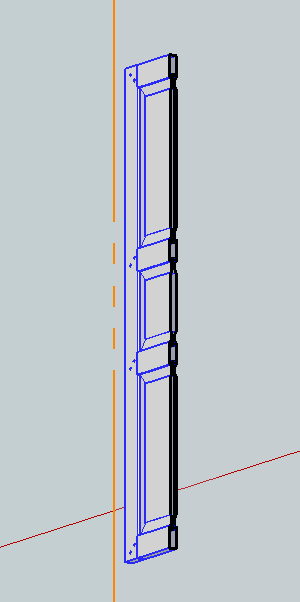
Dimensioned Shutters in Color — Rittenhouse Blue
With SketchUp you can also experiment with colors and textures. Above you can see my shutters in Rittenhouse Blue to match my existing trim out in the shop. For other projects I’ve used actual textures which help give you a feel for how a surface would look with real wood grain etc.
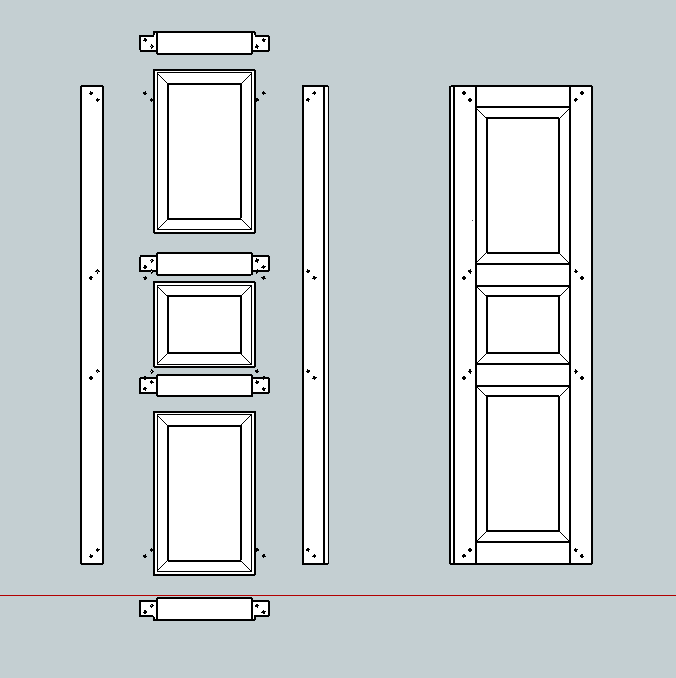
Exploded View
The other big time saver is how fast you can generate other views — beyond top, bottom, front and back you can quickly generate an exploded view….
Section View
Or a section view…
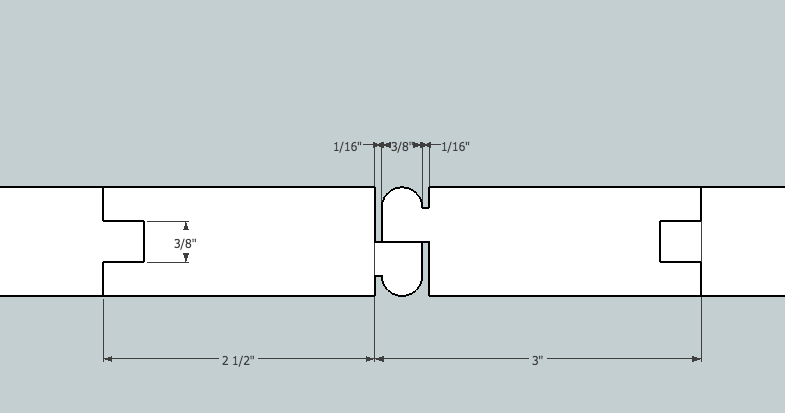
Molding Details Dimensioned
or a dimensioned detail view. The dimensioning goes in quickly and the model can be probed in the future if you missed a dimension and want to see exactly how big a part or detail should be. All of these views help me create additional visual aids for this blog and for my teaching as I think a lot of woodworkers are visual learners. You can also share your models with other users or download thousands of models from the 3D Warehouse to save you some time.
I also like the fact that I can draft from the couch in front of the TV at night when I am too tired to be out in the shop and don’t want to be in another room hunched over the drafting board. If you have been waiting for a good reason to try out SketchUp, or draft something new you have no excuse — if you are reading this blog you are likely on a device that can be used to run SketchUp. 🙂
I look forward to seeing some of your new creations and hearing what others think about using the program.
Take care,
-Bill
P.S. If you’d like to build one of these shutters with me in person, there are still 1 or 2 seats left in my upcoming workshop at NBSS on this very topic. You can find more details here.
P.P.S. If you’d liked to check out Robert Lang’s SketchUp For Woodworker’s Shop Class on Demand Videos or DVDs I bought my copies from here. (I don’t get any sort of kickback for this, just recommending a good resource)
A Joiner's Guide To Traditional Woodworking and Preservation