Can you spare a quoin? — A visit to Gunston Hall

On a recent trip down to Virginia, my wife and I finally got a chance to see Gunston Hall in Lorton, VA.  This 18th century mansion was the home of George Mason — a patriot, statesman and founding father  often best known as the ‘Father of the Bill of Rights.’

Approaching Gunston Hall

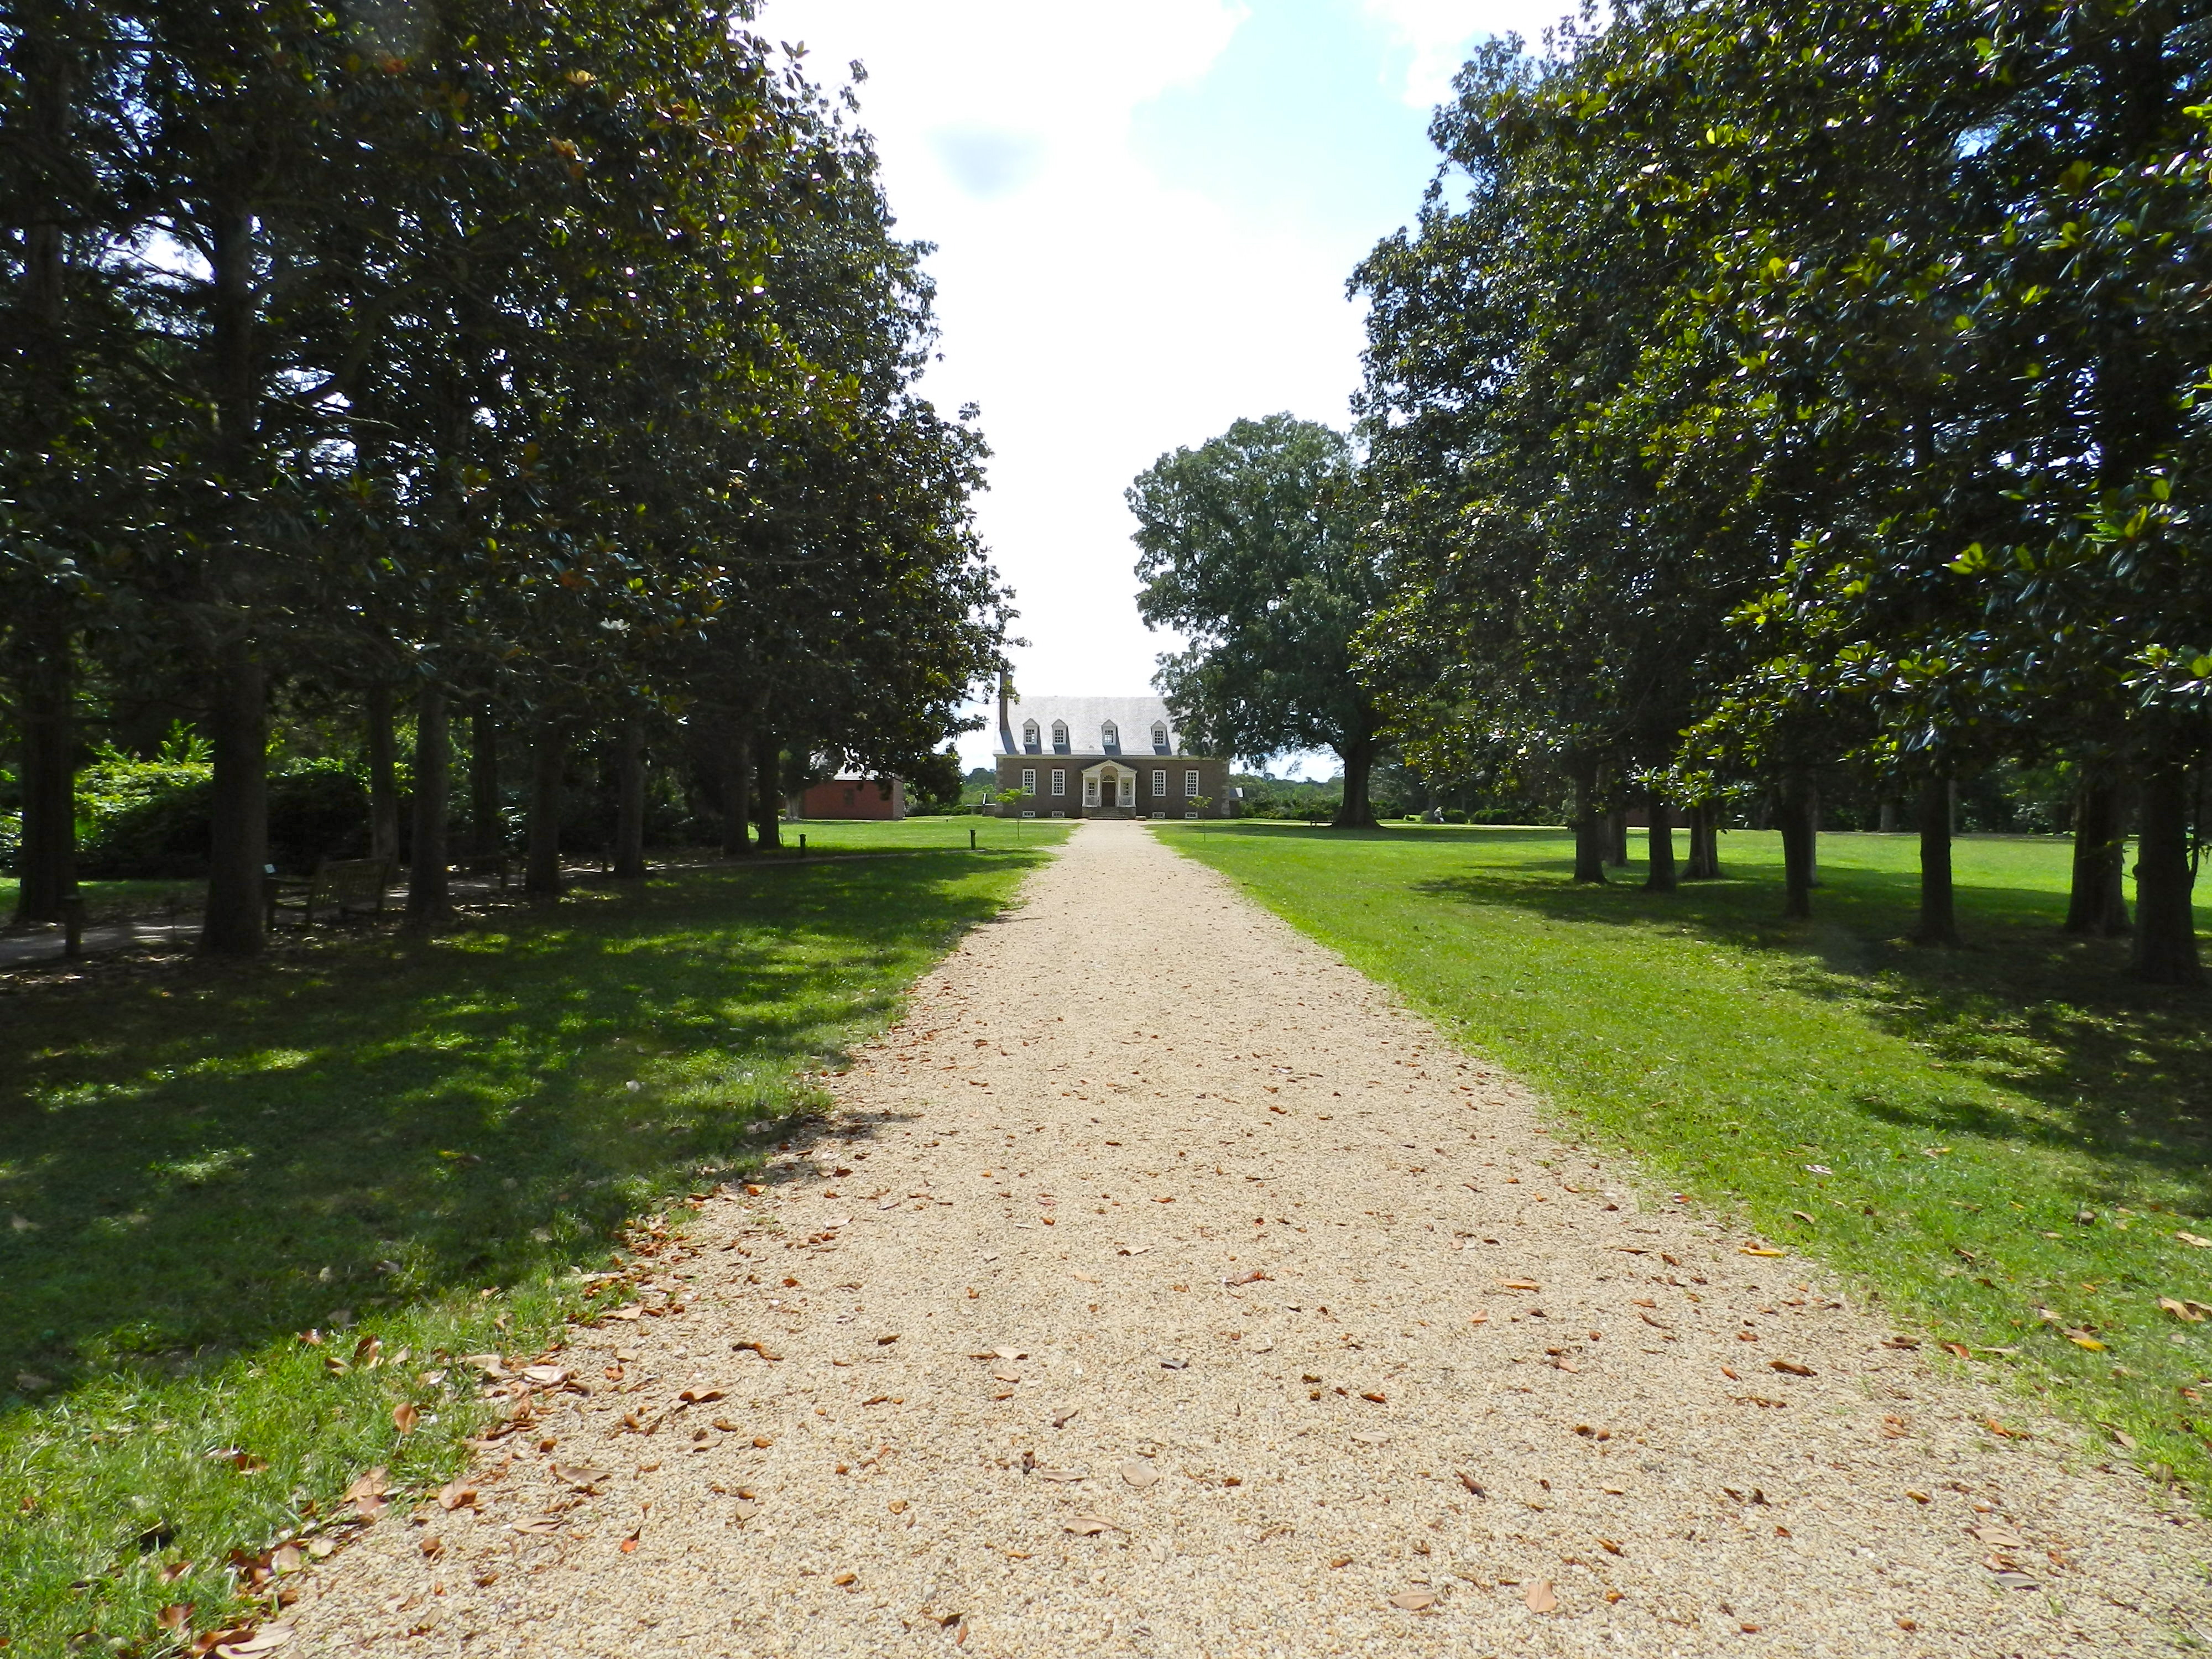
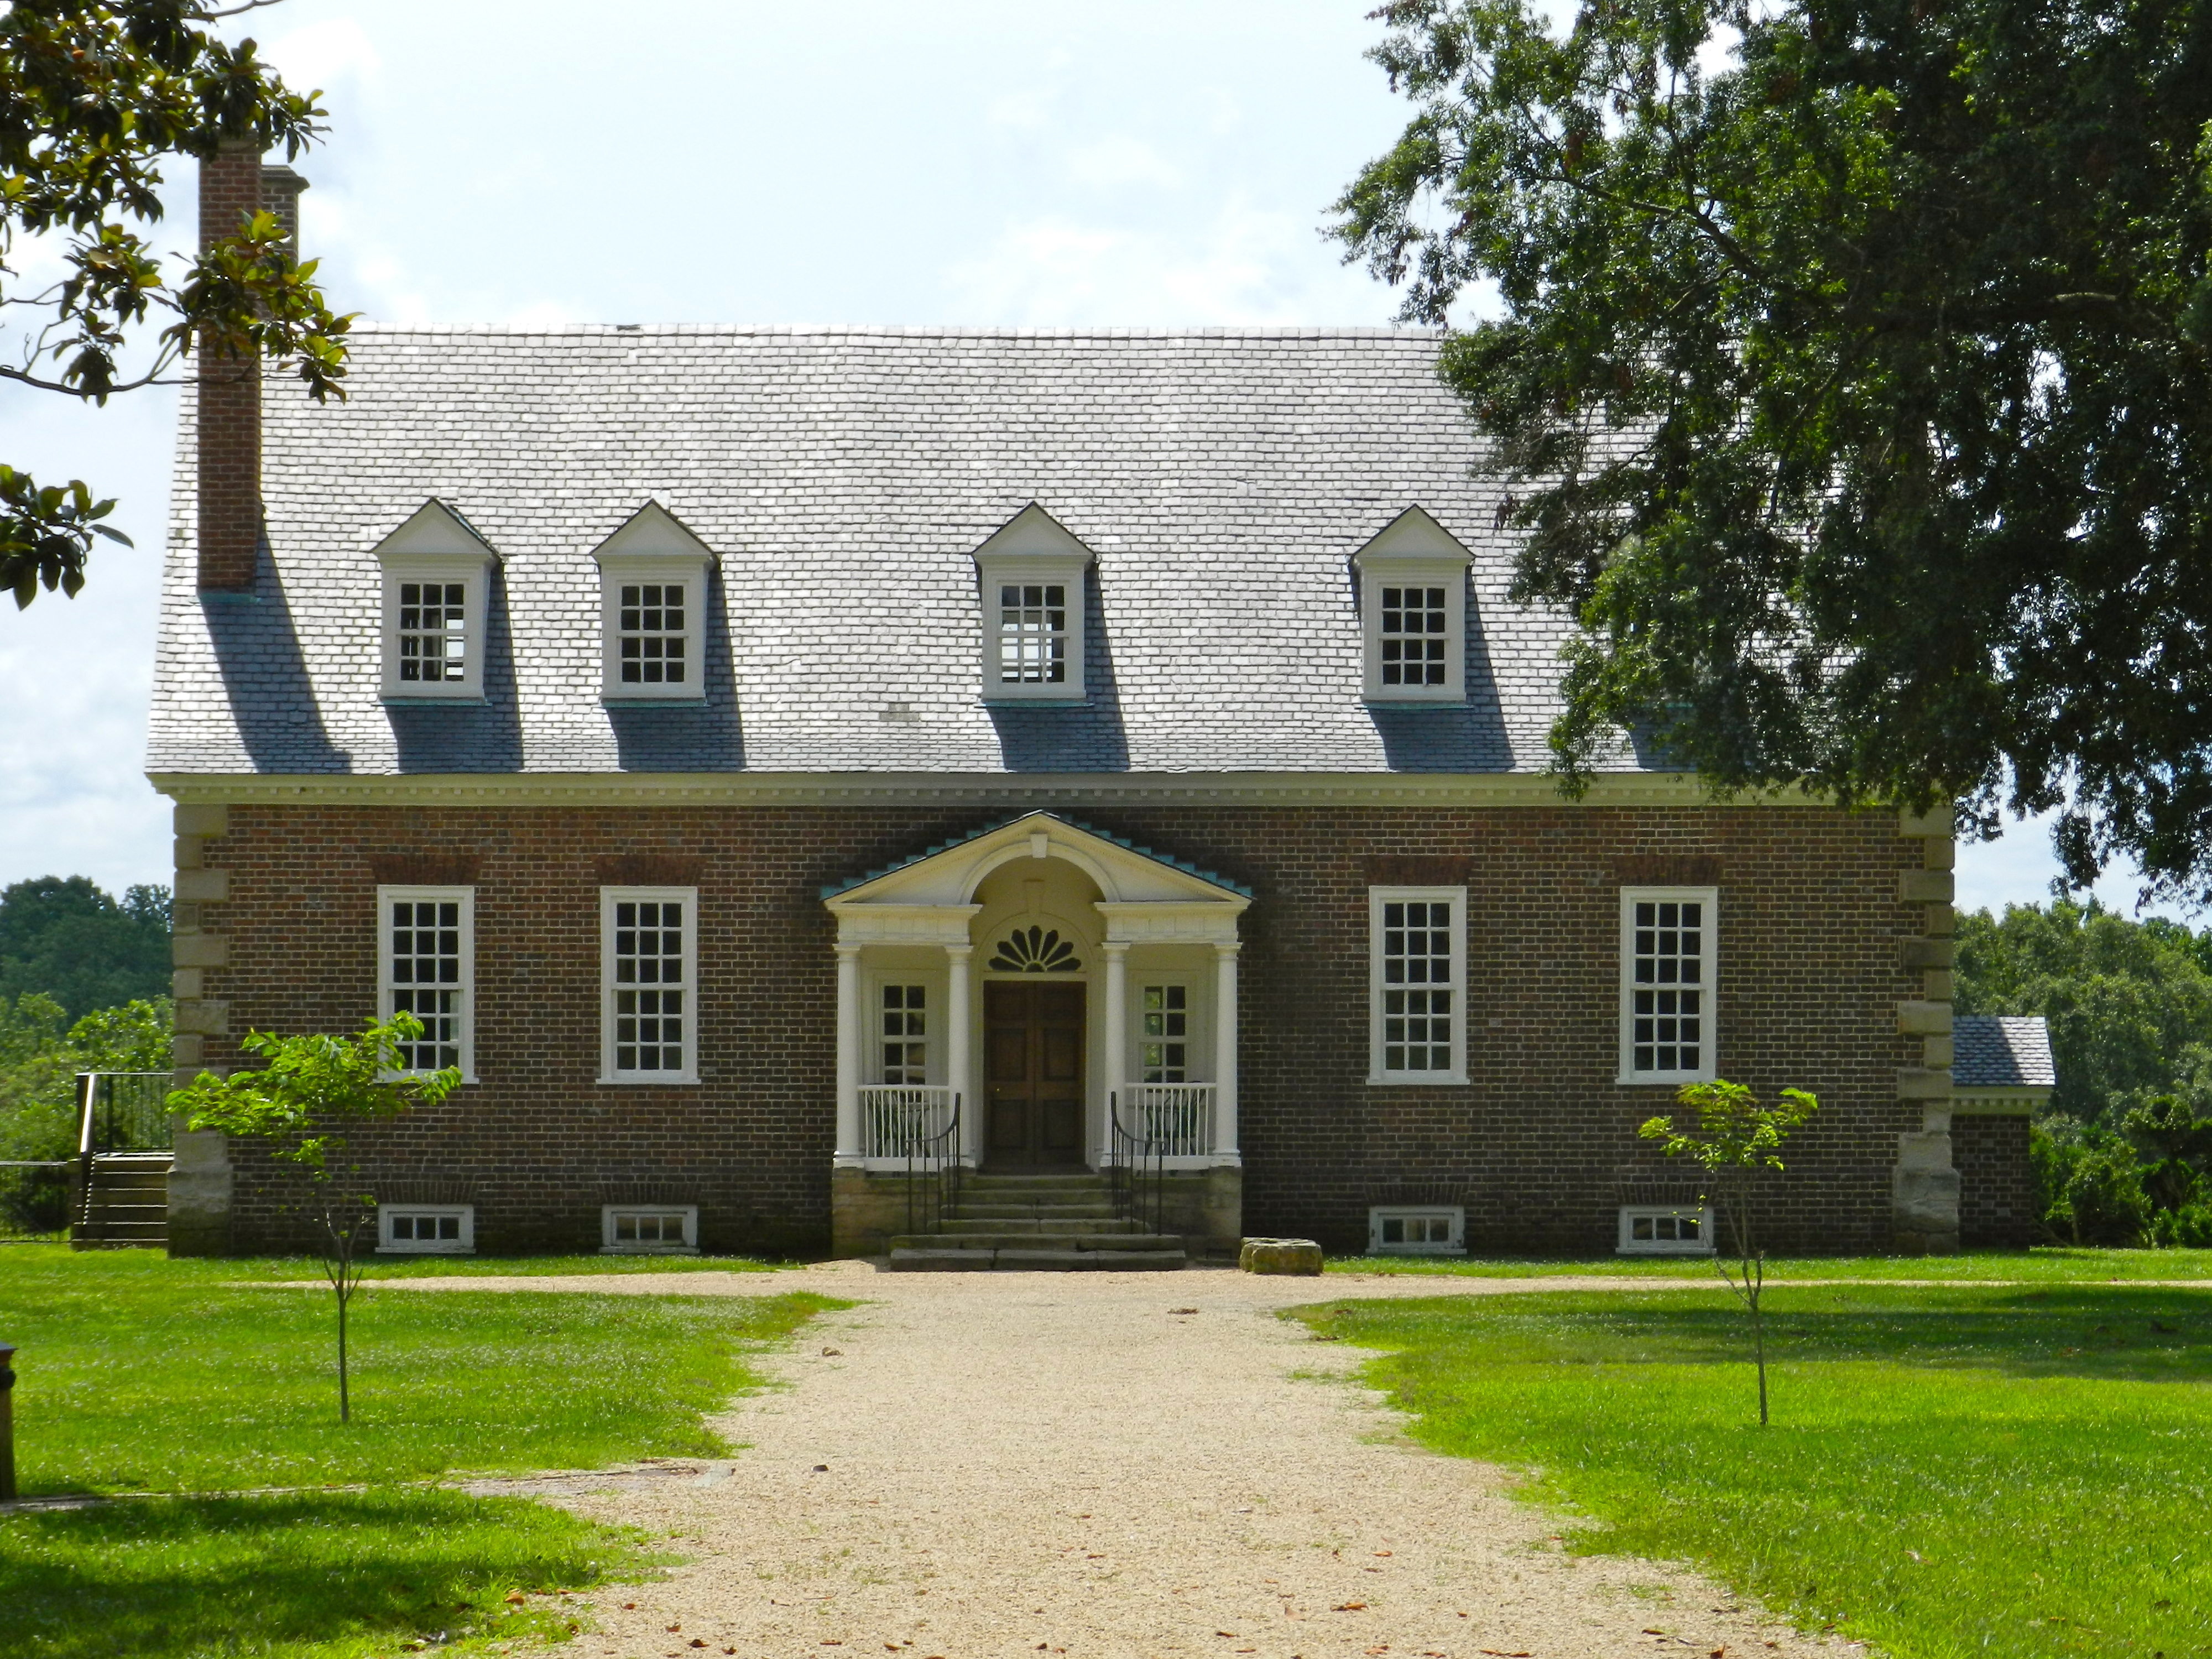
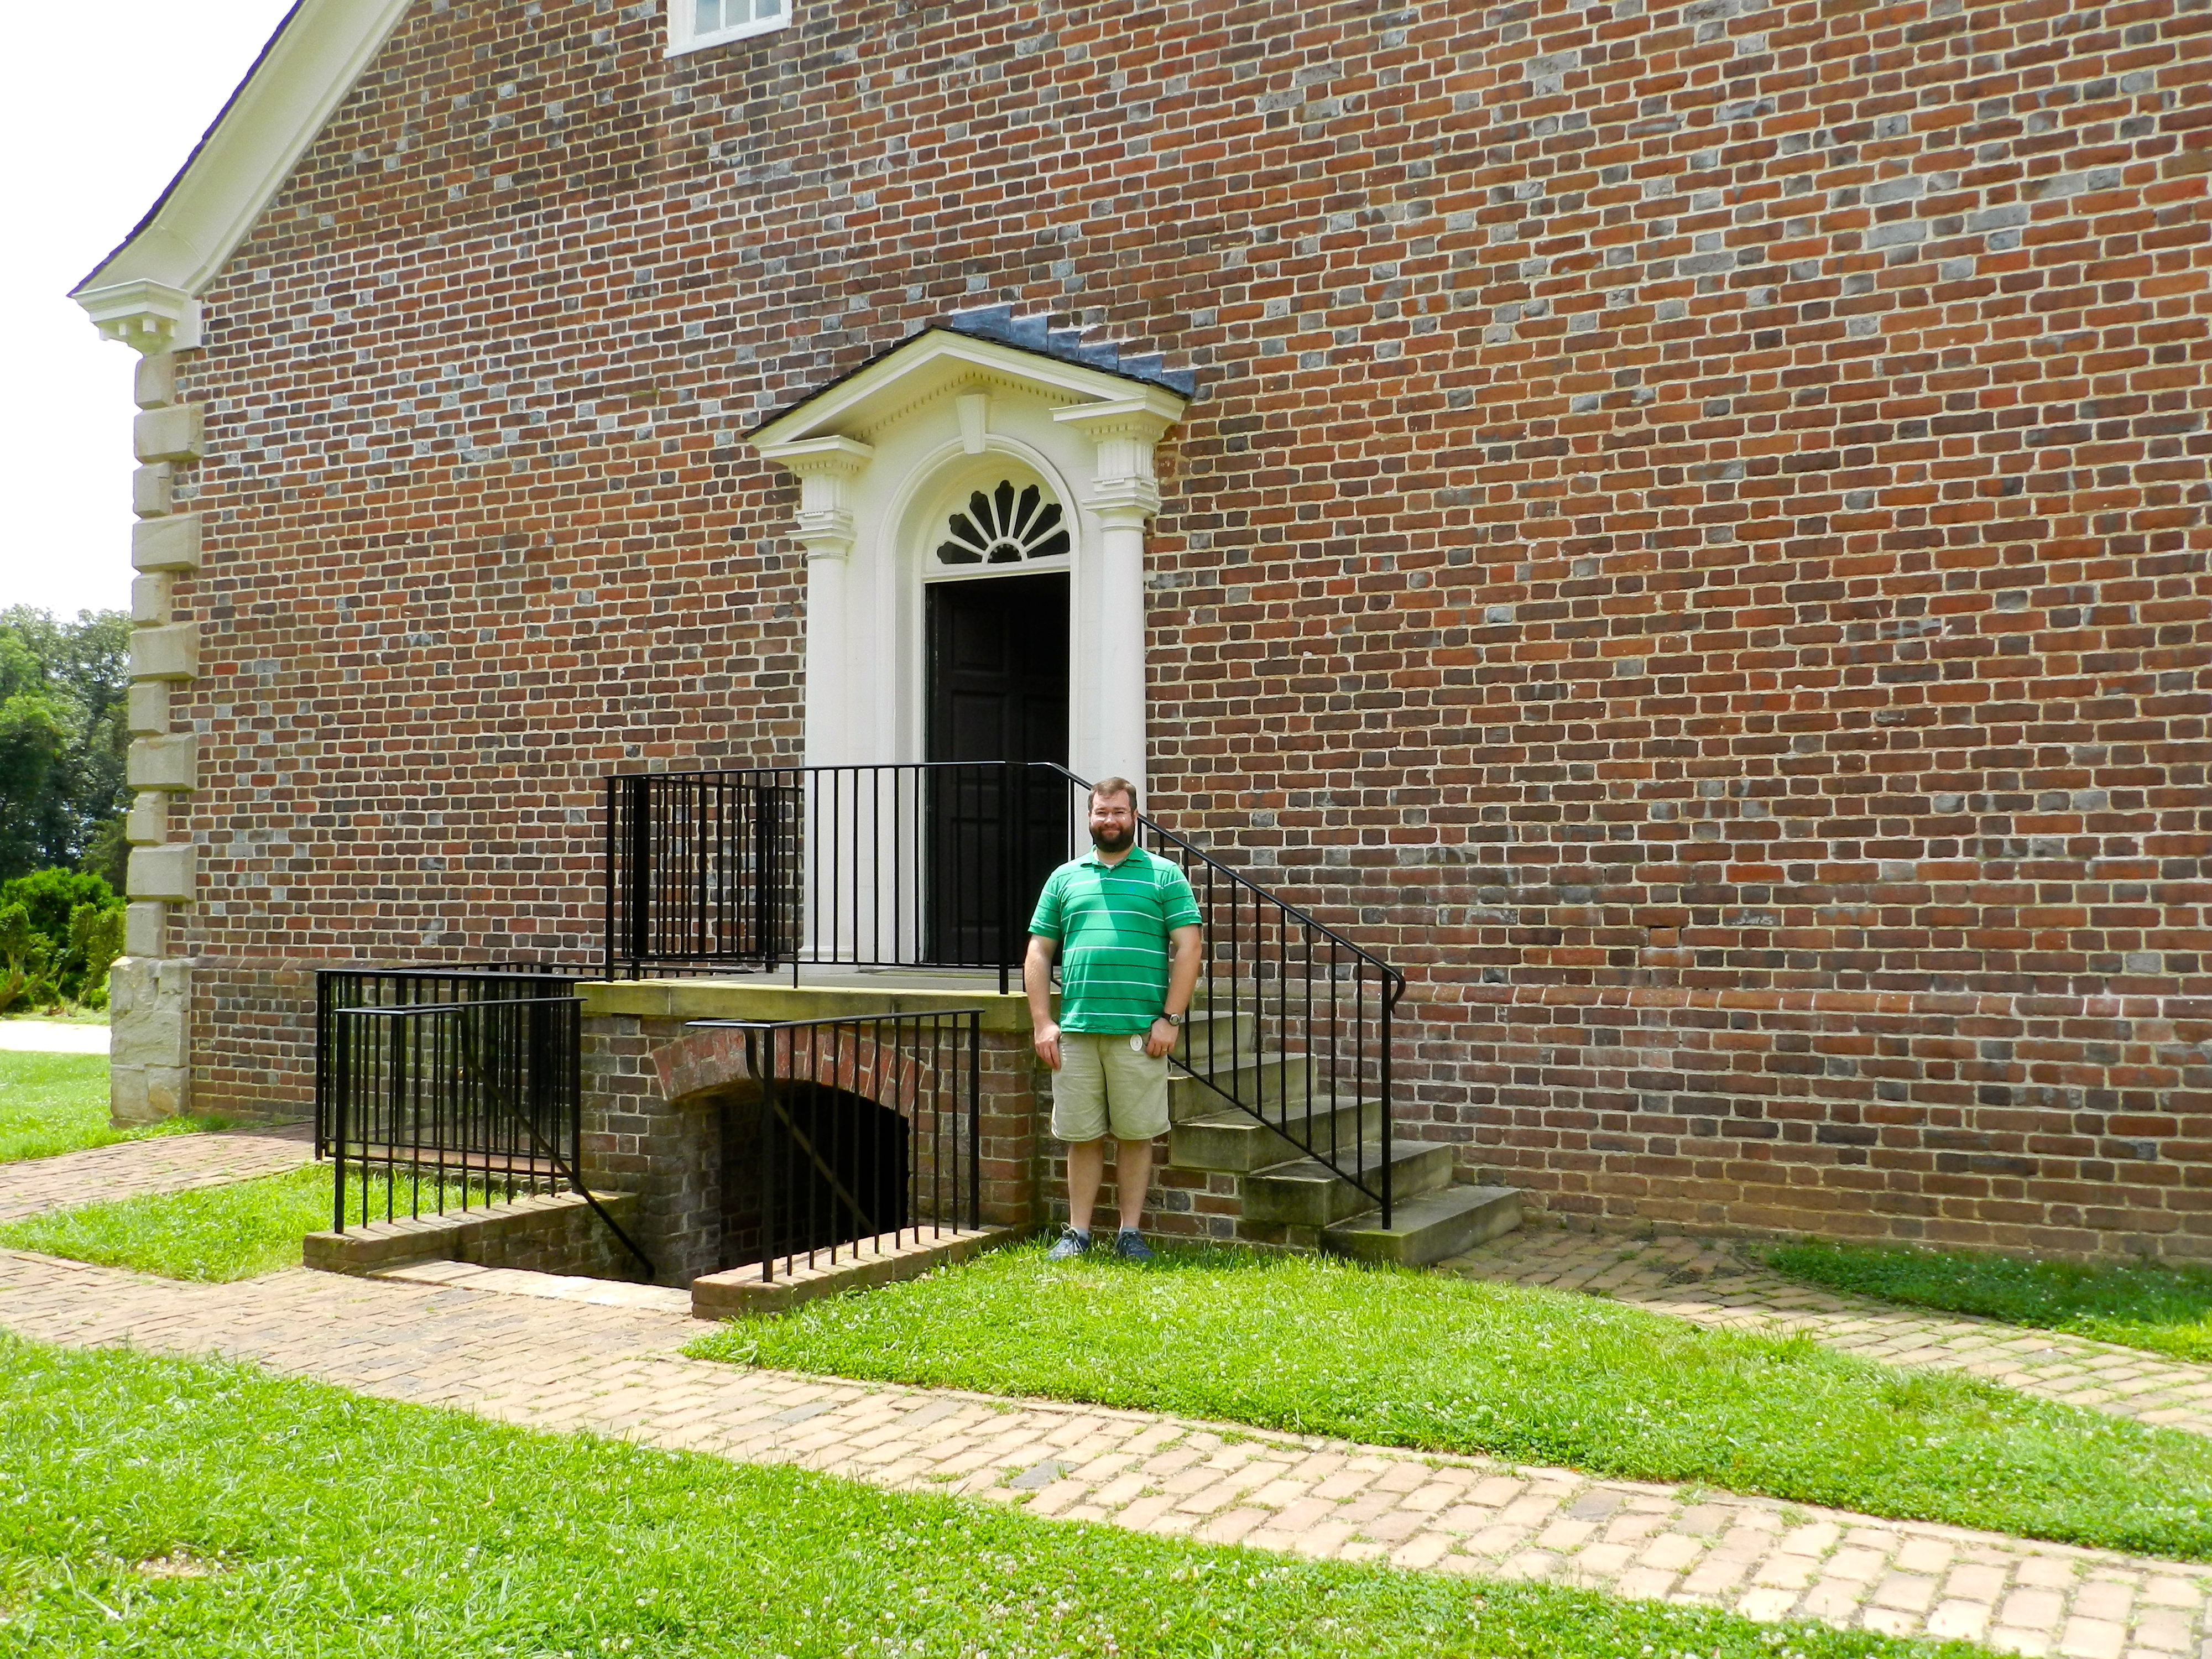
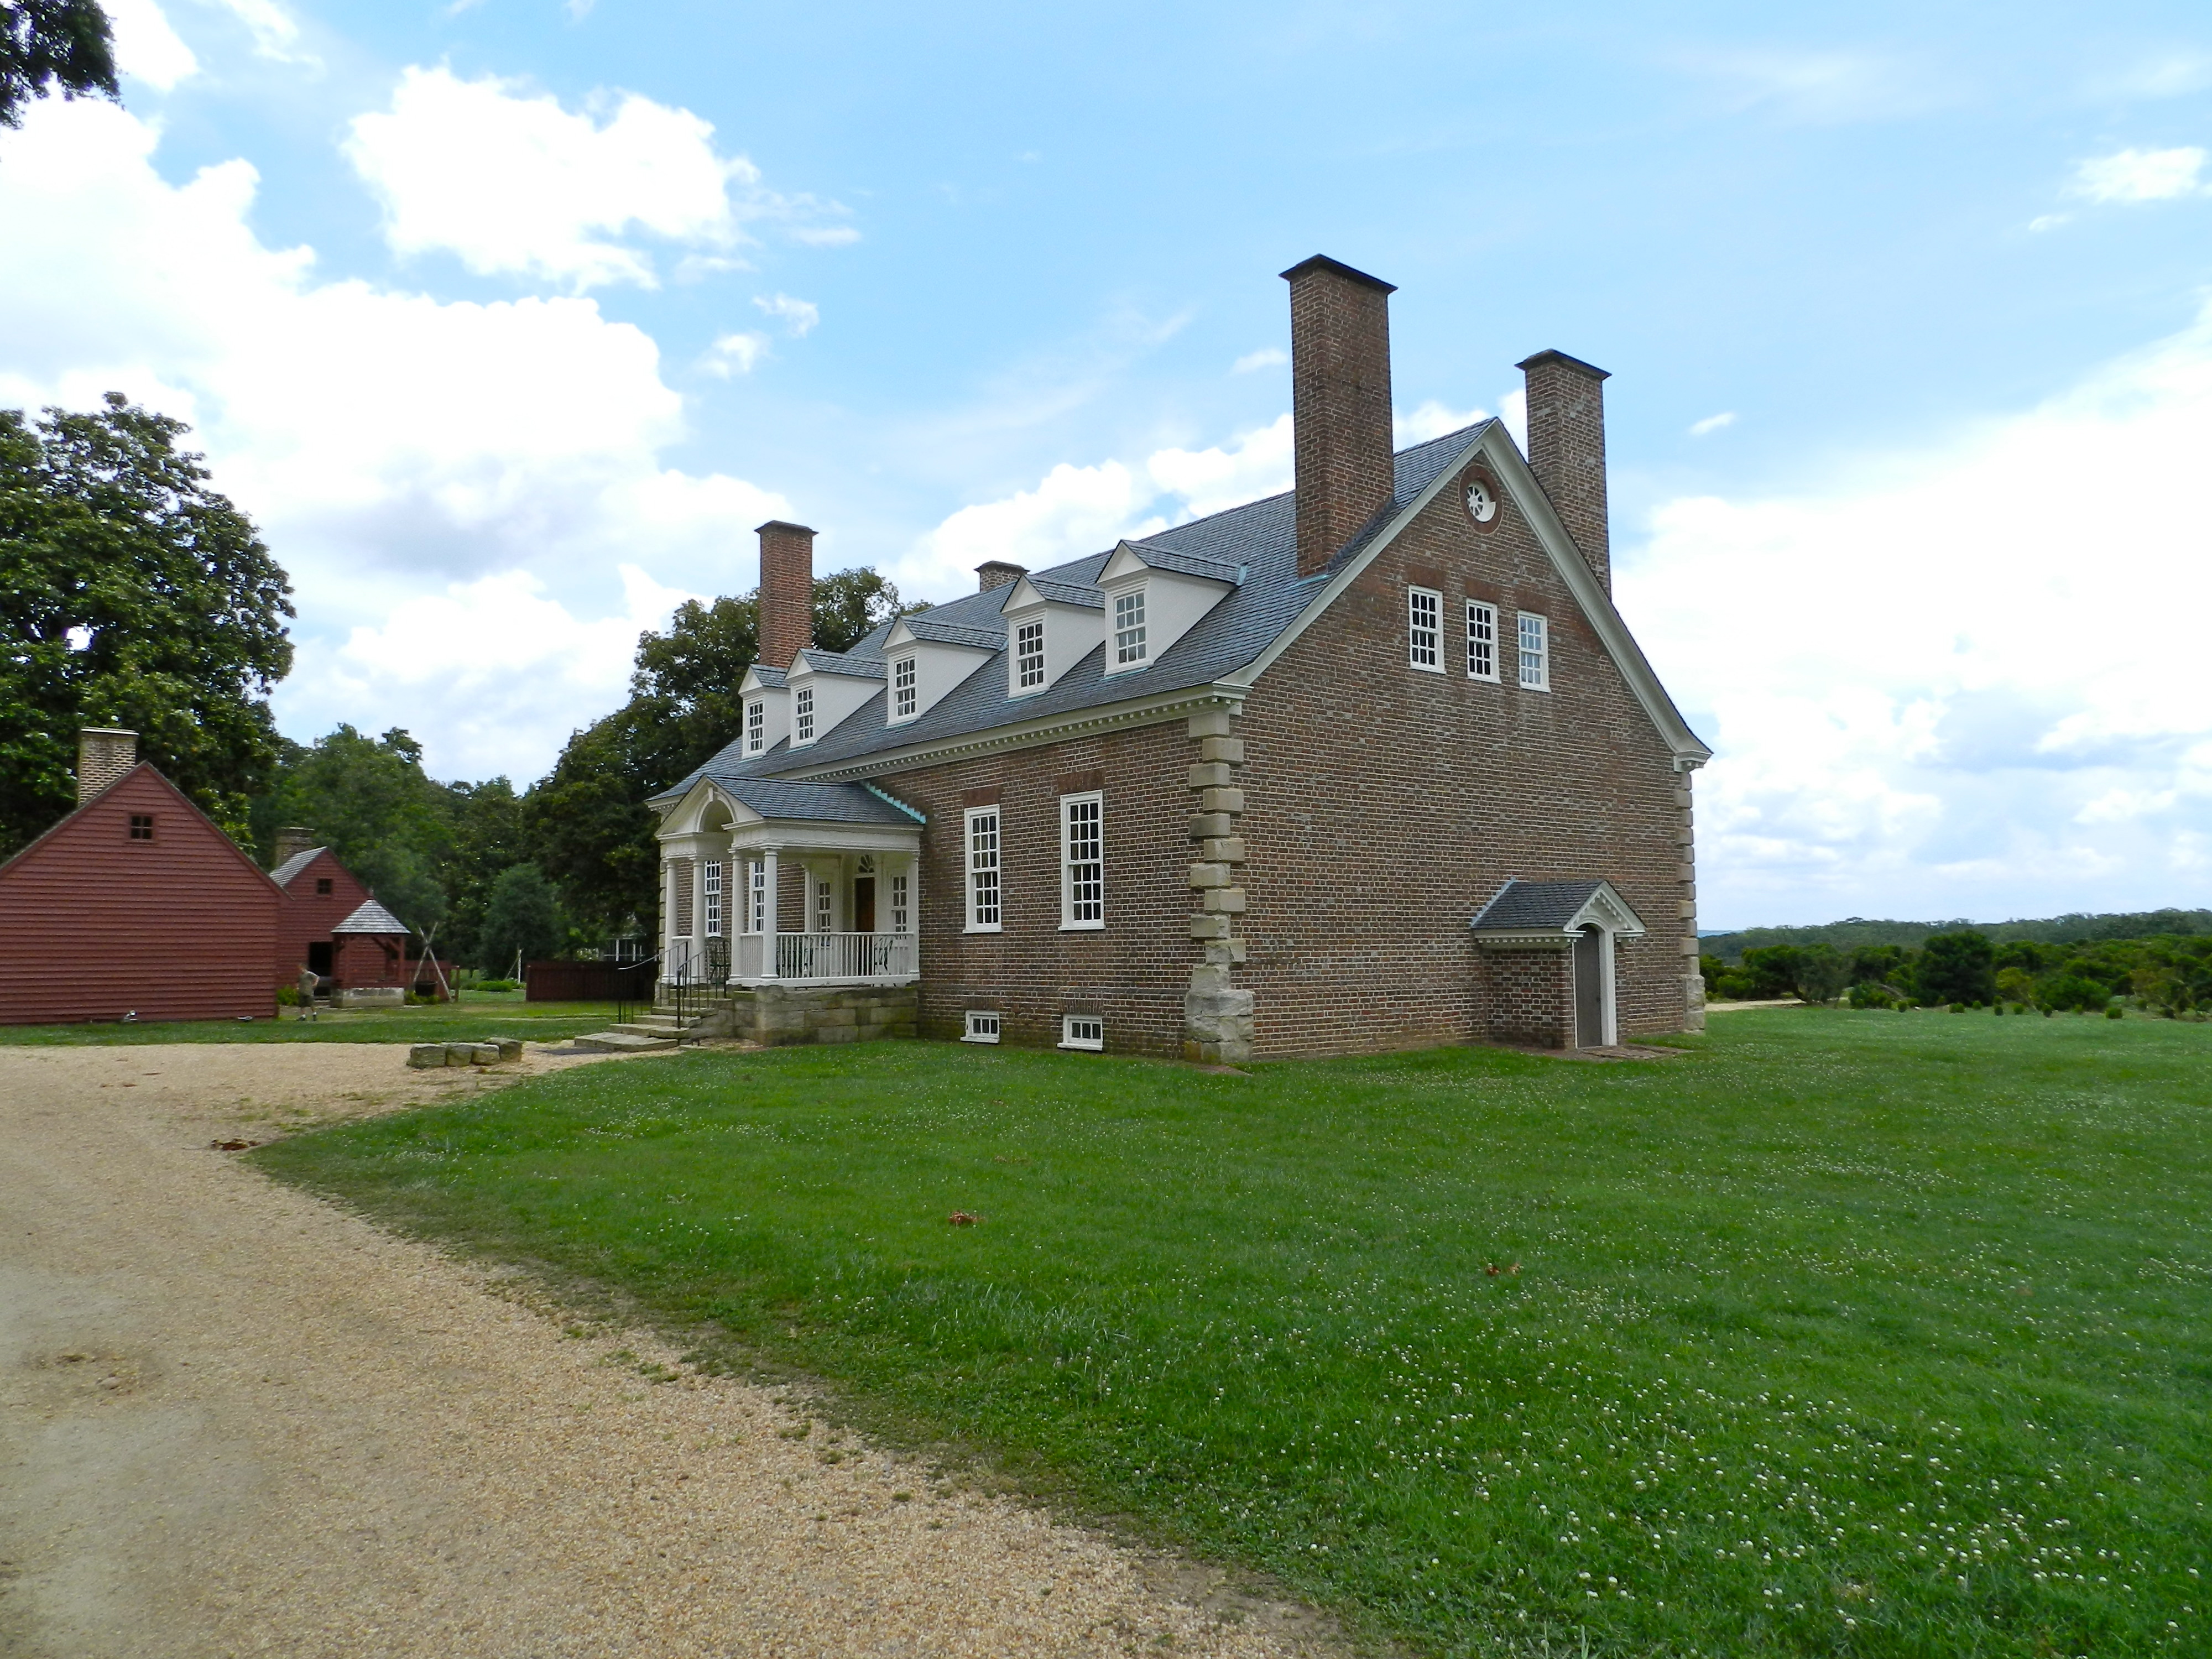
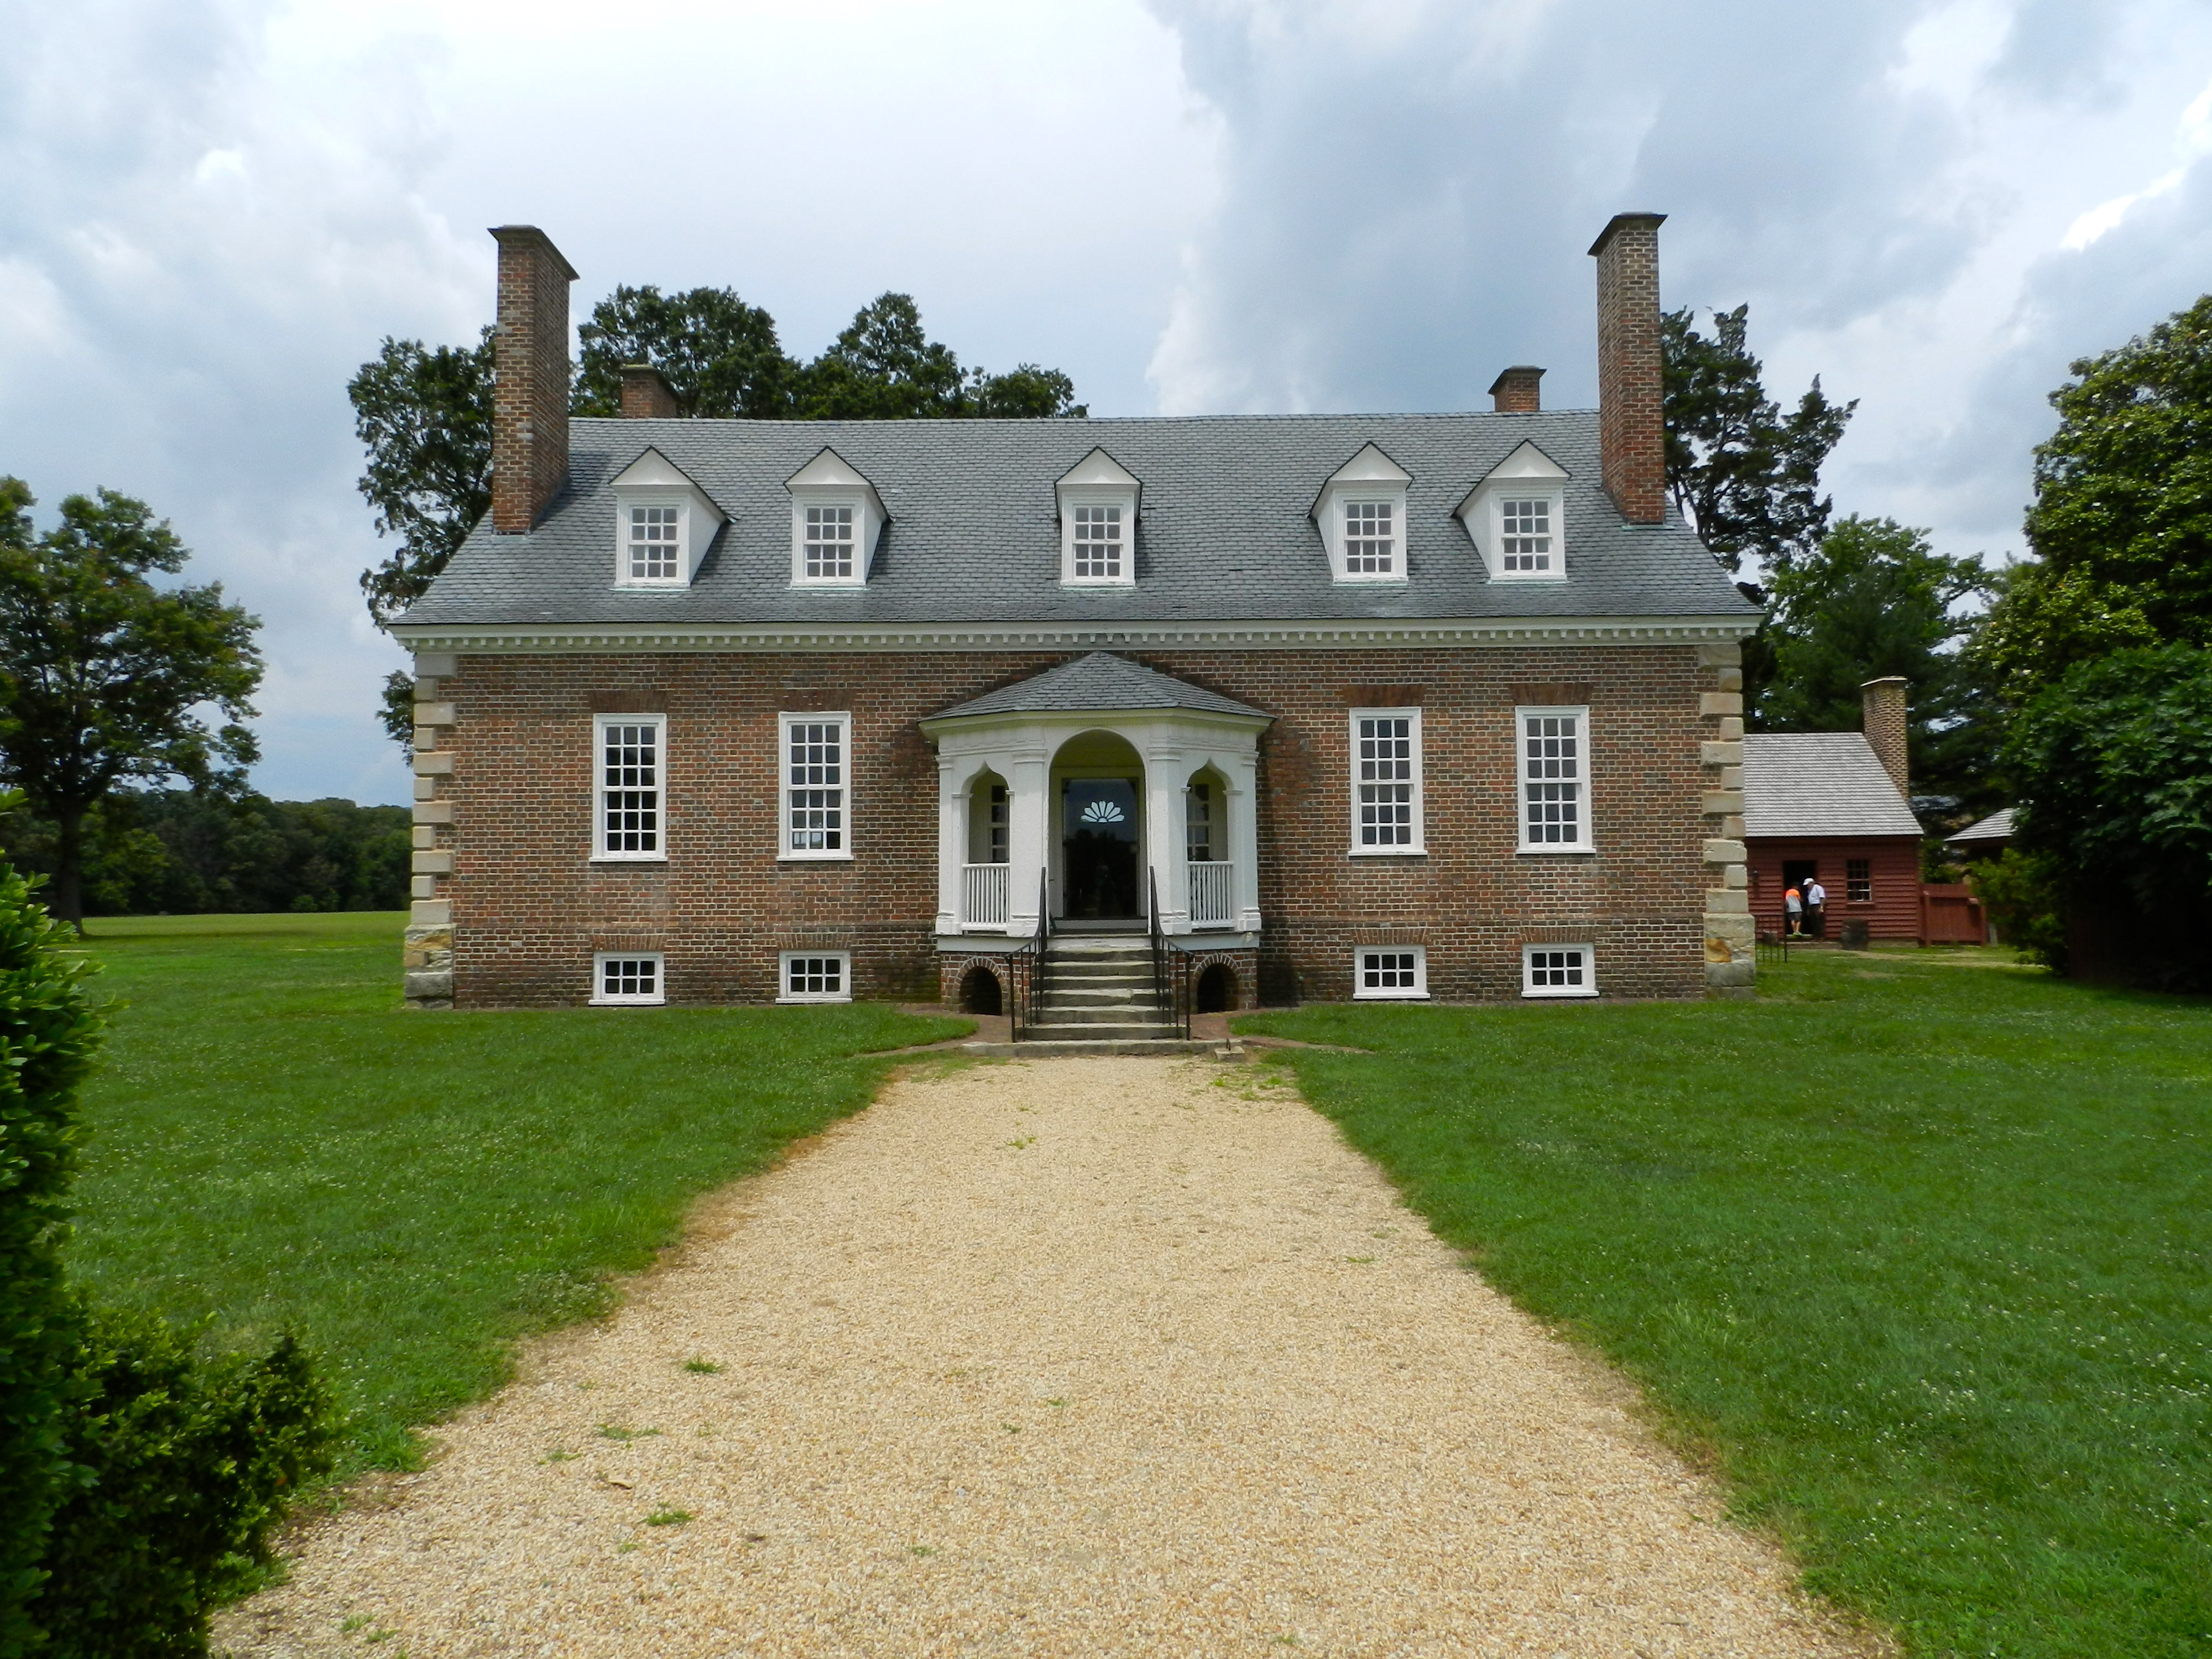
The plantation sits on what became known as ‘Mason’s Neck’ in Northern Virginia on the Potomac River. This handsome brick home was under construction from 1755-1759 and was a formidable mansion in its day. The exterior is brick with distinctive quoins in the the four exterior corners exude a sense of permanence and have helped the home outlast most of it’s contemporary wood clad buildings.

Gunston Hall (From the landed entrance)

The detailed interiors were designed by a young William Buckland who went on to design the interiors of other famous homes including the Hammond-Harwood House, Mount Airy (Richmond, VA), and the Prince William County Courthouse.

Obligatory tourist picture of me standing in the kitchen yard.

Buckland worked with the very talented carver William Bernard Sears to fit out the interior of the house. The interior combined elements of rococo, chinoiserie, and gothic styles which was an unusual contrast when compared to the simple decoration favored in Virginia homes at the time.  Although chinoiserie was popular in Britain at the time, Gunston Hall is the only known house to have this decoration in colonial America. [click here for more info — previous sentence paraphrased from this Wiki entry]

Schoolhouse as viewed from front portico of the main house.

Unfortunately the museum does not allow photography inside the mansion, so you will have to take my word for it, but the interior details and carvings are exquisite — from the fretwork in the yellow ochre dining room which imparts a very asian feel, to the gilded rococo baufats and carved egg and dart details on the doors and mantel in the ‘Paladian room’. From what little remains of Buckland and Sears’ original work you can see what gifted craftsmen they were.

3/4 View of Gunston Hall

Based on architectural and archeological research, conservators and preservation craftsmen have done an excellent job preserving and restoring the home to much of it’s earlier prominence — from carvings, to wall papers and hangings, to the chinoiserie. Much of this restoration work is fairly recent and the house is deliberately spartan in the areas where they do not have reasonable evidence to say what was there originally. (A refreshing take compared to some other properties wherein the preservationists and curators filled in the blanks as they went and thus blurred the line between was was really there and what is an educated guess on how to interpret a room)

Alee of ancient boxwood

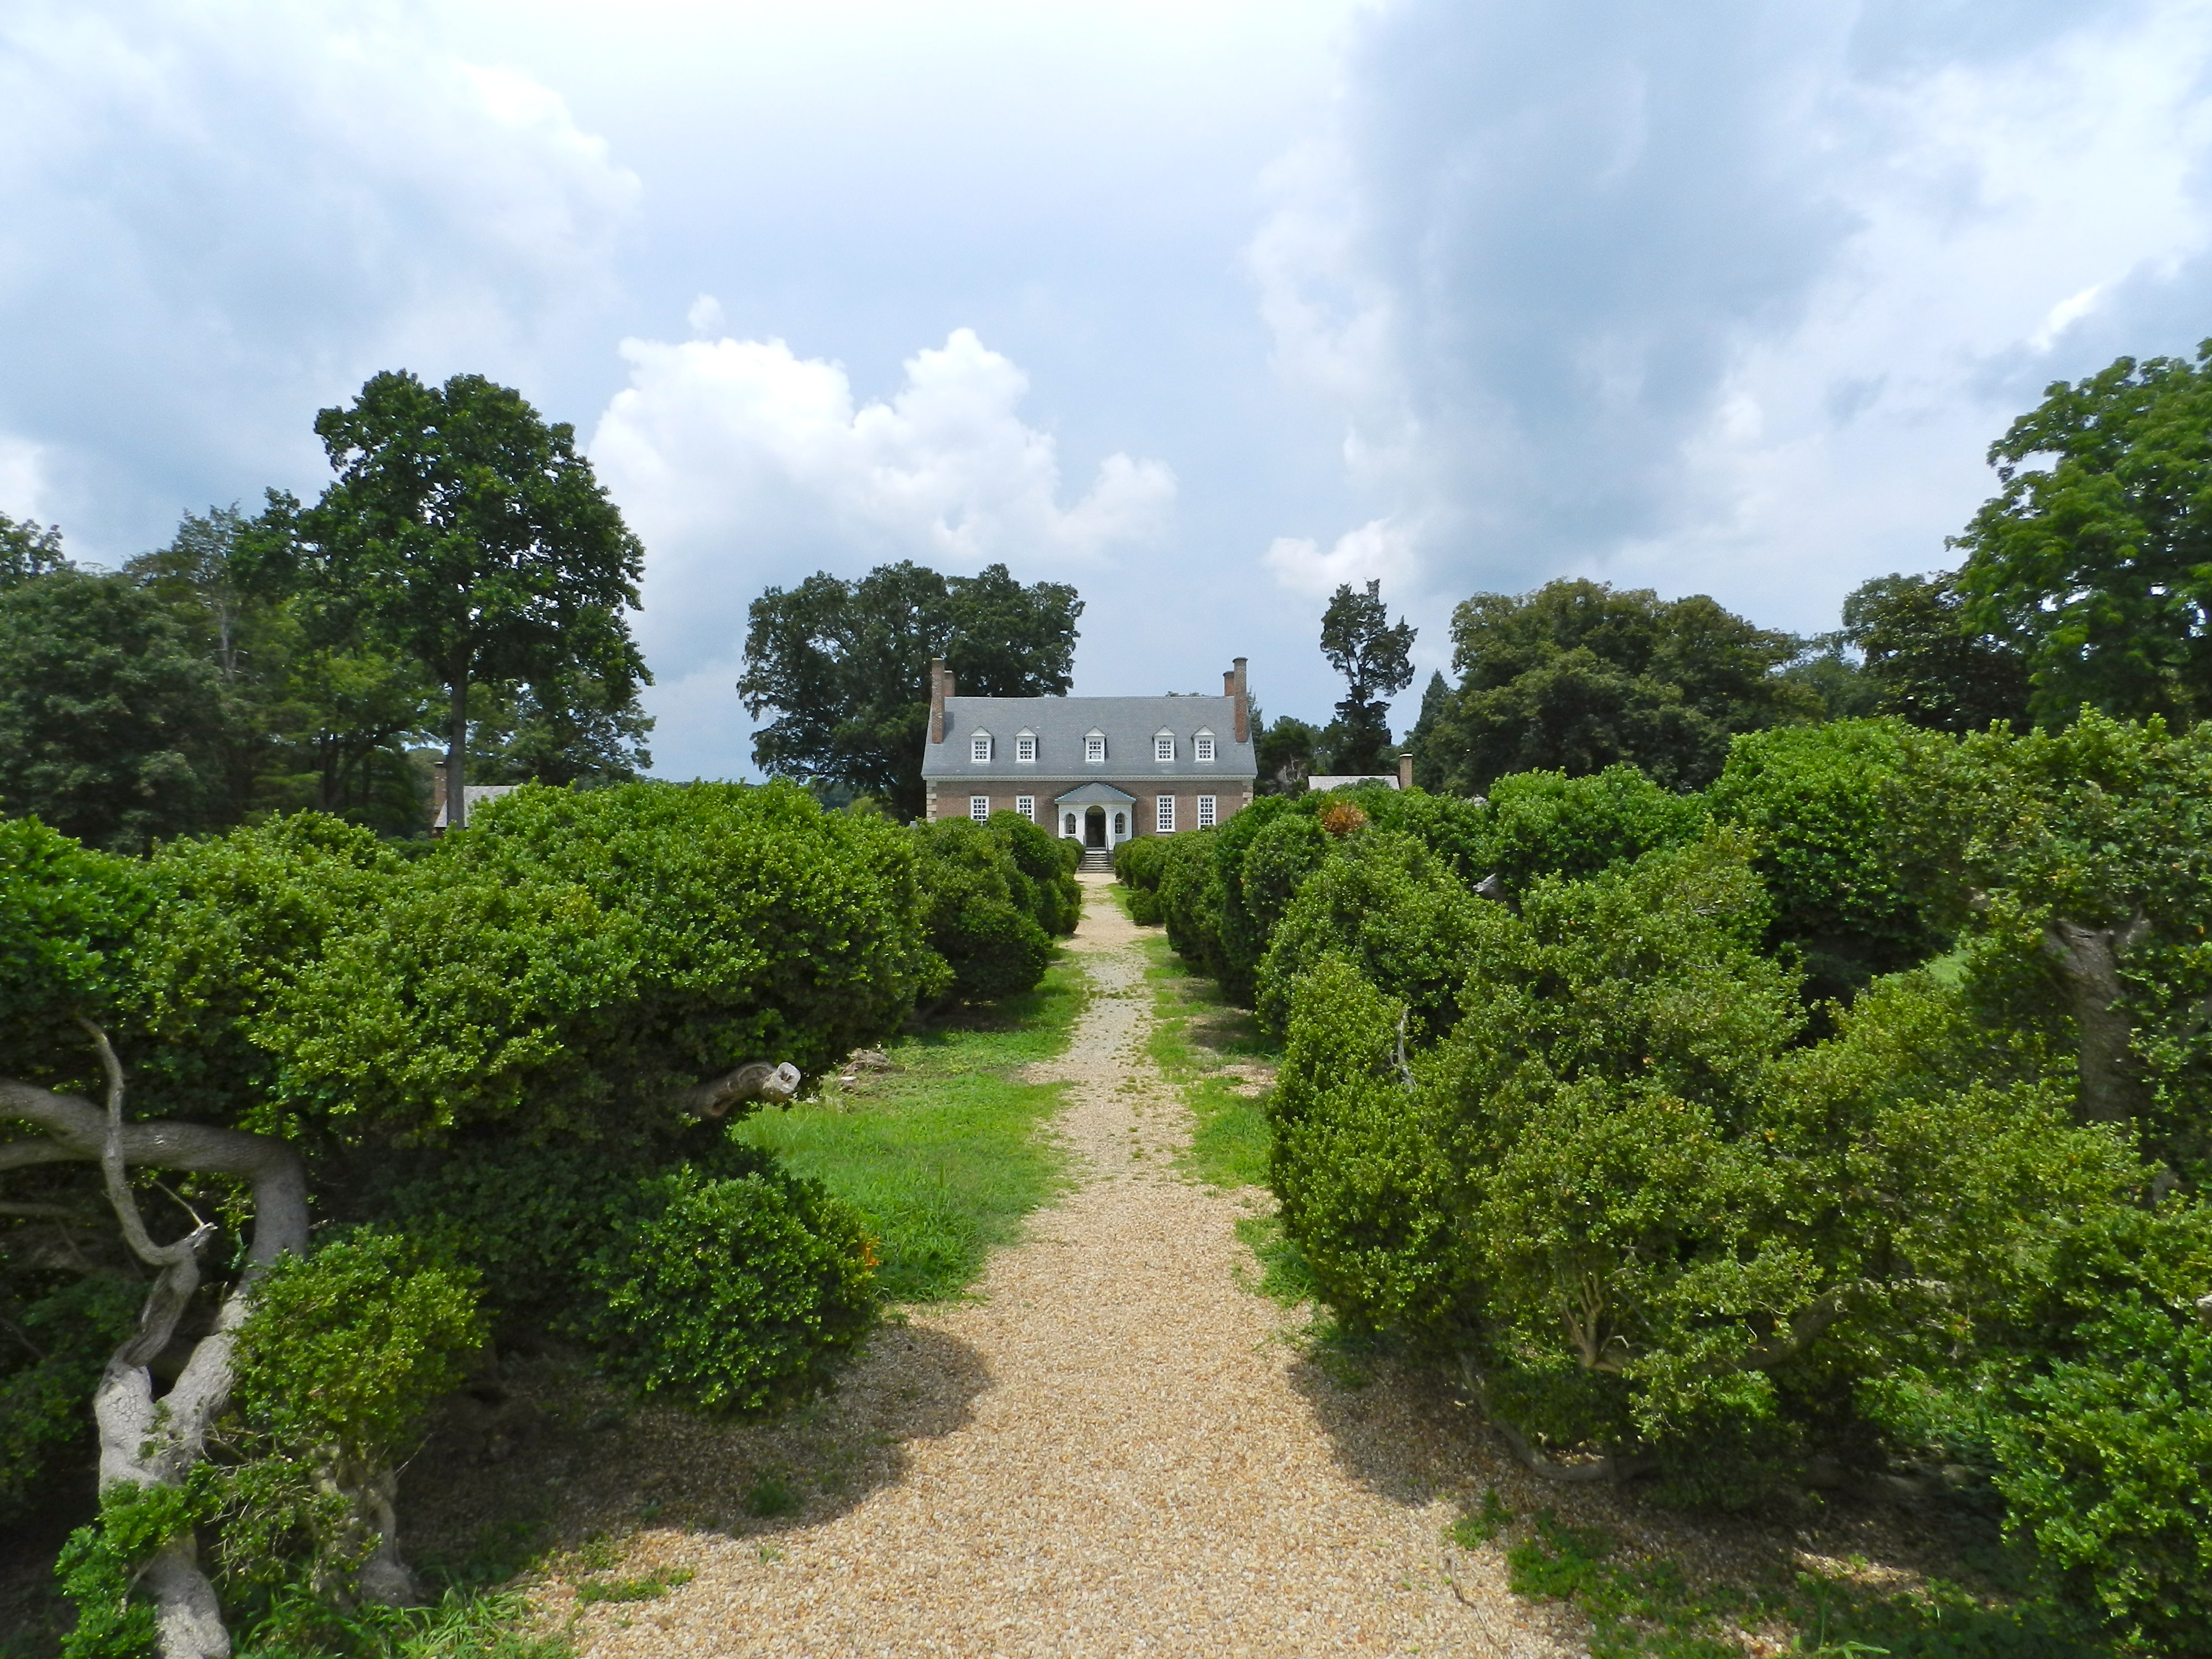
On the rear or riverside of the home you will see the allee of boxwoods that date back to the time of George Mason and may be the last extant example of a once imported Boxwood species no longer found in England. The rear porch was also quite distinctive with it’s Gothic arches.

Riverside entrance to Gunston Hall

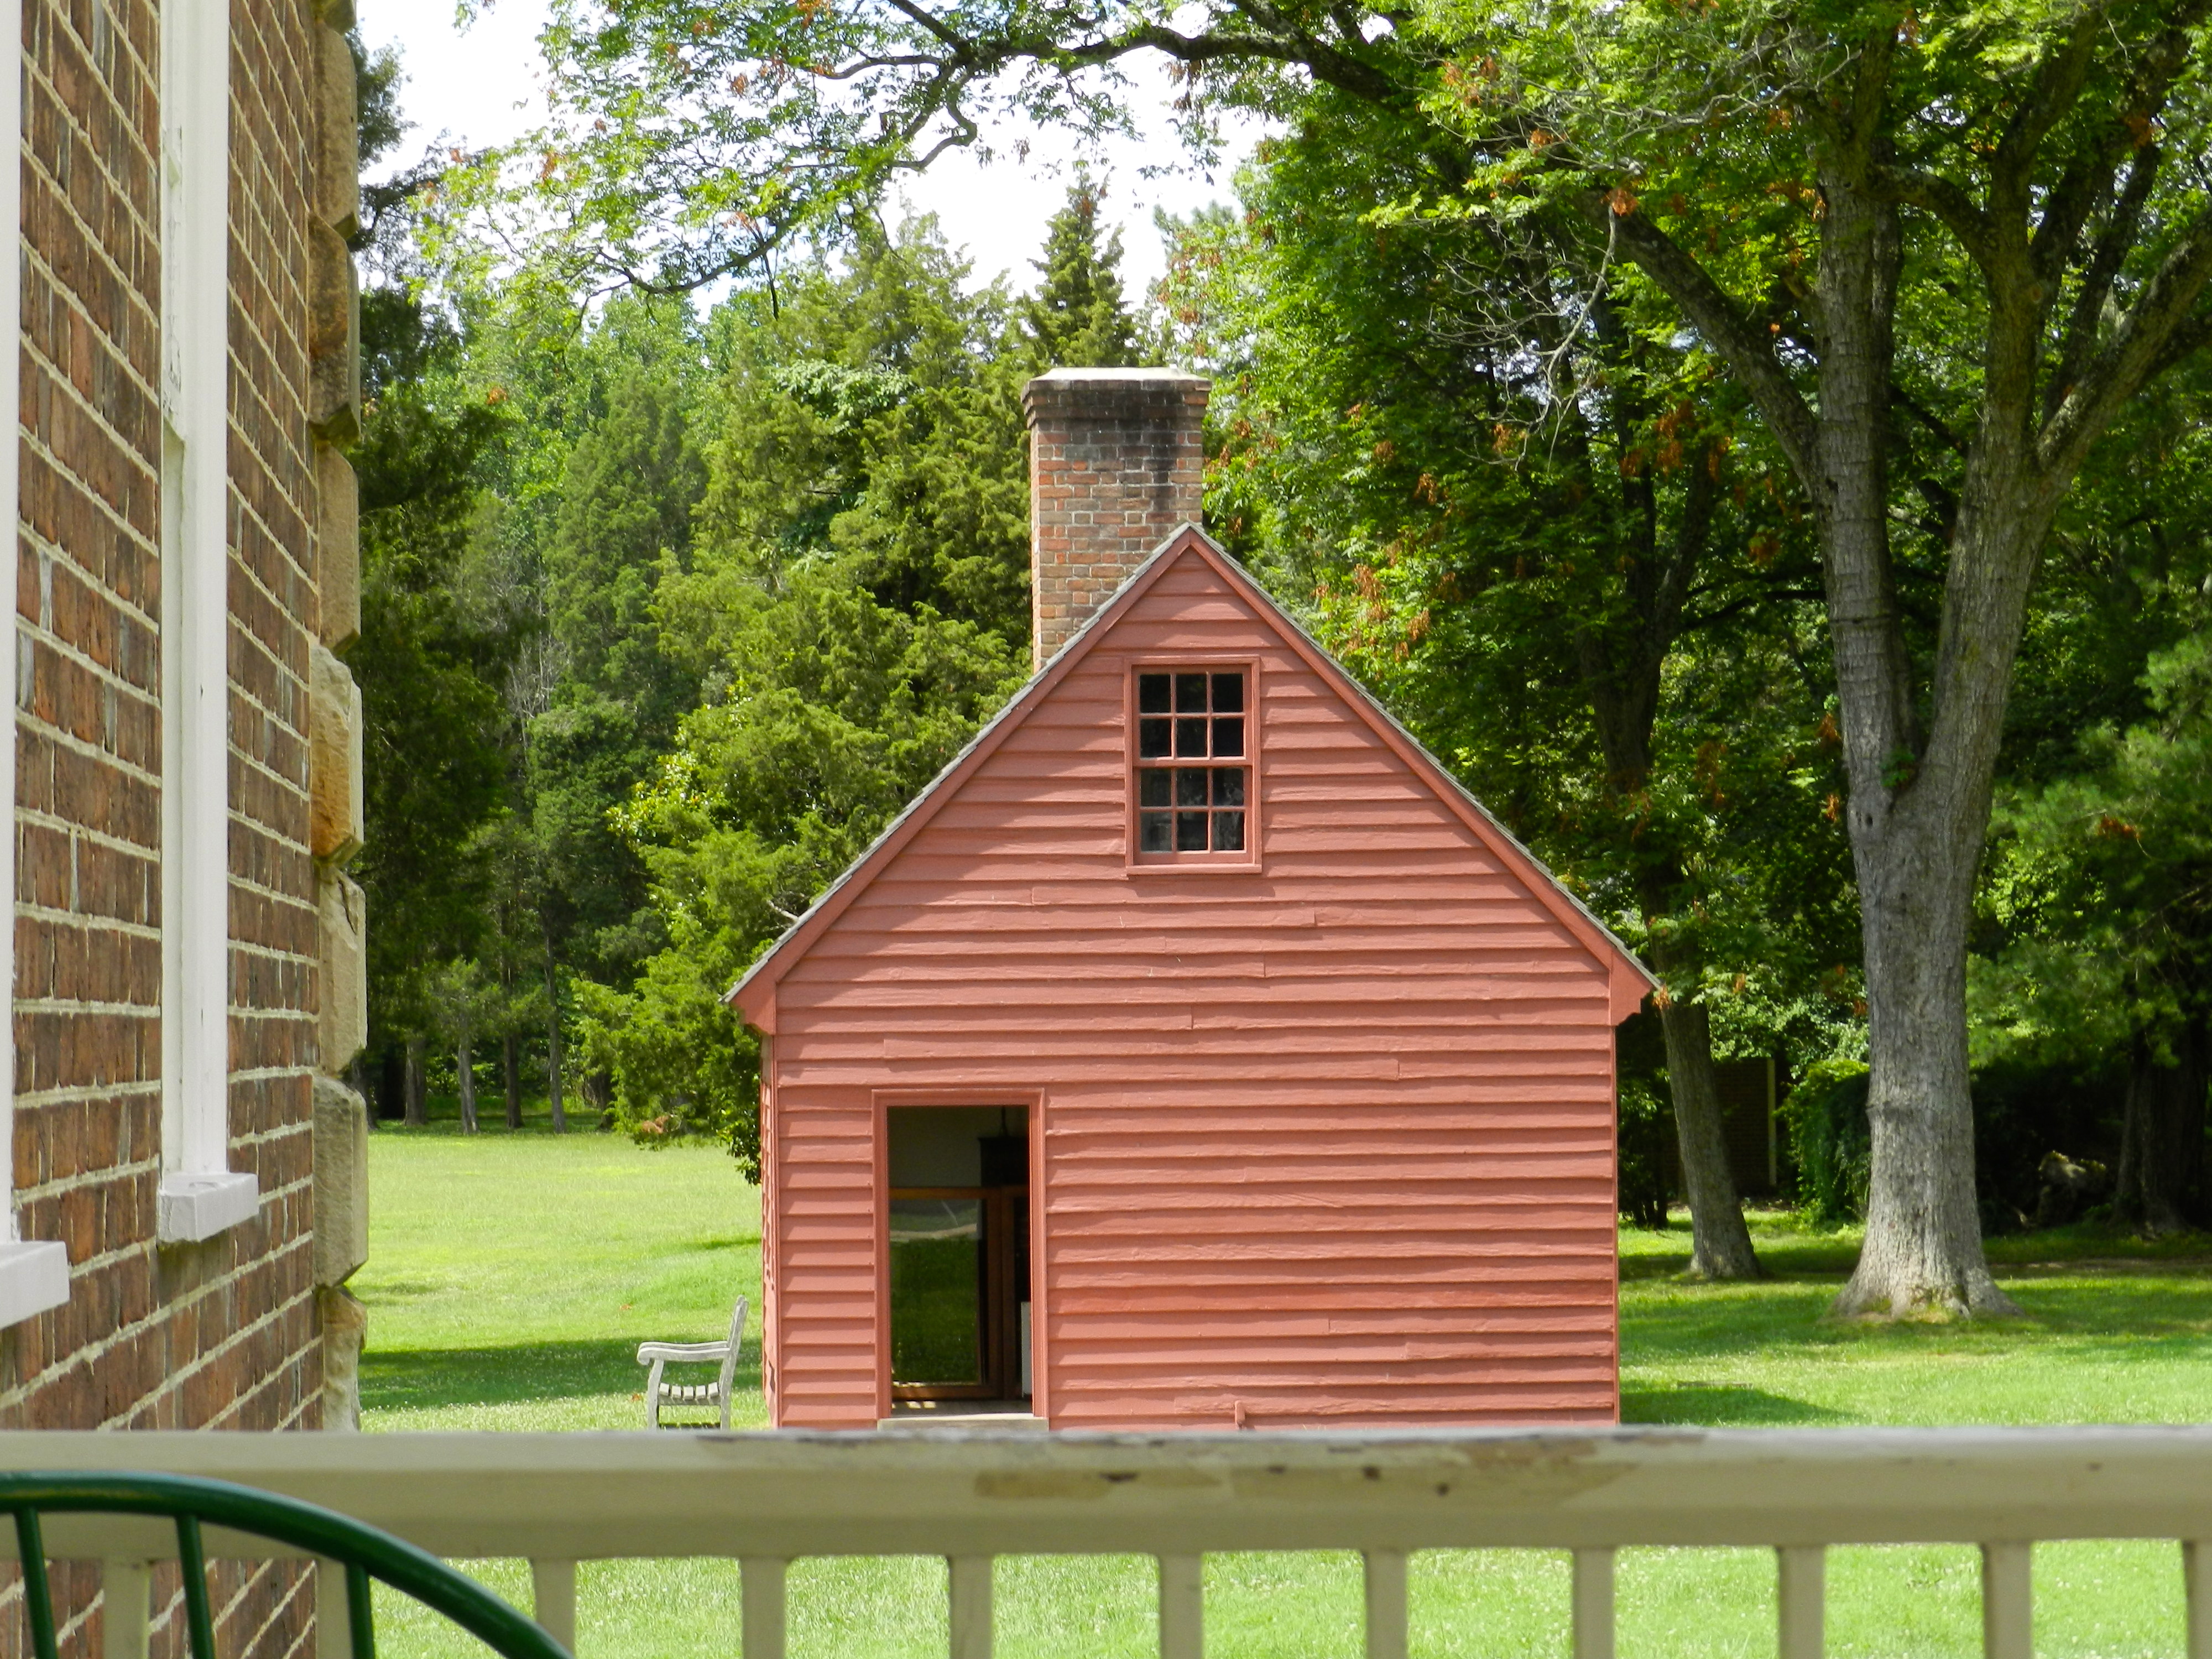
If you are interested in architecture, woodwork, wood carving or early American history I highly recommend a visit to Gunston Hall. It takes about  half day to see it all and explore the grounds and outbuildings. You can learn more about this historic site here.

Lights, Camera, Action….

I’m happy to report that the companion video series for my recent Fine Homebuilding article ‘Master Carpenter: Reproducing Traditional Moldings’ went online today.

Behind the scenes. (Photo courtesy of the Taunton Press)

I had a great time making the videos and I hope you will enjoy watching them. Several of them are free, though a few of them are reserved for FineHomebuilding.com (FHB) members only.

Bill Rainford using molding planes to reproduce traditional molding profiles. (Photo courtesy of the Taunton Press)

Details below as they were presented this morning in Fine Homebuilding’s e-newsletter and where to find the videos:

Fine Homebuilding Logo

In this Master Carpenter series, Bill Rainford shows how to get period details right with both power and hand tools.

Watch the intro video

Plus watch more free episodes from this series:
Interview with the craftsman
Bill chats about how traditional carpentry is better for his body and soul
An inside look at old-fashioned home building
Bill and senior editor Chuck Bickford visit the Alvah Kittredge House and dig into its traditional construction details

Sign in as a member or sign up for a FREE 14-day trial to see this complete series and much more.

Take care,
-Bill

How many tools are in your Tool Chest?

Tool chests come in all shapes and sizes — from the hand built traditional joiner’s chest, to a mail order gentleman’s chest, to the plastic fantastic junk you find in big box stores today. Depending on what kind of work you do the number of tools you have in your chest may vary, but at some point I think all traditional craftsmen (and craftswomen) wonder how many tools they can actually fit inside their primary chest.

How many tools can you fit into your tool chest?  Don’t worry, if you want to cram in a few extra items before we start counting I’m willing to wait.

Alexander Forbes Tool Chest from the Mid-Late 19th century.

How many tools did you to fit in your chest? How about 500 tools?!  That’s right, the tool chest shown here once belonged to Alexander Forbes who was a cabinet maker and Pullman car builder from Cleveland Ohio contained over 500 traditional woodworking tools.

Close up of the Forbes Tool Chest from Ohio

This tool chest is currently on display at the Winterthur Museum and Gardens in Delaware and is part of the 400 Years of Massachusetts Furniture display at the museum.

A sampling of the tools from inside the chest

On the wall behind the chest you will see over 100 tools on display from this chest that dates to about 1880. The tools look like they are in exceptionally good shape and would be right at home on my own workbench. This set is representative of the kinds of tools a cabinetmaker would use to make many of the pieces on display in this exhibit.

Side view of Alexander Forbes Toolchest
Side view of Alexander Forbes Tool-chest

Don’t let the painted and time worn exterior finish fool you, the interior of the chest was well laid out and carefully constructed with mahogany tills proudly inlaid and showing off the woodworking skills of Alexander Forbes. He apparently also had incredible spacial relation skills to fit that many tools into that fairly average sized chest and to it in such a way that the tills etc do not get beat up in the process. Having said that I assume he likely only crammed all the tools in there for longer trips; I would think for efficiency purposes he’d likely partially unpack/deploy tools just to make enough room in the chest to access all the tools he’d need on a daily basis.

Tools for learning the trade of cabinetmaking -- any of which could be found on my own workbench
Tools for learning the trade of cabinetmaking — any of which could be found on my own workbench

The display also went to great lengths to explain how craftsmen learned their trade, how they used various woods and how many pieces were constructed.

Dressing Table parts in varying stages of completeness to demonstrate how it is build. Made by Steve Brown (NBSS CFM Instructor and former Dept. head)

Prominently on display was the partial dressing table shown above which was put together by Steve Brown who is an instructor in the Cabinet and Furniture Making program at the North Bennet Street School in Boston. This carefully constructed sample piece concisely shows the progressive steps it took to make a piece like the period dressing table shown to the left of the tool-chest I’ve been admiring.

Sample of the many chair variations created by Massachusetts craftsmen

Moving beyond the intro, the display shows representative samples of ‘Boston’ style furniture in the collection and the wide variety of the objects created by Massachusetts Bay craftsmen during the last 400 years.

Beautiful side chair and high-boy

From simple utilitarian stools to high style chest pieces you get a feel for the design elements that representative of the work coming out of Boston and the surrounding area. You will need to visit the exhibit in person to fully experience the depth and variety of style I am talking about.

Floating staircase that was saved from destruction and installed at the museum

Beyond this exhibition which runs through October 6, 2013, there is a LOT more to see and explore at Winterthur. They offer several tours to parts of the house that are not part of the regular admission, including customized tours you can request, so I highly encourage you to schedule some tours of the other floors when you visit. In the fall I heard thy will also have an exhibit on the costumes of Downton Abbey which will be interesting to see along with all the great furniture, architectural elements (many rooms are furnished with the interior trim that was salvaged from historic homes around the country), and beautiful gardens.

If you’d like to learn more about Winterthur, please check out their website here. And if you’d like to learn more about  ‘400 Years of Massachusetts Furniture’ which is a series of events throughout the year at a consortium of museums and cultural institutions you can learn more about it here.  At the least you’ll learn how to efficiently pack tools in your tool chest….

-Bill

Reproducing Traditional Molding for the Alvah Kittredge House

The Alvah Kittredge House in Roxbury Massachusetts is a great example of high style Greek Revival architecture in Boston and a tangible link to the city and the nation’s early history.

Alvah Kittredge House in the 1880s (Photo Courtesy of Historic Boston Inc)

The Greek Revival Style was most popular in the United States during the second quarter of the 19th century. (Approximately 1820-1850) During this time period the population and economy was also growing by leaps and bounds. The United States was still a young nation and many folks wanted to show off their new found affluence.  During this period of great optimism there was a strong belief in the American Democracy and many associated the ideals of the new nation with those of early Greek Democracy. Around this time, access to Greece and the designs of antiquity were also coming into the mainstream as influential citizens like Thomas Jefferson read books like ‘The Antiquities of Athens‘, Benjamin Latrobe and others built out Hellenistic monuments and public buildings in Washington D.C. and other large east coast cities, and builder’s guides like Asher Benjamin’s ‘The Practical House Carpenter’ proliferated the tool chests of local joiners and carpenters. Given this atmosphere many folks wanted to have their own building look like a Greek temple. For most of the ‘middling’ Americans, especially those in more rural and western locales the scale and details would be simplified down to keeping classical proportions and greatly simplifying details to meet their budgets — pilasters instead of columns, simplified moldings or even flat boards attempting to echo the pediment and other design elements of a Greek temple.

Looking up at the portico of the Alvah Kittredge House (Photo by Bill Rainford)

In places with money — like public buildings and mansions — the builders could afford to go big with design elements like a colonnaded portico and carved relief details in the pediment etc. The Alvah Kittredge house is a great example of a high style Greek revival home which reflected the wealth of its original owner, and of Boston and the US in general at that time.  Not only is the house unusual given how the city has grown up around this once grand country estate, but the scale of the front facade needs to be seen in person to be properly appreciated. The two story portico with its double hung windows and high ceilings required wide and detailed moldings in order to be the appropriate scale for such a magnificent home.

The original crisp detail of this hand run molding is obscured by the many layers of paint over the generations. (Photo courtesy of the Taunton Press)

This 8 inch wide molding was made by hand using traditional wooden molding planes likely on site and from eastern white pine. This is not the sort of thing you can buy at a local big box store, or millworks supply company. The best way to replicate this sort of casing is to make it from the same materials and in the same manner as the original joiner….

Using a molding comb to capture the profile. (Photo courtesy of the Taunton Press)

I started by capturing the molding profile via molding comb or profile gauge which aids in transferring the profile to the newly prepared stock.

Setting in the details with a Snipe's Bill plane. (Photo courtesy of the Taunton Press)
Setting in the details with a Snipe’s Bill plane. (Photo courtesy of the Taunton Press)

Next by using traditional wooden molding planes I carefully set in all the major transitions in the profile

Using traditional molding planes to replicate the profile. (Photo courtesy of the Taunton Press)

Many of these planes I use date back to the time period when the Kittredge house was actually built and yields results that simply cannot be duplicated by machine. The original handwork had variations and facets which catch the light differently when compared to stock that is milled by a machine.

Section of new molding alongside an original sample -- a nice match. (Photo by Bill Rainford)
Section of new molding alongside an original sample — a nice match. (Photo by Bill Rainford)

The end result is a near identical match that will help insure that future generations living in the Kittredge house will be able to enjoy it’s many details in much the same way as Alvah did when the house was first built.

If you’d like to learn more about how to make traditional moldings, please check out the related article ‘Master Carpenter Series:Traditional Molding’ I wrote for FineHomebuilding which can be found here  (There is also a related video series which you can find on www.finehomebuilding.com/extras for the Sept 2013 issue)

-Bill Rainford
Preservation Carpenter, Joiner, and Instructor
https://rainfordrestorations.wordpress.com

P.S. The above post was written for my friends at Historic Boston Inc here. You can learn more about Historic Boston and specifically about the Alvah Kittredge House here.

Making Your Mark — Name Stamps with Peter Ross

How do you mark your wooden tools ?

Carve your name into it? No.
Burn your name into it with a branding iron? Meh.
Sharpie? That’s so ’90s.
If you really want to be a traditional woodworker you’ll want to use a hand made metal name-stamp. I’ve seen some of these stamps over the years in tool sales, but never found my name or initials, so I figured it was time to take matters into my own hands. This past week I had the opportunity to take a workshop at the Woodwright’s School making a metal name-stamp. I had a great time during the class and will cover some of the highlights here:

Master Blacksmith Peter Ross at the forge

The class is held in the forge/workshop of Master Blacksmith Peter Ross who was the long time master of the blacksmith shop at Colonial Williamsburg. Pete is a friendly person and a great instructor.

In the afternoon Roy came by to visit. (Bill Rainford with Roy Underhill)

During the afternoon we were visited by Roy Underhill who came by to make sure we weren’t making counterfeit Nikes or anything illegal. 😉  It was great to chat with Roy for a few minutes and he’s every bit as nice in person as he is on TV.

My first stamp 'BMR' which will be used to mark some of my tools with my initials.
My first stamp ‘BMR’ which will be used to mark some of my tools with my initials.

Now on to business….for my first stamp I made one with my initials ‘BMR’ so that I can label some of my tools. By stamping some of my old wooden planes I’ll officially be part of the long line of owners who had them before me and those who will have them after me.

Testing my Initials stamp in some end grain

After forging the rough blank we learned to use the various types of files and letter stamps needed to make a nice stamp. Along the way we’d test the stamps in the end grain of some wood and in lead flashing.

Testing the stamps on some lead flashing

Why do you use end grain wood and lead flashing?!

The stamps work by crushing some fibers and leaving others proud, thus creating a 3D surface that can be read — much like you see in the maker’s marks on the toe of a molding plane. The lead does a great job showing you crisply where your stamp is pressing and where you may need to work on it some more.

Peter teaching the class how to file and use the leg vise

Peter demonstrated how to properly file and also how tough the surface of the stamps become once they were case hardened — the files were no match.

My second stamp -- 'RAINFORD' with a slight curve over the length of the stamp
My second stamp — ‘RAINFORD’ with a slight curve over the length of the stamp

Making a longer name stamp was even more challenging since the letters are all set free hand you could very easily mess it up with any given letter. If you do mess it up, file off the mistake and try again, and again as needed.

Testing my second stamp

For my second stamp I made my last name and curved it a bit to make a gentle arch. Around the edge of the stamp you could decorate it any way you wanted, the most common being a traditional sawtooth-like border.

Another test block showing some of the variation across the stamps

Most if not all folks in the class got a chance to make a couple of name stamps and practice their filing skills.

A beautiful lock that Pete made

Beyond the class itself we also got a chance to see some of the amazing work Peter does in his shop. From beautiful locks, to tools, to massive Roubo holdfasts it was neat to see the variety of black and whitesmithing tasks Peter carries out in his shop.

If you are interested in taking this workshop, please check out the Woodwright’s School website here. I had a great time and look forward to my next workshop at the Woodwright’s School.

How many tools do I really need? — Sloyd Tool List

Hello Fellow Sloyders,

The post below is an expanded version of a recent post I made for my friends at Popular Woodworking which can be found here. For the sake of continuity on the series related to Sloyd on this blog I am providing an extended look at this topic.

In honor of American Independence day this past week, why not do something that makes you a little more independent?

When I started out woodworking I’d watch television shows and read magazines pushing all kinds of fancy new tools and think ‘If only I had a shop full of those tools I could build anything’. I spent a long time saving my pennies, reading the reviews and trying out the latest tools. The models seemed to change with the seasons. New project? Time for a new bit or jig or gizmo. Realizing that earlier craftsmen didn’t have access to all of these modern wonders yet they produced far more intricate work, I went in search of the hand cut dovetail and the arts and mysteries of our ancient craft.

Sloyd Tool Cabinet
Sloyd Tool Cabinet & Tool Set — Makes a great gift for the Sloyder in your life

I quickly found that power equipment was not broadening my capabilities as much as it was like an anchor tethering me to a limited band of work and taking up valuable shop space. I also didn’t like wearing the requisite dust mask, hearing protection and safety glasses all the time — it was like a mini sensory deprivation chamber. When I asked master cabinetmaker Dan Faia (NBSS) what he does for dust protection in his own shop, his succinct reply was “I never coughed up a curl“. That pithy remark reflected the very different view traditional woodworkers have — without all the big machines, the dust and noise,  you can focus on the work, invest in a smaller set of high quality tools that should last a lifetime and enjoy the process as much as the result.

Sloyd Tool Cabinet Ad -- From Chandler and Barber
Sloyd Tool Cabinet Ad — From Chandler and Barber (Photo Courtesy of John Pirie)

If you are looking to downsize your powered shop, get into more traditional woodworking or just starting out the questions that often come up are —

What is a good minimum set of tools I need to get started? How much is this all going to cost me?

In researching the Sloyd tool cabinet shown above I found some old tool catalogs from Chandler and Barber of Boston (a primary supplier of Sloyd paraphernalia including the Larsson benches etc ) including one from 1900 complete with a listing of and pricing for all the tools in the cabinet.  According to the Federal Reserve’s website $1 in 1900 that should be worth about $27 today. A straight monetary conversion doesn’t paint a complete picture since some tools that were common back then are a specialty today and vice versa so I also included a column showing what an equivalent quality tool would cost new today.

In 1900,  just as it was when I was a student over 100 years later, the view is that it is better to buy a quality tool once that will last a lifetime than buy something of poor quality which will not serve you well in your work. Keep that in mind as you review the list — since the tools were not the cheapest back then and surely are not the cheapest today. But with this modest set of tools you can build an amazing array of projects just as many ‘Sloyders’ (Sloyd school students) have done before us.

Tool Original Price Original Price in Today’s $ Today’s Price Notes
2′ Folding Wood Rule $0.15 $4.05 $24.00 Bi-fold Rule from Garret Wade
6″ Metal Blade Try Square $0.25 $6.75 $13.65 Swanson Try Square On Amazon
Marking Gauge $0.25 $6.75 $30.00 Robert Larson Marking Gauge on Amazon
Bevel Gauge $0.25 $6.75 $22.50 Shinwa (Japanese) Lee Valley or Amazon
Pair Dividers, 5 inch $0.30 $8.10 $49.50 Starrett 4″ or 6″ on Amazon
Screw Driver, 4 inch $0.15 $4.05 $13.95 Marples, from Tools For Working Wood
13 oz. Claw Hammer $0.42 $11.34 $9.97 Stanley 13 oz Hammer, Walmart
Block and Rabbet Plane $1.00 $27.00 $175.00 Lie Nielsen Block Rabbet Plane
Bailey Jack Plane $1.13 $30.51 $93.00 Stanley Bailey Jack, from Rockler
Cross-cut Saw, 20 inch $1.37 $36.99 $96.00 Pax Handsaw, from Lee Valley
Splitting Saw (Rip), 20 inch $1.37 $36.99 $96.00 Pax Handsaw, from Lee Valley
Keyhole Saw $0.20 $5.40 $18.00 Japanese Keyhole Saw, from Lee Valley
Firmer Chisel, 1/4 inch $0.25 $6.75 $28.95 Henry Taylor, from Traditional Woodworker
Firmer Chisel, 3/4 inch $0.32 $8.64 $30.95 Henry Taylor, from Traditional Woodworker
Firmer Gouge, 3/8 inch $0.29 $7.83 $40.95 Henry Taylor, from Traditional Woodworker
Firmer Gouge, 3/4 inch $0.34 $9.18 $44.95 Henry Taylor, from Traditional Woodworker
Bit Brace $0.50 $13.50 $69.50 French Bit Brace, from Lee Valley
Jennings Pattern Bits, 1/4,1/2,3/4in. $0.78 $21.06 $54.00 Auger Bits, from Traditional Woodworker
2 Gimlet Bits $0.20 $5.40 $16.00 7 Piece Set, from Garret Wade
Screwdriver Bit $0.15 $4.05 $11.50 Driver Adapter Bit, from Lee Valley
Countersink $0.20 $5.40 $19.50 Hand Countersink, from Lee Valley
Spoke Shave $0.15 $4.05 $34.99 Stanley Spoke Shave, from Rockler
Brad Awl $0.05 $1.35 $19.95 Brad Awl, from Lee Valley
Nail Set $0.10 $2.70 $3.15 Stanley Nail Set, from Amazon
Half Round File $0.34 $9.18 $9.97 Nicholson Half Round File, from Home Depot
Oil Stone $0.50 $13.50 $18.99 Norton Combo Oil Stone, from Amazon
Oil Can $0.10 $2.70 $7.11 Goldenrod Oil Can, from Amazon
Pair Combination Pliers $0.50 $13.50 $8.60 Crescent H26N, from Amazon
Can Glue $0.15 $4.05 $5.88 Titebond, from Amazon
Assorted Brads $0.05 $1.35 $7.23 Crown Bolt brad and nail assortment, from Amazon
Assorted Screws $0.10 $2.70 $8.10 Maxcraft woodscrew assortment, from Amazon
Total: $11.91 $321.57 $1081.84

If your wallet still cringes at the totals above, fear not, for the totals above are for all brand new tools. The one luxury we have in our modern day of hand tools falling out of favor is the large secondhand market where you might be able to scoop up some great tools — possibly even some of the actual tools that once inhabited these cabinets for the original price in today’s dollars or less.

Fully Stocked Sloyd Tool Cabinet

So before you break out the barbeque, give some thought to how you can free yourself from a mountain of modern tools and invest in a modest set of traditional hand tools that will get you started on the path to more enjoyable woodworking.

-Bill

P.S. Extended Content For Readers of My Blog:

Note, the table above is expanded to show what sources I pulled my current pricing data from — which may be controversial to some — but was a best effort to identify similar makes, brands, qualities and countries of origin to be the same as what was in the original cabinet. For items no longer made in the U.S.A. I tried to find the next closest replacement.

P.P.S Why did the relative price of new tools go up so much?

This is a topic we’ll explore more in a future post, but for all the armchair economists looking to convert see what a dollar was worth in the past, this site from the FED was interesting.

Sloyd Workbench — Larsson Adjustable Workbench

Hello My Fellow Sloyders,

Recently we’ve talked a bit about the Sloyd Tool Cabinet and it’s contents — but with all these tools on hand and a book full of models to build, where do you actually build them?

I’d like to introduce you to a slightly more famous cousin to the Sloyd Tool Cabinet — the ‘Larsson Improved Adjustable Workbench’ or more commonly known as a ‘Sloyd Bench’.

Larsson Adjustable Bench from November 1908 Sloyd Record

This workbench was designed by Gustaf Larsson the principal of the Boston Sloyd School in the late 19th and early 20th centuries and manufactured by Chandler and Barber to Larsson’s specifications.  The bench was the result of Larsson’s experiences at Naas, at the Boston Sloyd School and at  the North Bennet Street Industrial School. It draws upon design elements found in traditional continental European benches but was scaled to the needs of a classroom setting and had to accommodate both children and adults.

The Sloyd Record: Issue No.1 January 1904 -- Boston Sloyd School Alumni Newsletter
The Sloyd Record: Issue No.1 January 1904 — Boston Sloyd School Alumni Newsletter

How do we know so much about this bench?

In some ways it is fairly well documented in old tool catalogs, like those of Chandler and Barber — the premier supplier of ‘Sloyd System’ benches, tools and supplies and in other advertising. In addition, a fair number of these benches still survive which is a testament to how well they were built and how many of them were produced. While the North Bennet Street Industrial School catered to training immigrants and younger students in its earliest days, the Boston Sloyd School focused on teaching the teachers of Sloyd. Teachers would come to the school, learn how to teach Sloyd to students and then go back to their municipalities to teach Sloyd to the local population. So with diplomas in hand these new teachers often wanted to order the same or very similar setups to what they learned on. This was the genesis of many manual training programs in the United States.

Chandler and Barber Sloyd System Supplier Ad from January 1904 Sloyd Record

Above you can see one of the many ads Chandler and Barber took out in Sloyd related publications — in this case the ‘Sloyd Record’ which was the alumni newsletter of the Boston Sloyd School. Chandler and Barber seemed to be the most prolific dealer in this space, but just like today there was a lot of competition. You’ll see ads from Hammacher Schlemmer (they used to specialize mostly in tools and hardware back then), lumber dealers, publishers and other similar companies trying to get a piece of the apparently semi-lucrative Sloyd pie.

Buy the best -- buy a Larsson Bench from Chandler and Barber
Buy the best — buy a Larsson Bench from Chandler and Barber

The competition got so fierce that some of the Chandler and Barber felt it was worth mentioning how others got burned trying to save a few dollars going with a competitor’s bench of inferior quality. Don’t be a part of that sorry lot…..

Larsson IMproved Adjustable Sloyd Bench as seen in 'A Textbook Of Working Models Of Sloyd' By Gustaf Larsson
Larsson Improved Adjustable Sloyd Bench as seen in ‘A Textbook Of Working Models Of Sloyd’ By Gustaf Larsson

What made this bench so special?

Beyond being the brand name bench associated with Sloyd pioneer Gustaf Larsson the bench did have some novel features. If you look carefully in the picture above you can see a set of hinges on the cross member of the base (near where you see the word Pat.Aplc..). Why would anyone want hinges on their bench? Essentially you could take the top of the bench off, flip up or down those blocks, re-install the bench top and be able to accommodate both children and adults in the same workspace. Over the years several models of bench were associated with Larsson’s name, including the popular No. 5 model shown here, another larger model designed for 2 students to share a workspace, and even a clamp on vise which could be used for light work when attached to a sturdy table.

Beyond being a reasonably stout bench, it could be ordered with wood or metal vise screws, a few variants of removable tool rack (which made it easy for instructors to see if all the tools were put back in their proper place and in good condition), vise and dog hole configurations and similar tweaks.

Larsson Improved Adjustable Bench as Seen on Craigslist (Thanks to Gary Roberts for the link)
Larsson Improved Adjustable Bench as Seen on Craigslist (Thanks to my friend Gary Roberts for the link)

During my time at NBSS over the years I’ve had the chance to work at some of these benches a few of which seemed to survive in the darker corners of the workshop department. At the time I didn’t realize the history of what I working on — I thought it was just another old workbench which had seen better days and was propped up to accommodate taller students. At this sort of old bench I first learned to layout and cut a proper dovetail and it was well suited for the task and you could fit a fair number of them in a modest sized classroom. The benches were commonly bolted down into the floor which made up for the lack of mass when compared to a full sized bench. As a joiner these days I am used to working from a much larger bench as I work on a bigger scale, but if you are tight on space or find a good deal on a used model, it would be a great place to start on your path to more enjoyable woodworking.

In your travels, if you see any of these benches, tool cabinets or Chandler and Barber catalogs from the early 1900s, I’d be interested to see or hear about your findings here on the blog or via email.

Take care,
-Bill