Carve your name into it? No. Burn your name into it with a branding iron? Meh. Sharpie? That’s so ’90s.
If you really want to be a traditional woodworker you’ll want to use a hand made metal name-stamp. I’ve seen some of these stamps over the years in tool sales, but never found my name or initials, so I figured it was time to take matters into my own hands. This past week I had the opportunity to take a workshop at the Woodwright’s School making a metal name-stamp. I had a great time during the class and will cover some of the highlights here:
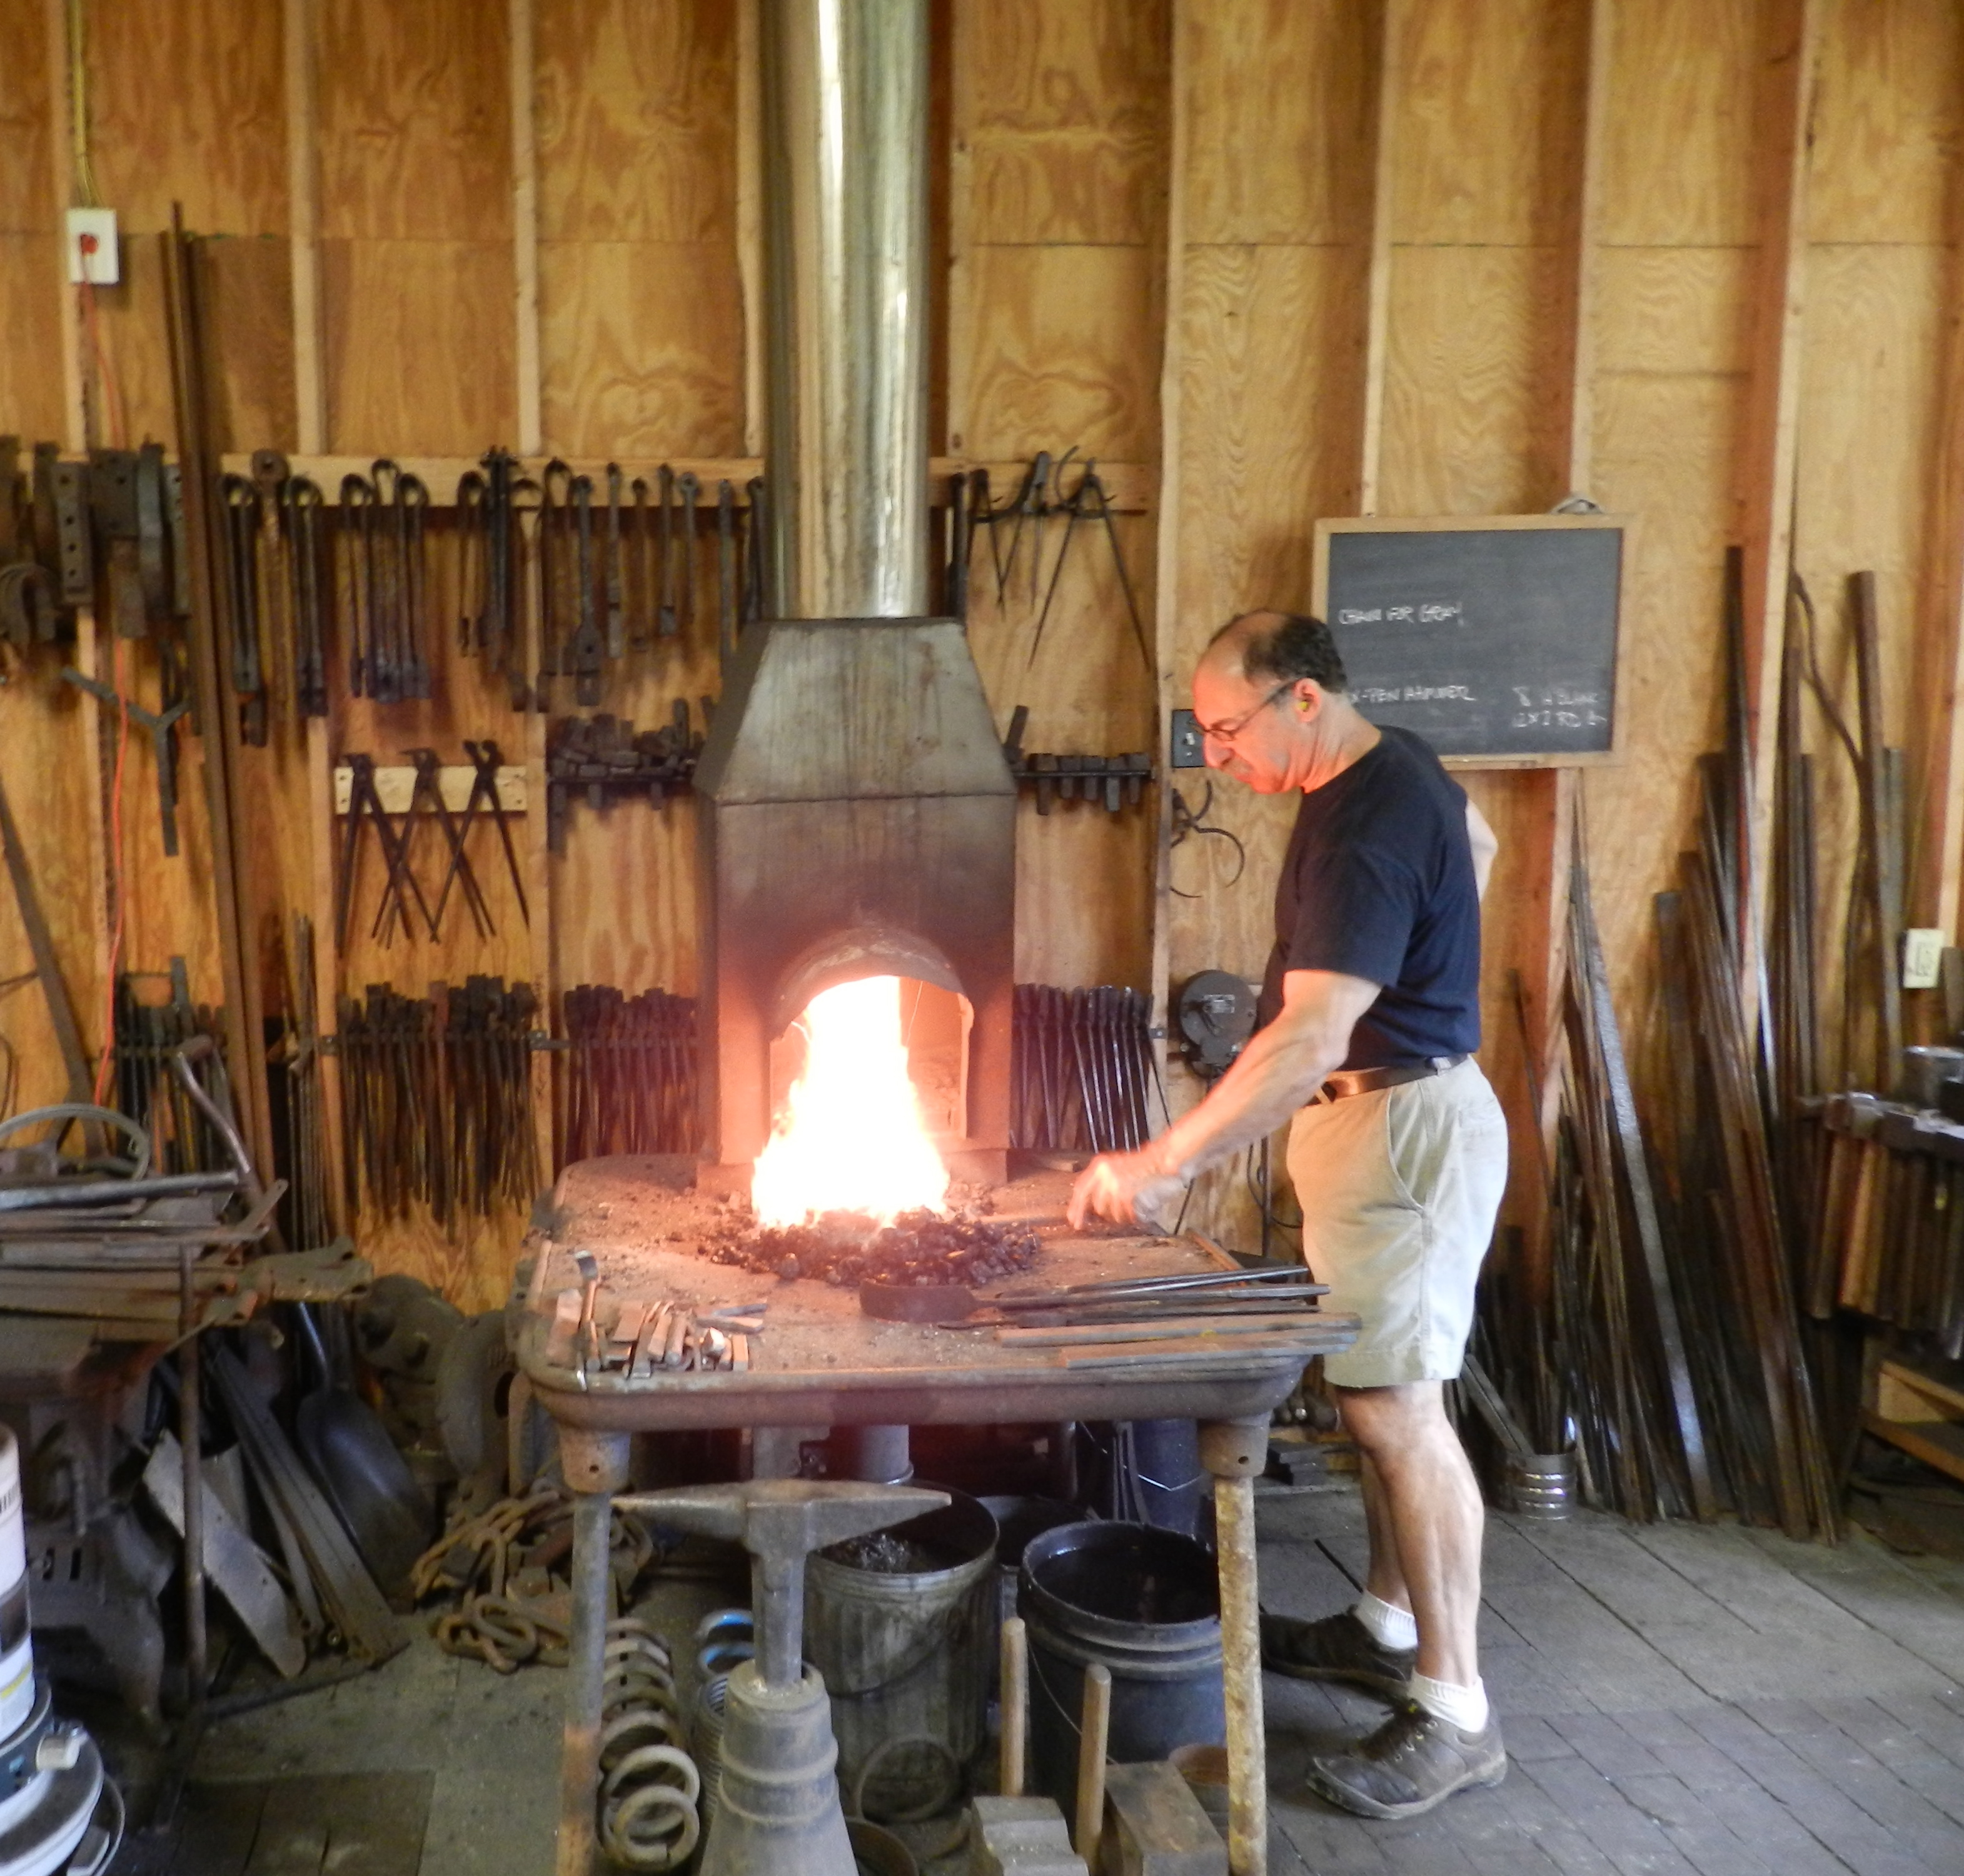
Master Blacksmith Peter Ross at the forge
The class is held in the forge/workshop of Master Blacksmith Peter Ross who was the long time master of the blacksmith shop at Colonial Williamsburg. Pete is a friendly person and a great instructor.
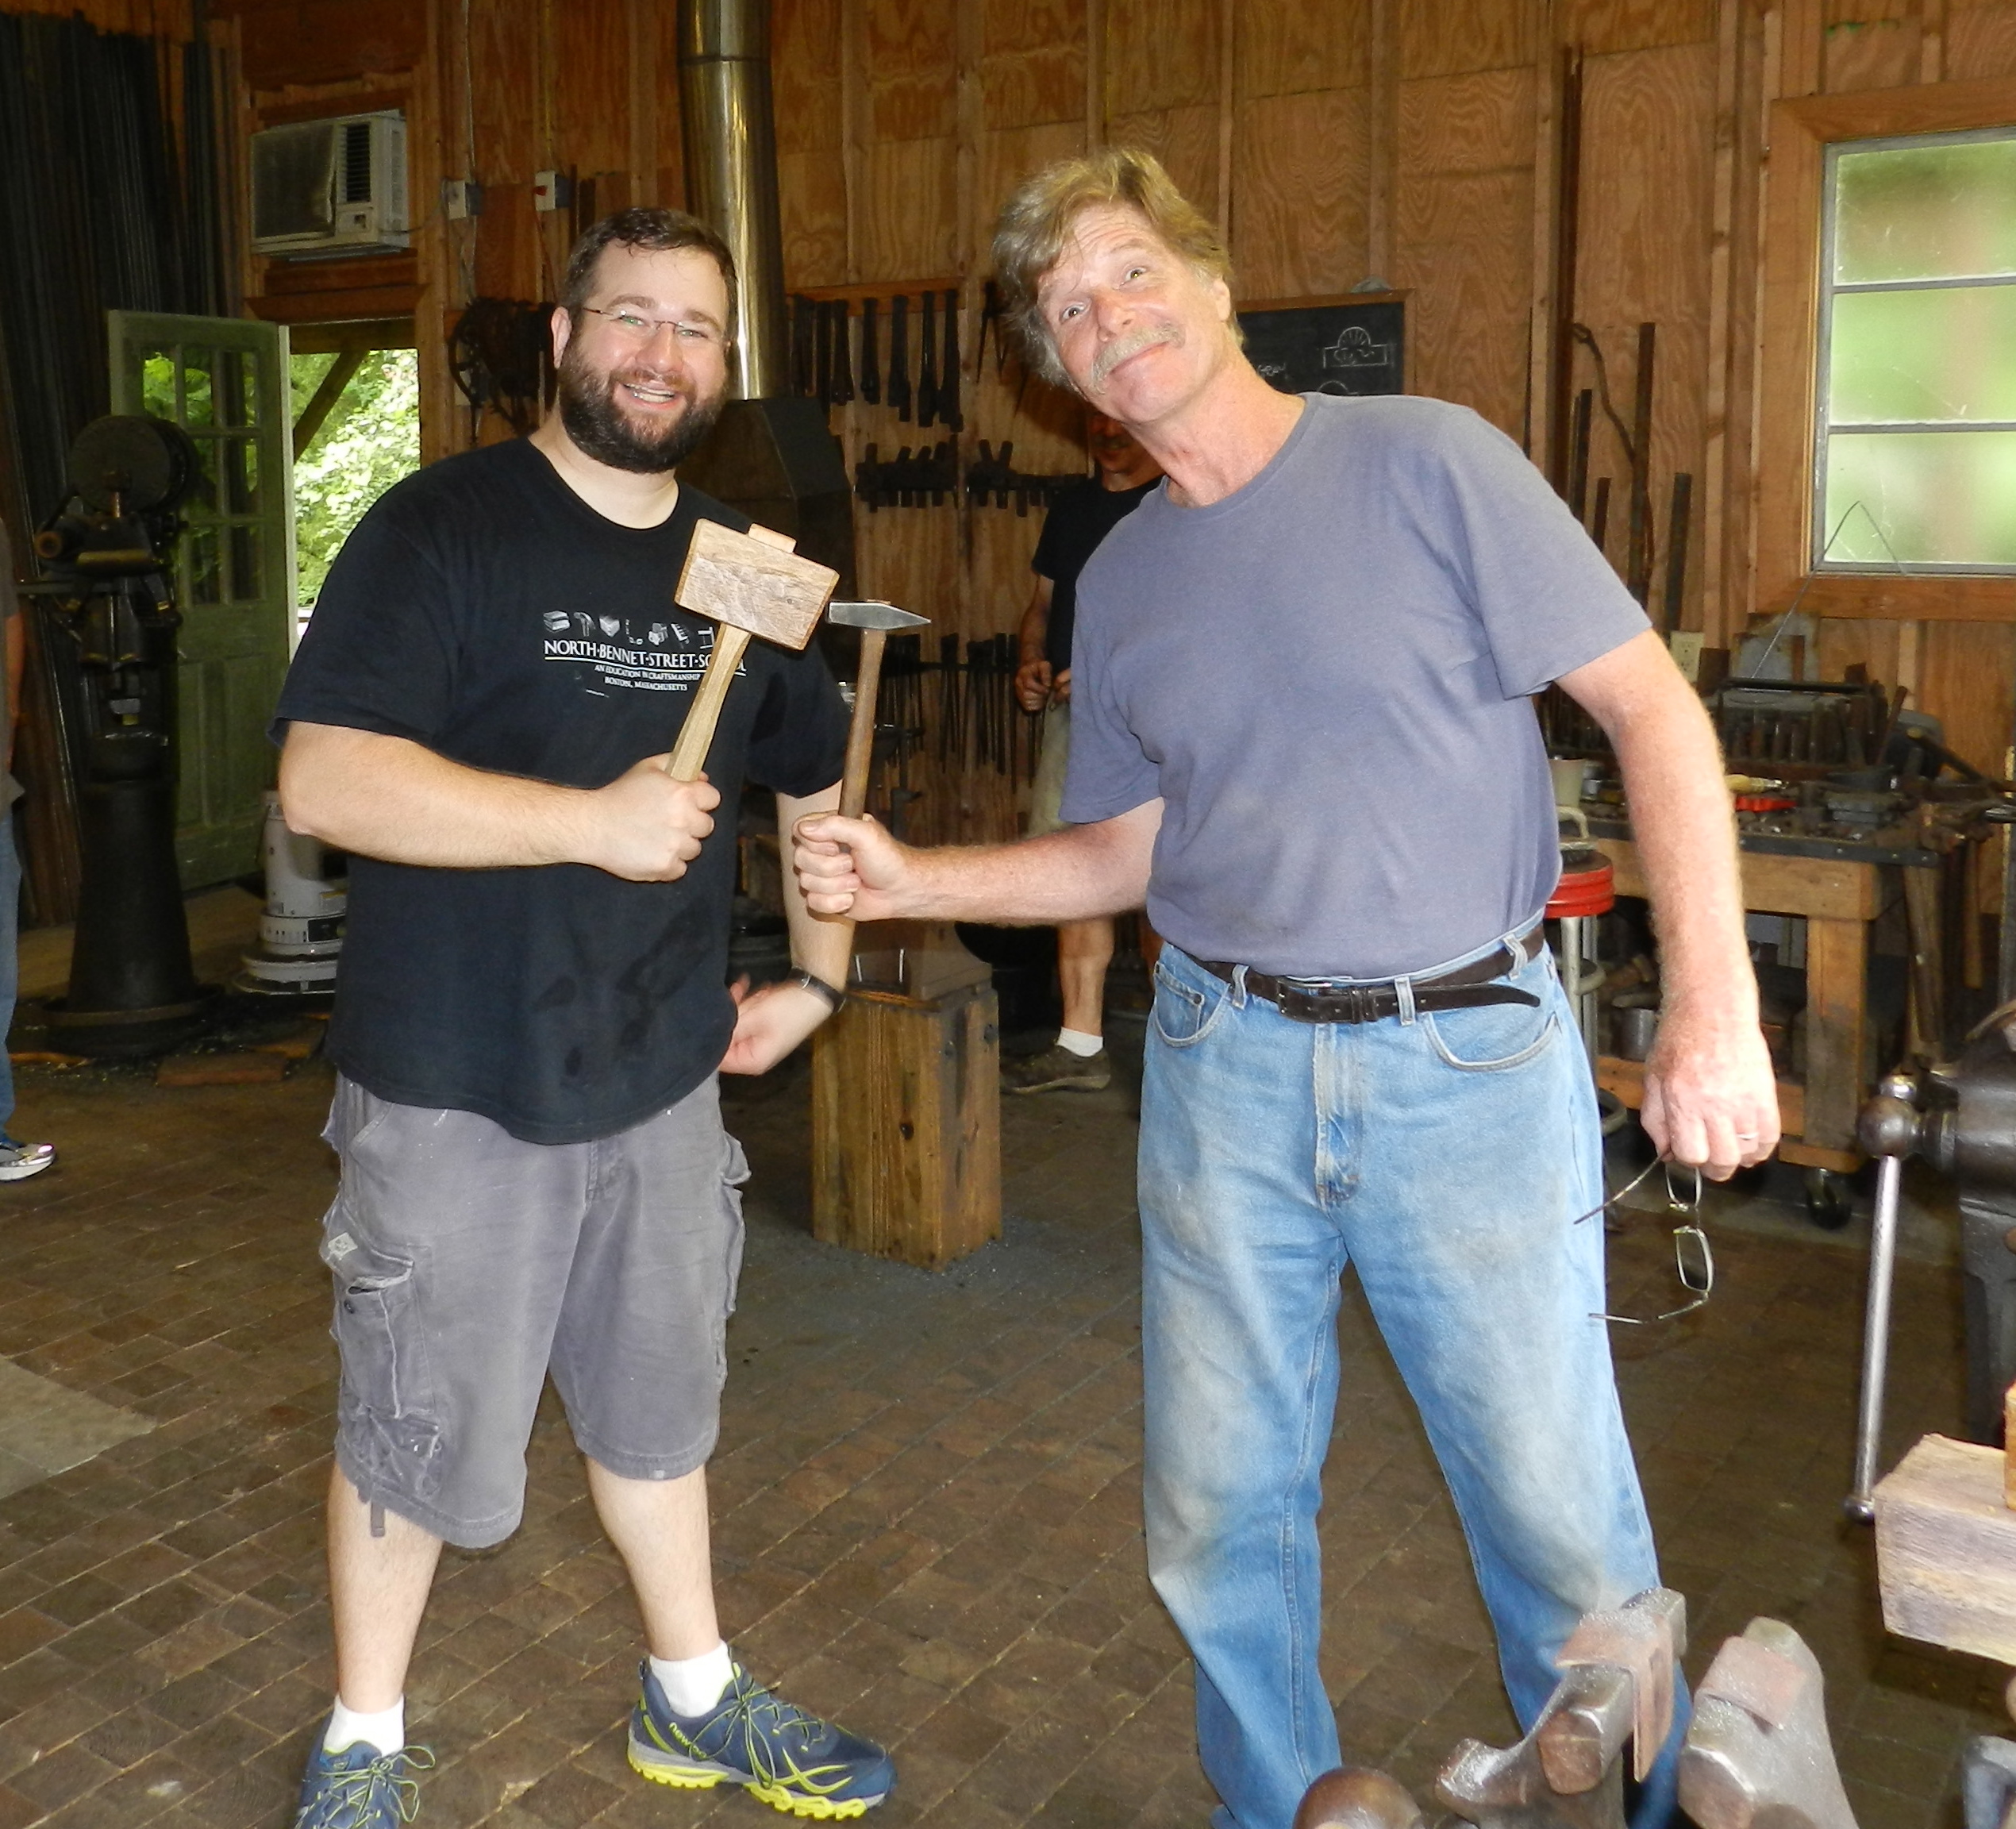
In the afternoon Roy came by to visit. (Bill Rainford with Roy Underhill)
During the afternoon we were visited by Roy Underhill who came by to make sure we weren’t making counterfeit Nikes or anything illegal. 😉 It was great to chat with Roy for a few minutes and he’s every bit as nice in person as he is on TV.
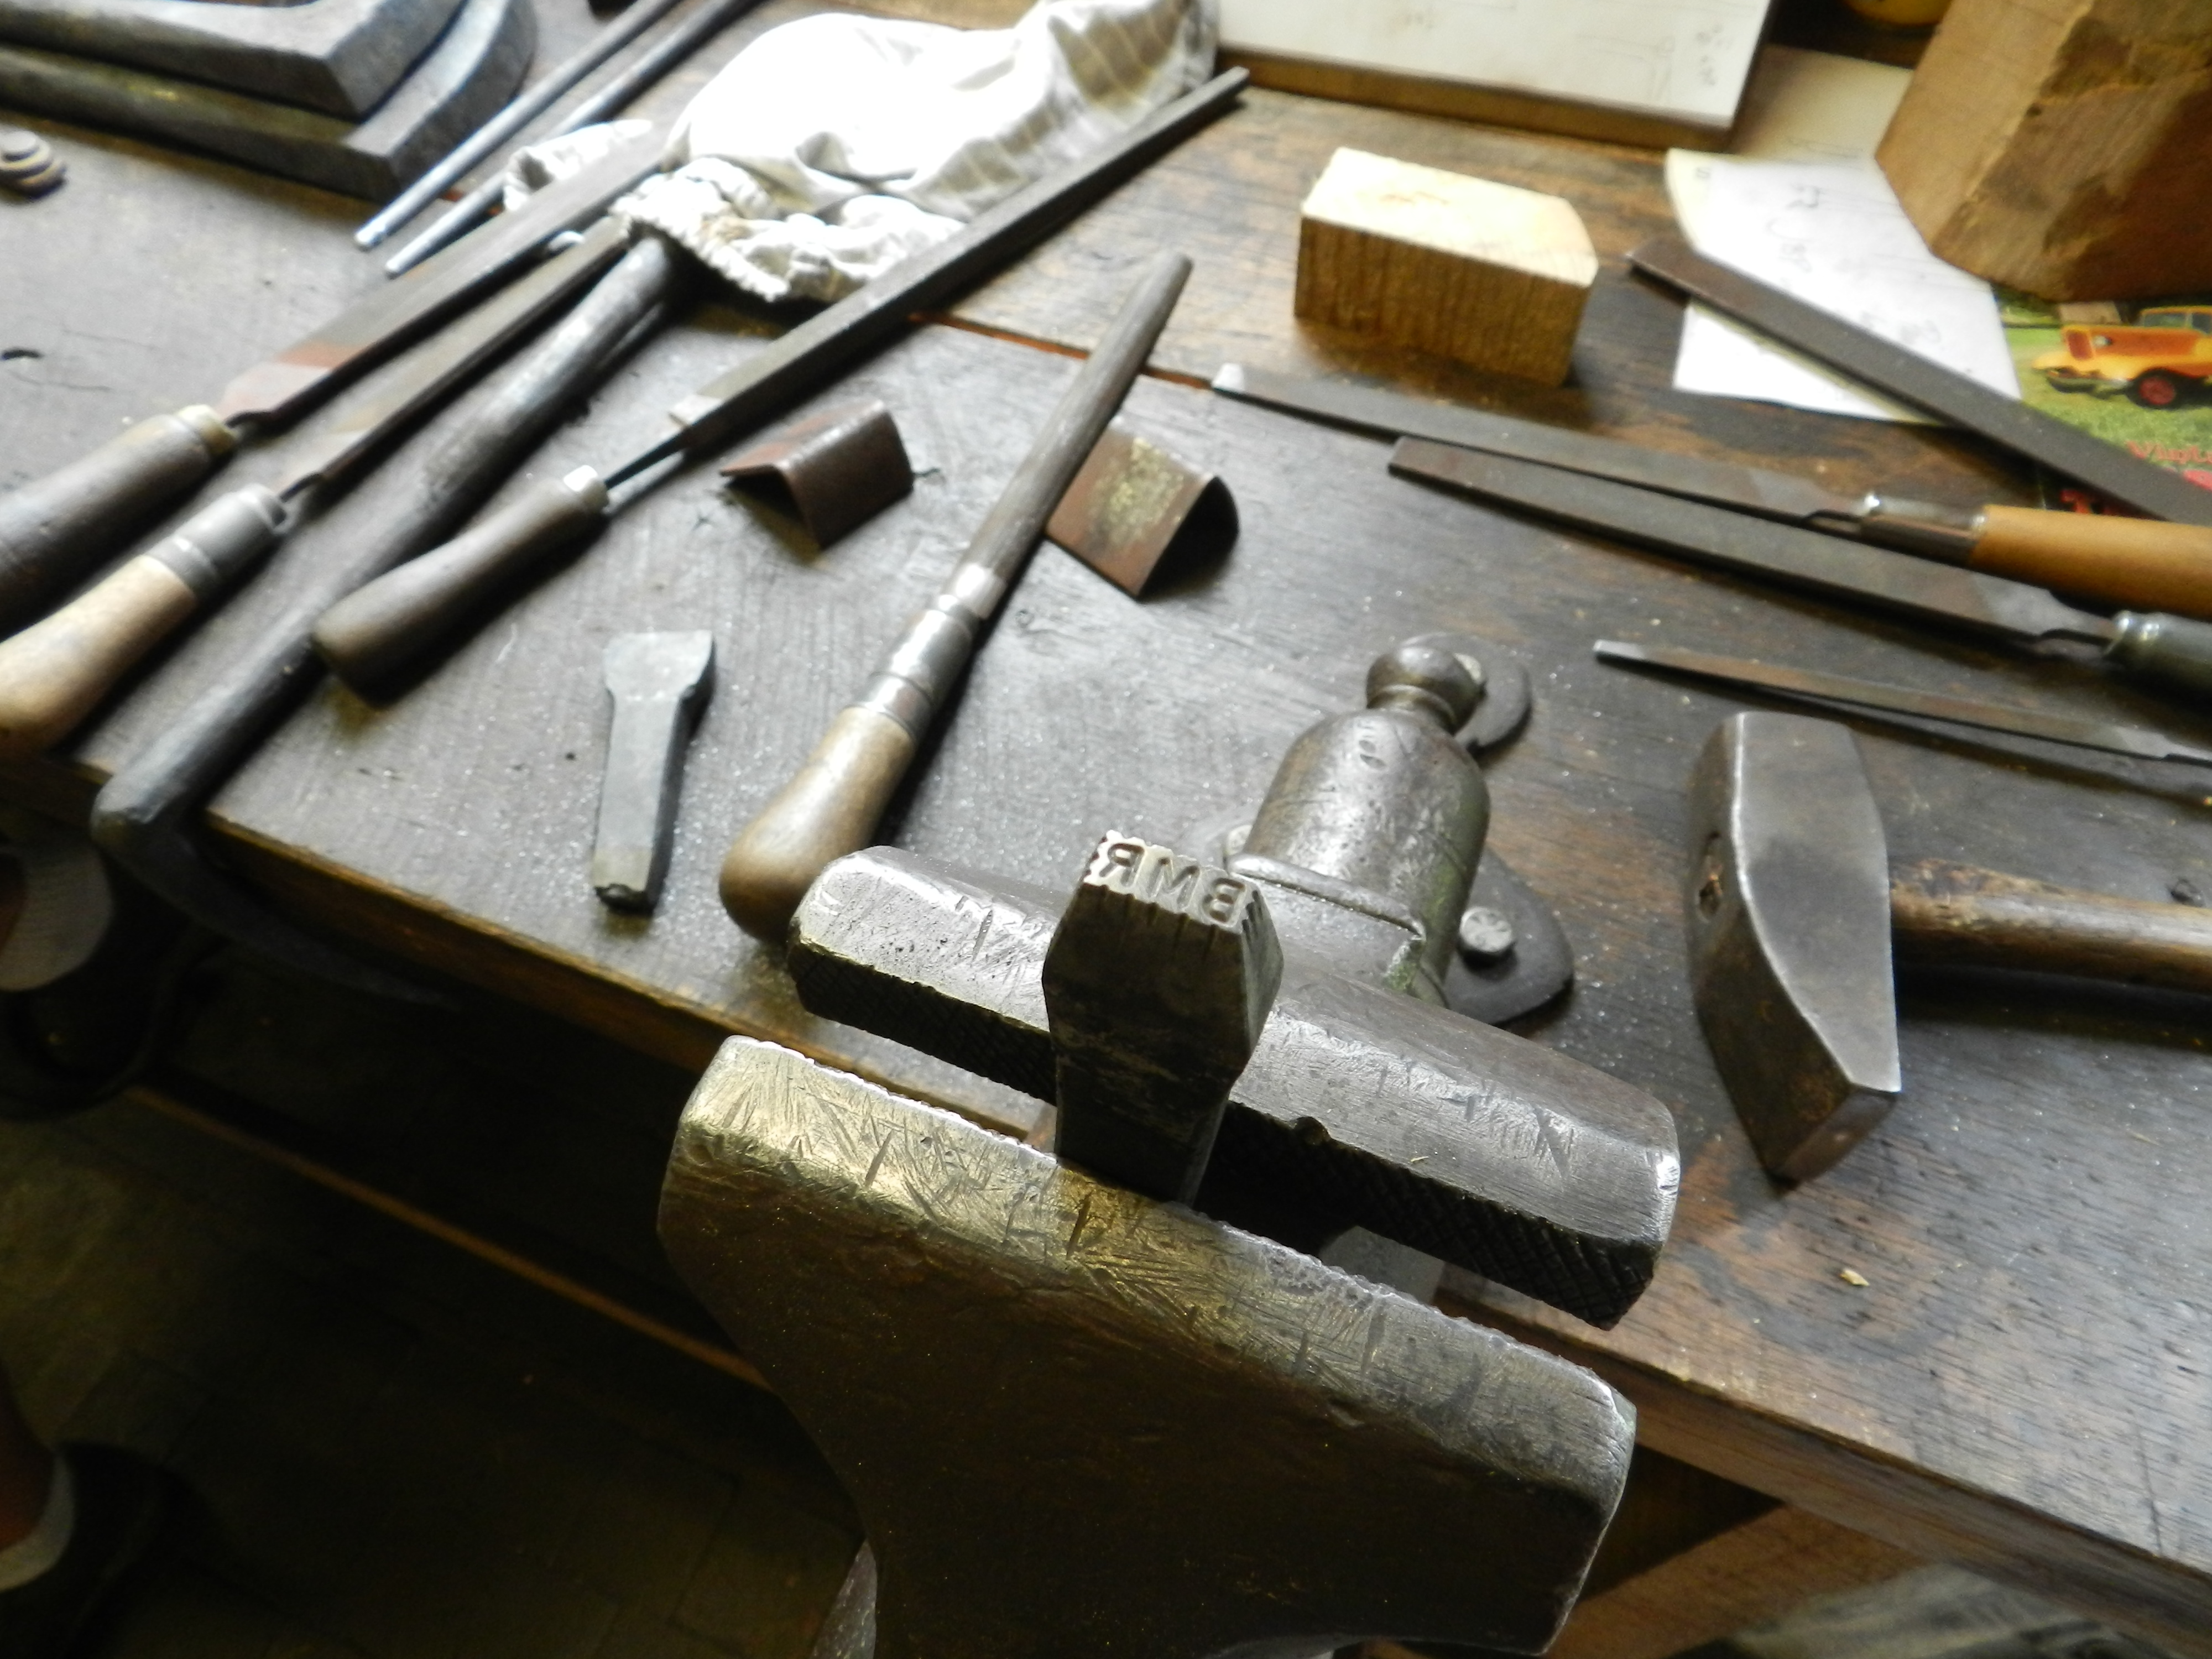
My first stamp ‘BMR’ which will be used to mark some of my tools with my initials.
Now on to business….for my first stamp I made one with my initials ‘BMR’ so that I can label some of my tools. By stamping some of my old wooden planes I’ll officially be part of the long line of owners who had them before me and those who will have them after me.
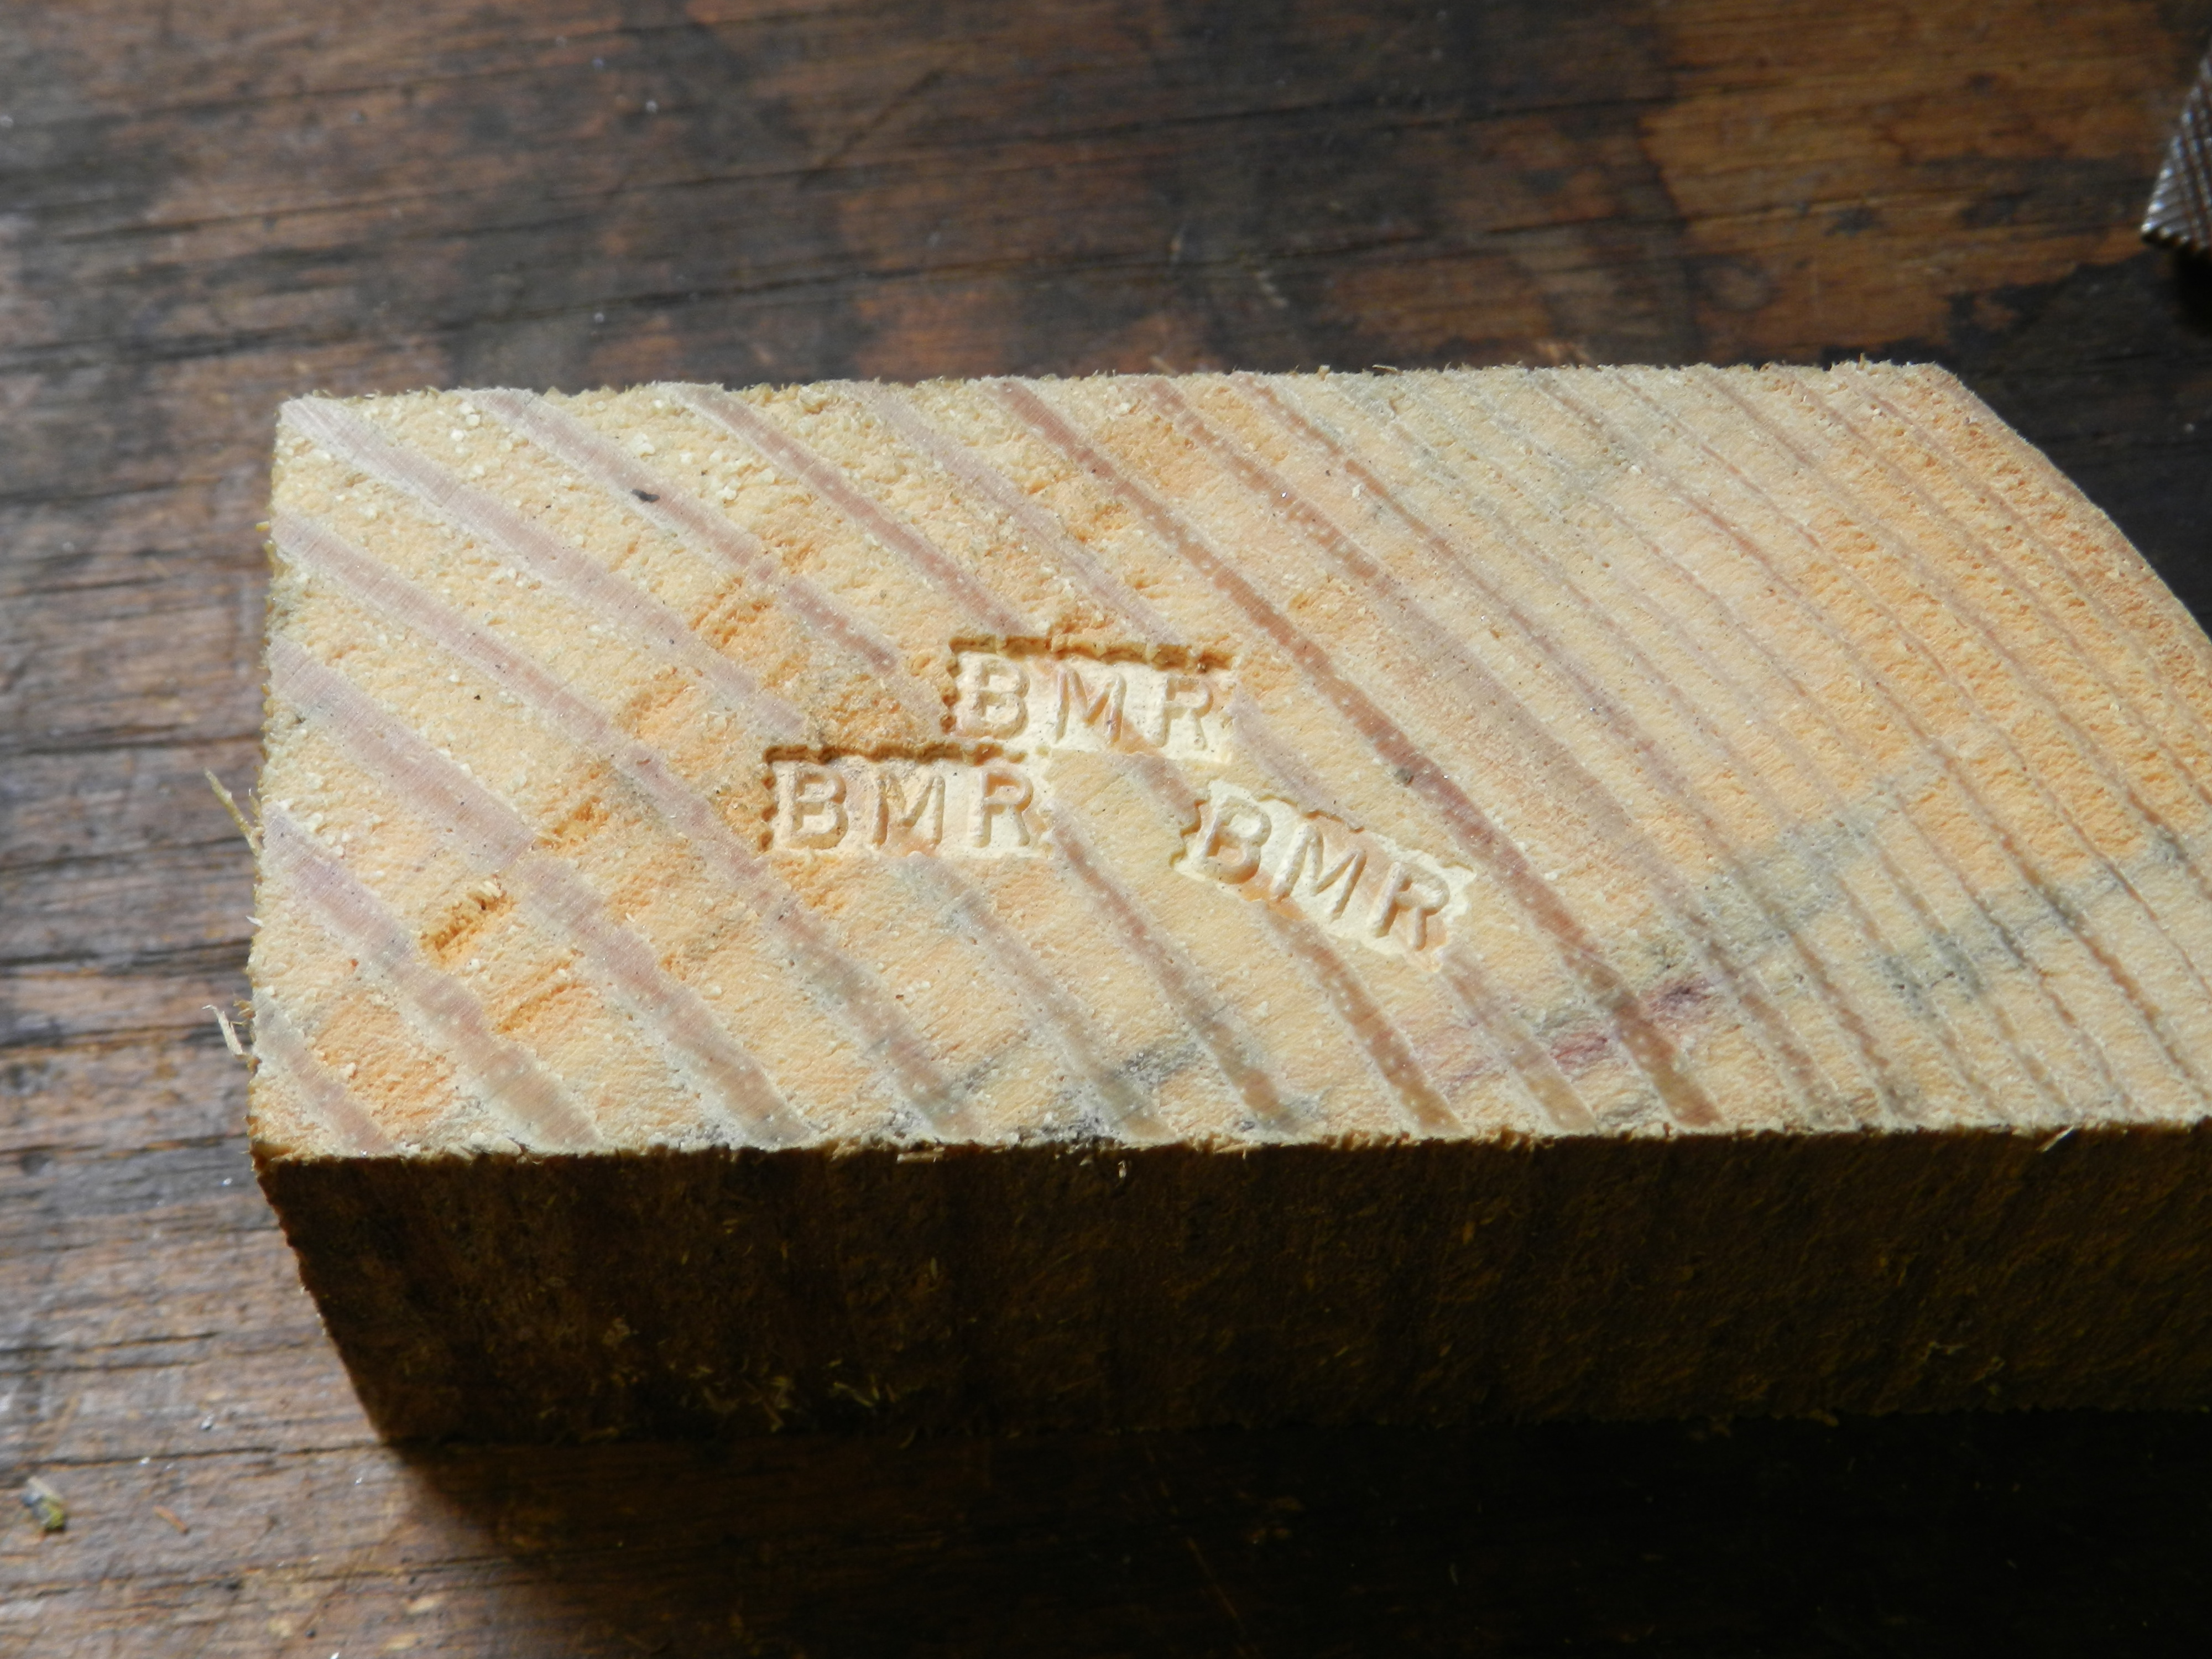
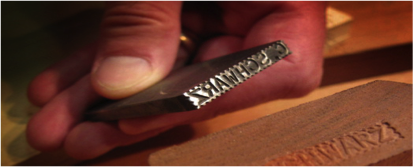
Testing my Initials stamp in some end grain
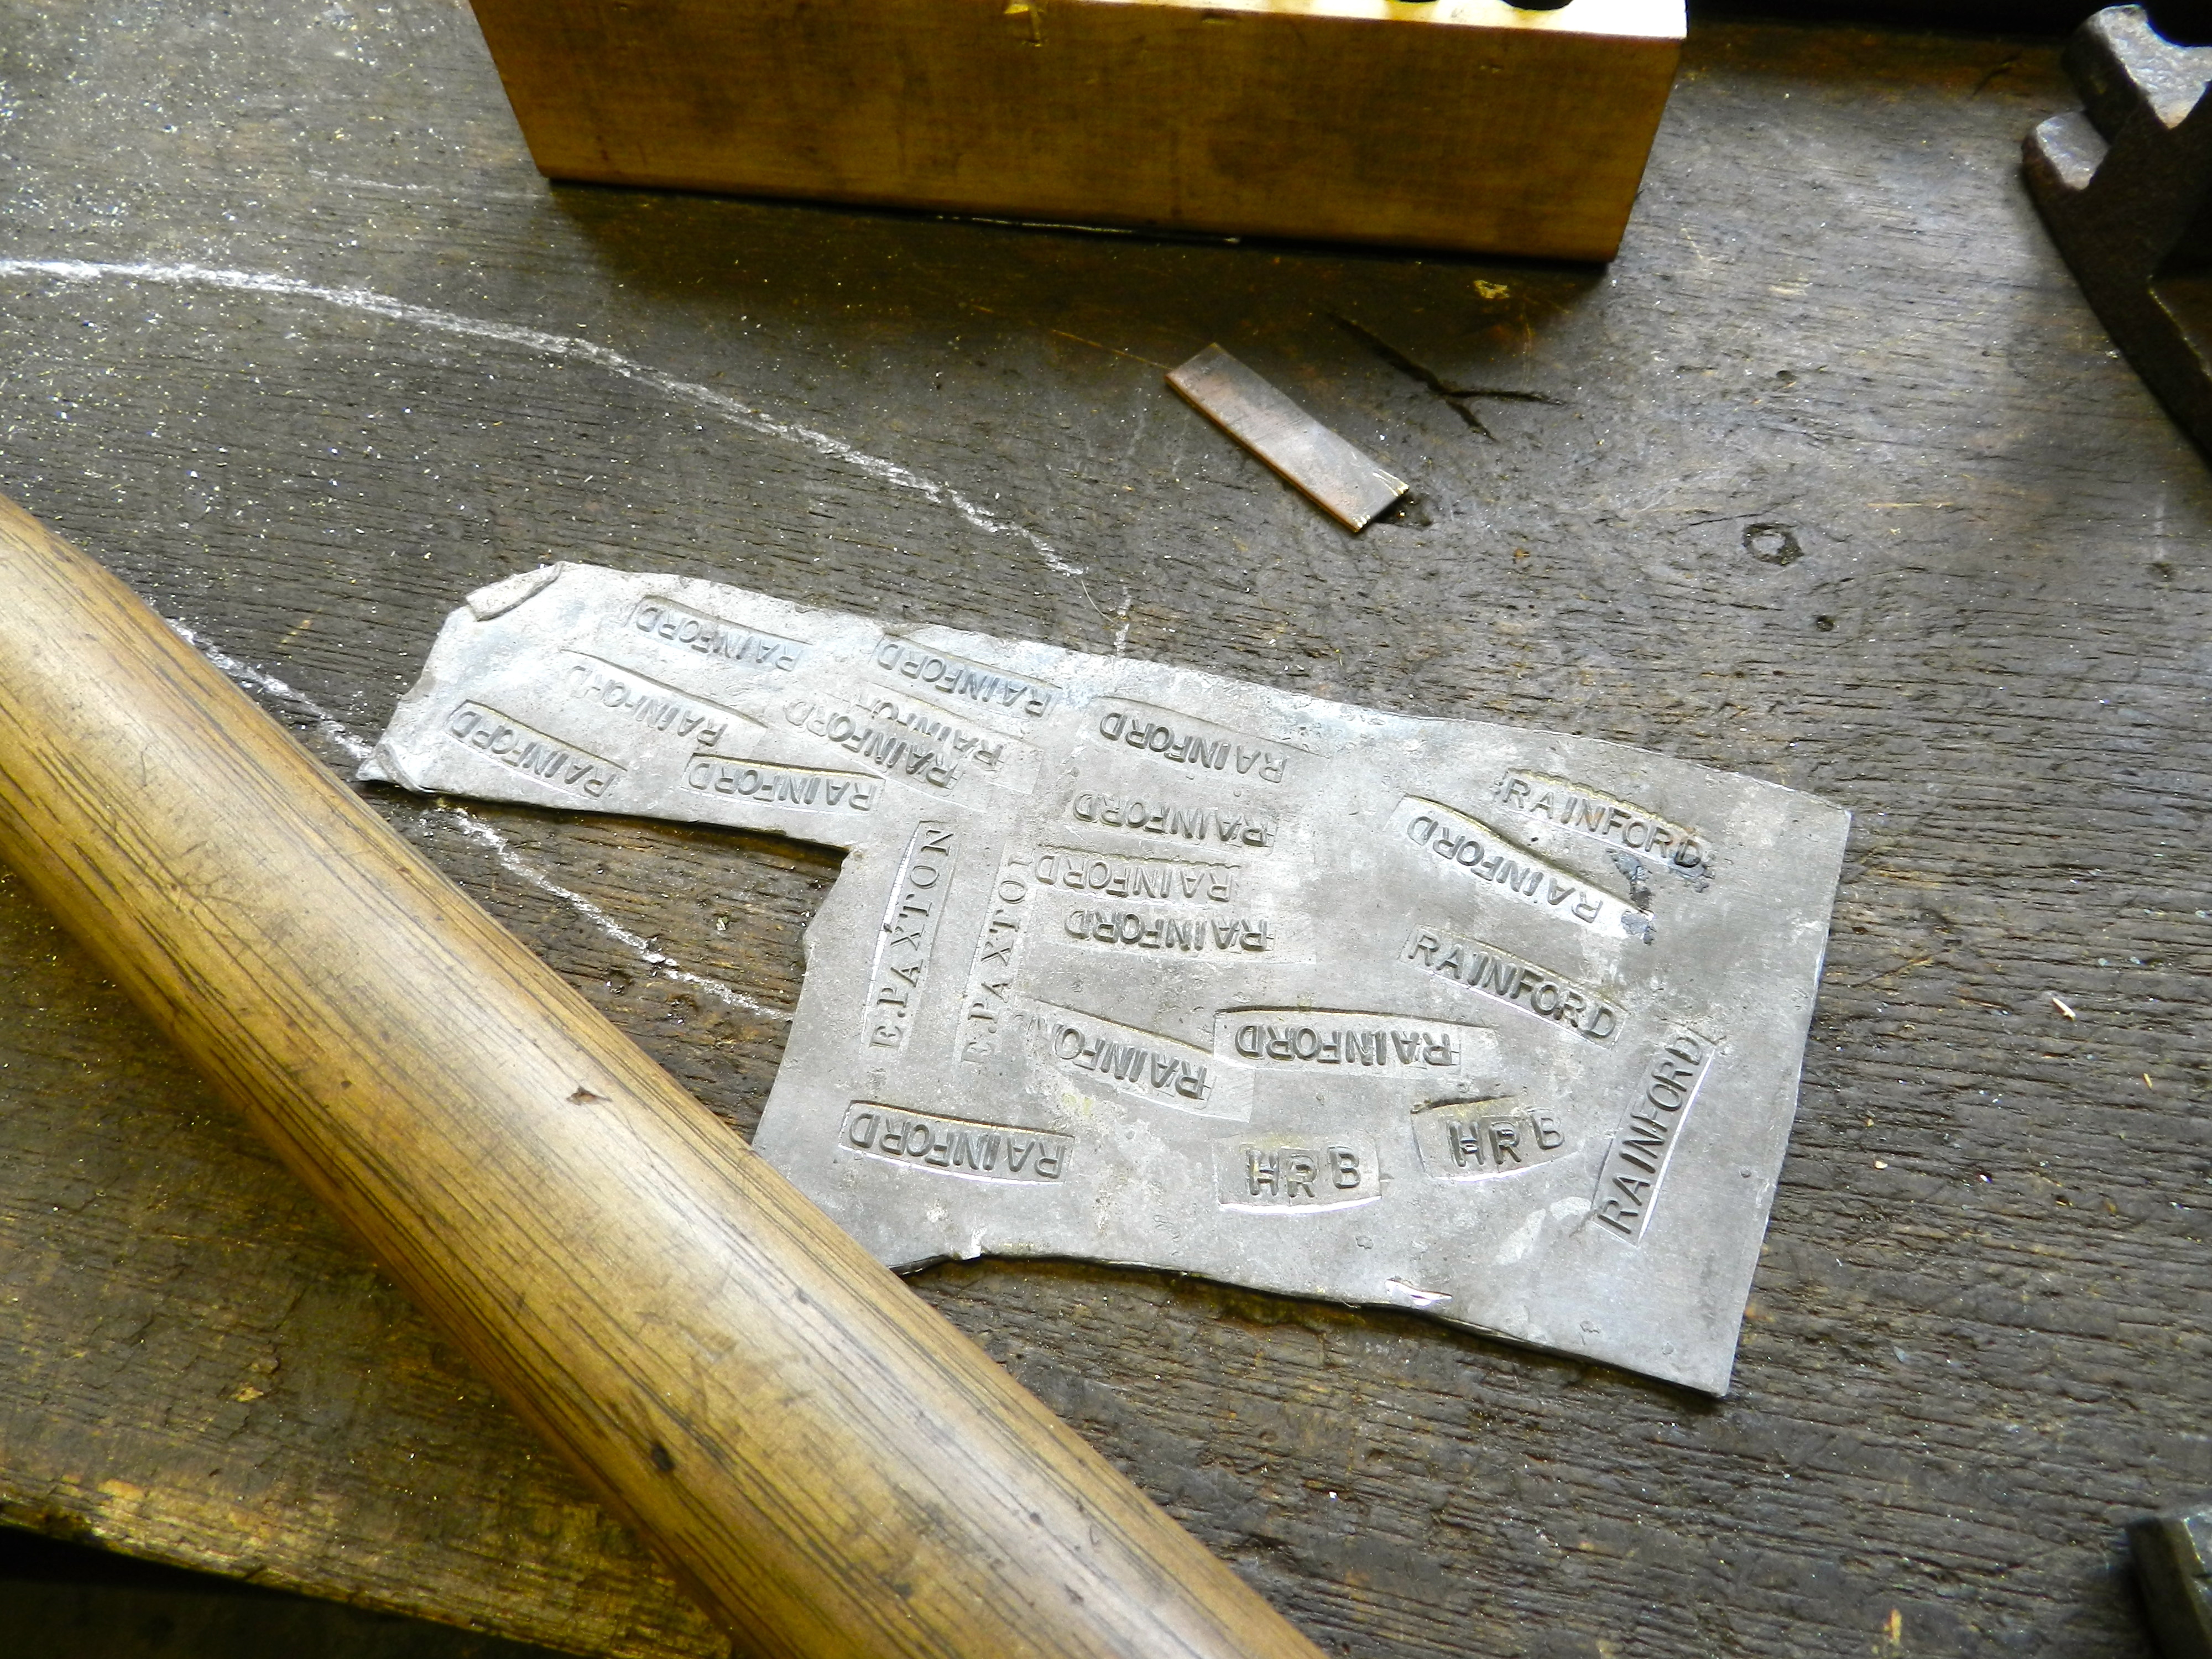
After forging the rough blank we learned to use the various types of files and letter stamps needed to make a nice stamp. Along the way we’d test the stamps in the end grain of some wood and in lead flashing.
Testing the stamps on some lead flashing
Why do you use end grain wood and lead flashing?!
The stamps work by crushing some fibers and leaving others proud, thus creating a 3D surface that can be read — much like you see in the maker’s marks on the toe of a molding plane. The lead does a great job showing you crisply where your stamp is pressing and where you may need to work on it some more.
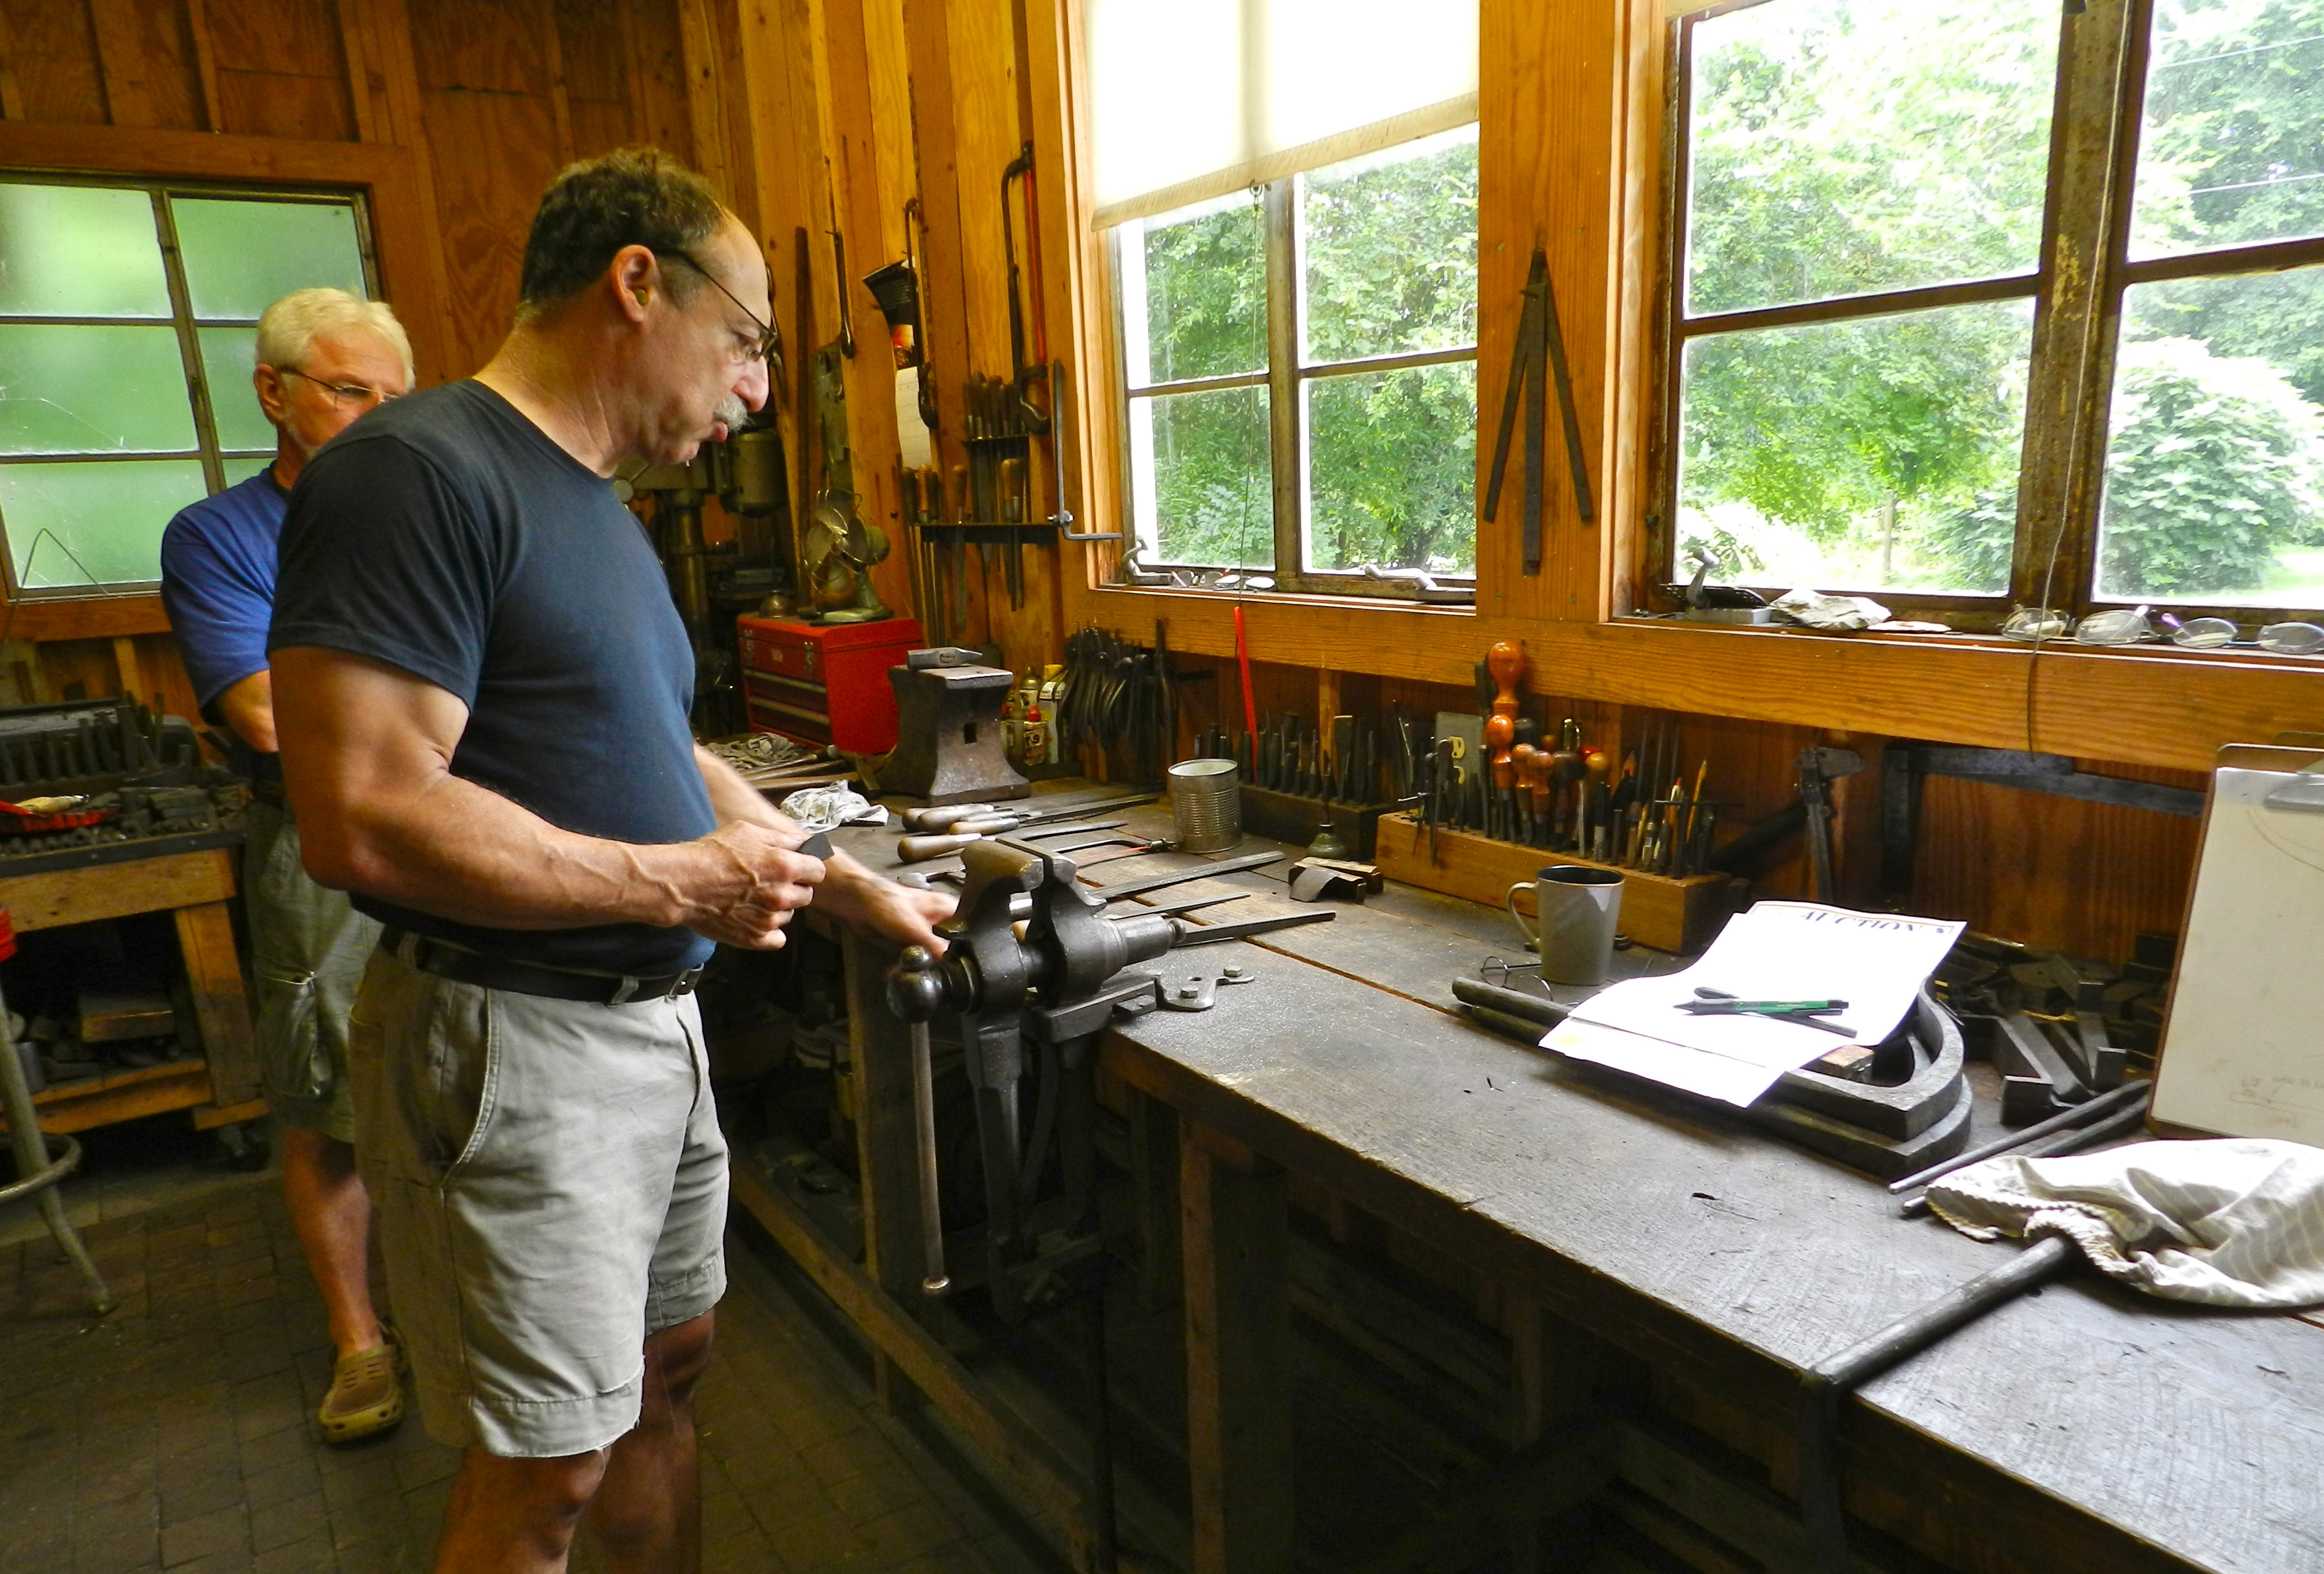
Peter teaching the class how to file and use the leg vise
Peter demonstrated how to properly file and also how tough the surface of the stamps become once they were case hardened — the files were no match.
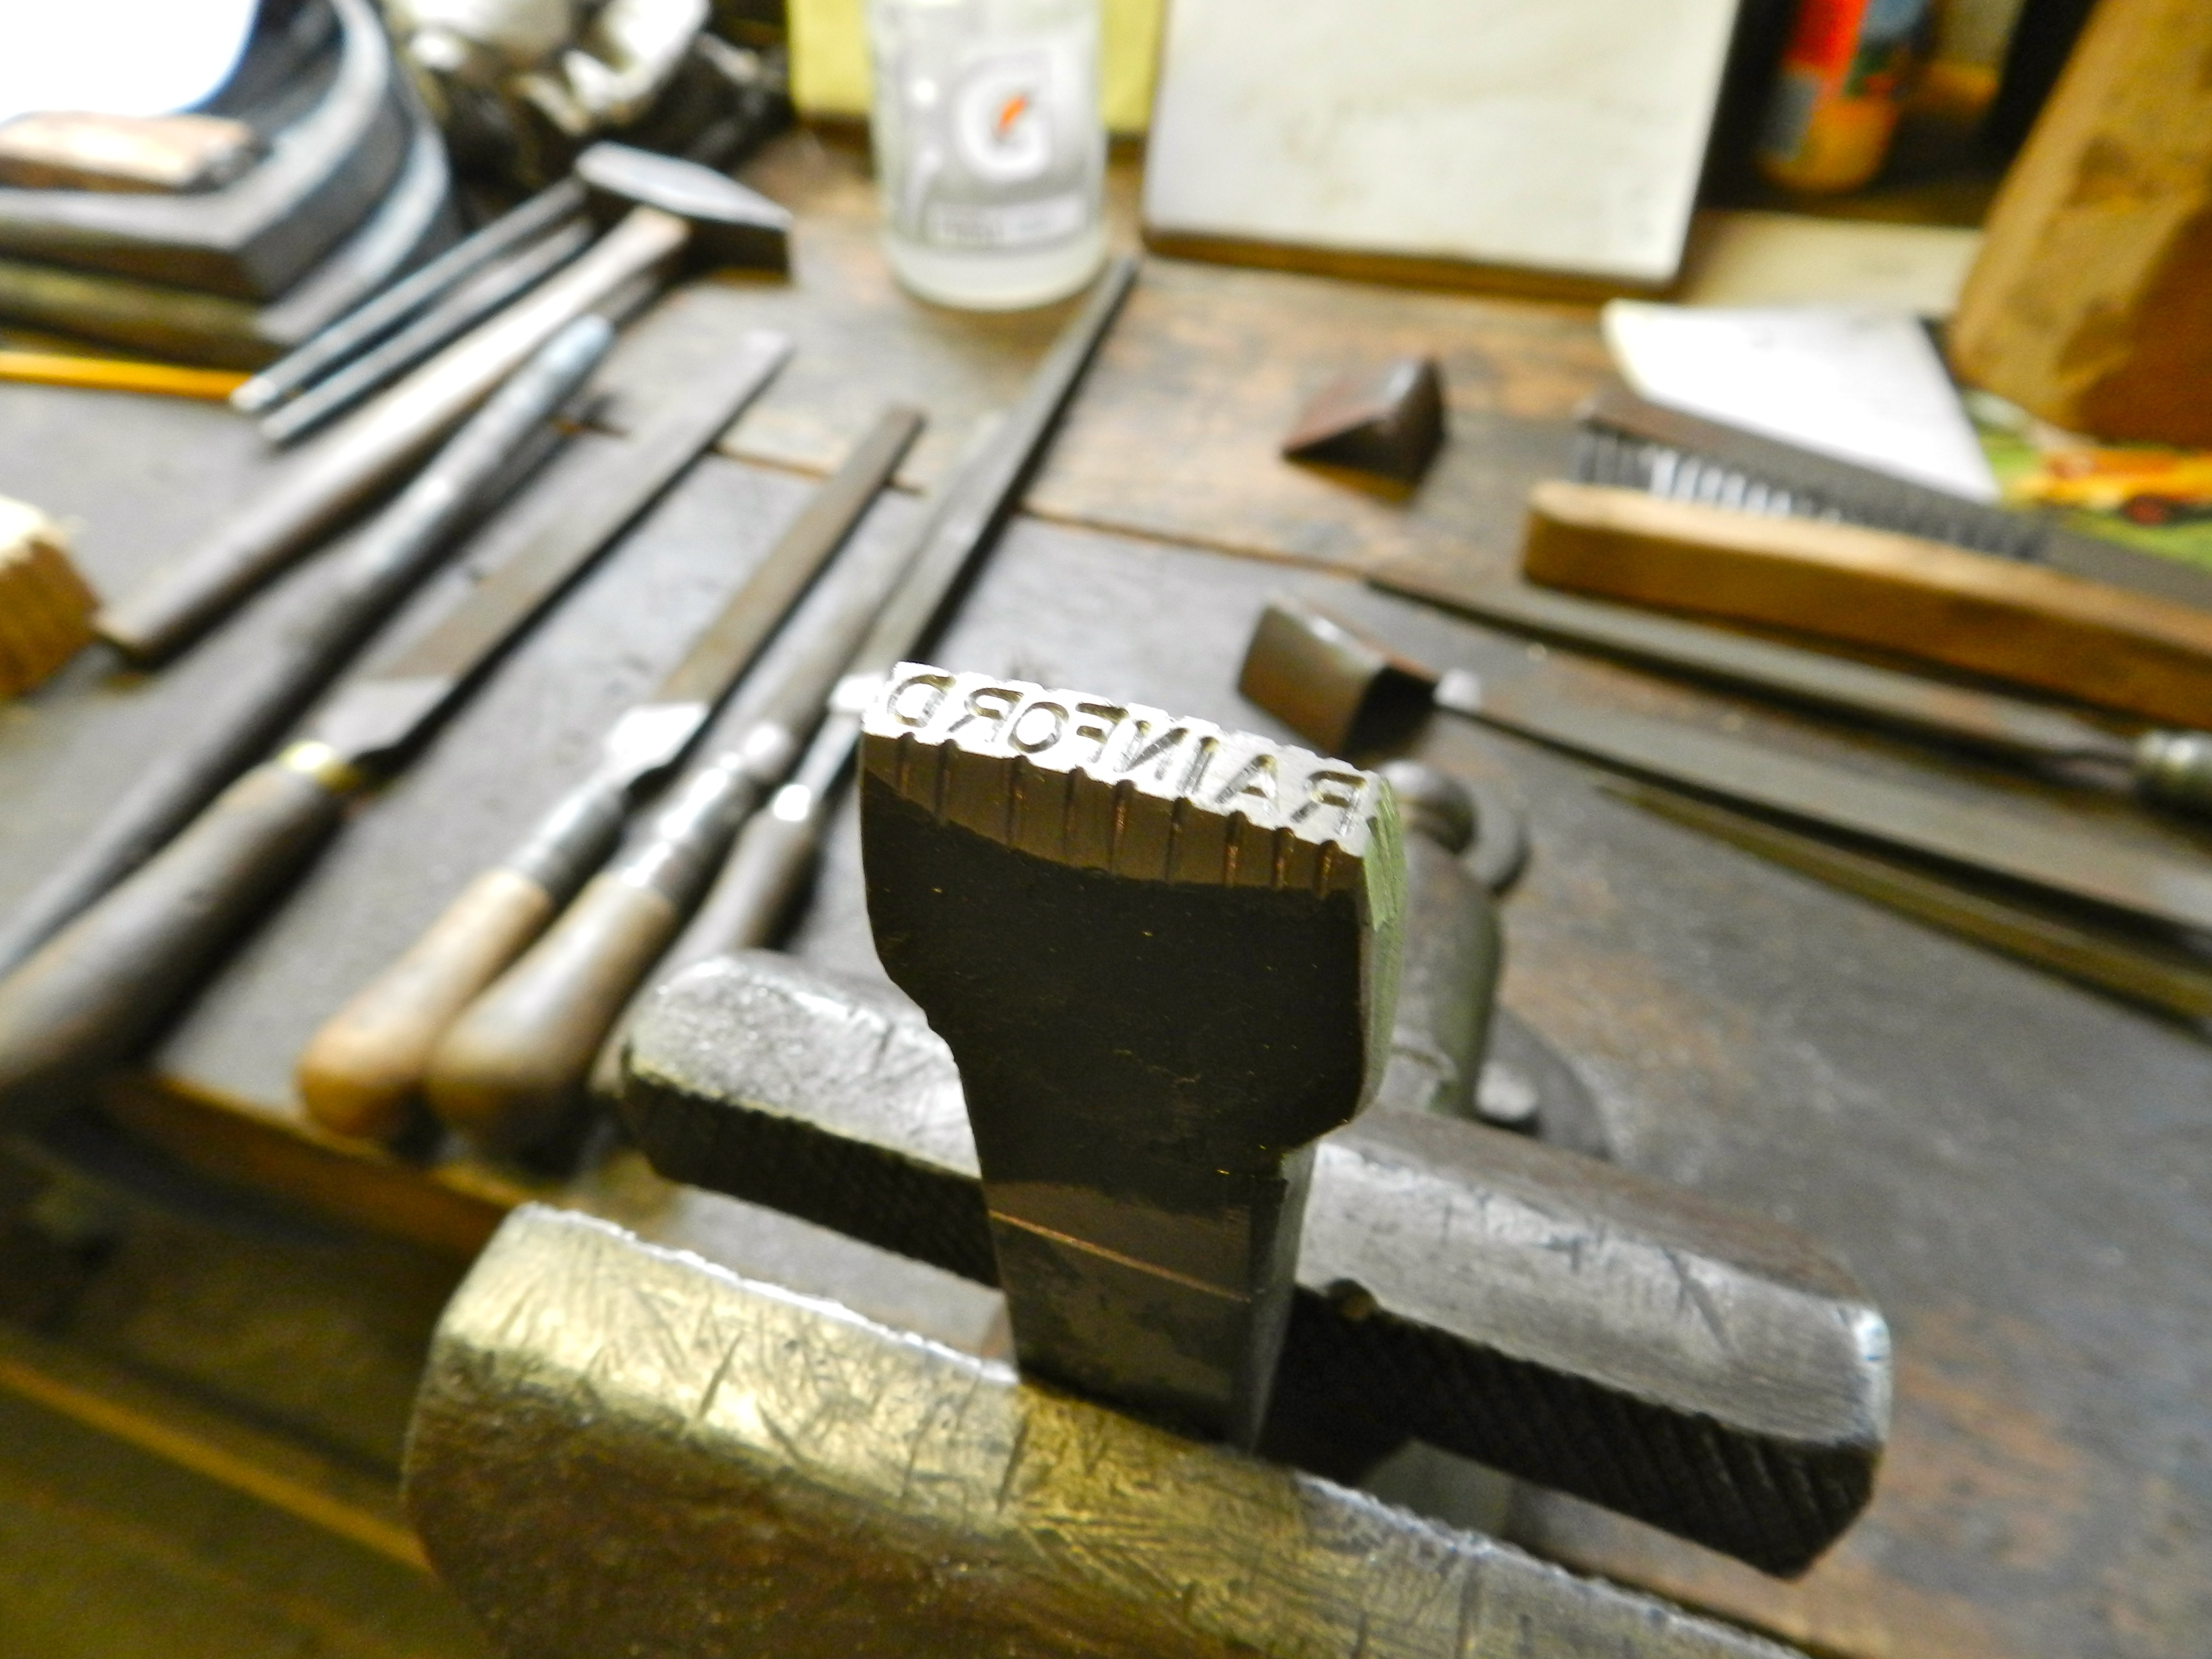
My second stamp — ‘RAINFORD’ with a slight curve over the length of the stamp
Making a longer name stamp was even more challenging since the letters are all set free hand you could very easily mess it up with any given letter. If you do mess it up, file off the mistake and try again, and again as needed.
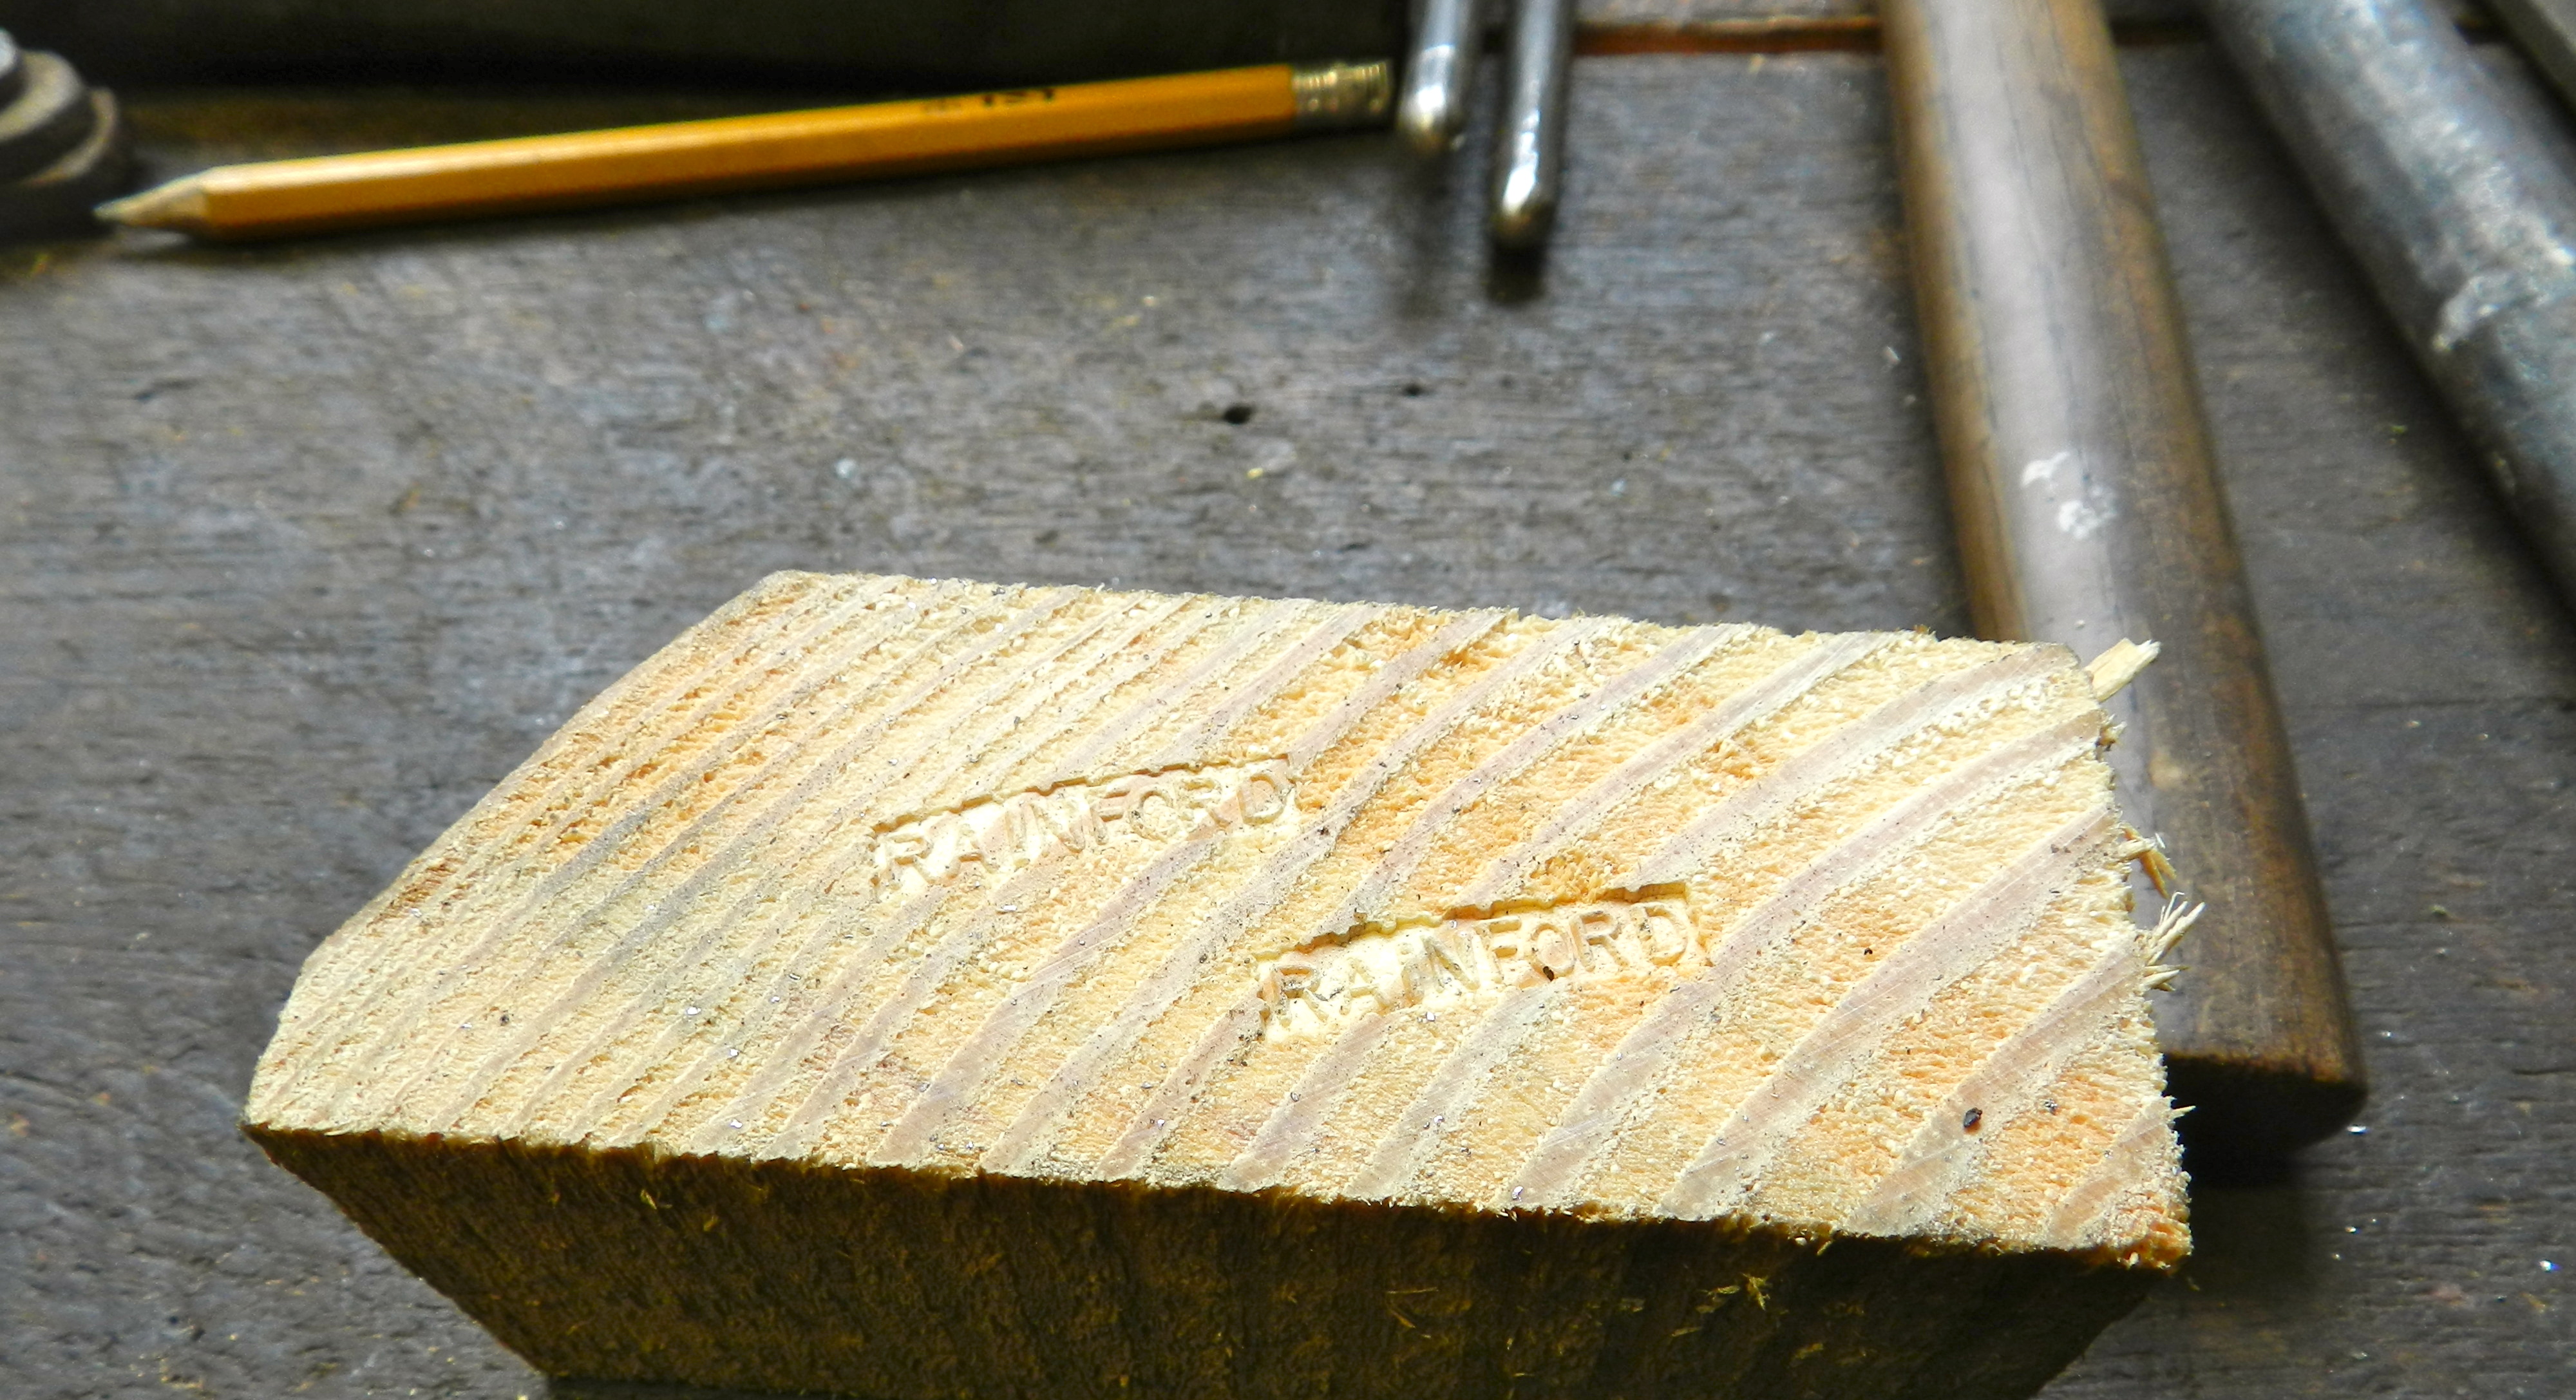
Testing my second stamp
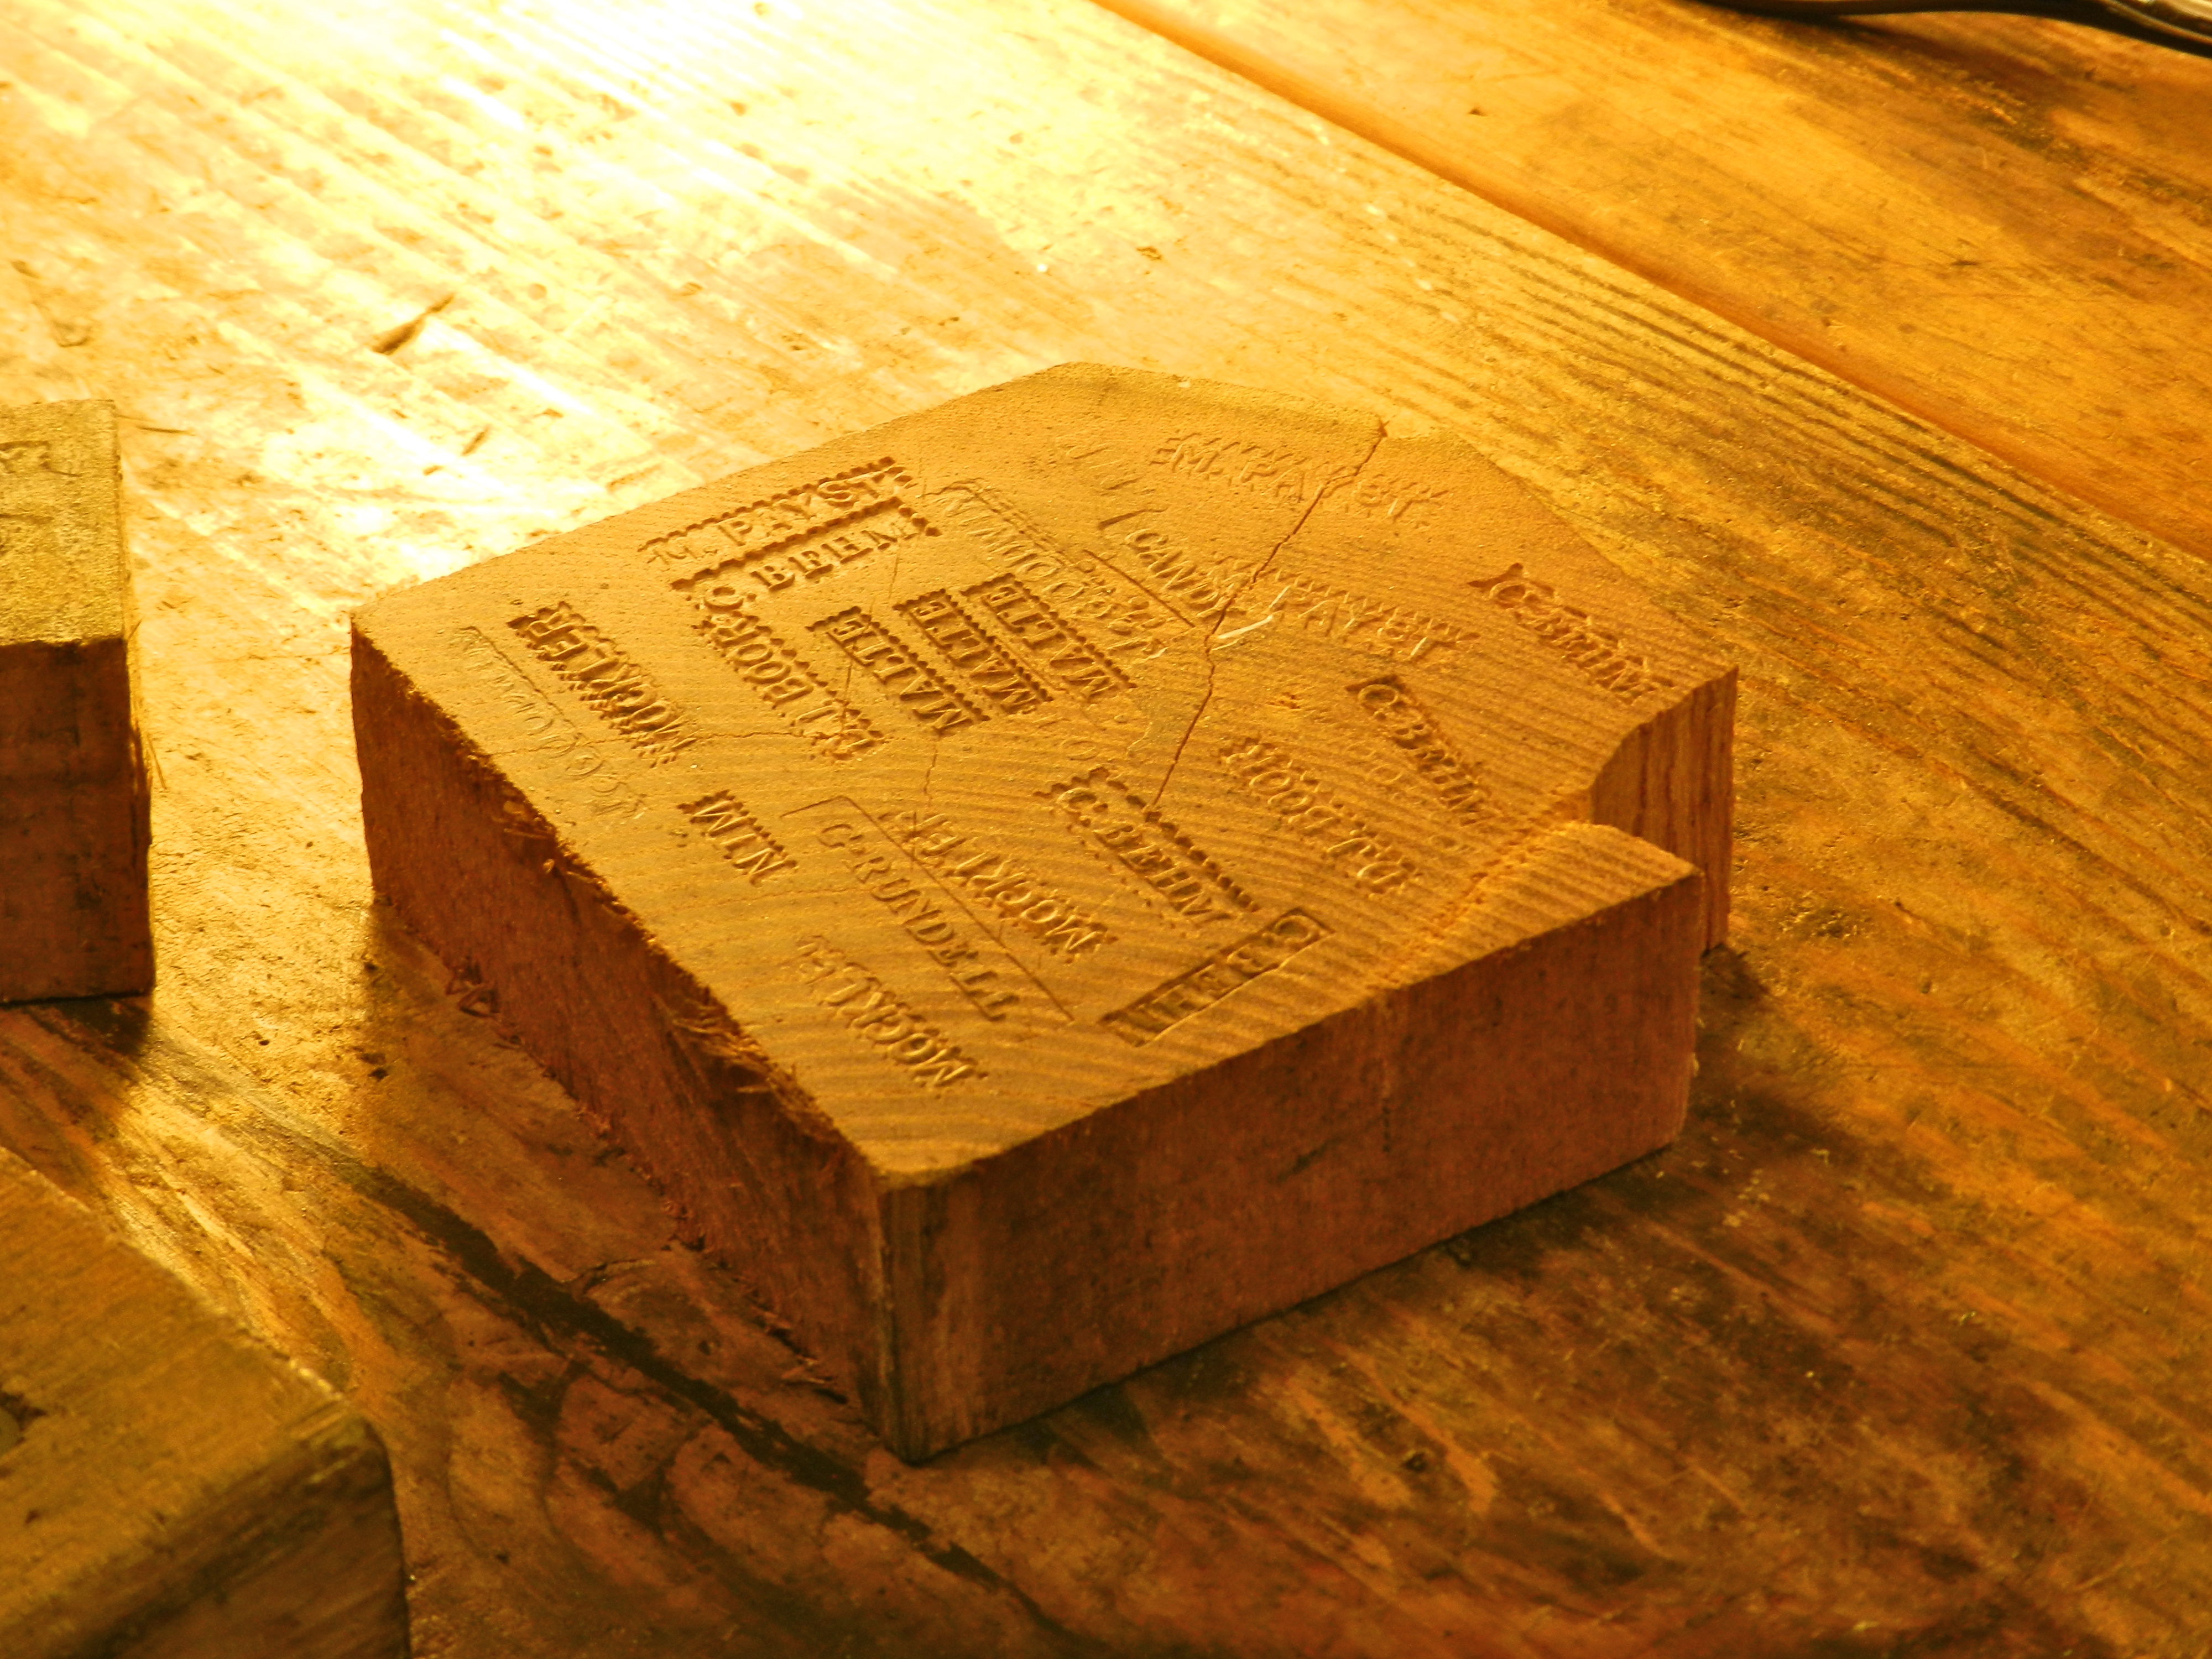
For my second stamp I made my last name and curved it a bit to make a gentle arch. Around the edge of the stamp you could decorate it any way you wanted, the most common being a traditional sawtooth-like border.
Another test block showing some of the variation across the stamps
Most if not all folks in the class got a chance to make a couple of name stamps and practice their filing skills.
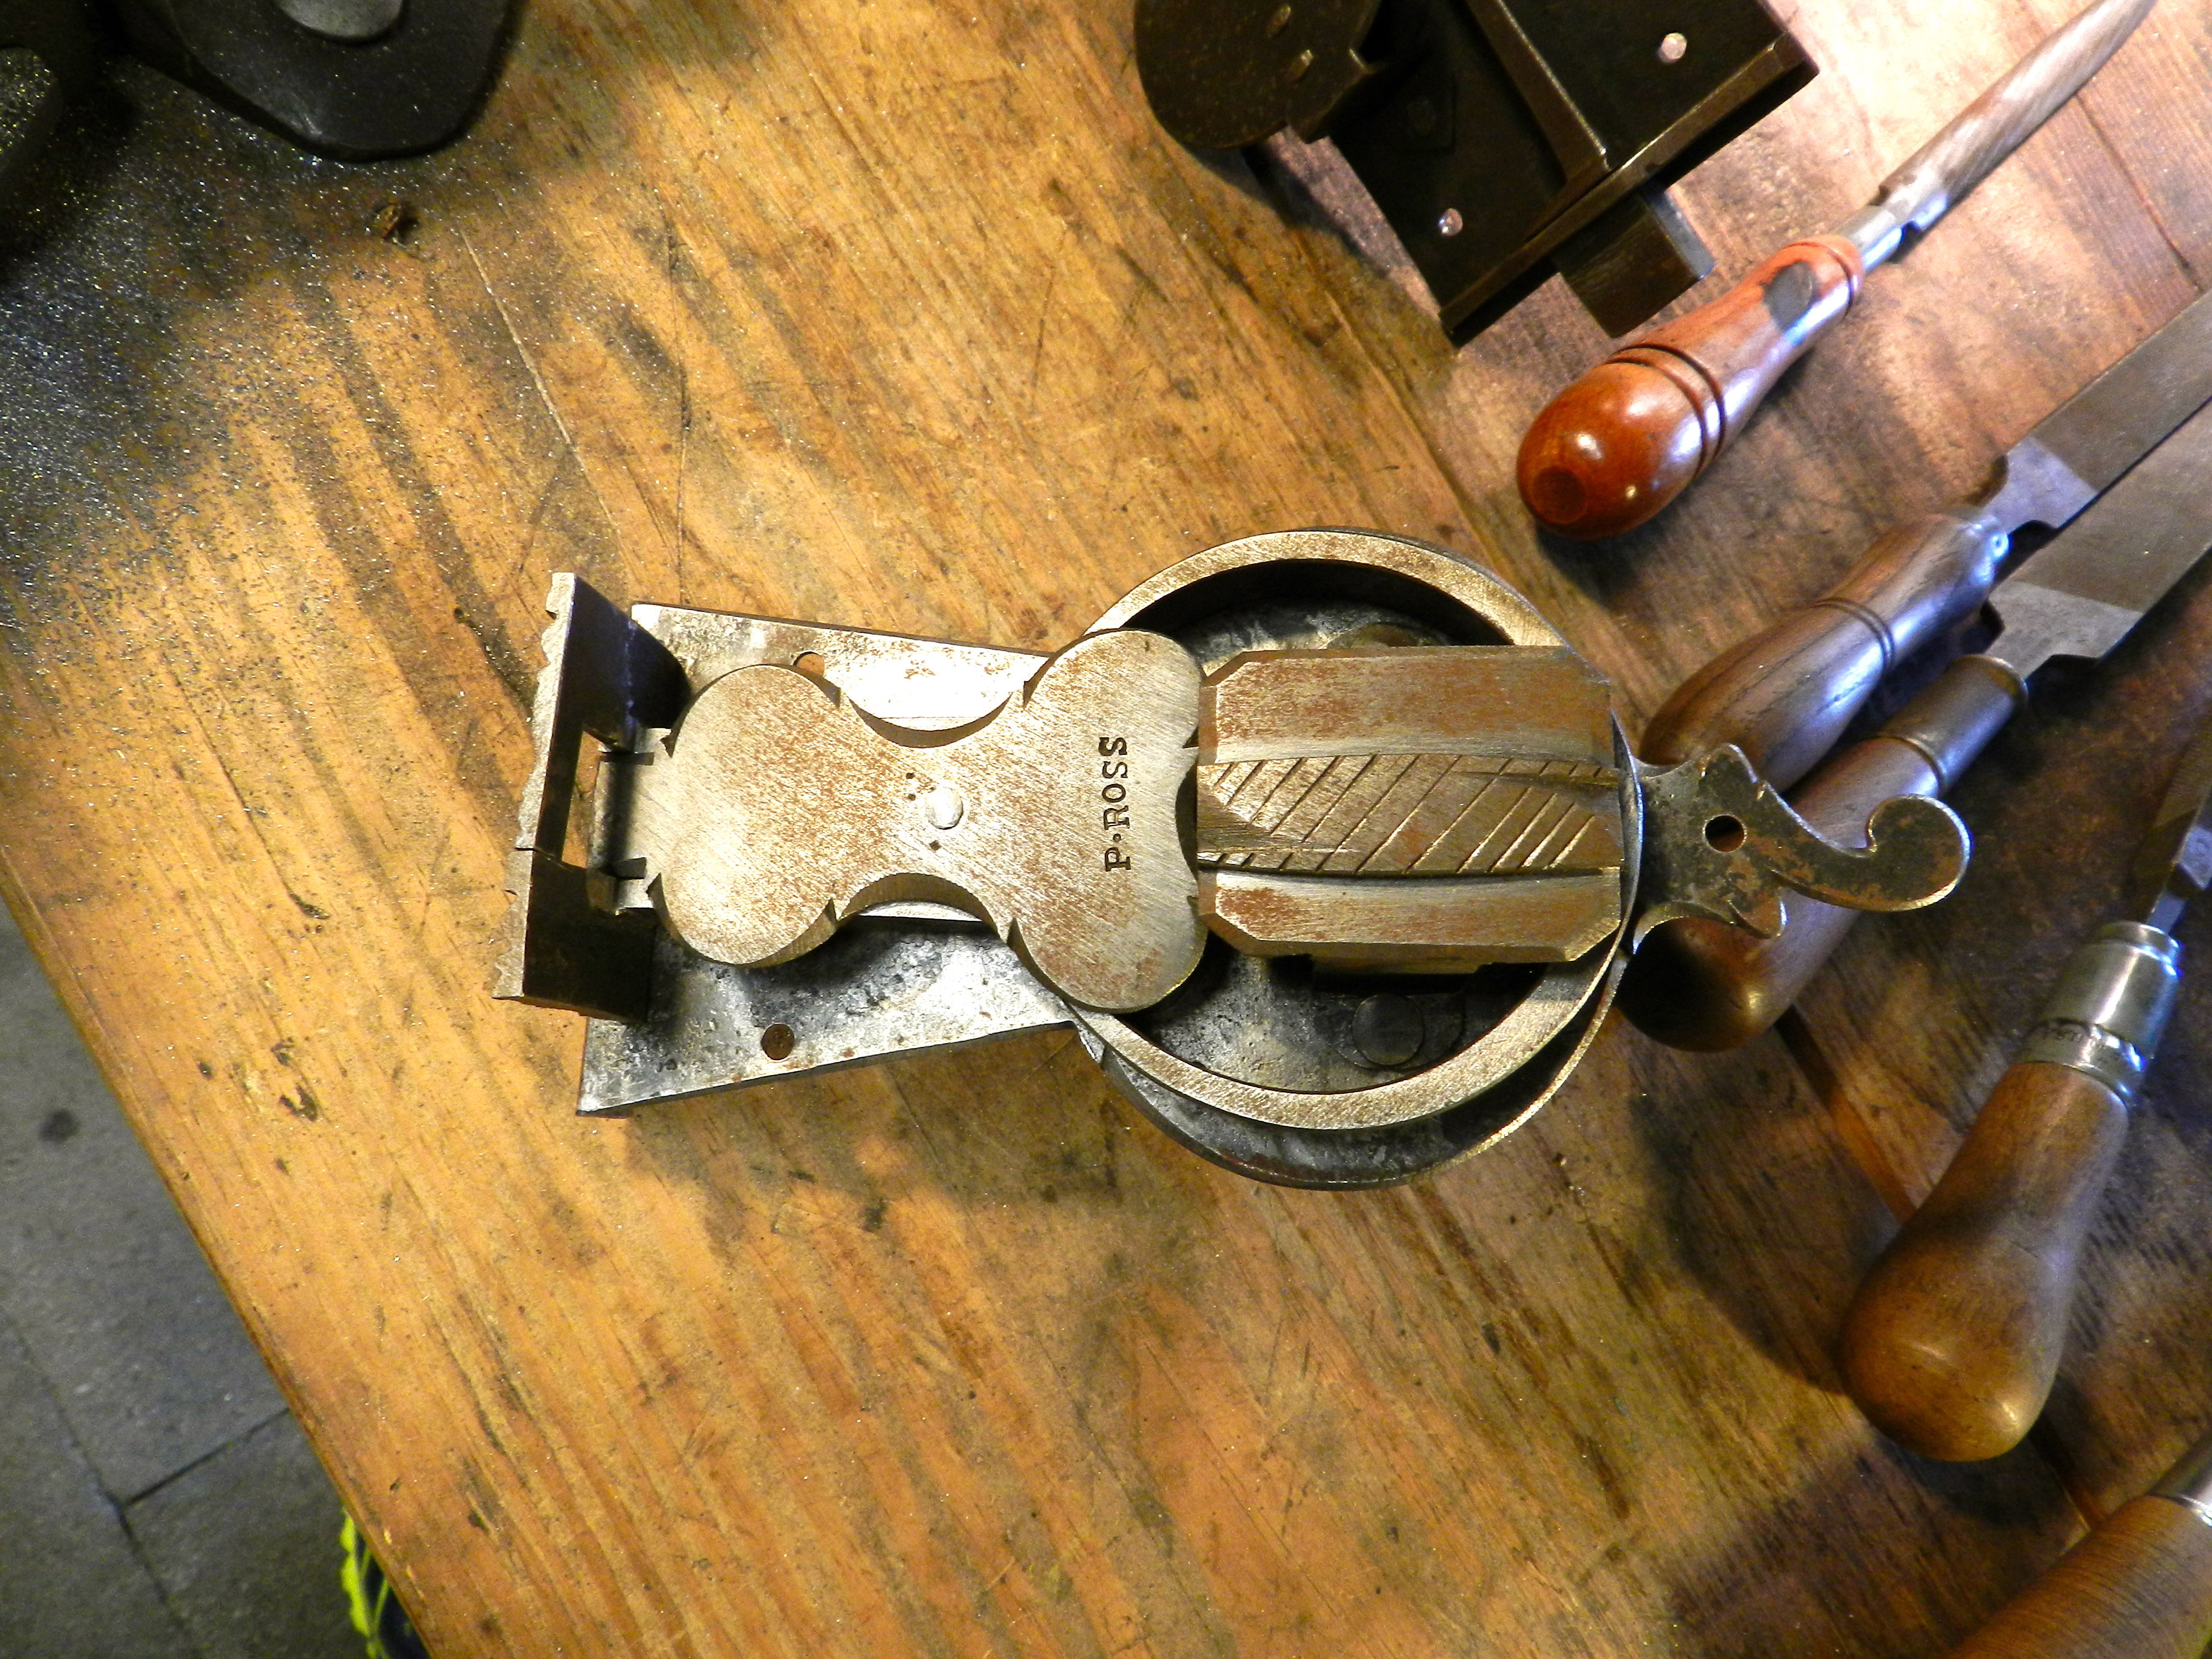
A beautiful lock that Pete made
Beyond the class itself we also got a chance to see some of the amazing work Peter does in his shop. From beautiful locks, to tools, to massive Roubo holdfasts it was neat to see the variety of black and whitesmithing tasks Peter carries out in his shop.
If you are interested in taking this workshop, please check out the Woodwright’s School website here. I had a great time and look forward to my next workshop at the Woodwright’s School.
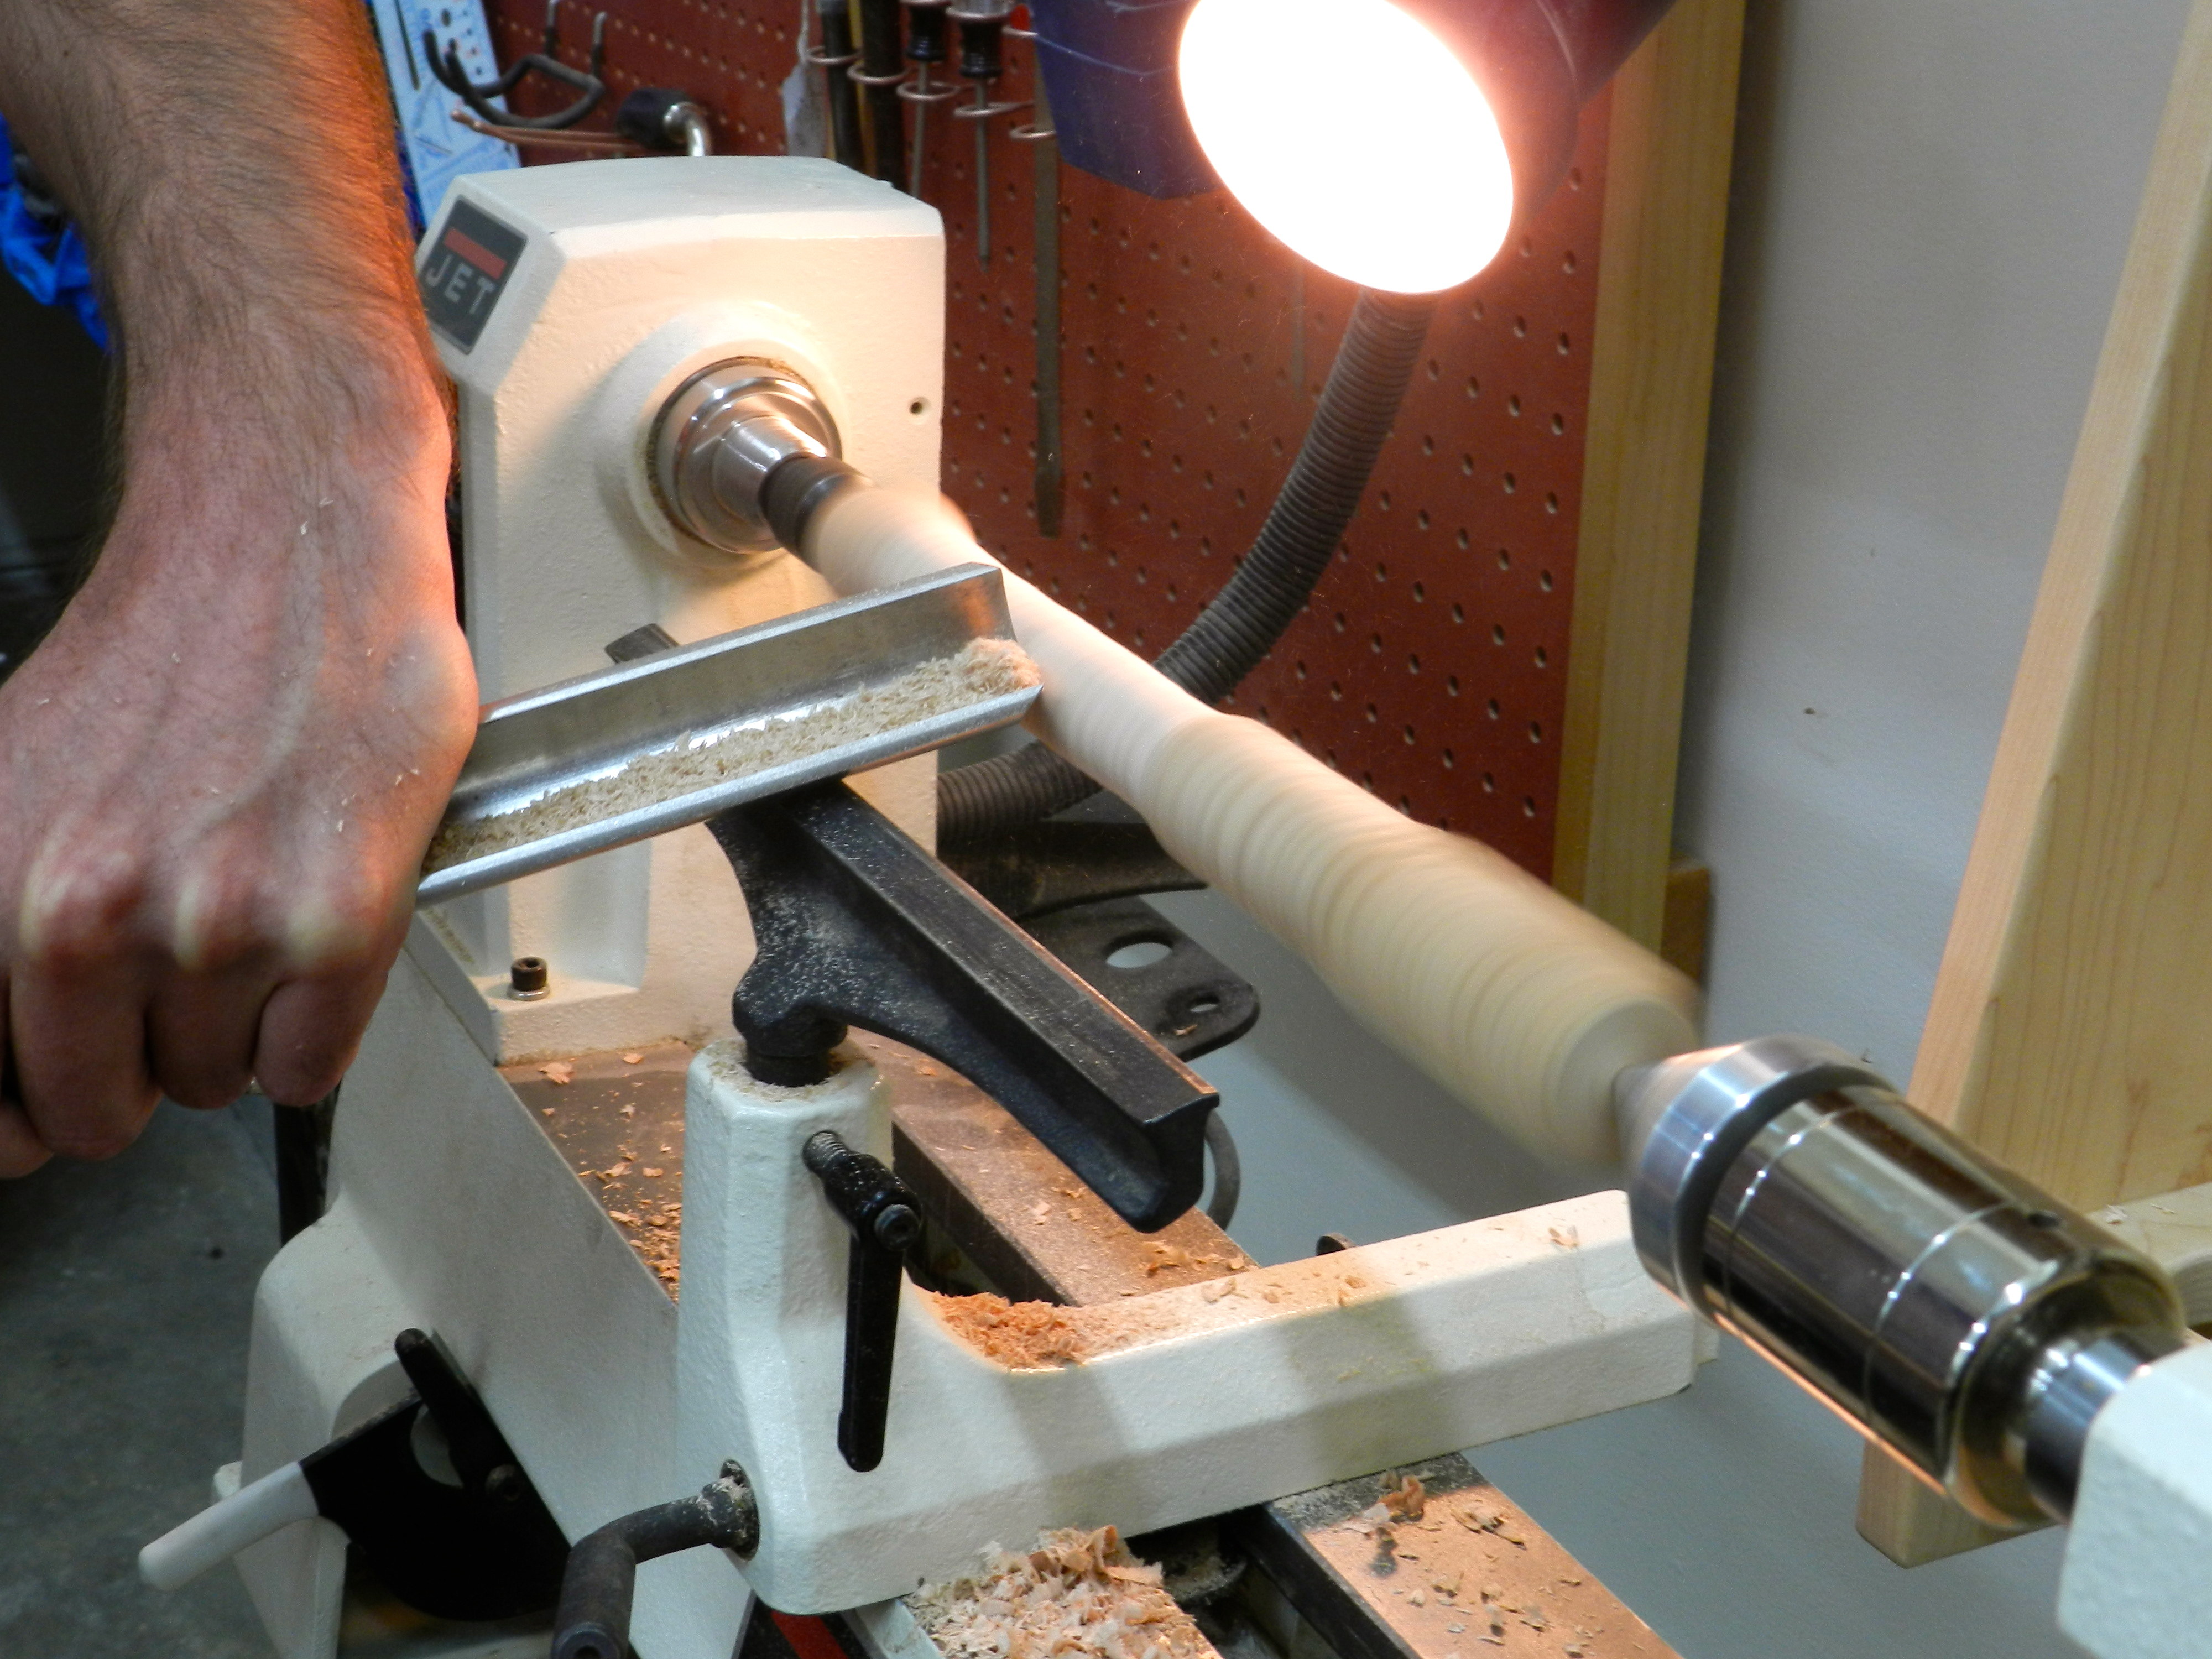
This past weekend I was busy in the shop working on a variety of projects. Sunday I spent most of my day doing some wood-turning at the lathe.
A favorite warm up project of mine is to make a traditional wooden spurtle.
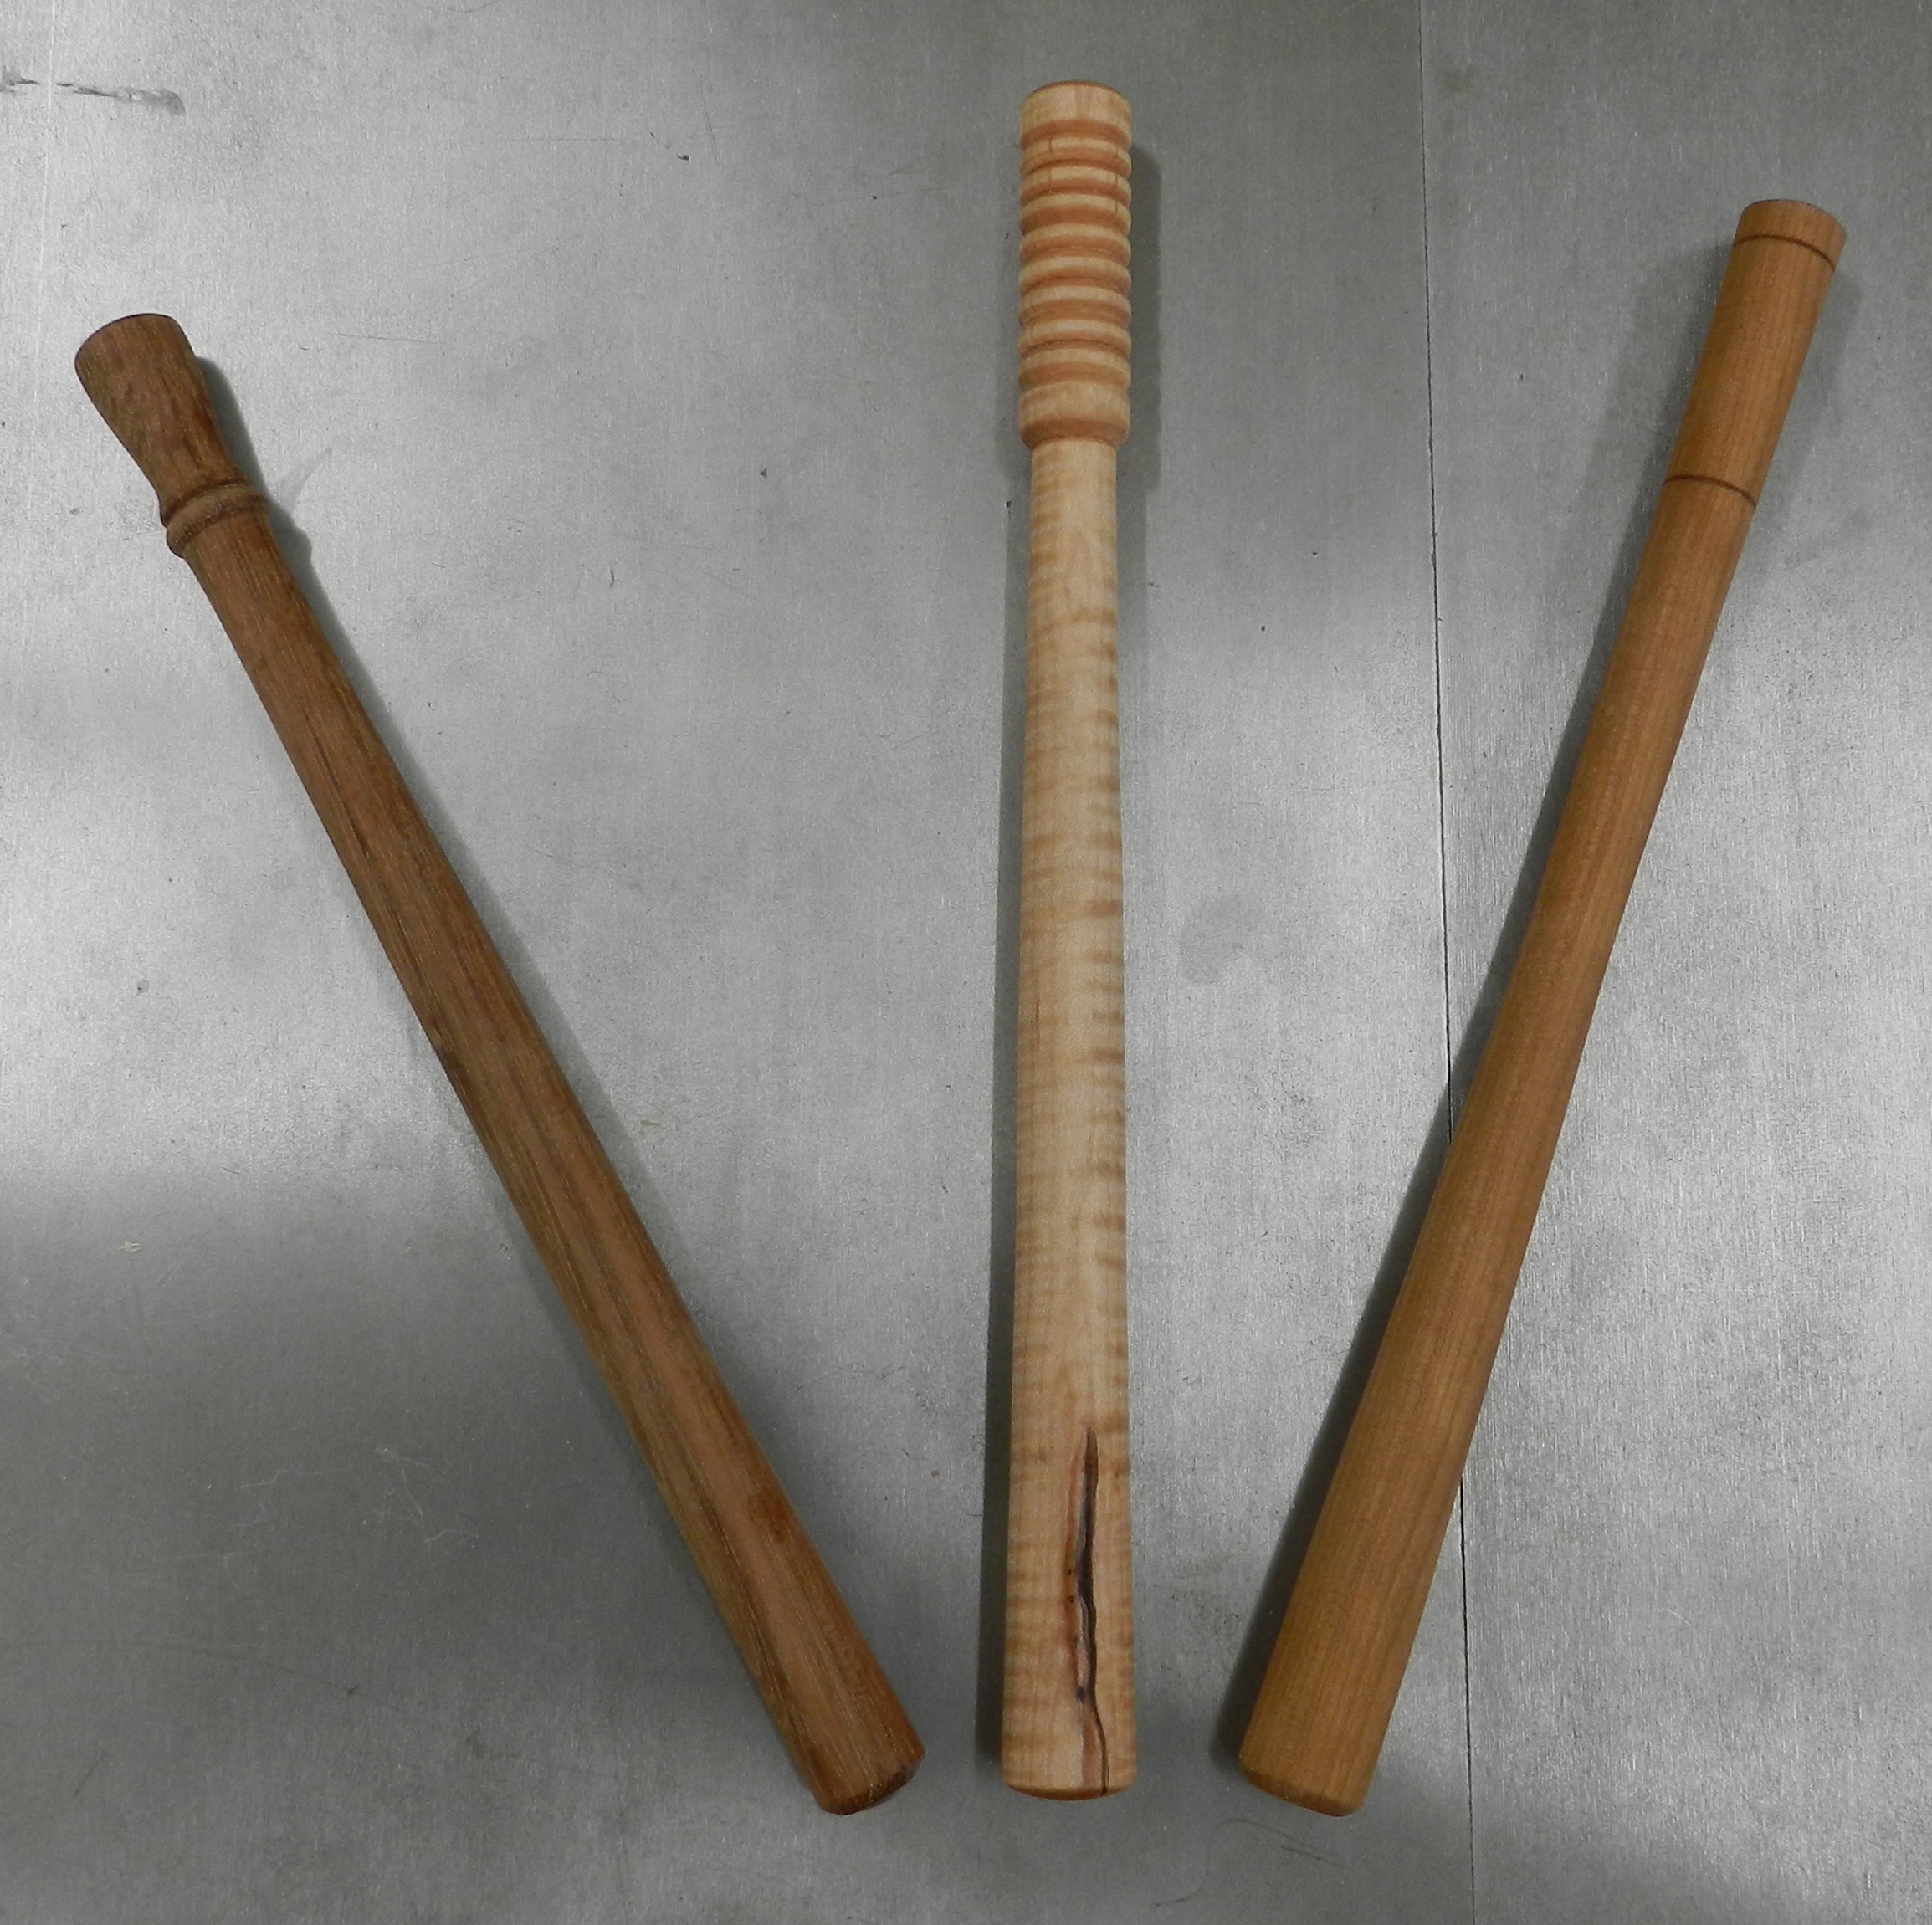
Variety of Spurtles
What’s a spurtle?
A spurtle is a traditional Scottish kitchen tool that dates back to the middle ages. Traditionally made from maple this utensil is often used to stir soups, and beat the lumps out of porridge. If you are not big on porridge, it also works well with a wok and will not damage your pots and pans.
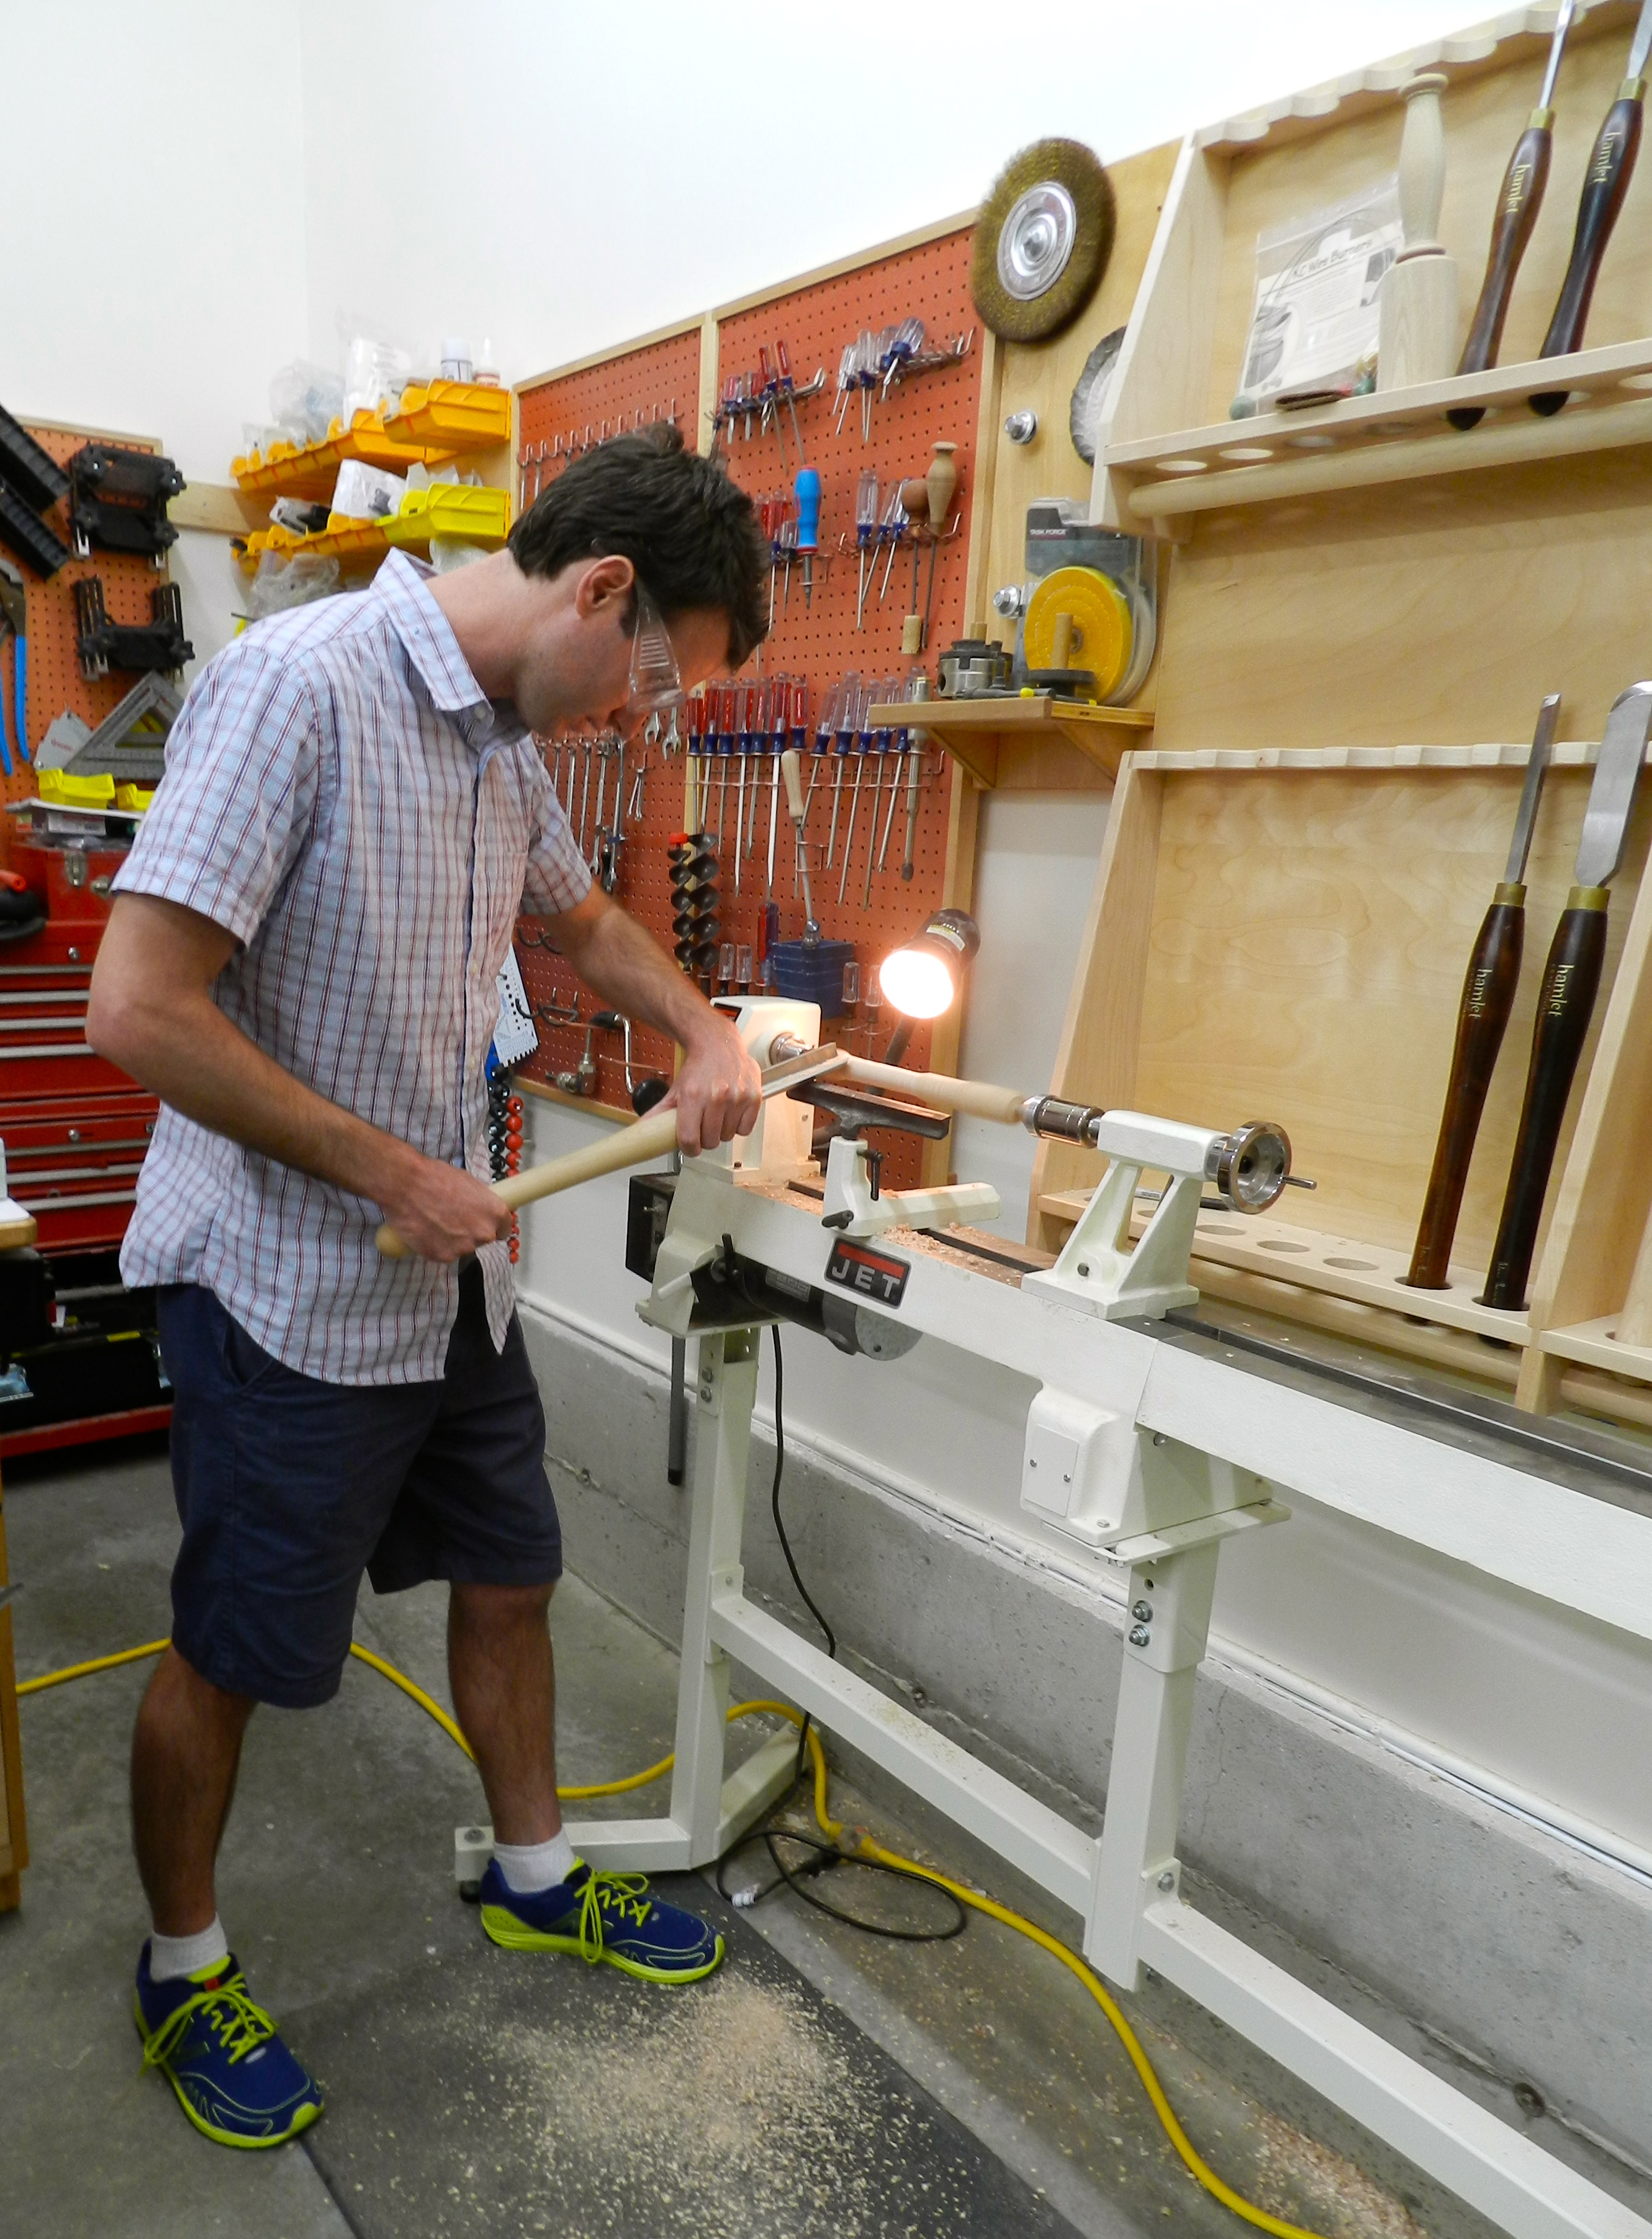
Dan turning on the lathe
Over the weekend, my friend Dan Farnbach stopped by the shop for a quick lesson on the basics of spindle turning. He was a quick study and picked up a lot of the basics.
Roughing Gouge
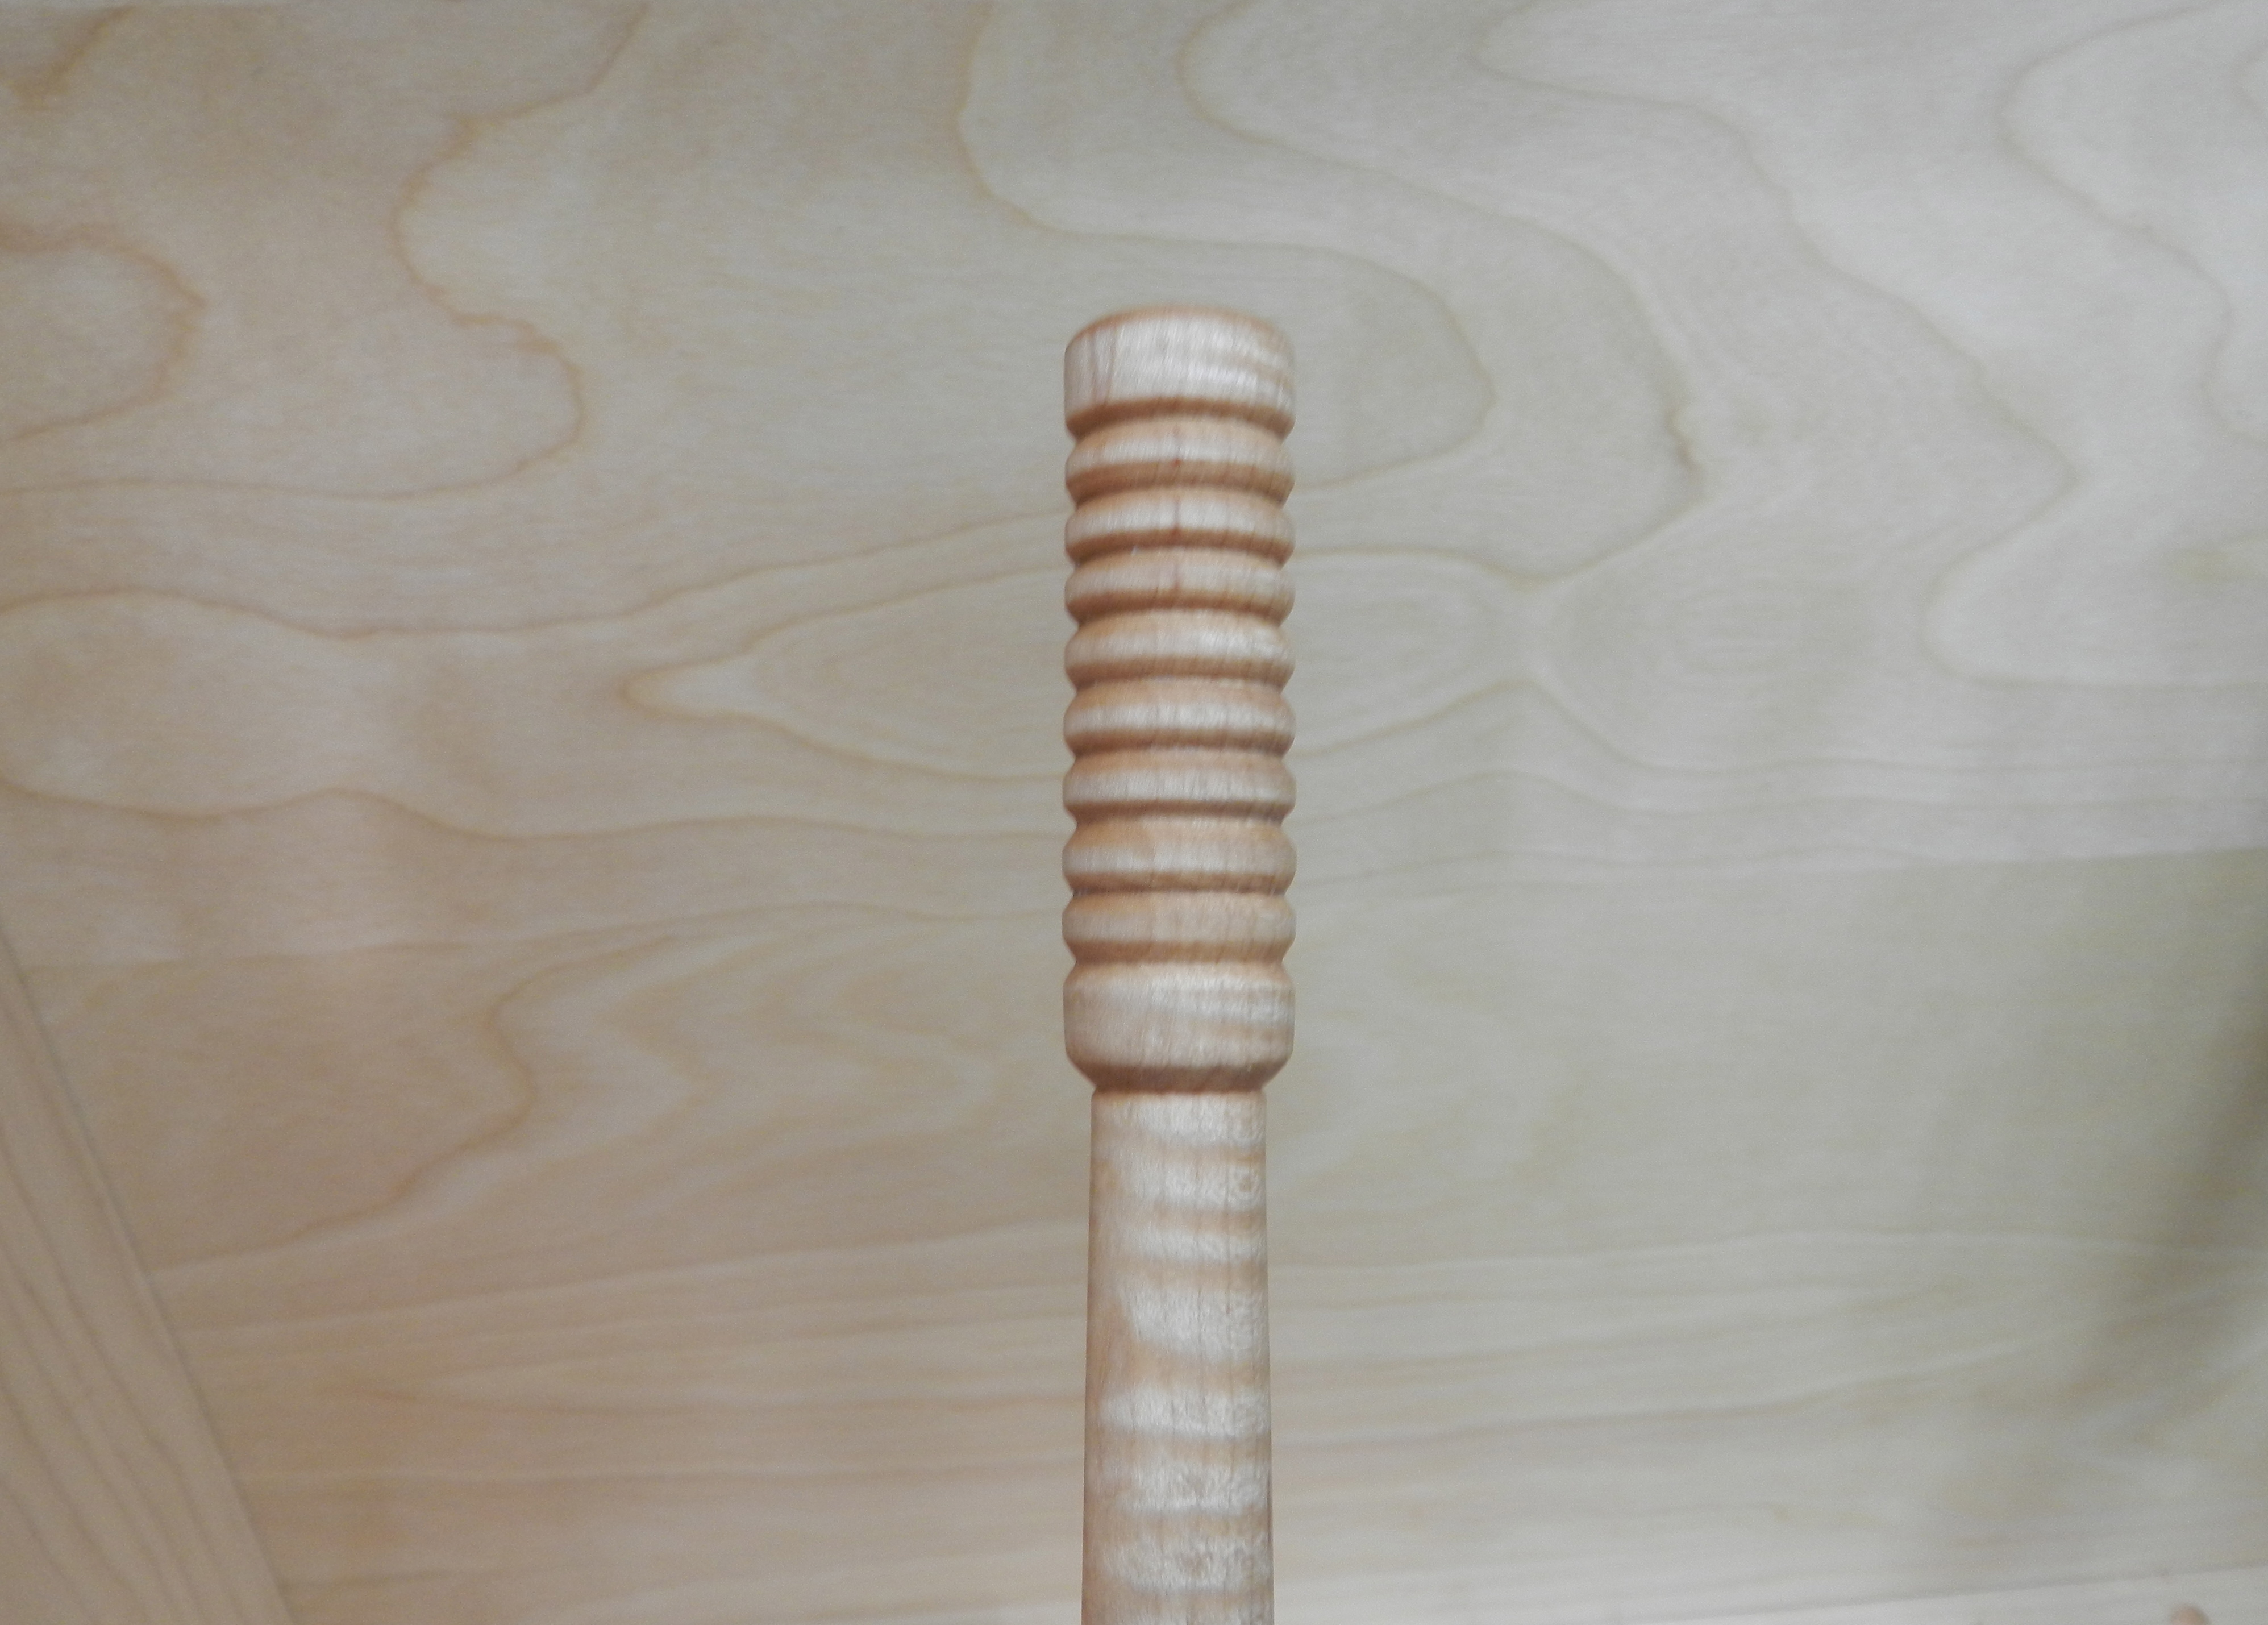
I learned about turning Spurtles from my friend and master wood turner Rich Friberg (NBSS PC2 Instructor). It’s a great way to make use of small pieces, produce something usable and explore design possibilities. For this piece I like how the small beads echo the light and dark similar to what you see in the curly figure itself.
Handle Detail
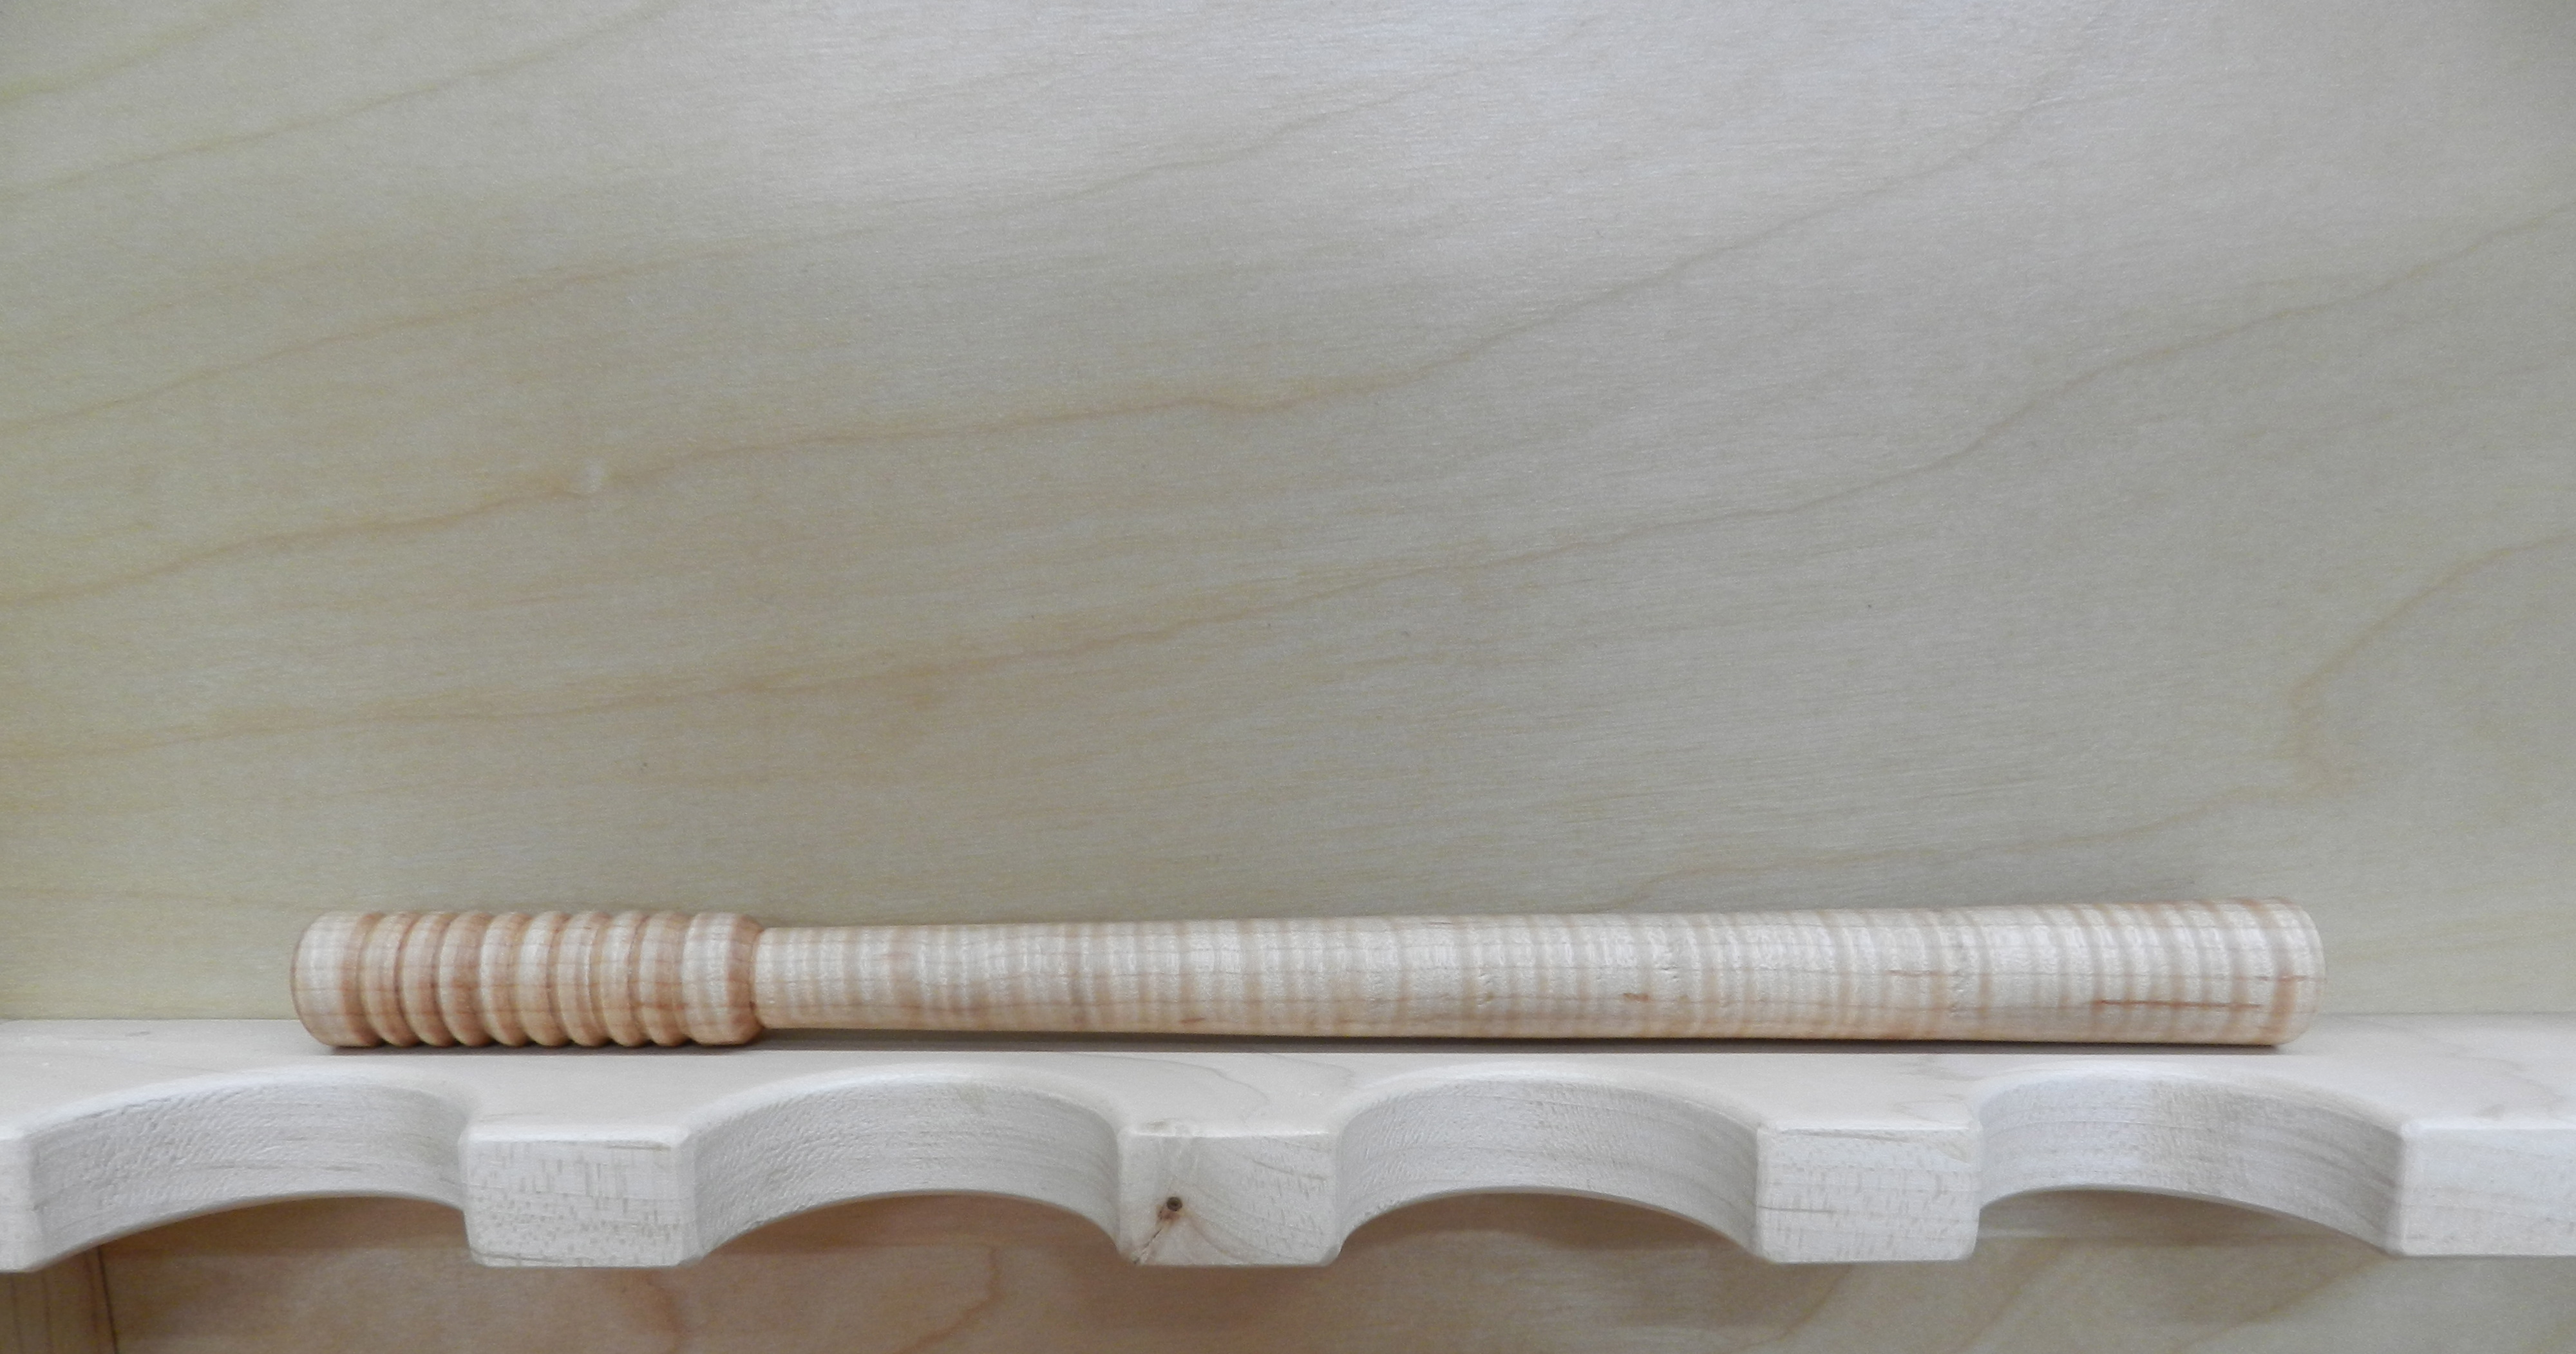
A good spurtle is generally about a 10-12 inches long, held in the hand similar to a pencil or chop stick and stirs using a wrist action. I tend to like the designs that flair out a little bit at the bottom and are well balanced in the hand. Beyond that, the design possibilities are endless. The spurtle shown here is made from curly maple and finished with mineral oil. With use the finish can be renewed with more mineral oil or salad bowl oil.
Completed Spurtle
If you make some spurtles of your own, make sure to share some pictures with us. If you get really good at making and using them you might want to enter the World Porridge Championships and compete for the Golden Spurtle.
Good luck and happy turning!
ADMINISTRATIVE NOTE:
Earlier this evening many of you may have received a partial post related to Sloyd showing a partial table — that was an accidental misfire wherein a draft got posted prematurely. But fear not, I do have some more Sloyd related posts coming up soon.
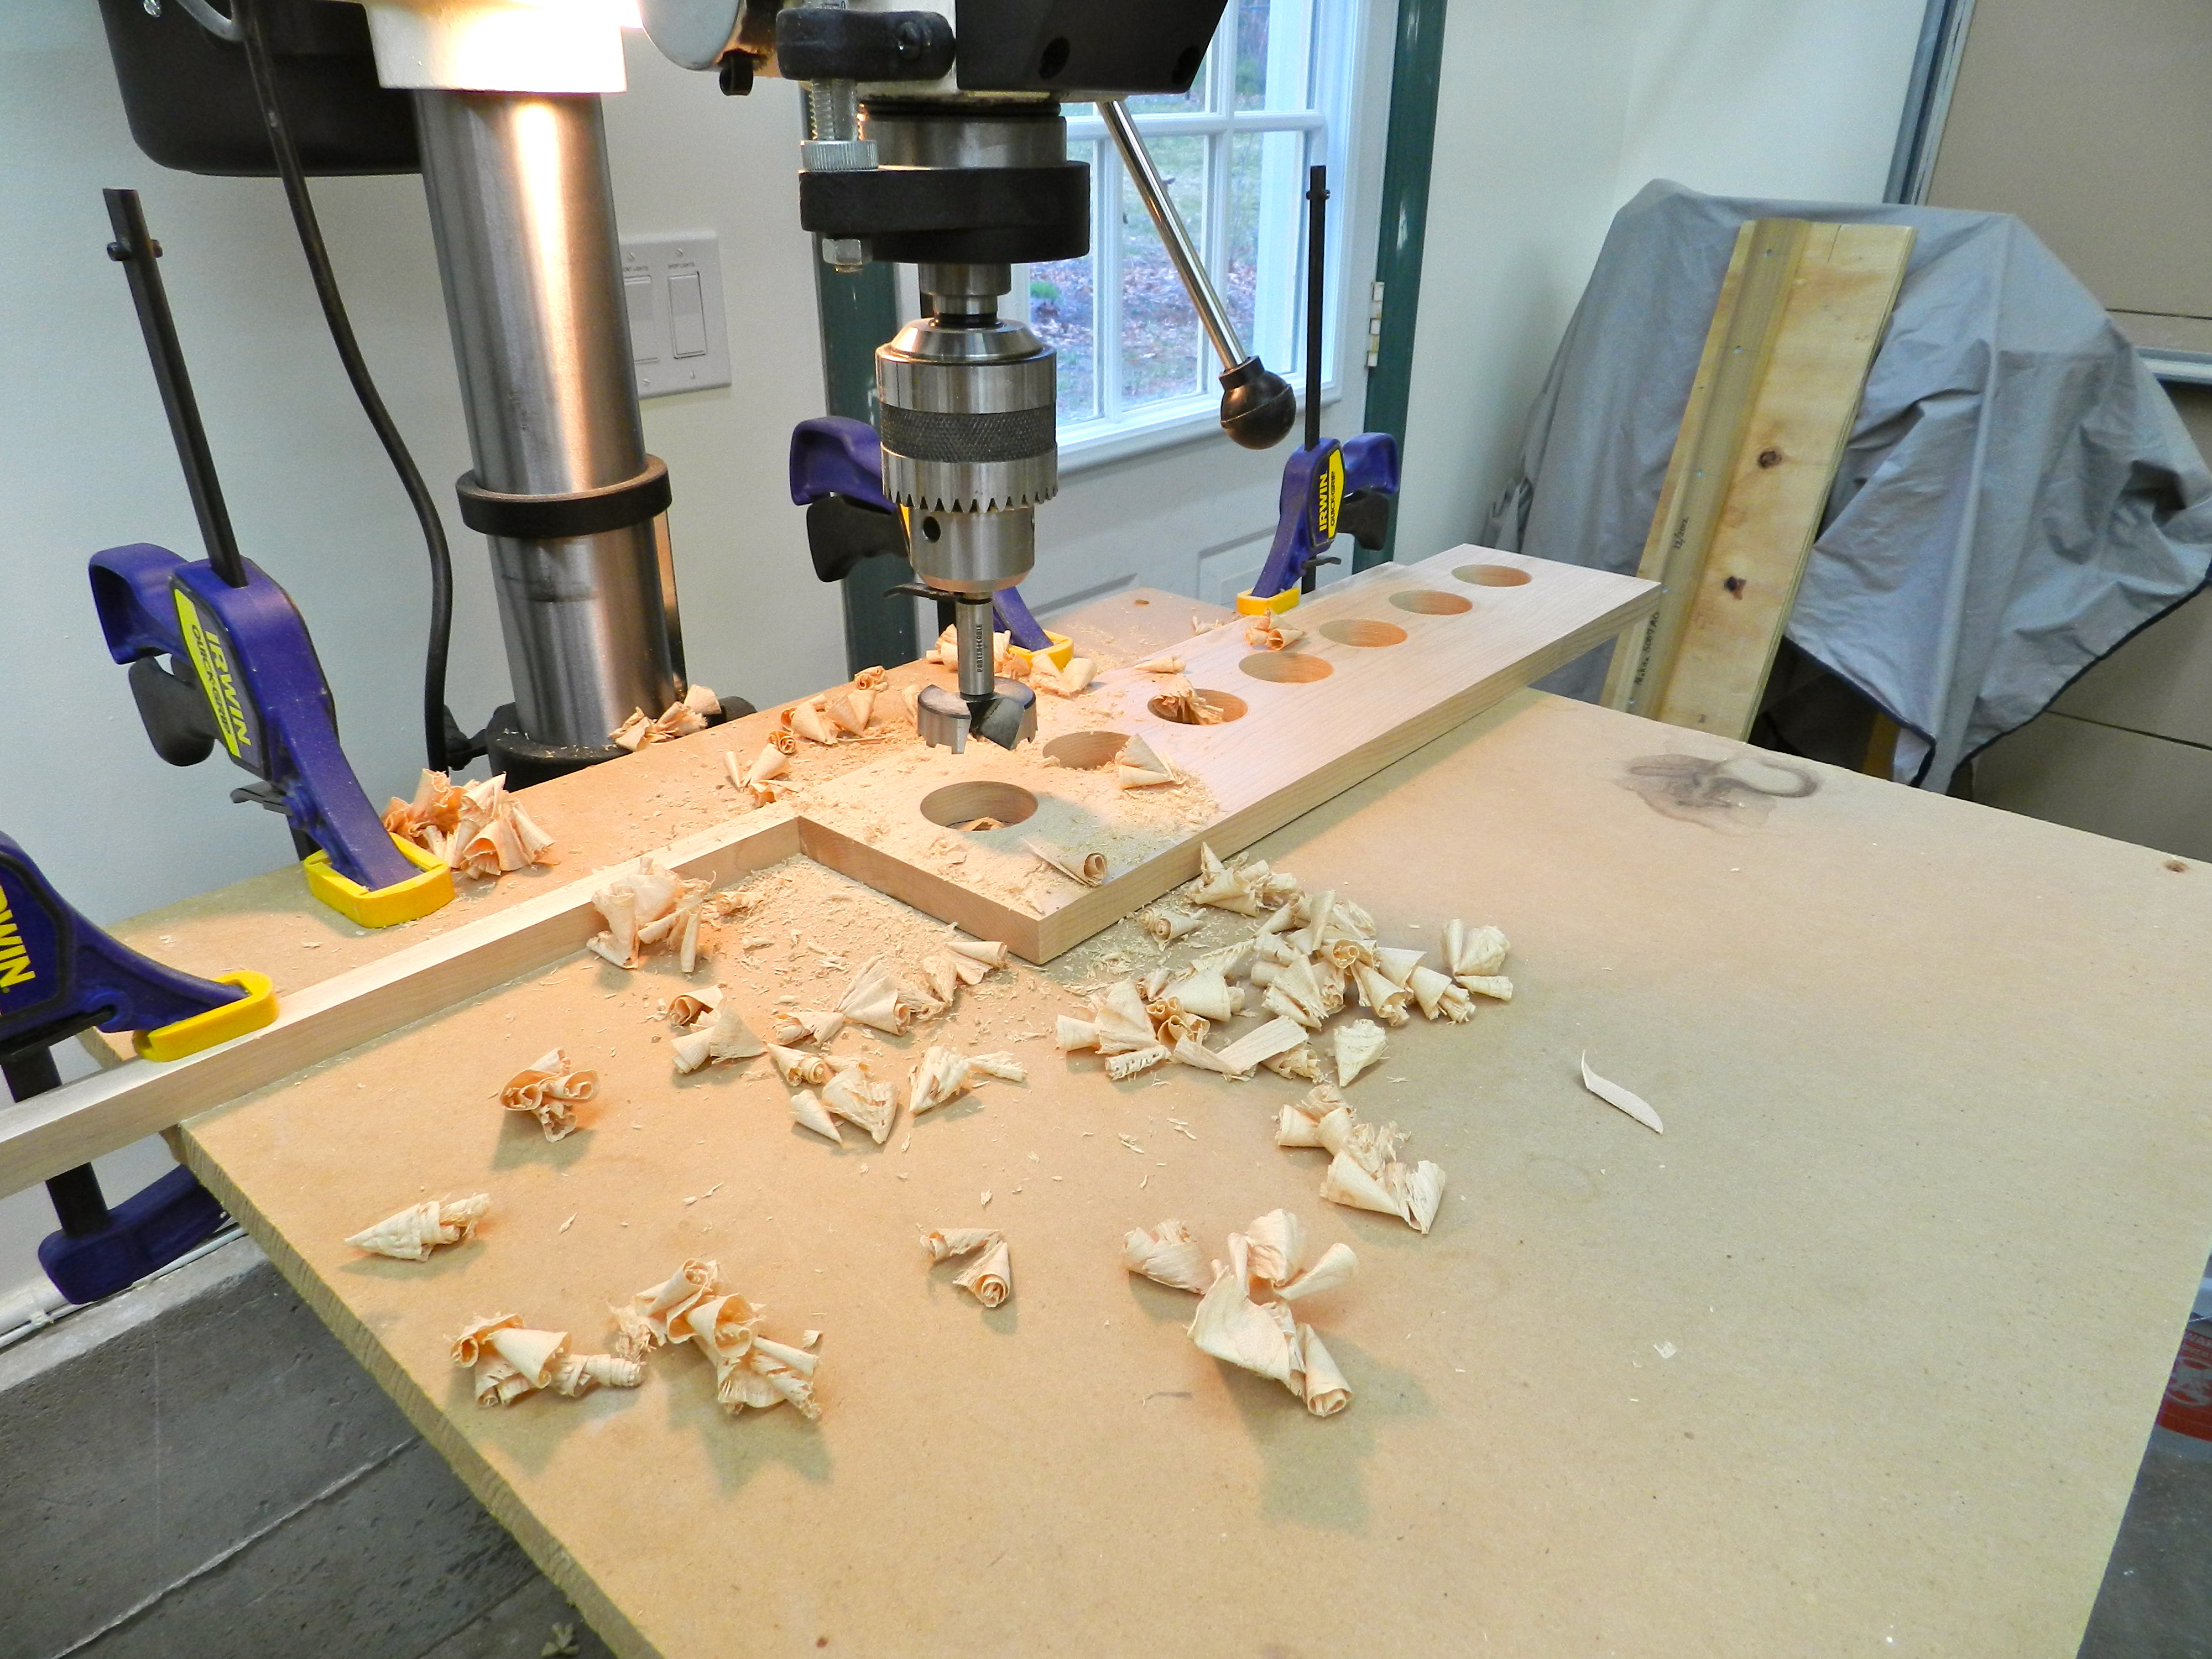
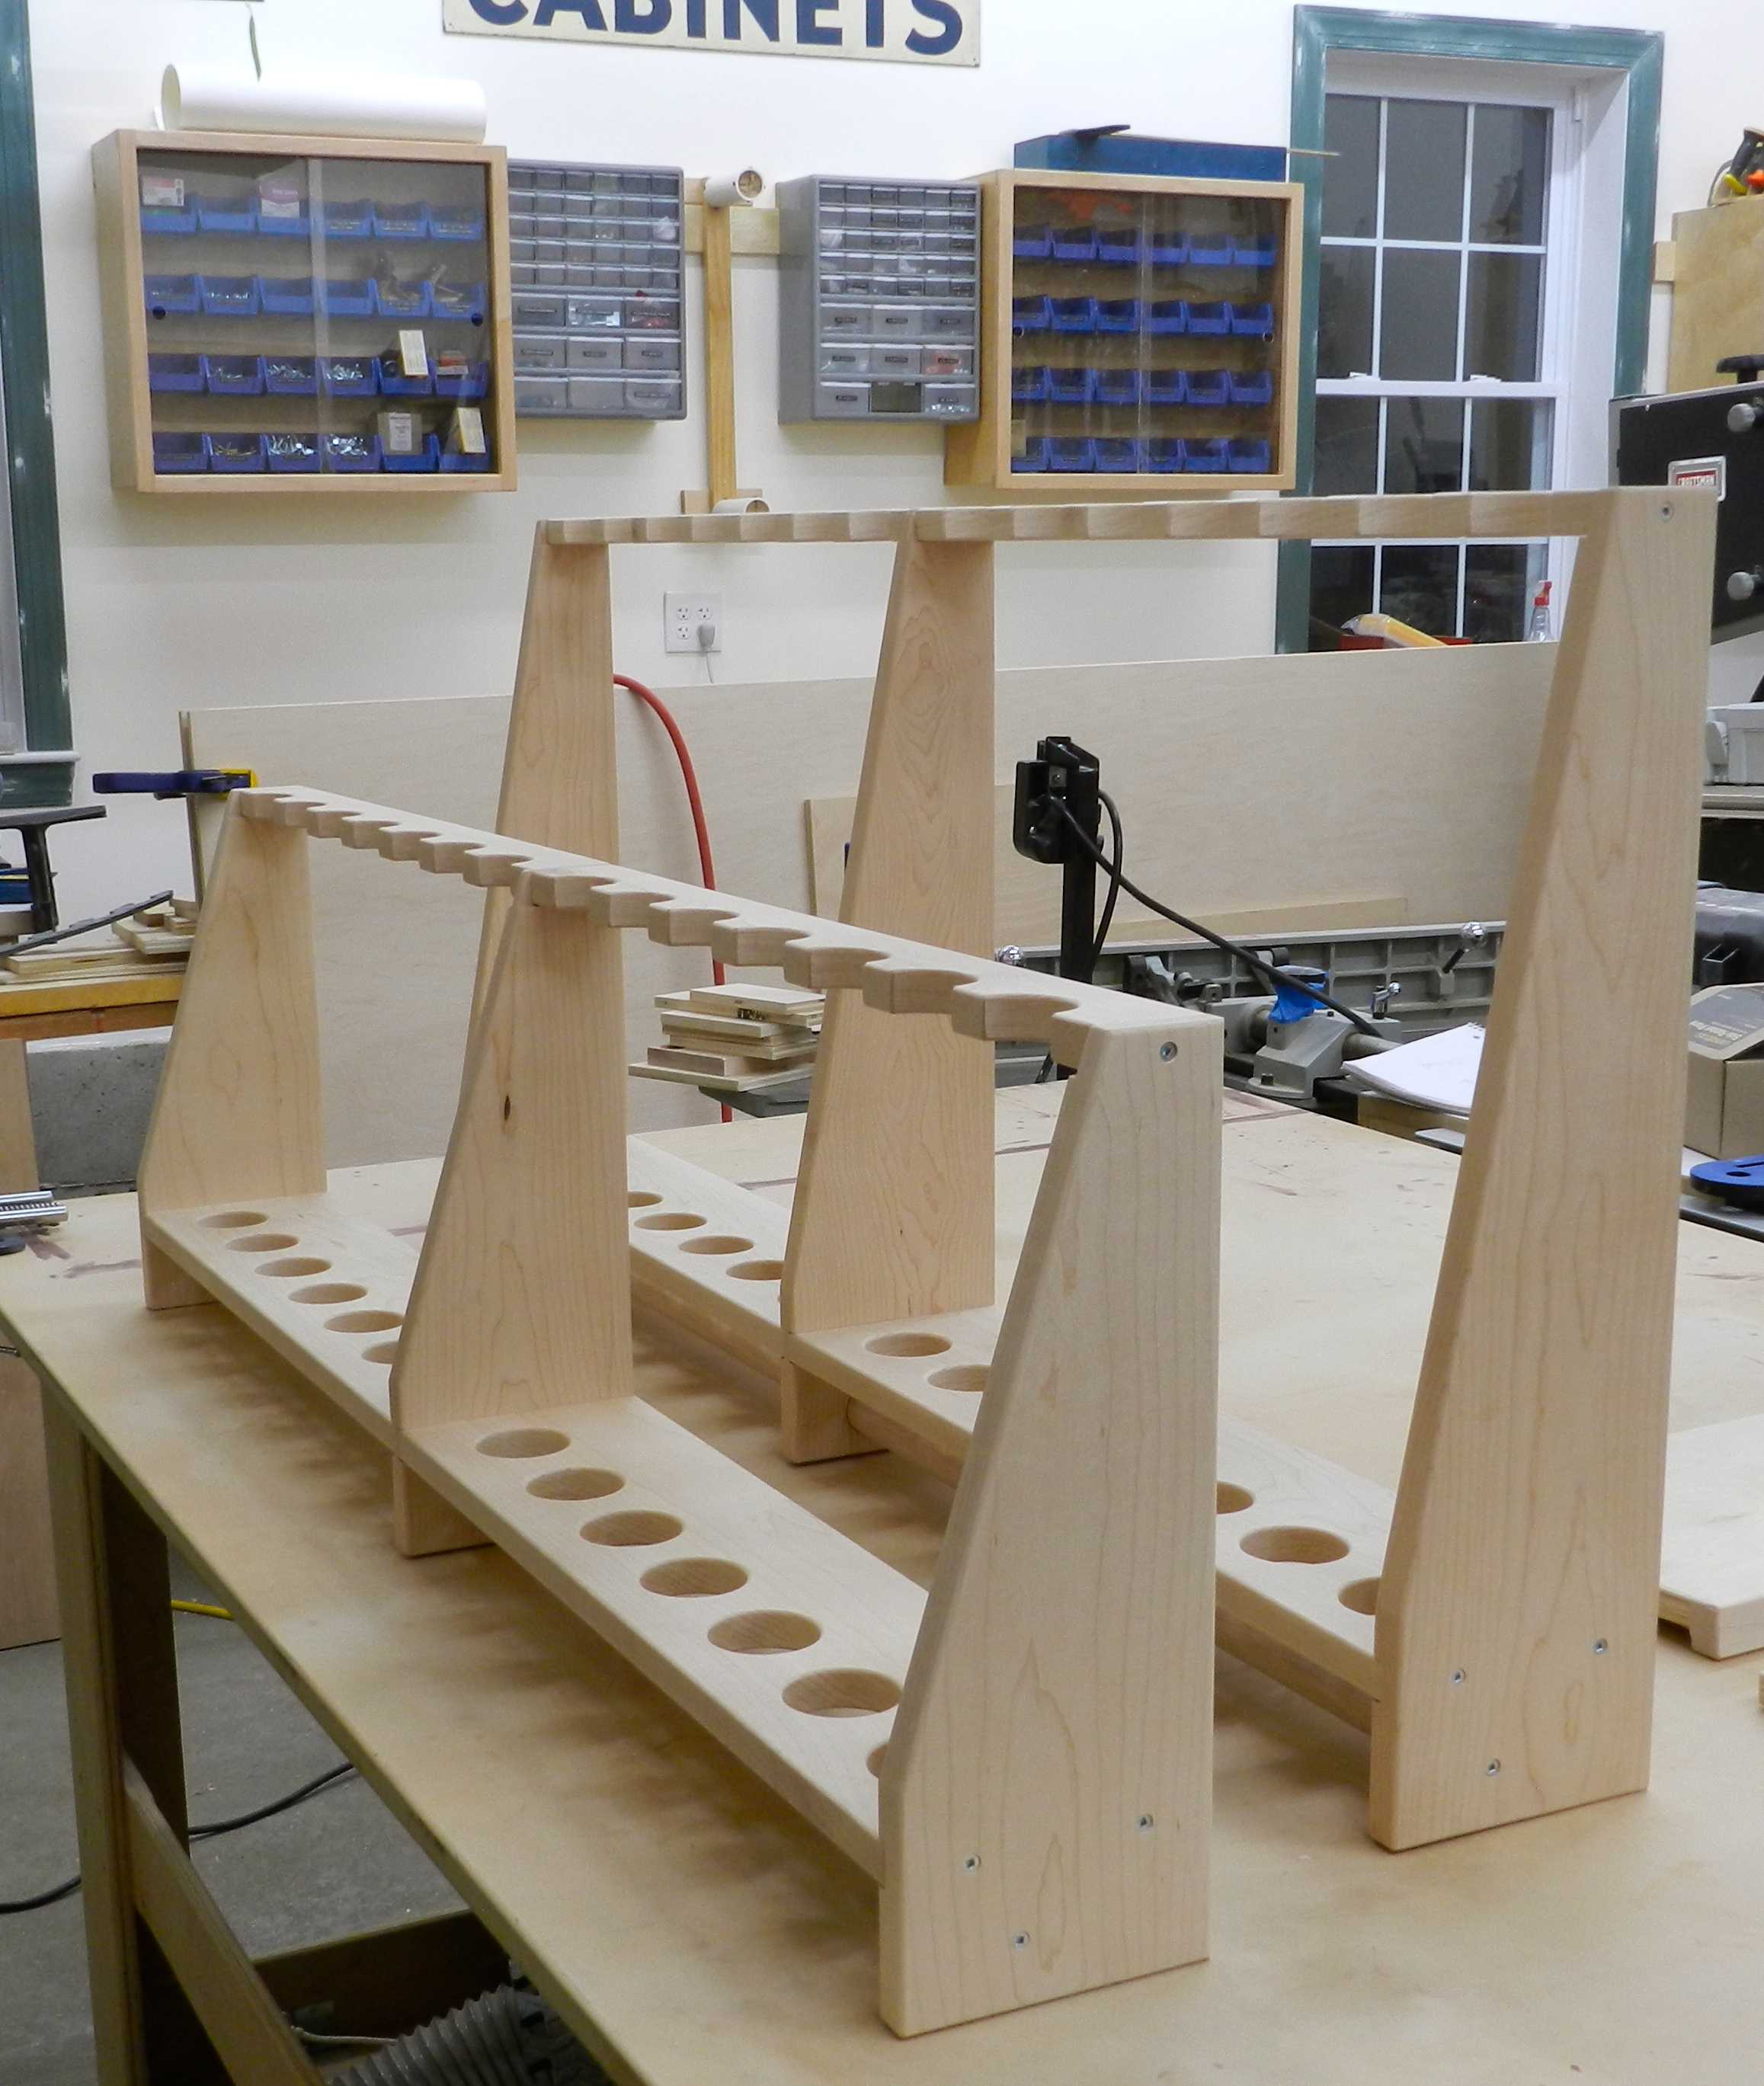
As an avid wood turner I often spend a lot of time at the lathe. When doing production work I am often trying to figure out better ways to be more efficient in my work. A modest time sink is often finding the next tool to use as historically my turning tools usually lived in a Woodcraft tool travel bag which was overflowing on a nearby table or tool, and a small rack for 4 tools that would sit on the end of my lathe’s bed. Over the past few weekends I set out to fix this problem…
Drilling Holes
The drill press got a workout hogging through a LOT of Maple…
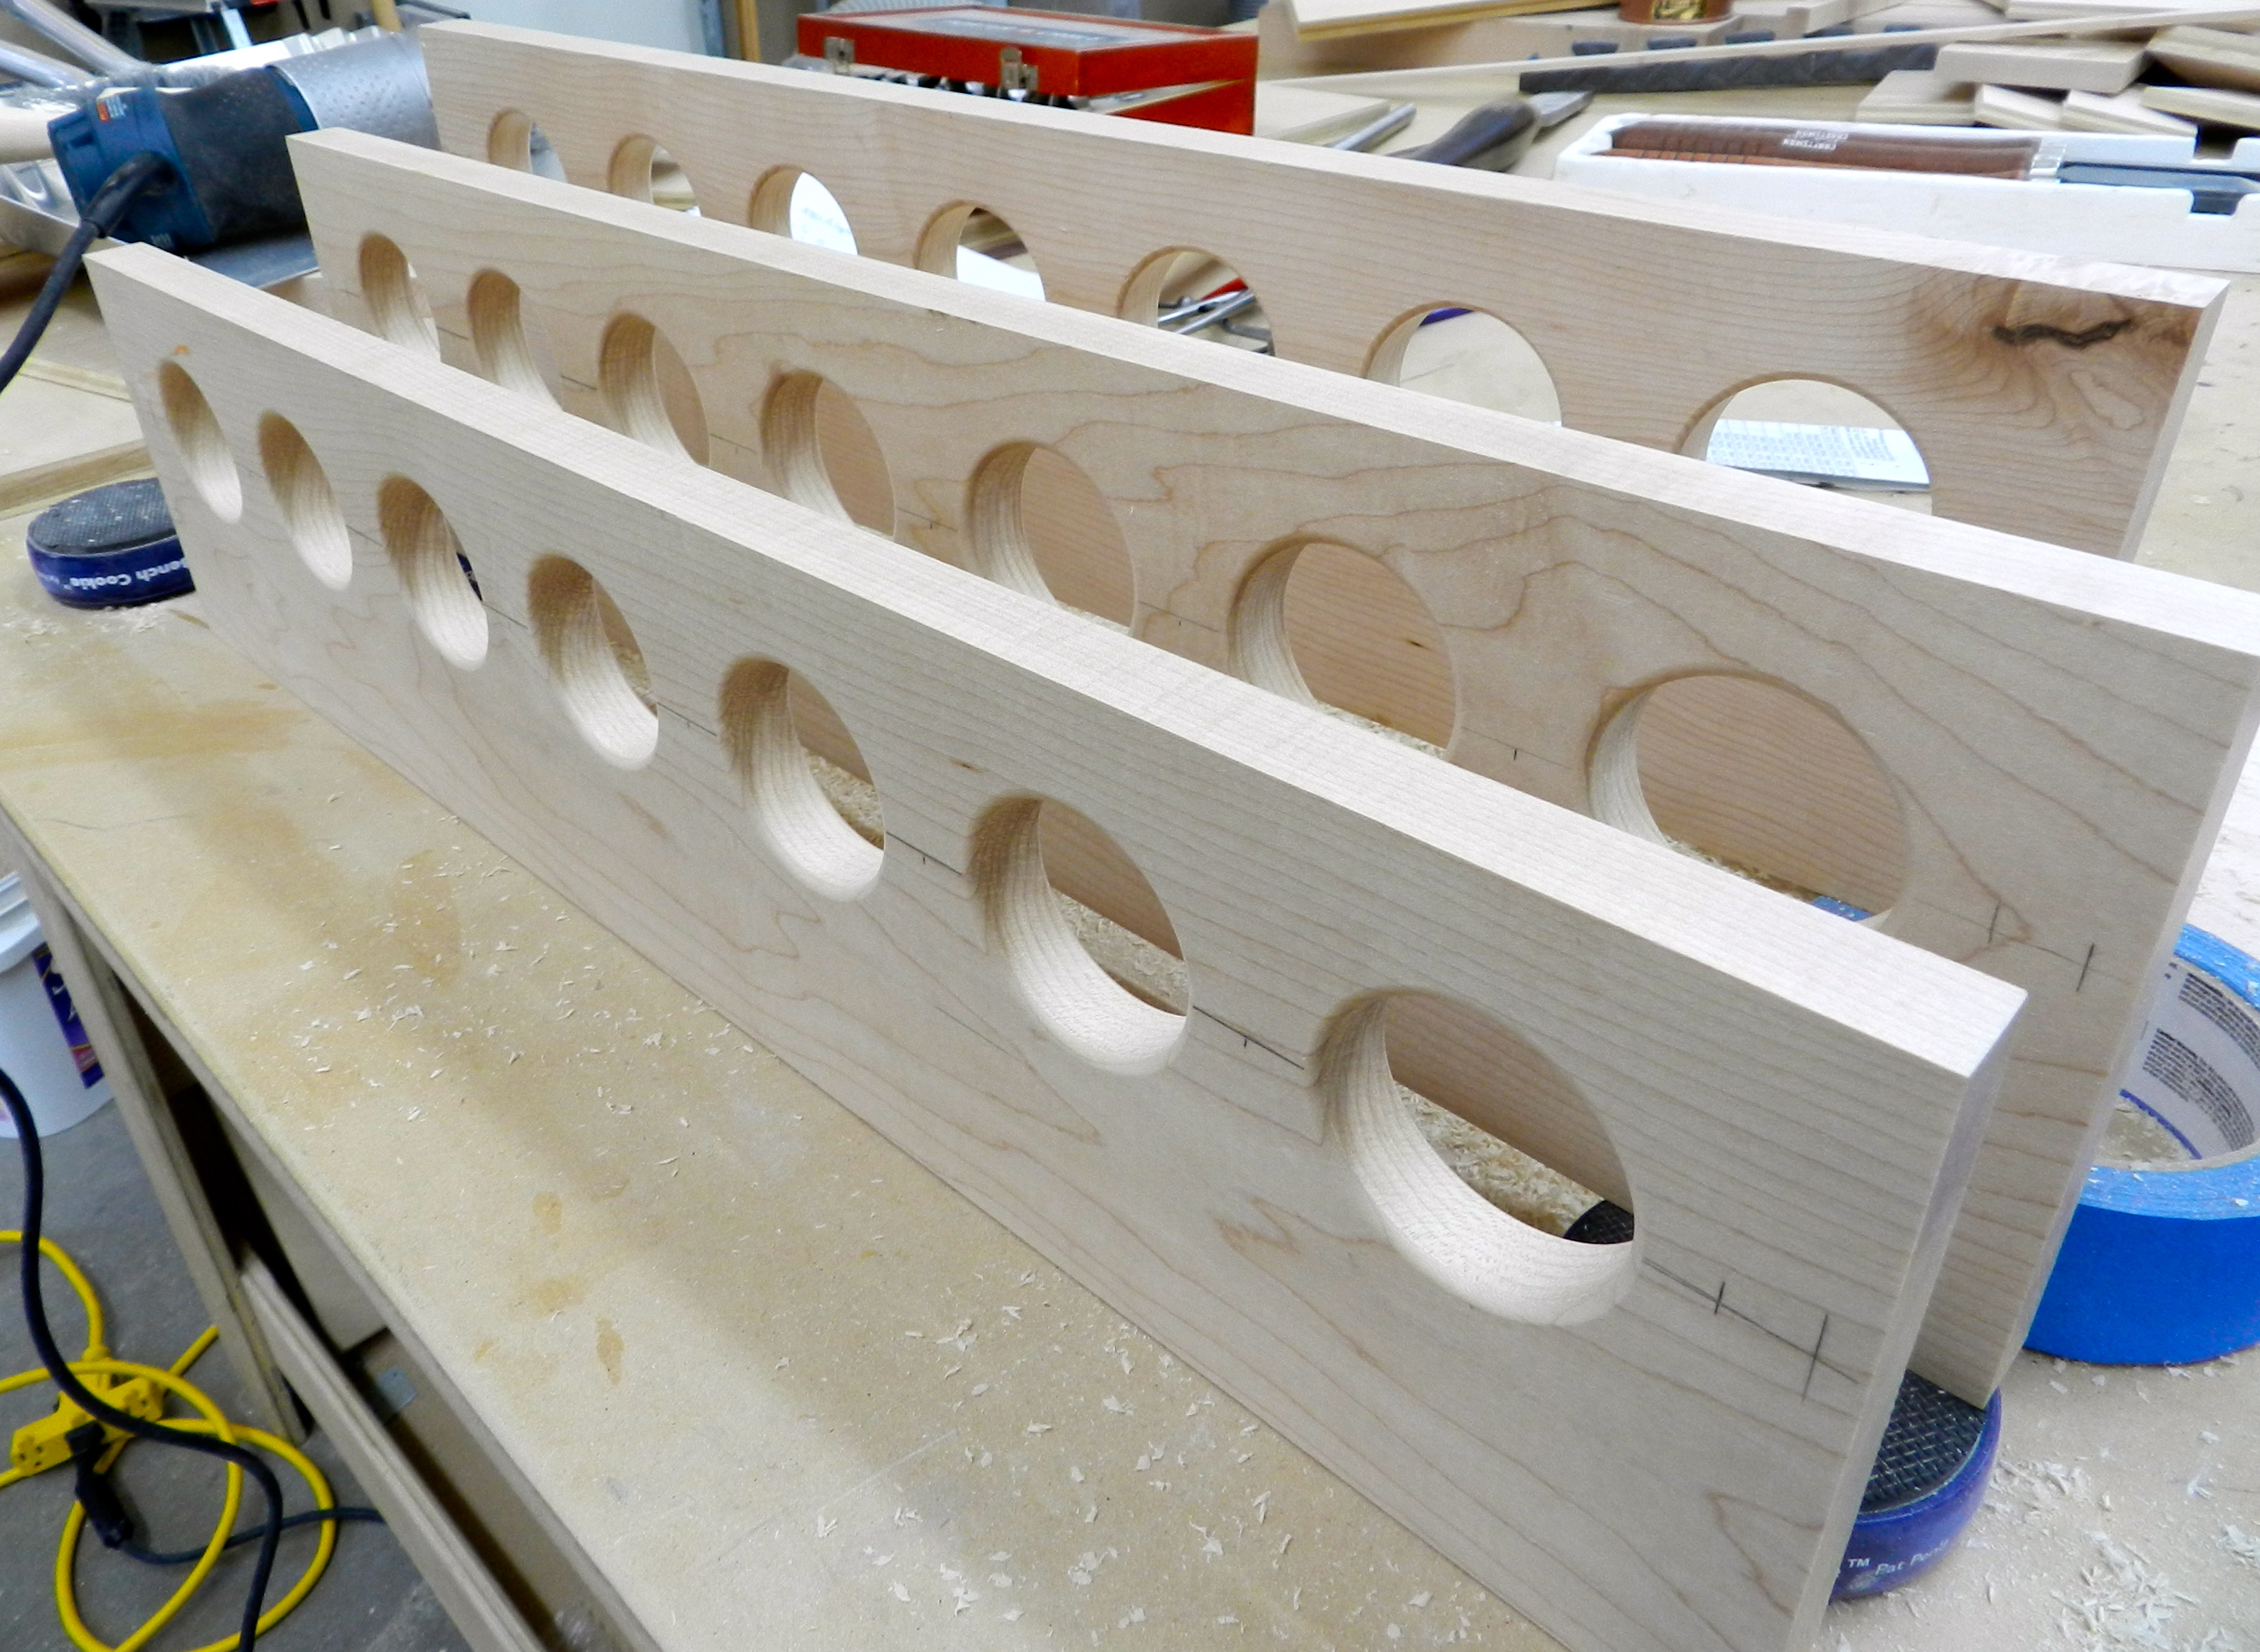
Completed sets of holes
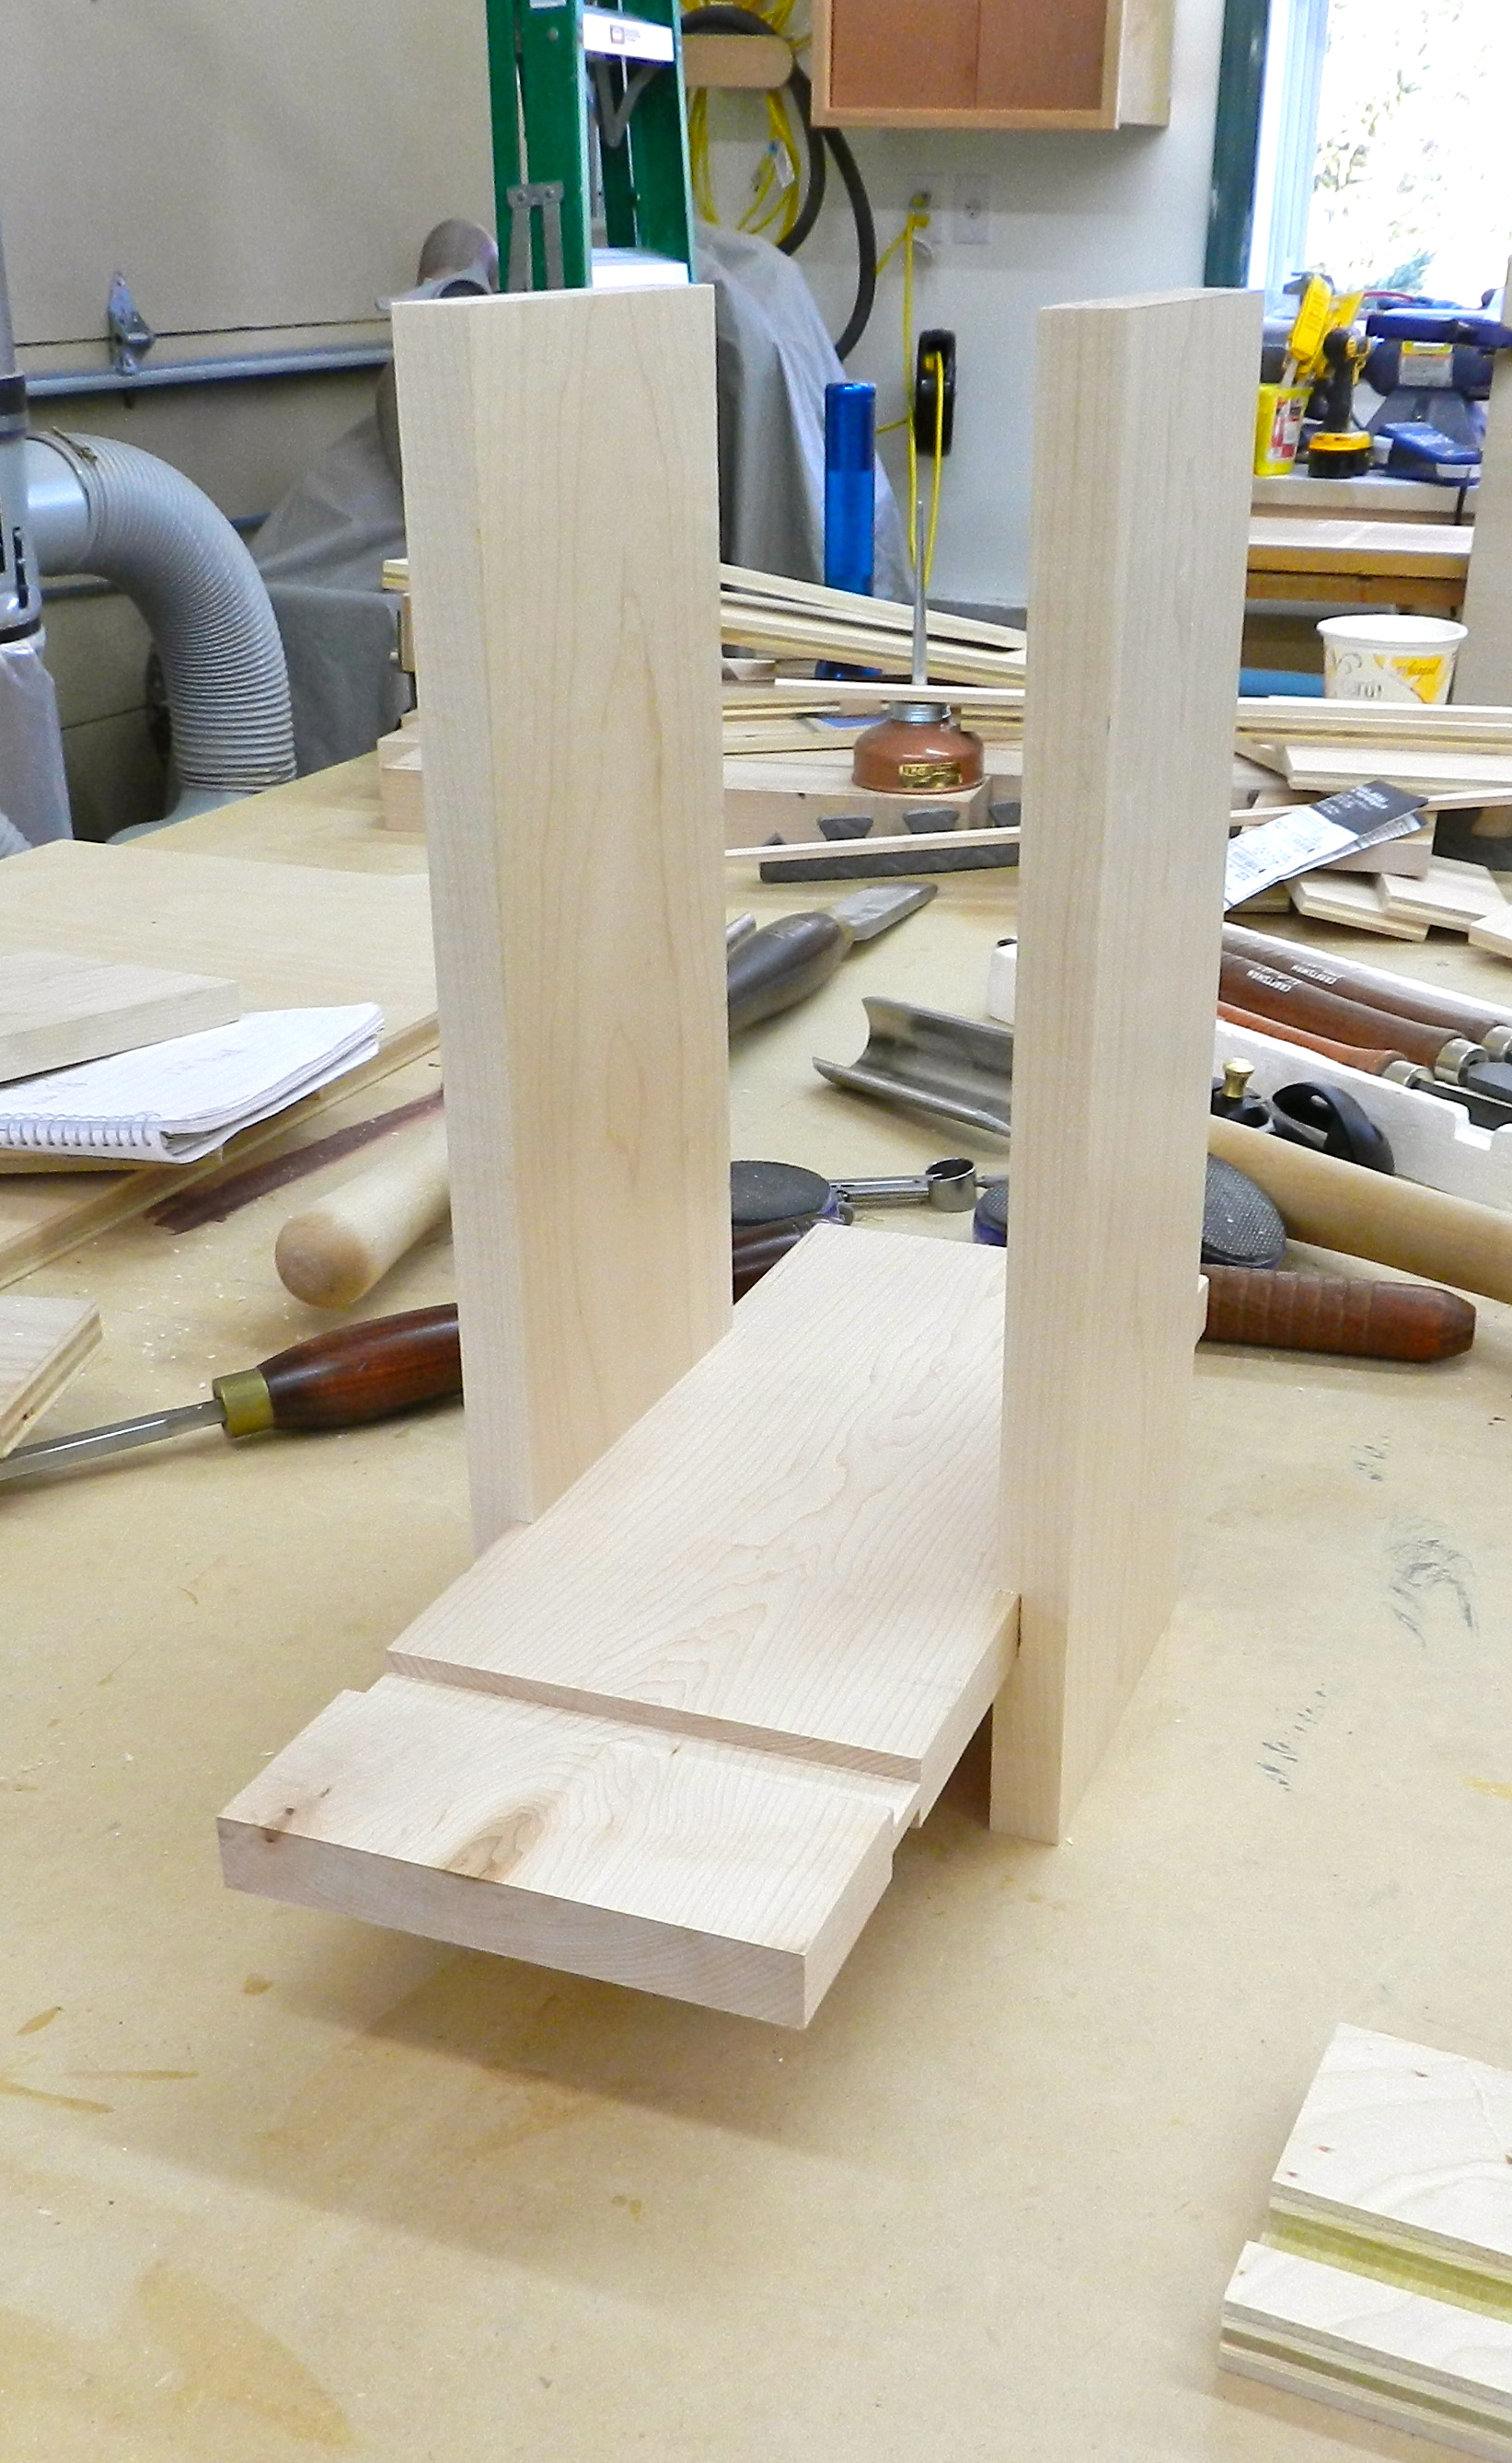
Then came test fitting the joints….
Testing Joints
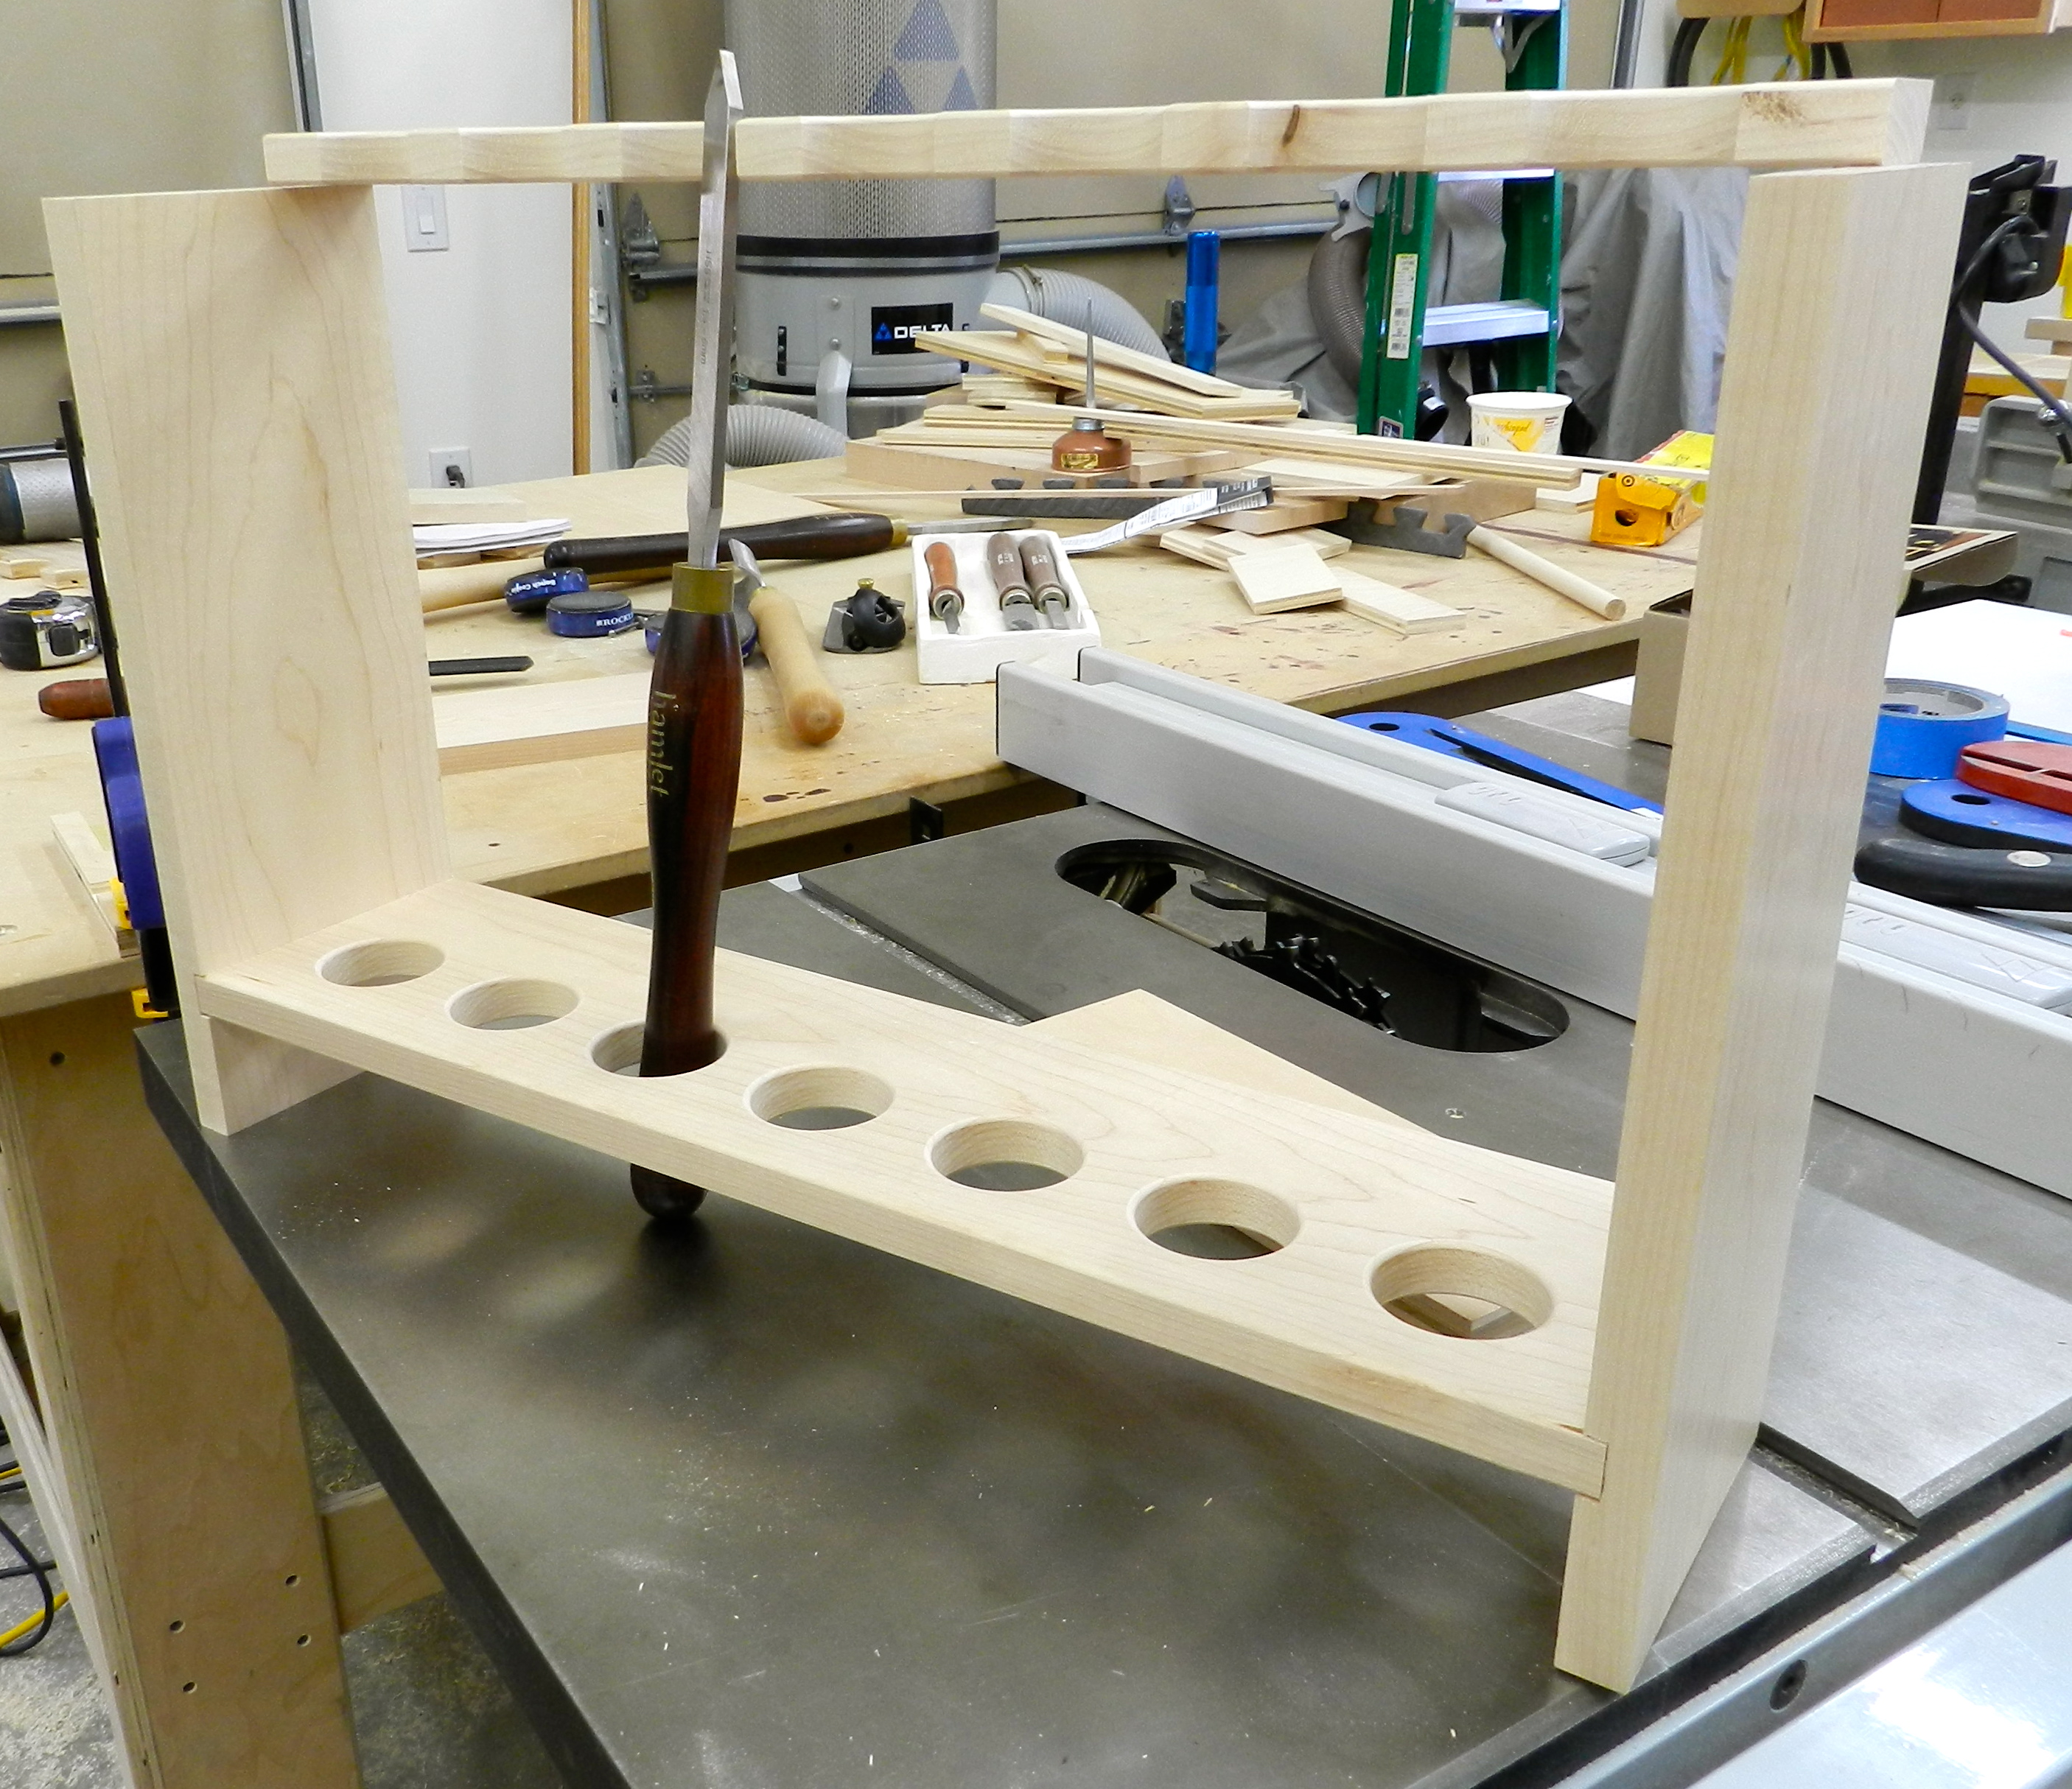
Then making sure the size, shape and angles I figured actually worked for tools in the real world…
Working out design
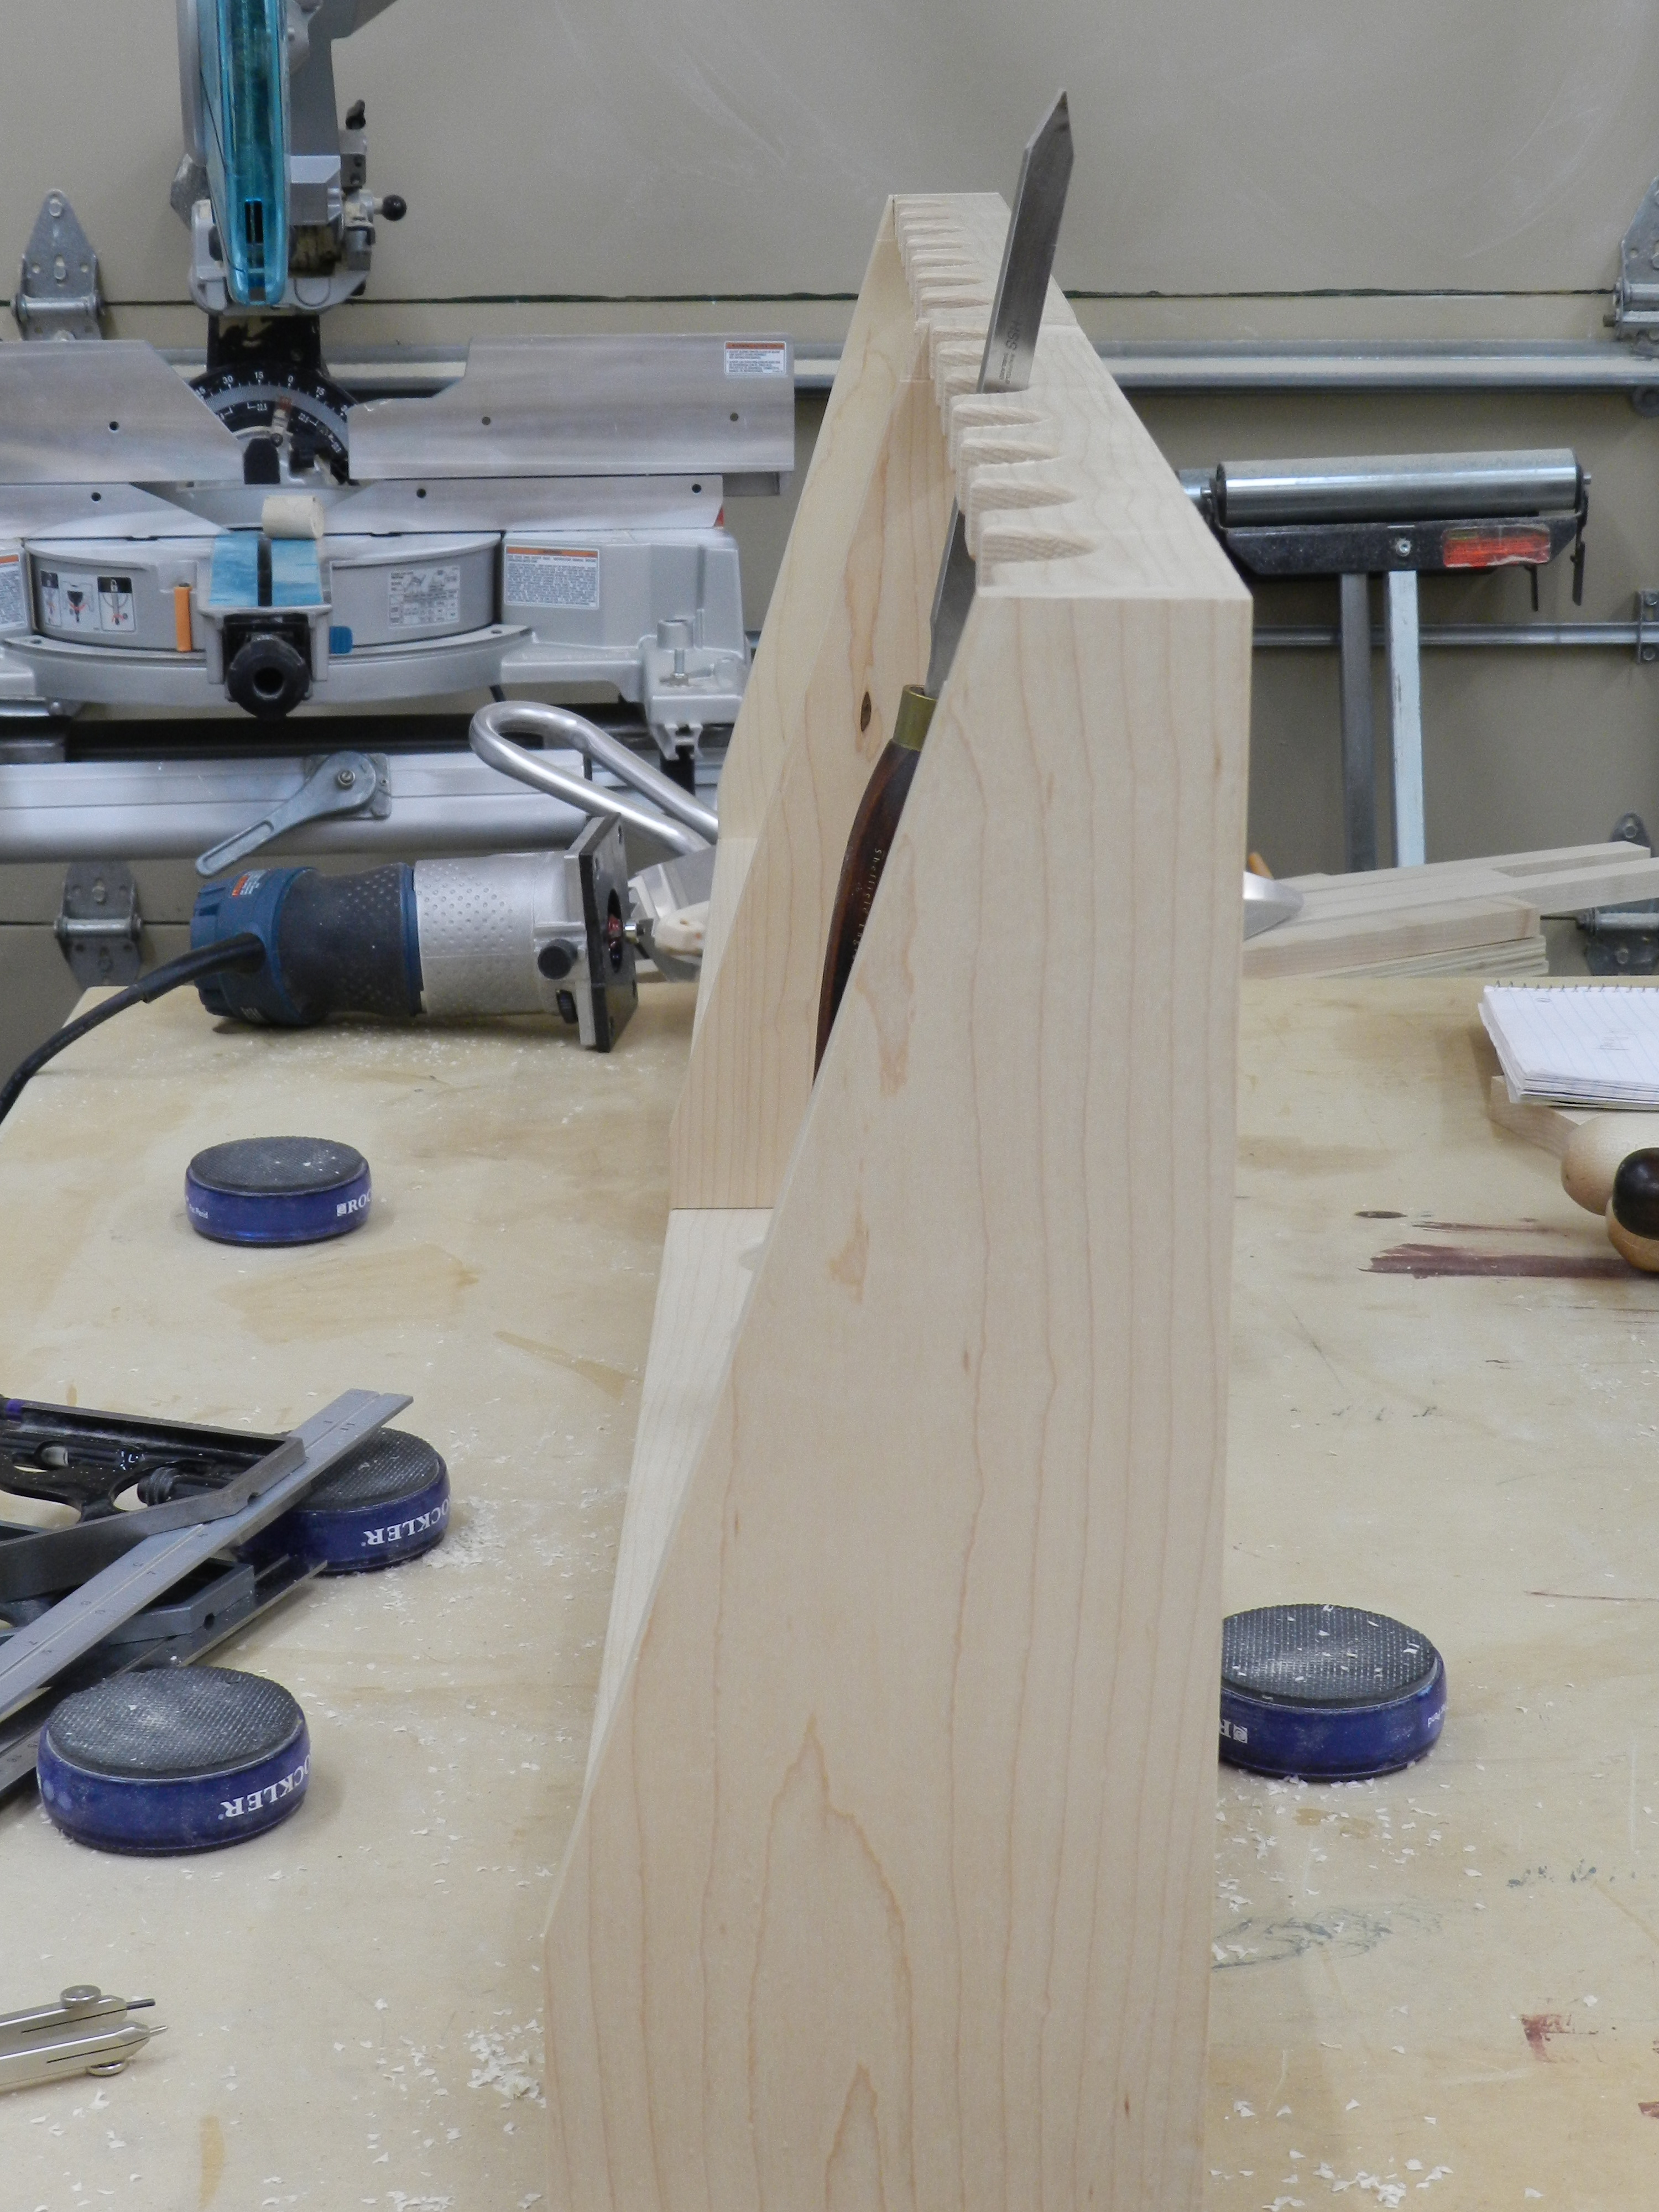
Refined the design a bit by tapering the sides…
Tapering the sides
Next up was fitting together each of the double units..
Completed racks awaiting finish
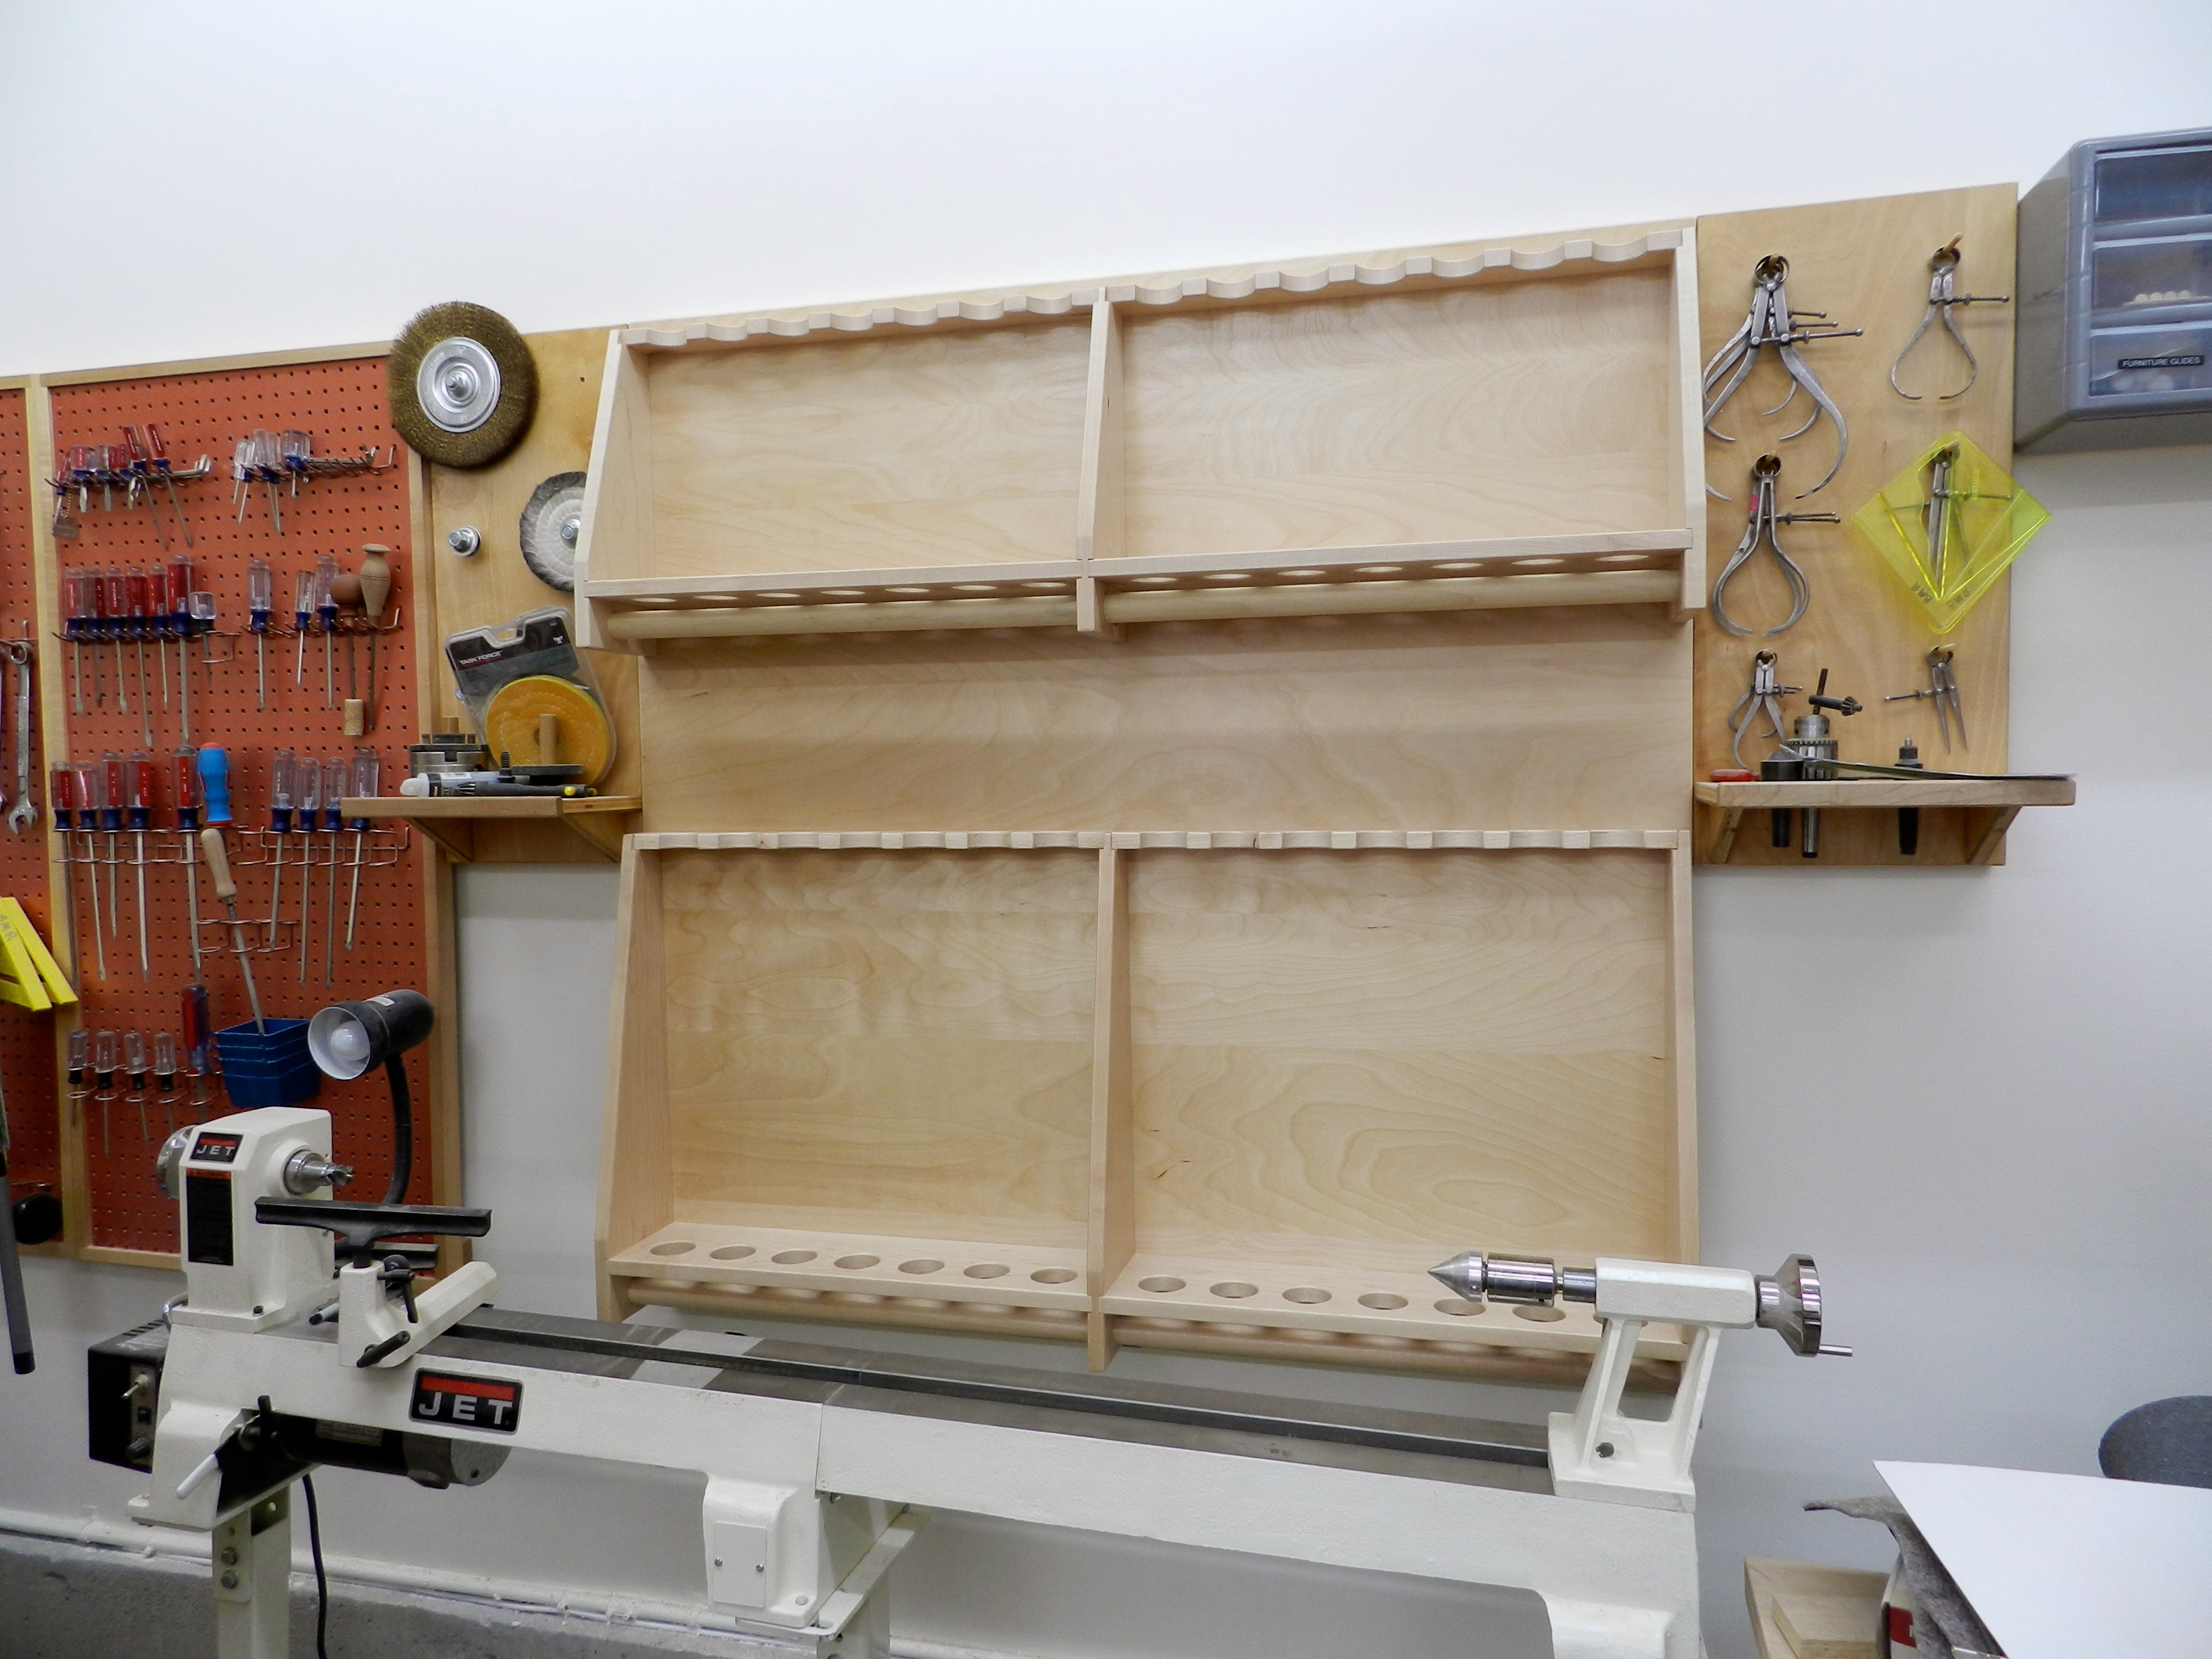
Then finishing them and installing them on to the 4’x4′ plywood backing. The backing, much like everything else in my workshop rides on a french cleat, so I can re-arrange my wall space each time my needs, tooling or shop changes.
Completed racks installed
Part of the beauty of this design is the over sized holes and the large dowel underneath which allows shavings to easily fall through the rack, rather than fill up as they would if the bottom of the holder was closed in. (This was a design element seen on similar, but smaller turning tool racks we had at NBSS — so thank you to my friend Rich Friberg or one of his predecessors for the inspiration 🙂 ) The completed rack looks naked without any tools, so time to populate it…
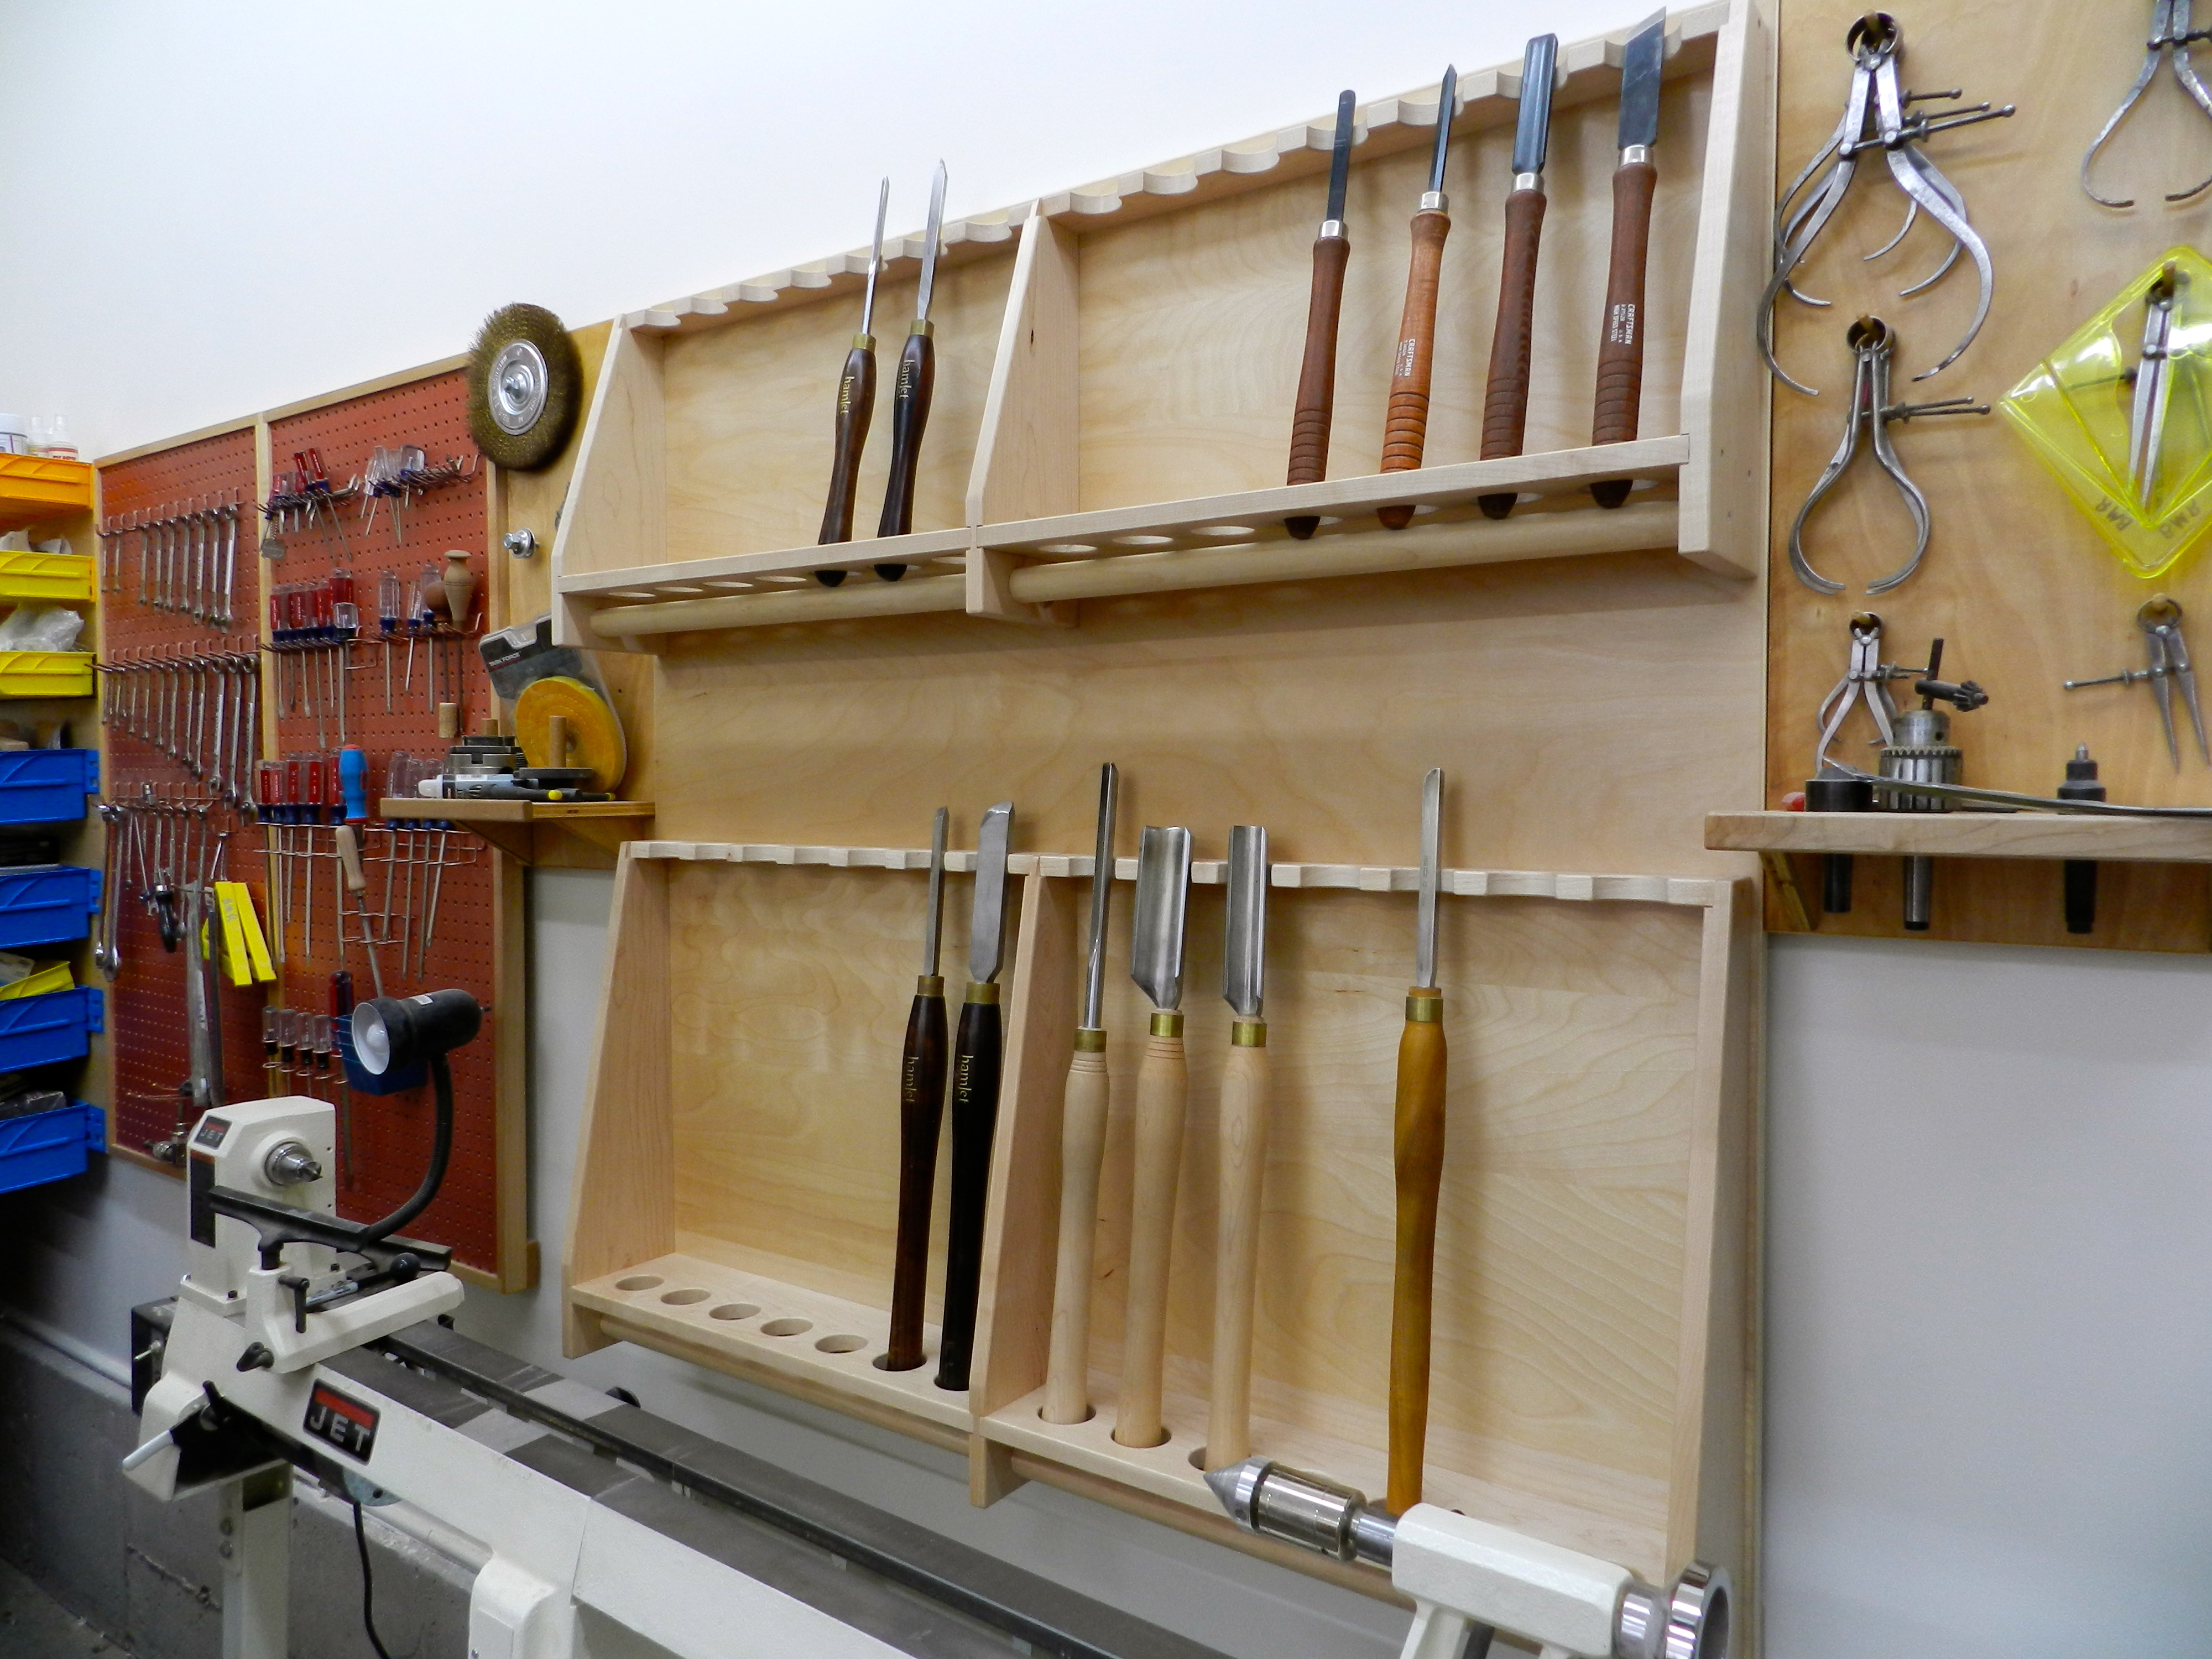
Completed racks, with room to grow
The completed rack has worked out great. When I turned the handles for my tools, I made them different shapes and species so I could tell them apart with only a quick glance and this rack allows for very fast identification and selection. There is room for my full sized tools, room for my smaller detail tools, and room to add more. (I’ve been itching to build some of the hollowing tools from Alan Lacer’s video on making your own turning tools). The rack holds 28 tools, 14 on each level, so as your collection of tools grows you can still make use of the shelf space — I filled some of the space with tiny turning blanks and rolls of turner’s tape)
Side view
Time to get back out into the shop and keep turning…
Are you interested in meeting and taking a woodworking class with Roy Underhill of the Woodwright’s Shop and Woodwright’s School? (Along with Peter Ross the former master of the Colonial Williamsburg Anderson Forge and Bill Anderson a master plane maker – both of which have been on Roy’s show)
I talked to Roy and the guys and they were willing to do a special run of the two workshops below on the following dates*: Arrive July 8th class 9-12th leave the 13th at Roy’s School in Pittsboro NC
* (Given the very long drive from NH down to NC I wanted to try and get a few days in a row down at Roy’s school to get the most I could out of the trip, and I am very appreciative they were willing to do so, but we need a few more people to sign up in order to run it) So if you are interested in one or both of these sessions I encourage you to sign up soon.
3 Day class $425 + $115 materials (beech + plane iron etc) to make a massive single iron jointer plane
Jointer Plane Workshop
Total: $725 Tuition and materials for 4 days + your own food and lodging. I will be driving down (11hour drive from NH) and if folks from NBSS or the general Boston area are interested in joining me I can carpool. Hotels in the area are $55-100/night. Info from Roy on what it’s like to take a class at his school can be found here.
I also hear there is a good pizzeria behind the school that Roy has been known occasionally have a drink with the students after class and above the school is an old time used tool shop that has similar stuff to what we hunt for at the Nashua Tool show.
If folks are interested, we could also take an extra day to go see nearby Old Salem, which is home to the Museum of Southern Decorative Arts and a Moravian living history museum much like Colonial Williamsburg. http://www.oldsalem.org/ It’s kind of a crazy adventure, but I think it would be a memorable experience.
For more info, please contact me or sign up at Roy’s site:
You can reach Bill Rainford at: (My firstname ‘dot’ lastname at facebook.com) — or via my blog or my linkedin page
“Warning: Sharp chisels are dangerous and should be handled with care. Dull chisels are even more dangerous and should be sharpened.”
This timeless advice comes deep in the small print of the little card that comes with many Lie-Nielsen tools. Much like a shower or brushing your teeth, sharpening is a regular daily routine for most traditional woodworkers, and while it is amazing to see the lengths we go to be sharp, many of us often relegate this task to the end of the bench or tiny bits of counter space here and there.
Why all the fuss about about where to sharpen? How do I avoid this ‘dangerous’ situation?
For many years I was sharpening wherever I could find a bit of space yet knowing there was a better way to go about this. After moving last year I finally got around to re-arranging and re-imagining my workshop space and decided to do something about where I sharpen. Several years ago I went through a phase where I built a lot of New Yankee Workshop projects meant to organize the workshop and at that time I bought the supplies to build Norm’s Sharpening Station but never got around to building this one last project — I even had the top all laminated and ready to go since before the move. Now as I looked to make more room in my shop and move my 4’x8′ sheet goods cart out of the shop I needed to clear off that extra plywood and get some more storage space for all my sharpening paraphernalia. Now that I’ve finished this project I don’t know how I lived without it for so long. I *finally* have all my sharpening gear in one place, I have a spot I can quickly sharpen at and get back to work. I also have waited way too long to finally have an actual paper towel holder in the shop — yes the simple pleasures in life — like not having sawdust all over a clean sheet from the roll that was bouncing around the shop.
The point? Keeping your tools sharp is a vital part of doing good work, so the investment in a dedicated sharpening space and a couple of weekends is a great way to keep your edges keen, your points sharp and your paper towels clean (especially if you don’t want to get caught stealing paper towels from the kitchen 😉 ). Happy Sharpening….
Cut and label pieces
Gluing up the carcass
Installing the drawer guides
Finishing the Drawers
Fitting the drawers
Dual paper towel holders — one for regular paper towels, one for shop towels
Towel racks in use
Completed sharpening station with drawers open and step extended
It’s easy enough to sign your work with a Sharpie or branding iron…and I’ve done both many times in the past. But what if you are looking for something that will give your work that extra flourish? Or work on a massive scale like a timber framed barn? Or be a new sign for your shop? Often the best solution is to carve your own sign or inscription.
This past weekend I had the opportunity to take a two day workshop in letter carving with Janet Collins at the North Bennet Street School. I had a great time. Below is a quick recap of how I spent my Superbowl Weekend.
Demonstrating how to make the first cuts
Janet is a graduate of the NBSS CFM program, instructor, former workshop director and accomplished artisan. She has a passion for woodworking and loves sharing the craft with others.
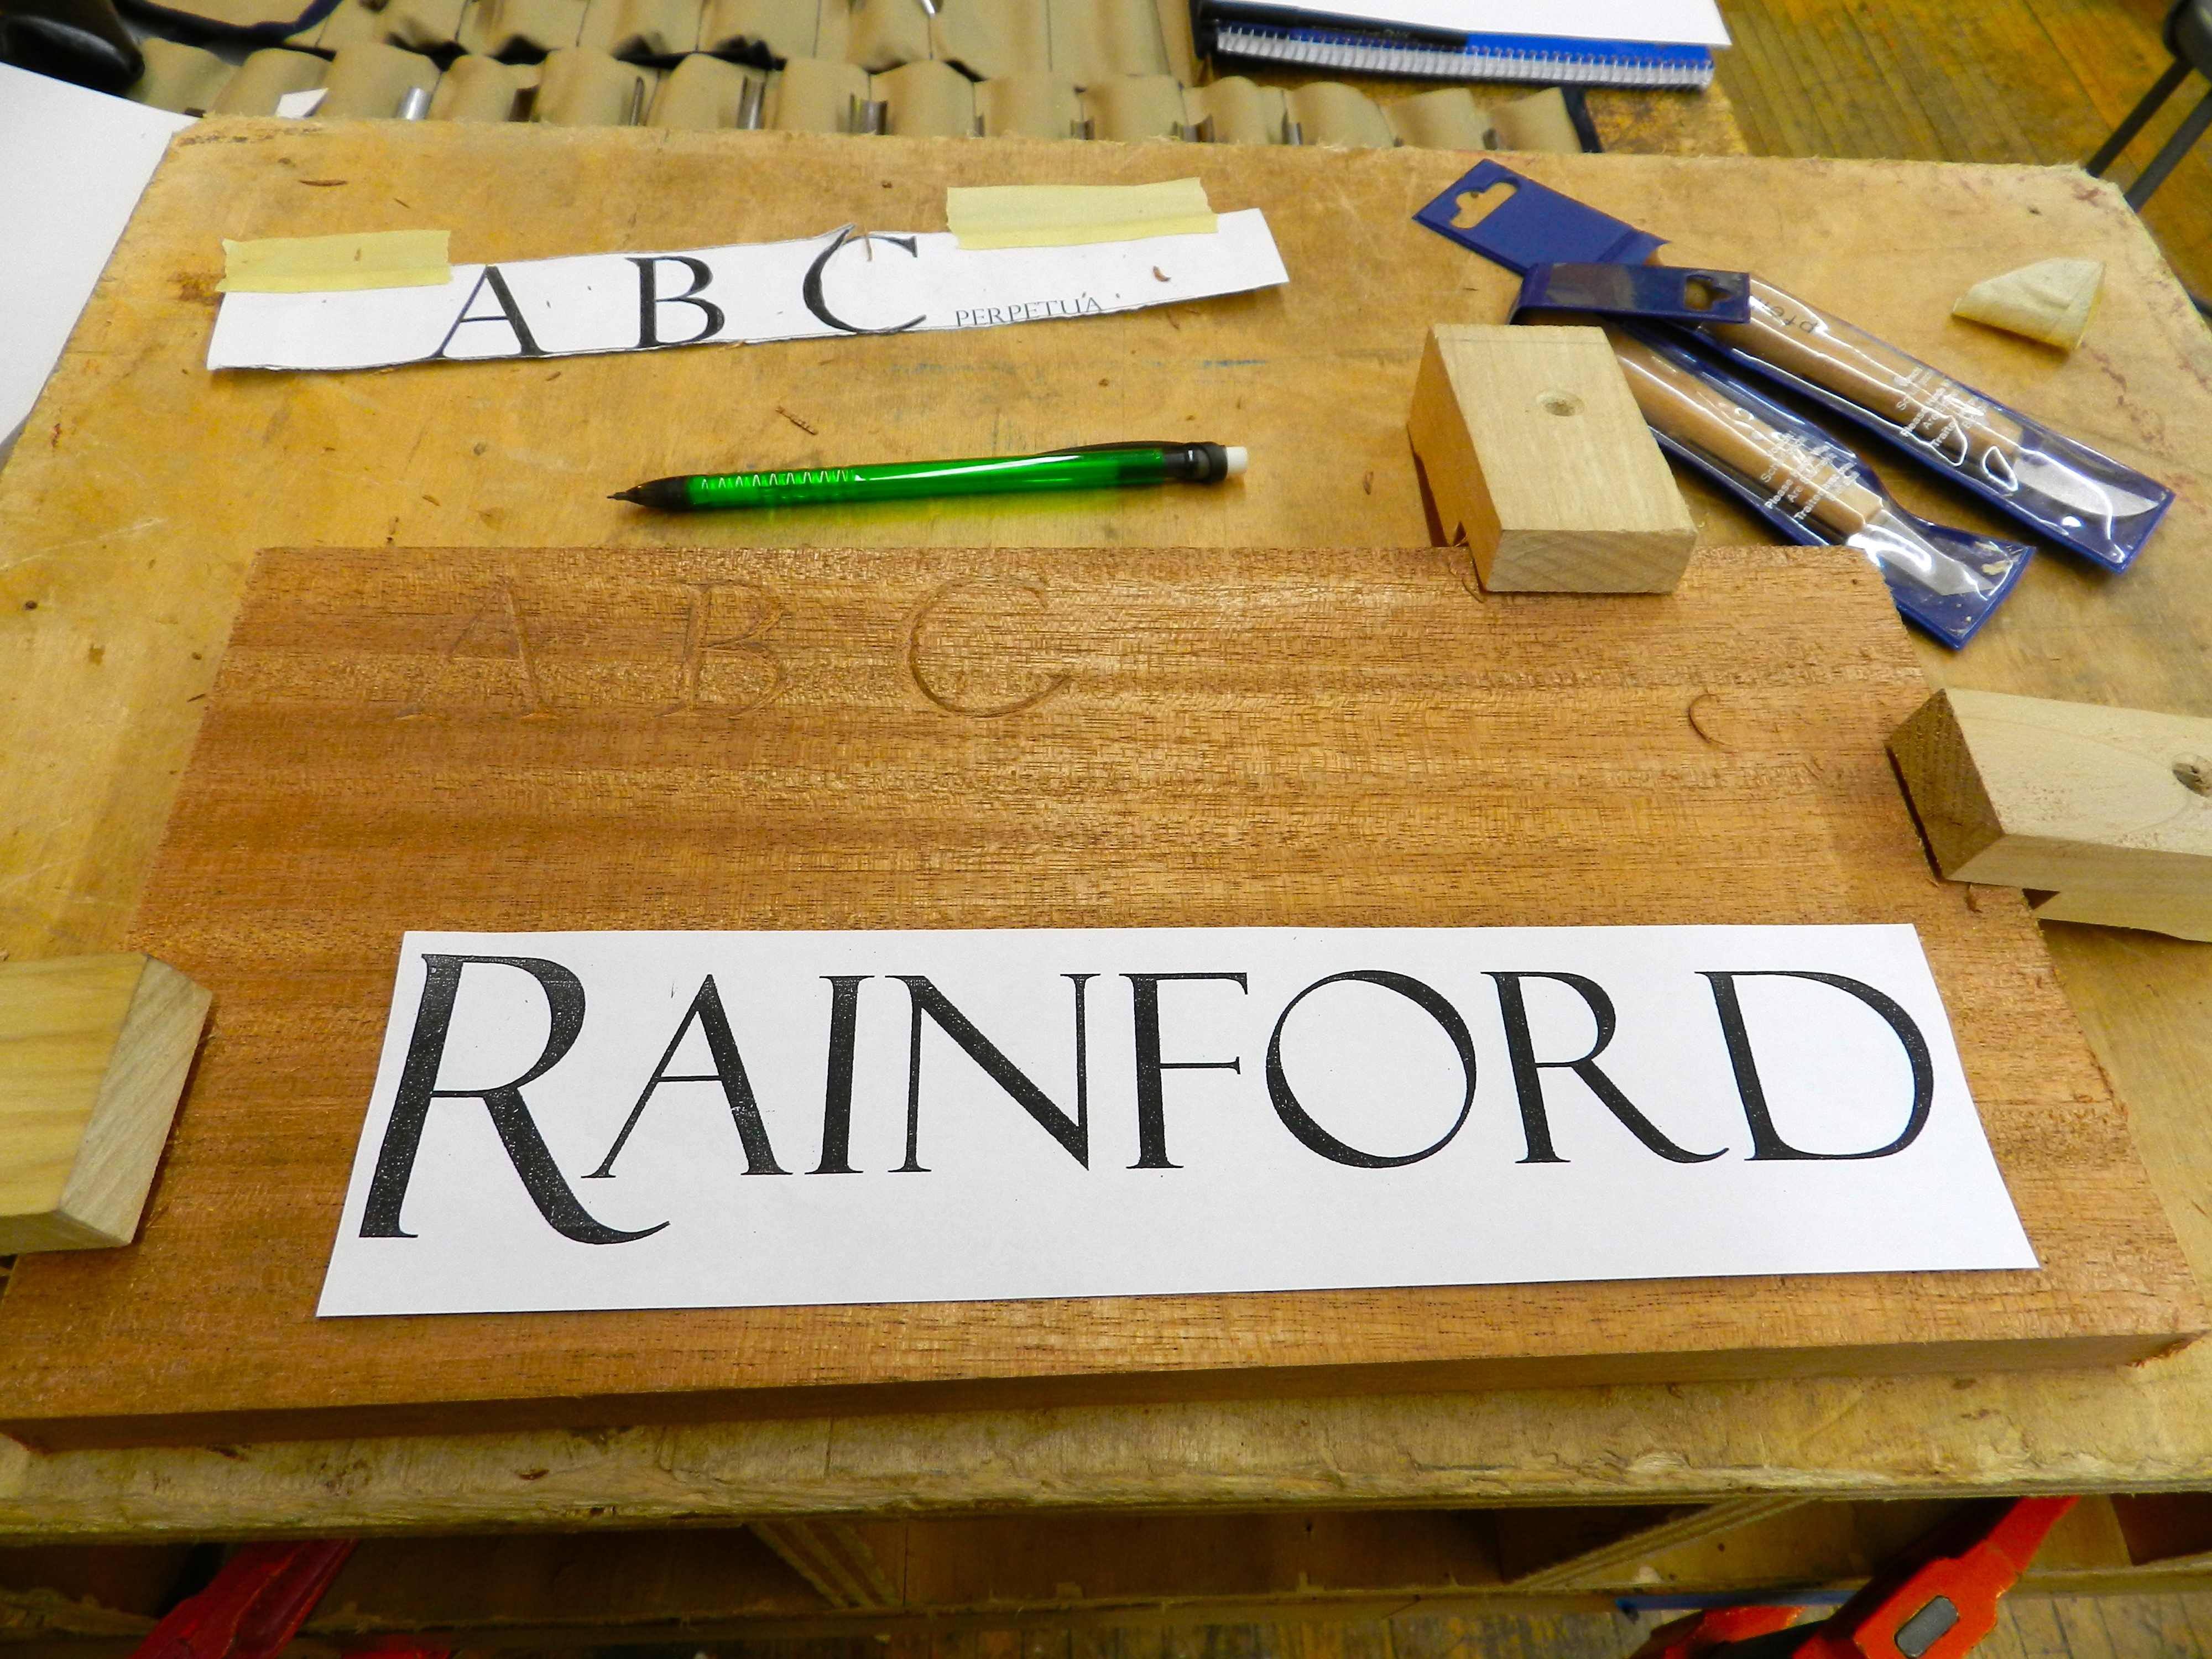
Laying out your letters
After sharpening your tools the first step is laying out your text first on paper or a computer.
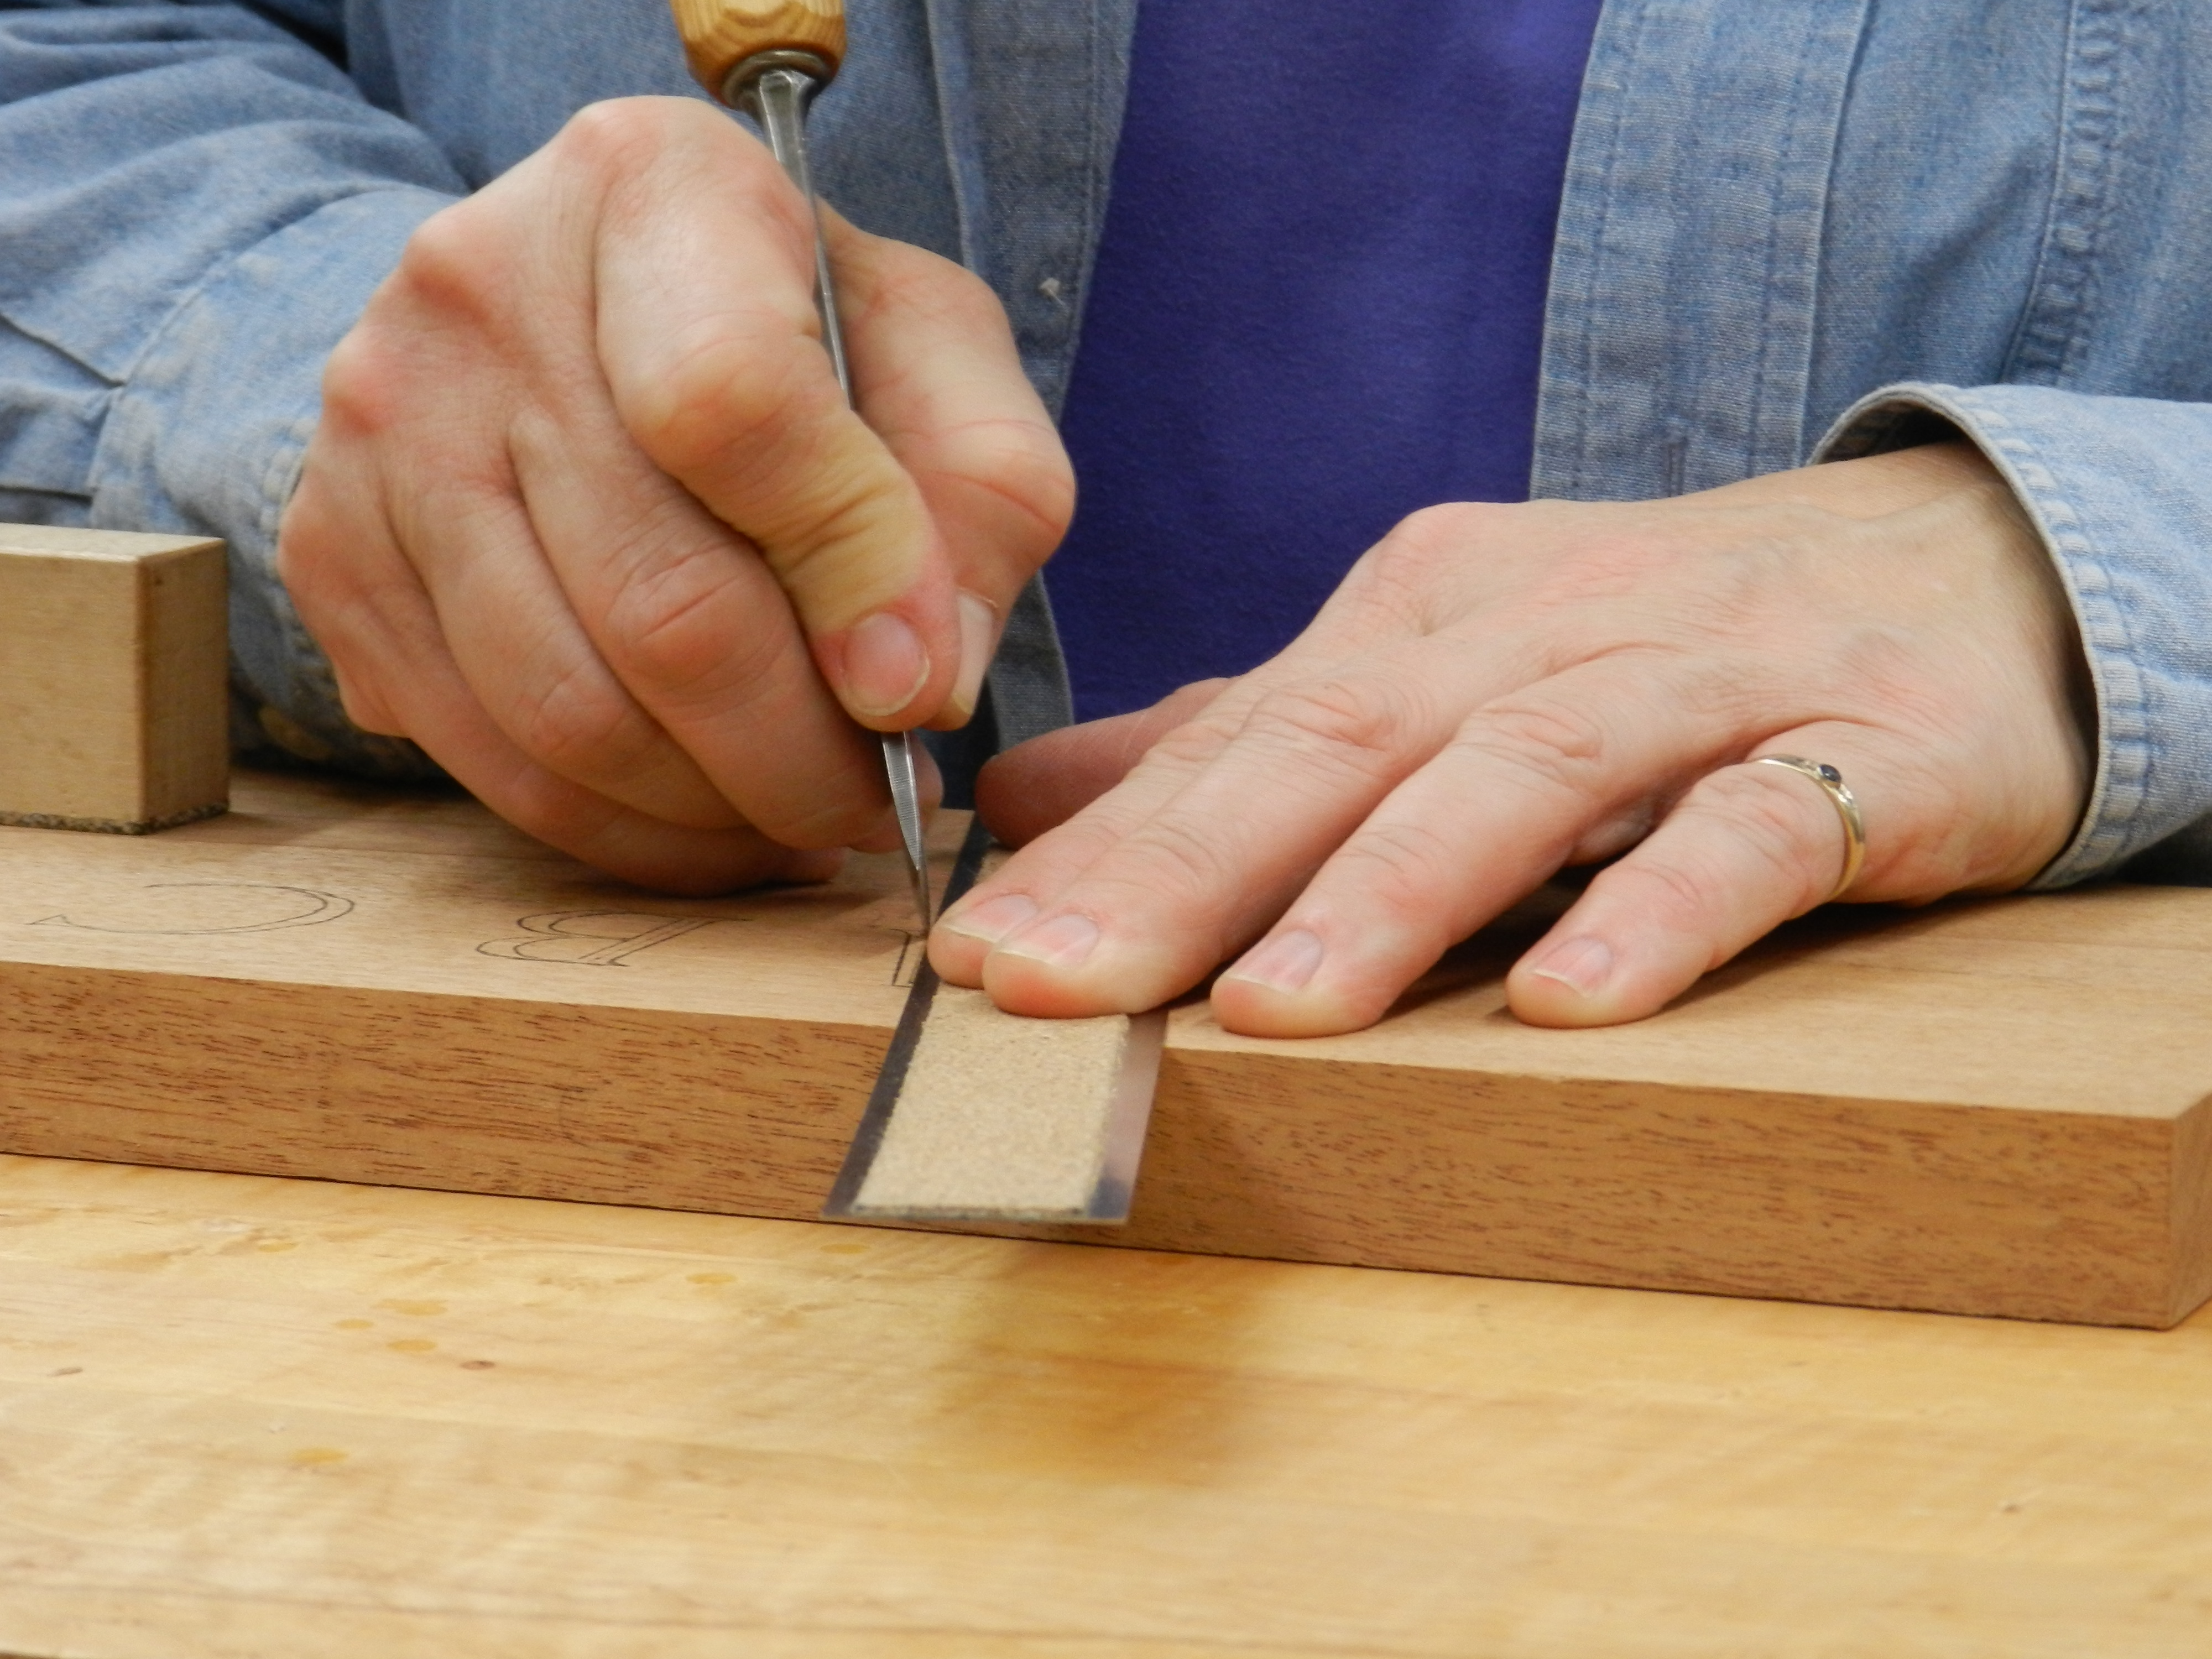
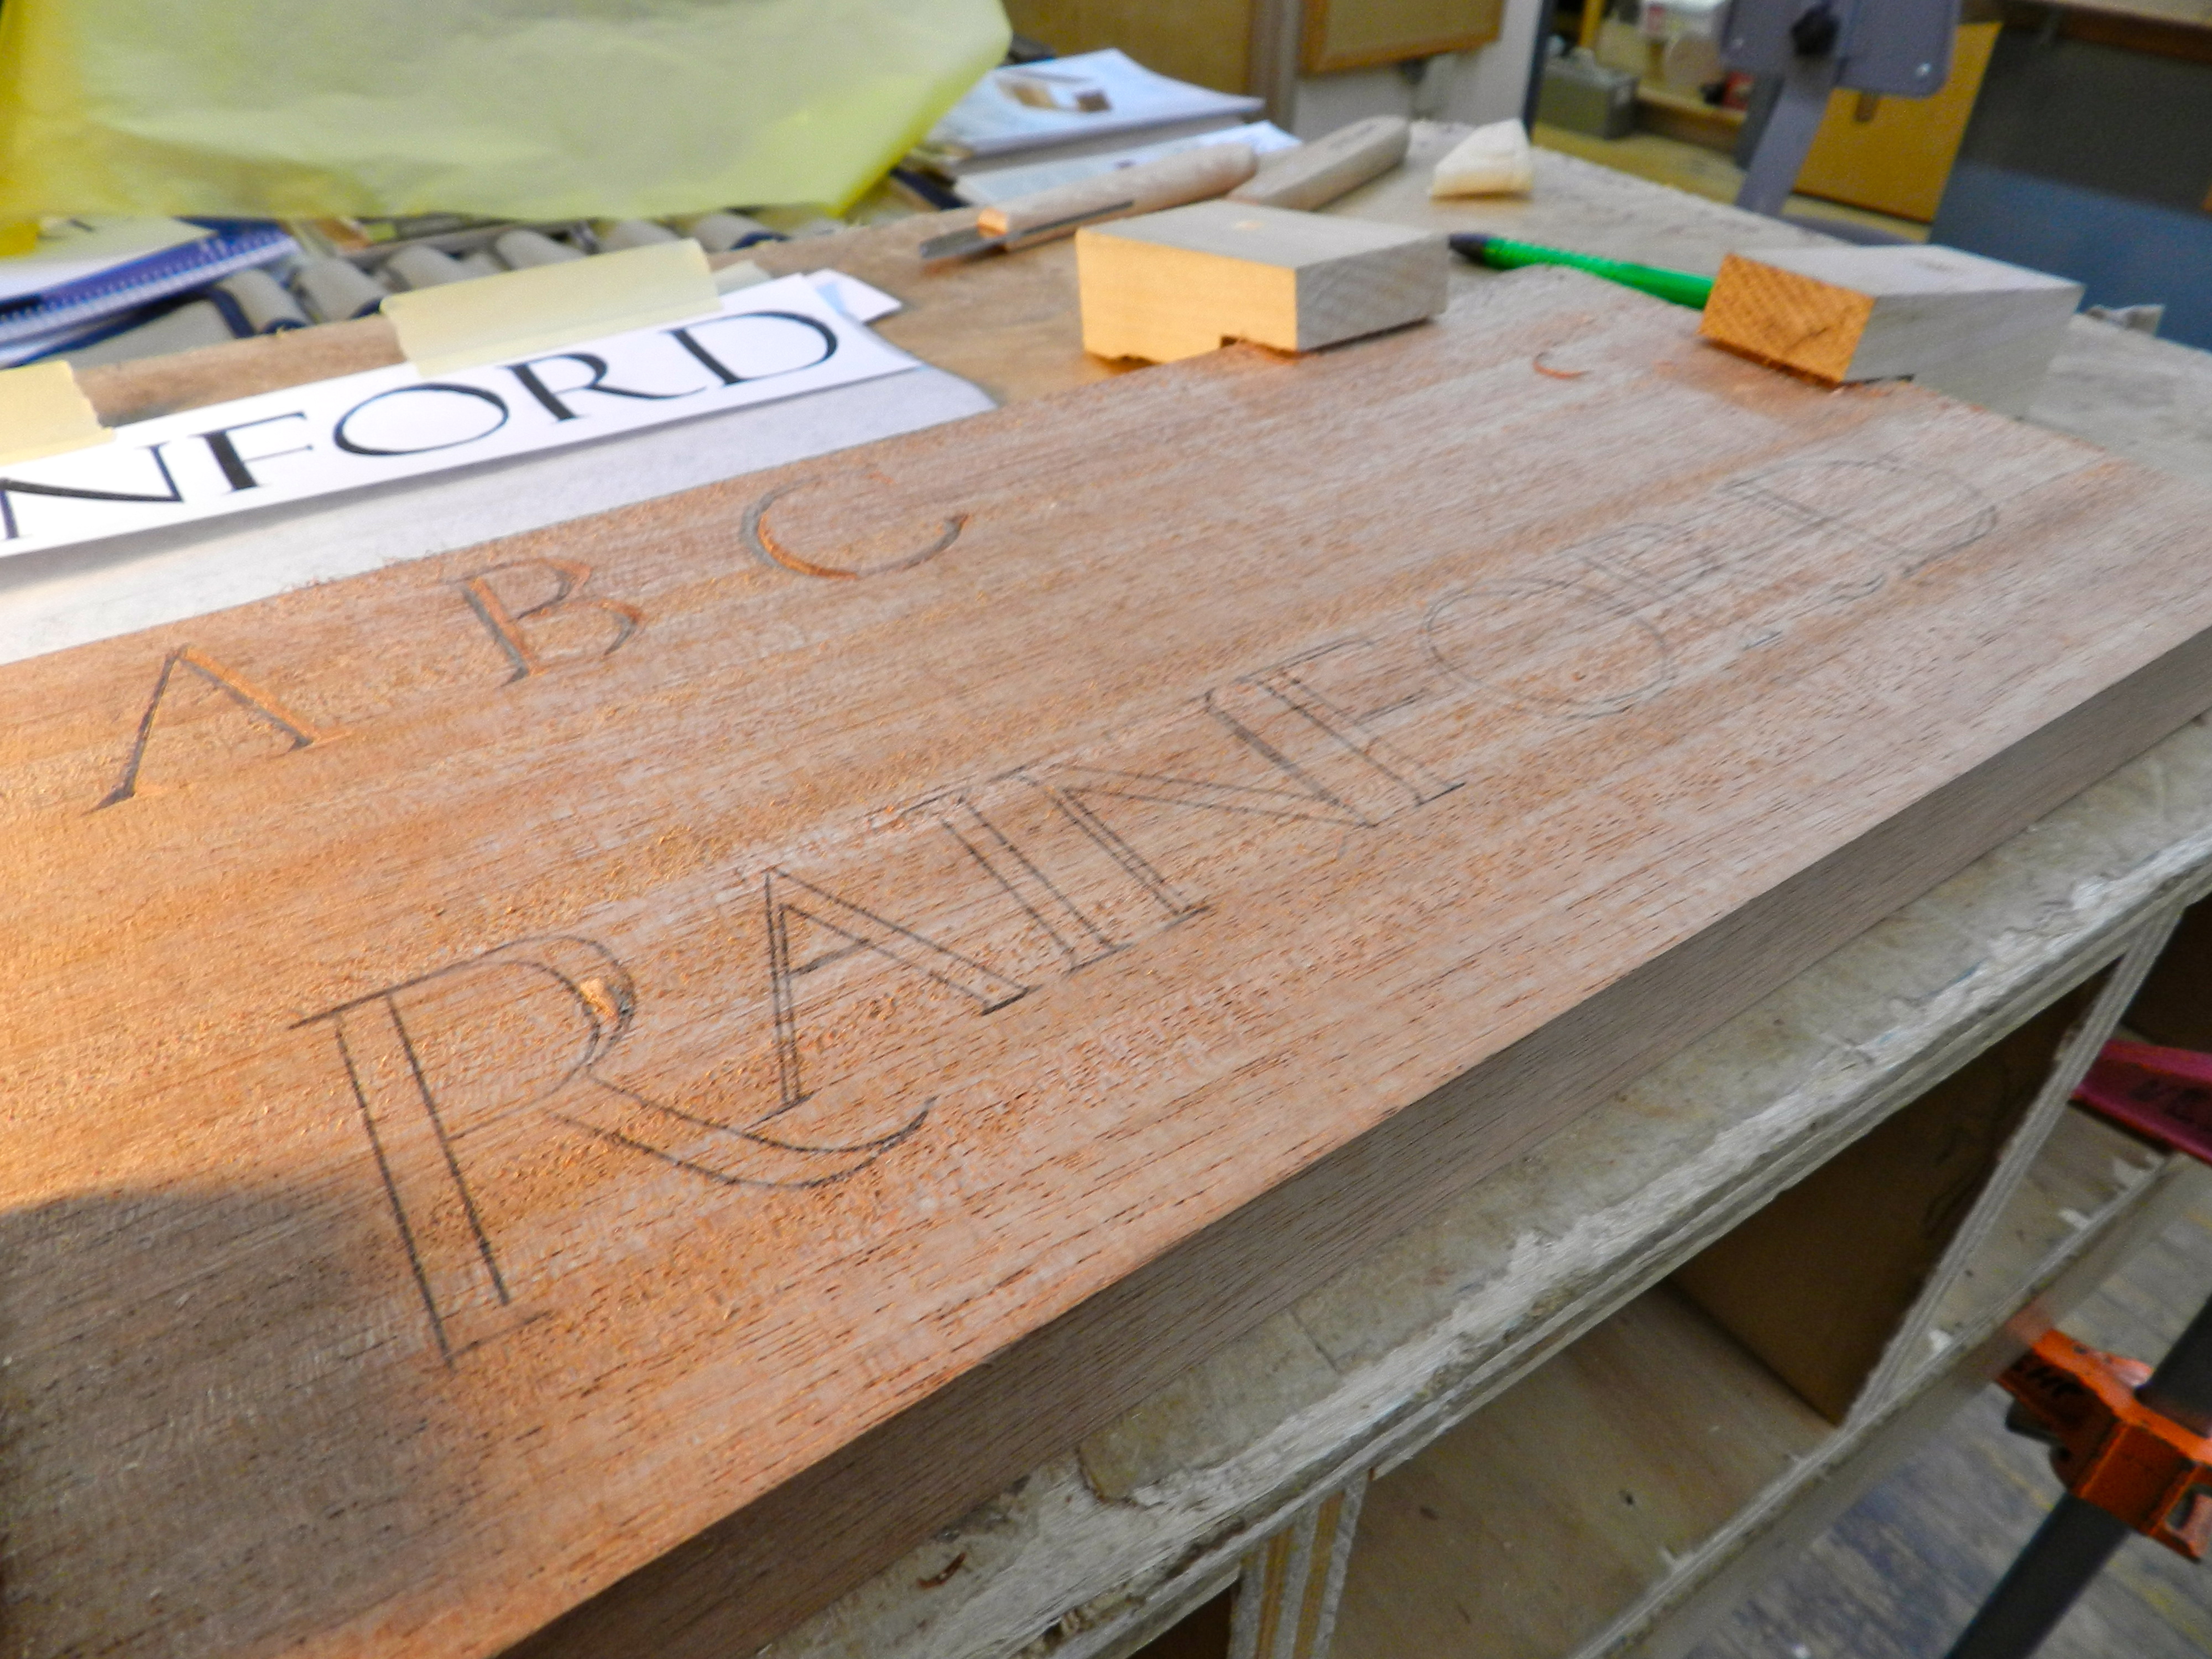
Transferring your pattern
Transfer your pattern on to the workpiece.
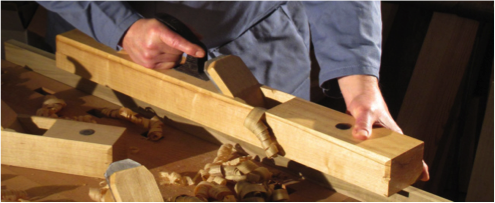
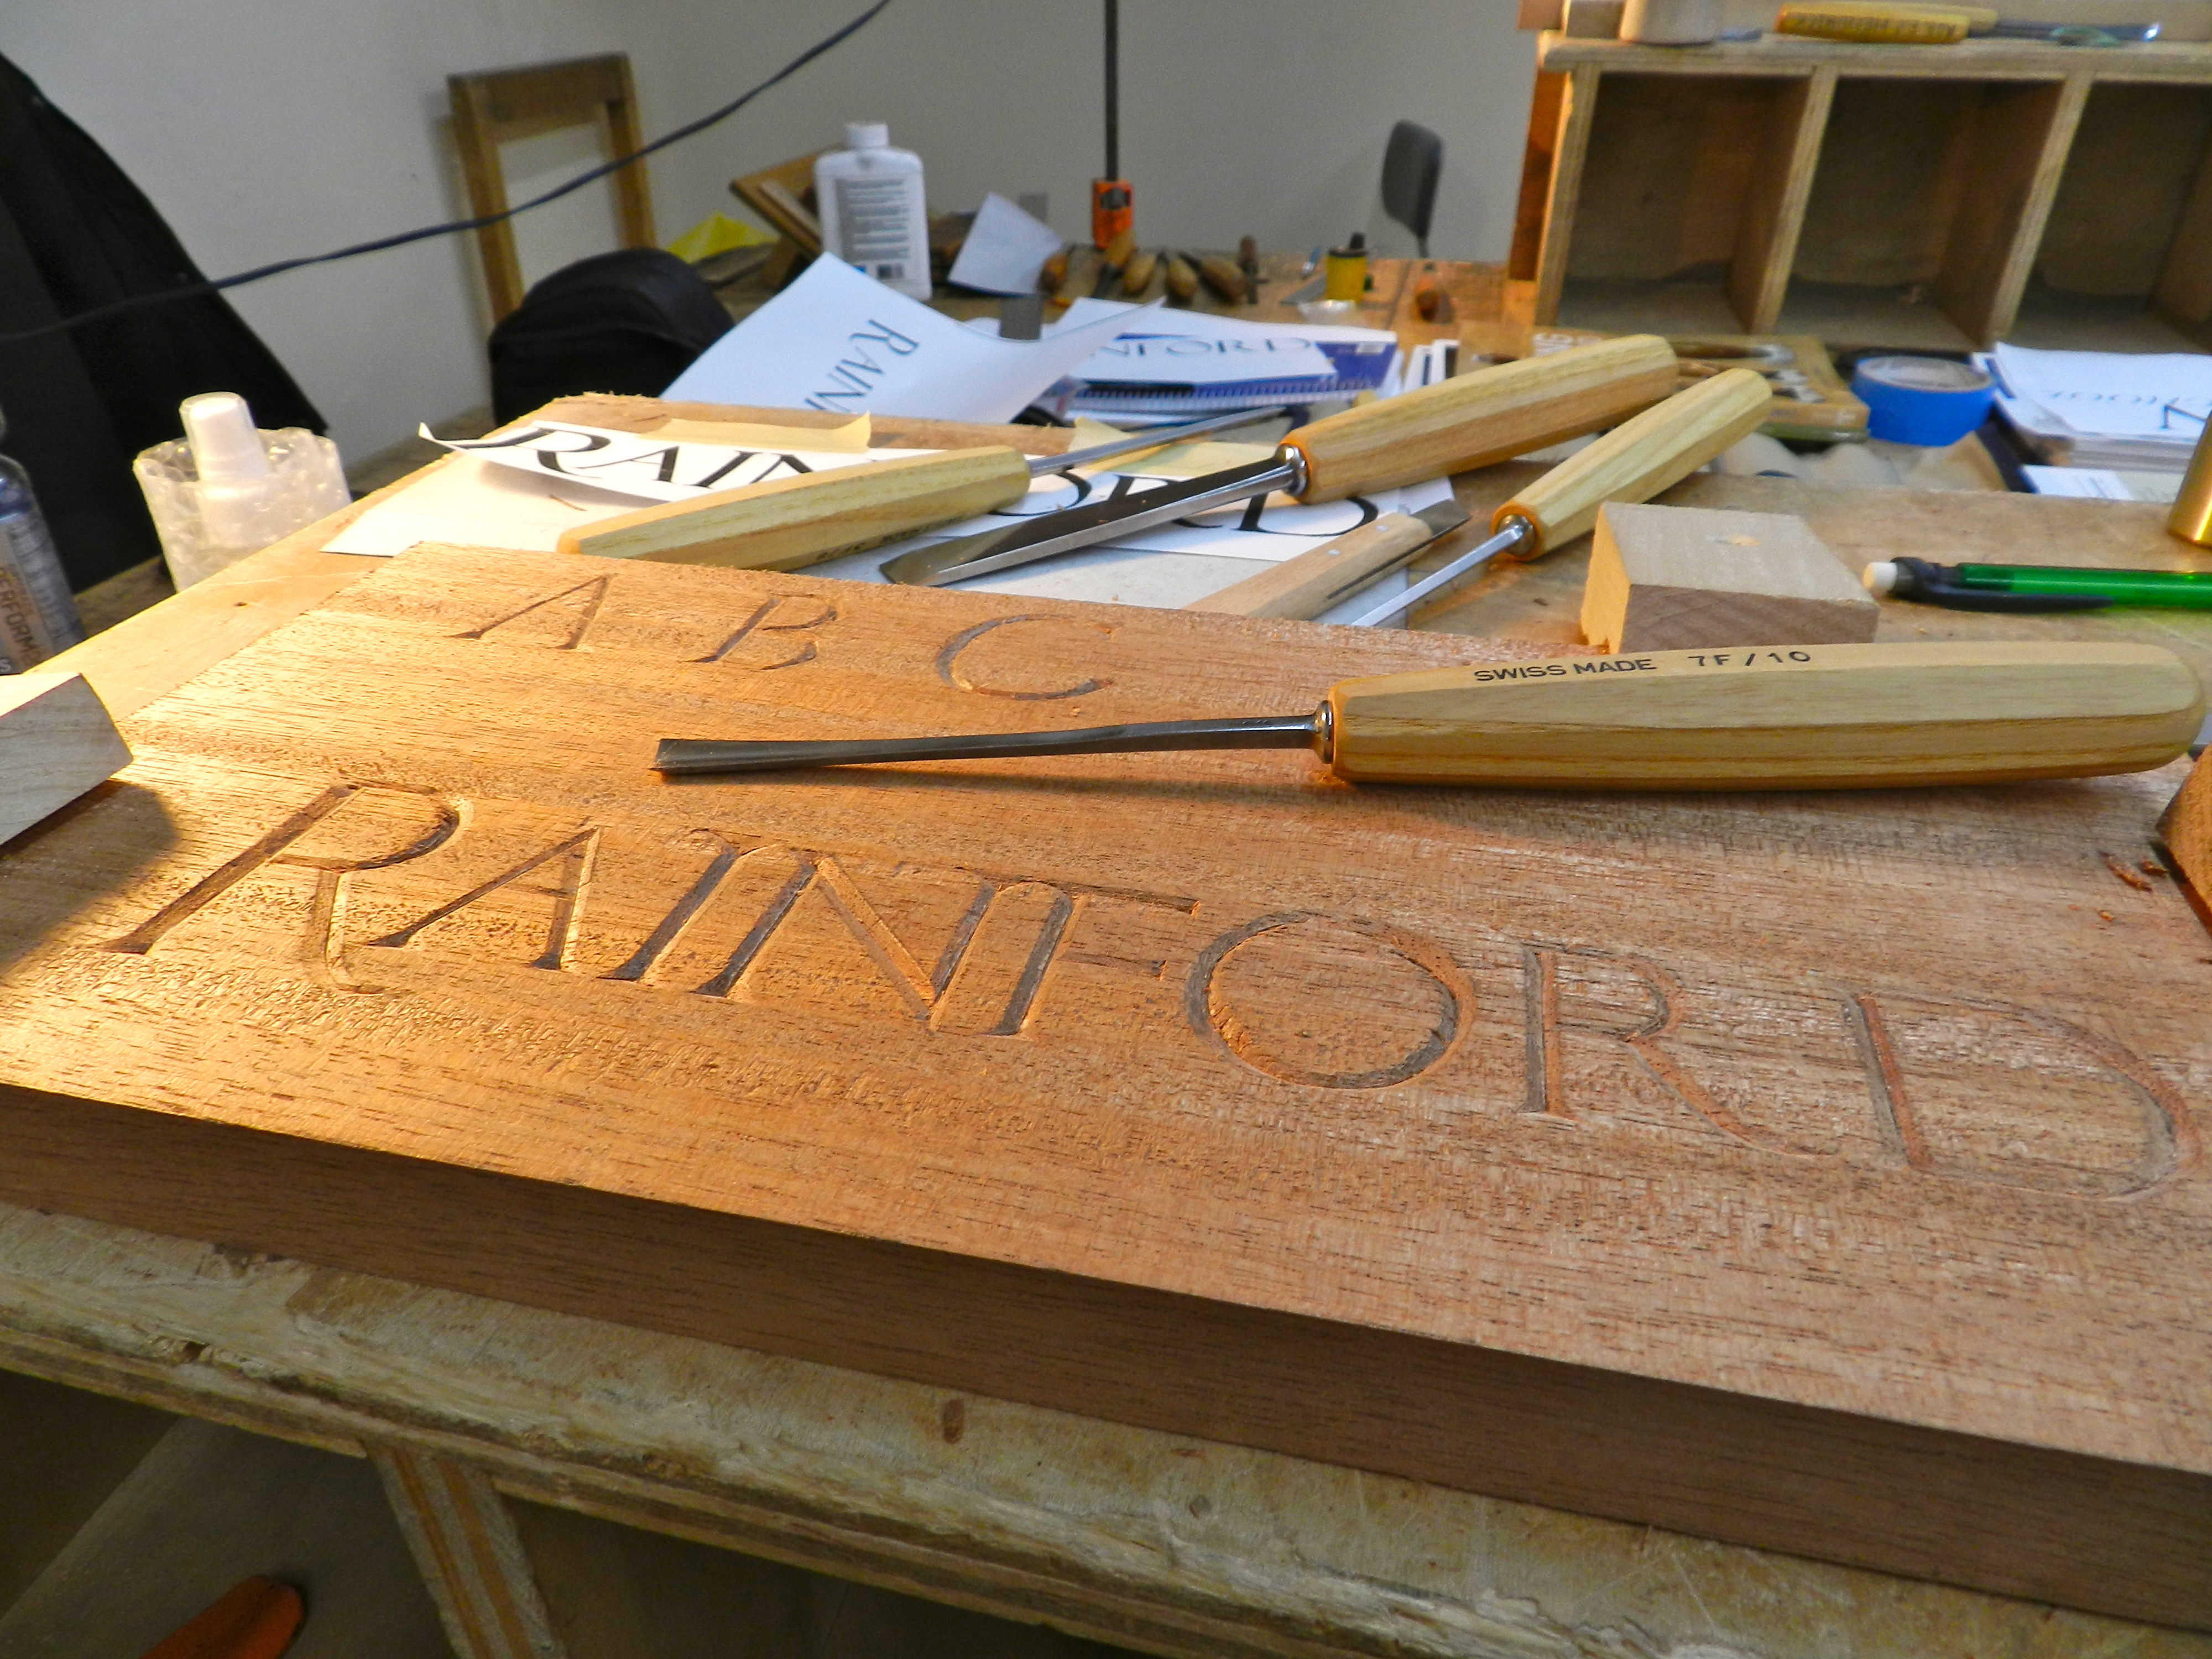
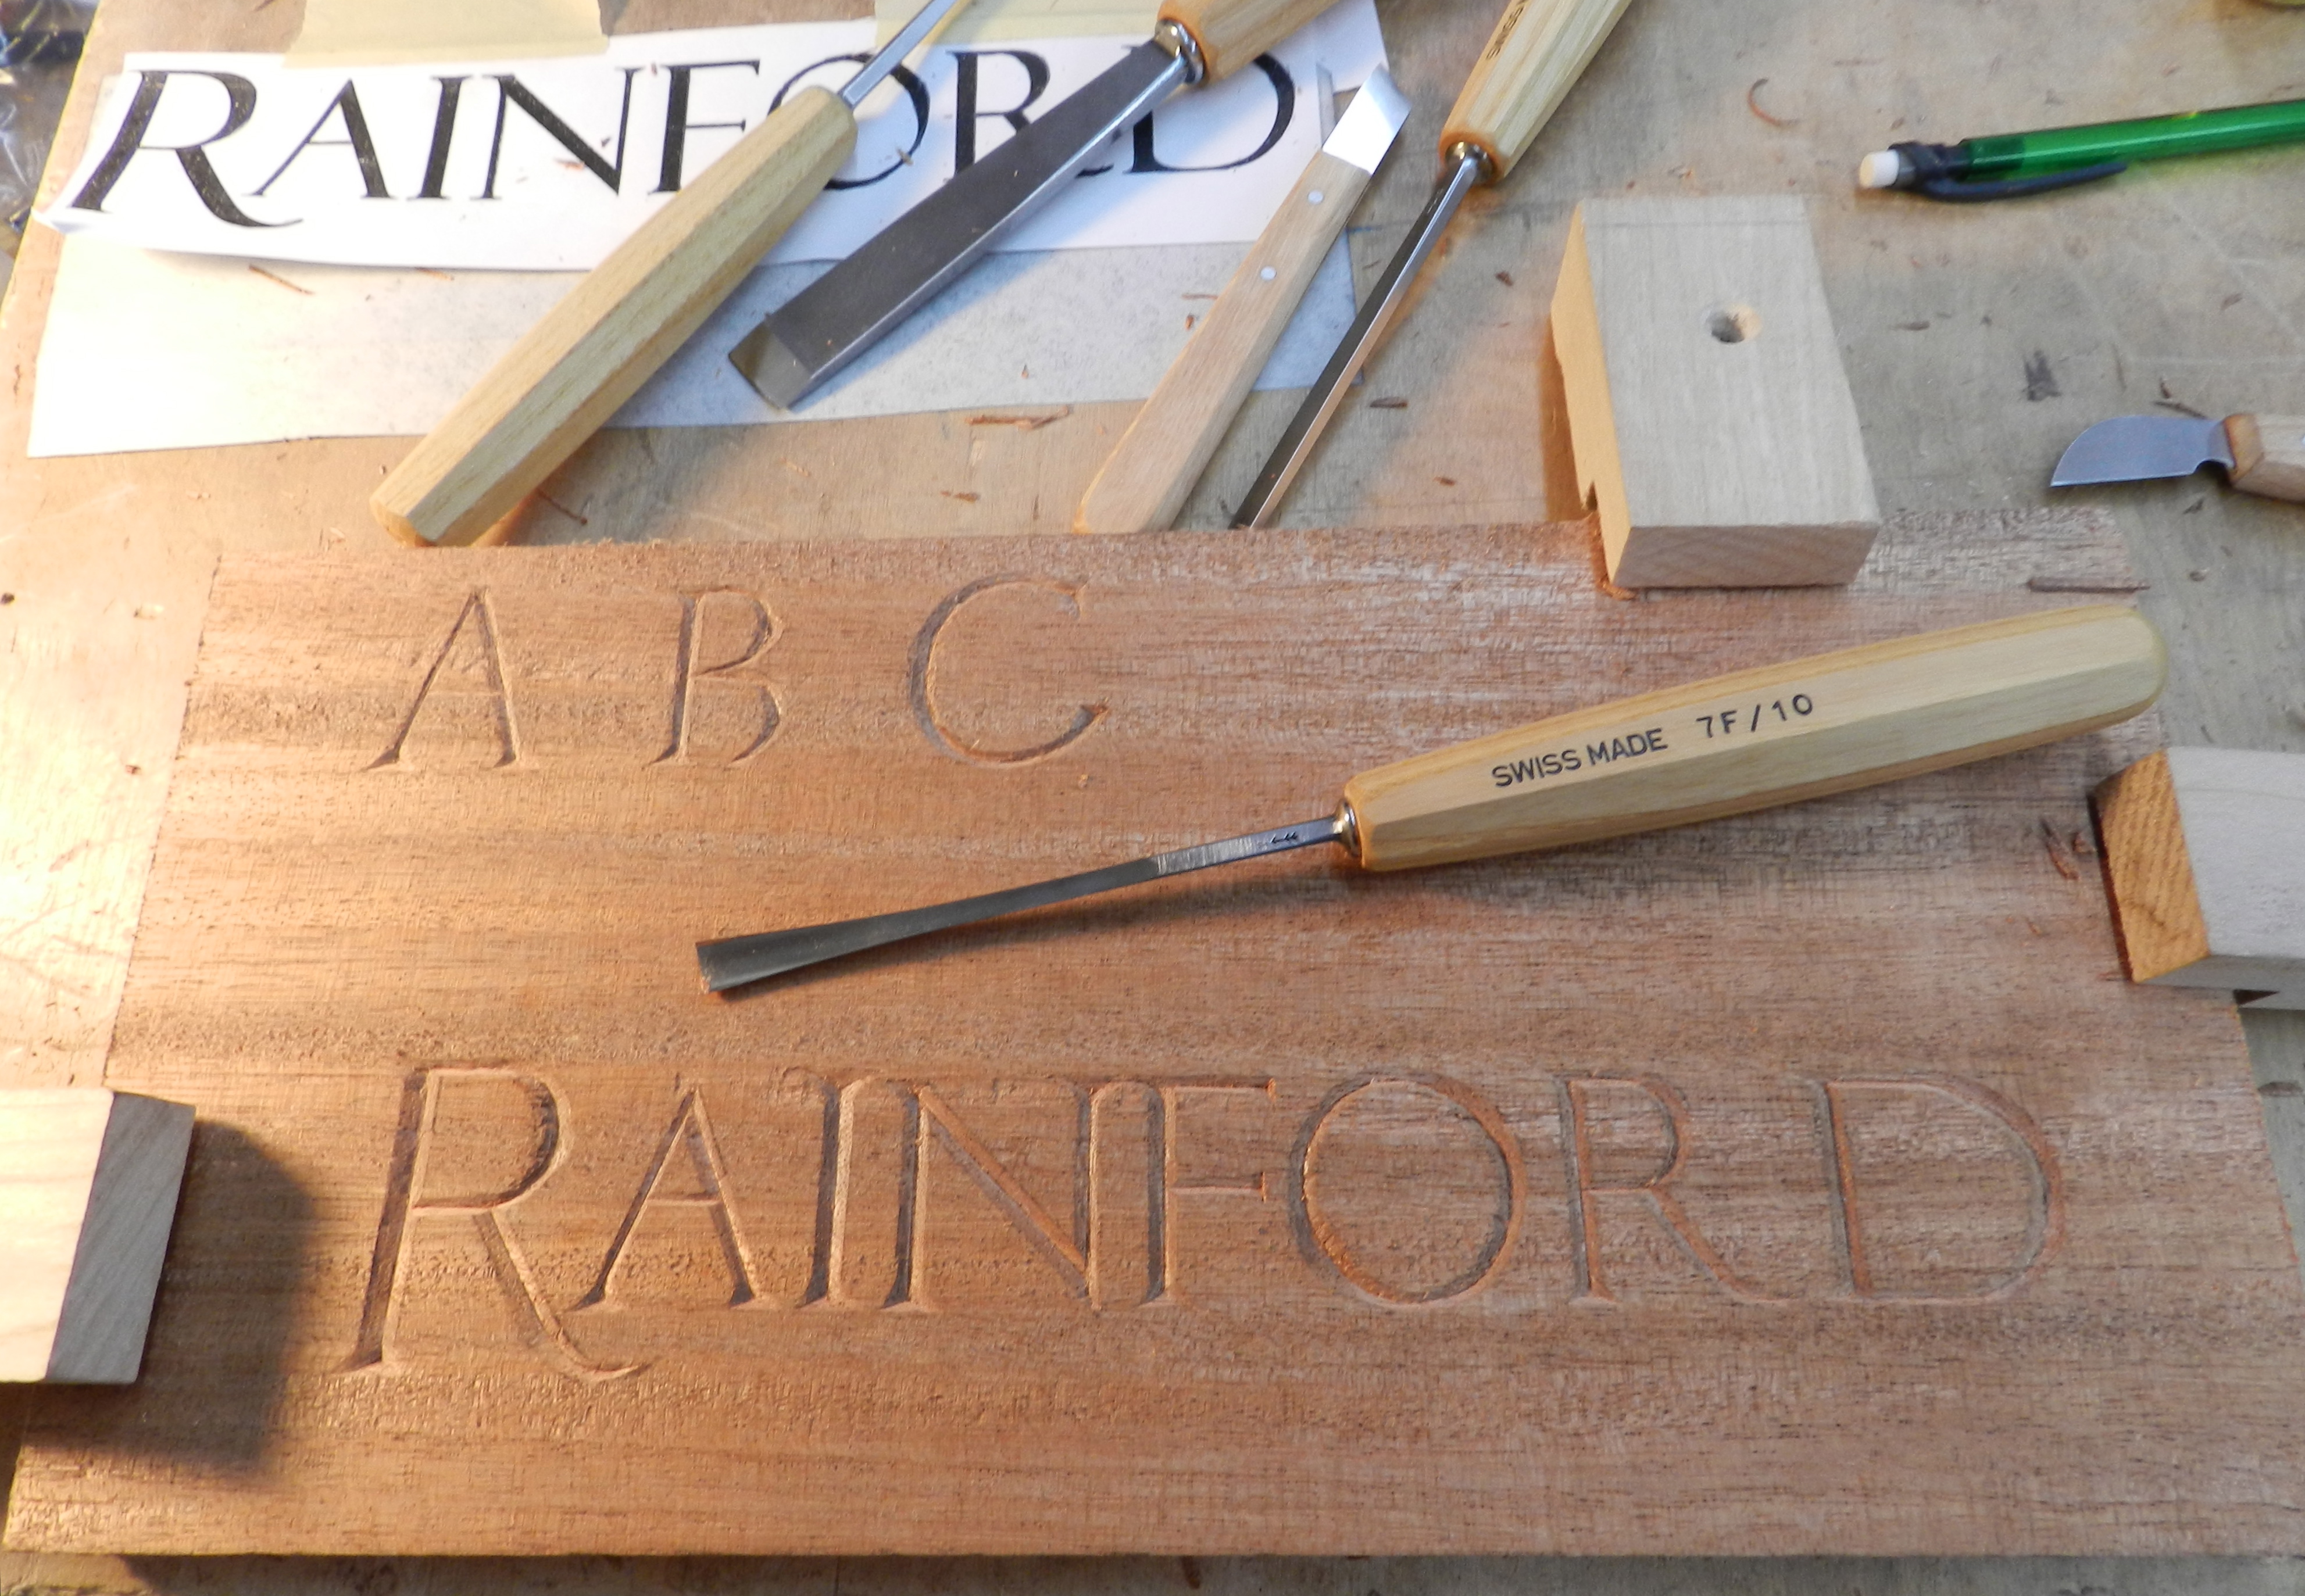
Carving
Now for the fun part — carefully carving your letters into the piece. You want to take a light touch, always be aware of the grain direction and strive for an even depth of cut.
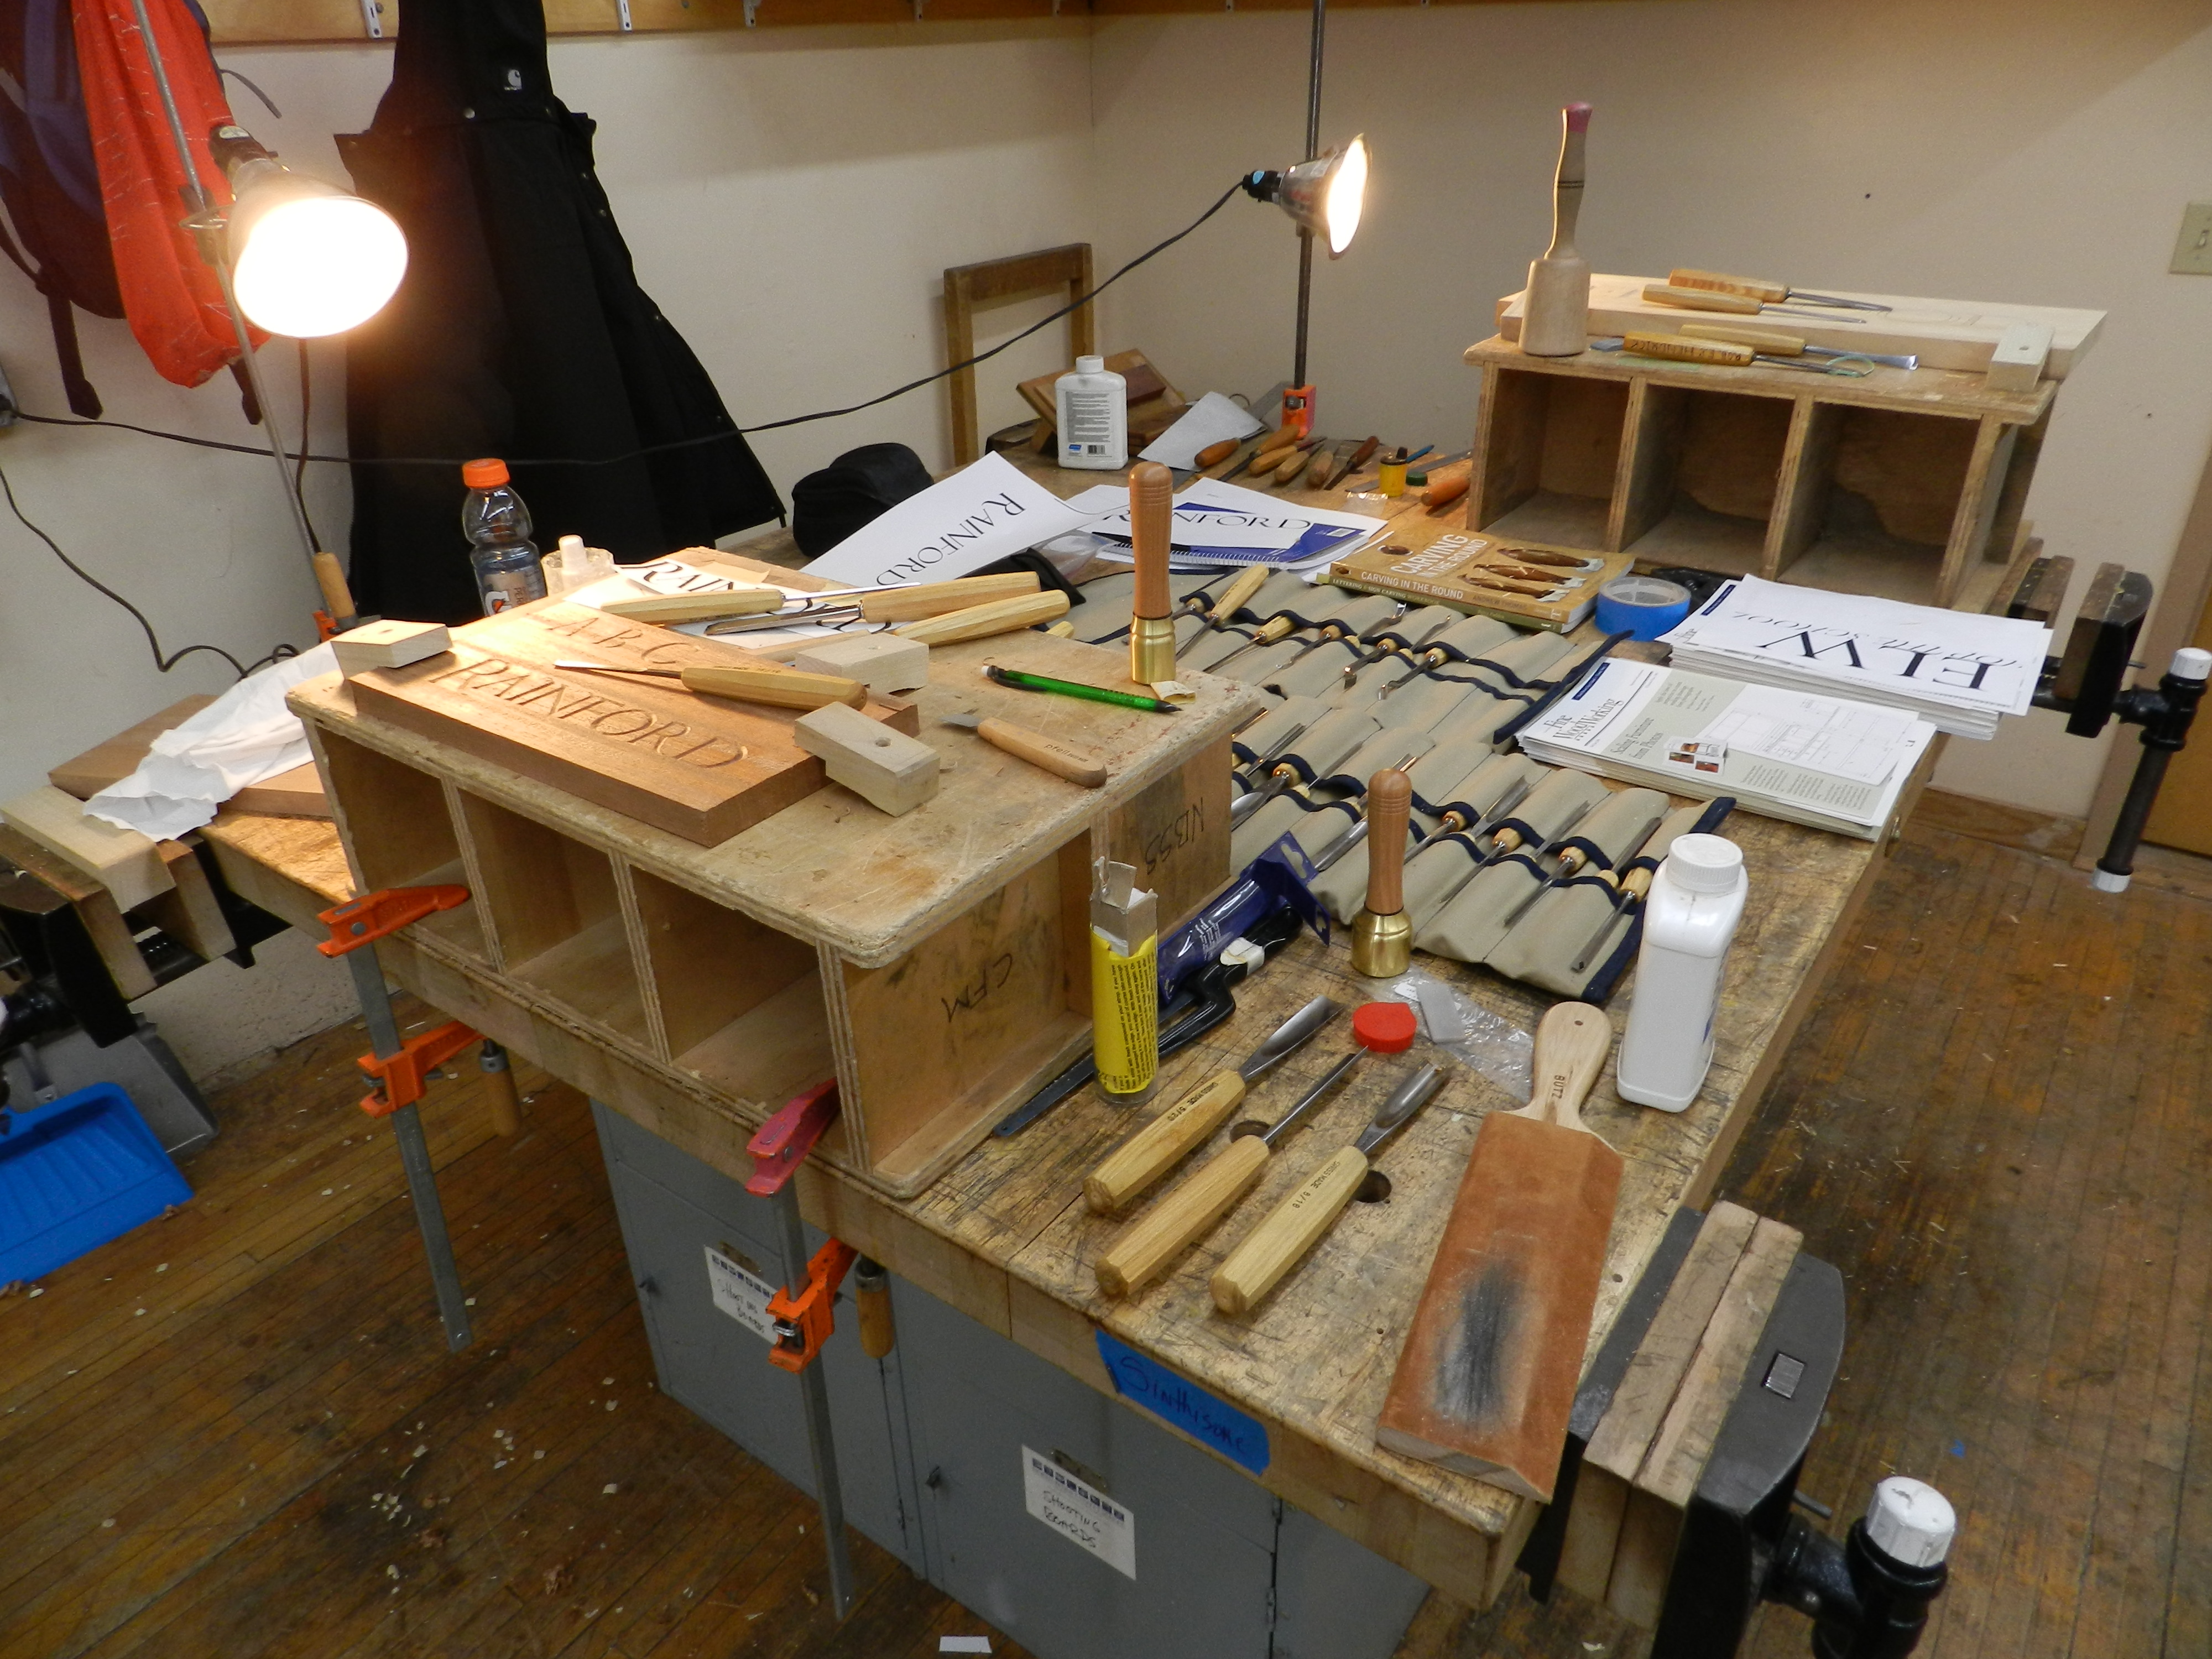
Carver’s natural habitat
Just as you can never have too many clamps, you can never really have too many carving chisels and gouges.
My completed name carving
A raking light and solid platform to secure your work are requisites to success in this sort of work.
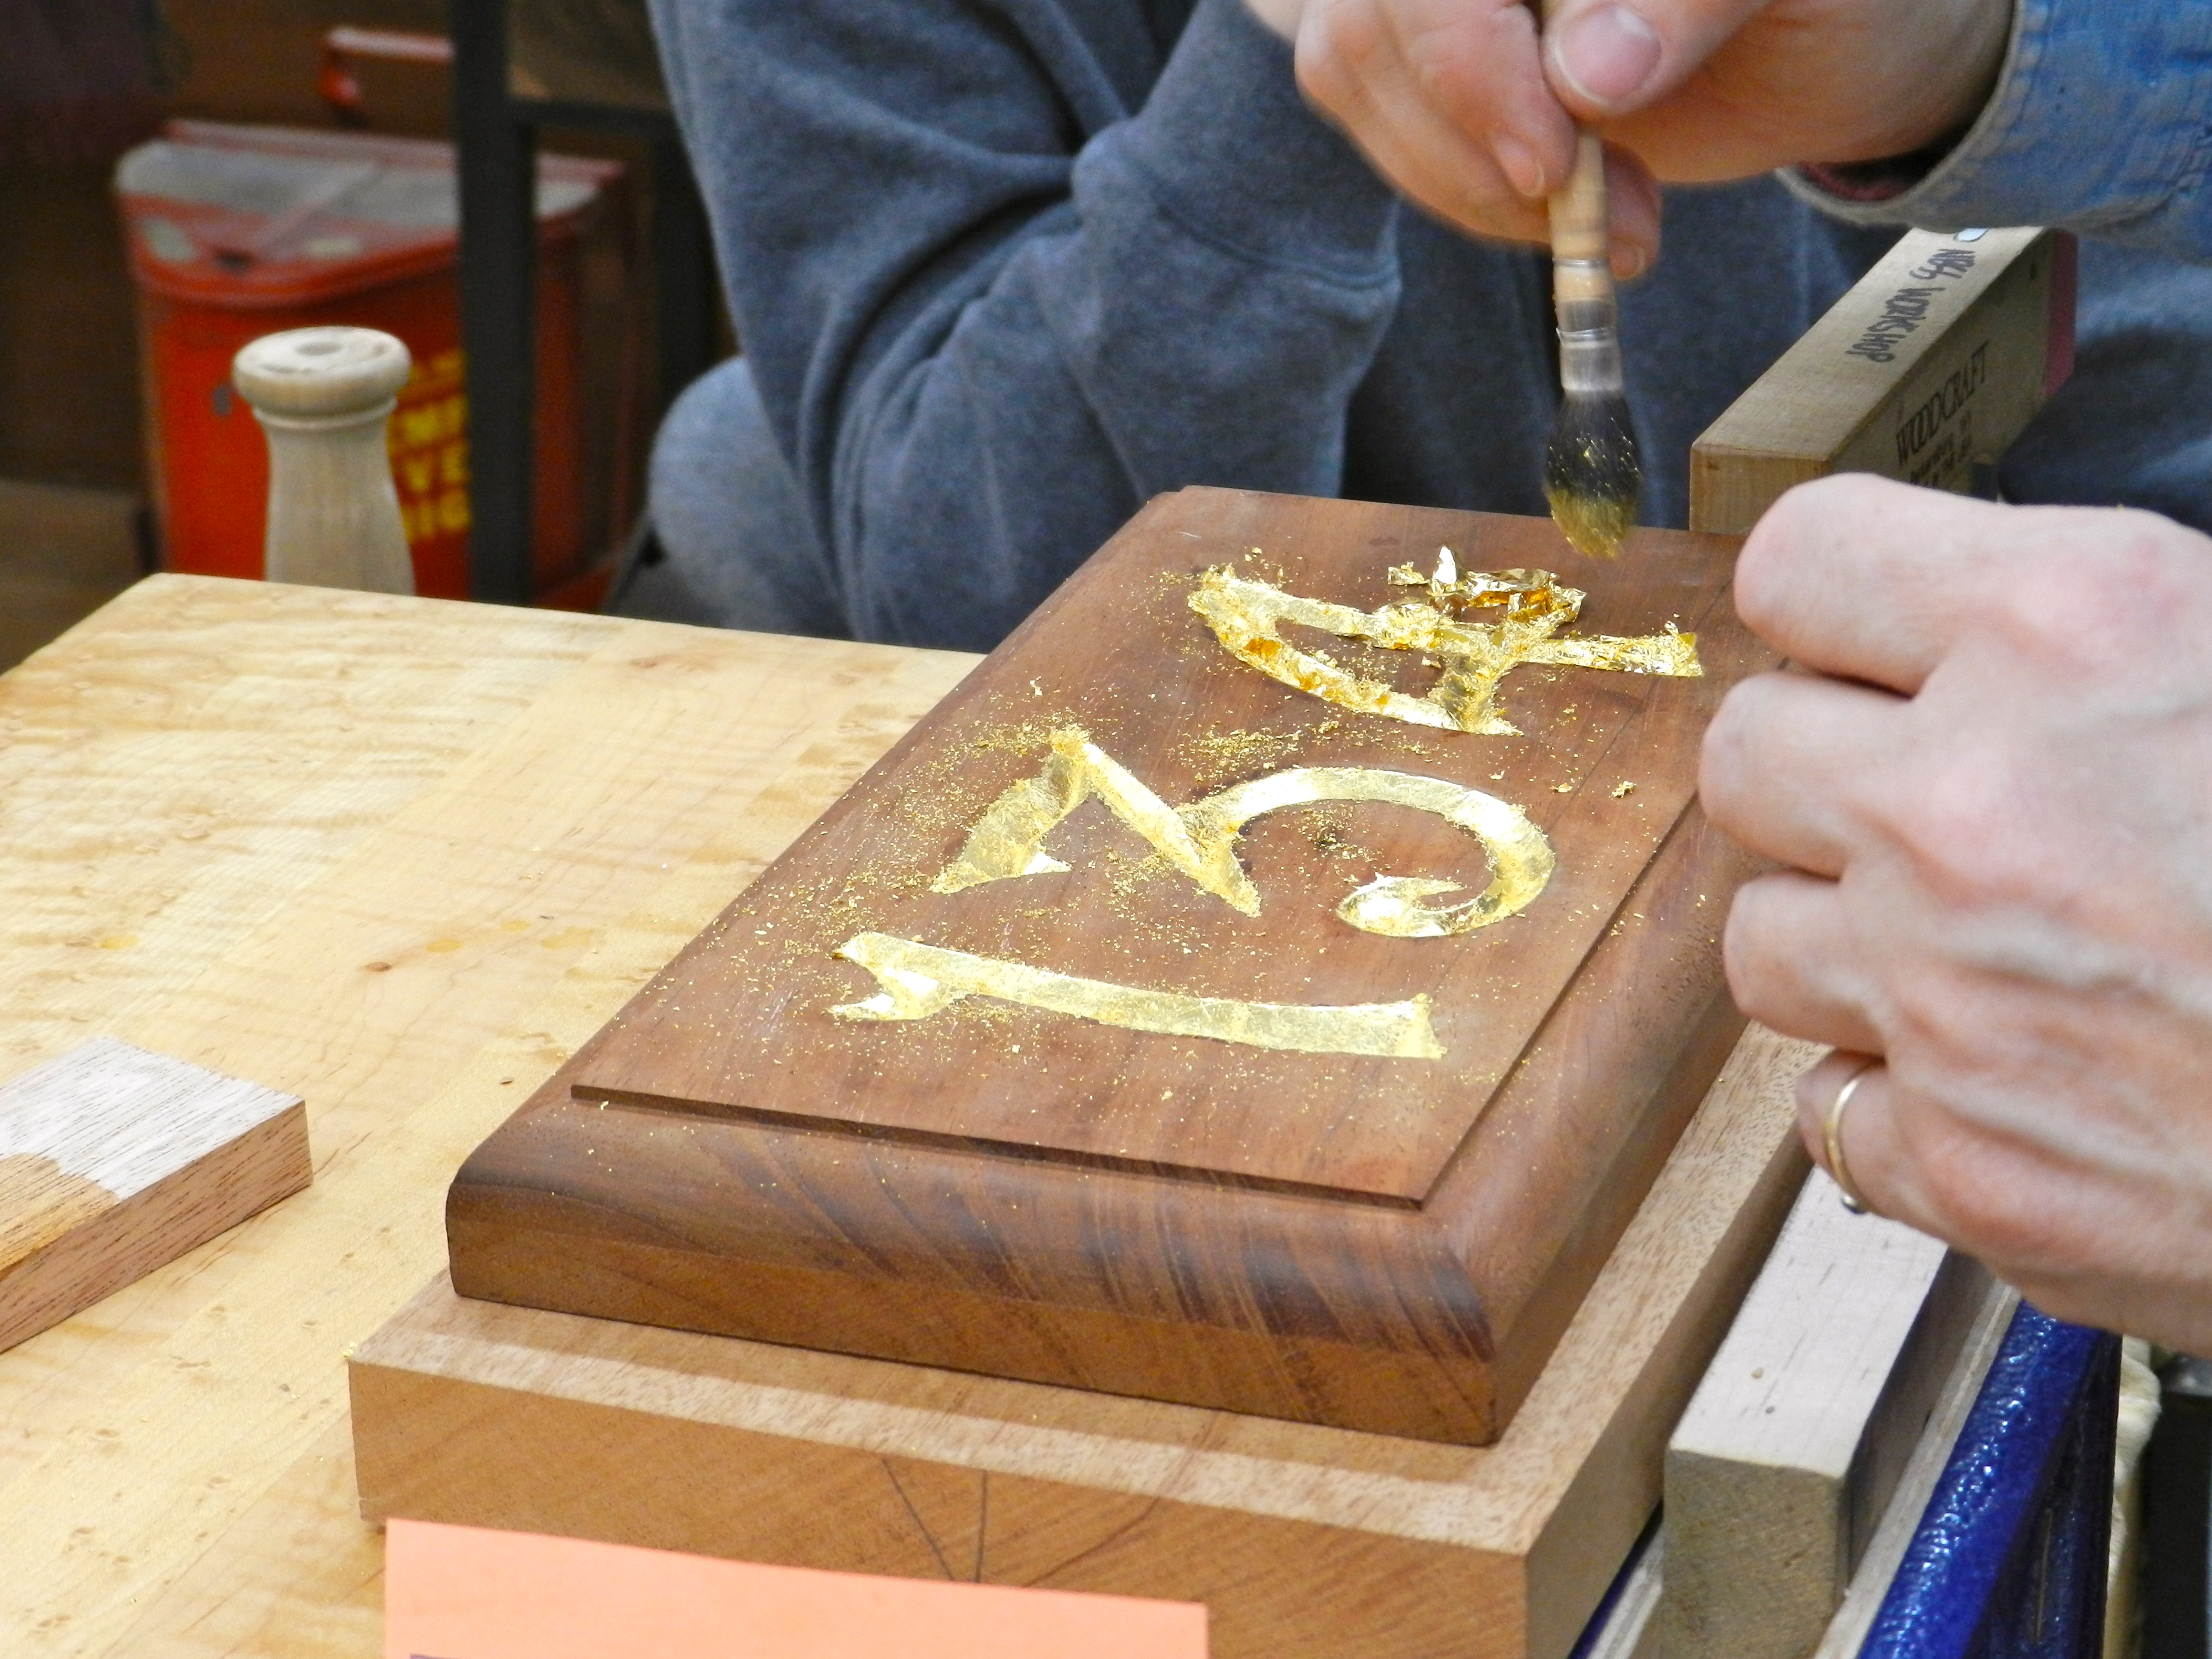
Gilding lesson
Beyond the carving exercises we were also treated to a nice demonstration on how to gild this sort of hand carved sign.
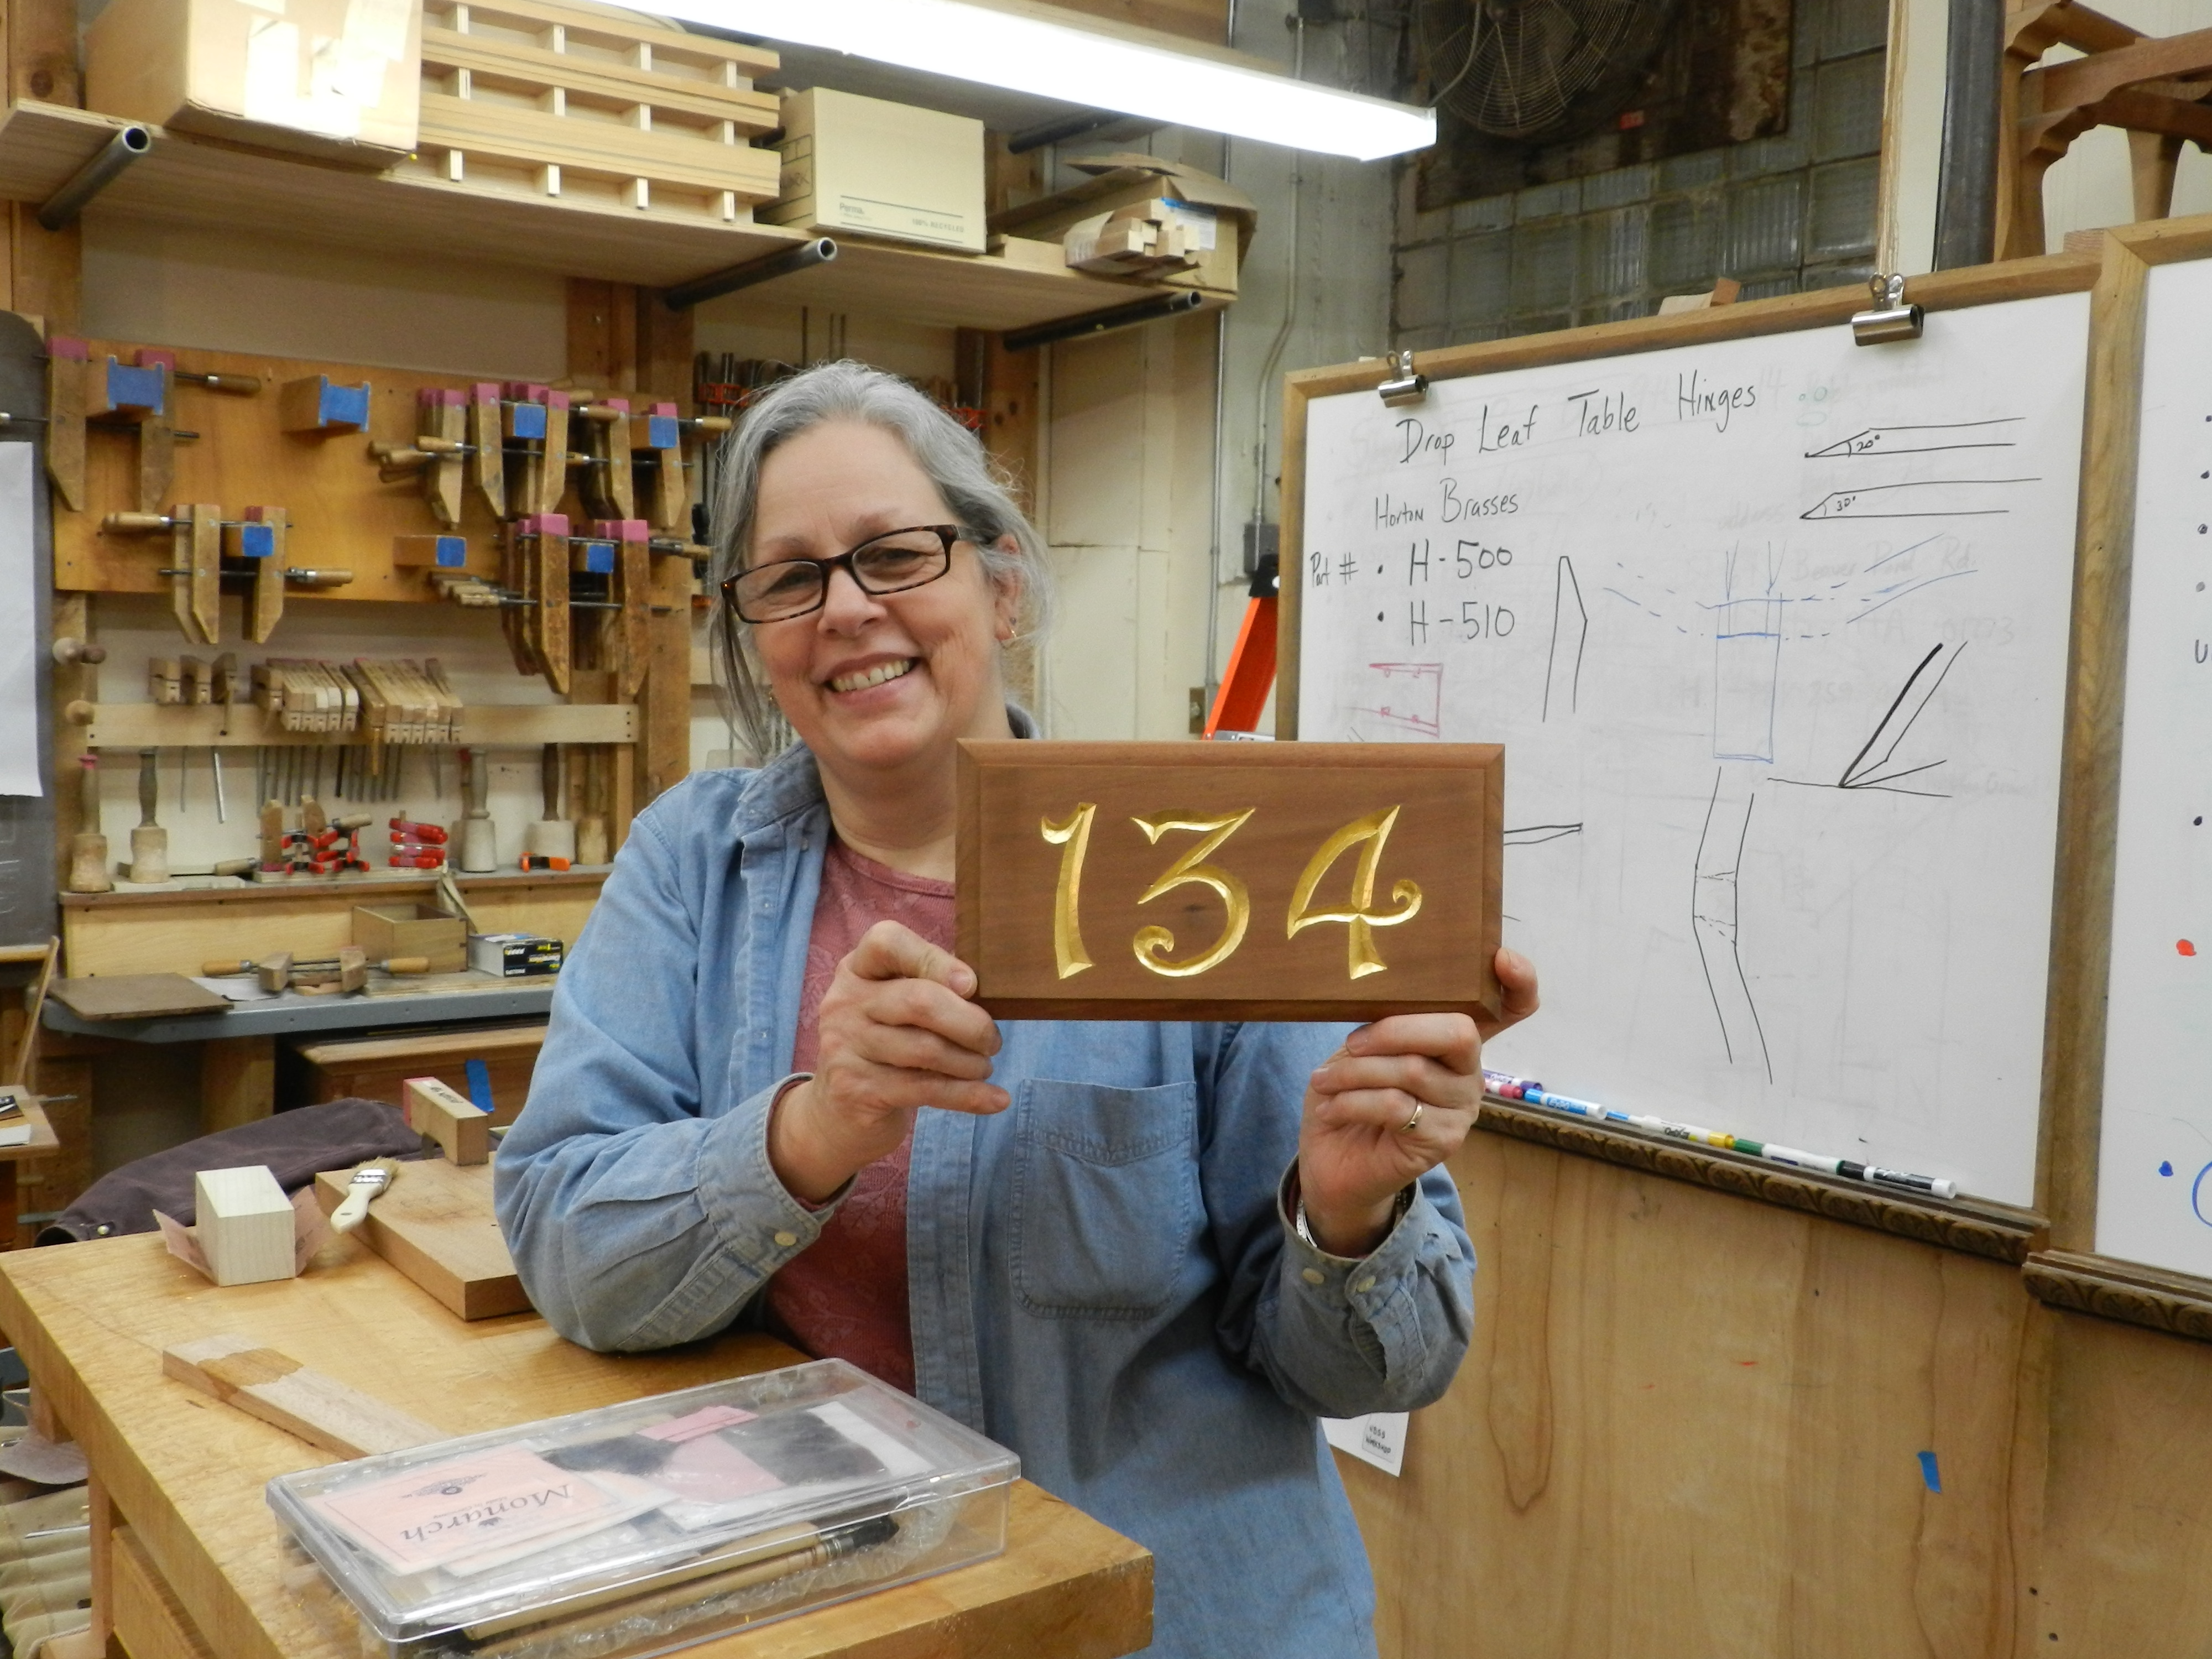
Janet Collins with completed sign
Pictured here is Janet with her carved and gilded number sign.
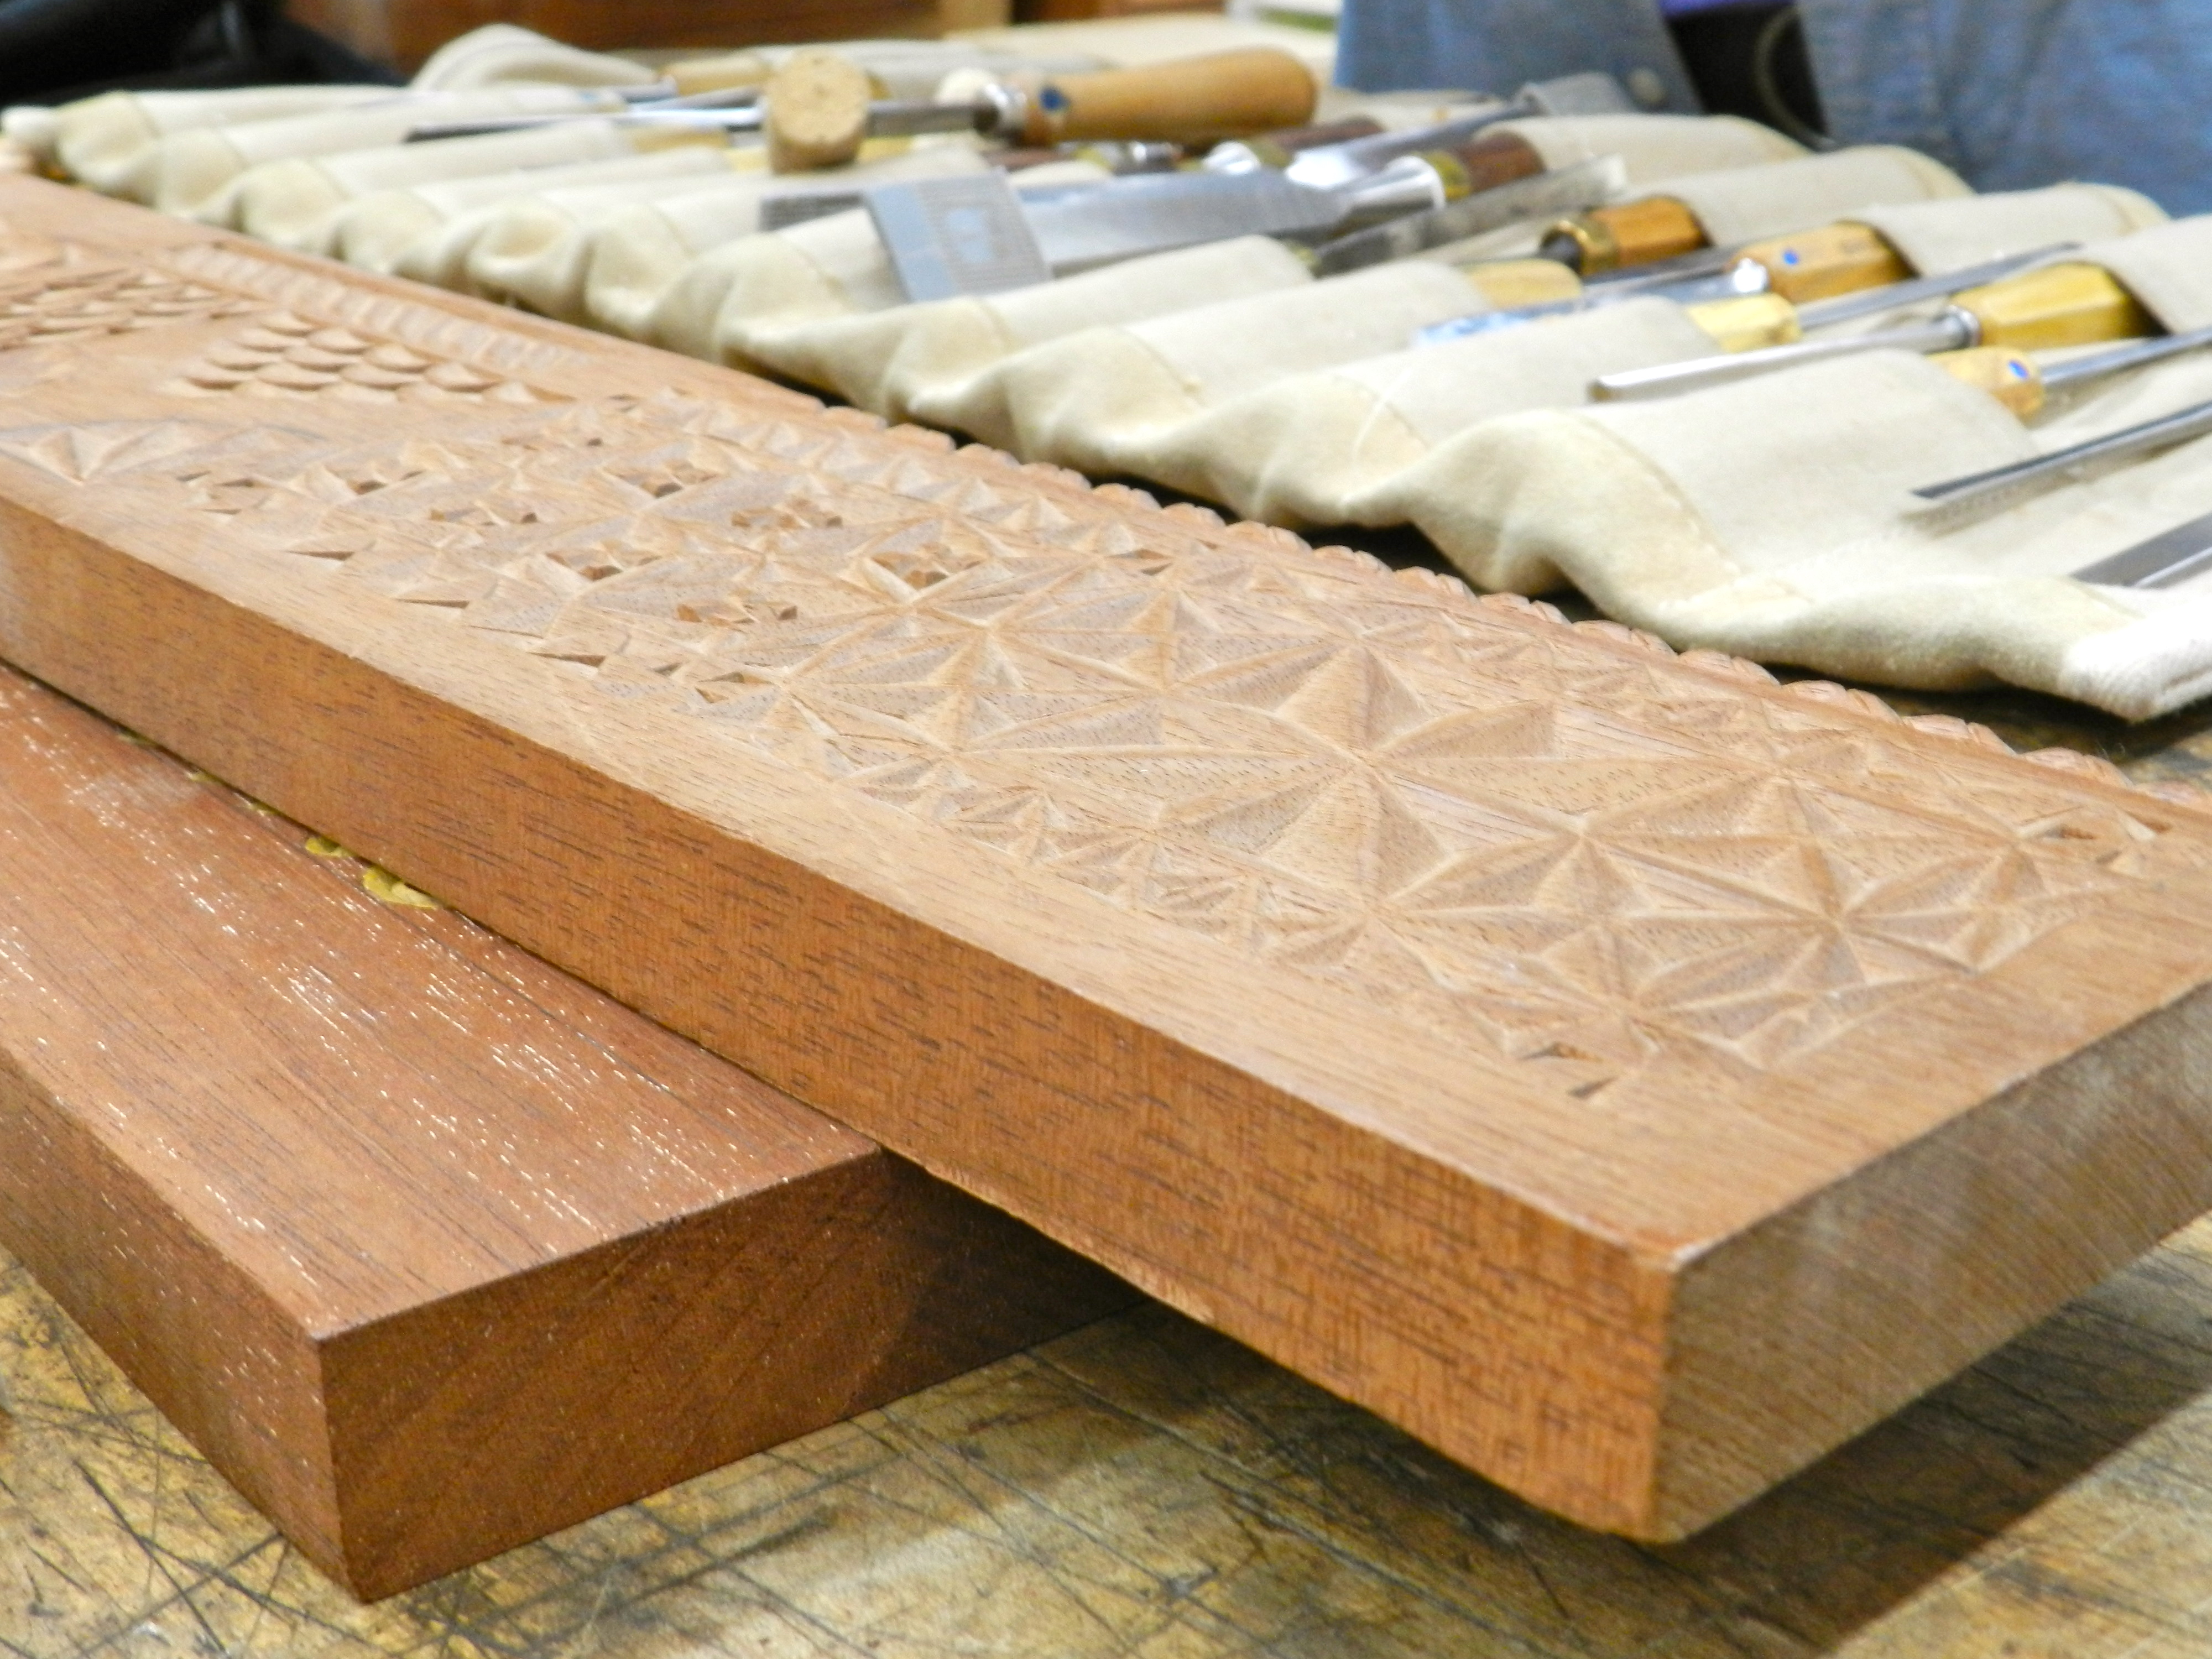
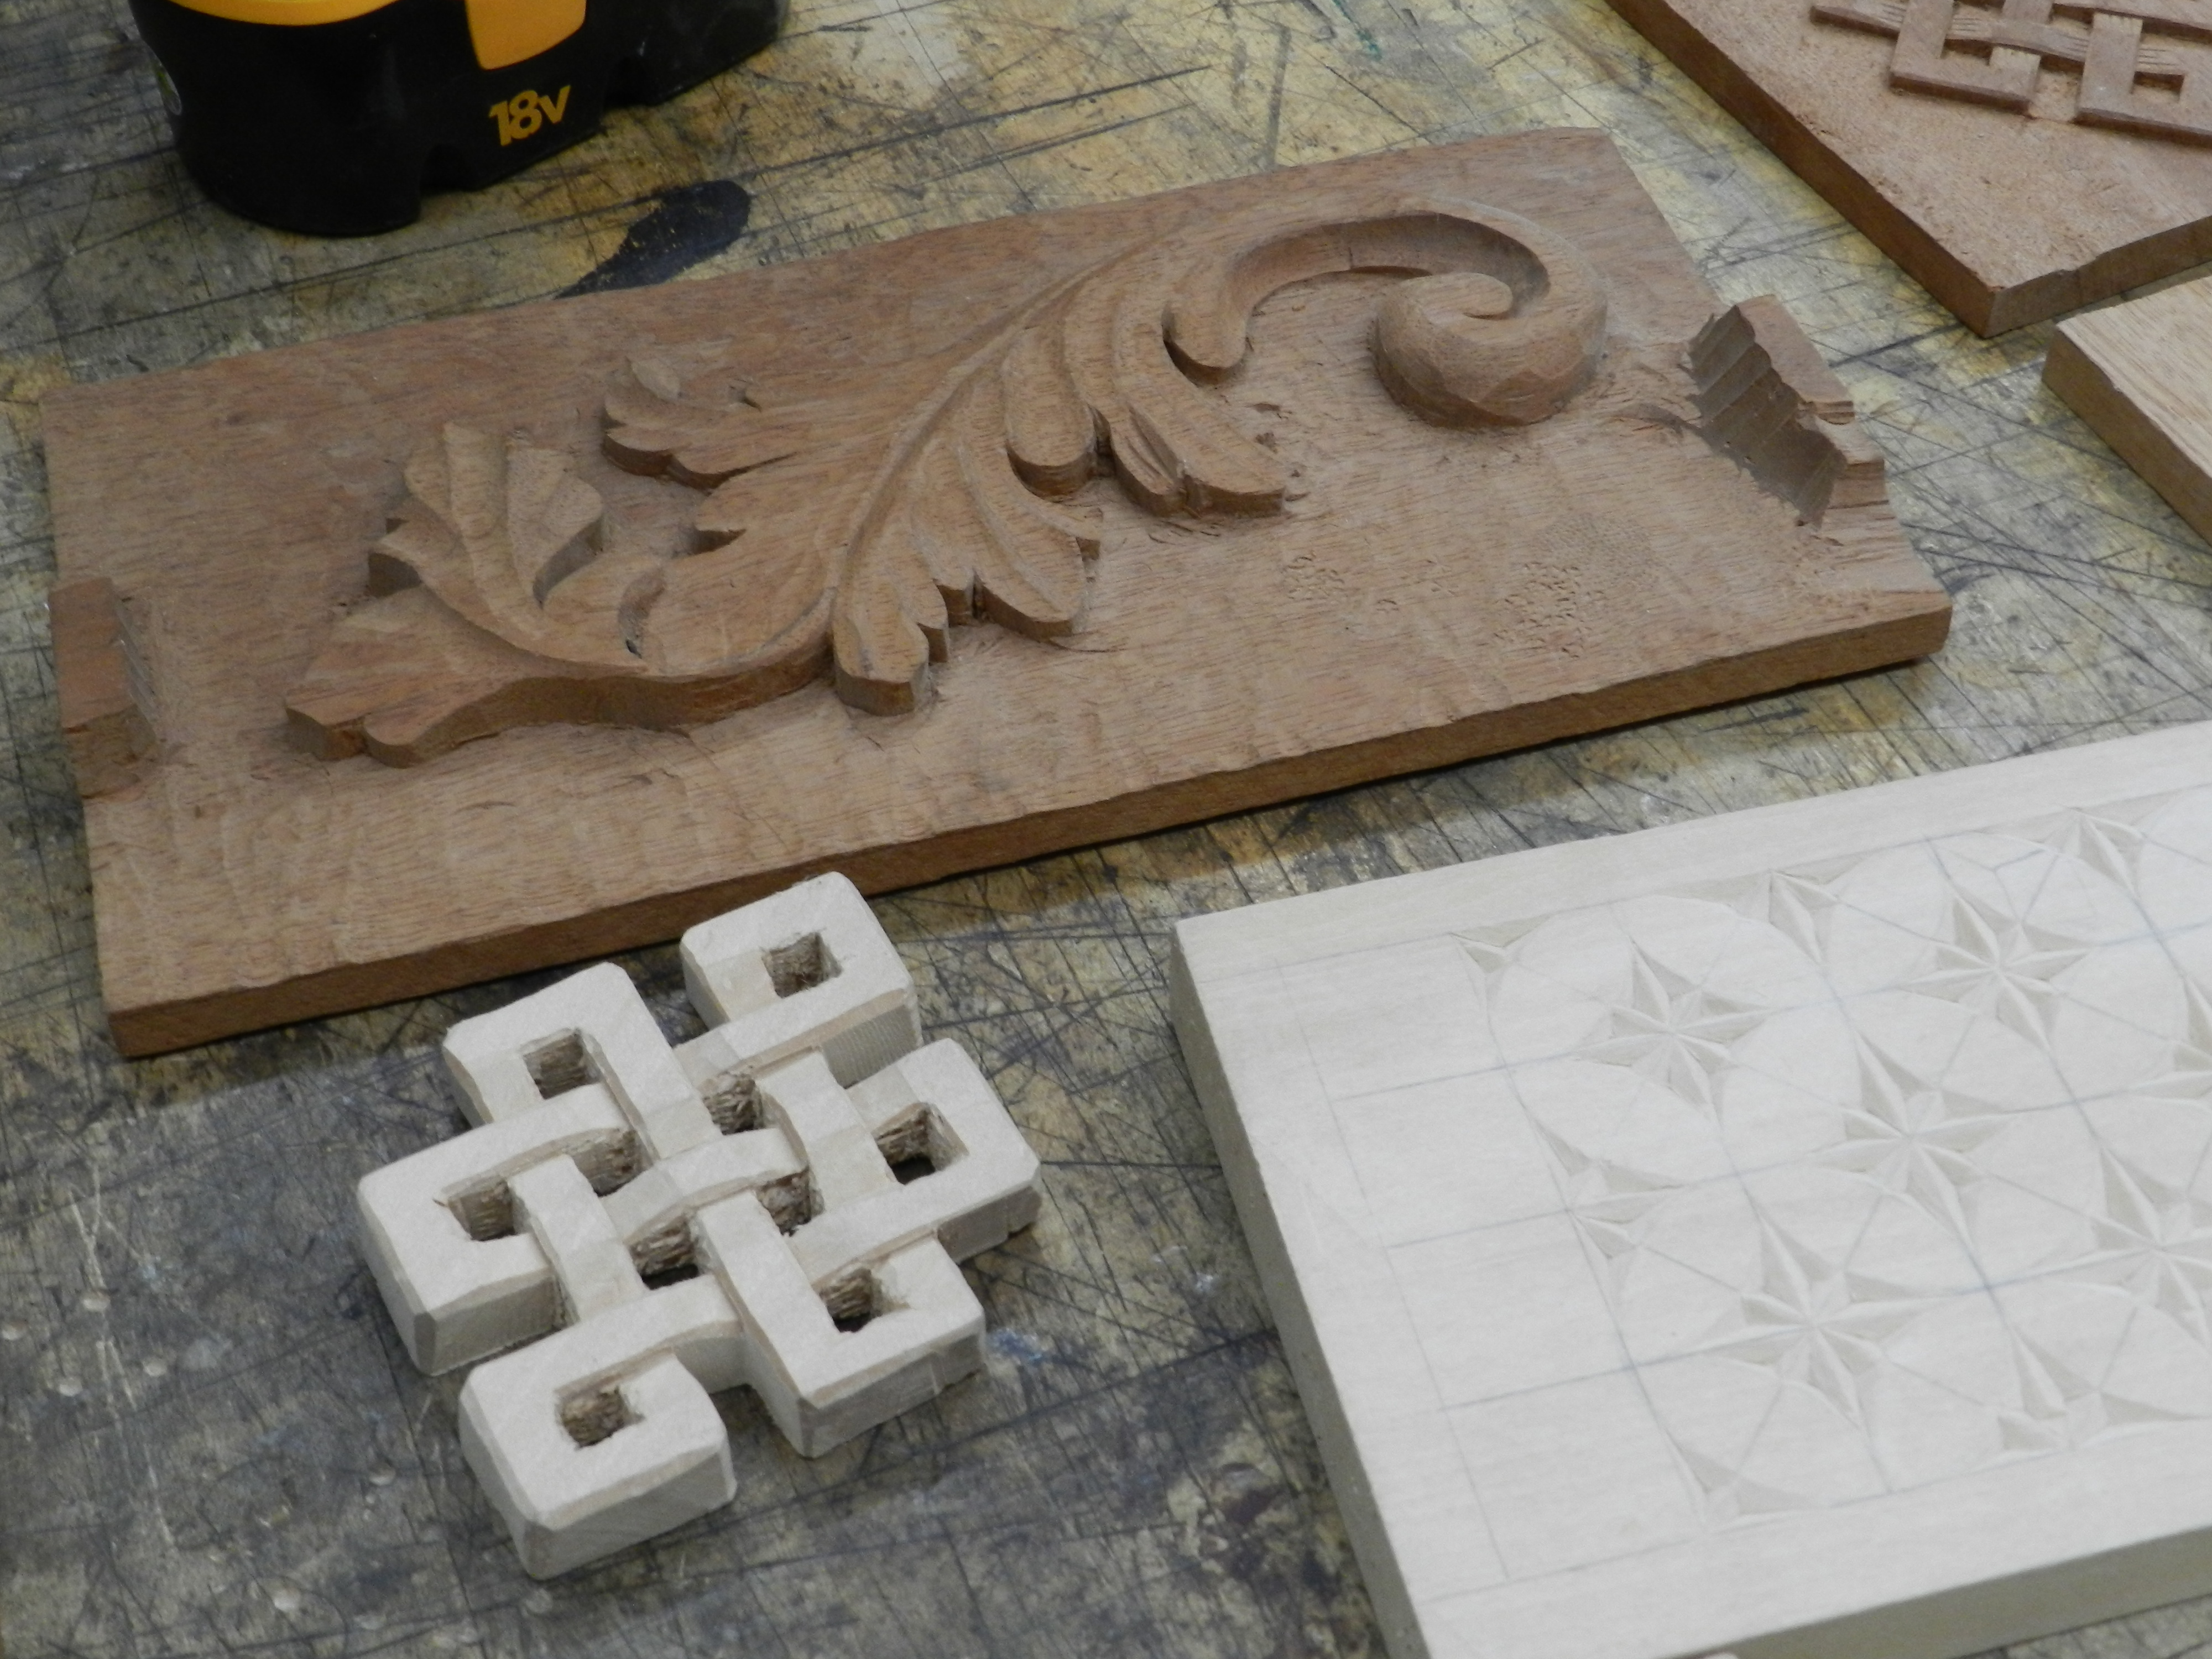
Chip carving samples
Beyond letter carving, these kinds of woodworking skills can be applied to may other forms of carving…
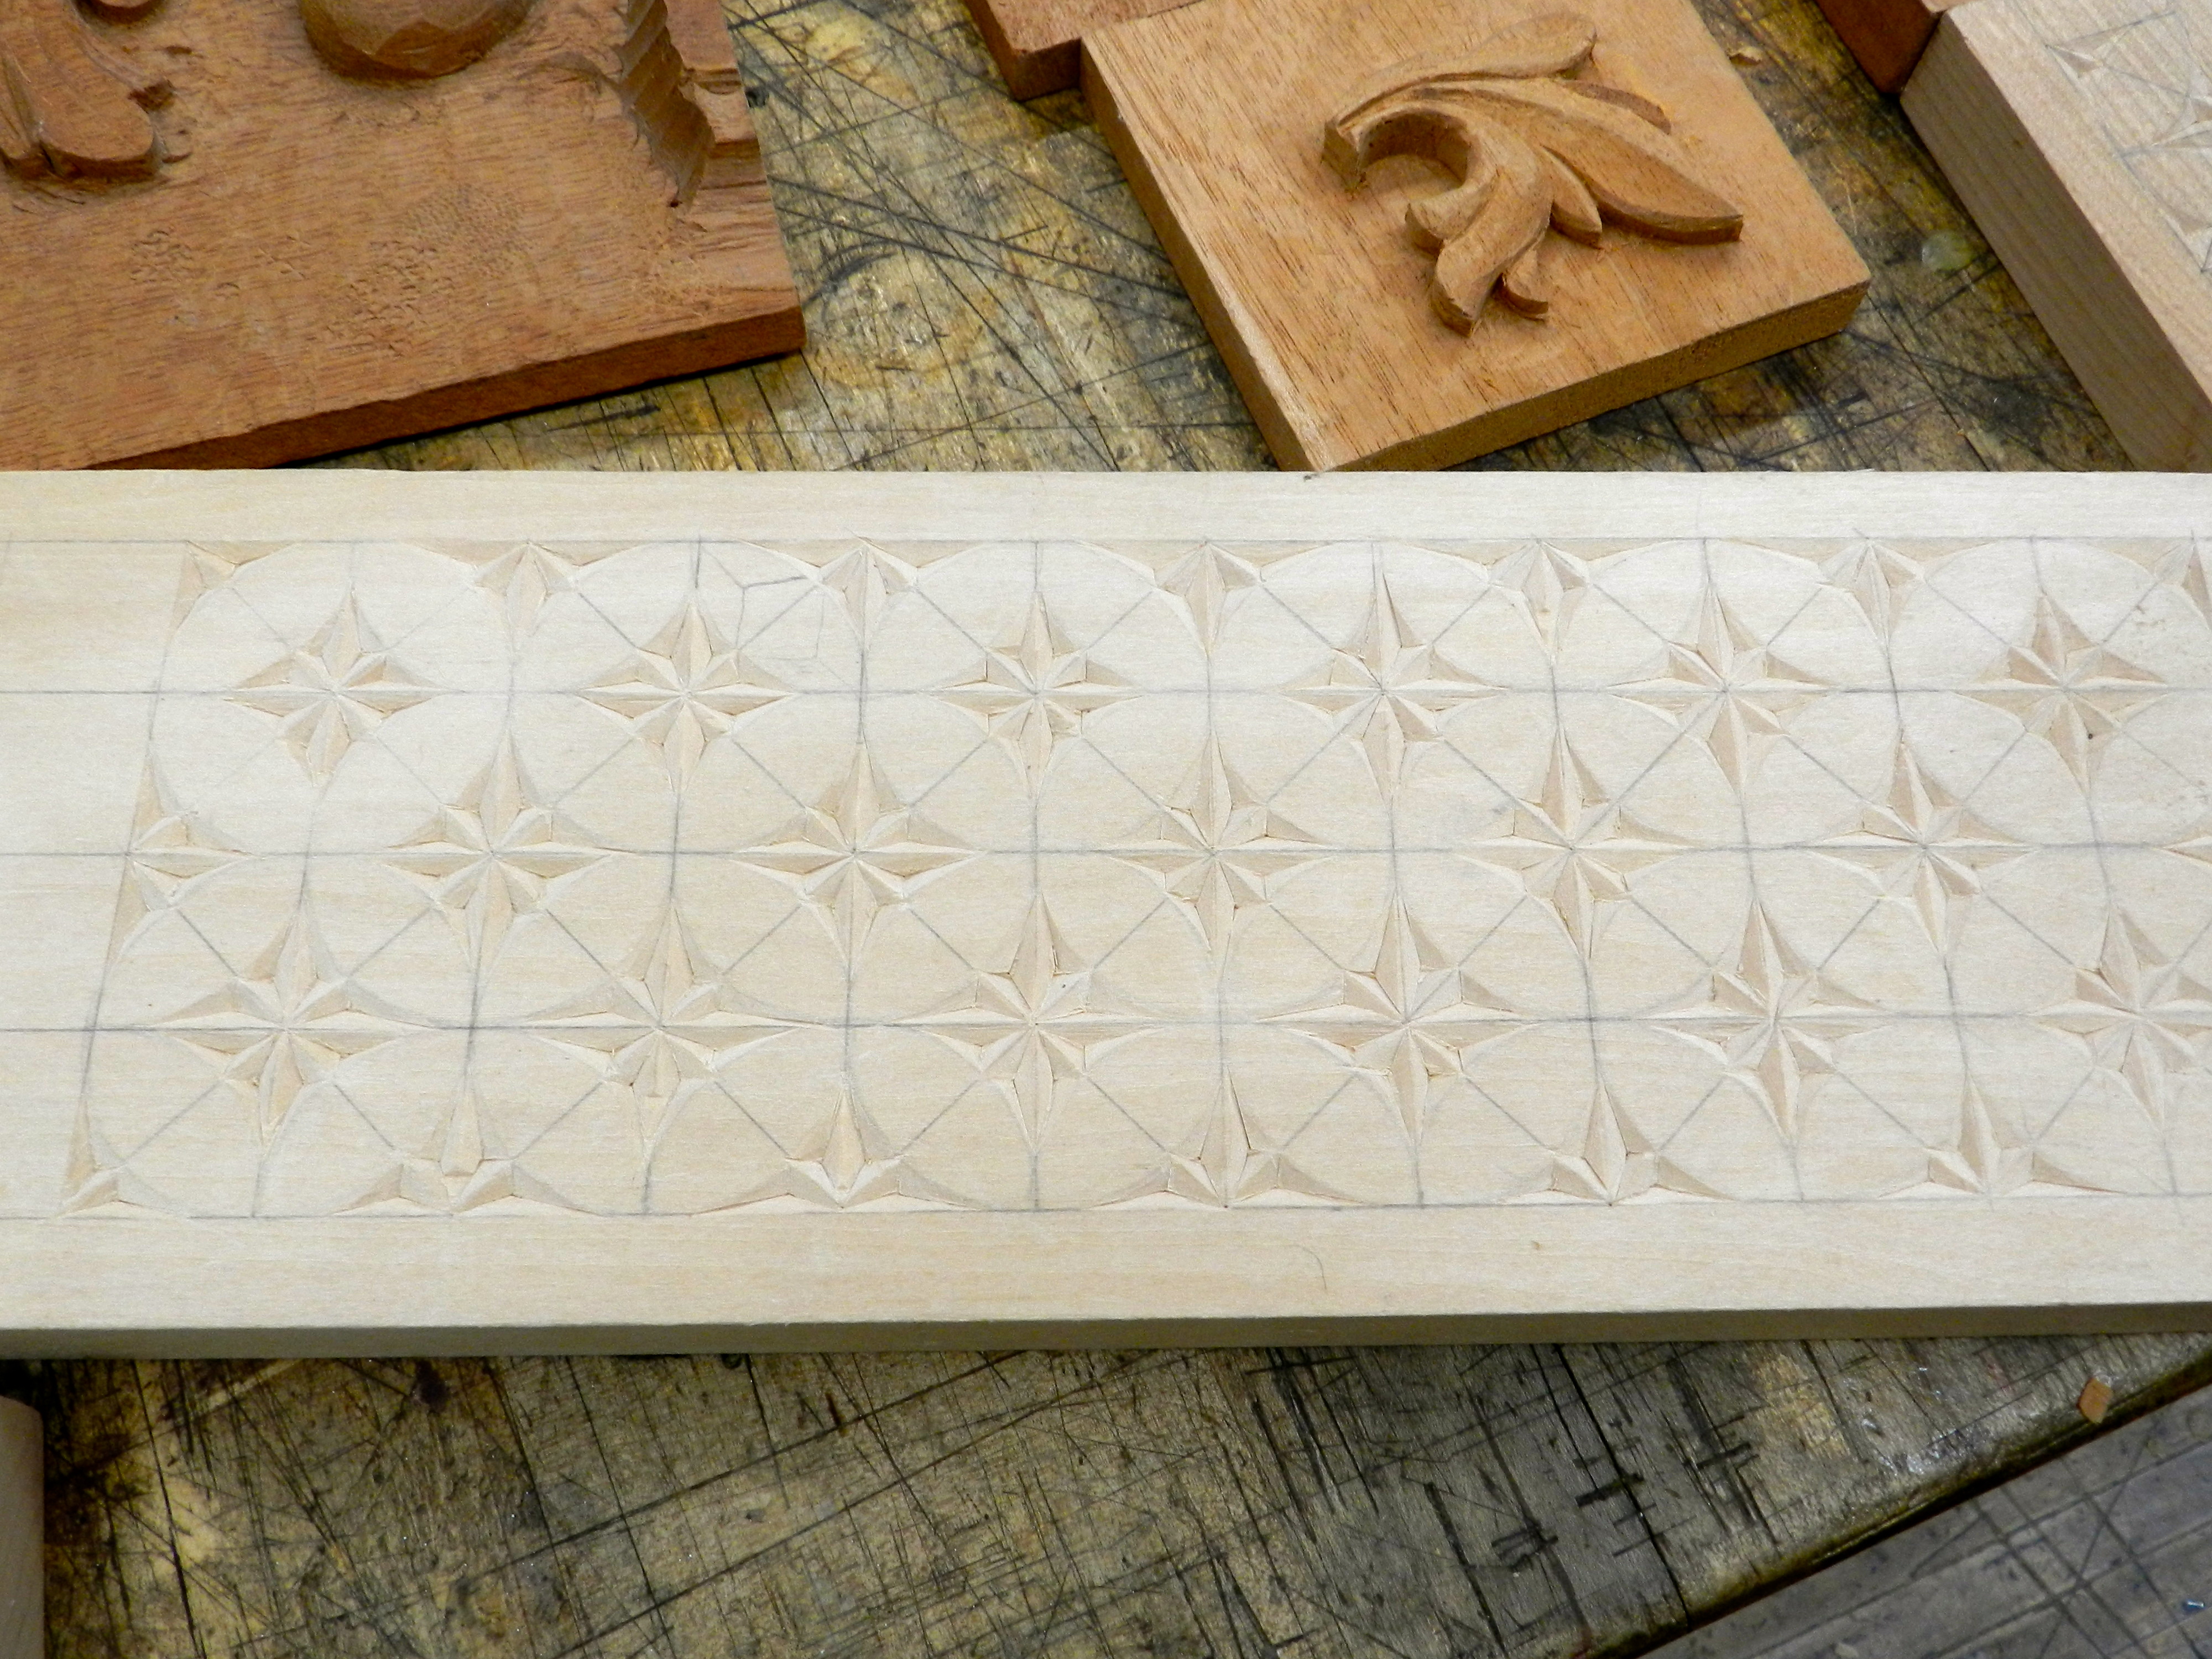
More chip carving
such as chip carving…
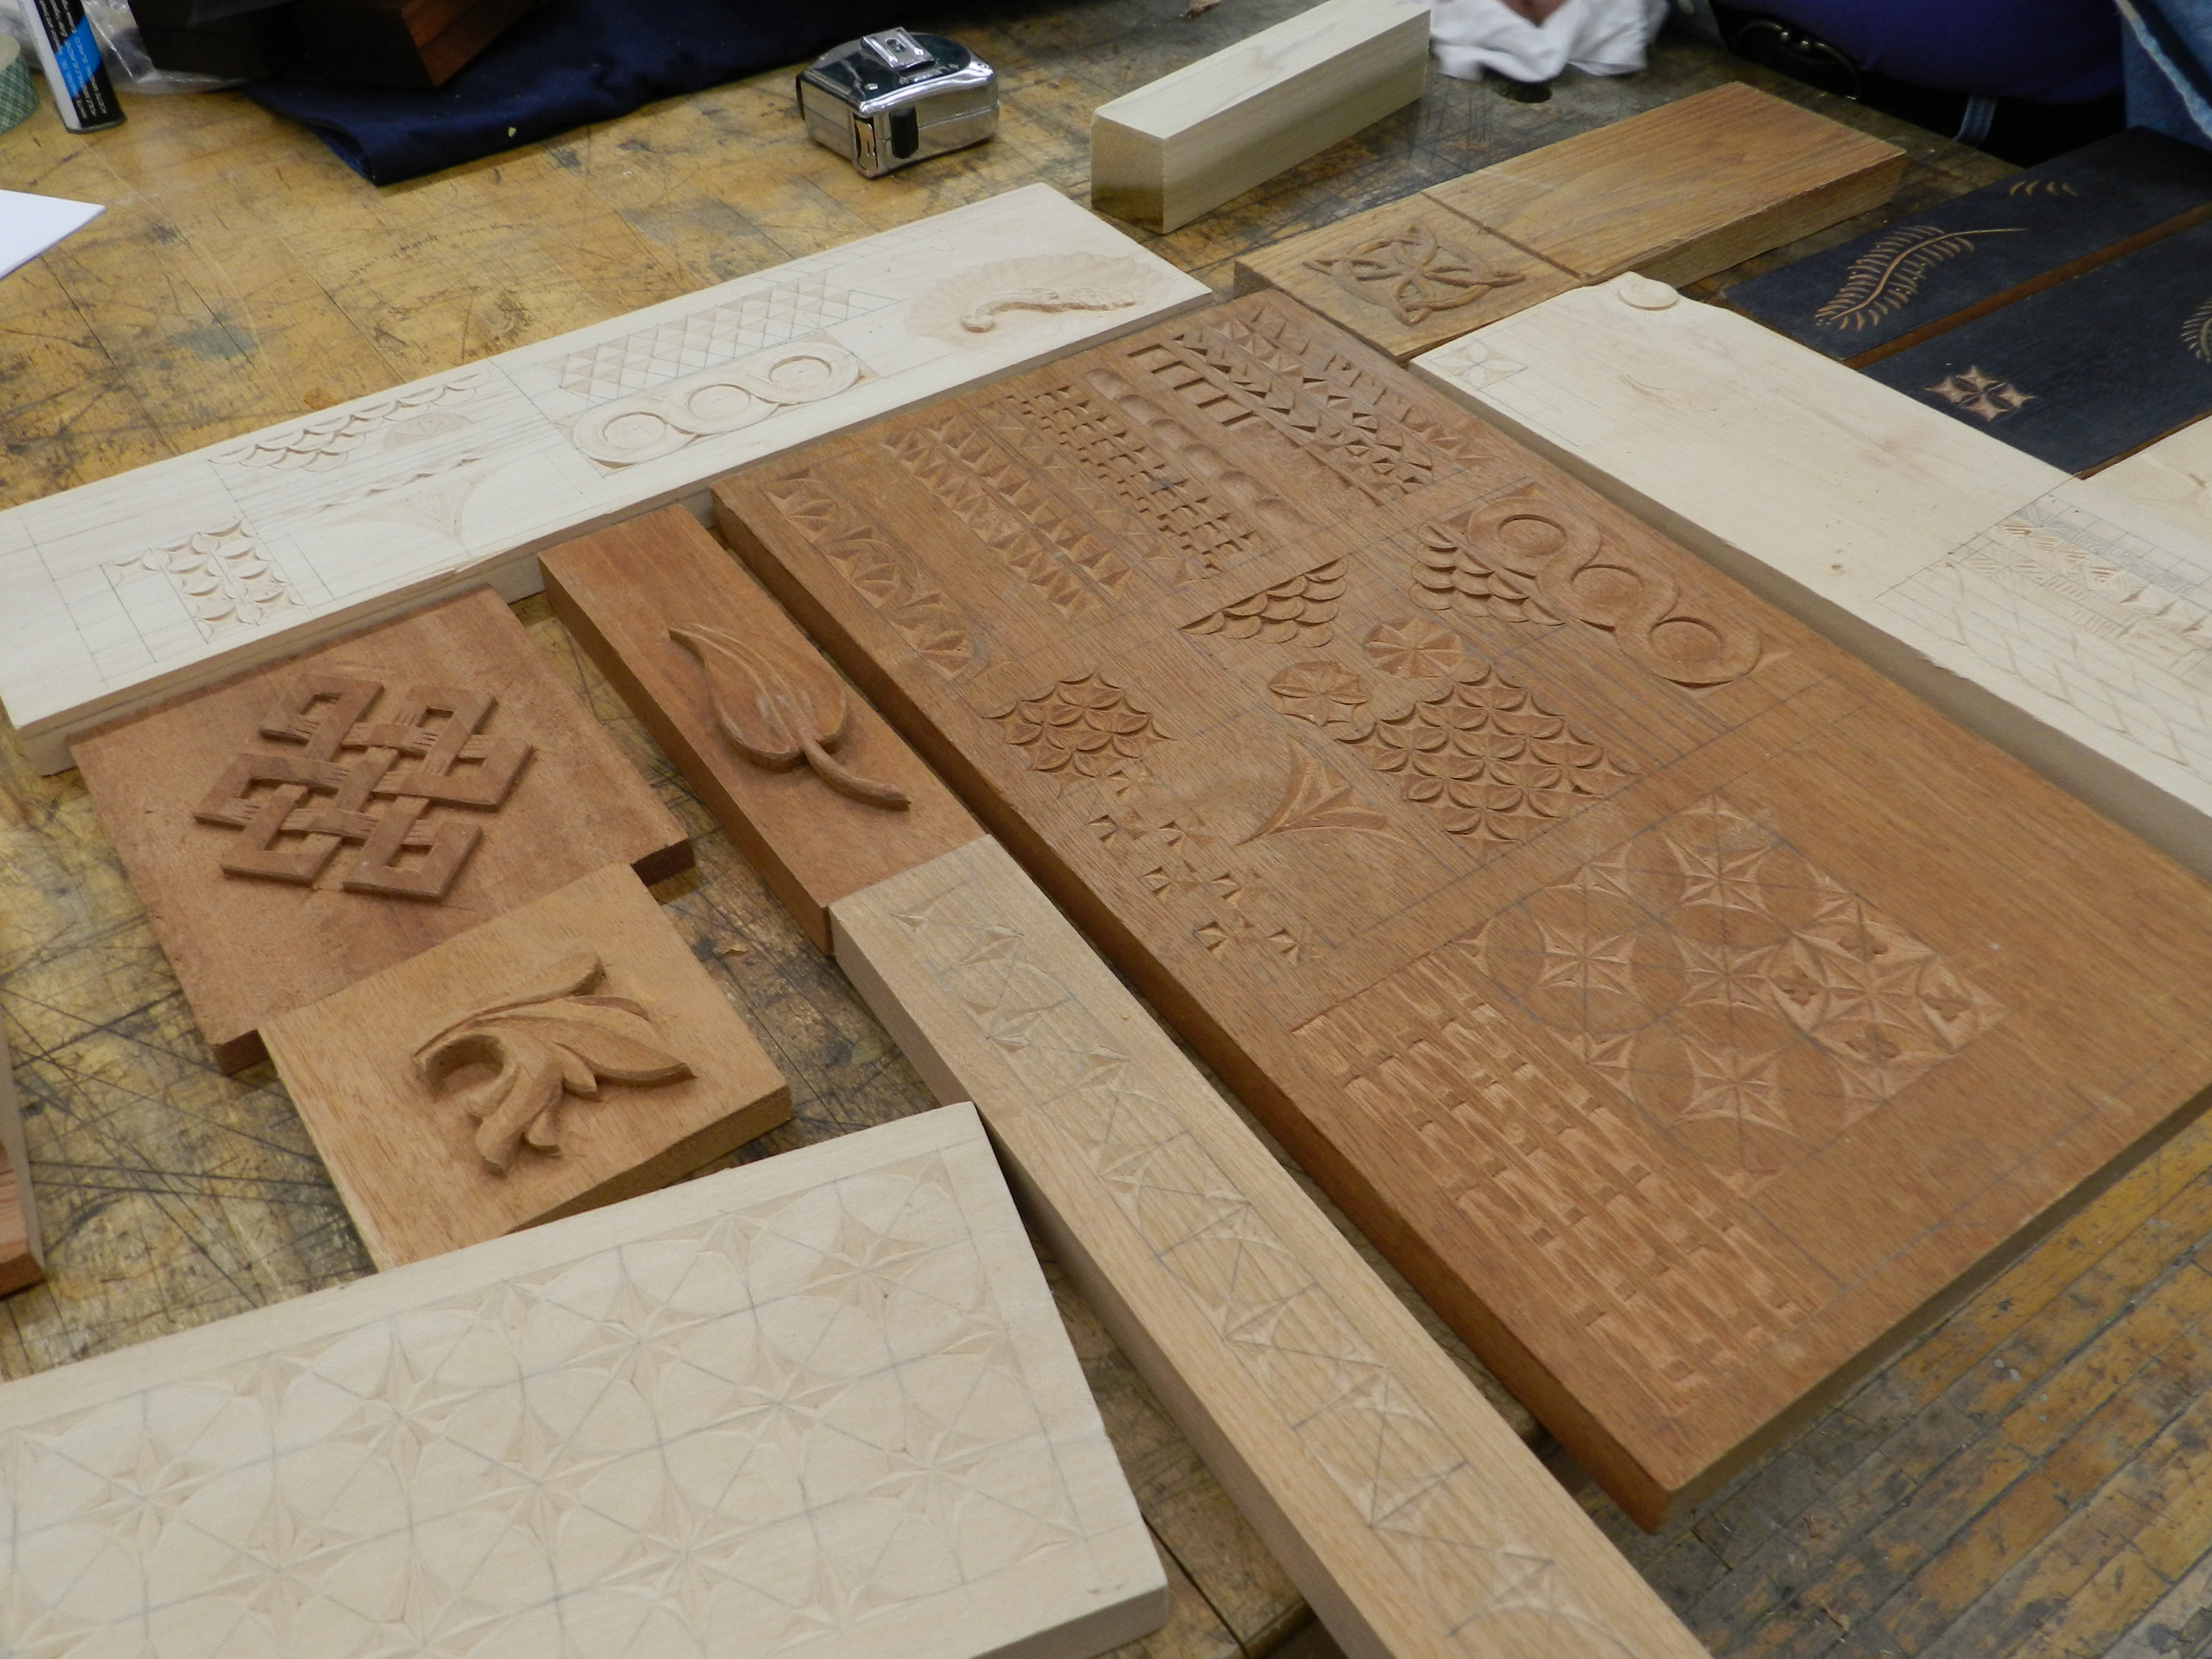
Chip and relief carving samples
relief carving…
Celtic knot and floral carving
organic designs, geometric designs, anything you can imagine. The above sample boards are just a few from the large bag of samples Janet brought to show the class.
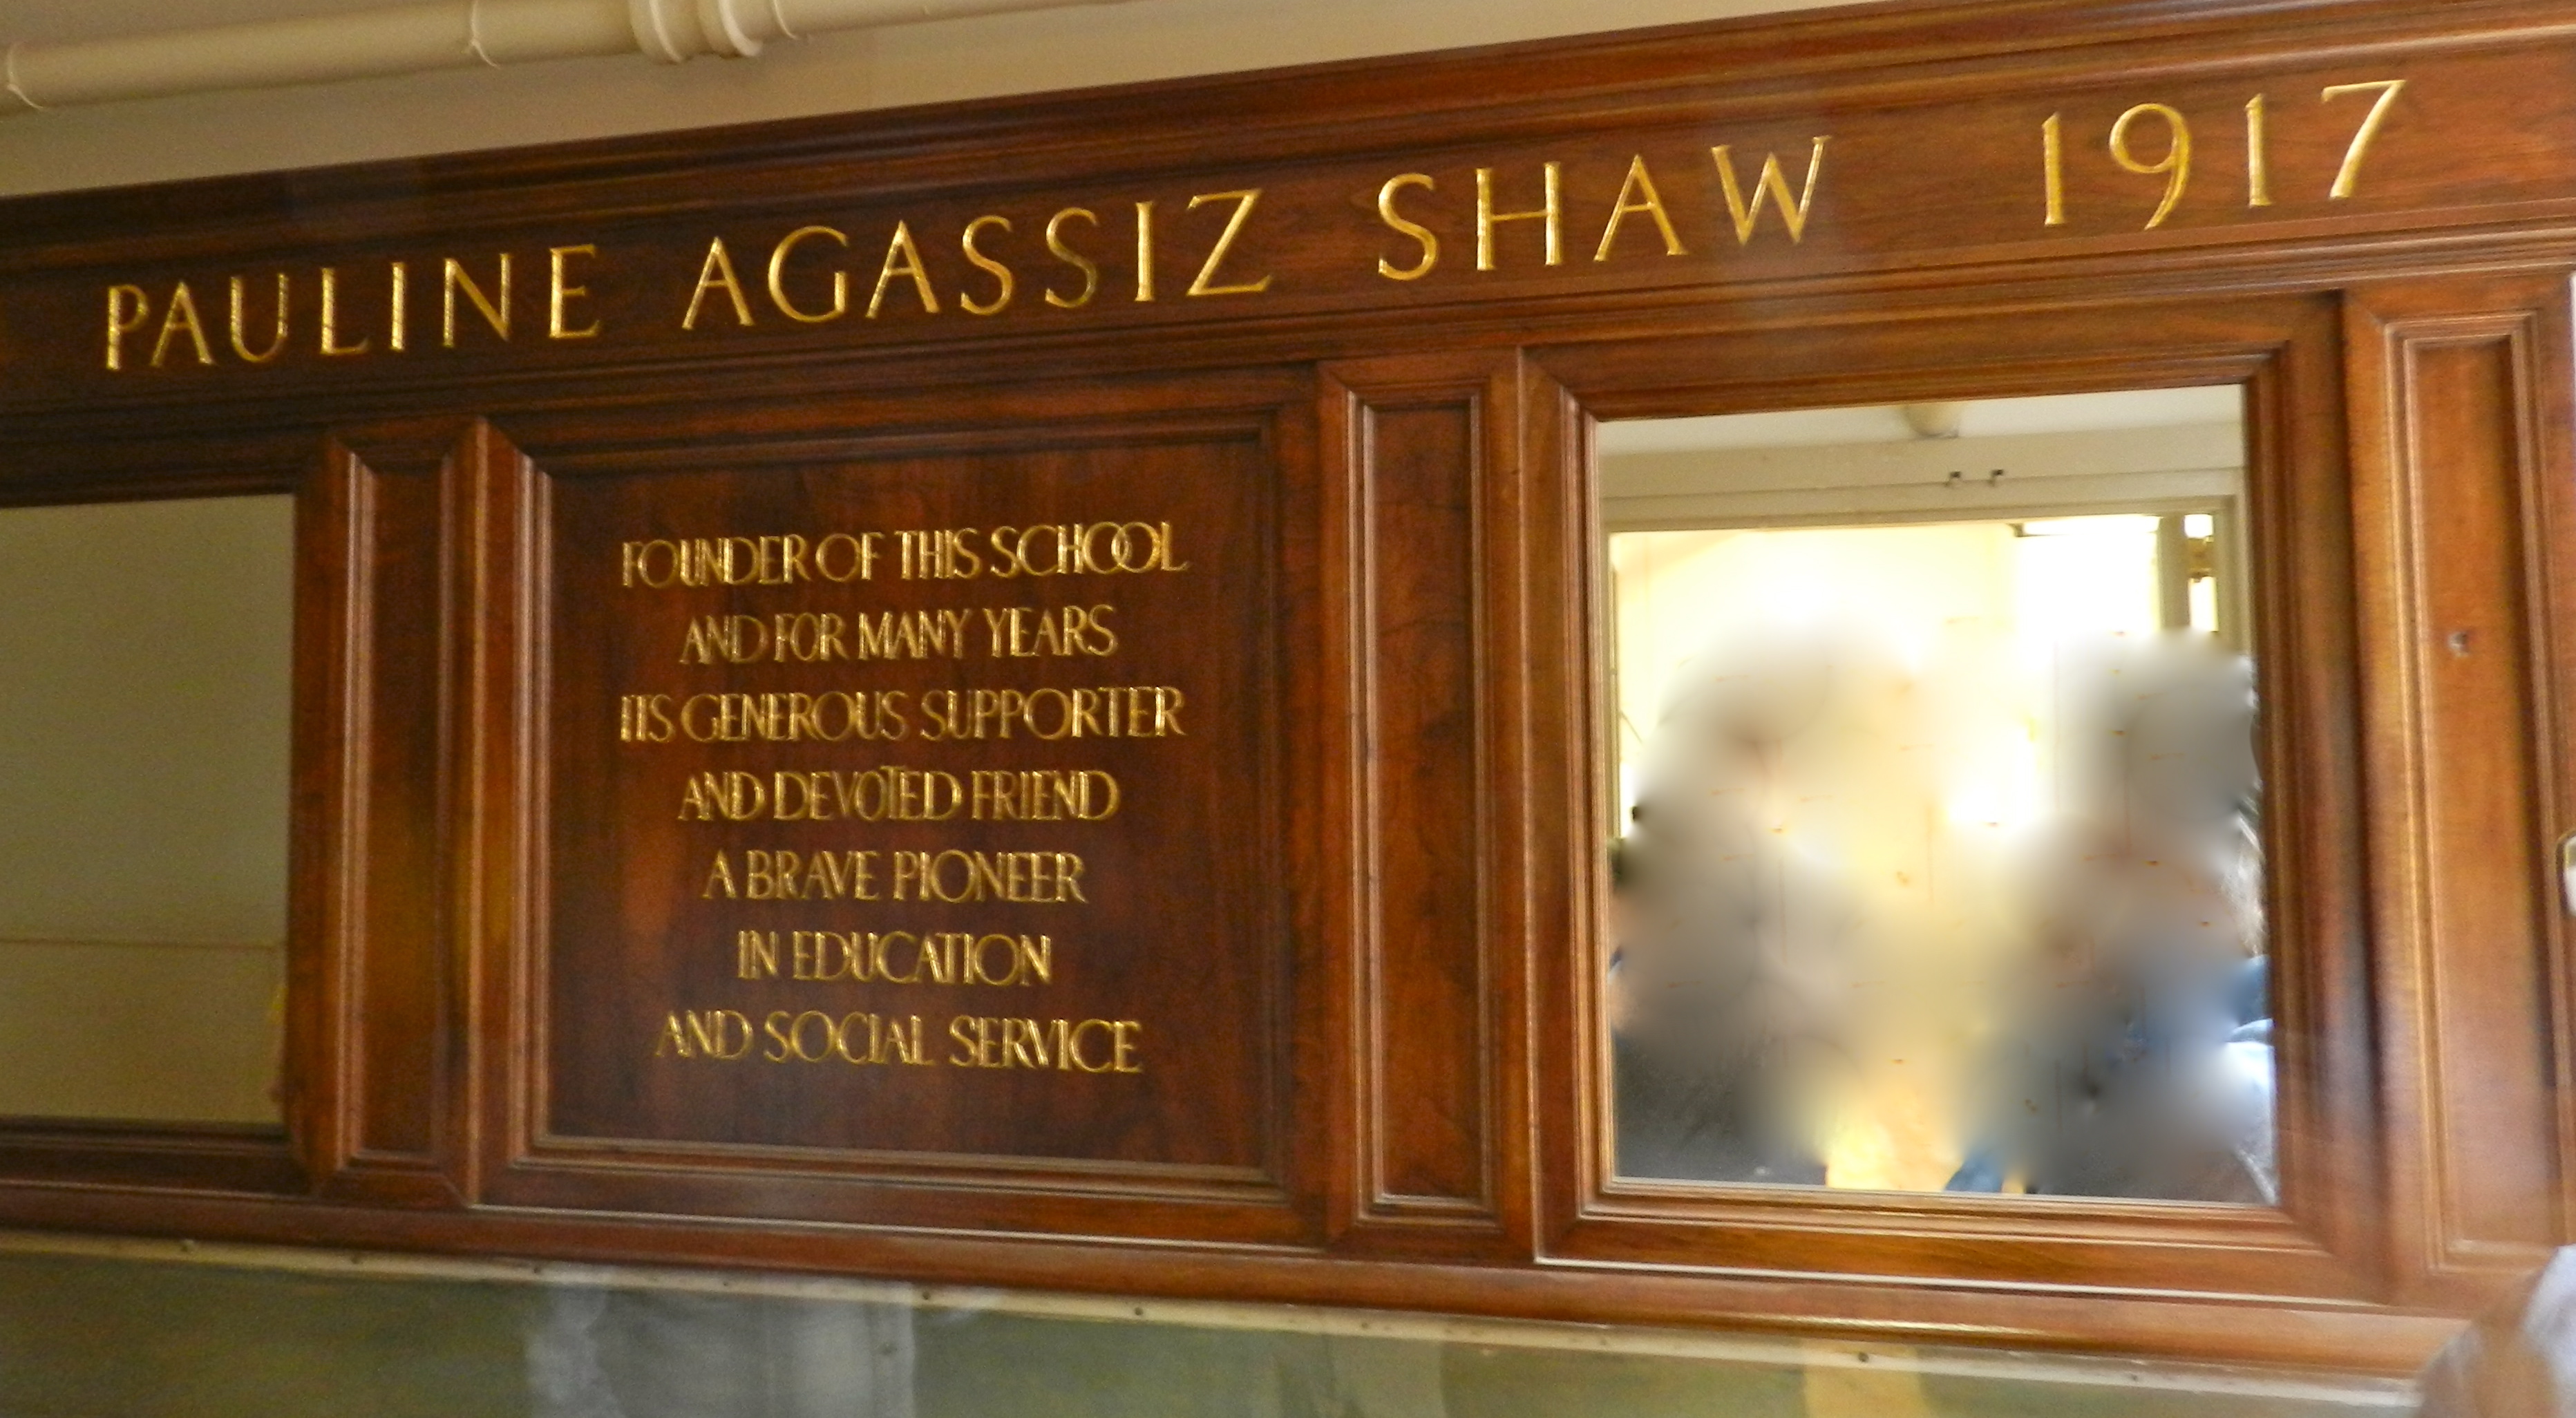
Carved and Gilded sign at NBSS
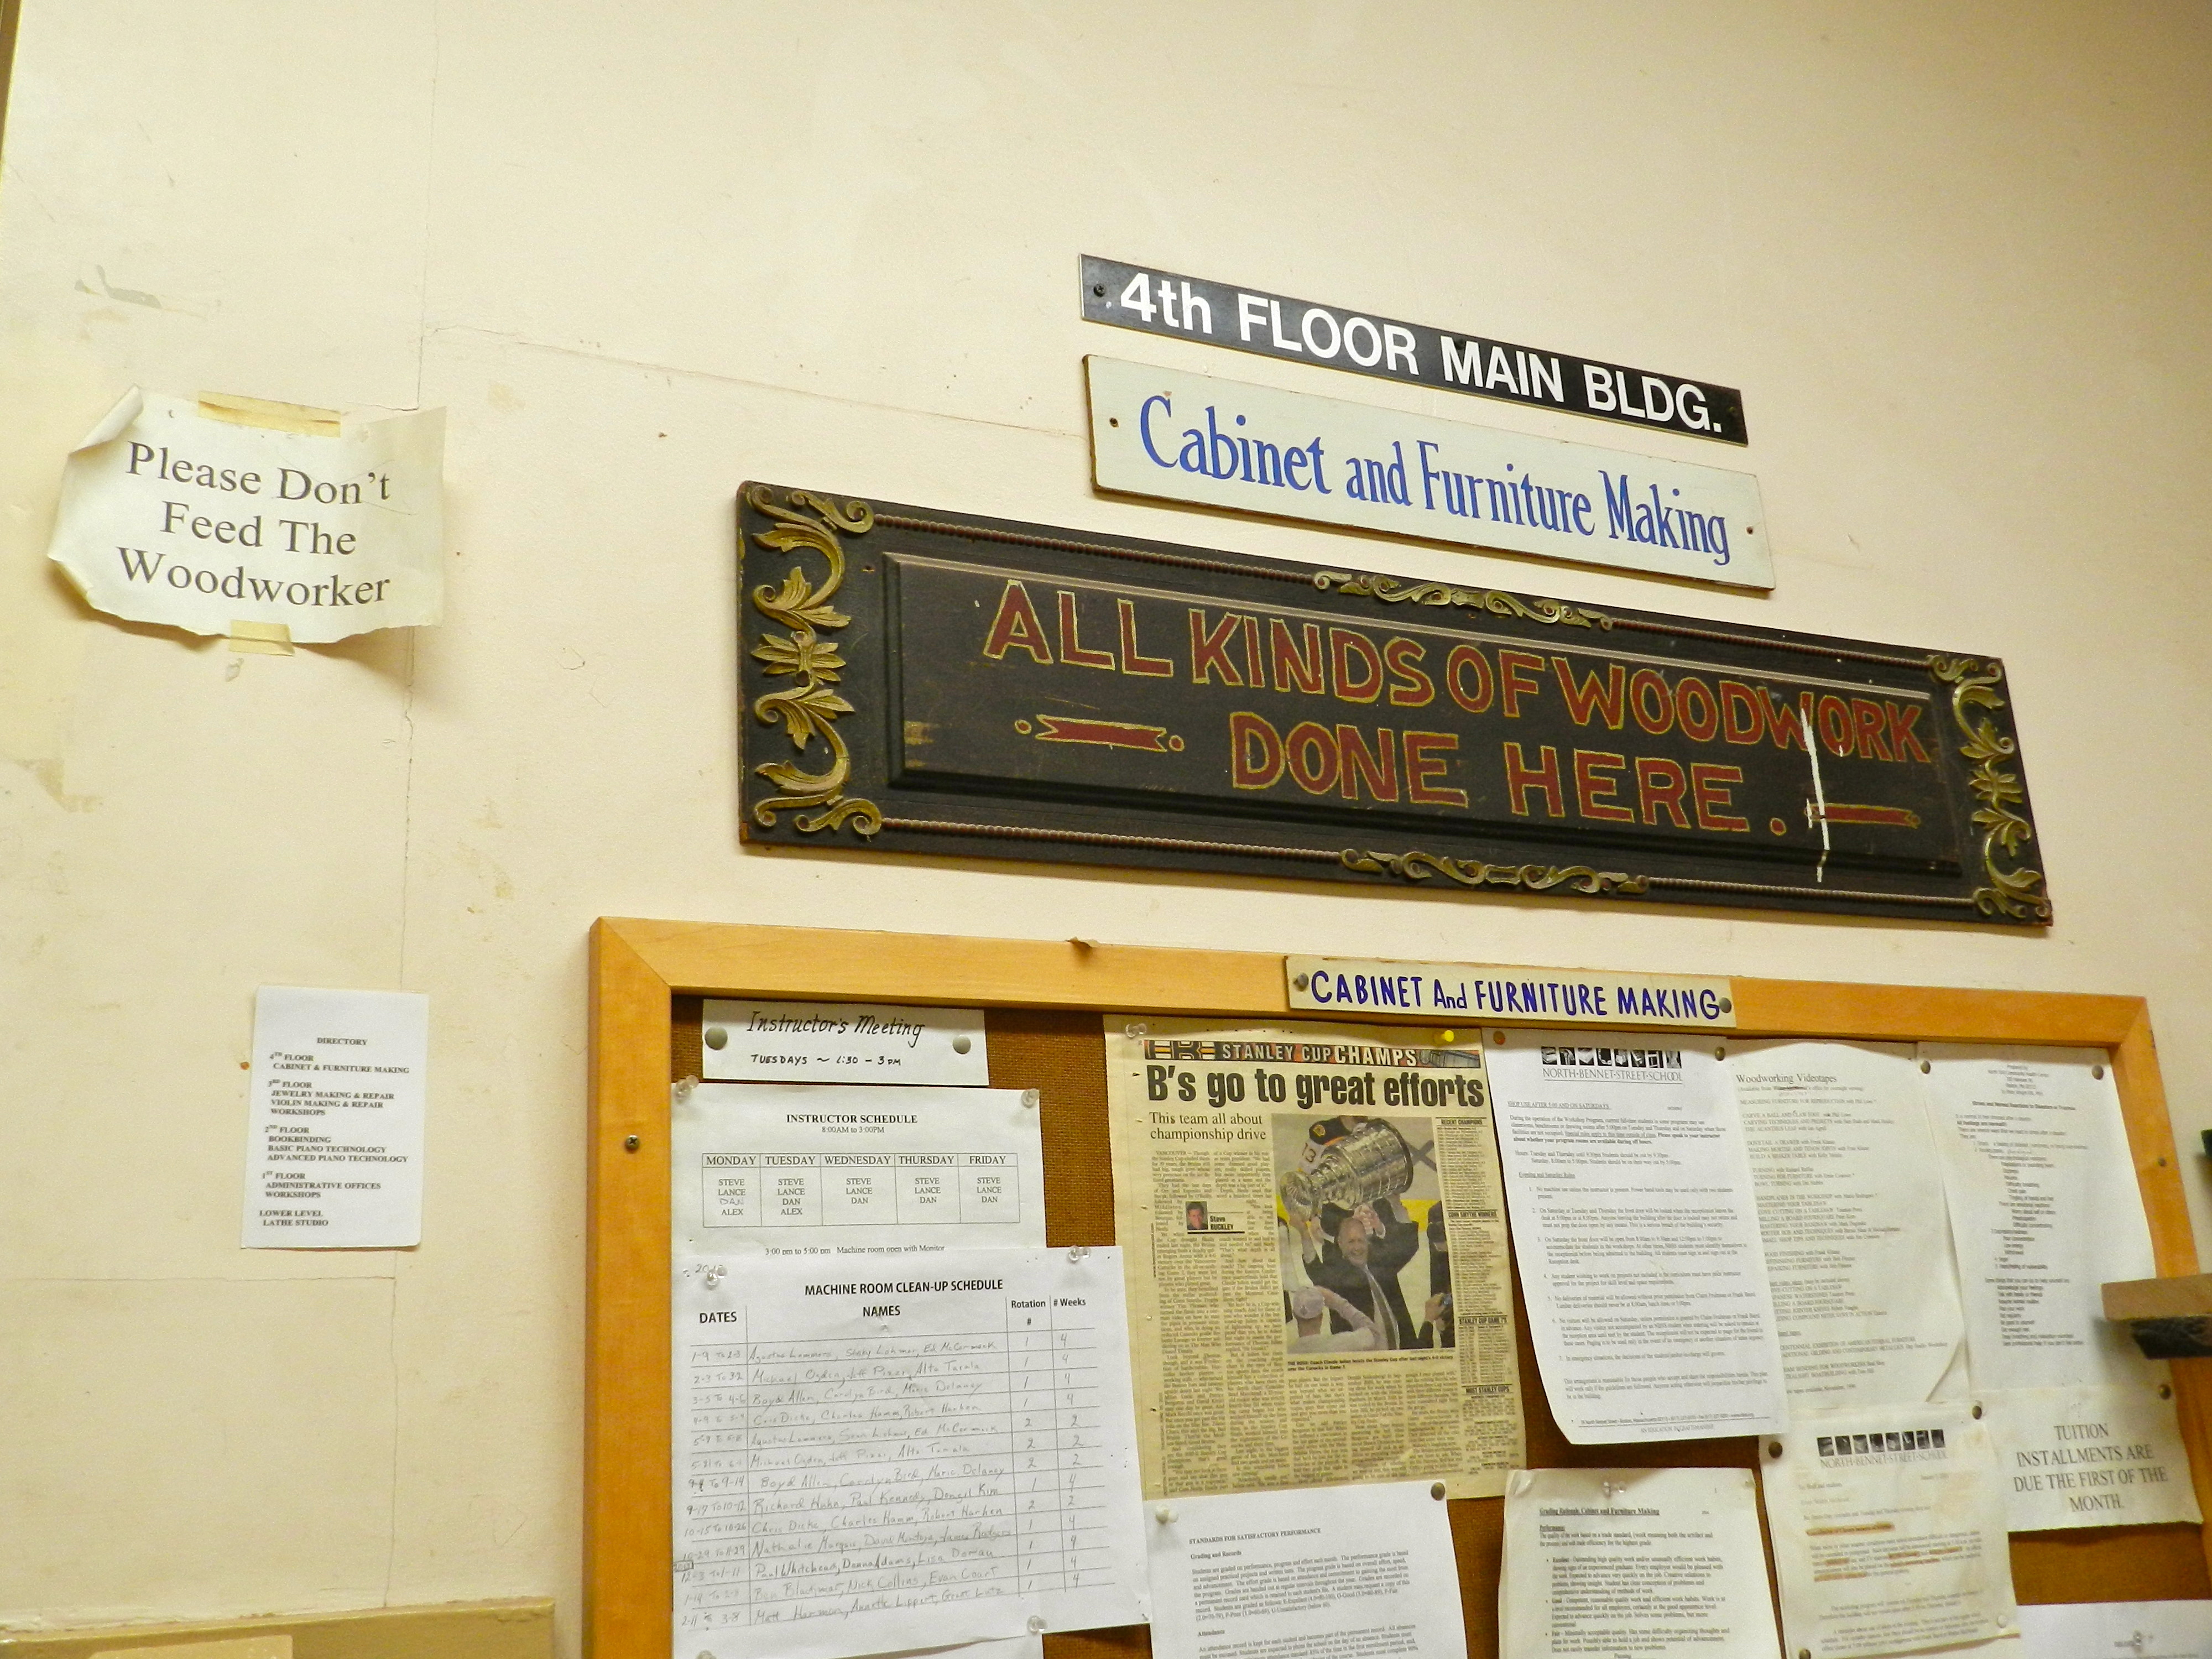
Above is a hand carved and gilded sign honoring the founder of NBSS — Pauline Agassiz Shaw. If you study it carefully you can see how it was clearly laid out by hand and shows many of the tool marks and design cues you’d expect to see in hand work. Pictured below is a nice old sign in the Cabinet and Furniture Making department at NBSS which is a combination of painting and carved details — “All Kinds Of Woodwork Done Here” which is an apt description for what goes on in the upper bench room. I am also partial to the “Please don’t feed the woodworker” sign.
“Don’t feed the woodworkers” and “All Kinds of Woodwork Done Here” signs by the entrance to Cabinet and Furniture Making department at NBSS.
After taking this course I have a new sign for my workshop, and a whole new appreciation for hand carved signs. Next time you are walking around your town take a moment to look at some of the carved signs and see if you can differentiate the ones that were carved by hand versus those which were made by machine. After looking at a few of them you’ll likely see that many of the signs with the best details were carved by hand.
I’m looking to make some signs for my barn and workshop and will be sure to post them here on the blog. In the meantime you can learn more about Janet Collins and her work via her website here and here. And if you are interested in taking workshops at NBSS you can find out more here.
A good mallet of often overlooked. All too often we settle for a store bought carving mallet or crude instrument we fashioned in a hurry and then live with for years. Before the holidays I decided is was time to make a nice larger mallet for myself and one for a friend. I wanted a mallet that was a little larger and heavier than the average.
You can never have too many clamps, especially when clamping up a blank wherein you do not want to see any glue lines. Plus it takes on the look of some modern art work. 😉
I decided to make my new mallet out of cherry and hard maple as they are two of my favorite woods to work with, and I like they contrast they have with each other when finished. The hard maple (Same I used for my workbench) is hard, dense and wears well, and the cherry (From a curly cherry piece I had around the shop) has a nice even tone and finishes well.
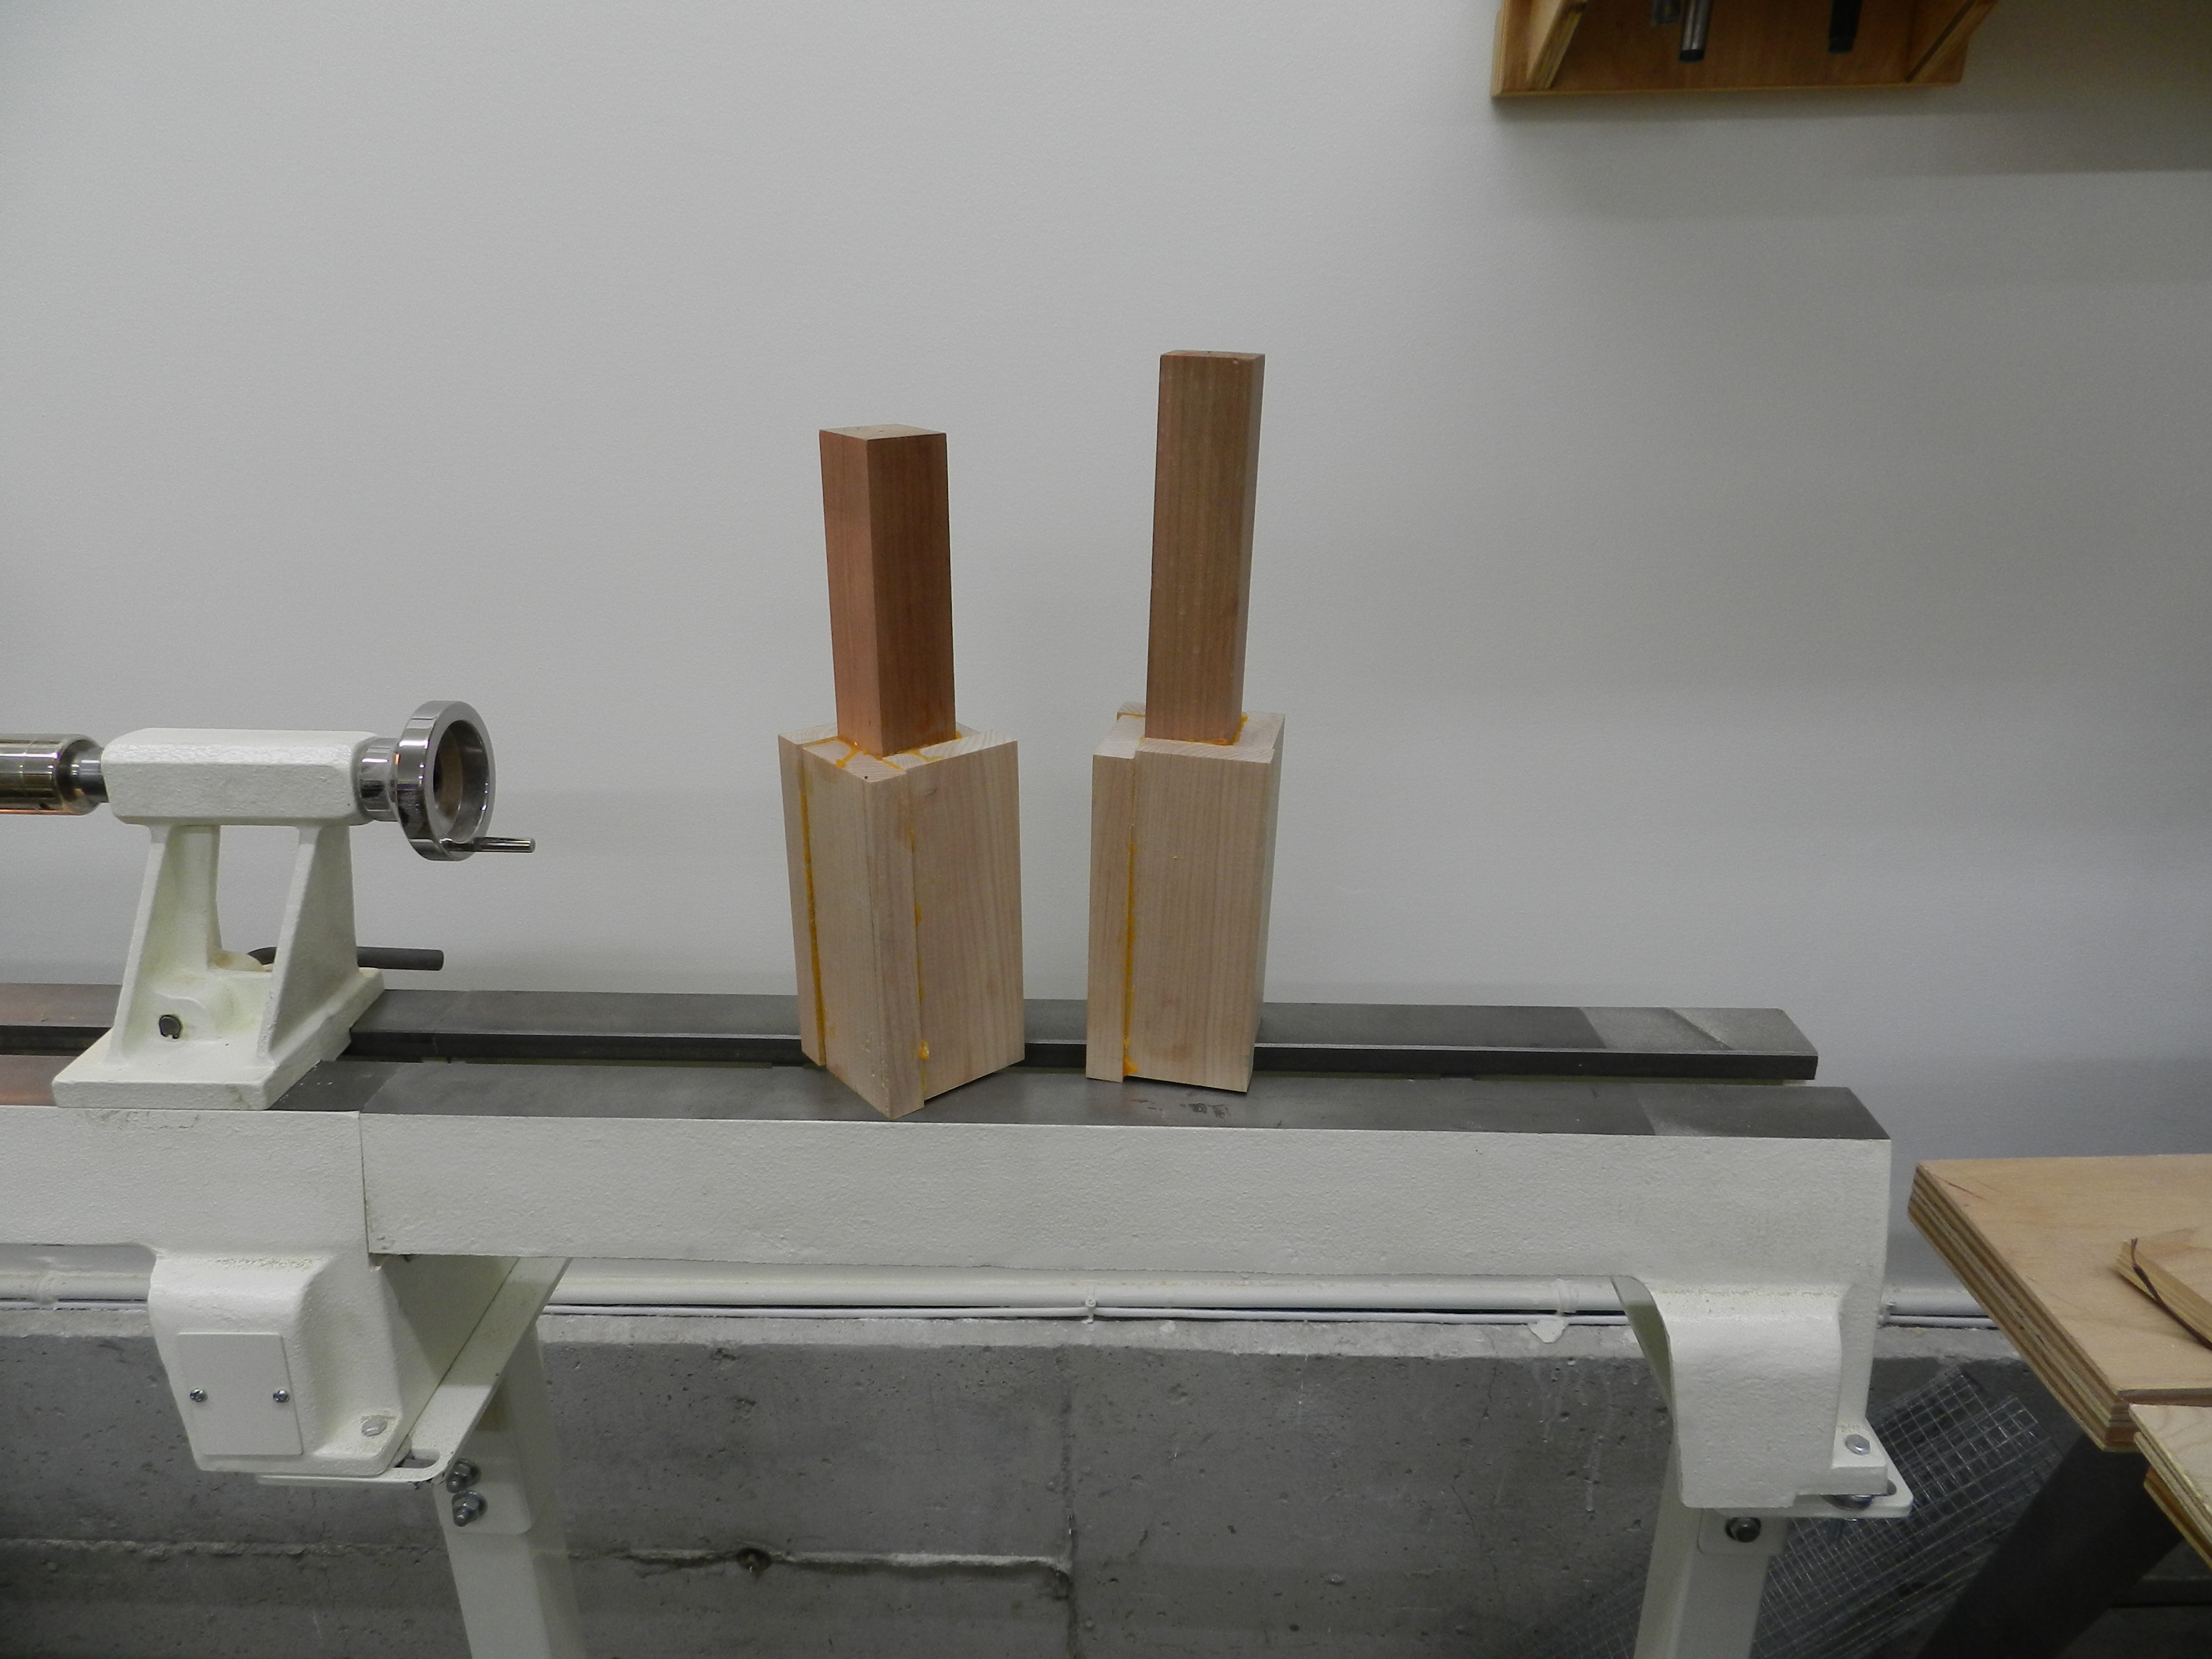
Blanks ready to be turned
In making this sort of mallet, the stock preparation work is more important than the actual turning and finishing. That is why its critical to get the mating surfaces planed dead flat and take the time to clamp it up tightly (don’t starve the joint of glue) but make sure you do not have gaps or you will have unsightly glue lines and a potentially weaker mallet.
First Mallet Turned, Next to the blank
Why would someone spend so much time and effort to make a fancy mallet you are only going to beat the heck out of?
If you’ve ever turned a mallet from a single piece of wood and used it for a while you’re likely to see parts of it eventually come flying off — but only from two sides. This leaves you with an unbalanced mallet which may not hit your chisel the way you want. Where quarter sawn grain is exposed the wood is mostly intact after years of use, but where long grain is exposed some hard hits can take advantage of the plane of weakness in the wood causing them to fly off. They break off much the way splitting a piece of wood with a froe separates the grain.
The good news is there is a way to avoid this…
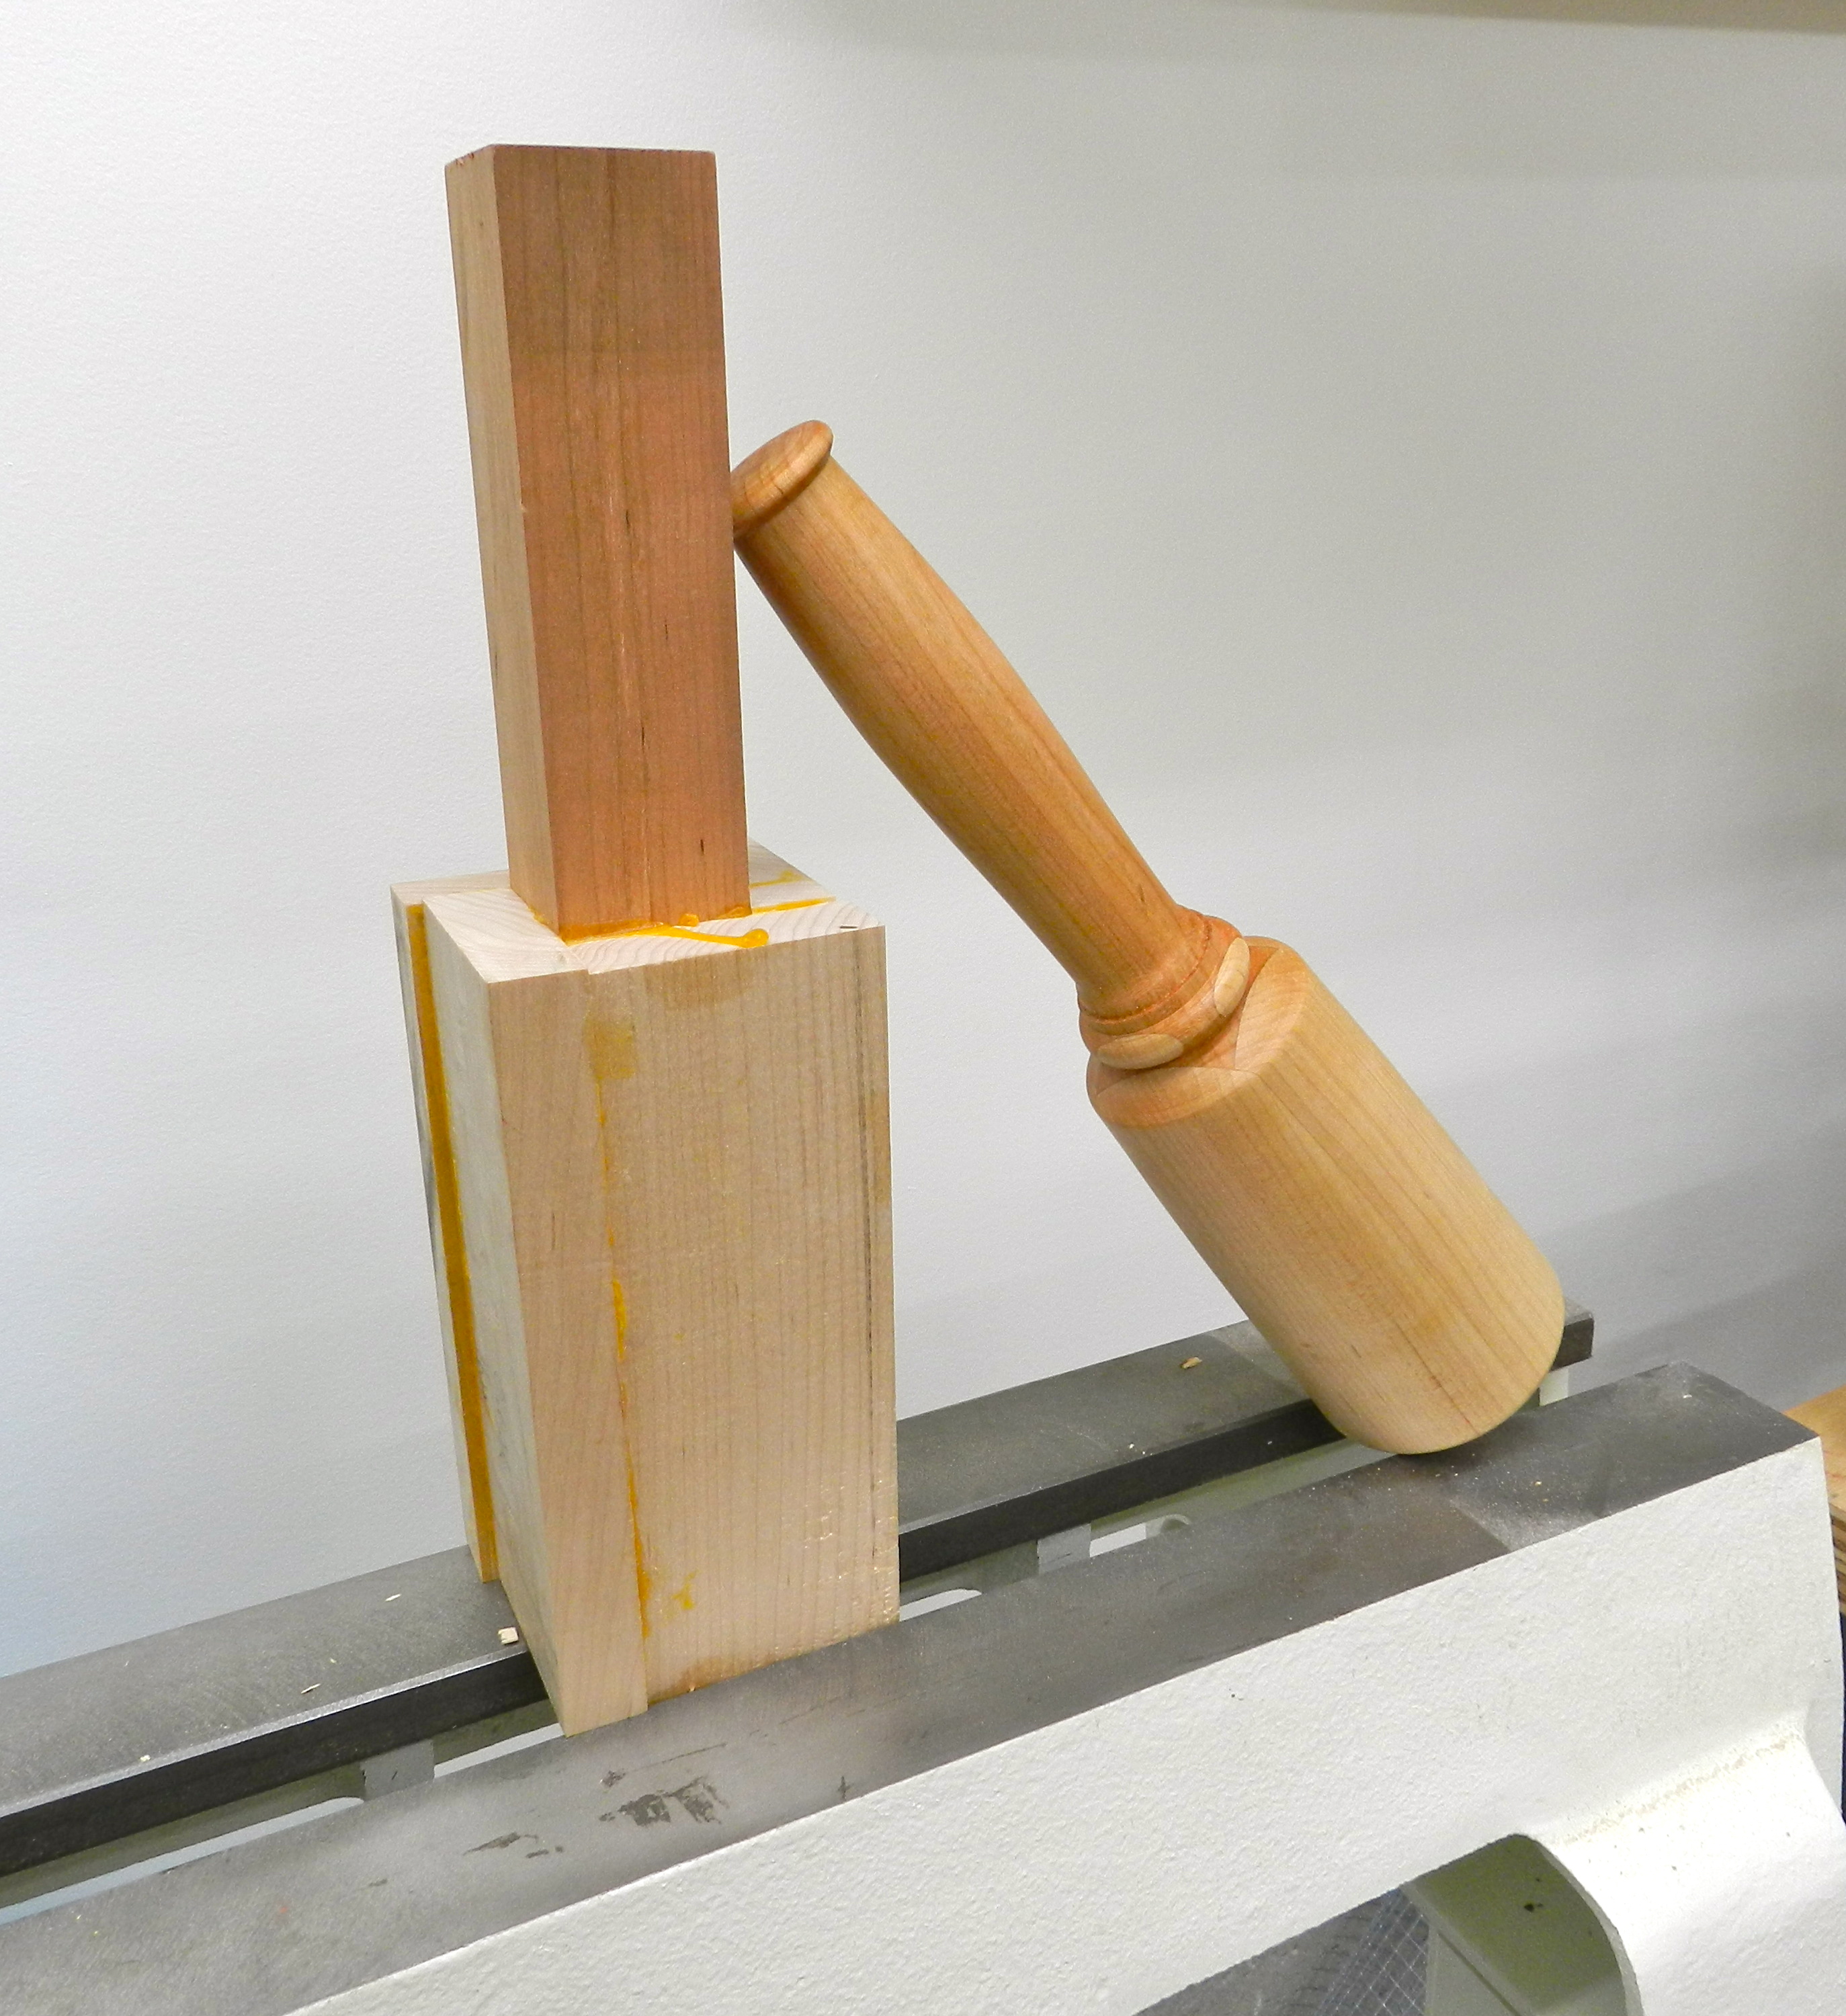
Completed Mallet
By gluing up a mallet as you can see here the hard maple pieces are quarter sawn — so on all 4 sides of the finished mallet you have nice dense quarter sawn hardwood grain oriented in such a way that it should have a nice long service life even under harsh conditions — plus it’s pleasing to look at especially with contrasting woods.
End of mallet with finish applied
Won’t it break apart with seasonal movement or use? I used Tite-Bond II for the glue which has been proven to be stronger than wood when used in long grain to long grain bonds. The center or handle piece of wood should be a well seasoned hardwood ideally rift sawn and known to be stable. I’ve seen many of these mallets get heavy shop for years and hold up very well. A similar mallet is often a regular project the cabinet and furniture making program at NBSS.
Completed Mallet
You should take the time to fit the handle to your hand and make it as austere or ornate as you see fit. I particularly like how the laminated structure of the blank results in nice contrasting areas like you see on the bead in the above photo. I do a lot of period work so I was thinking about the 18th century as I turned these mallets. Most of it is finished with the skew chisel and needed almost no sanding. The finish is tongue oil with a very light coat of wax only on the end grain and handle. I look forward to it providing years of solid service.
The historic Wellington House in Waltham MA dates back to the late 1700s and has a long history which was almost lost to development. In recent years this house has seen some exterior restoration, but now things are progressing on the interior as well. This post is the tale of how the kitchen fireplace surround was documented and restored.
Front of the Wellington House
First some history about the house:
It was home to the Wellington Family from 1779 – 1930 when it was sold to the state and became part of the Middlesex County Hospital and was used as an office for some of the hospital administration. After the hospital closed the house stood abandon for 20+ years and the weather and neglect took a toll on the building
Interior Front Door of the Wellington House
This house is an interesting specimen of Massachusetts Architecture from the time of the revolutionary war, the local militia and the large percentage of original details that remain intact in the house, though many of them are in desperate need of preservation.
Central Stair Hall, Wellington House, Waltham MA
In 1989 the house was put on the National Historic Register of Historic Places. As a developer was looking to develop the acreage behind this historic property the city of Waltham had the foresight to ask that this house be donated back to the town along with funds to cover the restoration work. Since that time the roof was replaced, some structural stabilization was carried out and much of the exterior has been touched up, but the interior is another story. Once restored this building will eventually serve as the offices for the historical commission.
Now on to the interior of the main kitchen:
The ‘Before’ this was the kitchen fireplace surround as we found it
Above is what the kitchen looked like when I arrived at the house.
Steve O’Shaughnessy working with me on documenting what was left of this historic fabric
Steve O’Shaughnessy and I examined what was left and worked to document the fireplace surround, paneling, cabinets, hardware etc via photographs and site notes. Water had been infiltrating the chimney stack and was causing a lot of damage to this woodwork — along with various small animals. The paneling on the right side was bowed several inches off the wall. Sara Chase, NBSS adviser and paint analysis expert examined samples to determine the original color of the trim.
Carefully removing pins so we can disassemble the paneling
After initial documentation we carefully disassembled the paneling so the masonry could be examined and repaired and so the woodwork could also be restored.
Getting the large panel and surround down in one piece (Pictured Bill Rainford)
Getting the central panel out in a single piece was an accomplishment and while exhausted at the time we were happy that everything came out without breaking anything and it even revealed a nice surprise….
Signed and dated 1904 in beautiful cursive — likely when the panel was put back in to cover the earlier hole made when a stove was installed
Behind the large panel was a large signature in fancy cursive writing that read: “Ernest S Farr January 28th 1904” I did some digging around on the internet and found that there was an Ernest S Farr (ca 1874-1920) in Middlesex who was married to Ida Farr and had a daughter named Helen N Farr in 1895.
The masonry seeing the light of day for the first time in well over 100 years (At least since 1904, possibly since 1799)
With the paneling removed you could see the masonry work of the chimney mass. You could see the heavy wood lintel was sagging a bit, but otherwise the masonry was largely intact. You could also see the scars of installing a stove into the main chimney flue and also into the flue for the beehive oven. It appears that the work of Ernest S Far was to replace the fielded panel and cover in the stovepipe hole in the primary fireplace, which leads me to think the stovepipe in the beehive oven was the later addition. I also have to comment that Ernest did a very good job getting that panel in place without disturbing the other woodworking — when we removed the rest of the surround we could see the cut nail holes and the rest of the paneling were original to the first installation.
Martin Hickman fine tuning some hardware during installation
My friend and colleague Martin Hickman (also from NBSS) restored the woodworking that was removed. This was a laborious task that took many days to complete.
Restored paneling being re-installed (Pictured Martin Hickman)
Beyond the dissassembly, paint scraping and basic repairs , Martin also had to work to remove the large bow in the paneling caused by the water damage
Martin finishing up the final pieces of the installation
Martin’s efforts paid off well as the final product once re-installed would likely have looked very familiar to the original Wellington’s who once inhabited this house. This room will eventually be used as a conference room for the Waltham Historical Commission. If you notice the small patch above the fireplace that is an area deliberately preserving the long paint history of this woodwork and will be exposed as a reminder to the later inhabitants of the room.
The ‘After’ — the restored surround, paneling and cabinets have been re-installed and are looking great. The off color patch in he middle will be preserved under glass as a reminder of the change this woodworking has seen and for future paint analysis if ever needed again in the future.
While there is a LOT of work that remains on the rest of the interior the Wellington House is off to a great start and I hope that the rest of the building will be restored to its earlier glory in the coming years.
You can learn more about the Wellington House and some of its history here.
From meeting a lot of the top timber framer’s in the country, to great talks, joint busting and axe throwing there was a lot to take in. Below is a quick recap of some of the more memorable events from this year.
Conference T-Shirt, Wood Bookmark, Swag from the show
I was excited to meet a lot of the guys who helped to found the Timber Framer’s Guild and wrote many of the books I often reference in my work and teaching: Jack Sobon, Ted Benson, Will Beemer, and many others. It was also great to see lots of friends from the field and make new connections.
Keynote Presentation by Ted BensonHard, Slow Learning: We Weren’t Very Good Yet, but at Least We Were Skinny — from Ted Benson’s Talk
Rich Friberg, my good friend and the second year instructor at the North Bennet Street School gave an interesting talk on Preservation Principles and Methods and showed off some of the great work the school is doing.
Rich Friberg Talking About Historic Preservation Topics
We also got the chance to meet Thomas C. Hubka author of “Big House, Little House, Back House, Barn: The Connected Farm Buildings of New England” and learn about his current research as well as the other projects he’s been involved with including the Timber Framed Synagogue in Europe.
Thomas C. Hubka author of “Big House, Little House, Back House, Barn: The Connected Farm Buildings of New England”
I was excited to get up on stage Friday night and talk about some of the timber framing work I did with NBSS. Shown below I was discussing the new square rule barn and also the historic ~1791 two bay English Style Barn we restored at Brookwood Farm in Canton MA.
Bill Rainford (Me) talking about some work I did with NBSS at Brookwood FarmBill Rainford (Me) talking about some work I did with NBSS at Brookwood Farm on Friday Night
BANG — CRACK — SNAP — JOINT BUSTING! In a corner of the trade show portion of the conference during the inter-session breaks we got to see a lot of the joint busting competition. Basically you build a timber framed joint meeting some specific size specifications and it is placed into a hydraulic or pneumatic press that will apply an incredible amount of pressure to see what it would take to cause the joint to fail. This info is projected on the screen and also logged by computer sensor for research purposes. When the joint fails it often makes quite the sound.
Joint busting competition at the trade showSome of the many and varied joints that were busted this yearGreat looking joint with carved embellishments
Look out for flying axes at the AXE THROWING COMPETITION!
Outside the guild setup some targets and allowed us to practice our axe throwing before the big competition. I had never thrown an axe before, but after a quick lesson, it was a lot of fun and with a little practice we made some good shots.
Kim Catlin (NBSS Graduate) Throwing an AxeBill Rainford (NBSS) Throwing an AxeAxe in flightBill Rainford (Me) standing next to my bullseye shot
I had a great time at the show, I’m all fired up to get out in the yard and start hewing and framing some more outbuildings and I can’t wait to go back next year!
On a recent visit to Washington D.C. my wife and I took a day trip out to Orange VA to see Montpelier — the rural estate of James and Dolley Madison. If you have never been to the home of the 4th U.S. President and ‘father’ of the U.S. Constitution, I highly recommend taking a day to visit especially if you are interested in modern historic preservation.
The Mansion at Montpelier
The mansion is situated on ~2700 acres and provides stunning views of the Blue Ridge Mountains and surrounding terrain.
View from the second floor roof deck
Many people have seen Washington’s Mt. Vernon, Adam’s Peacefield, Jefferson’s Monticello over the years and depending on when and how they were preserved you can see varying degrees of ‘re-muddling’ from generations of caretakers each with their own budgets, skill sets and agendas. In more recent years Historic Preservation efforts have evolved along with related science and technology to try and adhere to more scientific methods and standards which allow for better educated decisions around reading materials, doing research etc — though there are still politics and agendas — my belief is that modern interpretations attempt to be more grounded in findings from the site and related research and more forthcoming with calling out what was done based on fact and what was carried out based on an educated guess — a trend I hope continues as new facts are learned about a site.
Front door flanked by columns
Many people have not seen Montpelier since the the property was a private residence for parts of the DuPont family for much of the 20th century. In 1983 the site was bequeathed to the National Trust for Historic Preservation (NTHP) which carried out a $25M major restoration effort from ~2003-2009.
Earlier entrance to the older portion of the home, note the ghost lines in the brick
After doing extensive research which called upon many experts in the field of historic preservation — from the National Parks Department, Colonial Williamsburg and private practitioners — the NTHP removed 23,739* square feet of living space from the 20th century additions made by the DuPonts. The goal was to restore the property to what it looked like at the time the Madison’s lived there.
View from the ice house/temple
One exterior feature that survived largely intact was Mr. Madison’s temple which sat atop the ice house which was the source of ice for Dolley’s famous ice cream.
The Temple
The exterior work ranged from removing later exterior renovations to stabilizing, preserving, restoring and/or replacing exterior architectural details like the front door surrounds.
The side lights flanking the door can lower into recessed pockets to promote air flow
A close up detail of the pediment and its crisp detailing:
Detail view of the pediment
Other work was based on archeological and documentary evidence of the site — this was the case with the outbuildings which would have serviced the main home and was where the slaves and servants lived and worked.
Re-constructed timber frames of some of the outbuildings
The interior of the mansion also underwent extensive work, unfortunately we are not allowed to take photos inside, so if you want to see it for yourself you will have to visit.
Rear service door
What has me so excited about this site compared to many others is the fact that is was largely preserved — even with all the later renovations and additions the core of the house and many of its doors, windows and mantels survived on site AND the preservation and restoration work mainly happened during the last ten years with the benefit of being carried out by some of the best practitioners in the field.
Window with louvered shutters.
The restored mansion takes on the look and feel of many of the historic buildings I often work on — you can see and smell the fresh plaster, the rooms are sparsely furnished as the Foundation is still looking to acquire some of the original furnishings — you can see active preservation projects going on at the site — it feels more alive and tangible compared to some of the similar sites which feel more dusty and tired from a constant stream of visitors.
The meticulous attention to detail in the restoration is evident throughout. On the second floor of the mansion they have a room that is partially restored and shows some of the more interesting finds from the exploration of the building — paint details on plaster and timbers, tags and branded numbering on repairs so future generations know who did what during this period, and an array of other interesting facts and figures. (Similar to the Gedney house in Salem MA)
So why would I ever need 56 pounds of horsehair at Montpelier? To mix into 90 tons of dry mix plaster* of course! That is how much plaster it took to restore the interior of the mansion. Staggering figures and interesting facts will keep your inner preservation carpenter happy as you take the tour. The foundation offers many books in the gift shop about the Madison’s and other founding fathers but below are two of my favorites as they are also used to train some of the docents. I recommend picking them up if you go there. They walk you through the history of the site and its inhabitants, documentation of the restoration and related research.
Montpelier Foundation Books on Preservation of the Site
If you are interested to learn more about the restoration of Montpelier check out the official website here. And for the gardener in your life — the history of the various gardens and landscapes can be found on this site.
The Gardens
If you are interested in visiting Montpelier, check out their calendar of activities on the main Montpelier website here. There are lots of events throughout the year including candle light tours, and tours going more in depth on the Madison’s, Archeology, Historic Preservation, and the life and times of inhabitants of that period in American history. I hope to see you there.
Since I’m usually behind the camera, I figured I’d add this one — “Now try to look more like a tourist”
And last but not least, since I an not in many of the pictures on this blog I figured I’d add on at least one touristy pic in front of the visitor’s center. If you make your own pilgrimage to Montpelier, let me know or better yet share your own picture in front of this sign. 🙂
* Above facts were taken from ‘James Madison’s Sovenir Book’ UPC 190001 and available from the gift shop at Montpelier.
A Joiner's Guide To Traditional Woodworking and Preservation


")

")

")


 talking about some work I did with NBSS at Brookwood Farm")
 talking about some work I did with NBSS at Brookwood Farm on Friday Night")


 Throwing an Axe")
 Throwing an Axe")

 standing next to my bullseye shot")


 I figured I'd add this one into the collection")
