Late last night I got home late from the EAIA Annual conference down on Cape Cod — we had a great time at the event and I will post on that more this week.
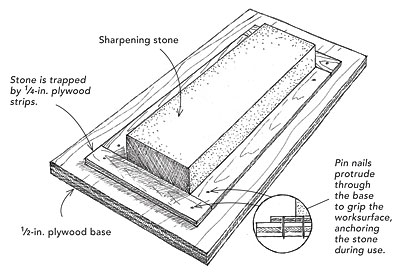
In my mailbox I was happy to see the new issue of Fine Homebuilding — the July 2013 Issue — since it contains the first small article I wrote for them. It can be found in the ‘Tips and Techniques’ section of the magazine on page 24 in a piece titled ‘A self-anchoring sharpening-stone station’
Below is a picture from this small article, but if you want to see all the details, please check out the magazine on your local newsstand or view this tip online here.
Self Anchoring Sharpening Stone Holder
Stay tuned for next month’s issue (August/September 2013) — I have a much longer piece with online video components coming out in with that issue.
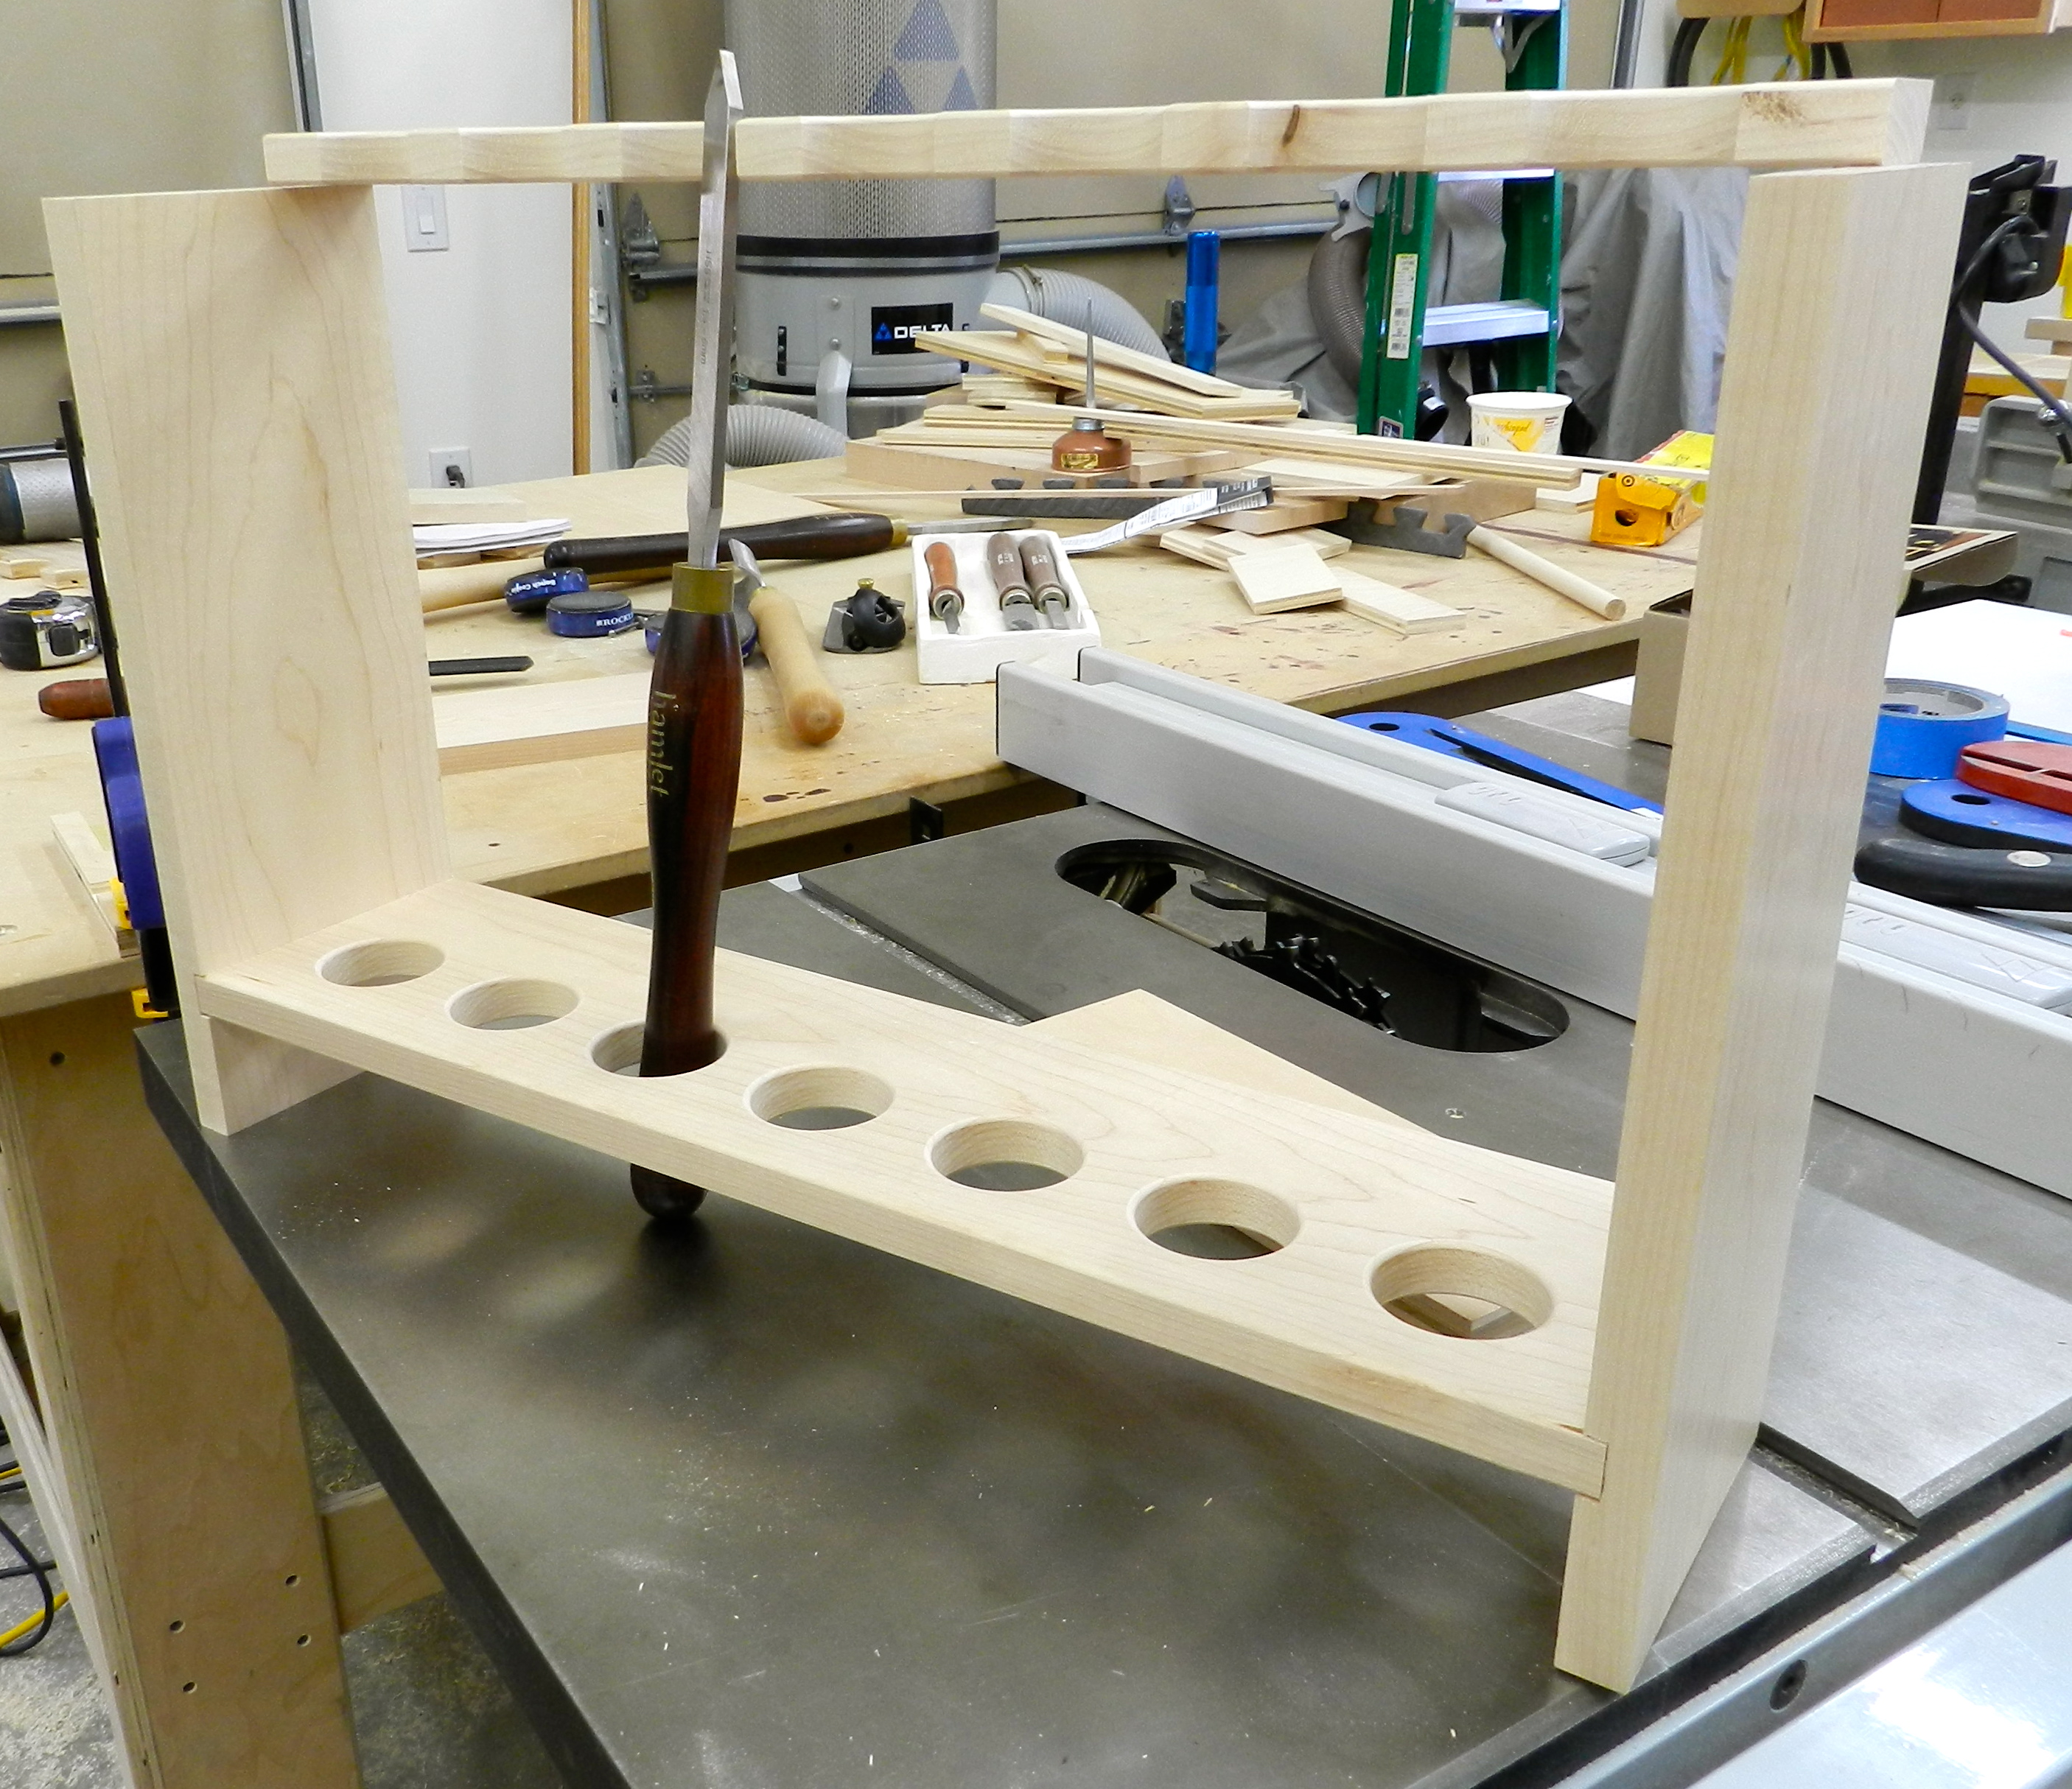
As an avid wood turner I often spend a lot of time at the lathe. When doing production work I am often trying to figure out better ways to be more efficient in my work. A modest time sink is often finding the next tool to use as historically my turning tools usually lived in a Woodcraft tool travel bag which was overflowing on a nearby table or tool, and a small rack for 4 tools that would sit on the end of my lathe’s bed. Over the past few weekends I set out to fix this problem…
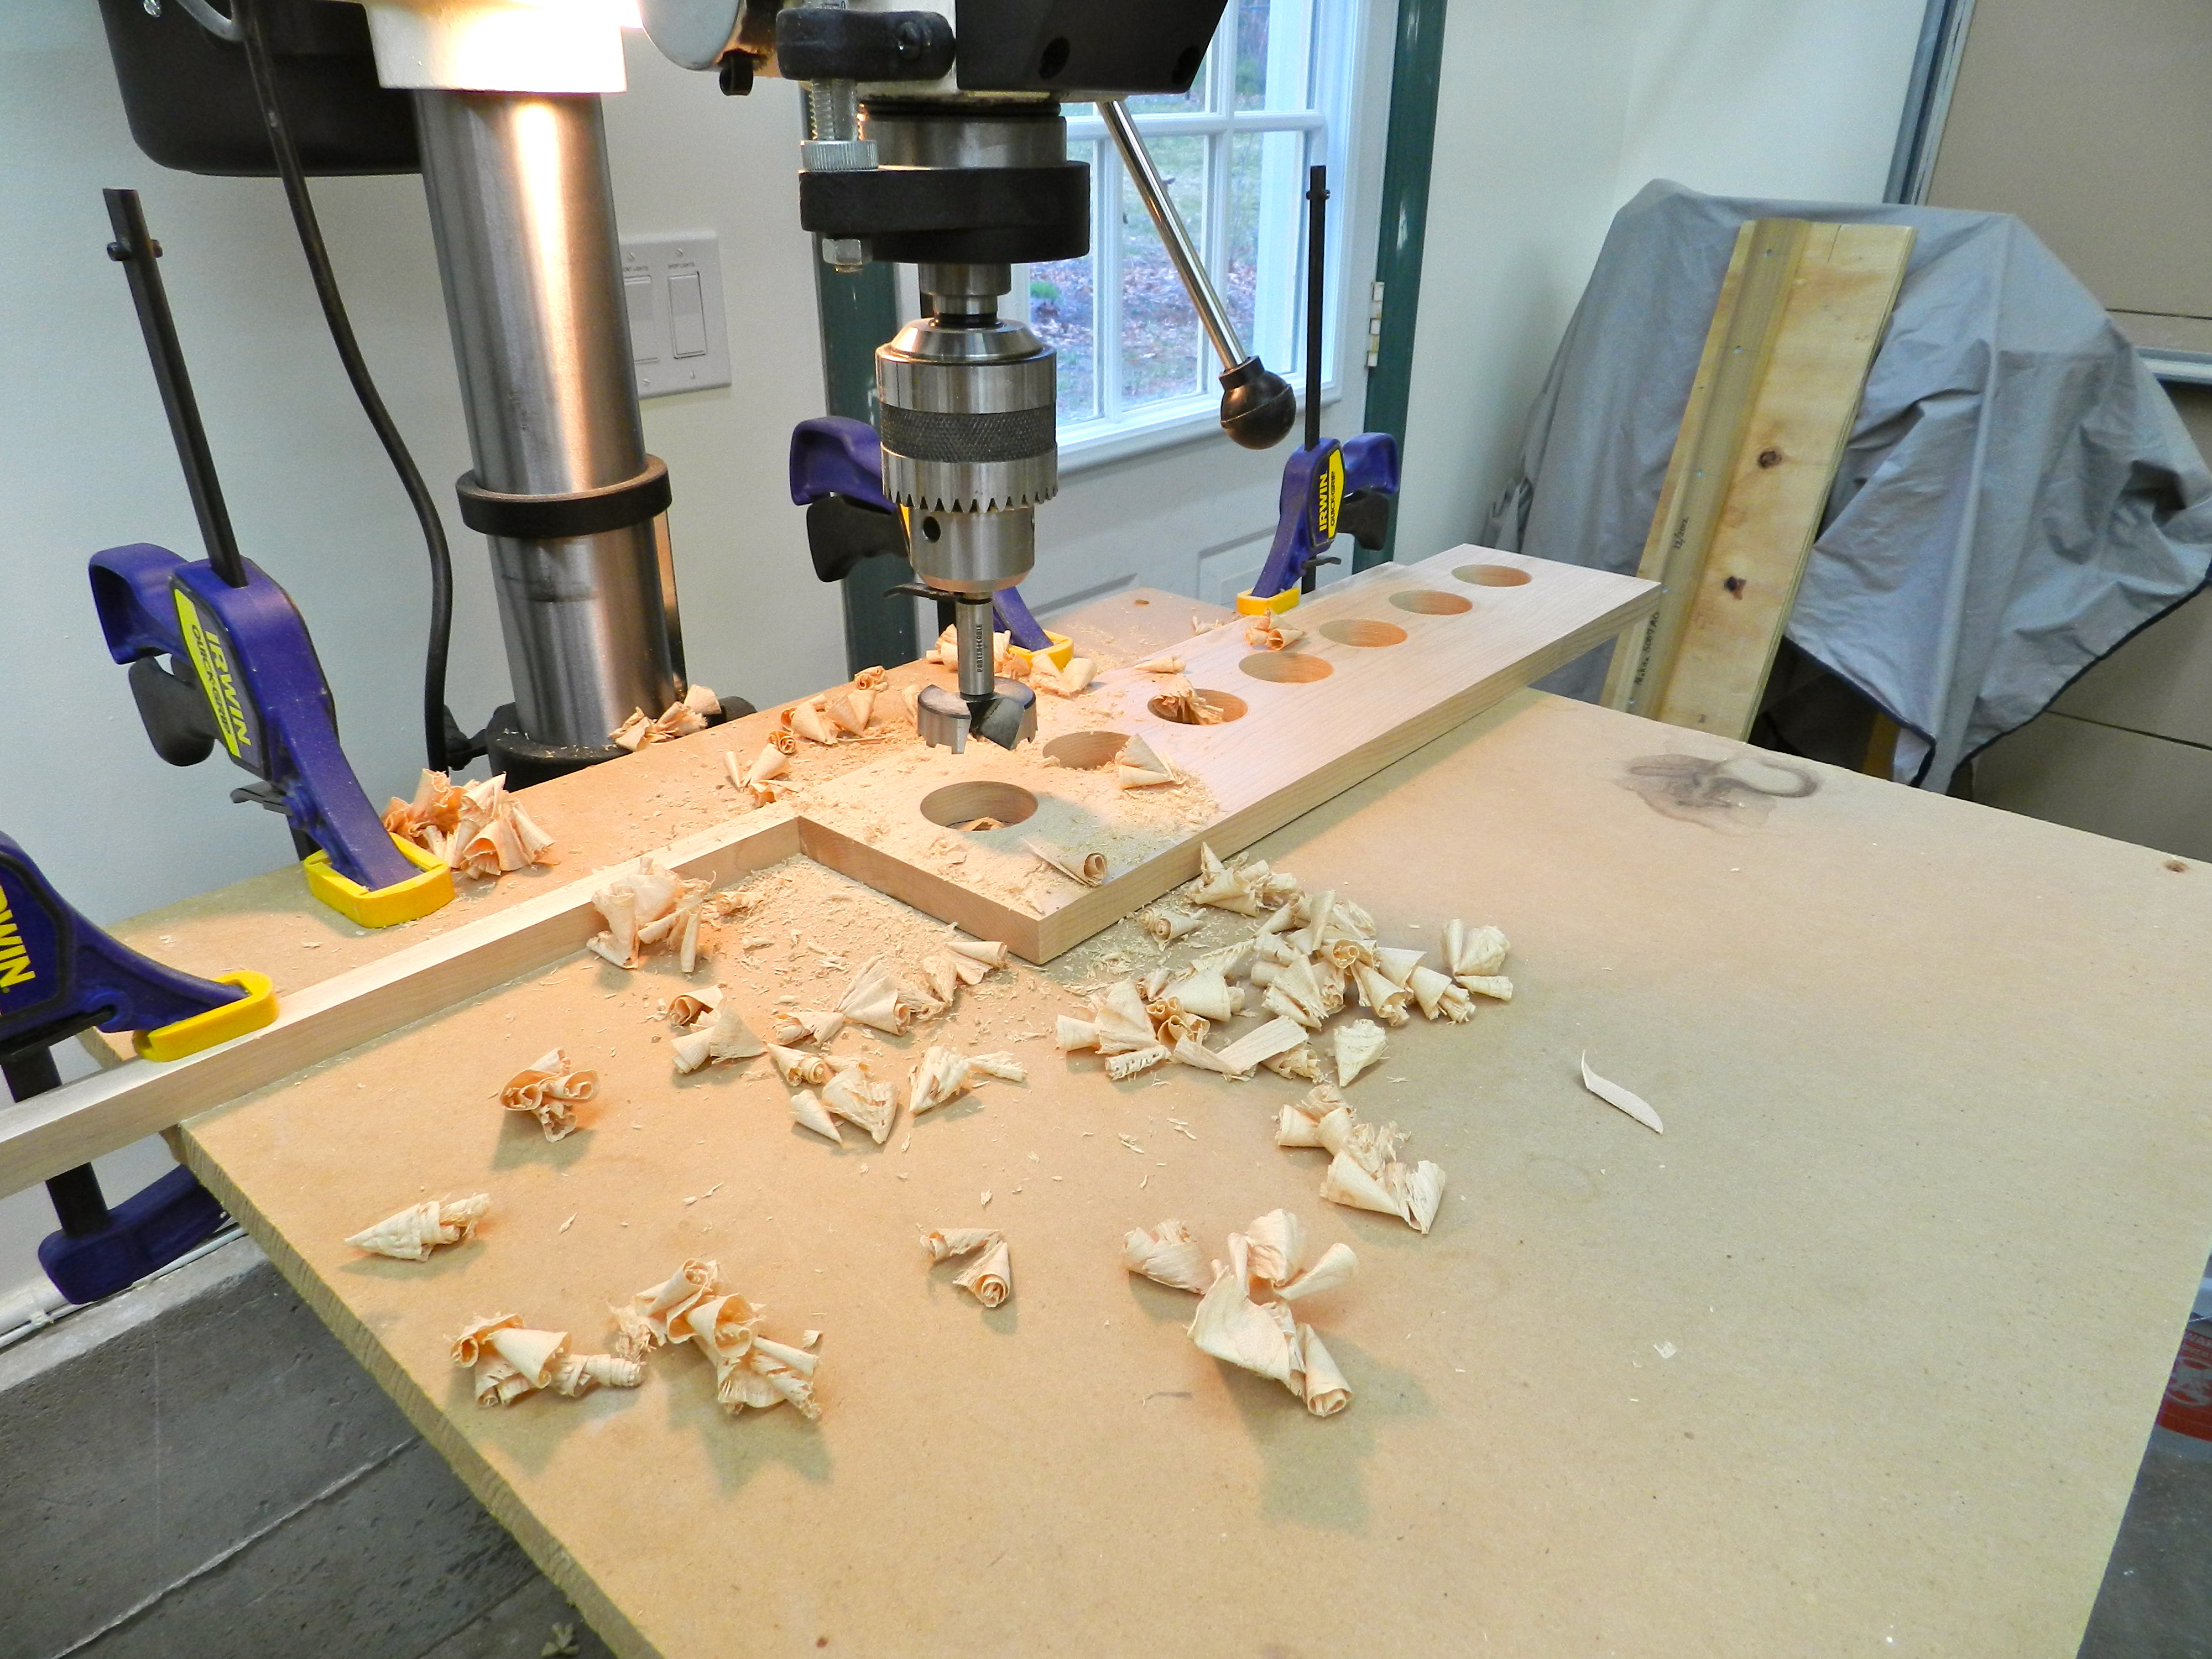
Drilling Holes
The drill press got a workout hogging through a LOT of Maple…
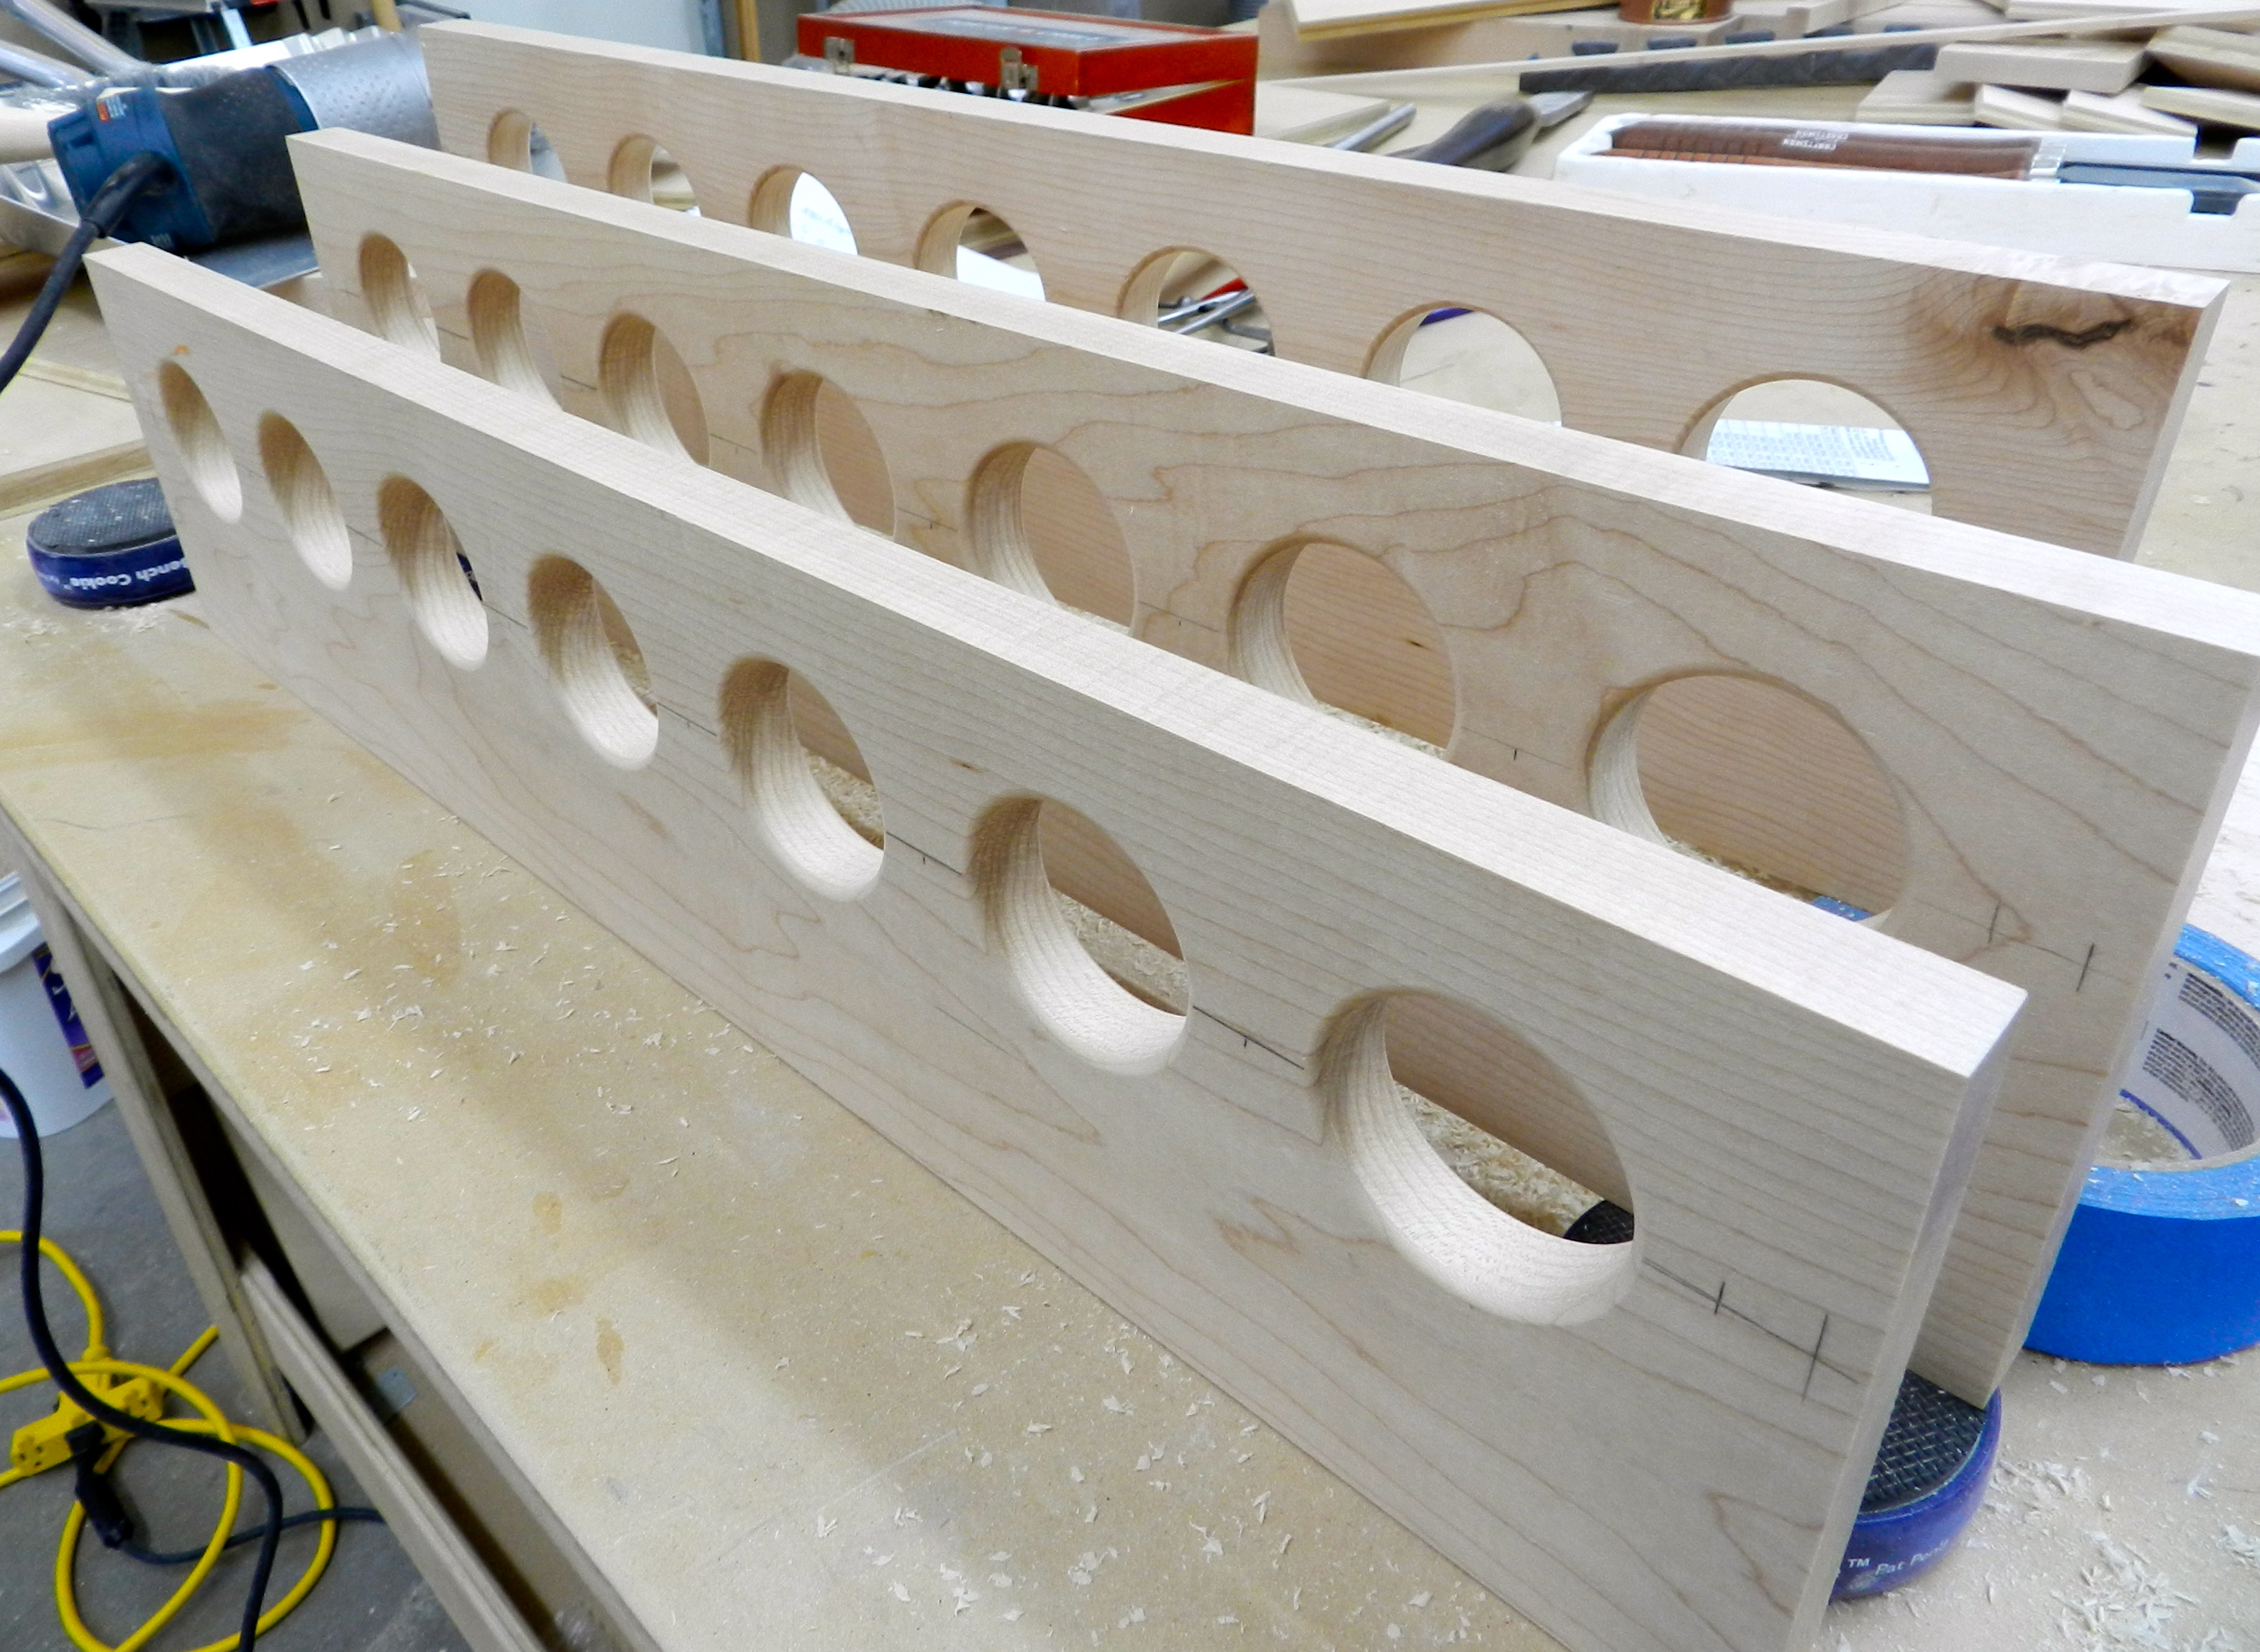
Completed sets of holes
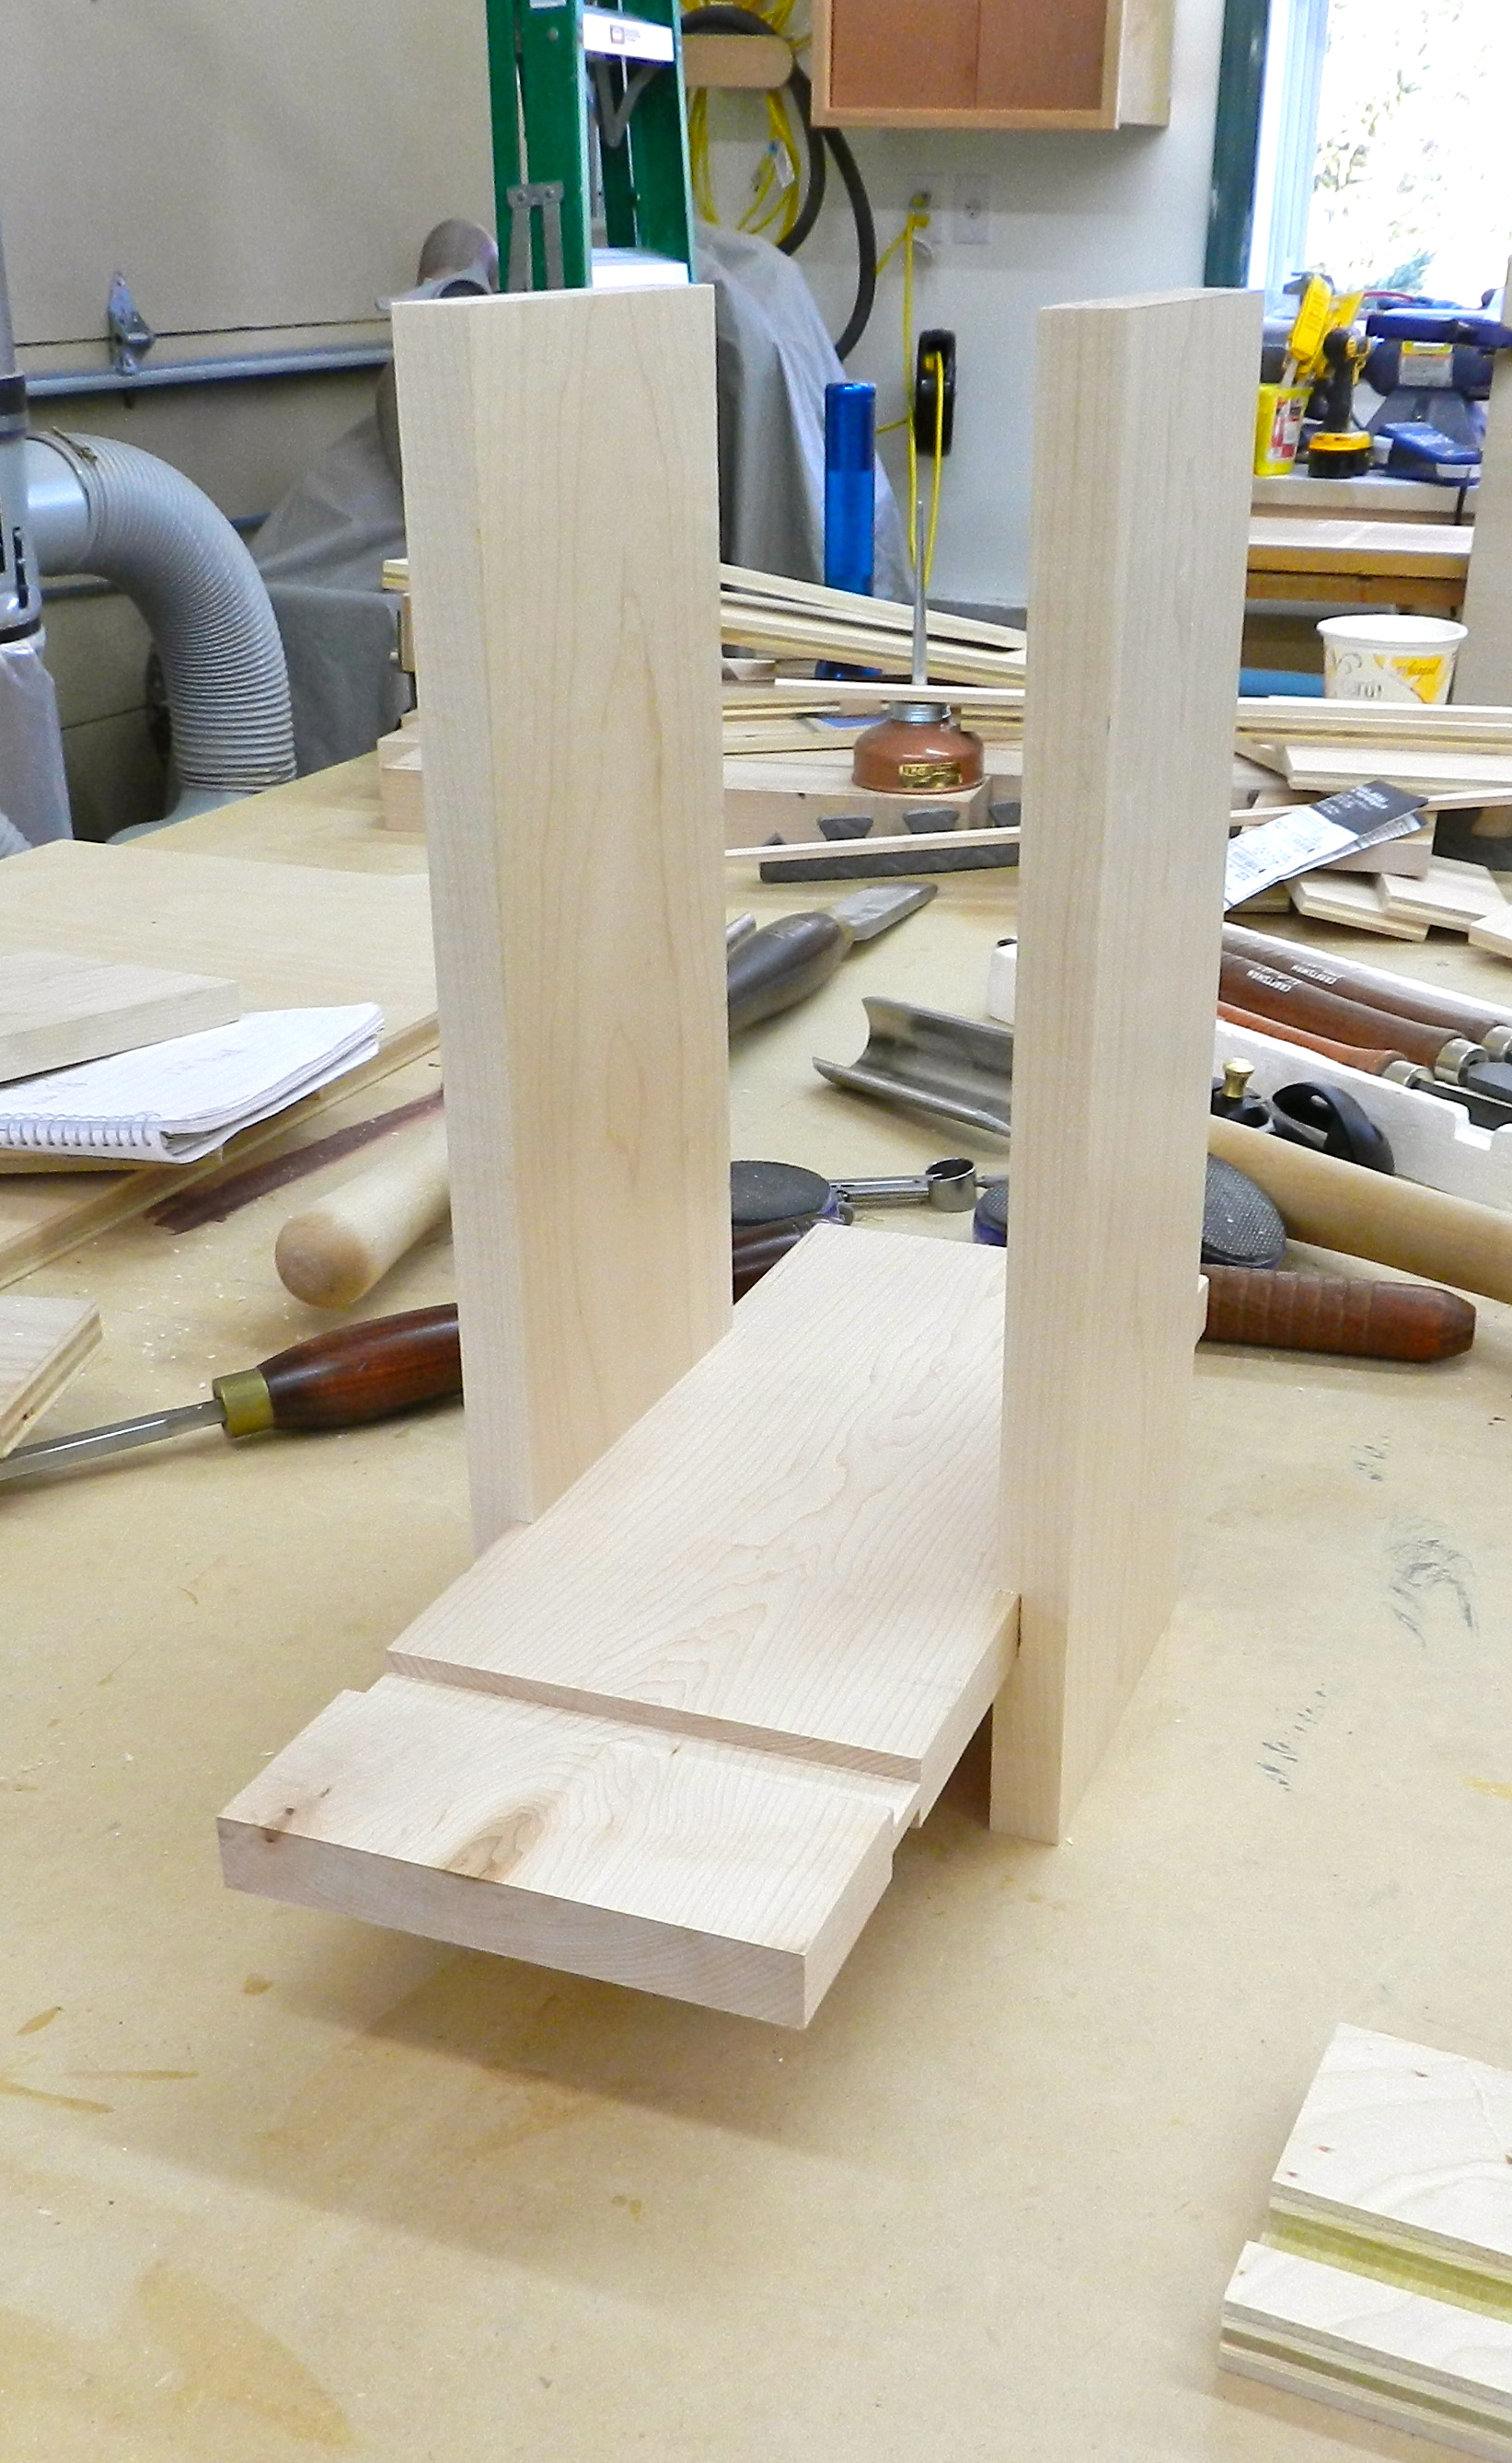
Then came test fitting the joints….
Testing Joints
Then making sure the size, shape and angles I figured actually worked for tools in the real world…
Working out design
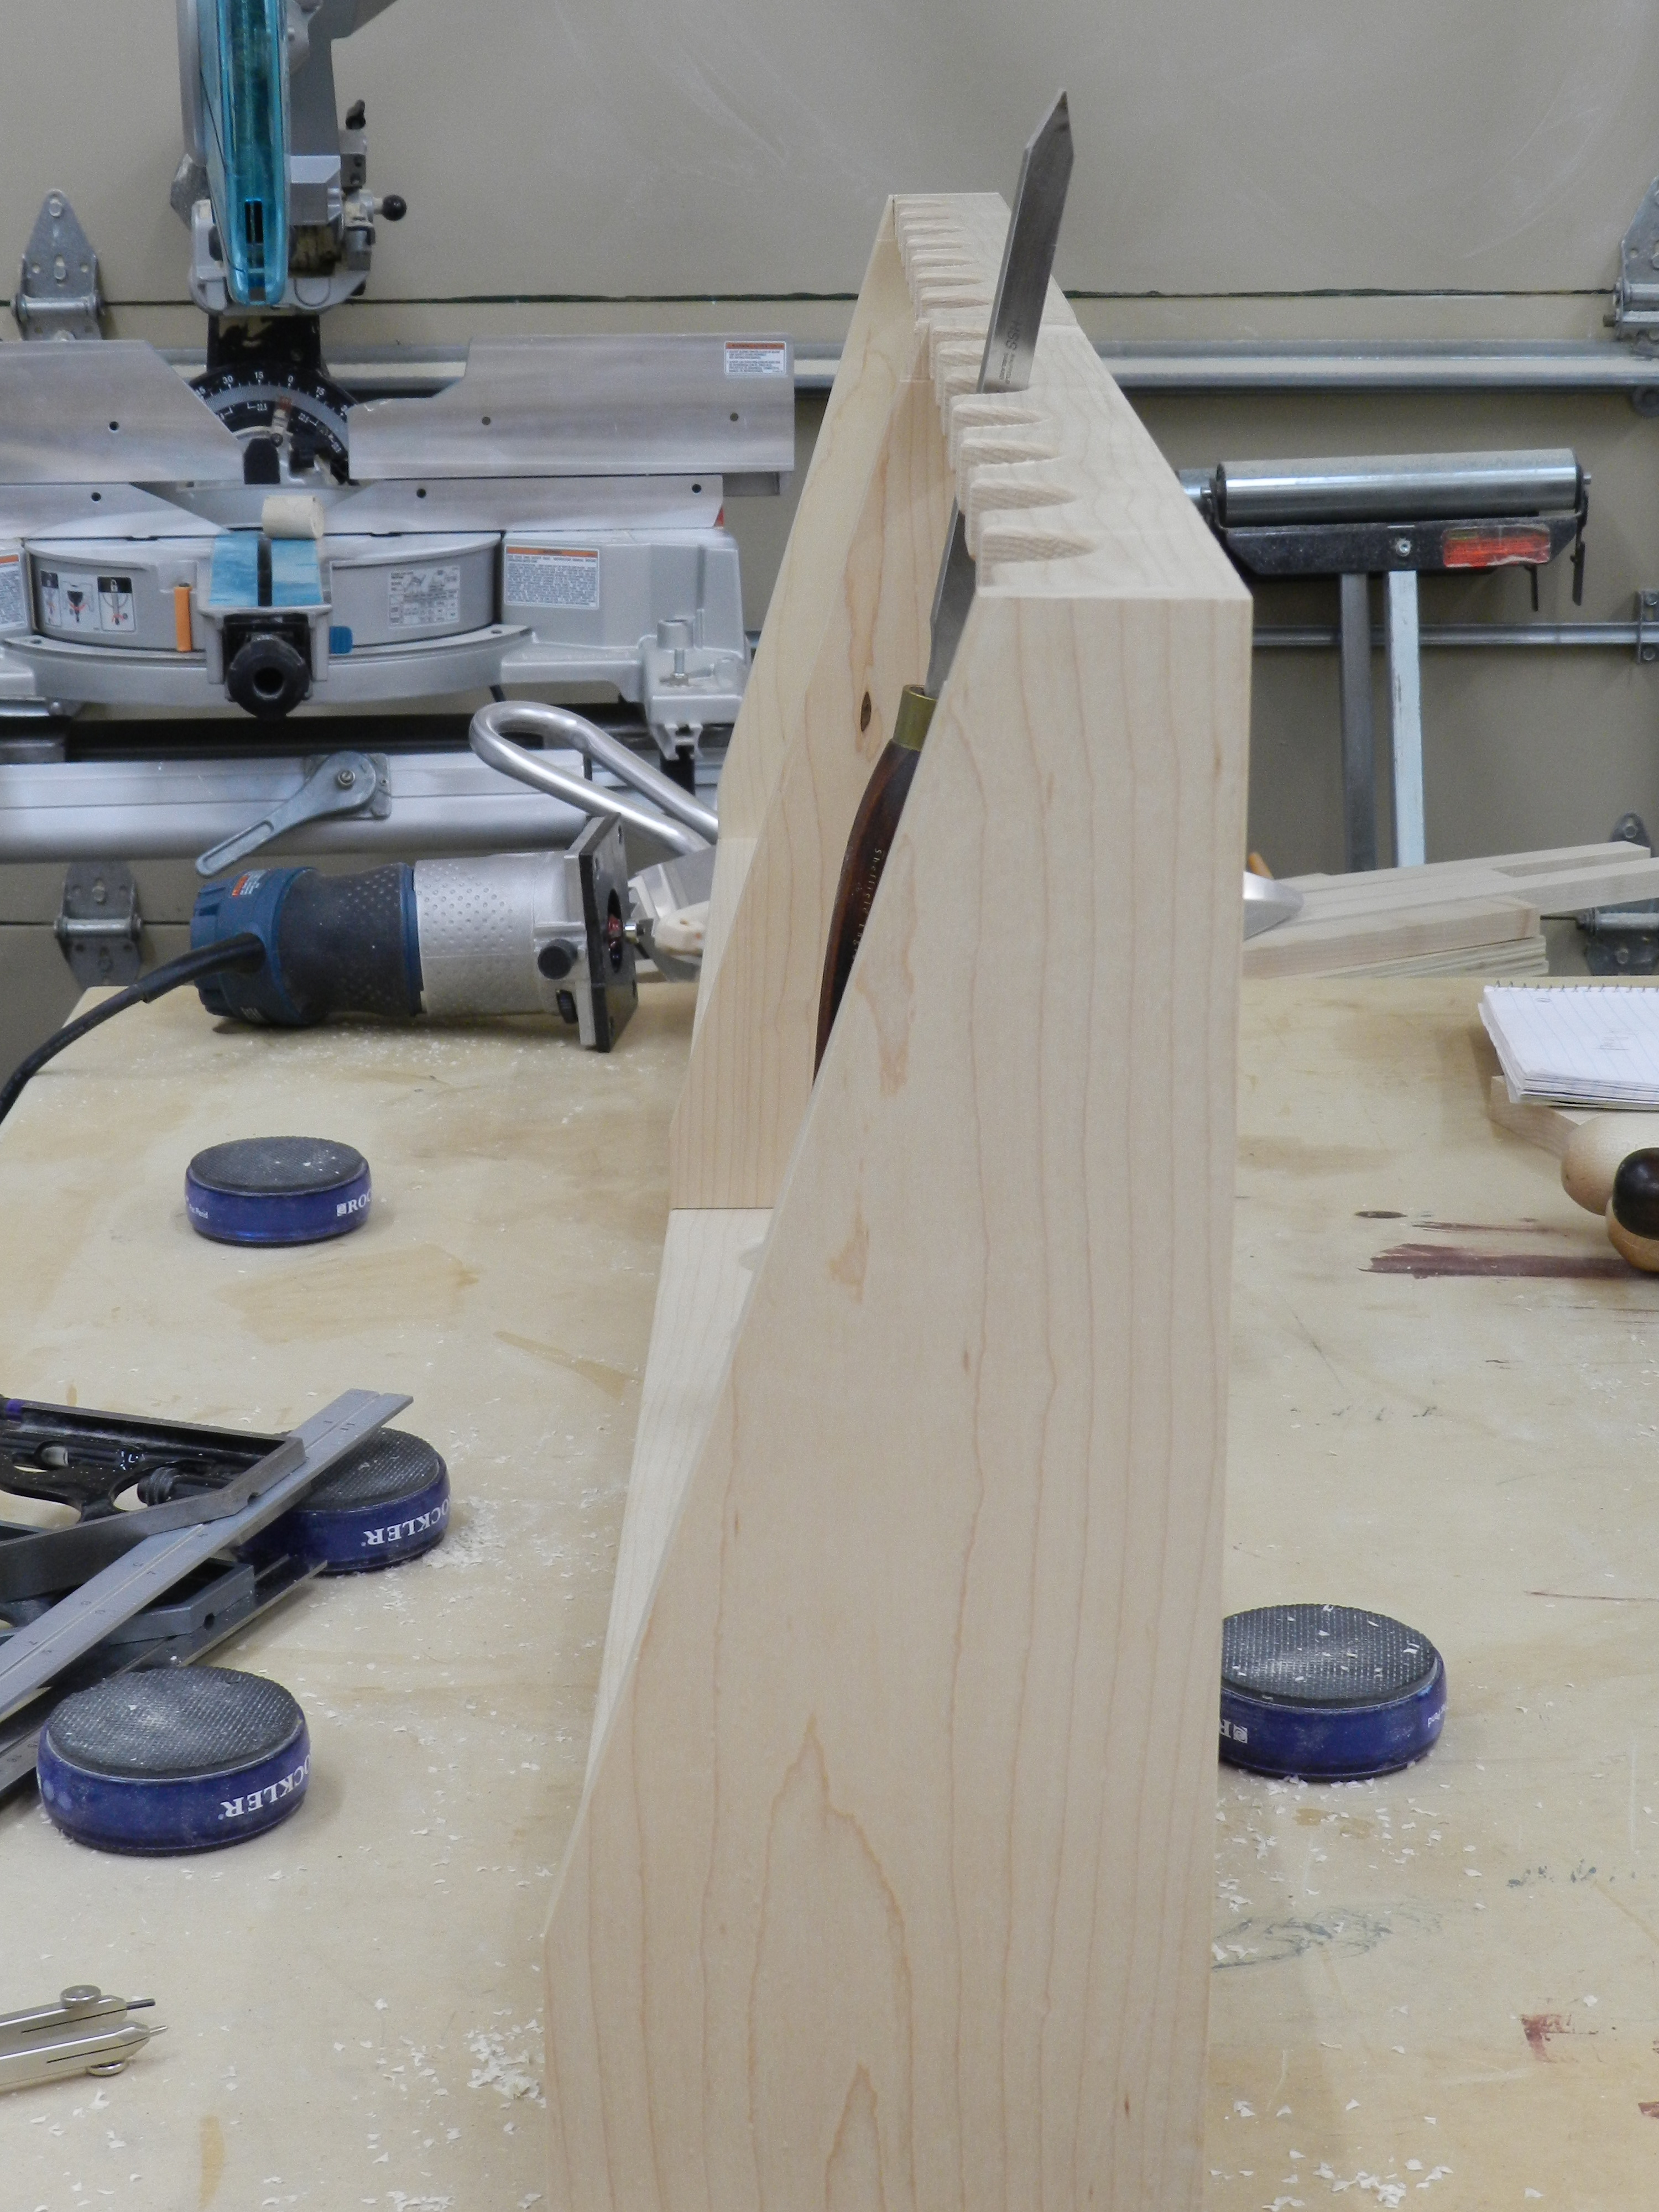
Refined the design a bit by tapering the sides…
Tapering the sides
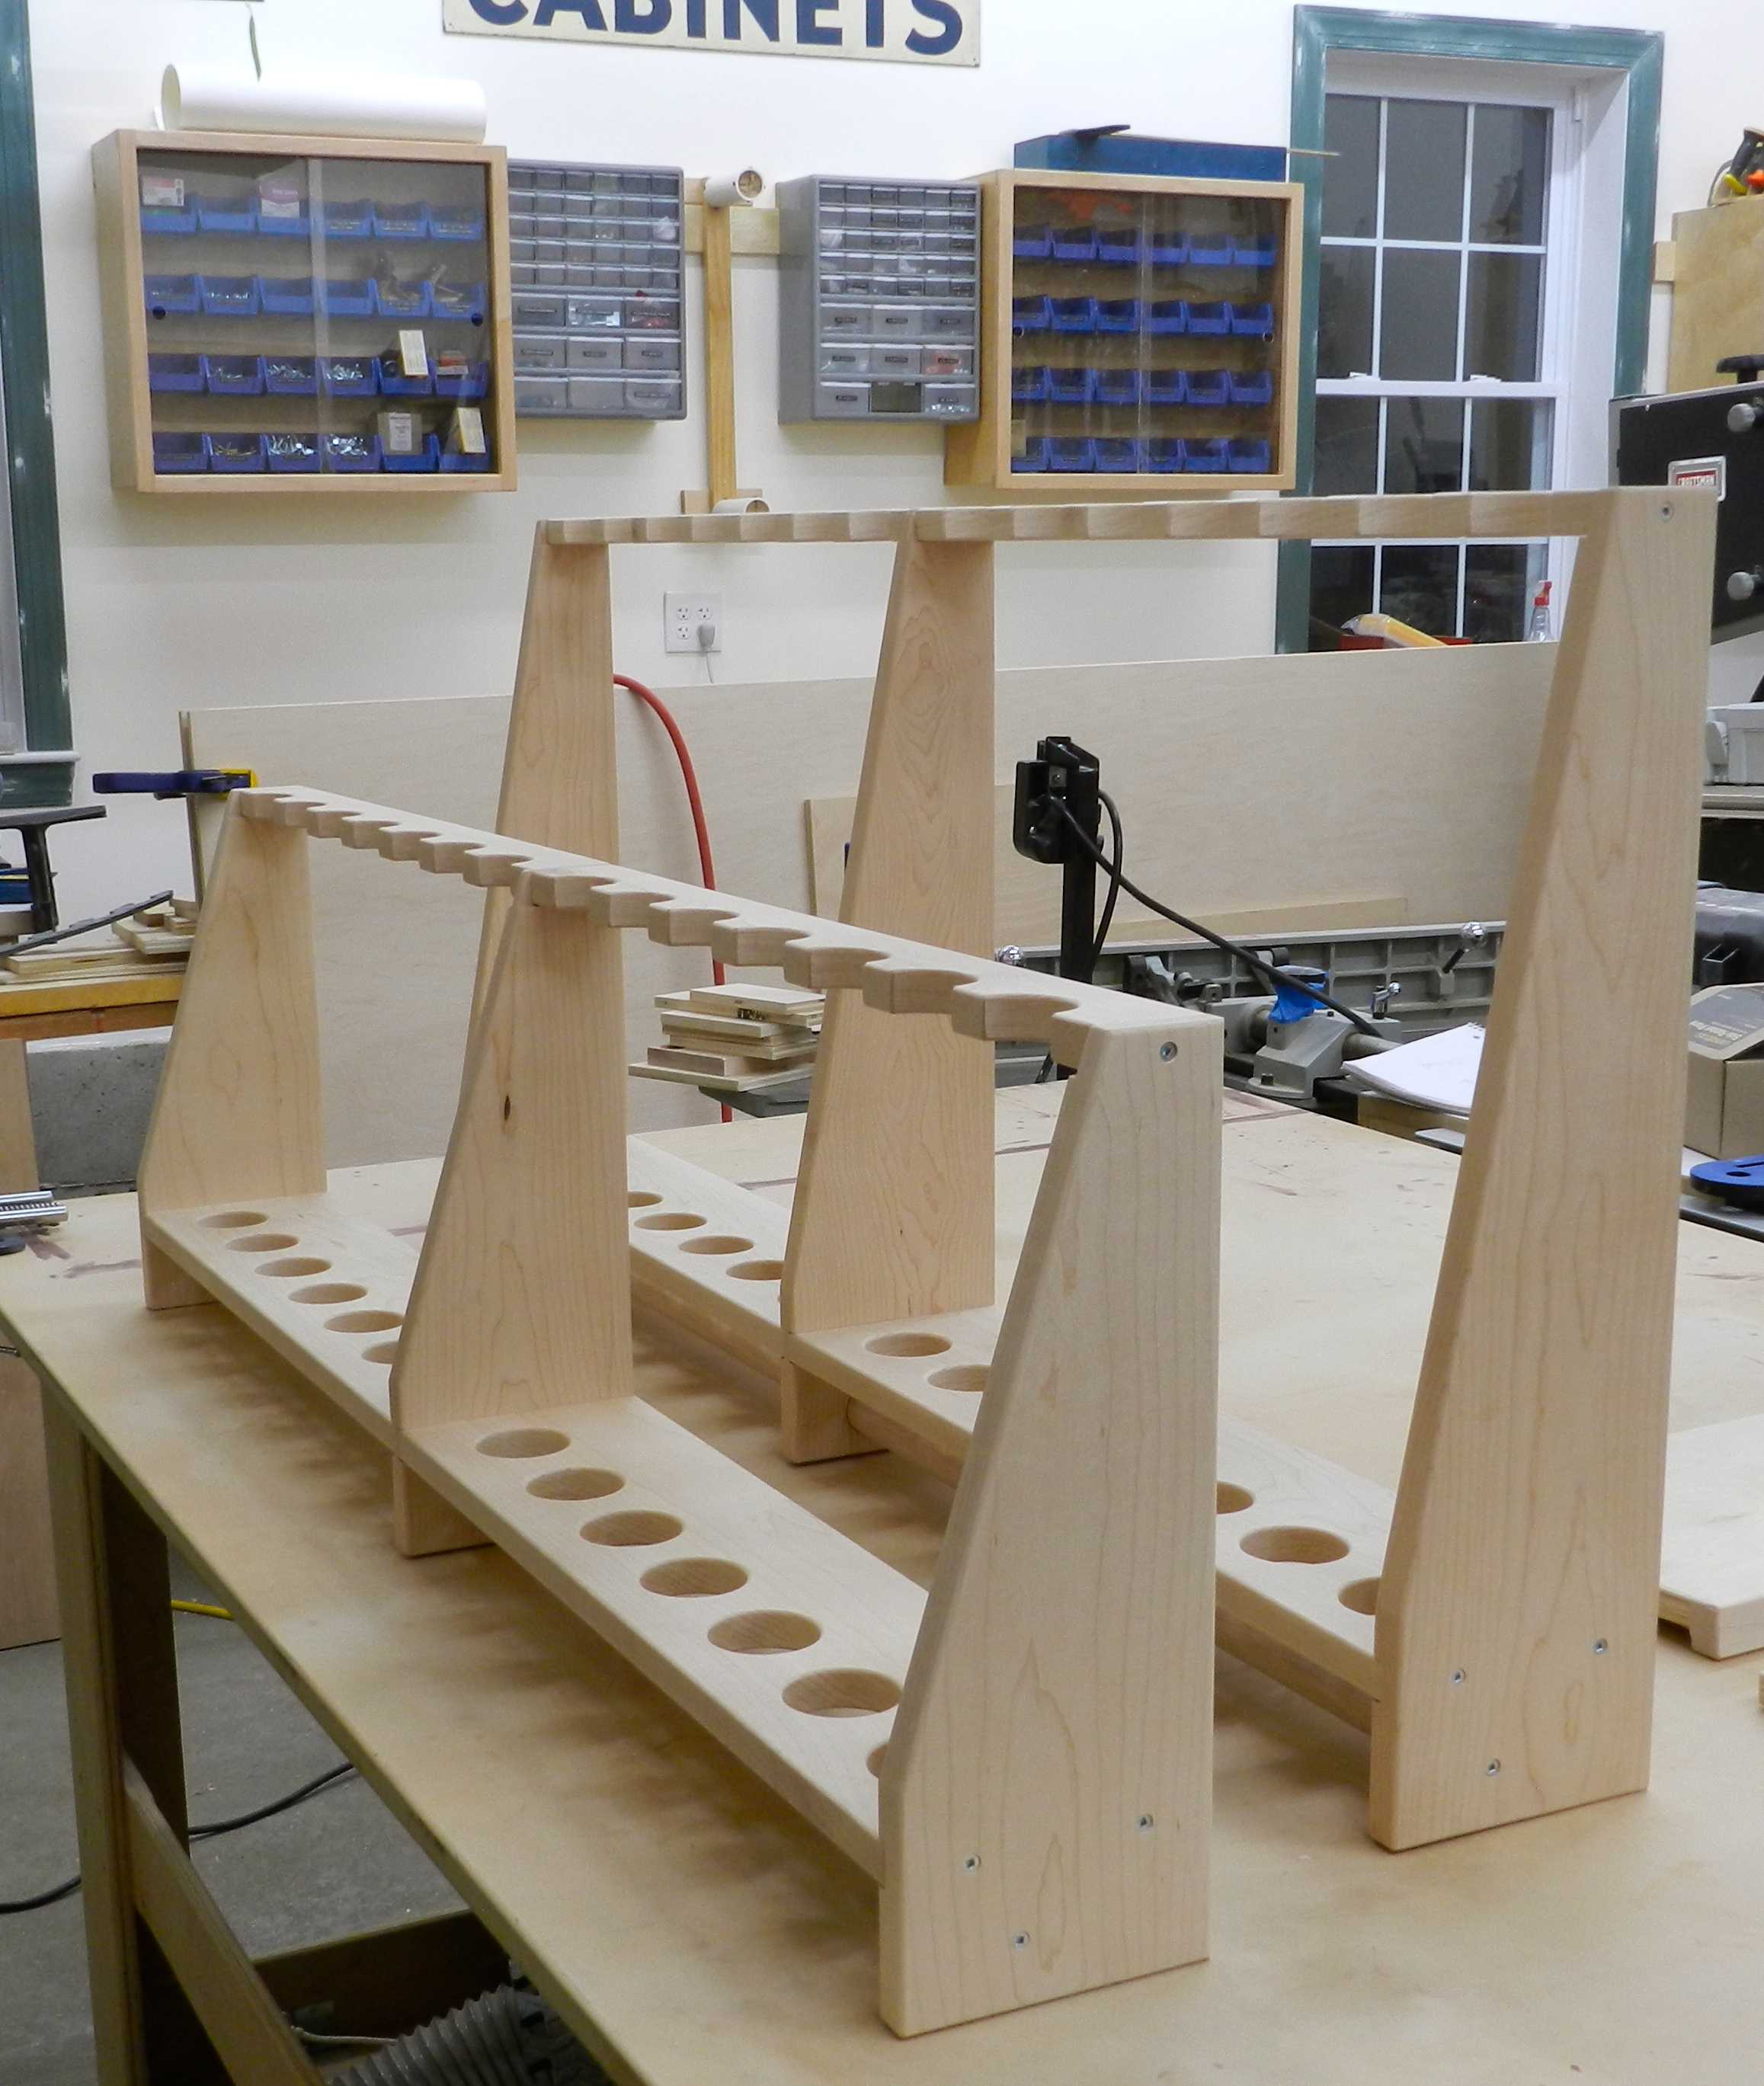
Next up was fitting together each of the double units..
Completed racks awaiting finish
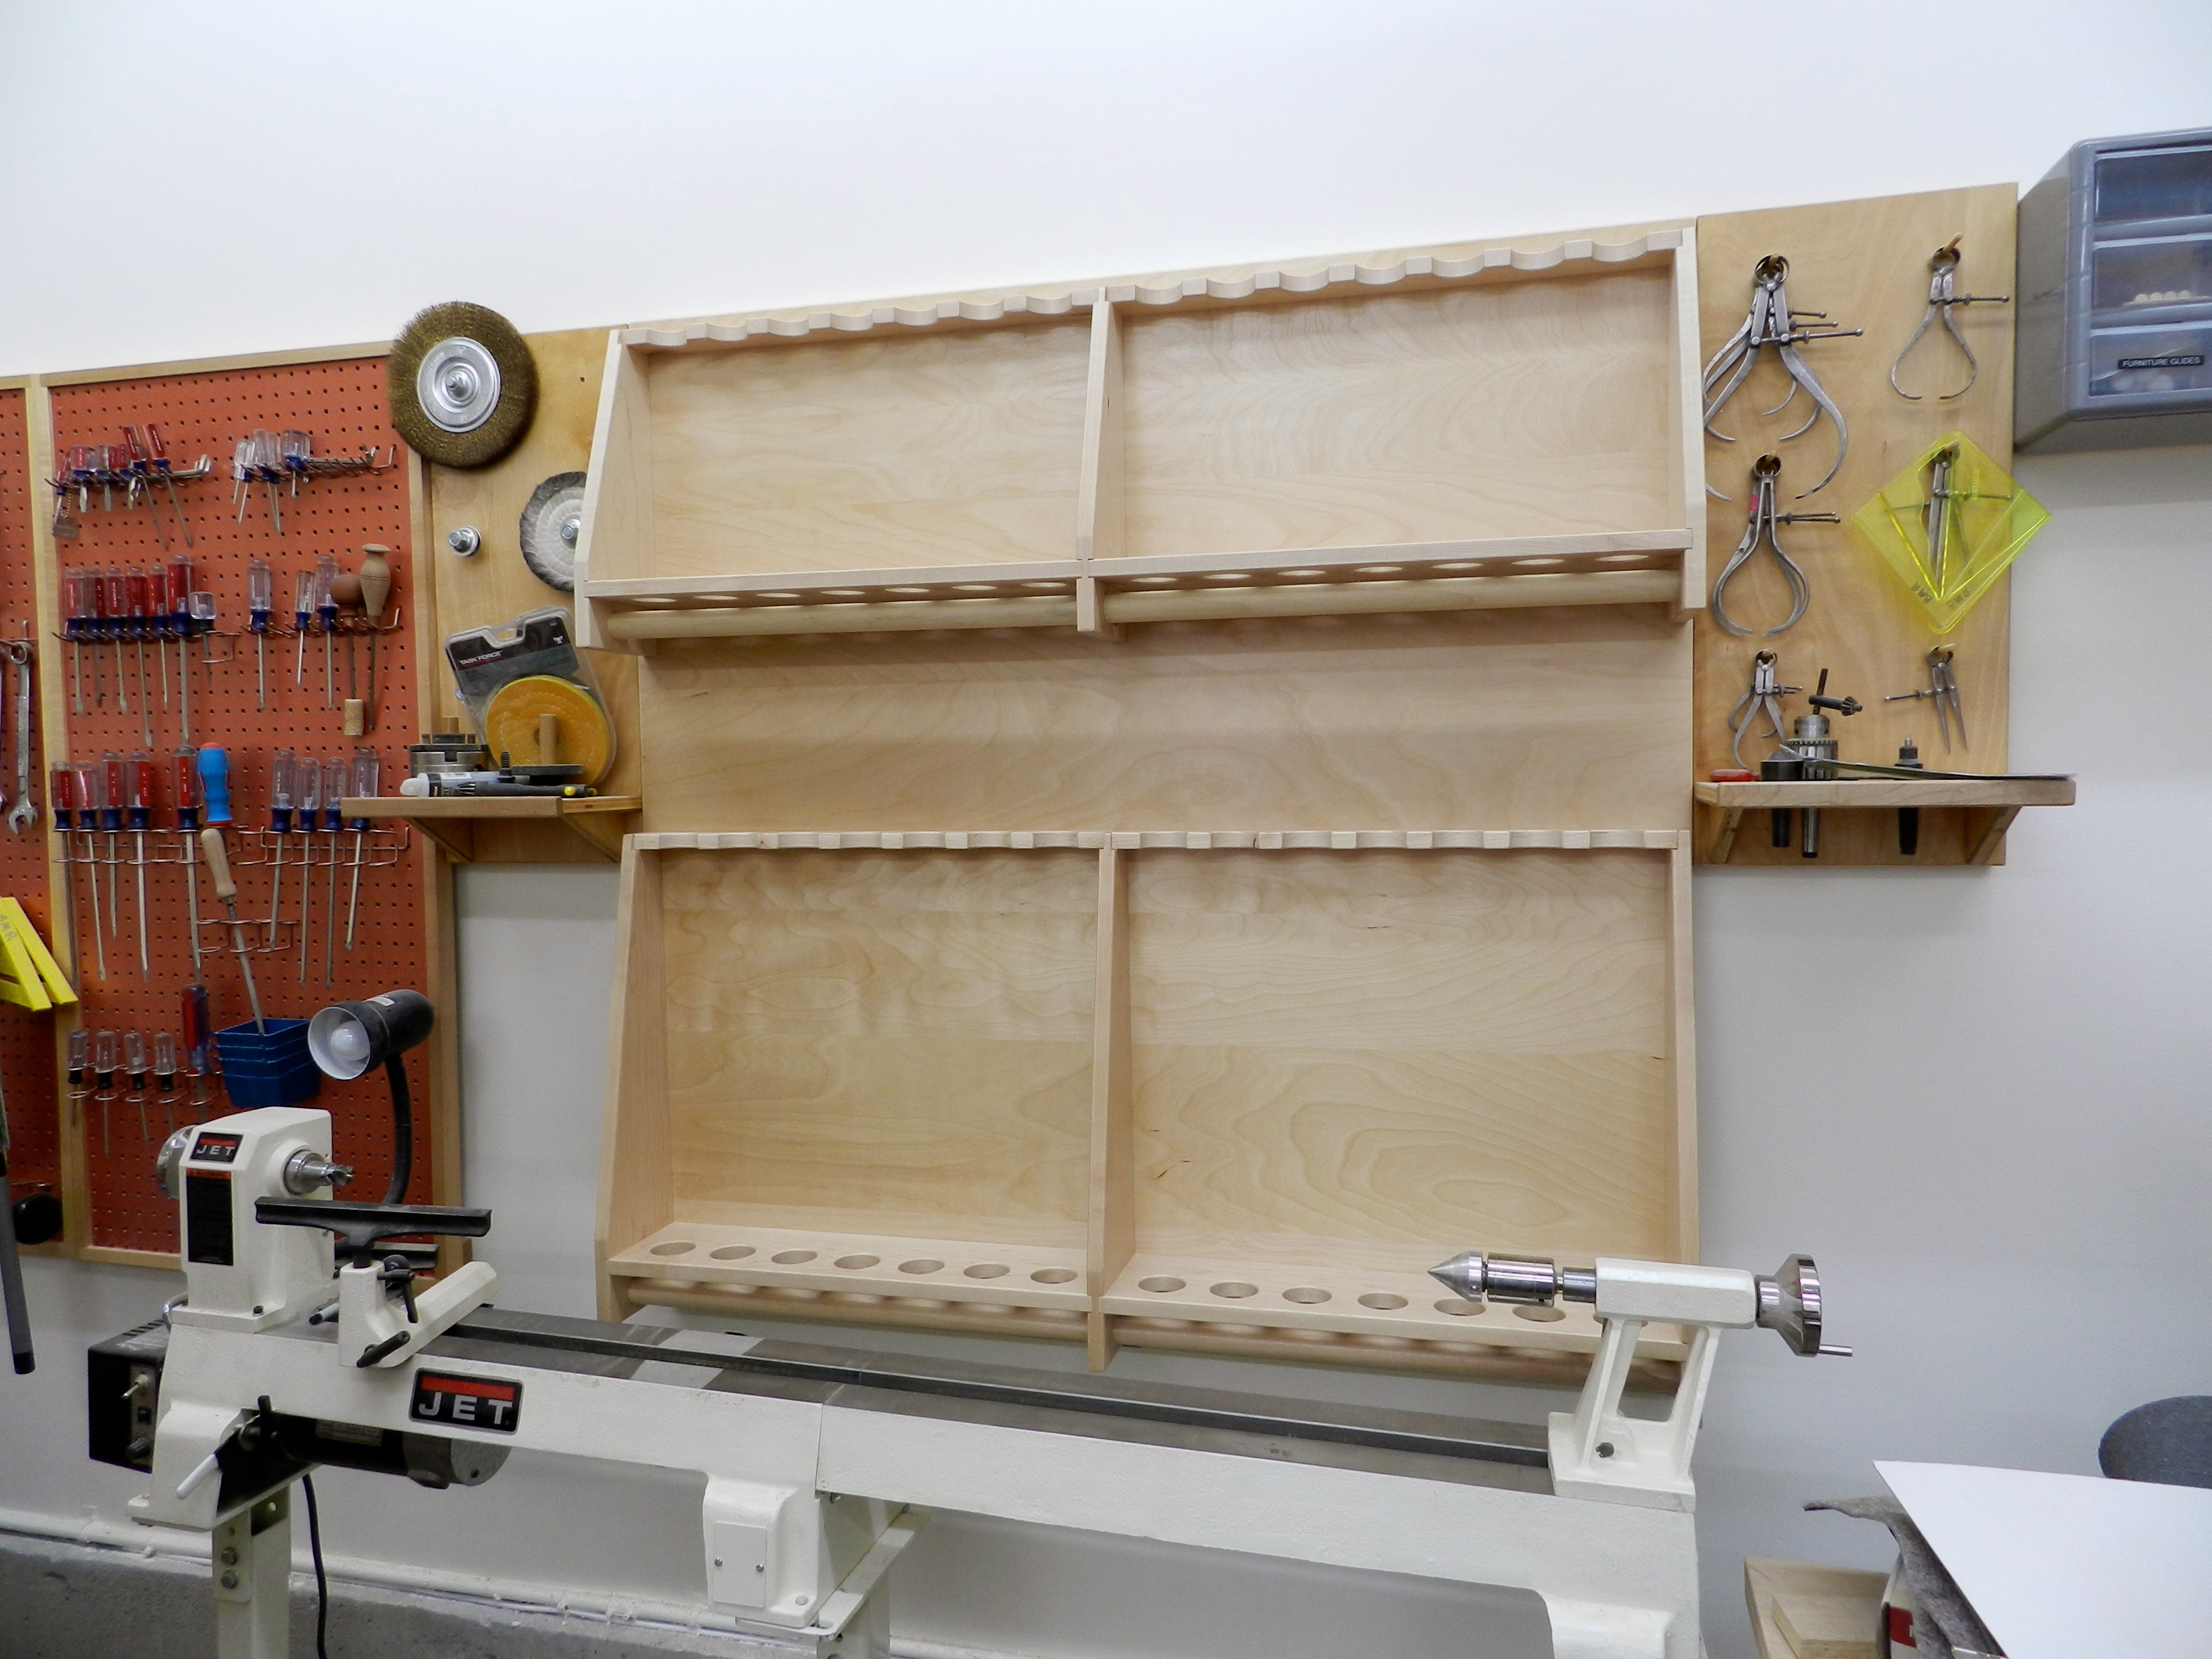
Then finishing them and installing them on to the 4’x4′ plywood backing. The backing, much like everything else in my workshop rides on a french cleat, so I can re-arrange my wall space each time my needs, tooling or shop changes.
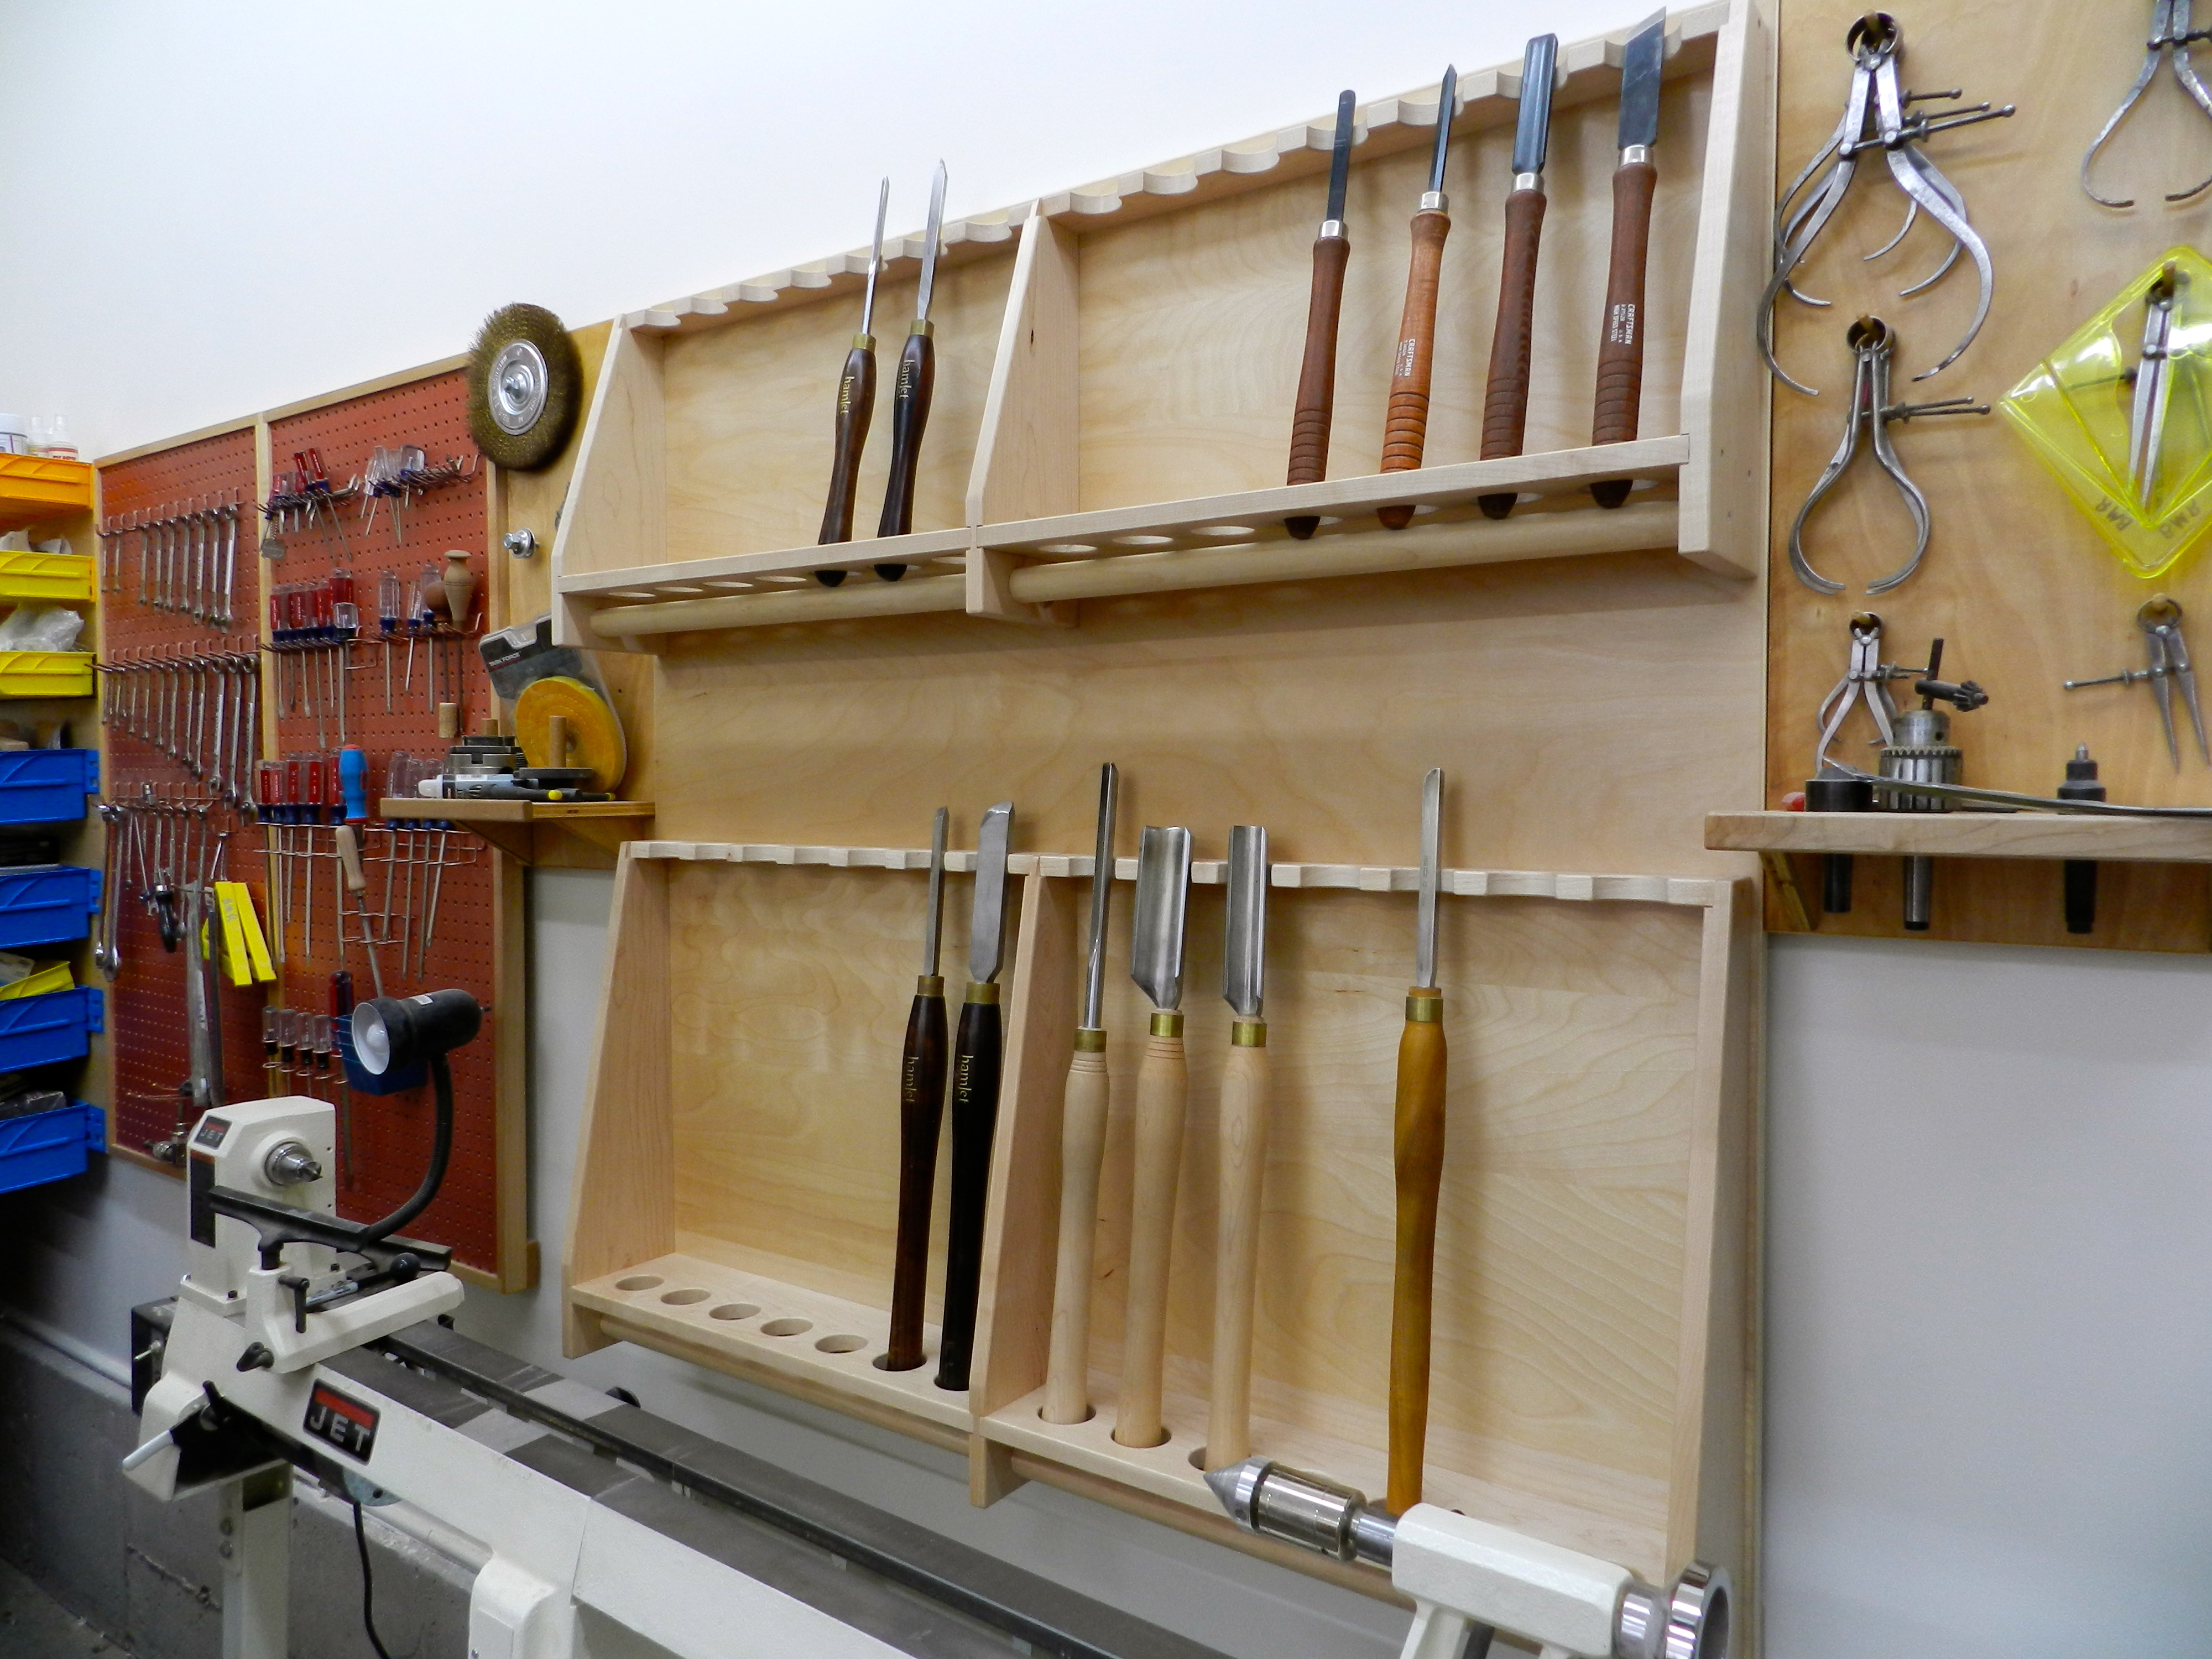
Completed racks installed
Part of the beauty of this design is the over sized holes and the large dowel underneath which allows shavings to easily fall through the rack, rather than fill up as they would if the bottom of the holder was closed in. (This was a design element seen on similar, but smaller turning tool racks we had at NBSS — so thank you to my friend Rich Friberg or one of his predecessors for the inspiration 🙂 ) The completed rack looks naked without any tools, so time to populate it…
Completed racks, with room to grow
The completed rack has worked out great. When I turned the handles for my tools, I made them different shapes and species so I could tell them apart with only a quick glance and this rack allows for very fast identification and selection. There is room for my full sized tools, room for my smaller detail tools, and room to add more. (I’ve been itching to build some of the hollowing tools from Alan Lacer’s video on making your own turning tools). The rack holds 28 tools, 14 on each level, so as your collection of tools grows you can still make use of the shelf space — I filled some of the space with tiny turning blanks and rolls of turner’s tape)
Side view
Time to get back out into the shop and keep turning…
Are you interested in meeting and taking a woodworking class with Roy Underhill of the Woodwright’s Shop and Woodwright’s School? (Along with Peter Ross the former master of the Colonial Williamsburg Anderson Forge and Bill Anderson a master plane maker – both of which have been on Roy’s show)
I talked to Roy and the guys and they were willing to do a special run of the two workshops below on the following dates*: Arrive July 8th class 9-12th leave the 13th at Roy’s School in Pittsboro NC
* (Given the very long drive from NH down to NC I wanted to try and get a few days in a row down at Roy’s school to get the most I could out of the trip, and I am very appreciative they were willing to do so, but we need a few more people to sign up in order to run it) So if you are interested in one or both of these sessions I encourage you to sign up soon.
3 Day class $425 + $115 materials (beech + plane iron etc) to make a massive single iron jointer plane
Jointer Plane Workshop
Total: $725 Tuition and materials for 4 days + your own food and lodging. I will be driving down (11hour drive from NH) and if folks from NBSS or the general Boston area are interested in joining me I can carpool. Hotels in the area are $55-100/night. Info from Roy on what it’s like to take a class at his school can be found here.
I also hear there is a good pizzeria behind the school that Roy has been known occasionally have a drink with the students after class and above the school is an old time used tool shop that has similar stuff to what we hunt for at the Nashua Tool show.
If folks are interested, we could also take an extra day to go see nearby Old Salem, which is home to the Museum of Southern Decorative Arts and a Moravian living history museum much like Colonial Williamsburg. http://www.oldsalem.org/ It’s kind of a crazy adventure, but I think it would be a memorable experience.
For more info, please contact me or sign up at Roy’s site:
You can reach Bill Rainford at: (My firstname ‘dot’ lastname at facebook.com) — or via my blog or my linkedin page
The Live Free or Die Tool Auction (and the sale out in the lot out back), also known as the ‘Nashua Tool Show’ is one of the few times a year I am happy to get up at 5am. I rarely if ever go into the actual auction; I spend all my time and money out in the parking lot tracking down odd and old tools on my list and all the things I didn’t know I needed until I found them and realized how I could not live without them. 😉 It’s a great event twice a year and well worth the trip if you are into old hand tools.
Below is a highlight reel from this weekend’s show and sale:
Workbench
A stout, but short workbench.
Interesting tray
An interesting tool tote/tray that holds the tools off the ground for easier access.
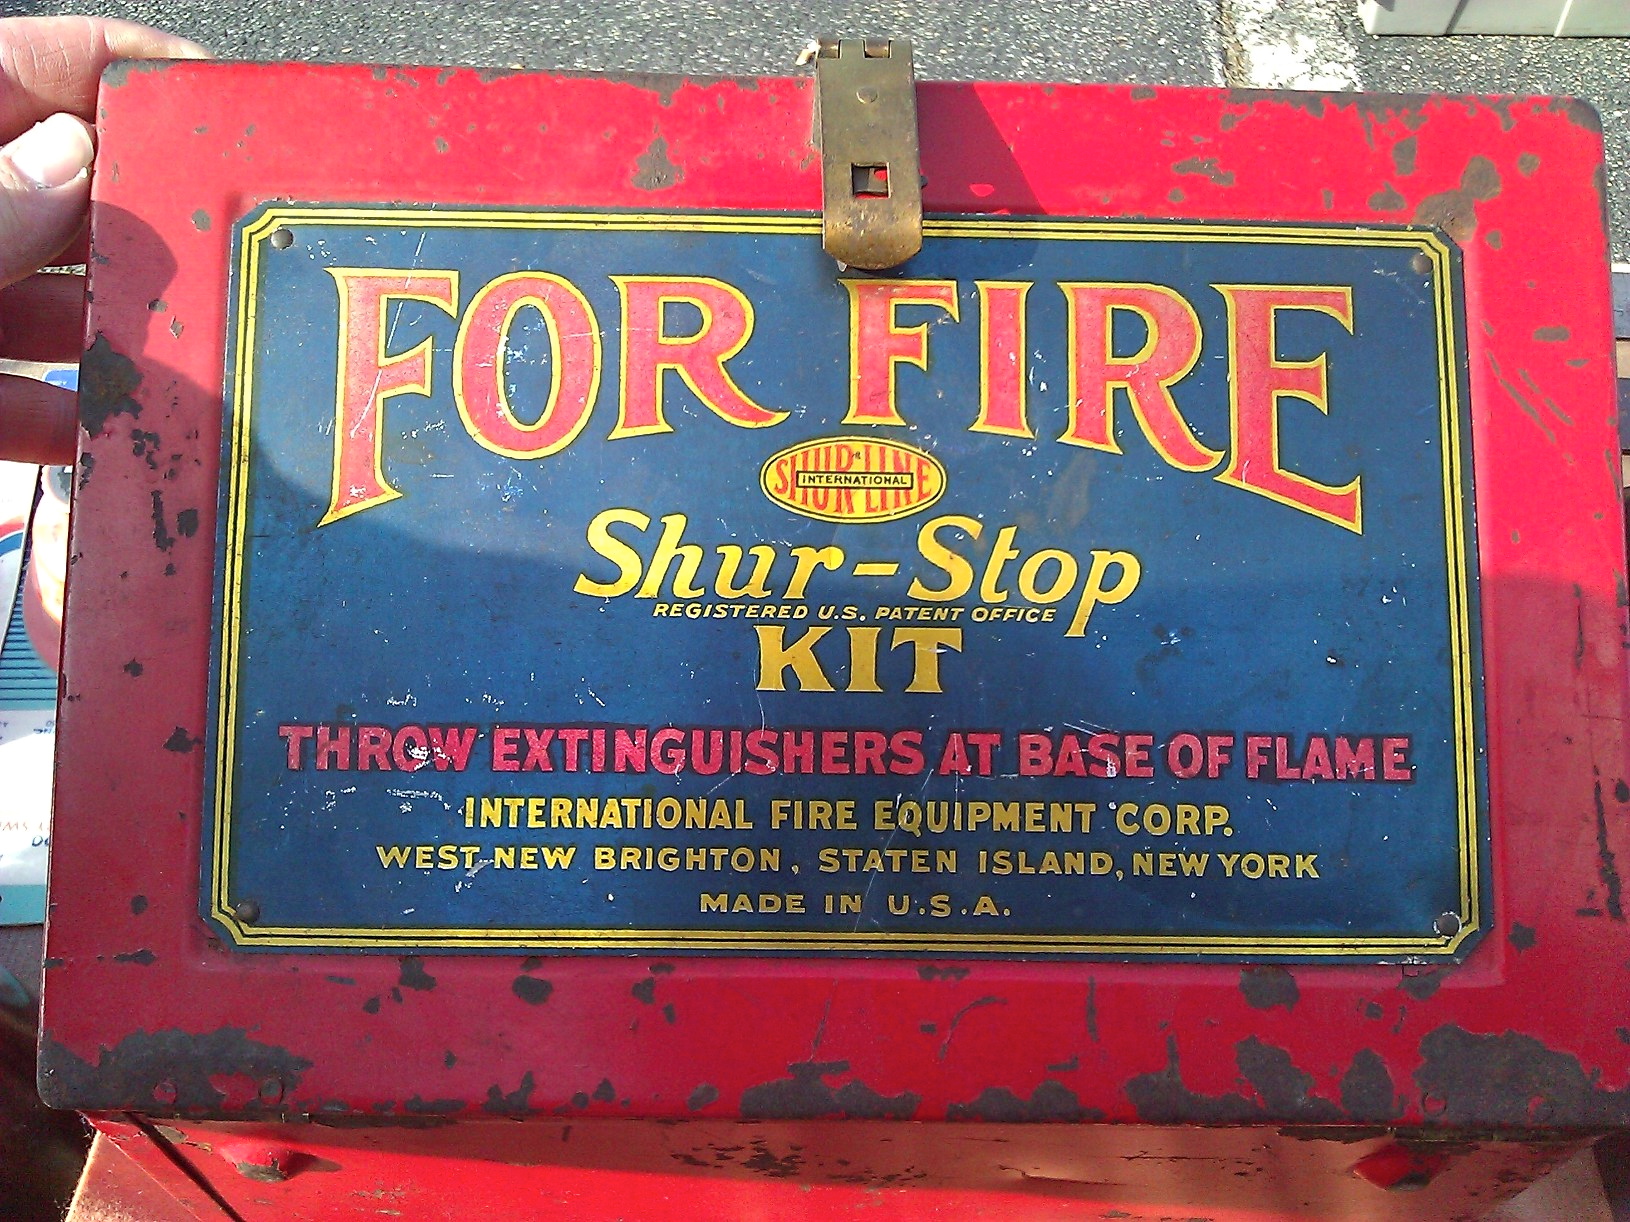
Shur Stop Glass Ball Fire Extinguishers
Neat antique fire extinguisher grenades by ‘Shur Stop’. I never saw a full technician’s case of them before along with several of the holders for them. If they were exposed to enough heat the hammer would spring like a mouse trap, smash the glass causing a violent chemical reaction that would remove oxygen from the area and hopefully put out the fire. We’ll often see these over old boilers or up in the attics of old homes.
Full Case of Shur Stop Glass Ball Fire Extinguishers
Apparently you could also throw them at the base of a flame — giving them the nickname: ‘Fire Extinguisher Grenade’
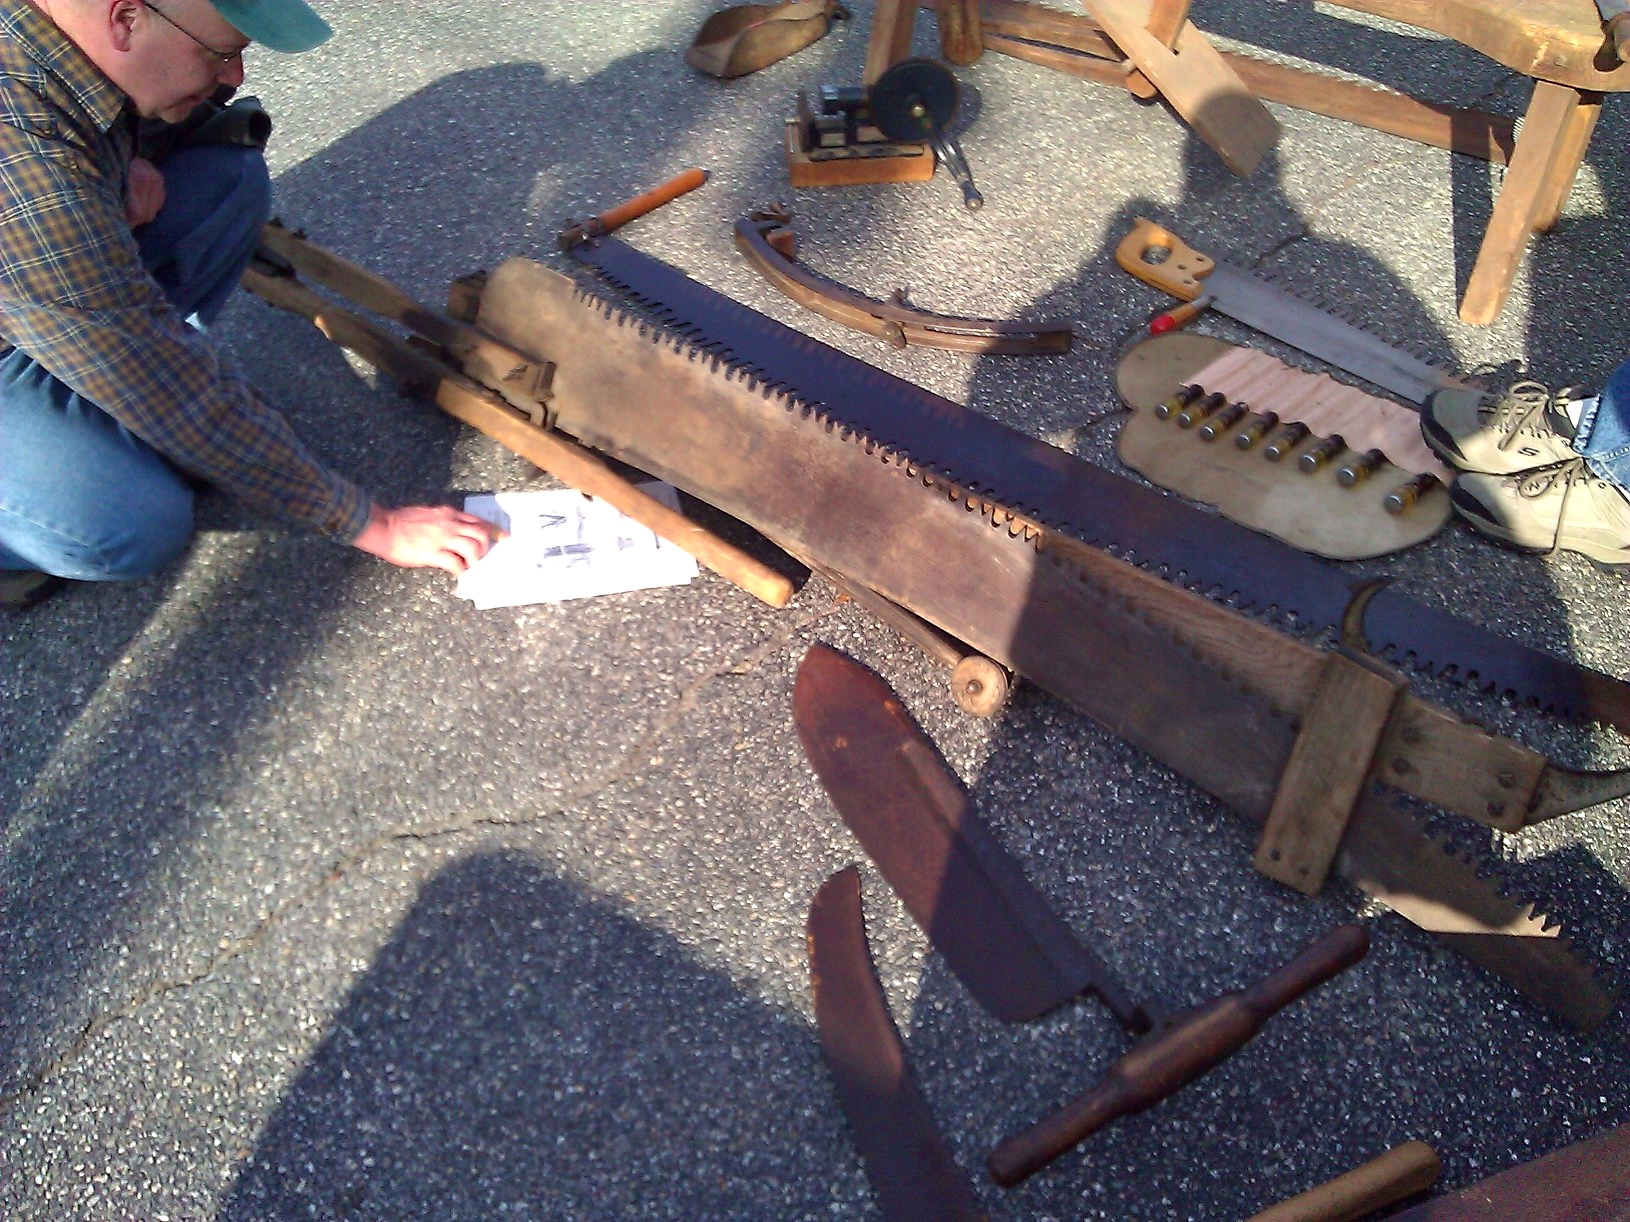
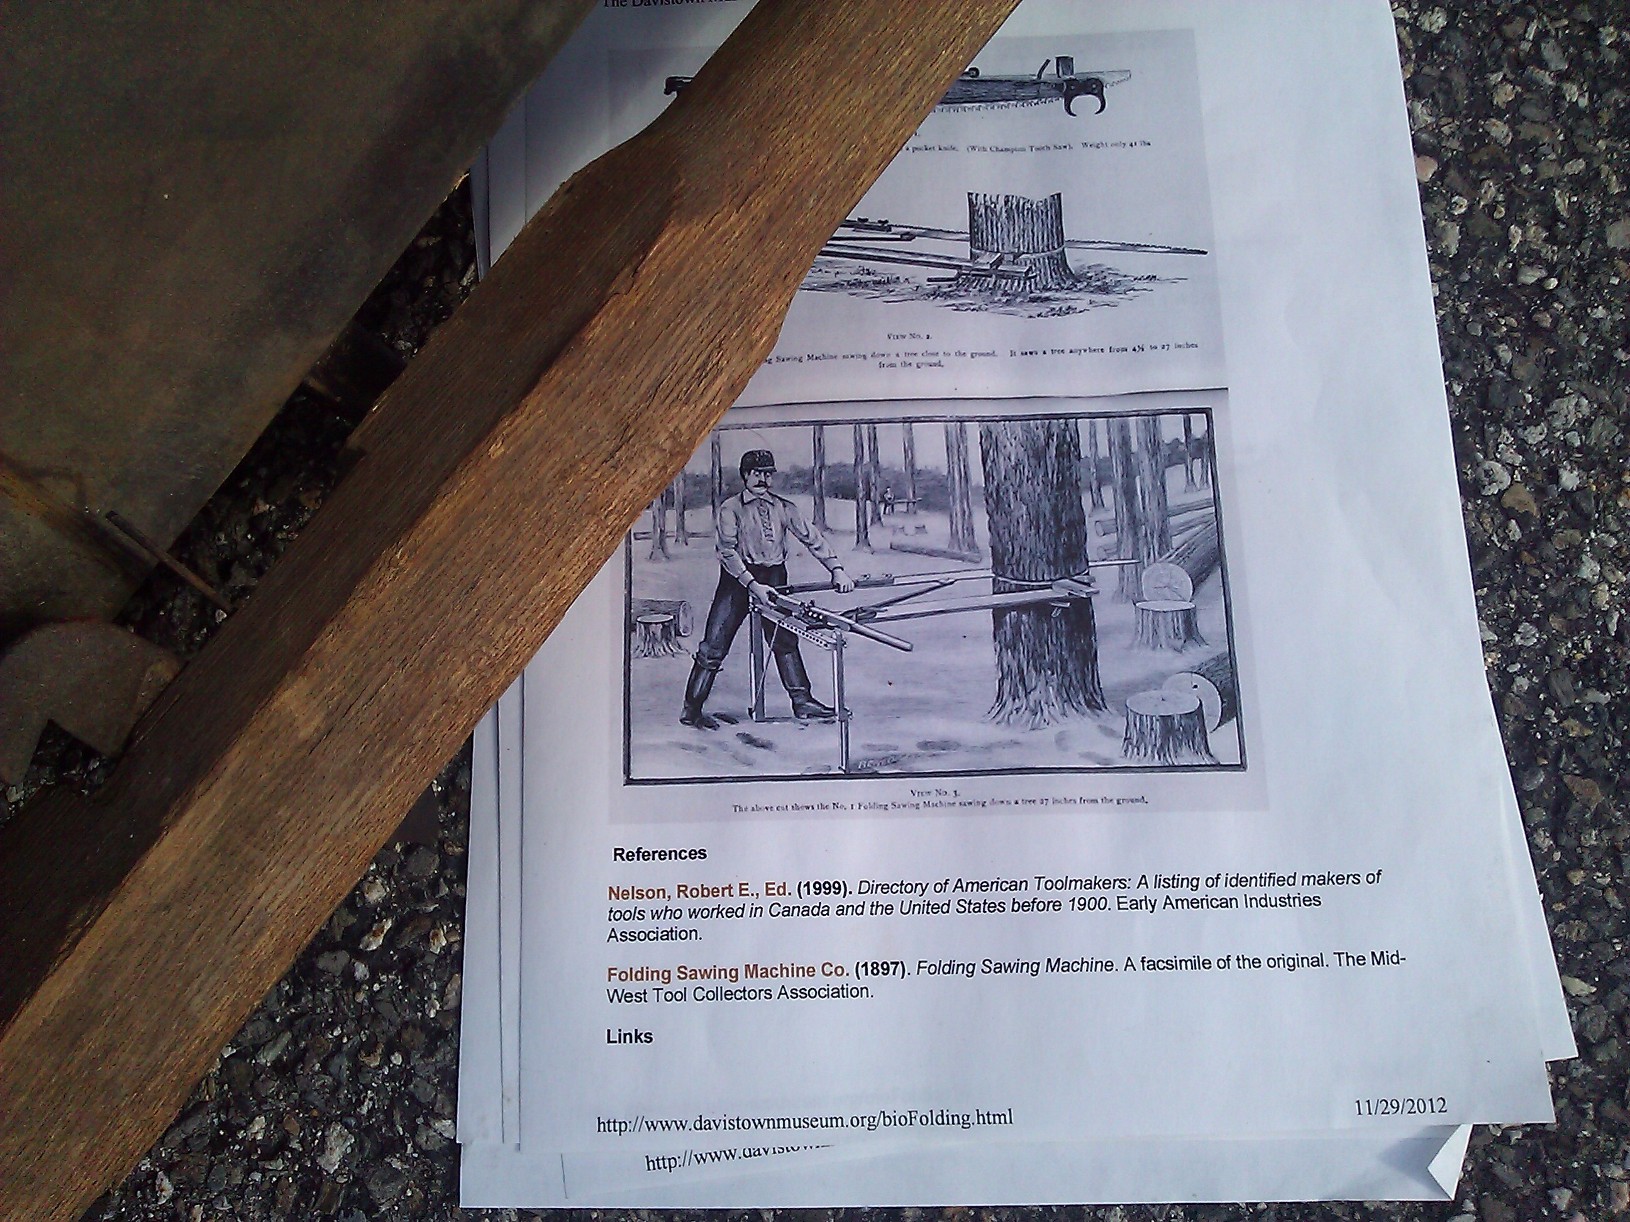
1897 Folding Sawing Machine
If you are living in the 1890s and want to use a 2 man saw to fell a large tree and don’t have any friends willing to help, you should check out this ‘Folding Sawing Machine’ from 1897. It helps hold the saw perpendicular to the tree and allows you to use a lever to push and pull the saw.
1897 Folding Sawing Machine
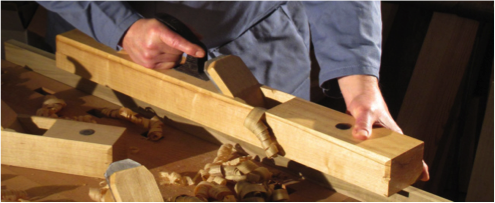
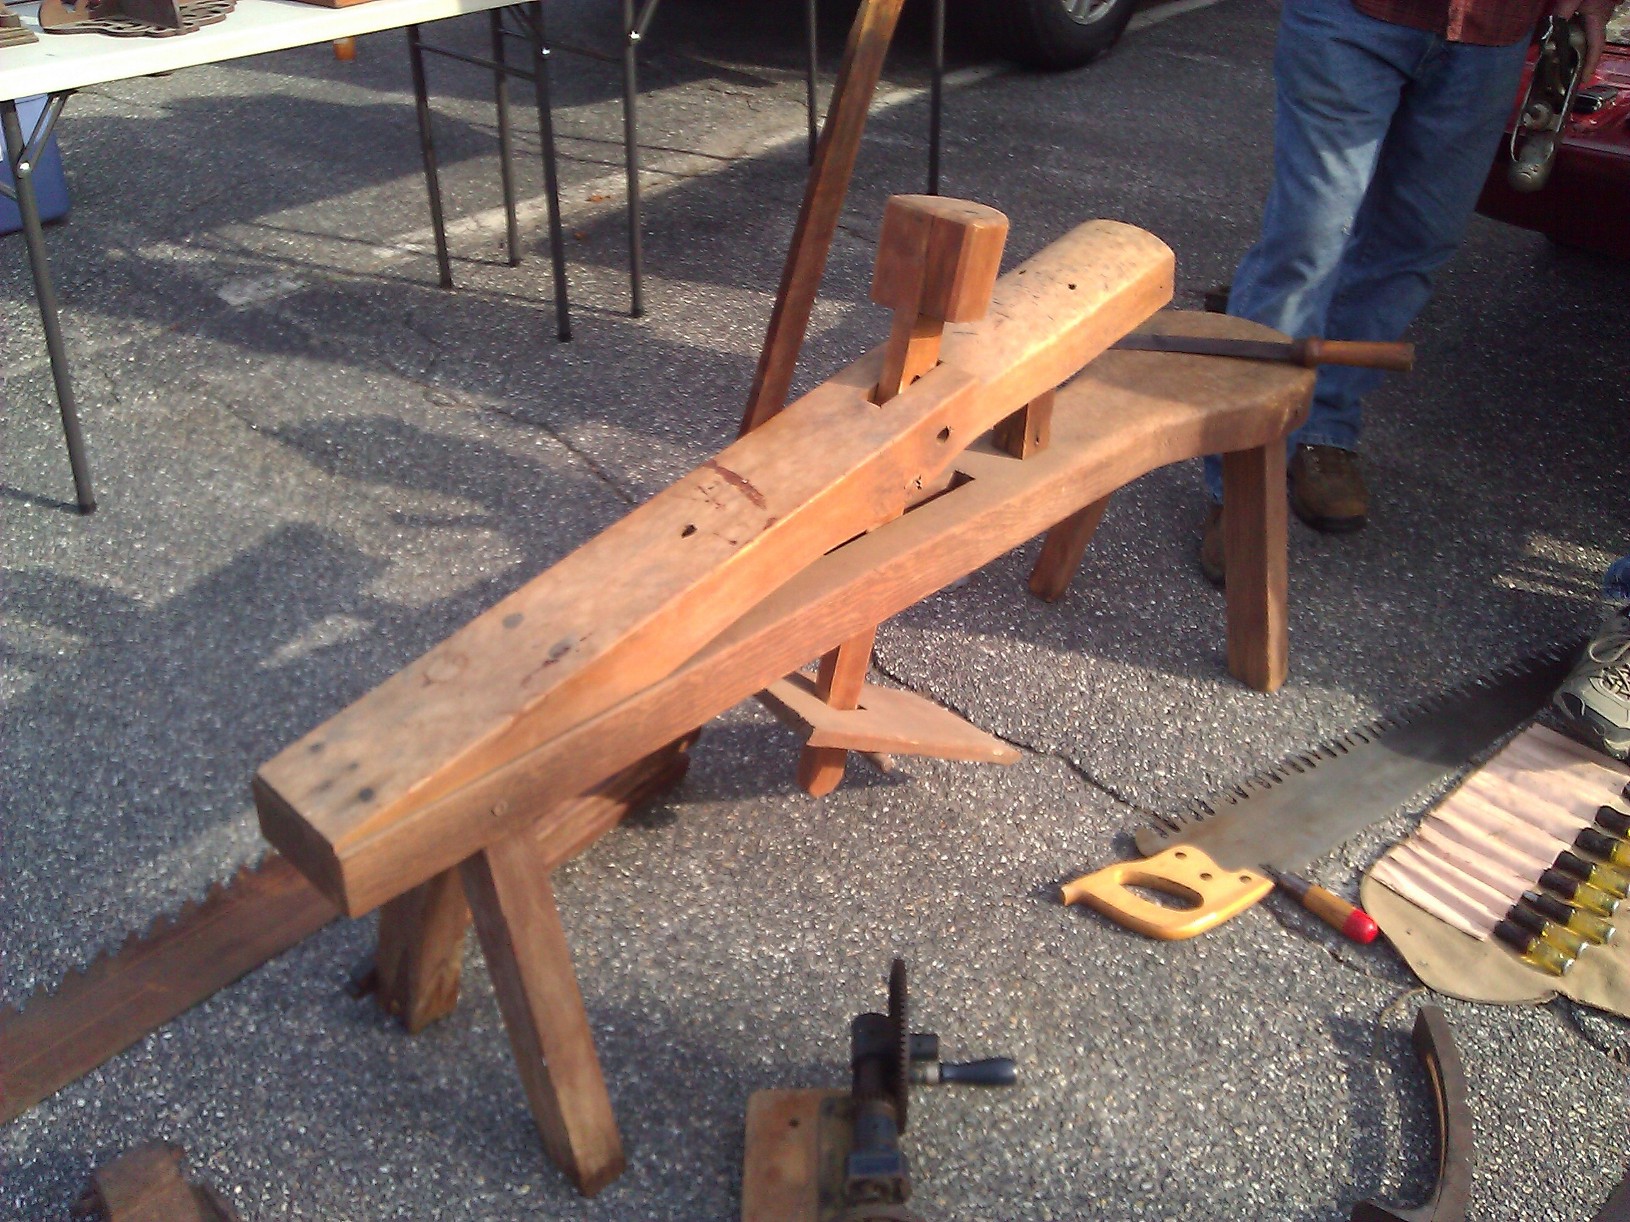
Shave Horse aka Schnitzelbank
A nice oak shave horse or schnitzelbank It was made from heavy oak, pegged and secured with cut nails.
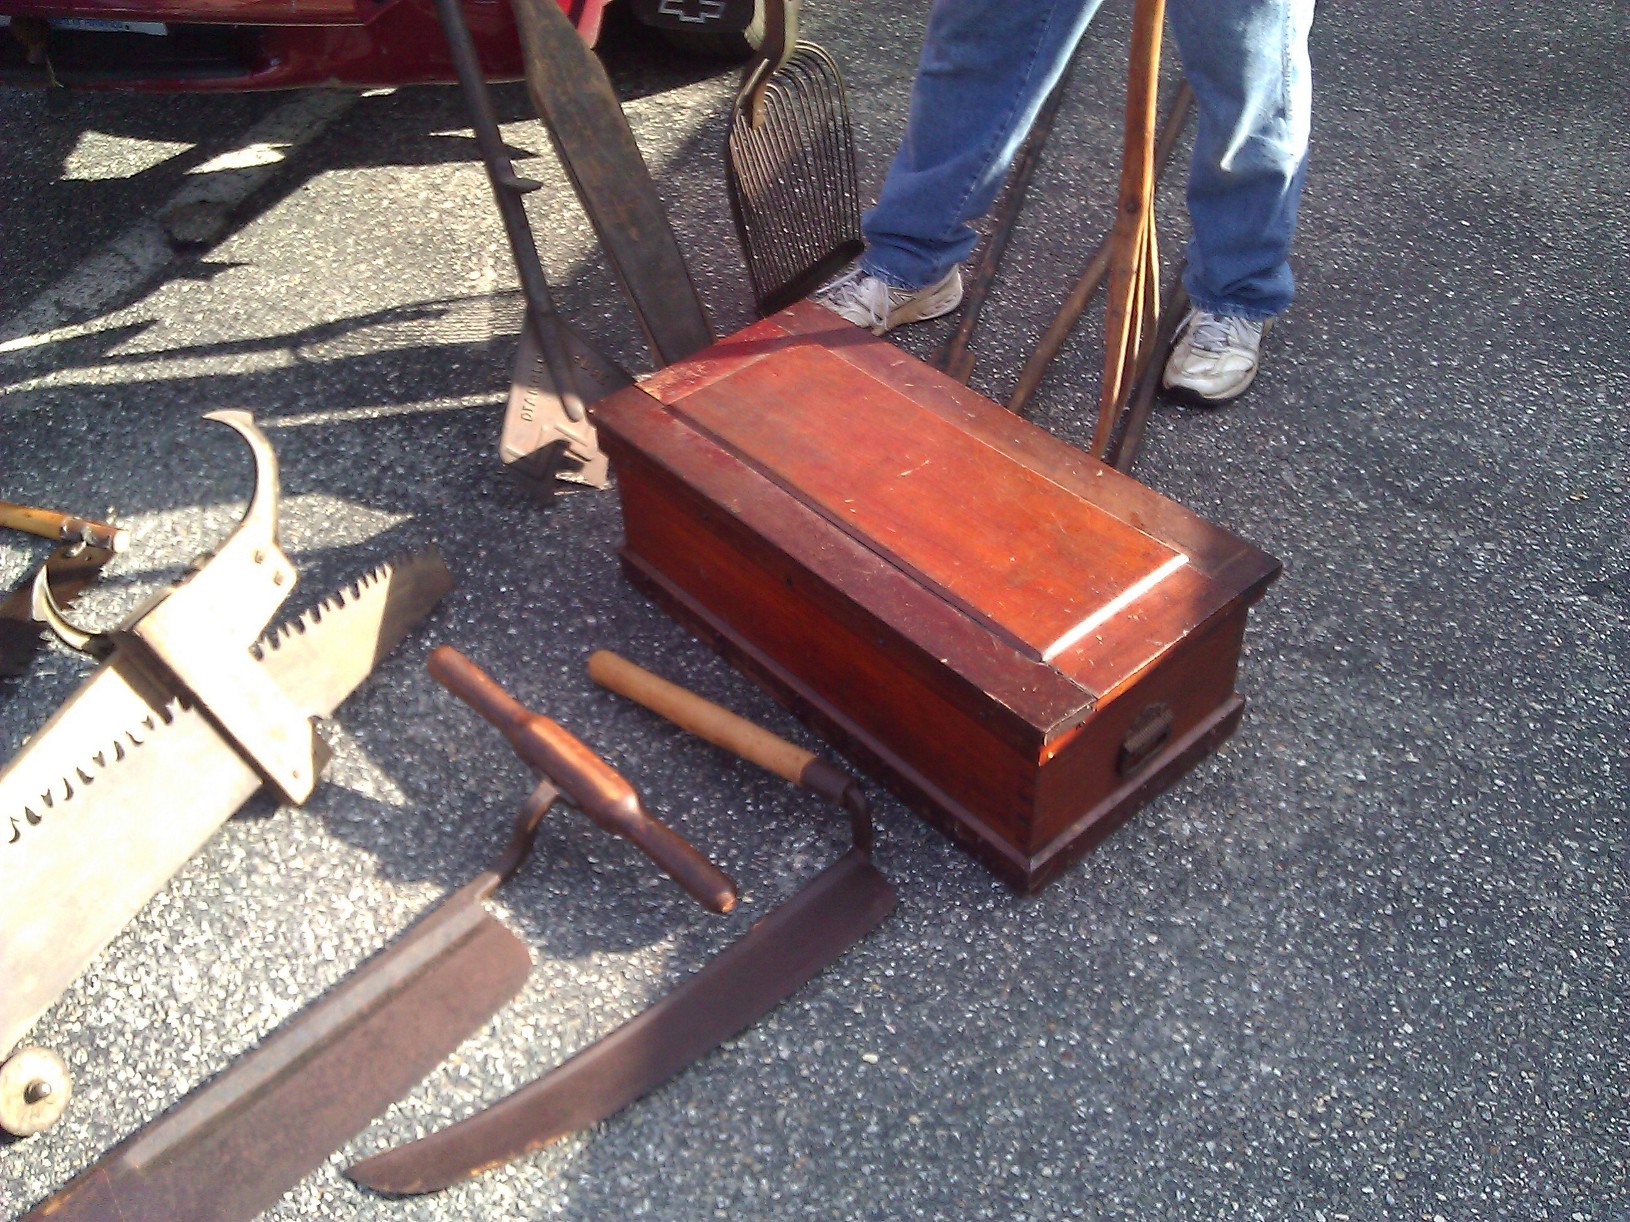
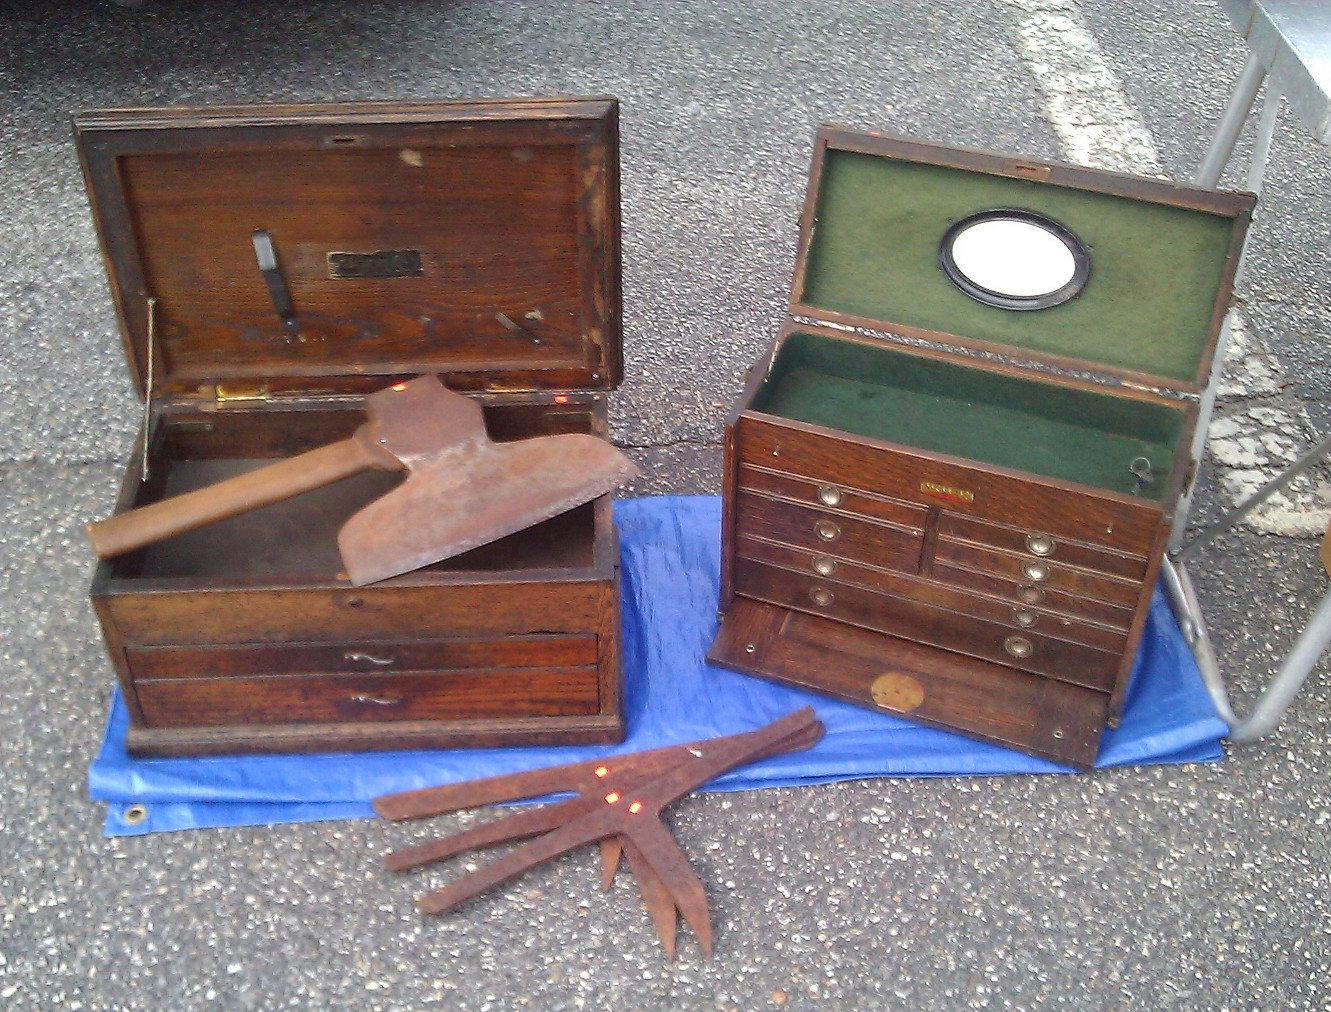
Small Traveling Tool Chest
Pair of tool chests
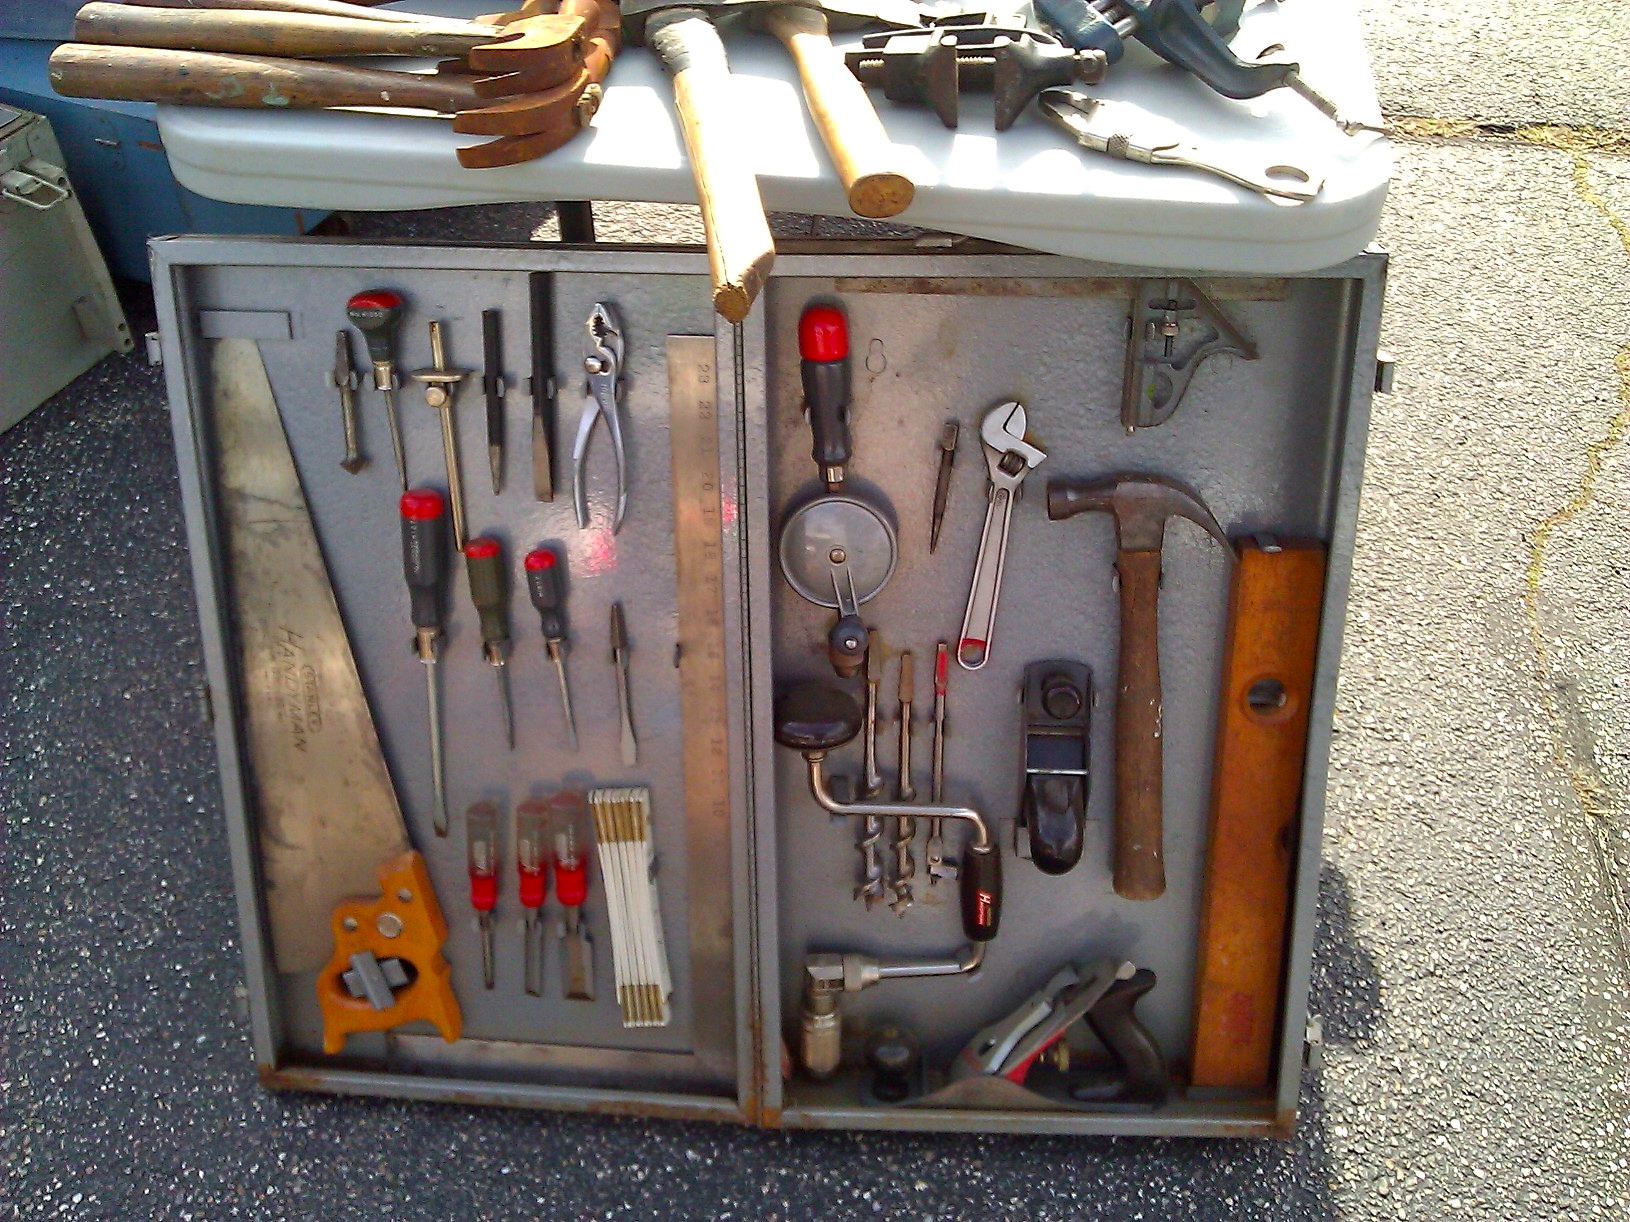
Metal Tool Cabinet
An interesting commercial tool cabinet made from metal with what looked like mediocre post WWII tools.
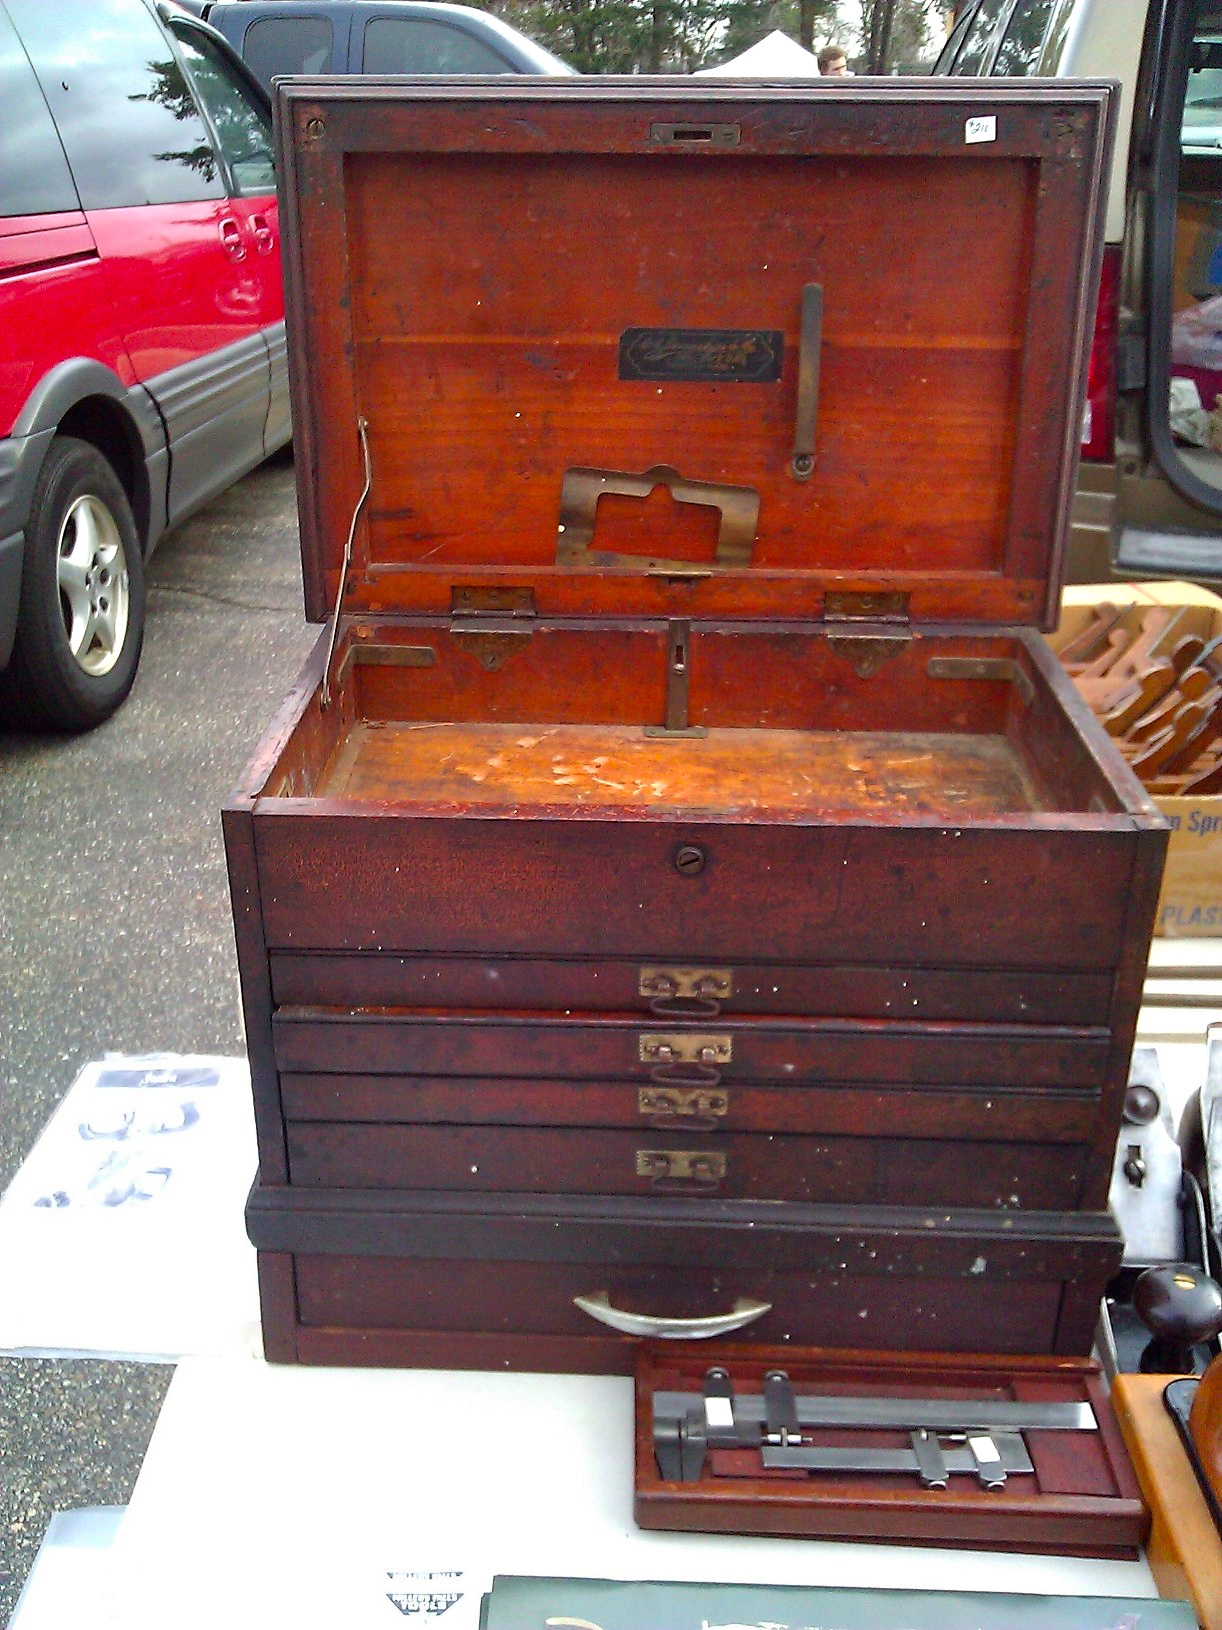
Machinist Tool Chest
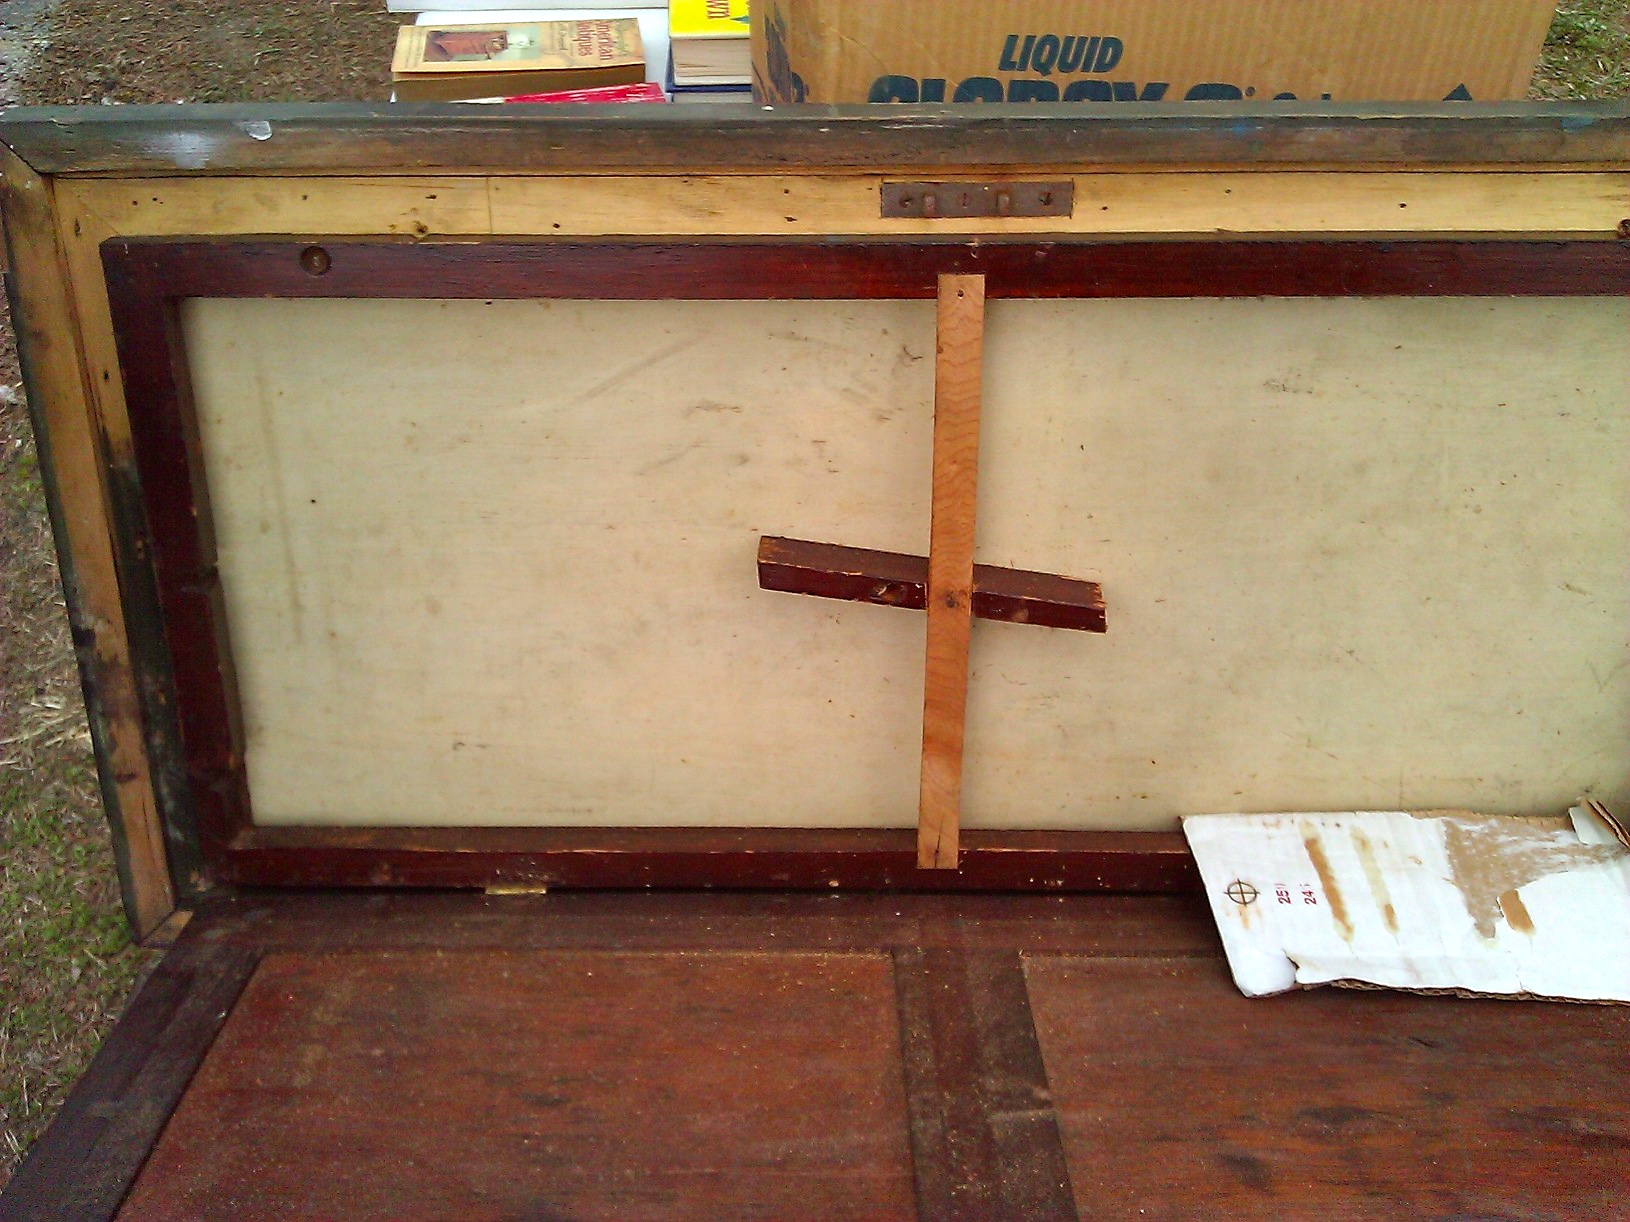
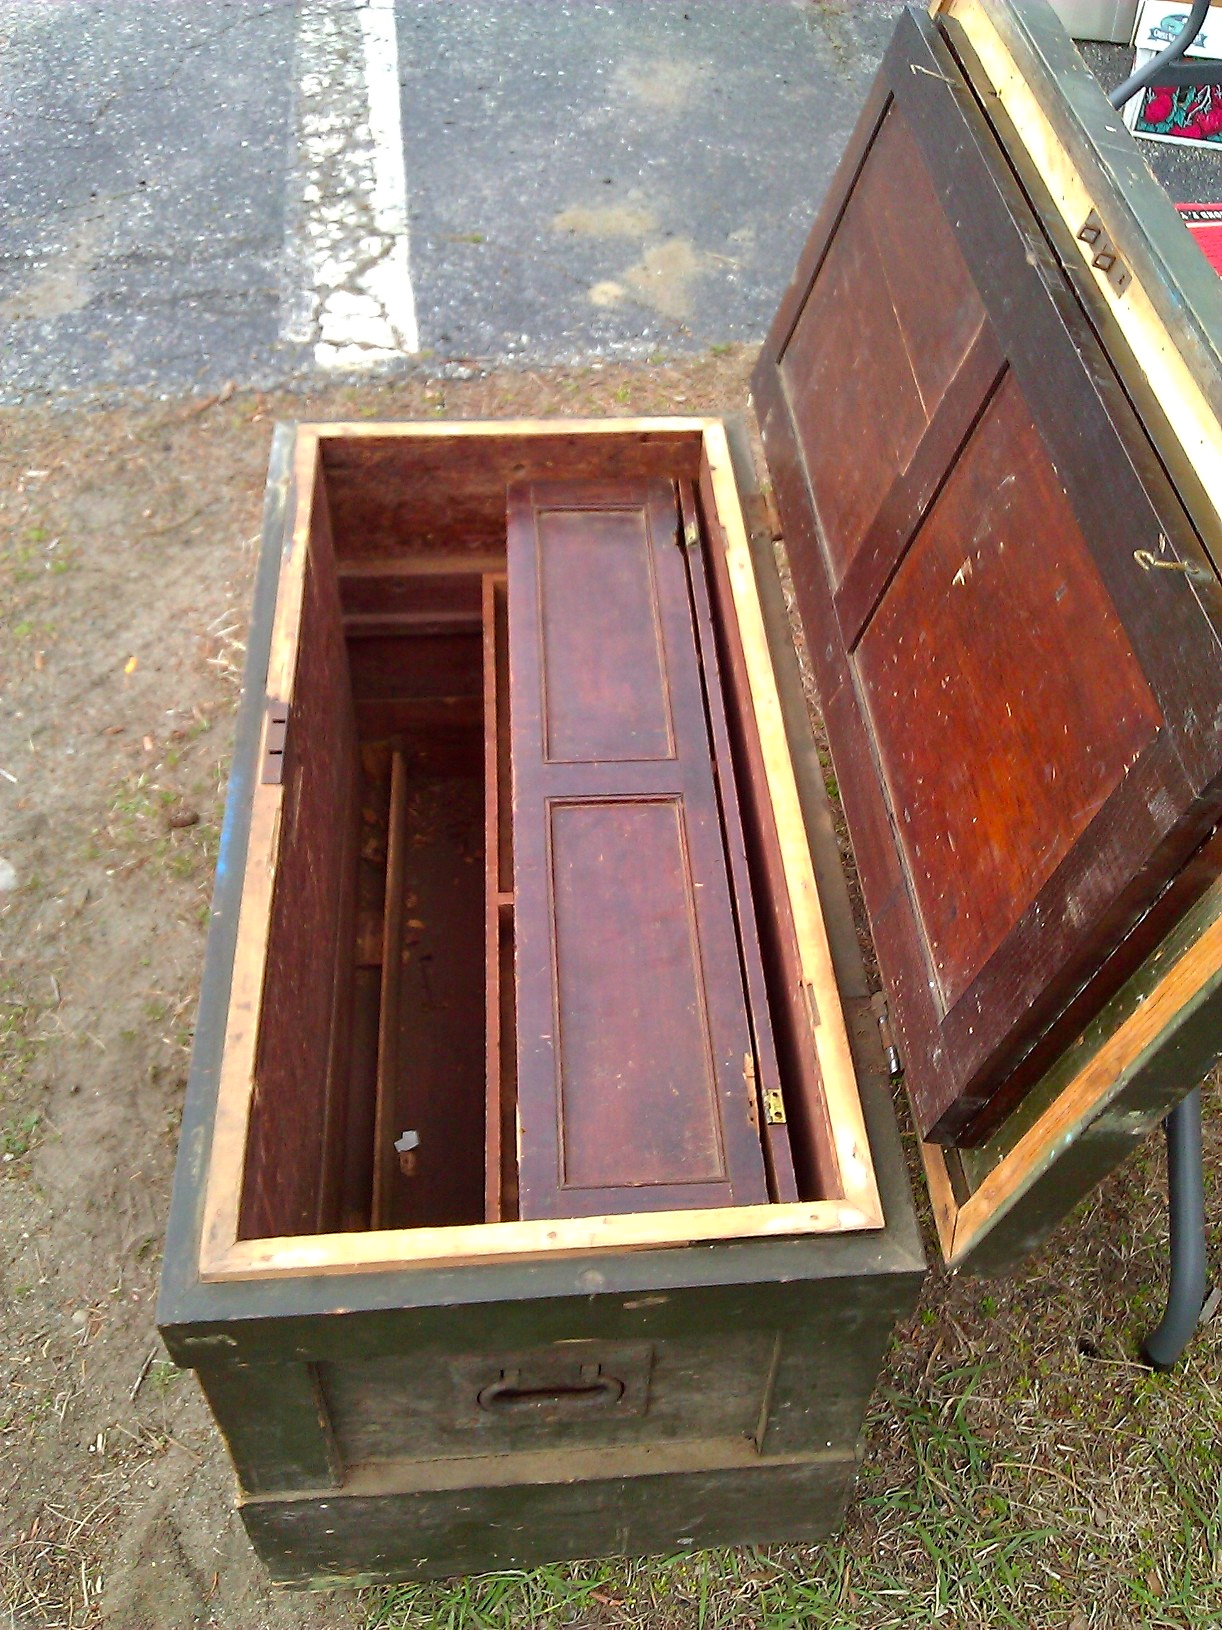
Saw till on lid closed. Lid back on tool tray in chest — Nantucket Tool Chest
While no Anarchist’s tool chests were to be found this year, this solid old chest, presumably from Nantucket given the huge painted label on the front. It looks like it was based on traditional designs, made in the 20th century but built a bit more like a modern carpenter with very simple joinery compared to a traditional joiner who more likely would have used dovetails, mortise and tenon etc.
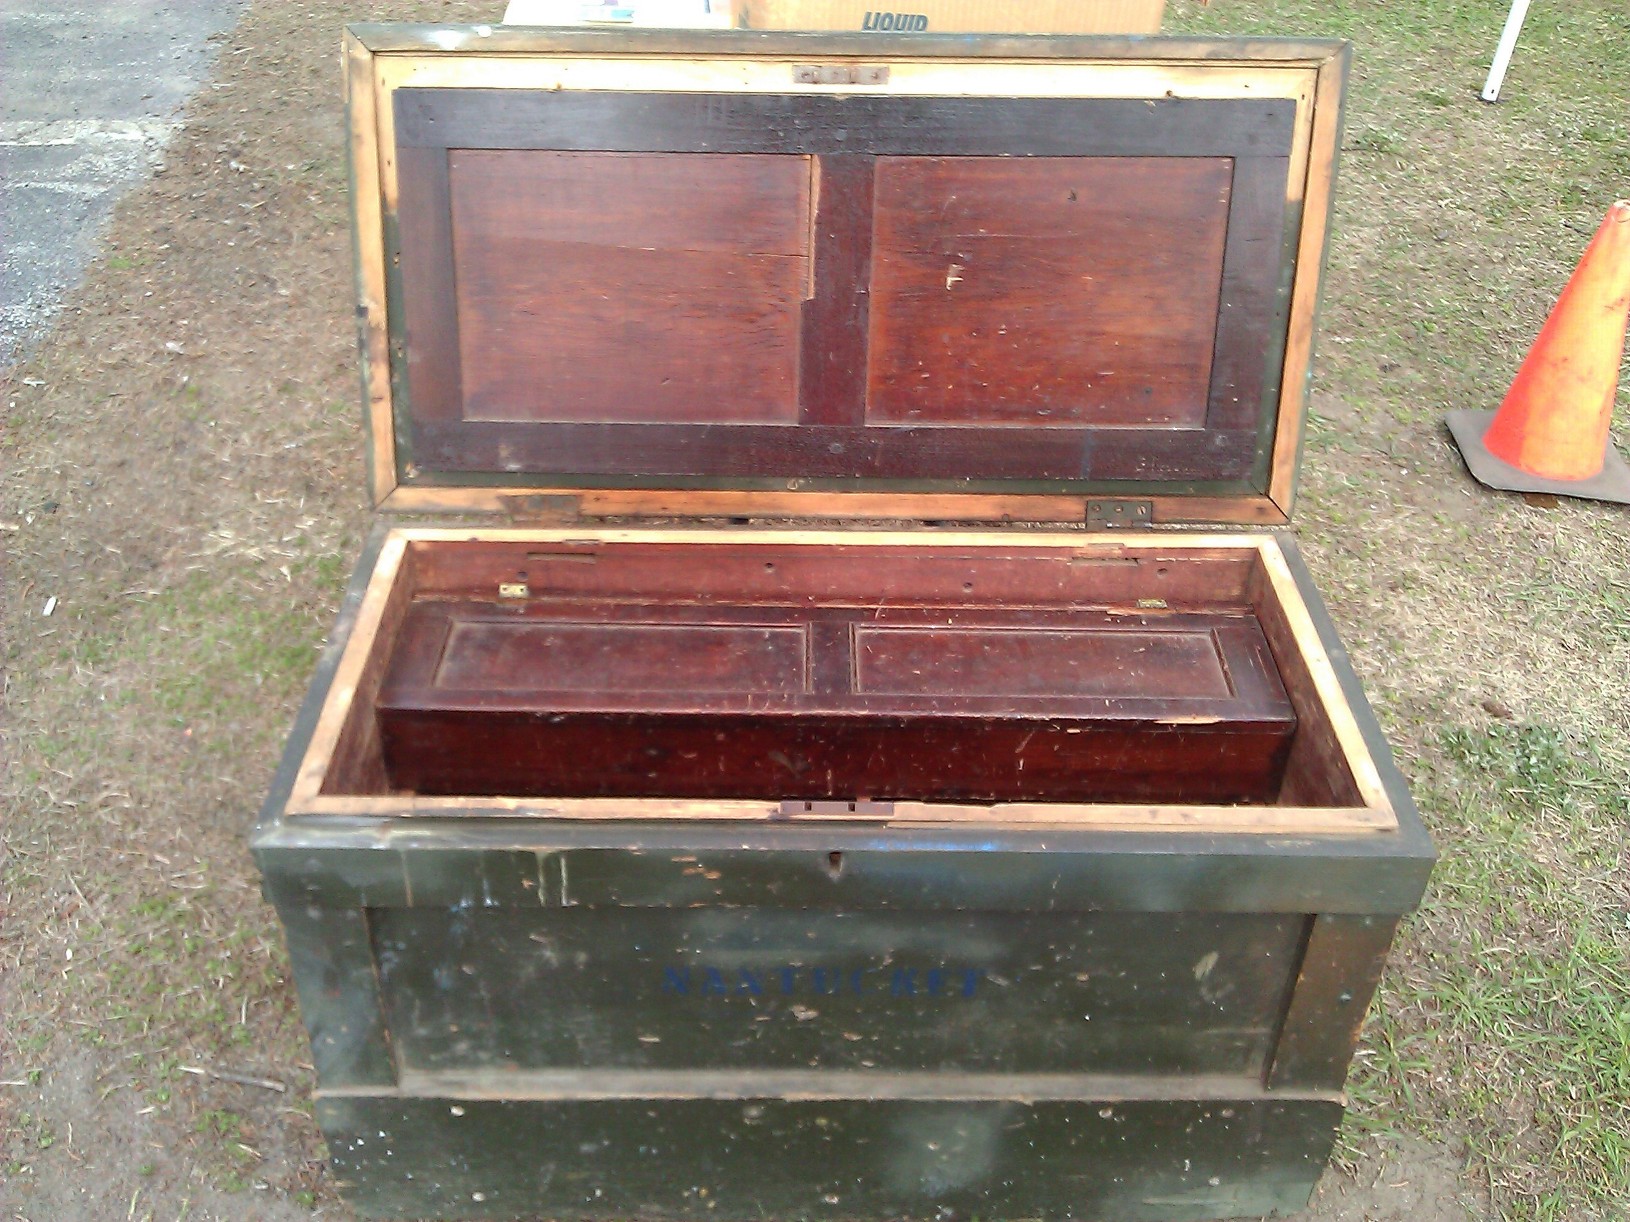
Sliding Tool Trays or Tills — Nantucket Tool Chest
The till lid screws were stripped and was removed for the above photo. There were 3 layers of tills and at least one division on the bottom to divide the bottom compartment of the chest.
Saw Till — Nantucket Tool Chest
Saw till was protected by a frame and panel that attempted to dress up the chest. The corners of the chest were reinforced with extra wood and hid the joinery, but I suspect the overlapping boards mean that the corners were potentially all nailed together which means this chest was likely built quickly.
Nantucket Tool Chest
The chest lifts were heavy cast lifts that looked of modest quality. It was interesting to see how the dust rim was screwed on.
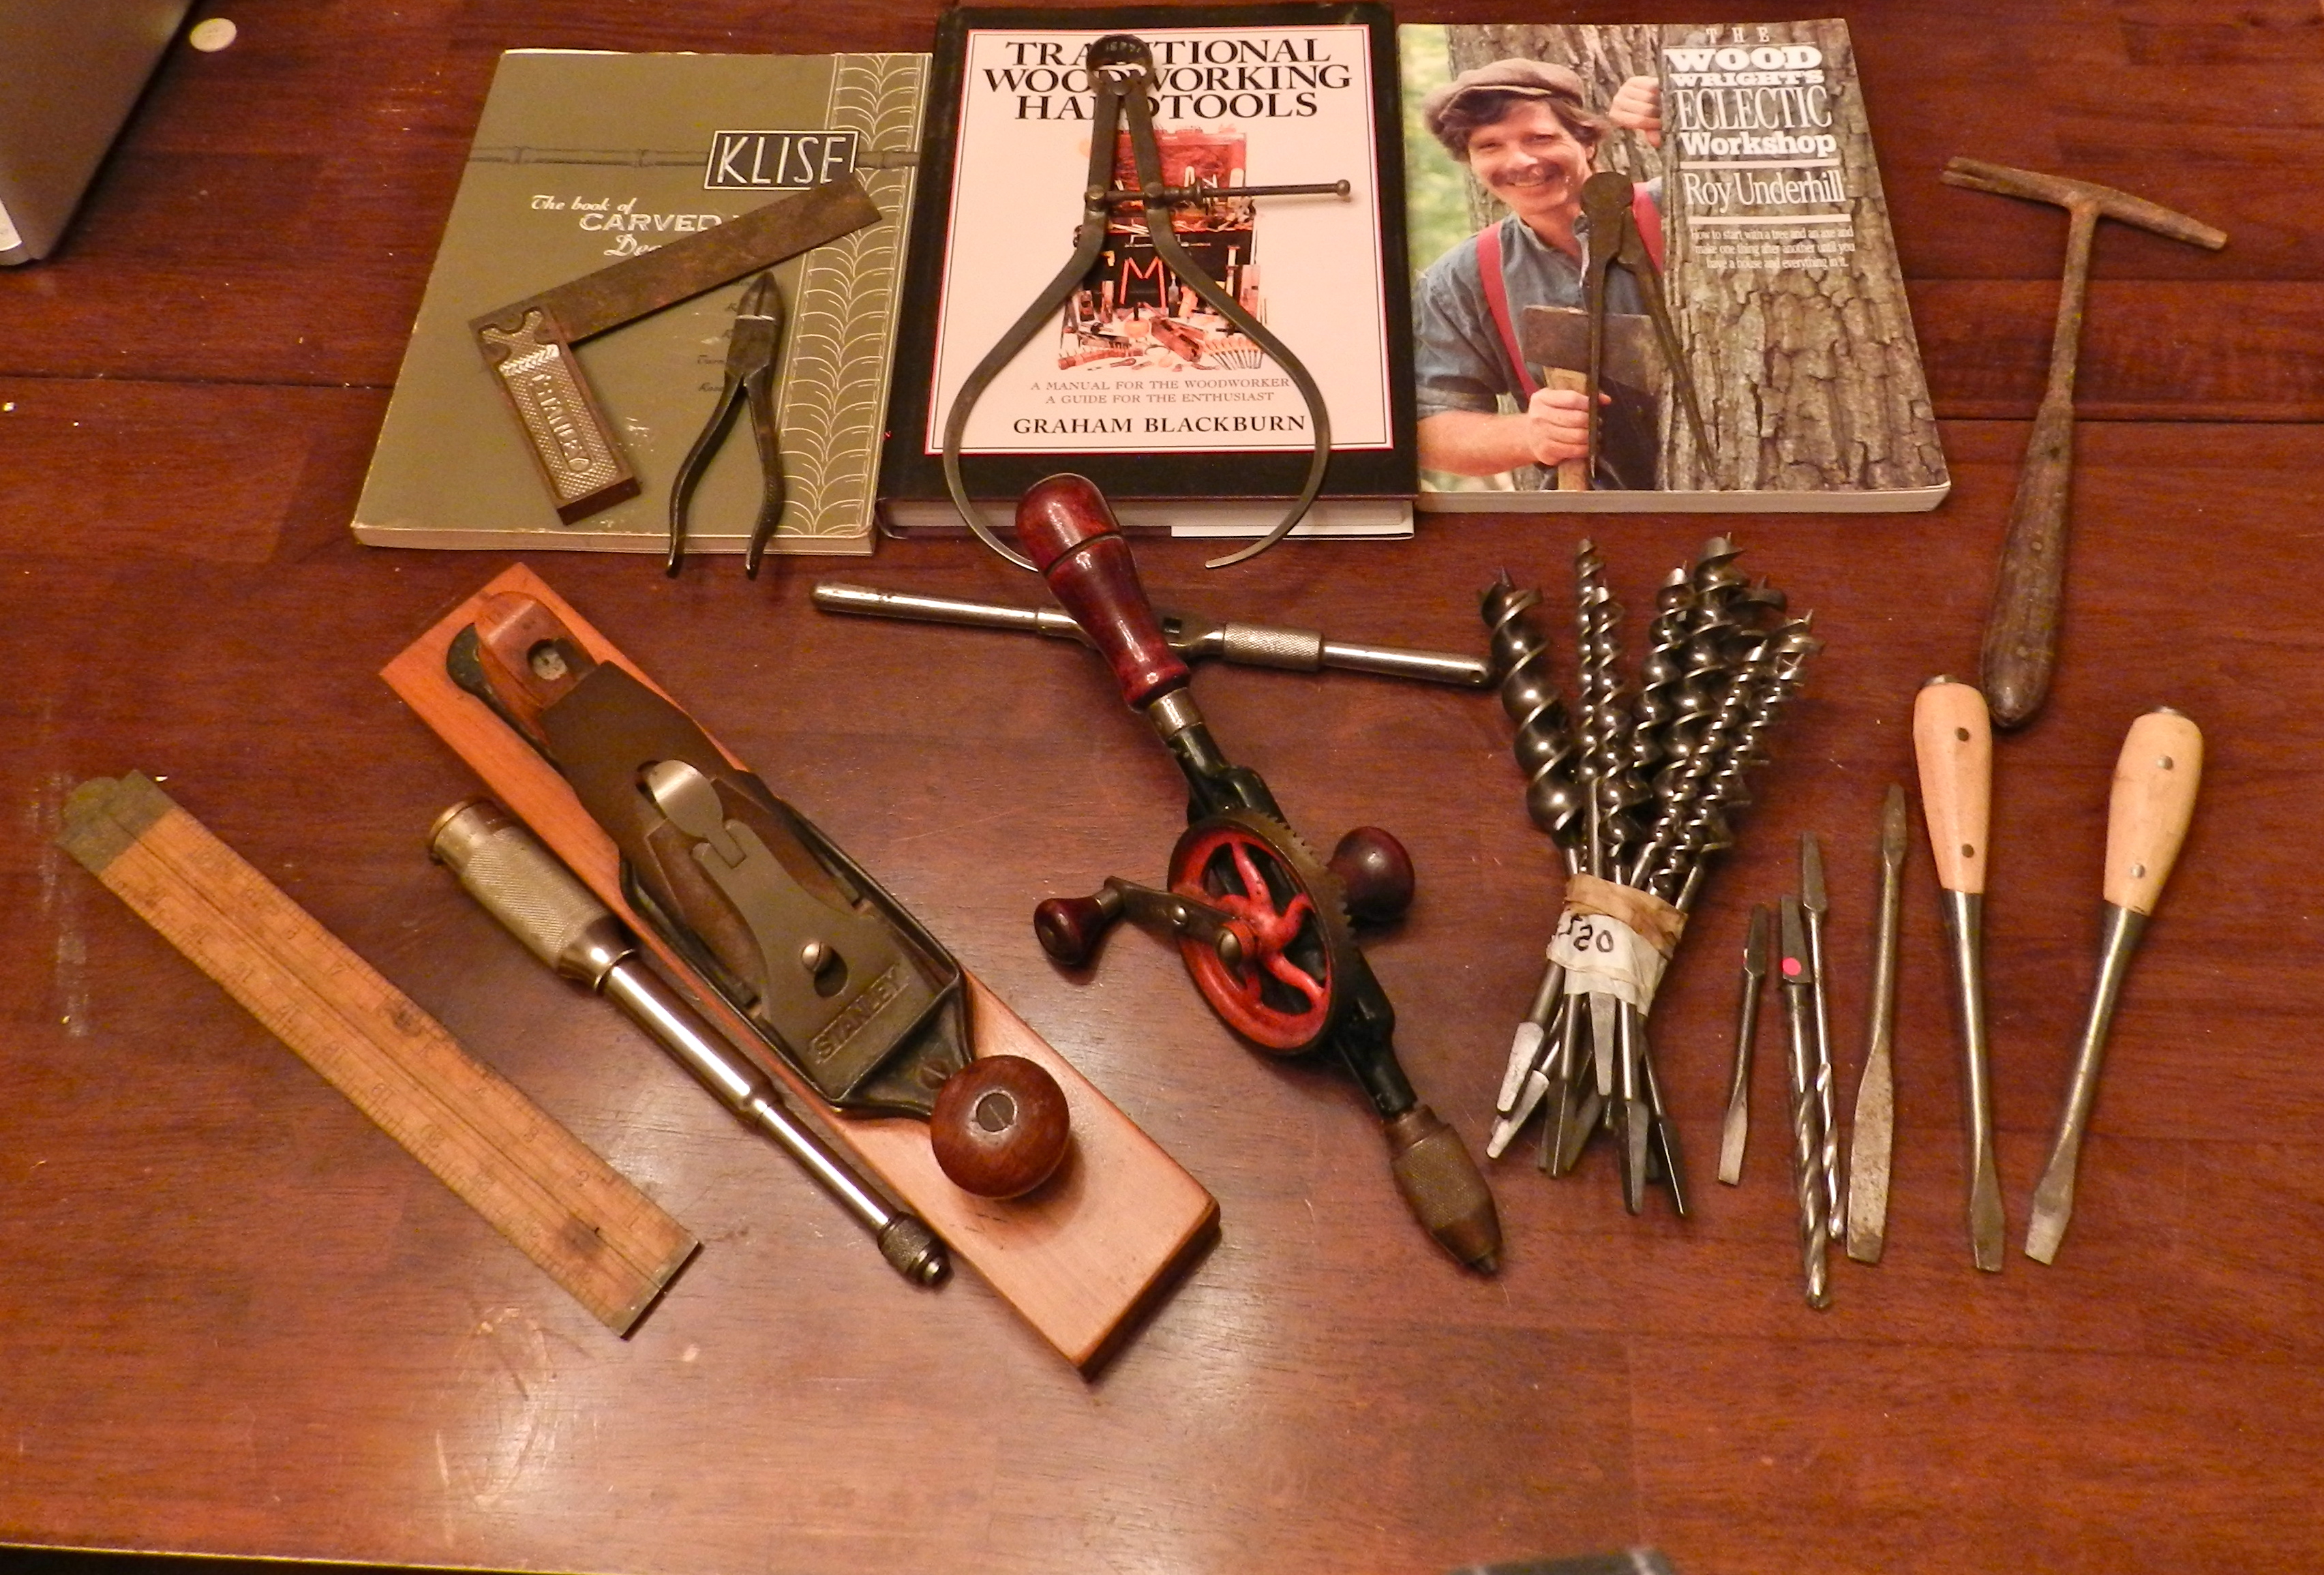
My new treasures from the show this year
This year I did well. I found all the odd items on my list and only a couple of extras. I picked up a great double gear Miller’s Falls egg beater drill — recommended by Tom Fidgen and love it so far. Also got a nice set of Russel Jennings Pattern Auger bits, a nice Miller’s Falls push drill (just a novelty I wanted to try), and a few books. For my Sloyd related projects I found a real nice transitional jack plane, 2 foot folding rule, bit brace drivers, stanley square etc. As always I had a great time and I’m already looking forward to the September show.
(You can check out what happened last September here.)
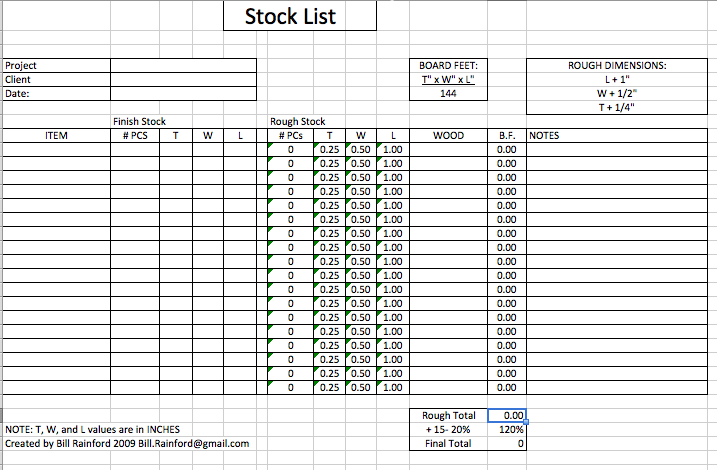
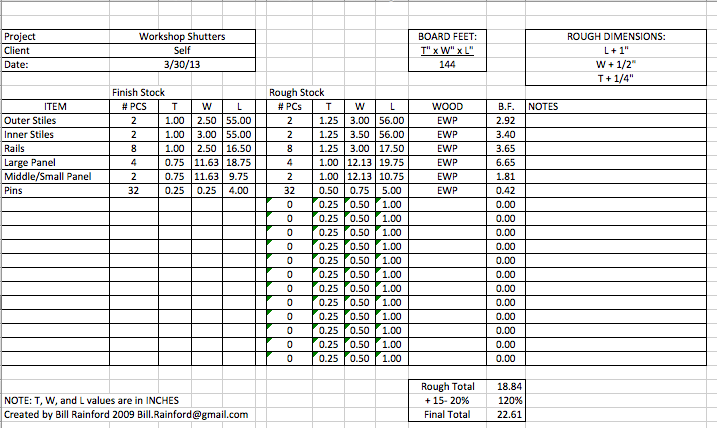
After drafting a new project or case piece but before you head to the lumber yard, you have to make a stock list. This inglorious bit of work is a necessary evil if you want to get all the necessary supplies on your first trip. The past few weeks I’ve been working on drafting up several upcoming projects and as I used this spreadsheet a few times and thought it was worth sharing with you.
Empty Stock List
Back when I was a student at the North Bennet Street School they had a nice little photocopy of a stock list that looked like it was originally made in Excel. We’d enter all the details for our project and then calculate the board footage for our projects by hand with a calculator. This often tedious work was susceptible to the occasional human error so I’d usually wind up checking and rechecking my calculations as I went. After doing this a few times, the computer scientist in me thought ‘Wait a minute, I can code this up in Excel and let it do all the work for me’ — plus printing this spreadsheet for a customer or when dealing with a supplier looks better than a hand written version.
Example Stock List For Shutters
Highlights:
Keeps track of name of pieces, quantity
All values are in inches
Automatically calculates board footage
Adds common extra length (+1″), width (+1/2″) and thickness (+1/4″)
Totals up board footage
Adds extra at the end to take care of test cuts, small amount of scrap etc
This spreadsheet has worked well for me over the years and I hope you will benefit from using it as well. You can find a copy of it here (*.XLSX format):
Just a quick note: I will be teaching some new workshops this spring at the North Bennet Street School’s Arlington, MA location. My teaching schedule can be found here. I look forward to seeing some of you in class this spring or summer.
-Bill
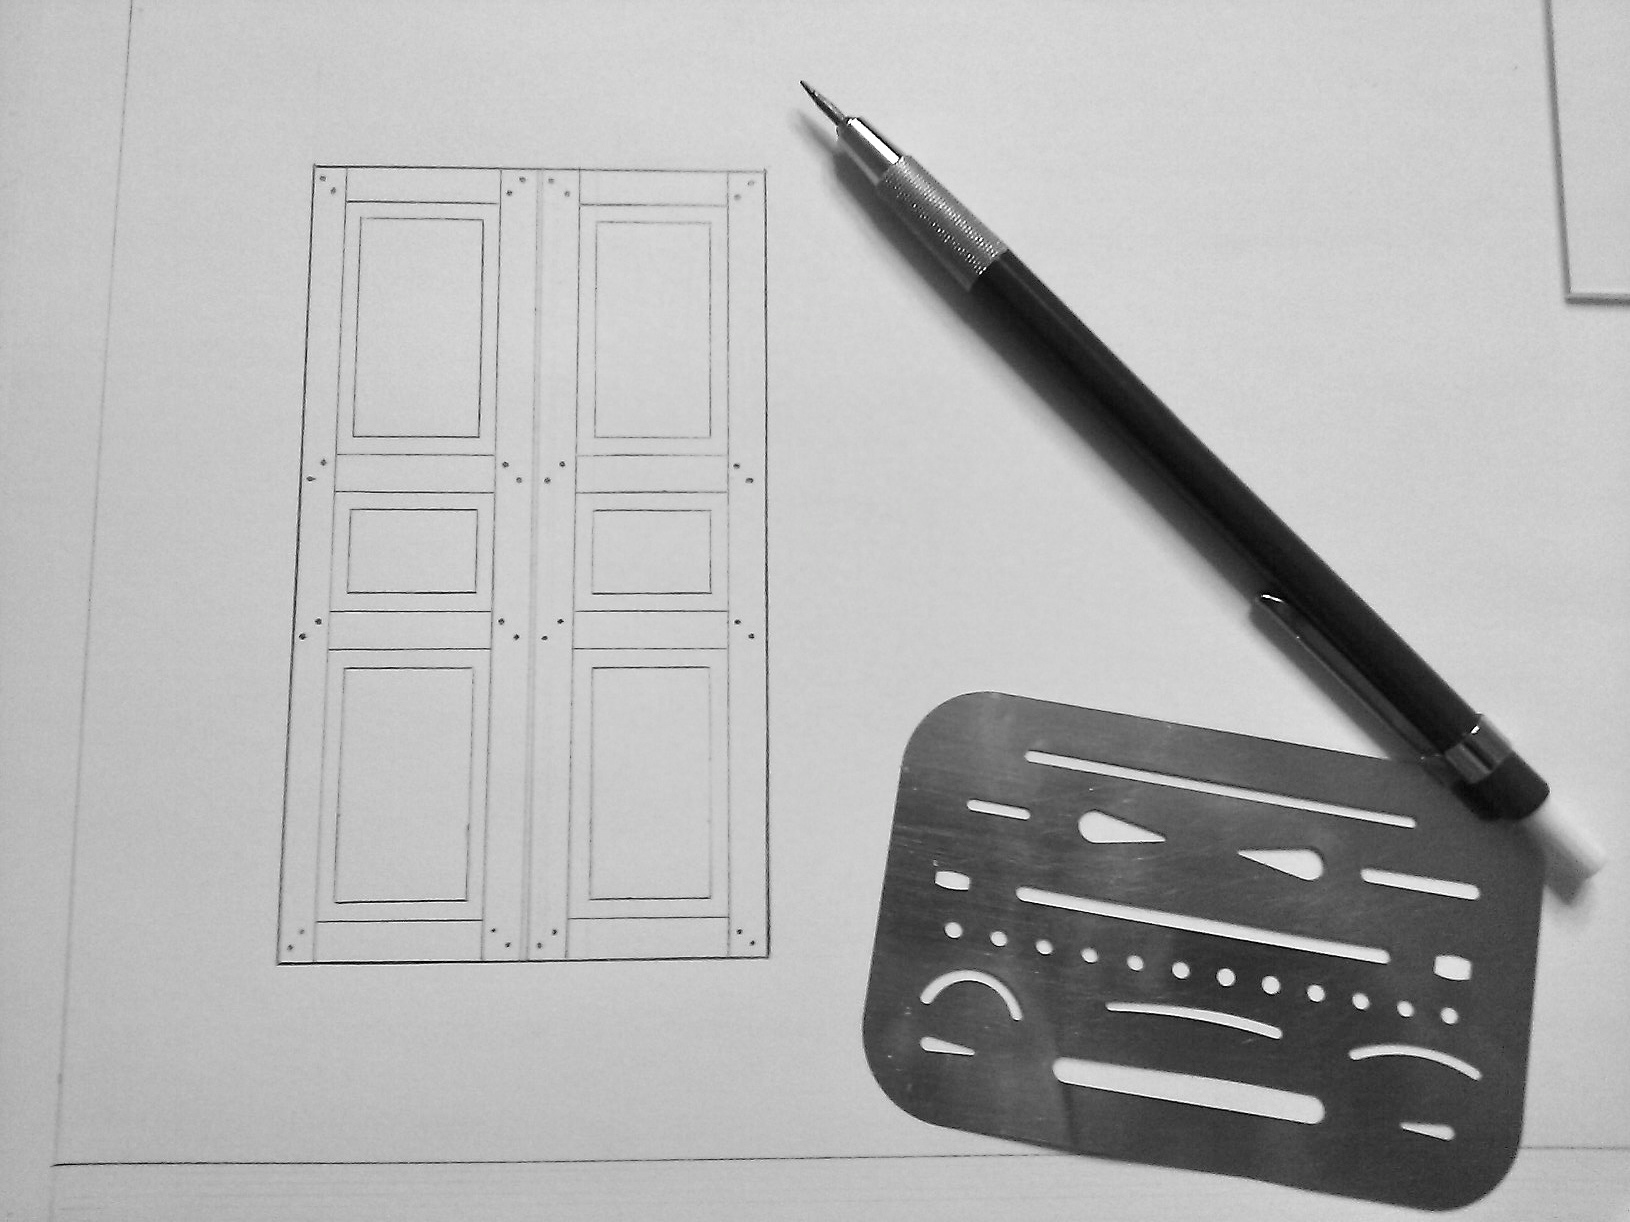
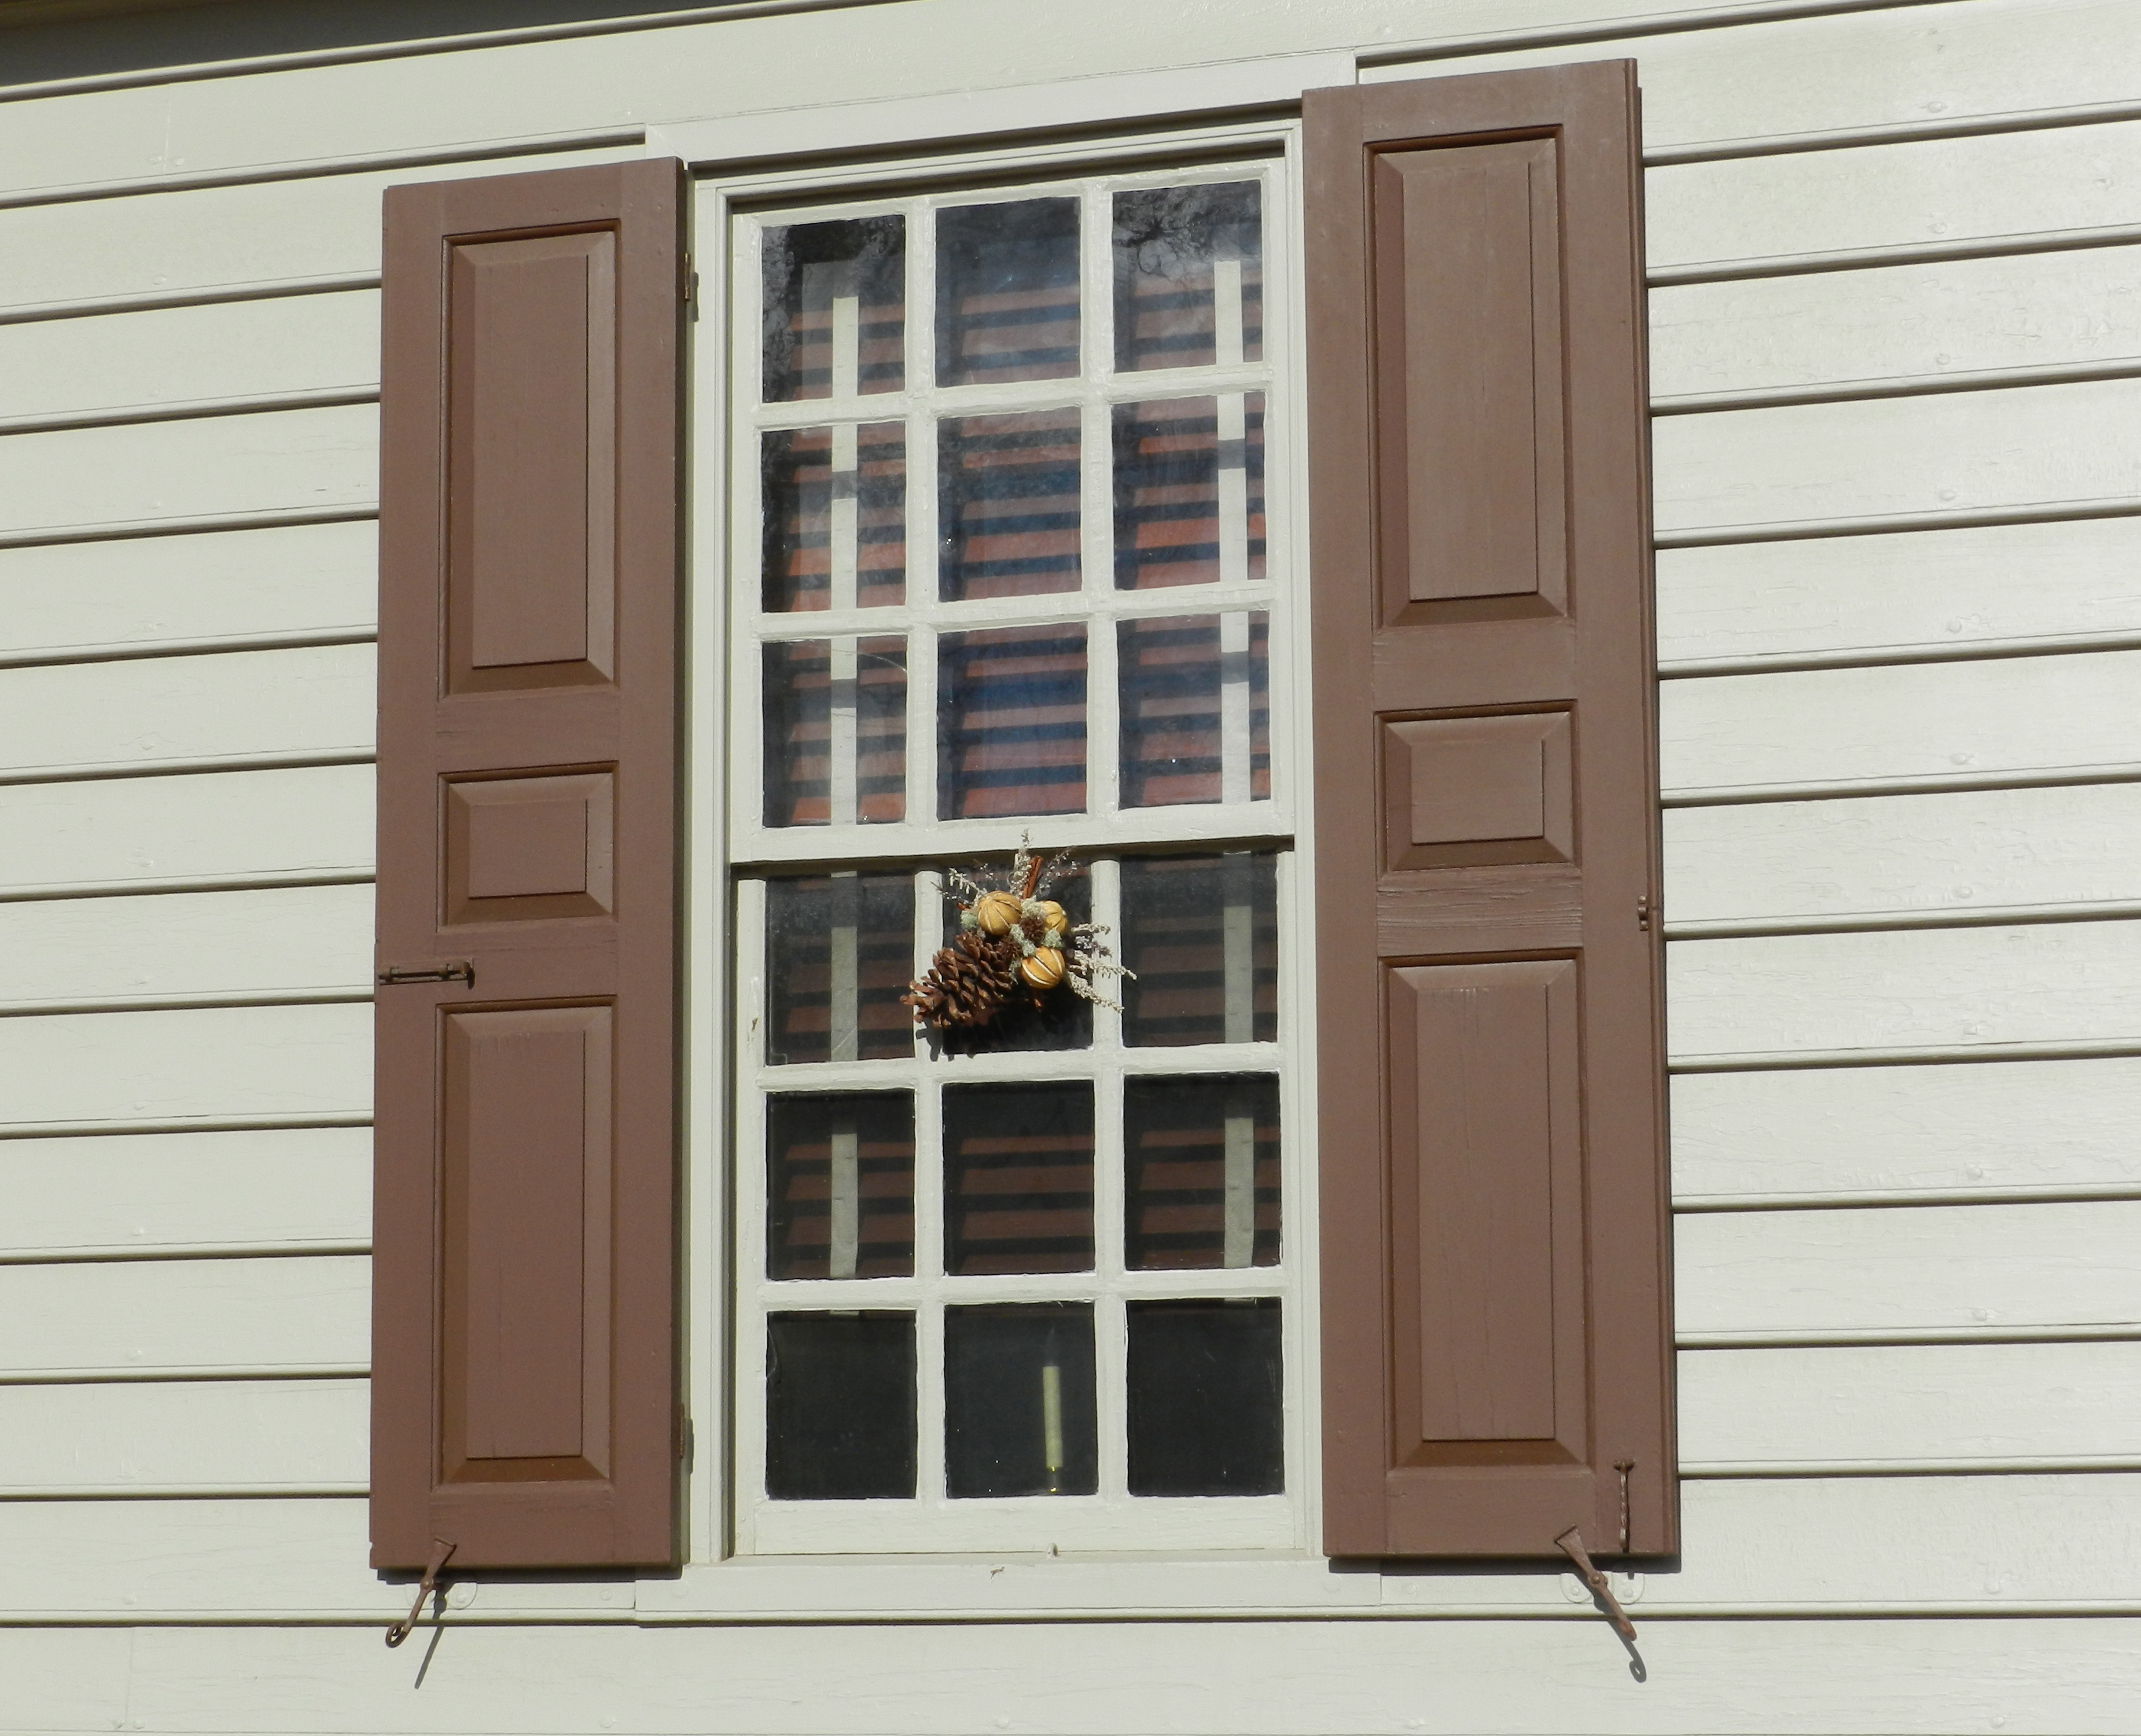
Introduction to shutters @ The North Bennet Street School
Learn about traditional wooden shutters in this two-day workshop. Using traditional joinery, students will build a sample shutter and learn the skills needed to layout and build shutters for your own home. Discussion includes interior and exterior uses, fielded panels and louvered styles Students should be able to plane and square up a board by hand and have some experience laying out and cutting traditional mortise and tenon joinery by hand. Some experience with tuned hand tools and power tools is required. PLEASE NOTE THIS CLASS WILL BE HELD IN ARLINGTON.
This one-day demonstration workshop includes installing a modern door, cutting to accommodate a door knob and lock set, mortising hinges, installing a modern window and related trim and flashing. We cover the proper tools for these projects and include ample time for questions throughout the day. PLEASE NOTE THIS CLASS WILL BE HELD IN ARLINGTON.
“Warning: Sharp chisels are dangerous and should be handled with care. Dull chisels are even more dangerous and should be sharpened.”
This timeless advice comes deep in the small print of the little card that comes with many Lie-Nielsen tools. Much like a shower or brushing your teeth, sharpening is a regular daily routine for most traditional woodworkers, and while it is amazing to see the lengths we go to be sharp, many of us often relegate this task to the end of the bench or tiny bits of counter space here and there.
Why all the fuss about about where to sharpen? How do I avoid this ‘dangerous’ situation?
For many years I was sharpening wherever I could find a bit of space yet knowing there was a better way to go about this. After moving last year I finally got around to re-arranging and re-imagining my workshop space and decided to do something about where I sharpen. Several years ago I went through a phase where I built a lot of New Yankee Workshop projects meant to organize the workshop and at that time I bought the supplies to build Norm’s Sharpening Station but never got around to building this one last project — I even had the top all laminated and ready to go since before the move. Now as I looked to make more room in my shop and move my 4’x8′ sheet goods cart out of the shop I needed to clear off that extra plywood and get some more storage space for all my sharpening paraphernalia. Now that I’ve finished this project I don’t know how I lived without it for so long. I *finally* have all my sharpening gear in one place, I have a spot I can quickly sharpen at and get back to work. I also have waited way too long to finally have an actual paper towel holder in the shop — yes the simple pleasures in life — like not having sawdust all over a clean sheet from the roll that was bouncing around the shop.
The point? Keeping your tools sharp is a vital part of doing good work, so the investment in a dedicated sharpening space and a couple of weekends is a great way to keep your edges keen, your points sharp and your paper towels clean (especially if you don’t want to get caught stealing paper towels from the kitchen 😉 ). Happy Sharpening….
Cut and label pieces
Gluing up the carcass
Installing the drawer guides
Finishing the Drawers
Fitting the drawers
Dual paper towel holders — one for regular paper towels, one for shop towels
Towel racks in use
Completed sharpening station with drawers open and step extended
As a woodworker we often delve into specialties other related trades and crafts — blacksmithing, forestry, drafting etc, but not many talk about the woodworkers who sew….
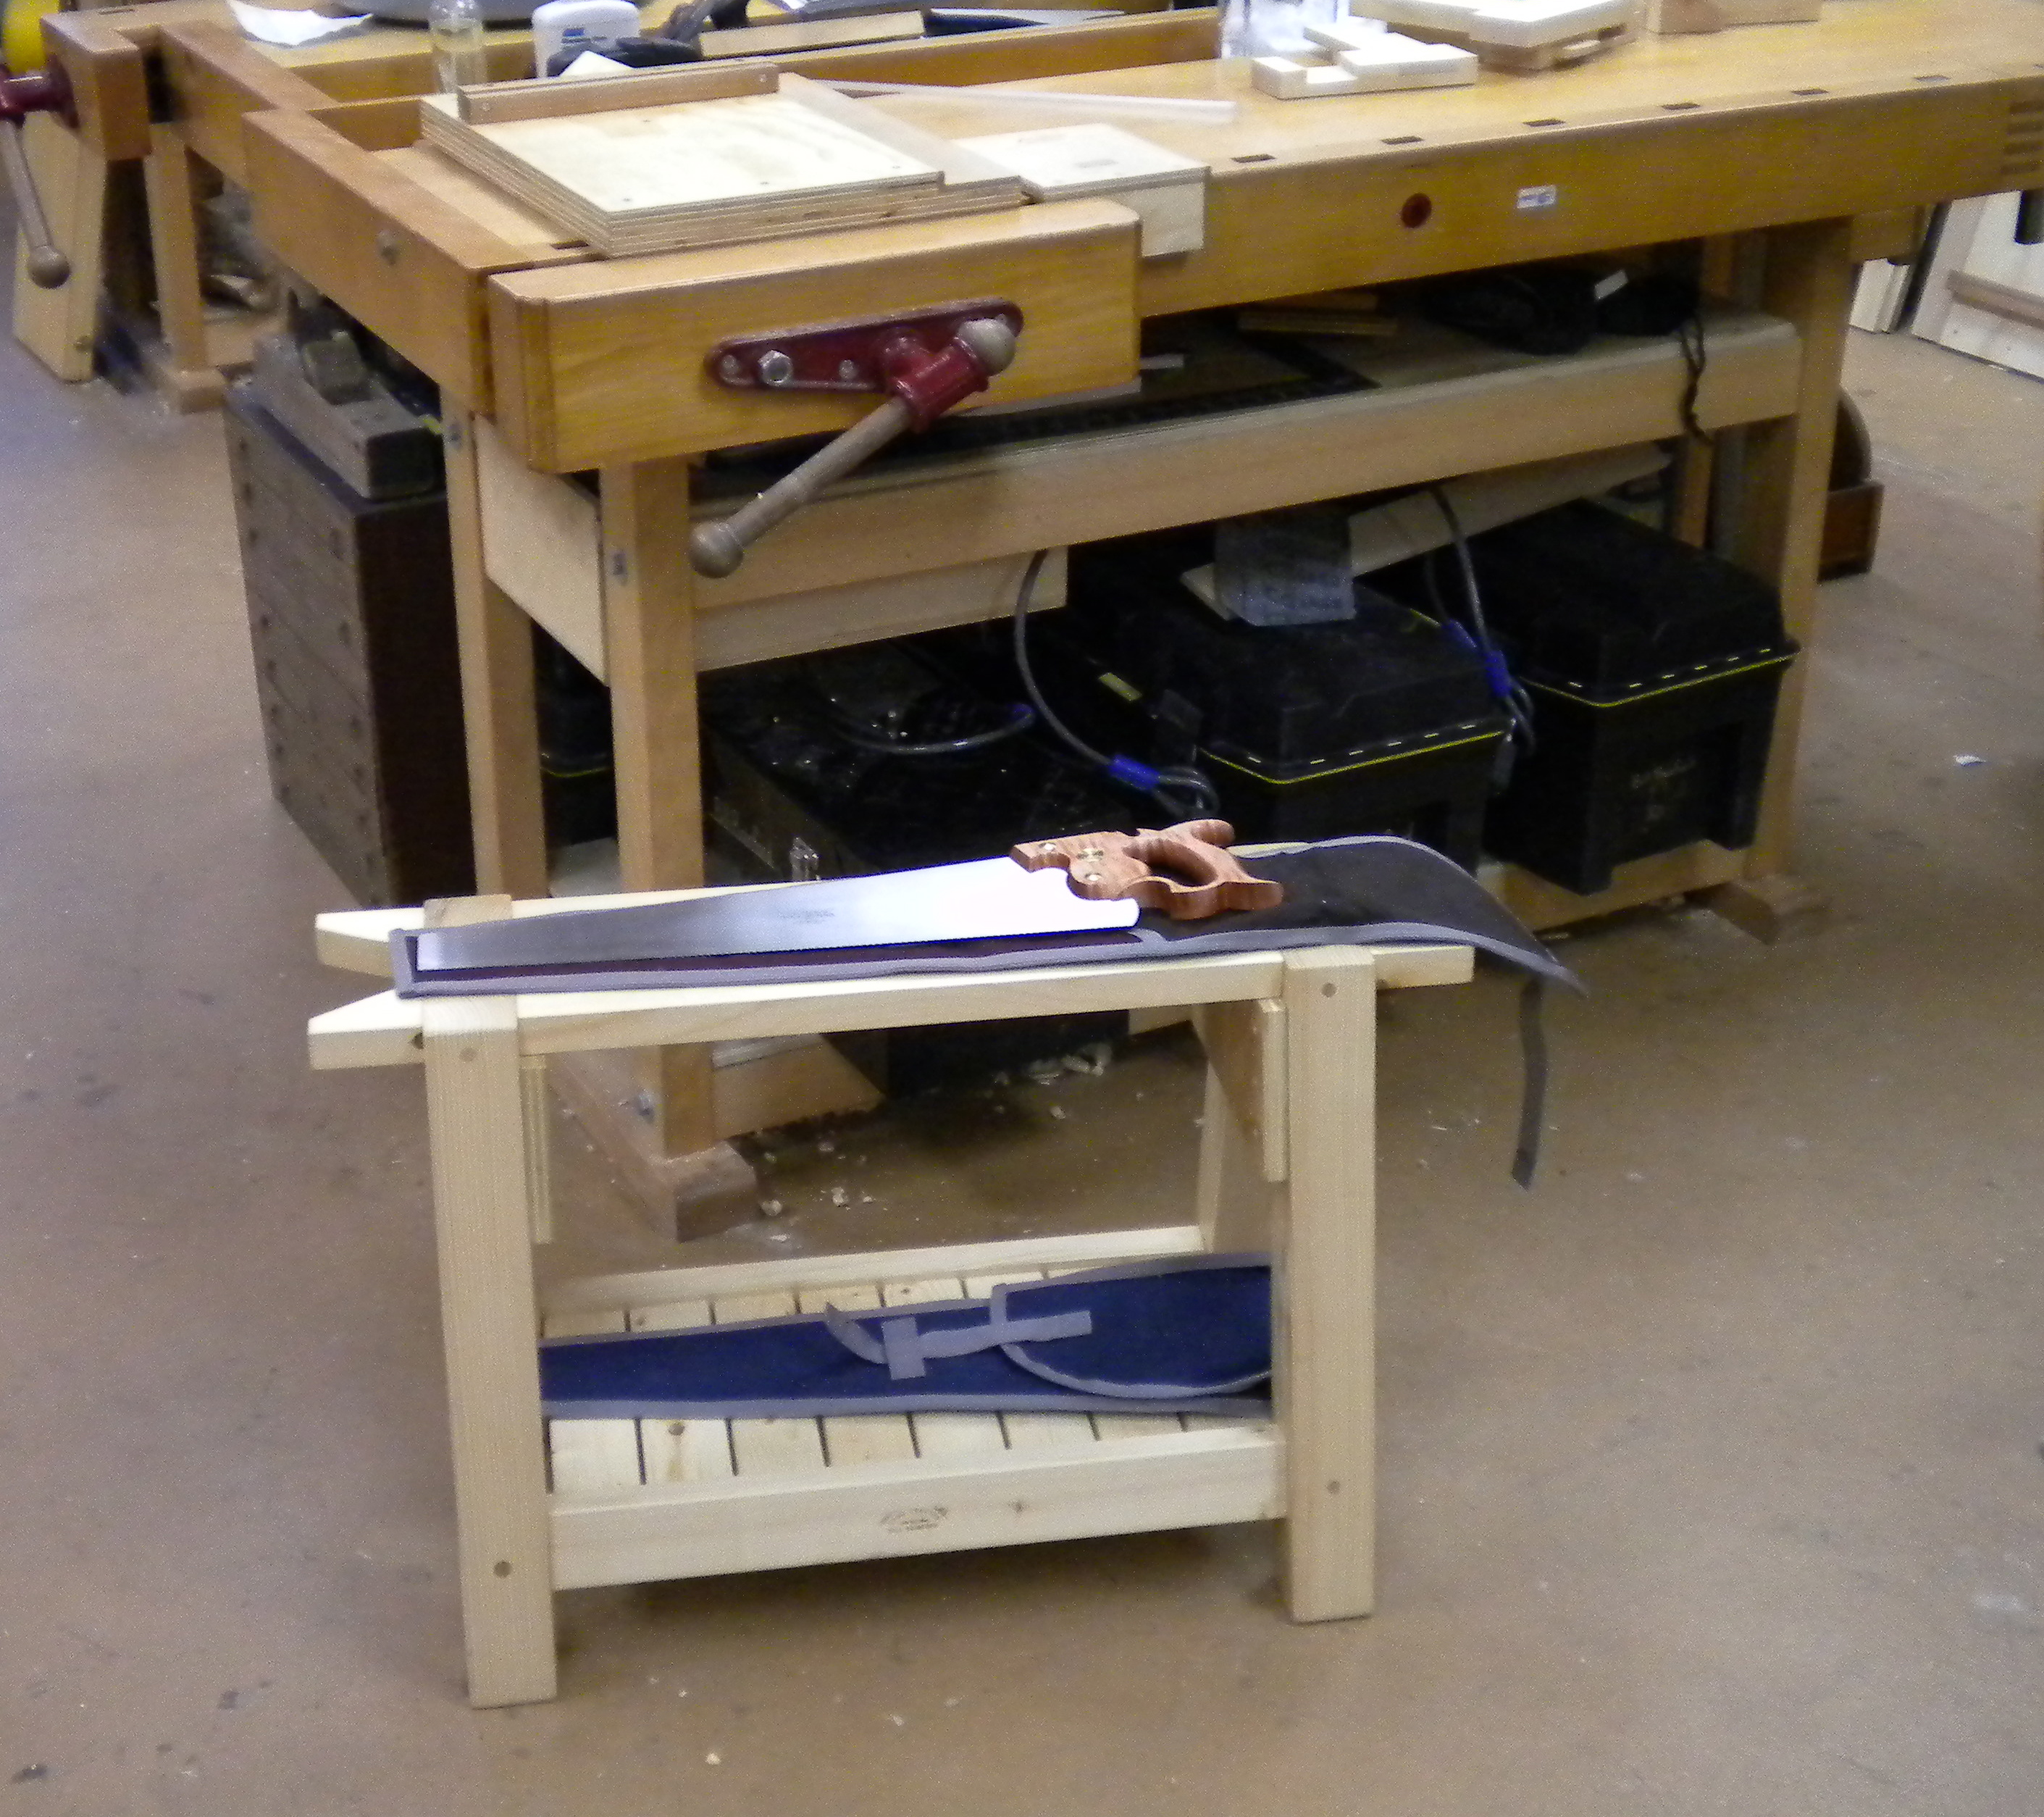
Panel Saws On Saw Bench
You sew?! Yep, and the is the same look I get when I walk into a Jo-Ann fabric wearing Carhartt — I know exactly what I am looking for and where to find it. I’m usually in there picking up supplies to make tool rolls, saw cases and similar projects. In fact the only reason we have a sewing machine at home is because I picked one up to make tool related projects.
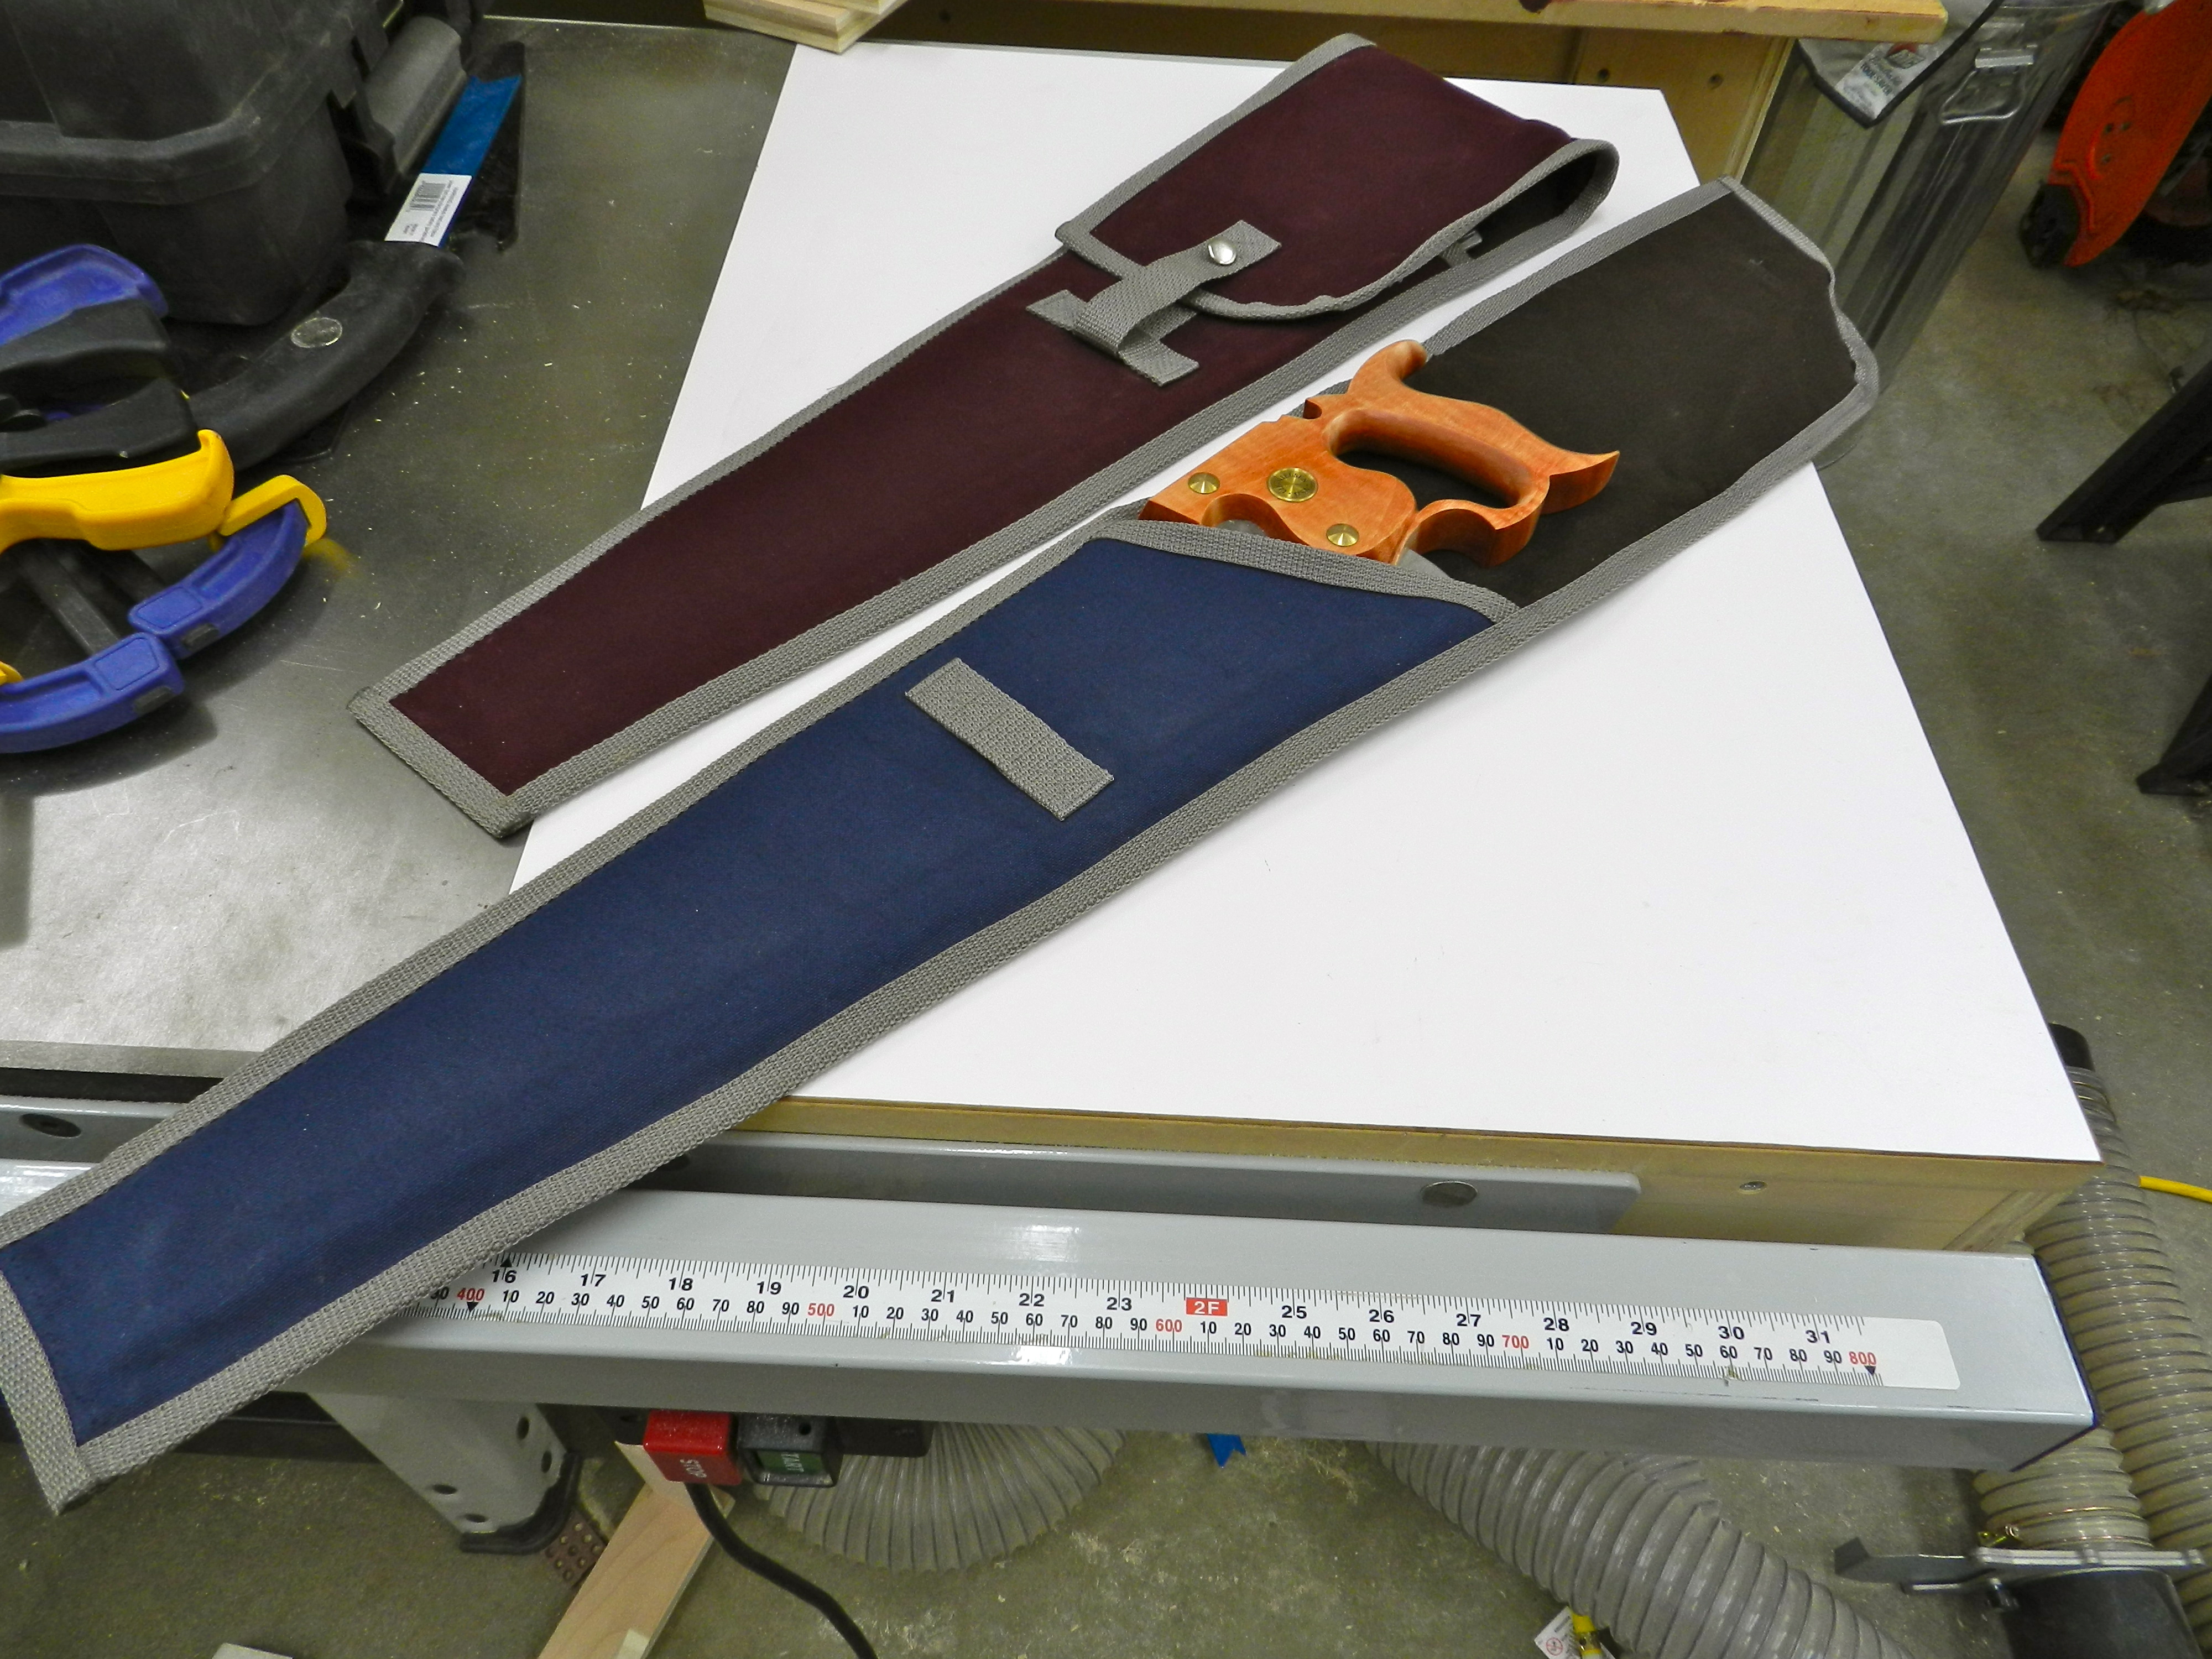
Panel Saw Cases
Do you do it to be cheap? Like most woodworker’s I’d make water from a powder if I could, but I don’t think its ever really been much about saving money — that sewing machine + supplies was reasonable, but certainly not cheap. I learned the basics of using a sewing machine in middle school Home Ec and figured it would be like riding a bike. When it came time to make a tool roll for my timber framing chisels or a saw case for my panel saws I could not find anything on the market that met my needs, was made in the US or was worth the price being asked of it. So out of necessity I decided if I wanted a nice saw case for my panel saws I better make one myself.
Closed Cases
So I bought some heavy duck canvas, poly edging and metal snaps and started making some patterns. Shown in this post are the results of that effort. I made the first of these cases when I was a student at NBSS and they have served me well. I also lined them with material that will protect the tool metal and compared to its unprotected brethren who were only wearing a coat of oil the saws in their cases remained free of rust. My only complaint is that the cases are a bit of a saw dust and cat hair magnet, but so long as I put them back in my tool chest as I do with a plane sock they have been holding up well. Critical joints have been reinforced, the corners sealed (you can melt poly so it does not fray) and the closing strap secured with a metal snap. Just make sure you keep or replace that little plastic tooth protector or you run the risk of sawing your seams. I’ve been very happy with the results and just picked up some material to make some more custom tool rolls for my auger bits and some other smaller tools, so stay tuned for more info on those projects.
Panel Saw
If you want to take your subversive woodworking to the next level the next power tool you buy might be a sewing machine, or better yet track down an old treadle powered model. You might be surprised at the results.
If you’d like to learn more about subversive woodworking and anarchy check out these links:
The bench planes and chisels are not the only tools that need regular sharpening…your handsaws will also benefit from a little TLC.
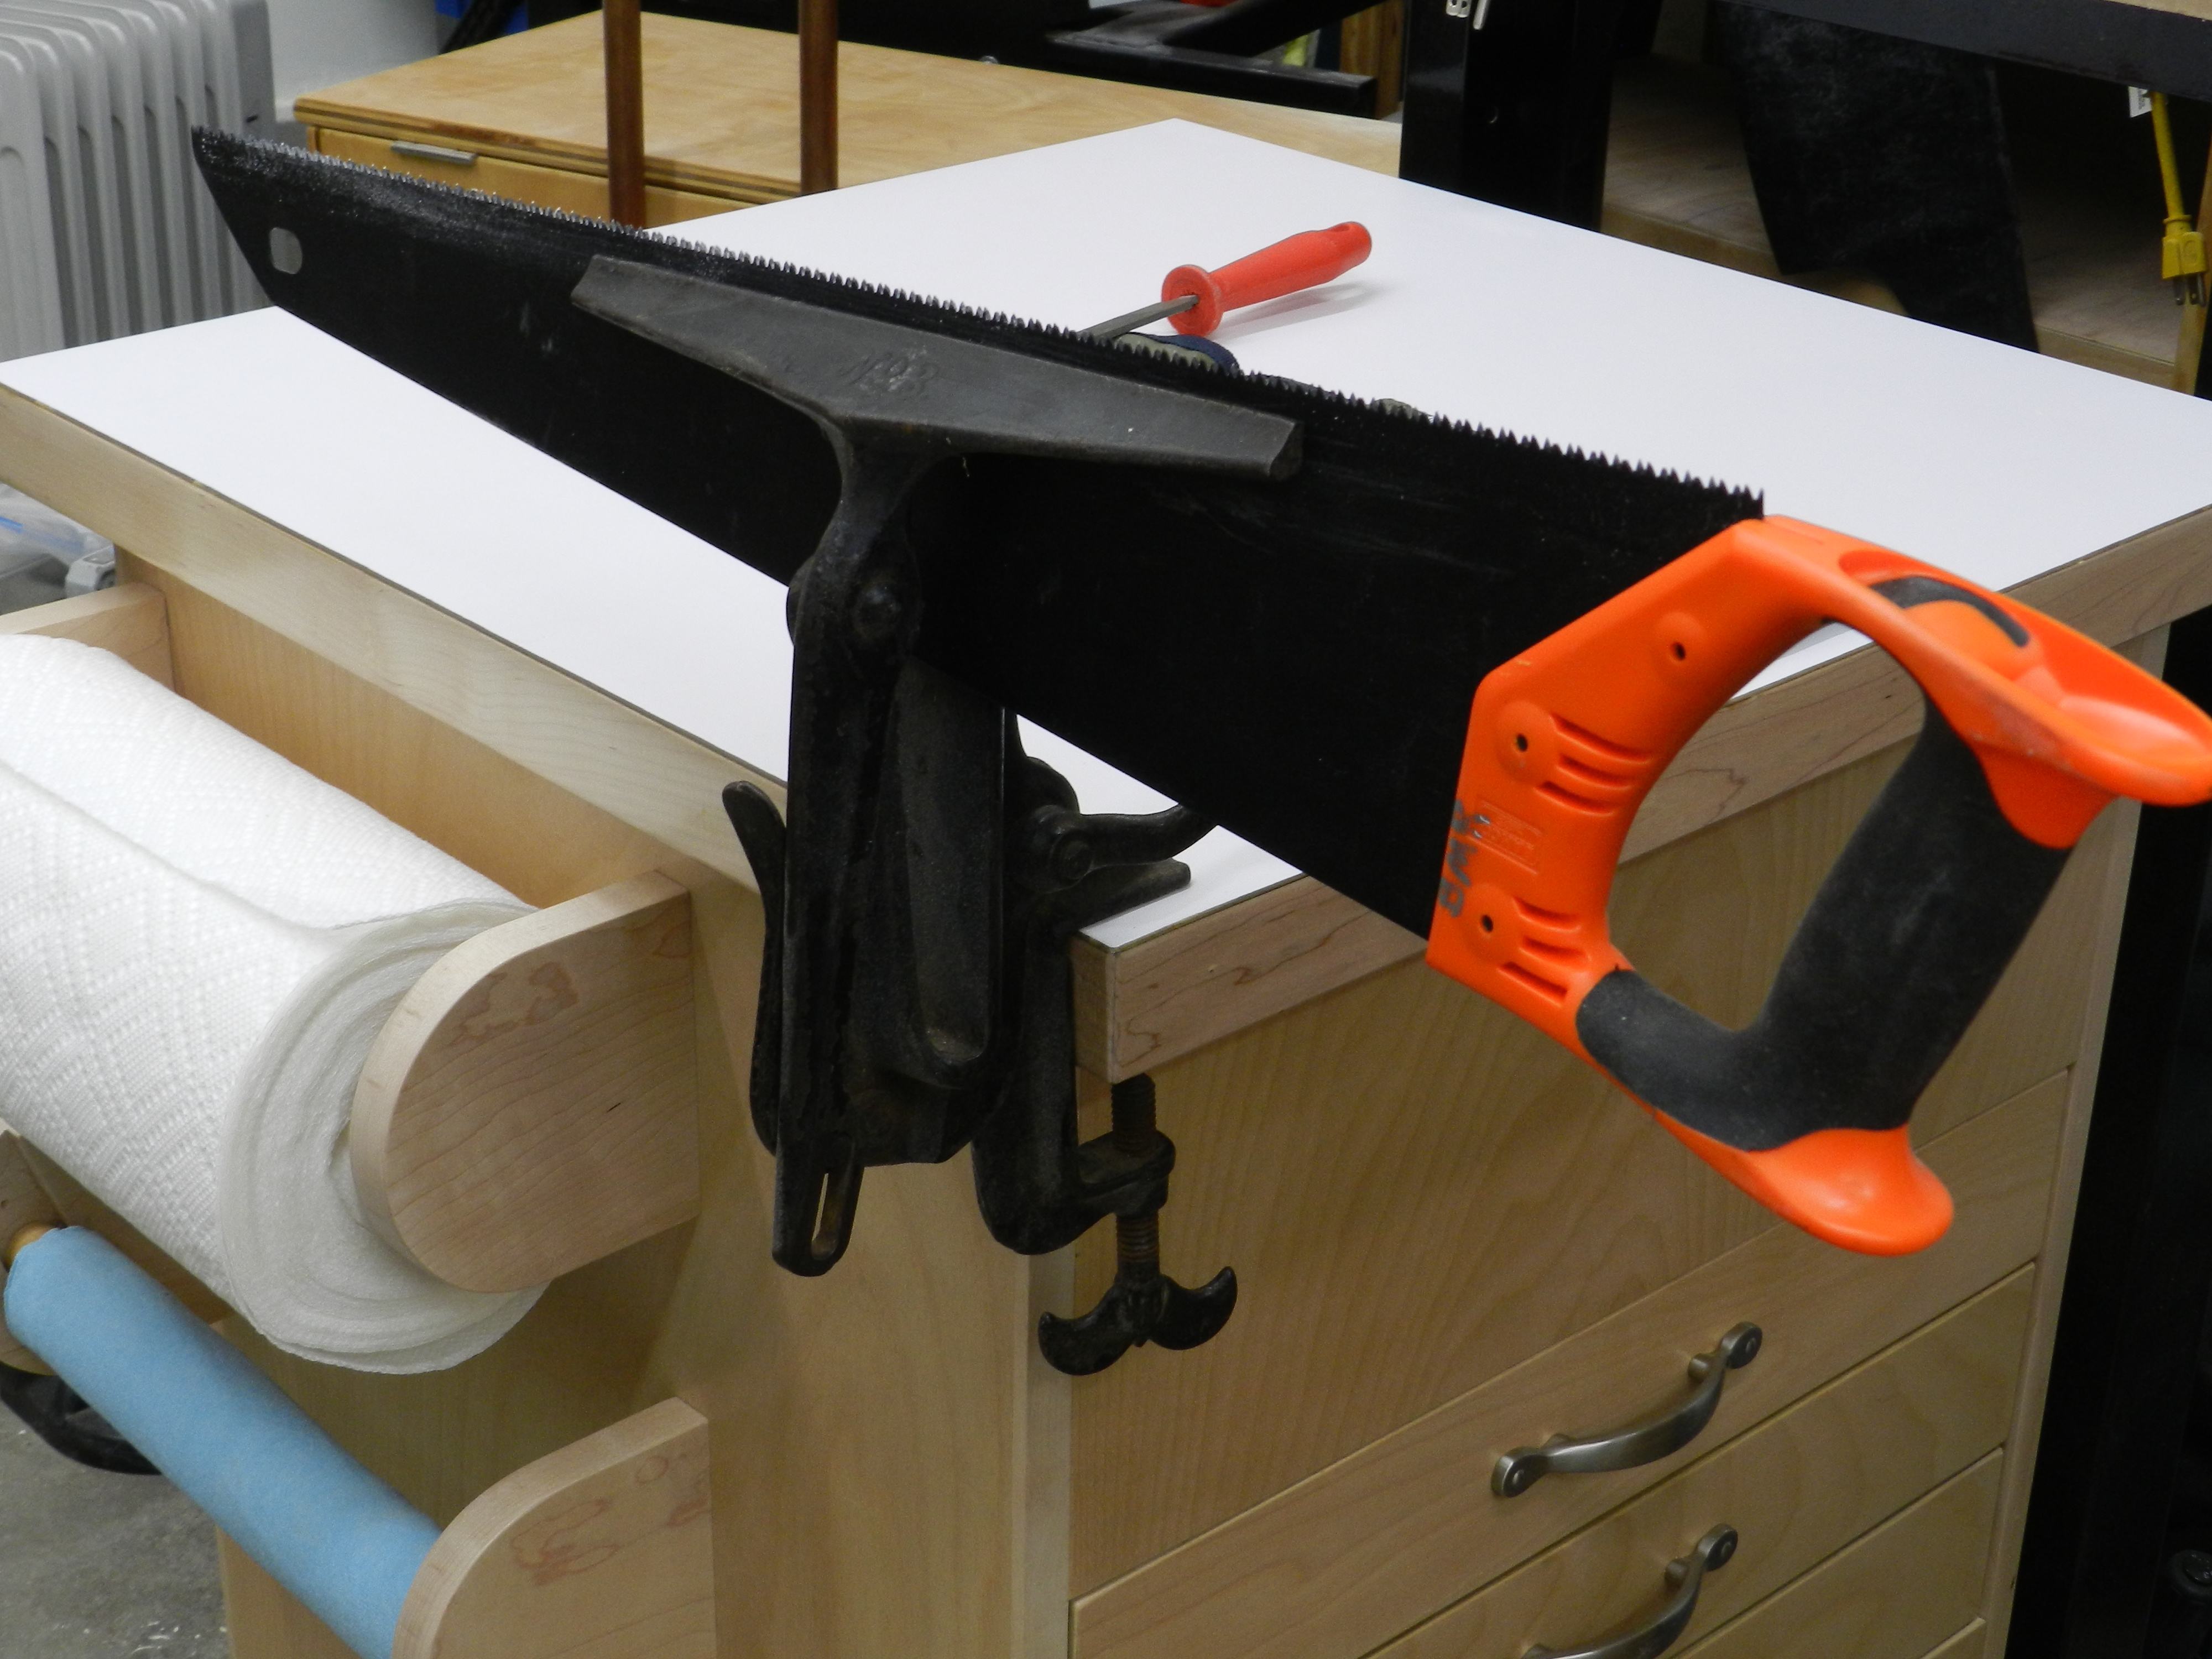
Below is a nice vintage saw sharpening vice I picked up years ago from a cabinetmaker in Newton who was retiring and moving south. It was in very good shape and had some very graceful lines in the casting, but the little vise screw was designed to only close up to about 1″ so I could never use it on my 3/4″ thick assembly table unless I wanted to shim it up with an extra block of wood. It now found its home on the edge of my sharpening station where it’s generally out of the way when I am sharpening on the stones.
Saw in Saw Vise (No, that Bachco saw for timber framing is not the most traditional saw for sharpening, but every now and then a quick touch up helps extend its life)
When looking for a saw sharpening vise, make sure you pick one where the inner jaw faces are smooth, the center of the jaws are open in the center when not under pressure — this way it evenly applies pressure when holding your saws — and has a solid clamping action both on the saw and onto the bench. If you cannot find one of these old vices, you can make your own jaws from wood and use it in your bench vise or check out the modern version of this vice from Gramercy Tools.
Space at center of the jaws
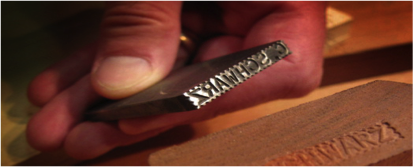
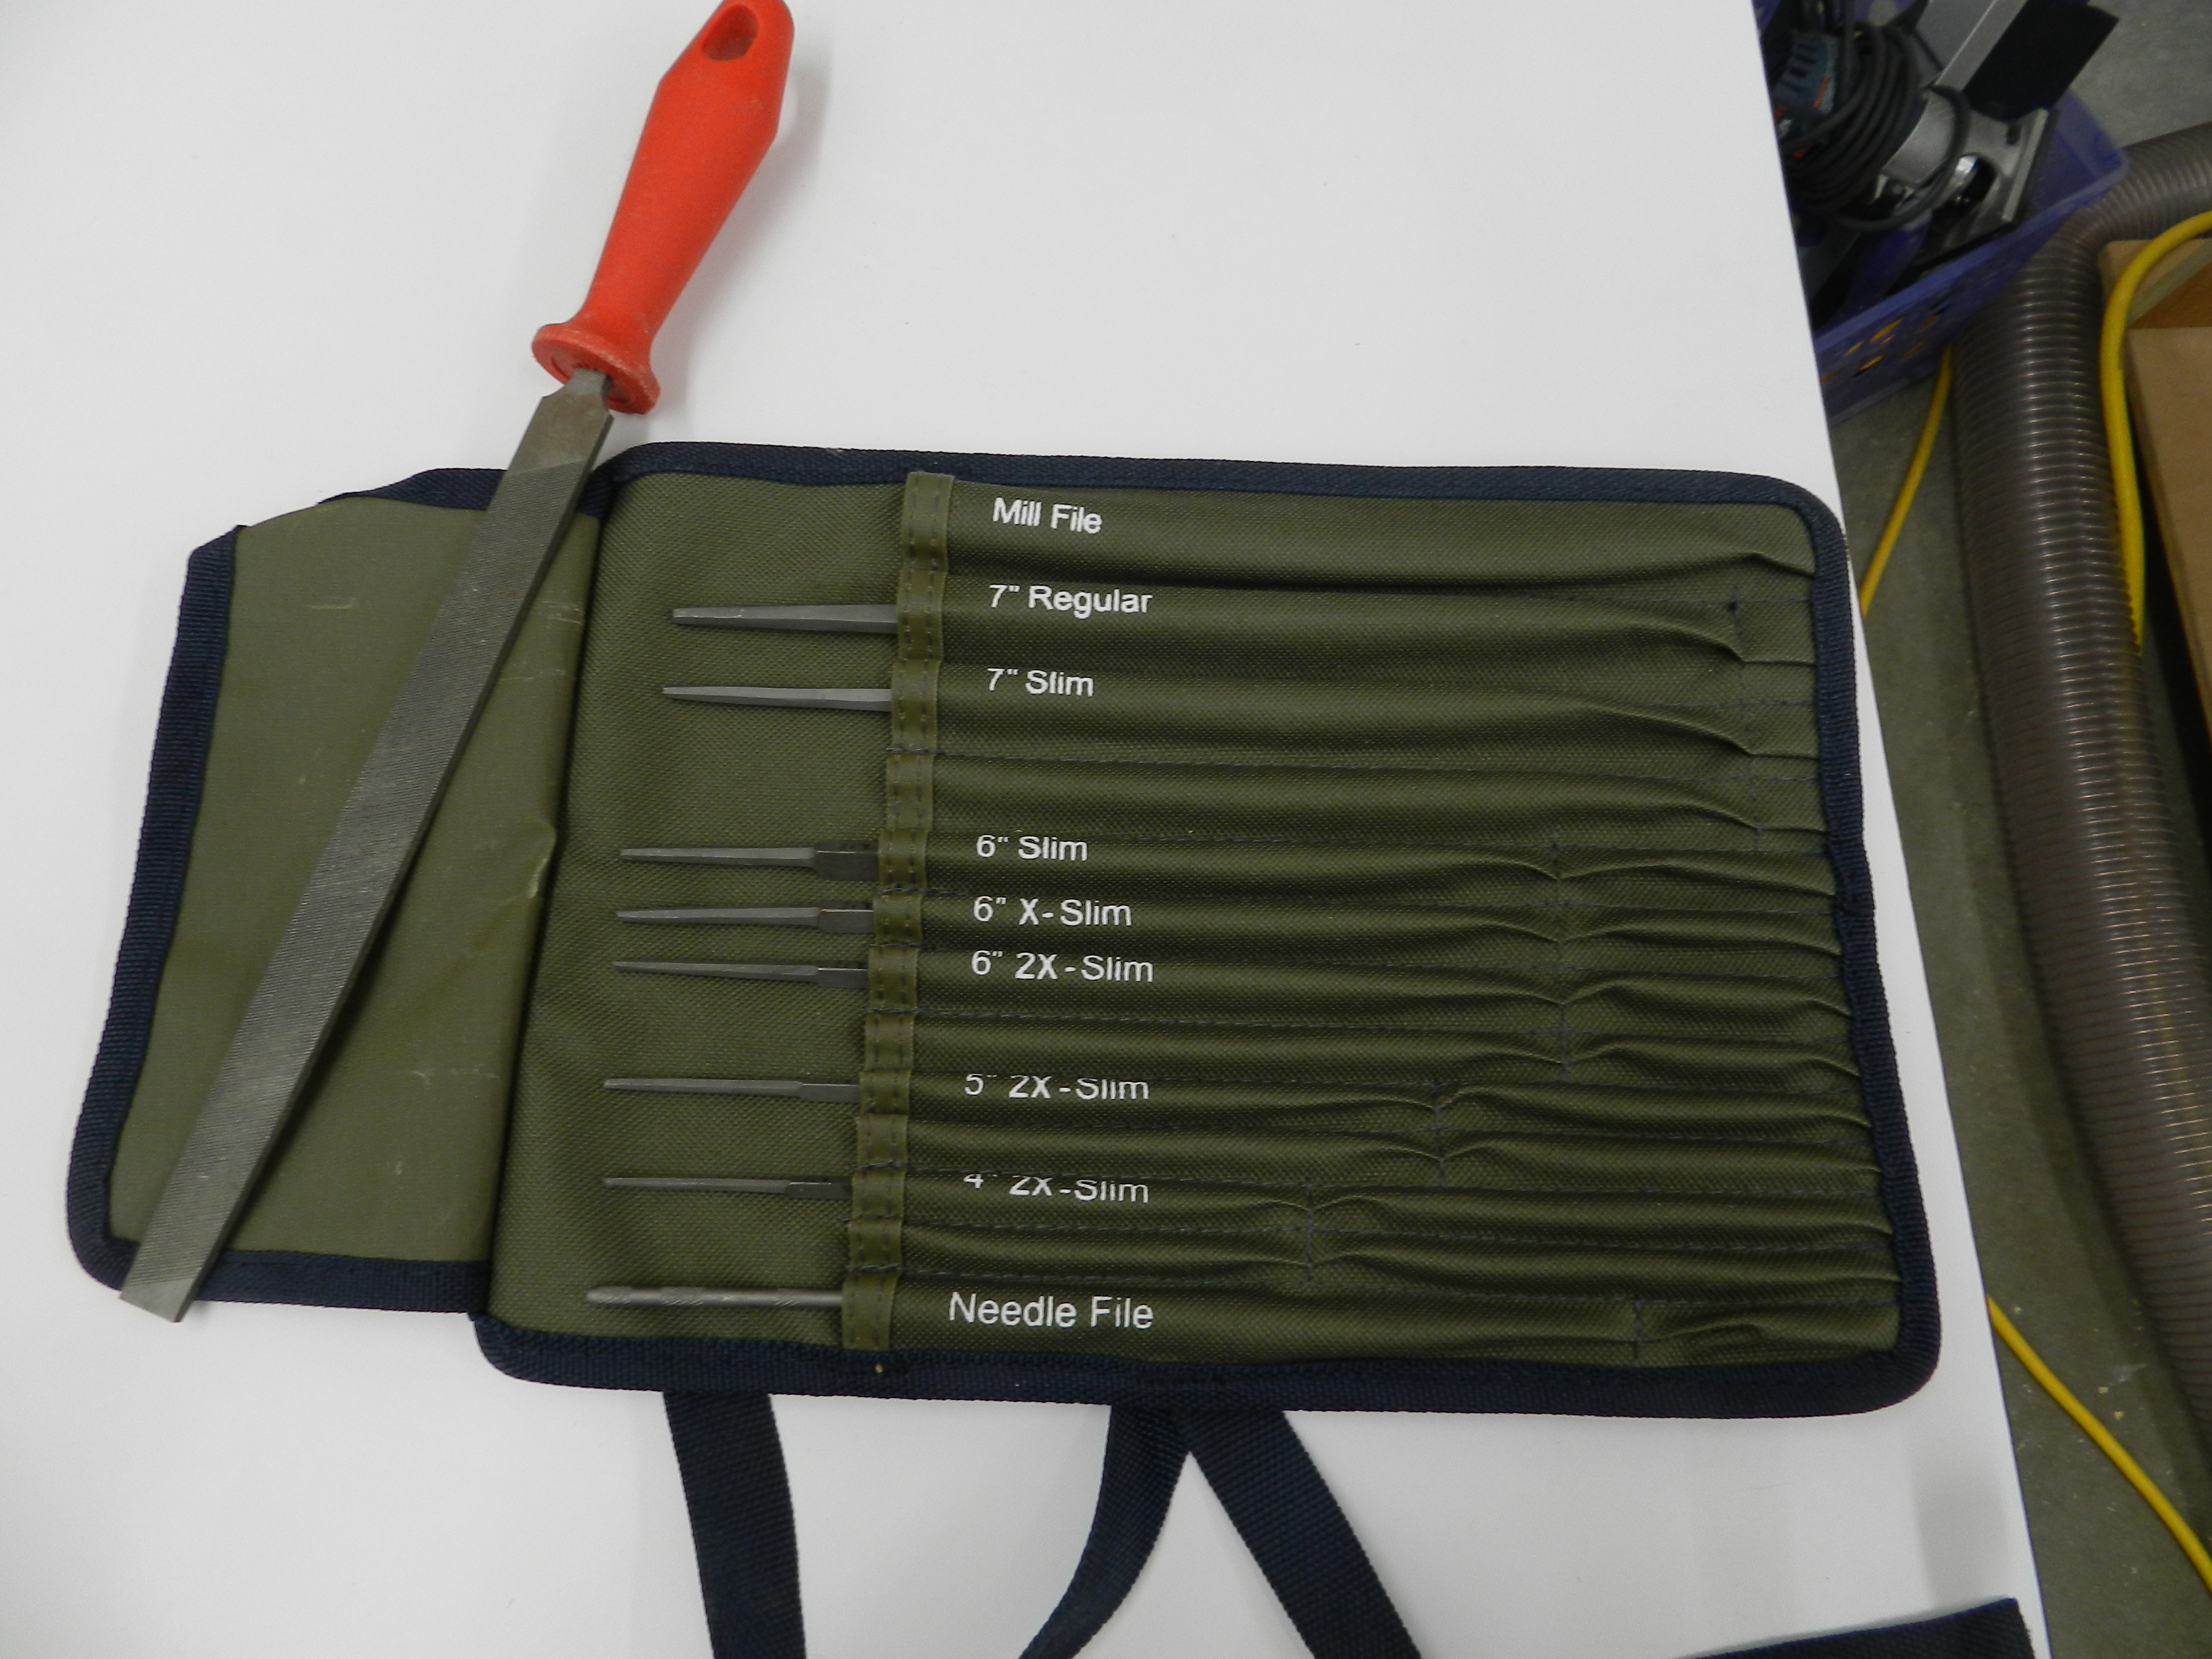
Now that you have a place to hold your saw, it’s time to start sharpening. I used to have a random assortment of files I bought from various machinist’s chests, flea markets and used tool dealers over the years and I got by with that. The problem with that random assortment was if you wanted something just a little bigger or smaller or finer or at a different profile it was a lot of hunting around, I may not have what I was looking for and I do not believe all of them were necessarily meant for hand saw sharpening. Then a few weeks ago I saw Lee Valley started offering a Grobet Swiss files with a labeled tool roll and decided to give it a try. I’ve had other Grobet Swiss files in the past (for carving and similar applications) and been very happy with the quality.
Lee Valley Saw File Set + Tool Roll
So far it’s been a great little set and earned a place in my tool chest. I sprang for the ‘needle file’ which is used with very fine and progressive pitch saws and has a dedicated pocket in this tool roll. Online there are plenty of great articles on how to sharpen a saw so I won’t go into detail about how to do that here, but I will make a few high level suggestions. If you sharpen regularly and with a consistent motion you’ll likely have good results. If you have to joint and reset a saw, track down an old Stanley or similar saw set tool. I found an old one in the original box for < $10 and it looked almost new — these tools often do not see a ton of use, but when needed they work much better than the very old bending wrench style saw set.
It’s easy enough to sign your work with a Sharpie or branding iron…and I’ve done both many times in the past. But what if you are looking for something that will give your work that extra flourish? Or work on a massive scale like a timber framed barn? Or be a new sign for your shop? Often the best solution is to carve your own sign or inscription.
This past weekend I had the opportunity to take a two day workshop in letter carving with Janet Collins at the North Bennet Street School. I had a great time. Below is a quick recap of how I spent my Superbowl Weekend.
Demonstrating how to make the first cuts
Janet is a graduate of the NBSS CFM program, instructor, former workshop director and accomplished artisan. She has a passion for woodworking and loves sharing the craft with others.
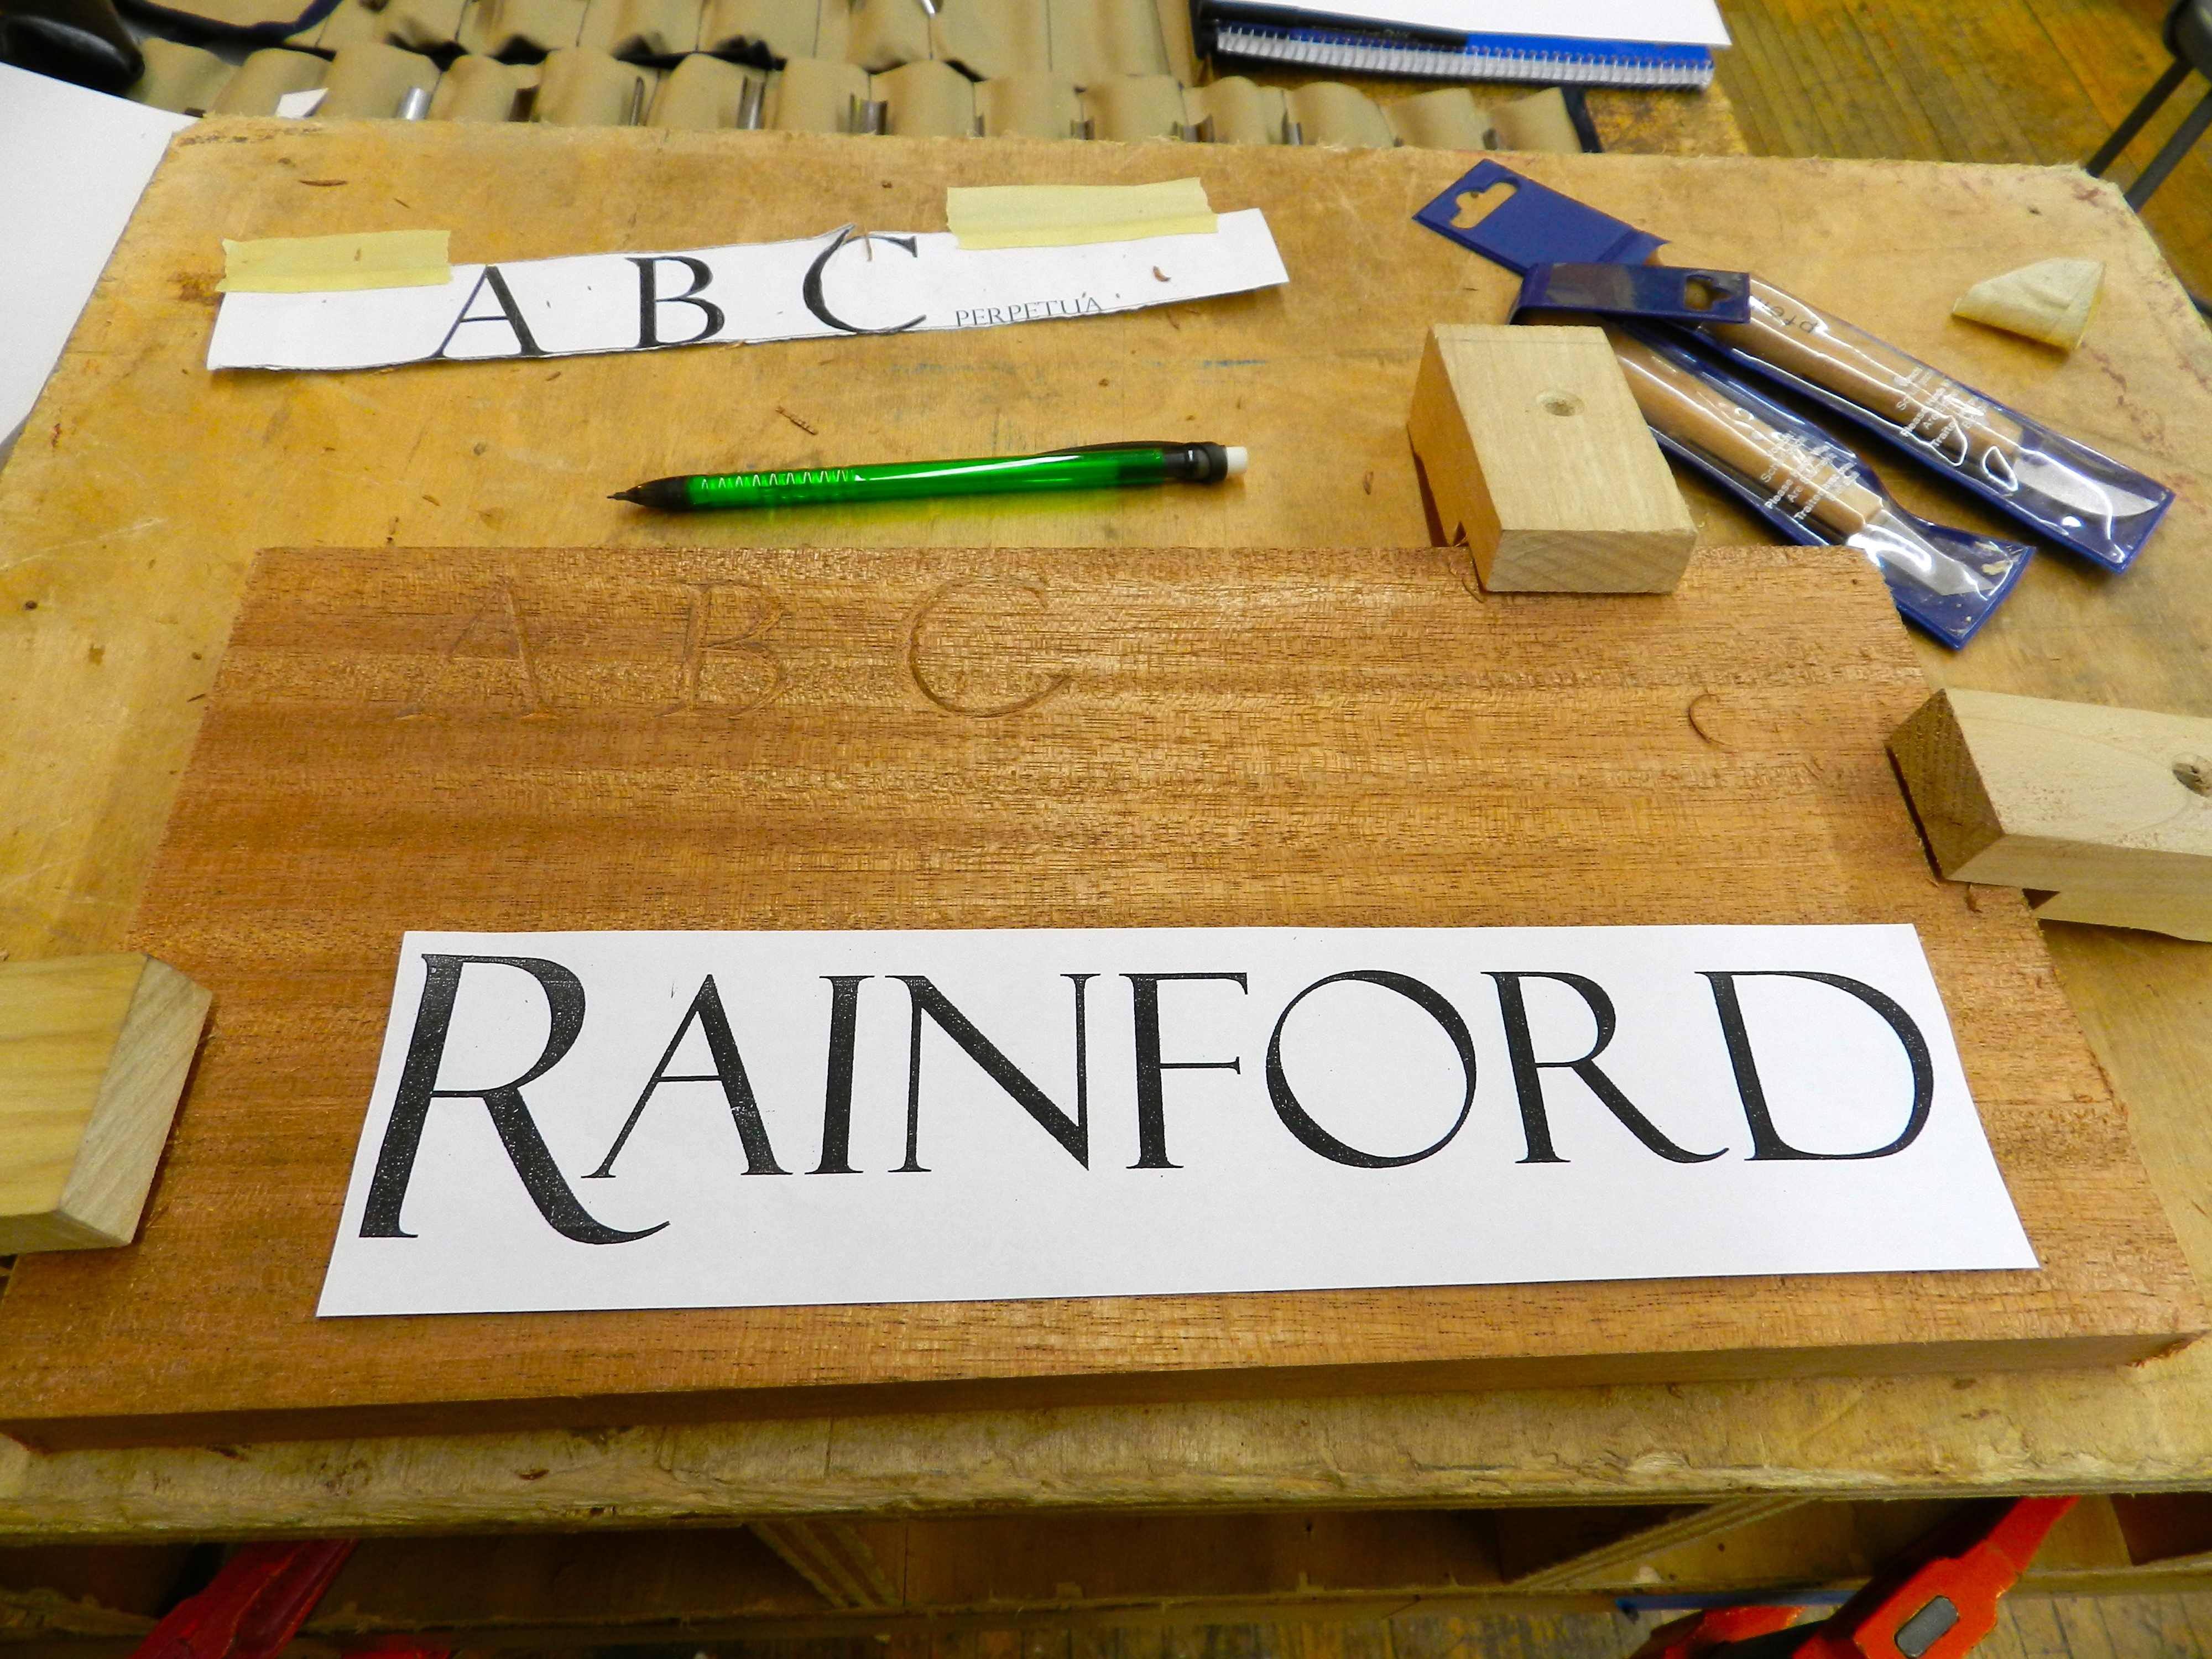
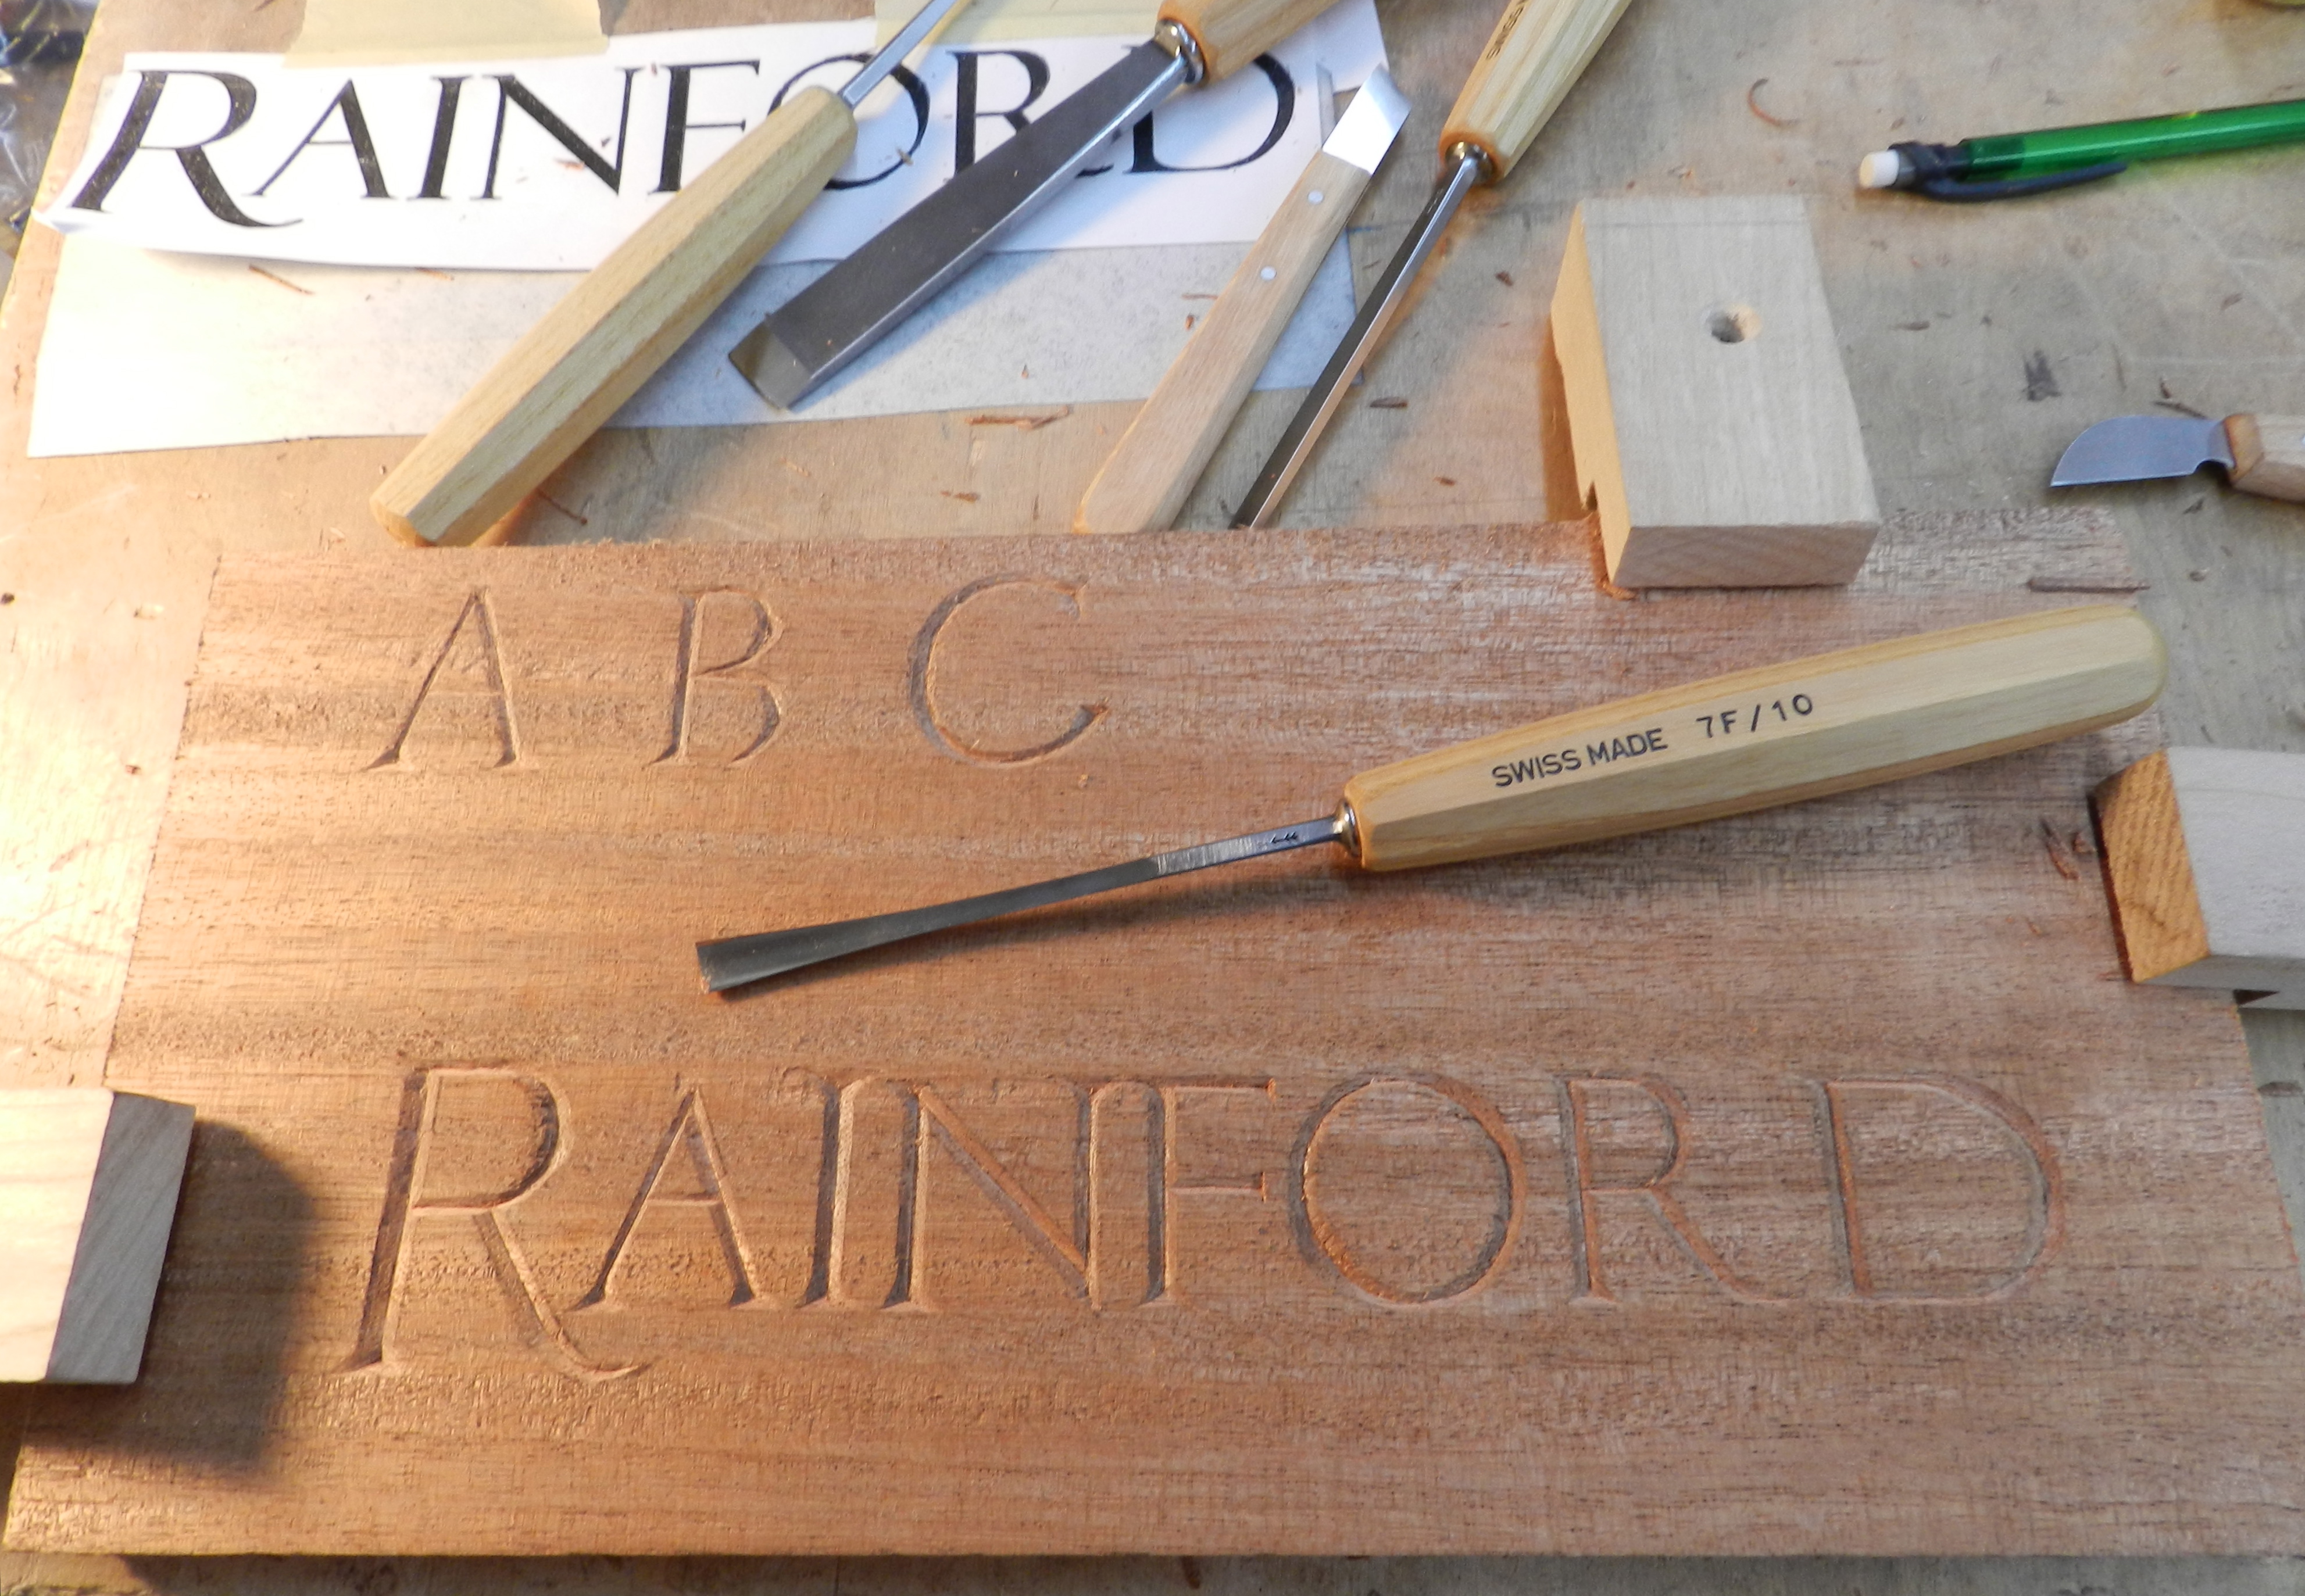
Laying out your letters
After sharpening your tools the first step is laying out your text first on paper or a computer.
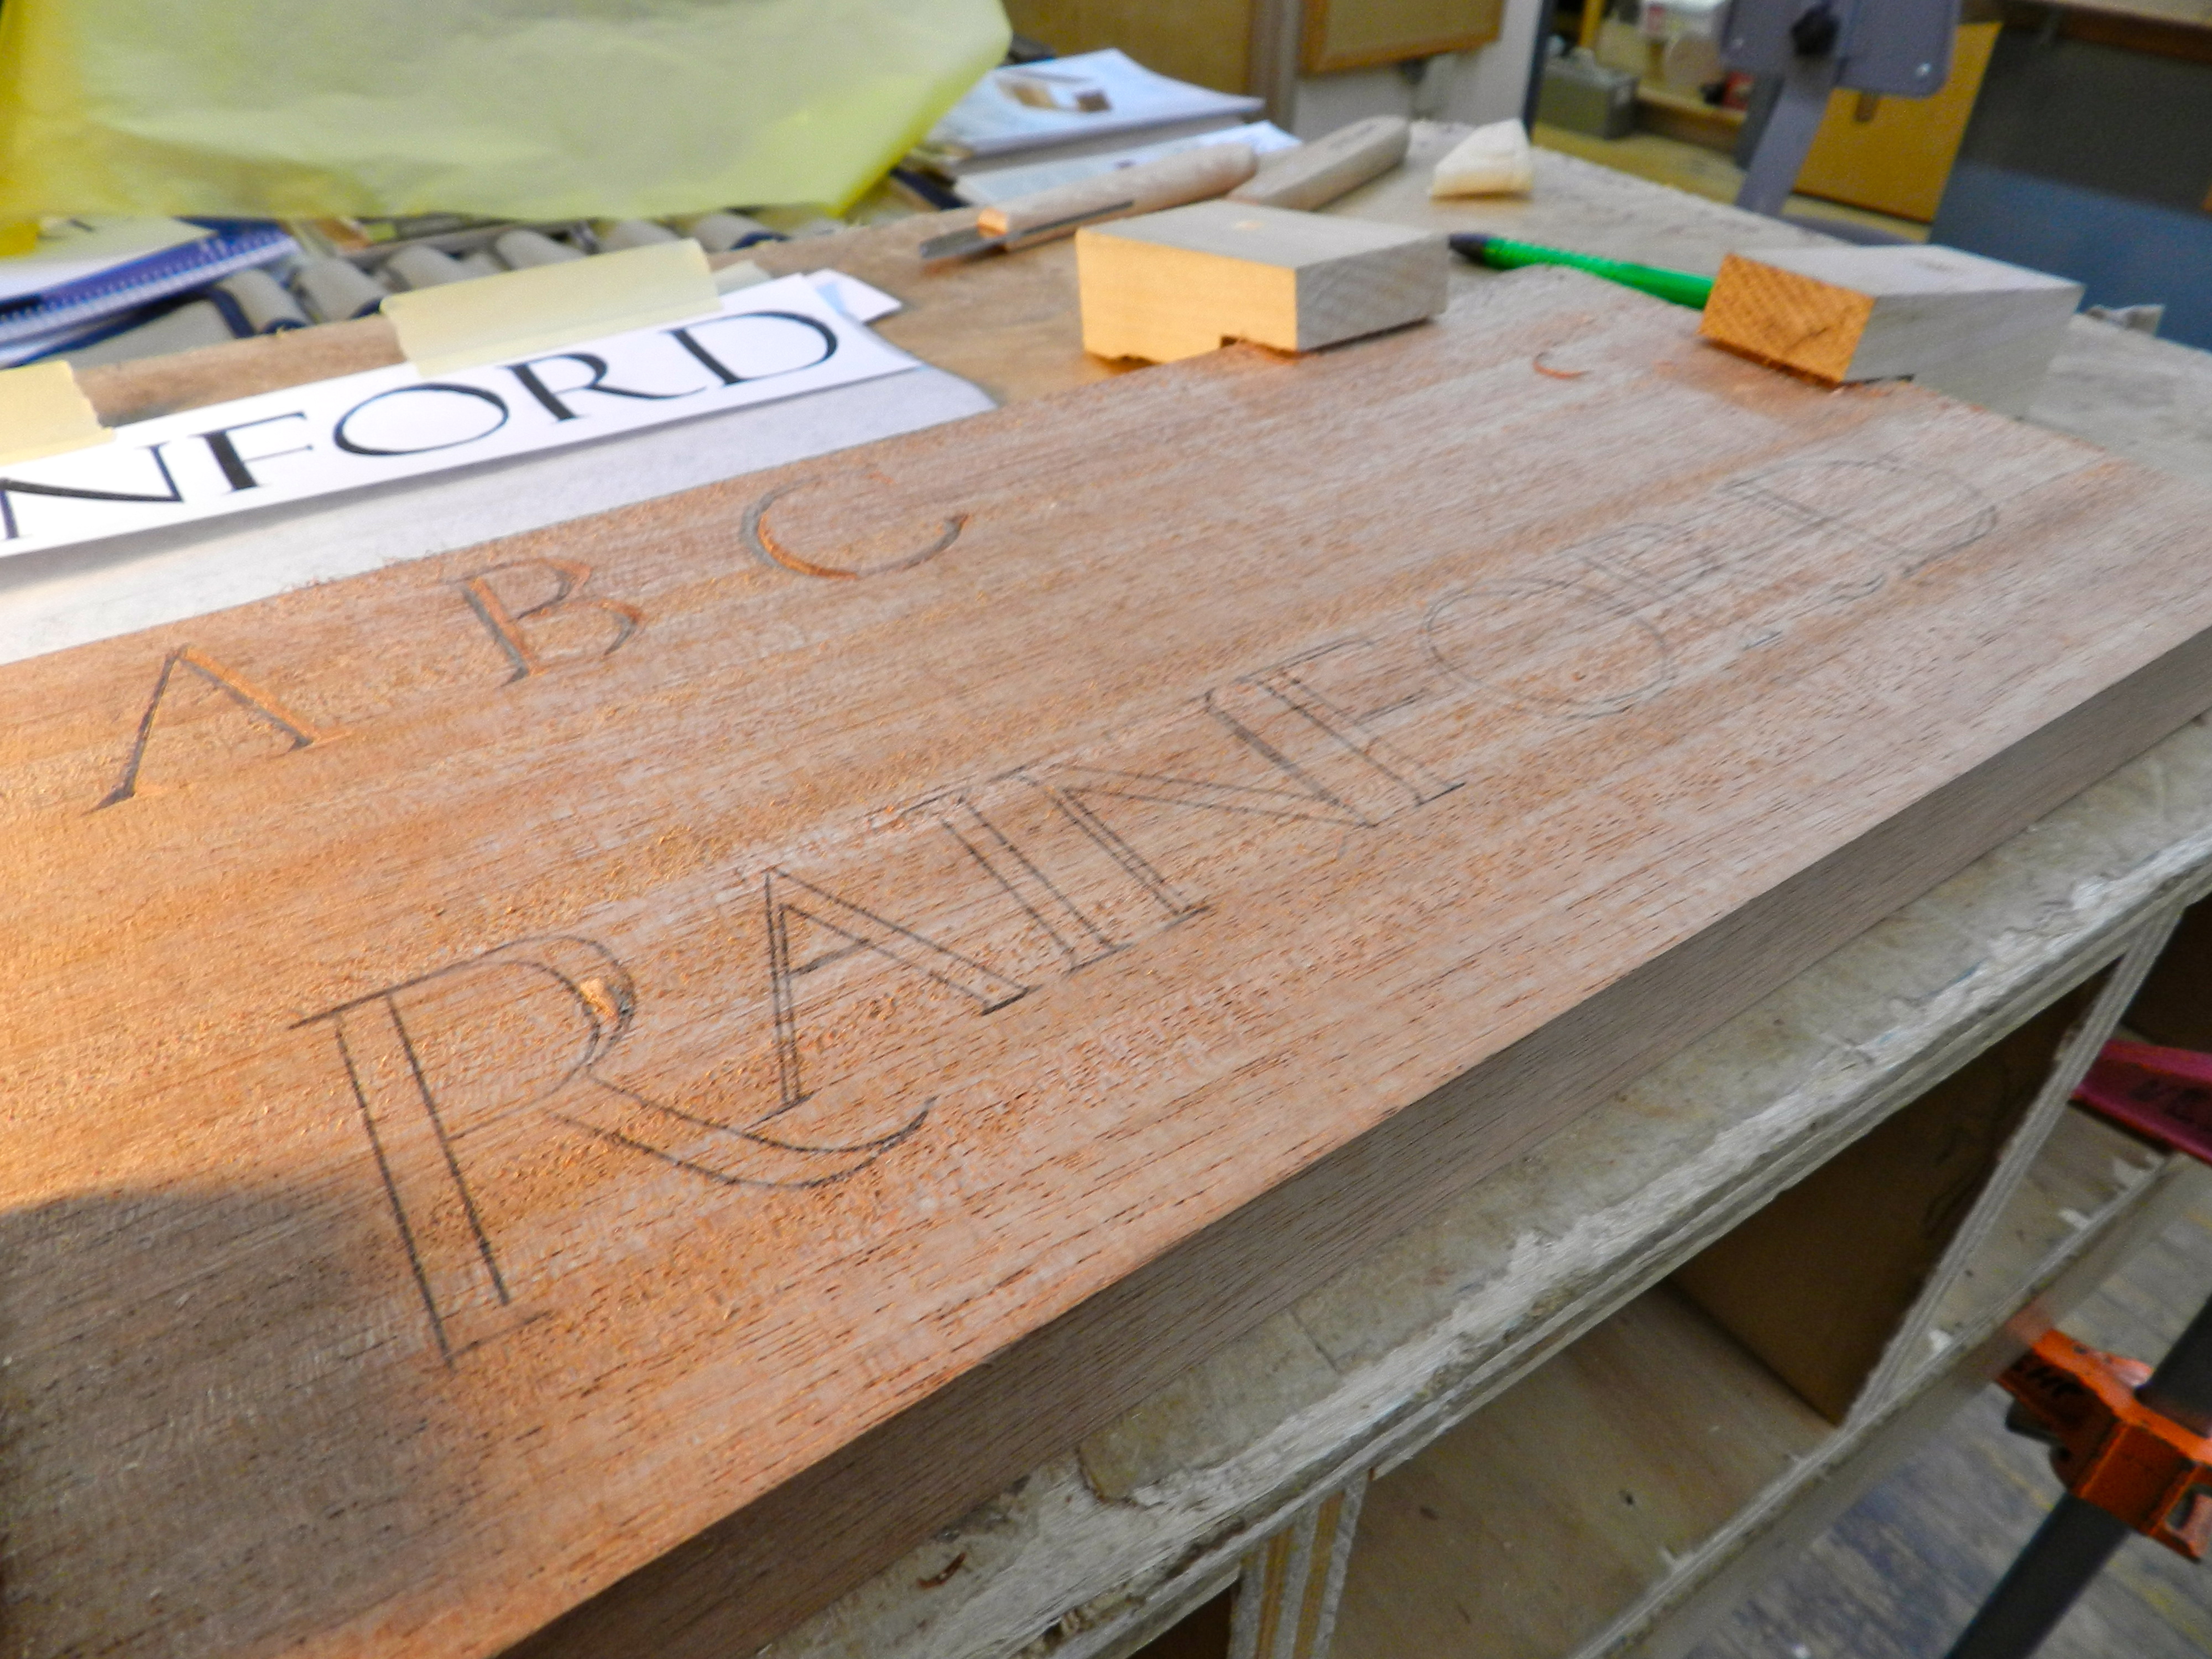
Transferring your pattern
Transfer your pattern on to the workpiece.
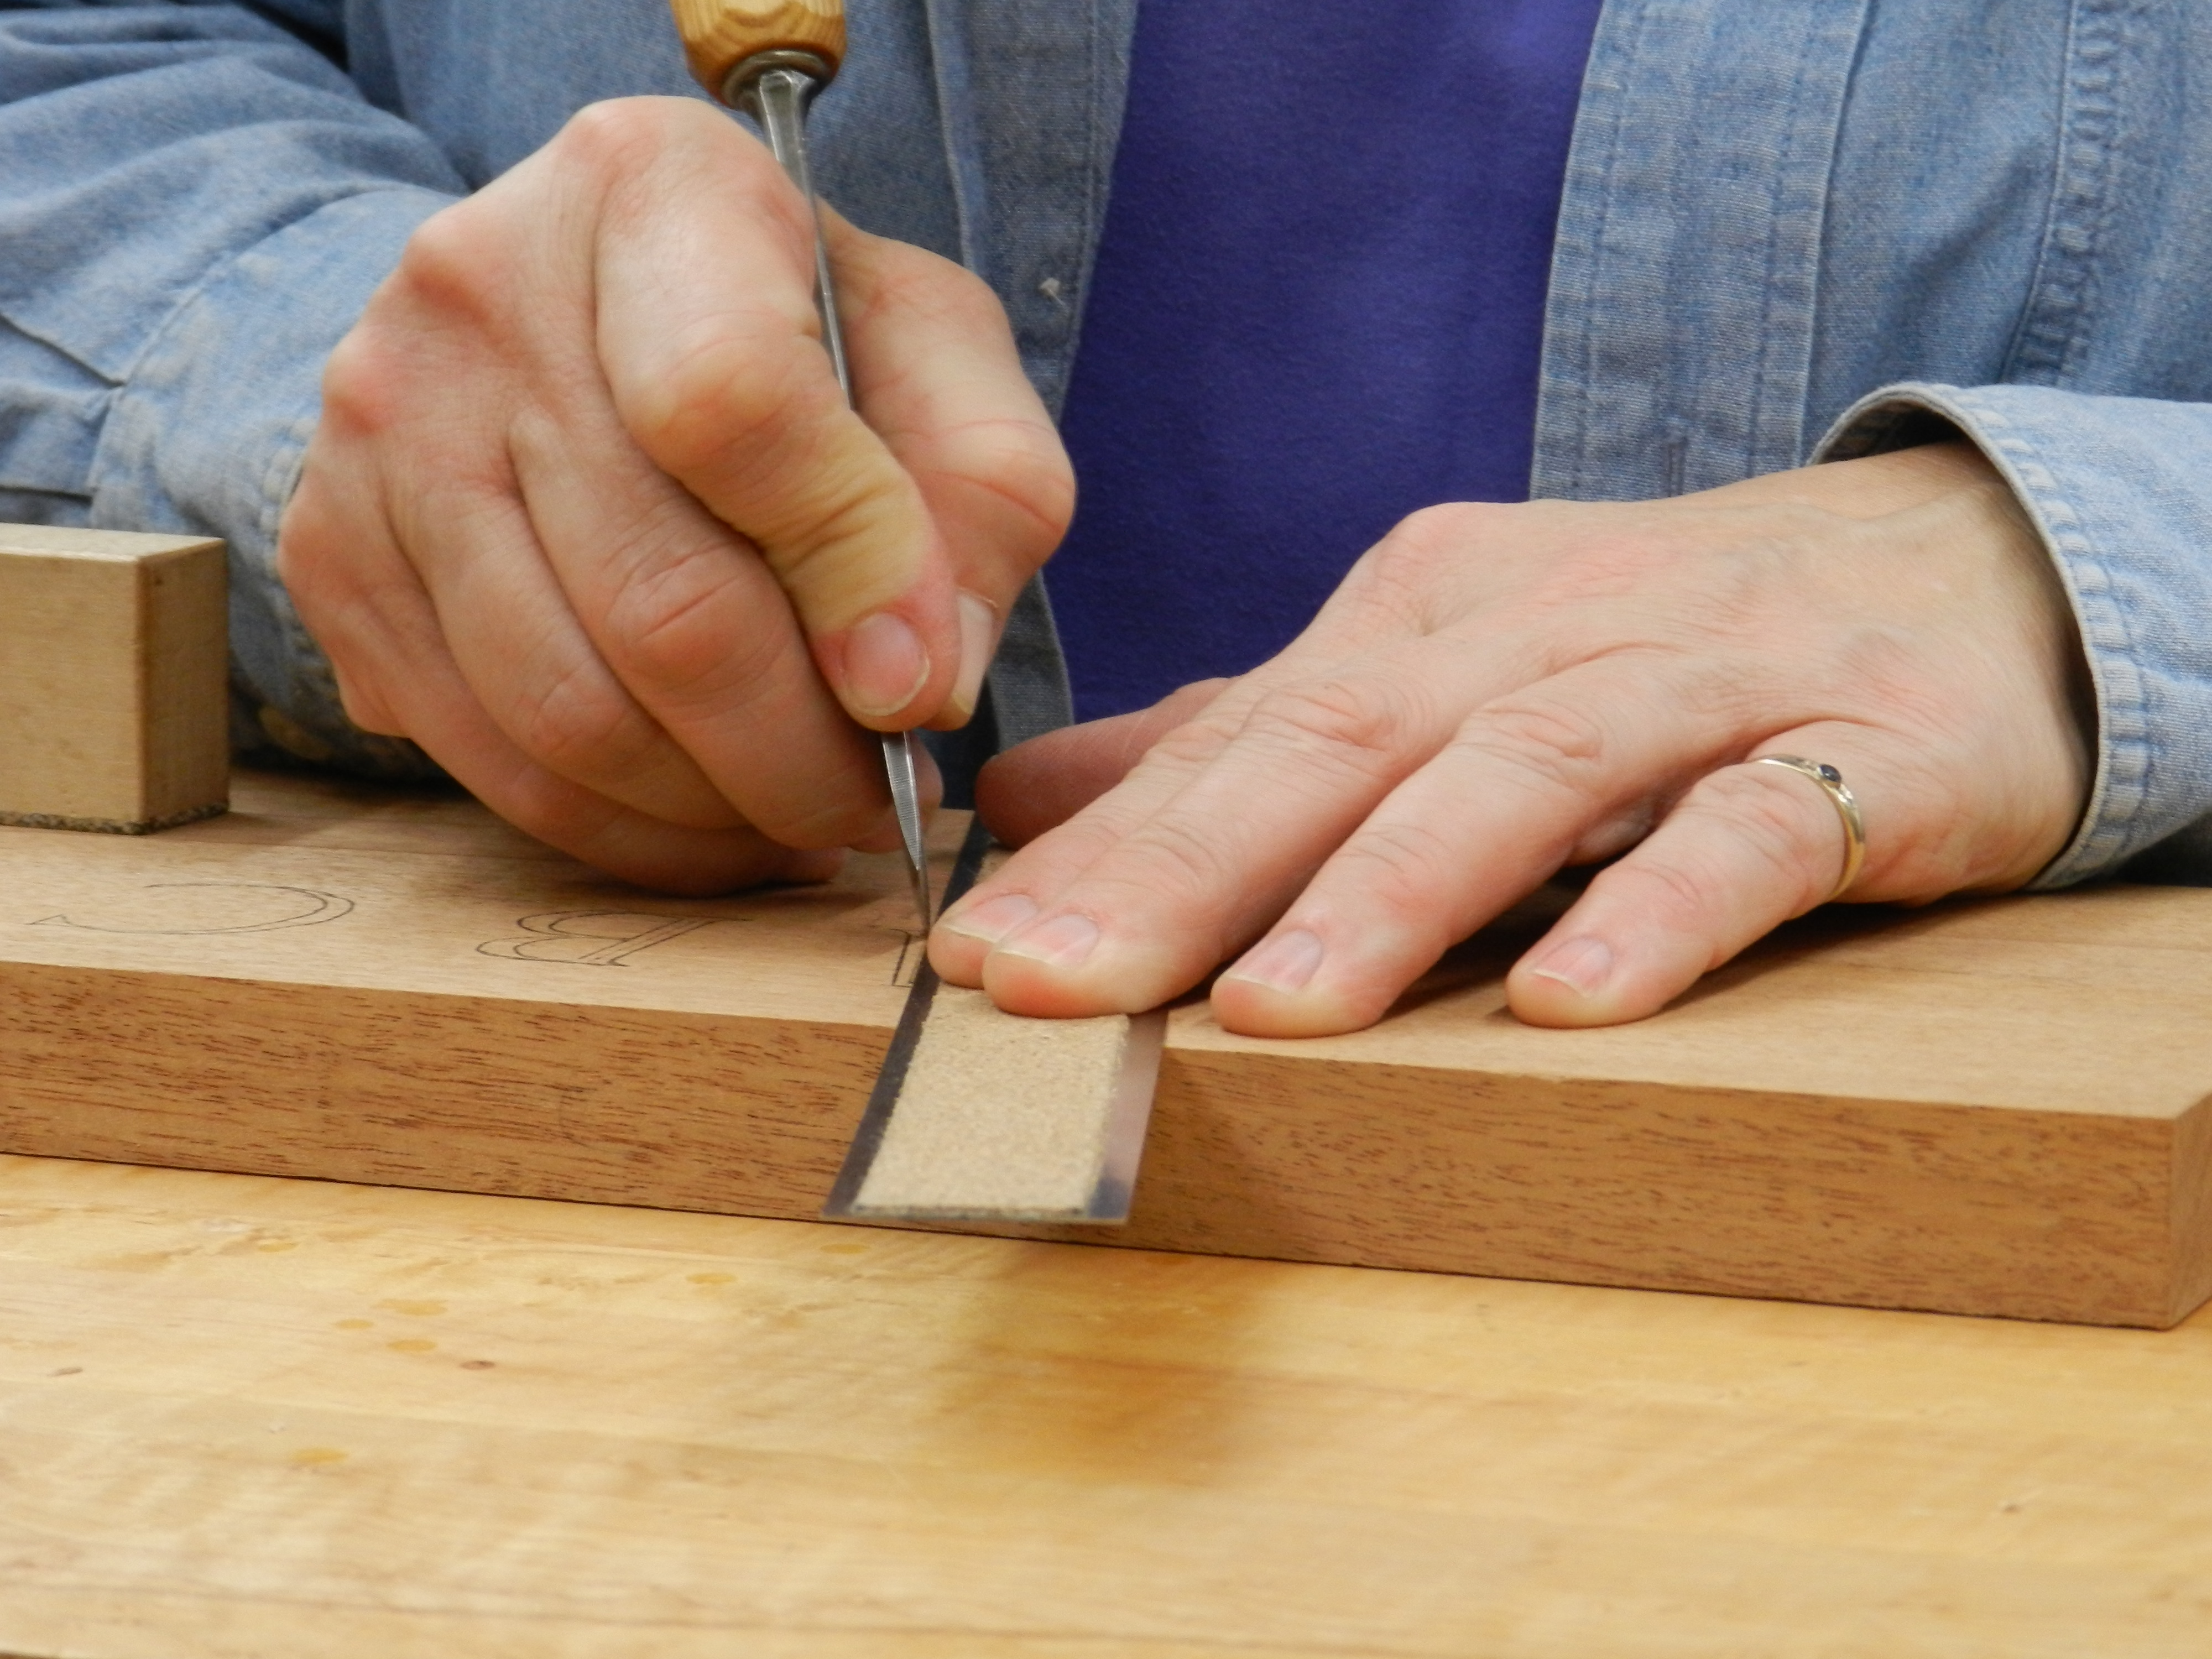
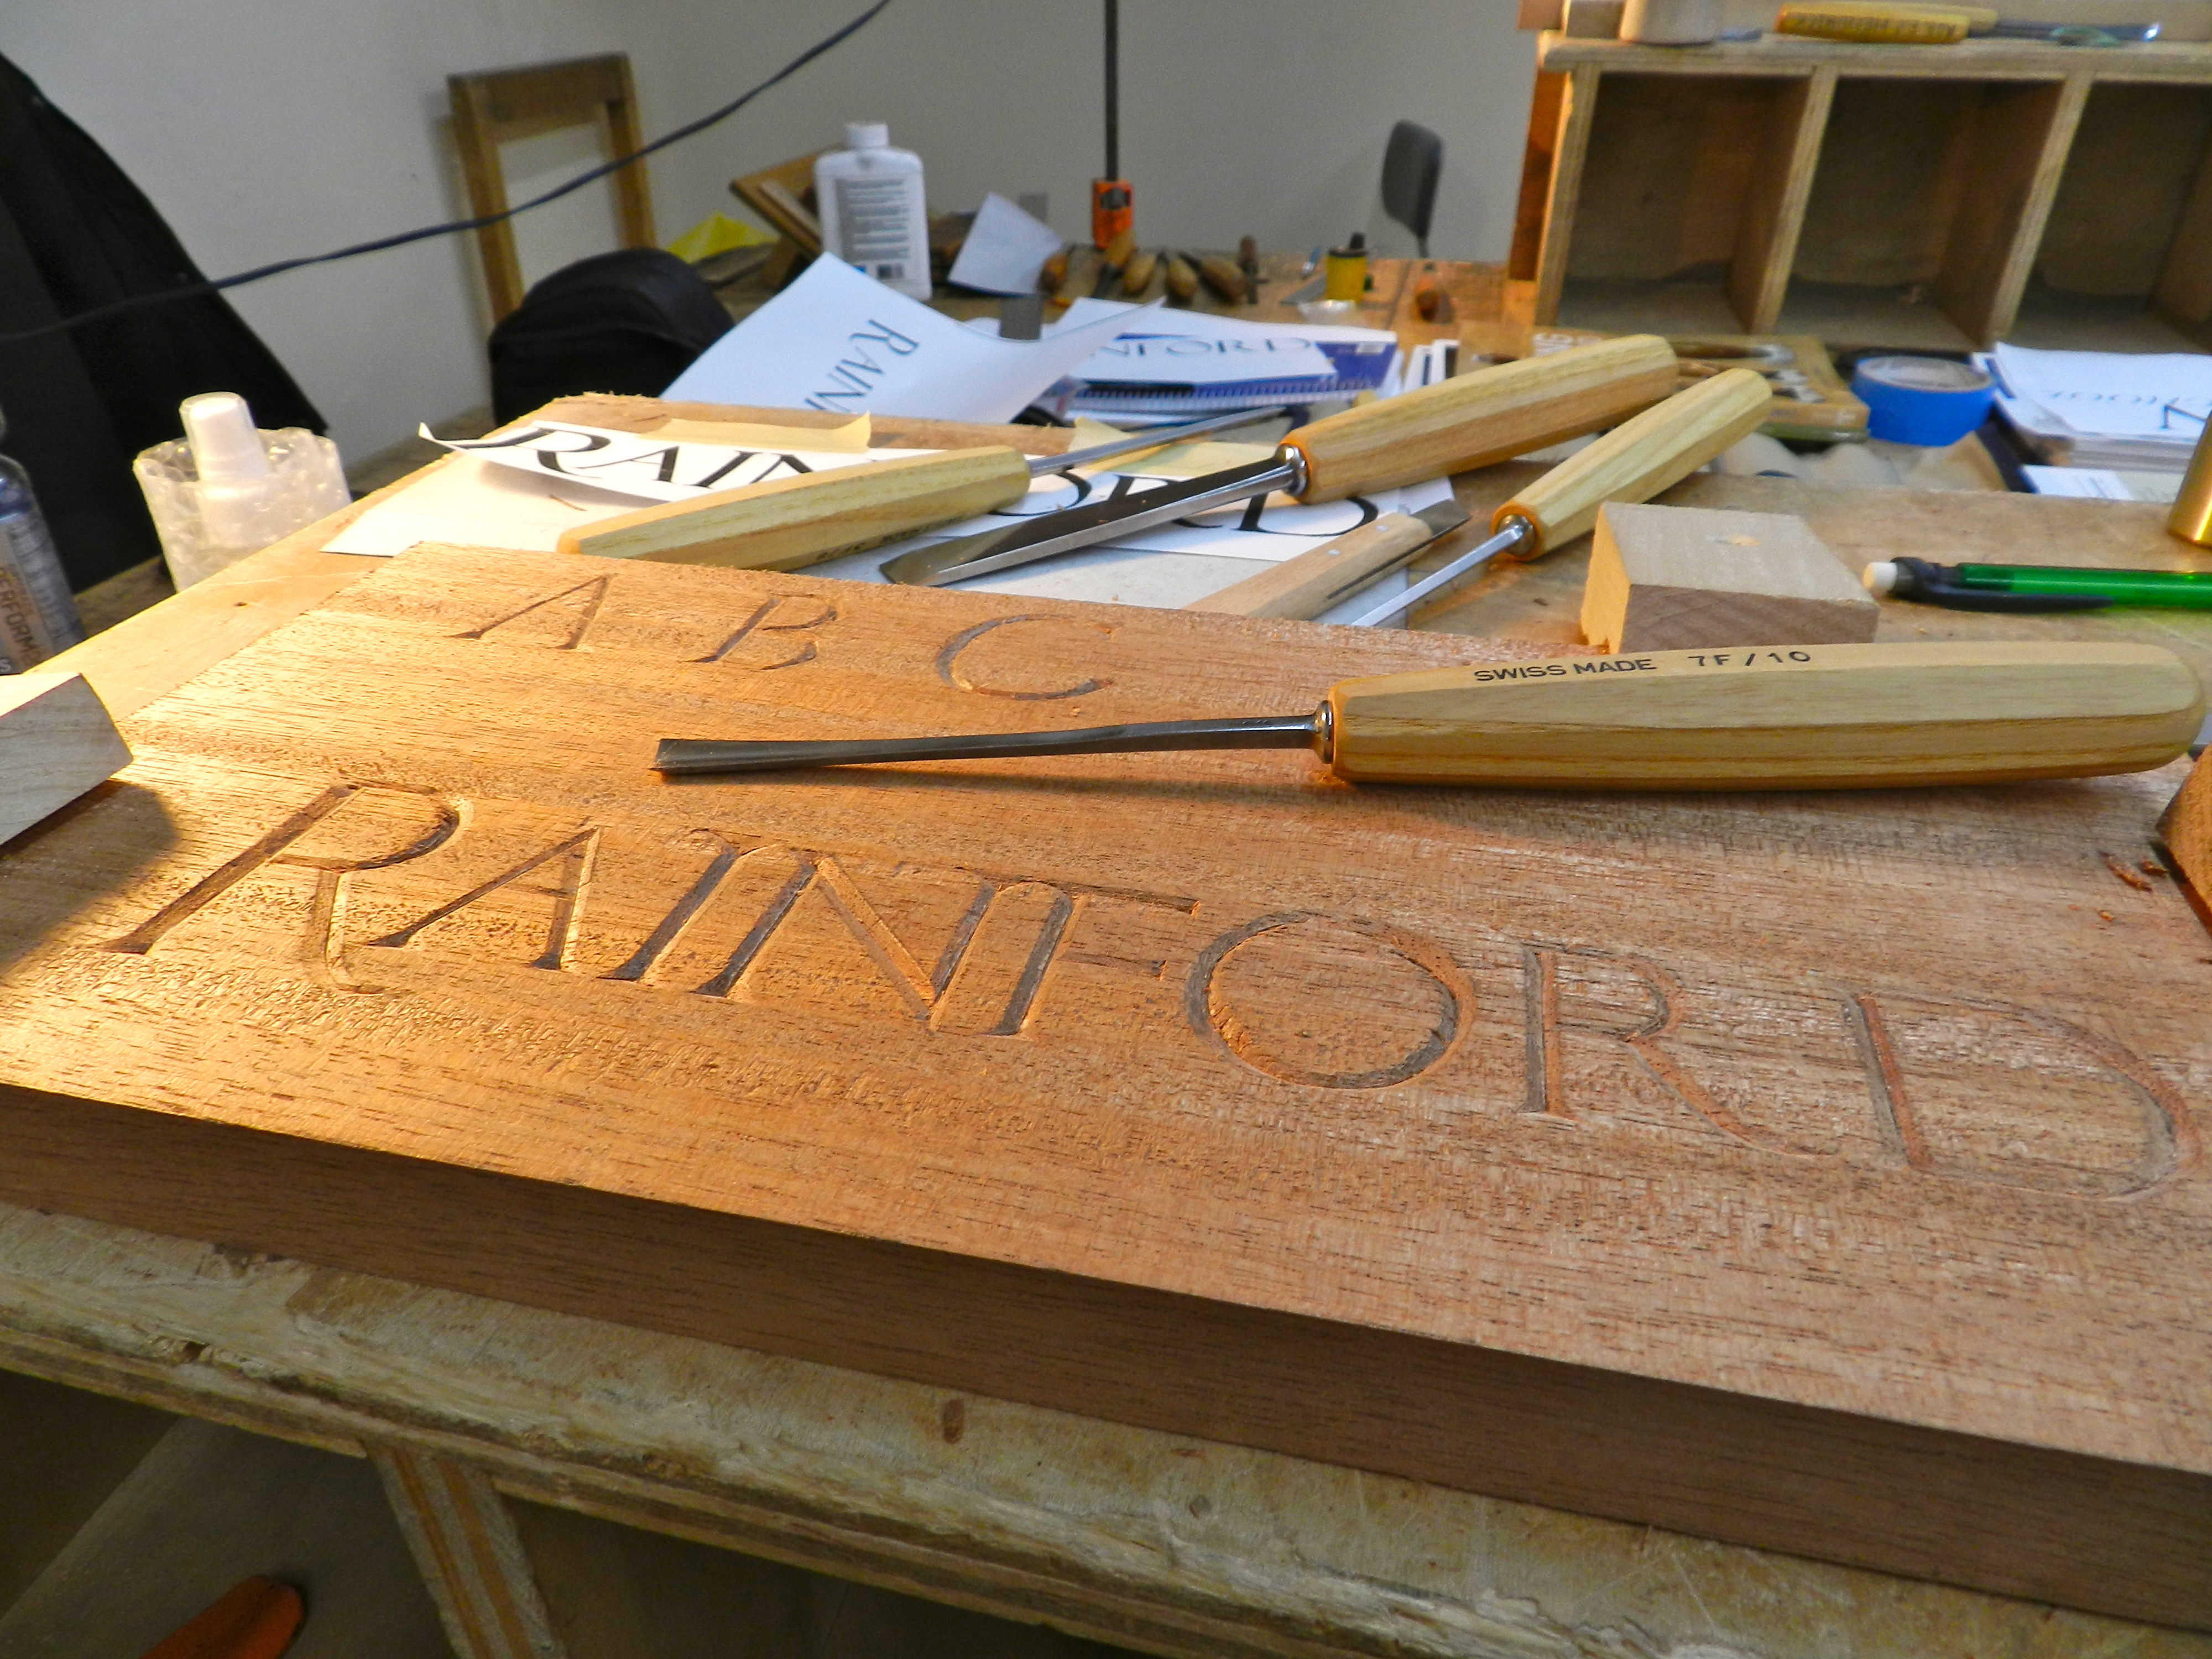
Carving
Now for the fun part — carefully carving your letters into the piece. You want to take a light touch, always be aware of the grain direction and strive for an even depth of cut.
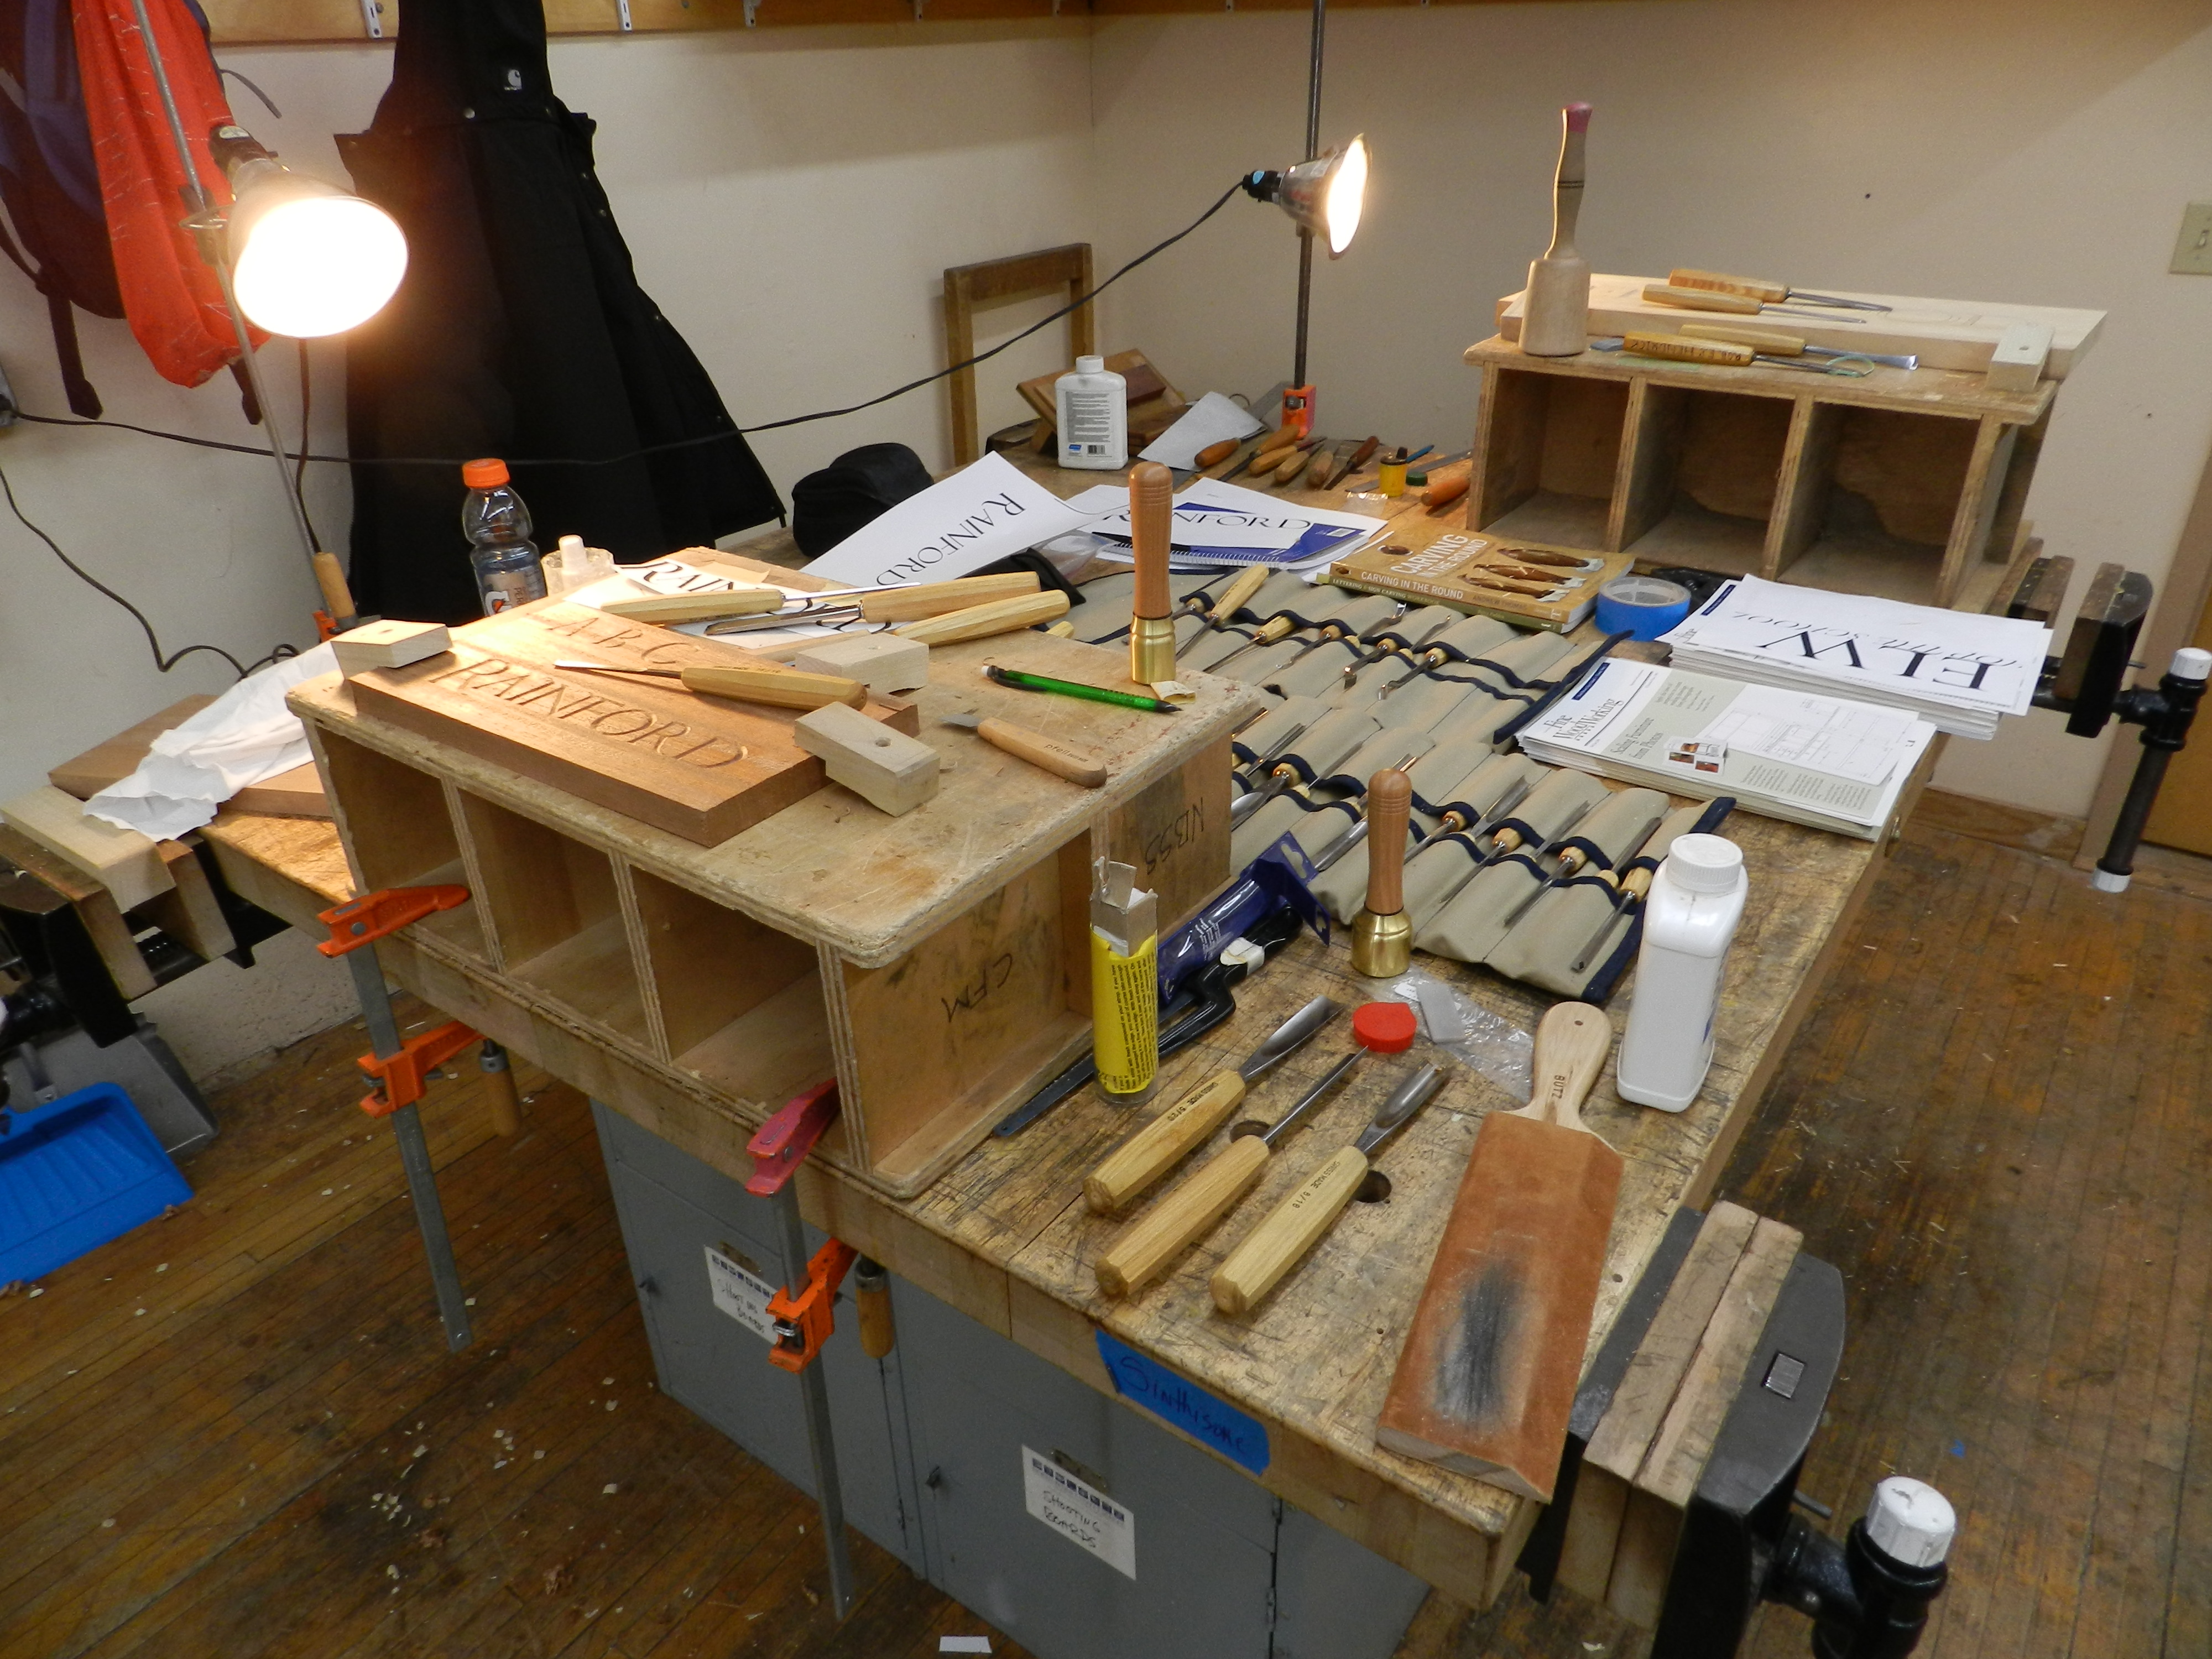
Carver’s natural habitat
Just as you can never have too many clamps, you can never really have too many carving chisels and gouges.
My completed name carving
A raking light and solid platform to secure your work are requisites to success in this sort of work.
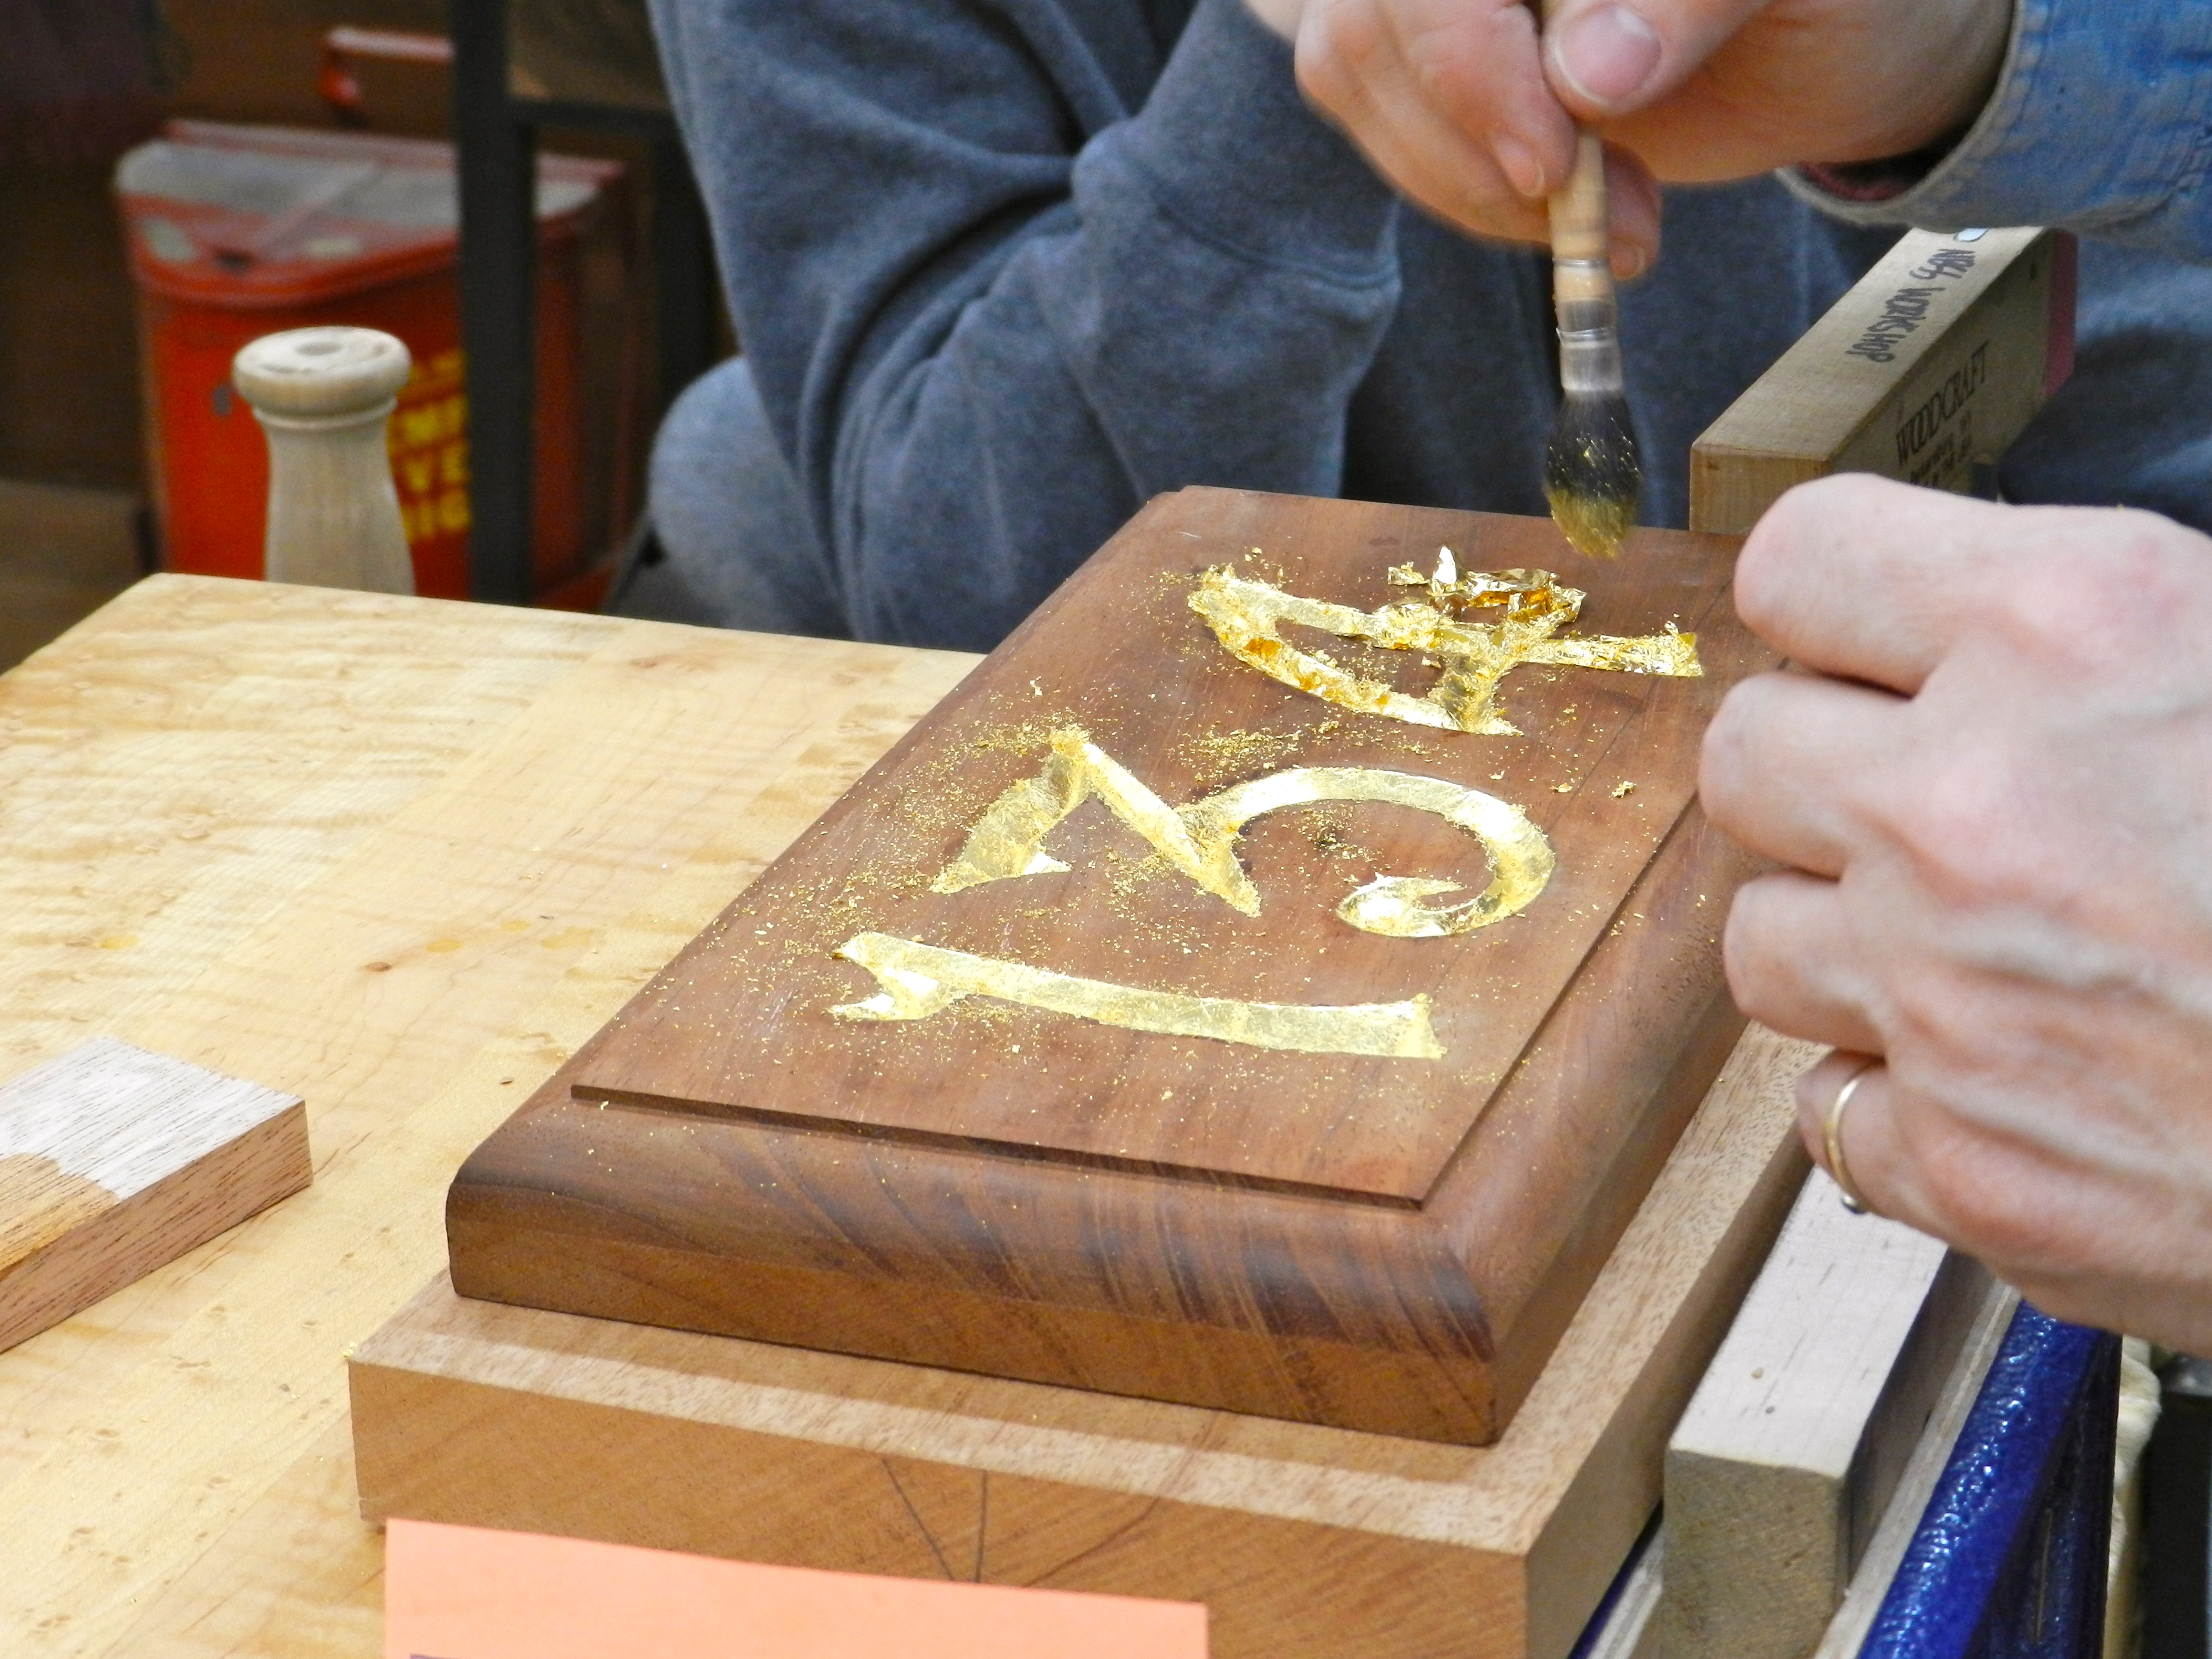
Gilding lesson
Beyond the carving exercises we were also treated to a nice demonstration on how to gild this sort of hand carved sign.
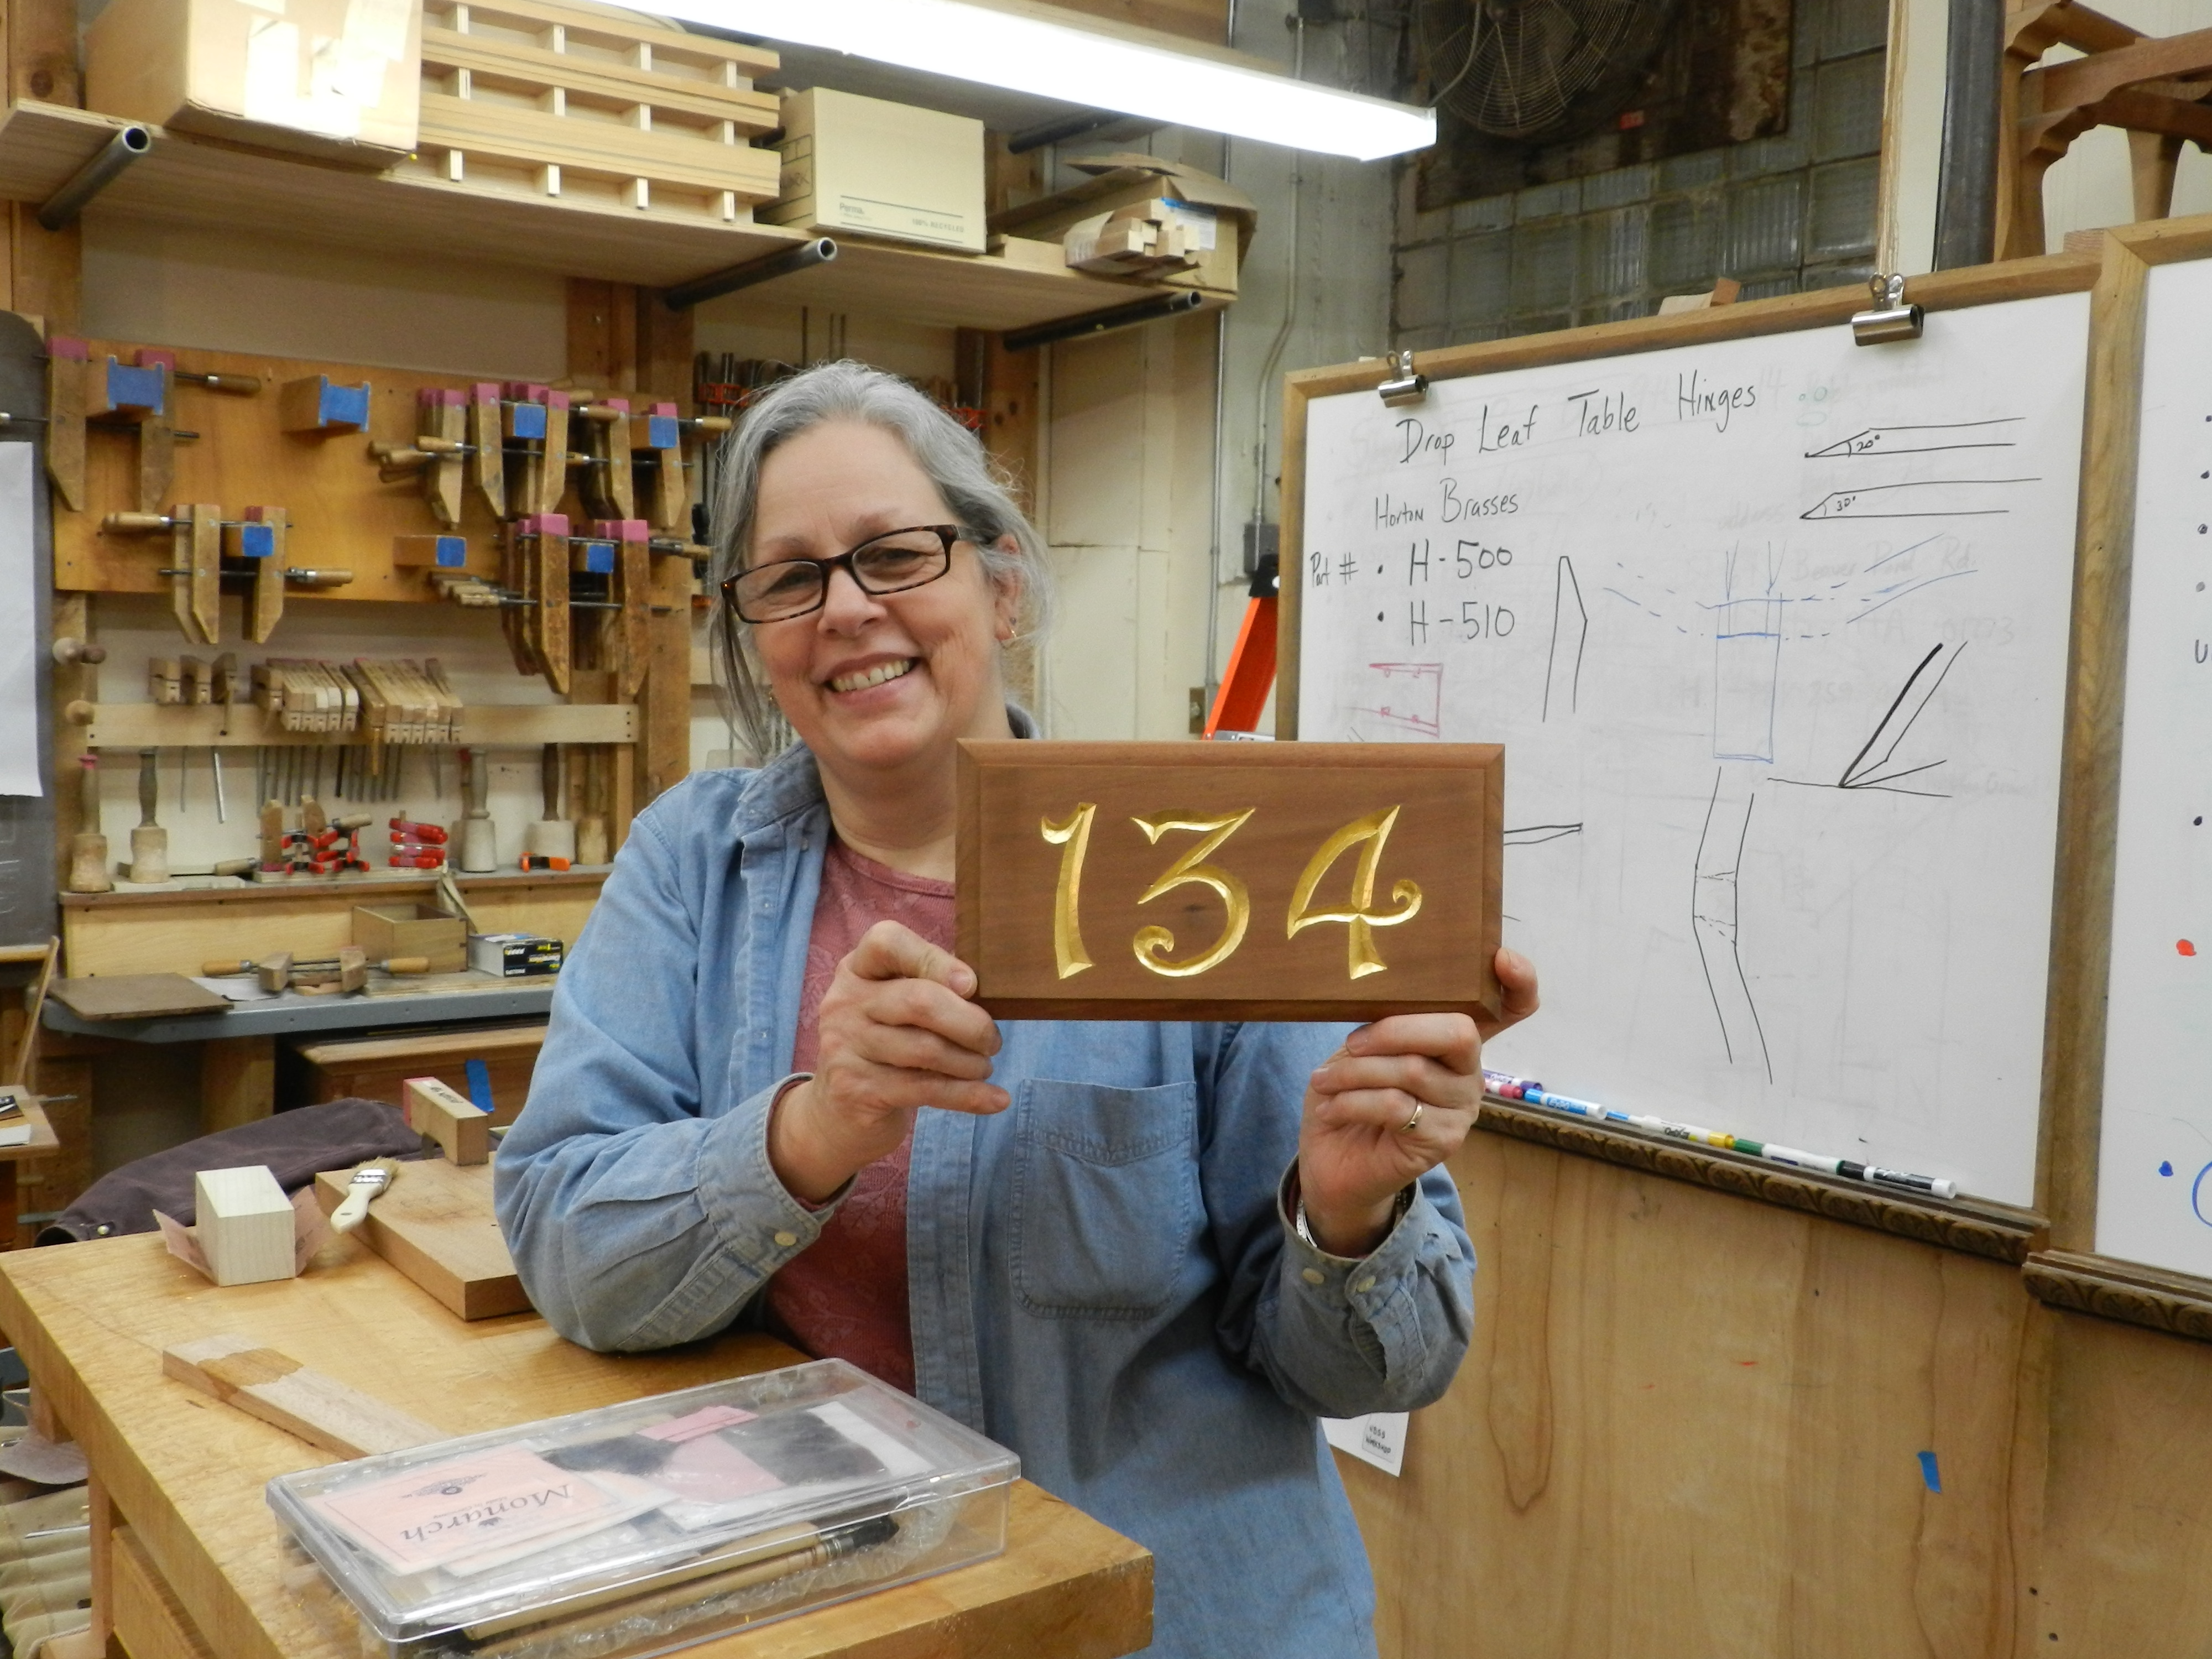
Janet Collins with completed sign
Pictured here is Janet with her carved and gilded number sign.
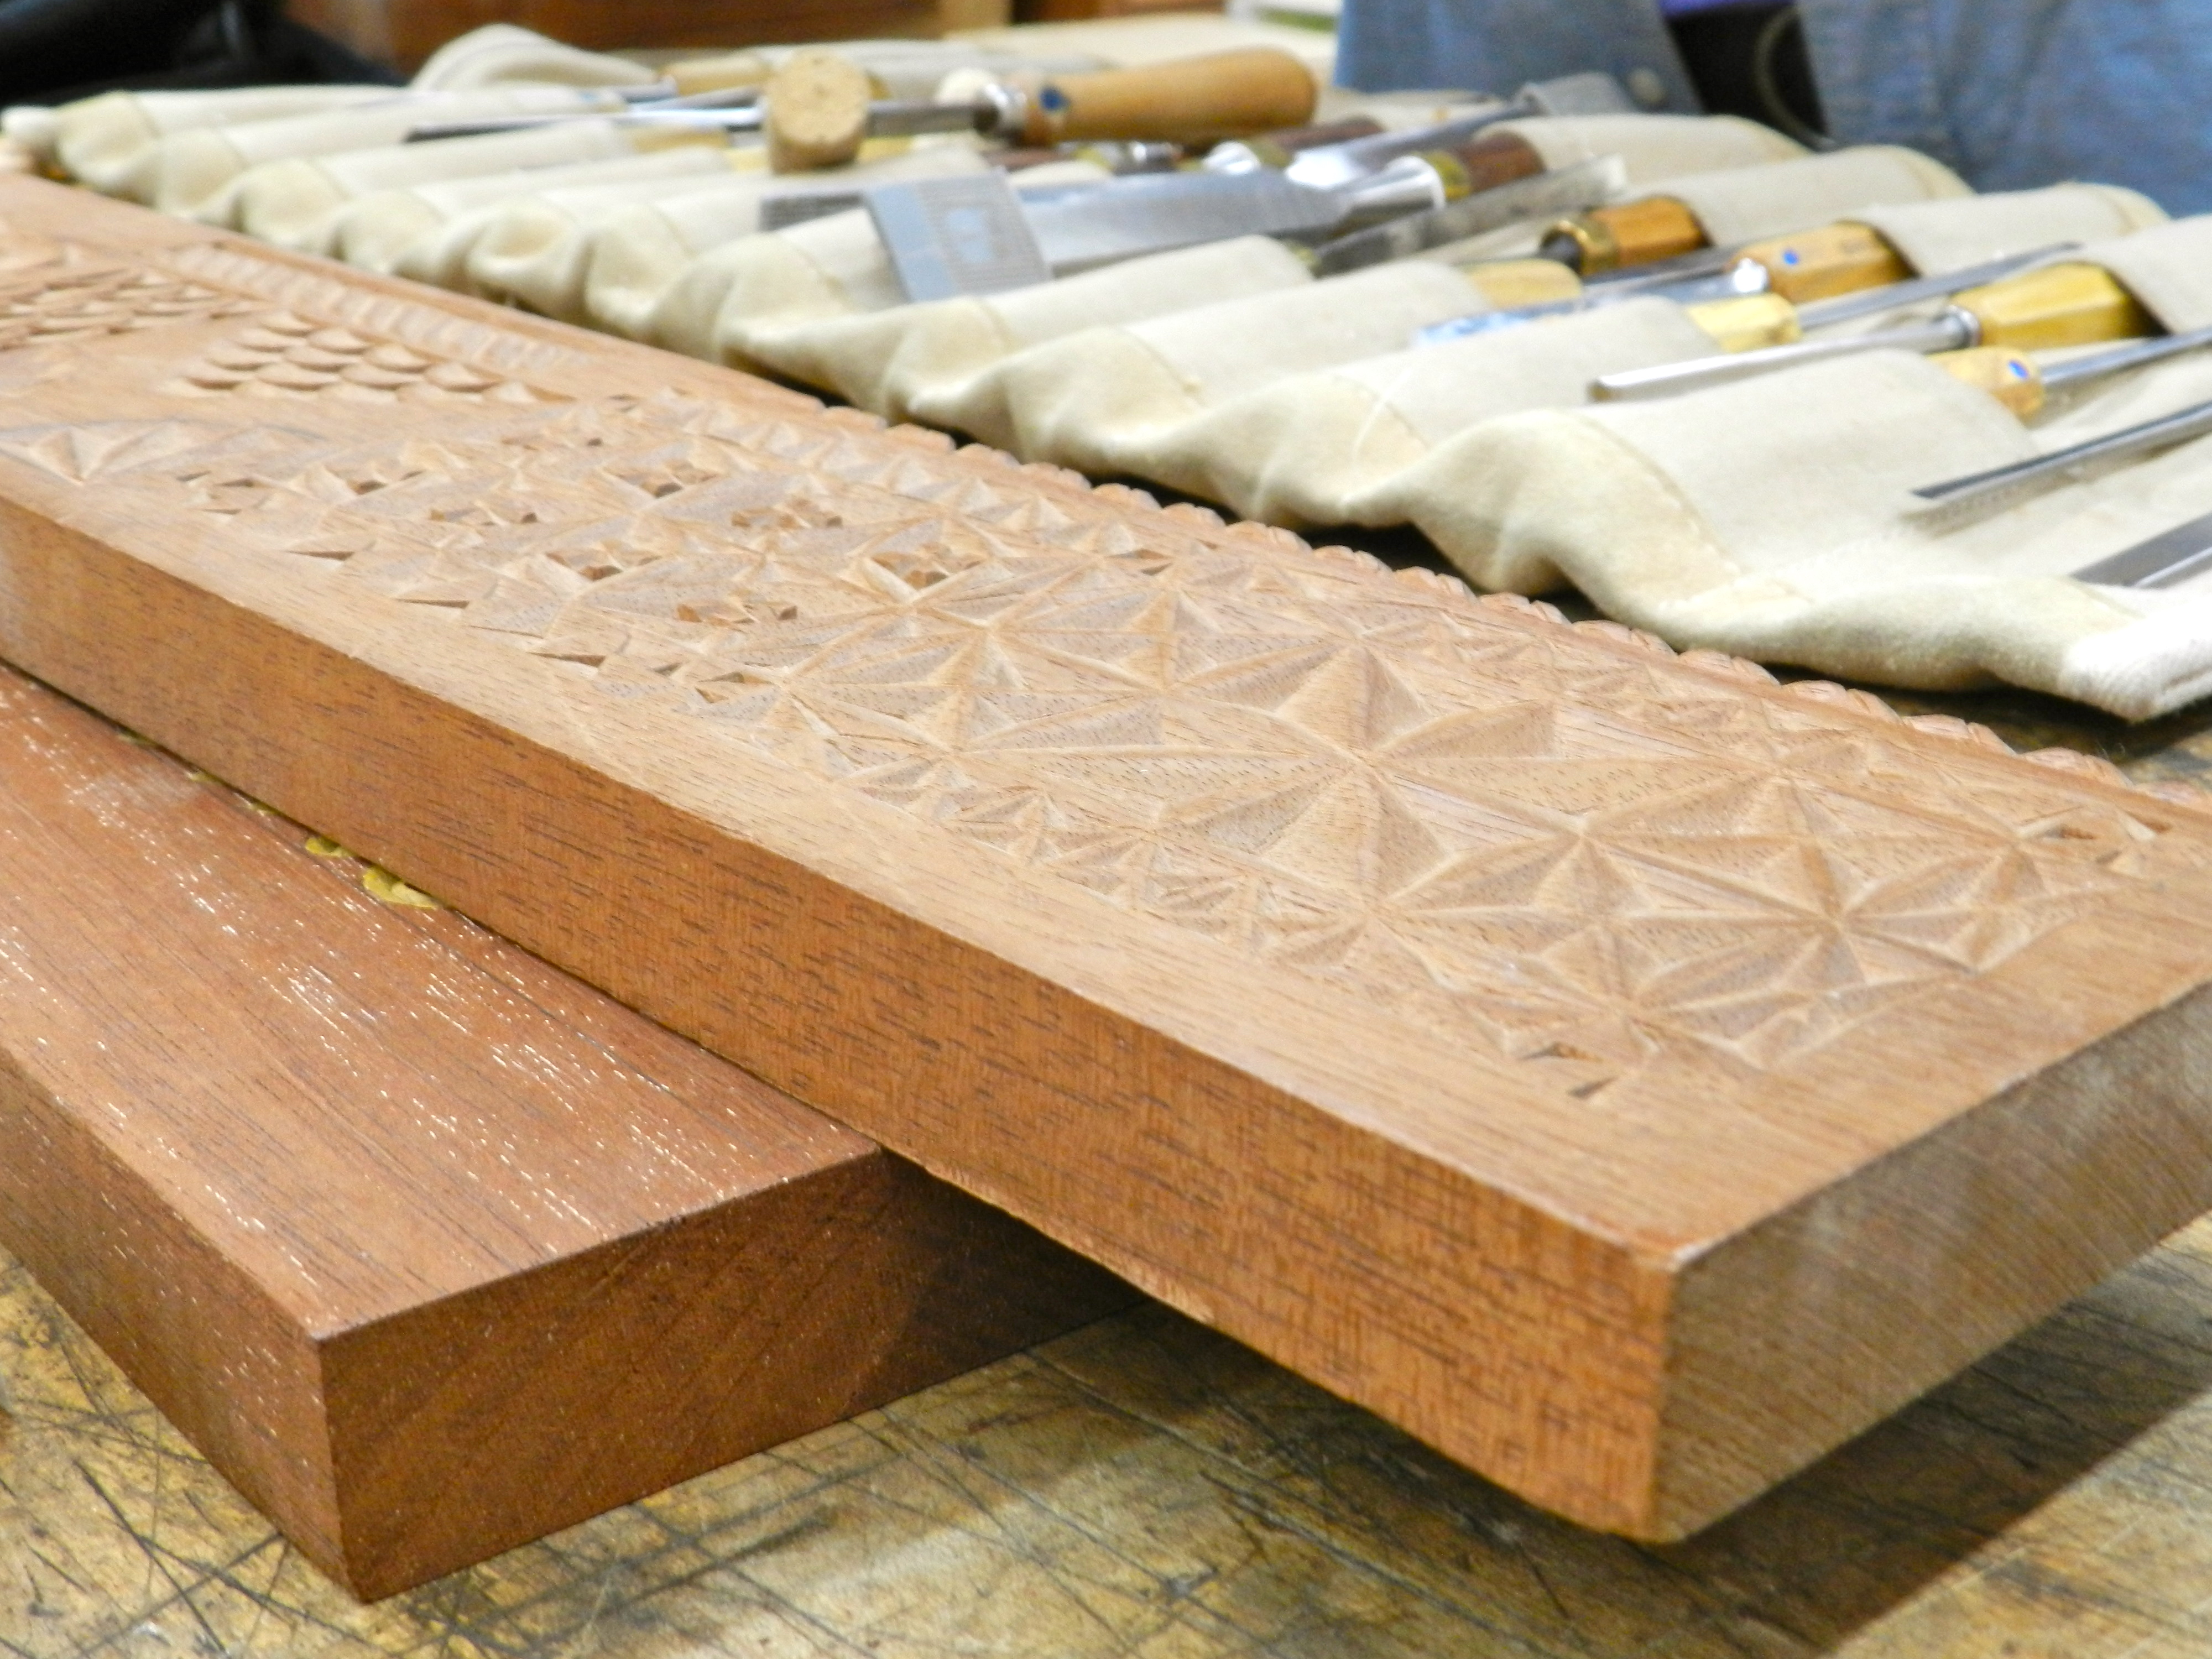
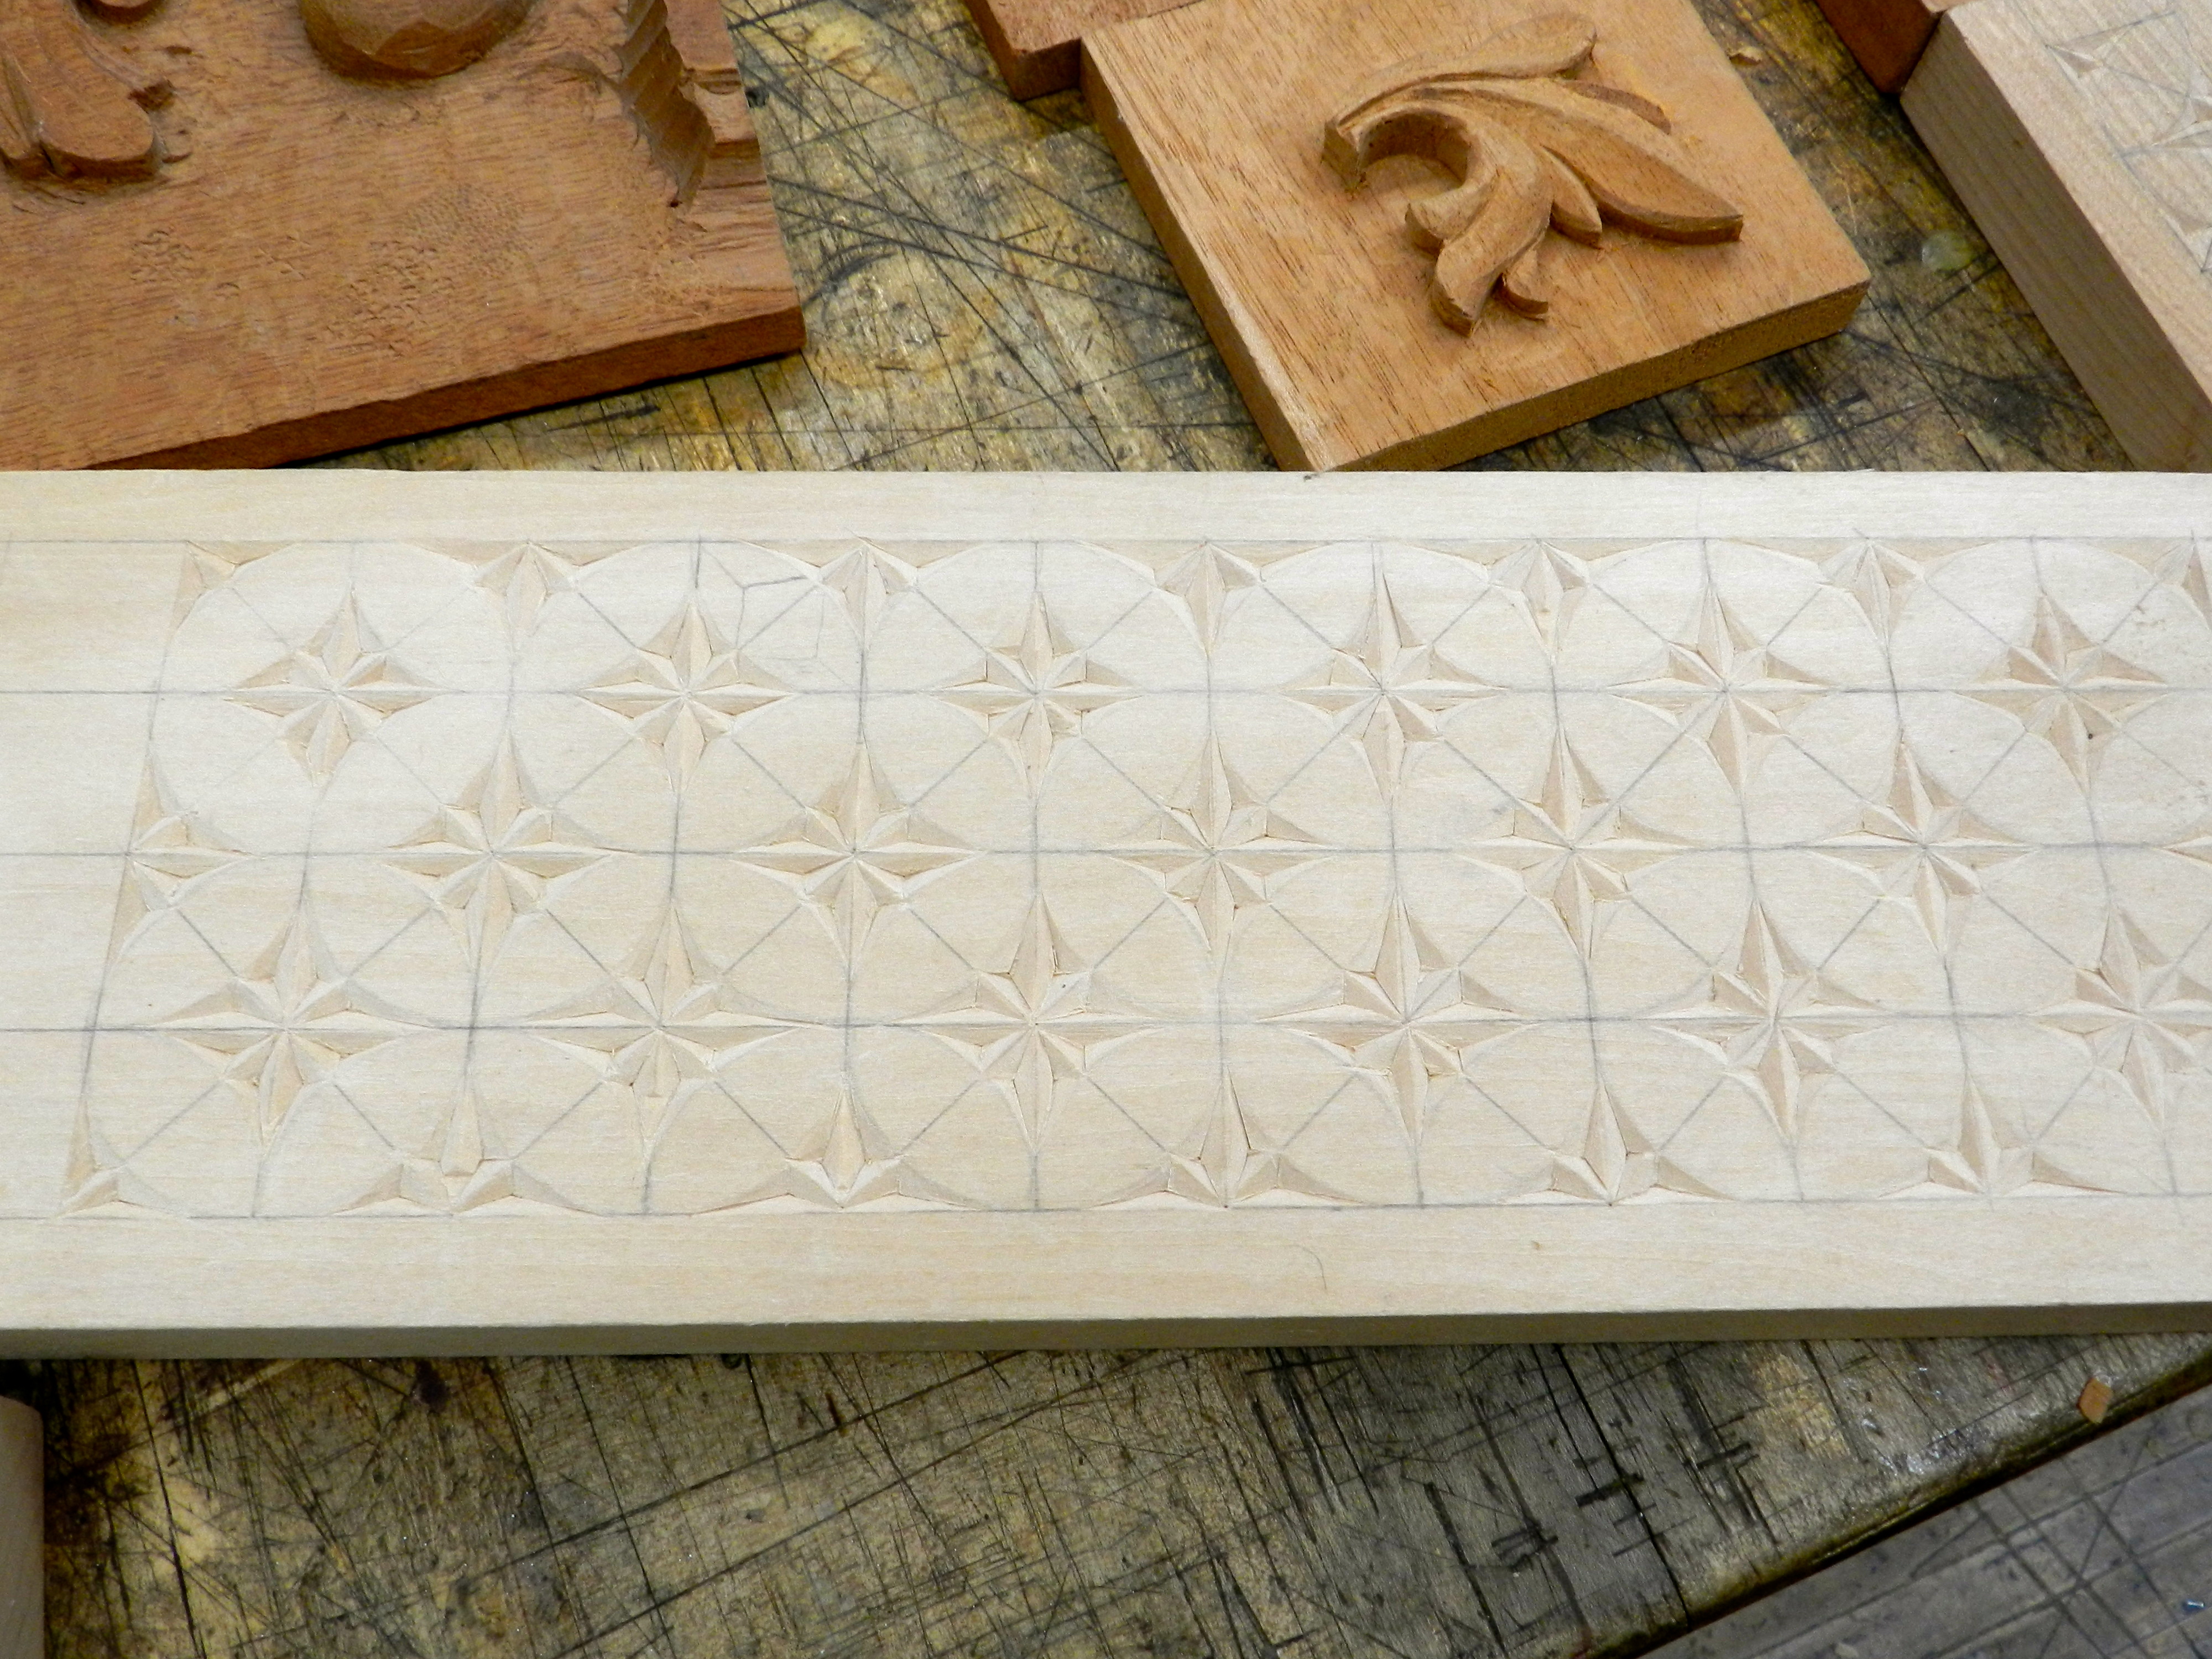
Chip carving samples
Beyond letter carving, these kinds of woodworking skills can be applied to may other forms of carving…
More chip carving
such as chip carving…
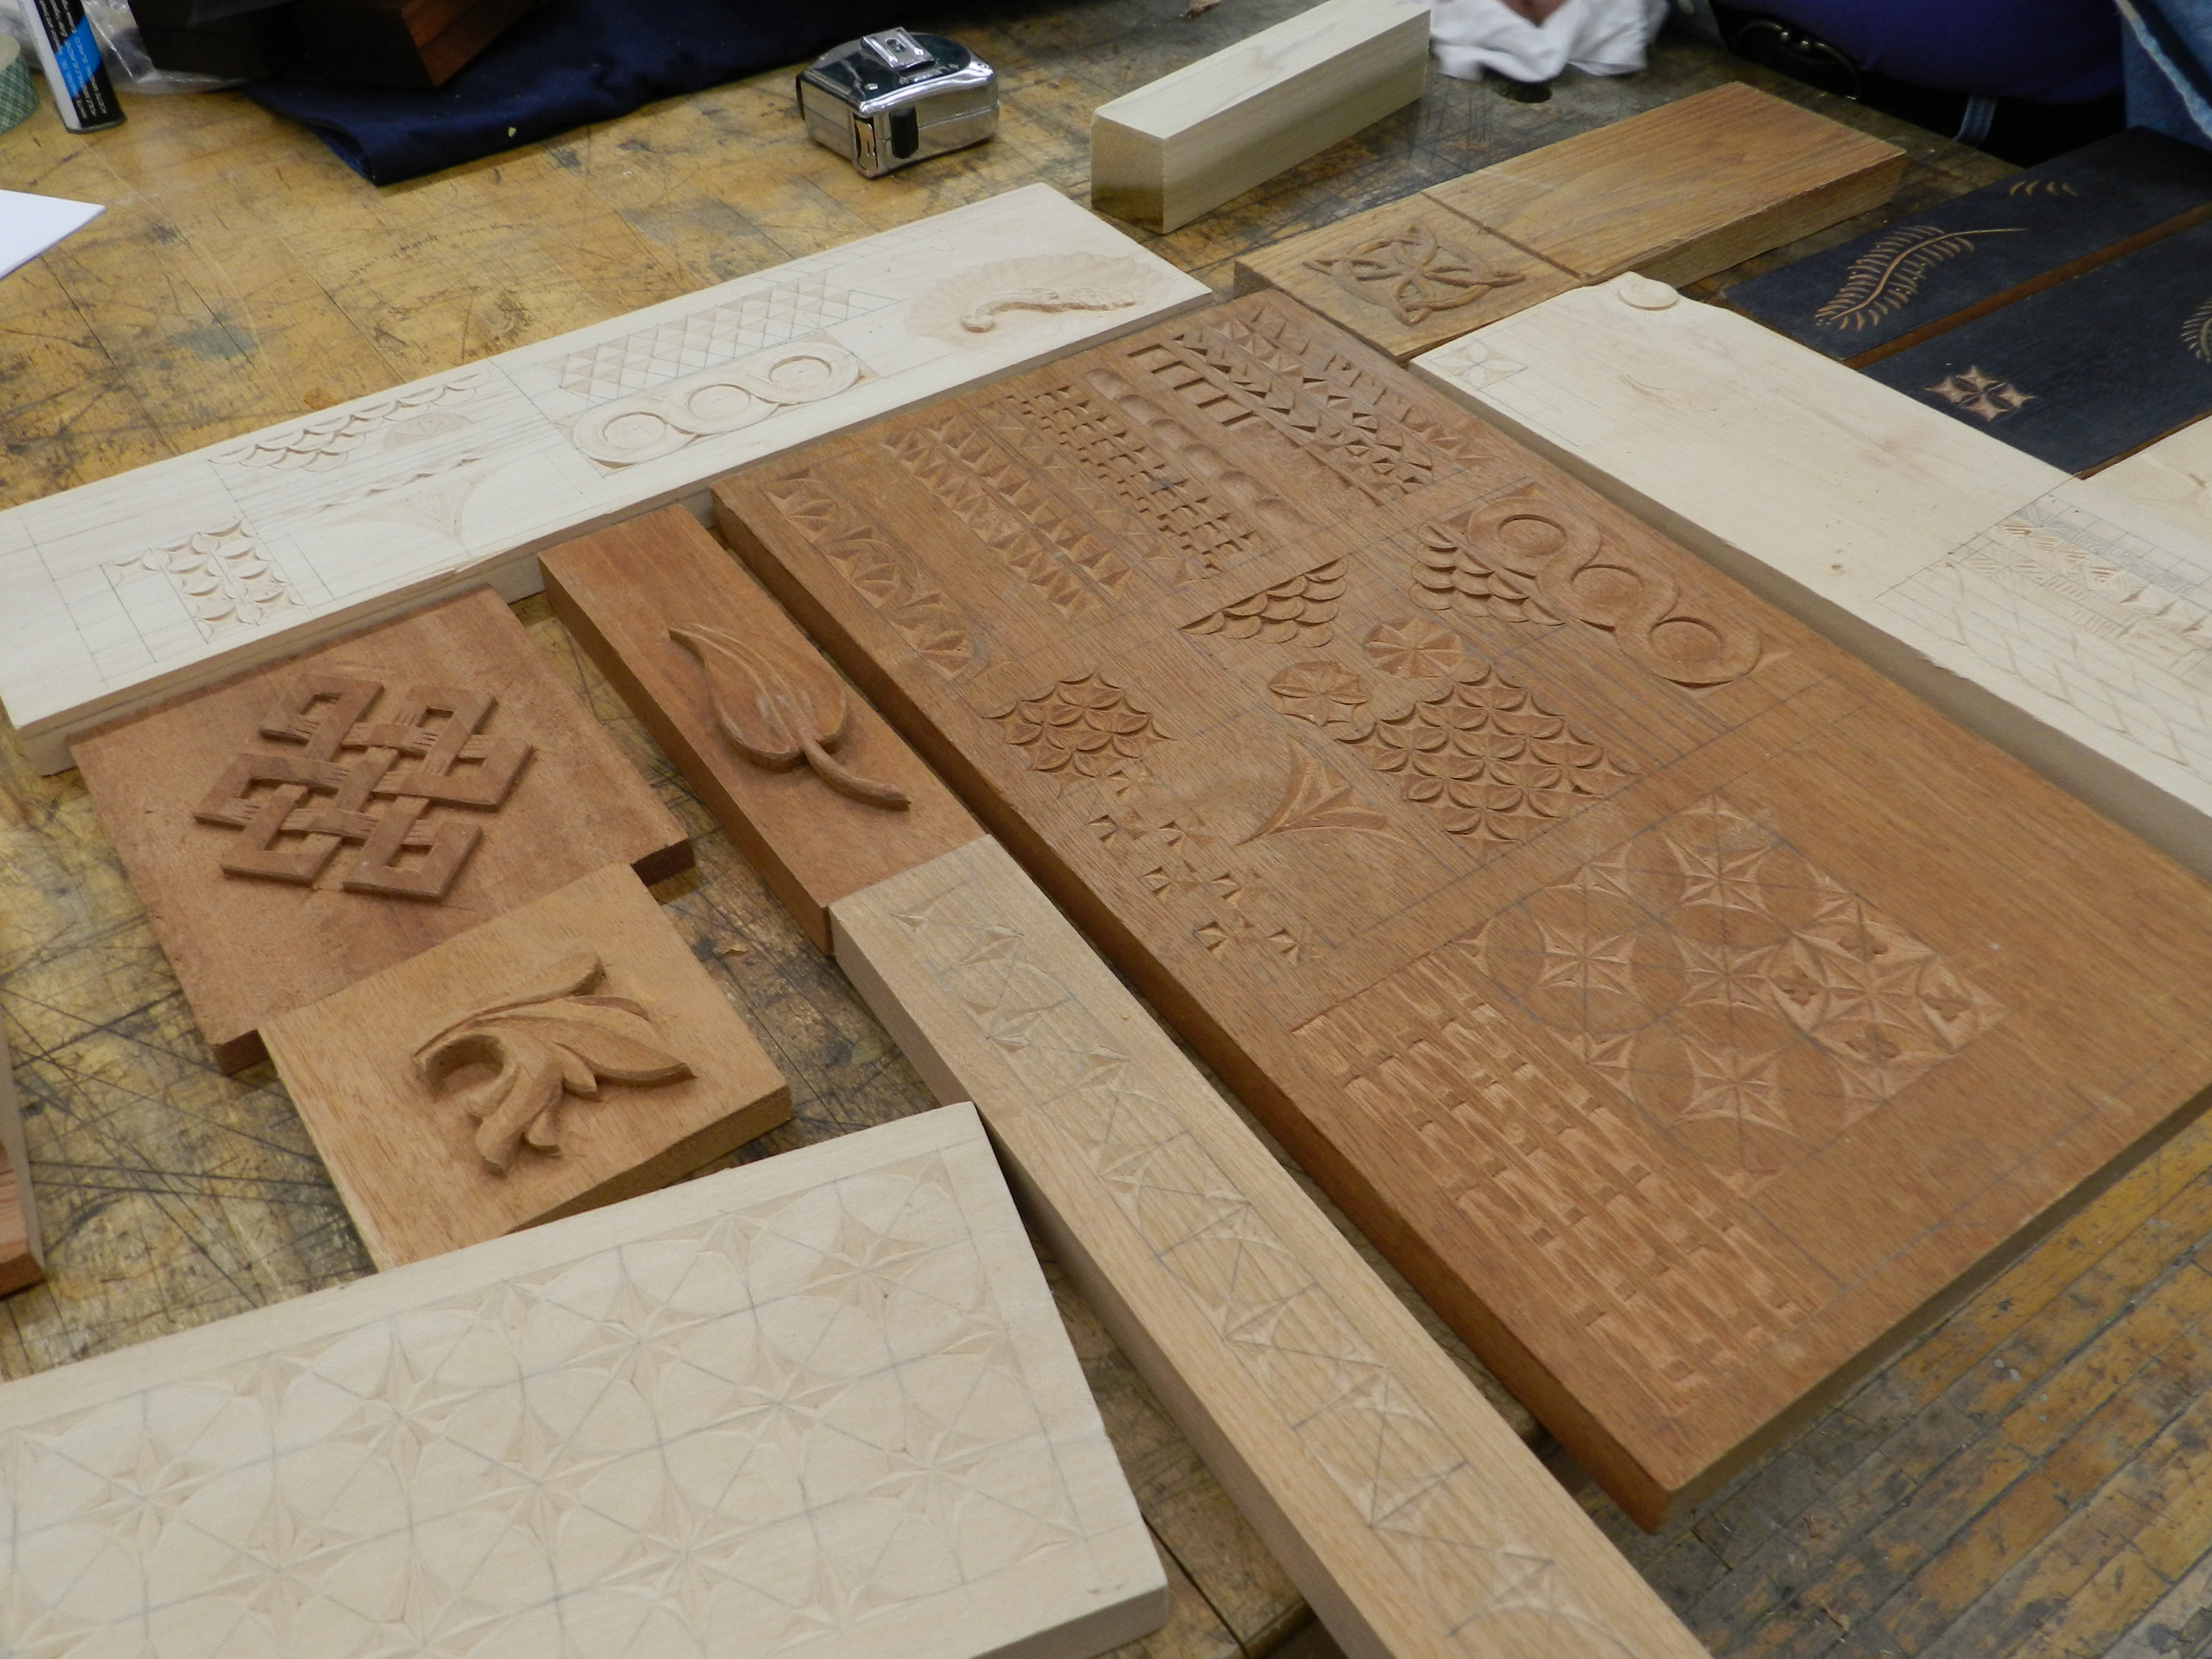
Chip and relief carving samples
relief carving…
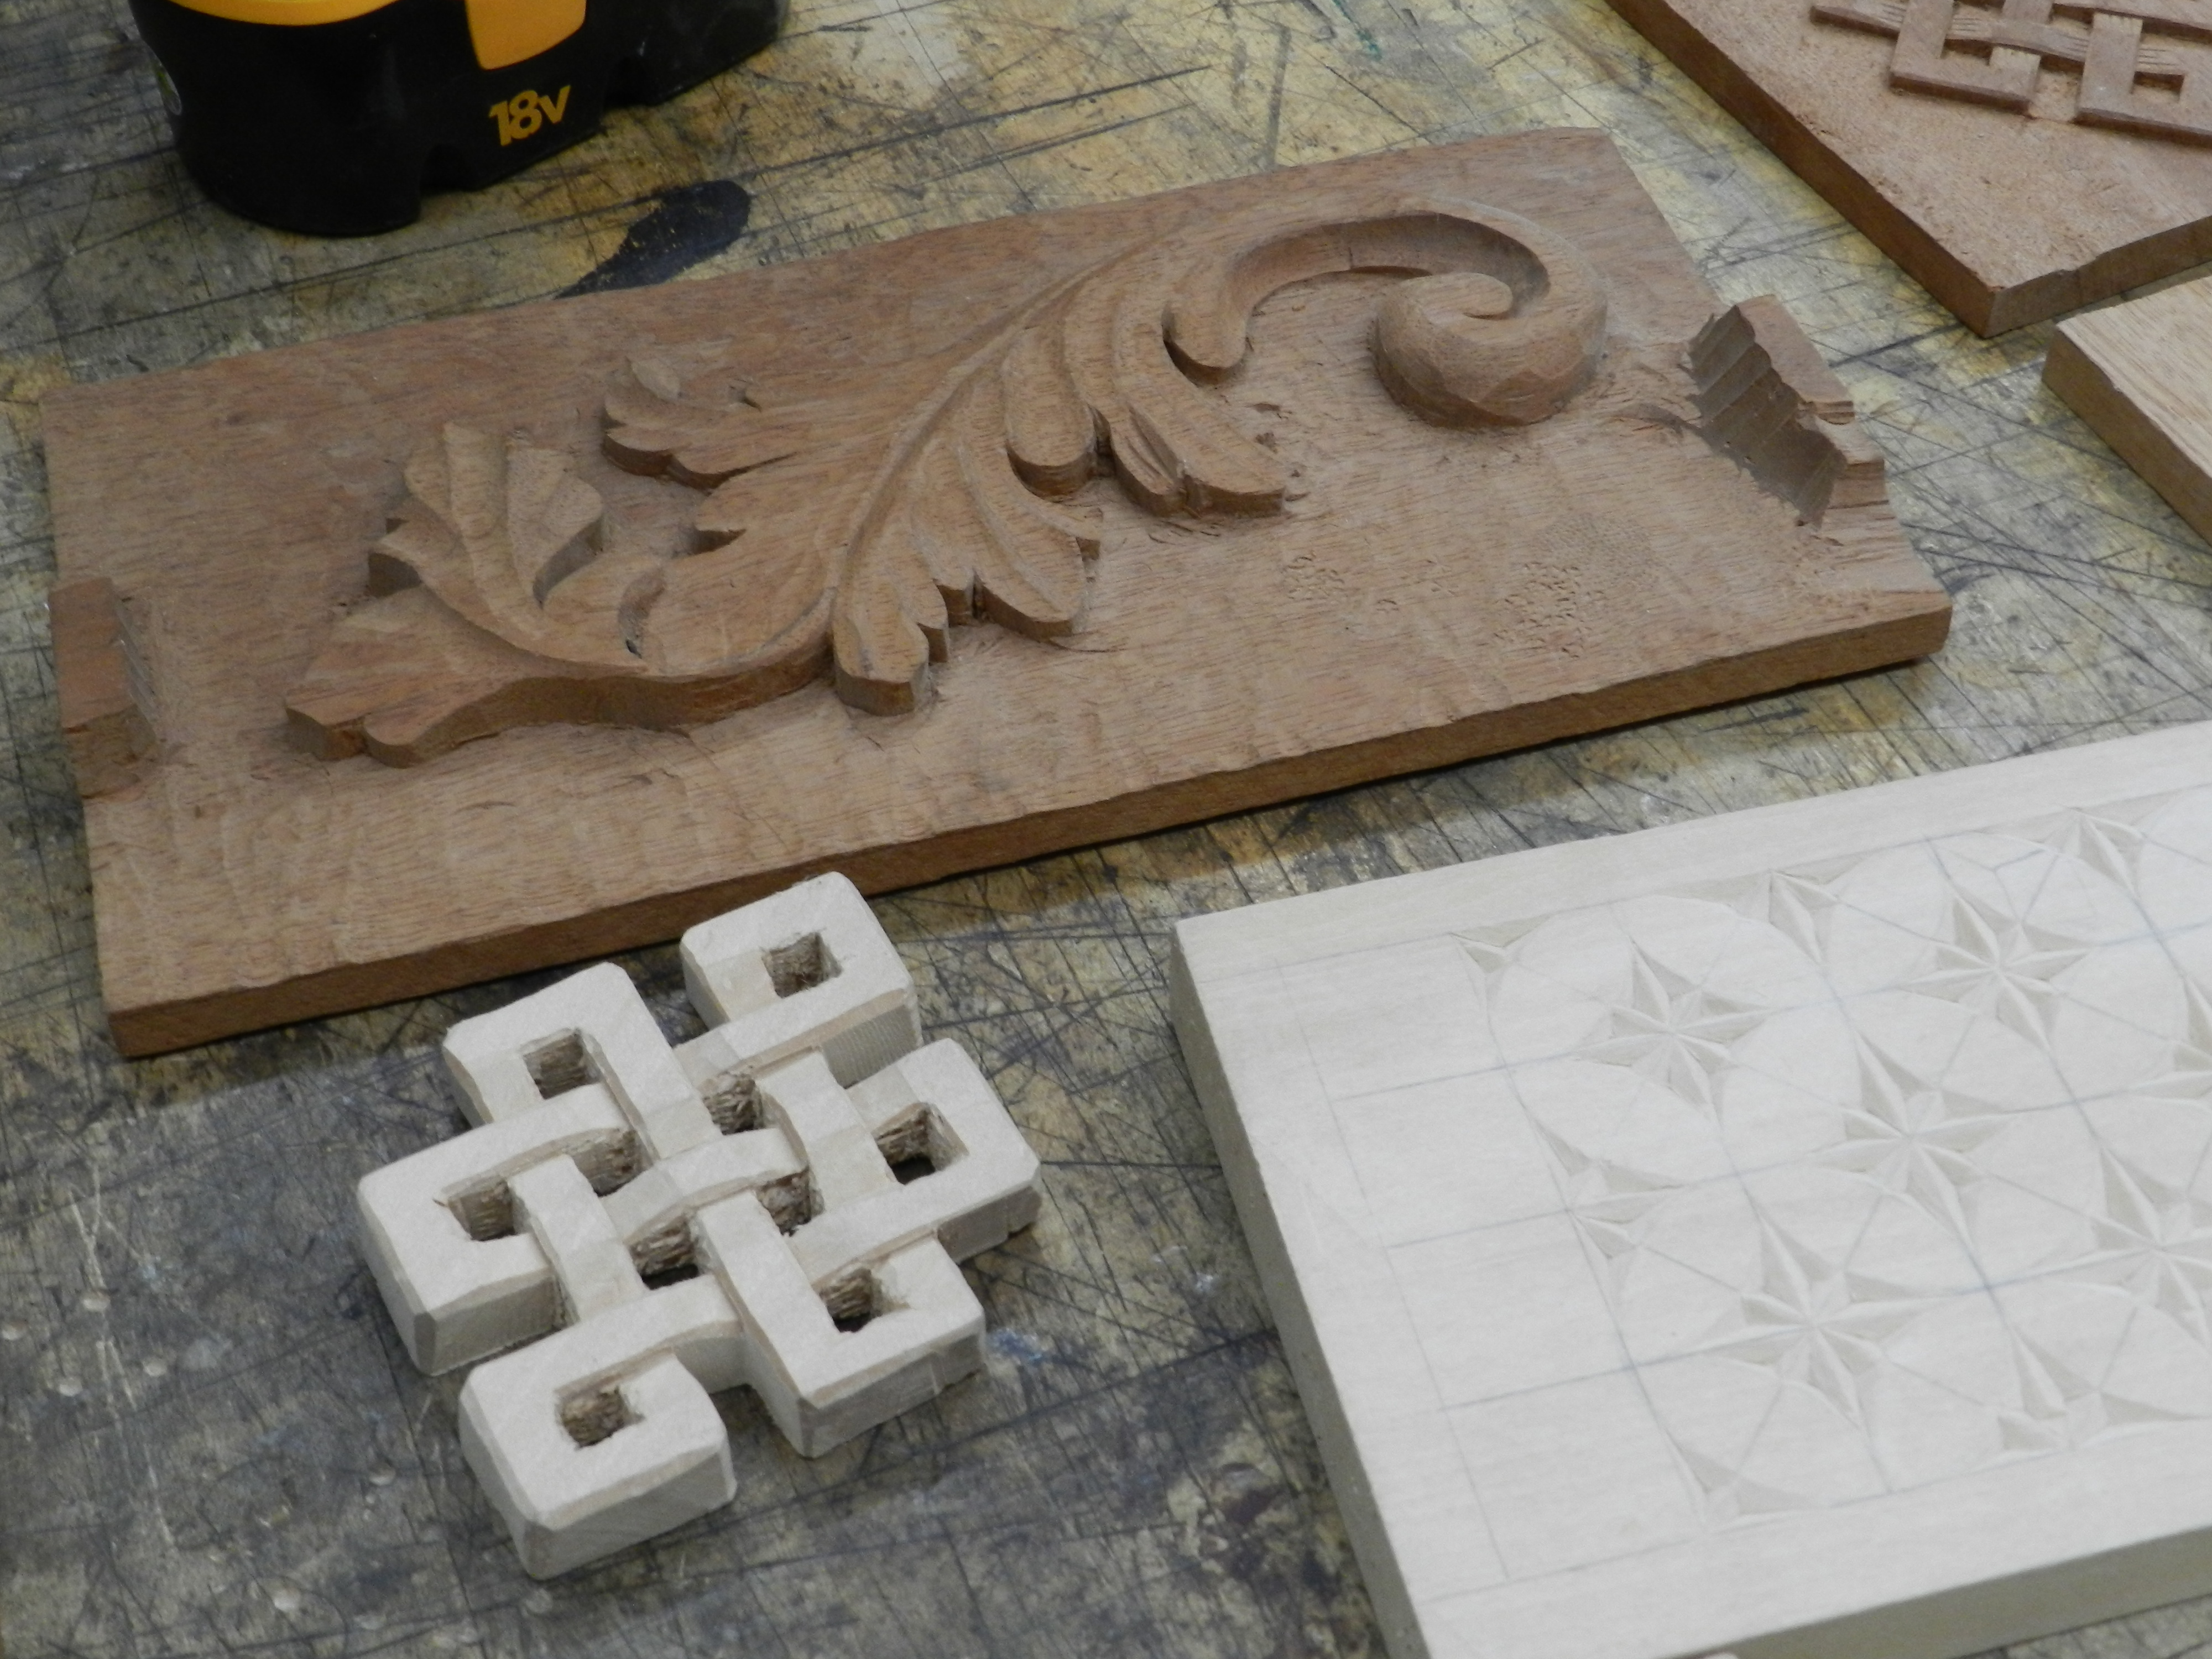
Celtic knot and floral carving
organic designs, geometric designs, anything you can imagine. The above sample boards are just a few from the large bag of samples Janet brought to show the class.
Carved and Gilded sign at NBSS
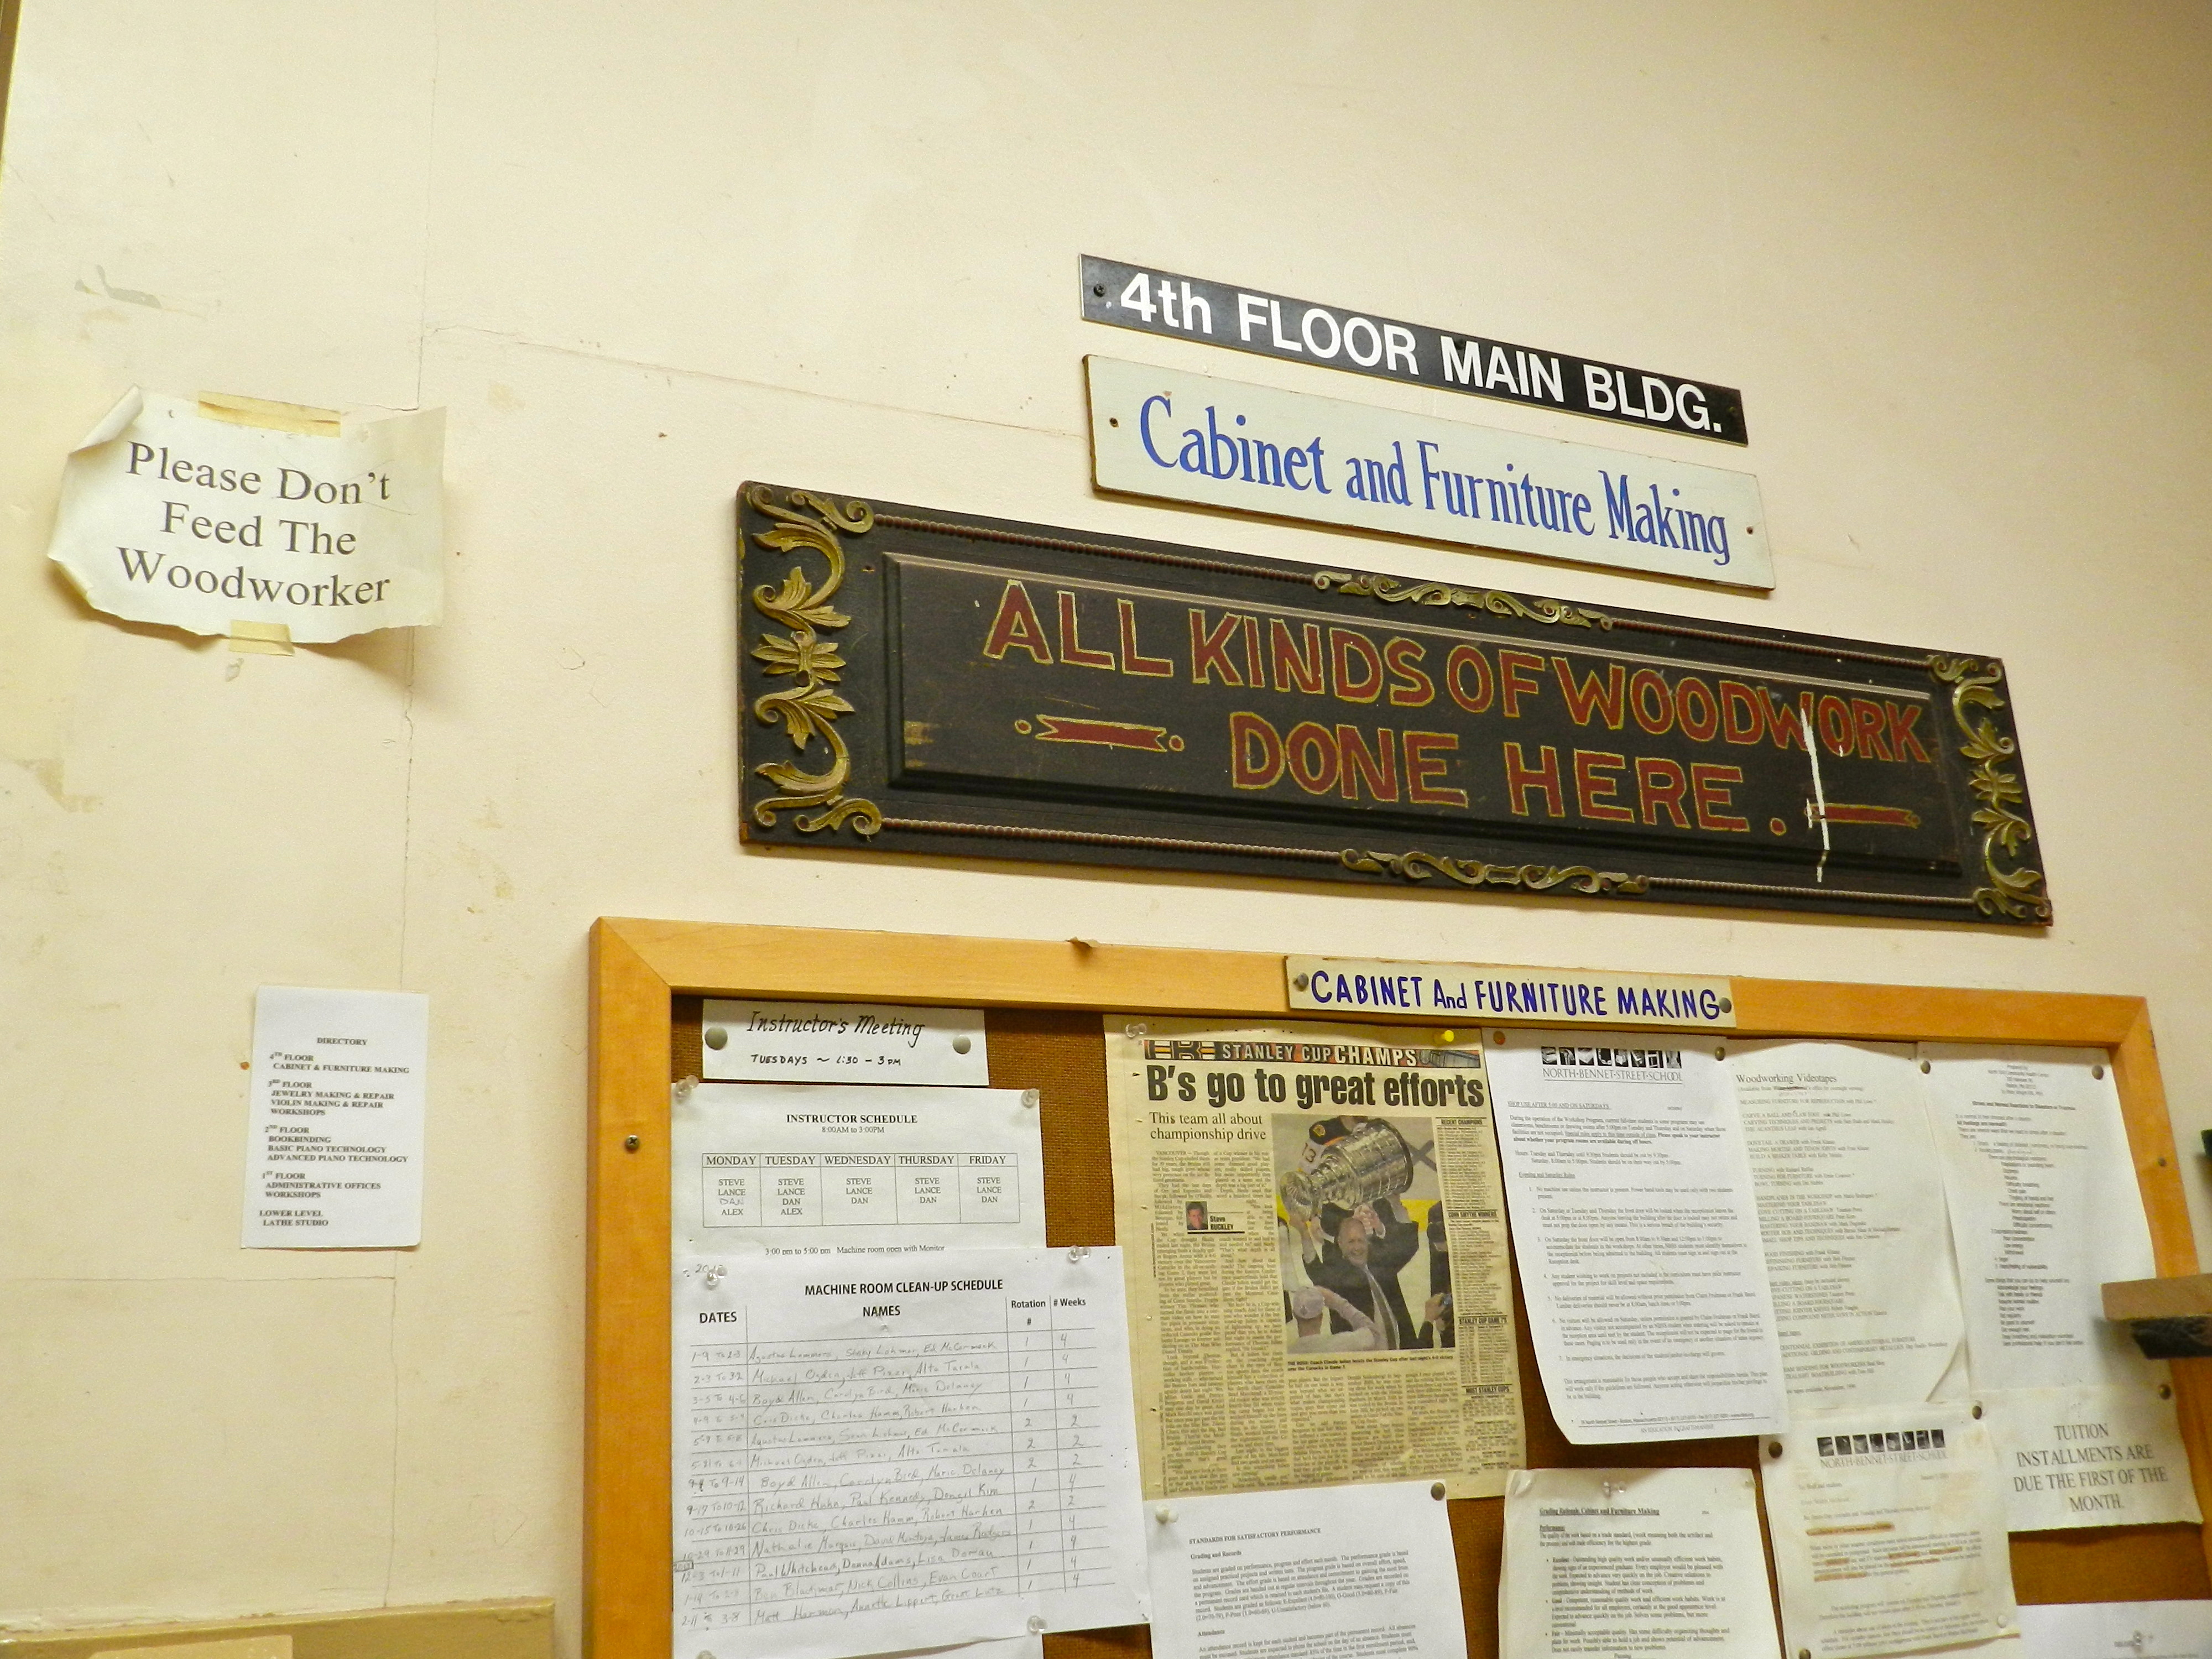
Above is a hand carved and gilded sign honoring the founder of NBSS — Pauline Agassiz Shaw. If you study it carefully you can see how it was clearly laid out by hand and shows many of the tool marks and design cues you’d expect to see in hand work. Pictured below is a nice old sign in the Cabinet and Furniture Making department at NBSS which is a combination of painting and carved details — “All Kinds Of Woodwork Done Here” which is an apt description for what goes on in the upper bench room. I am also partial to the “Please don’t feed the woodworker” sign.
“Don’t feed the woodworkers” and “All Kinds of Woodwork Done Here” signs by the entrance to Cabinet and Furniture Making department at NBSS.
After taking this course I have a new sign for my workshop, and a whole new appreciation for hand carved signs. Next time you are walking around your town take a moment to look at some of the carved signs and see if you can differentiate the ones that were carved by hand versus those which were made by machine. After looking at a few of them you’ll likely see that many of the signs with the best details were carved by hand.
I’m looking to make some signs for my barn and workshop and will be sure to post them here on the blog. In the meantime you can learn more about Janet Collins and her work via her website here and here. And if you are interested in taking workshops at NBSS you can find out more here.
A Joiner's Guide To Traditional Woodworking and Preservation